Quick Navigation
Attention, coffee lovers! If you’re a fan of the Keurig K-Mini Plus, the compact coffee maker that delivers a rich and flavorful cup of joe, then this article is for you. I understand the excitement of starting your day with the perfect brew, but sometimes, unexpected problems can arise. That’s where I come in. In this troubleshooting guide, I’ll tackle the most common issues you might encounter while using the Keurig K-Mini Plus. From power glitches to brewing inconsistencies, I’ve got you covered. So, grab your favorite mug, sit back, and let’s troubleshoot your way to a flawless coffee experience with your Keurig K-Mini Plus.
Getting started with troubleshooting your Keurig K-Mini Plus is easy when you have the right tools. Here are the essential tools that you’ll need to fix any issues that may arise with your coffee maker:
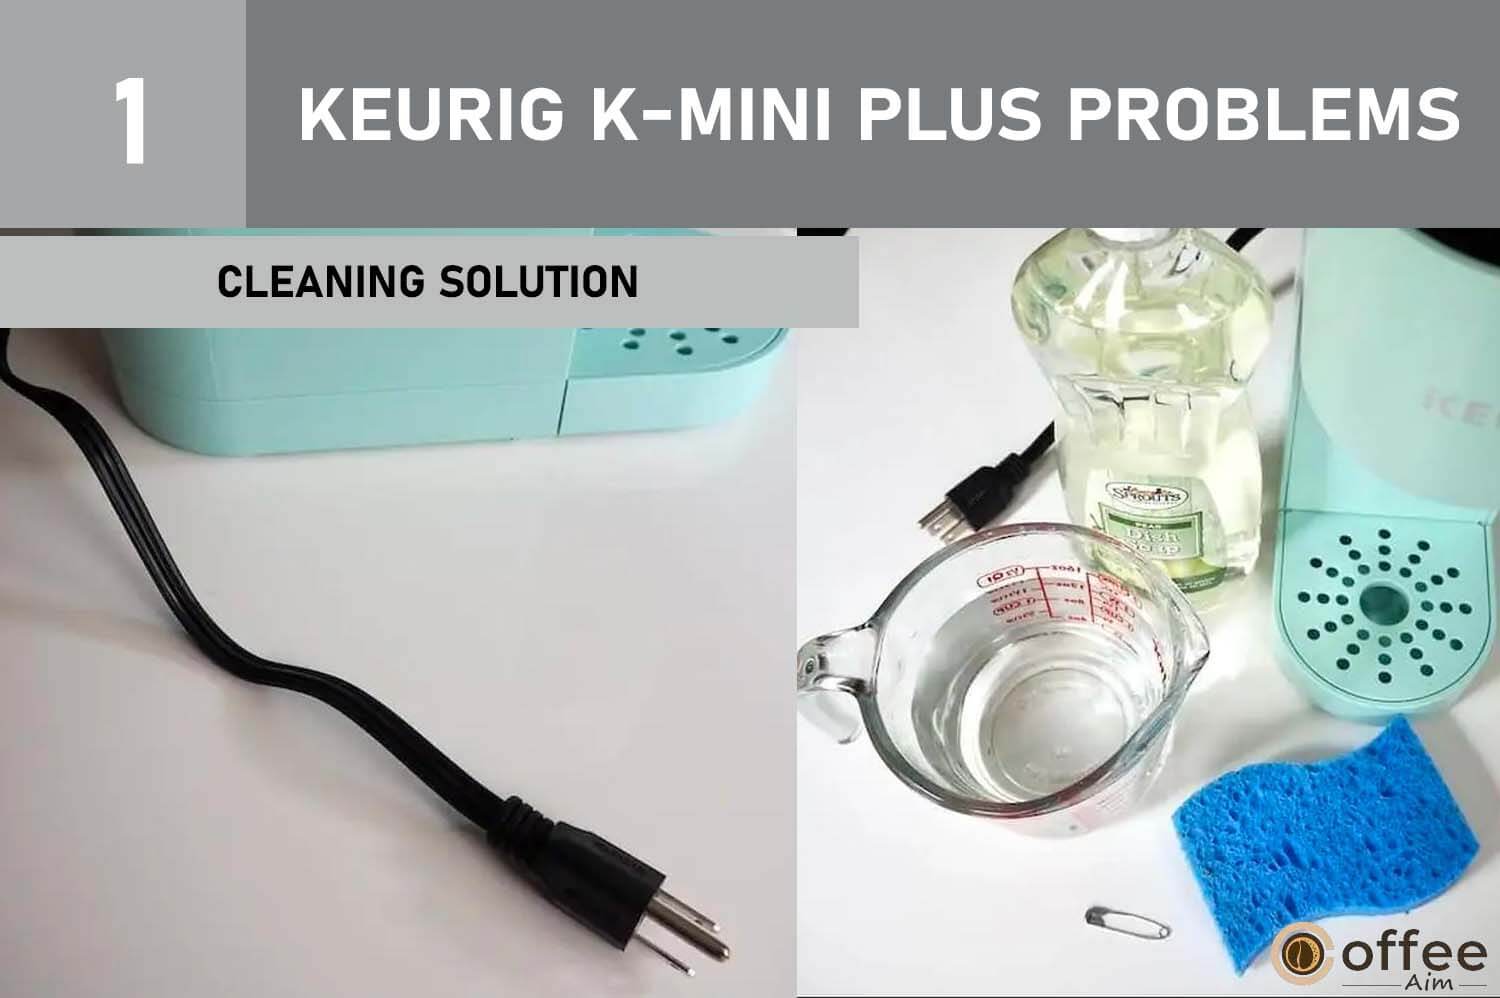
1. Cleaning Solution
A cleaning solution specifically designed for coffee machines is crucial for maintaining the cleanliness and performance of your Keurig K-Mini Plus. It helps remove mineral deposits, coffee residue, and other build-ups affecting the machine’s functionality.
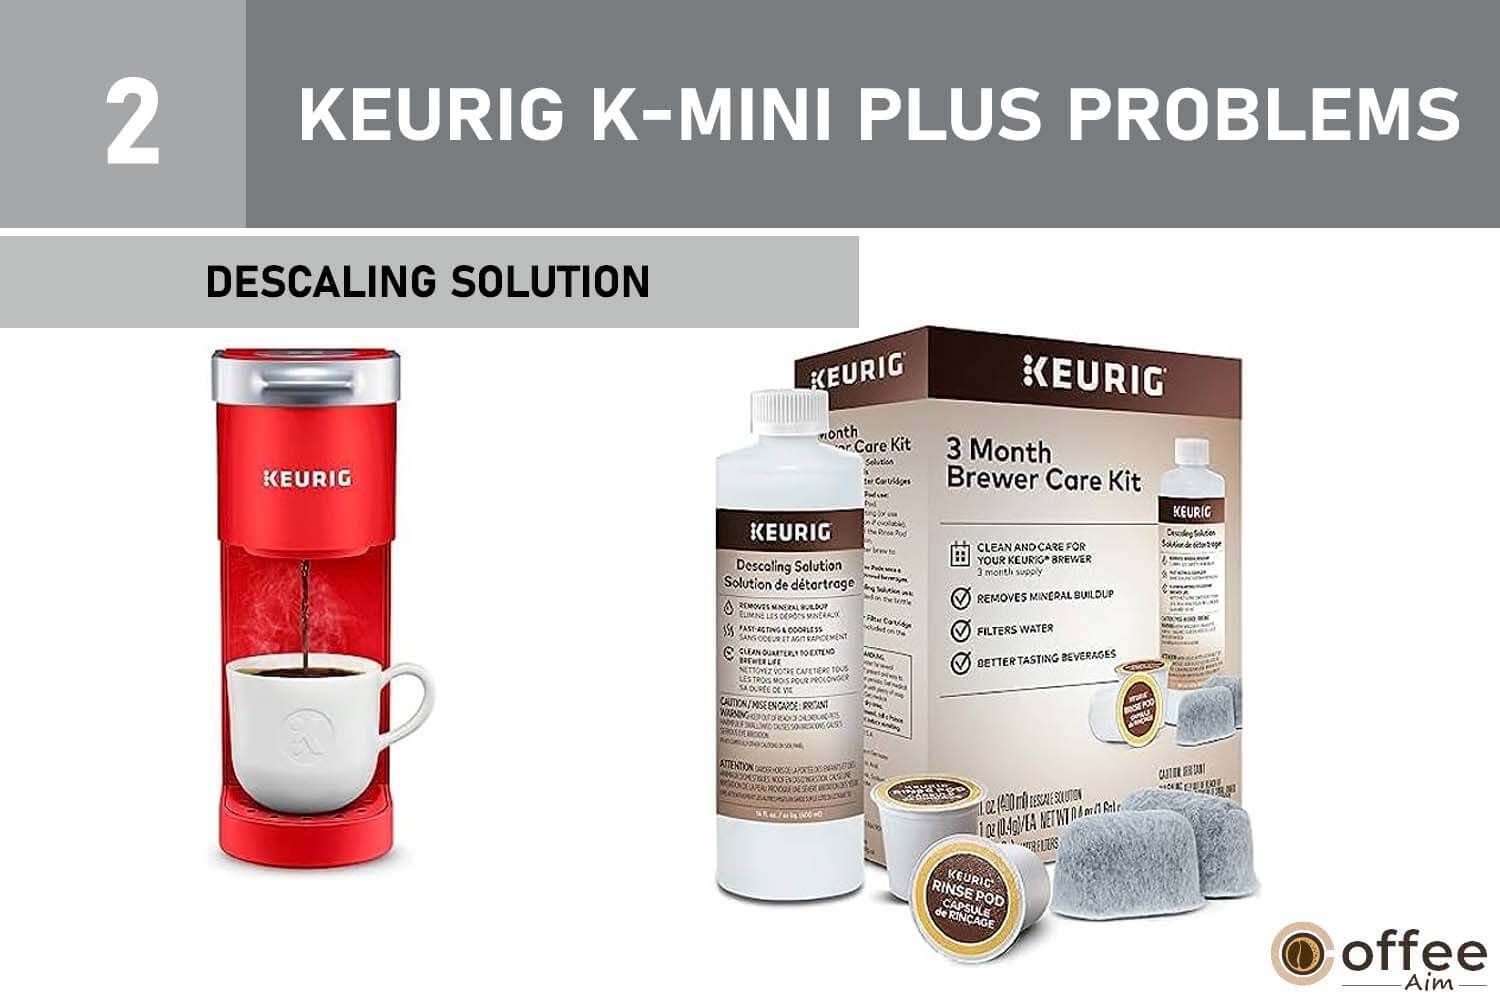
2. Descaling Solution:
Over time, mineral deposits can accumulate in your coffee maker, leading to clogs and reduced performance. A descaling solution helps remove these deposits and keeps your machine running smoothly.
3. Needle Cleaning Tool
This handy tool allows you to clean the needle that punctures the K-Cup, ensuring optimal water flow and preventing clogs. Regular cleaning of the needle is essential for consistent brewing.

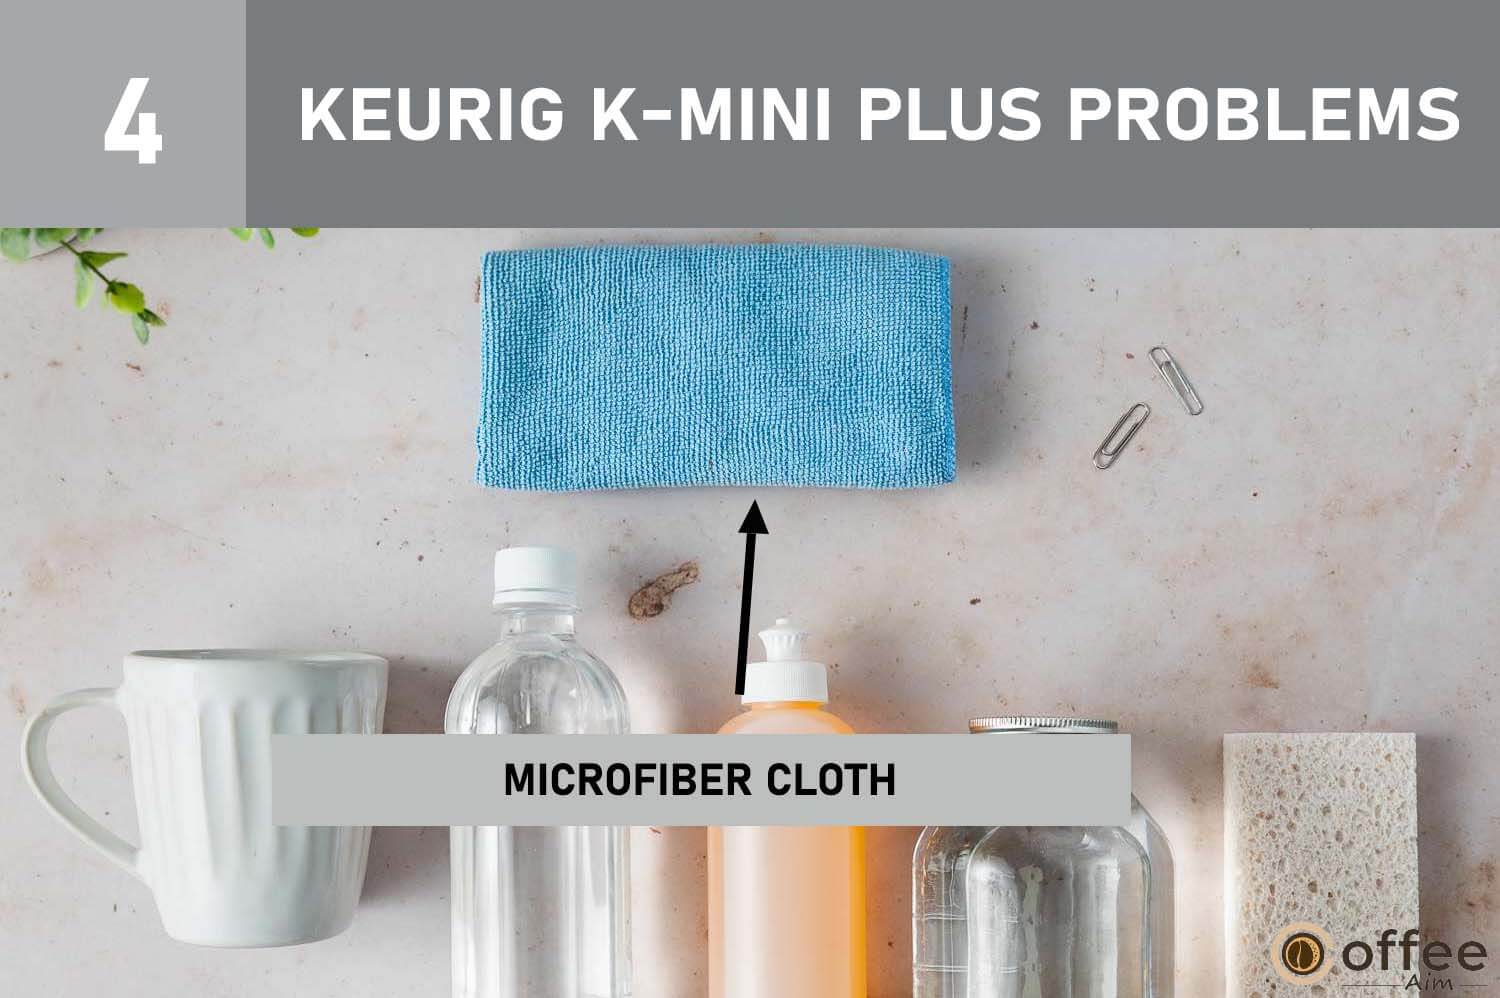
4. Microfiber Cloth
A soft microfiber cloth is perfect for wiping down the exterior of your Keurig K-Mini Plus, removing any dust or stains. It helps keep your coffee machine looking clean and presentable.
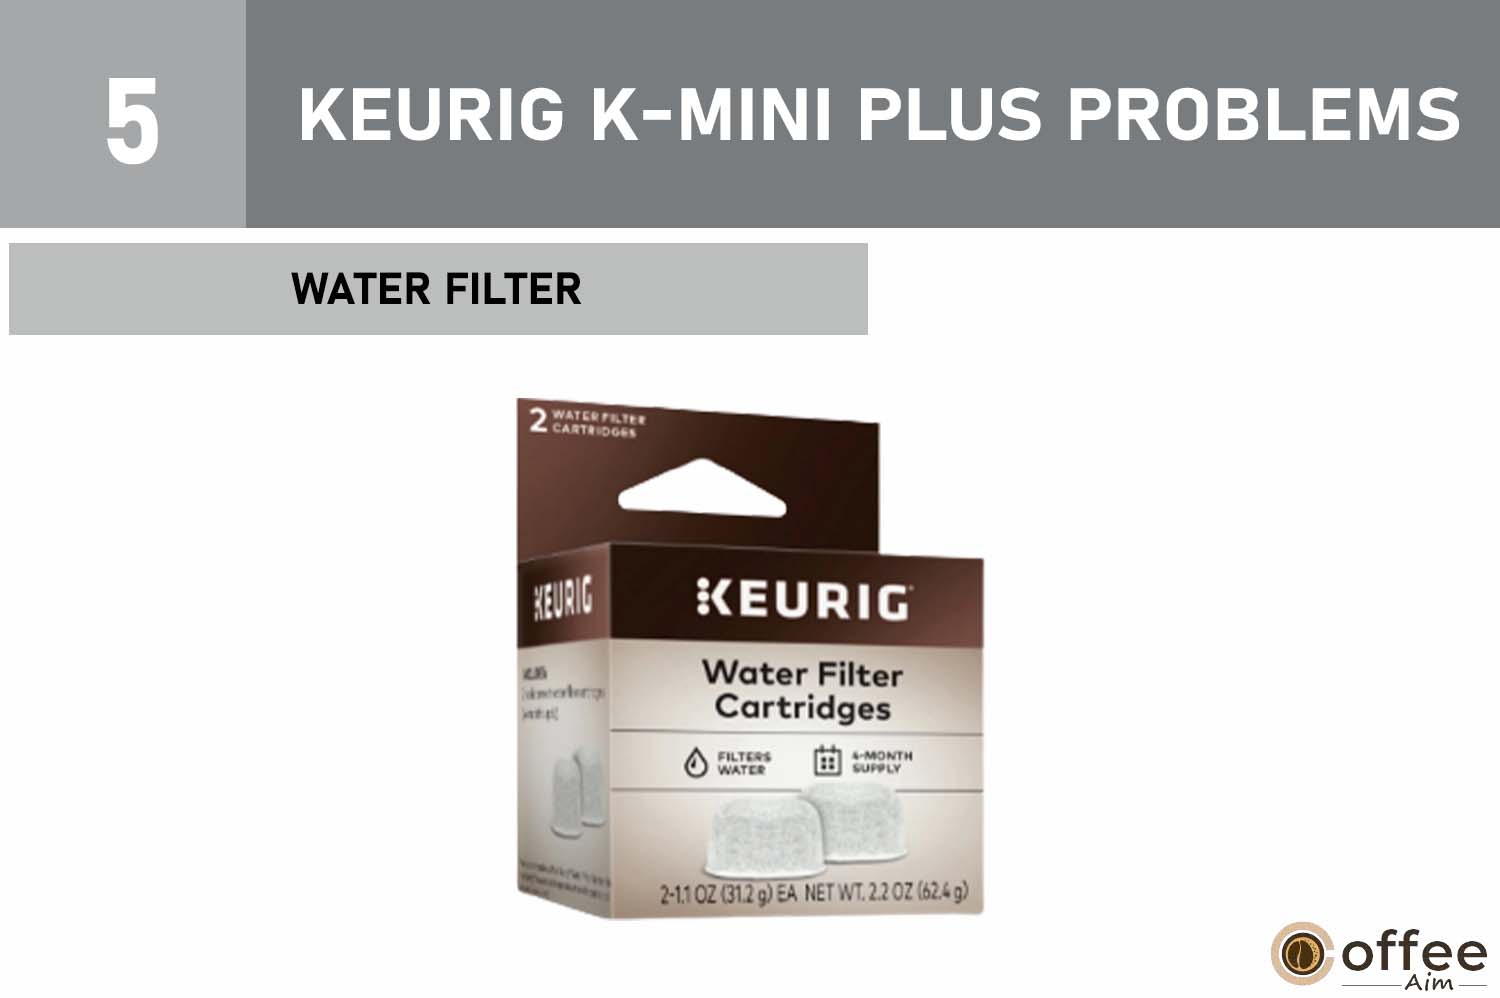
5. Water Filter
Using a water filter can improve the taste of your coffee by reducing impurities in the water. It also helps prevent mineral build-up in your machine, extending its lifespan.
These tools will make troubleshooting your Keurig K-Mini Plus much easier and more effective. So, gather your arsenal and get ready to conquer any problems that come your way!
While the K-Mini Plus is a compact and convenient coffee maker, it can sometimes present a few challenges that disrupt your caffeine-fueled bliss. From power issues to brewing inconsistencies, it’s important to be aware of these potential problems and how to overcome them. Here are some of the most common issues users encounter with their Keurig K-Mini Plus, coffee makers:
Problem 1: Why Is My Keurig K-Mini Plus Not Brewing?
So, your Keurig K Mini Plus has stopped brewing. I know how frustrating this situation can be for a coffee lover, particularly for the one who enjoys coffee every hour. Lacking coffee intake in the morning can have a significant impact on your entire day’s performance.
But! do not worry because Keurig not brewing is a common problem.
To save yourself, you can take steps to fix the issue rather than assuming your machine is at fault. Using these crucial troubleshooting steps below, you can quickly get your Keurig K-Mini Plus to start making your favorite coffee again. Let’s investigate the causes and solutions to this problem without holding back.
Cause 1: Keurig K-Mini Plus Is Clogged
Your Keurig will not brew when it is clogged. But how can the machine be clogged? So, my pals! You can experience a clogged Keurig K-Mini Plus when you forget to descale it within the period of 3 to 6 months, as recommended by Keurig. With time, mineral deposits from the water (used for brewing) build-up inside the machine, especially in water lines, valves, and needles. These mineral deposits then eventually clog your coffee maker.
Consequently, it can cause slow, inefficient, or even no brewing. In actuality, the water flow is restricted when your Keurig K-Mini Plus gets clogged, which prevents it from operating correctly. Follow the solution below to fix your Keurig clogging issue.
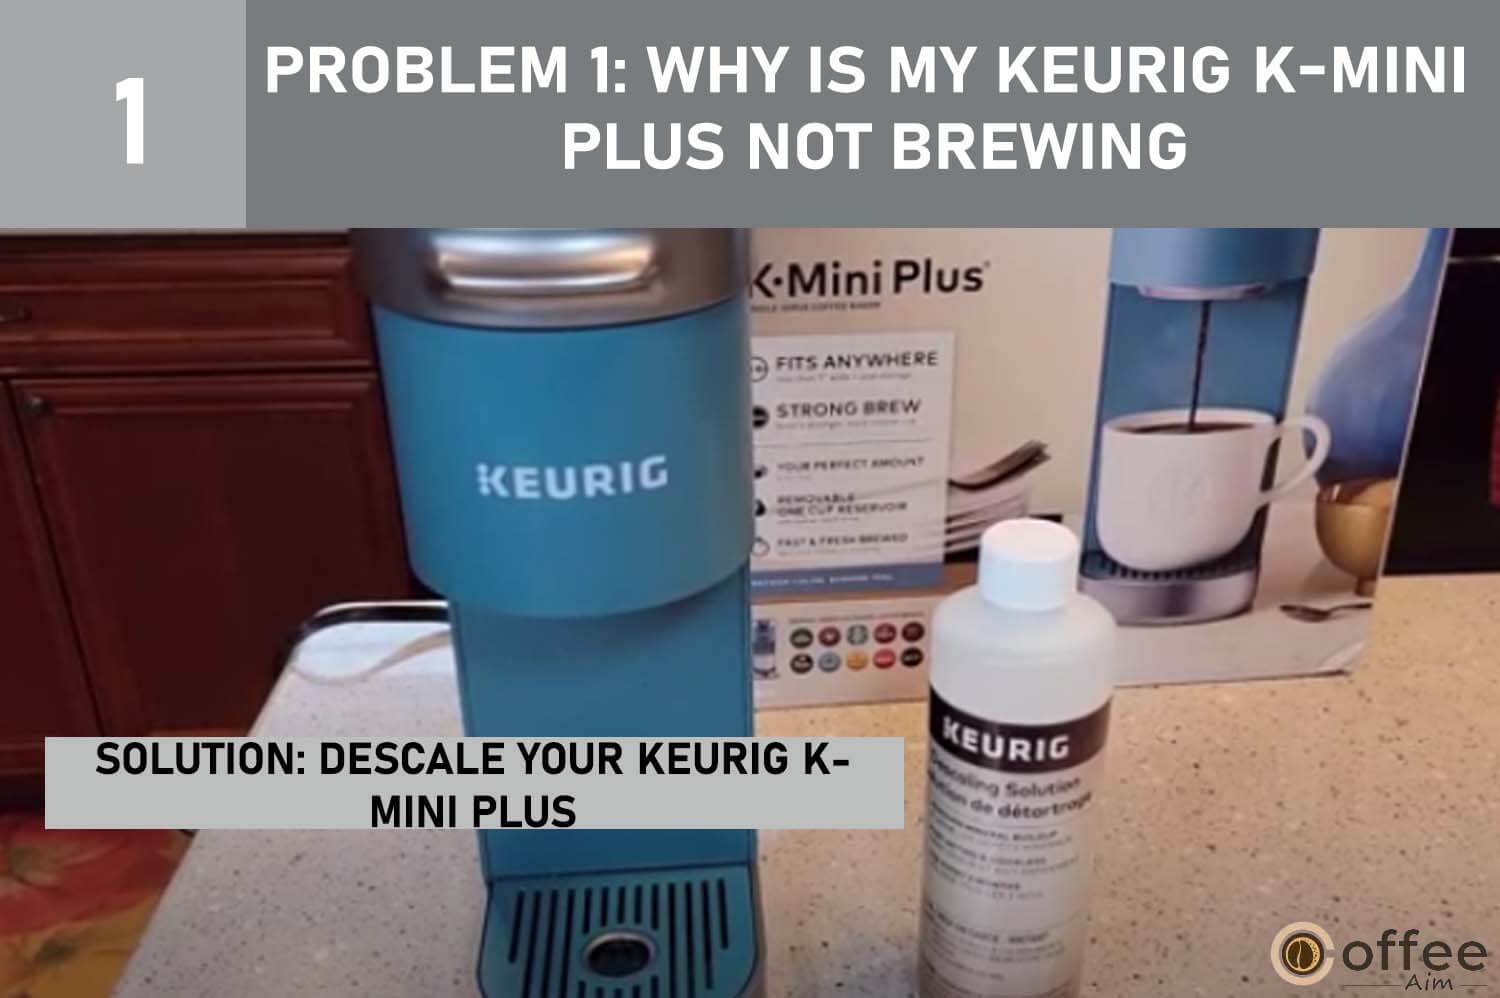
Solution: Descale Your Keurig K-Mini Plus
The most practical way to solve a clogged Keurig K-Mini Plus machine is to perform a descaling solution rinse. For step-by-step Keurig K-Mini Plus descaling instructions, please see the “Descaling The Keurig K-Mini Plus” written afterward in the troubleshooting section.
Cause 2: Air Bubbles
Another cause of your Keurig K-Mini Plus not brewing is the presence of air bubbles in its water lines. It happens when you run your coffee maker without properly filling the water reservoir or when it is not properly set up on the base. Consequently, the pump sucks air inside the machine due to the water reservoir’s absence. When the air gets stuck in the water lines, it disturbs the water flow and affects the brewing process.
Below are the Keurig K-mini Plus air bubbles removal instructions. Choose one of the two methods and implement the one you believe is most practical.
Solution 1: Shake Your Keurig
Follow these methods to clear air bubbles from your Keurig:
- First, disconnect the brewer’s power supply.
- Remove the drip tray and the water reservoir.
- Take hold of your Keurig firmly with both hands.
- Shake the Keurig firmly to get rid of any trapped air bubbles.
- Although it may seem strange, shaking the Keurig releases any trapped air bubbles and makes it run more smoothly.
Solution: 2 Use the Finger Method
Here is another approach to removing air bubbles from the water pipes in your coffee maker:
- First, check if your coffee maker’s water reservoir is open. You need to access the opening that connects the reservoir to the coffee maker; this can be located at the bottom of the reservoir.
- Next, use your finger to cover the opening or connection. This process aids in creating pressure within the system.
- Prepare for a water-only brew cycle now. Make sure that the pod holder is empty. Our primary focus is getting rid of the air bubbles.
- Keep your finger on the water hole while the brew cycle is running. By doing this, you’re maintaining pressure and forcing the brewer to pump water through the pipes.
Cause 3: Problem with Water Reservoir
Oh! Your Keurig is still not brewing even after performing the above-mentioned solutions. Do not Worry; there is still a way.
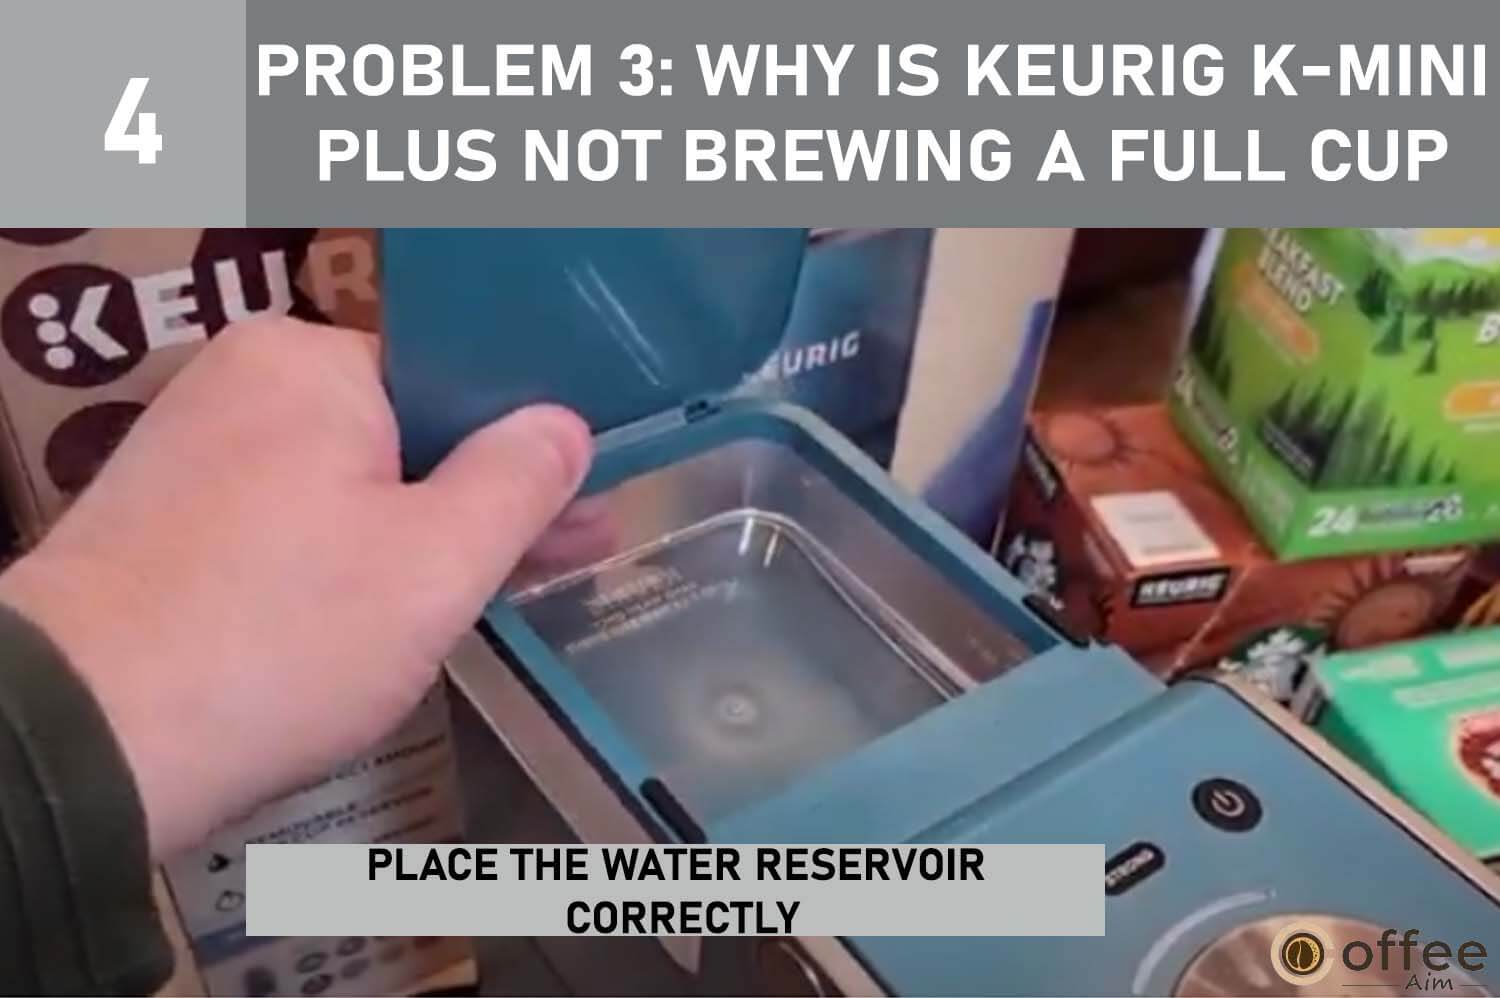
Another usual cause of a Keurig K-Mini Plus’s improper brewing is a problem with the water reservoir. Keurig can only access the water required for making coffee if the reservoir has enough water and is properly placed on its base. Let’s examine the easy yet crucial ways to solve the problem.
Solution 1: Place the Water Reservoir Correctly
The Keurig K-Mini Plus’s water reservoir must be correctly installed on the base for the brewer to begin brewing. The water reservoir should be appropriately aligned on its base. Make sure it is balanced and that it is not tilting on either side.

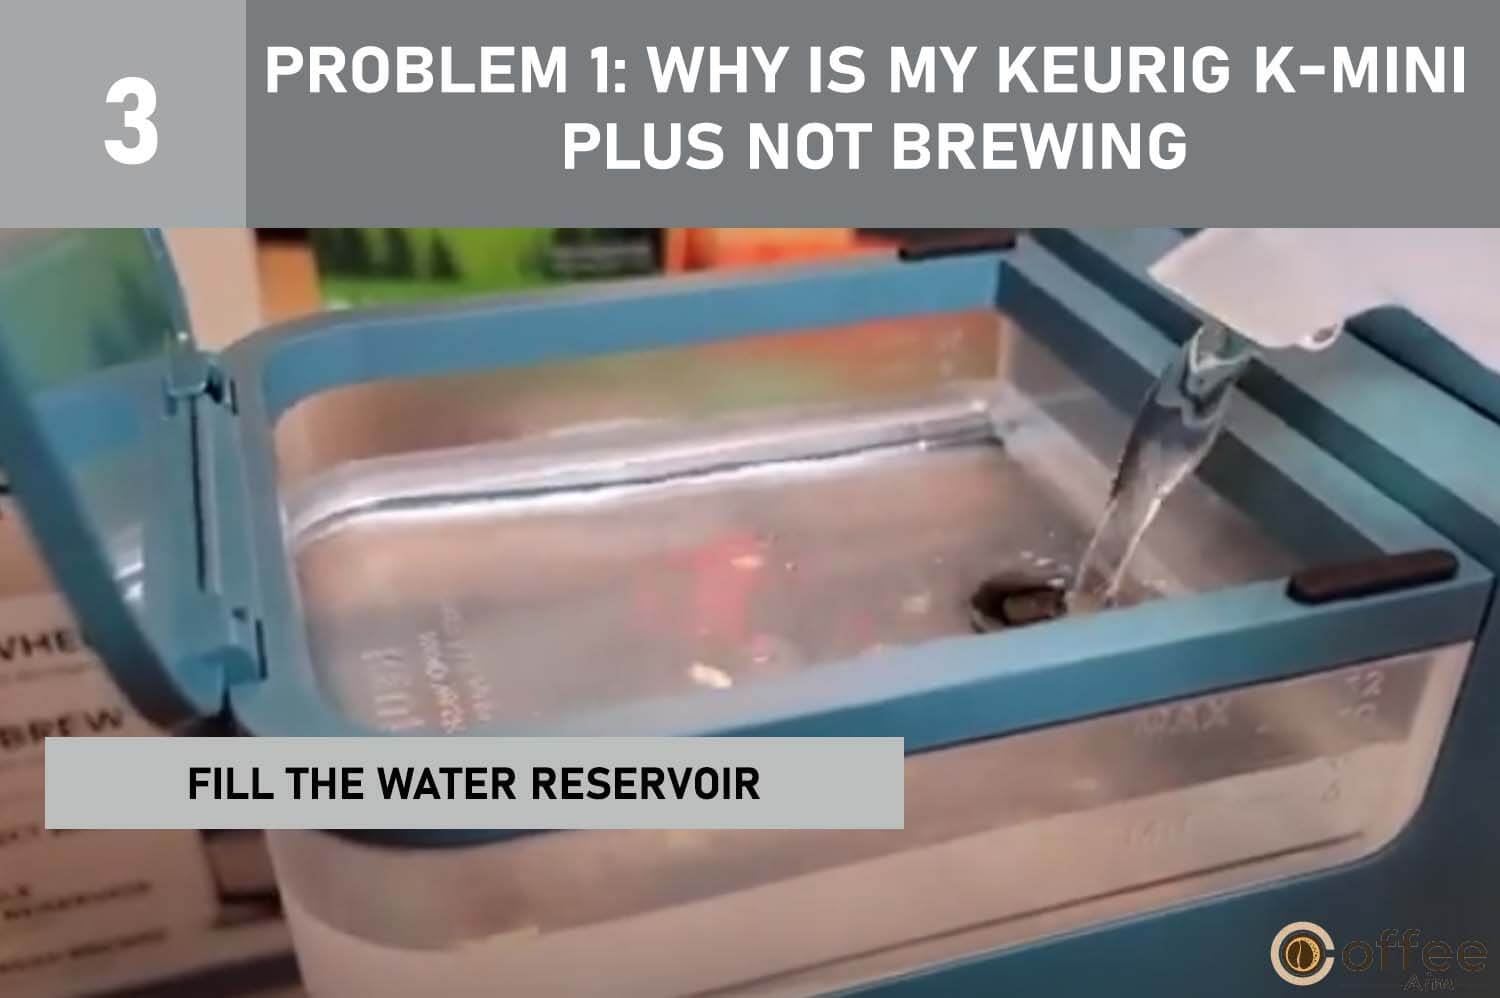
Solution 2: Fill the Water Reservoir
Your Keurig K-Mini Plus works slightly differently from the usual models of Keurig. It has a small water reservoir which needs to be filled according to the quantity of coffee you need. For example, if you need to brew a 6oz cup of coffee, you will fill precisely 6 oz of water in the water reservoir. For your ease, the water reservoir has oz levels marked on it so you can fill the water without any stress. However, it should not be filled below the MIN or Max Fill Line.
Note: Before every brew, you should ensure that the water reservoir is filled with enough water you need to brew your coffee.
Now that you know how to fix a brewing problem with your Keurig K-Mini Plus, let’s look at what to do if your Keurig K-Mini Plus won’t turn ON.
Problem 2: Why Is My Keurig K-Mini Not Turning On?
Your mind is still sleepy and yearns for a hot cup of coffee to start the day. But to your disappointment, your Keurig did not turn on, denying you the much-needed coffee dose. This minor annoyance can cause bigger problems later, disrupting your daily routine and lowering productivity. But hold off on giving up just yet. I’ve gathered useful data to aid you in resolving this problem. Let’s explore the potential reasons and find quick yet powerful fixes to restore your morning coffee.
Cause 1: Power Connection Problem
The power transfer could be one of the causes of your Keurig K-Mini Plus not turning on. Here are some thorough answers to this issue that will help you create a reliable and secure connection. Let us see the Keurig K-Mini Plus power connection instructions.
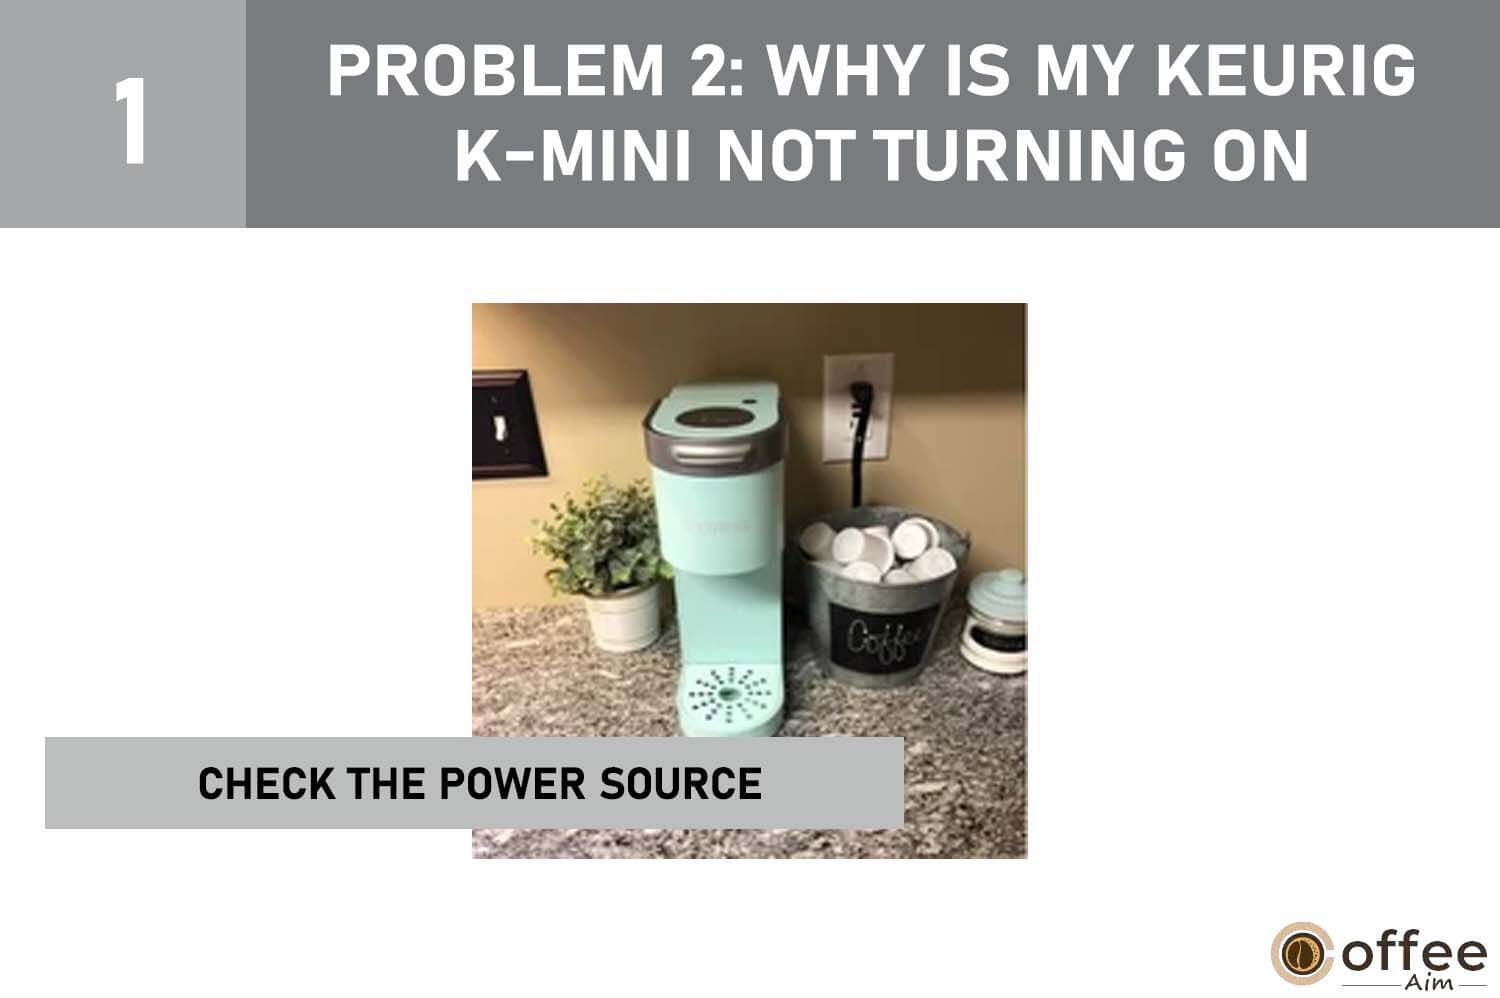
Solution 1: Check the Power Source
Make sure the power outlet you are using is operational. You can easily check if electricity is getting to the outlet or not by plugging in another appliance, such as a phone charger or a lamp. The next steps can be taken if the backup device functions. However, it is advised to check your circuit breaker or call an electrician to further explore the problem if there is no power.
Solution 2: Check the Plug For any Damage
Please make sure the plug/switch of your Keurig is not out of order. To guarantee a secure connection, I recommend you replace the plug with a new one if it displays signs of damage.
Solution 3: Inspect the Power Cord
Check your Keurig’s power cord for any damage indications, such as frayed or exposed wires. If you encounter any of these problems, the power cord must be changed immediately. Call Keurig customer service or a licensed technician to look into this matter.
Solution 4: Voltage Incompatibility
Check the voltage generated by the outlet with a voltage tester or a multimeter. The standard voltage in the United States is 120V. Your Keurig K-Mini may not turn on if the voltage is much lower. In these situations, seek the advice of an electrician to resolve the voltage problem.
Note: The information about contact can be found under the section “When To seek Professional Help”
Cause 2: Brewer Is Malfunctioning
If you have followed the instructions above to ensure a stable power transfer to your Keurig K- Mini Plus, but it still won’t turn on, it means the issue is with the brewer itself.
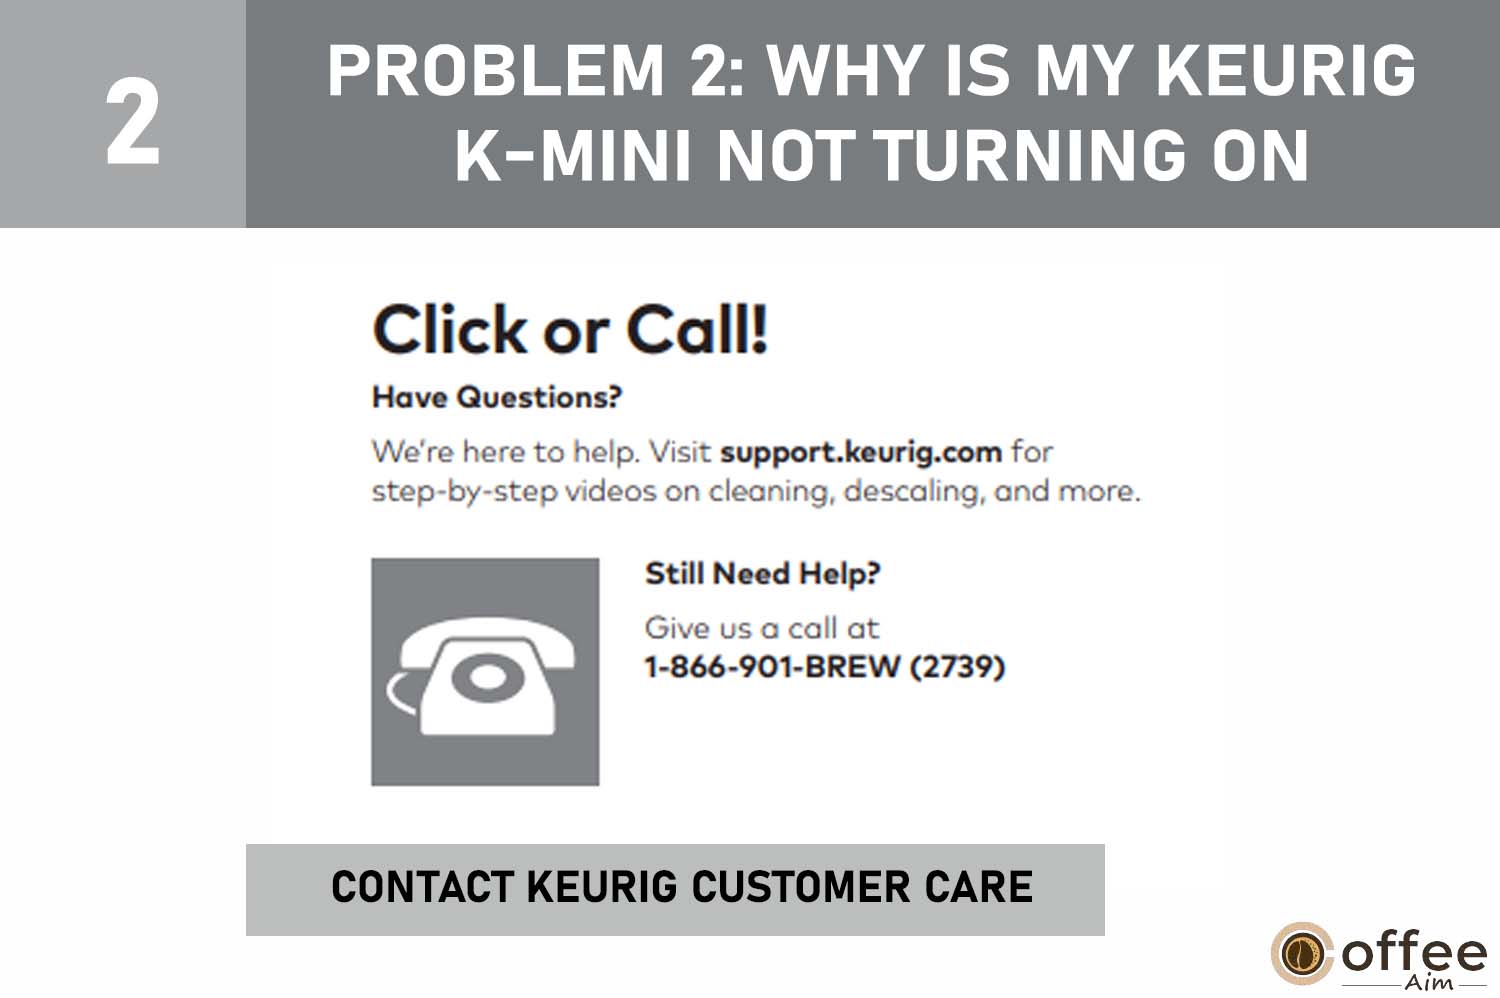
Solution: Contact Keurig Customer Care
For the best assistance in this matter, I recommend you contact Keurig Customer Care. You can find their contact information in the “When to Seek Professional Help” section mentioned later in this article. They will be able to provide you with the necessary support and guidance for resolving the issue with your Keurig.
After thoroughly discussing the solutions to your Keurig not turning on, let’s shift our focus to finding solutions for a more annoying problem, “Keurig not brewing a full cup,” you can encounter with your Keurig K-Mini Plus.
Problem 3: Why Is Keurig K-Mini Plus Not Brewing a Full Cup?
The excitement of getting a good cup of coffee replaces bewilderment and discontent when your Keurig is not brewing a full cup. But don’t worry! I’m here to address this problem head-on and provide practical answers that will make using your Keurig K-Mini Plus a faultless experience. Let’s explore the solutions to end this annoying issue once and for all.
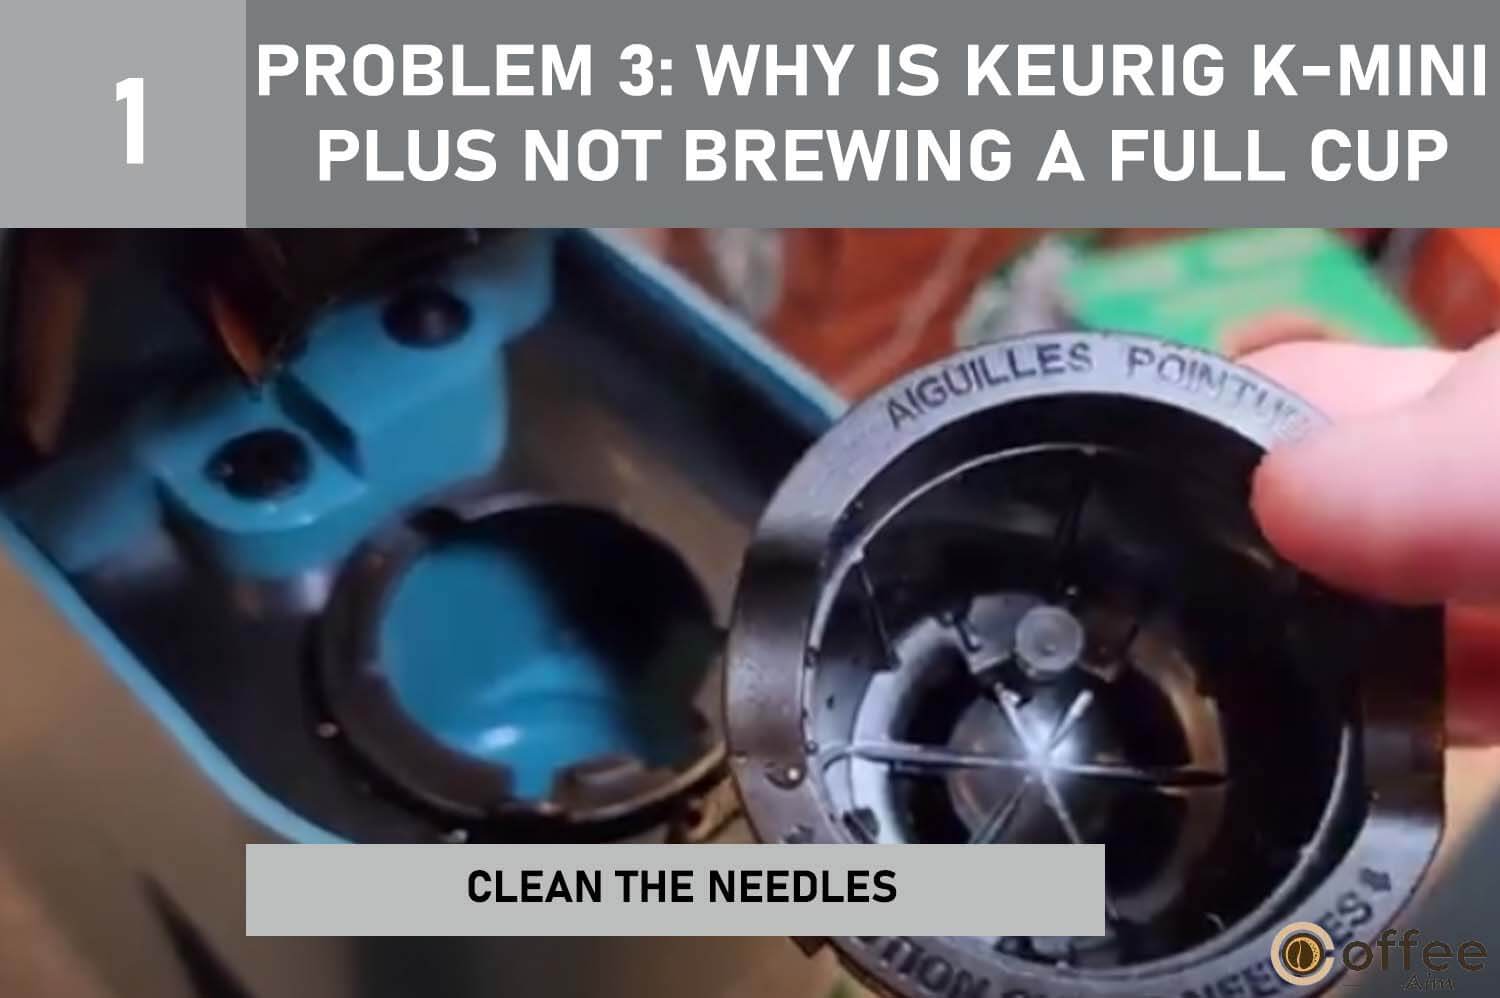
Cause 1: Dirty Needles
Sometimes, descaling your Keurig is not enough to solve the issue of an incomplete cup of coffee. It might be a result of clogged needles poking the K-Cup during brewing. These needles could get stuck with debris, such as K-Cup foil or coffee grounds. Fear not, though, since fixing this problem is not too challenging. Follow the solution below to effectively deal with the issue of dirty needles and guarantee a consistently pleasurable and full cup of coffee.
Solution: Clean the Needles
It is mandatory to frequently clean and make sure your Keurig K-Mini Plus’s needles are clear of debris. For a step by step Keurig K-Mini plus needle cleaning instructions, please see the detailed sections under “Cleaning The Exit Needle” and “Cleaning The Entrance Needle.”
Cause 2: Water Reservoir Valve Is Blocked
The potential existence of an obstruction within the tubing that links the reservoir to your Keurig K-Mini Plus brewing units is an additional vital factor to consider. This tube can get clogged with debris or mineral deposits over time and with repeated use (no regular cleaning), preventing the water from flowing freely and leading to interrupted brewing cycles. You can use the detailed instructions provided below to address this problem effectively.
Solution: Remove the Blockage
To clear the obstruction in the water reservoir, follow these instructions.
- To make sure that any potential obstructions or debris are cleared, swirl the water around the reservoir.
- You can locate the tube opening at the bottom of the water reservoir.
- Remove any dirt or residue from the area where the reservoir attaches to the machine with a cloth to improve the water flow.
- Use a turkey baster or other high-pressure equipment to force water into the pipe. Any blockages can be moved by the water pressure, which will also improve water flow.
- After completing this process, make sure to descale your Keurig K-Mini Plus to remove the potential mineral deposit in the valve or water lines.
Cause 3: Air Bubbles
When using your Keurig, it’s crucial to make sure the water reservoir is full and set up correctly on the base. Otherwise, air can get in the water lines (sucked by the pump) if one or both of these requirements aren’t met. These annoying air bubbles can obstruct water flow and prevent your Keurig from brewing coffee, leaving you with a partial cup of coffee. I’d be happy to help you and look into some potential instructions and methods to solve the problem you’re experiencing.
Solution 1: Remove the Air Bubble
I have thoroughly explained two methods above in this article to solve this problem. You can visit Problem 1 (Cause 2) to look into the air bubbles removal instructions.
Cause 4: Problem with Water Reservoir
Problems with the water reservoir in your Keurig K-Mini Plus can also frequently cause poor brewing. The water reservoir always has to be set up properly on its base and filled to the required level. This enables your Keurig to get the essential water for efficiently brewing coffee. Let’s examine the easy yet essential stages that make up the solution to this issue.
Solution 1: Place the Water Reservoir Correctly
Properly positioning the water reservoir on the base of your Keurig is essential as it is an important factor for a smooth kickstart of the brewing process. Therefore, double-check that the water reservoir is correctly placed before initiating brewing. Place the water reservoir on its base while aligning its sides. If it is balanced and not tilting, you have done a great job.
Solution 2: Fill the Water Reservoir
The water reservoir should not be filled below the MIN Fill line. You should always fill the reservoir with exactly the amount of oz of coffee cup you need.

Now you are well aware of the solution to the Keurig K-Mini Plus dispensing a partial cup of coffee, it’s time to look at the techniques for troubleshooting the issue when your Keurig K-Mini Plus starts leaking.
Problem 4: Why Is My Keurig Leaking or Dripping Water?
I understand how annoying and messy it can be when your Keurig K-Mini Plus starts leaking. Your kitchen countertops, flooring, and other surfaces can also be damaged. Moreover, If the water gets to the machine’s electrical parts, electrical issues or safety risks are also possible.
Furthermore, continual drips can waste water and encourage the growth of mold, which can cause unpleasant odors and pose health risks for your family. It is essential to handle this matter right now to avoid more issues. Let’s take a proactive approach to solving this issue by considering the necessary actions and workable alternatives.
Cause 1: Keurig K-Mini Tubes Are Clogged
Do you know that Internal component blockages are frequently a common source of Keurig K-Mini Plus leaking, specifically the blockage of tubes? As these tubes are always in contact with the water, the minerals get easily deposited here, making them blocked. When the tubes are clogged, the water flow is inconsistent, which raises the pressure in the system and finally causes leaks. Let’s look at the actions you may take to address this problem and get your Keurig K-Mini Plus back to working properly. Here are the instructions to descale the clogged tubes of your Keurig Mini Plus.
Solution: Descale Your Keurig K-Mini Plus
How will you get rid of tube clogging? It’s simple! Descale your Keurig K-Mini Plus. It is essential to regularly descale (every 3-6 months) first to prevent issues like leaks and to preserve your machine’s best performance.
So, go get the details of the descaling process in the section titled “Descaling The Keurig K-Mini Plus,” a little below in this article…

Cause 2: Dirty Entrance Needle
It seems that there is a little culprit who is responsible for your dripping Keurig; a dirty entrance needle. The entrance needle pierces the K Cup, allowing hot water to pass through. However, the accumulation of coffee grounds poses a potential problem as they have the potential to clog the needle. It can make it challenging for the needle to successfully puncture the pod. Consequently, during a brew cycle, coffee may begin to back up in the brewing chamber. Eventually, this backup can lead to the coffee seeping out of the machine’s top.
Solution: Clean the Entrance Needle
Stay calm if you encounter this problem. The entrance needle can be cleaned with an easy and efficient method. For a detailed explanation of how to clean the entrance needle, see the section “Cleaning The Entrance Needle.”
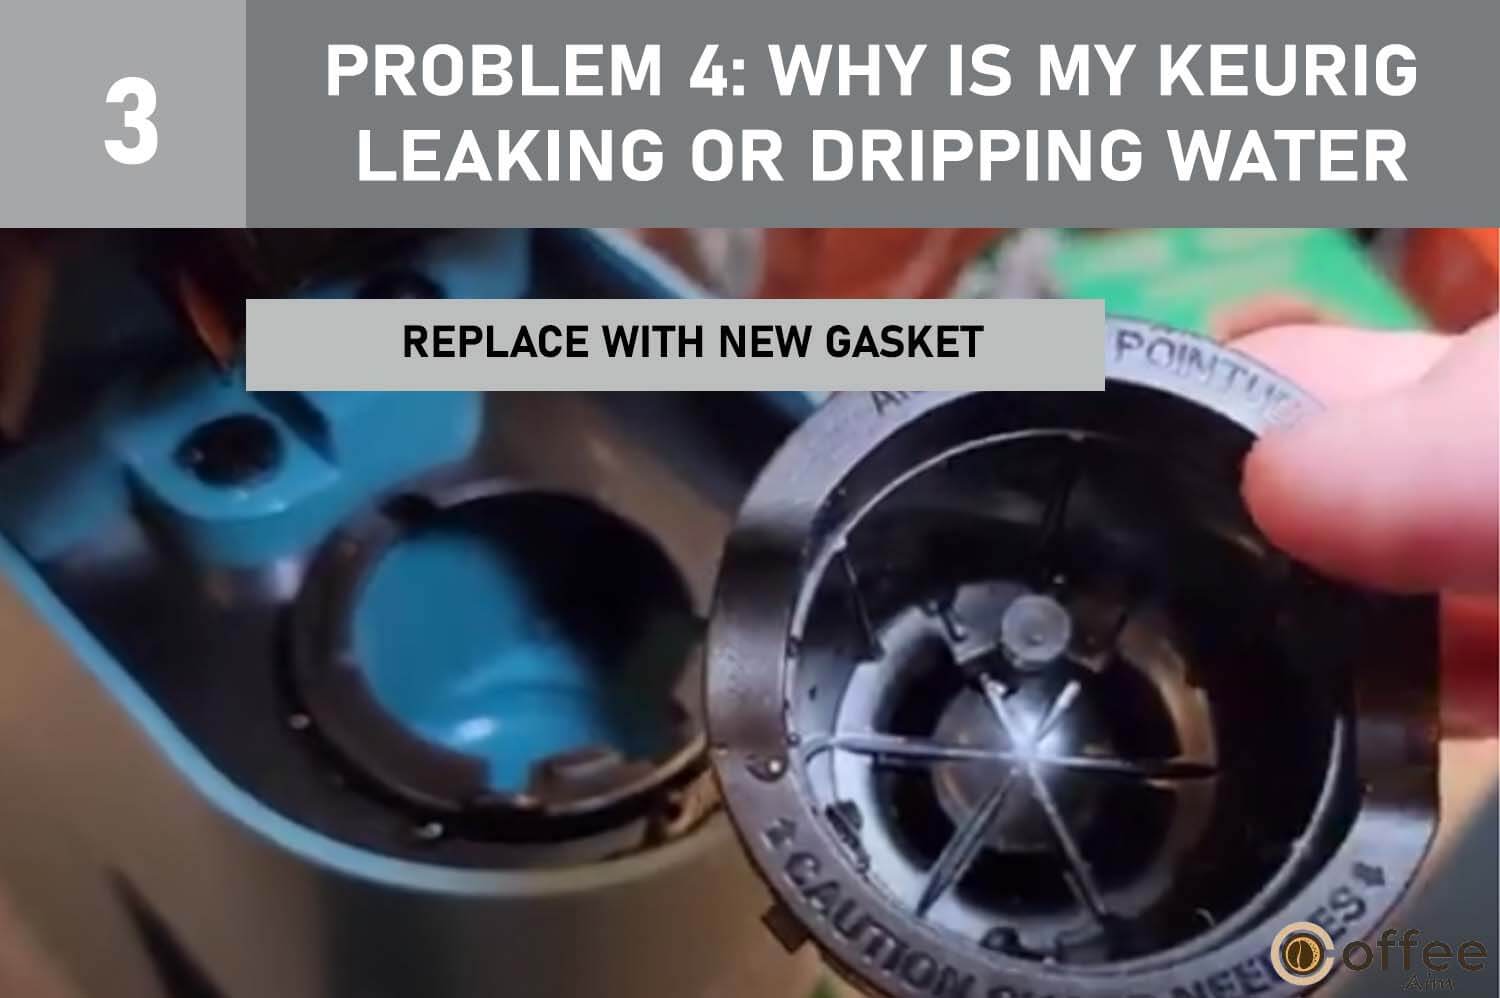
Cause 3: Damaged Exit Needle
Besides clogging, sometimes the needle can break and cause problems in making holes in the pod holder. It is necessary that the exit needle be vertical to puncture the bottom of the K-cup properly. If cleaning the exit needle doesn’t fix the problem, the exit needle can be broken. Let’s examine the actions you can take in such a circumstance.
Solution: Replace with New Gasket
The best course of action in this situation is to change it out for a new needle gasket. You make sure that the needle operates securely and effectively punctures the bottom of the K-cup by buying and installing a new needle gasket. You can buy it from Amazon.
Cause 4: Use of Third-Party Coffee Pods
Your Keurig K-Mini Plus could leak if you use low-quality third-party coffee pods. Sometimes these pods could not fit completely, leading to issues like trouble piercing the top or leaks, especially if the cover is thicker than the typical Keurig K-cup. Moreover, when the dimensions or construction of these K-cups do not align with the machine’s design, causing gaps and improper seals during the brewing process, let’s examine the potential fix for this unusual problem.
Solution: Use Original Keurig K-Cup Pods
It’s simple and effective to use Keurig K-Cup pods to prevent any problems with your coffee machine. Because there are so many different coffee flavors available in these pods, it’s simple to discover and enjoy your preferred flavor, ensuring that every cup of coffee is delightful. You can buy the original Keurig K-Cup from the Keurig Store and Amazon.
Cause 5: The Upper Gasket might be Loose or Broken
Water leakage from the coffee maker during brewing may also occur if the gasket is broken or gets loose. A coffee maker’s top gasket (silicone part) plays a role in creating a tight seal between the water hose and the K-cup, which ensures that water flows through the system as meant to.
To maintain a solid seal and prevent this problem, you should frequently inspect the gasket for signs of deterioration and make sure it is adequately placed. Now let’s examine the potential solution to this issue.
Solution: Repair the Gasket
Here are the instructions for repairing the gasket.
First, take the coffee maker’s water reservoir and reservoir lid.
- After that, find the circular screen at the reservoir’s base and remove the three screws keeping it there with a screwdriver.
- An O-ring will be seen once the circular screen has been taken out. Utilizing a plastic opening tool, carefully remove the rubber seal.
- Replace a fresh, undamaged O-ring with the old, damaged one. Place it securely to achieve a tight seal and avoid any leaks or other problems.
- After replacing the O-ring, use the three screws to connect the circular screen to the reservoir’s bottom.
- Reinstall the water reservoir’s reservoir lid and the water reservoir’s tank into the coffee maker.
Let’s say you want additional information regarding the steps that have been suggested to resolve the problem. In that situation, hiring a seasoned specialist to complete the repair on your behalf could be a good idea. The “When To Seek Professional Help” part of this article contains the contact information for such services.
Cause 6: The Pod Holder Does Not Grip the K-Cup
Your brewer might create too much pressure within the pod holder if the lid of your K-cup is not securely placed. As a result, the mixture of water and ground coffee may be driven out of the K-cup, causing leaks from the top of the appliance. Not only does this issue result in an ugly and muddy cup of coffee, but it also shows that the water pressure in the brewer is not being properly controlled. Let’s look at what you can do to tackle this issue successfully and guarantee a pleasant coffee experience.
Solution: Contact Keurig Customer Support
You should get in touch with Keurig’s customer service team to ask for help. The part of this page under “When To Seek Professional Help” contains their contact information.
Cause 7: Water Reservoir Is Cracked
Last but not least, another potential cause of your leaking Keurig is a damaged water reservoir. Flip the water reservoir and look for any obvious signs of damage. The size of cracks can vary from obvious and clear to small tiny fractures that are difficult to see. However, you can find out whether there is a breakage that might be the source of the leakage problem by pouring water into the water reservoir and inspecting for leaks or drips.
Solution: Replace with a New One
It’s necessary to replace the water reservoir immediately if you find cracks or other damage indicators. If a damaged reservoir is used repeatedly, your Keurig coffee machine may develop more leaks or other problems. So, buy a brand-new water reservoir from the Keurig store.
Alright, now that we’ve covered all the ins and outs of a leaking Keurig, let’s tackle another issue that might come up – loud noises coming from your trusty Keurig K-Mini Plus.
Problem 5: Why Does My Keurig K-Mini Plus Coffee Maker Make a Loud Noise?
Your quiet morning routine could get disturbed if your Keurig K-Mini Plus coffee machine starts producing loud, disturbing noises. These loud noises not only spoil the entire atmosphere, but they could also be a sign that something is wrong with your coffee machine. If you ignore them, it could result in further issues and possibly have an impact on the functionality and durability of your Keurig K-Mini Plus.
If you want to restore peace and the correct operation of your coffee maker, it’s critical to recognize and treat the origins of these noises. Let’s look at the fixes for this problem to resume our peaceful brewing experience.
Cause 1: Keurig is Clogged
You are aware that a buildup of minerals over time might cause problems for your Keurig coffee maker. Yes, those annoying minerals in tap water can slowly build-up and ruin your beloved brewer. It is like a cunning tiny enemy of your brewer hiding in your water supply!
As previously mentioned, these minerals can cause clogs and decrease the efficiency of your Keurig. And guess what? They can even be the source of the annoying noises you hear when making coffee.
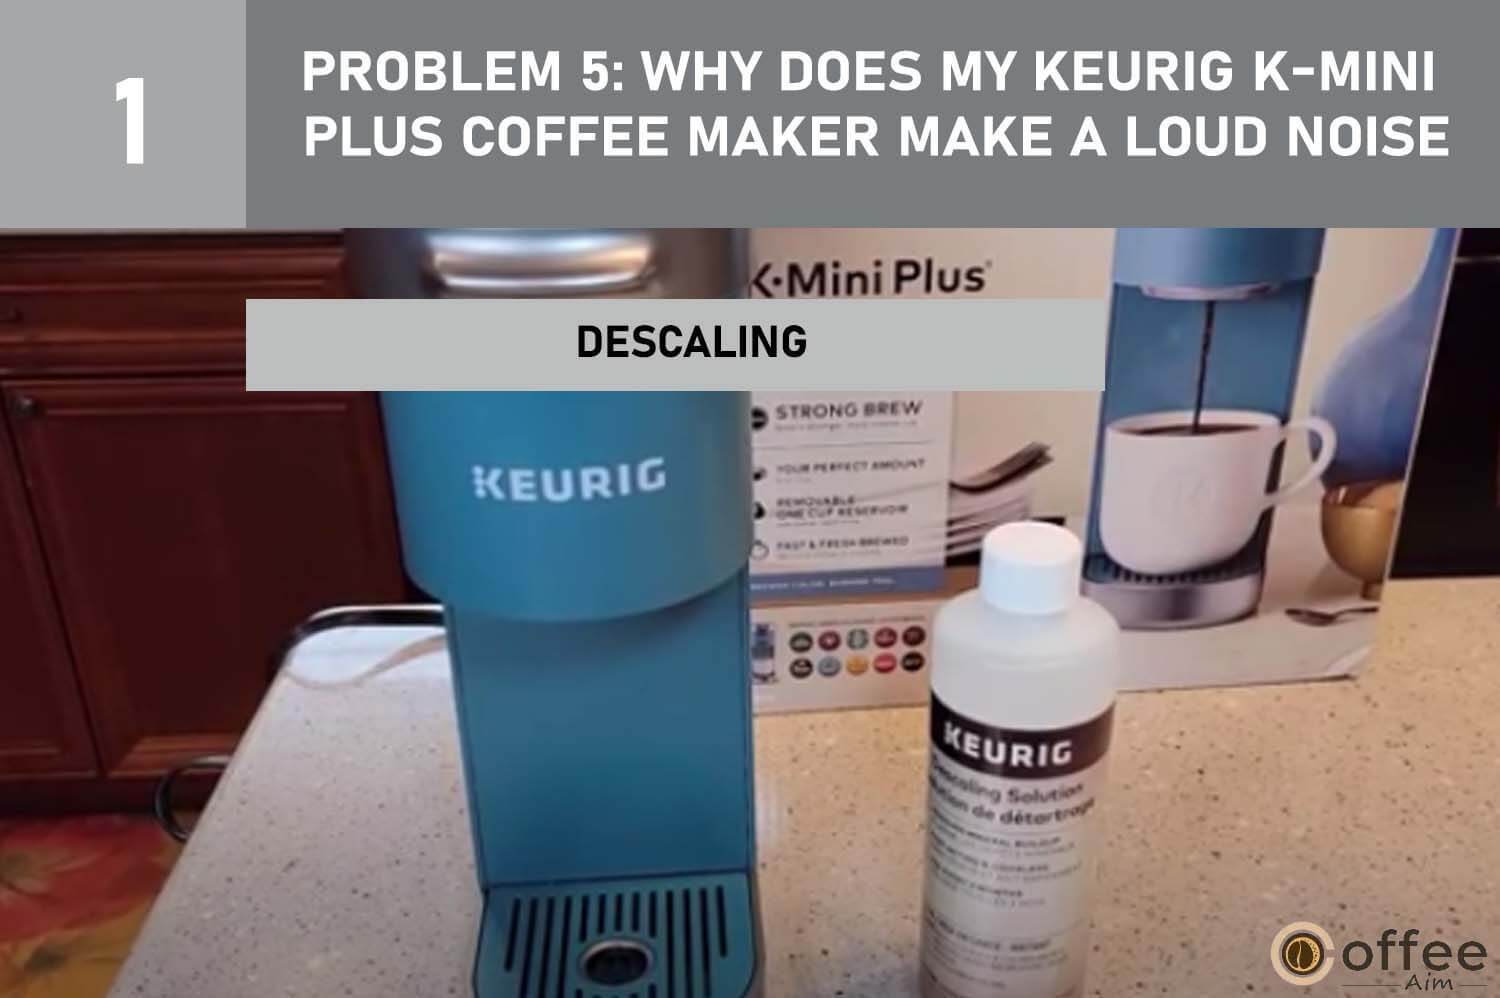
Solution: Descaling
In case of annoying mineral clogs, your only savior can be descaling. So, see the section below in this article, “Descaling The Keurig K-Mini Plus,” if you need help descaling. It offers a thorough, step-by-step walkthrough to make the descaling procedure simple and successful for you.
Cause 2: Wrong Placement of Your Keurig K-Mini Plus
Where have you placed your Keurig? Do you know that the position and surface where your coffee maker is placed can affect how loud it is? It is indeed true! Your machine will probably rattle and make more noise if it rests on an uneven surface.
Therefore, let’s collaborate to resolve this problem. We want your coffee brewing process to be as quiet as possible, right?
Solution: Place It on a Steady Surface
Always setting your Keurig K-Mini Plus on a solid surface, such as a kitchen slab or table, is a crucial guideline to follow.
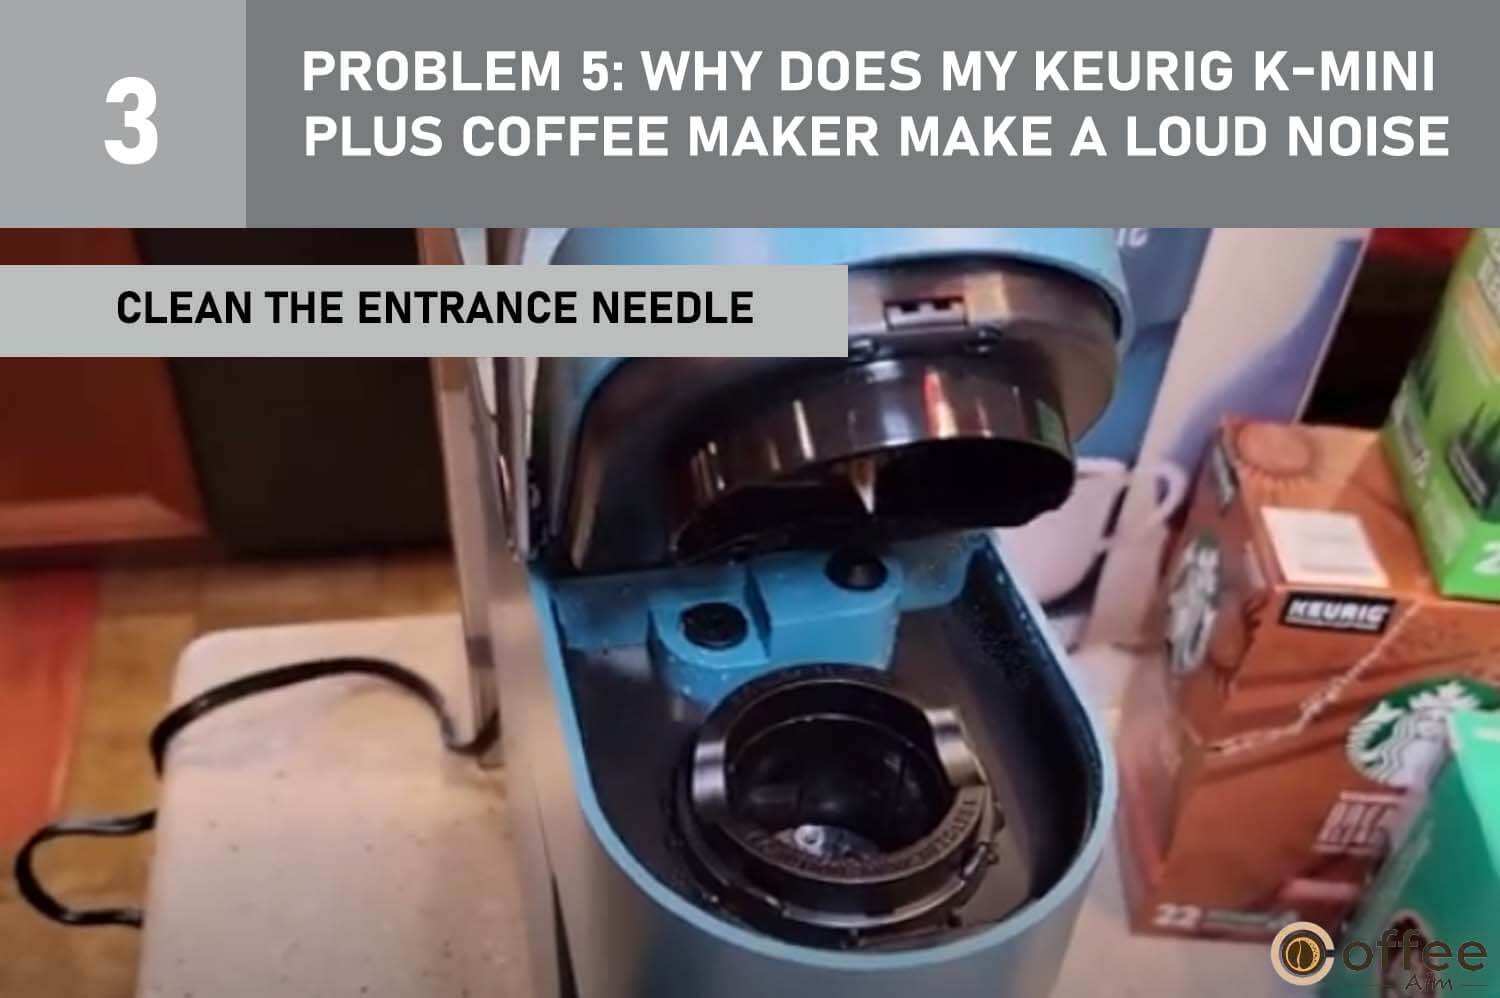
Cause 3: The Entrance Needle is Dirty
Other than the wrong placement of your Keurig K-Mini Plus, the clicking noises could be caused by a dirty entrance needle. The entrance needle pierces the K-Cup foil. The machine may make a clicking sound when it is blocked with coffee grounds or other dirt. So, want a remedy? Look down.
Solution: Clean the Entrance Needle
Cleaning the entrance needle makes sure that obstructions and debris are successfully eliminated. Please see “this article’s “Cleaning the Entrance Needle” section for comprehensive information on how to clean the entrance needle.
Cause 4: Broken Water Pump
Did you know that brewing a favorite cup of coffee depends heavily on the water pump in your coffee maker? It is true! But here’s the thing: if there’s a problem with the water line or pump, it may produce odd noises or even stop the flow of water, which would make your coffee machine dysfunctional. Any issues with the water pump need to be fixed right away in order to maintain a smooth and enjoyable coffee brewing process. Let’s fix the pump so we can resume brewing fantastic coffee!
Solution: Repair the Water Pump
The best plan of action in this situation is to get in touch with Keurig Customer Care. You can ask for expert assistance in repairing or replacing the water pump by getting in touch with them. The “When To Seek Professional Help” part of this page contains Keurig Customer Care’s contact details.
Let us jump on another frequent problem which is Keurig making weak coffee.
Problem 6: Why is My Keurig Producing Uneven or Weak Coffee?
Did you experience a weak and flavorless brew when you were longing for the ideal cup of coffee? It can genuinely ruin the experience of drinking coffee as a whole, leaving you disappointed and frustrated. It can even lower your mood and reduce your productivity when you skip your daily cup of coffee.
In order to resolve the issue and determine why your coffee is weak, it is imperative to identify the root of the problem. The joy and flavor of your coffee routines will return if we can identify the underlying issues and work towards a solution.
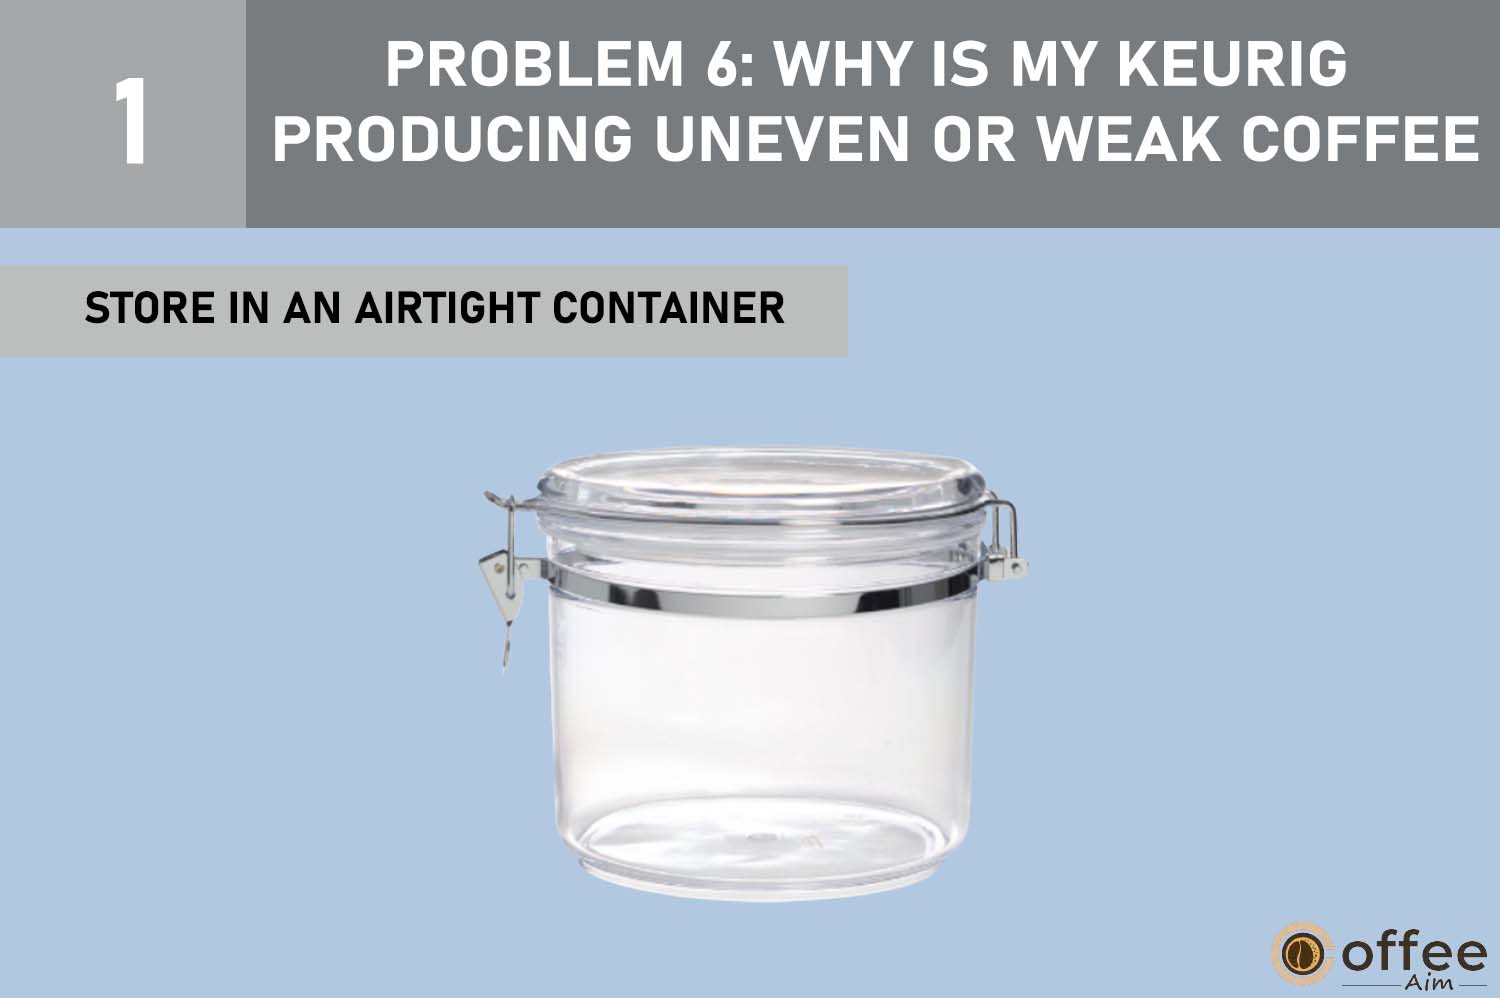
Cause 1: Improperly Stored Coffee Grounds
What if I tell you that your Keurig K-Mini Plus machine is not the true villain—instead, it’s the poor storage of coffee grounds you use to brew your coffee? Coffee grounds that have been mishandled during storage or exposure to humidity can significantly alter the flavor and intensity of your brew.
Therefore, it is important to consider the proper storage of the coffee grounds, especially when you rely on reusable K-Pods. Coffee grounds that have been mishandled during storage or exposure to humidity can significantly alter the flavor and intensity of your brew. So, whenever you detect a rapid decline in the flavor or strength of your coffee, it is mostly due to your negligence and not a problem with the coffee maker. You can solve this issue by taking some precautionary measures.
Solution 1: Grind Only the Required Amount of Coffee Beans
Instead of grinding a lot of coffee at once, you only need to grind what is required for each brew. This procedure aids in preserving the coffee’s flavor and freshness for a prolonged length of time.
Solution 2: Store In an Airtight Container
Improper storage can prevent coffee grounds from losing flavor and freshness—stale coffee beans result from light, air, and moisture exposure. You must keep the coffee grounds dry and in airtight containers if you want to preserve the flavor of your coffee. These measures will help the coffee stay tasty and fresh for longer.
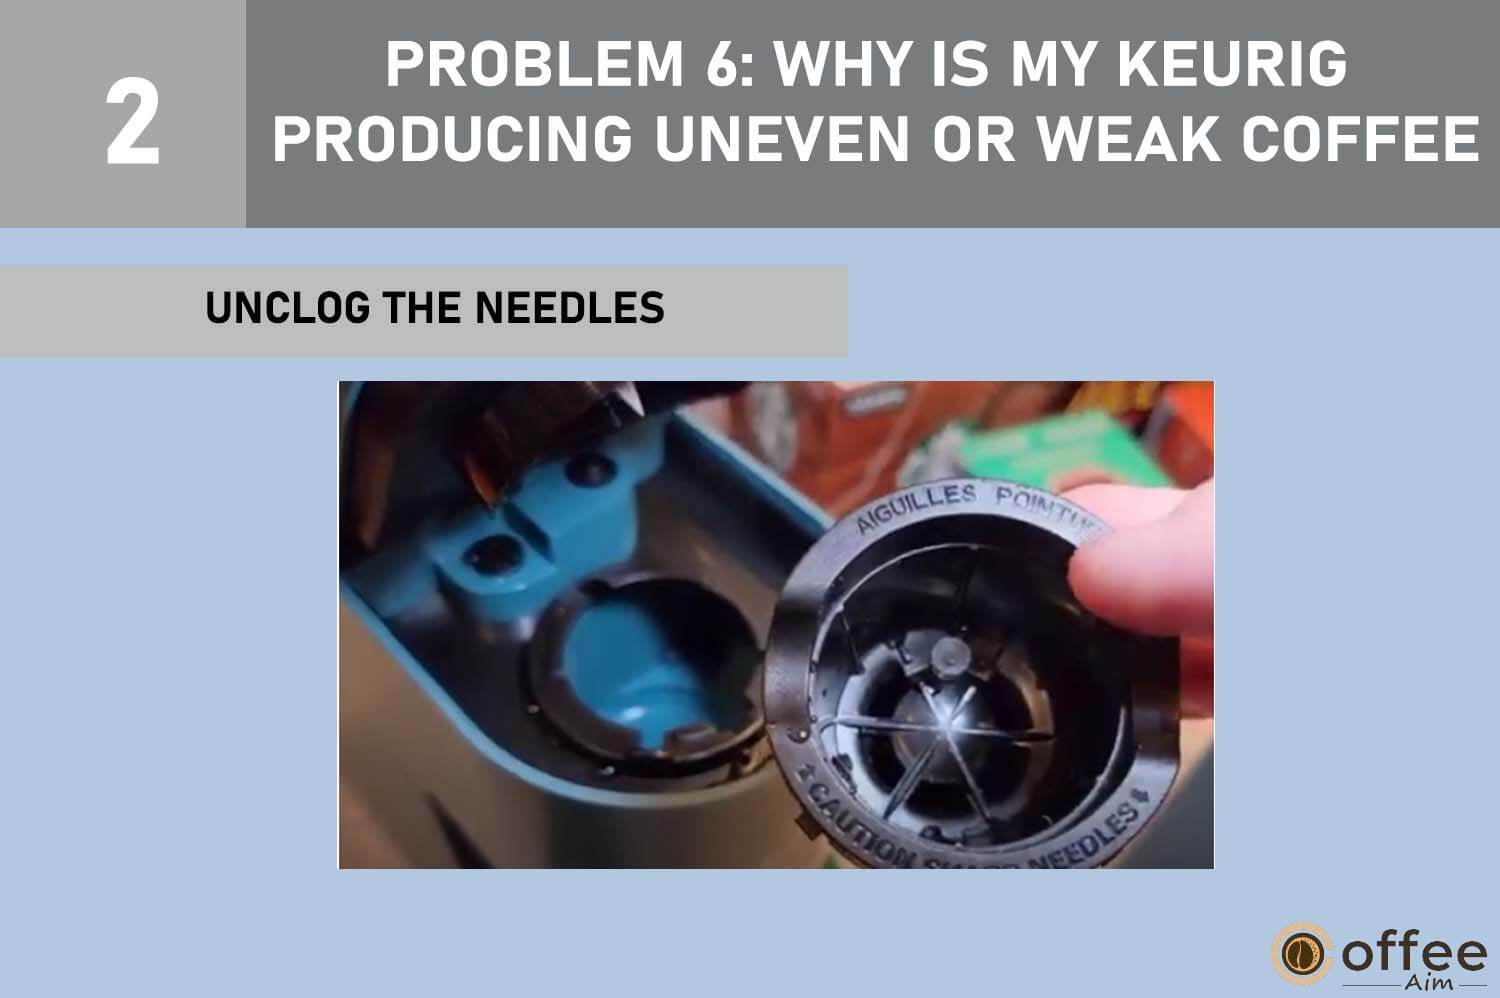
Cause 2: Needles Are Clogged
A blocked needle in the Keurig device is yet another typical cause of poor coffee. The coffee grounds are exposed to water when the K-Cups are punctured by the needle. With time, the needle may clog up with debris, mineral deposits, or items like used coffee grounds, which will stop the water from flowing. Due to water not reaching every bean and extracting coffee, the resulting beverage is weak and watery. Let’s look at some potential answers to this problem.
Solution: Unclog the Needles
Simply cleaning the needles is the answer. For Keurig K-Mini plus needles cleaning instructions, refer to the parts of this page under “Cleaning The Exit Needle” and “Cleaning The Entrance Needle” for a full step-by-step approach.
After carefully examining the many causes of weak coffee and the remedies that can be solved, it is now imperative to discuss the steps that a user should take if they find coffee grounds in their coffee cup when using a Keurig K-Mini Plus.
Problem 7: Why Are There Coffee Grounds in My Brewed Coffee?
It could be upsetting to eagerly pour a cup of coffee only to find irritating coffee grounds in your cup as a coffee fan who enjoys the strong flavors of coffee. This not only affects the enjoyment of your coffee habit but also jeopardizes the coffee’s full potential. Therefore, it is crucial to investigate the underlying cause of this problem and take the necessary actions to reclaim the desirable qualities of your coffee brewing experience. Let’s start this investigation together!
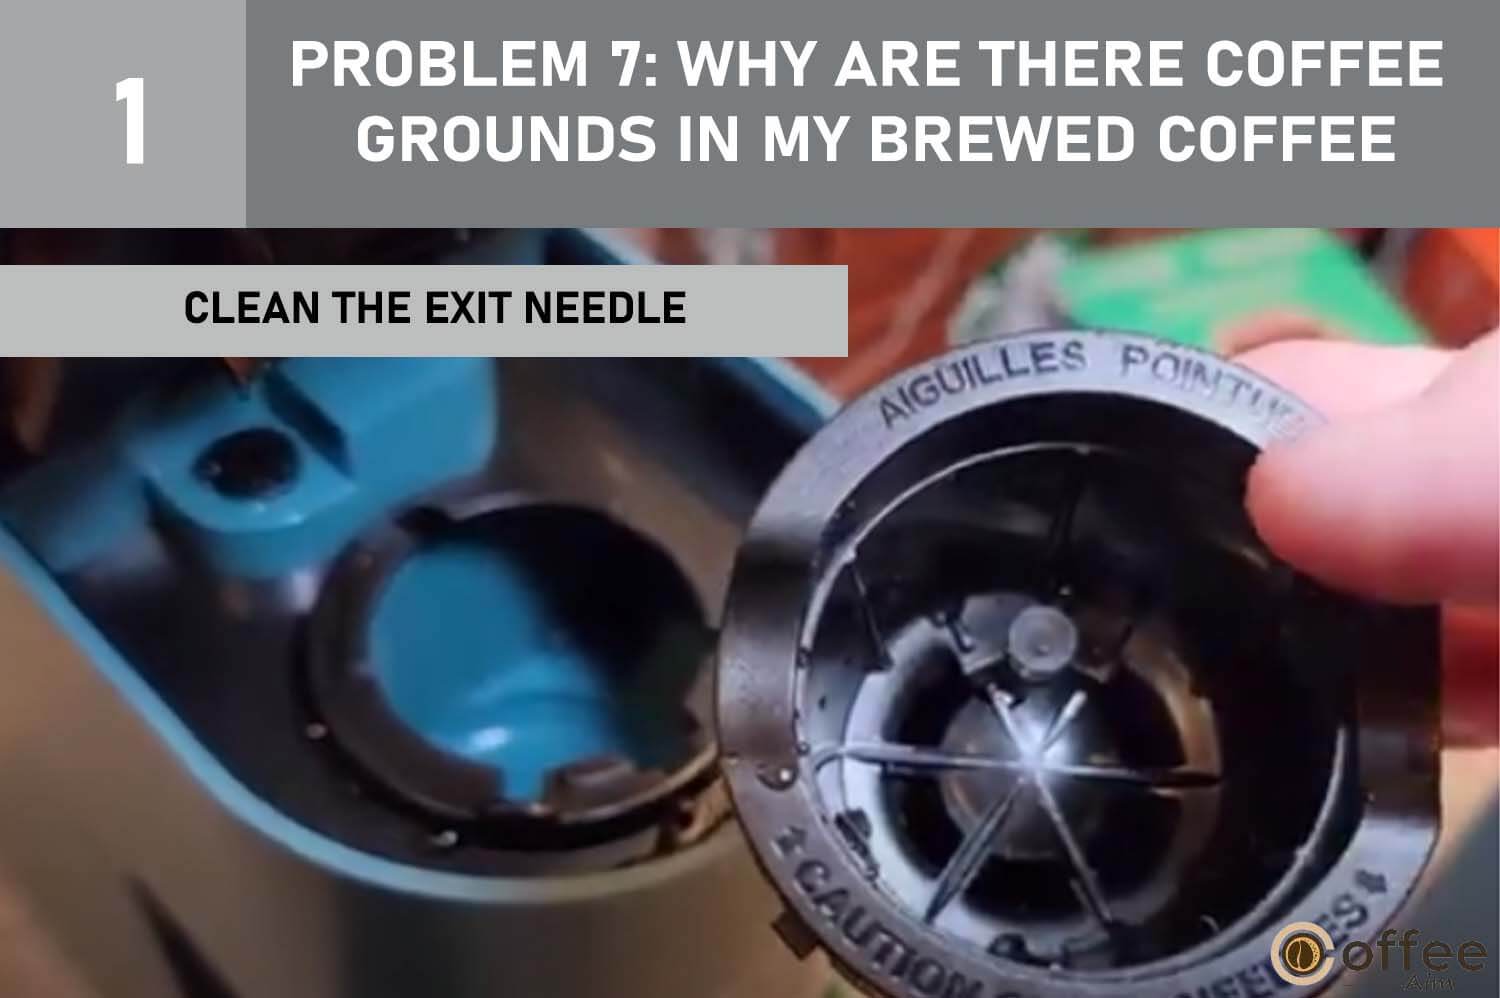
Cause 1: Dirty Exit Needle
As a matter of fact, a blocked exit needle in your Keurig machine is the leading cause of spilling coffee grounds. This obstruction happens when coffee or tea grounds get collected and jam the machine’s exit hole. Here is a solution to this problem.
Solution: Clean the Exit Needle
This step is important for maintaining Keurig K-Mini Plus’s functionality and stopping coffee grounds from escaping. Please see the part in this article titled “Cleaning The Exit Needle” for complete information on how to do so.
Let’s move on to a different problem and look at how to solve the problem of the Keurig K-Mini Plus not making hot enough coffee.
Problem 8: Why is My Keurig K-Mini Plus Not Making Hot Enough Coffee?
For those who value the tradition of beginning their day with a steaming beverage, learning that their Keurig coffee machine is unable to prepare a hot cup of coffee might be depressing. It can throw off your normal routine, depress your mood, and leave you yearning without a nice cup of hot coffee. Your Keurig K-Mini Plus might not produce the proper temperature for several reasons. Let’s examine these causes and potential remedies to improve the issue. Create a catchy opening sentence.
Cause 1: Malfunctioned Water Pump
Oh dear, if your coffee maker’s pump is malfunctioning, things may get pretty messy! The usual water flow is interrupted, and the heating element immediately switches off to prevent overheating in order to safeguard the brewer from harm.
This probably sounds like a safety feature. Right? Yet, this comes with a drawback that the water does not have enough time to warm up to the right temperature because of this interruption. Consequently, instead of getting the expected hot coffee, you receive one made at a lower temperature than it should have been.
But keep calm; I plan to deal with this problem because I want your coffee to be delicious and the ideal temperature to wake up your senses and tempt your taste buds.
Solution: Repair the Water Pump.
It would be wise to contact Keurig’s customer support for knowledgeable advice if you need help with a malfunctioning Keurig K-Mini Plus that won’t produce a hot cup of coffee. Their professional staff is prepared to offer assistance, troubleshooting advice, and even to enable repair or replacement if necessary.
Additionally, if your Keurig is still covered by warranty, you could be qualified for a replacement. I suggest consulting the “When to Seek Professional Help” portion of the article you cited to discover the contact details for Keurig customer support. Their knowledge will assist you in getting over this obstacle and guarantee that your coffee will once more be sizzling hot and just as you want it.
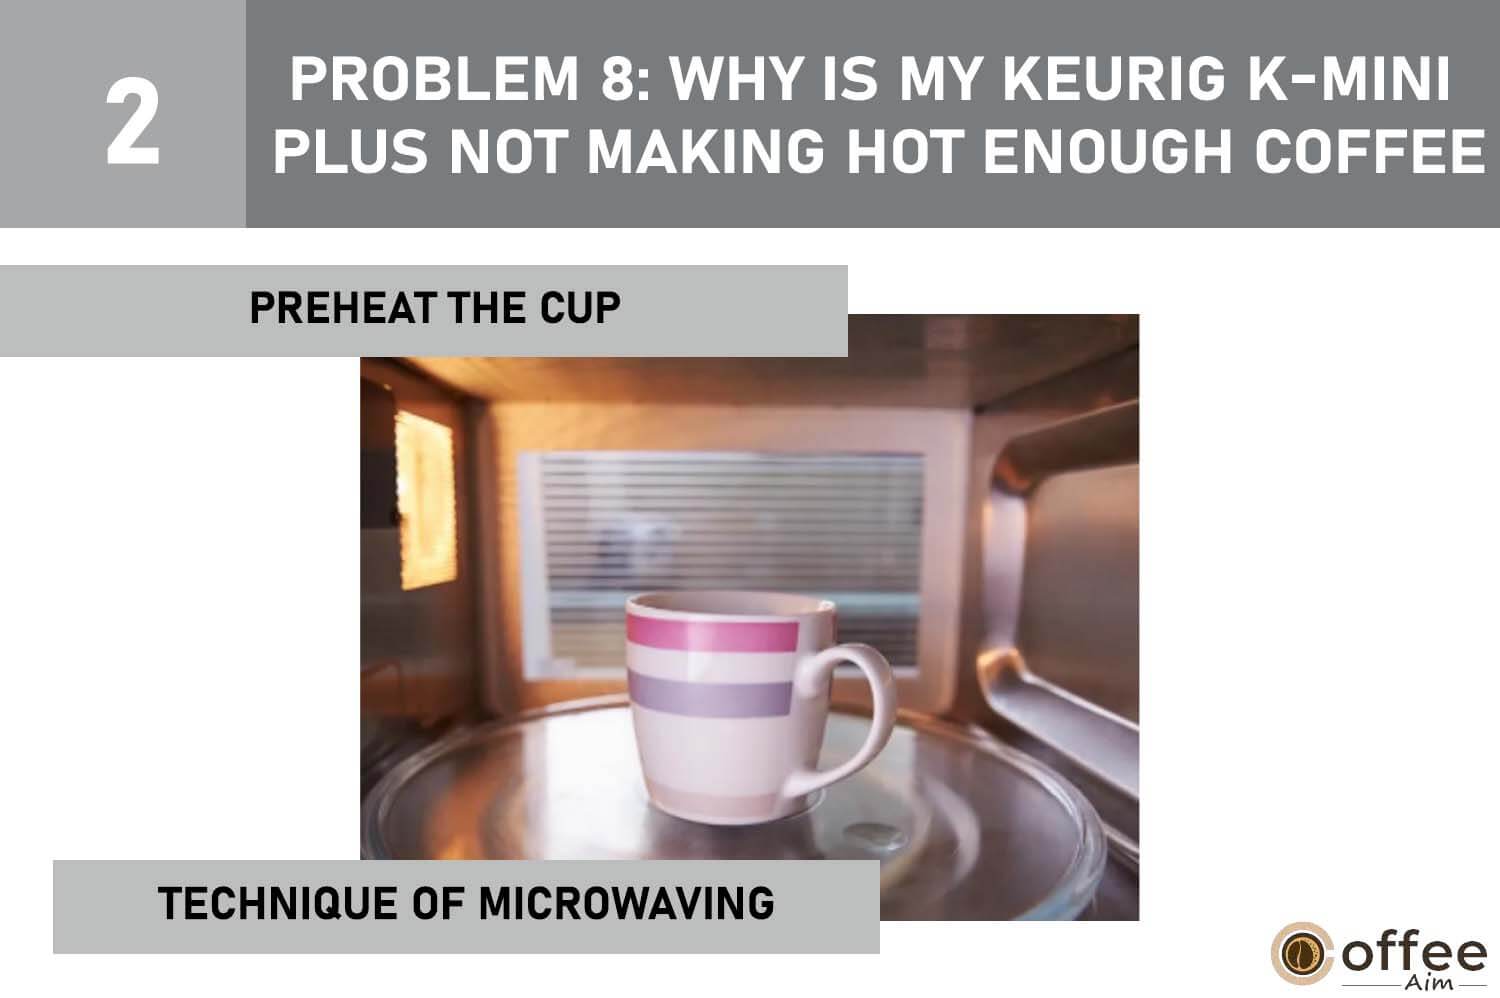
Cause 2: Use of Cold Cup
Another reason for your coffee getting cold is the use of a cold cup. It’s especially exacerbated during the winter months when your hot drink rapidly cools as it touches your freezing cup. It happens because of the heat transfer from drink to cup. But don’t worry! I am here to assist you in resolving this issue and keeping your coffee delightfully hot.
Say goodbye to underwhelming cooling and prepare to enjoy your winter beers with the warmth they deserve!
Solution: Preheat the Cup
A quick and simple method to reduce heat transfer and keep your coffee at the right temperature for longer is to preheat your cup. If you want your coffee hot, this straightforward yet amazing tip will greatly improve your coffee-drinking experience. You have a choice between two techniques for warming your cup.
- Technique Of Microwaving
Microwave your cup with some water in it for 30 to 60 seconds. After the cup has heated up, dump the water and immediately make your coffee in it.
- Boiling water method
Fill your cup with hot water, then wait 30 to 60 seconds before drinking. Pour out the water when the cup has been heated, then quickly make your coffee in it.

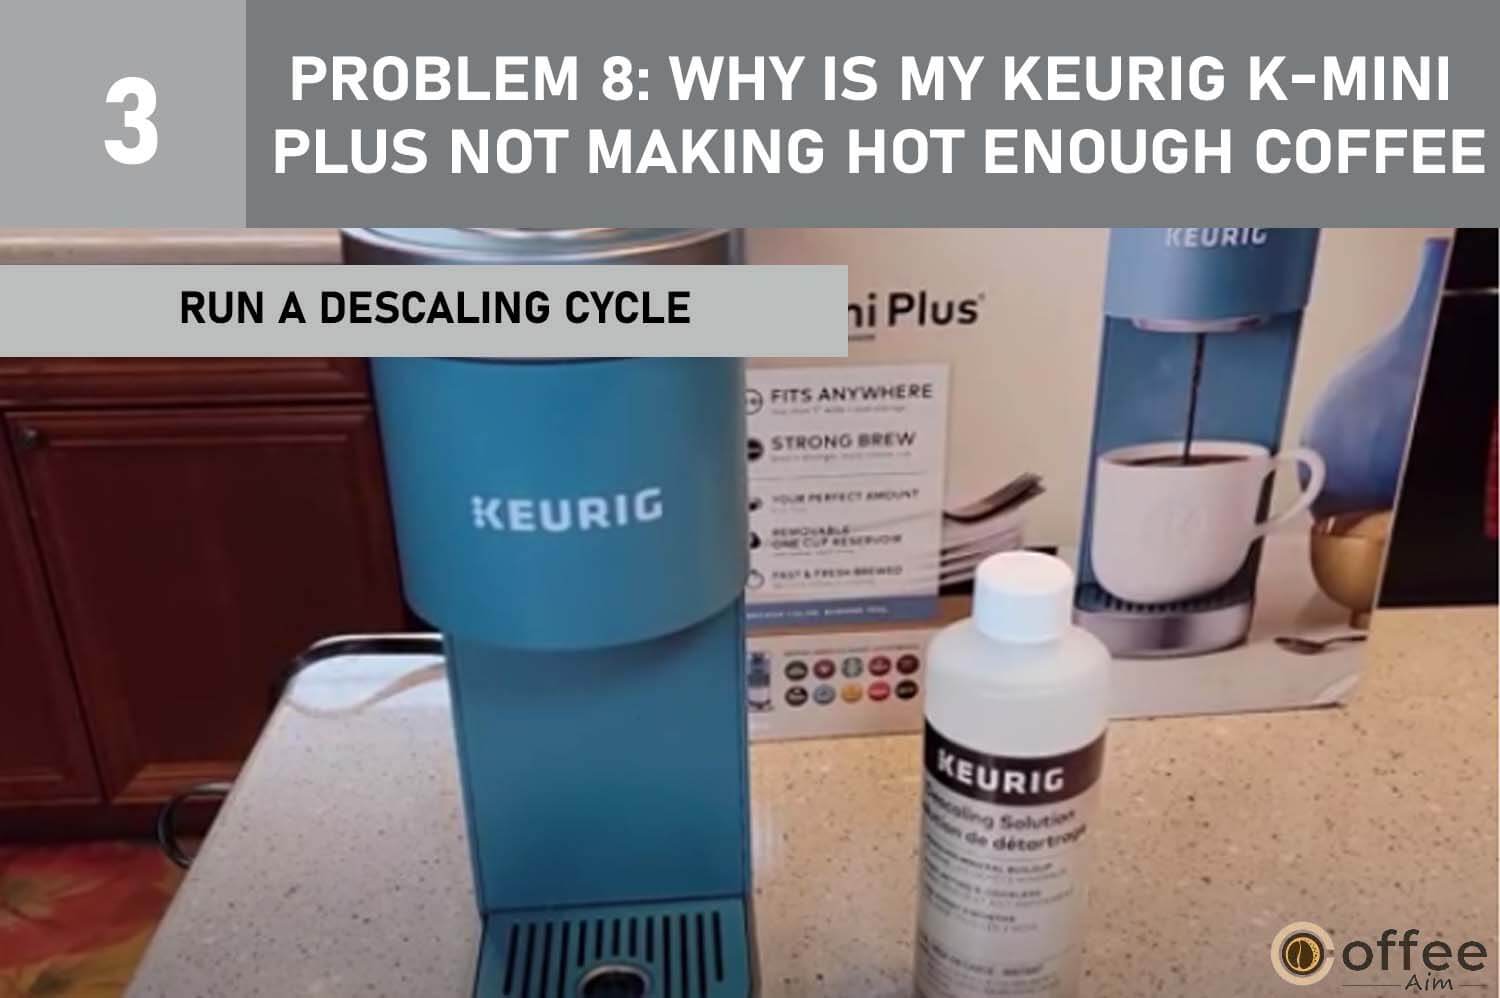
Cause 3: Keurig Is Clogged
If a frozen cup is not the problem, it might be possible that your Keurig K-mini Plus is clogged. When limescale and blockages build-up inside the system, the performance of your coffee maker’s water pump and heating element might be substantially affected. The machine’s ability to work properly suffers from this accumulation, which can also lower the brewing temperature. Let’s go more deeply into the potential remedies to deal with and resolve this issue.
Solution: Run a Descaling Cycle
Running a descaling cycle is the best approach to clear blockages caused by limescale accumulation in your Keurig K-Mini Plus coffee maker. Please see the part in this article titled “Descaling The Keurig K-Mini Plus” for more information on the precise descaling steps for your machine.
Cause 4: Malfunctioned Heating Element
While finding out the root cause of your Keurig dispensing cold coffee, do not forget the malfunctioning heating element. The heating element is in charge of bringing the water to the ideal temperature for brewing coffee. Coffee won’t get hot enough if it malfunctions since it won’t be able to heat the water to the appropriate temperature. Let’s investigate the potential answers.
Solution: Contact Keurig Customer Care
The best path to action would be to contact Keurig Customer Care and ask for their assistance in fixing this issue. The part of the article titled “When to seek professional help” contains the contact details.
After discussing the reasons and troubleshooting methods for your Keurig K-Mini Plus not brewing coffee hot enough, let’s shift our focus to how to troubleshoot a different issue you can have. We will specifically look at what to do if the coffee in your Keurig K-Mini Plus shuts off unexpectedly.
Problem 9: Why Is My Keurig K-Mini Plus Shutting Off During Brewing?
Your morning coffee habit could get disturbed and interrupted if your Keurig coffee maker abruptly shuts down while brewing. Such an unexpected interruption hampers the brewing process, and you cannot enjoy your desired cup of coffee. However, do not worry! I’m here to assist you in working through the problem-solving process, identify potential reasons, and provide solutions to help you overcome this obstacle.
Cause 1: Keurig Is Overworked
Keurig coffee makers can experience sudden shut-off from overheating. It can happen when your machine is overworked, causing an automated shutdown to stop any possible harm. Fortunately, there are several fixes available to address this issue and get your Keurig K-Mini Plus back to full functioning. Please see the methods below to learn more about preventing Keurig overheating.
Solution: Let it Rest
Turn off your Keurig K-Mini Plus and unplug it to give it time to cool. By taking a well-earned rest, your Keurig can reset itself and reduce the chance of additional overheating.

Cause 2: Malfunctioned Wiring
Faulty wiring, usually the consequence of a broken plug cable, is a common reason for unplanned shutdowns in Keurig coffee makers. Your Keurig K-Mini Plus wiring can trigger the automatic shut-off feature when damaged, protecting you from any potential danger. Let’s go on to the answer now.
Solution: Repair the Wiring
It can be dangerous and damaging to try to fix electrical problems on your own. You should seek a specialist who can safely inspect and fix your Keurig. For contact information of professionals who can offer the required assistance, see the article’s “When To Seek Professional Help” section.
Cause 3: Faulty Thermostat
If the wirings are not at fault, the thermostat could be the real culprit of these unexpected shutdowns. The thermostat plays an essential role in controlling the temperature of the water, and when it fails, the machine may abruptly shut down. Let us find out how you can fix this problem.
Solution: Contact Keurig Customer Care.
I suggest getting support from Keurig customer service if you think your Keurig may have a malfunctioning thermostat. They can provide suggestions for troubleshooting and alternatives for repair or replacement. If the warranty on your Keurig K-Mini Plus is still eligible, you can ask about a potential replacement or any other appropriate compensation. For contact information, please see the article’s “When To Seek Professional Help” section.
Cause 4: The K-Cup’s Bottom Is Unpunctured
Failure to pierce the bottom of the K-Cup is one probable cause of your Keurig coffee machine turning off during brewing. The machine shuts off automatically if it cannot pierce the bottom of the cup, which prevents the correct brewing of coffee. Let’s now examine the solution to this problem.
Solution: Contact Keurig Customer
Contact Keurig Customer Care or get advice from an expert to discover why your brewer cannot pierce the K-Cup. You can get the essential support and direction to help you address your problem by turning to the proper support channels for assistance. Please see the “When To Seek Professional Help” section for these experts’ contact details.
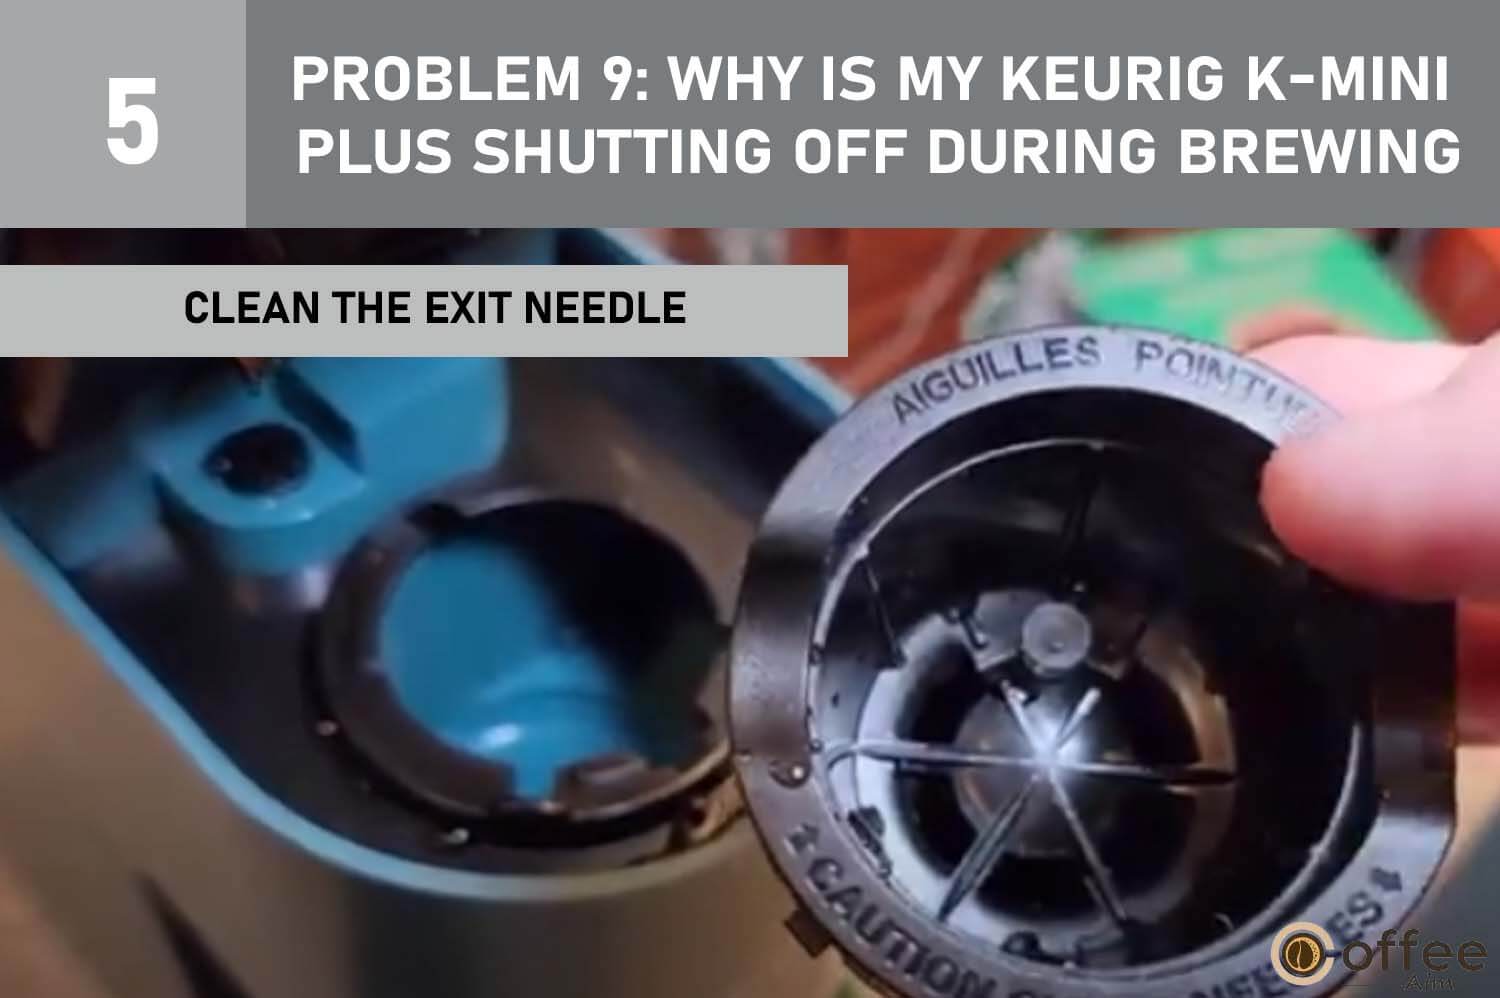
Cause 5: Clogged Exit Needle
A clogged exit needle could also hamper your brewing process. Coffee grounds building up around the Keurig machine’s needles might obstruct the piercing operation and result in only one hole in the K-cup. The hot water cannot pass through the K-cup, which prevents the Keurig from brewing and causes an automatic shutdown. Let’s now examine the options for resolving this problem and achieving proper functionality.
Solution: Clean the Exit Needle
When your Keurig turns off while brewing the next time, perform a brief examination to determine the cause of the problem. After removing the K-cup, check the pod’s bottom for an incomplete or too-small hole. If you see this, your brewer’s bottom needle is to blame. Before making your next cup of coffee, clean the exit needle. For comprehensive instructions, see the portion of this page titled “Cleaning The Exit Needle” below.
Cause 6: Bent Needle
Broken or bent needles could be another factor causing these sudden shutdowns. This frequently happens when excessive force is used, such as when a K-cup that is too large for the machine is inserted strongly. These situations could go up the needles at the upper entrance and exit sites. Let’s move on and examine the procedures to fix this problem.
Solution: Replace the Needle Gasket
The only solution to this problem is to replace the new exit needle gasket. You can buy it from Amazon and simply insert it in the pod holder.
Cause 8: Water Reservoir Magnet Alignment is Wrong
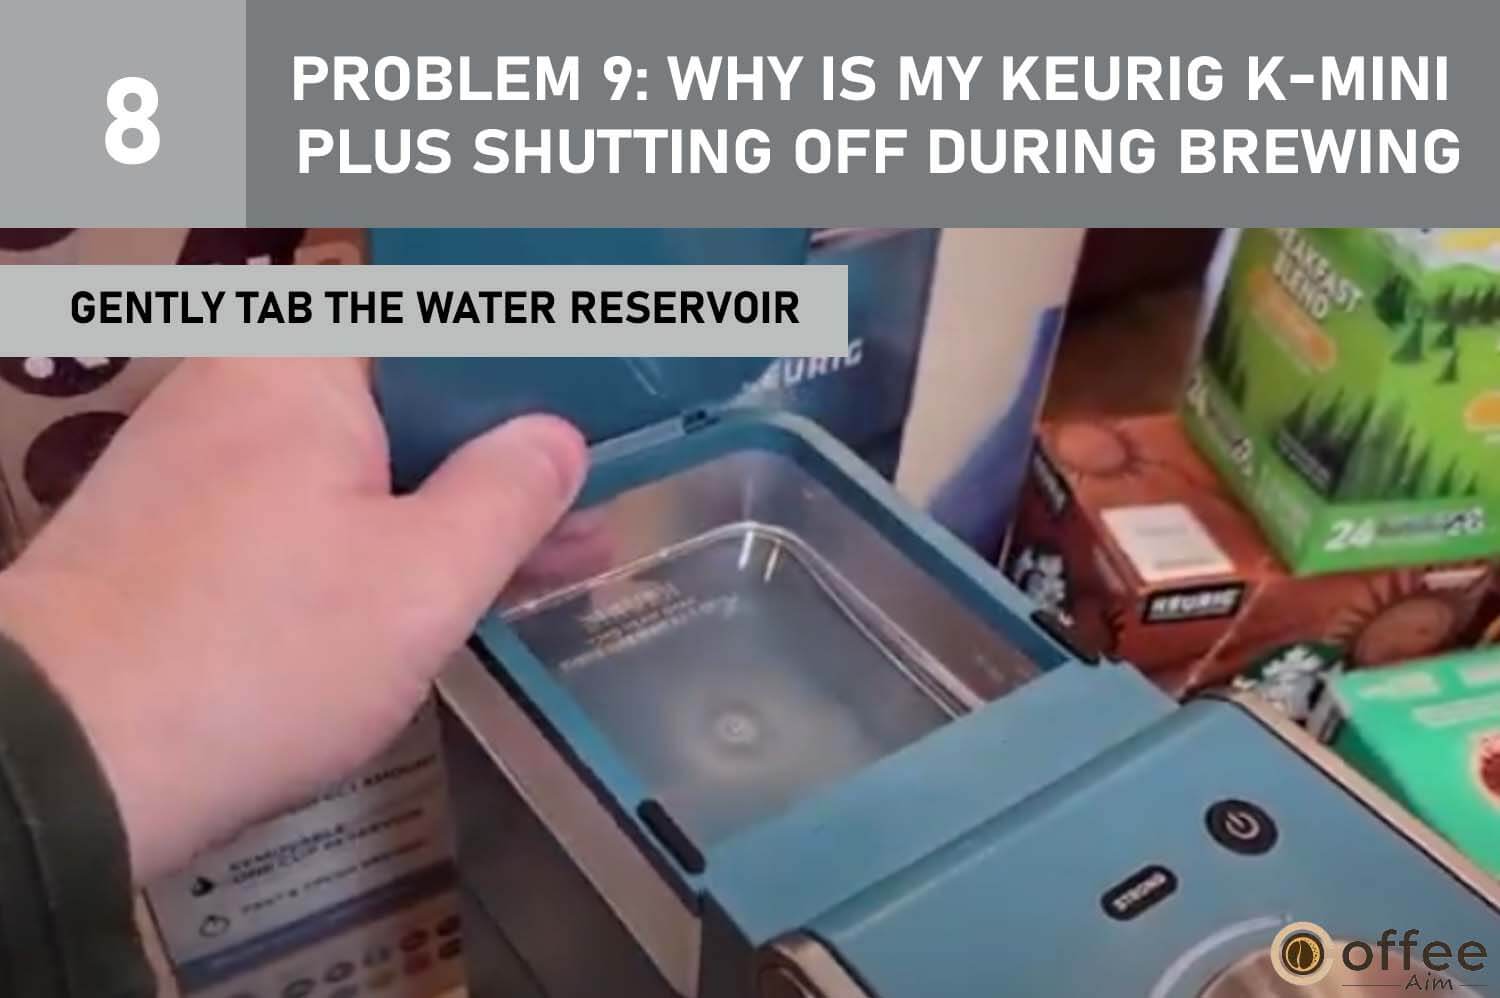
Your water reservoir’s tiny but essential magnet, which determines the water level, might become loose due to vibrations from the brewing process. Consequently, your Keurig cannot detect the water level effectively, causing sudden shutdowns rather than the flavorful coffee you deserve. But don’t worry; we’re about to embark on a mission to discover the solutions to put an end to this annoying issue. Get ready to enjoy smooth, consistent brewing like your Keurig was intended!
Solution: Gently Tab the Water Reservoir
So here’s the deal: make sure you gently tap the water reservoir next to the magnet housing before realigning the magnet. Got it? If this doesn’t work, gently shake the reservoir to nudge the magnet into the proper spot. Empty the reservoir and gently clean it with mild soap if the magnet is still unresponsive. Refill it with water, and then continue using your Keurig.
Cause 9: Brewing Process Was Interrupted
An interruption of the brewing cycle can also result in unexpected issues. A power outage or a malfunction that shuts down your Keurig during the brewing process are two potential causes. Let’s now examine the potential solutions for this problem to deal with it and fix it.
Solution 1: Ensure a Stable Electric Connection
By following the instructions, you can prevent your Keurig from abruptly shutting down during brewing because of a shaky power connection.
- First, ensure your coffee maker is plugged directly into an electrical outlet rather than through a power strip or an extension cable. The electrical connection might get weaker with additional devices plugged into the same outlet, increasing the likelihood that the machine will shut down while it is in use due to excessive load on the outlet.
- Look carefully for any visible damage, frayed wires, or loose connections at the plug or equipment end of the power cord for the brewing equipment.
- Check the plug to make sure it isn’t broken or bent, as this could result in a shaky connection.
Problem 10: Why Is My Keurig K-Mini Plus Not Pumping Water from the Reservoir
Oh, I completely get how you feel! When your Keurig is all up and ready to make your favorite coffee but fails to pump water, it may be quite aggravating. When you eagerly hit the brew button, the pump starts to get water from the water reservoir as it tries to push the water through. Be calm, though; I’m here to assist you in fixing it. Let’s walk through the procedures to get your Keurig working properly once more.
Cause: Clogged Water Pump
When your Keurig refuses to pump water, the culprit is often water scaling in the water lines —a buildup of debris that obstructs the water pump’s functionality. There are several effective ways to address this issue and get your Keurig back to its brewing prowess.
Solution: Unclog the Water Pump
Here are two different methods through which you can unclog the water pump!
First Method:
- Remove the Keurig water reservoir and empty it.
- Refill the reservoir with fresh water, filling it about one-third of the way.
- Shake the water vigorously inside the reservoir to dislodge any debris.
- Carefully spill out the water from the reservoir.
- Locate the opening where the Keurig pump delivers water into the brewer.
- Take a clean dish towel and thoroughly wipe the opening to remove any debris.
- Ensure the opening is clear and unobstructed for proper water flow.
- Reattach the water reservoir to the Keurig machine.
- Test the Keurig by running a brew cycle to check if the water pump is functioning properly.
Second Method:
Here Is an alternative method to unclog the water pump.
- Fill the Keurig water reservoir with some water.
- Insert a turkey baster into the part of the reservoir that connects to the machine and the water pump.
- With the turkey baster in place, apply gentle pressure to force a few bursts of water through the connection.
- As you do this, you may notice the water becoming cloudy, indicating that scaling and debris are being forced out into the water reservoir.
- Continue the process of forcing bursts of water until you feel the connection is adequately unclogged or descaled.
- Empty the water reservoir and wash it thoroughly to remove any dislodged scaling or debris.
- Refill the reservoir with clean water.
- Reattach the water reservoir to the Keurig machine.
Cause 2: Air Bubbles
You forgot to fill the water reservoir before brewing, and now air bubbles have formed in the water lines, which prevents the pump from priming and operating properly. It is another frequent cause that might lead to this disruption of the pumping process. The grinding sound may be caused by this disturbance in the priming process even while no water is being used. Let’s look at some potential strategies to deal with this issue and get your Keurig coffee machine back to performing at its best.
Solution: Remove the Air Bubbles
For information about the different methods and instructions on removing air bubbles, refer to the solution of “Problem 1( Cause 2)” of this article.
I’m confident that now you can identify the problem and fix it to stop your Keurig from turning off suddenly mid-brew. Let’s now go into the troubleshooting techniques for dealing with that obnoxious scent coming from your freshly brewed coffee.
Problem 11: Why Does My Coffee Taste and Smell Unpleasant?
The first sip of coffee in the morning ought to be a wonderful delight, but what if the flavor and aroma are unpleasant? It’s a depressing circumstance that might ruin your enjoyment of your favorite beverage immediately. But do not worry; we are here to solve the puzzle of these unsettling phenomena and their effects. I’ll uncover practical strategies to bring back your coffee’s pure and delightful essence by exploring the reasons and effects why it could start to taste and smell like plastic. Leave plastic interference behind and experience the genuine joy of your morning routine!
Cause 1: Dirty Machine
If you’ve neglected your Keurig coffee maker’s maintenance, it’s time to give it a thorough cleaning. This one step is frequently the solution to identifying and fixing a wide range of machine problems, including the issue with coffee that tastes plastic. Mineral buildup, bacteria, mold, and even the hot water itself can damage the plastic parts of your Keurig over time, giving your coffee an unfavorable plastic flavor.
Solution: Clean the Machine
Cleaning your machine is a simple solution. Your coffee should taste perfect once again once you’ve cleaned and refreshed your Keurig. Take a moment to give your machine the attention it needs, and you’ll soon be sipping great coffee without the use of plastic. Visit the section of this article titled “Cleaning Of Keurig K-Mini Plus” below for complete cleaning procedures.
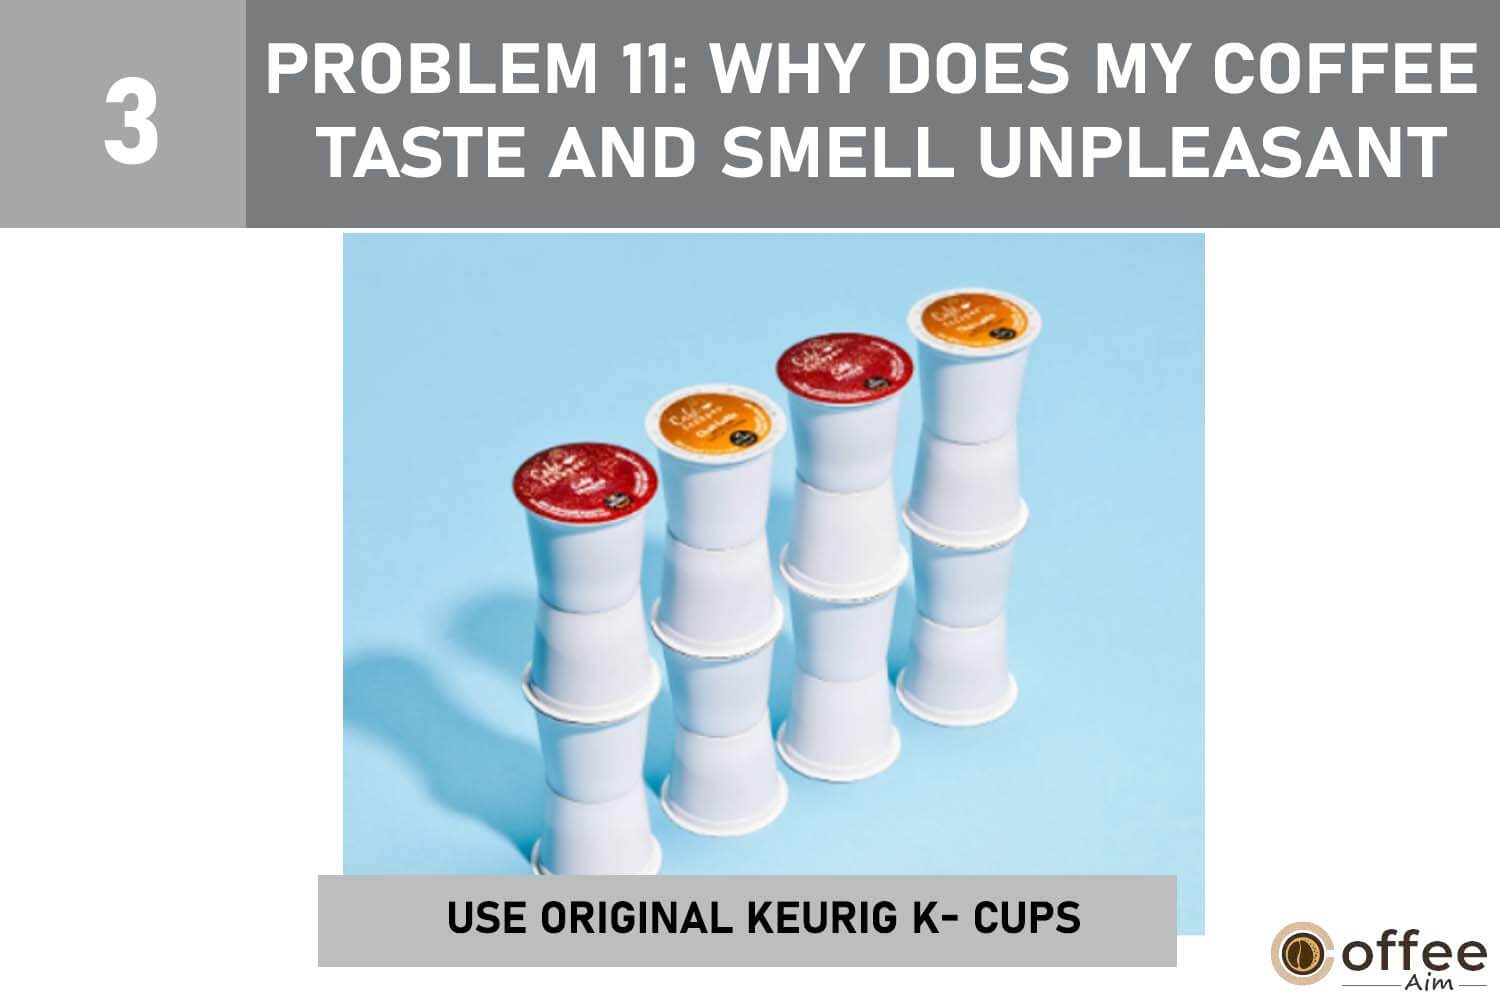
Cause 3: Low-Quality K-Cups
Are you using low-quality K-Cups? It’s important to remember the K-Cup itself could be to blame for the plastic flavor. Since the majority of K-Cups are made of plastic, this is especially important when using non-reusable, plastic-based K-Cups. While there are premium options, it’s essential to be mindful that less expensive pods could use inferior plastic, increasing the likelihood that your freshly brewed coffee will taste plasticky. Therefore, to ensure a wonderful and pure coffee experience, take into account both the quality of the K-Cup and its material composition when searching for the ideal cup of coffee.
Solution 1: Use Original Keurig K- Cups
Choose higher-quality K-Cups from Keurig directly to reduce your chances of tasting plastic in your coffee. To minimize any potential influence on the flavor of your coffee, these K-Cups are normally made with high-grade polymers.
Click here to buy from the Keurig store.
By choosing the substitutes, you can enjoy your coffee without being concerned that undesirable flavors would contaminate it from inferior plastic materials.
Solution 2: Use BPA-Free K-Cups
As an excellent alternative to ordinary K-Cups, consider trying the BPA-free K-Cups that are already on the market. These BPA-free K-Cups are intended to prevent any potential chemical leaching into hot liquids like coffee, unlike standard K-Cups. This means that you won’t have to worry about tasting or smelling like plastic. Keurig has developed BPA-free stainless steel K-Cups, and you can readily buy them from Amazon.

It is time to move on to another issue after having a comprehensive discussion of this one. Let’s examine the methods for troubleshooting the Keurig K-Mini Plus lights that are blinking.
Problem: 12: Why Are My Keurig K-Mini Plus Flashing Lights?
Did you just witness an unusual flashing on your Keurig? Do not worry. It must be an indication of a problem that you can fix easily. These lights aren’t just for aesthetics; their blinking patterns deliver important messages as well. Now, we’ll look at the significance of these blinking signals so you resolve the problem causing these lights to flash and have a more intuitive brewing experience.
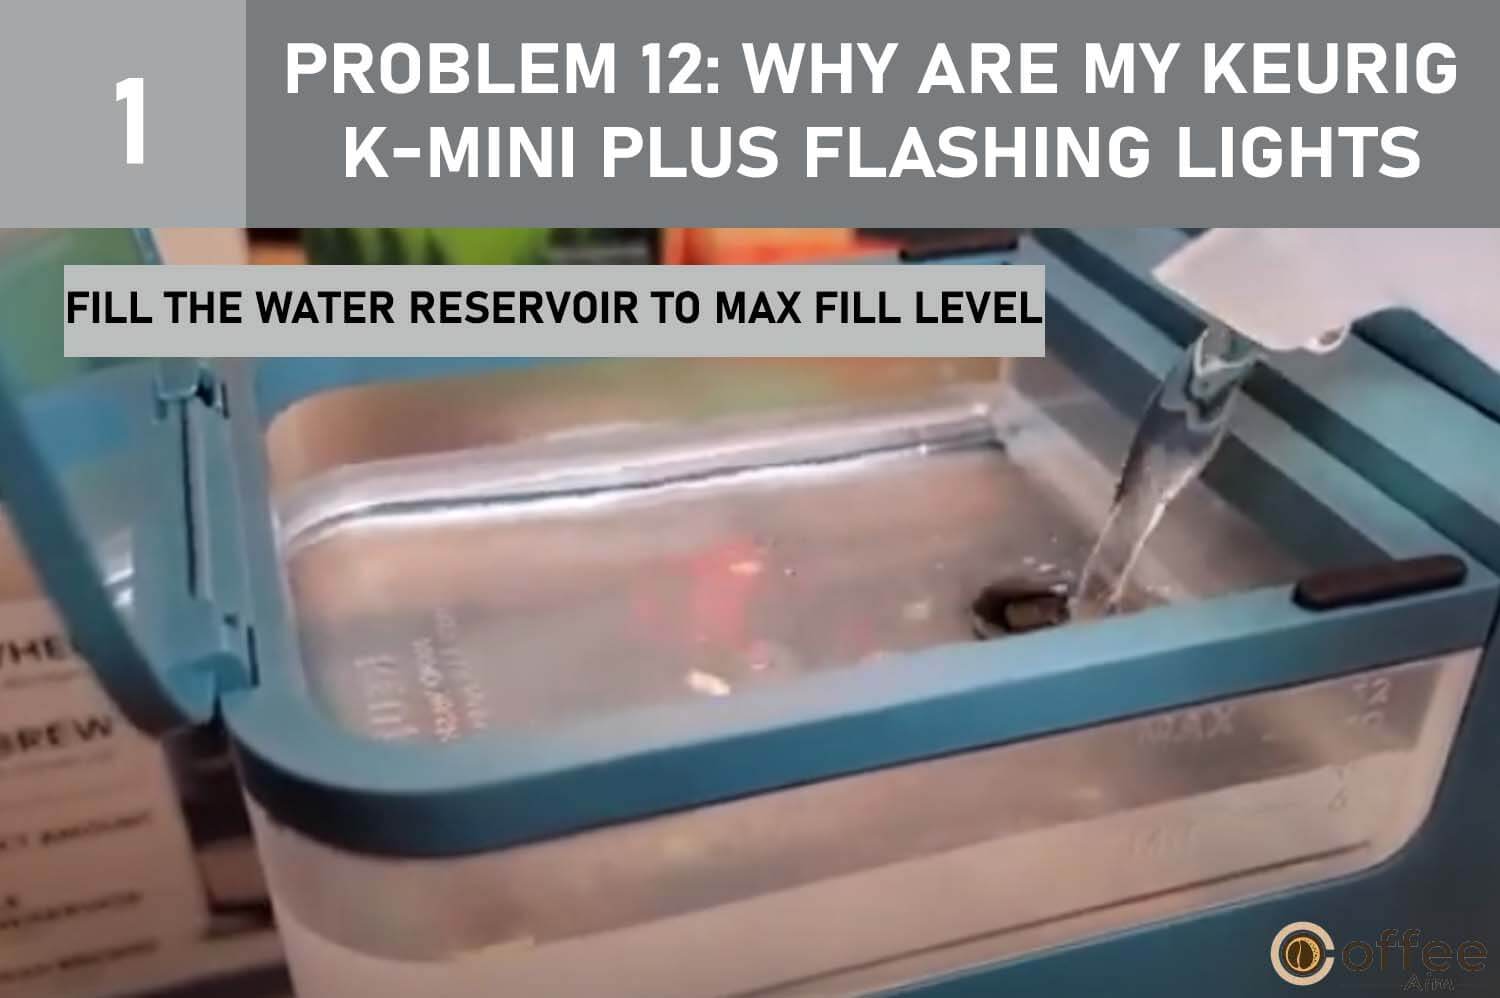
Cause 1: Low Water Level
One of the remarkable features of your Keurig K-Mini Plus coffee maker is its ability to notify you when the water level in its reservoir is getting low. The low water level light will start flashing when the machine detects a problem with the water level. It ensures that you’ll never find yourself running out of water during a brew, allowing for uninterrupted and delightful brewing sessions.
Solution: Fill the Water Reservoir to Max Fill Level
Refill the water reservoir according to your need but make sure not to exceed the Max Fill Line. You should accurately fill the water reservoir as per the requirement of your coffee according to the specified marked lines from 6 oz to 12 oz as a visual guide to make sure you add the correct quantity of water. The light on the control panel will instantly turn off once the reservoir is full to the MAX FILL line, allowing you to continue brewing uninterrupted.
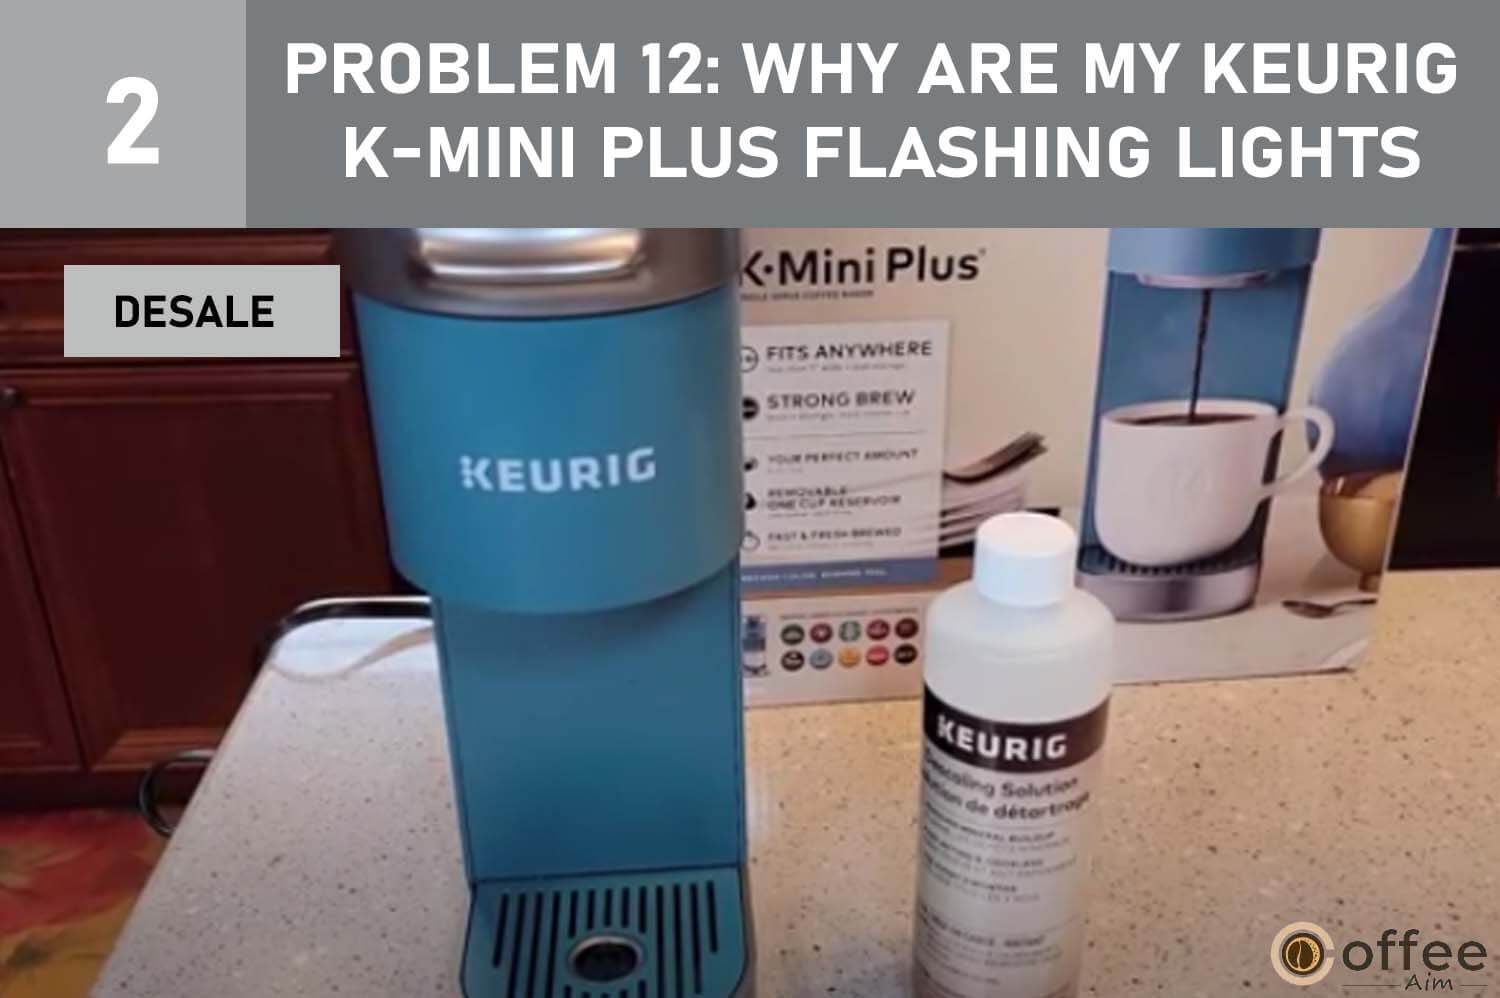
Cause 2: Keurig Is Clogged
The performance of your Keurig K-Mini Plus gets affected since mineral deposits have the potential to build-up over time. When the Keurig detects the presence of limescale, it will start flashing its light. But you can solve this problem by doing a simple trick. Let us see what the trick is.
Solution: Desale
You must perform a descaling cycle in your Keurig K-Mini Plus to clear any clogs. Descaling involves eliminating mineral buildup to get the coffee maker back to where it should be in terms of performance. For more information on the descaling procedure, see “Descaling the Keurig K-Mini Plus” for instructions.
Cause 3: Brewing Temperature Issue
If the lights on your Keurig K-Mini Plus are blinking, it could signify a potential problem related to the brewing temperature. It may be attributed to a malfunctioning heating element or an internal temperature sensor issue.
Solution: Contact Keurig Customer Care
You need to immediately get in touch with Keurig customer service to repair the problems with the broken heating element. The section “When to Seek Professional Help” provided below in this article contains the contact information.
Cause 4: Jammed or Improperly Inserted Pod
If the lights are flashing, the coffee pod can be stuck or not placed correctly. Do you want to know how to fix this problem? So let’s see.
Solution: Re-Insert the Pod
To resolve the issue, remove the pod from the holder and re-insert it, ensuring it is properly placed.

Cause 5: Maintenance Required
Furthermore, blinking lights could be a sign that frequent maintenance is necessary. It can involve descaling the machine and cleaning it.
Solution: Follow the Maintenance Routine
You must adhere to the recommendations given in the section “Maintenance Tips” below in order to resolve the maintenance problem.
After going through every possible problem you can encounter with your K-Mini Plus, let us move forward with the processes that you will need to resolve the issues with your Keurig K-Mini Plus.
Cleaning the Keurig K-Mini Plus
Regularly cleaning your Keurig K-Mini Plus is essential for maintaining its performance and ensuring a high-quality coffee experience. Below are the cleaning methods for some parts of Keurig K- Mini Plus. Please keep in mind that the components of your Keurig K-Mini Plus are not dishwasher safe. They should only be cleaned by hand using soap and water. Let’s get started!
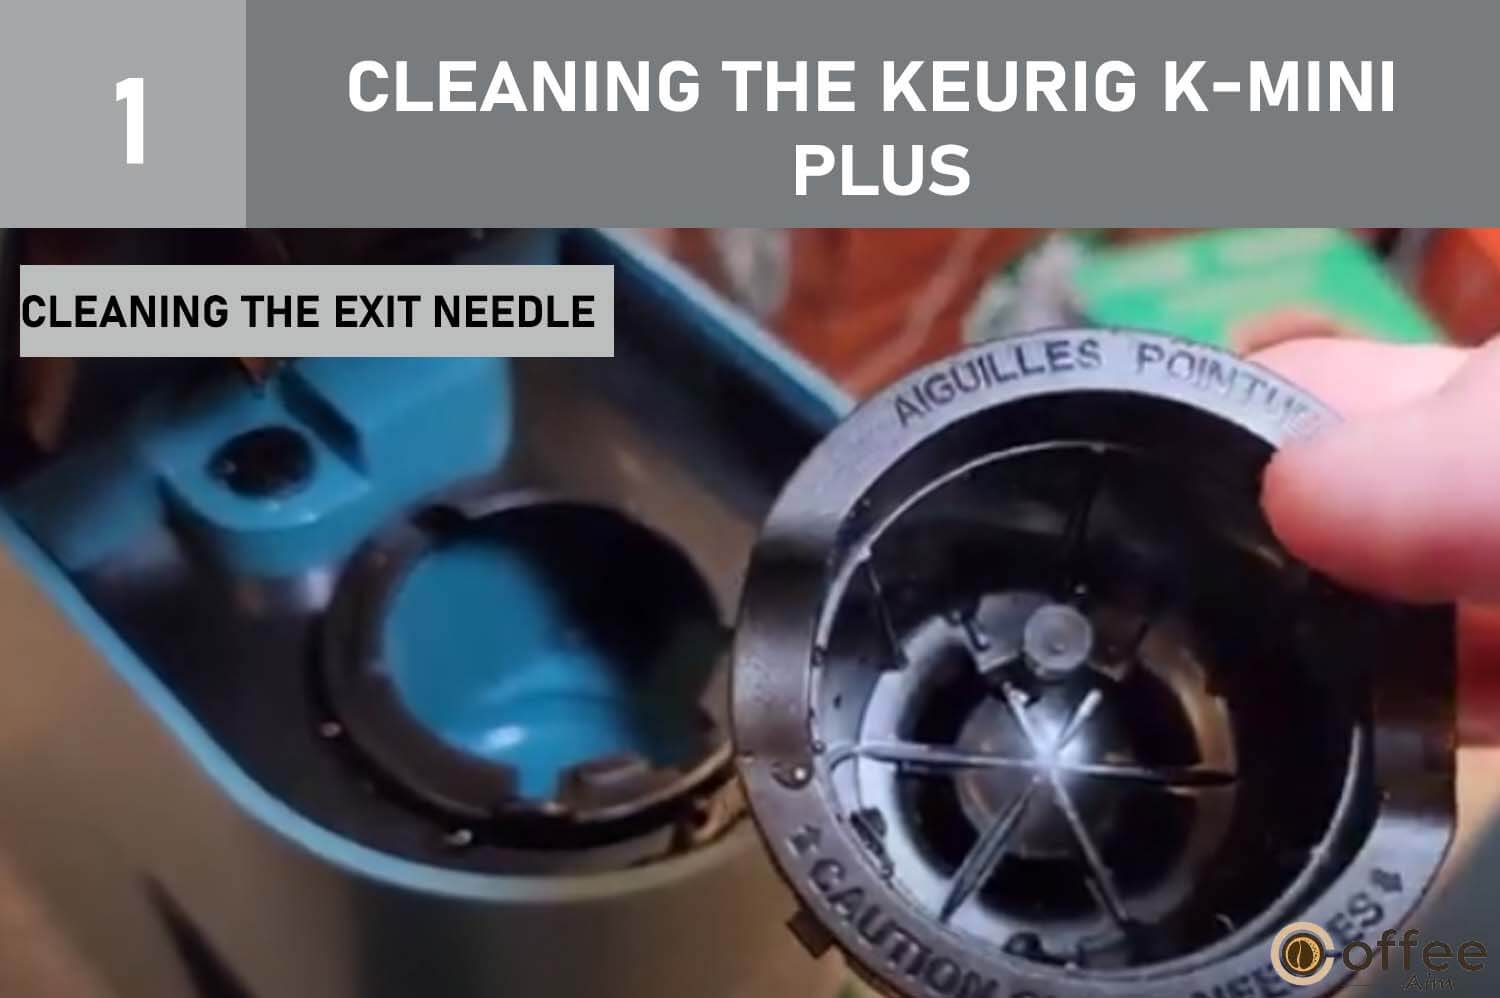
1. Cleaning the Exit Needle
This is how you should clean the exit needle.
- Before starting, make sure your Keurig K-Mini Plus is powered off and disconnected.
- Lift the handle to access the brewer head on your Keurig K-Mini Plus. Firmly grasp the pod holder part when you remove it from the brewer. Lay it out on a spotless surface.
- Find the funnel where the coffee pod is inserted while holding the pod holder assembly. With clips or screws, the funnel will be attached to the pod-holding assembly. Carefully remove the funnel from the pod holder assembly.
- Once the funnel is removed, flip the pod holder assembly over to see the inside bottom. The exit needle, a small piercing needle, can be found near the base of the pod-holding assembly.
- Now gently insert a paper clip that has been straightened into the exit needle. Don’t press it in too firmly since this might result in damage. For the purpose of removing any collected coffee grounds, move the paper clip back and forth.
- After the coffee grinds are released, take the paper clip out of the exit needle. Check the needle to make sure it is clear of any obstacles and debris.
- Make sure the funnel is tightly fastened before reattaching it to the pod holder assembly. Make sure the pod holder is properly positioned before replacing it with the brewer. When you fully insert it, it will click into place.
- Turn on the Keurig K-Mini Plus. Now, to make sure the water is moving through the system properly, perform a test brew without a coffee pod.
2. Cleaning the Entrance Needle
Follow the steps to clean the entrance needle of the Keurig K-Mini.
- Make sure your Keurig K-Mini Plus Machine is turned off and unplugged. Lift the brewer handle completely to uncover the brewing chamber.
- The entrance needle is located on the lid’s bottom. A needle punctures the top of the K-Cup pod during brewing.
- Straighten a paperclip or any other solid item that will fit within the entrance needle’s holes.
- Hold the brewer handle upright to gain access to the entry needle. Insert the straightened paper clip into both holes of the entry needle with the other hand you have.
- After cleaning both entrance needle holes, carefully lower the brewer handle to close the lid.
- Fill the water reservoir in your Keurig K-Mini Plus with fresh water. Place a cup on the drip tray to catch the water. Start two brew cycles without using a K-Cup pod. It will aid in cleaning out any remaining substance from the needle and keeping the brewing system clean.
- Remove the water from the cup and reservoir after finishing the water-only brew cycles.
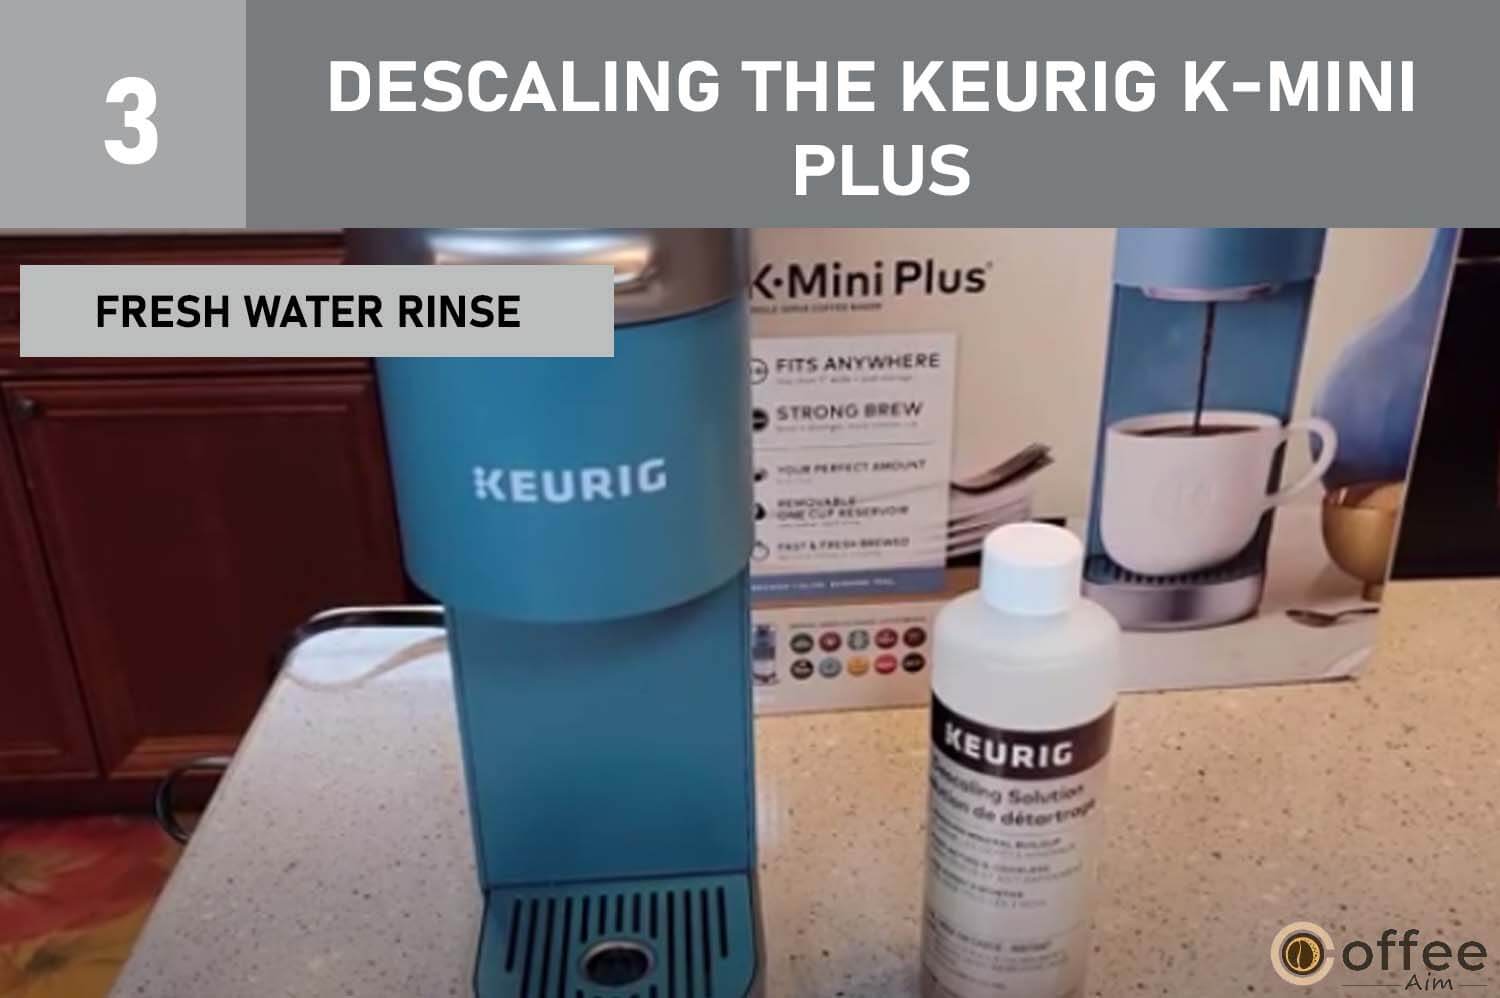
Descaling the Keurig K-Mini Plus
Descaling your Keurig K-Mini Plus is critical for preserving the functionality and longevity of your coffee brewer. Water mineral deposits, such as calcium and scale, can accumulate inside the machine’s internal components over time. This accumulation might have a severe impact on the brewing process, causing a variety of problems.
Regular descaling helps to eliminate these mineral deposits and keeps your Keurig K-Mini Plus running at peak performance. Descaling removes the obstinate residue that might clog the water lines and puncture the needle and other elements of the brewer. It allows water to flow freely and facilitates optimal flavor extraction from your coffee or tea.
You will learn how to describe your Keurig K-Mini Plus with step-by-step directions.
Beforehand Preparations
Gather a large ceramic cup, fresh water, Keurig Descaling Solution, and access to a washbasin before beginning to descale your Keurig brewer. Avoid using a paper cup. Remove any beverage pods from the K-Cup pod holder. The descaling technique takes about 45 minutes.
Descaling Process
The process is divided into three steps which include cleansing Rinse, Internal Tank Soak, and Fresh Water Rinse.
STEP 1: Cleansing Rinse
- Turn on your brewer.
- Pour one-third (4.6oz) of the Keurig Descaling Solution into the water reservoir.
- Add fresh water up to the 10oz fill level.
- Place a large ceramic mug on the drip tray plate.
- Lift and lower the handle of the brewer, but do not insert a K-Cup pod.
- Press the brew button to start the brewing process.
- Once the descaling solution is dispensed, carefully pour the contents into the sink.
STEP 2: Internal Tank Soak
- Repeat step 1, turning on your brewer.
- When the brew indicator light turns solid, press the power button just as the brewer starts to dispense.
- Allow the brewer to stand for at least 30 minutes to allow the descaling solution to work.
- Press and hold the brew button until you see the solution begin to dispense. Keep holding the button until all of the solution has been dispensed.
- Pour the contents of the mug into the sink.
STEP 3: Fresh Water Rinse
- Repeat step 1, turning on your brewer.
- Use only 12 oz of fresh water without adding any Keurig Descaling Solution.
- Repeat this step two additional times for three cycles with fresh water only.
- If you notice any residual taste, you may need to perform additional fresh water rinse cycles until the taste is completely eliminated.
Things to Remember
If you observe a foam dispensed from the brewer during the cleaning process with Keurig Descaling Solution, please note that it is a natural reaction between the solution and the scale inside the brewer. In some cases, a heavily scaled brewer may need to fill properly after adding the descaler. If this occurs, follow these steps:
- Turn off and unplug the brewer.
- If there is a Keurig Descaling Solution in the water reservoir, discard its contents. Rinse the water reservoir thoroughly.
- Refill the water reservoir with fresh water.
- Plug the brewer back in and power it on.
- Repeat Step 3, which is the Fresh Water Rinse cycle.
- The brewer should start functioning as the solution is rinsed out and the scale is removed.
- If the problem persists, allow the brewer to sit unplugged for at least 30 minutes before continuing with the rinse.
Maintenance Tips
In order To keep your Keurig K-Mini Plus in top-notch condition and prevent future problems, regular maintenance is key. By incorporating a few simple cleaning and maintenance practices into your routine, you can ensure that your coffee maker continues to brew delicious cups of coffee day after day. Here are some maintenance tips to keep in mind:
1. Descale Regularly
Over time, mineral deposits can build-up inside your coffee maker, affecting its performance. Descale the machine every three to six months using a descaling solution or a mixture of vinegar and water. It helps remove any mineral buildup and keeps your brew tasting fresh.
2. Clean the External Surfaces
Wipe down the exterior of your Keurig K-Mini Plus regularly with a damp cloth to remove any dust, dirt, or coffee stains. It keeps your machine looking pristine and prevents any potential contaminants from affecting the brewing process.
3. Clean the Water Reservoir
The water reservoir is a prime spot for bacteria and mold growth if not cleaned regularly. To keep it clean, wash it in warm, soapy water and thoroughly rinse.
4. Clean the Needle
The needle that punctures the K-Cup pod can get clogged with coffee grounds or debris. Use a needle cleaning tool or a paper clip to gently clean the needle and ensure smooth water flow during brewing.
5. Remove and Clean the Drip Tray
Any extra liquid and coffee spills are collected in the drip tray. The tray should be regularly removed, cleaned with warm, soapy water, and thoroughly dried before reinserting.
6. Use Filtered Water
Using filtered water instead of tap water can help reduce mineral buildup and improve the taste of your coffee. Consider using a water filter or filtered water pitcher.
Remember, proper maintenance not only extends the lifespan of your Keurig K-Mini Plus but also ensures optimal performance and great-tasting coffee. You can experience consistently enjoyable brewing by adding these easy maintenance guidelines to your regimen.
Now that you know how to maintain your coffee maker, let’s move on to the next section to learn when it’s time to seek professional help for more complex issues with your Keurig K-Mini Plus.
When to Seek Professional Help
While troubleshooting and fixing common issues with your Keurig K-Mini Plus can often be done on your own, there are situations where seeking professional help is necessary. If you encounter any of the following scenarios, it may be time to reach out to a reputable repair service that specializes in Keurig K-Mini Plus machines:
- Persistent electrical problems: If your coffee maker consistently fails to turn on or experiences electrical malfunctions despite trying various troubleshooting steps, it’s best to seek professional assistance. Electrical problems can be complicated and need specialized knowledge to identify and fix.
- Major water flow problems: If your Keurig K-Mini Plus consistently exhibits issues with water flow, such as low water pressure, irregular dispensing, or leaks that cannot be resolved through regular cleaning and troubleshooting, it’s advisable to consult a professional. They can assess the internal components and make necessary repairs.
- Heating issues: When your coffee maker fails to heat the water to the desired temperature or if it produces only lukewarm coffee, it could indicate a problem with the heating element. Professional technicians are equipped with the skills and expertise necessary to accurately identify and swap out defective heating elements.
- Warranty coverage: If your Keurig K-Mini Plus is still under warranty, it’s recommended to contact Keurig customer support or the authorized service center mentioned in the warranty documentation. They will assist you in making the necessary repairs or replacements and will walk you through the process.
It’s essential to pick a trustworthy repair shop that specializes in Keurig K-Mini Plus machines when seeking professional assistance. Here are a few reputable repair services in the USA that you can consider:
- Keurig Customer Service: Contact Keurig’s customer service directly for assistance with repairs or warranty-related issues. You can reach them at 866-901-2739 or visit their website.
- Authorized Keurig Service Centers: You can find authorized service centers for Keurig coffee makers. You can visit Keurig’s official website or reach out to their customer support. They have service centers located throughout the country that specialize in repairing Keurig coffee makers.
Remember, seeking professional help ensures that your Keurig K-Mini Plus is in the hands of experts who can provide efficient and reliable repairs. Now that you have this knowledge, you can confidently troubleshoot common problems on your own or reach out to professionals when needed to keep your Keurig K-Mini Plus brewing delicious coffee.
Conclusion
Congratulations! You have now learned to troubleshoot common problems with your Keurig K-Mini Plus, coffee maker like a pro. Let’s recap the key takeaways from this article:
- Familiarize yourself with the common problems: By understanding the potential issues that can arise with your Keurig K-Mini Plus, you are better equipped to identify and resolve them.
- Troubleshooting is within your reach: Many problems can be solved through simple troubleshooting steps that we have discussed. From power issues to clogged needles, you now have the knowledge to tackle these challenges head-on.
- Regular maintenance is key: Don’t overlook the importance of regular maintenance for your coffee maker. Cleaning and descaling your Keurig K-Mini Plus at recommended intervals will help prevent issues and ensure a consistent brewing experience.
- Seek professional help when needed: While I encourage you to try troubleshooting on your own, there may be instances where professional assistance is necessary. If persistent electrical problems, major water flow issues, heating malfunctions, or if your machine is still under warranty, it’s best to reach out to reputable repair services or Keurig’s customer support.
Remember, the goal is to enjoy that perfect cup of coffee from your Keurig K-Mini Plus. So, before you rush to seek professional help, give troubleshooting a shot. You might be surprised at how easily you can resolve the issues yourself.
Now, armed with this knowledge, go ahead and put your troubleshooting skills to the test. You have the power to conquer any problem that comes your way and ensure that your Keurig K-Mini Plus continues to brew your favorite coffee flawlessly. Happy brewing, and may every cup be a delightful experience!
FAQs
How Do You Fix a Keurig Mini that Won’t Brew?
If your Keurig Mini is not brewing, you can try the following troubleshooting steps:
- Verify that the water reservoir is placed correctly and has a sufficient amount of water in it.
- Check if the brewer’s power button is turned on.
- Clean the needle by using a needle cleaning tool to remove any clogs or debris that might be obstructing the water flow.
- Descale the machine if necessary, as mineral buildup can affect the brewing process.
Why Is the Light Blinking on My Keurig K Mini Plus?
A blinking light on your Keurig K Mini Plus can indicate various issues. Here are a few possible reasons:
- The water reservoir might not be properly positioned or filled.
- The machine might require descaling due to mineral buildup.
- There could be a problem with the internal components or sensors.
You can either contact Keurig’s customer care for additional help or consult the user manual for specific troubleshooting instructions based on the light pattern to fix this issue.
What Is the Lifespan of a Keurig Mini?
A Keurig Mini Plus’s lifespan might vary depending on a number of factors, including usage, maintenance, and care. On average, with regular cleaning and proper maintenance, a Keurig Mini Plus can last for three to five years. However, it’s important to note that individual experiences may vary, and factors like water quality and frequency of use can affect the lifespan of the machine.
Are K-Cup Pods Recyclable?
Unfortunately, many K-Cup® pods cannot be recycled, but there is a better alternative. You can now purchase reusable K-Cup® filters and fill them with whatever type of coffee you like.