Quick Navigation
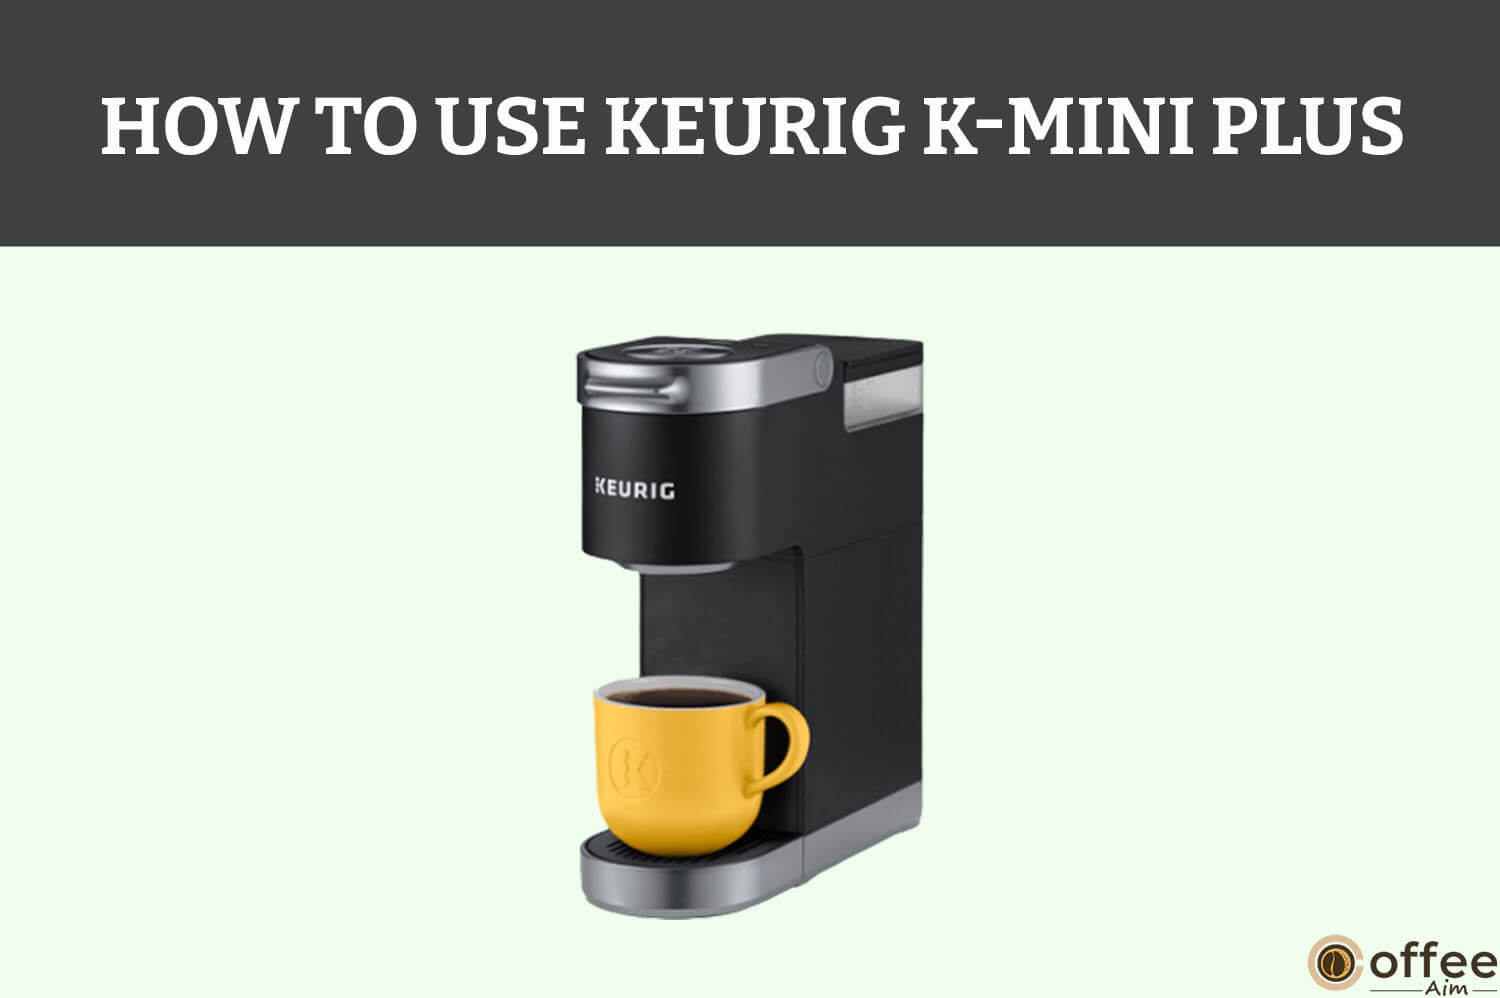
Are you ready to enhance your coffee experience and indulge in delicious espresso drinks right at home? Your search for this guide suggests that you are one of the growing numbers of Americans who have embraced the Keurig K-Mini Plus. Whether you are an experienced user who needs a guide because you accidentally lost the manual or a confused new owner, this guide is here to assist you. As a coffee lover, I would love to travel with you through every step and procedure and share my experience using Keurig K-Mini Plus. So, Shall we begin?
Keurig K- Mini Plus Precautions
Safety is crucial. Do you know? According to the US Consumer Product Safety Commission, 31,000 household electrical fires occur annually, and over 180 incidents of electrocution could have been prevented with proper safety precautions. Do not worry! You can easily save yourself from such tragedy with a little care and protection. To prioritize your safety, it is recommended to take extra caution. Click the link below to learn about important safety measures and accident prevention.
Related: Safety precautions of Keurig K-Mini Plus.
Specifications Of Keurig K-Mini Plus
Now we have reached another important step, which is familiarizing yourself with the specifications of your brewer. Understanding the machine’s capacity, brewing options, and settings will enable you to customize your coffee experience and make the most of its features. Knowing these specifications will help you use the machine properly and without any difficulties. Let us begin! If the features are incompatible with your needs, I recommend replacing them with another model.
| Features | Details |
| Product Line/System | K-Mini |
| Brew Sizes | Any size 6-12 oz |
| Water Reservoir | 12 oz |
| Dimensions | Width: 4.5″Depth: 11.3″ Length: 12.1″ |
| Display | Button control panel with a button for Brew Strength |
| Temp Control | No |
| Strength Control | yes |
| Weight | 4.6 lbs |
| Other Features | Removable water reservoirRemovable drip trayNo brew size selector (instead, you fill the reservoir with the volume you want, and it brews it all)High Altitude settingComes with a pod-storage compartmentExtremely easy to use.Fits almost anywhere, thanks to its compact design.Low-maintenance.Reliable.Great for making 1-2 cups per day.Removable water reservoir. |
Unboxing Of Keurig K-Mini Plus
The time has come to unravel the magical Kuerig K- Mini Plus to yourself, the moment you have been eagerly waiting for. This process is a blend of excitement and bewilderment since you are still determining what new features you will witness after unboxing your appliance. If you find any missing item mentioned below, it could become a matter of concern. Therefore, I recommend you immediately contact the shipper and the seller of your brewer.
1. Keurig K-Mini Plus Coffee Maker

When you unbox your Keurig K-Mini Plus, you’ll finally get to see what you’ve been waiting for: your coffee machine. This coffee maker comes with various controls and buttons, a water reservoir, and a lid to cover it.
2. A Quick Start Guide
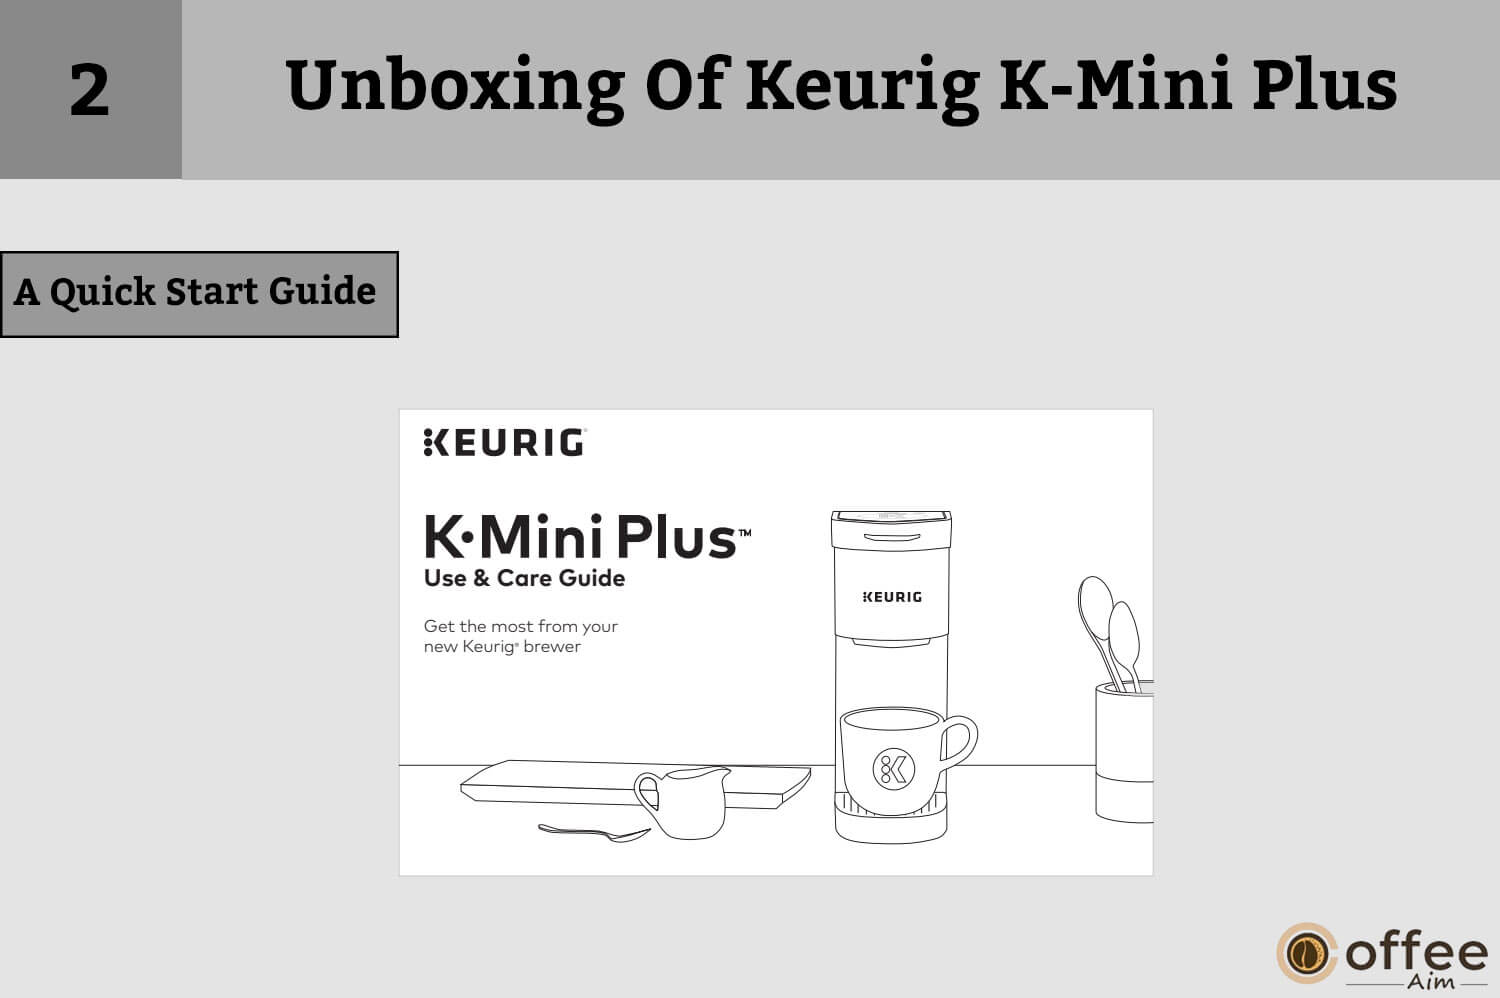
Quick Start Guide and a user manual to help you set up and use the machine. The Quick Start Guide provides a basic overview of the machine’s features and how to get started using it, and it may be a significant resource for troubleshooting and problem-solving.
Parts Of Keurig K-Mini Plus
Before using your Keurig K-Mini Plus, it’s essential to first become familiar with the different components of the machine. Knowing the various parts of the Keurig K MiniPlus will help you follow the brewing process more easily and operate the machine correctly. So let’s begin!
1. Handle
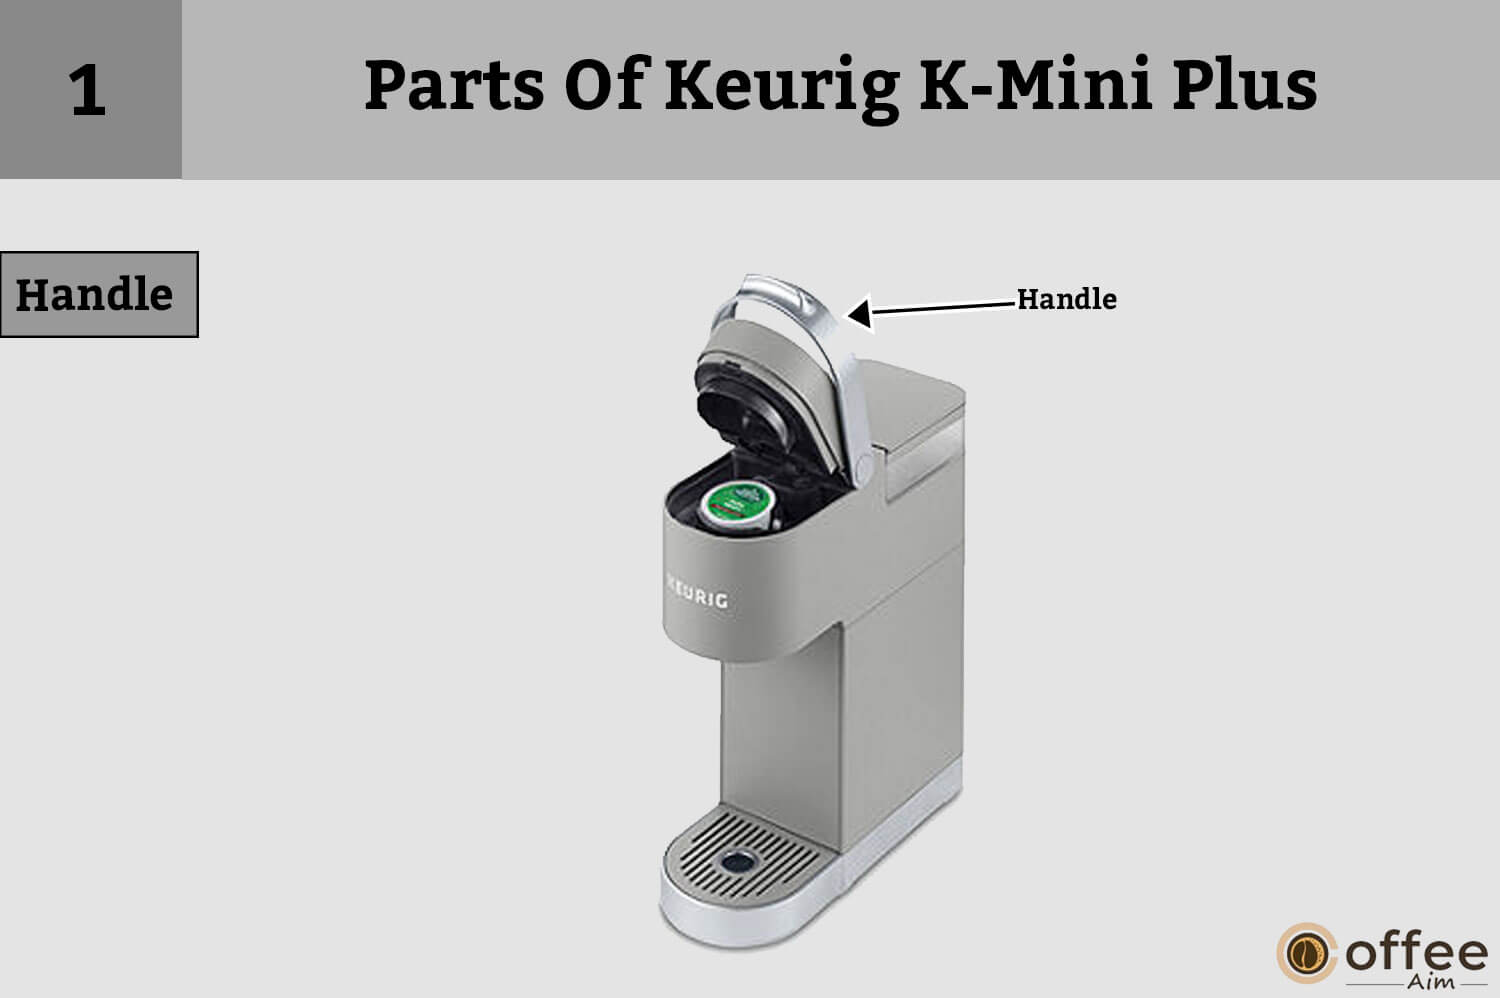
The handle is part of the machine that lifts up and down, allowing you to insert and remove K-Cup pods from the K-Cup pod holder.
2. K-Cup Pod Holder

The K-Cup pod holder is part of the machine that holds the K-Cup pods in place during brewing. The Keurig K-Mini Plus has a removable pod holder that makes it easy to insert and remove K-Cup pods.
3. Funnel

The funnel is a small, cone-shaped piece that sits inside the K-Cup pod holder and helps guide the water and coffee into your cup.
4. K-Cup Pod Assembly Housing

K-Cup pod holder and funnel are collectively called K-Cup pod holder assembly and K-Cup pod holder assembly housing holds the K-Cup pod holder assembly in place.
5. Drip Tray Plate
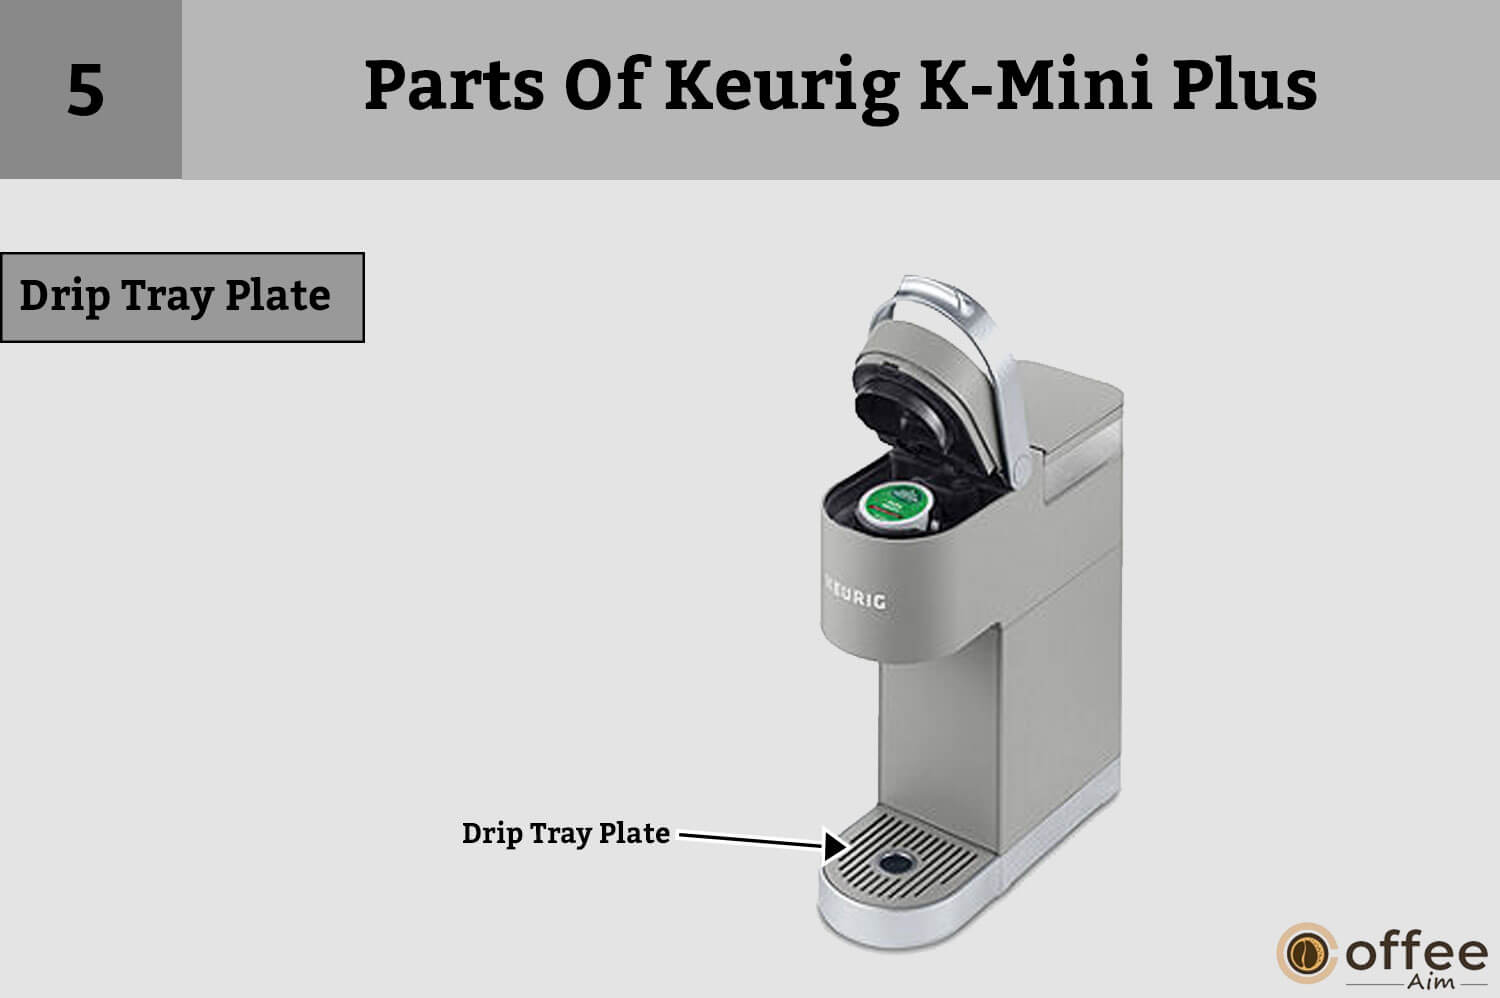
The drip tray plate sits on top of the drip tray and provides a stable surface for your coffee cup to rest on during brewing.
6. Drip Tray
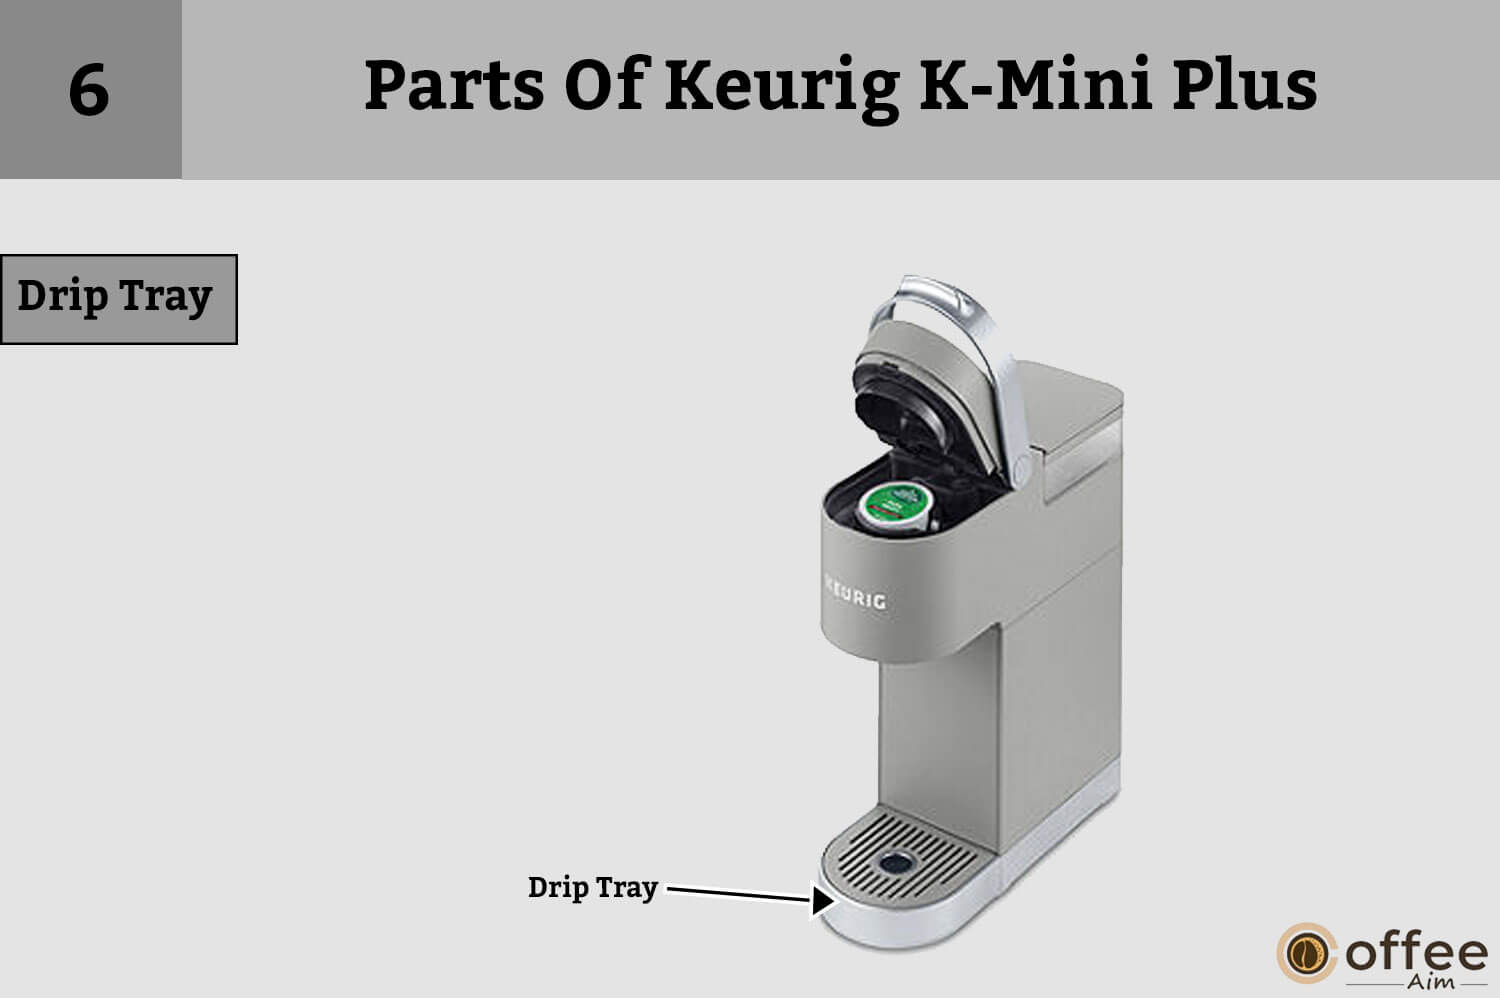
The drip tray catches any excess water or coffee that drips out of the machine during brewing. It is removable and can be easily emptied and cleaned.
7. Drip Tray Base

The drip tray base is the bottom part of the drip tray that sits underneath the drip tray plate.
8. Water Reservoir Lid
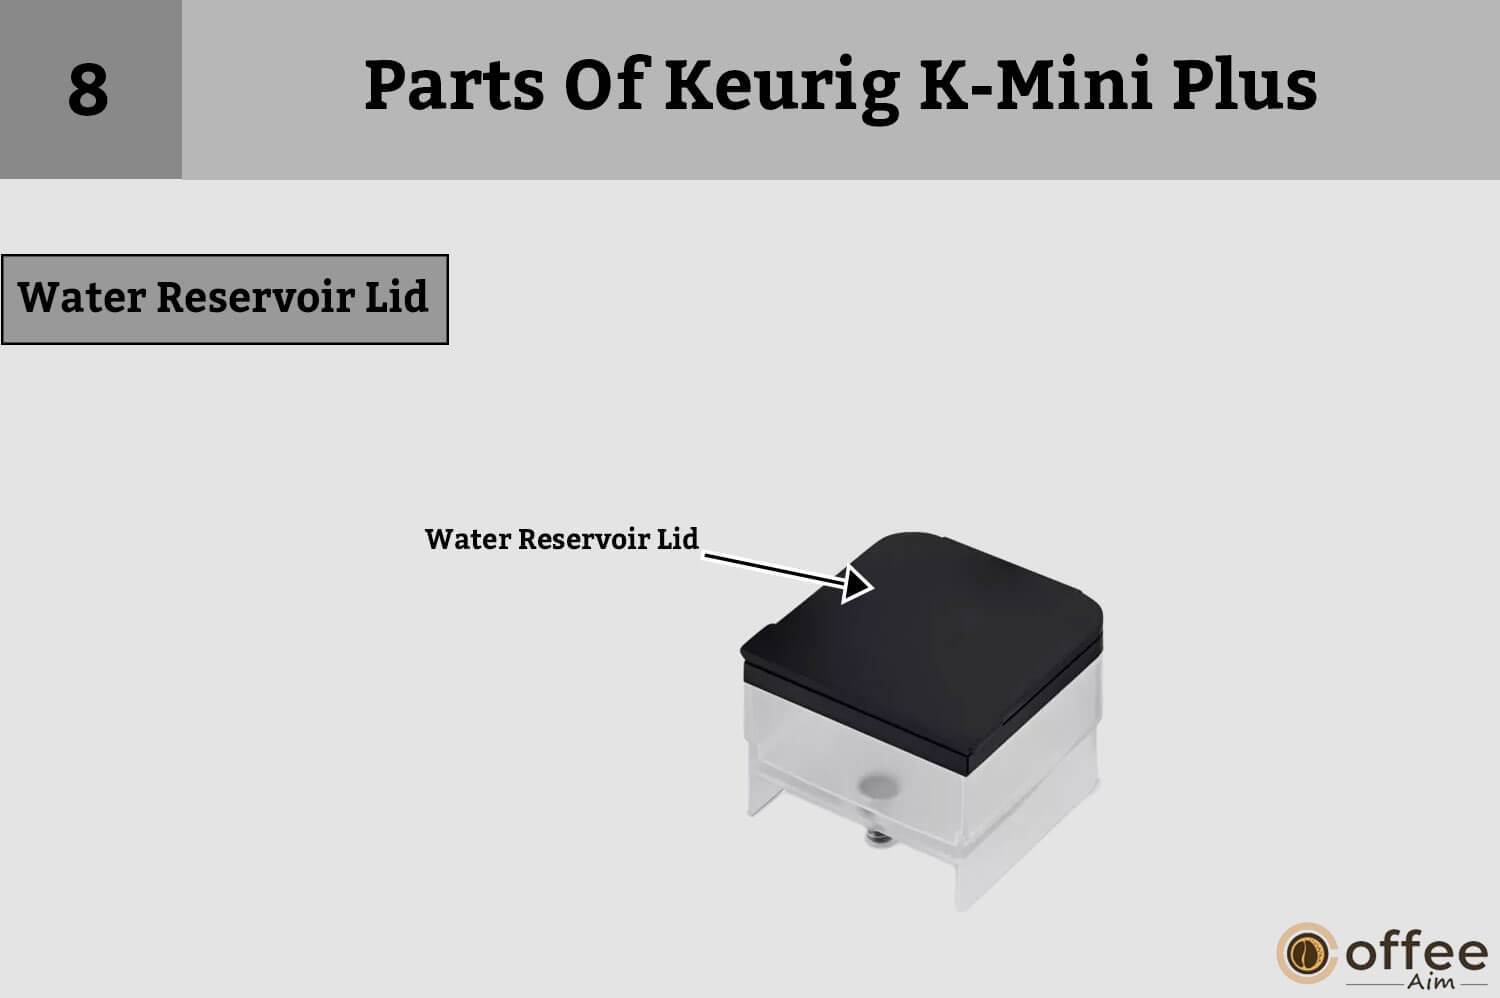
The water reservoir lid is the top part of the water reservoir that can be removed to fill the reservoir with water.
9. Water Reservoir

The water reservoir is where you add water to the machine for brewing. The Keurig K-Mini Plus has a 12-ounce water reservoir that is removable for easy filling and cleaning.
10. Power Cord

The power cord is the cord that plugs into the wall to power the machine.
11. Cord Storage

The cord storage is a small compartment on the back of the machine where you can store the power cord when the machine is not in use. It helps keep your countertop tidy and organized.
Before You Brew For First Or After A Long Period Of Non-Use
Starting your perfect cup of coffee begins with a simple process. There are certain steps to take before you start brewing delicious coffee for yourself. Allow me to guide you through each step with ease, to ensure a delightful brewing experience. Let’s start!
Plug & Power

”Plug & Power” – is a phrase that speaks volumes about the convenience of your coffee-making journey. Let us jump into the details to know more about the convenience.
- Take your Keurig K-Mini Plus out of the box and find a good place in your kitchen to go. Keep in mind that it has to be close to a power outlet.
- You will find cord storage on the back of your machine. Pull out the cord from there and plug it into a socket.
- You will find the power button at the top right; press the button to start your Keurig K-Mini Plus.
Lift & Lower:
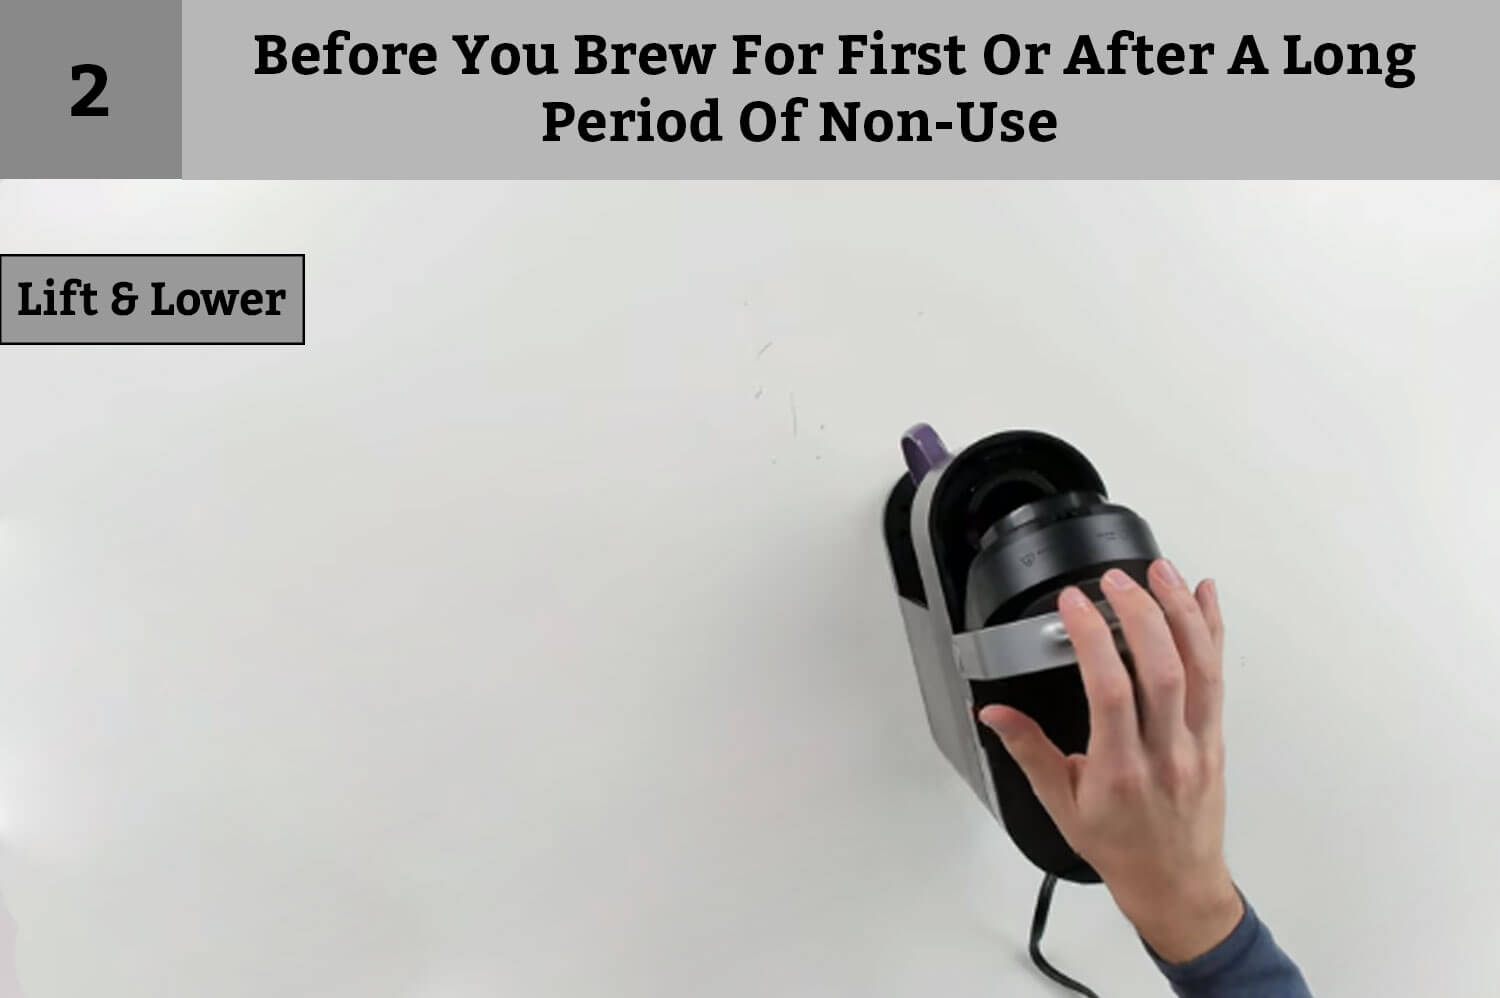
The next step is to check whether the coffee pod is in the pod holder.
- Lift and lower the handle.
- Do not insert the K-Cup pod.
- The indicator light will flash to indicate that the brewer is ready.
Fill & Place
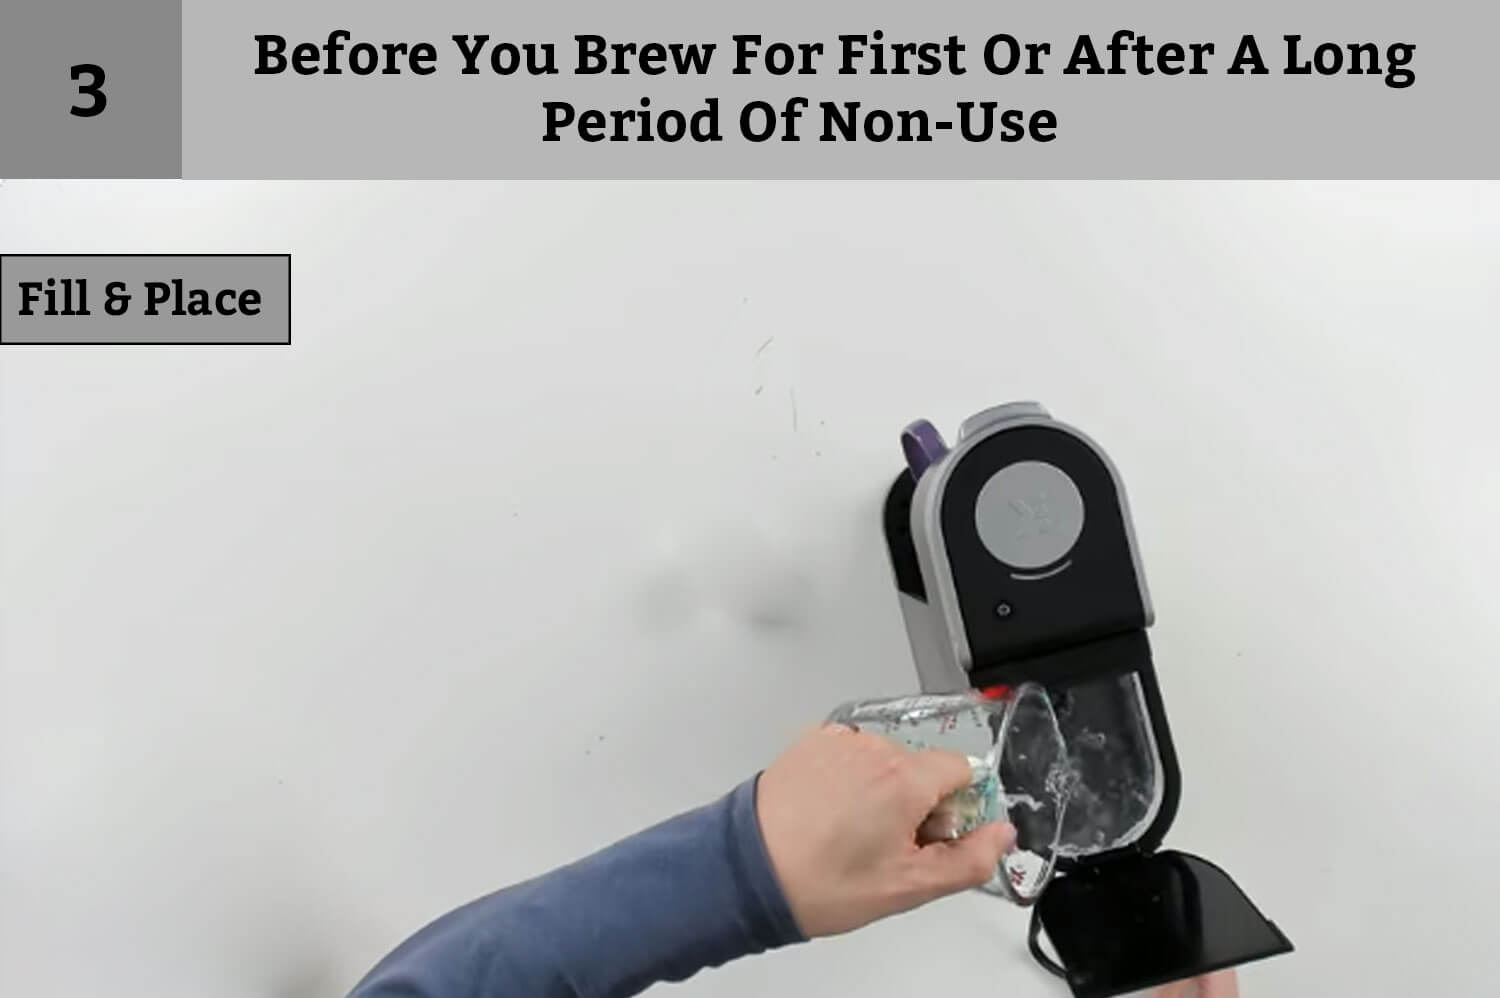
Your brewing process is about to commence, but ensuring the water tank is ready is crucial. Follow the guideline to get your brewer ready accurately.
- Fill a mug with 8oz of water.
- Remove the water reservoir lid and pour the water into the water reservoir.
- Avoid overfilling beyond the MAX Fill line or underfilling below the MIN Fill line. Close the lid and position your cup on the drip tray.
- Be careful not to use more than 8 ounces of water.
Note: Only use water in the machine. Using anything other than water, such as milk, will result in permanent and devastating damage to the machine.
Remember: Do not use distilled water in your Keurig K-Mini Plus coffee maker. Use only tap, bottled, or filtered water.
Cleansing Brew:
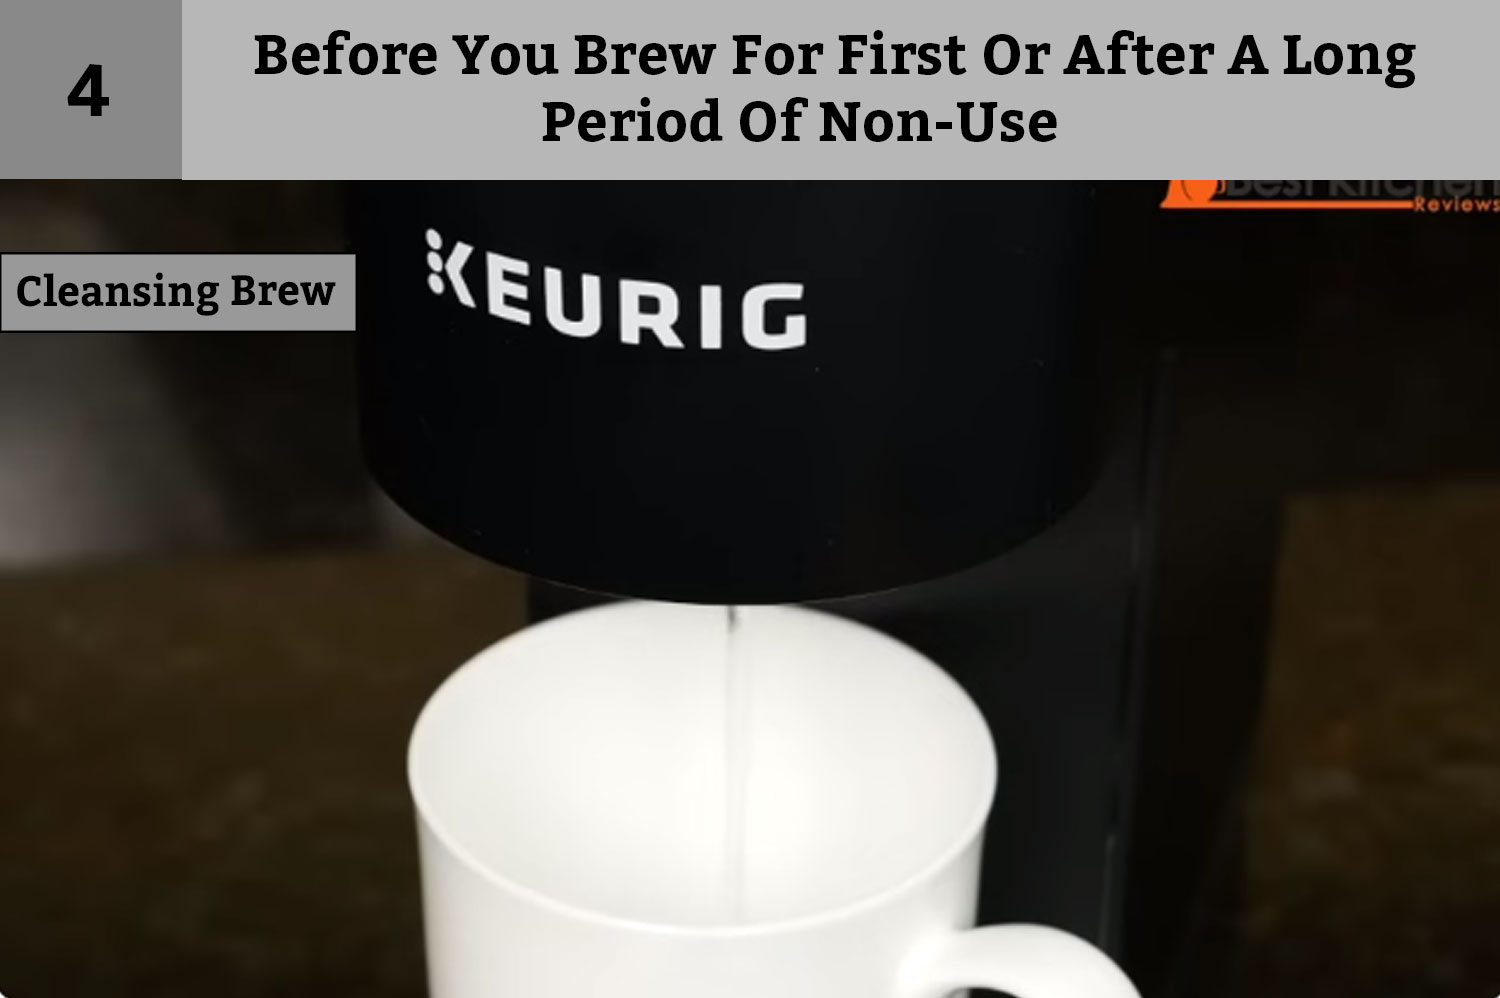
You must run a cleansing brew before brewing your first cup of coffee. It’s as easy as it sounds and is a great way to practice using your Keurig coffee machine before making coffee. Here’s how to run the cleaning brew:
- Turn on your Brewer by pressing the power button.
- The indicator light for brewing will remain solid, indicating that the brewing process has started and is in progress.
- The indicator light will start flashing while the brewer is heating the water, indicating that your coffee maker is reaching the desired temperature.
- The brewer indicator light will become solid again after approximately two minutes, signaling that the heating process has been completed and the water is ready to be dispensed.
- Dispose of the hot content from the cup by pouring it into the sink.
- Congratulations, The initial setup is now finished, and you can proceed with brewing your desired beverage.
Brew Your First Cup In Keurig K-Mini Plus
Now, get ready to experience the ultimate in convenience and deliciousness with your Keurig K-Mini Plus. Finally, you have reached very close to your destination, and you will have your hot cup of coffee in no time. So what are you waiting for?
Fill & Place Mug

To ensure a seamless brewing process, the initial stage involves correctly filling and positioning your mug. Following the steps for more information.
- Add the desired amount of water to a mug.
- Lift the water reservoir lid and pour water into the water reservoir from the mug.
- The water reservoir has a capacity of a minimum of 10oz and a maximum of 12oz.
- Do not fill beyond the MAX or below the MIN fill lines.
- Now, lower the lid and place your mug on the drip tray.
Lift And Place
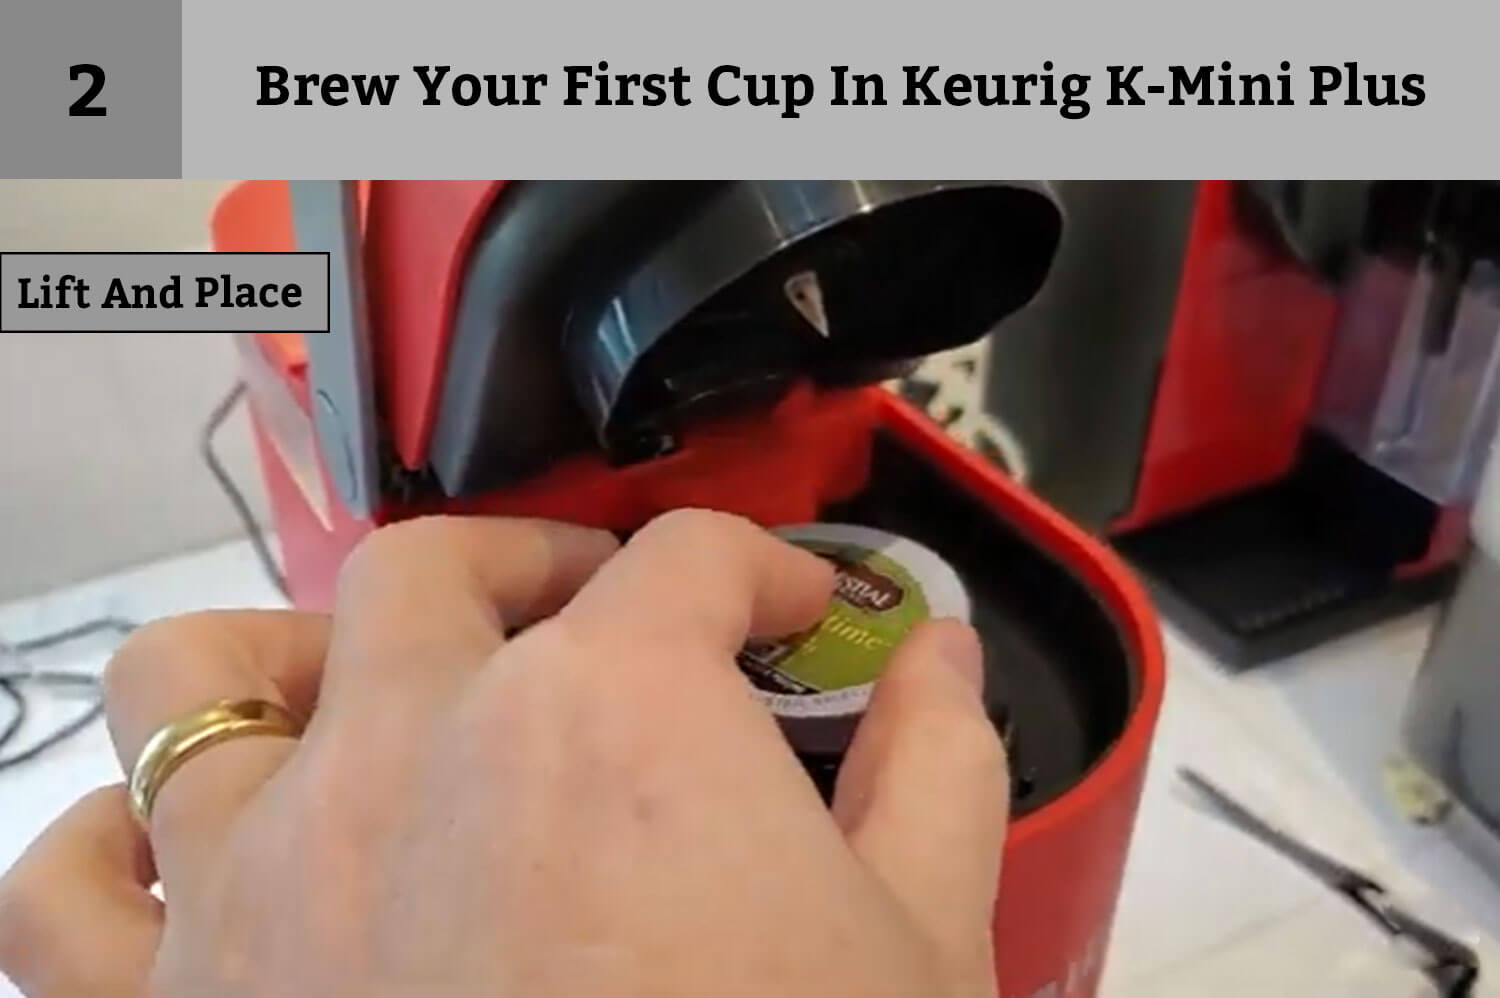
The second step involves accurately lifting and placing the pod. Follow the below-mentioned steps to perform this step without any error.
- Raise the handle.
- Insert a K-Cup® pod into the K-Cup® pod holder.
- Lower the handle to close the lid.
- The brew indicator light will flash, indicating the brewer is ready.
- Do not remove the foil lid from the K-Cup pod.
- Hold the handle up for high-altitude brewing and gently push down on the K-Cup pod in the pod holder until the exit needle punctures the bottom.
Brew & Enjoy!

The final step before you savor yourself a delicious, freshly brewed coffee at home because we are almost here. Get ready to enjoy your favorite brew in the comfort of your brewer. Let’s begin!
- To make bolder coffee, press the STRONG button before the Brew button.
- The brew indicator light will turn solid and pulse while heating.
- After 2 minutes, the brew indicator light will turn solid again.
- The beverage will start to dispense.
- Brewing is finished when the brew indicator light turns off.
- Lift the handle and dispose of the used K-Cup pod.
Caution: During the brewing process, the K-Cup® pod holder contains extremely hot water. To prevent injury, do not raise the handle while brewing.
Caring For Your Keurig K-Mini Plus
Regular cleaning keeps your brewer running smoothly. Furthermore, it also increases the life span of your coffee maker. Ensure to turn off and unplug your brewer before cleaning.
Exterior Of Your Brewer

To ensure that your Keurig brewer continues to perform at its best, it is important to clean it regularly. You will need a large ceramic mug, a non-abrasive cloth, dish soap, and access to a sink. The cleaning process will take approximately 5 minutes.
- Start by wiping down the exterior of the brewer using a damp cloth and non-abrasive soap.
- Avoid immersing the brewer in water or other liquids.
- To clean the drip tray, simply slide it toward you.
Water Reservoir

Do not neglect cleaning your Water reservoir, as it is one of the most important components of your brewer. A dirty or clogged reservoir can negatively impact the taste and quality of your coffee and can even lead to malfunctions or damage to the brewer. Regular cleaning helps ensure that the water used in the brewing process is fresh and free of contaminants and helps to prevent mineral buildup and bacteria growth. A clean water reservoir also helps extend the brewer’s life by freeing it from blockages and potential damage to the internal components.
- To prevent accidental overflow, keep the brewer level while cleaning the drip tray and drip tray plates.
- Use a damp soap and non-abrasive cloth to clean the drip tray and plates. This ensures that no cleaning solutions are left in the region where they might contaminate the water supply.
- You must clean the water reservoir and its lid approximately once a week.
- The water reservoir is removable if you have a k-Mini Plus Brewer. Remove the water reservoir and its lid for cleaning.
- Clean the reservoir and lid with a damp soap and non-abrasive cloth, then rinse thoroughly.
- Allow the reservoir to dry completely before reassembling the brewer.
- After cleaning the reservoir or brewing certain beverages, such as hot cocoa, run a cleansing brew to ensure proper maintenance.
Drip Tray

Follow the process mentioned below to clean the drip tray of your Brewer.
- The drip tray can hold 8 ounces of overflow.
- The tray should be emptied and cleaned periodically.
- To remove the tray, slide it towards you while keeping it level.
- Rinse and clean the tray using a damp, soapy, lint-free, and non-abrasive cloth.
K-Cup Pod Holder
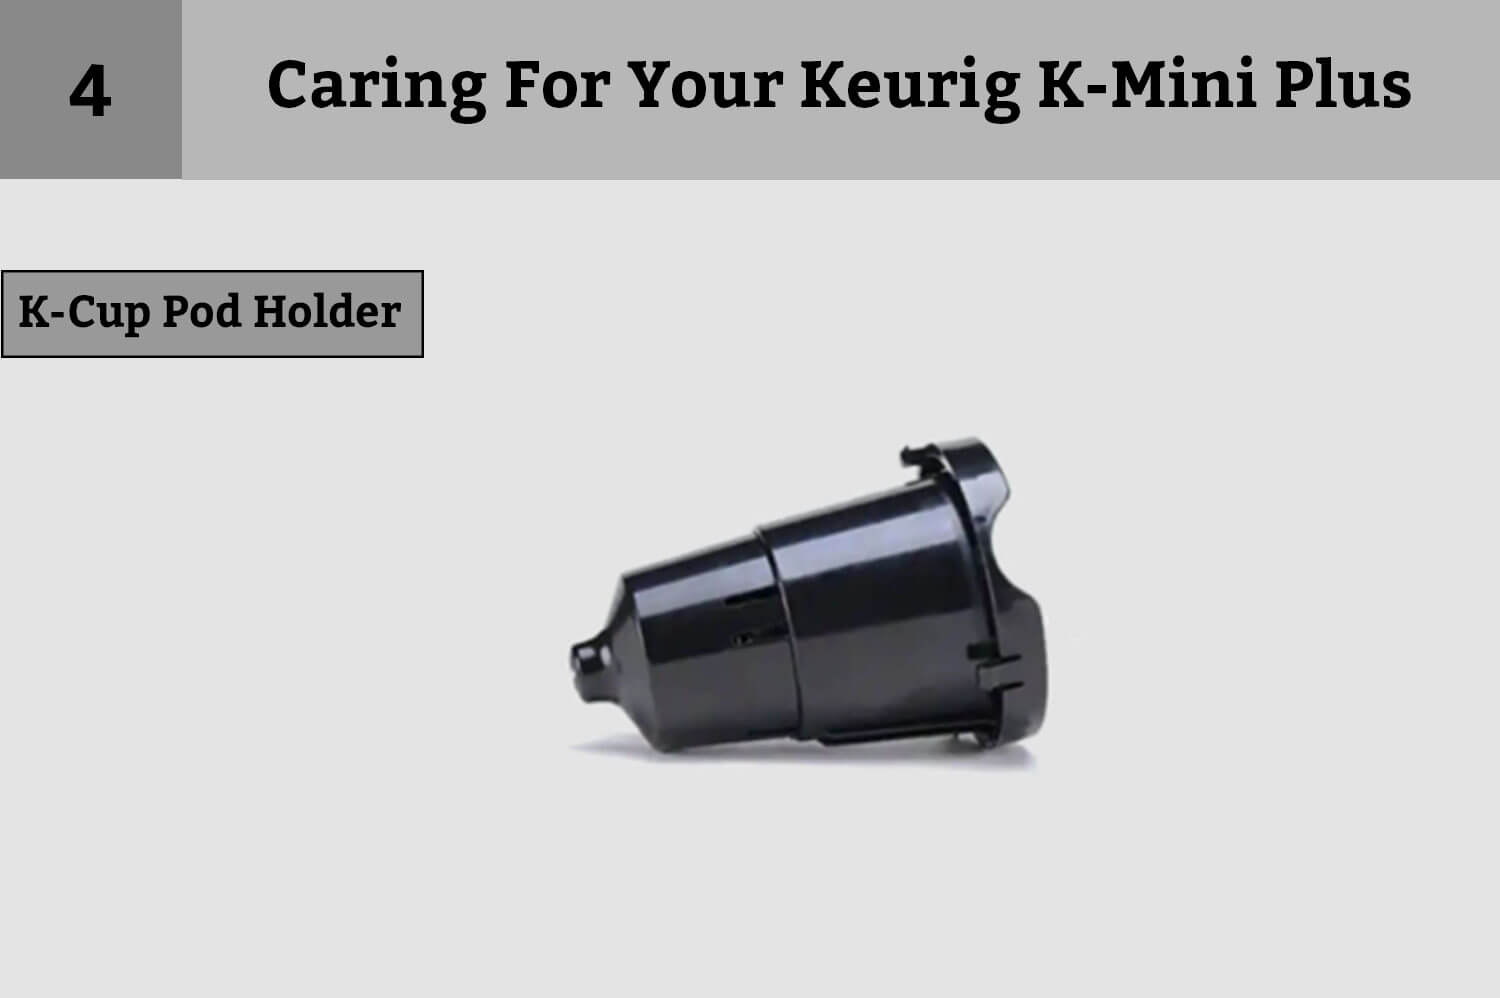
Follow the process mentioned below to clean the K-Cup Pod Holder of your Brewer,.
- Lift the handle to access the K-Cup® pod holder.
- Grasp the top of the holder with one hand.
- Push on the bottom of the holder from underneath with the other hand until it releases.
- Now, clean the holder with a damp cloth.
- Then, align the holder with the opening in the brewer, using the two front ribs as a guide.
- Snap the holder into place from the top.
Caution: Be aware of sharp needles in the K-Cup® pod holder and at the bottom of the K-Cup® pod. Do not place your fingers in the K-Cup pod holder to avoid injury.
NOTE: Always remove the used pod from the pod holder after brewing. As the K-cup pod is not reusable so, better is to dispose of it.
Exit Needle

To clean the Exit needle, remove the pod holder assembly and detach the funnel. Locate the exit needle on the inside bottom of the K-Cup® pod holder. Insert a straightened paper clip into the exit needle to loosen any coffee grounds.
Funnel

To ensure a fresh beverage experience, wash the funnel regularly. Follow the below-mentioned steps for proper cleaning
- Remove the funnel from the K-Cup pod holder by pulling on it until it pops off.
- Wash the funnel as desired.
- To replace the funnel, align the snaps with the indent on the K-Cupn pod holder.
- Snap the funnel back onto the holder.
Entrance Needle
To clean the exit needle perfectly, follow the below-mentioned steps.
- Firstly, lift the brewer handle.
- Then, find the entrance needle on the underside of the lid.
- To clean both holes in the needle, hold the handle upward with one hand.
- Using your other hand, insert a straightened paper clip into both holes.
- Gently move it around to loosen any coffee grounds.
- Close the lid completely.
- Finally, run two water-only brew cycles without a K-Cup® pod.
Descaling Your Brewer
Do you want to give an extended lifespan to your brewer? The only way to maintain the optimal performance of your brewer for the best beverage experience is regular Descaling. Regular descaling every 3-6 months is crucial to remove any buildup of calcium deposits or scale caused by the mineral content of your water. Scale, while nontoxic, can negatively impact your brewer’s performance if left unchecked. By descaling, you’re helping to preserve the heating element and other internal parts that come into contact with water, ensuring a smooth, consistent flow of delicious coffee. Don’t wait until it’s too late; make descaling a regular part of your brewer’s maintenance routine.
Descaling Procedure
Before starting the descaling process, you need a few things. Gather a large ceramic mug, access to fresh water, Keurig Descaling Solution, and a sink. Avoid using a paper cup during the process. Ensure no beverage pods are in the K-Cup pod holder before starting. The entire descaling process will take approximately 45 minutes.
Cleansing Rinse:

- Start the descaling process by turning on your brewer.
- Place a large ceramic mug on the drip tray plate.
- Fill one-third of the water reservoir with Keurig® Descaling Solution (4.6oz) and then add fresh water to reach the 10oz fill level.
- Raise and lower the handle without adding a K-Cup pod.
- Press the brew button to start the process.
- Once the solution is dispensed, pour it down the sink.
Internal Tank Soak:
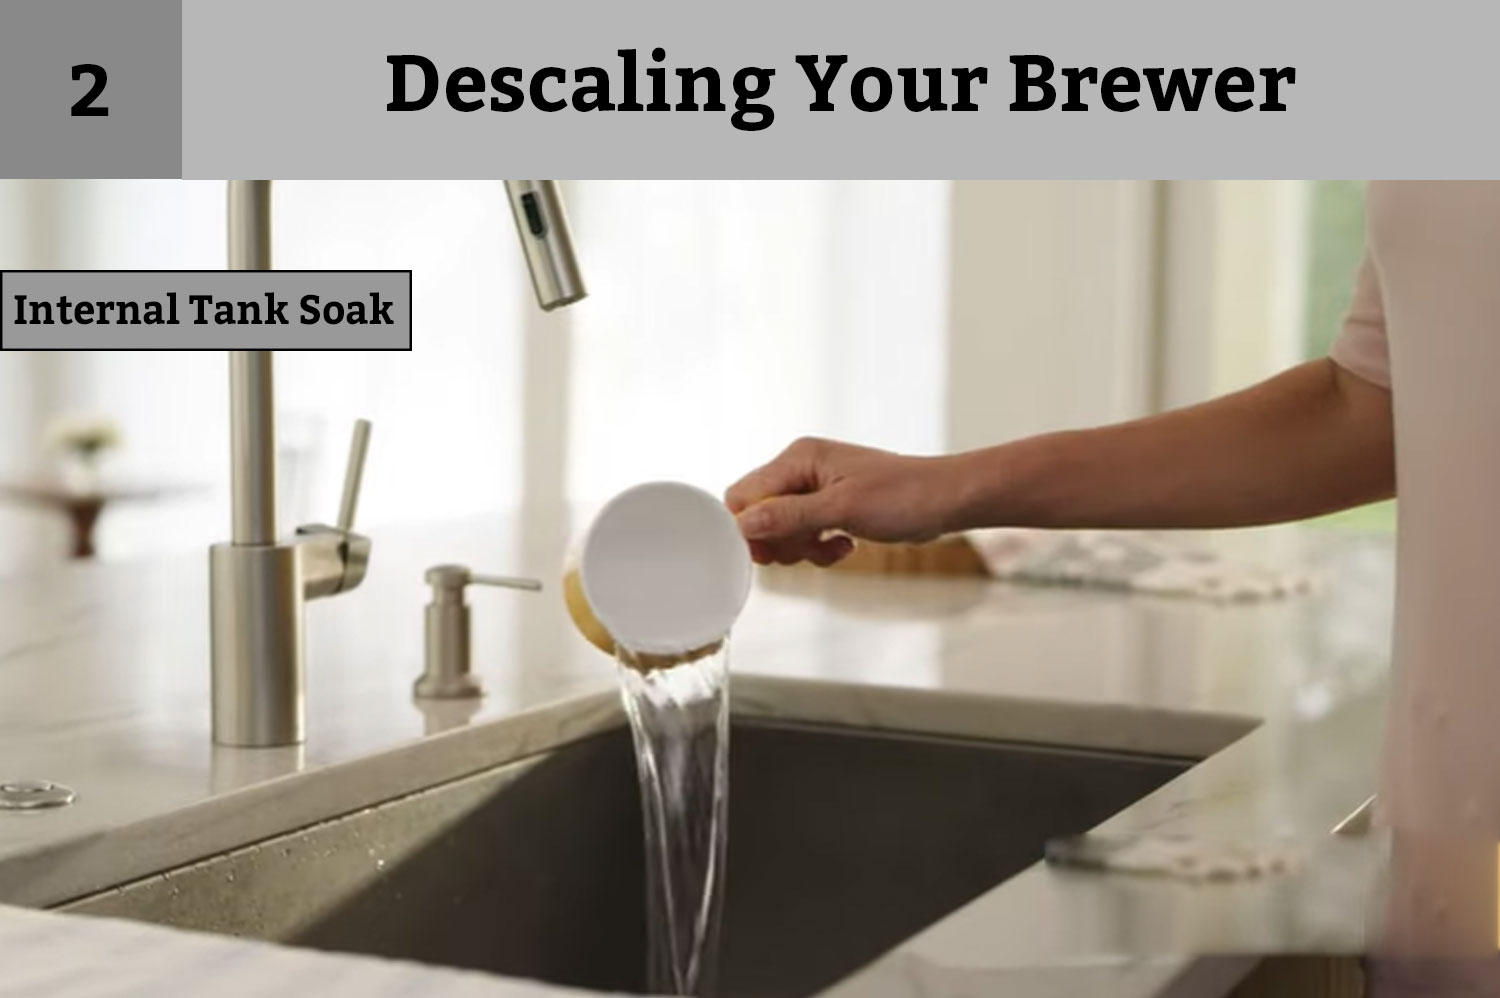
- Perform the descaling procedure again by following the same steps as before.
- When the brew indicator light illuminates, stop the flow of the solution by pressing the power button.
- Allow the brewer to sit for at least 30 minutes.
- Press the brew button and hold it down until all the solution has been dispensed into a ceramic mug.
- Pour the contents into the sink.
Fresh Water Rinse

Repeat the process of step 1, but instead of Keurig Descaling Solution, use only 12oz of fresh water. Repeat this step two more times. If you detect any lingering taste, you may need to perform extra rinse cycles with fresh water.
NOTE: During the descaling process, you may notice some “foam” being dispensed from your brewer. It is a natural result of the descaling solution reacting with the built-up scale.
If the brewer is heavily scaled, the solution may not dispense properly. It can result in only a small or no output being dispensed, followed by air blowing out.
If this occurs, take the following steps:
- Turn off and unplug the brewer.
- Discard the contents of the water reservoir, rinse it thoroughly and refill it with fresh water.
- Plug the brewer back in, turn it on, and repeat the fresh water rinse cycle.
The brewer should start functioning normally as the solution is rinsed out and the scale is removed. If the problem persists, let the brewer sit unplugged for at least 30 minutes before repeating the rinse.
Troubleshooting
Your Brewer is your loyal coffee companion, so it can be frustrating when it starts acting up. But fear not! With some troubleshooting know-how, you can fix the most common issues and get your brew going quickly. Not only will this save you time and money, but it will also give you a sense of satisfaction and coffee mastery.
To help you out, we’ve compiled a list of common problems and their solutions. So, the next time your Brewer starts acting up, look at this guide and see if you can resolve the issue on your own. Let us start.
| Problems | Possible Solutions |
| Grounds in Your Coffee | If you’re experiencing grounds in your coffee, it may be due to clogged needles. It can be cleaned using a straightened paper clip or a similar tool.Clean the exit needle of the K-Cup pod holder. Refer to the Exit Needle care instructions.Clean the brewer entrance needle. Refer to the Entrance Needle care instructions. |
| Brewer Will Not Brew | Ensure the water reservoir has at least 6oz of water.Add an extra 2oz of water if necessary.Press the brew button.Repeat the process until the brewer starts dispensing. |
| Brewing a Partial Cup | Turn on the machine by pressing the power button.Hold down the brew button for 5 seconds until the water is dispensed.If the exit needle is clogged, clean it according to the exit needle care instructions.Clean the K-Cup Pod Holder as described in the care instructions.If descaling the machine twice does not improve the issue, contact customer service. |
Helpful Hints
To address an undesirable taste in your beverage, use bottled or filtered water instead of tap water. Avoid using distilled water.
Service
This brewer is not meant to be serviced by the user. For any required service, please refer to the warranty section of the guide.
Storage
Before storing or transporting your brewer, it is important to empty the water reservoir and store it in a safe and frost-free place. Before using it after storage, rinse the water reservoir with fresh water and descale the brewer as outlined in the descaling instructions. If transporting the brewer, turn it off, unplug it, and empty the water reservoir. If the brewer has been exposed to temperatures below freezing, allow it to reach room temperature for at least 2 hours before use.
Warranty
As a Keurig K- Mini Plus owner, you can be confident that the manufacturer’s warranty will cover any malfunctions during the first year of service. It’s important to understand the terms and conditions of this warranty policy.
Limited One-Year Warranty
Keurig Green Mountain, Inc. (Keurig) provides a one-year warranty for your brewer, starting from the date of purchase, against any defects in materials or workmanship under normal home use. It is recommended to register your brewer on keurig.com/new for easy access to your purchase information. Keurig will, at its discretion, repair or replace any defective brewers without charge, provided it receives proof of purchase. The replacement brewer may be new or refurbished, and a new one-year warranty will be applied to it.
This warranty applies only to brewers used in the United States and Canada and provides specific legal rights. Other rights may vary based on state laws in the United States and provincial laws in Canada.
For proper functioning and lifetime of your Keurig brewer, it is recommended only to use Keurig K-Cup brand pods and accessories. Using non-Keurig pods and accessories can result in damage or malfunctions, which may not be covered by the warranty or may incur a service fee if it is determined that the use of such products caused the issue.
What Is Not Covered By The Limited Warranty?
Keurig’s warranty for your K- Mini Plus brewer does not cover any indirect or accidental damages, such as property damage or any costs incurred as a result of the breach of the warranty, even if they were foreseeable. However, this limitation or exclusion may not apply to you depending on the state or province where the brewer was purchased, as some jurisdictions do not allow such limitations or exclusions of damages.
This warranty also does not cover any damage caused by the use of non-Keurig® pods or accessories, services performed by anyone other than Keurig or its authorized service providers, the use of parts that are not genuine Keurig® parts, or external factors such as abuse, misuse, an inappropriate power supply, or acts of nature.
Other Limitations
The warranty provided by Keurig for the Keurig Brewer is the only express warranty. Keurig specifically denies all other warranties, including any implied warranty of merchantability or fitness for a particular purpose. These limitations may not apply depending on the state or province of purchase, as some states or provinces do not allow such limitations on implied warranties.
How Do You Obtain Warranty Service?
If you need warranty service, contact Keurig Customer Service at 1-866-901-BREW (2739). Before sending your brewer for servicing, it’s necessary to speak to Keurig Customer Service to receive a Return Materials Authorization (RMA) number. Brewers returned without an RMA number will not be serviced and will be returned to the sender.
Conclusion
With your newfound understanding of your Keurig K-Mini Plus Brewer, you’re all set to create delicious coffee, lattes, and more. No more confusion or frustration when it comes to the brewing process. Your knowledge from this article has transformed the experience into one that is effortless and enjoyable, just like savoring a perfectly brewed cup of coffee.
For those who share our love of coffee, it’s more than just a drink – it’s a way of life. Visit coffeeaim.com for a wealth of information and inspiration about your favorite subject.
Happy sipping!
FAQs
Can You Use Regular K Cups In K Mini?
All Keurig K-Cup pods and the Keurig Universal, My K-Cup Reusable Coffee Filter, are compatible with the Keurig K-MINI Coffee Maker.
Can You Use A Reusable K-Cup In Keurig Mini Plus?
Only reusable K-Cups for Keurig Mini (K-Mini) and K-Mini Plus fit all Keurig Brewers globally. SUPER COMPATIBLE: K-Mini Cups suit practically every brand of Keurig machine.
Is It Ok To Use K-Cups Twice?
Nothing prevents you from using your K-Cup many times. But just because you can reuse a Keurig K-Cup doesn’t mean you should. Some individuals reuse their K-Cups, but they must first replenish the coffee grounds.
Can you put milk in a K-Mini?
It seems like a nice idea to put milk in a Keurig for hot chocolate, but you should never put milk in a Keurig or any other drip coffee machine. This damages your Keurig K-Mini Plus and is nearly hard to clean.
Can You Make Tea In Keurig Mini Plus?
All Keurig K-Cup Pods, including various tea options, are compatible with the K-Mini Plus Coffee Maker.
Is K-Cups Good After 3 Years?
The fact is that as long as the seal and packing of the pod are intact, these pods will normally keep for at least eight months to a year, regardless of the date on the package. K-Cup Pods are nitrogen-flushed and hermetically sealed against oxygen, light, and moisture.
What can you make in a Keurig K-Mini Plus?
- All Beverages, Just Arrived, Seasonals.
- Coffee, Dark Roast & Espresso Roast, Decaf, Iced Coffee.
- Tea, Black Tea, Chai Tea. Iced Tea, Speciality Shop, Hot Cocoa, Latte & More.