Quick Navigation
In the mornings, you only crave to immerse yourself in the steamy aroma of your delicious cup of coffee, solely responsible for revitalizing your new day. But if nothing happens as you switch on the coffee maker to serve yourself a delicious cup of coffee instead of the humming sound, the machine stucks. Panic starts because you realize your beloved Nespresso Creatista Uno is not working. Don’t worry! there’s no need to despair, as I will ensure your delightful morning doesn’t get spoiled. You can quickly fix your Nespresso Creatista Uno with a few troubleshooting tips and enjoy your perfect cup of coffee again.
To ensure a stress-free coffee brewing experience, it’s important to keep a few things in mind. Firstly, be sure to fill the water reservoir to an adequate level, so that you don’t run out of water mid-brew.
Additionally, make sure to clean your brewer after each use to maintain optimal performance and hygiene. Finally, descaling your machine every three months of use is crucial to prevent mineral buildup and blockages that can affect the quality of your coffee and also causes many malfunctions. By adhering to these simple practices, you can enjoy a worry-free coffee experience every time.
Problem 1: Why Are The Buttons Of Nespresso Creatista Uno Not Illuminated
Nespresso Creatista Uno is a user-friendly coffee maker. Its user-friendly interface includes buttons that allow users to customize their drinks by selecting the coffee type, milk amount, and temperature. Moreover, the light sends signals about different processes and alerts. Nevertheless, you may encounter an issue where these buttons do not illuminate, hampering your ability to operate the machine efficiently, especially when the buttons don’t show any response. But don’t worry! with some troubleshooting, you can rediscover the hidden treasure of illuminated buttons and enjoy your perfect cup of coffee every morning.
Cause 1: Underfilled Water Reservoir
As you may know, the coffee brewer’s water reservoir is essential because it stores the water necessary for brewing your coffee. The problem arises when the water reservoir needs to be adequately filled or correctly positioned. The former can result in turning off the button’s lights and halting the brewing process.
Solution: Fill The Water Reservoir

Check the water reservoir; if you notice inadequate water in the reservoir, fill it correctly to the marked level.
Cause 2: Auto-Off Feature
The Nespresso Creatista has an innovative feature called “Auto Shut Off Mode,” which automatically turns off the brewer after a certain period of inactivity. It is not a malfunction but rather an energy-saving measure. If your Nespresso buttons have turned off and are not showing any lights, it may be because the machine is in Auto Off mode. You can exit this mode by turning it off
Solution: Turn On The “ON Mode”

To get out of “Auto Off Mode” on your Nespresso machine, simply press either the Ristretto, Espresso, or Lungo button, whichever you desire to make. It will switch the machine to the “ON mode,” allowing it to remain active.
Cause 3: Power Issue
Lastly, this light issue could also occur due to the inadequate power transfer to the brewer. The following could be one of the reasons for this happening.
Solution 1: Check The Plug

Double-check the plug of your Nespresso and insert it in the outlet properly. If this doesn’t turn the button light on, inspect the outlet for any signs of damage or issues. Ensure that your Nespresso Creatista is only plugged into a dedicated outlet solely used for this appliance. Other devices or appliances should not be connected to the same outlet. Otherwise, the plug can get tripped.
Solution 2: Check The Voltage
Ensure that you are getting adequate voltage for your brewer, and there should be no voltage fluctuations. It could stop your brewer in the middle of the process, resulting in turning off the lights.
Solution 3: Check The Fuse

Your coffee machine may stop working due to a minor electrical malfunction within its circuitry. It could occur if there is a disruption or failure in the circuit system. To identify if overloading is the cause of the circuit breaker tripping repeatedly, you should unplug some appliances to decrease the load on the circuit. Once this is done, attempt to turn on the coffee machine again.
Problem 2: Why Is There No Steam Or Hot Water Coming From Nespresso Creatista Uno
There may be times when you encounter issues with the steam of your Creatista Uno, such as the lack of steam or hot water. Due to this issue, you will get a lukewarm coffee instead of a hot one. There can be several reasons causing this problem. However, don’t worry, as there are some troubleshooting steps you can take to fix this issue and get back to enjoying your coffee.
Cause 1: Needs Descaling
One of the common reasons why your Nespresso Creatista Uno is not dispensing steam or hot water is due to mineral buildup, which can cause blockages in the system. Descaling is the only solution to remove that buildup. If you will not descale your Nespresso Creatista Uno then you can experience less steam.
Solution: Check The Descale Alert Led

To confirm that your Nespresso needs descaling, check the Descale alert LED. If it is on, it indicates that the machine needs descaling.
Cause 2: Clogged Steam Wand
The steam wand in the Nespresso Creatista Uno is a tool that allows you to froth and texture milk to create different types of coffee beverages, such as cappuccinos, lattes, and macchiatos. Sometimes it gets clogged and affects the steam of the brewer. In this situation, you need to descale or purge your steam wand.
Solution1: Descale The Seam Wand
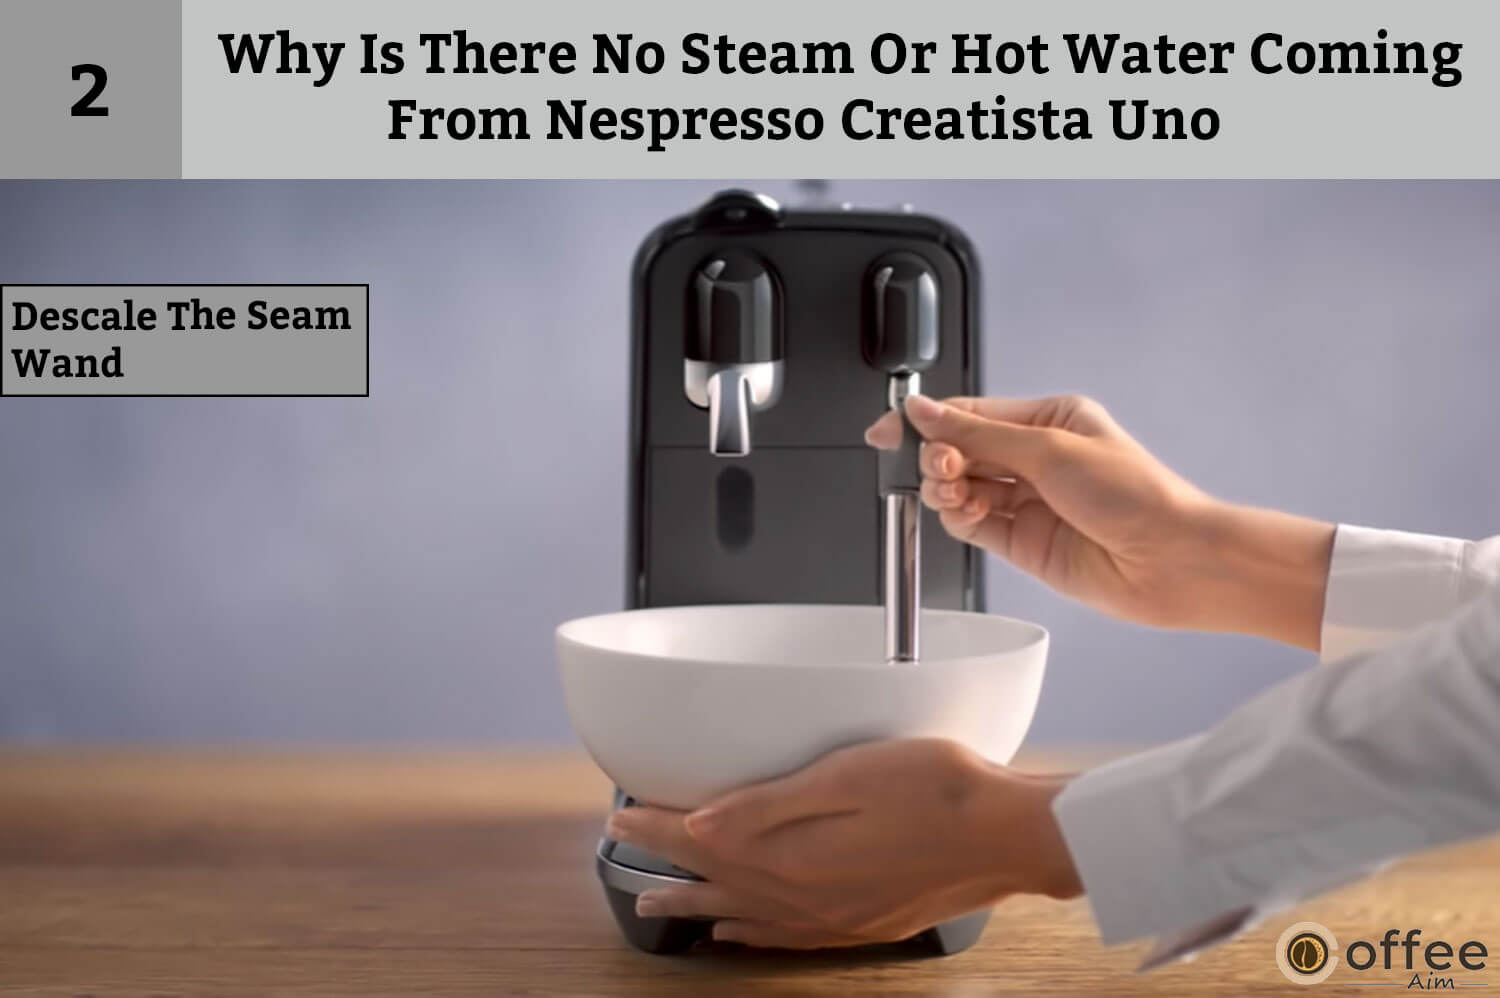
If the steam wand cleaning alert LED is on in your Nespresso Creatista Uno, it means that the machine has detected a buildup of milk residue in the steam wand. To resolve this issue, you will need to descale or clean the steam wand.
Solution 2: Manual Purging
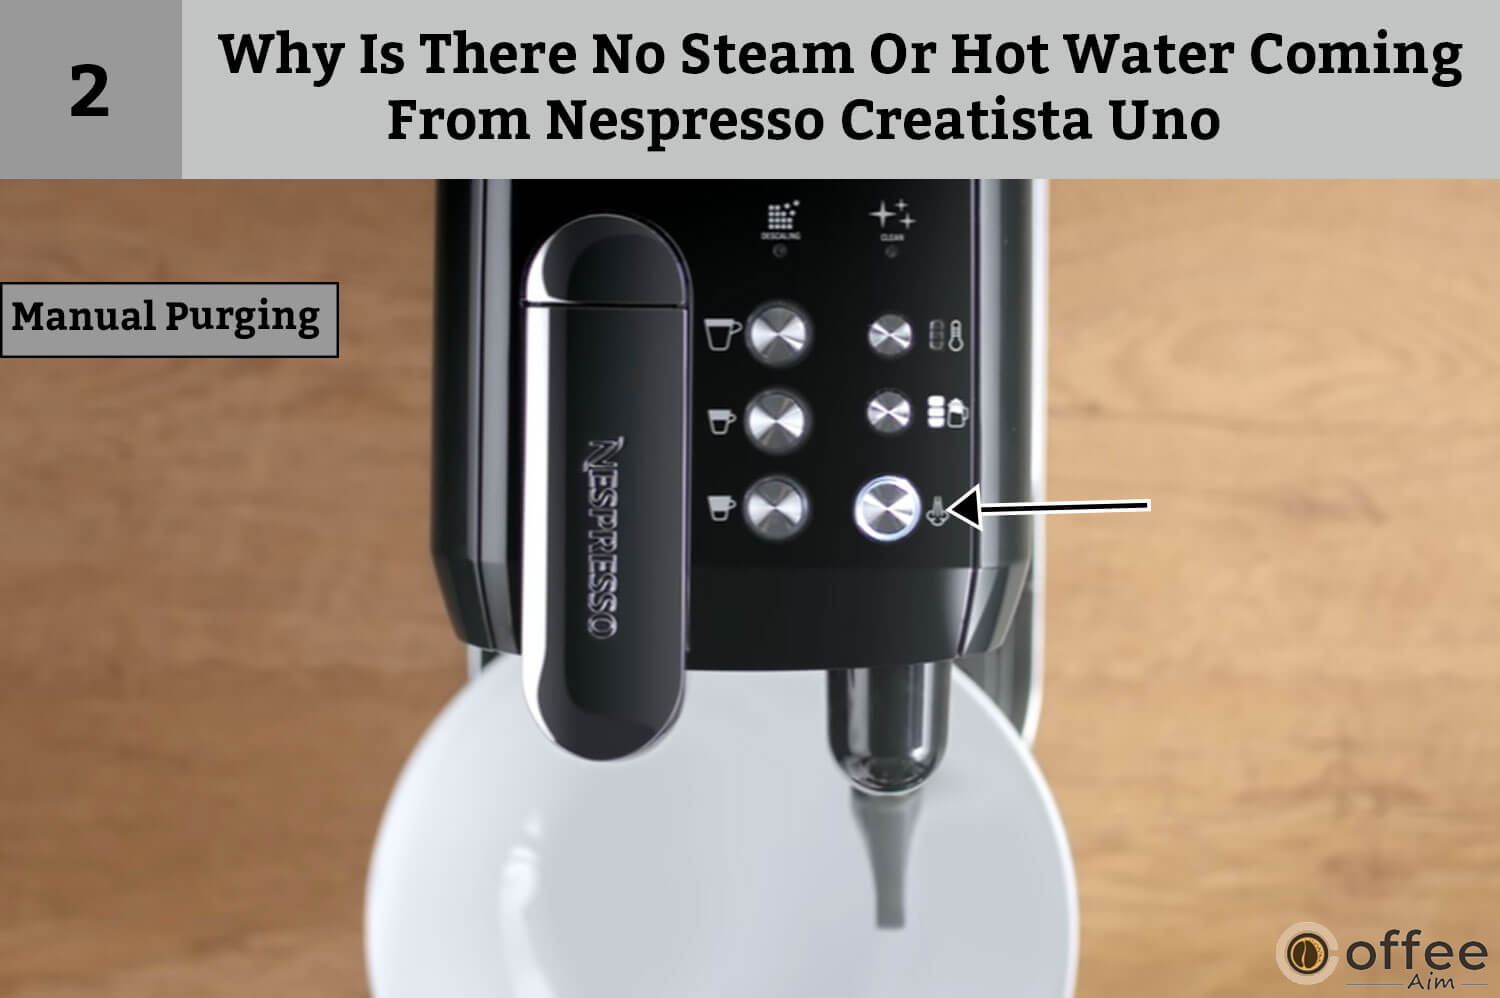
Performing a manual purge on a Steam system is a process of releasing any built-up pressure and water from the system’s pipes and boiler. You can do this by pressing and holding the Steam button for three seconds. To begin, ensure that the Steam system is switched off and unplugged from its power source. Place a cup under the coffee outlet. Locate the Steam button on the system’s control panel, which is located on the top of the system’s housing. Press and hold the Steam button down for three seconds, while simultaneously plugging the brewer and then releasing the button. The brewer will automatically turn off indicating that the machine is completely empty and the purging is completed.
Cause 3: Error In Plug, Voltage, Fuse
While troubleshooting this issue, it is important to check the outlet that the device is plugged into. Here are the steps to check the outlet:
Solution: Check the plug, voltage and fuse of the machine

- Make sure that the plug of the device is properly inserted into the outlet. Check if the prongs of the plug are bent or damaged, which may prevent the plug from making a proper connection with the outlet. If the plug is damaged, replace it with a new one.
- Check the voltage of the outlet using a multimeter or a voltage tester. The voltage should be within the range specified in the device’s manual.
- Check the fuse of the outlet or circuit breaker panel that supplies power to the outlet. If the fuse is blown or the circuit breaker is tripped, the outlet will not provide power to the device. The brewer can stop in the middle of the brewing.
Problem 3: Why There Is No Coffee, No Water, And Unusual Flow In My Nespresso
The sound of flowing water and coffee and the aroma of freshly brewed coffee is what every coffee enthusiast desires every morning. But, one morning, you press the button, only to be greeted with an unusual flow of coffee, or worse, no coffee at all. Frustration sets in as you realize your beloved Nespresso machine is malfunctioning. Relax! you can troubleshoot this problem quickly if you recognize the error.
Cause: 1 A Problem With The Water Reservoir
To resolve this problem, the first thing to check is your Nespresso Creatista Uno’s water reservoir, which is responsible for storing and dispensing water in the brewer. If the water reservoir is inadequately filled and positioned incorrectly, it will affect the water flow, sometimes stopping the coffee flow.
Solution: Fill And Position The Water Reservoir Correctly
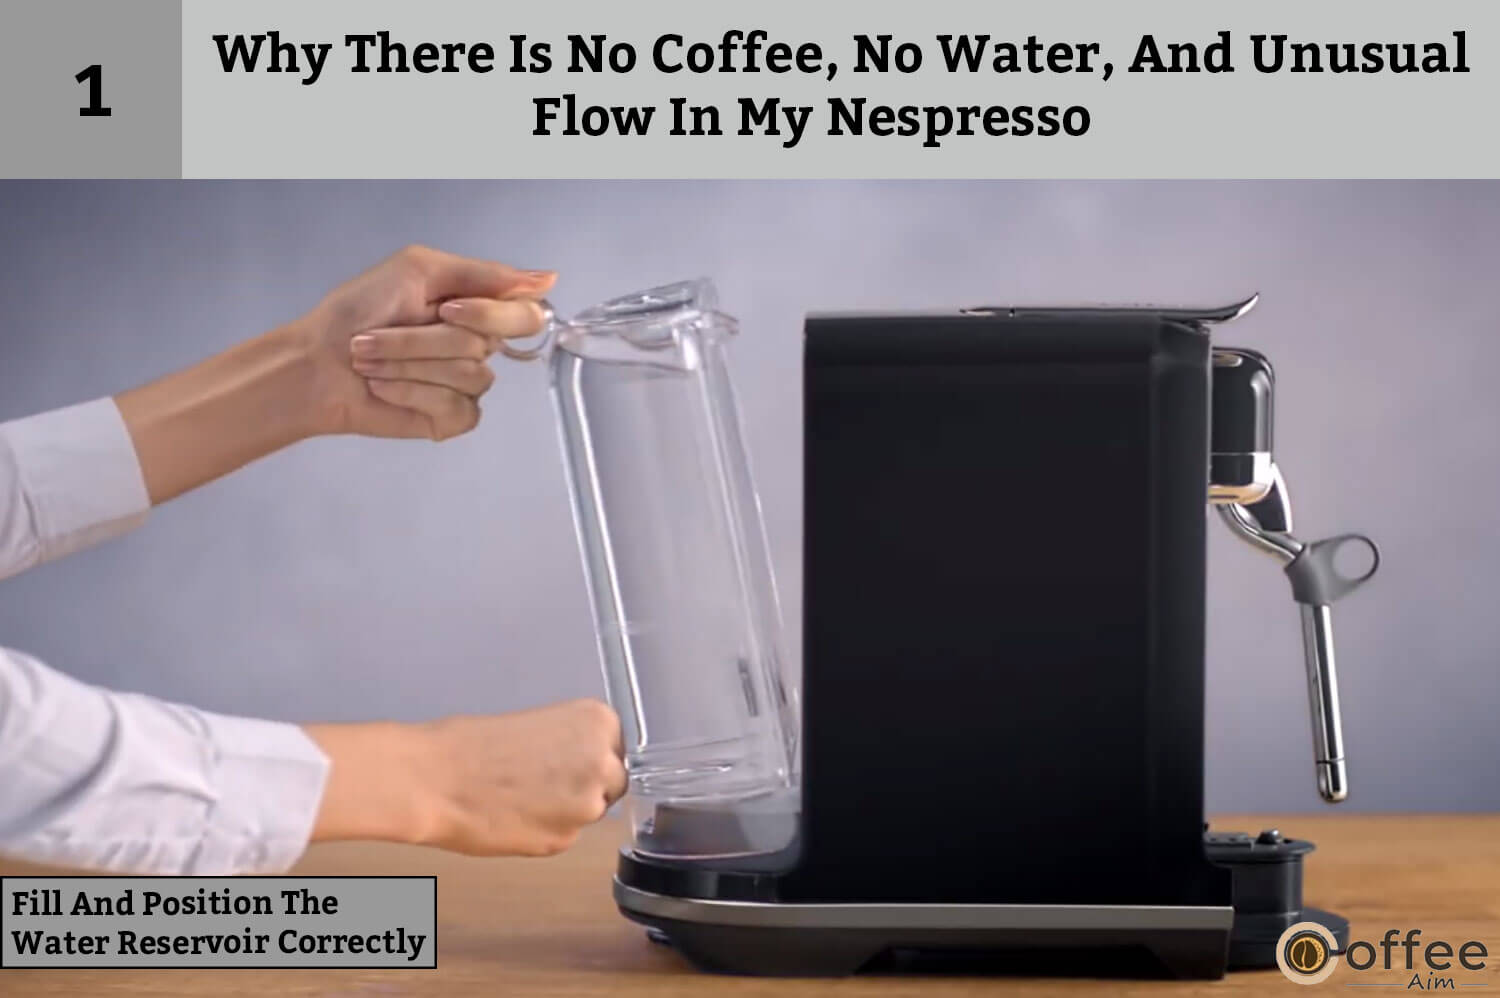
Check that the water reservoir is filled to the MAX FILL line and correctly positioned on your machine. The brewer will only be able to function efficiently if the water reservoir is full and it is set correctly. Fill the tank with freshwater and reposition it on the brewer.
Cause: 2 Brewer is Clogged
A clogged nozzle or brewing unit in your Nespresso Creatista Uno machine can be caused by a buildup of dirt from not cleaning it regularly. This can result in a slow and inconsistent flow of coffee, indicating that the machine needs to be serviced.
Solution: Clean And Descale
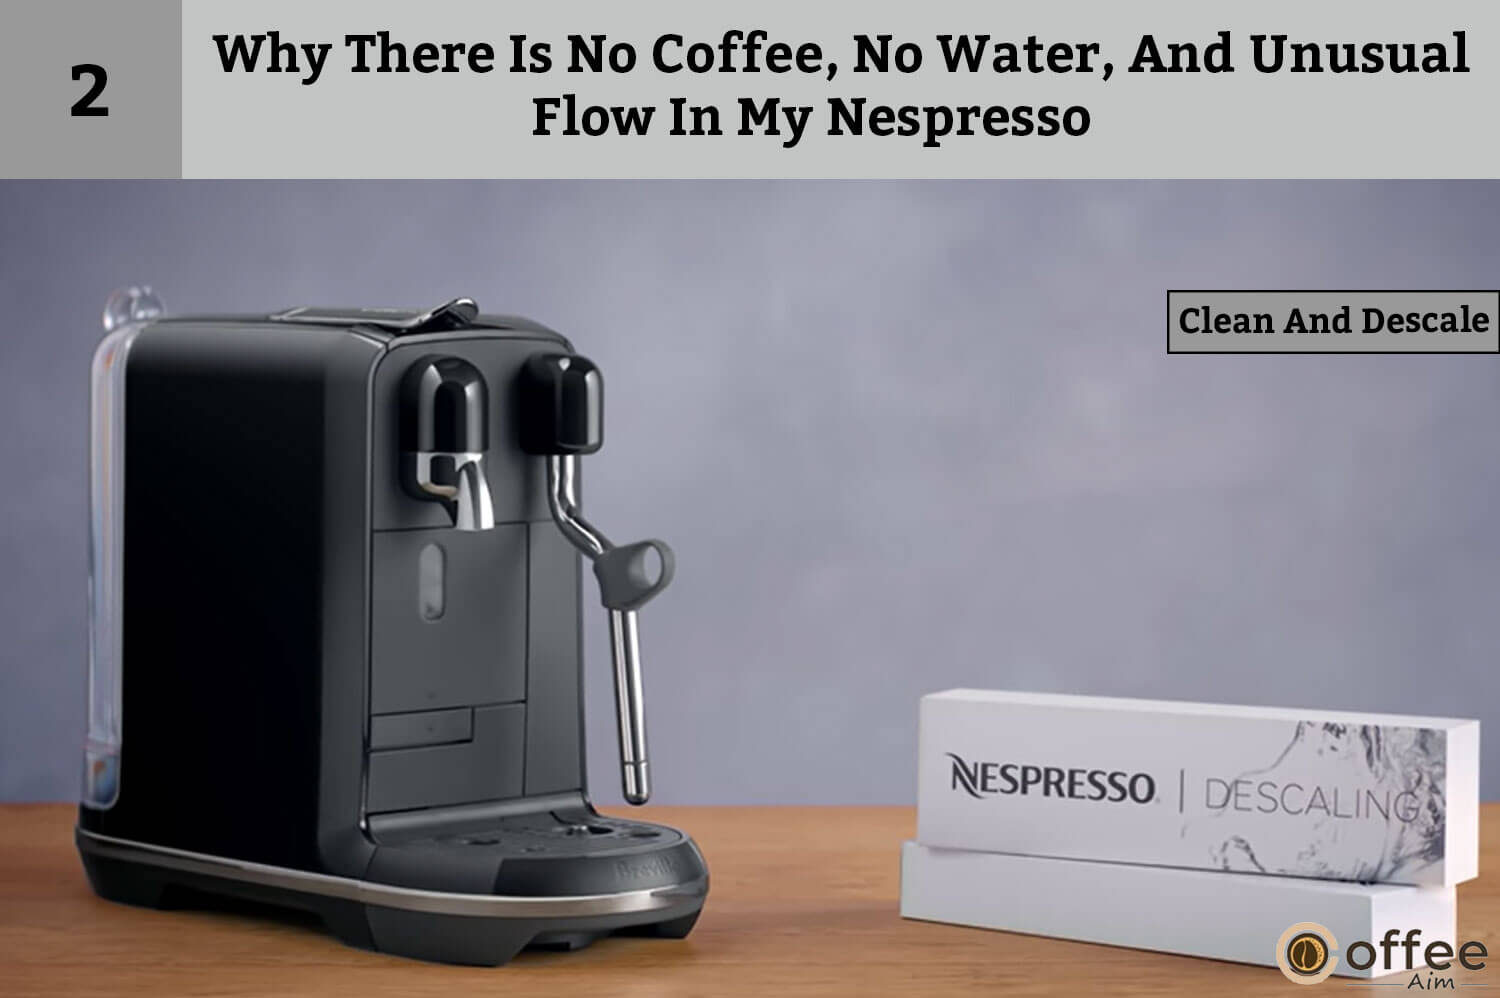
To address this issue, it’s important to clean the machine regularly or try running a descaling cycle.
Problem 4: Why My Coffee Is Not Hot Enough
Nothing quite compares to the sight of steam wafting from a freshly brewed cup of coffee for coffee lovers. It signals that the coffee is at its peak temperature. On the contrary, the absence of steam can be a major buzzkill, indicating that the coffee is not at its full temperature, which can spoil the experience and leave one feeling unsatisfied. There can be various reasons responsible for this occurrence and you can solve this at home by following the troubleshooting tips.
Cause 1: Cold Cup
It seems that you are using a cold cup while brewing your coffee which is why you are facing this problem.
Solution: Preheat The Cup

The solution to this problem is simple: preheat the cup. By doing so, you can ensure that your coffee stays hot for longer and that you get the most out of your caffeine fix.
Cause 2: Broken Heating Element
The heating element in a coffee brewing machine is like the beating heart of the system, responsible for generating the heat needed to brew a perfect cup of coffee. If you’re facing issues with the heating element in your Nespresso machine, it can be a significant concern and disrupt your coffee routine.
Solution: Replace The Heating System
To resolve the problem of the heating element, it is recommended to replace the heating system of your Nespresso Creatista Uno. Since this task involves technicalities, it should be performed by a qualified technician or by following the manufacturer’s instructions for replacing the part.
Problem 5: Why is The Capsule Lever Of Nespresso Creatista Uno Not Close Completely
If the capsule lever of your Nespresso Creatista Uno machine does not close completely, there could be a few possible reasons for this issue
Cause: Problem In Capsule Container
One of the most common reasons is that the capsule container may be full, or there may be a capsule stuck inside the machine, preventing the lever from closing properly.
Solution: Check The Capsule Container
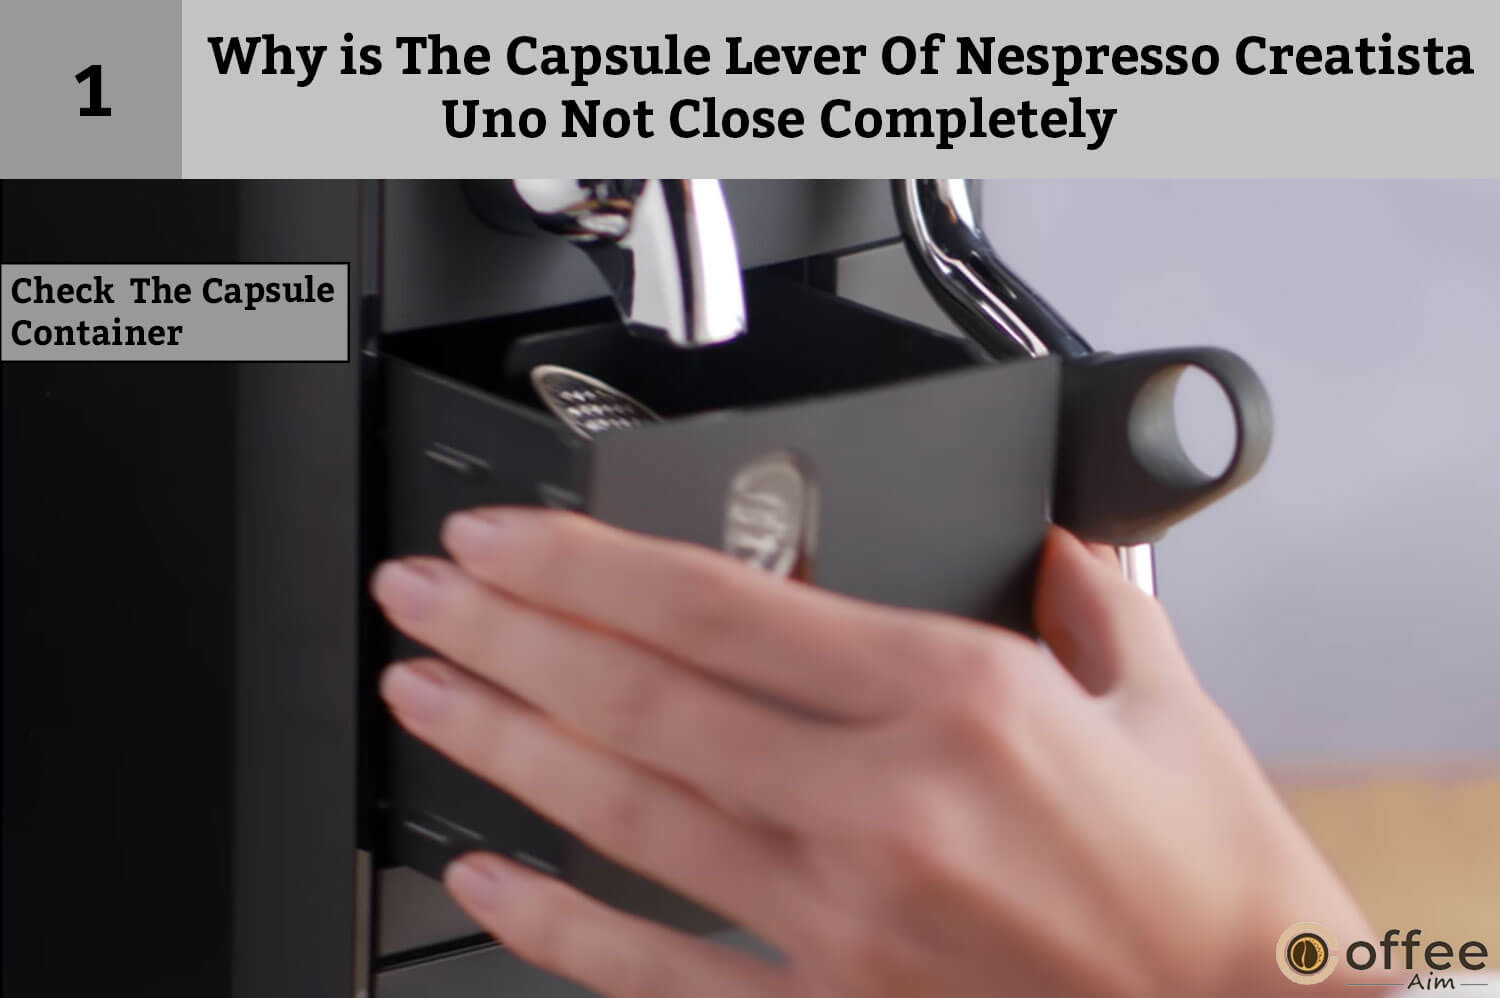
To resolve this problem, start by emptying the capsule container and ensuring that there are no capsules or debris stuck inside your machine. It is essential to be careful while doing this, and you should never put your fingers inside the pod holder.
If the capsule lever still does not close properly, there may be other underlying issues with the machine, such as a malfunctioning mechanism or a problem with the capsule holder. In such cases, it is recommended to contact the Nespresso customer service team or take the machine to an authorized repair center to have it checked and repaired.
Problem 6: Why is my Nespresso Creatista Uno Leakaging (Water Under The Machine)
If your Nespresso Creatista Uno machine leaks water, it not only creates a mess but can also affect the machine’s functionality and lead to potential safety hazards. Moreover, water leakage can cause damage to the internal components of the machines as well, leading to malfunction or failure. Additionally, the electrical components of the machine can be damaged by water, which can pose a significant risk of electric shock or short circuits. Therefore it is important to know the root cause of the problem to fix this issue.
Cause 1: Drip Tray
Nespresso Creatista Uno comes with a drip tray, a tray located at the base of the machine where the cup or mug sits during the brewing process. Its purpose is to catch any drips or spills that may occur while the machine dispenses the coffee. However, sometimes due to being incorrectly positioned and overfilled, the water starts leaking.
Solution 1: Empty The Drip Tray If Full.
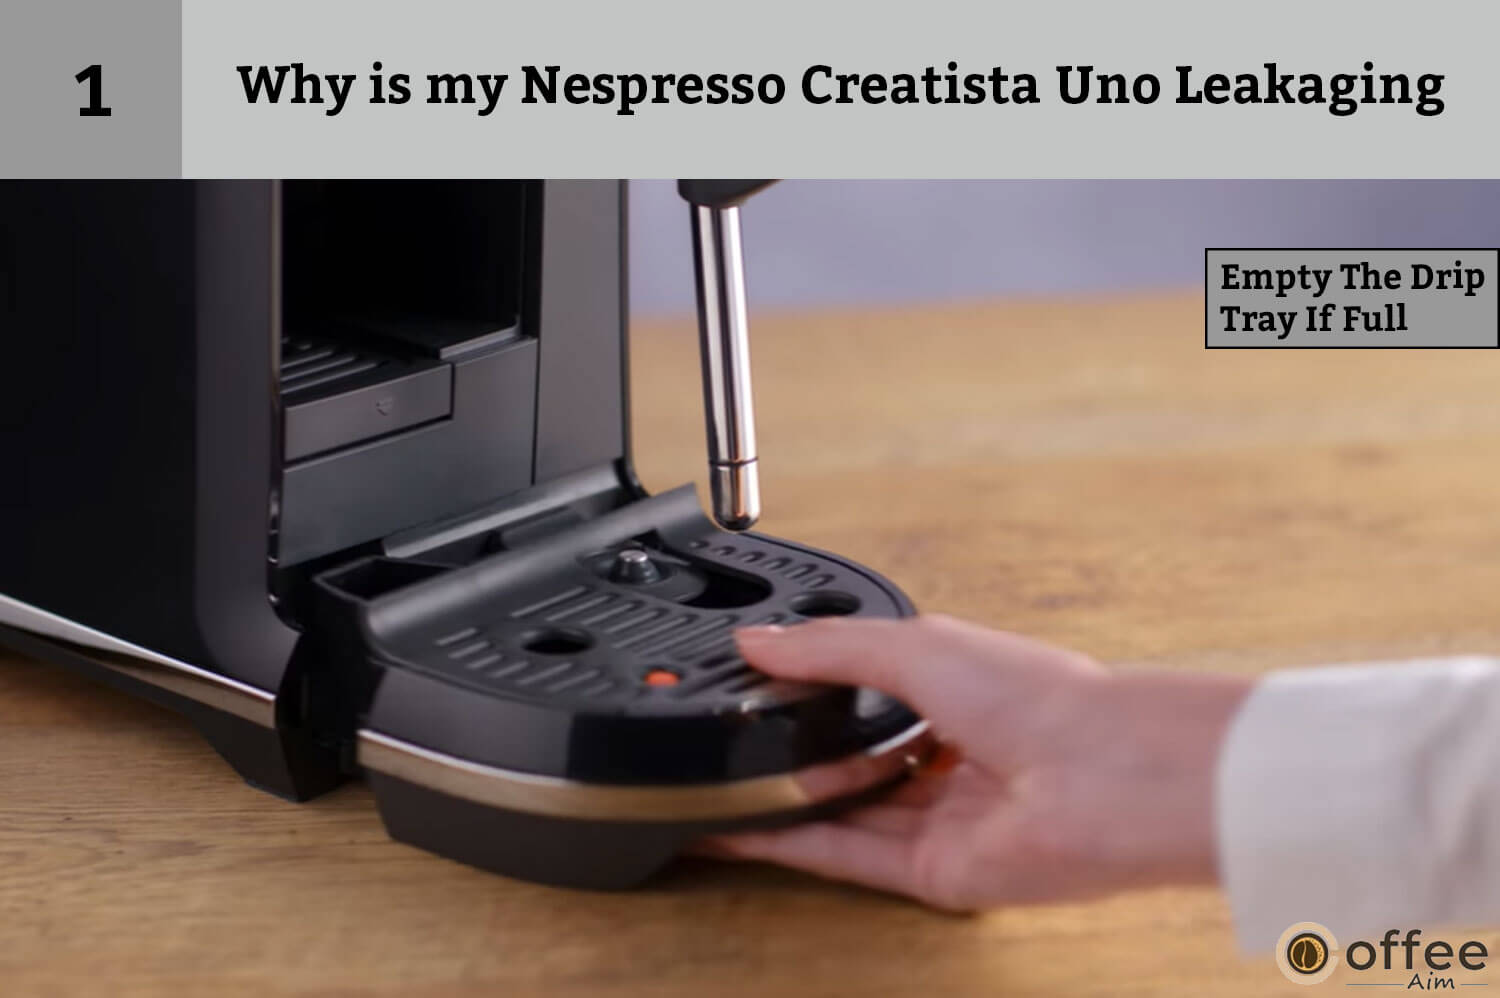
The drip tray is designed to collect excess water and coffee spills from the brewing process. If the drip tray becomes full, it can overflow and cause water to leak from the machine. Therefore, it is essential to regularly check and empty the drip tray to prevent any potential leakage.
Solution 2: Check Drip Tray Is Securely Inserted.
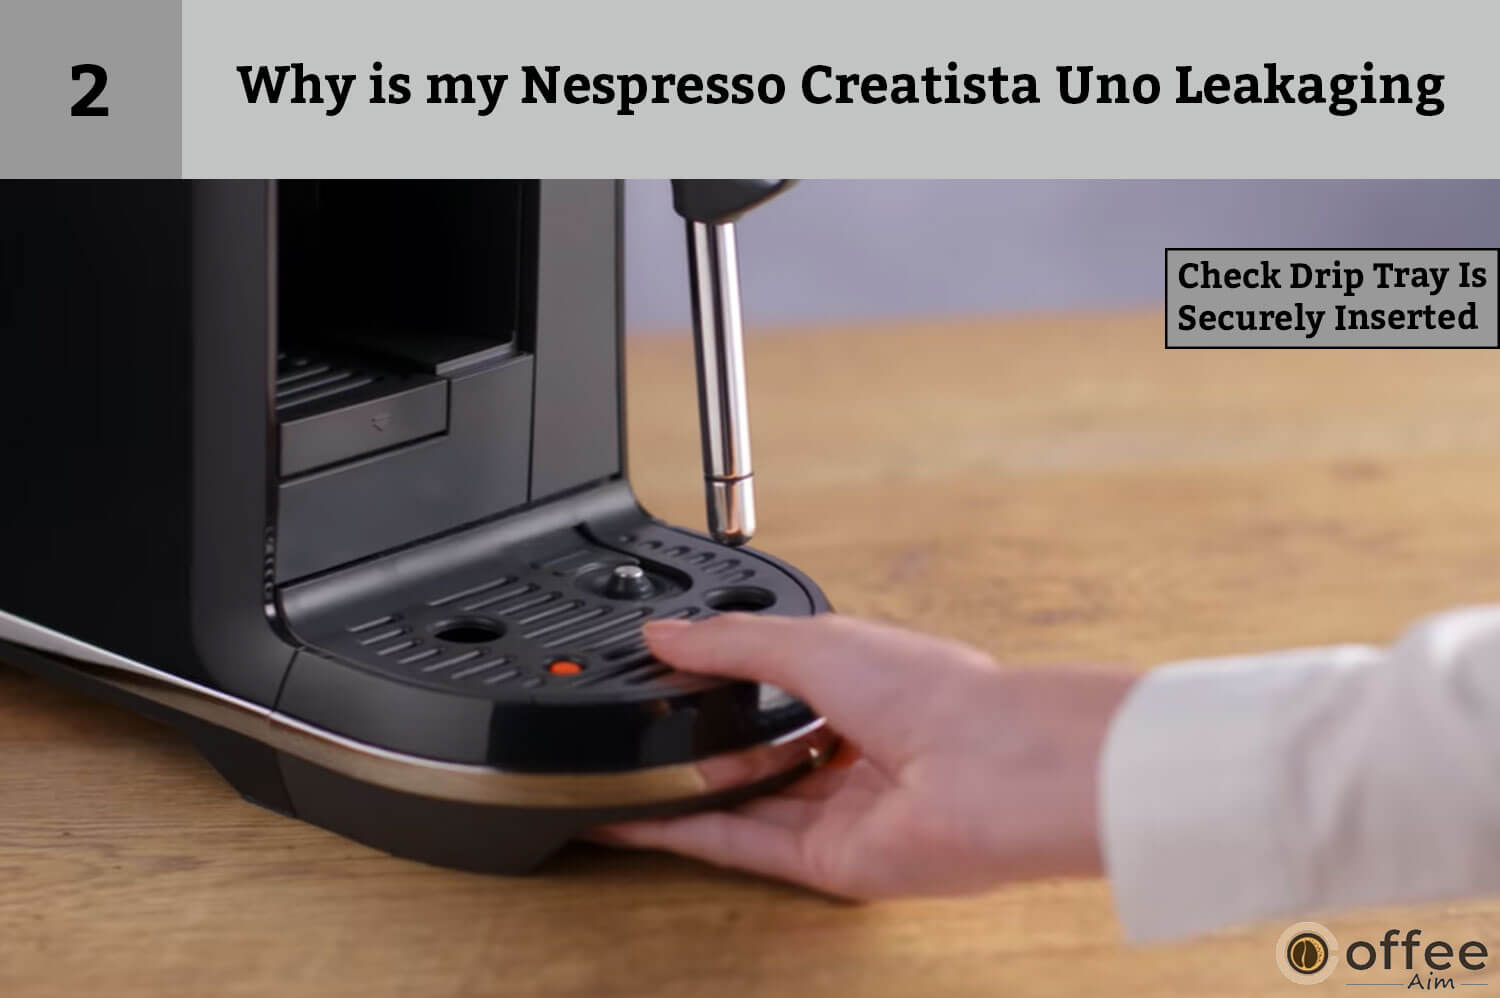
Another common reason for water leakage in your Nespresso Creatista Uno machines is an improperly inserted drip tray. If the drip tray is not securely inserted, it can cause water to leak from the machine. Therefore, it is crucial to ensure that the drip tray is properly inserted and locked into place before using the machine.
Problem 7: No Coffee Flow, Water Goes Directly Into The Capsule Container (Despite Inserted Capsule)
If you’re experiencing a problem where the water goes directly into the capsule bucket instead of flowing through the capsule, there may be a few potential causes.
Cause 1: Problem with Capsule And The Capsule Unit
There are chances you are facing this issue because there is some problem with your capsule and its unit
Solution 1: Position The Capsule Correctly

First, make sure that the capsule is seated securely in the capsule holder and that no obstructions prevent water from flowing through it.
Solution 2: Unclog The Capsule Unit

Blockage in the capsule unit can also cause the issue of coffee flow. To unclog it, empty the capsule unit and check for any potential blockages. Sometimes, a capsule may become stuck in the machine or fail to puncture properly, preventing water from flowing through. While doing this, make sure to never put your finger inside the machine, which can be dangerous and cause injury. Instead, unplug the machine and carefully remove the capsule bucket. Check the container and surrounding areas for any visible blockages or debris, and remove them if possible.
Cause 2: Clogged Needle
Another potential cause could be a clogged needle. The needle in the capsule holder punctures the capsule to allow water to flow through, but it can become clogged with coffee grounds or other debris over time
Solution: Clean the Needle
Try cleaning the needle with a small brush or toothbrush to remove any buildup. Moreover, you can also use a straightened paper clip to clean the needle.
Problem 8: Why Are The Nespresso Creatista Uno Buttons Flashing
For some individuals, identifying the underlying cause of problems with their Nespresso Creatista Uno can be challenging due to the machine’s complexity. However, there are a few typical issues that can be signaled by blinking lights on the machine, and there are available troubleshooting methods to resolve them. The following are some standard troubleshooting techniques to address these flashing light problems:
Cause 1: Problem With Water Reservoir
If the buttons on your Nespresso Creatista machine are flashing, it typically means that the water reservoir is empty or not properly inserted into the machine. This is a safety feature designed to prevent the machine from operating without water, which could damage the machine or cause a hazard.
Solution 1: Fill The Water Reservoir
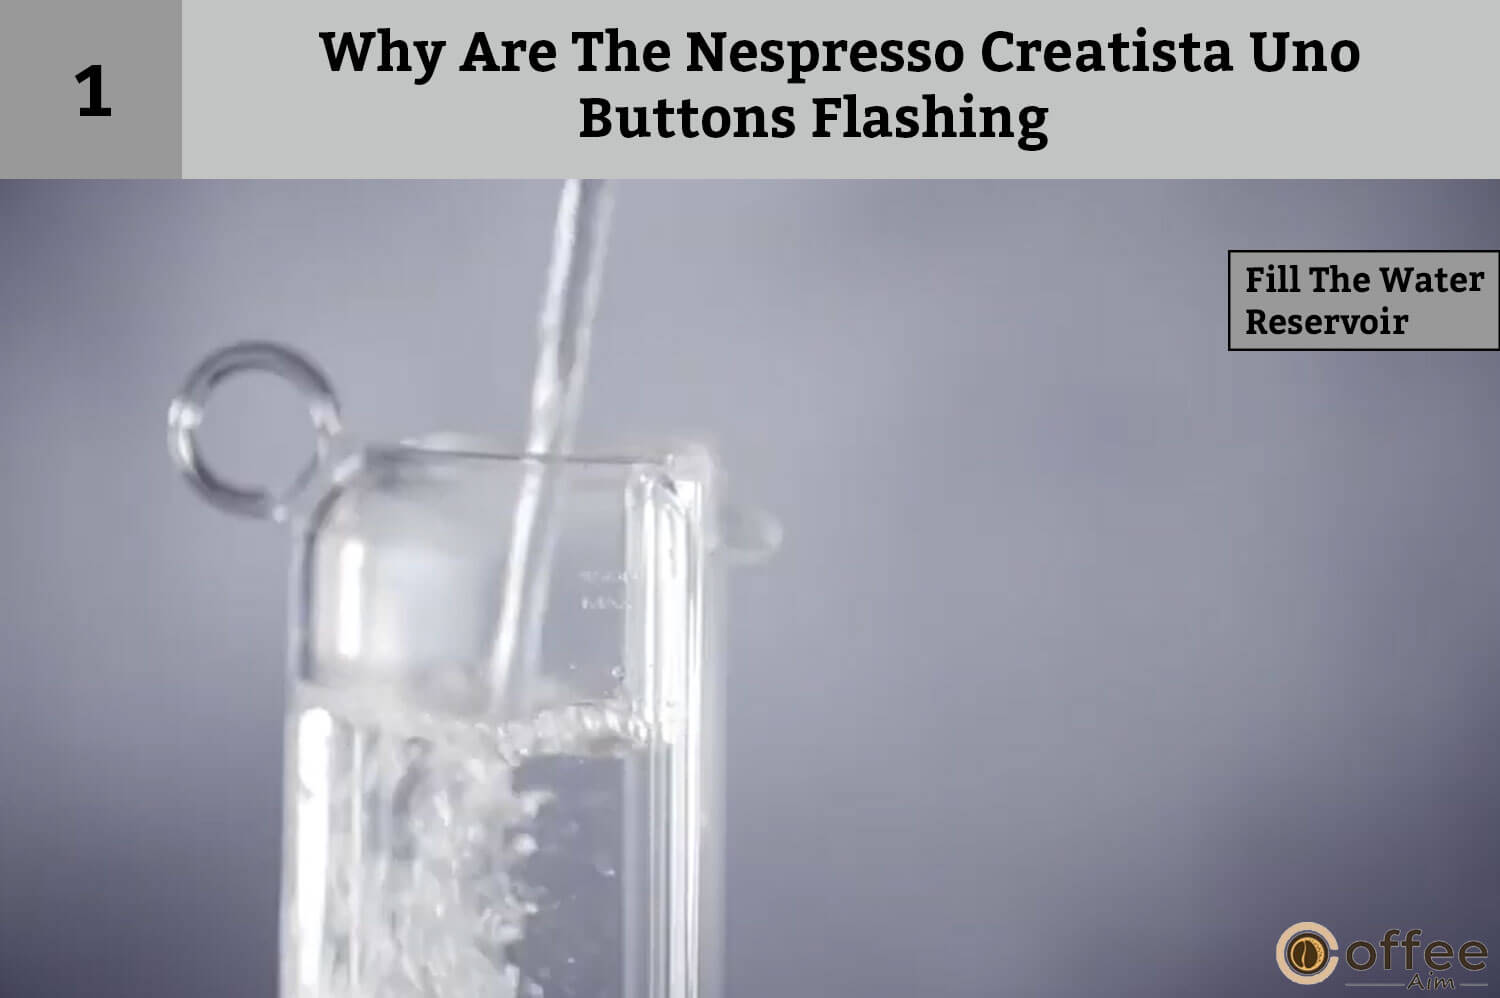
To resolve the issue, you should first check the water reservoir to make sure it is filled with potable water and properly inserted into the machine. If the tank is empty, fill it with water and try brewing a coffee again.
Cause 2: Clogged Steam Tip
If the water reservoir in your Nespresso Creatista machine is clogged, it may be due to a blockage in the steam tip. This can occur if milk or other debris has built up in the tip over time.
Solution 2: Unclog The Steam Tip

To resolve the issue, you can follow these steps:
- Turn off your machine and unplug it from the power source.
- Remove the steam wand tip from the machine.
- Check the tip for any visible blockages or debris.
- Use the pin-cleaning tool that is stored under the water tank to unblock each of the holes in the steam tip.
- Rinse the steam wand tip with clean water to remove any remaining debris.
- Reattach the steam wand tip to the machine.
Cause 3: Needs Descaling
If the descaling alert is flashing, it means that your Nespresso has detected a mineral buildup and wants a descale cycle. When you see this alert, it becomes mandatory to run the descale cycle.
Solution: Run The Descaling Cycle
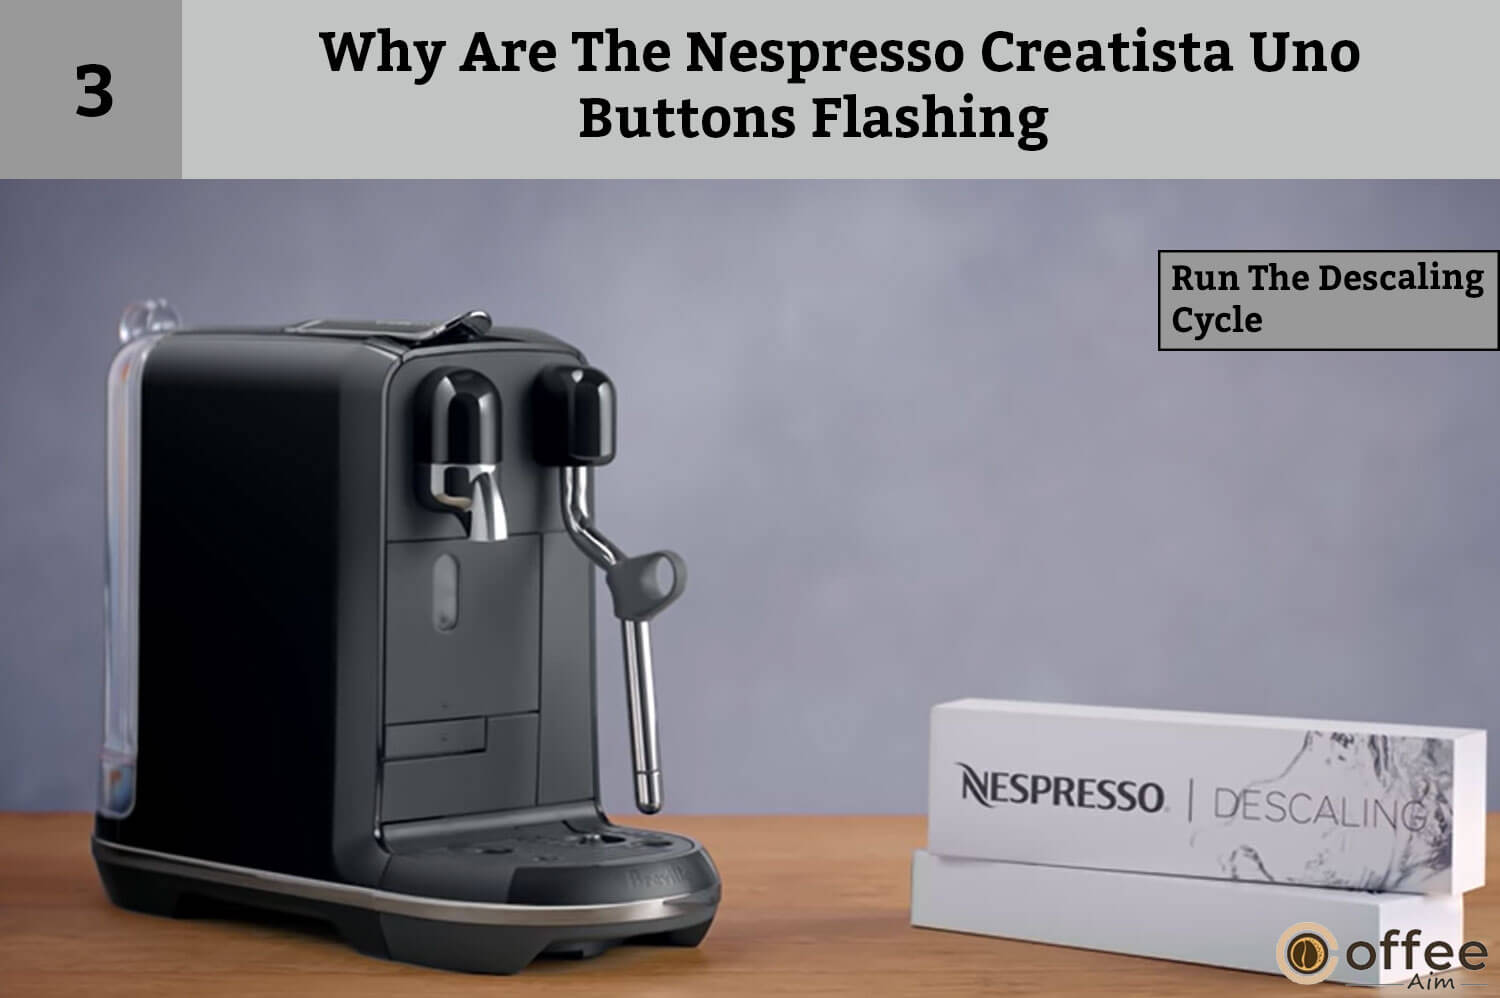
To run the descaling cycle on your Nespresso, first, fill the water tank with a descaling solution and water according to the manual instructions. Then, start the descale by pressing the Ristretto or Lungo button. For detailed procedure click on the link: “How to Use Nespresso Creatista Uno”
Cause 4: Dirty Steam Wand
Over time, milk residue and buildup can accumulate inside the wand, affecting the taste and texture of your espresso drinks.
Solution: Clean The Steam Wand

To ensure that your steam wand is free from any contaminants and not causing any trouble for your Nespresso Creatista Uno, it is essential to perform a clean steam wand cycle regularly.
Here are the steps to properly clean your Nespresso machine’s steam wand.
- Unscrew and remove the wand’s tip.
- Use the pin-cleaning tool to clean each hole thoroughly.
- Remove the steam pipe with the pin tool and clean any milk residue by washing it with water.
- Finally, wipe the steam wand with a damp cloth to complete the cleaning process.
Problem 9: Why Descale Alert LED Is On My Nespresso Creatista Uno
When the descaling alert on your Nespresso machine starts flashing, it indicates that there is a buildup of minerals inside the machine’s water lines and heating elements. This buildup can affect the quality of your coffee and the machine’s performance.
Solution: Descale Your Brewer
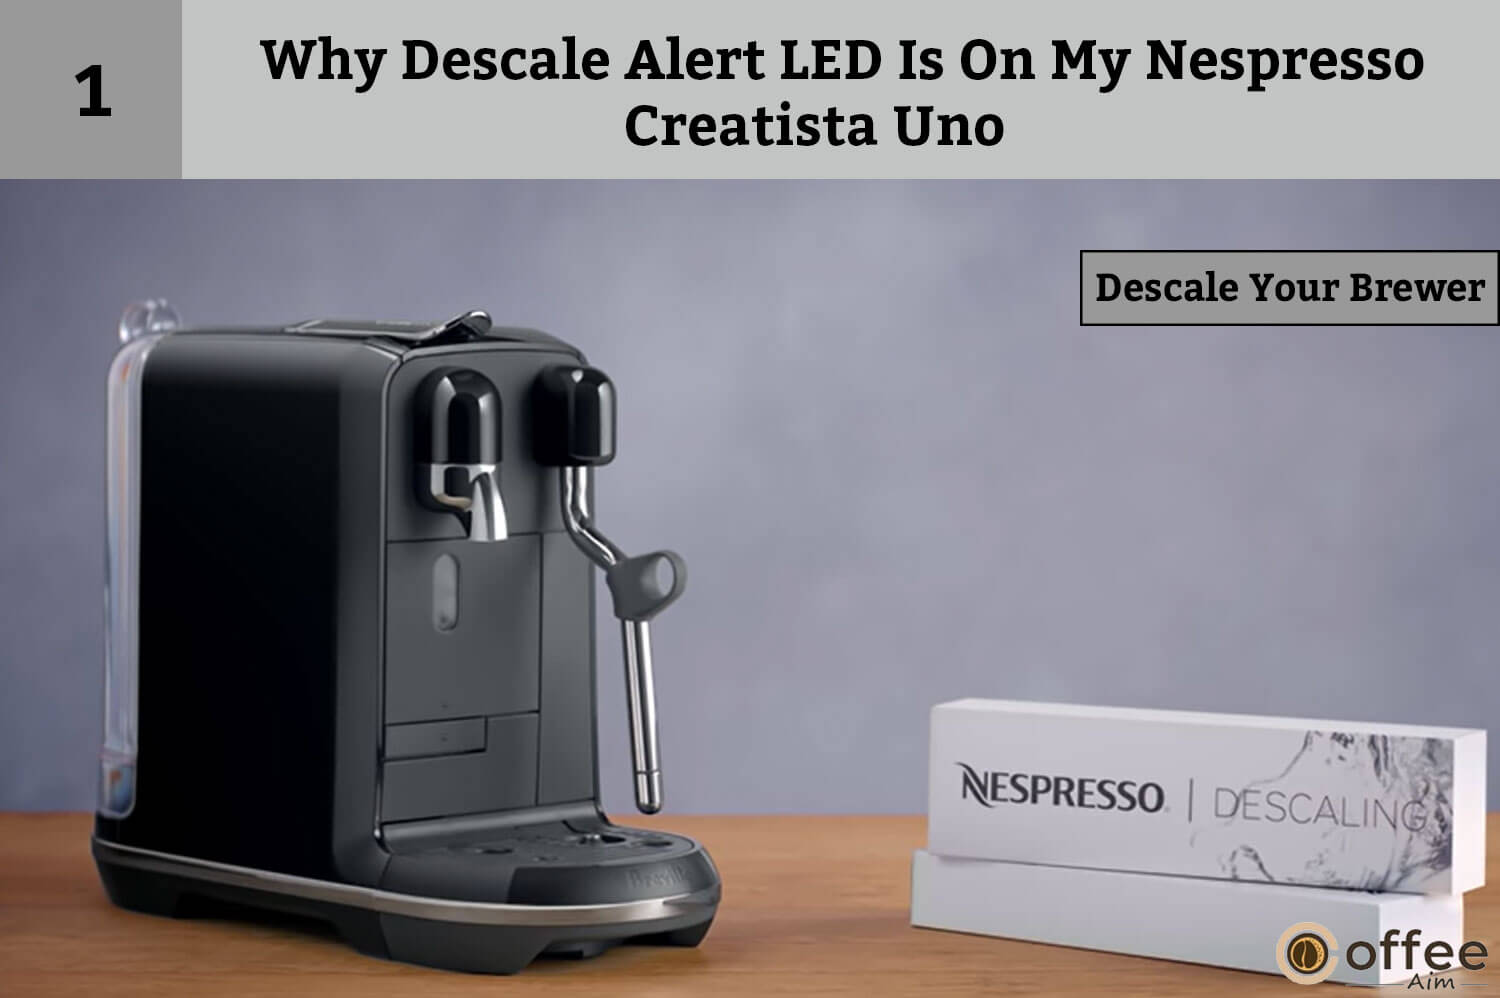
In order to resolve this issue, it’s essential to run a descaling cycle to remove the mineral buildup. Ignoring the alert and not running the descale cycle can potentially damage the machine and result in a subpar coffee experience.
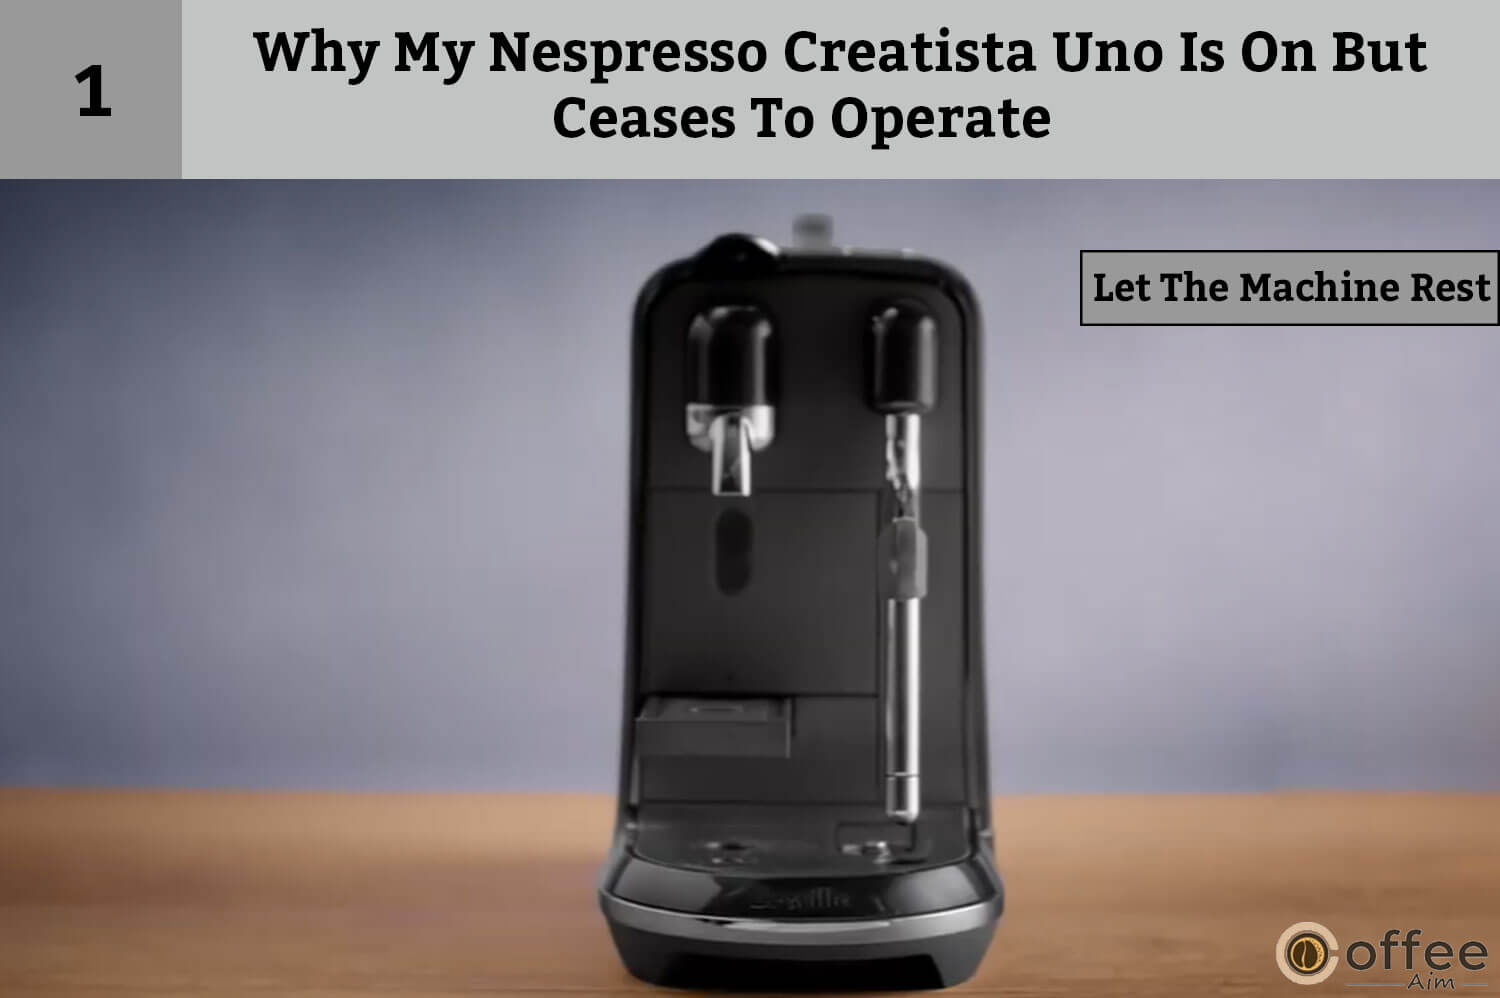
Problem 10: Why My Nespresso Creatista Uno Is On But Ceases To Operate
Sometimes your Nespresso Creatista Uno stops and does not function properly. Let us look at why your brewer is facing this problem and how you can resolve this.
Cause: Overheating
Continuous use and overheating can cause machines to encounter glitches that affect their normal operation. If you experience such issues with your machine, there are some steps you can take to resolve them and restore normal functionality.
Solution: Let The Machine Rest
- Turn off your machine
- Let it rest for 60 minutes and do not turn it on
- After waiting for 60 minutes, turn it on.
- If the problem still persists, contact Nespresso Club.
Problem 11: Why My Nespresso Turns To Off Mode
This is not an issue of concern as The Nespresso Creatista has an Auto Shut Off Mode that turns off the machine after a period of inactivity to save energy.
Solution: Turn On The “ON Mode”
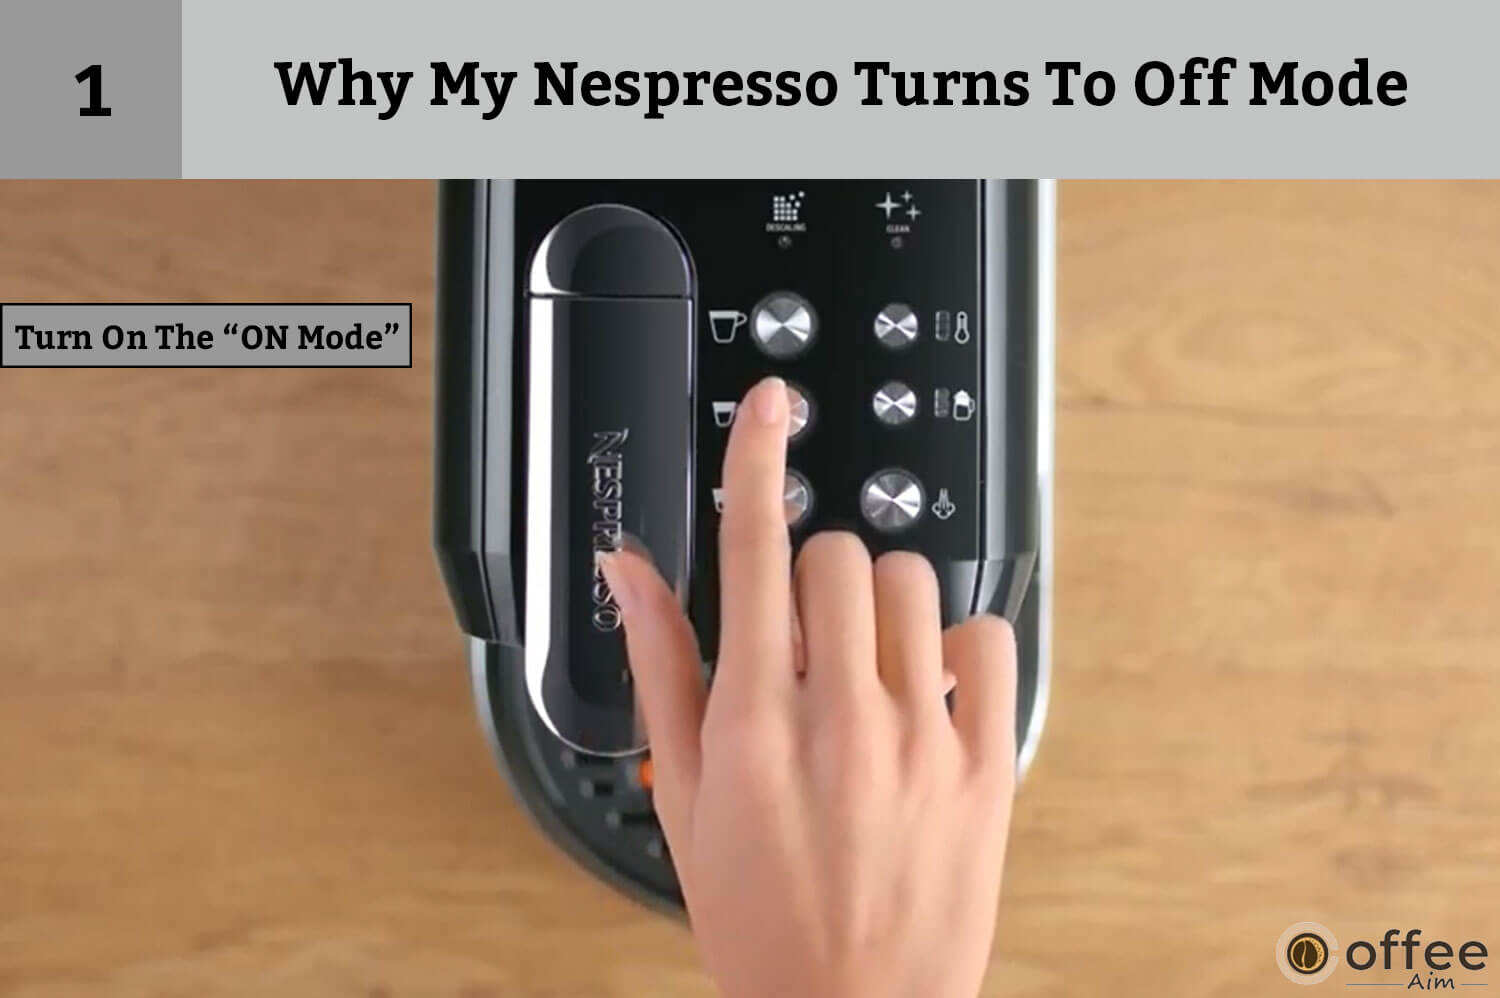
You can come out of the “Auto Off Mode” on your Nespresso machine, by pressing the Ristretto, Espresso, or Lungo button. This allows the machine to stay active and start functioning again.
Problem 12: Why The Milk Steam Cycle Does Not Start During Frothing
If you are experiencing issues with the milk steam cycle not starting during frothing, there are a couple of possible reasons why this may be happening.
Cause 1: Issue With Water Reservoir
The problem arises when the water reservoir of your Nespresso machine is not correctly positioned or empty. In such cases, the machine cannot produce steam for frothing milk, which can lead to an unsatisfactory coffee experience for you.
Solution: Check Water Reservoir
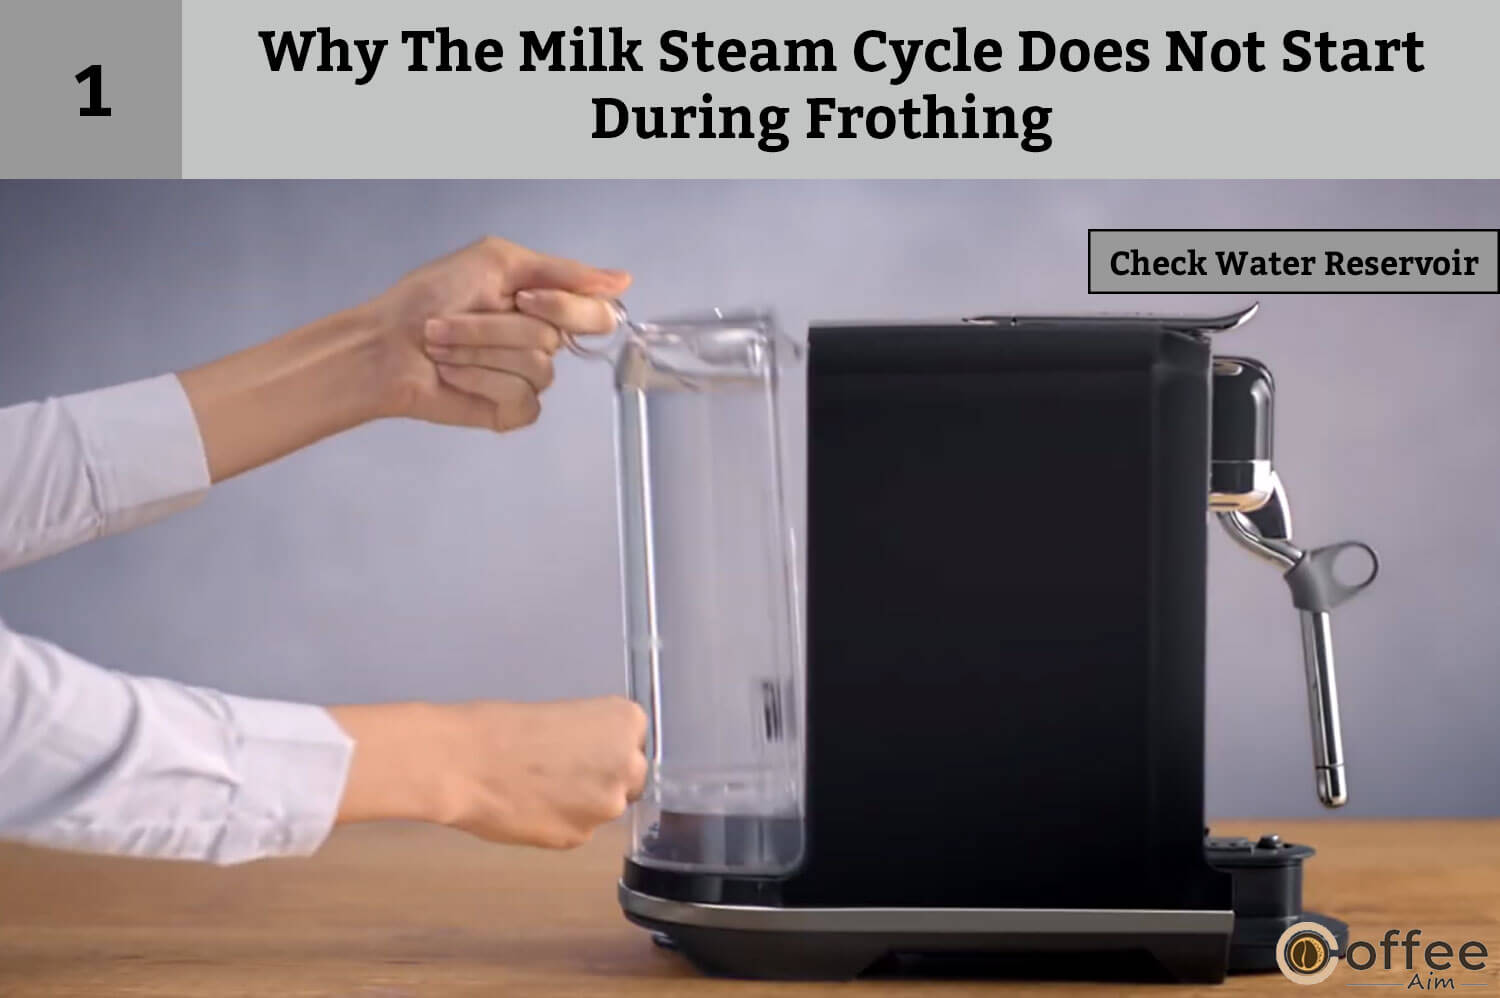
First, check if the water reservoir is correctly positioned and if it’s empty, fill it with potable water. This is because the machine requires water to produce steam for frothing milk, and if the reservoir is empty or not correctly positioned, it can prevent the steam cycle from starting.
Cause 2: Steam Tip Blockage
If the steam tip or wand of your Nespresso machine is blocked, it can cause the steam cycle to be ineffective, leading to difficulty in frothing milk.
Solution: Clean The Steam Tip
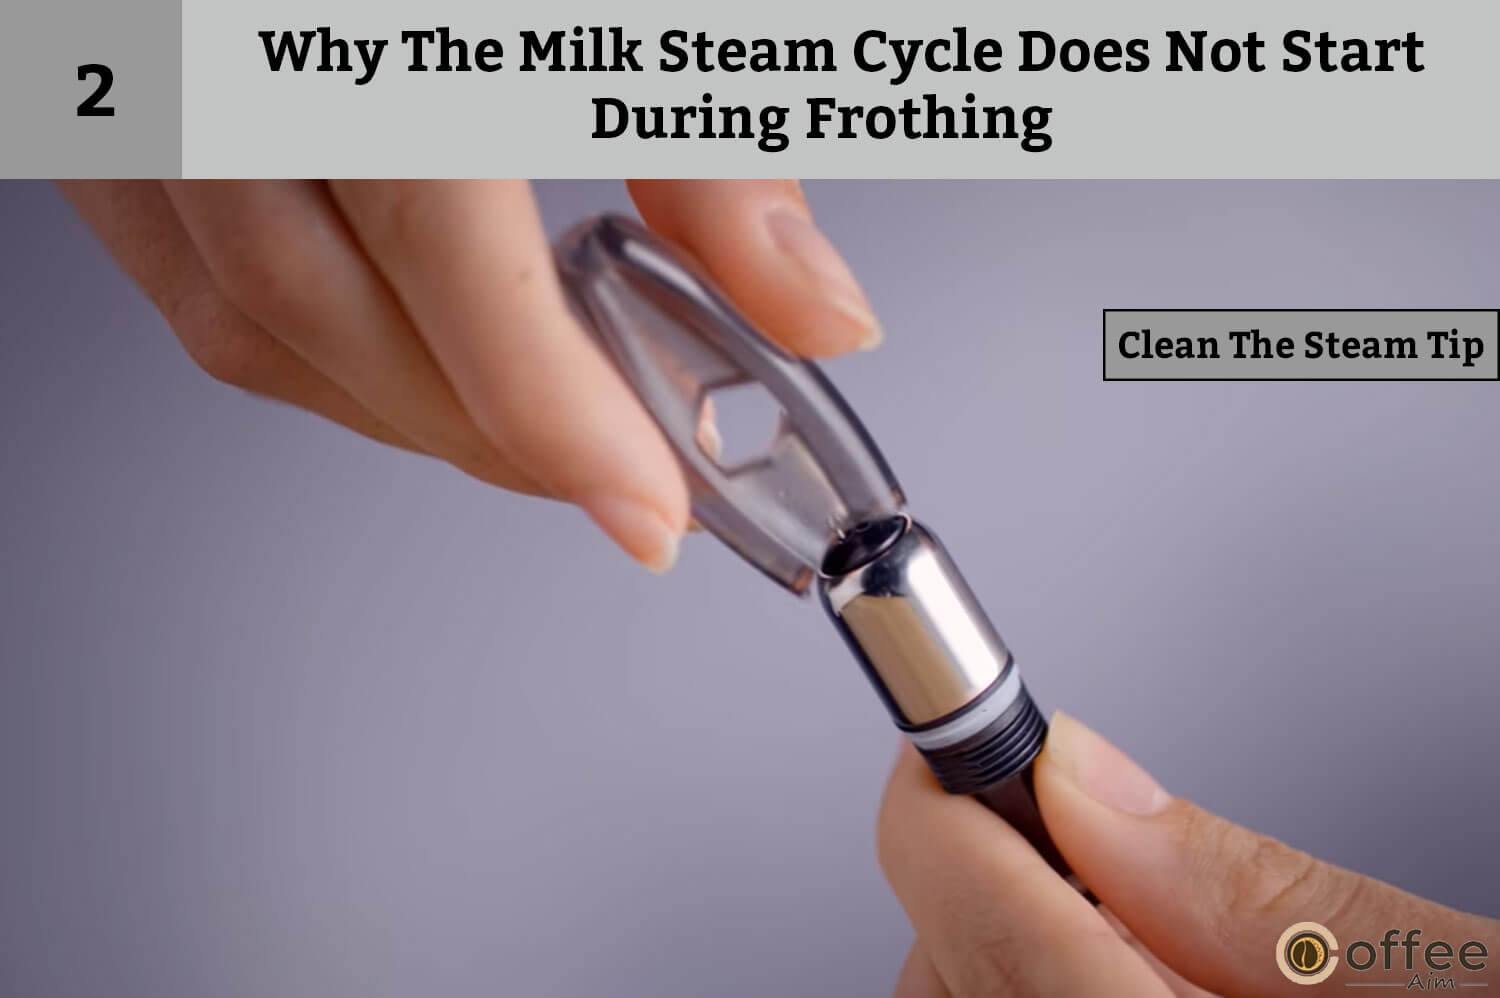
Check the steam tip for any blockages and ensure that the wand is lowered correctly. This is because a blockage can restrict the flow of steam and prevent the milk steam cycle from starting. Clean the steam tip using a tiny brush. By ensuring that the steam tip is clear and the wand is lowered correctly, you can improve the flow of steam and get the milk steam cycle to start during frothing.
Problem 13: Why The Quality Of Froth Is Not Up To Standard
Only a well-made froth could only give you that thick and creamy layer of foam. If your Nespresso Creatista Uno starts producing low-quantity froth, you can try the following solutions.
Cause 1: Use Of Warm Milk
The use of warm milk is not recommended for frothing, if you are not getting a heavy and foamy froth, it is probably due to the use of warm milk.
Solution: Use Refrigerated Milk

Use refrigerated, pasteurized whole or semi-skimmed milk at a temperature of about 4-6°C / 39-43°F.
Cause 2: Use Of Old Milk Pack
As milk ages, it can lose its ability to get froth effectively, resulting in a less-than-ideal texture and consistency. If you are noticing less consistency of froth, you may be using old( already opened) milk
Solution: Use Newly Opened Milk

For obtaining the optimal results for frothing, I recommended you use newly opened milk.
Cause 3: Wrong Milk Froth settings
Nespresso Creatista Uno comes with customizable options for milk froth, you may be experiencing this issue due to the wrong setting.
Solution: Check The Milk Froth Setting

Before frothing your milk, it is important to ensure that your milk frother’s settings are adjusted appropriately. Make sure to choose the one that suits your desired level of frothiness.
To Choose the Milk Foth Volume Follow the steps.
- Locate the milk froth button on the control panel
- There are three levels from which you can select.
- Customize the froth level by pressing the button one to three times.
Cause 4: Use Of Regular Jug
If you are using a regular jug for frothing, that could be the root cause of your less froth. Because regular jugs are not designed for frothing milk and lack the proper shape and materials necessary for creating a proper foam. As a result, the froth may not be as creamy or long-lasting, and the texture may not be as smooth as it could be.
Solution: Use The Provided Breville Milk Jug
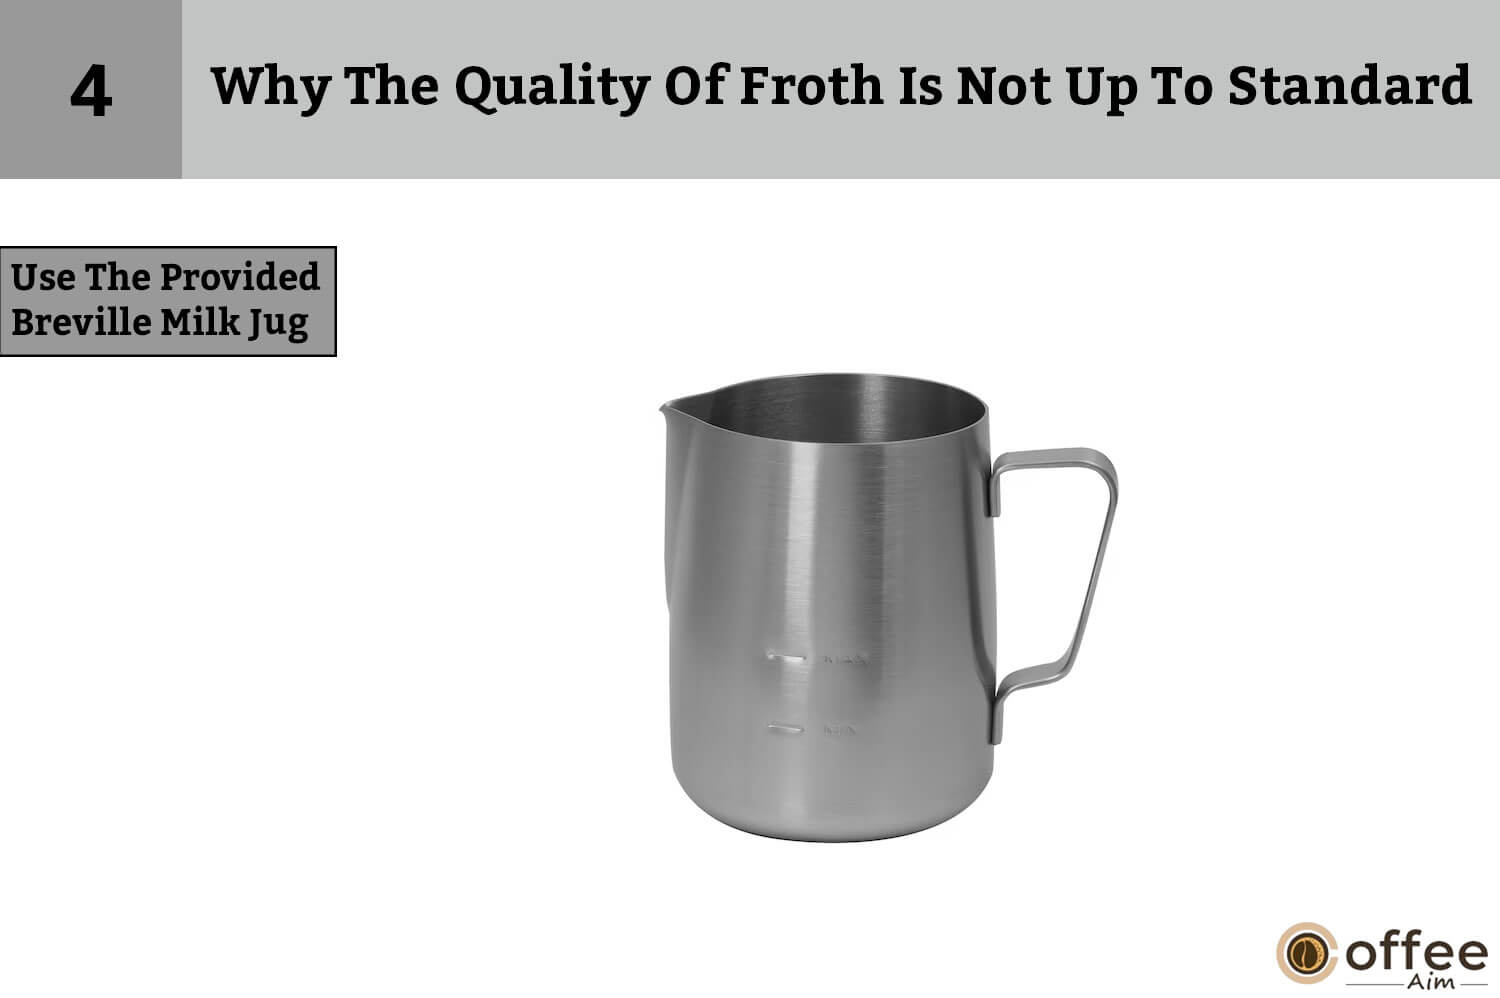
Using the milk jug provided with your Breville milk frother ensures optimal frothing results. The jug is designed to enhance the texture and temperature of the milk, resulting in perfectly frothed milk that is smooth and velvety.
Cause 5: Dirty Milk Jug And The Steam Wand
A dirty milk jug and the steam wand can negatively impact the quality of the froth in espresso drinks. Milk residue can build up on the steam wand and in the milk jug, which can lead to blockages and ineffective steam cycles.
Solution: Clean Both The Milk Jug And Steam Wand After Each Use
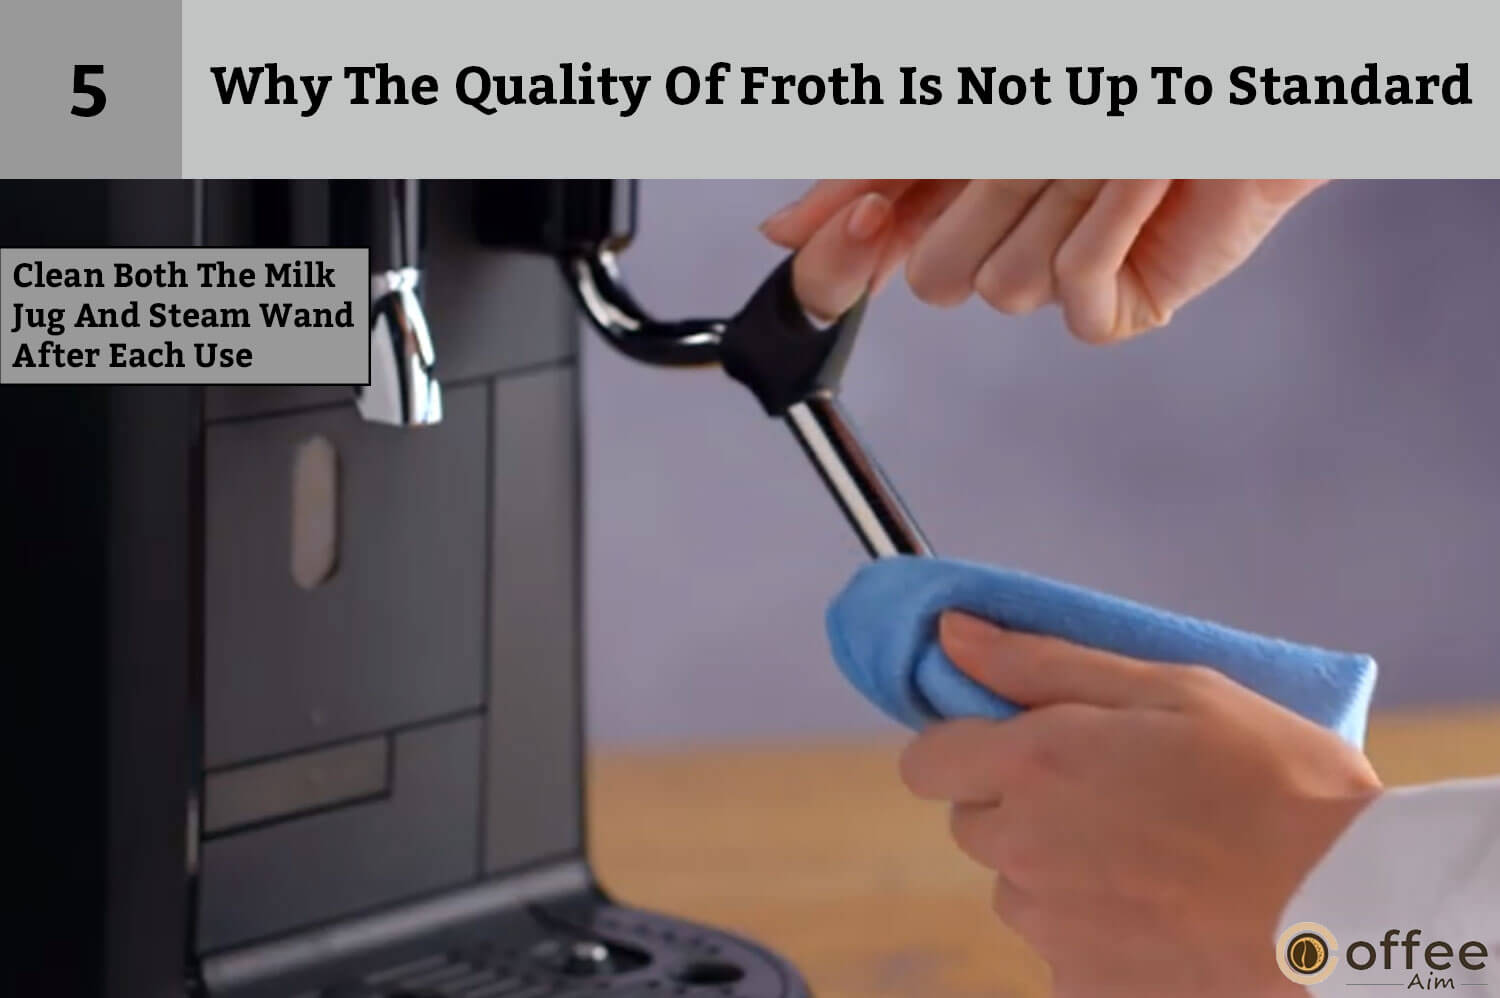
To maintain the quality of your milk frother and ensure consistent frothing results, it is essential to clean both the milk jug and steam wand after each use. This helps prevent the build-up of milk proteins that can clog the steam wand and impact the quality of the froth.
Clean The Milk Jug
Make sure to clean the milk jug by washing it with detergent and water.
Clean The Steam Wand
Cleaning the steam wand is particularly important as it helps to prevent the build-up of milk residue which can affect the temperature and consistency of the froth. After each use, use a damp cloth to wipe the wand and ensure it is free of any milk residues. This will help maintain the quality of your frothing experience and prolong the life of your milk frother.
Problem 14: Why The Froth Steam Is Very Wet
If instead of a thick and creamy layer, you notice that the froth is wet and runny, you are probably doing something wrong. Let’s explore some of the reasons behind this common issue and some tips to improve your frothing skills.
Cause: Use Of Highly Filtered, Demineralized, Or Distilled Water
In order to make a perfect froth, avoid using highly filtered, demineralized, or distilled water because these lack the essential minerals that are necessary for creating a stable and smooth froth. These minerals, such as calcium and magnesium, help to stabilize the proteins in the milk and create a dense and creamy froth. Without these minerals, the proteins in the milk may break down too quickly, resulting in a wet and loose froth that is difficult to work with.
Solution: Use Cold, Potable Water

In contrast to distilled water, using potable water balances the mineral content and can help to create a more stable and consistent froth. The minerals in the water help to support the protein structure of the milk, allowing it to hold its shape and texture when steamed. Additionally, using cold water for steaming can help to reduce the temperature of the steam and prevent the milk from scorching or overheating.
Problem 15: Why The Milk In Nespresso Creatista Uno Overflows
If your Nespresso Creatista Uno milk dispenser is releasing more milk than necessary, causing it to overflow and creating a mess on your countertop, you might be doing something wrong. There can be several reasons why this milk overflow occurs, ranging from the type of milk you use to the temperature settings on your machine. Let’s delve into some of these factors and provide you with helpful tips to prevent this milk overflow from happening.
Cause 1: Inappropriate Milk Volume In Jug
The Nespresso Creatista Uno is designed to froth a specific amount of milk, and using too much milk can result in the frothed milk overflowing from the jug, making a mess and potentially damaging the machine.
Solution: Appropriate Milk Volume
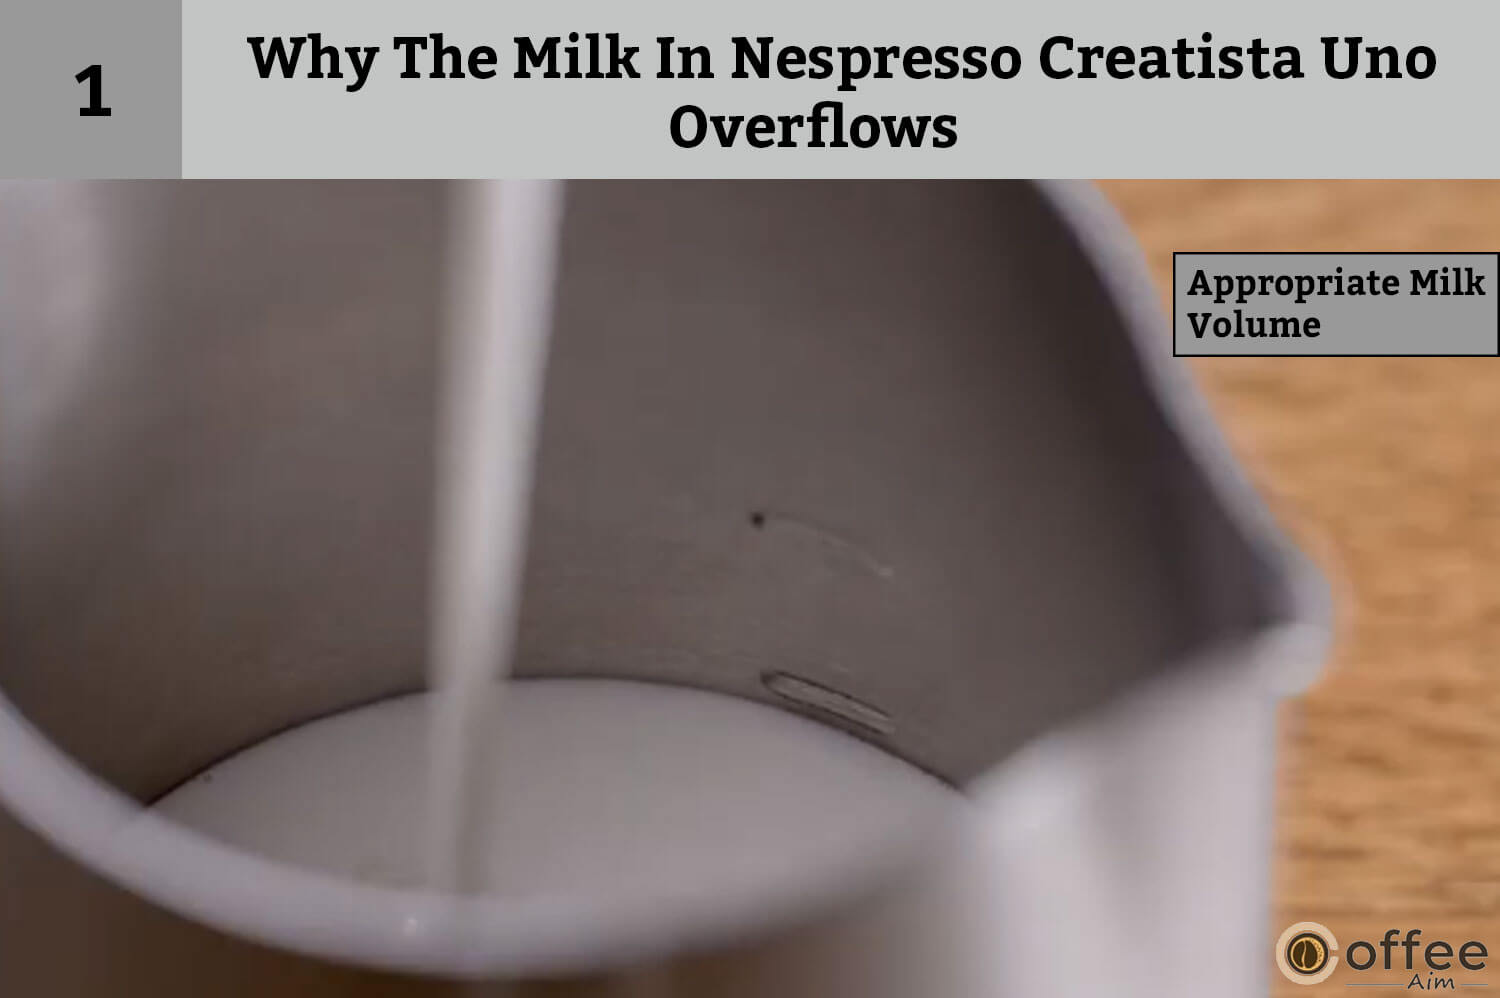
To prevent milk overflow when using your Nespresso Creatista Uno, it’s important to pay attention to the milk volume in the jug. The jug has minimum and maximum fill levels marked both on the inside and outside, which should guide you when measuring the appropriate amount of milk.
Make sure you fill the jug with the maximum amount of milk required for the drink you’re making, as marked on the inside and outside of the jug. Filling the jug beyond the maximum fill level will cause the milk to overflow when frothing, which can be messy and difficult to clean up.
Cause 2: Inappropriate Froth Level
Selecting the froth level plays an important role in the functionality of your brewing during frothing. If you are not using the froth level according to the type and quantity of milk, the milk may overflow.
Solution: Appropriate Froth Level
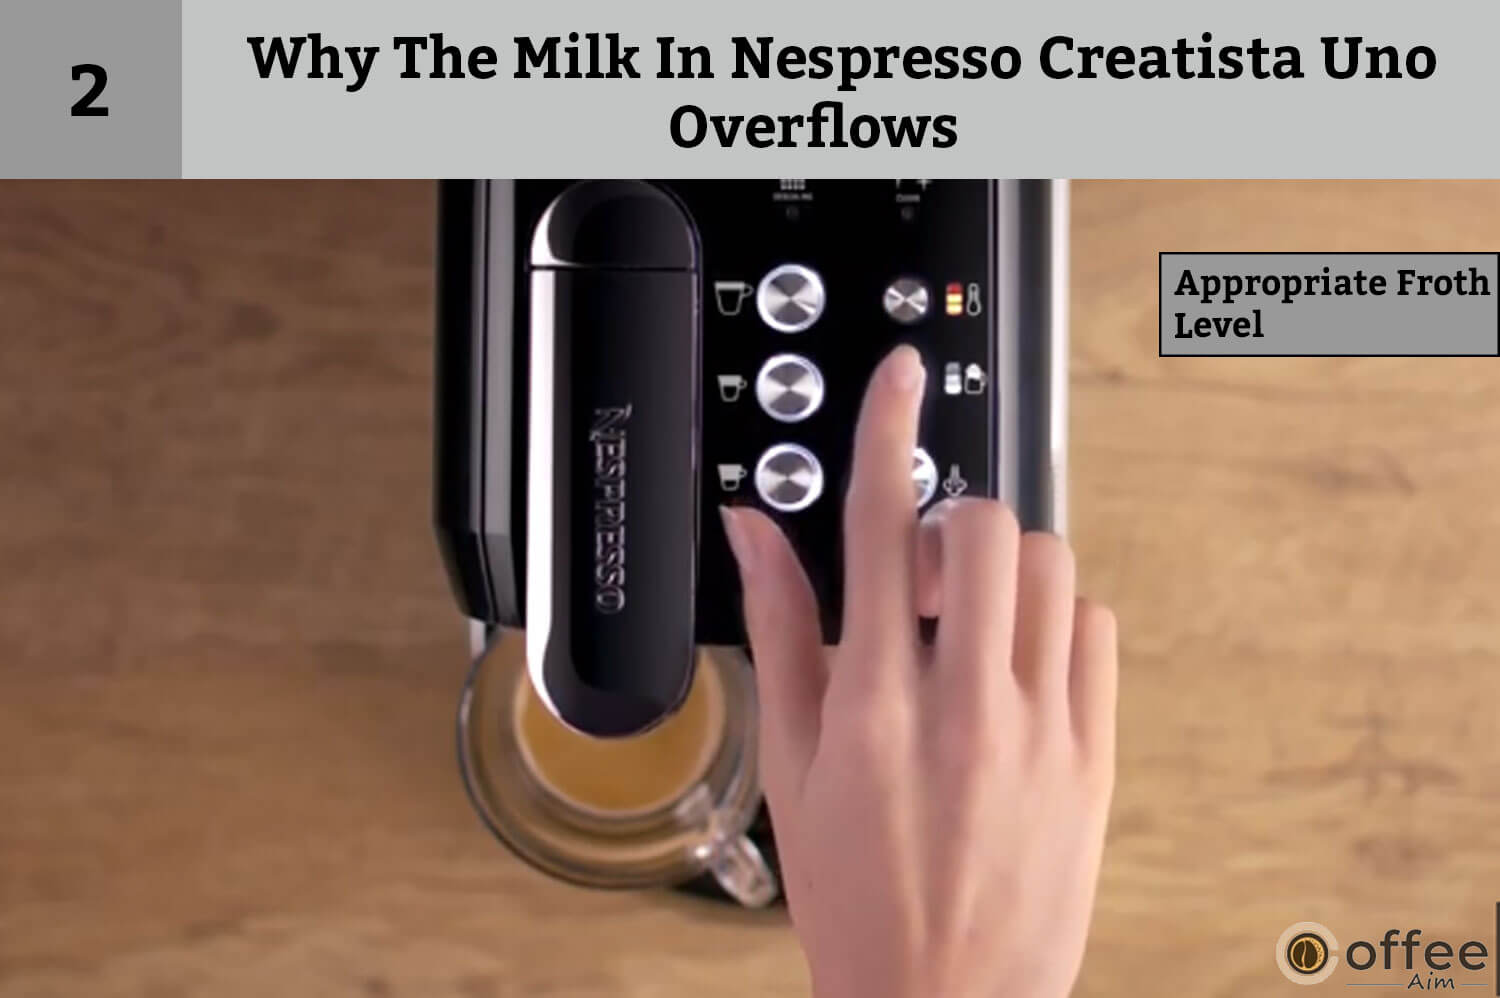
The method to stop overflowing is by reducing the initial volume of milk and/or reducing the froth level. The appropriate method to do this will depend on the type of milk you’re using. For example, if you’re using whole milk, reducing the initial volume of milk by a small amount and decreasing the froth level can help prevent milk overflow.
However, if you’re using almond or soy milk, which has a lower fat content, reducing the initial milk volume may not be enough, and you may need to decrease the froth level significantly. By experimenting with different milk types and adjusting the initial volume and froth level, you can find the right balance and prevent milk overflow from happening.
Problem 16: Why The Milk Temperature Is Too Hot In Nespresso Creatista Uno
If you’re finding that the milk temperature in your Nespresso Creatista is too hot, it can affect the taste and quality of your coffee, making it less enjoyable to drink. Let us explore the reasons and how you can fix this problem.
Cause 1: Wrong Temperature
One of the possible reasons for milk getting too high in your Nespresso Creatista Uno is the high milk temperature setting.
Solution: Decrease The Milk Temperature Setting
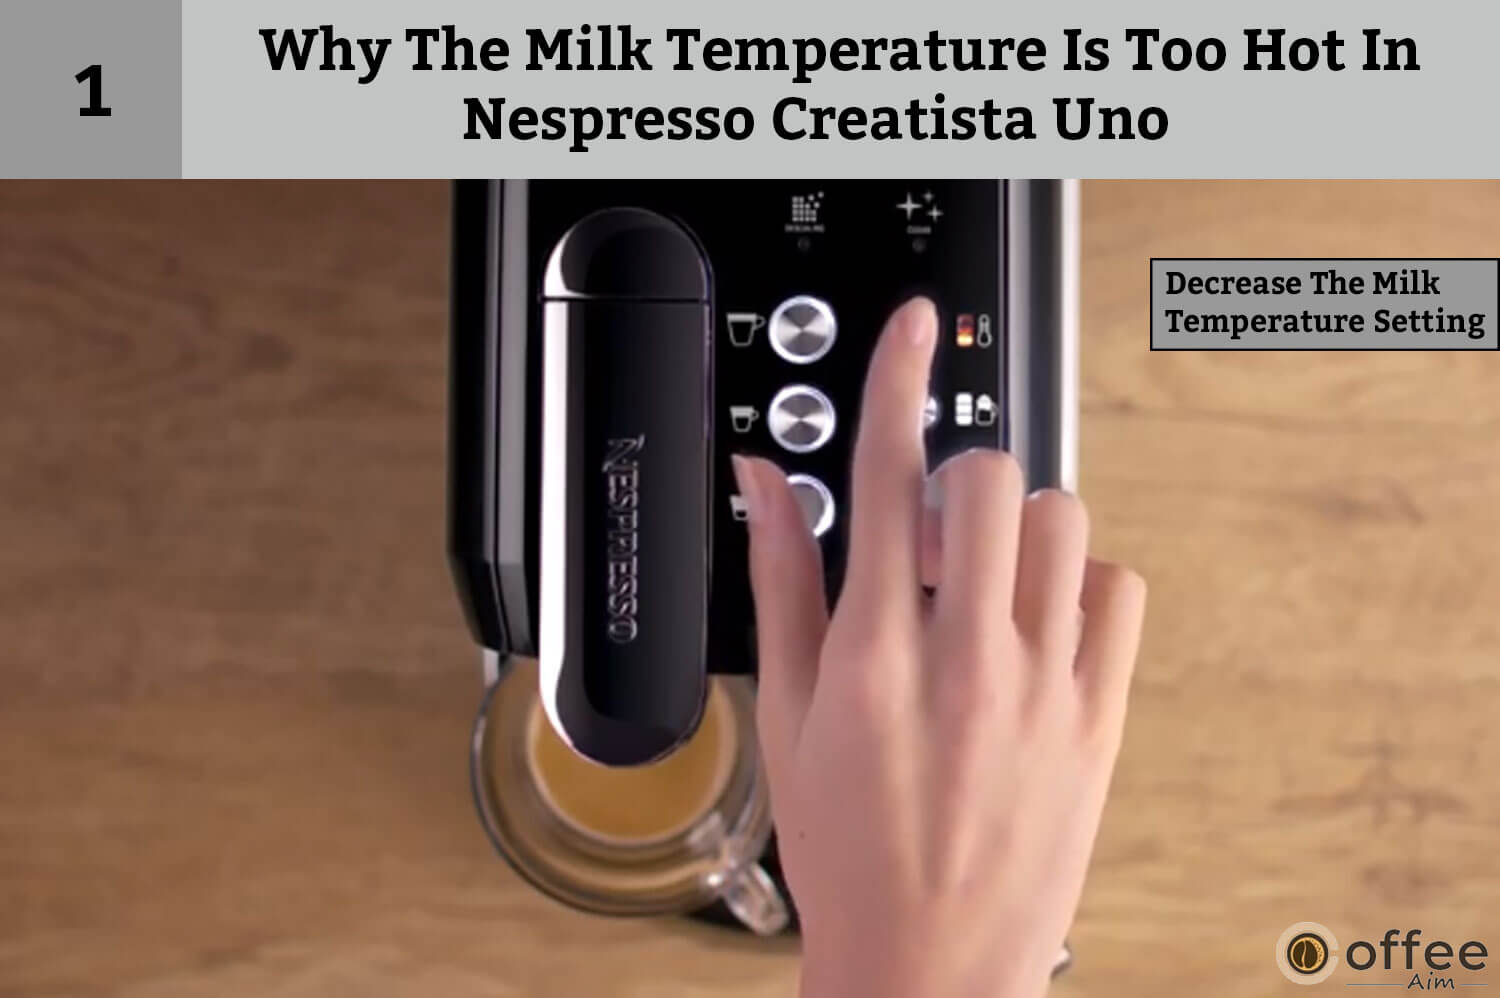
To adjust the temperature setting press the milk temperature button to adjust the temperature.
There are three levels of temperature that you can select. Press the button one time to set the lowest temperature
Problem 17: Milk Temperature Is Not Hot Enough
If you’re not having the desired milk temperature in your Nespresso Creatista Uno, it can be frustrating and take away from the enjoyment of your coffee. You need to do the following to fix this issue.
Cause 1: Cold Cup
Using a cold cup could be one of the possible reasons for you not getting a hot cup of coffee from Nespresso Creatis Uno. When you use a cold cup, the hot coffee turns cold after being dispensed in it.
Solution: Preheat The Cup

Preheating your cup can make a significant difference in ensuring that your coffee stays warm for longer. To preheat the cup, simply pour hot water into it and let it sit for a few minutes before discarding the water and adding your coffee.
Cause 2: Use Of Normal Jug
Using a normal jug for frothing milk also becomes a reason for a lukewarm coffee. The reason for this is that a normal jug does not have the specific design features that are needed for optimal milk frothing.
Solution: Use The Breville Provided Milk Jug
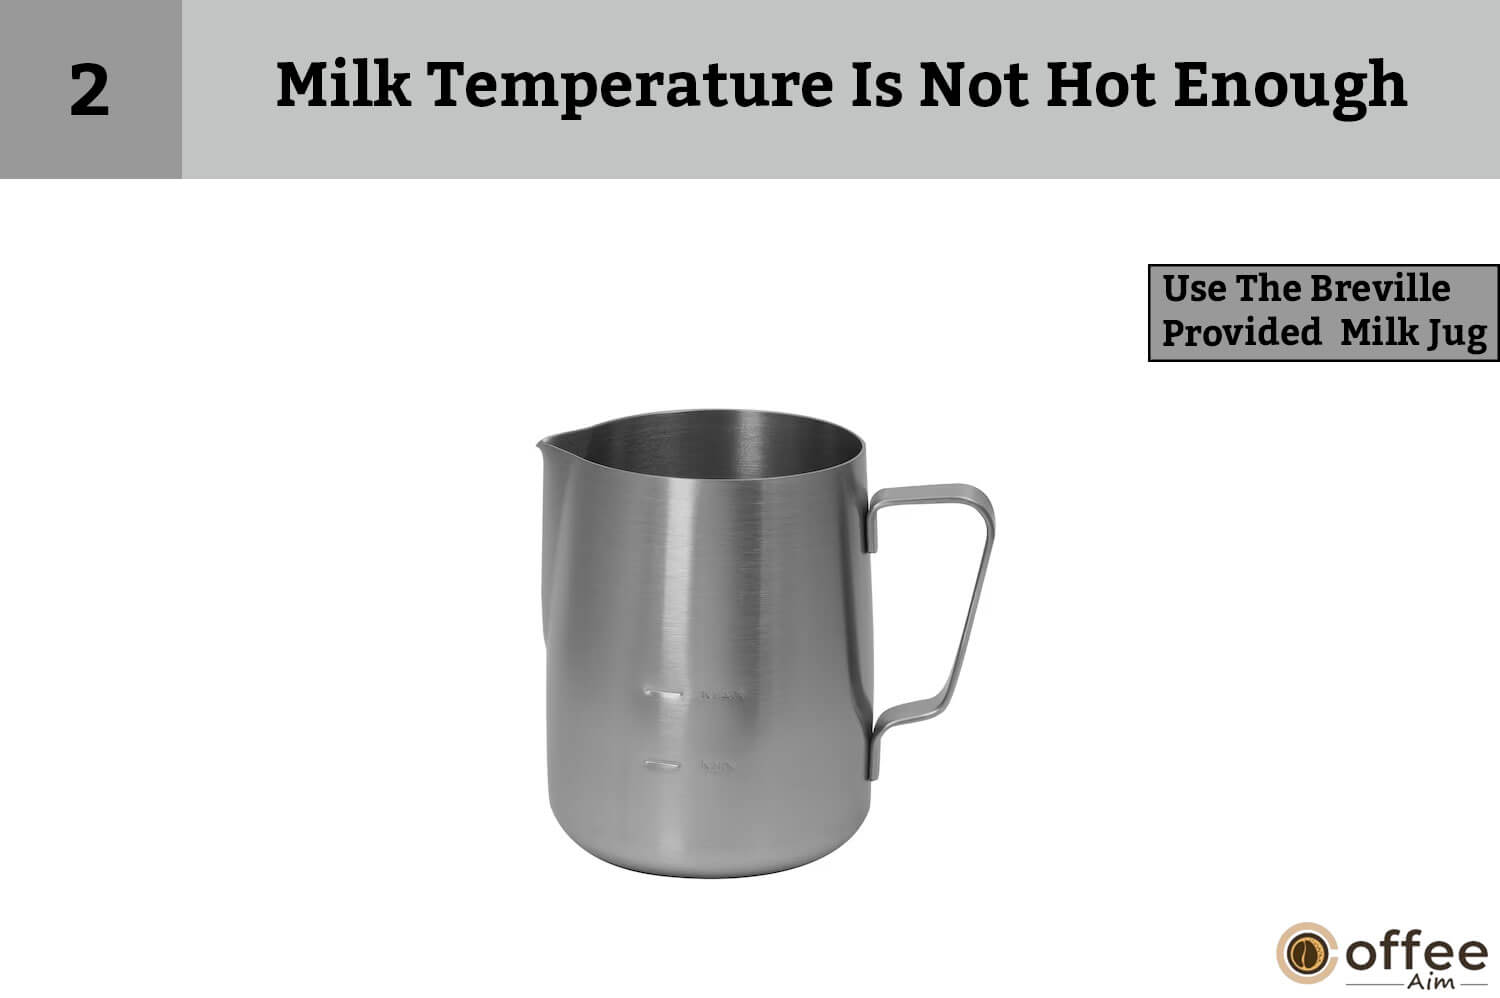
The Breville milk jug provided with your Nespresso Creatista Uno is specifically designed to work with the machine and is the best option to use for optimal milk frothing and temperature control. Using a different milk jug may lead to inconsistent milk temperatures and frothing.
Cause 3: Improper Milk Setting
Nespresso Creatita Uno comes with the option of setting the desired milk temperature for your coffee. If you are not getting a hot cup of coffee, then, the milk temperature settings on the nespresso need to be changed
Solution: Increase The Milk Temperature Setting
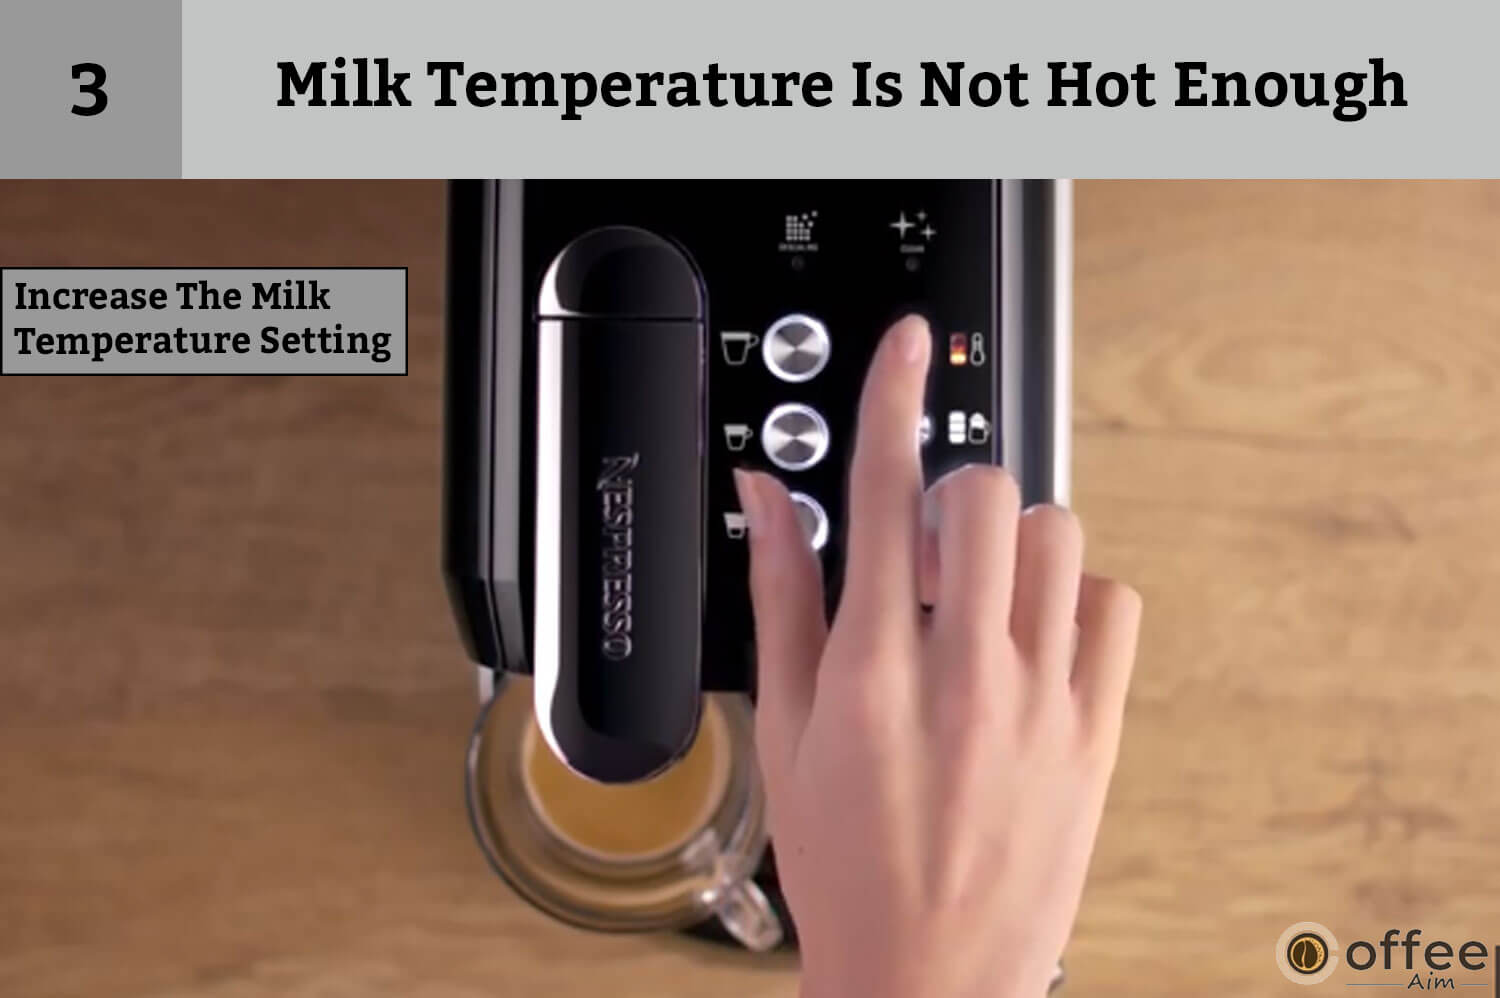
The other significant thing you can do for a hot milk temperature is to increase the milk temperature setting on your machine. This can be done by accessing the control panel and adjusting the milk temperature accordingly. Follow the steps to increase the milk temperature.
- Press the milk temperature button
- There are three levels of temperature that you can select.
- Press the button three times to set the highest temperature.
Cause 4: Steam Tip Is Blocked
If the steam tip is blocked, it can prevent the steam from properly heating the milk and your brewer makes you a cold coffee.
Solution: Check The Steam Tip For Blockages
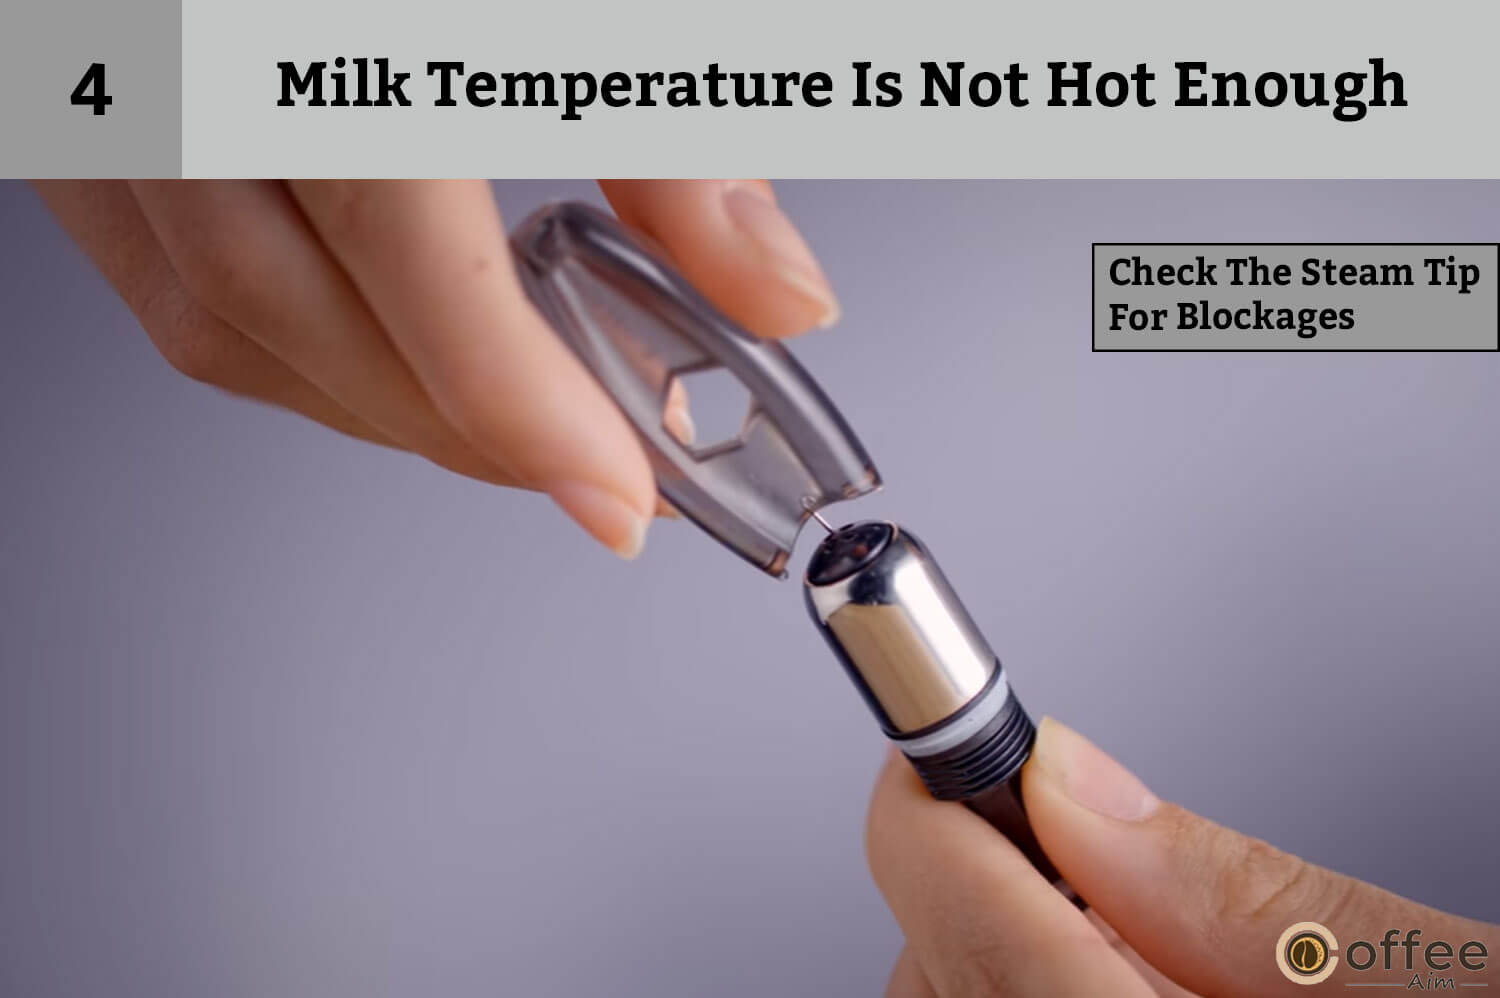
To check for blockages, remove the steam tip and clean it thoroughly with a cleaning solution or a small brush. Reattach the steam tip and try frothing the milk again.
Problem 18: Why The Clean Steam Wand Alert LED Is On
The Clean Steam Wand alert LED on your Nespresso Creatista Uno is an indication that it’s time to clean the steam wand. When the steam wand becomes clogged with milk residue or other debris, it can affect the quality of the froth and even damage the machine over time.
The machine sends alerts by illuminating the LED when it detects that the steam wand is blocked or after the machine has done 90 cycles.
Solution: Clean The Steam Wand
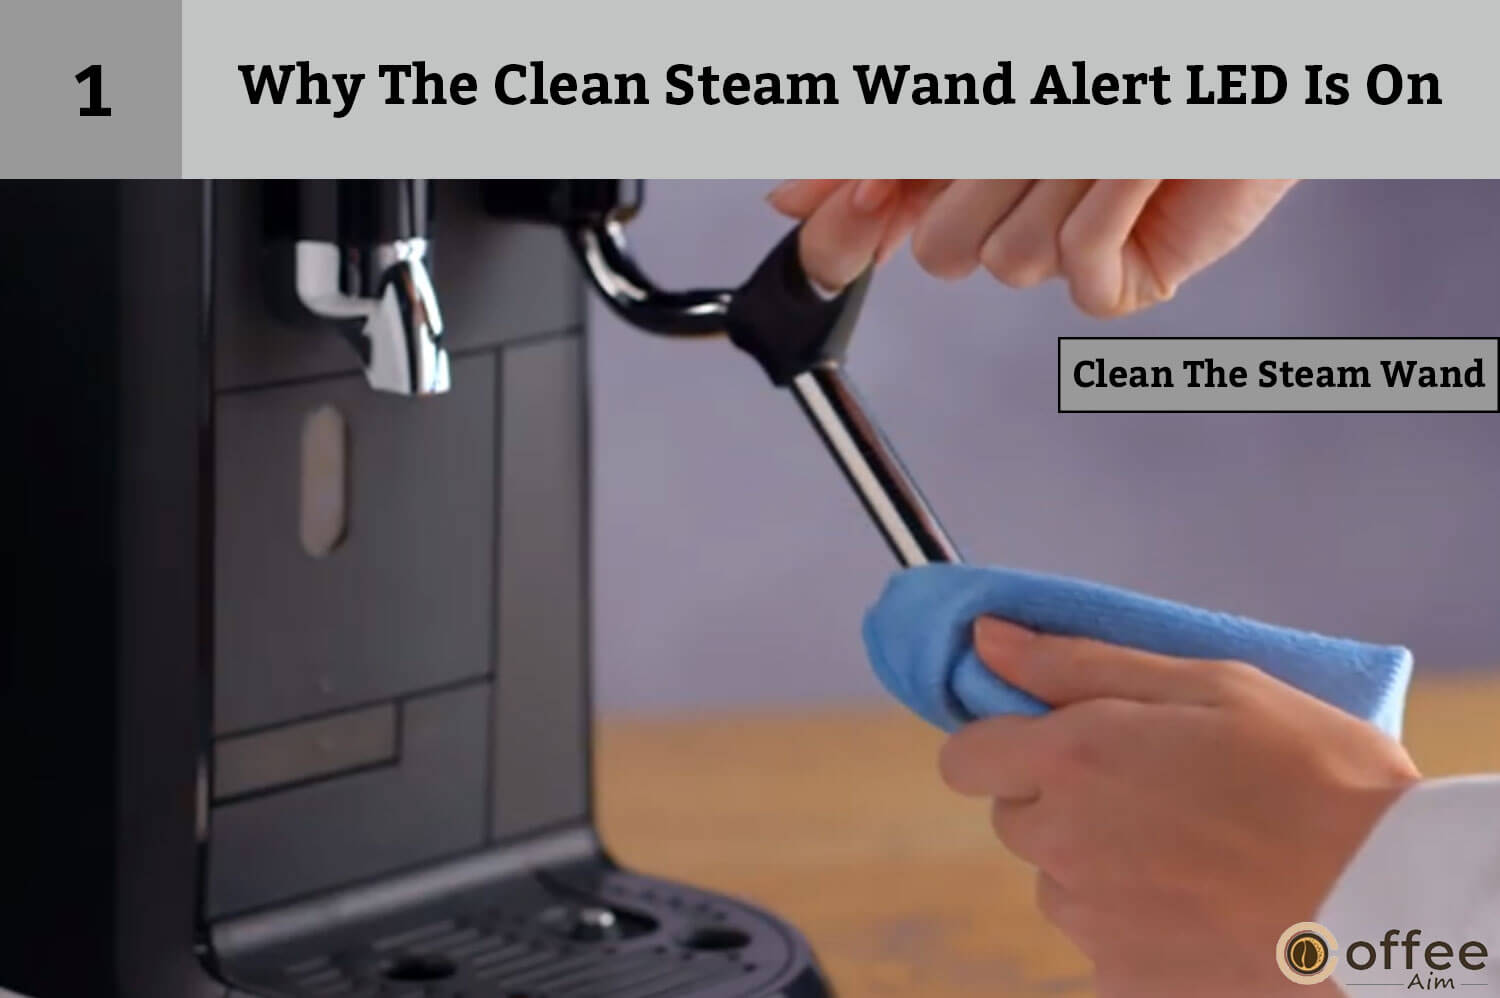
Cleaning the steam wand on your Nespresso Creatista Uno is a relatively simple process, which you do by yourself.
- Turn off your machine and unplug it from the power source.
- Wait for the steam wand to cool down completely.
- Remove the steam tip from the wand.
- Soak the steam tip in hot, soapy water for several minutes.
- Scrub the steam tip with a small brush to remove any milk residue or debris.
- Rinse the steam tip thoroughly with hot water.
- Wipe down the steam wand with a damp cloth to remove any remaining milk residue.
- Reattach the steam tip to the steam wand.
- Turn on the machine and test the steam wand to ensure it’s functioning properly.
Problem 19: Why Is Water Not Coming Out Of My Coffee Machine?
When you are using a new Nespresso Creatista Uno or the machine has been unused for an extended period, you may experience a situation where you detect no water flow after pressing the brew button. There are a few possible reasons why your Nespresso machine is not dispensing any water: Let us explore them and their solutions.
Cause 1: Inadequate Water Level
Ensure that the water tank is filled to an appropriate level and is correctly positioned. Nespresso machines do not come equipped with low-water sensors, so it is crucial to verify the water level before inserting a capsule.
Solution: Fill & Adjust The Water Tank

So, if the water tank is empty then fill it with fresh potable water up to the MAX FILL line and place it properly on its position.
Cause 2: Wrong Capsule Placement
Another cause of water not coming out of your Nespresso can be due to the wrong capsule placement. You are required to place the capsule in a specific way or orientation, and if it’s not done correctly, it can cause a blockage and prevent the water from flowing through.
Solution: Capsule Placement
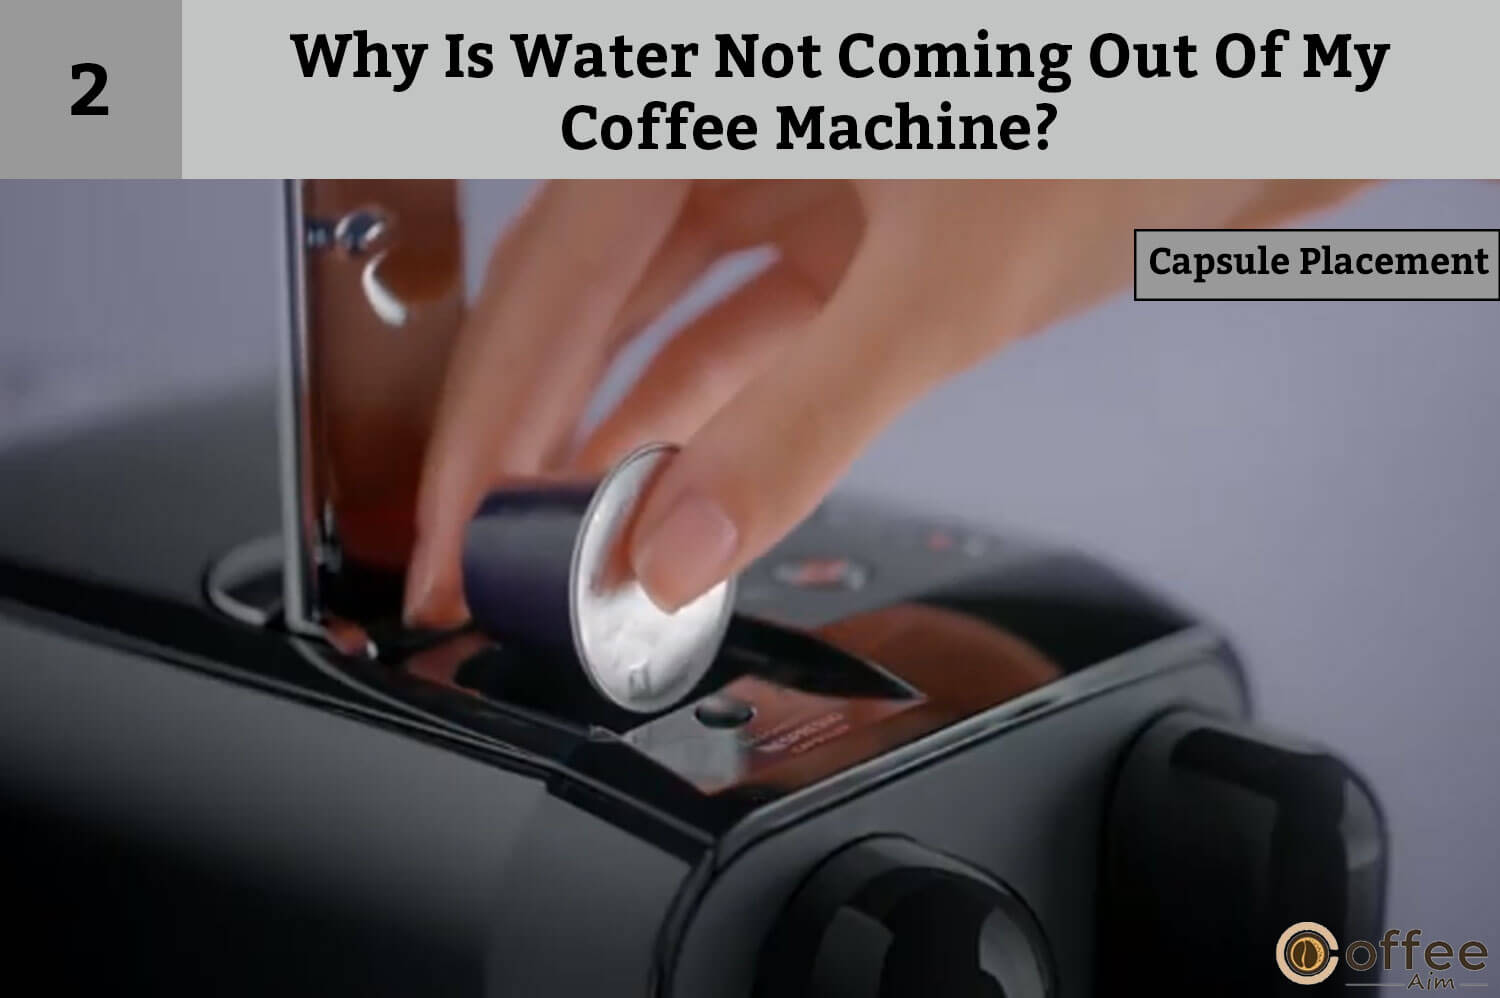
Check that the capsule has been inserted correctly and lying straight in the capsule holder and that the machine is locked and closed properly.
Cause 3: Brewer Is Clogged
The possibility of a clogged brewer always causes problems. Over time, coffee residue can build up inside the brewer and cause a blockage, preventing the water from flowing through. This can result in a slow drip or no water coming out at all.
Solution: Clean And Descale

By attempting a cleaning cycle and descaling the machine you can resolve the issue. Often, performing a rinse cycle can resolve any blockages that may be present.
Cause 4: Air Pocket
If the problem still persists, then there must be air blockage in the water pump. This commonly occurs when the water reservoir runs dry during the brewing process, resulting in the machine making a loud “whooshing” noise as it blows air through the system.
Solution: Release The Air Pockets
Even after refilling the water tank, you may still face the “airlock” problem when using the next pod. To resolve this issue, follow the steps below:
- Remove the capsule from the machine.
- Ensure that the water reservoir is connected correctly to the coffee machine.
- Press any of the coffee buttons (such as Lungo) to start brewing coffee. Repeat this process multiple times, which will help cycle out the air. Air bubbles will come out during the first few tries, but after two or three attempts, your Nespresso machine will change its sound and start working correctly.
- Once the air is cycled out of the machine, re-insert the capsule and brew coffee as usual.
- If the problem still does not resolve, contact Nespresso for assistance.
Problem 20: Why Does The Nespresso Creatista Uno Stop After A Few Seconds
If your Nespresso Creatista Uno stops after a few seconds, there may be some common reasons why this is happening. Try the following solution to get rid of this issue.
Cause 1: Needs To Be Descale
One of the causes of your Nespresso Creatista Uno stopping after a few seconds is that the machine needs descaling,
Solution: Descale Your Brewer
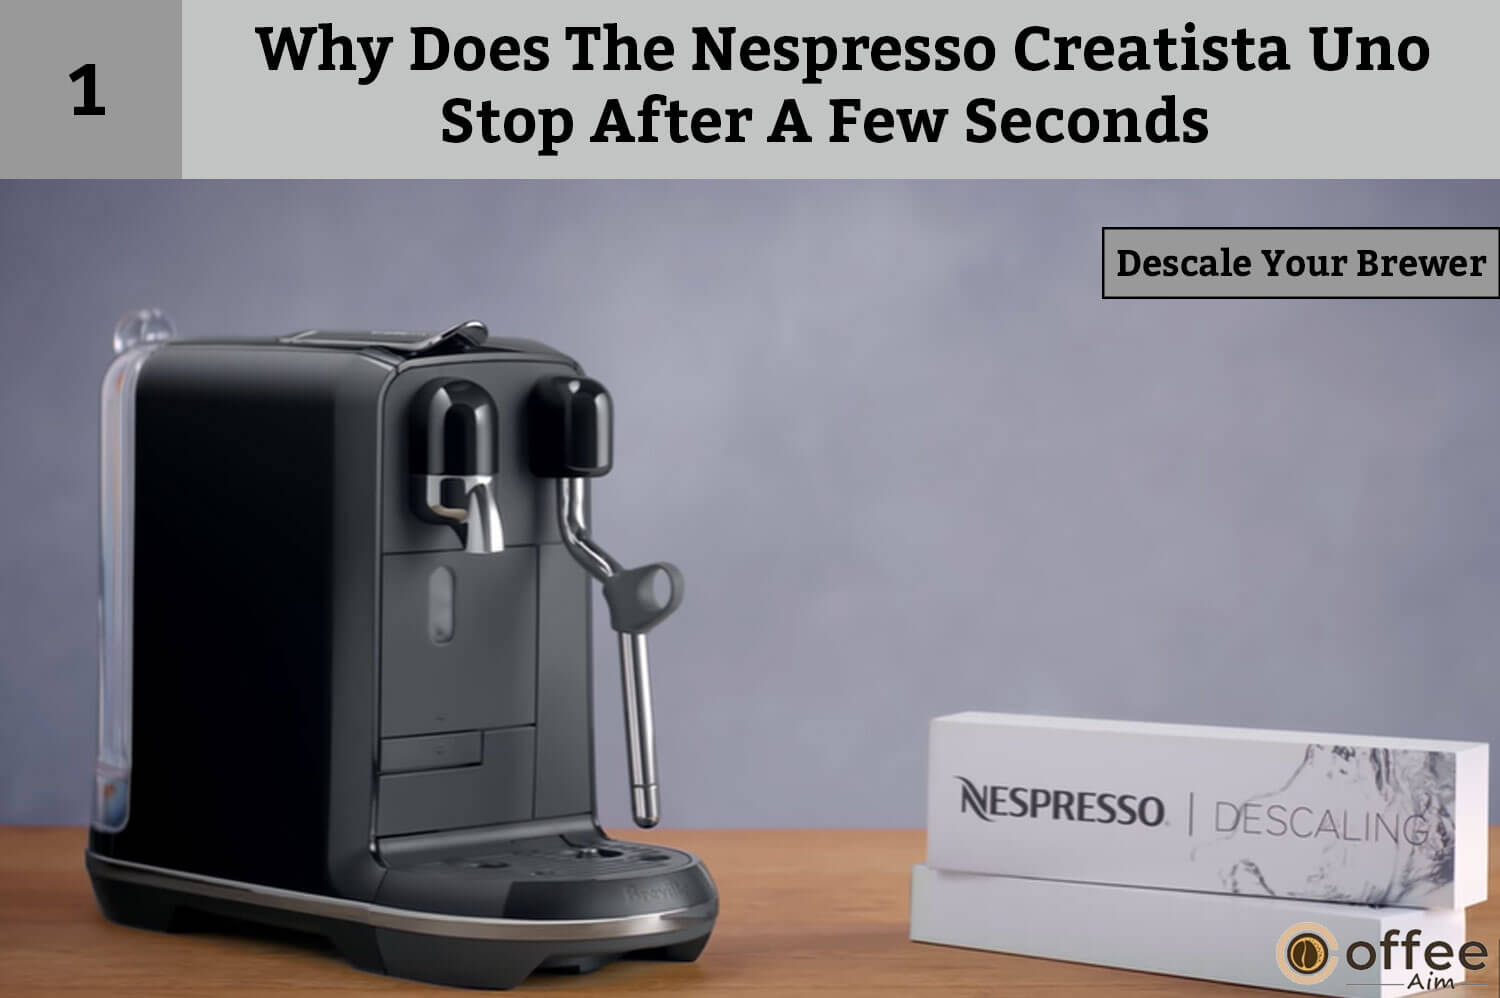
One of the first things to try if your Nespresso machine is stopping after a few seconds is to descale it. Pour the descaling agent and water into the water tank, and run the descaling process. For a detailed process click on the link: How to Use Nespresso Creatista Uno
Cause 2: Problem In Water Reservoir
Another cause of the Nespresso Creatista Uno stopping after a few seconds can be a problem with the water reservoir. If the water reservoir is not correctly positioned or if there is an issue with the water level sensor, the machine may not be able to detect that there is water in the reservoir and will stop the brewing process
Solution: Check The Water Level

The water level in the water reservoir should be at the required level in order to have a smooth and continuous flow. Additionally, check if the water reservoir is securely seated on the base and ensure that it clicks into its place because if the machine detects ill placement of the water reservoir, it would stop in the middle of the process.
Problem 21: Why Is My Nespresso Creatista Uno Not Pumping Milk
If your Nespresso Creatista Uno machine isn’t pumping milk, there are a few steps you can take to troubleshoot and potentially fix the issue:
Cause: Problem With Milk Jug And The Steam Wand
The cause of poor milk pumping in your Nespresso can be due to the milk jug not being properly attached to the machine or a clogged milk frother. If the milk jug is not properly attached, it can cause air to enter the milk frother and prevent the milk from being frothed correctly. Similarly, if the steam wand is clogged with milk residue, it can prevent the machine from creating the desired texture and consistency of milk froth.
Solution 1: Check The Milk Jug
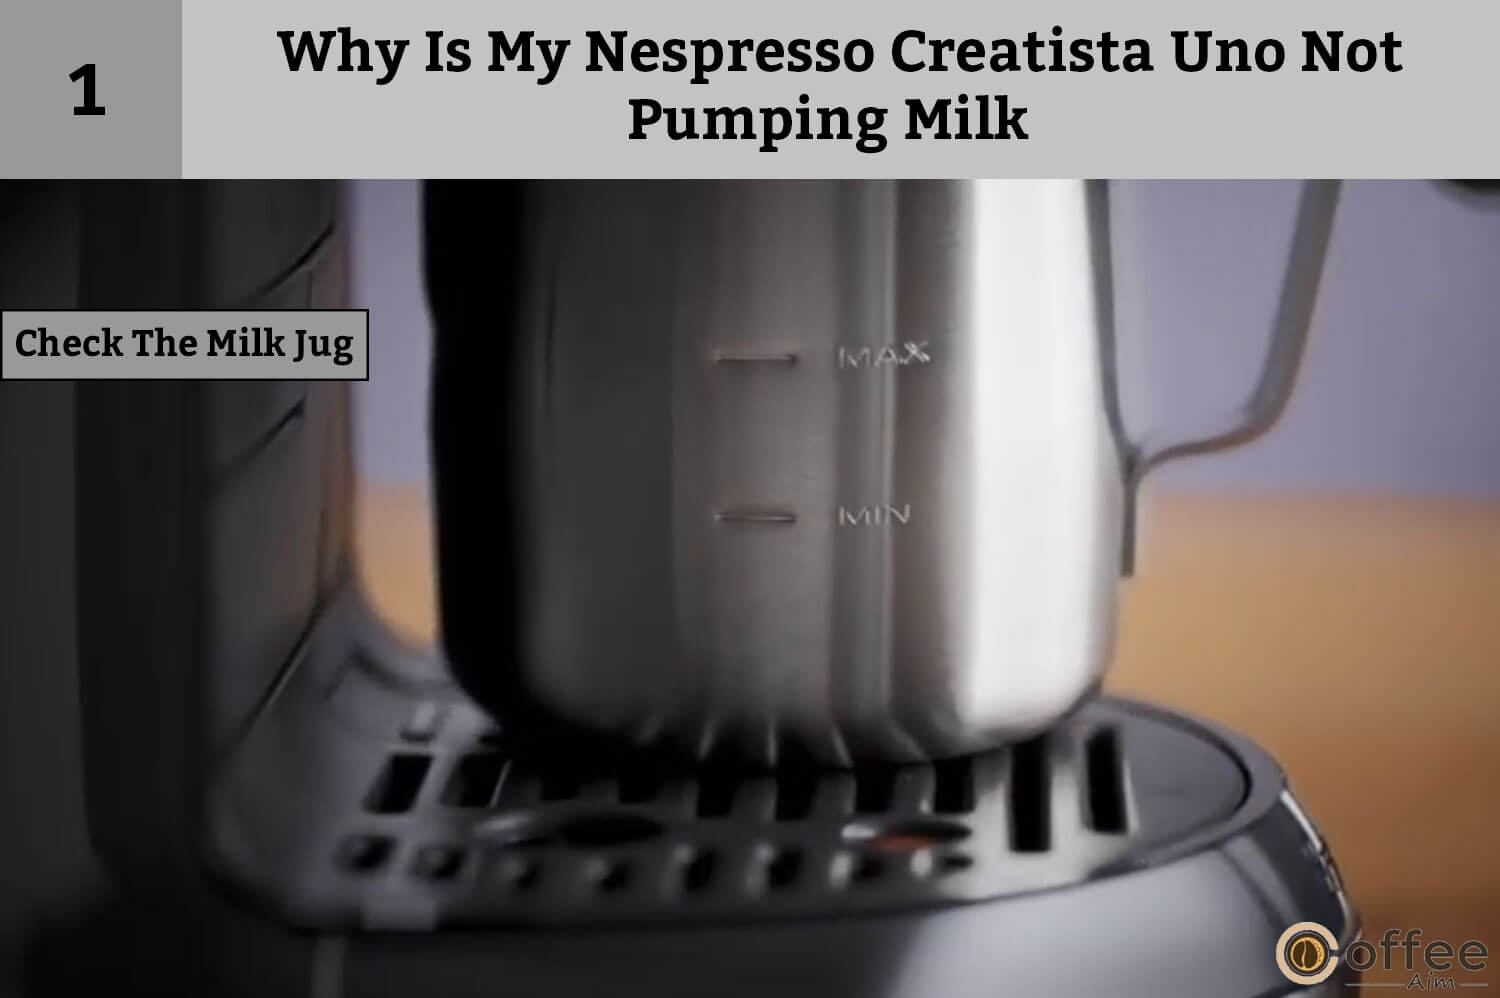
Adjust the milk jug properly and make sure it is attached to the machine.
Solution 2: Clean The Steam Wand
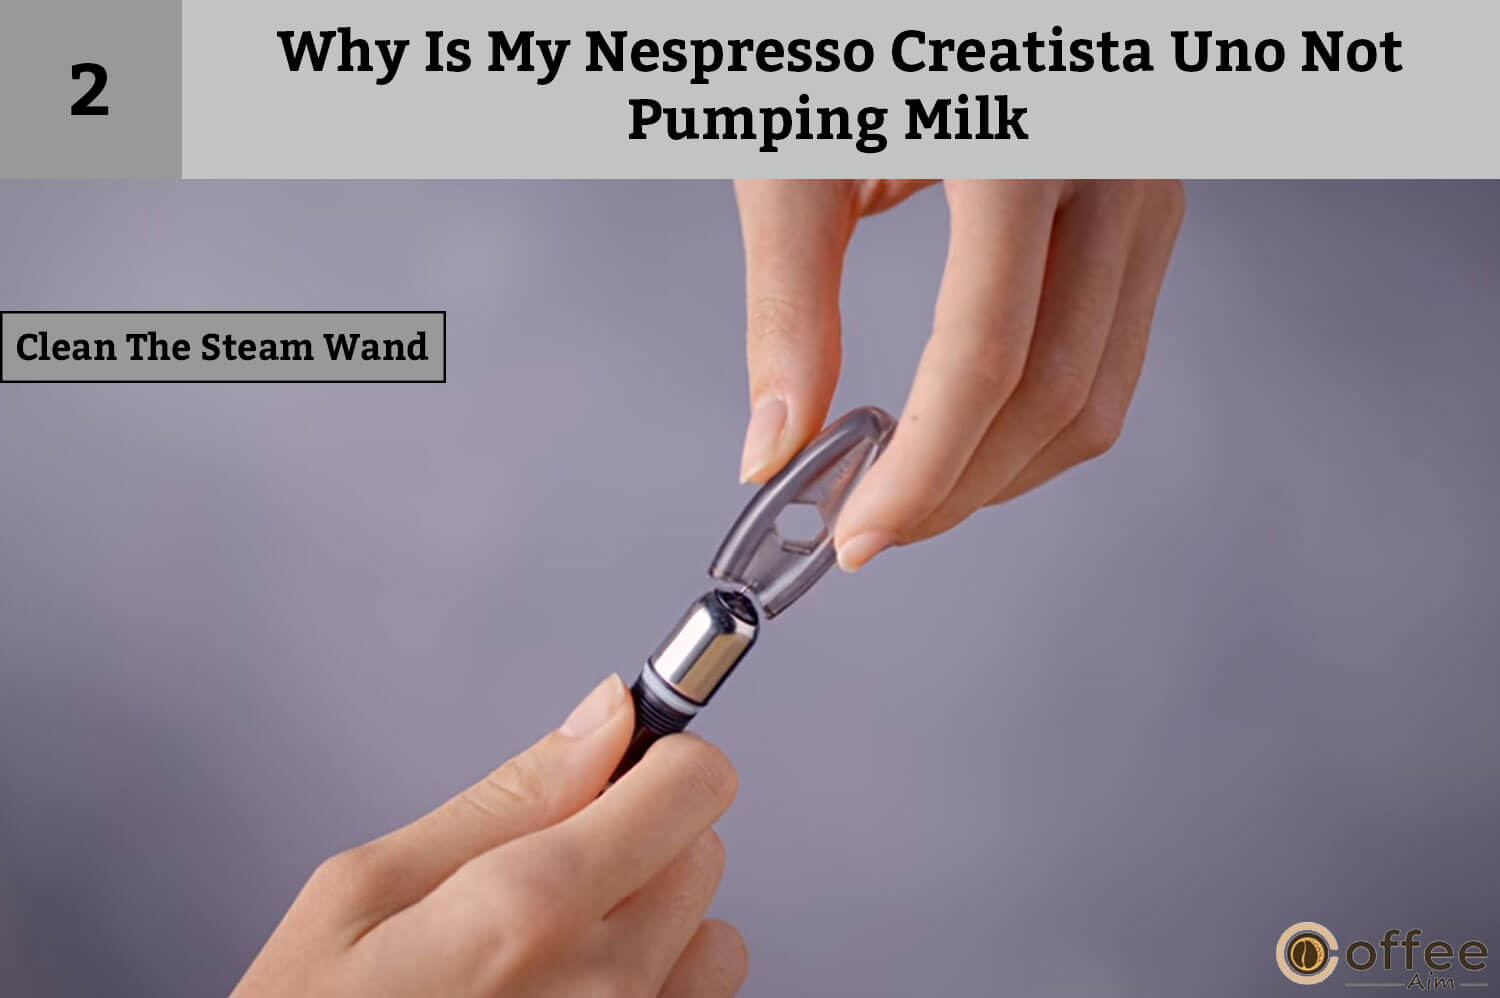
If the steam wand is clogged, clean it with the use of a pin-cleaning tool.
- Unscrew and remove the tip
- Clean each hole using the pin-cleaning tool.
- Remove the steam pipe using a pin tool.
- Clean any milk residue by washing it with water
- Finally, wipe it with a damp cloth.
Cause 2: Machine Is Clogged
The problem of poor milk pumping could be due to the buildup of residue in the machine, which can interfere with milk processing.
Solution: Descale The Machine
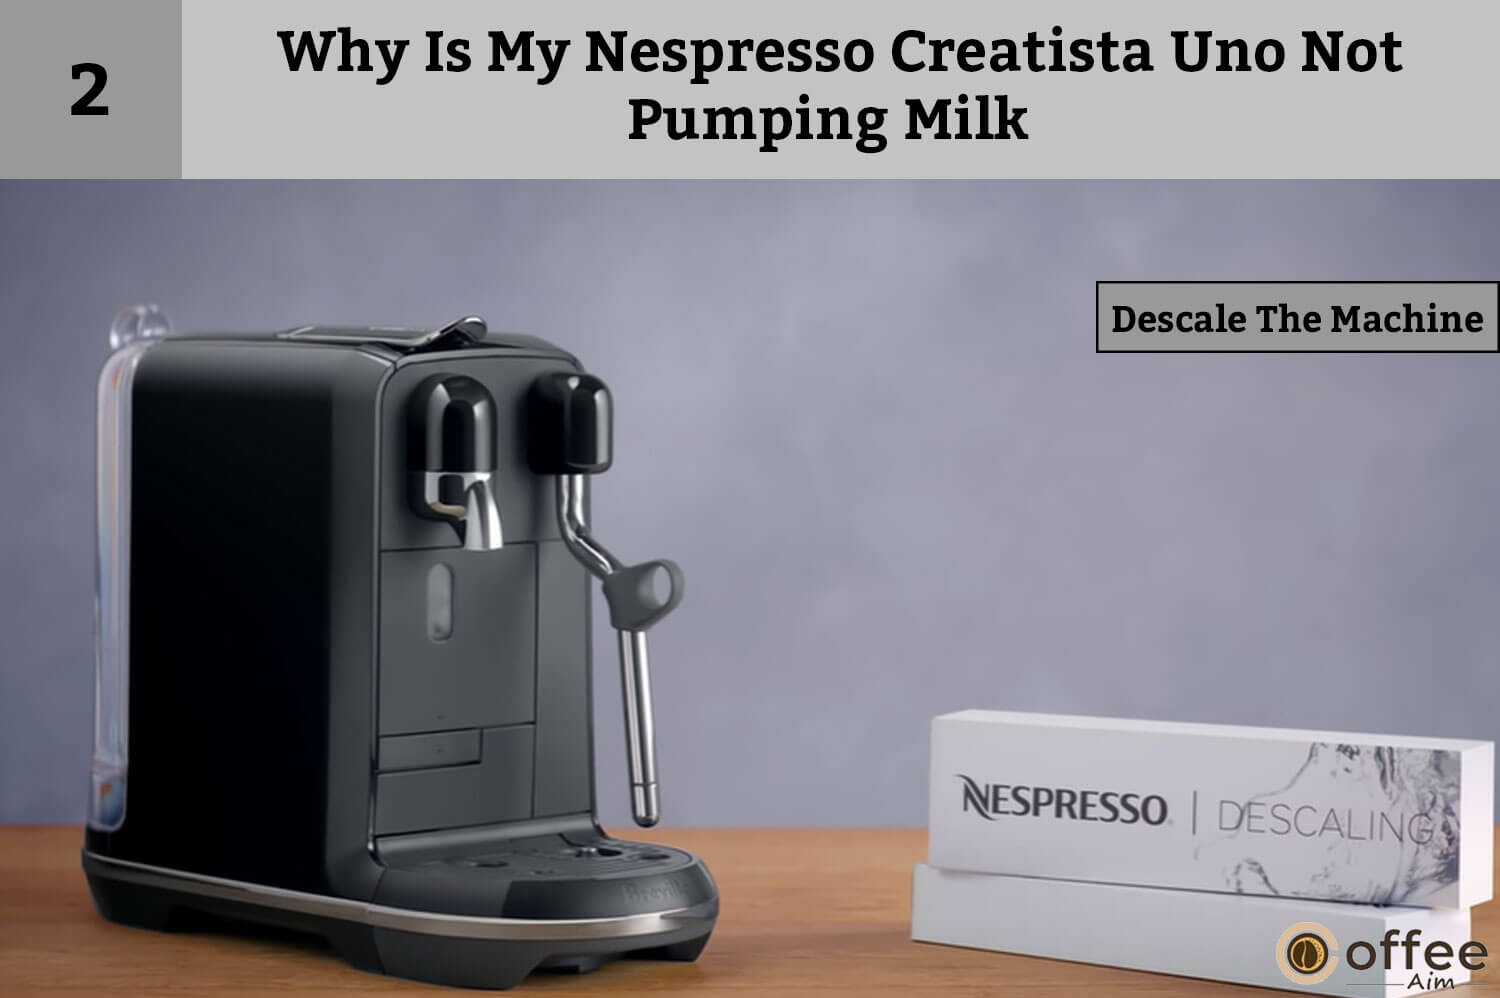
If none of the above steps worked, try cleaning the machine. Run a descaling cycle with the Nespresso descaling solution, which will help remove any buildup in the machine that could be interfering with the milk pumping.
Problem 22: Why Is Nothing Coming Out Of My Nespresso Creatista Uno
If nothing is coming out of your Nespresso Creatista Uno, there could be a few possible reasons:
Cause 1: Problem With Water Reservoir
The problem of Nespresso machines not brewing coffee can be due to the water reservoir not being properly filled or in the correct position.
Solution: Check The Water Reservoir

Check to make sure that the water tank is properly filled and in the correct position. Nespresso machines do not have low-water sensors, so you may need to manually check the water level before brewing.
Cause 2: Airlock
If you hear a loud “whooshing” noise coming from the machine, it may indicate an airlock. This can happen when the machine runs dry and needs to cycle the air out of the machine.
Solution
To resolve the issue of air in your Nespresso machine, there are a few steps that can be taken. First, remove the capsule from the machine to prevent any damage from occurring. Then, ensure that the water reservoir is connected correctly to the coffee machine to ensure proper functioning. To cycle out the air, press the coffee button (such as Lungo) to start brewing. Repeat this step multiple times. During the first few tries, air may come out of the machine, but after two or three attempts, the Nespresso machine will change its sound and operate correctly. Once the air is cycled out of the machine, re-insert the capsule and brew coffee as usual.
Cause 3: Clogged And Blockage
It is also possible that your Nespresso Creatista Uno is clogged or facing blockage in its capsule unit because if something is clogged or blocked in the machine, it starts blocking the way for water and coffee.
Solution 1: Clogged Machine

If the machine is clogged, it may prevent the coffee from flowing through. Clean the machine regularly to prevent this issue.
Solution 2: Blocked Capsule
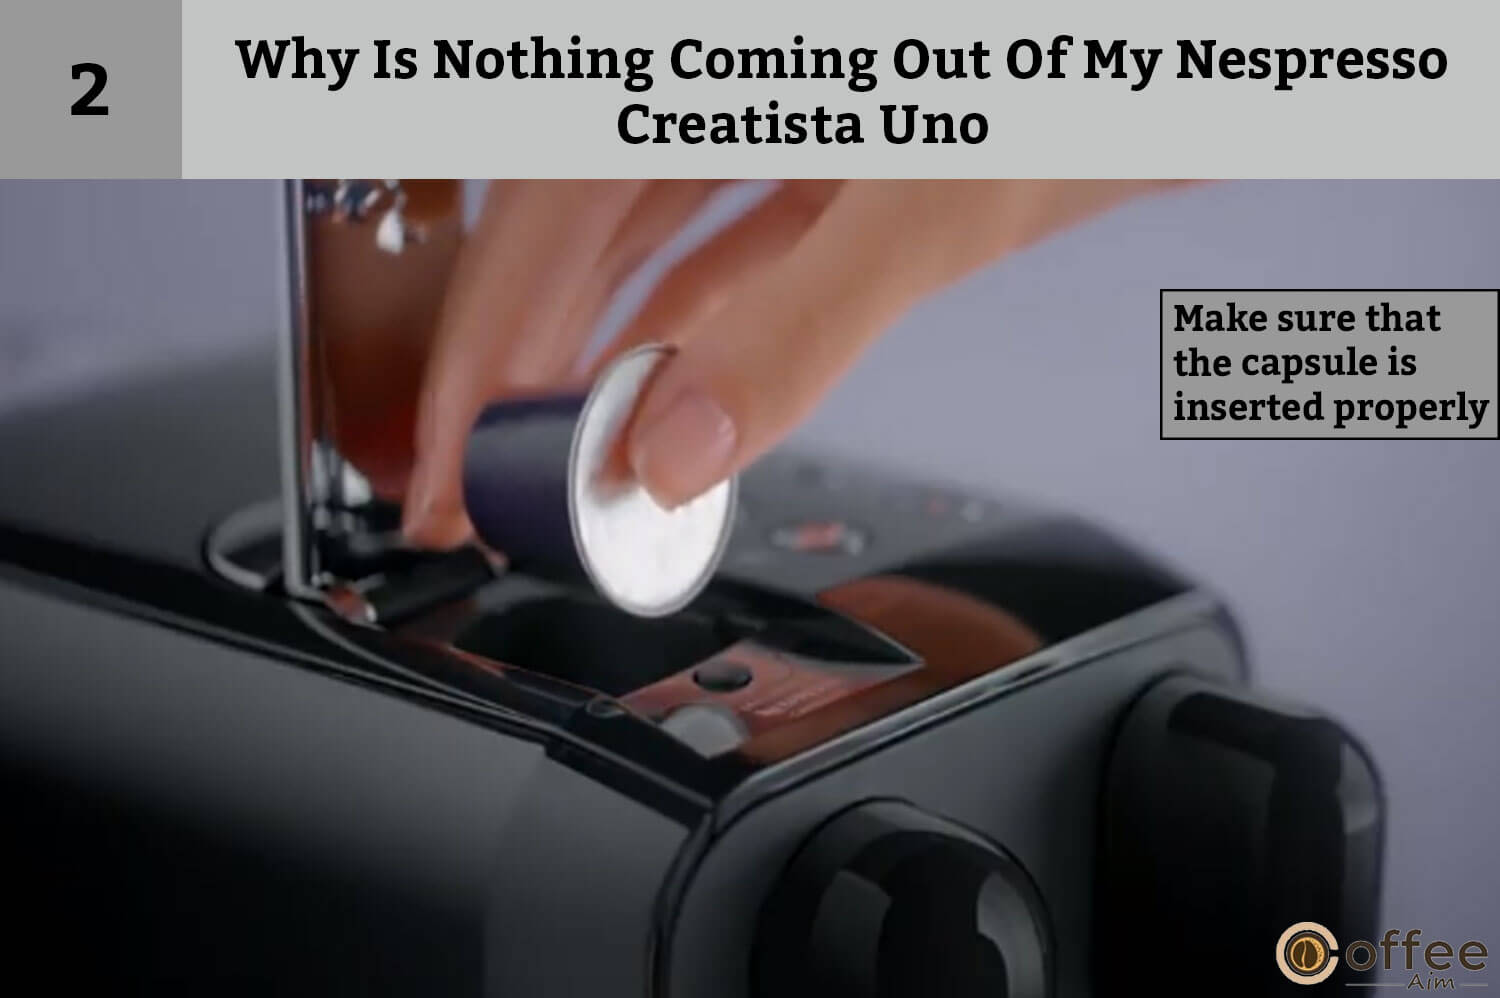
Check to make sure that the capsule is inserted properly and that the capsule unit is not blocked. Remove the capsule and try again.
Problem 23: What Do I Do If My Nespresso Won’t Turn On
Your Nespresso is probably not turning on due to the power issue. Try doing the following to rule out the possibility of power breakage for this particular issue.
Cause: Power Issue
One of the reasons why your brewer does not turn on is due to inadequate power transfer. If the power outlet or cable is damaged or not providing enough voltage, it can cause the brewer to not receive enough power to turn on.
Solution 1: Check The Plug And Socket

Check the plug and ensure it is inserted properly into a dedicated outlet. Check for any signs of damage or issues with the outlet. It’s important to avoid plugging any other devices or appliances into the same outlet as the Nespresso.
Solution 2: Check The Fuse

Check the fuse of the outlet or the circuit breaker panel that supplies power to the outlet. A blown fuse or tripped circuit breaker can prevent the outlet from providing power to your device.
If everything is working perfectly fine, contact Nespresso Club as your brewer is facing internal damage.
Problem 24: Why My Nespresso Creatista Uno Descaling Doesn’t Work
If Nespresso descaling does not work, there may be several reasons for this, such as a clogged water line or a malfunctioning pump.
Cause: Clogged Water Line Or A Malfunctioning Pump
A clogged water line or a malfunctioning pump can both cause problems with the flow of water in a pumping system. A clogged water line occurs when debris, sediment, or other materials build up inside the pipes, blocking the flow of water. Similarly, a malfunctioning pump can also lead to issues with water flow. Pumps are responsible for moving water through the pipes, and when they are not functioning properly, the water may not be able to circulate as it should. This can result in low water pressure or a complete lack of water flow, depending on the severity of the pump malfunction
Solution: Contact Nespresso Club

In situations like this, it is recommended to contact Nespresso customer service for assistance. They may recommend the troubleshooting steps or arrange for a repair or replacement of the machine if it is still under warranty. It’s important to address the issue promptly to ensure that your Nespresso machine continues to function properly and produce high-quality coffee.
Problem 25: Why Won’t The Descale Light Go Off In Nespresso?
Sometimes, the descale light does not turn off even after running a descaling cycle. Let’s delve into the reasons why this happens and what are the possible solutions.
Cause: Improper Rinse
If the descale light on your coffee machine remains on even after descaling, it could be because you didn’t rinse your Nespresso Creatista Uno with enough water. To resolve this issue, try giving a cleansing brew, as the remains of particles are still present in the brewer. I will walk you through the steps to fix this problem.
Solution: Repeat The Water Rinse
- Fill a bowl with fresh water and put it under the coffee outlet.
- Start the rinsing by pressing the Lungo button.
- Wait for the machine to finish rinsing.
- Once finished, empty the container and the drip tray.
- Refill the water tank with tap water.
- Check if the light indicating the need for descaling has turned off.
Have A Perfect Brewing Experience
It is my hope that the article I have provided will assist you in alleviating any stress and resolving any issues you may have had regarding your Nespresso Creatista Uno. By following the tips and advice outlined in the article, you can confidently tackle any challenges you may encounter with your machine and enjoy a smooth, hassle-free coffee-making experience.
From the Article, you may have gotten the pivotal importance of running a descaling cycle in your brewer. Regular descaling can prevent your Nespresso from having issues. On the contrary, neglecting to descale regularly could lead to a plethora of problems that will leave your coffee experience less than satisfying. That’s why experts recommend descaling every three months or as soon as your machine’s indicators urge you to do so. By taking this simple step, you can prevent mineral buildup and blockages that could hinder your machine’s output and quality of coffee.
Will See You Again
Looking for more high-quality coffee content? Head over to www.coffeeaim.com, where you’ll discover an enchanting world of coffee enthusiasts who share your passion. From coffee brewing techniques to the latest coffee gadgets, this website has everything coffee lovers need to deepen their knowledge and appreciation of coffee. So, whether you’re a seasoned barista or a coffee newbie, there’s something for everyone to enjoy in the magical world of CoffeeAim.
Happy Coffee Sipping!
FAQs
How Long Does It Take For Creatista To Heat Up?
After turning on the brewer, it takes approximately 3 seconds for the machine to heat up. Once heated, the Lungo button will illuminate, indicating that it’s ready to brew. To start the brewing process, place an empty jug under the coffee outlet and press the Lungo button. This will initiate the brewing cycle, and your coffee will begin to flow into the jug.
Can You Run Vinegar Through A Nespresso To Clean It?
Absolutely! You can clean your machine by filling the container with a solution of 2 parts water and 1 part white vinegar. Once you have the solution ready, run it through the machine, ensuring that it cycles completely. After running the vinegar solution through the machine, it’s essential to follow up with five additional cycles using plain water. This ensures that all traces of the vinegar solution are removed, leaving your machine clean and ready for its next use. However, keep in mind that using Vinegar is not recommended by Nespresso.
How Do I Reset My Nespresso Uno?
To restore your Nespresso Uno machine to its factory settings, follow these simple steps. Power ON the machine.
- Press and hold the Lungo button and the Ristretto button simultaneously for 5 seconds.
- Press either the Lungo or Ristretto button to confirm, and press any non-blinking button to exit the mode.
How Do I Get My Nespresso Creatista Uno Out Of Power Save Mode?
You can get out of “Auto Off Mode” on your Nespresso machine, by pressing the button for the type of coffee you want to make, such as Ristretto, Espresso, or Lungo. This action will switch the machine to the “ON mode,” allowing it to remain active before turning off again after a period of inactivity.