Quick Navigation
Ready to brew your first cup of delicious coffee with your Keurig B-55? No! But why? Don’t you know how to operate this coffee machine? Don’t worry! Whether you have recently bought your Keurig B-55 or have been using it for a long time but are now stuck at the same point, “How to use Keurig B-55”, you will get answers to all your questions. Without extending the talk, let’s get straight into the main topic!
Safety Precautions
What is worse? Taking precautions first or facing severe damage later? Do not overlook it! Your coffee maker is an electrical appliance, and you should treat it carefully. If not, it could result in significant issues like fire eruptions or other accidents. As a result, you must first review all the safety measures.
Specifications
To have a delightful coffee journey, compatibility between the human and the machine is a must. So, it is better to overview all the specifications of your Keurig B-55, and if you find it a misfit for you, then fear not. Be wise and return your coffee machine to avoid any later-on headaches. Let’s check them out!
| Specifications | Details | |
| Product Line | Keurig 1.0 Signature | |
| Compatibility to K-Cups | Unlicensed K-CupsKeurig 2.0 licensed K-CupsMy K-Cup (Ground coffee) | |
| Power | Watts(W) | 1500 |
| Brew Volume | Large Cup(oz/ml) | 8/236.6 |
| Small Cup(oz) | 6/177.4 | |
| Water Reservoir Capacity | oz/L | 48/1.4 |
| Weight | lbs | 7.6 |
| Dimensions | Width(in) | 10.1” |
| Depth(in) | 13.2″ | |
| Height(in) | 13.3″ | |
| Temperature Control | No | |
| Water Filter | Compatible (Not included) | |
| Strength Control | No | |
| Display | LCD DisplayMenu button2 Brew buttons | |
| Other Features | Quiet Brew TechnologyAuto-ON/OFF Feature24-hour Digital ClockDrip Tray (Removable)K-Cup Variety pack | |
What Will You Find Inside The Box?
So, you have recently received your Keurig B-55 Brewer machine? Now, it’s time to unbox. Wait! Before unboxing, have a clear vision of what you should look for inside the box. So, whenever you purchase a Keurig B-55 from any online store, it comes with certain mandatory items. So, I am enlisting these items below. Carefully check for these items in your parcel, and if you find anything missing, then contact the seller and ask for a new order. Let’s get started!
1. Keurig B-55 Brewer Machine
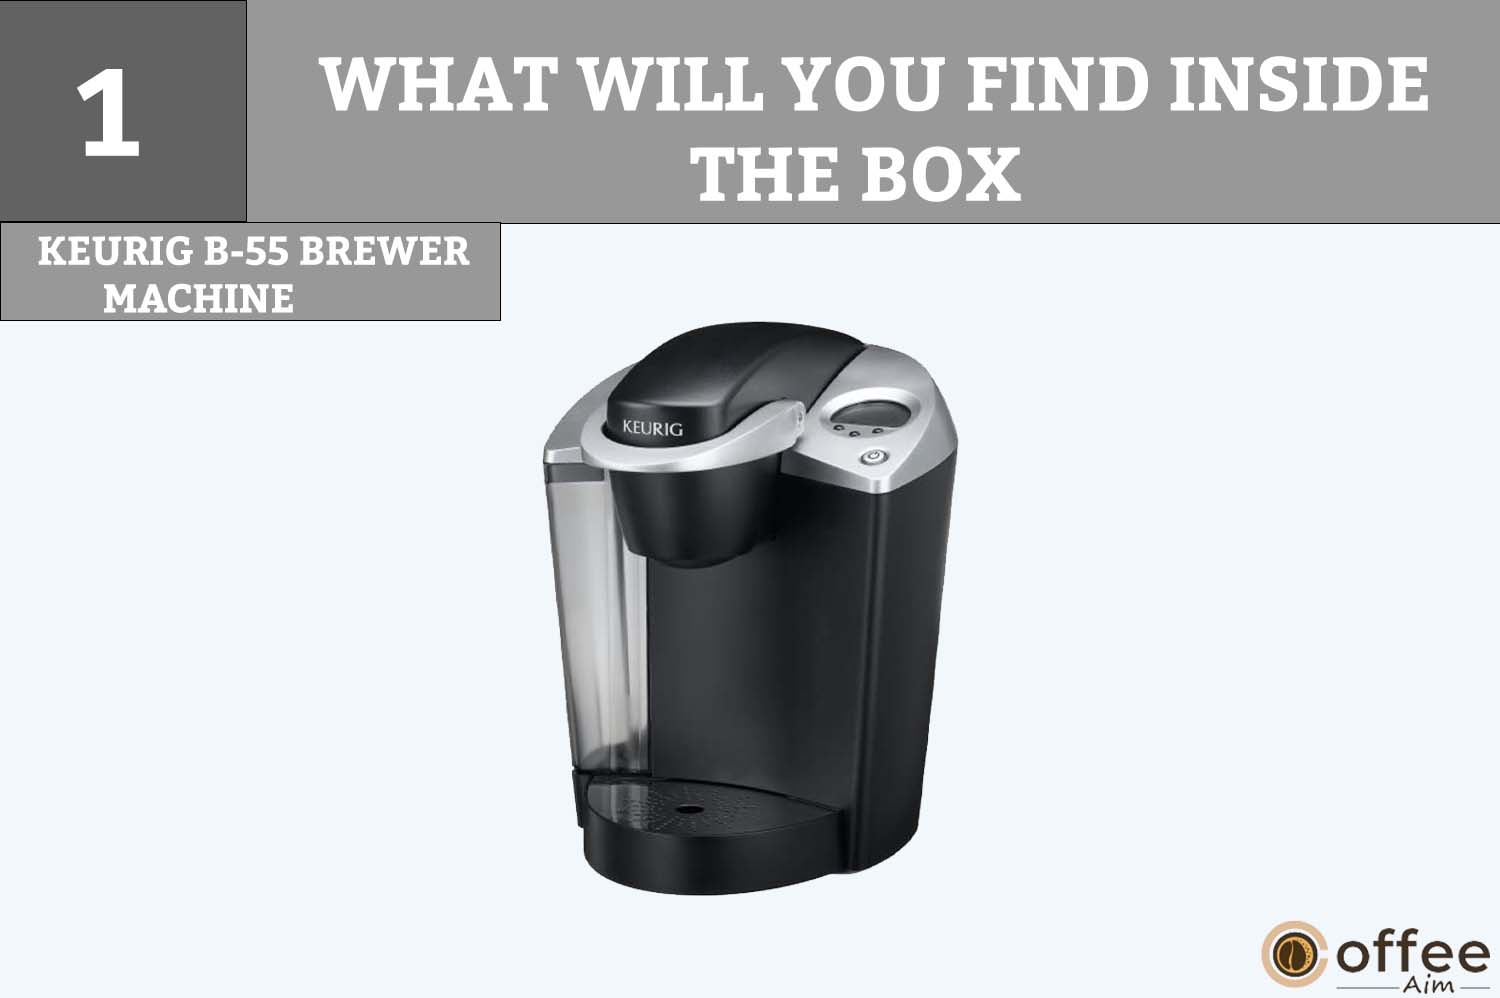
Congratulations! You have got your Keurig B-55 Brewer machine. Brew the cafe’s quality coffee at home by following the instructions given in this manual.
2. User Manual

To operate any machine, you must understand the procedure before usage. Keurig provides you with the User Manual of the Keurig B-55 Brewer machine. Read this manual carefully and repeatedly.
3. Quick Start Guide
Keurig also provides the Quickstart guideline for the Keurig B-55 Brewer machine. Read this literature carefully.
4. K-Cup Variety Pack
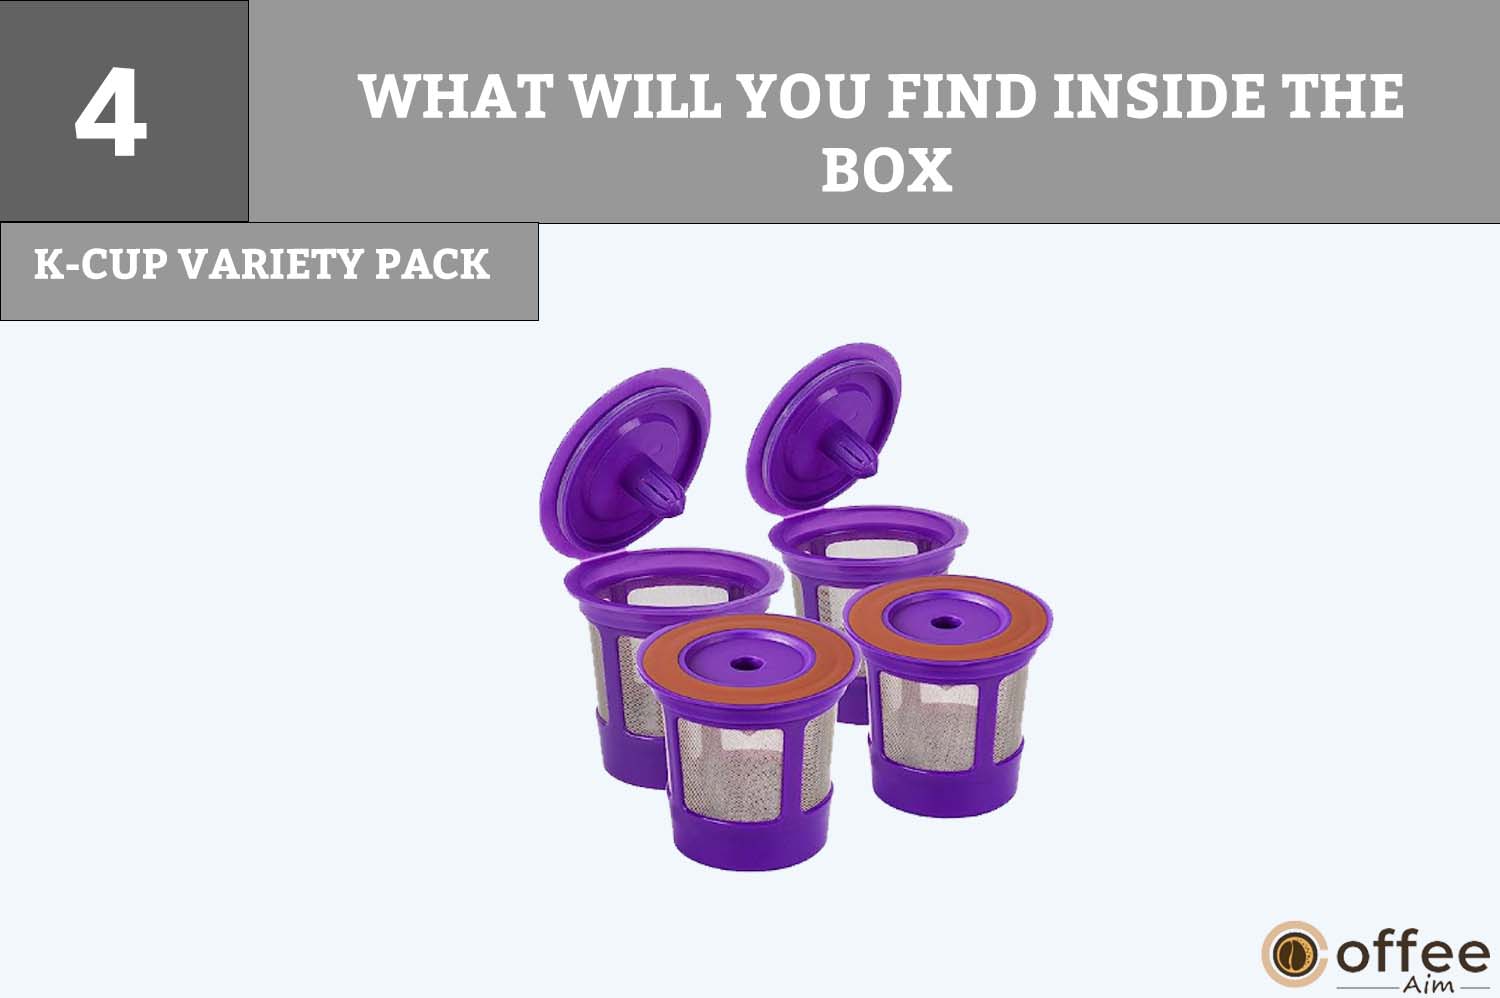
Good News! With the package of your Keurig B-55 Brewer machine, you will get a complimentary variety of K-Cup packs.
5. Water Filter Starter Kit
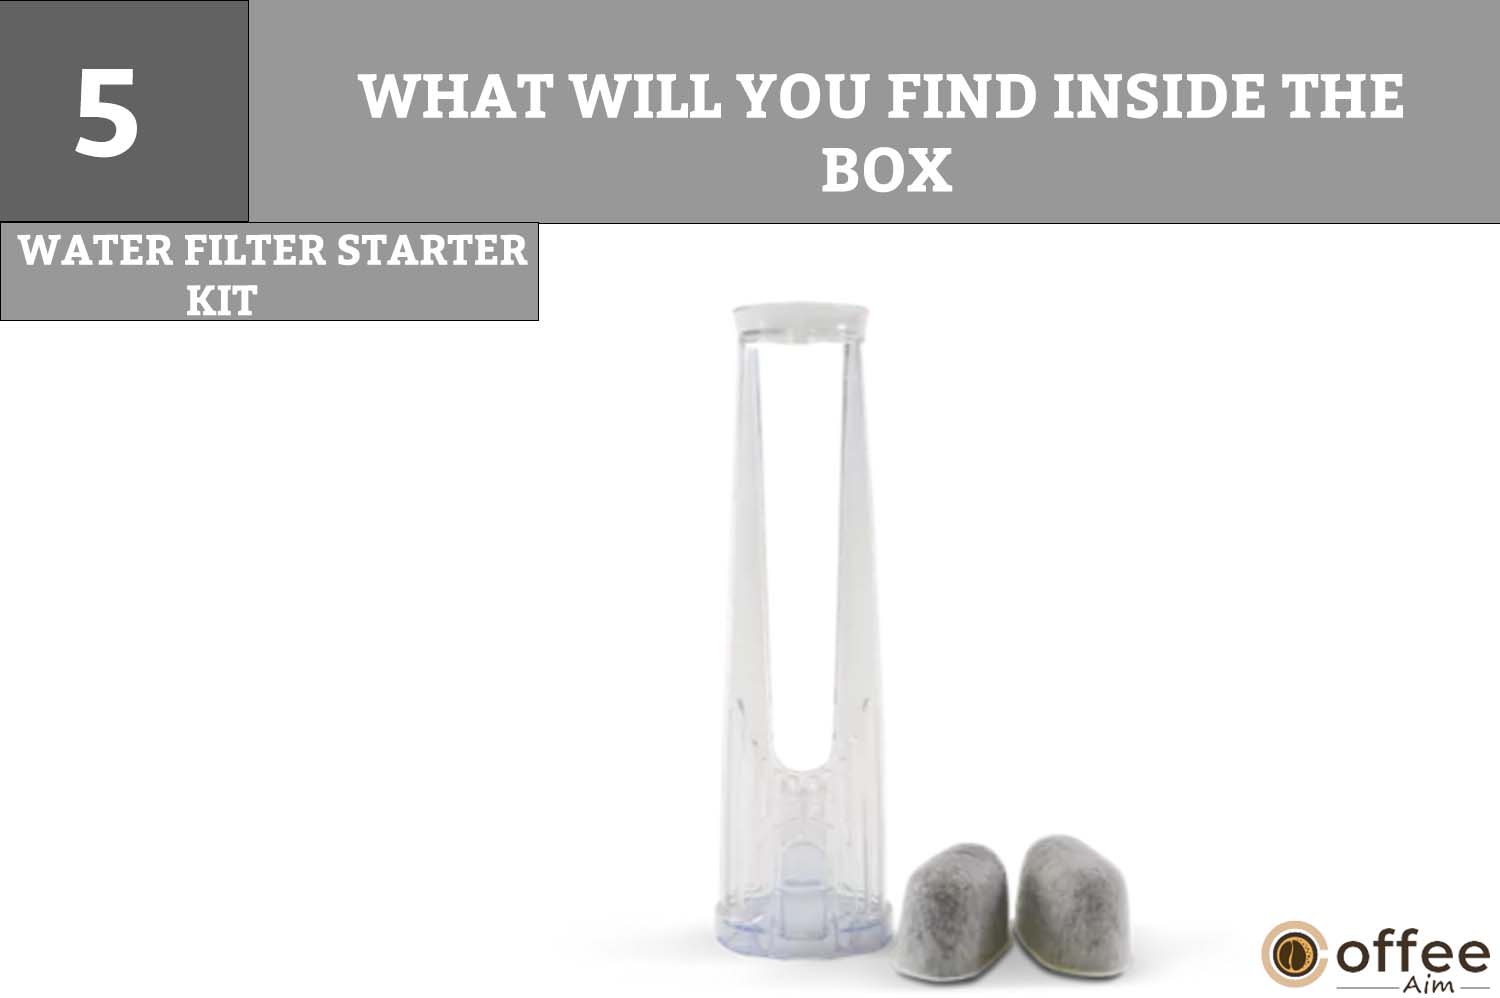
The Kit includes one filter handle and two water filter cartridges. It is used to clean the water impurities present in Water Reservoir.
- Warranty Card
Keurig provides its appliance with an exclusive 1-year of warranty. And here you will find the warranty card, which is proof of this.
How To Unpack Your Keurig B-55 Brewer?
The users who have already bought the Keurig B-55 Brewer know the thrill and excitement they are facing to unpack their machine. Let’s come and understand how to unpack your Keurig B-55 Brewer without damaging it.
- Put the Keurig B-55 Brewer on the floor or a big, stable surface (such as a table or countertop).
- Take out the User Manual, the Quick Start Guide, and other literature.
- Remove the complimentary K-Cups that came with the package.
- Turn the box on its side.
- You should carefully pull the plastic bag (and any packaging materials) away from the box. The Keurig B-55 Brewer will remain on its side and enclosed in the polyfoam.
- Now, remove the top poly foam packaging material.
- Lift the Keurig B-55 Brewer off the bottom polyfoam and set it upright on a stable, flat surface.
- After removing all the polyfoam, lift the assembled Brewer out of the plastic bag.
- Position the Brewer vertically on a stable, flat surface.
You should save all packing materials in case future shipping of the product is required.
WARNING: Keep away all the plastic bags from your children to prevent any mishap.
Keurig B-55 Brewer Parts
You must be eager to brew a cup of coffee! Let’s first understand the parts of the Keurig B-55 Brewer and get familiar with them. After understanding the elements, it will be easy for you to understand their usage. Let’s get started!
1. Water Reservoir Lid
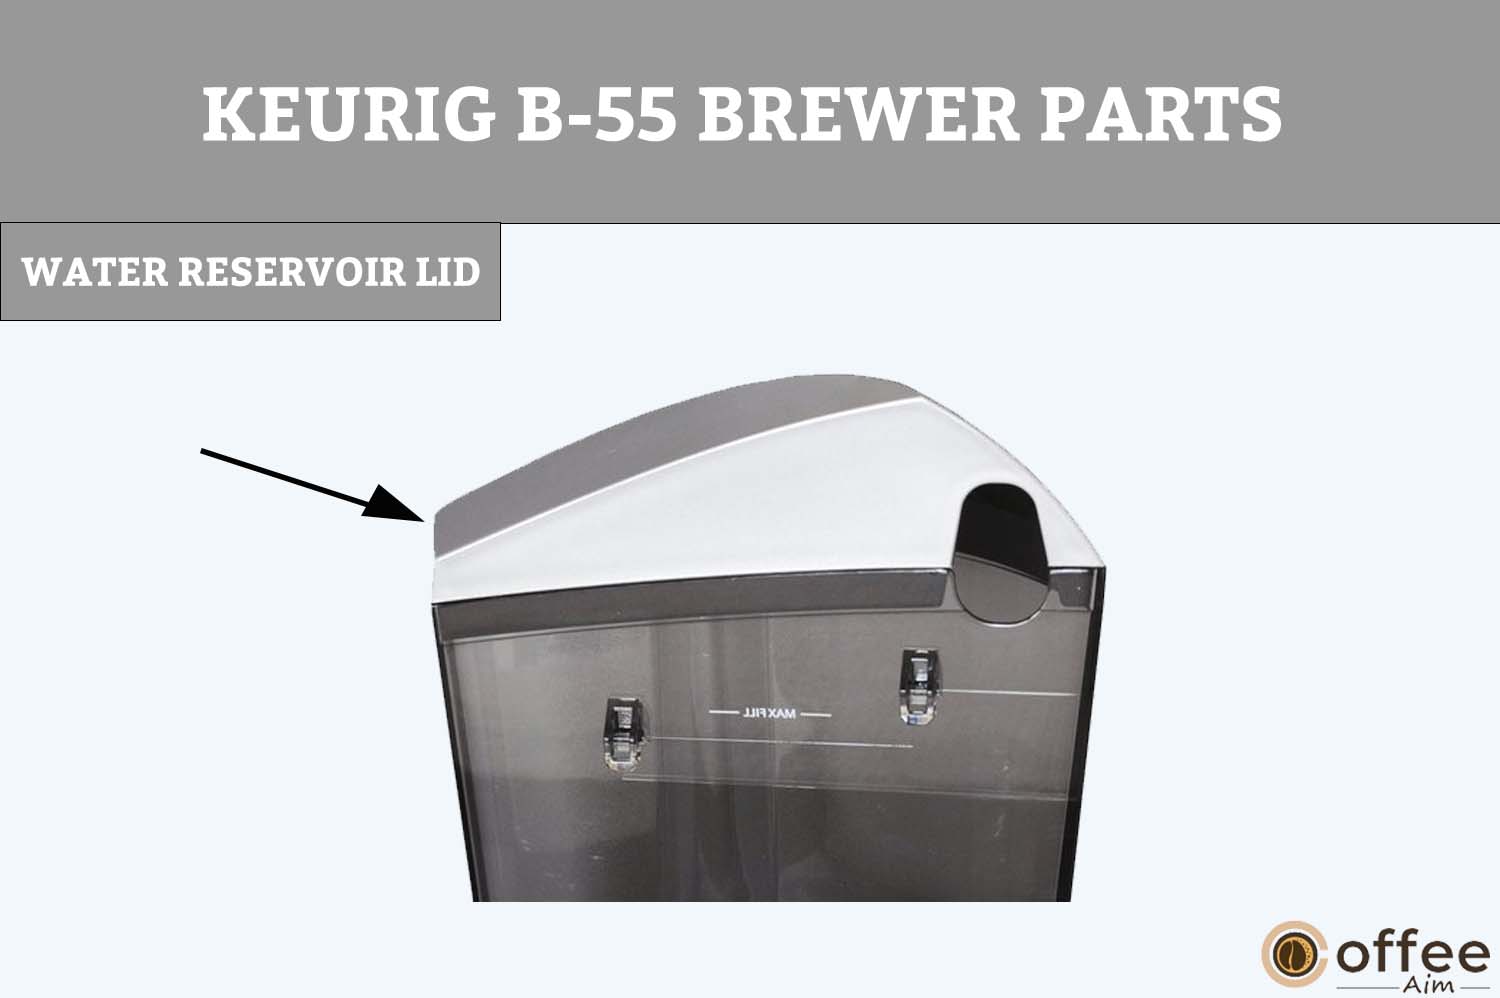
It is present on the left side of the Keurig B-55 Brewer. You should always cover the Reservoir with the lid.
2. Water Reservoir

It is on the left side of your Keurig B-55 Brewer. It is detachable. Water stored in the water reservoir will be used for brewing coffee, cleansing, and descaling.
3. Handle
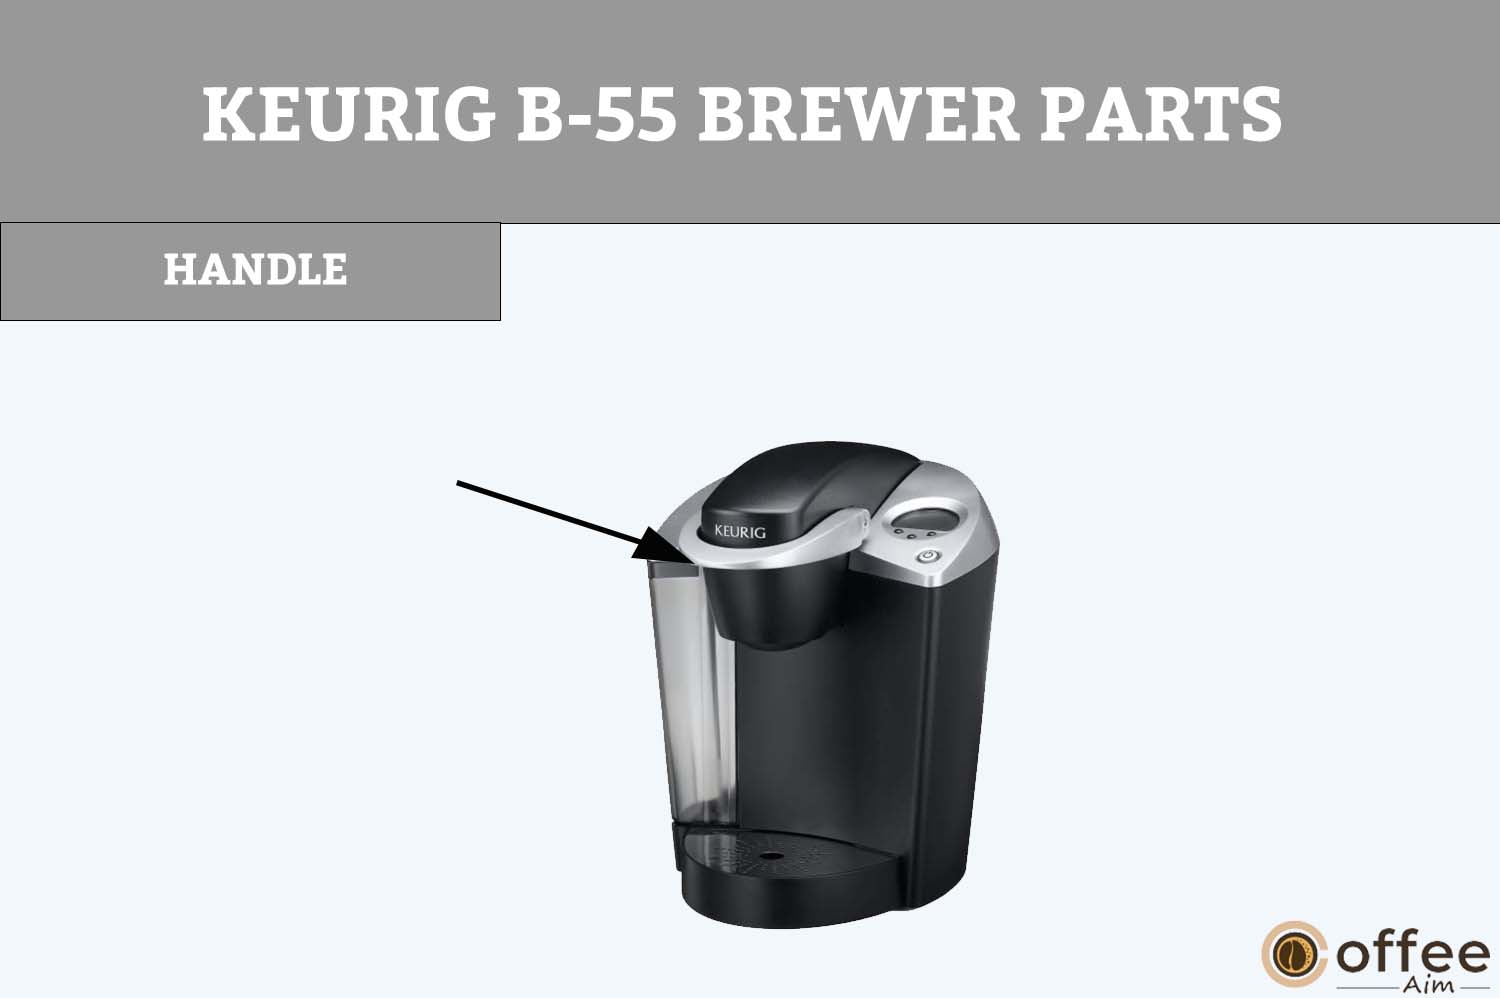
It is present on the top of the Keurig B-55 Brewer. You can open and close the lid of the Brewer by lifting and lowering the handle, respectively.
4. K-Cup Holder
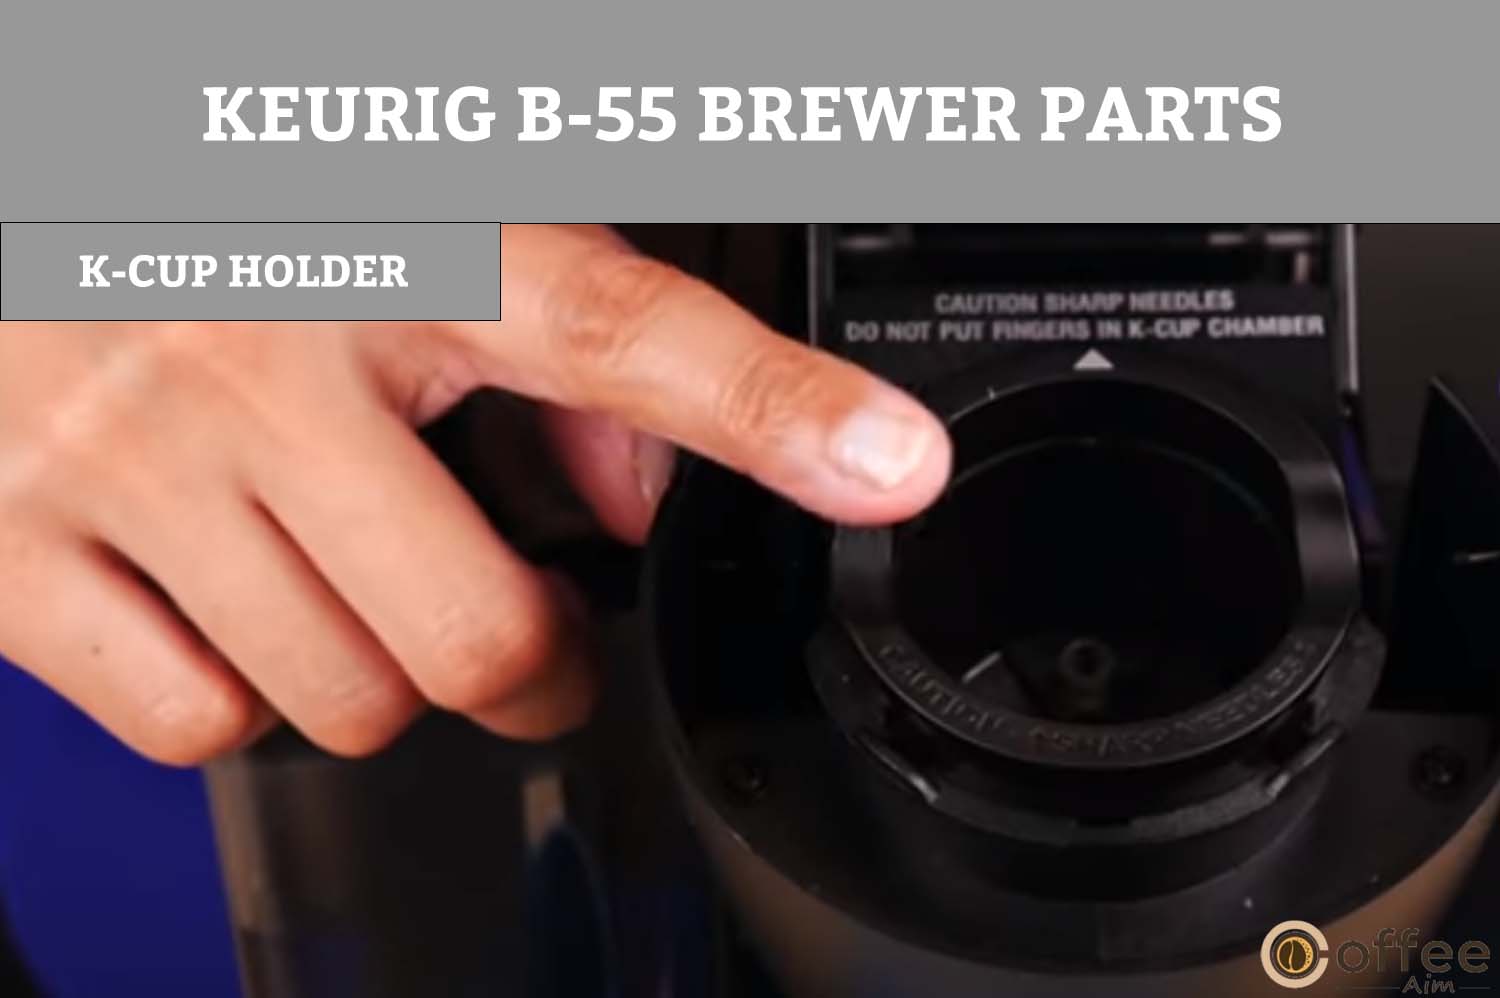
It is part of the K-Cup Holder Assembly. It holds your K-Cup.
5. Funnel
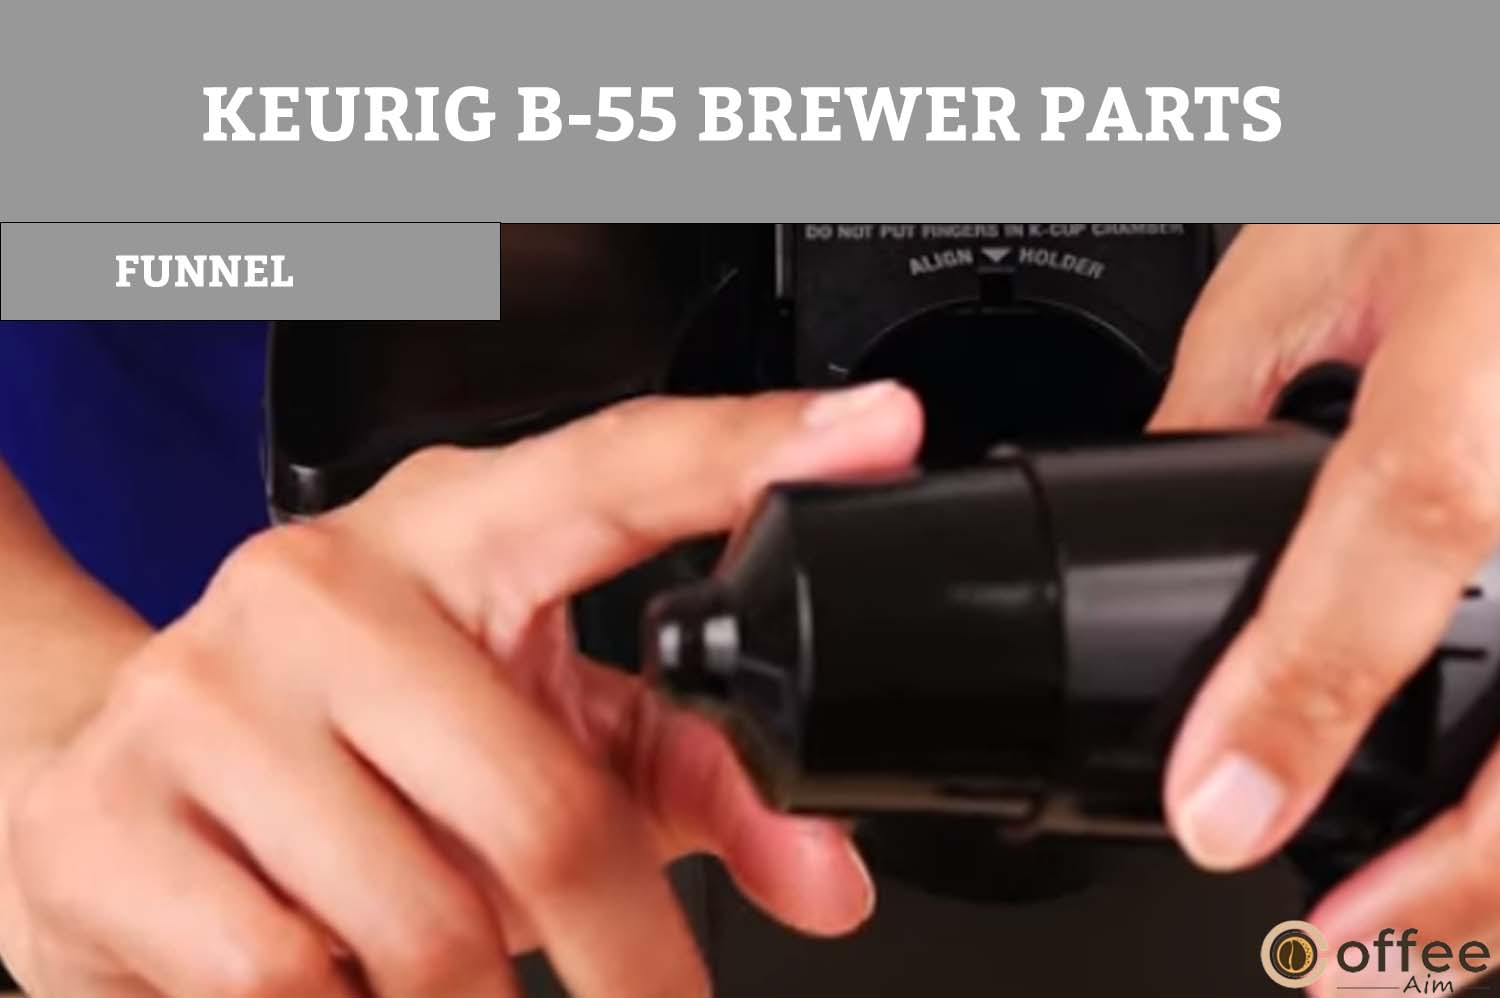
It is part of the K-Cup Holder Assembly. Coffee grounds will strain out from the funnel. It also channelizes the brewed coffee toward the coffee spout.
6. Lid

It is on the Keurig B-55 Brewer’s top. It covers the K-Cup Holder Assembly.
7. Water Reservoir Lock Tab Slots
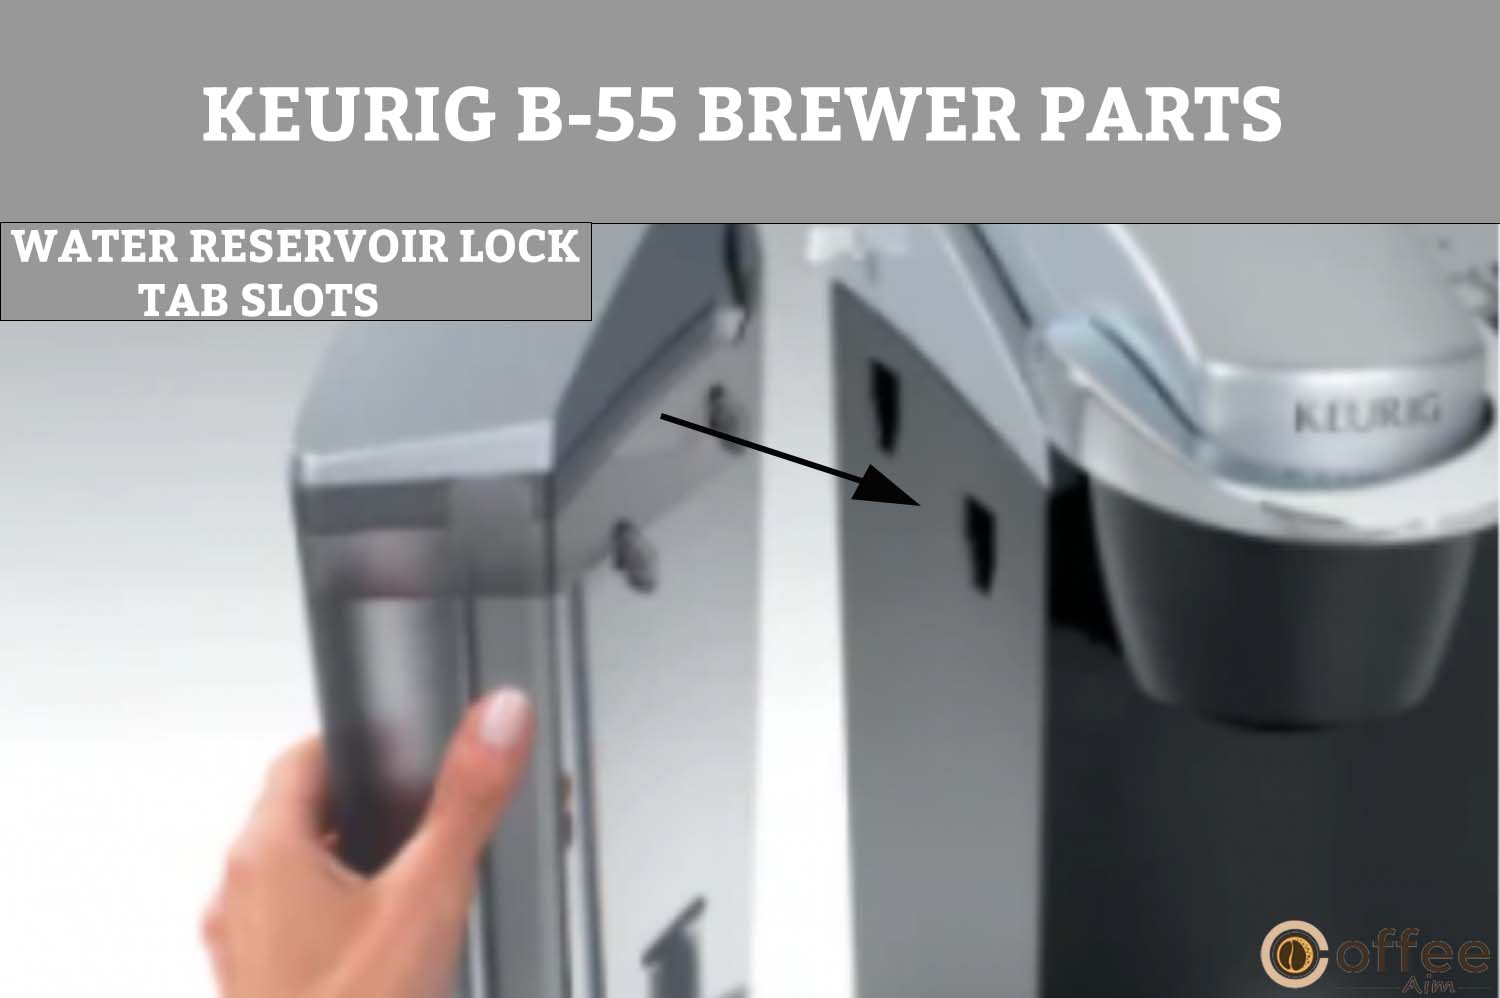
It is present on the left side of the Keurig B-55 Brewer. It connects the Water Reservoir with the Brewer.
8. Housing

Housing is the place where the Water Reservoir will be placed. It is present on the left side of your Keurig B-55 Brewer.
9. K-Cup Holder Assembly
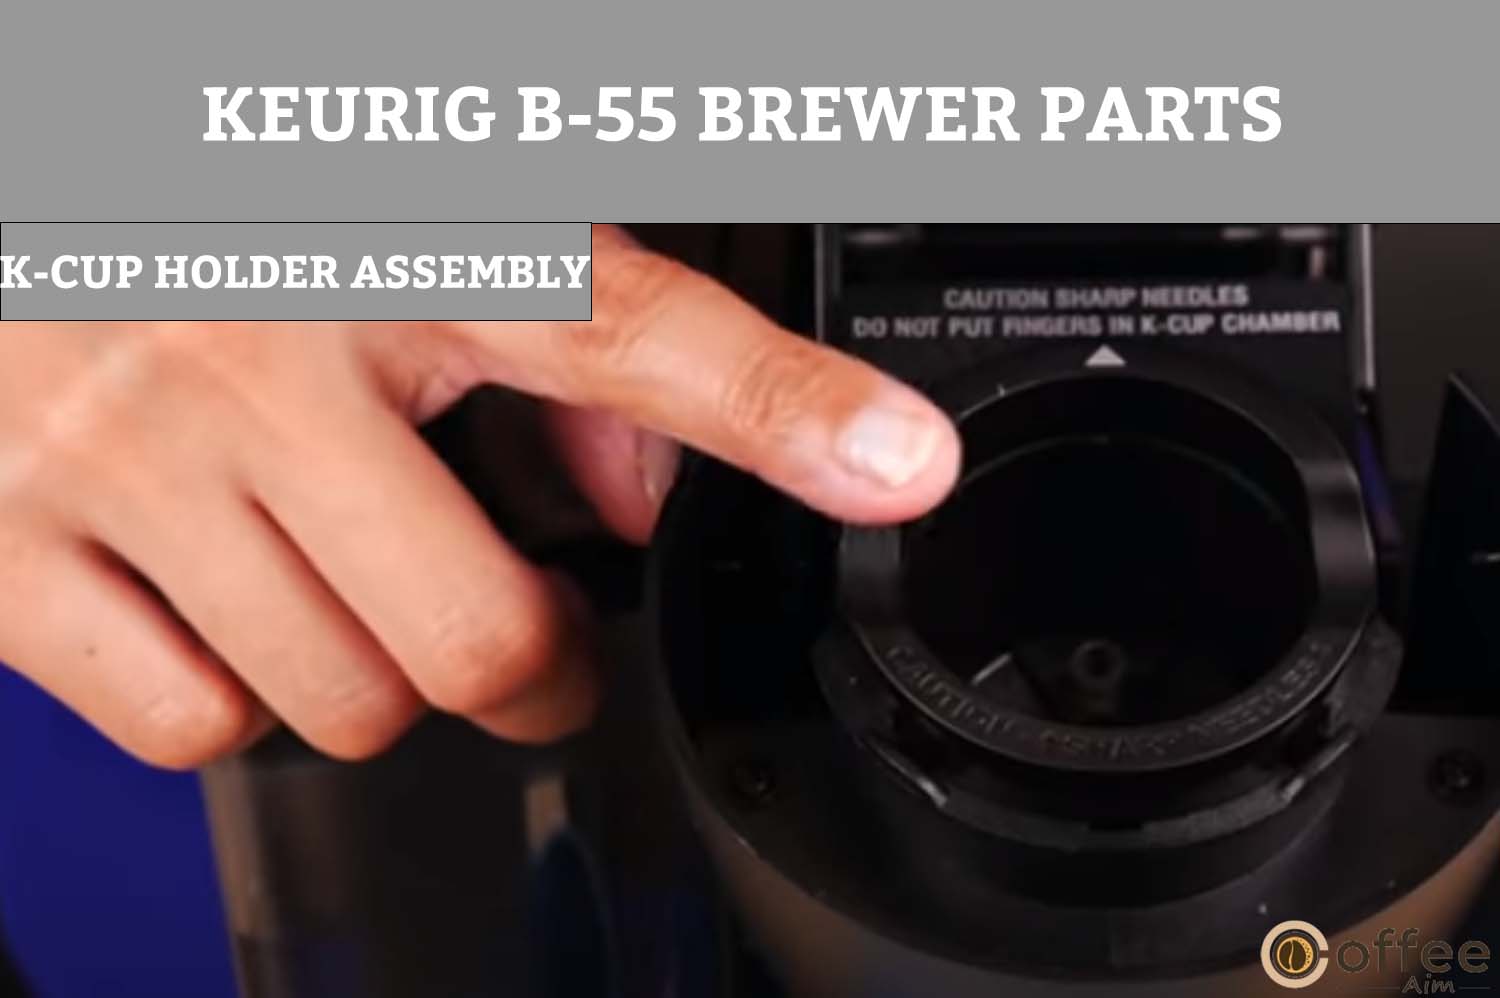
It is inside the Keurig B-55 Brewer. You should insert your K-Cup in this assembly.
10. Drip Tray Plate
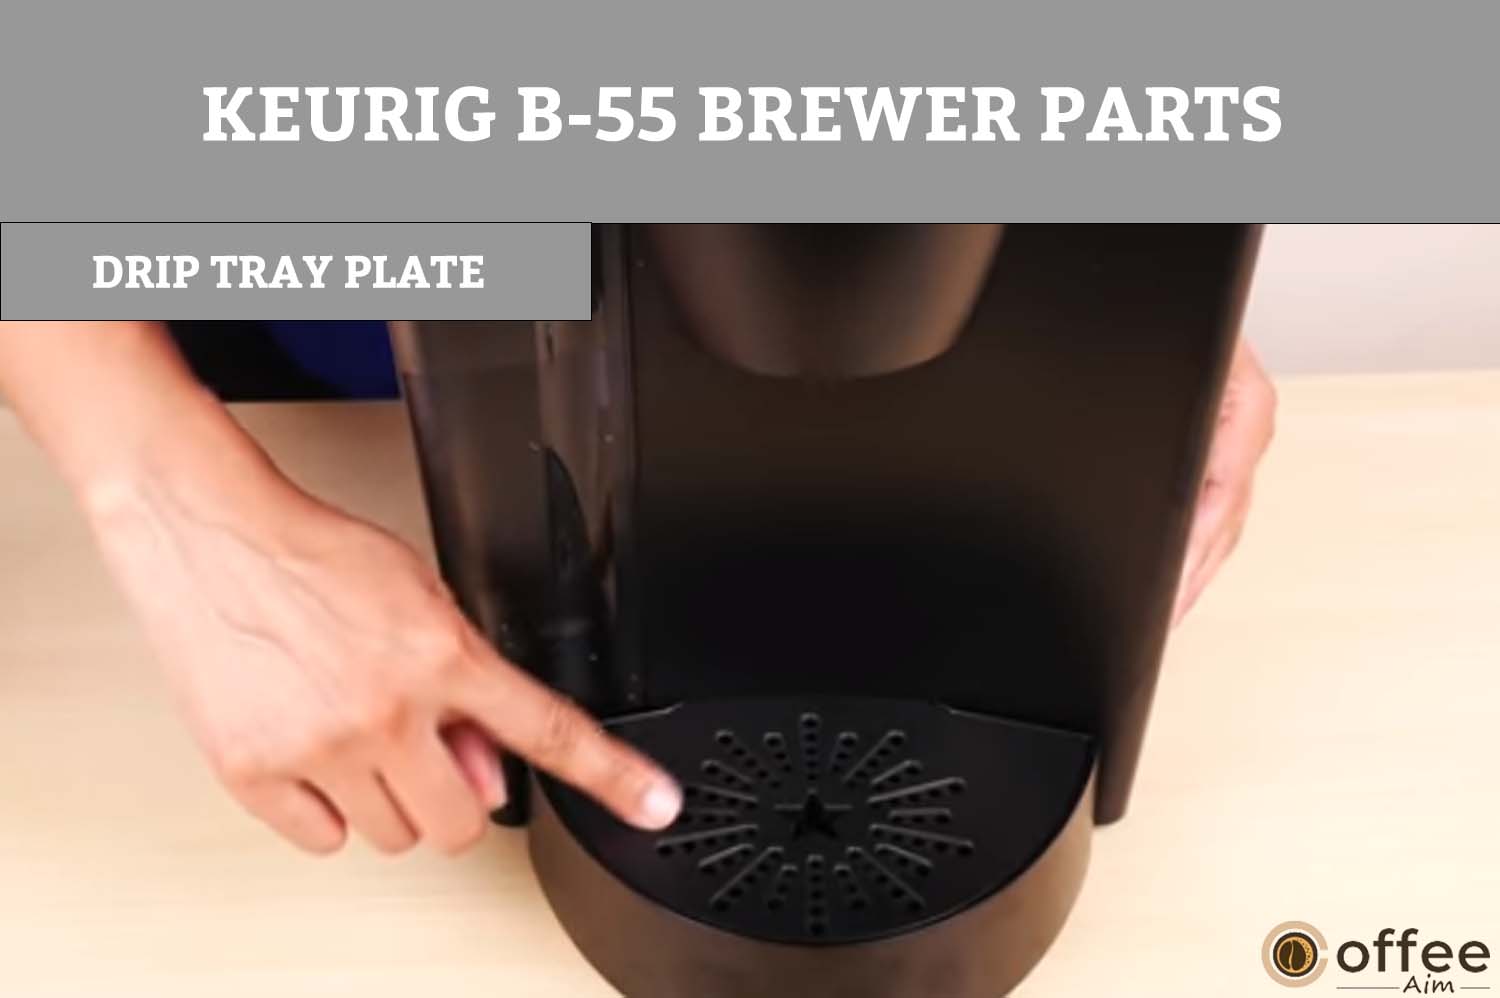
It is present at the bottom of your Keurig B-55 Brewer and is a lid on the drip tray plate. It has a sieve-like structure and is used to catch the drips from the cup while dispensing. It is also used to place your cup on it.
11. Drip Tray
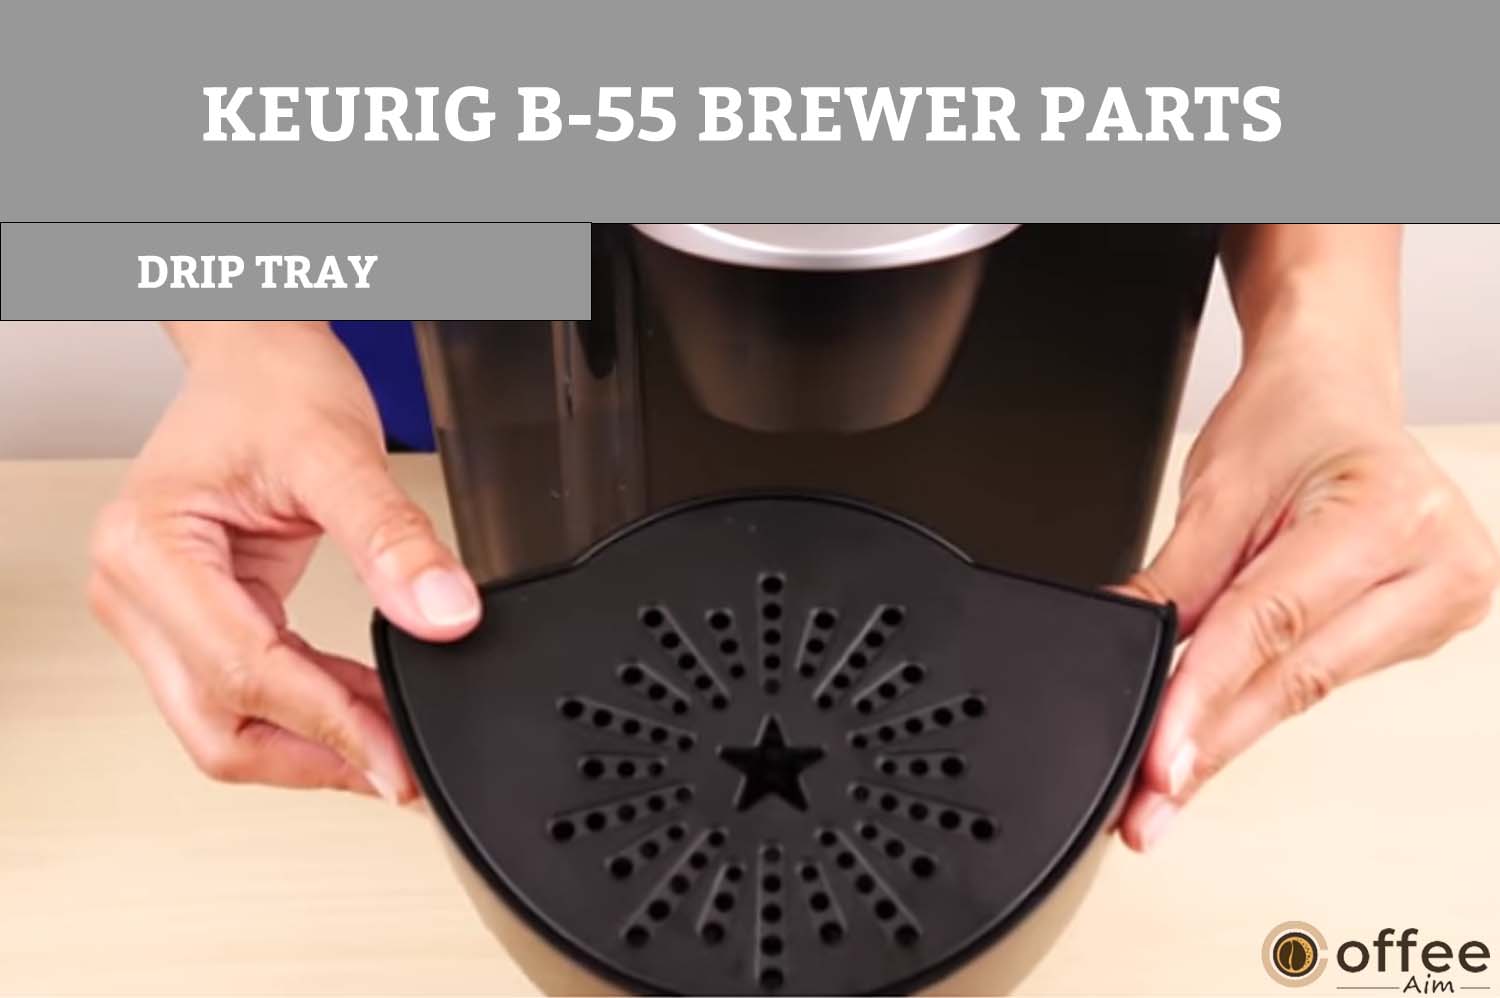
It is at the bottom of your Keurig B-55 Brewer and is used to collect all the drips from the cup while dispensing. It is also detachable.
12. Drip Tray Base
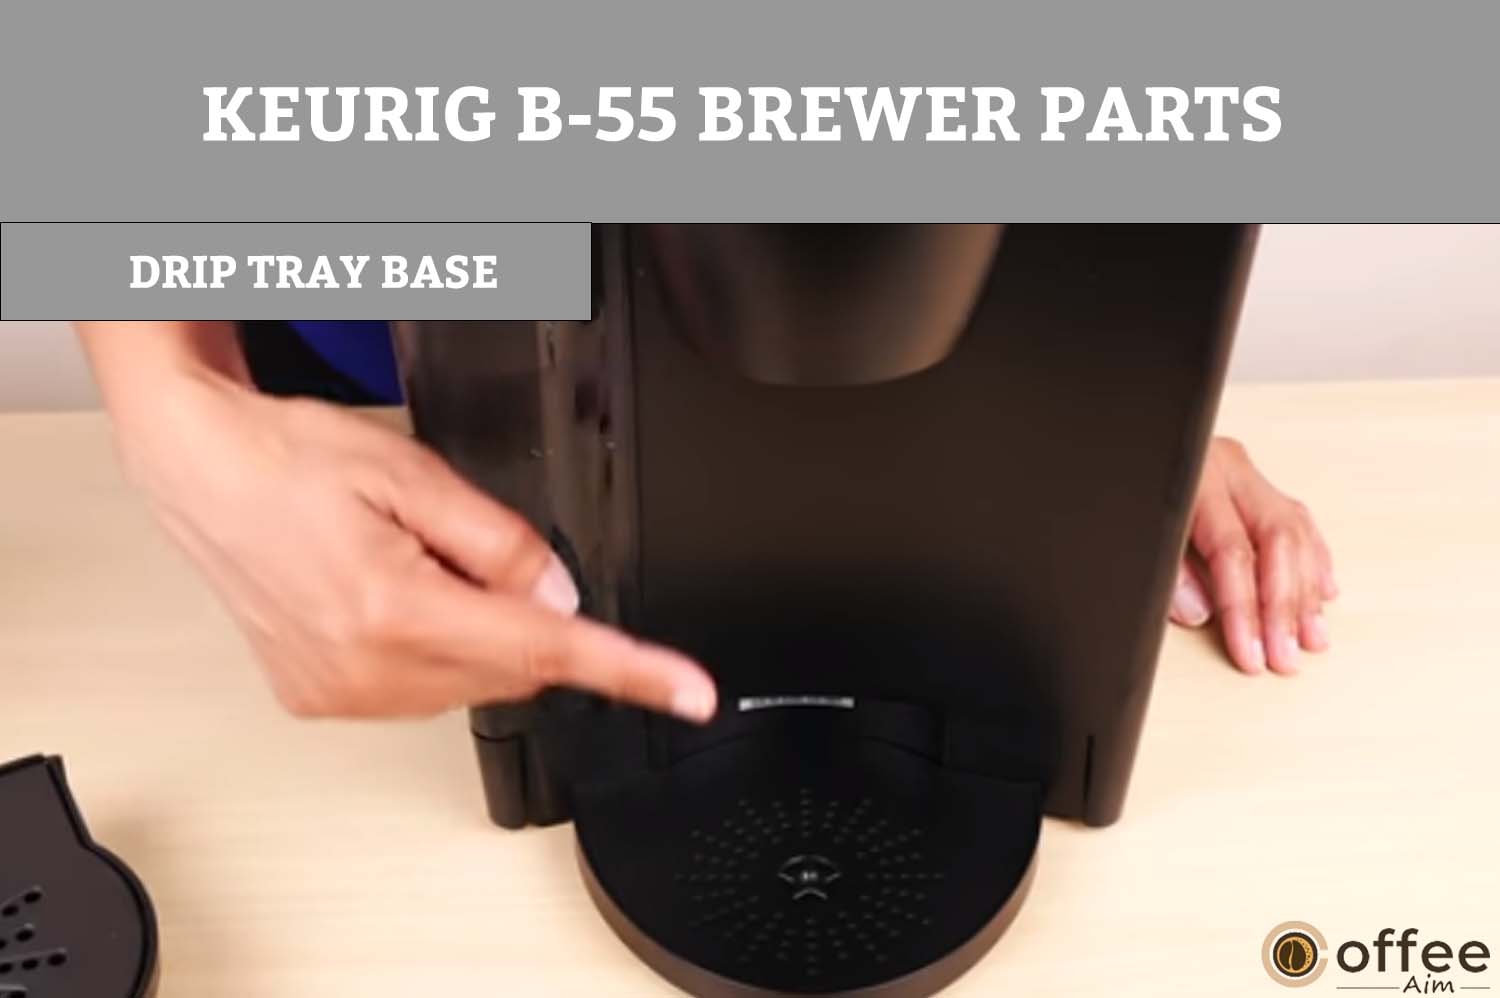
It supports the drip tray plate and is located at the bottom of your brewer. Another function of it is the accommodation of tall mugs such as travel mugs. Thus, if you want to dispense coffee in a travel mug, then remove the drip tray plate and place your mug on the drip tray base.
13. Vent

The position of the Vent is on the left side of the Keurig B-55 Brewer. After the heating process, the steam will excrete from the vent.
14. Power Cord
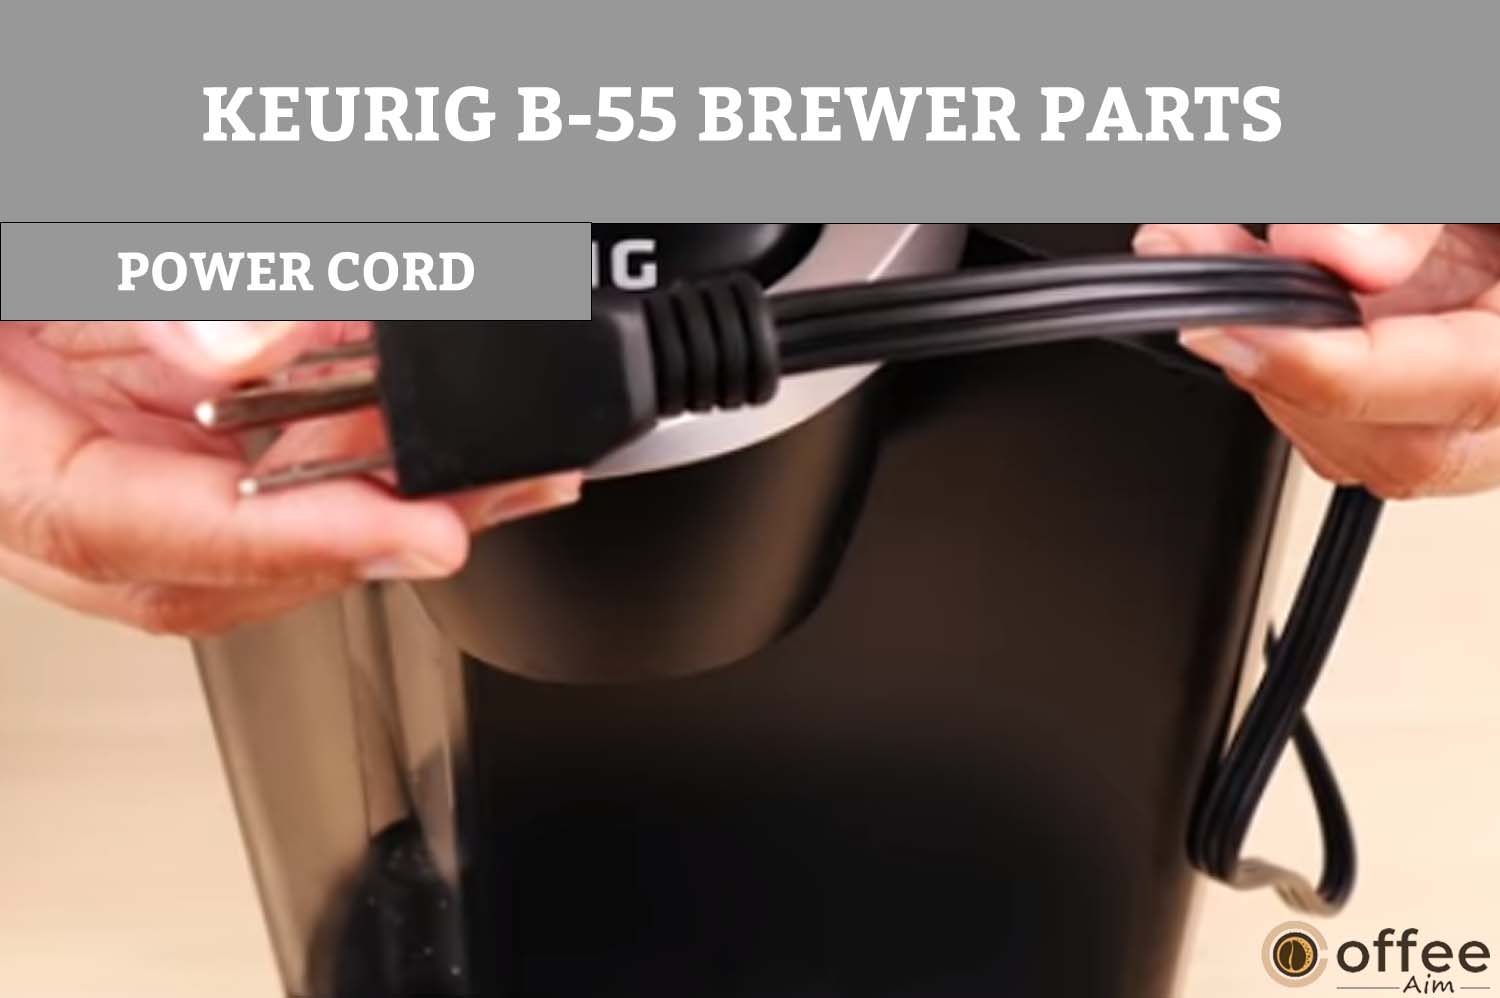
It is present on the back side of the Keurig B-55 Brewer. It transfers electricity to the Brewer from the power source.
Controls And Indicators
The Keurig B-50 series introduces the first brewer machine, which has an LCD screen. It consists of the following buttons, and each button has multiple purposes.
1. Small Cup/H Button
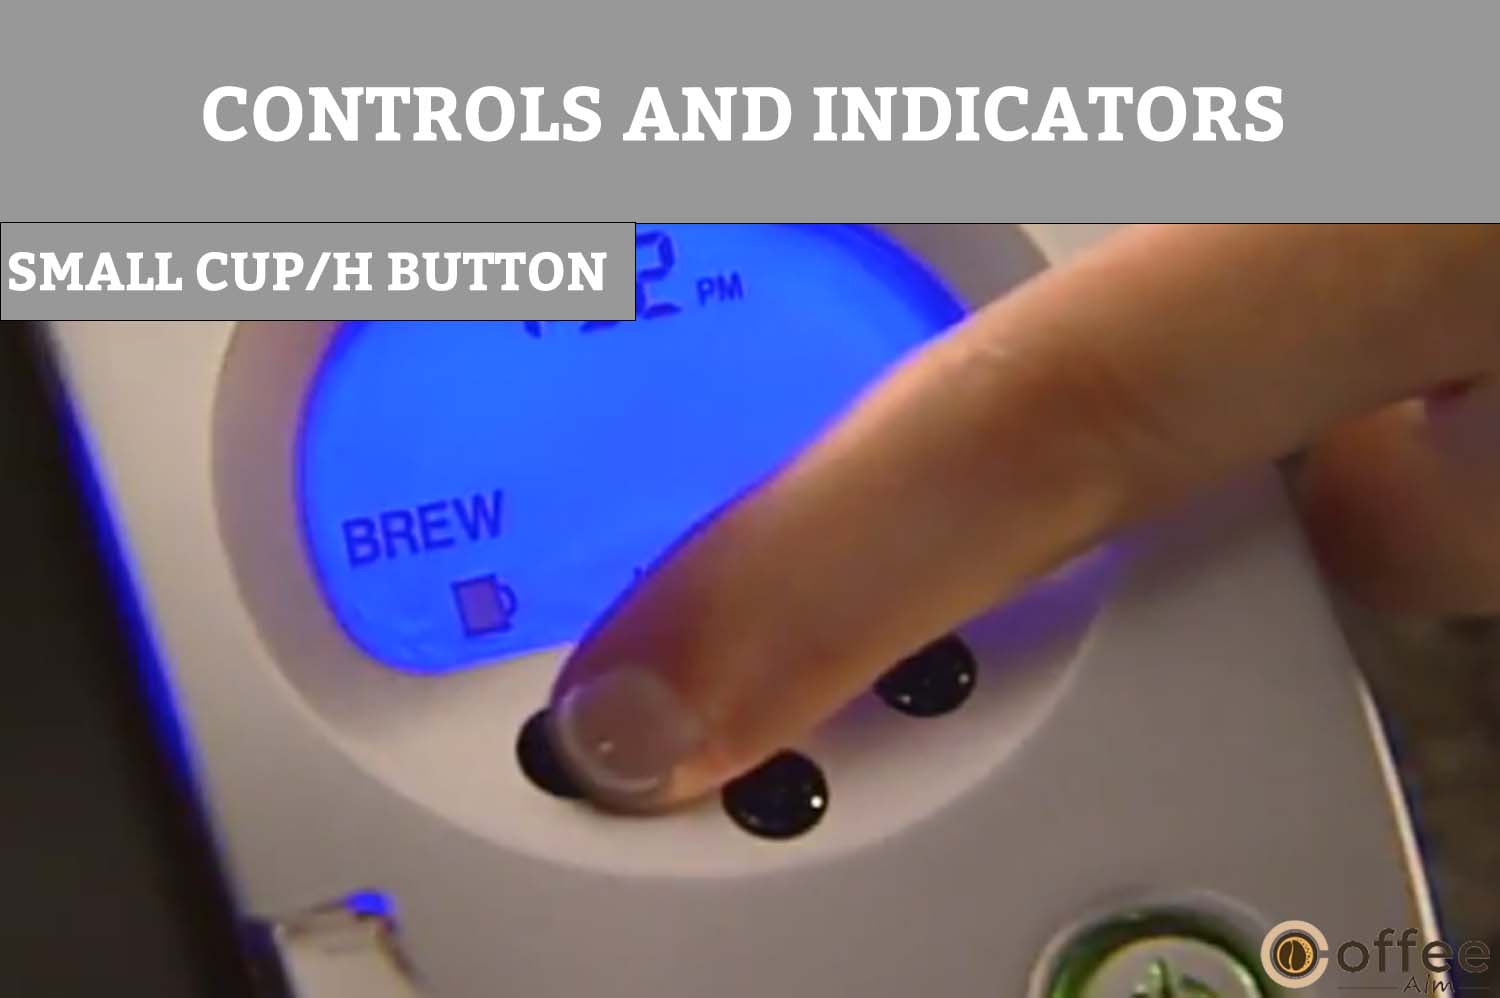
You can select a small cup of coffee and set the hours by pressing this button.
2. Menu Button

Push the button to reach the menu from where you can set the clock or ON/OFF time of the Keurig B-55 Brewer machine by pressing the Menu button.
3. Large Cup/M Button
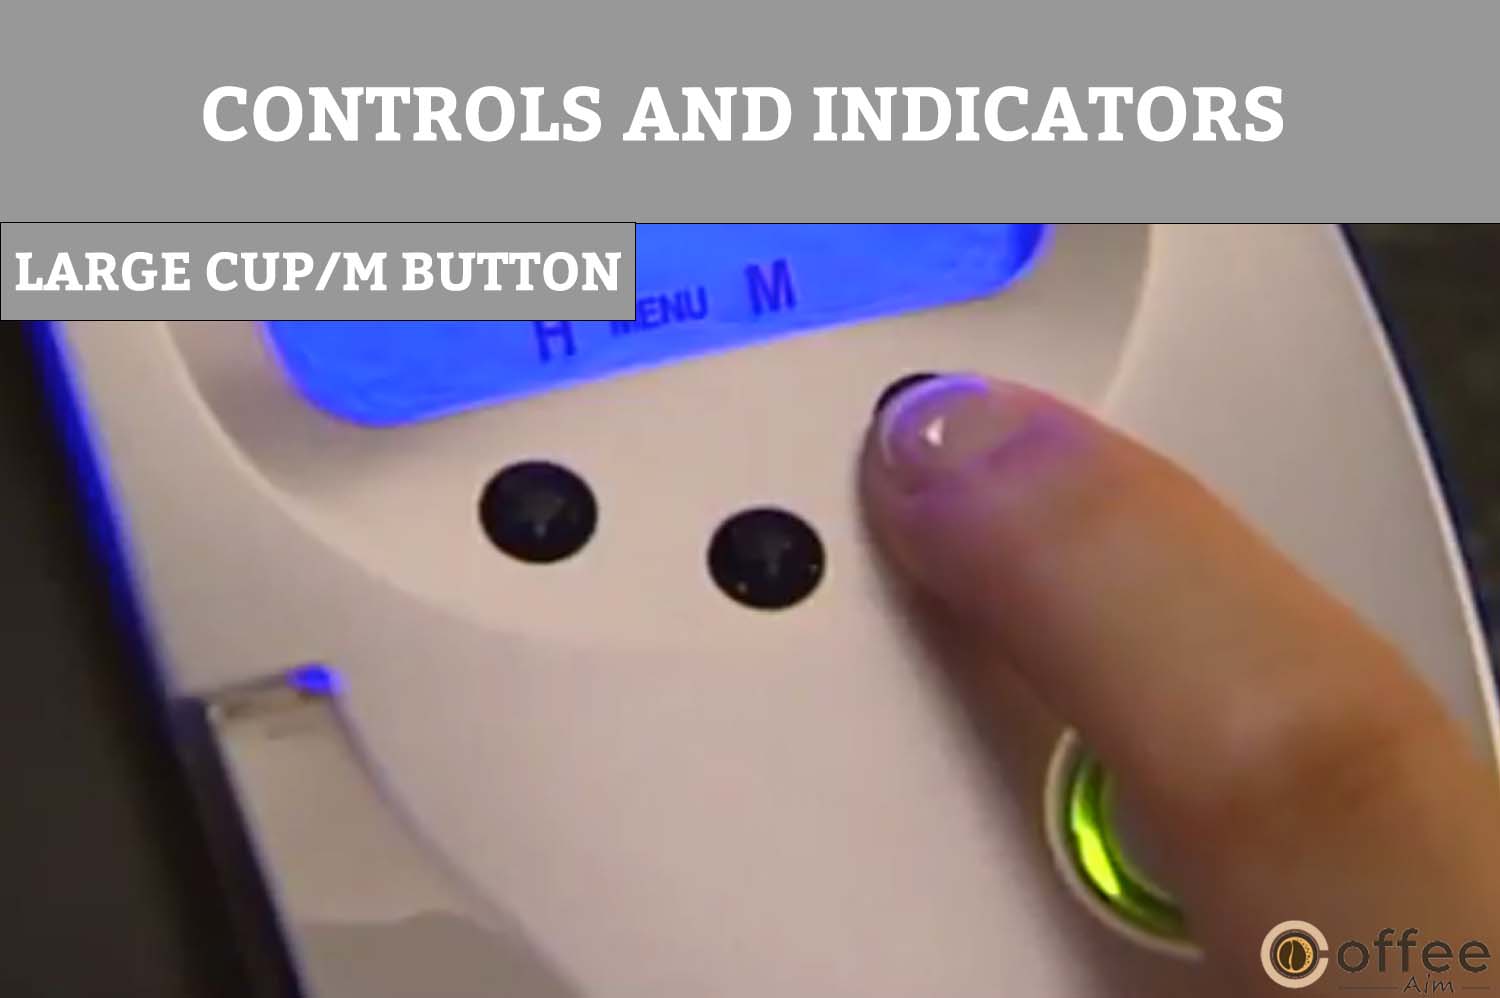
You can select the large cup of coffee and set the minutes also by pressing this button.
4. LCD Message Center
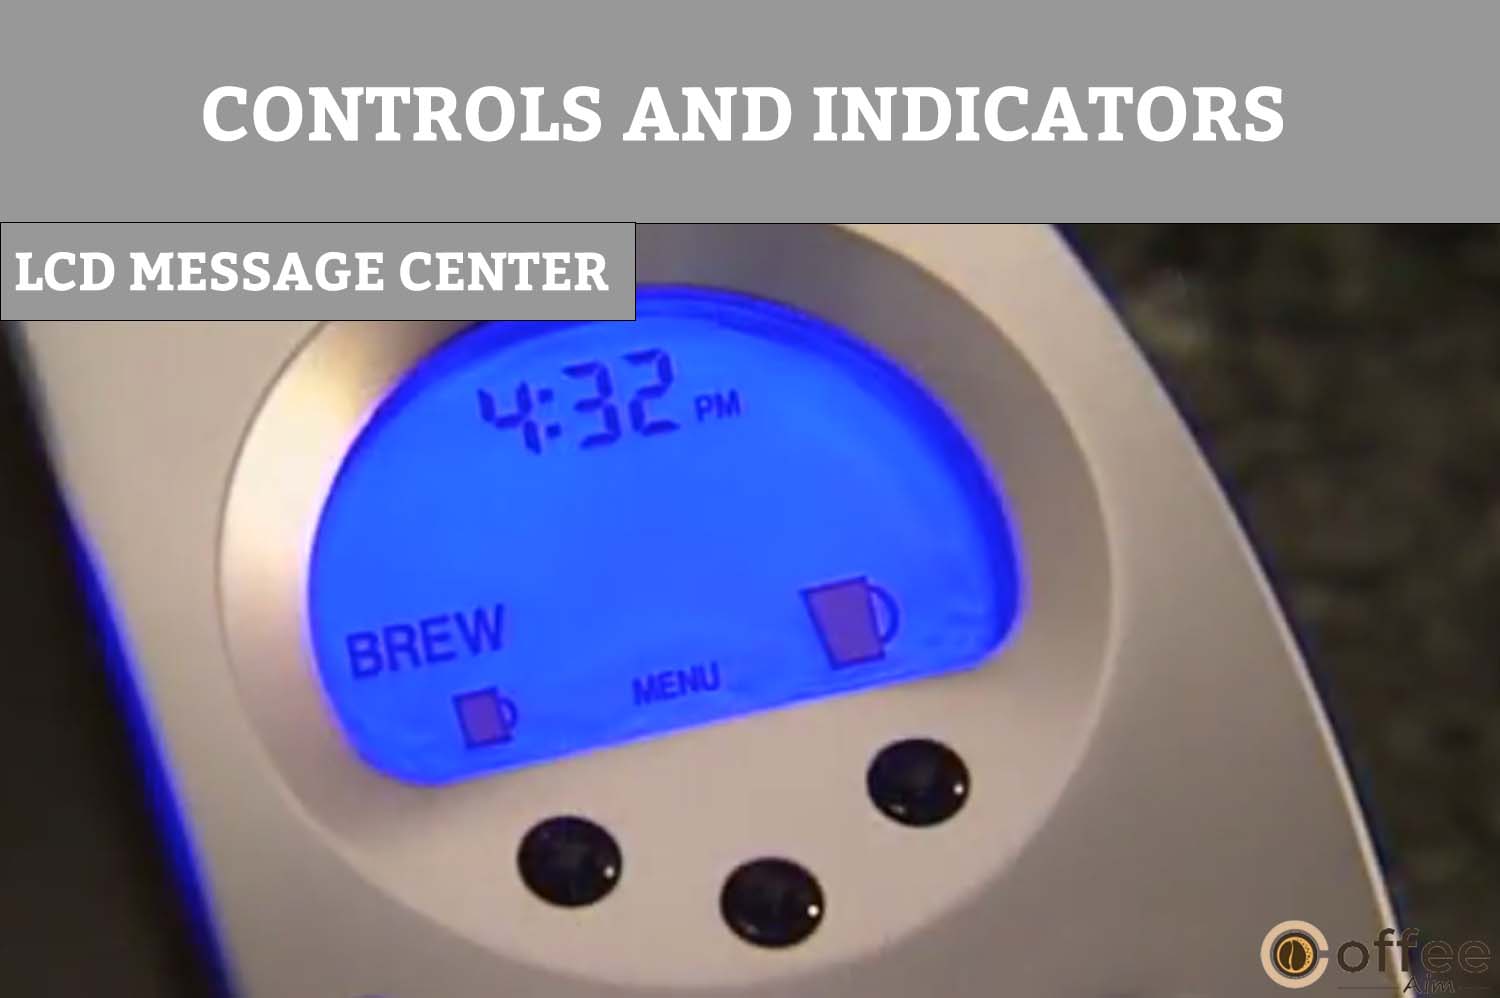
You will get the messages on the LCD Message Center. Press the buttons according to the notifications prompt on the LCD display.
5. Power Button
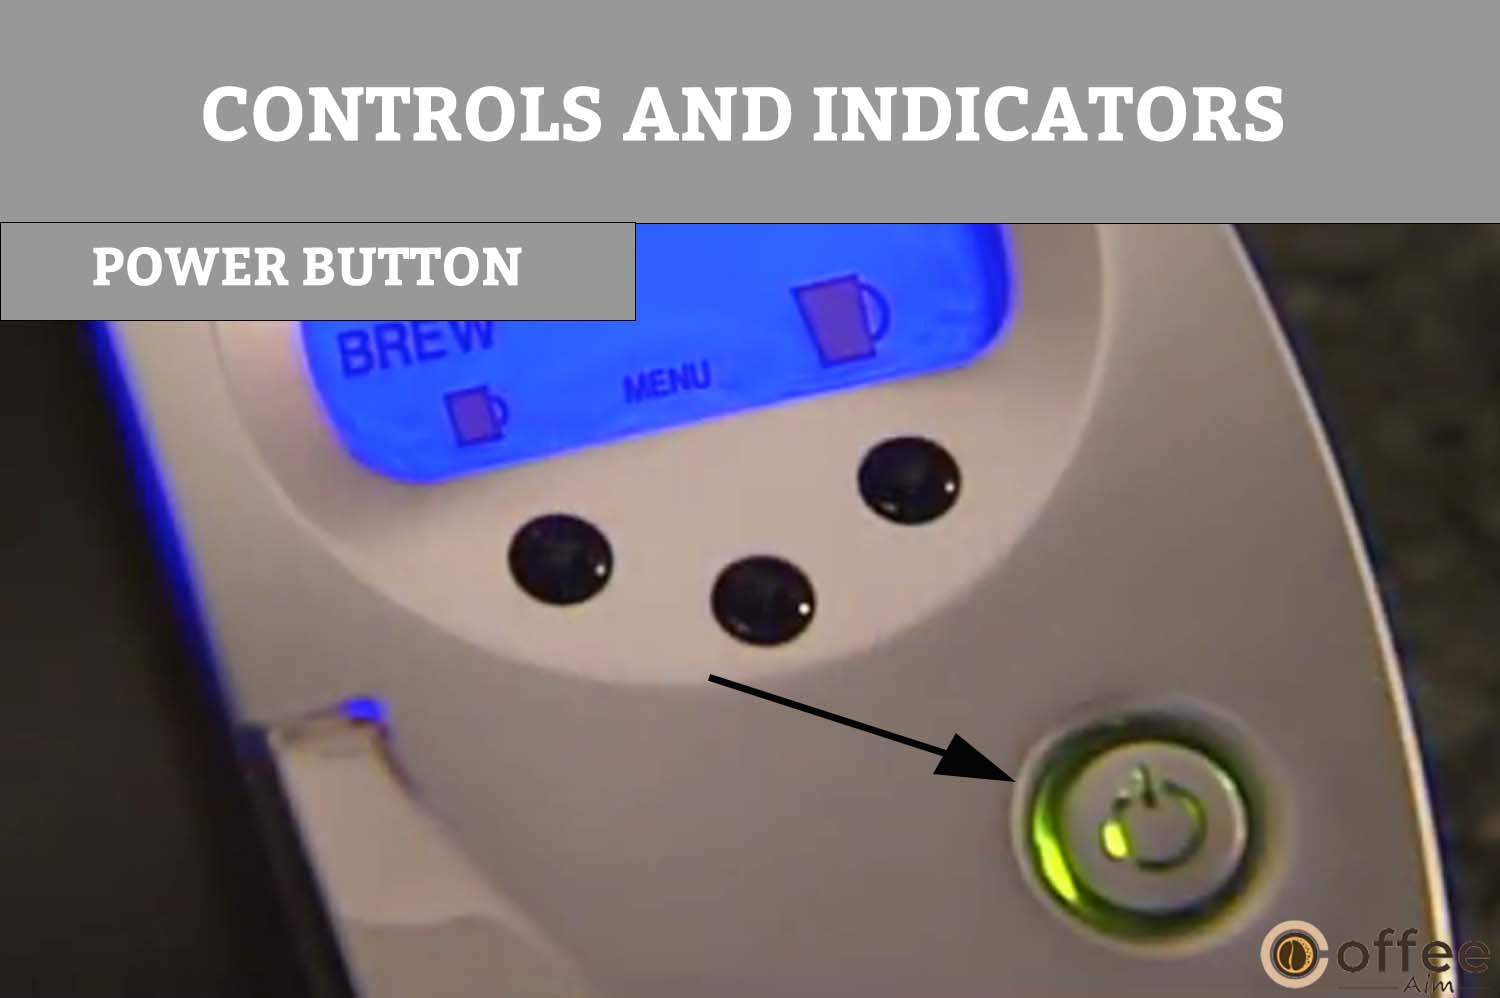
You can turn the machine on/off by pressing the power button.
Helpful Hints
What if you brew a cup of coffee with excitement, which does not give you the required result? Or what if the brewing stops midway? You will feel devastated. Don’t you think it is much better to read hints first? Yes, you must, so let’s get started!
1. Always Keep Your Brewer Turned “On”

It is recommended to leave your Brewer “ON” at all times so you may brew a fresh cup of coffee whenever you desire. The Brewer may, however, be fully programmed to switch on and off automatically per your schedule.
You will learn this in detail under the heading “How to Prepare Coffee on Your Schedule Using Controls & Indicators?”
2. Only Use Bottled Or Filtered Water.

Every location has different water quality. Consider using bottled water or water from a filter system if you detect an unpleasant flavor in your cup of coffee, such as chlorine or another mineral flavor.
3. Select Between Two Serving Sizes.

To each coffee enthusiast, the ideal cup of coffee signifies something different. Thanks to Brewer’s ability to make a conventional big cup (8 oz serving) or a stronger small cup (6 oz serving). You may enjoy your custom-brewed cup of coffee.
4. Connect The Brewer To Its Outlet.
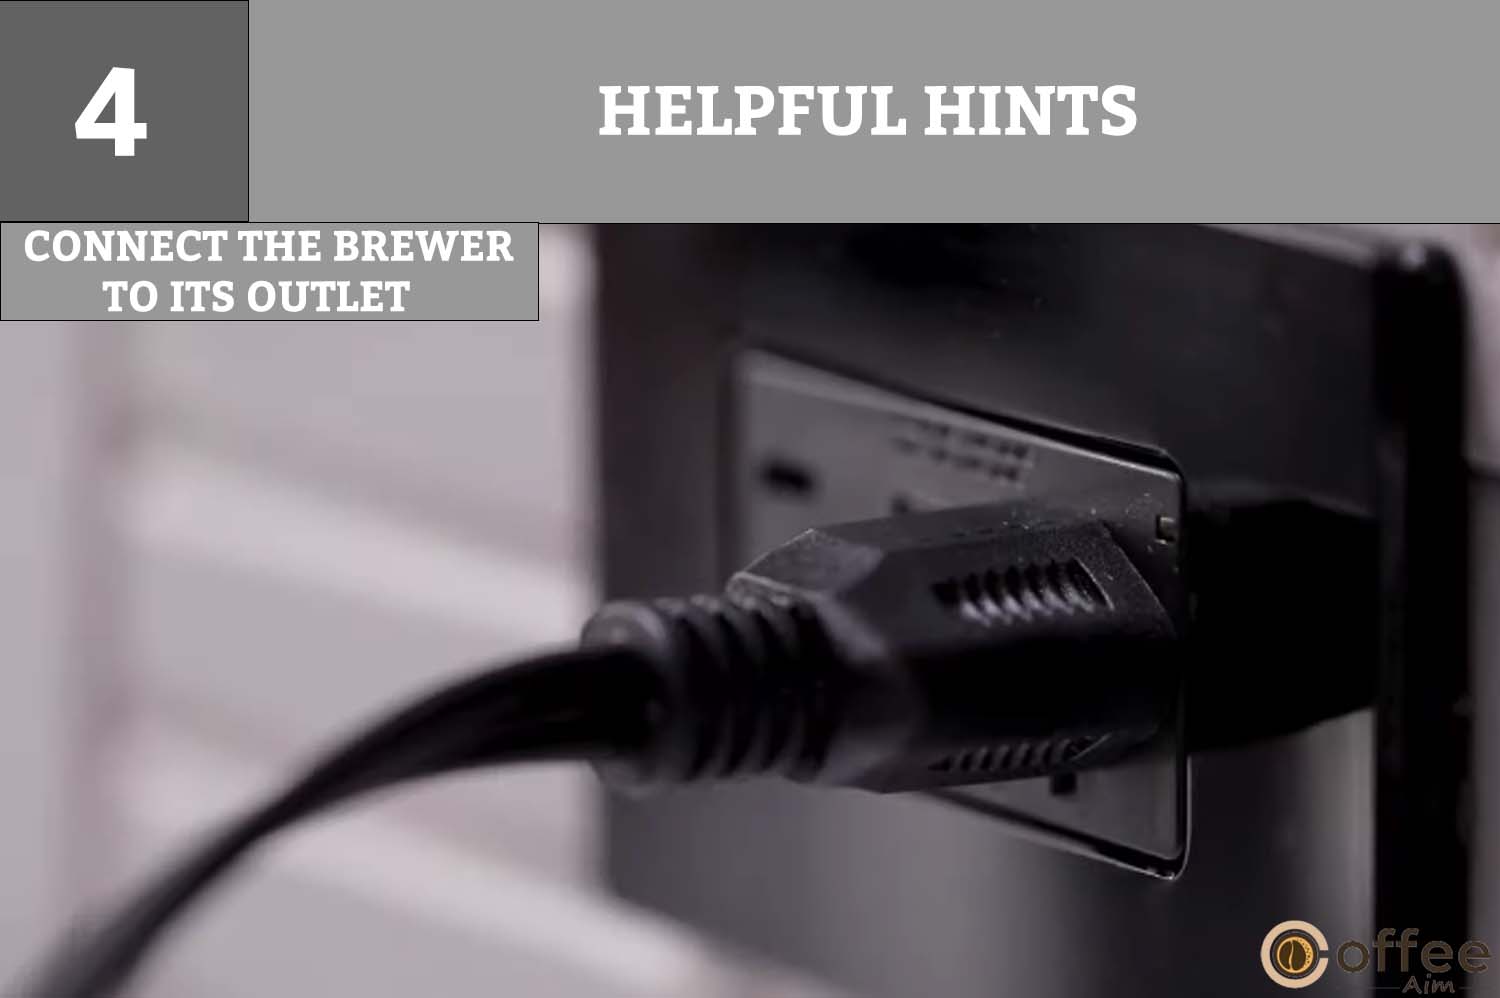
Your Brewer might not work correctly if the electrical circuit is overburdened with other appliances. You should run the Brewer on a separate circuit from other appliances.
5. Brew Coffee In A Travel Mug.

Simply take out the drip tray assembly, set the travel mug on the drip tray base, and start brewing.
Setup The Keurig B-55 Brewer For First Use Or After Storage Period.
Now after unpacking your Keurig B-55 Brewer machine, let’s make your device ready for its first use. You must be very excited to brew your first cup, but priming your brewer is necessary. So, let’s start it!
IMPORTANT: You must prepare your Keurig brewer for its initial usage, as described below, before you may use it.
Prime Keurig B-55
Whether you are using your coffee machine for the first time or after a long period of inactivity, then priming is a must. Let’s explore how you can do this!
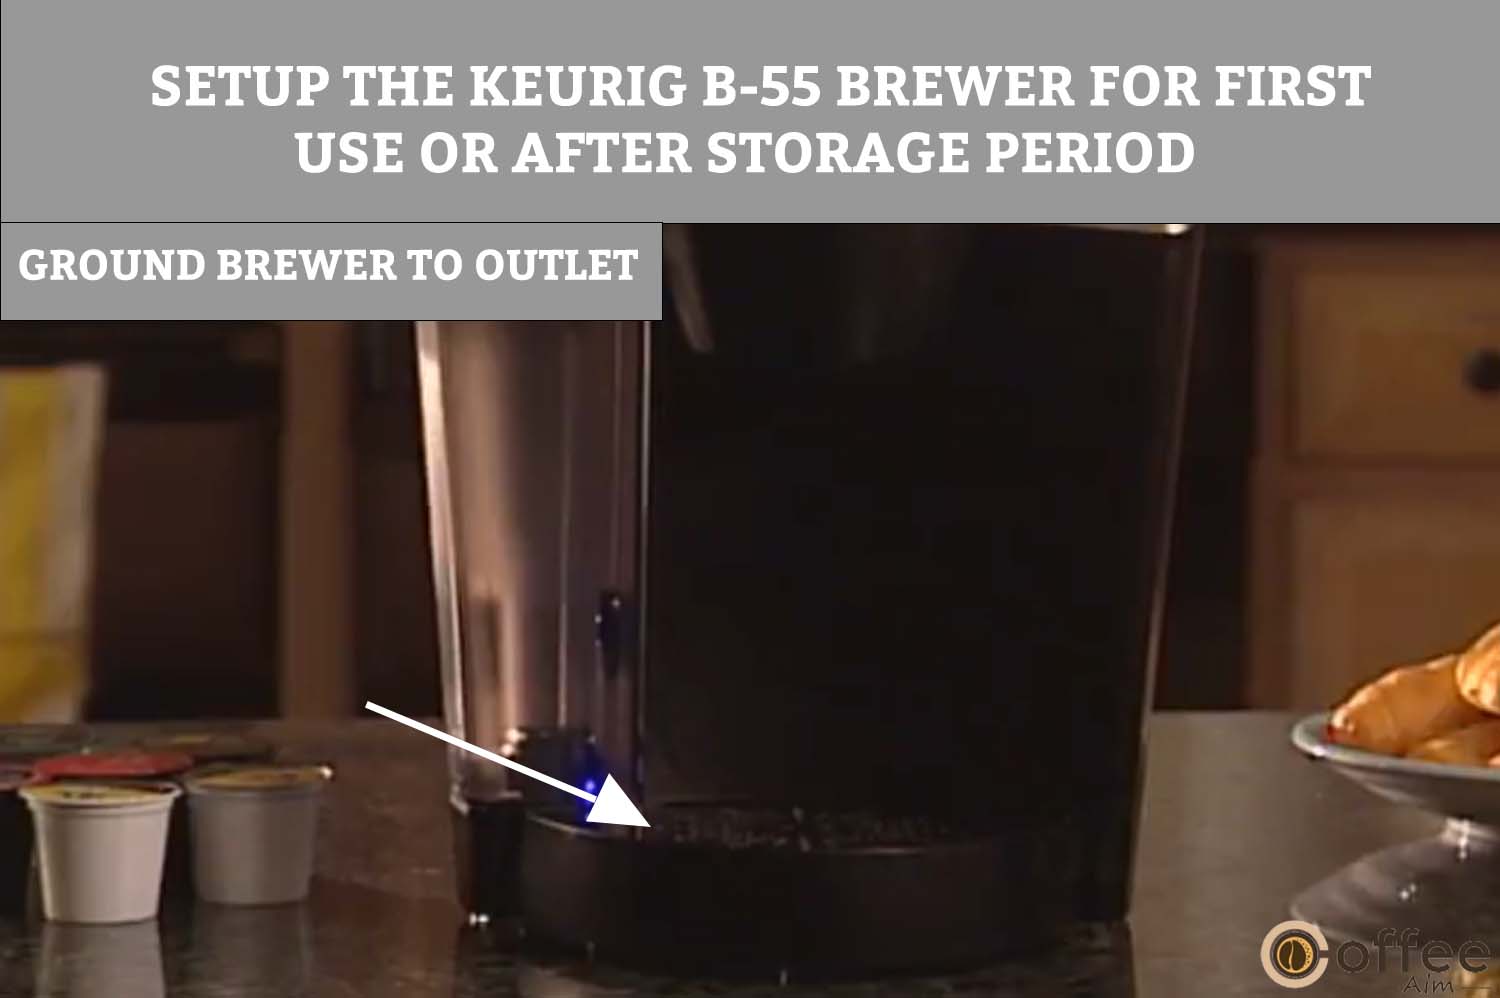
1. Connect the brewer machine to a grounded outlet.
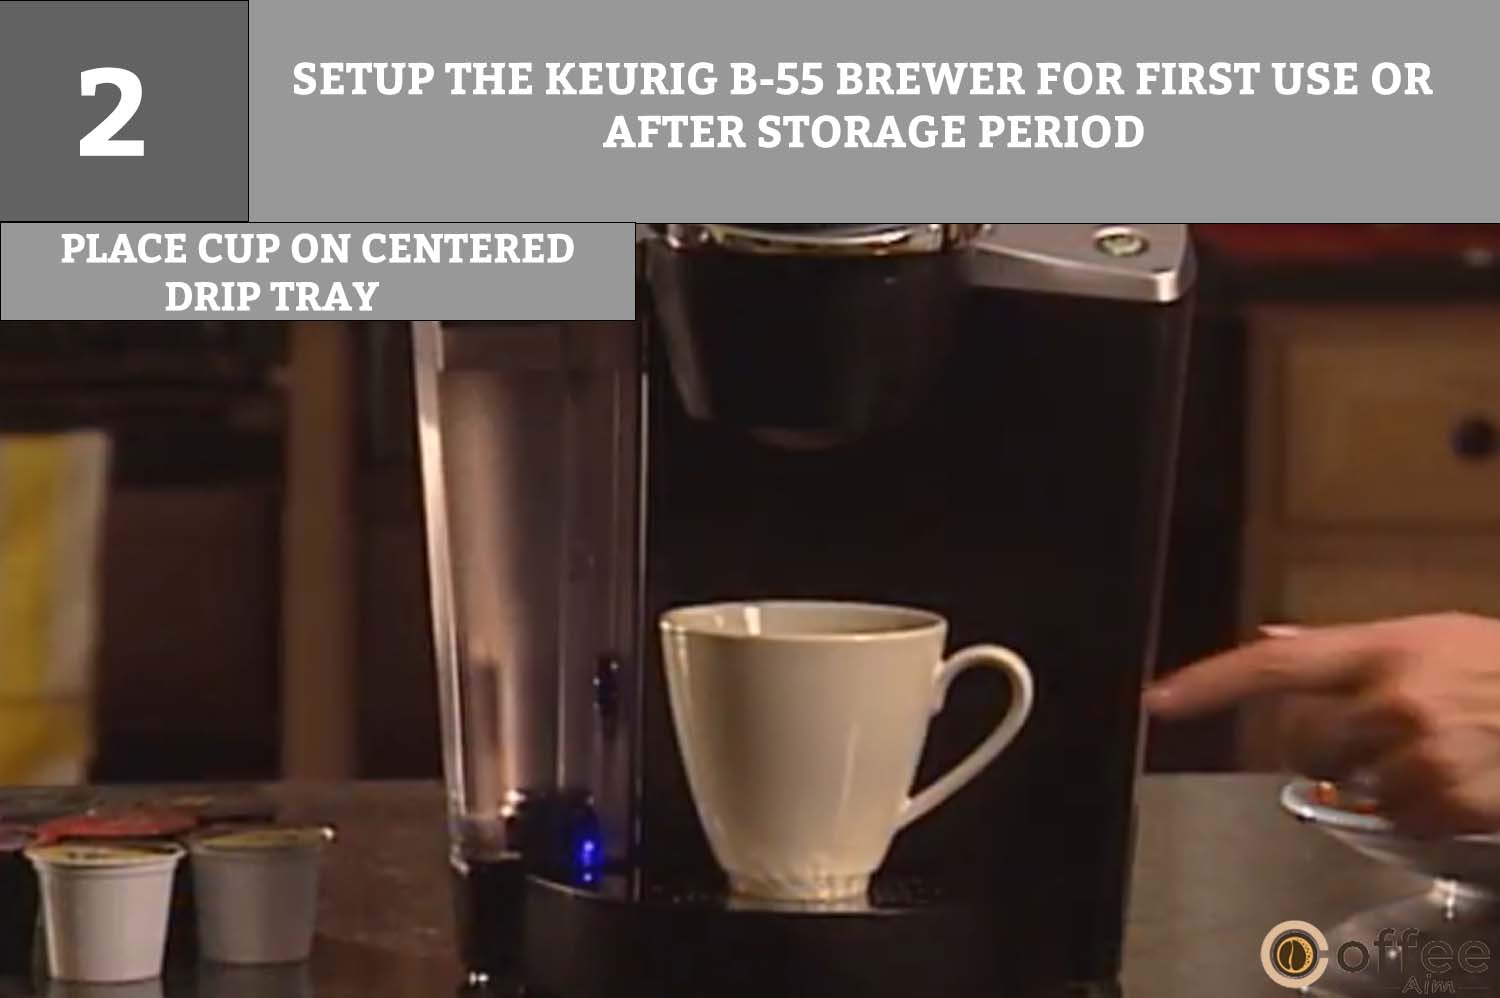
2. Set a cup or mug on the Drip Tray Plate. You should make sure that cup is at the center of the drip tray plate.
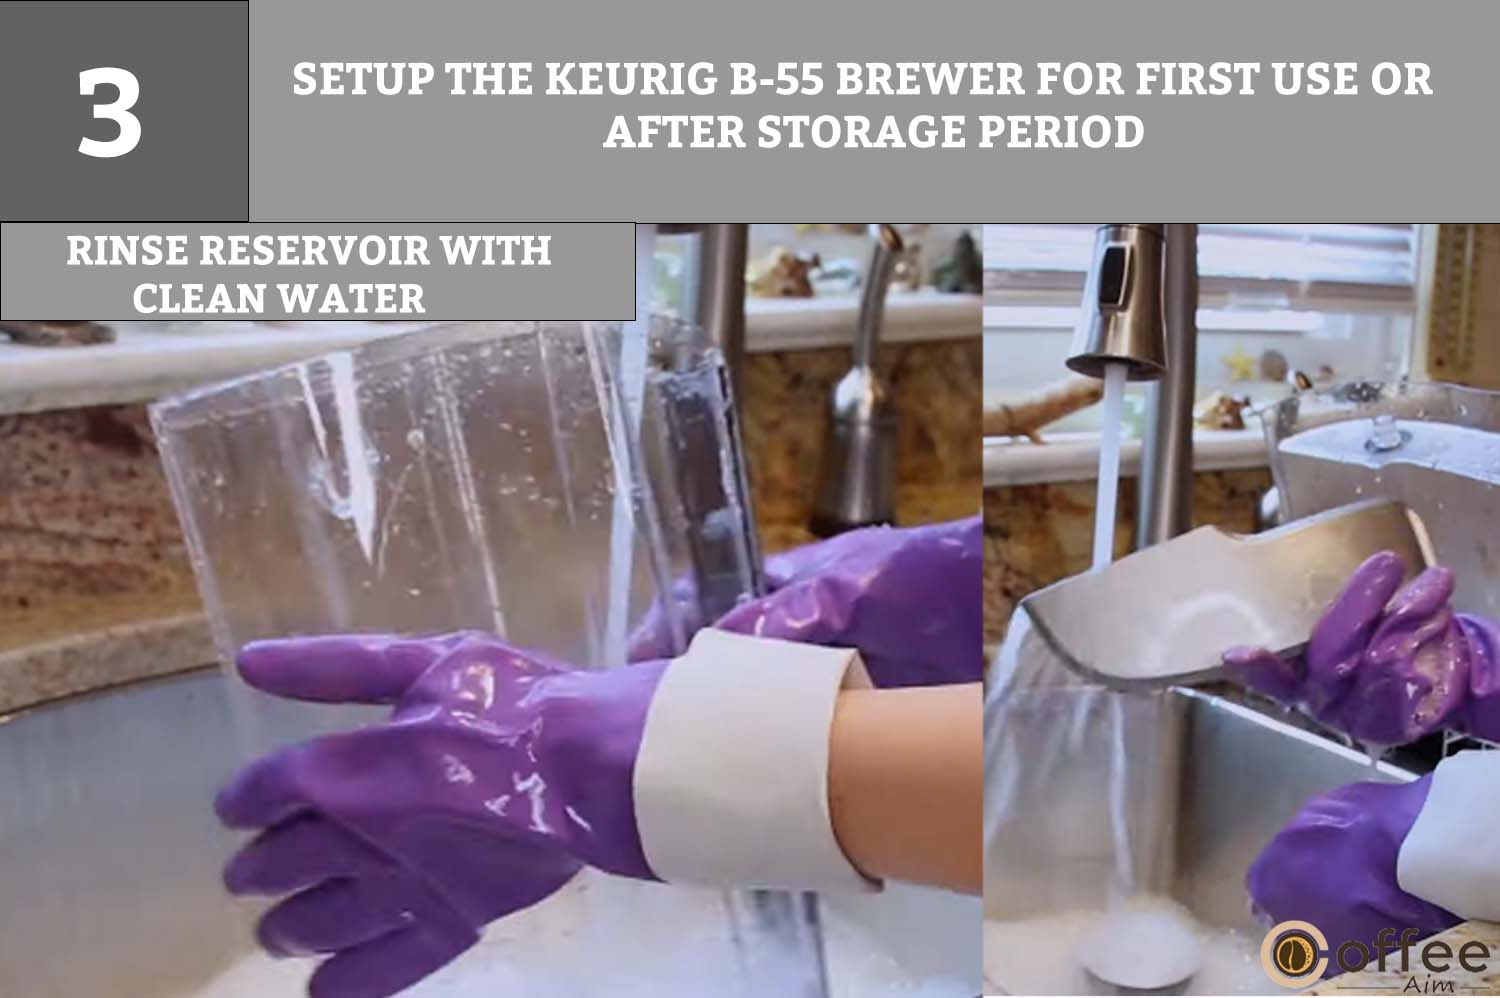
3. You should use Clean water to rinse the water reservoir and its lid.
4. Now, add fresh water to the Water Reservoir until it fills the top border of the clear viewing area. Put the lid on the water reservoir.
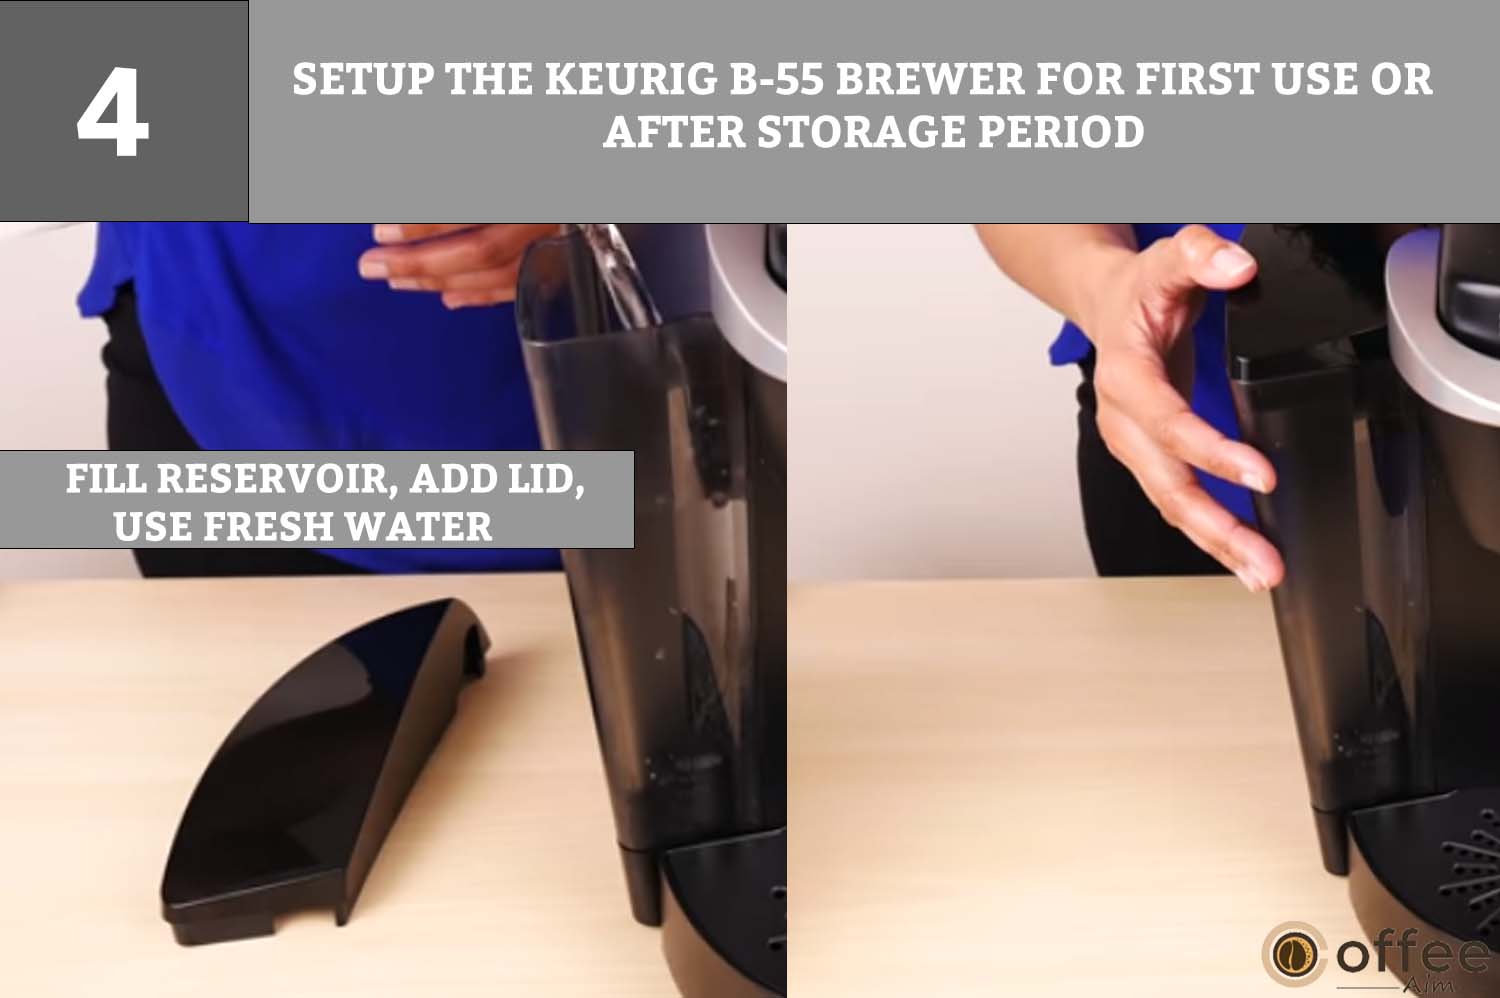
5. You must engage the Water Reservoir Lock Tabs with the Brewer before inserting the Water Reservoir base into the left side of the Brewer.

6. You have assembled; press the Power button on Brewer’s upper right panel to turn the machine on. The Power Button’s surrounding green light will turn on.

7. After turning your machine on, The Large Cup icon will flash, and you will get the word “PRIME” in the LCD Message Center.

8. Press the Large Cup Button (black color) that is present under the blinking Large Cup icon.
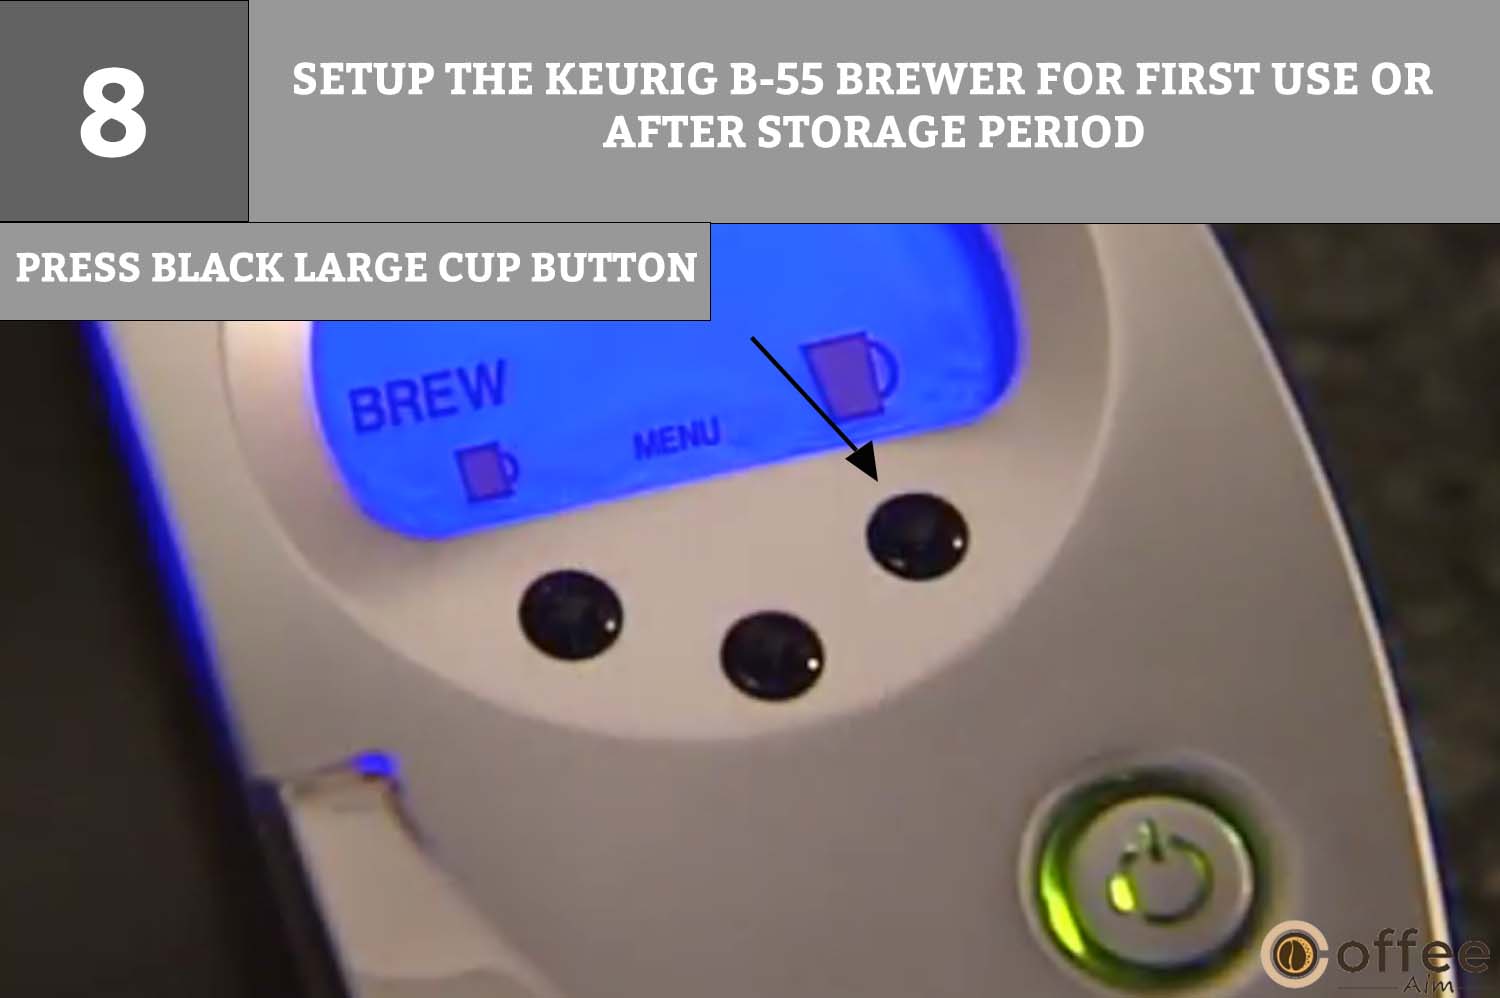
NOTE: The LCD Message Center will also display “ADD WATER” if the Water Reservoir on the Brewer is empty or not placed. All buttons will work once water is filled in the Water Reservoir.
9. After you press the Large Cup Button, the priming will start. The Keurig B-55 Brewer will automatically fill the Brewer and heat the water in approximately 3 minutes. The “NOT READY” indication will be on during the heating phase. The “READY” sign appears when the water is heated.
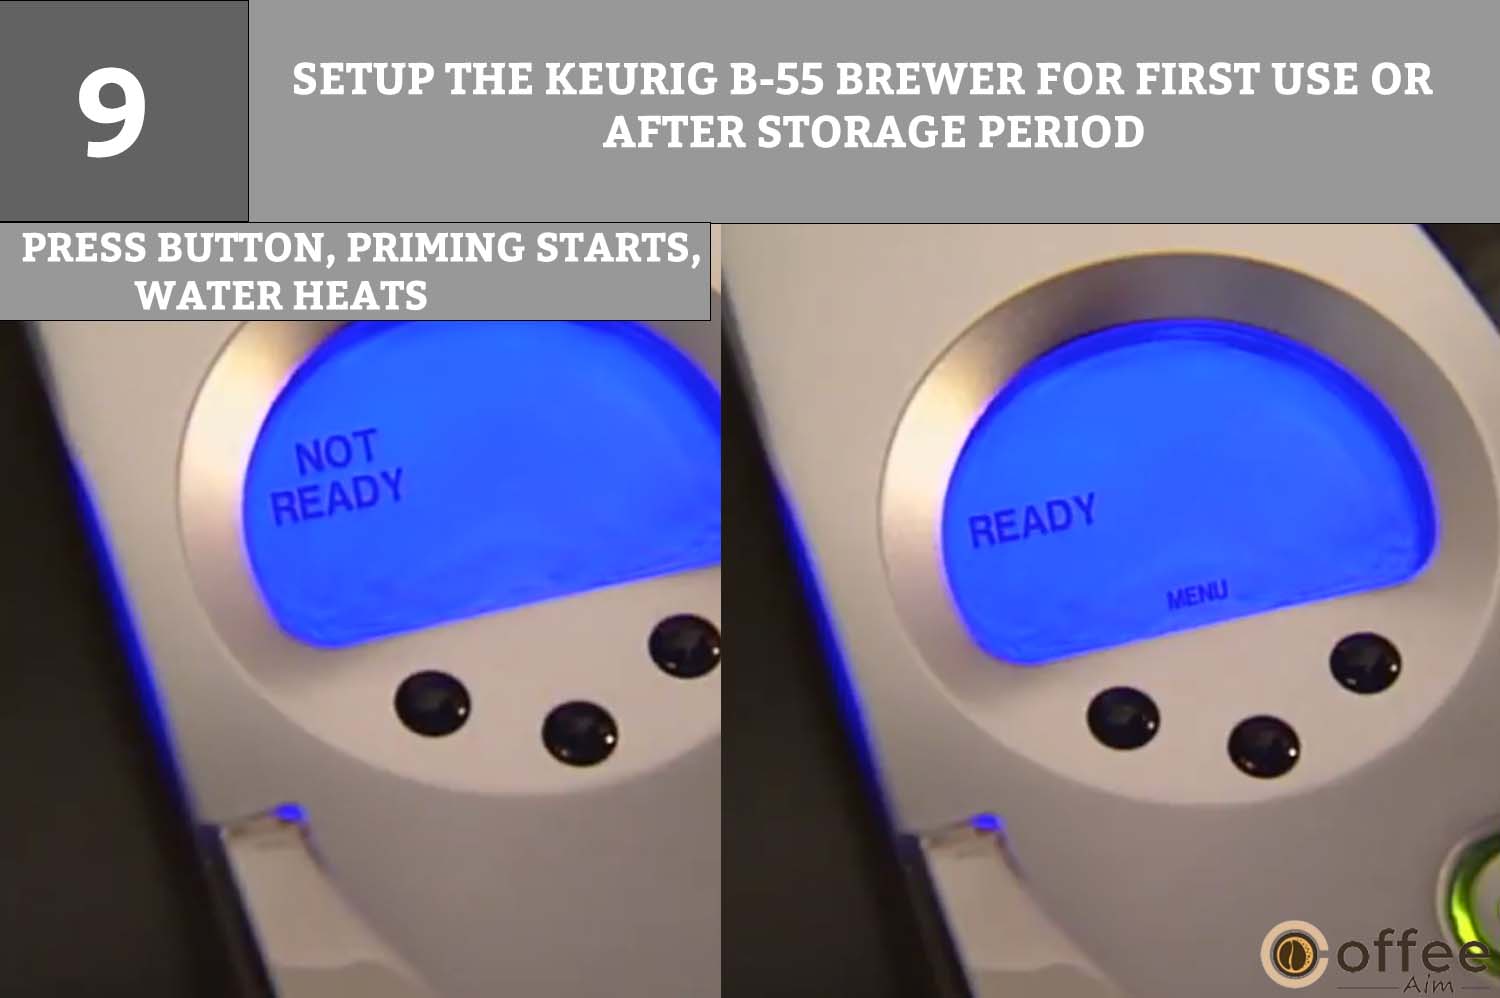
NOTE: During this heating process, you might notice a few drops of water dripping into the water reservoir from the vent. This dripping is common.
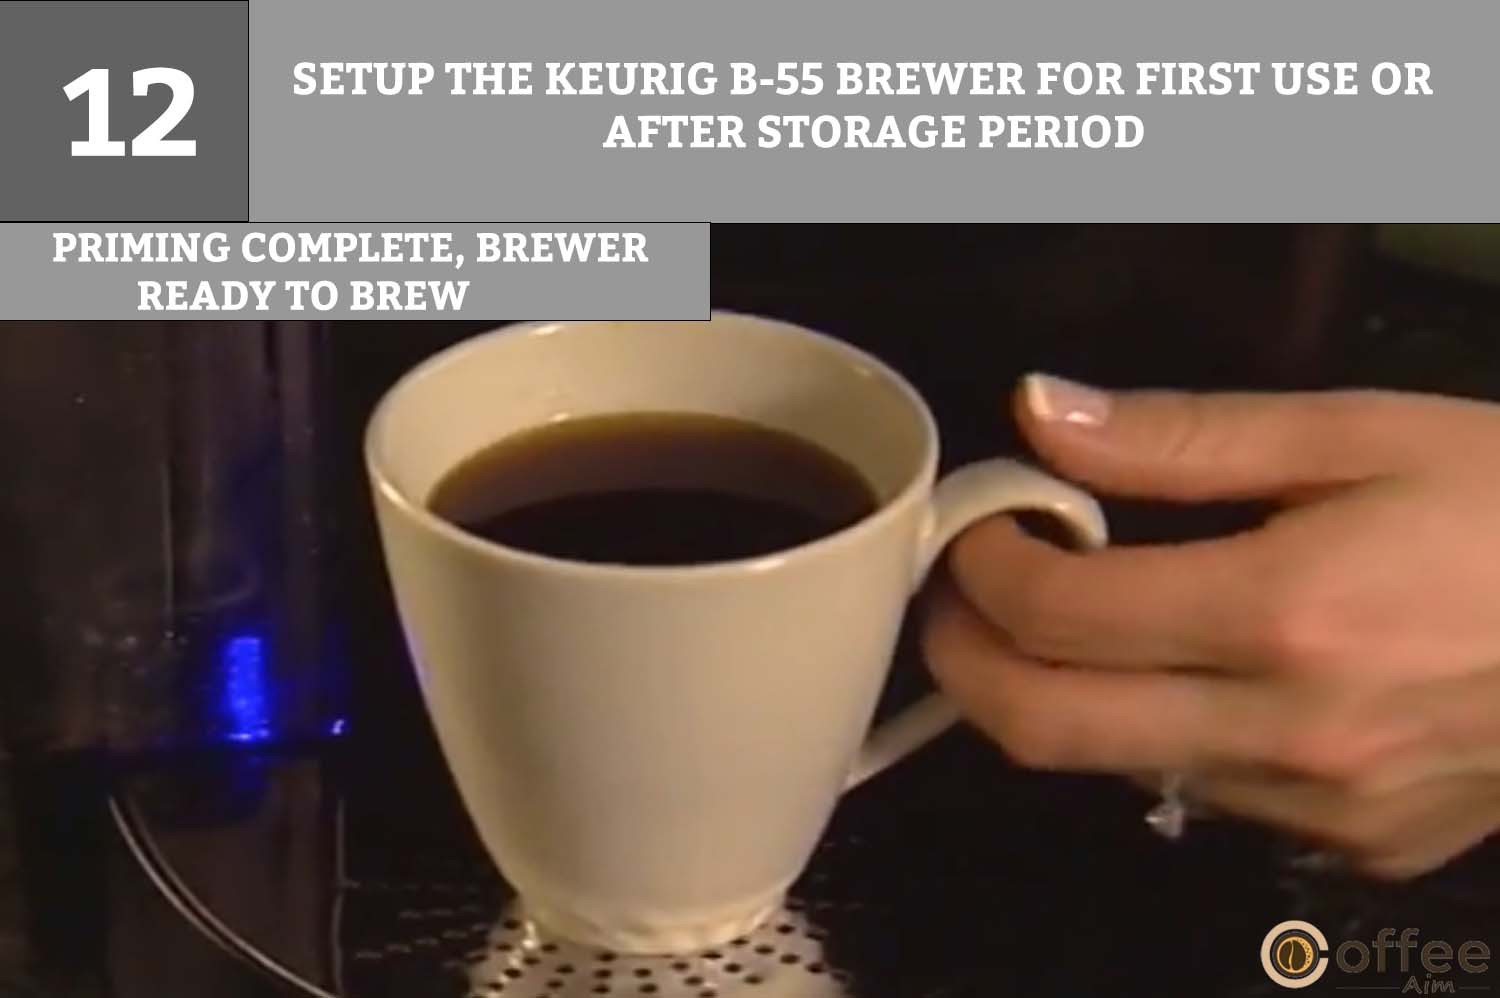
10. You will get hot water filling your cup or mug. Waste the hot water in the sink.

11. The Keurig B-55 Brewer may need 15 seconds to reheat the water, and then the ‘READY’ sign appears again.
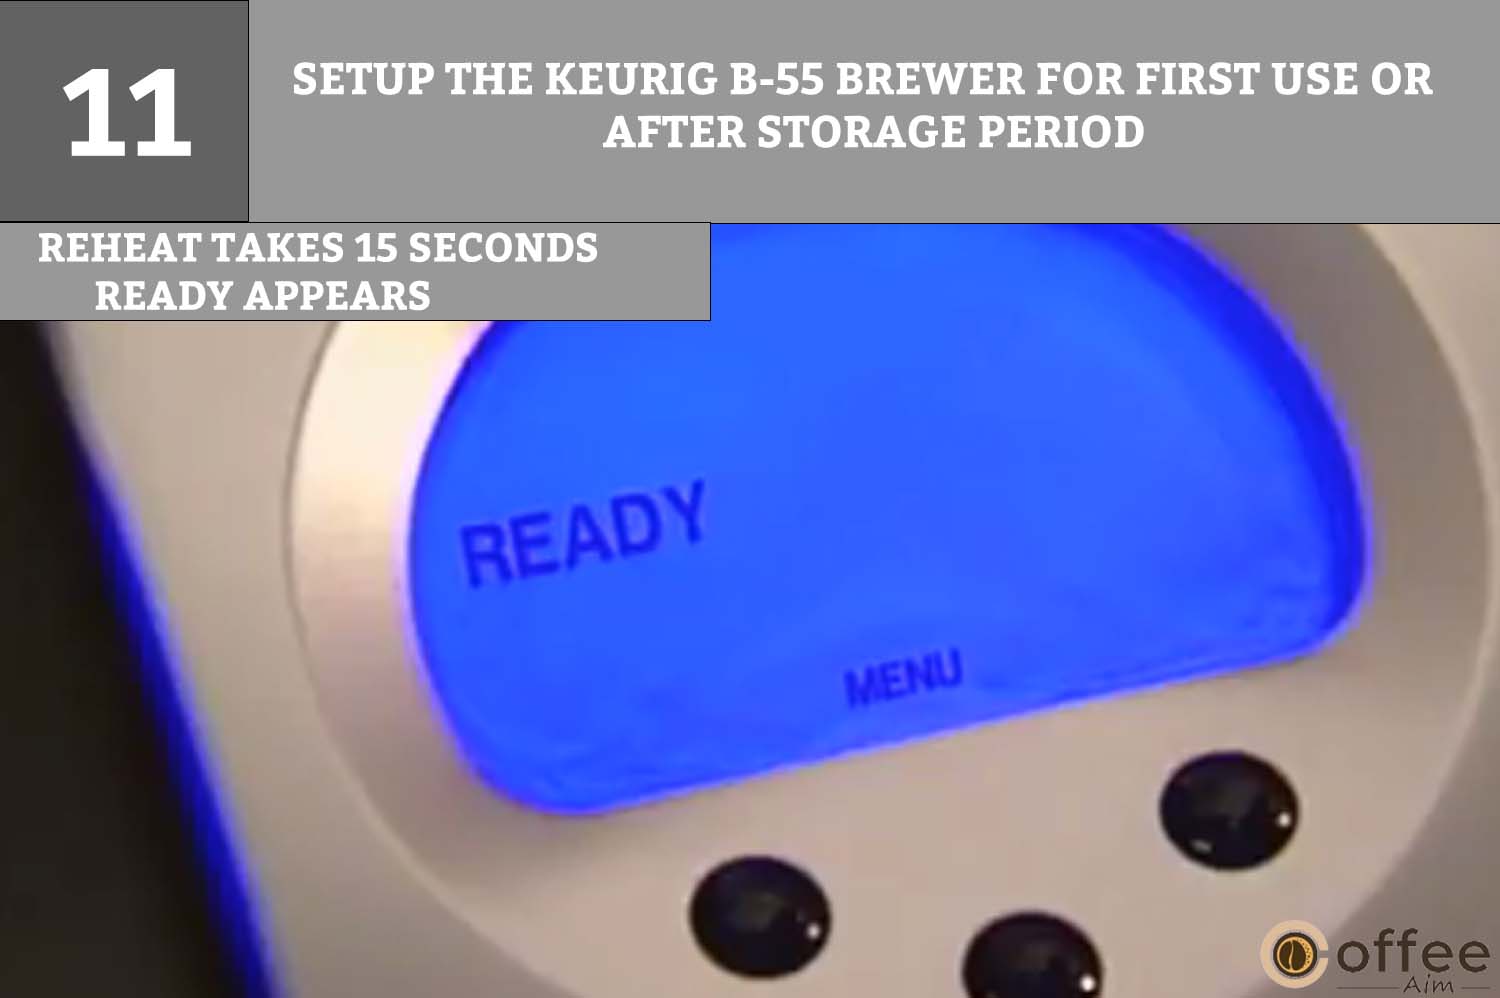
12. Now you have done the one-time priming procedure, and your brewer is ready to brew your first cup!
How To Brew Coffee In Keurig B-55 Brewer?
Bravo! You have successfully primed your Keurig B-55 Brewer. The time has come that you are eagerly waiting for. Now, it’s time to head toward brewing the first coffee cup!
Ready To Brew First Cup!
You should follow every step below to make your first cup of coffee.
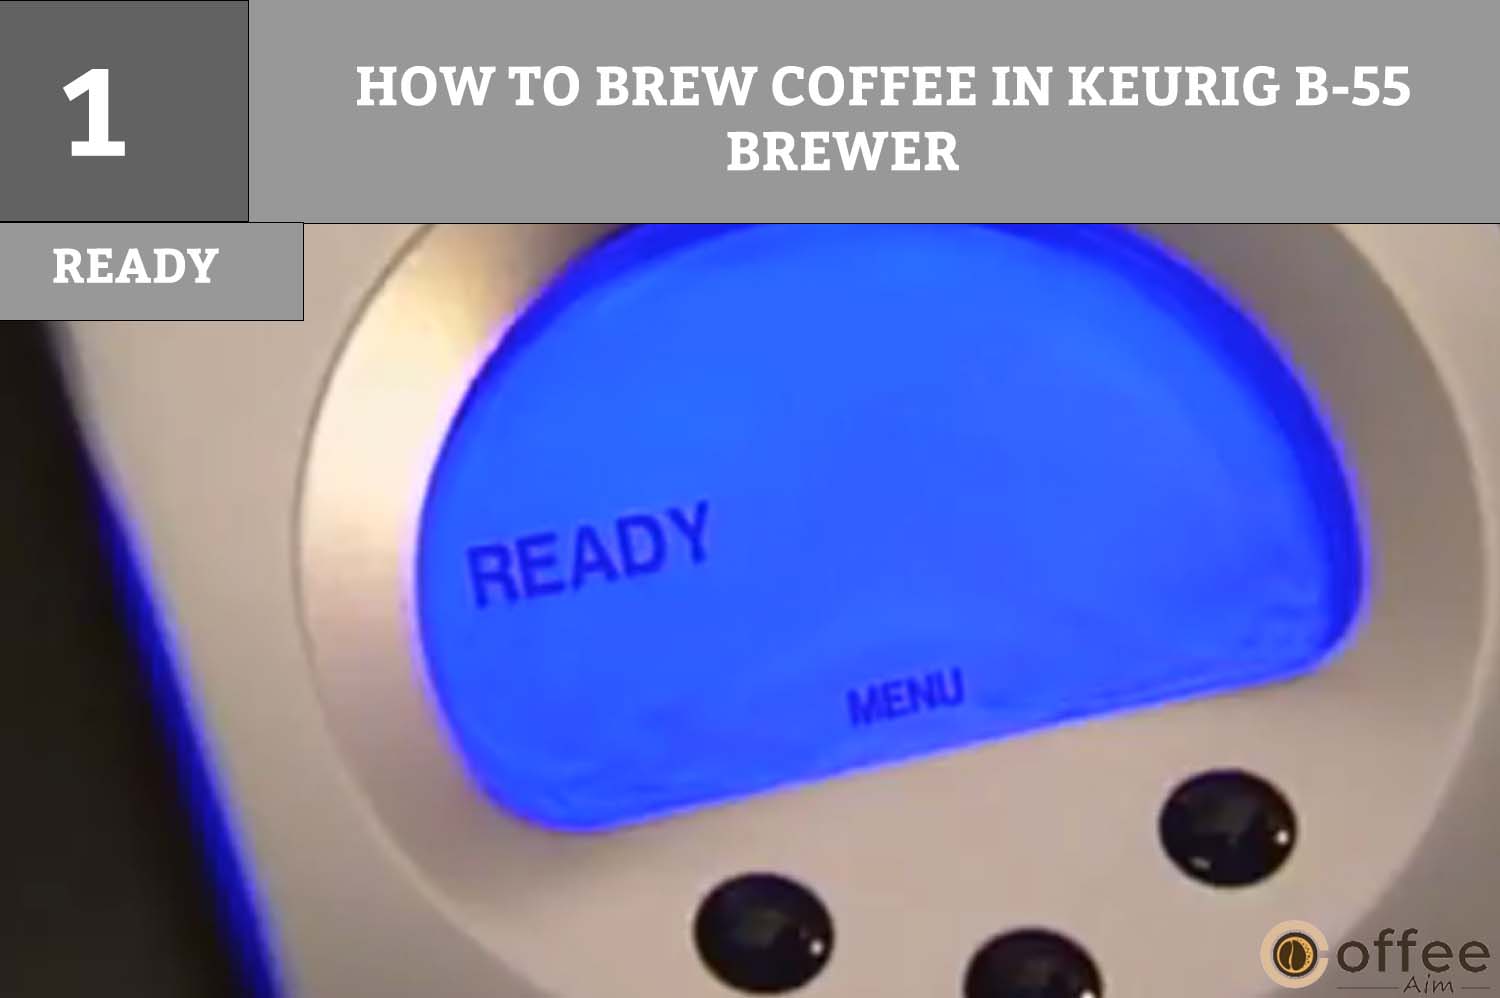
1. After priming your Keurig B-55 Brewer, the LCD Message Center will indicate ‘READY.’
2. Now, set a cup or mug on the Drip Tray Plate. You should make sure that cup is at the center of the drip tray plate.
3. The K-Cup Holder will open toward you when you lift the handle.

CAUTION: The bottom and the top of the K-Cup Holder contains pointed needles that pierce the K-Cup. Do not put your fingers inside the K-Cup chamber to reduce the risk of harm.
4. After successfully opening the K-Cup Holder, you may select a K-Cup provided with your Keurig B-55 Brewer.
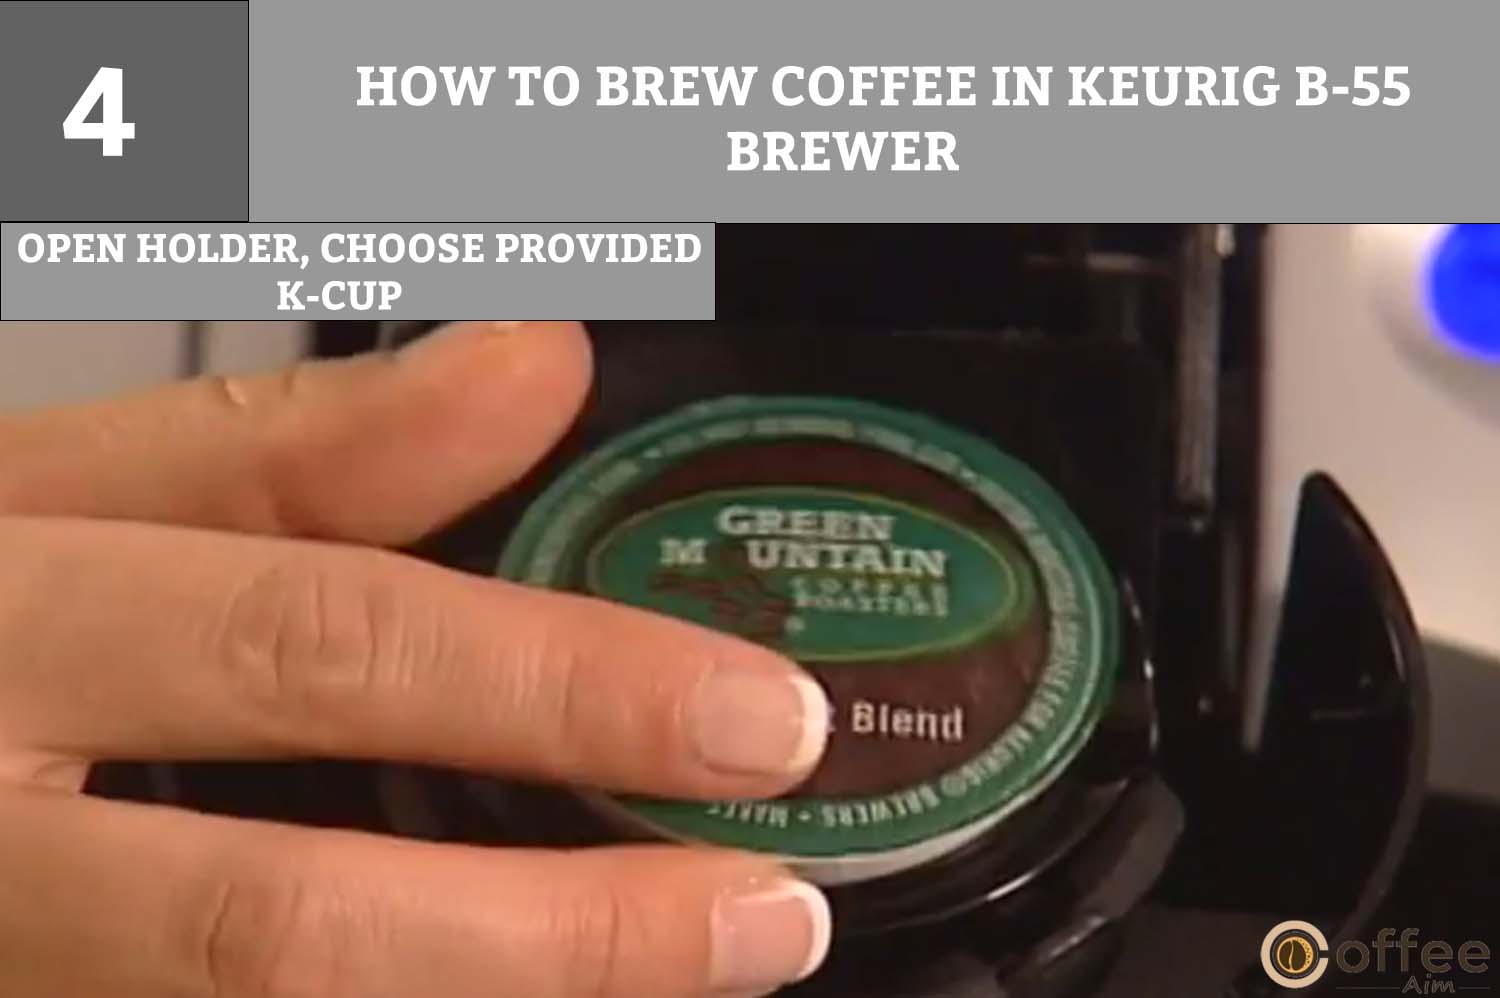
5. Insert a K-Cup in the K-Cup Holder of your Keurig B-55 Brewer.

NOTE: Never manually puncture the K-Cup or remove the foil lid.
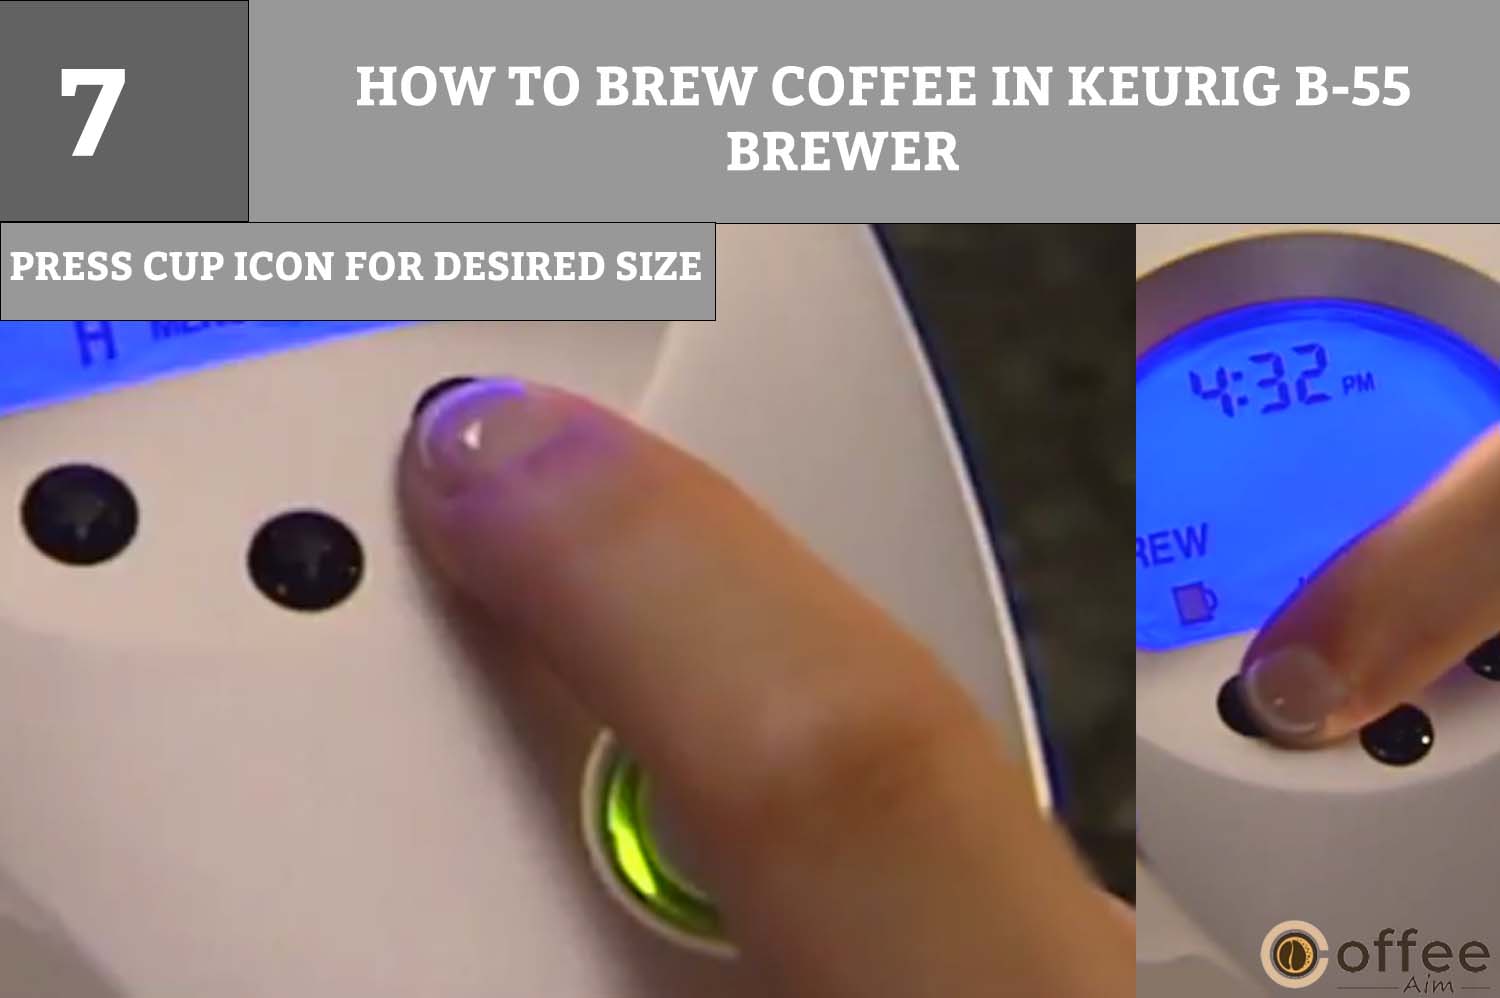
6. Close the lid over the K-Cup Holder by lowering the handle. When the lid is entirely closed, the LCD Message Center will display “BREW,” and the icons for the big and small cups will flash for 60 seconds.

NOTE: To prevent unintentional activation, the LCD Message Center will return to “READY” after 60 seconds if you do not press the Brew Button. Raise and lower the Handle to reactivate the Brew Button.
7. Press the button under the small or large cup icon that to the quantity of coffee or tea you want to brew. The Small Cup option will result in a 5.25 oz portion, while the Large Cup option will result in a 7.25 oz serving.
CAUTION: During the brewing process, the water in the K-Cup Holder is hot. Lifting the Handle or opening the K-Cup Chamber during the brewing process puts you at risk for injury.
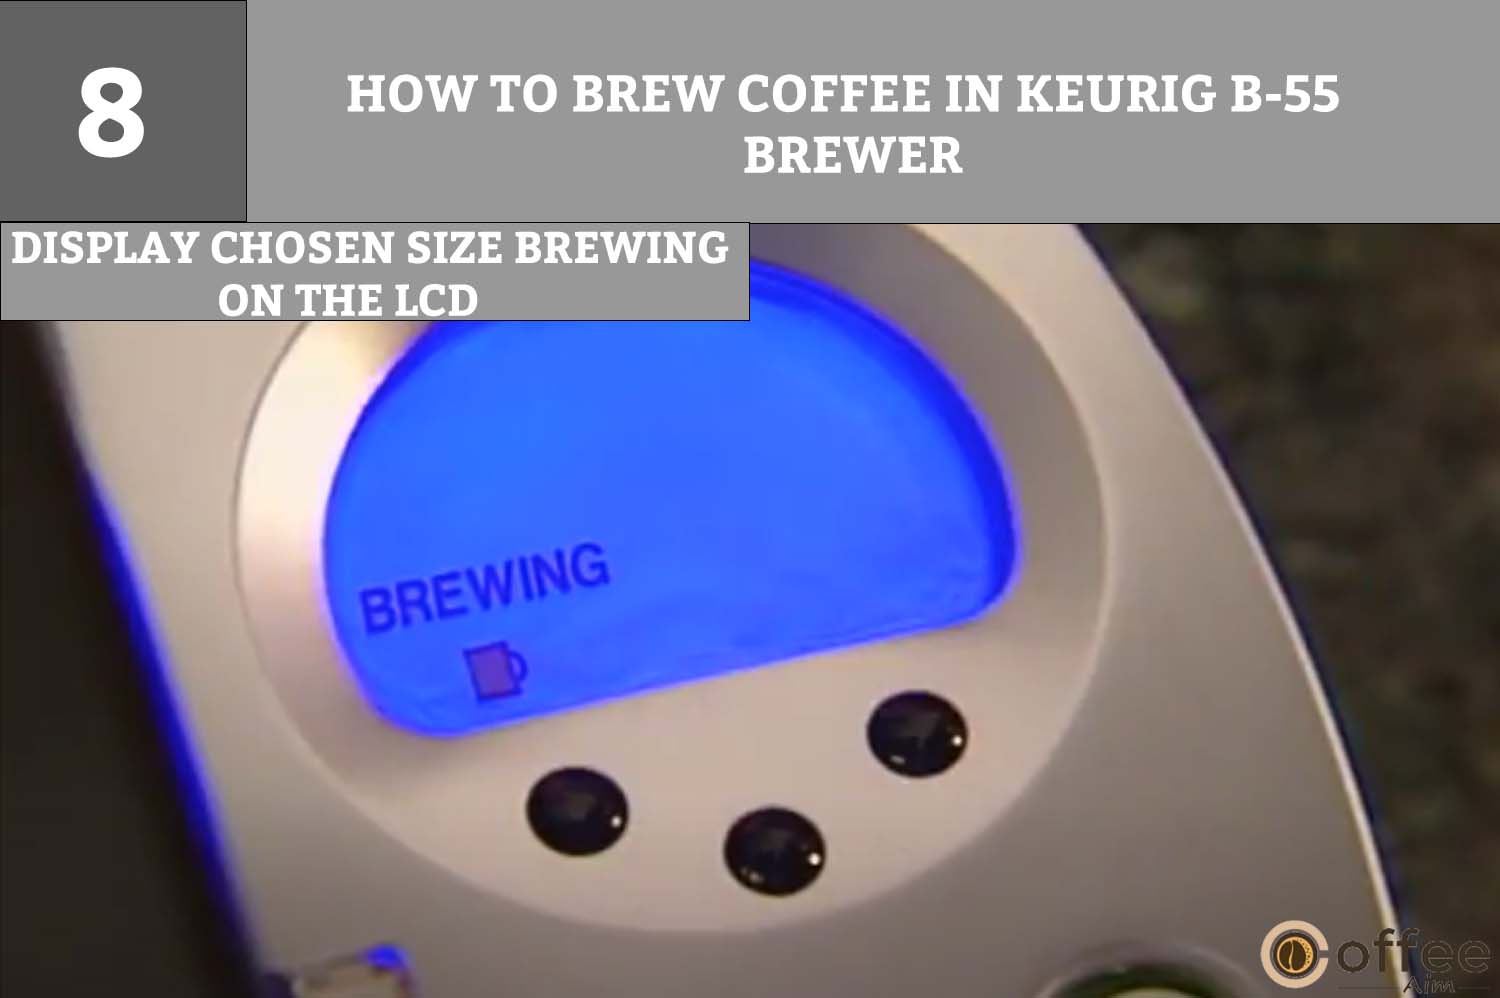
8. The brewer will display the serving size you chose along with the term “BREWING” on the LCD.
9. Before the brewing process starts, there can be a little halt. The procedure takes around 40 seconds to complete, and it ends with a burst of air that clears the K-Cup of all liquid coffee or tea.

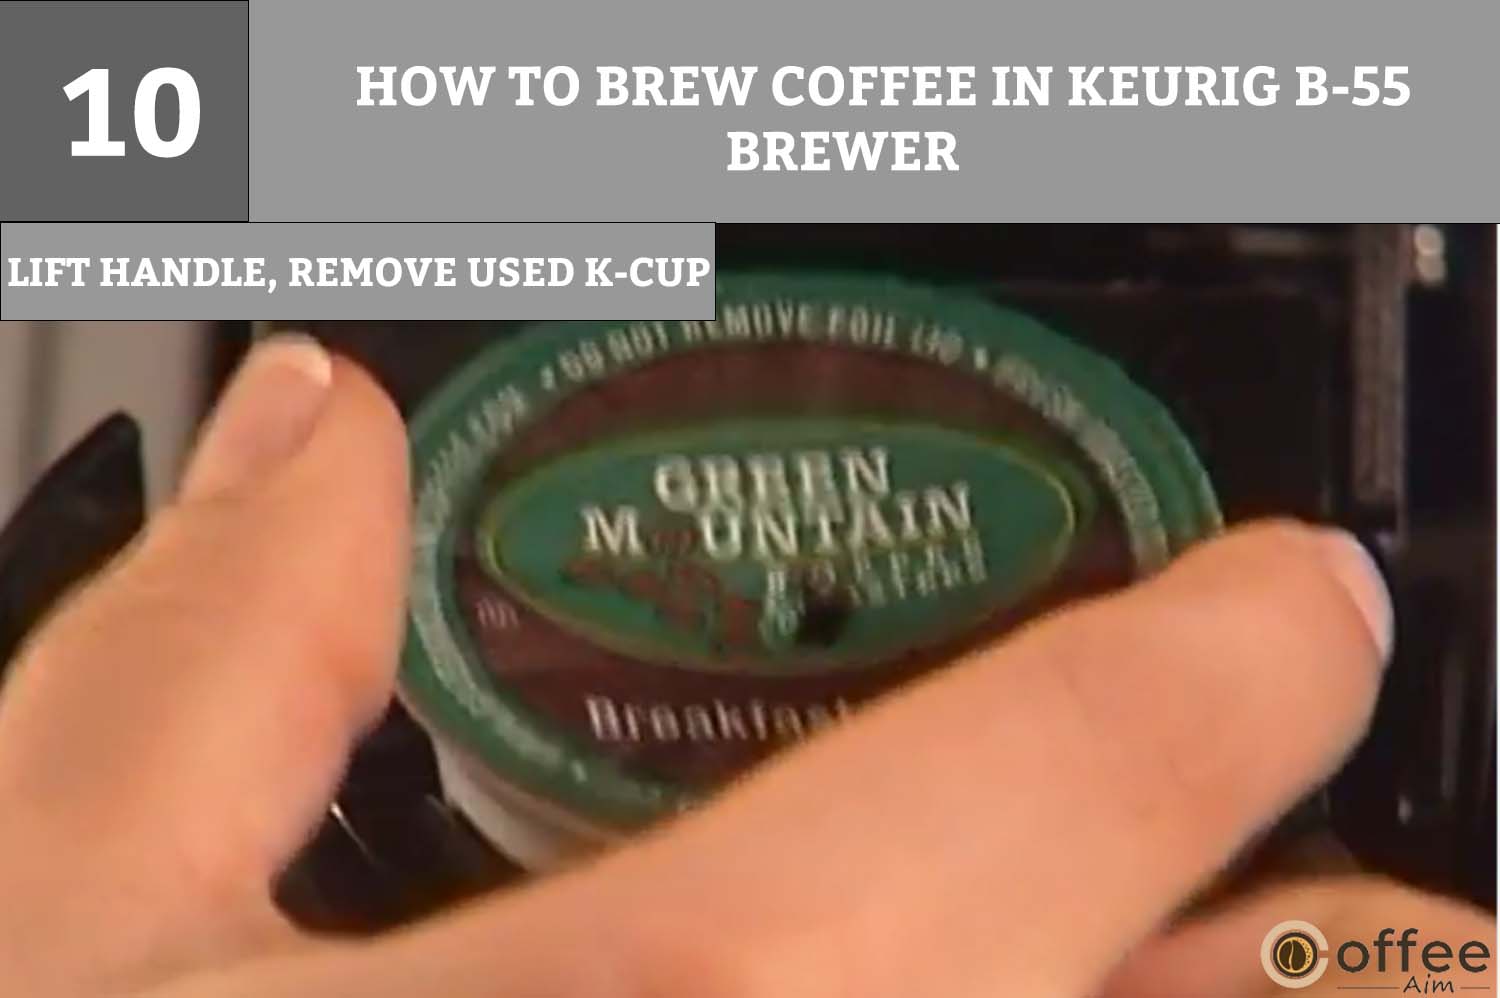
10. Remove and discard the used K-Cup by lifting the handle.
11. Savor your first cup of delicious coffee or tea extracted through the Keurig B-55 Brewer.

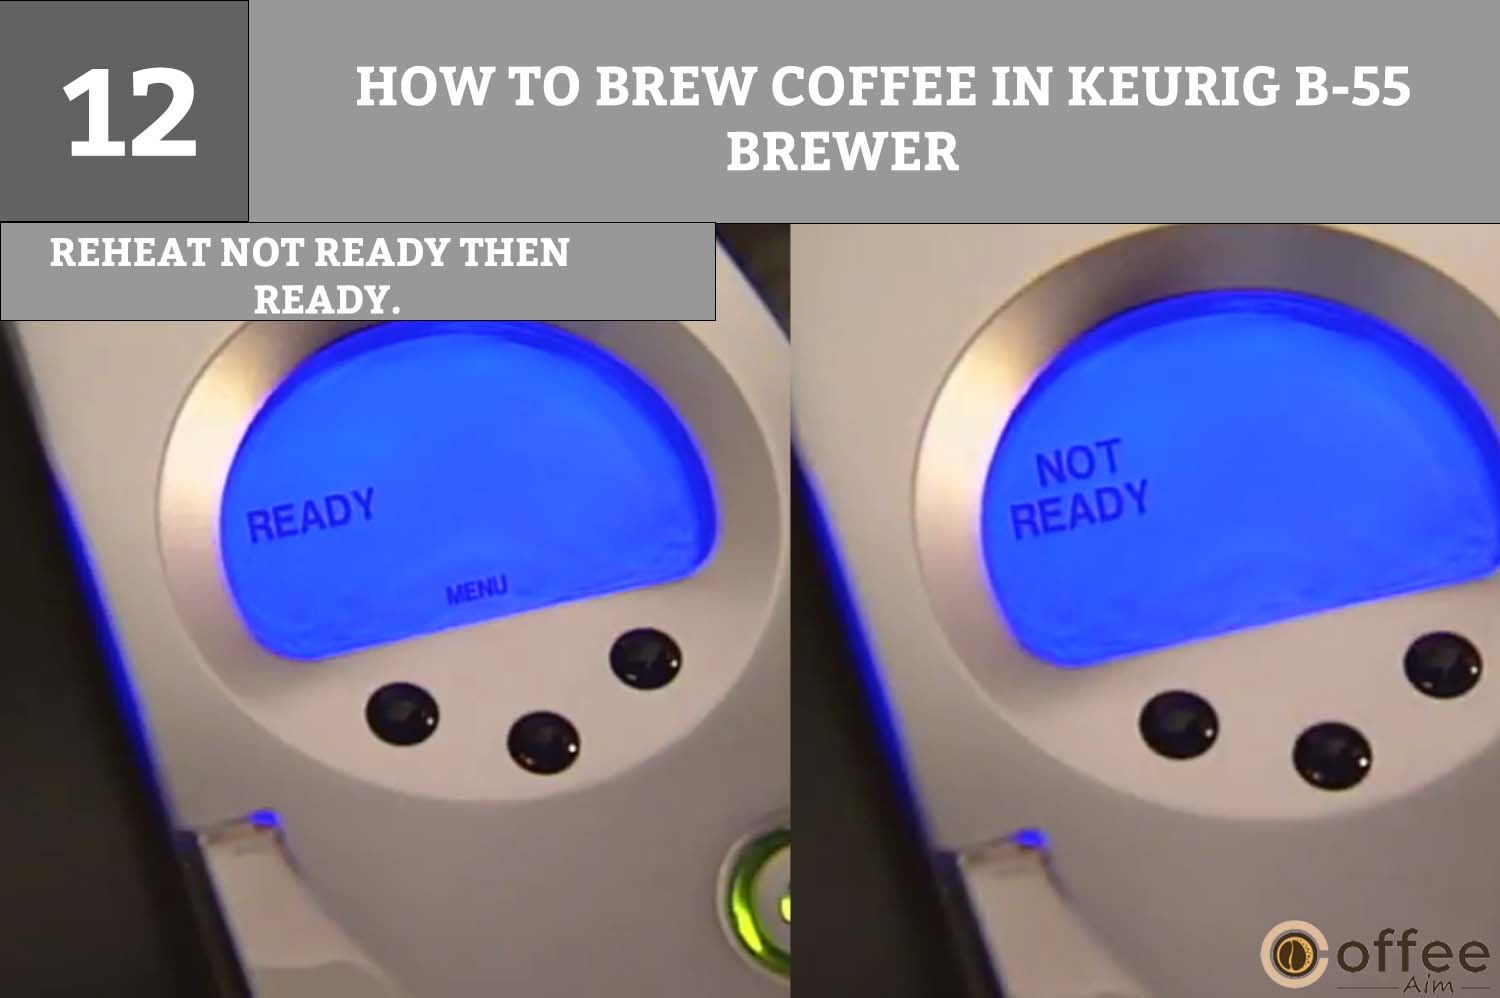
12. As it reheats water for the upcoming brew cycle, your brewer may indicate “NOT READY.” In roughly 15 seconds, the LCD Message Center will display the word “READY.”
Stopping The Brew Process
What if you change your mind and don’t want to drink coffee at the moment, or anything happens? You must want to stop the coffee-making process, and you can stop that by following the steps below;
1. After the brewing has begun, if you need to stop it, push the power button to switch the Keurig B-55 Brewer “OFF.”
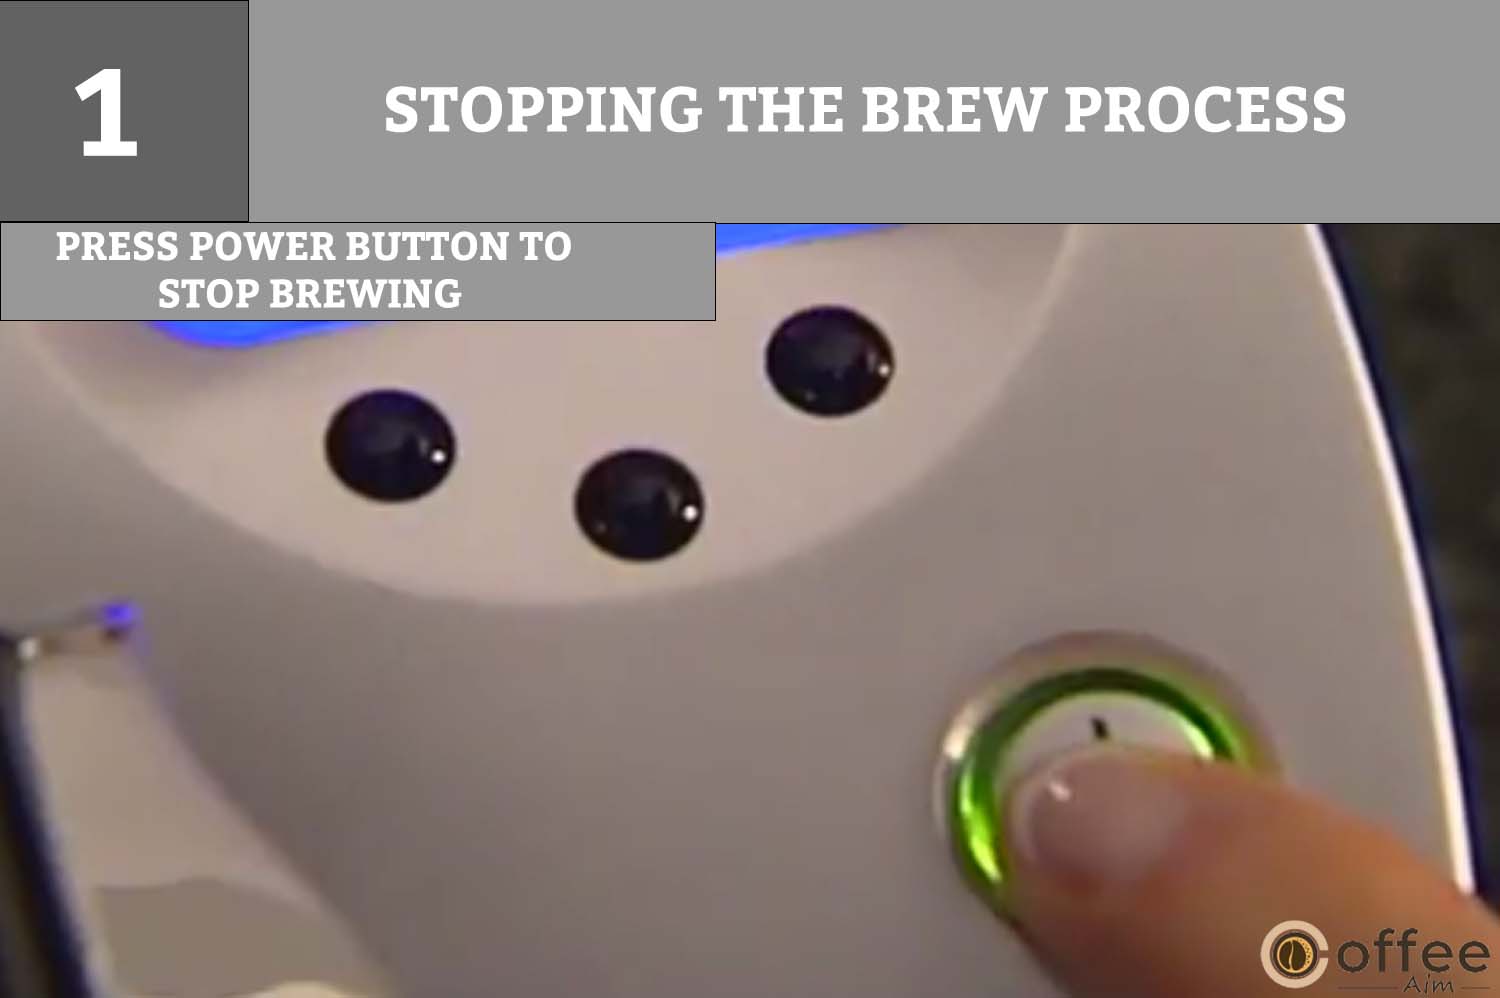
2. The heating element will turn off, the coffee or tea will cease flowing, and the green light that illuminates the Power Button will vanish.
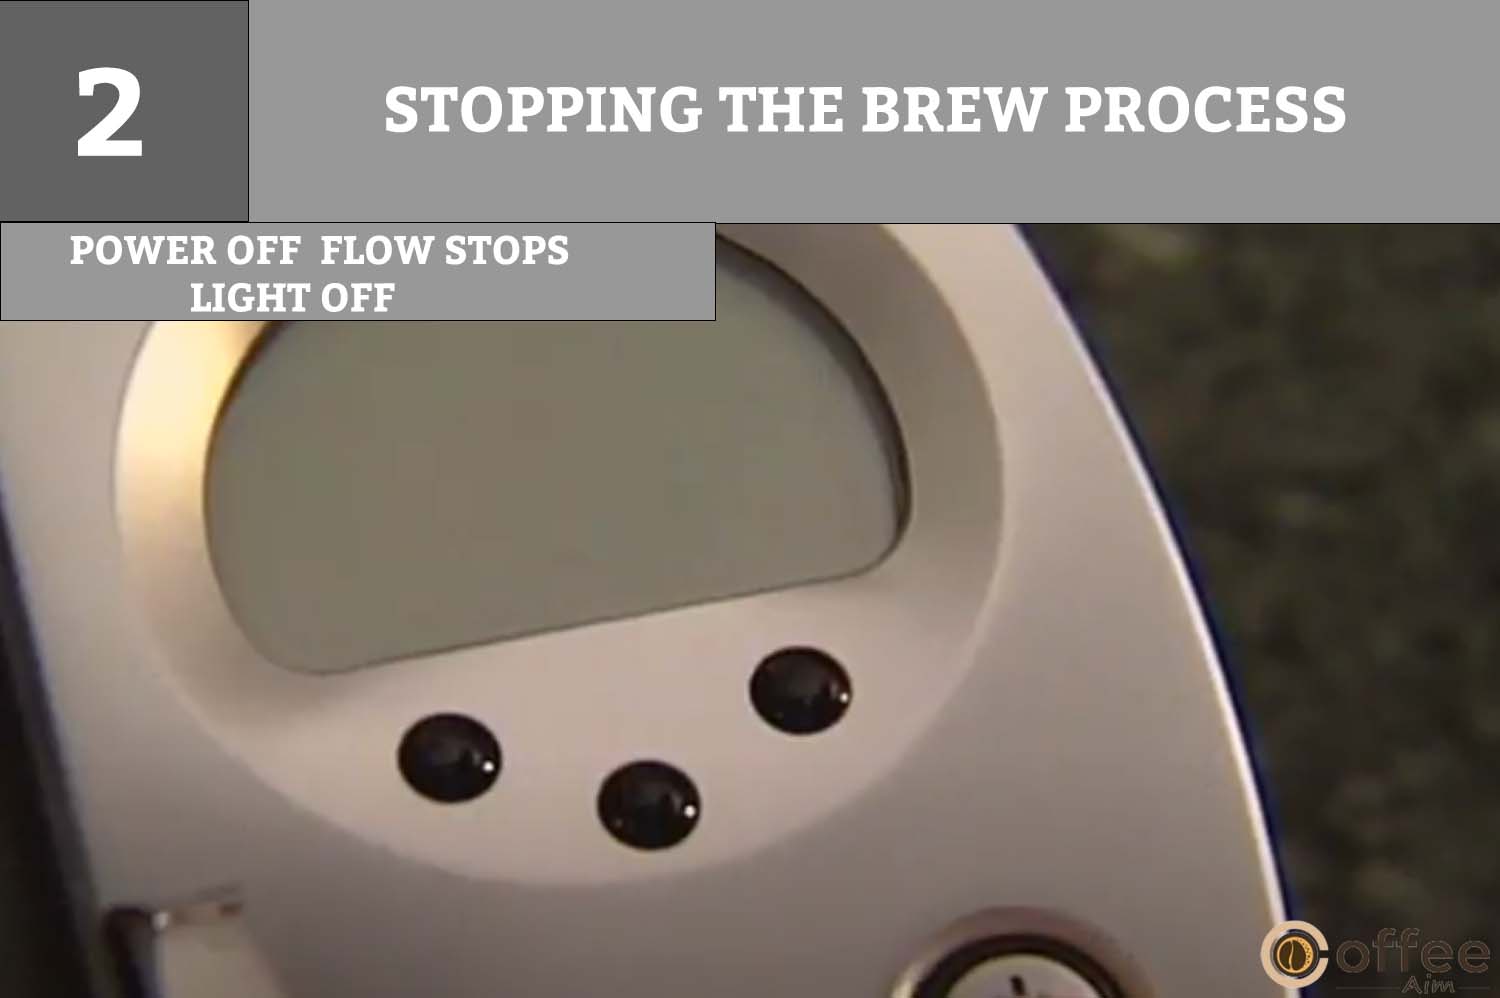
NOTE: After a terminating brew, you might get less coffee or tea in your next brew. I advise you to make a water-based cleansing brew after a terminated brew. After cleansing, the brewer will use the volume you have chosen for your NEXT brew.
Adding The Water
Your Keurig B-55 Brewer’s LCD Message Center will display the words “ADD WATER” when the tank’s water level is low, or the water reservoir is not in position. The Brewer won’t let you brew when “ADD WATER” is blinking.
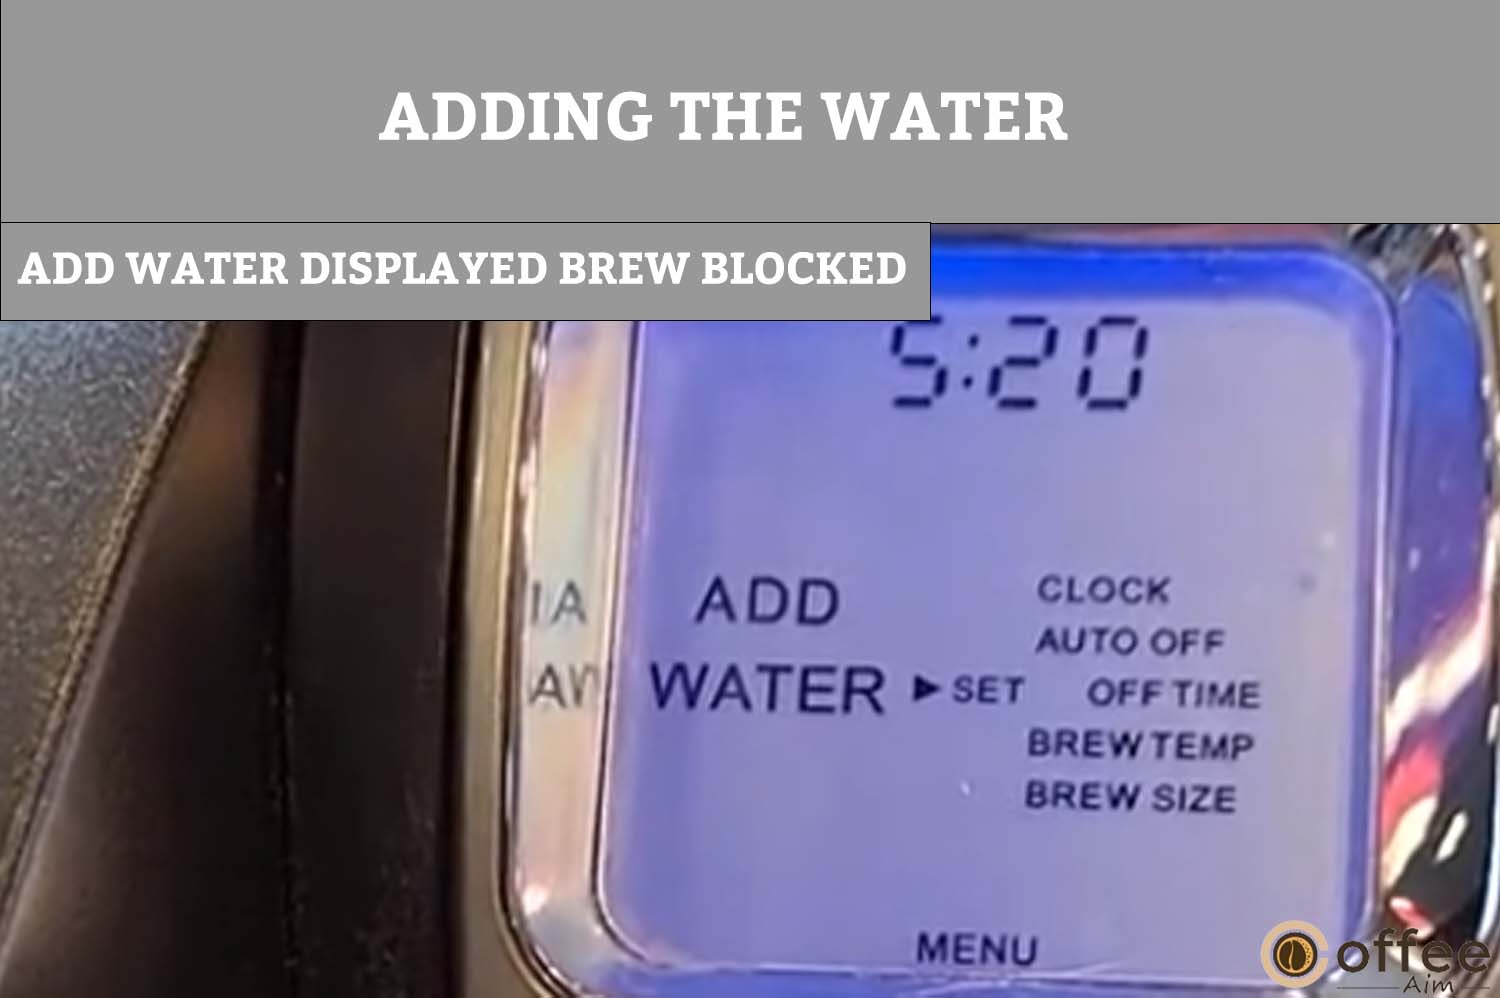
You can fill the Water Reservoir in two ways;
1. Remove the Water Reservoir Lid from the Brewer, fill the reservoir with water using any jug while the reservoir is still connected, and then reinstall the lid.
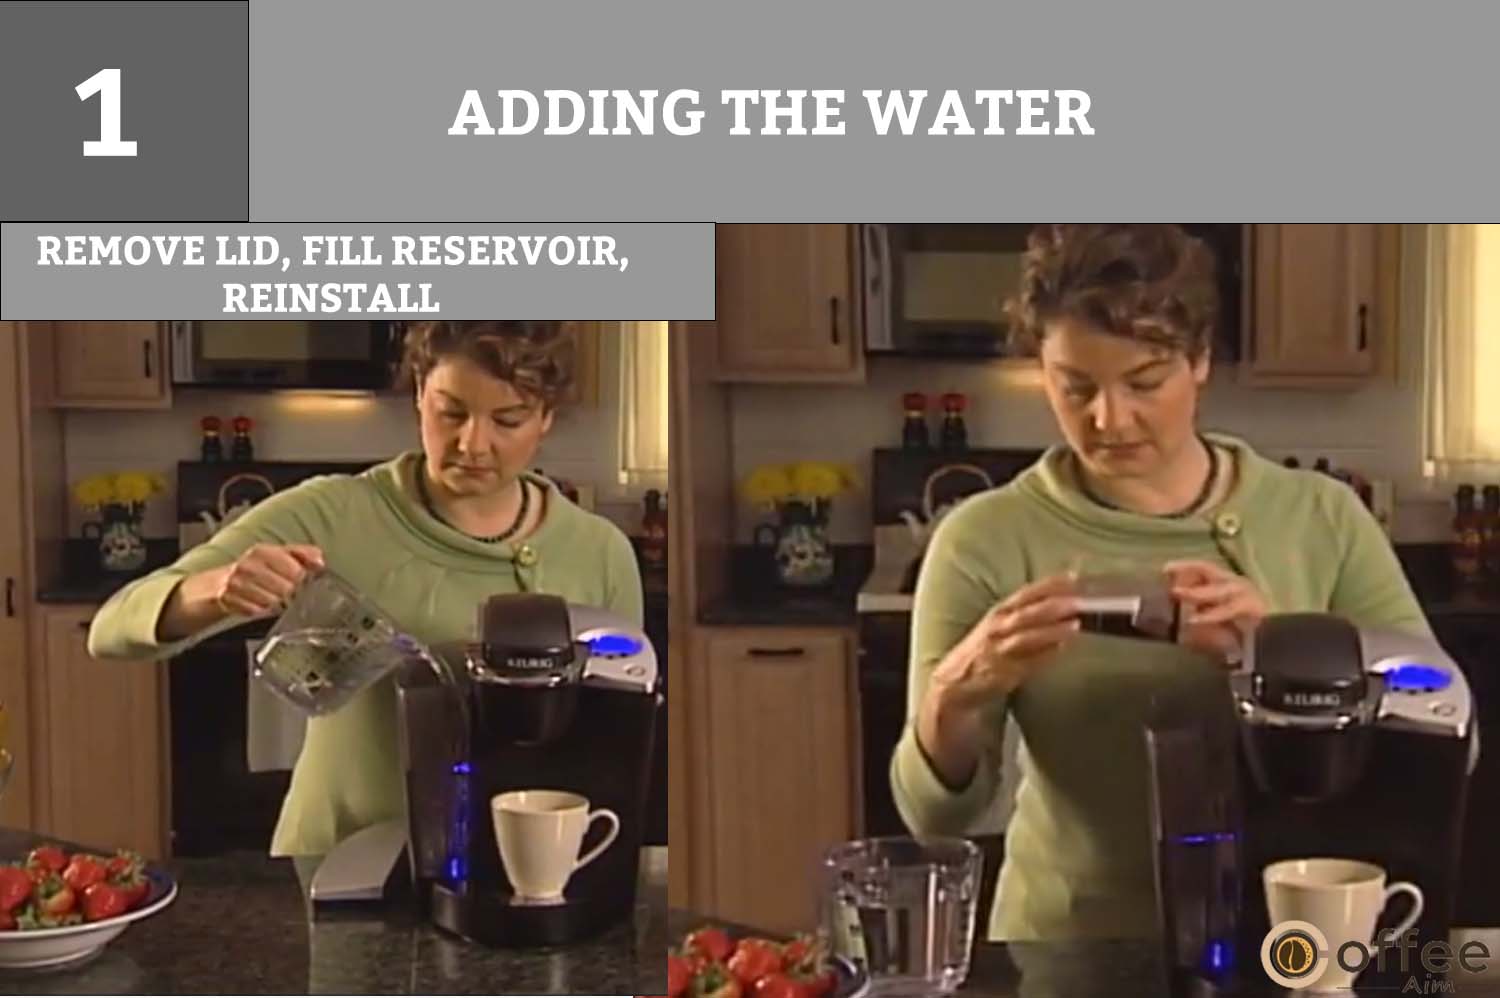
2. Lift the Water Reservoir away from the Brewer and remove the Water Reservoir Lid before adding water. Put the Water Reservoir back in its base and replace the lid.
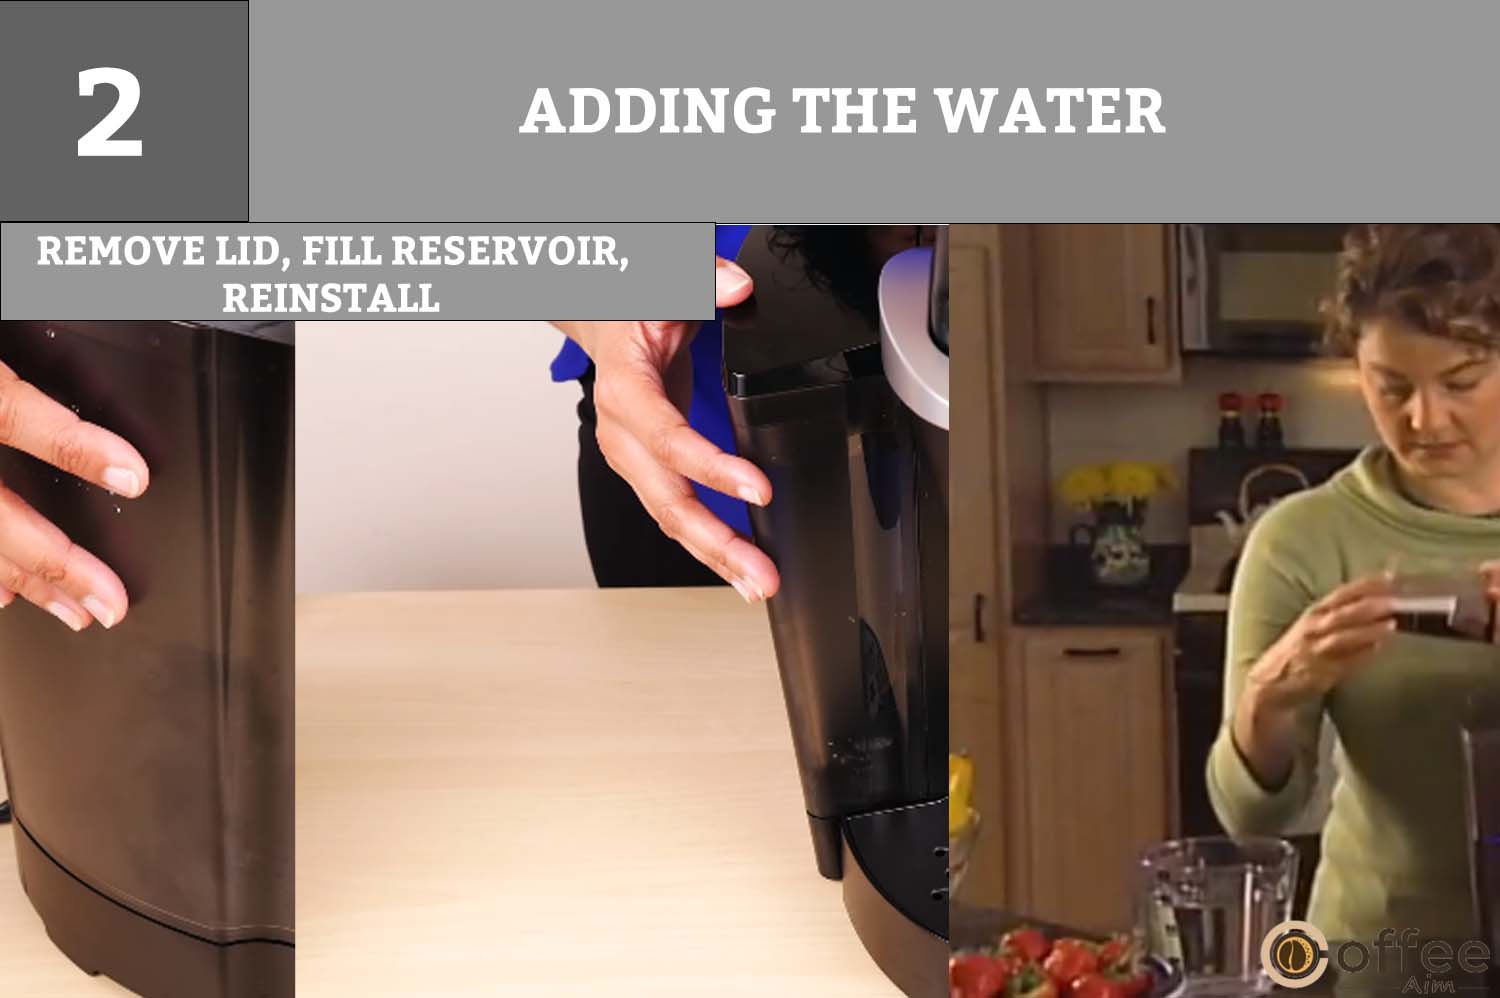
IMPORTANT: Keep the Water Reservoir in place correctly when brewing.
How To Prepare Coffee On Your Schedule Using Controls & Indicators?
Until now, you have understood how to prime your machine and make the first cup of coffee using the controls and indicators. You will now know how to make coffee according to your schedule using controls and indicators.
LCD Message Center
LCD Message Center is a jackpot of the Keurig B-55 Brewer’s users. The Brewer allows you to operate it in three modes using an LCD screen and buttons to enjoy gourmet coffee or tea on your schedule.
But first, understand how to set the time in your Keurig B-55 Brewer.
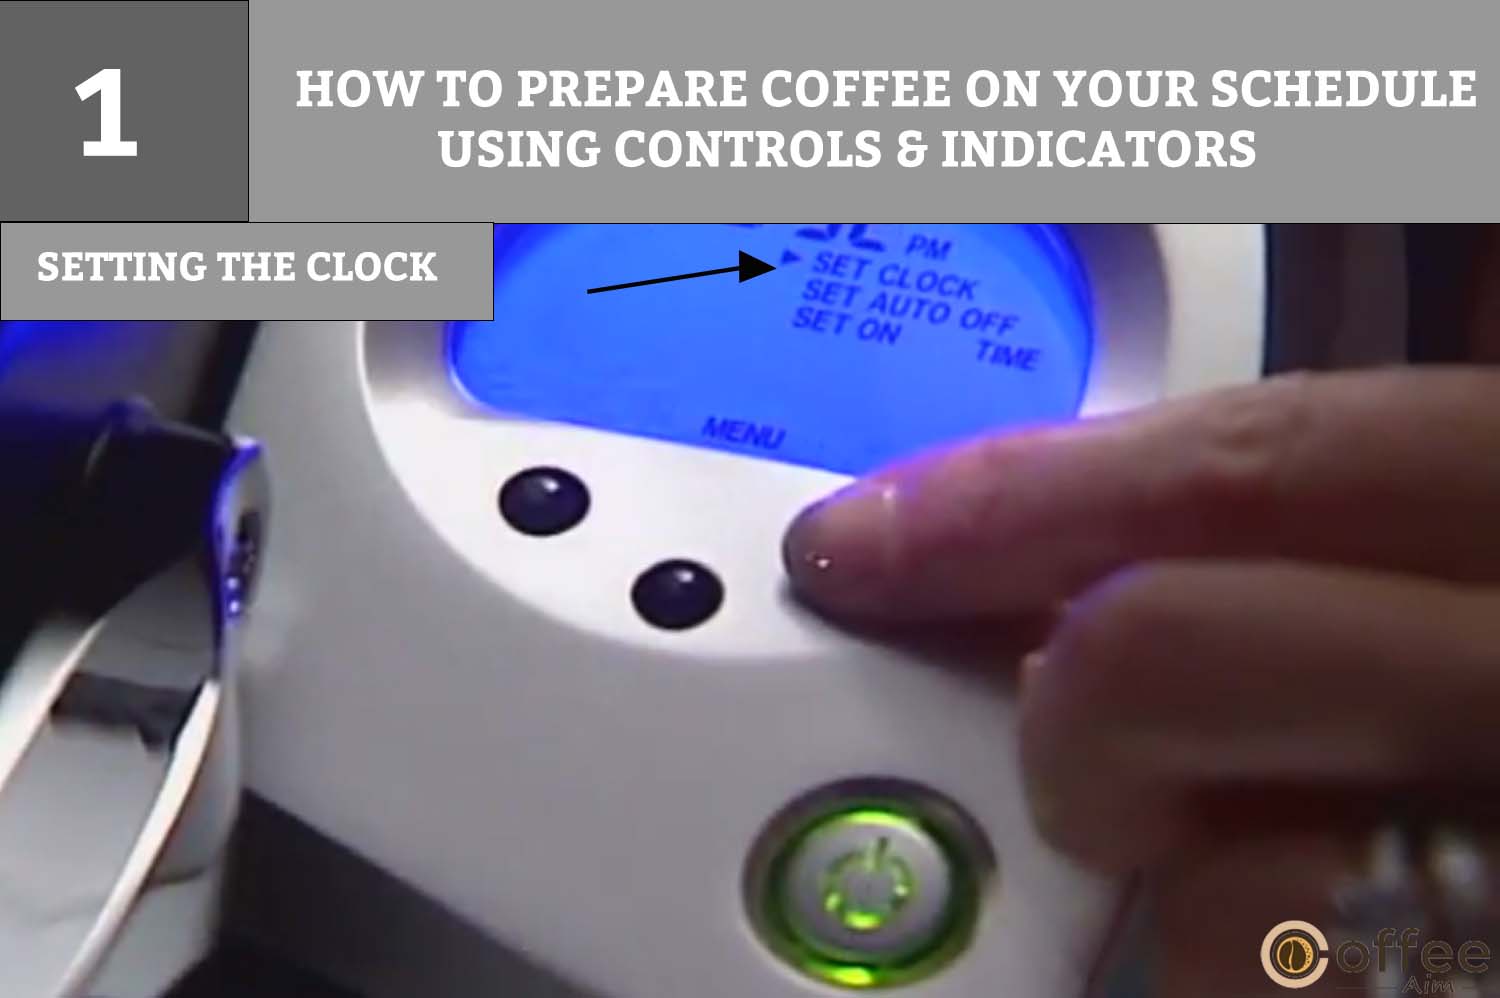
1. Setting The Clock
NOTE: The brewer will not display the clock if your Keurig B-55 Brewer’s power is cut off by being unplugged or load-shedding.
Use the steps below to set the time. Let’s get started!
- Press the Menu Button.
- On the upper right corner of the screen, you will see the word “SET CLOCK.” H and M will blink above the two black buttons.
- You will set the hours by pressing and holding the H button. The LCD indicator changes between AM and PM when the number count reaches 12. Press and hold the button to advance one hour at a time. When the number displayed gets closer to the actual time, release the button.
- You will set the minutes by pressing and holding the M button. To advance one minute at a time, press and release the button when the number displayed gets closer to real-time.
You have successfully set the time. Now, you will understand the three ways you can brew coffee according to your schedule.
2. Leave It ON Constantly:
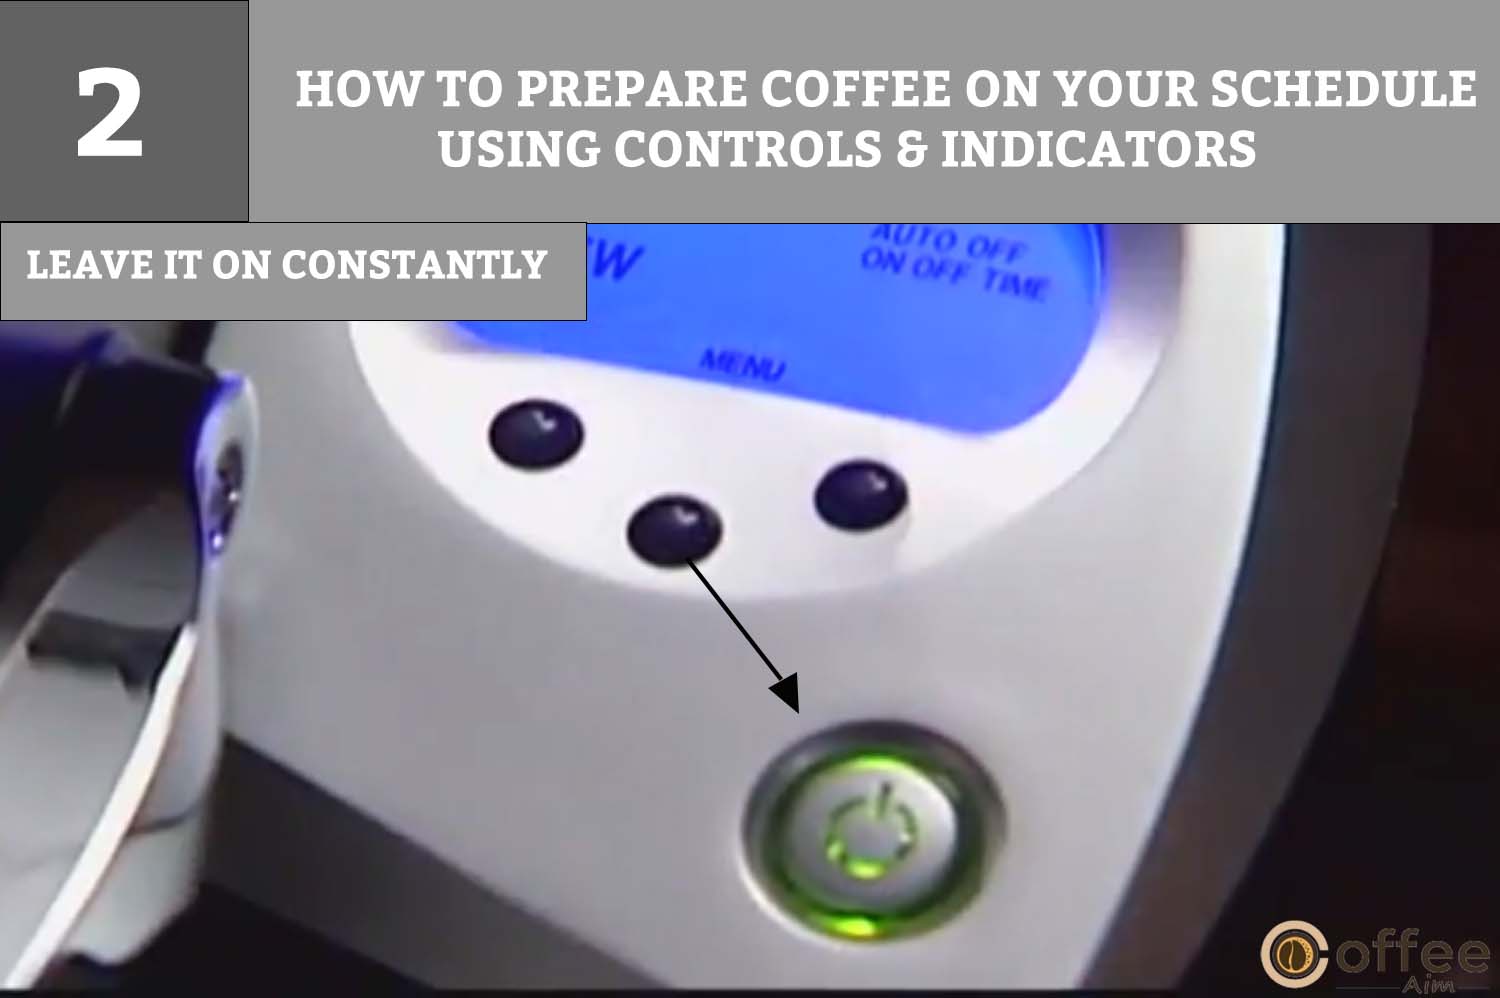
- You should always leave the brewer on if you want the Keurig B-55 Brewer to continuously brew a delicious cup of tea or coffee.
- Simply push the Power Button whenever you want to turn the Brewer off.
- After turning off the brewer, you cannot make coffee or tea. The clock continues to run.
- To give the Brewer electricity again, press the Power Button once more.
- The Brewer will be ready to start brewing once the water has warmed up.
3. Set The Keurig B-55 Brewer To Turn Off For A Certain Period After The Last Brew
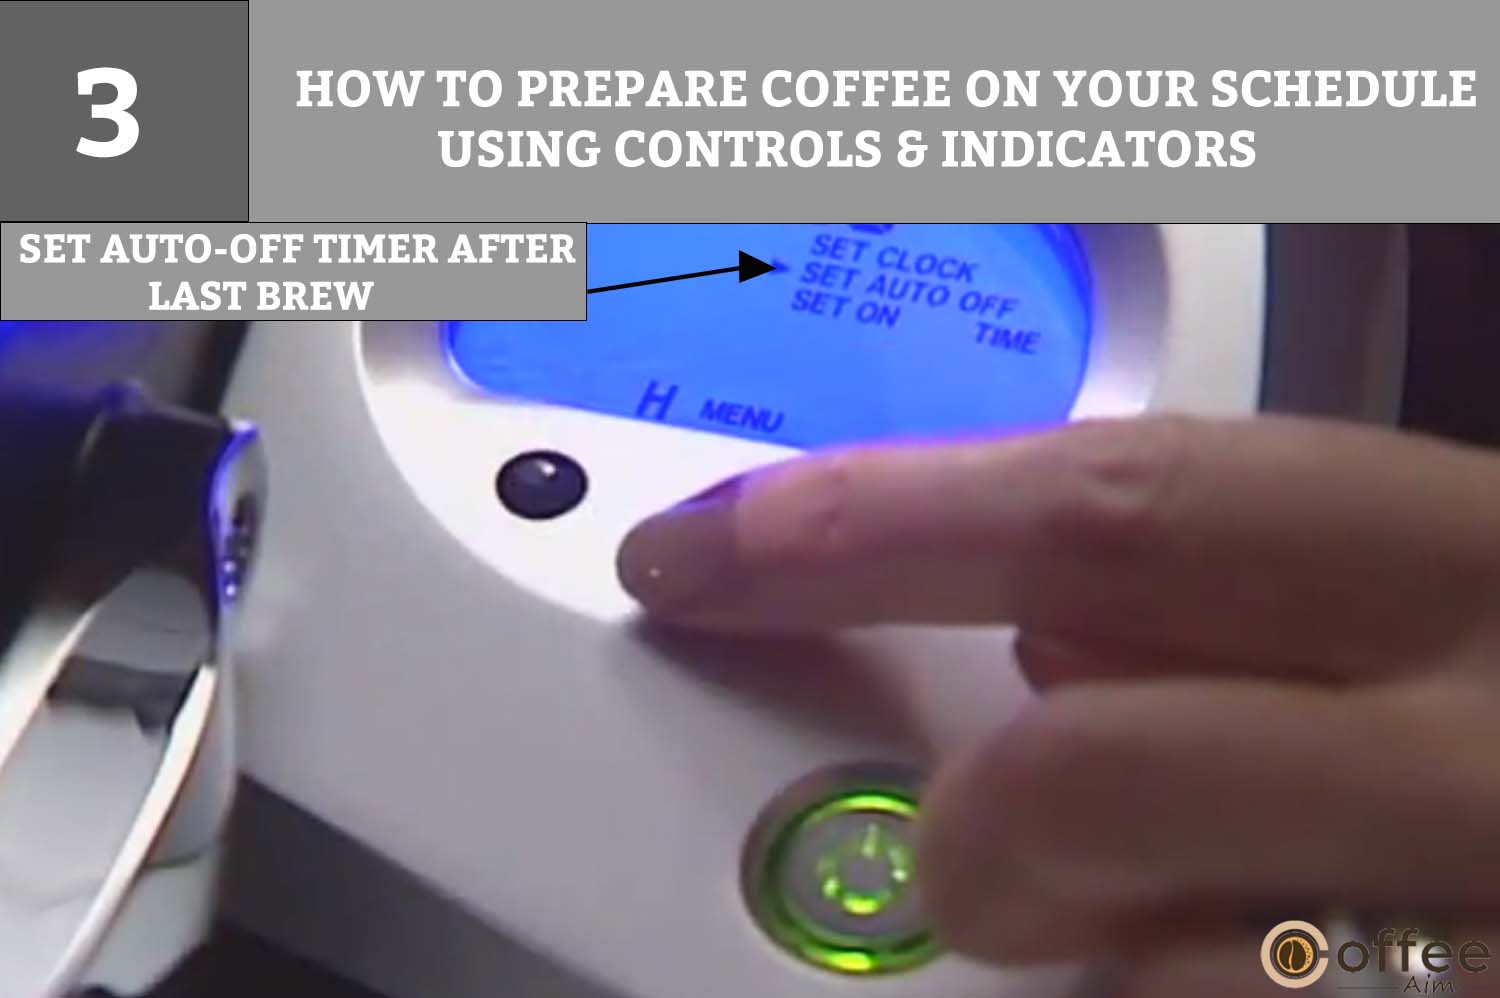
NOTE: You must set the clock to the correct time. After setting the time, you will see the clock on the LCD screen:
- Once you’ve set the time correctly, hit the Menu button one time to set up the Auto Off function. ‘SET AUTO OFF’ will now appear in the LCD Message Center.
- You will set the hours by pressing and holding the H button. Press and hold the button to advance one hour at a time. When the number displayed gets closer to the actual time, release the button. You can reach up to 9 hours.
- Press the Menu Button to save and return to the ready state after choosing the desired time.
- By setting the time to “OFF,” you can disable the Automatic Shut Off.
4. Program Your Keurig B-55 Brewer For An Auto On/Off Time
NOTE: You must set the clock to the correct time. After setting the time, you will see the clock on the LCD screen.
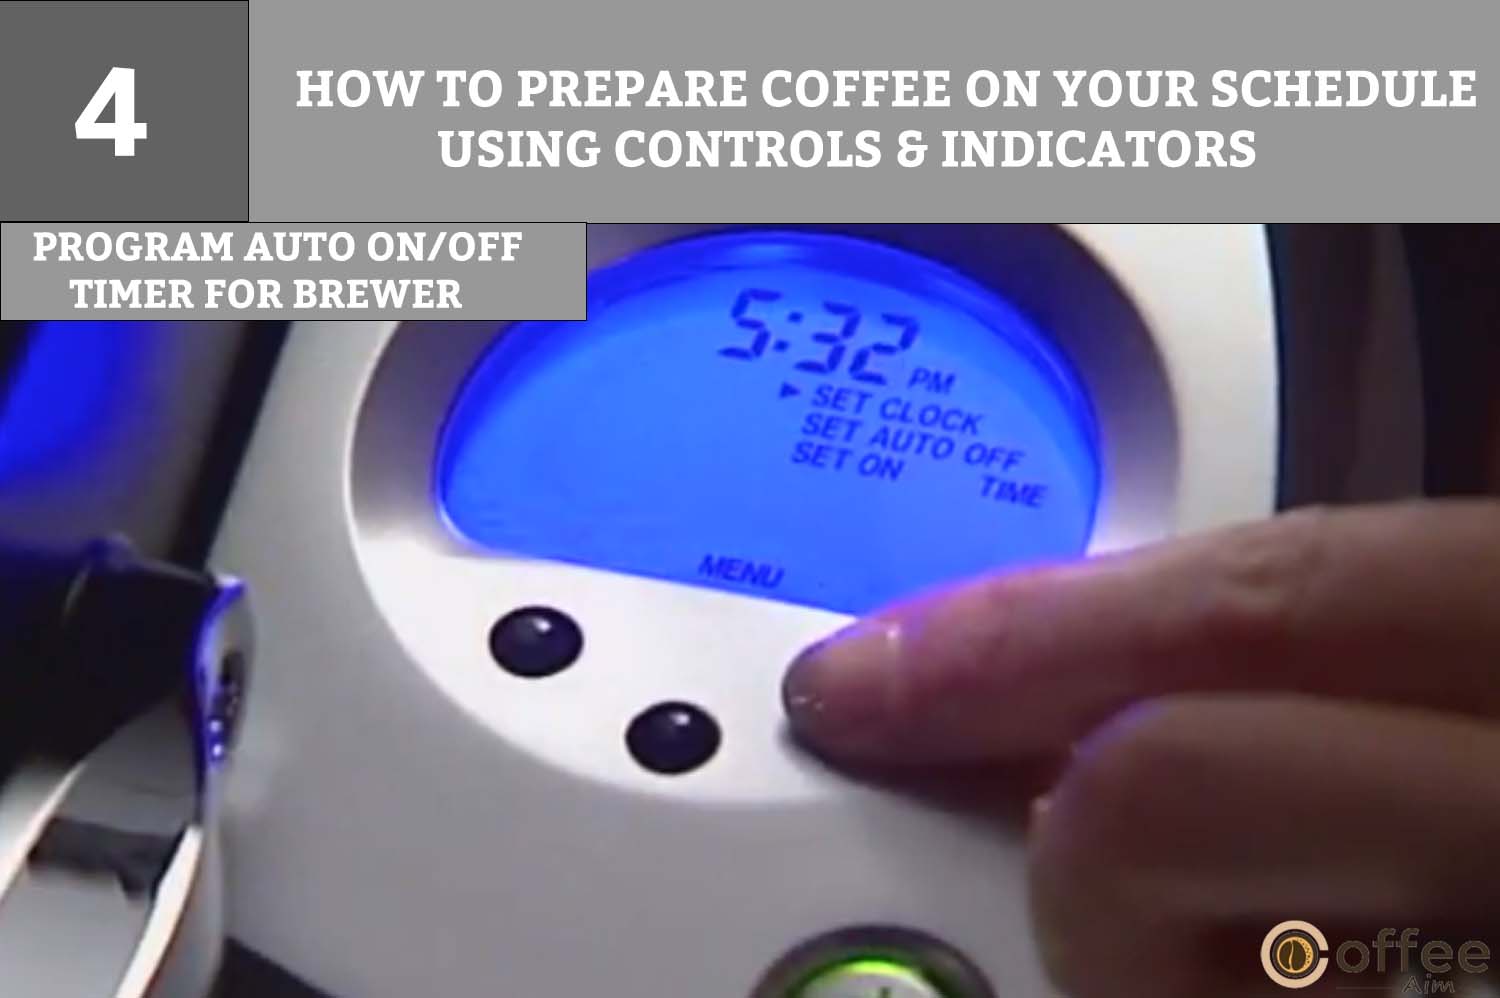
- Once you’ve set the time correctly, hit the Menu button three times to set up the Auto On/Off function. ‘SET ON TIME’ will now appear in the LCD Message Center.
- You will set the hours by pressing and holding the H button. Press and hold the button to advance one hour at a time. When the number displayed gets closer to the actual time, release the button.
- You will set the minutes by pressing and holding the M button. To advance one minute at a time, press and release the button when the number displayed gets closer to real-time.
- Once you have chosen the desired time, hit the menu button to save it and proceed to the SET-OFF TIME.
- To establish your preferred Off Time, follow steps b, c, and d.
- Press the Menu Button once more to finish and get out of programming mode.
- Use these instructions to set the on and off times to 12:00 AM to cancel. The LCD Message Center will show ‘OFF.’
Let’s understand the process by this example;
EXAMPLE: If you set the On and Off Times to 6:15 AM and 10:00 PM, respectively, the Keurig B-55 Brewer will keep the water in the tank hot during that period so that it is always ready for you to brew a cup of coffee or tea. Simply press the Power Button if you want to brew outside this time frame. You can brew as soon as the water is hot, and the LCD will indicate ‘READY.’ The Brewer will automatically shut down when the current time matches the Off Time setting.
Cleaning & Maintenance Of Keurig B-55 Brewer
To ensure the long life of your machine, you should clean your Keurig B-55 Brewer daily or weekly. Cleaning is a must to avoid the formation of mineral build-ups and coffee residues. Let’s get started!
1. Cleaning External Parts

You should regularly clean Brewer’s external parts. Let’s see how you will do it!
- You should never submerge the base in liquid. You should use a non-abrasive, soapy cloth to clean the housing and other external parts.
- The Drip Tray has a capacity of 8 ounces for spillage. You should inspect and clean the drip tray and drip tray plate regularly.
- Slide the drip tray assembly toward you to remove it. You should keep it level at all times to prevent spills.
- You can wash the Drip Tray and Drip Tray Plate in the dishwasher as it is safe.
- Cleaning The K-Cup Holder Assembly
You should regularly clean all the components of the K-Cup Holder Assembly. If you skip cleaning, it may lead to machine leaking or needle blockage.
2. Disassemble The K-Cup Holder Assembly
Before cleaning, you will first learn how to disassemble your K-Cup Holder Assembly.
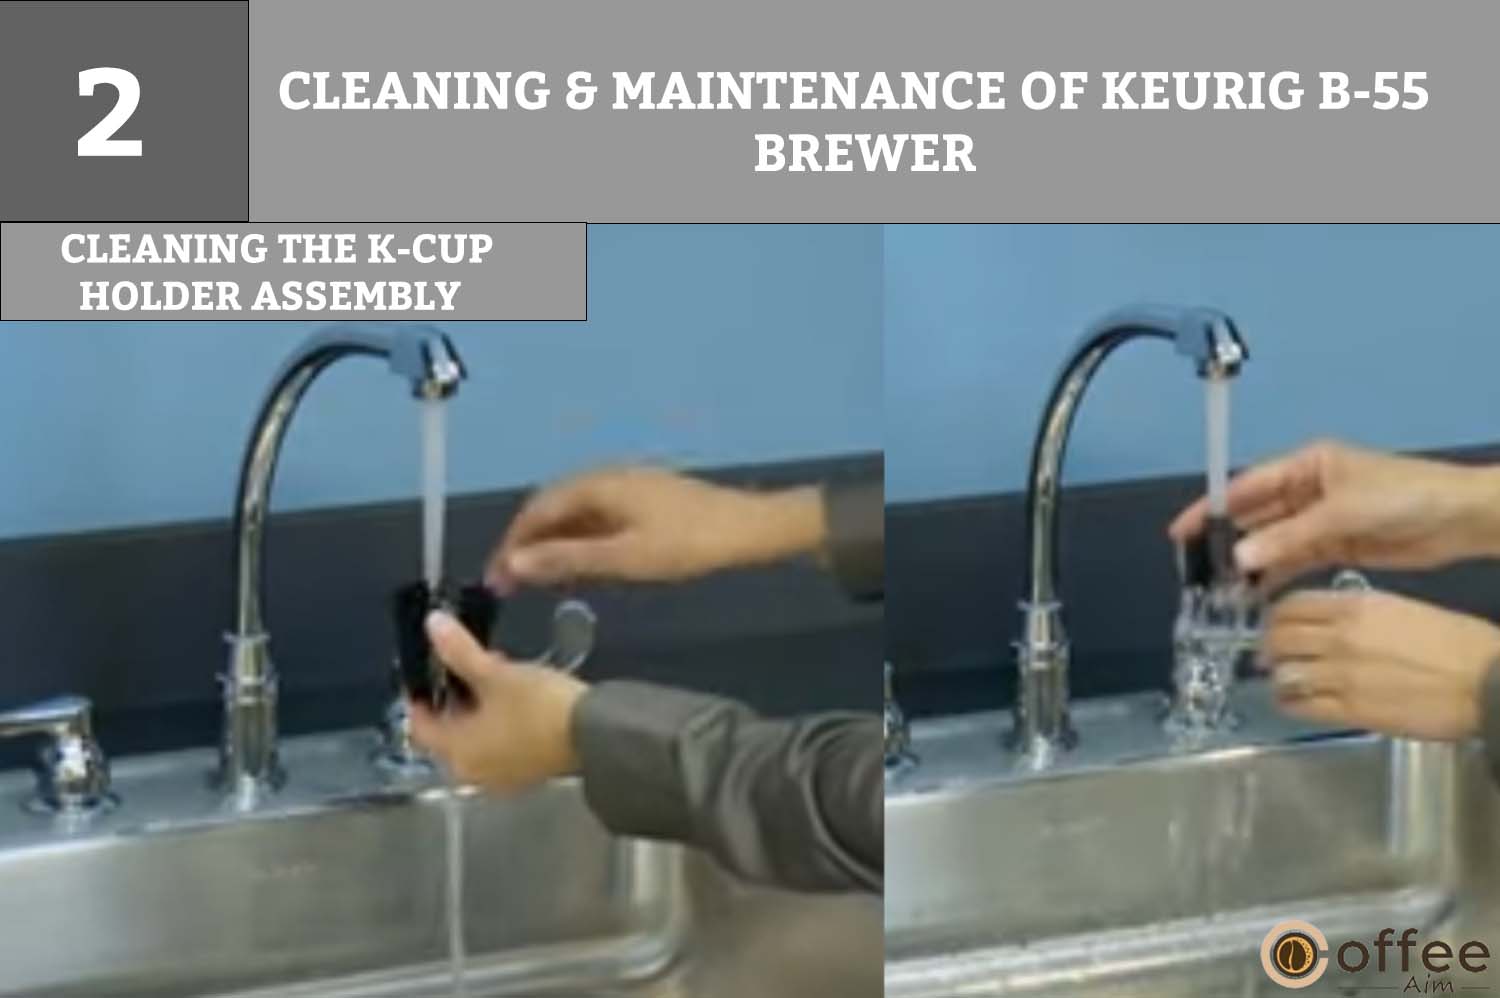
- You can wash the K-Cup Holder Assembly in the dishwasher. It is safe.
- You can open the lid of your Keurig B-55 Brewer by lifting the handle. After opening the lid, you can easily remove the K-Cup Holder Assembly from the Keurig B-55 Brewer.
- Hold the funnel’s bottom with your fingers and the K-Cup Holder’s outer housing with your thumbs.
- Holding the housing firmly, push the Funnel straight up with your fingertips.
- Simply line it up with the slots and press until the K-Cup holder Assembly clicks into position to replace it.
2. Cleaning The Funnel

After disassembling the assembly, let’s now understand how to clean the funnel.
- To remove the Funnel from the K-Cup Holder, pull on it until it snaps off.
- You can wash the funnel in the dishwasher. It is safe.
- You can snap it back onto the K-Cup Holder Assembly to replace it.
3. Cleaning The Exit Needle
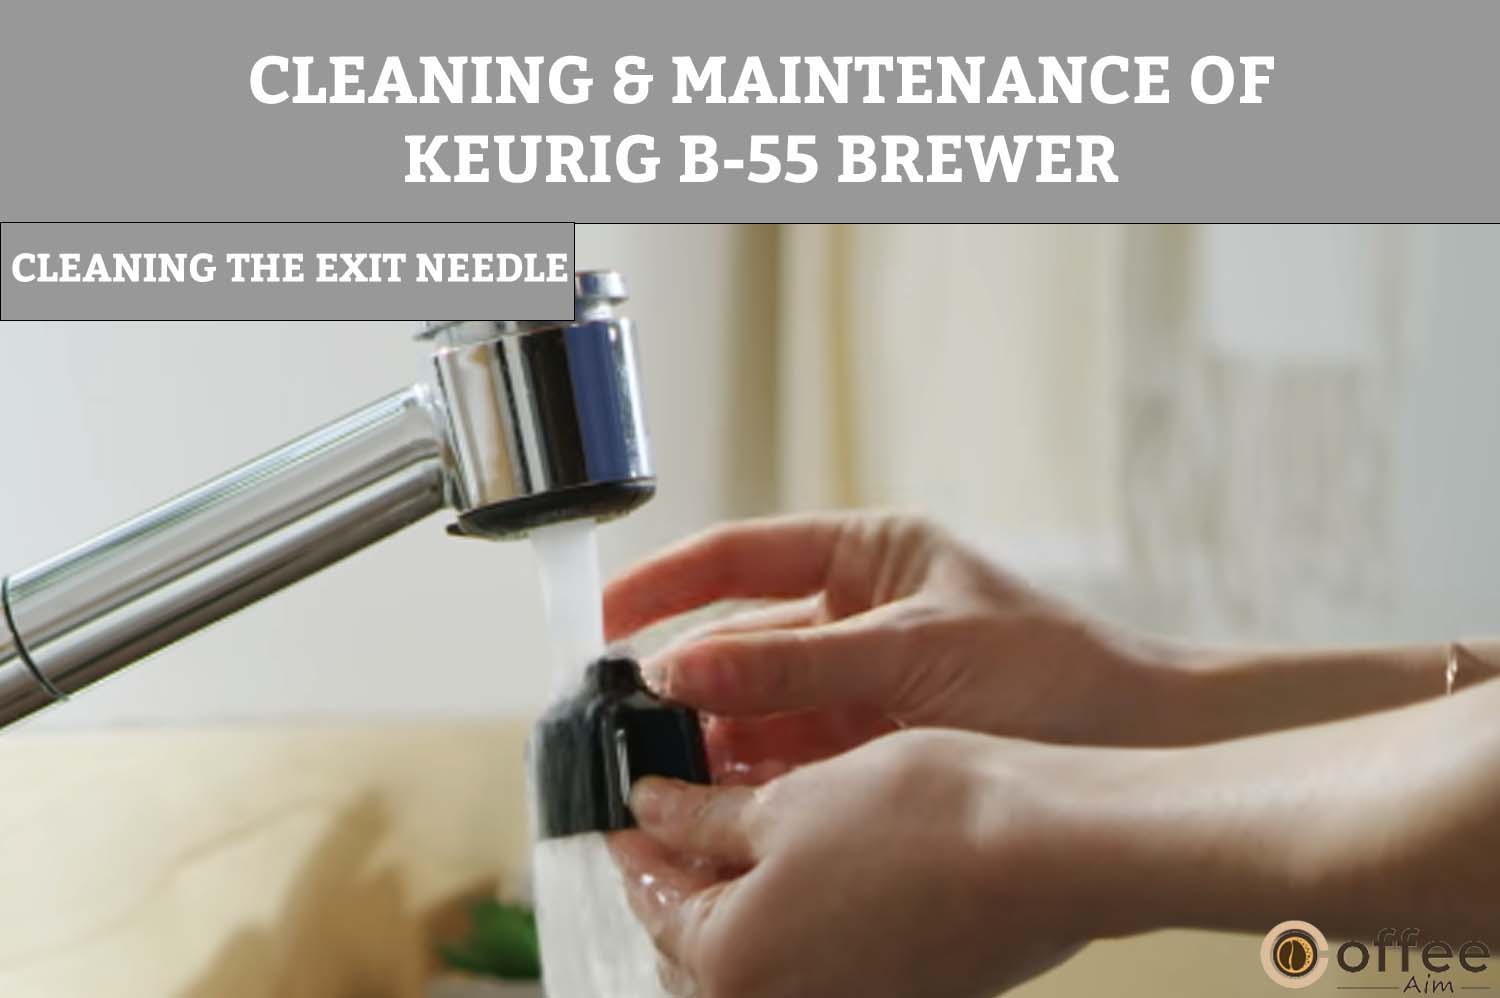
The Exit Needle is on the inside bottom of the K-Cup Holder Assembly. A clog may arise due to coffee grinds. It is recommended to clean it regularly.
- You should use a paper clip or other similar instrument to clean it.
- You can push the clog out by inserting the paper clip into the needle.
- After clearing out all the clogs, wash the exit needle with warm, soapy water. Afterward, rinse it with clean water.
CAUTION: The bottom and the top of the K-Cup Holder include sharp needles that pierce the K-Cup. Do not put your fingers inside the K-Cup Chamber to reduce the risk of harm.
3. Cleaning The Water Reservoir And Water Reservoir Lid:

- You should use a damp, soapy, non-abrasive cloth to clean the Water Reservoir Lid.
- You can not wash the Water Reservoir Lid in the dishwasher. It is not safe.
- You should wash the Water Reservoir with soapy water and rinse it with clean water.
- You can wash the Water Reservoir in the dishwasher. It is safe.
- Avoid using a cloth to dry the water reservoir inside since lint may be left behind.
CAUTION: After cleaning, wash the water reservoir thoroughly to remove any cleaners or clean agents that might have lingered there and contaminated Keurig B-55 Brewer’s water supply.
Descaling Your Keurig B-55 Brewer
First! You must know what de-scaling is. For what reasons do we descale our coffee makers? So let’s come and understand every bit of Descaling.
- Water in different locations/regions has different mineral contents. Calcium deposits may accumulate in your Brewer, depending on the mineral concentration of the water in your area. Although the deposit is non-toxic, it can affect Brewer’s performance if left unattended.
2. You can maintain Brewer’s internal components that come into contact with water by descaling.
3. Therefore, you should descale the Keurig B-55 Brewer every six months for optimum performance. Calcium deposits can form more quickly. Thus, you will have to descale more frequently.
4. This Brewer has sensors that can determine when scale building is hindering Brewer’s performance. The De-Scale indicator will turn on in the LCD Message Center.
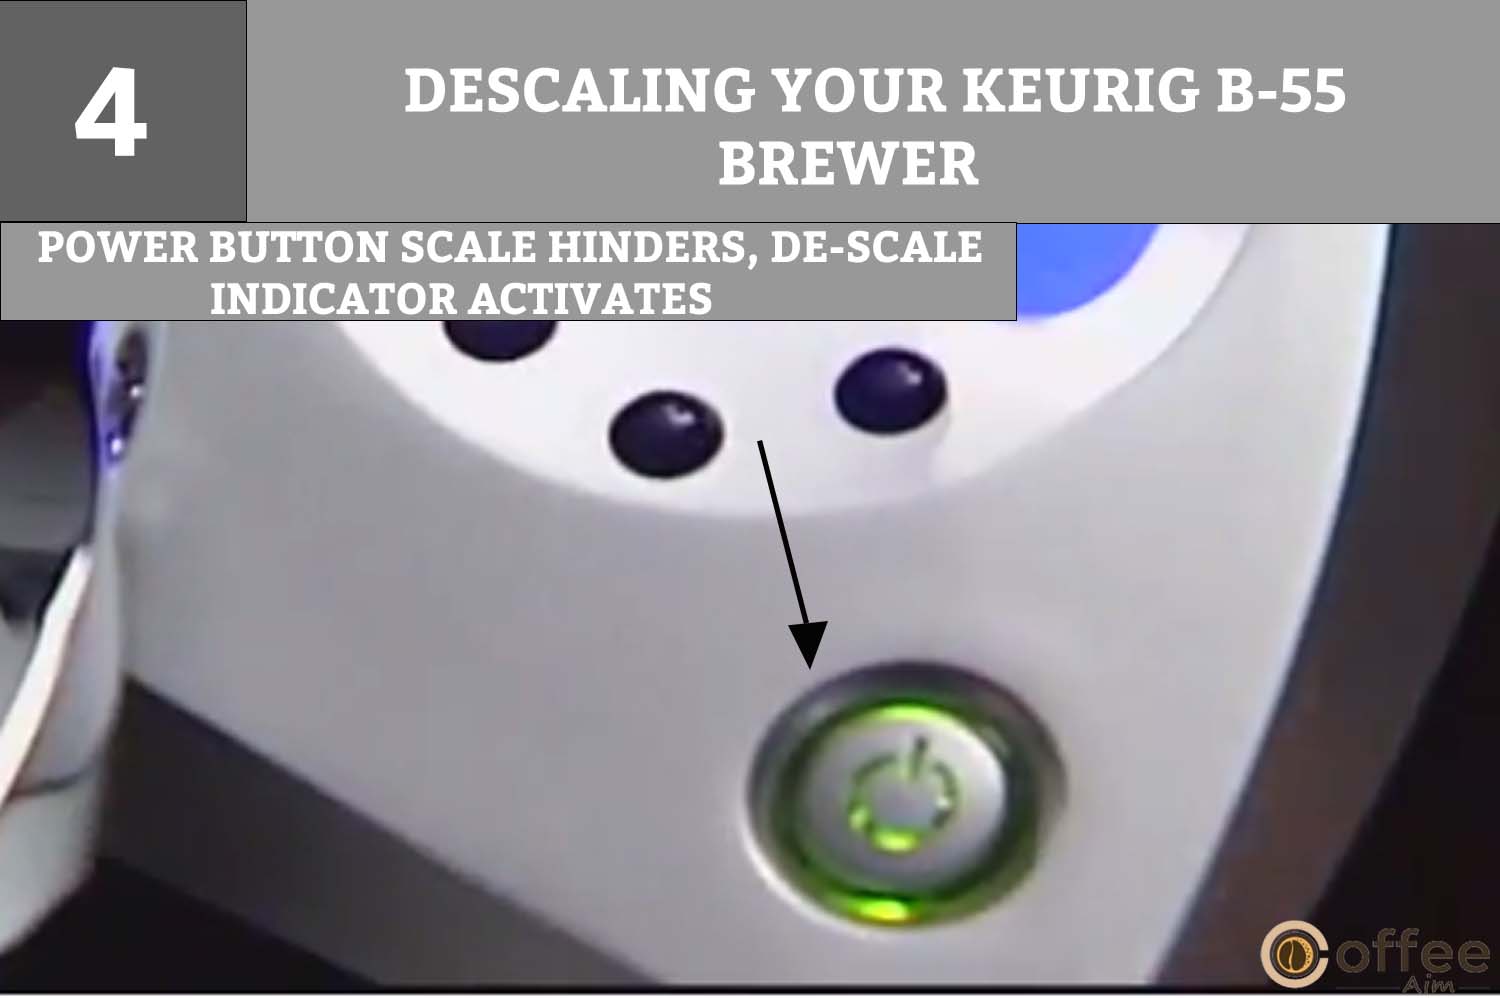
- If you see this indicator on the LCD Message Center, you should descale your coffee maker immediately. Follow the descaling instructions listed below precisely.
NOTE: The Keurig B-55 Brewer will still function when the Descale sign is lit. However, continuous scale buildup could harm the Brewer if you delay descaling. If this happens, the De-Scale indicator will flash to warn you that the Brewer can suffer damage if you do not descale immediately.
You understand what descaling is and why it is essential for your coffee maker’s performance. Now, let’s understand how to descale your Keurig B-55 Brewer.
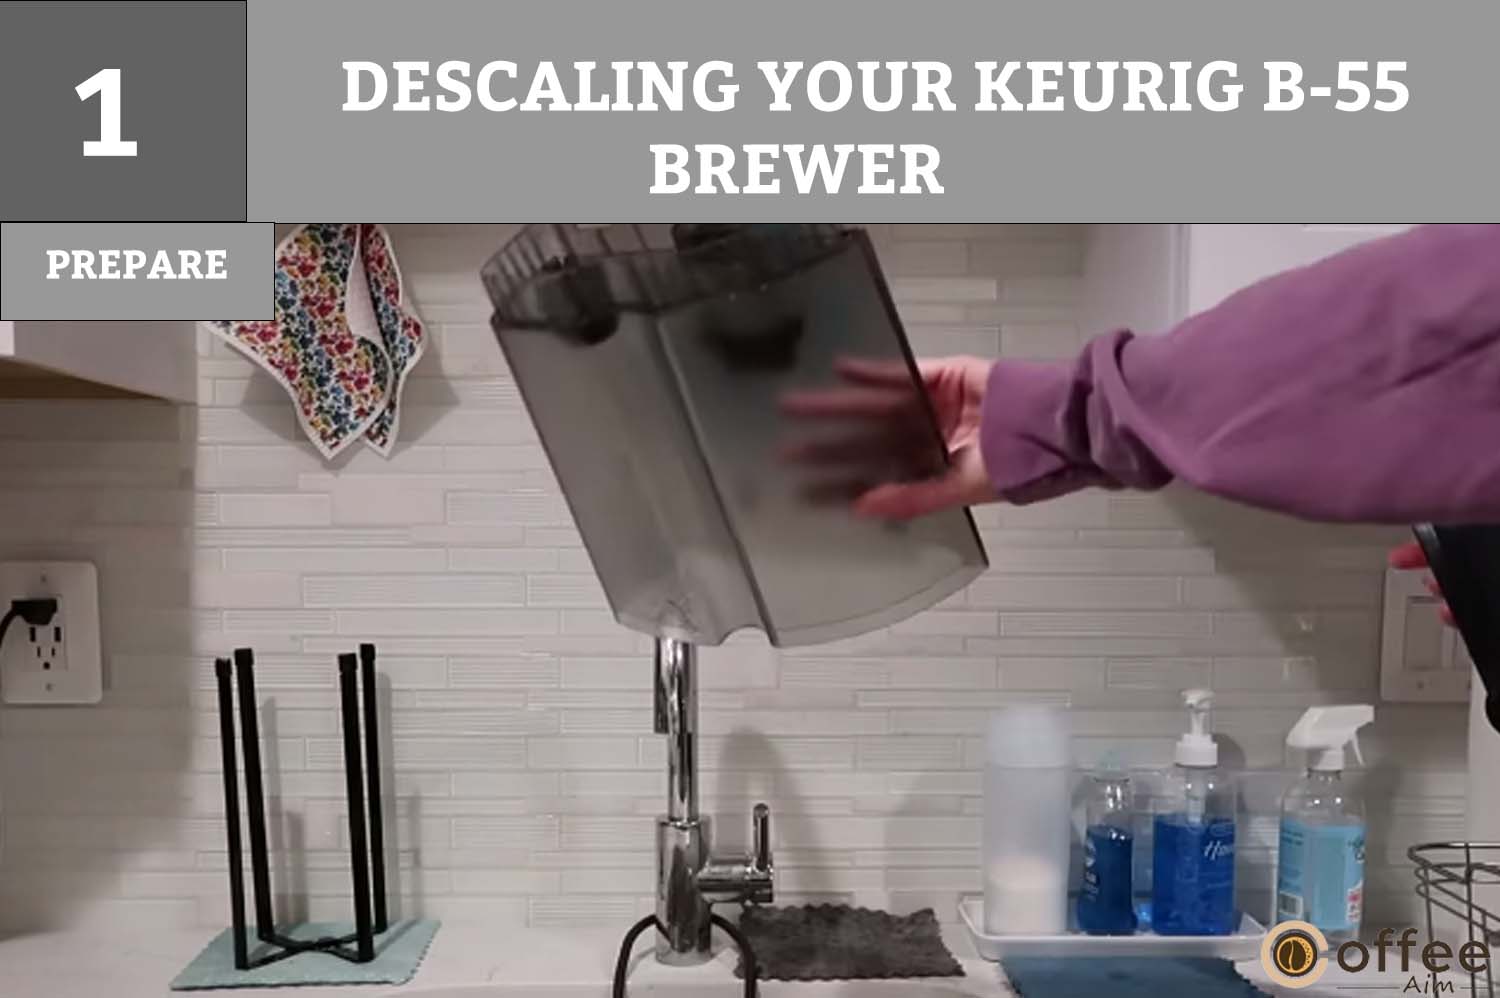
1. Prepare:
Ensure you have at least 48 ounces of undiluted white vinegar before beginning.
You should be near a sink.
Ensure to use a ceramic cup (do not use a paper cup.)
You should drain out all the water present in the Water Reservoir.
2. Fill And Clean:
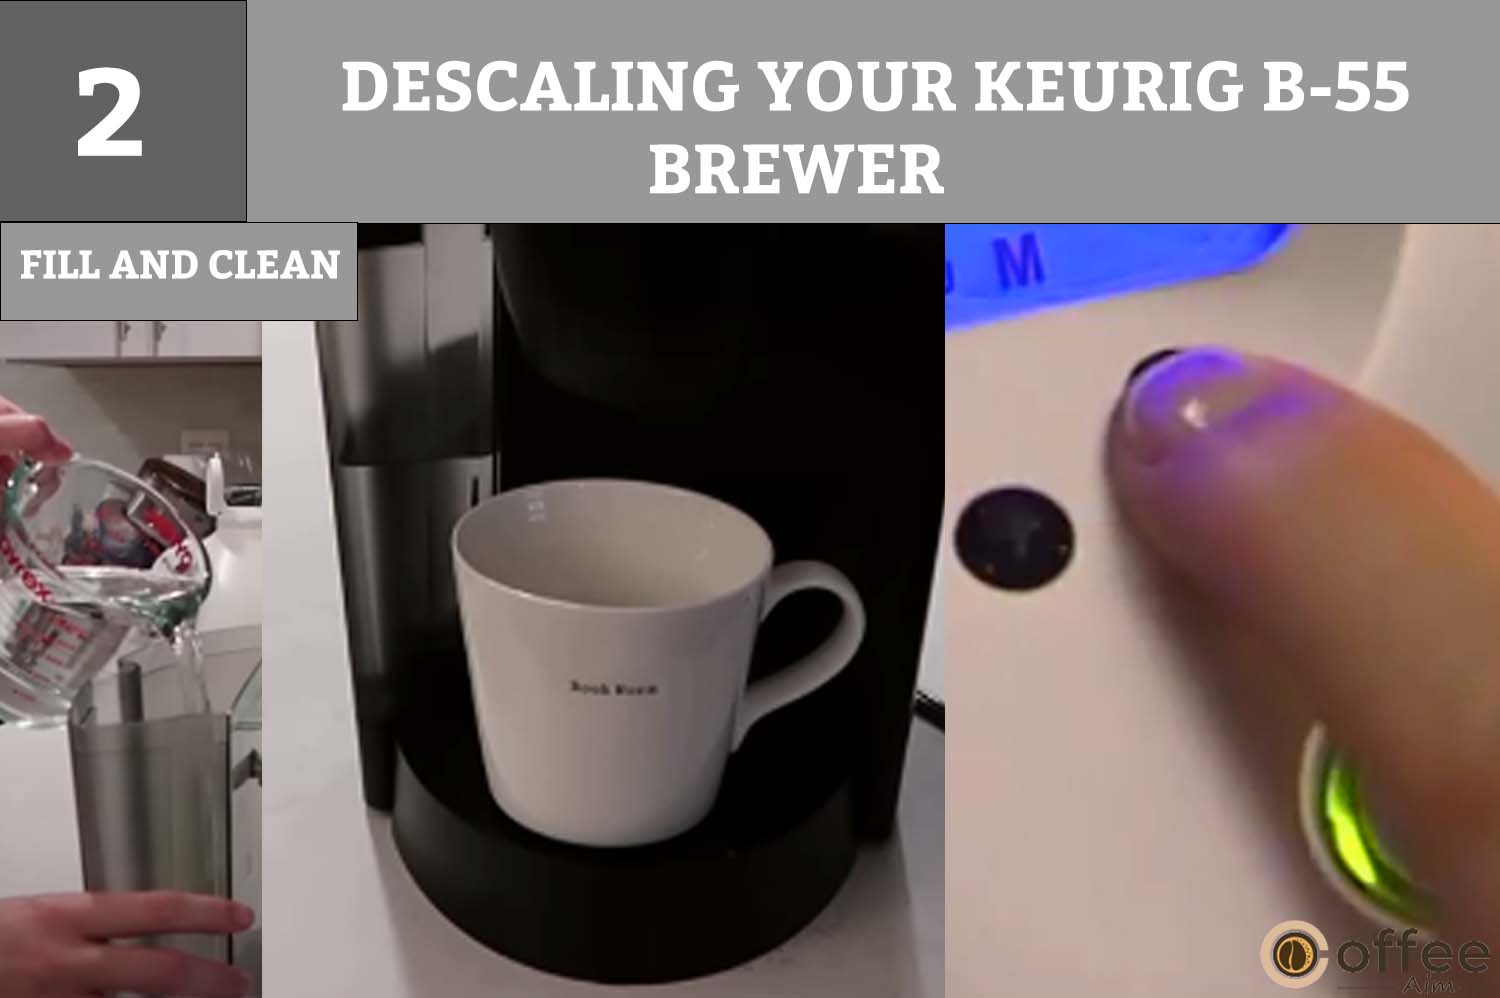
- Fill the Water Reservoir with vinegar until it reaches the upper border of the clear viewing area.
- Brew a cycle while a ceramic cup is in the drip tray. Use the Large Cup Button. Drain the cup’s contents in the sink. Do not use K-Cup.
- Pour the cup’s contents into the sink after each brewing cycle, and continue this process until the Water Reservoir is empty. Between each cycle, you should open and close the lid.
- Thoroughly rinse the water reservoir before refilling the water reservoir with fresh water.
- After that, leave the Brewer for 4 hours (it should be on).
3. Rinse:

- You should add fresh water to the Water Reservoir.
- Run a typical water rinsing brew cycle (without vinegar and K-Cup) while a ceramic cup is on the drip tray. Drain the cup’s contents into the sink.
- Continue the brewing cycle until the water reservoir is empty.
- If any flavor remains, you should run further rinse cycles.
NOTE: You should repeat the de-scaling operation described above if the De-scale indicator on the LCD Message Center stays on even after the procedure.
Where And How To Store Your Keurig B-55 Brewer?
It is crucial to store your brewer in a safe place. You should also keep the temperature of the storage place in your mind. Let’s see how you can store your coffee maker!
1. Before storage, empty the Water Reservoir and make sure your Keurig B-55 Brewer is in a secure location and free from frost.
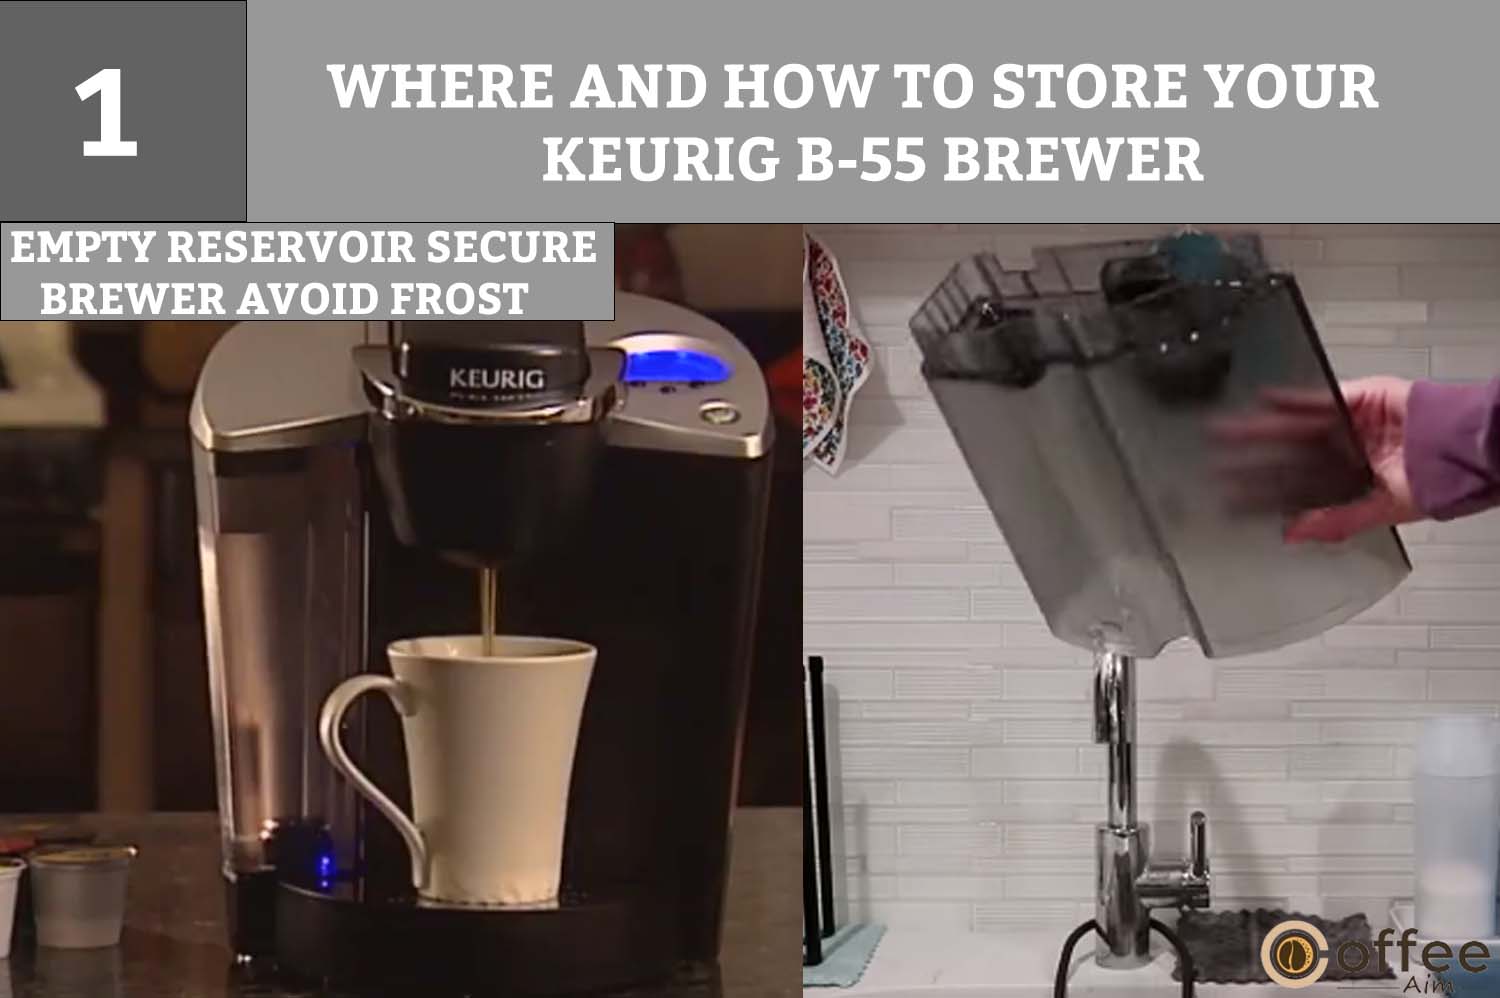
You will face the danger of water freezing within the Brewer if you keep it in a cold climate. It could lead to harm.
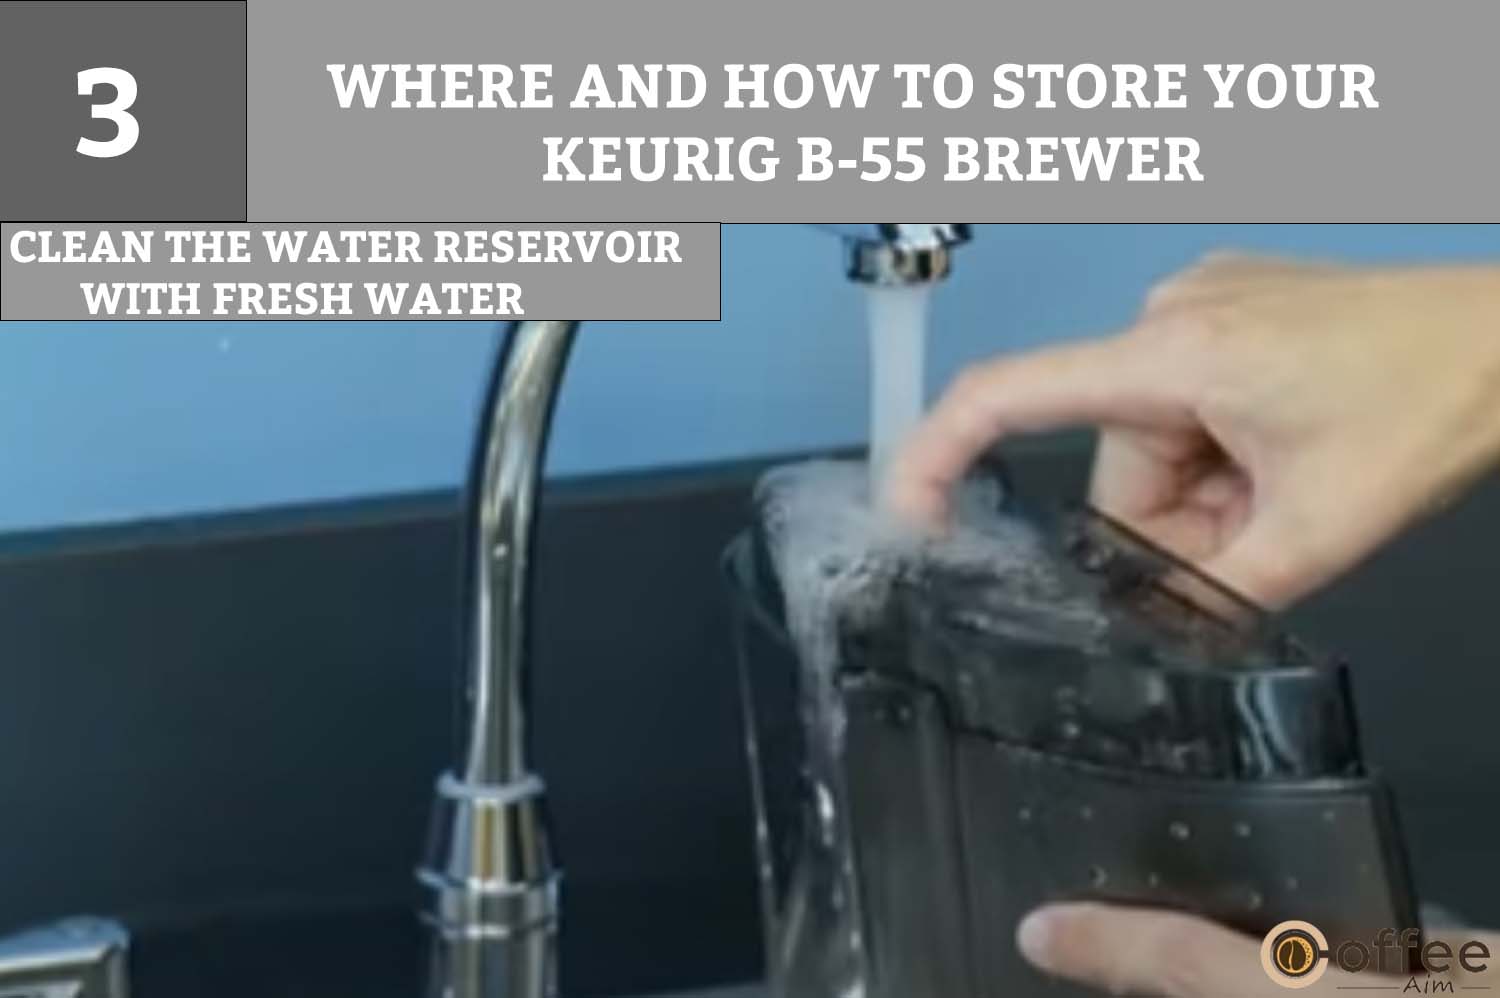
3. When you use the Keurig B-55 Brewer after storage, you should run three cleansing brew cycles and clean the Water Reservoir with fresh water.
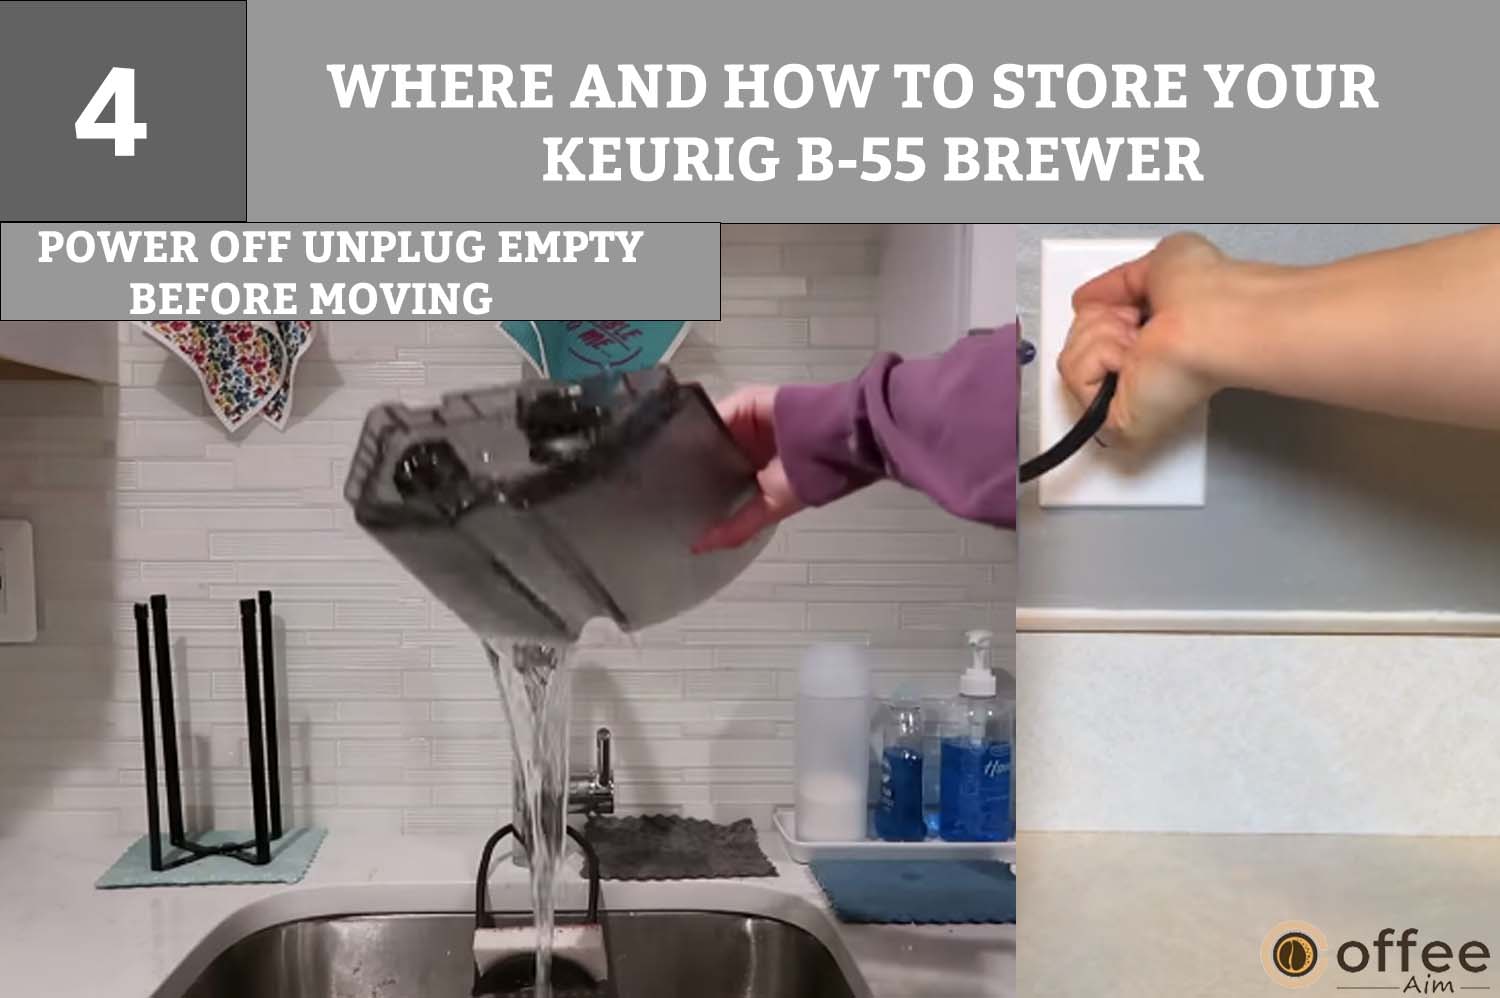
4. Turn off your brewer, unplug it, and empty the water reservoir before moving it to a new place.
Troubleshooting The Common Problems
Until now, we understand making coffee with the Keurig B-55 Brewer. Please go through the solutions below if you still have problems and need help making your desired coffee.
| SITUATIONS | SOLUTIONS |
| No Power for the Keurig B-55 Brewer. | You should insert the plug firmly.Use another outlet.If necessary, reset the circuit breaker.Verify that the Power Button is activated and that the green light is on. |
| The Keurig B-55 Brewer won’t brew when used for the first time. | Before making the first brew, you should prime your brewer by following the steps explained under the ‘How To Set Your Keurig B-55 Brewer For First Use?’ topic. |
| Keurig B-55 Brewer will not brew. | You should place the K-Cup in the K-Cup Holder and ensure the Handle is down. The LCD Message Center changes from “READY” to “BREW.” After this indication hit either the Large Cup or Small Cup Button.You should fill the water reservoir with water If the LCD Message Center says to “ADD WATER.”You should seat the Water Reservoir correctly in its base.After refilling, if the LCD Message Center still reads “ADD WATER,” call customer service at 1-866-901-BREW (2739). |
| Brewing a partial cup. | The Exit Needle may be clogged. Clean the complete K-Cup Holder Assembly mentioned under the “Cleaning & Maintenance Of Keurig B-55 Brewer.” heading.Maybe you have removed the Water Reservoir during brewing. Replace the Water Reservoir and make a purifying brew.Descale the Brewer if the LCD Message Center says to do so.Contact customer service at 1-866-901-BREW (2739) if the notification is still shown after two attempts to descale your brewer. |
| The LCD Message Center does not show the current time. | Unless you set the time, it won’t show up on the LCD. Follow the steps outlined under the “How to Prepare Coffee on Your Own Schedule Using Controls & Indicators” heading to set the clock.You will have to reset the clock if the Brewer loses power. |
Warranty
The Keurig B-55 Brewer warranty includes the following;
Limited One-Year Warranty:
- For a year following the date of purchase, Keurig guarantees that your Brewer will be free of manufacturing or material flaws when used in a typical household setting.
- Upon receiving documentation of the purchase date, Keurig will, at its discretion, repair or replace the Brewer free of charge.
- If a replacement Brewer is sent, the original product’s remaining warranty will apply. Keurig will pay for all shipping fees for authorized returns.
- This warranty covers only Brewers in the United States and Canada. You may also have other legal rights, which differ from state to state and, in the case of Canada, from province to province. This warranty offers you specific legal rights.
What Is Not Covered By The Limited Warranty?
- This warranty does not cover the expenses resulting from any breach of this warranty, even if foreseeable, consequential, or incidental losses like property damage.
- The limitation above or exclusion may not apply to you depending on the state or Province where the transaction was made since certain states or Provinces do not permit the exclusion or limitations of incidental or consequential damages.
- Additionally, this warranty does not cover harm by services rendered by parties other than Keurig or its approved service providers by using components other than genuine Keurig components or by outside factors, including overuse, abuse, improper power supply, or acts of God.
How Do You Obtain Warranty Service?
- Keurig Brewers are high-quality equipment that should last for many years with careful maintenance. However, if warranty service is required, contact Keurig Customer Service at 1-866-901-BREW (2739), which is a toll-free number.
- Please don’t send your Brewer back for repair unless you first get in touch with Keurig Customer Service and have the Authorization to Return number (ATR). Without an ATR number, Keurig Brewers will be returned to the sender unserviced.
Conclusion
Now, you are fully prepared to start a delightful journey with your Keurig B-55. As you have read the whole article, no glitches will occur while brewing. However, if you ever get stuck at any point while using your coffee machine, then make another visit to this article. Additionally, you can browse the website “CoffeeAim” to learn more about coffee beans or coffee makers. Conquer the coffee world with your elegant and remarkable Keurig B-55.
Enjoy! By brewing and taking sips of hot coffee.
FAQs
Why Isn’t Your Keurig B-55 Brewer Working?
Water scaling, which accumulates and blocks the Keurig water pump, is the most frequent cause of a Keurig not pumping water.
There are numerous approaches to fixing this issue. The simplest method is to remove the water reservoir from the Keurig, drain it, and then fill it with fresh water.
Why Does The Keurig B-55 Brewer Not Brew When The Button Is Pressed?
Please try pressing the power button first if the controls aren’t responding. Try unplugging the power cord and then plugging it back in if that doesn’t work (after a short period). Try choosing the power button after that.
Are K-Cups Supposed To Be Shaken?
Before brewing a coffee in Keurig B-55 Brewer, shake the K-Cup bag.
Can You Use The K-Cups More Than Once?
Unfortunately, once a K-Cup pod has been used to brew coffee, you cannot use it again to create different coffee. The holes on the top and bottom make it challenging for people to reseal the cup, and they require more grounds to produce a decent (or even passable) second serving. However, if you want to use a K-Cup again, then it is better to use a reusable “My K-Cup”.
After Use, Should The K-Cup Be Removed?
We advise you to take out any K-Cup pods as soon as brewing has been completed. After completion of the brew cycle, as the pods are too hot to handle, we advise waiting a few minutes until you can remove them from Keurig B-55 Brewer comfortably.