Quick Navigation
The Keurig K-Supreme is a famous single-serve coffee maker that promises a convenient and customizable brewing experience. However, like any machine, it is not immune to problems and malfunctions that can affect its performance. In this article, I will discuss some common issues that Keurig K-Supreme owners may encounter and provide practical solutions to help resolve them.
The Common Problems Owners May Encounter
The Keurig K-Supreme is a popular single-serve coffee maker that promises a convenient and customizable brewing experience. However, like any machine, it is not immune to problems and malfunctions that can affect its performance. Some of the common problems that Keurig K-Supreme owners may encounter include the machine not turning on or brewing, producing weak coffee or no coffee at all, making loud noises, leaking water, or producing inconsistent brewing.
It is important to address these common problems for several reasons. Firstly, a malfunctioning Keurig K-Supreme can result in an unsatisfactory coffee-drinking experience and render the machine unusable. Secondly, ignoring issues can lead to further damage to the machine and potentially expensive repairs. Regular maintenance and prompt resolution of any issues can help extend the lifespan of the machine and save money in the long run. Finally, identifying and addressing common problems can empower owners to take control of their brewing experience and optimize the performance of their Keurig K-Supreme. By taking the time to understand the common issues and their causes, owners can take proactive steps to prevent problems from occurring and enjoy a hassle-free coffee-drinking experience.
Getting Started To Solve Keurig K-Supreme Problems
Before attempting to fix any issues with your Keurig K-Supreme coffee maker, it is important to have the right tools on hand. Here are some of the essential tools that users need to have to fix the Keurig K-Supreme:
- Distilled Water: Distilled water is recommended for cleaning and descaling the Keurig K-Supreme. It is important to use distilled water to prevent any mineral buildup that can clog the machine.
- Cleaning Cloth: A cleaning cloth is essential for wiping down the machine and removing any dirt or debris that may be clogging the machine.
- Needle Cleaning Tool: A needle cleaning tool can help remove any coffee or debris that may be clogging the needle, which can result in weak coffee or no coffee at all.
- Replacement Parts: It is recommended to have some replacement parts on hand, such as seals or water lines, in case they become damaged or worn out.
Having these tools readily available can make it easier to troubleshoot and resolve common issues with the Keurig K-Supreme. With the right tools and knowledge, users can take control of their coffee brewing experience and enjoy a hassle-free cup of coffee every time.
Problem 1: Why Does Keurig K-Supreme Won’t Turn on?
When you’re craving that perfect cup of coffee to kickstart your day, discovering that your beloved Keurig unit won’t turn on can be incredibly frustrating. But fear not! Before you dive into troubleshooting, check a few simple things to resolve the issue potentially. So, grab your troubleshooting hat, and let’s explore some quick and easy steps to bring your Keurig back to life and savor that delightful brew again.
Cause 1: Problem With Power Connection
The possible cause of this problem lies in the power transfer to your Keurig K-Supreme; here are the few steps you can take to ensure a safe and secure connection to solve this problem. Let’s explore!
Solution 1: Check The Plug For Any Damage.
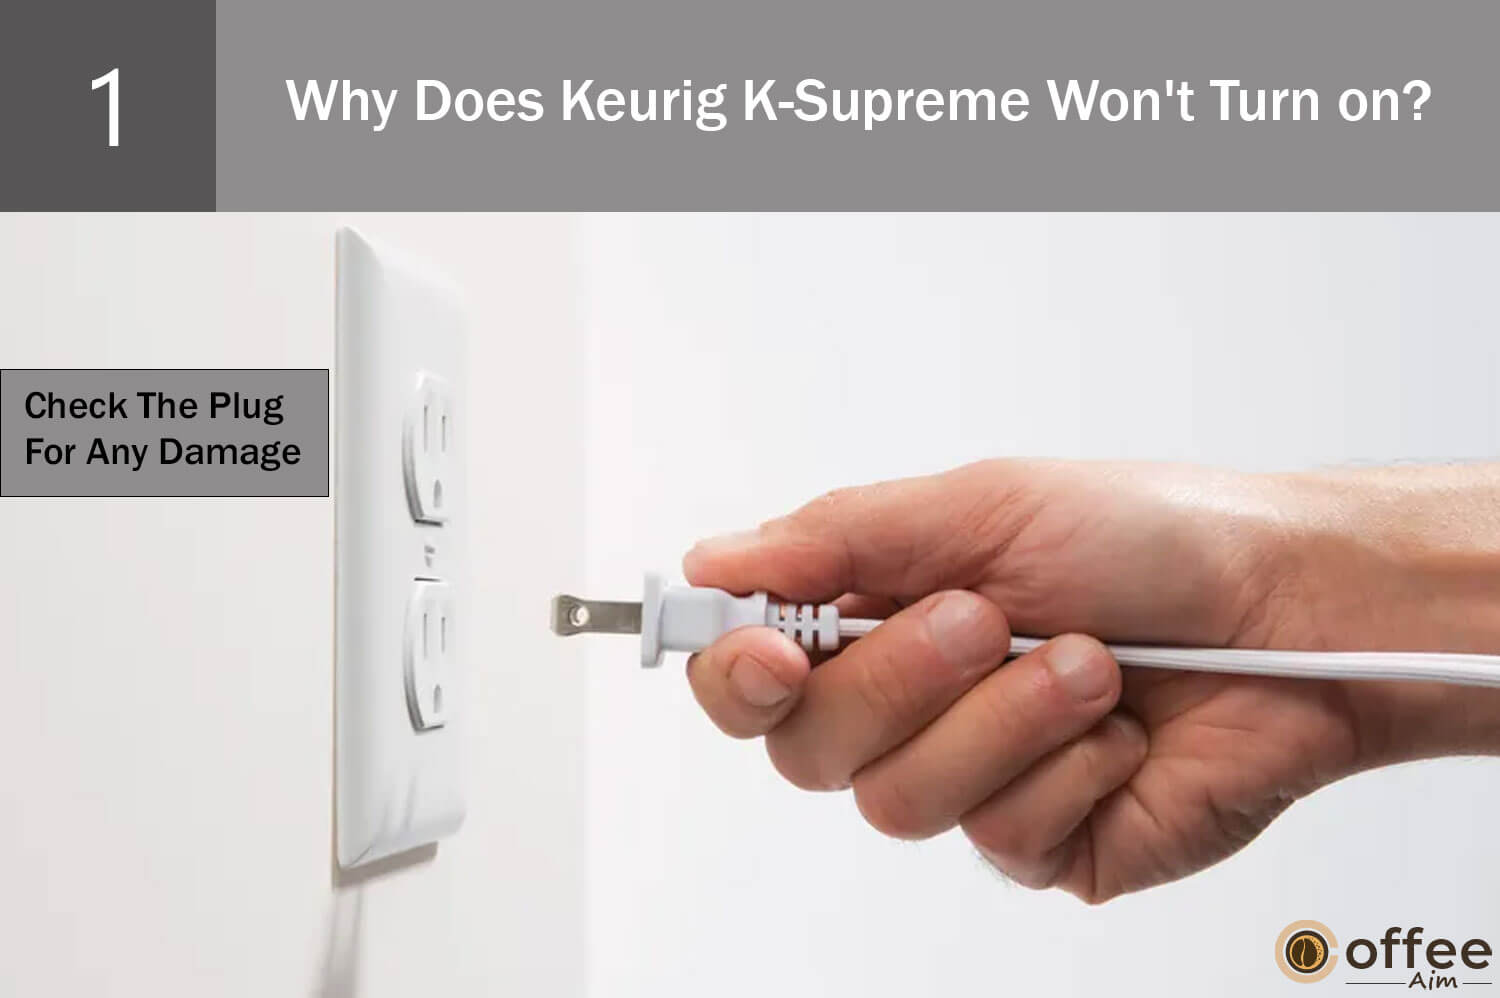
First, check the plug and make sure it is correctly inserted into the outlet. If the plug is damaged, replace it. Avoid plugging other devices or appliances into the same outlet to prevent any potential tripping that could disrupt the power supply to your Keurig. By following these guidelines, you can ensure a stable and uninterrupted power source for your Keurig.
Solution 2: Inspect The Power Outlet
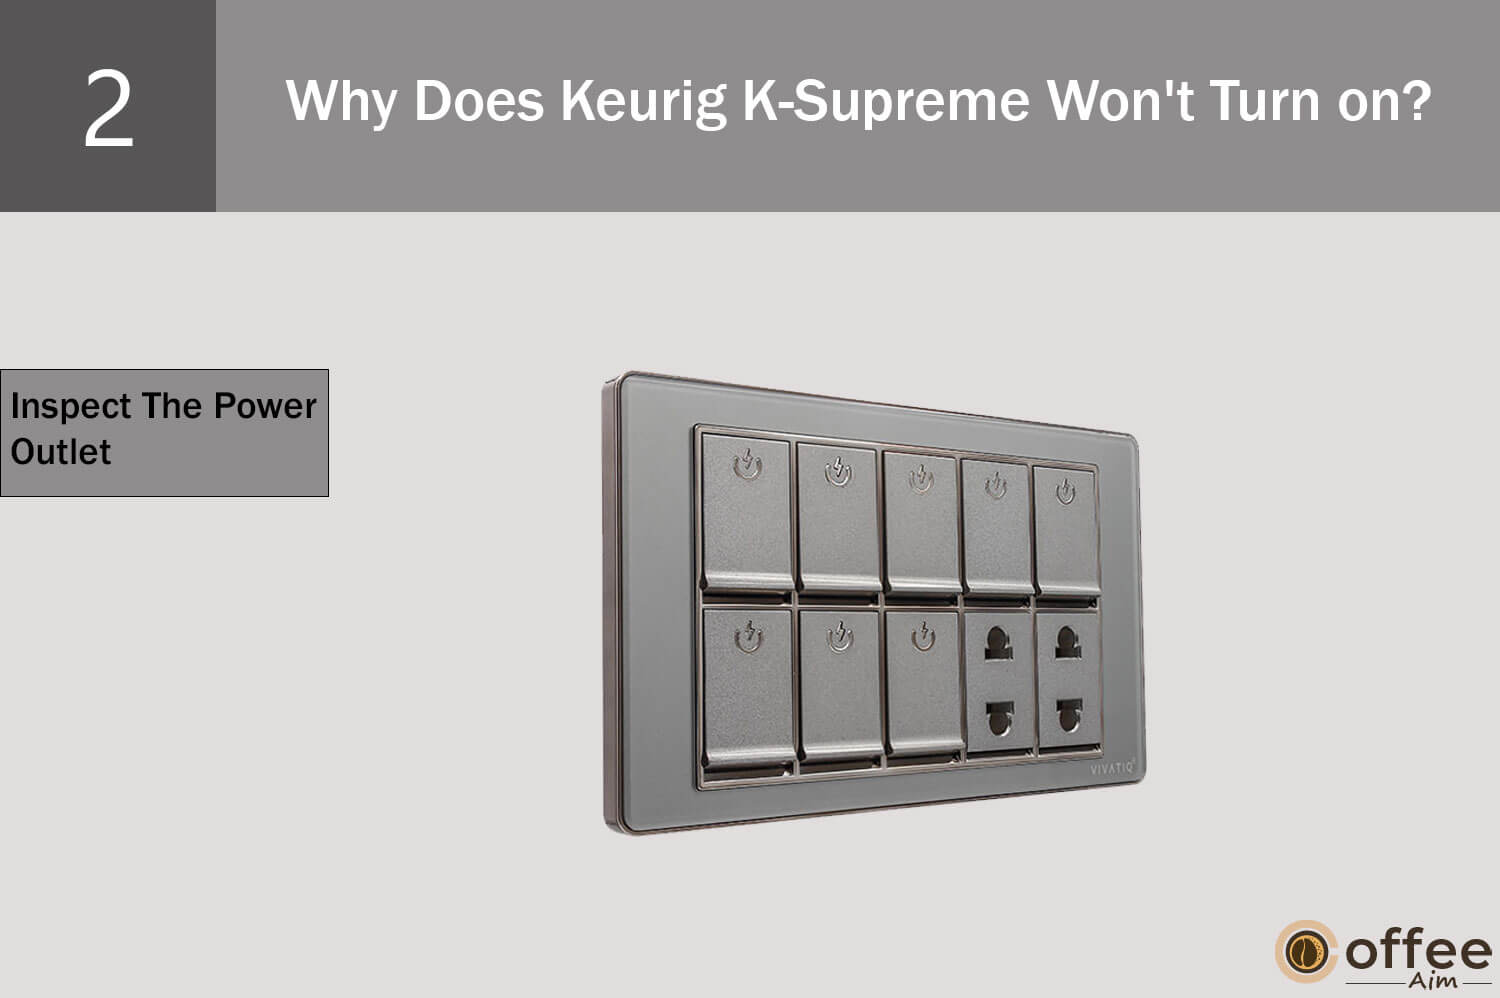
Start by examining the outlet where it’s plugged in. Look for any visible signs of damage, loose connections, or burn marks, as these can hinder the proper power supply to your Keurig. If you observe any issues with the outlet, it’s important to address them promptly to prevent potential safety risks. It is advisable to seek help from an electrician or a qualified professional to resolve any outlet-related problems.
Cause 2: Brewer Is Malfunctioning
After ensuring a stable power transfer to the brewer if it is still not turning on, it may be the brewer causing trouble. Let us look into the solutions.
Solution: Contract Keurig Customer Care

Contact Keurig customer care for assistance with this matter. If your Keurig K-Supreme is still under warranty, inquire about the possibility of a replacement. The contact information is in this article’s “When To Seek Professional Help” section below.
If you encounter your Keurig K-Supreme where it is not brewing? Let’s explore the steps you can take to resolve this problem.
Problem 2: Why My Keurig K-Supreme Is Not Brewing?
Even the most reliable appliances occasionally encounter issues that disrupt our beloved coffee routines. But fear not! Instead of pointing fingers at the machine, let’s proactively troubleshoot and get your Keurig K-Supreme back to brewing your favorite coffee in no time. With simple tips and tricks, you’ll soon enjoy that perfect cup of joe again. So, let’s dive into the troubleshooting world and get your coffee routine back on track!
Cause 1: Keurig Is Clogged
One common problem for Keurig users is a clogged machine. This can lead to slow, incomplete, or no brewing at all. Let’s explore some solutions for dealing with a clogged Keurig.
Solution: Run A Descale Cycle

The best approach is to run a descaling cycle to resolve a clogged Keurig K-Supreme machine. You can find step-by-step instructions on how to descale your Keurig K-Supreme in the “How To Descale Keurig K-Supreme” section given below in this article.
Cause 2: Problem With Water Reservoir
An inadequate water reservoir setup is a common cause of brewing issues in the Keurig K-Supreme. The Keurig can only access the necessary water for brewing when the reservoir is filled correctly. Additionally, maintaining the water level within the recommended range is essential, avoiding excessively low and high levels, as they can affect the coffee maker’s performance. Let’s explore the straightforward yet crucial steps to solve this problem.
Solution 1: Place The Water Reservoir Correctly
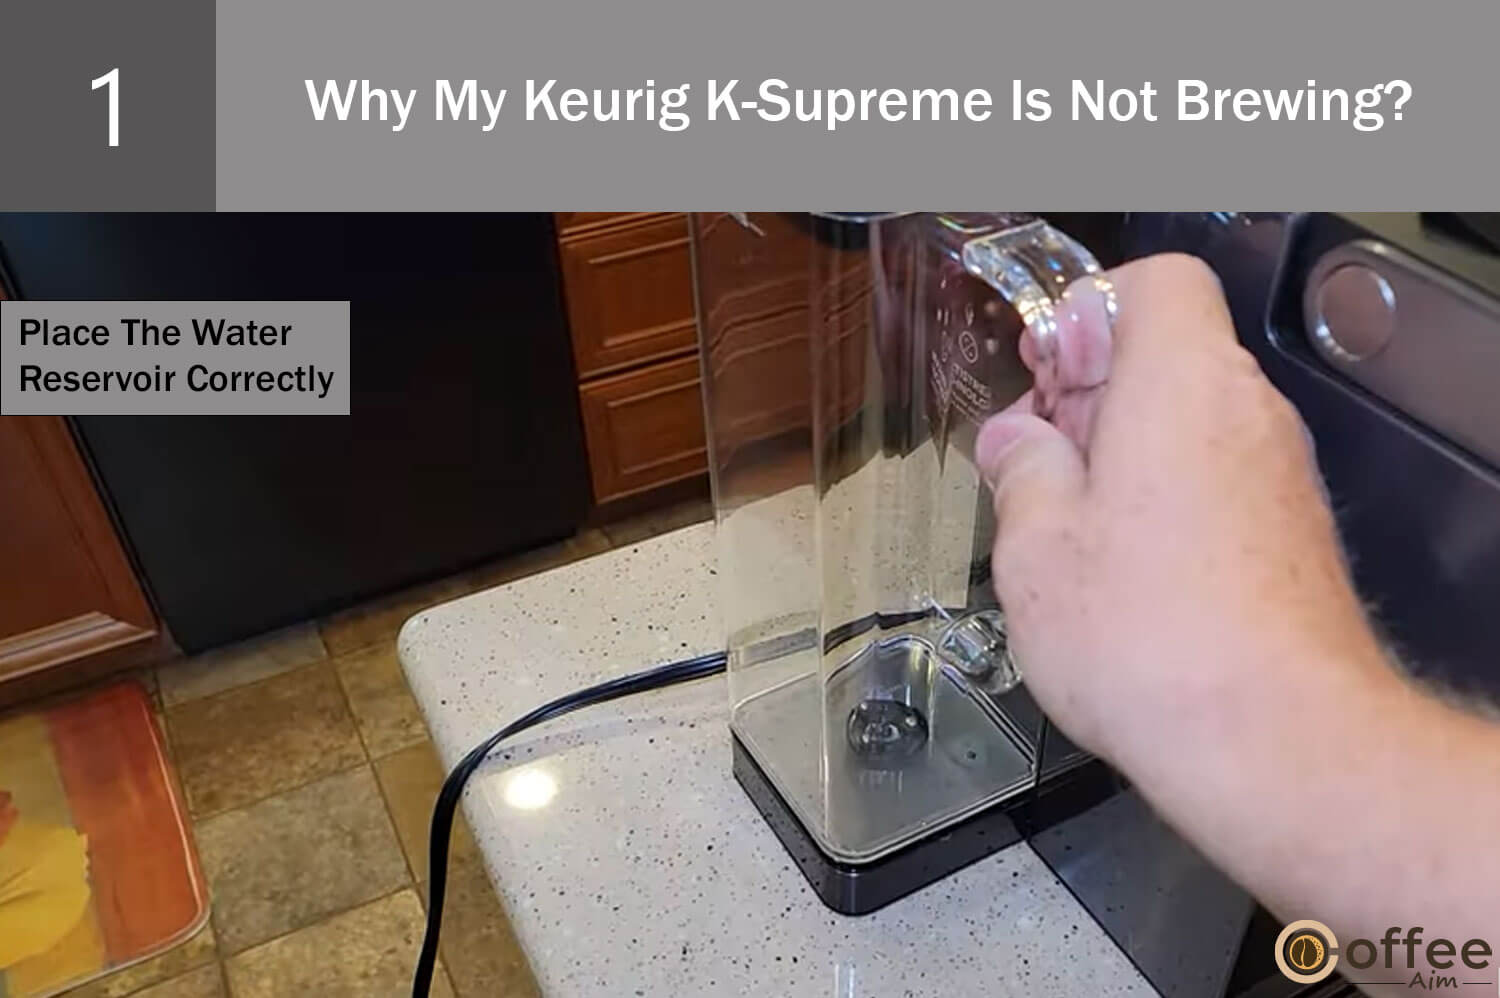
Make sure that the water reservoir is appropriately placed on its base.
Solution 2: Recheck The Position Of the Water Reservoir Base
Keurig K- Supreme comes with the option of two positions for its water reservoir, which you can choose according to your ease and preference. If you have recently changed the position of your water reservoir base,u need to recheck it; if it is adjusted properly, the water will not be able to flow through the water reservoir. For a complete procedure of repositioning your water reservoir, check the section “ How to reposition the Water Reservoir on Keurig K-Supreme” in this article’s last part.
Solution 3: Fill The Water Reservoir
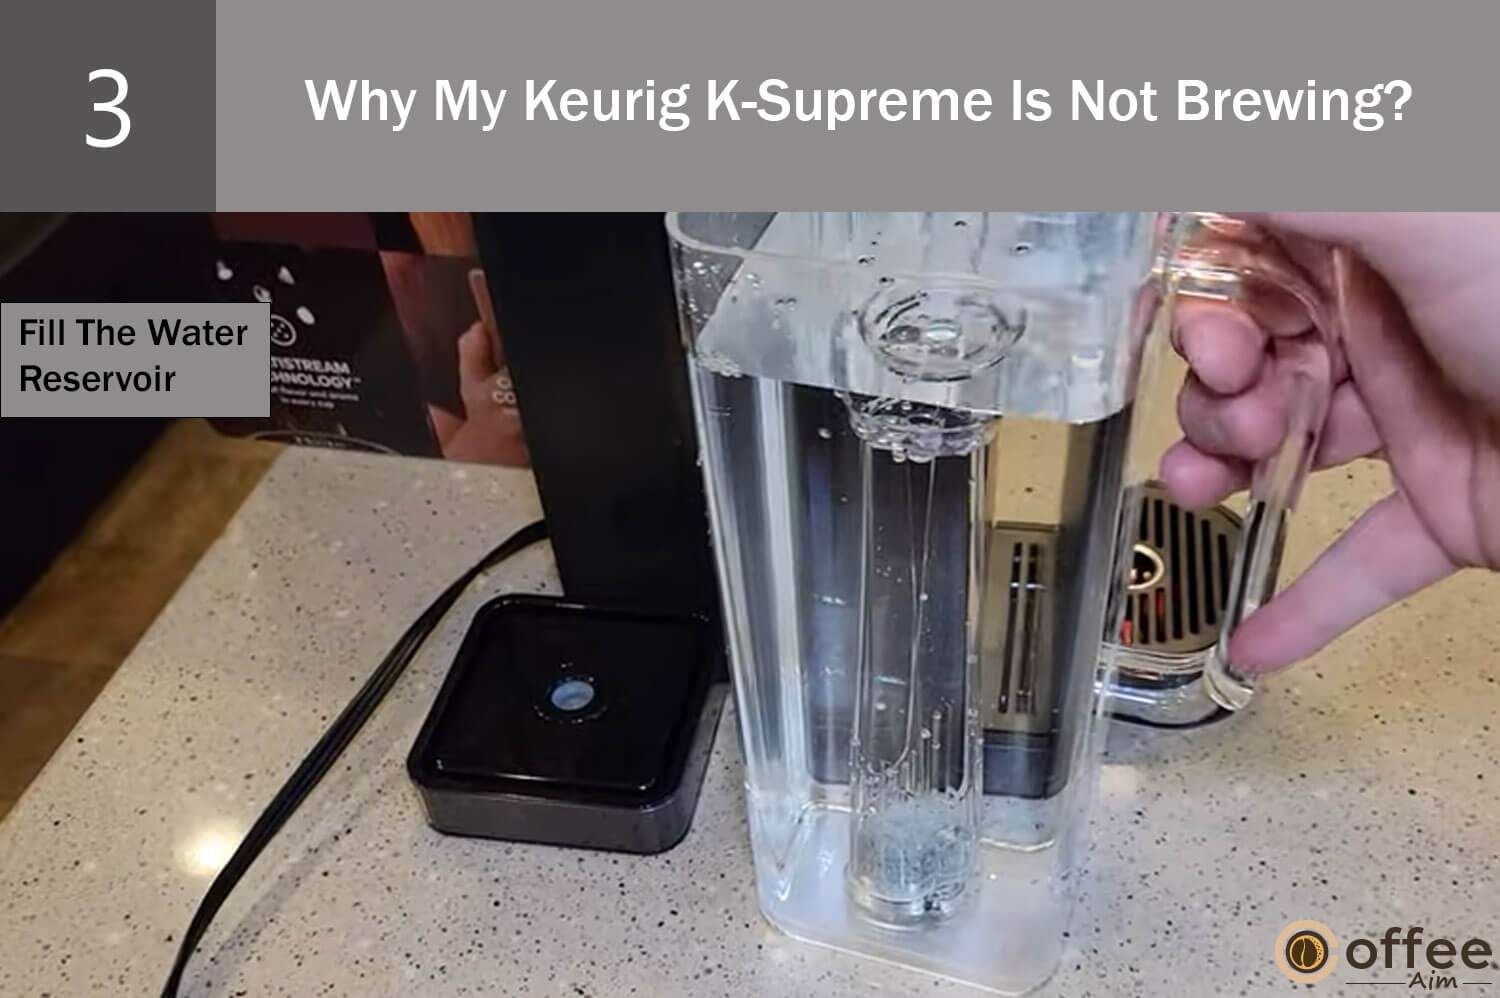
When the water reservoir has not been filled adequately, the “Add Water” light on the display will activate, and the brewing process will not start. To fix this, fill the water reservoir up to the Max Fill level, which should turn off the indicator. If the Add Water light persists even after filling the reservoir, it is advised to contact Keurig customer services for additional support. The “When To Seek Professional Help” section of the provided article contains the contact information you need.
Cause 3: Air Bubbles
Air bubbles can form in the water lines of your Keurig if you run the brew cycle with an insufficiently filled water reservoir or if the reservoir is not properly placed on the base. These air bubbles can obstruct the water flow and hinder the brewing process in your Keurig, resulting in a lack of coffee production. You can solve this easily by using the methods given below.
Solution 1: Remove The Air Bubble
To remove air bubbles from your Keurig, follow these steps:
- Disconnect the brewer from the power source.
- Remove the water reservoir and thedrip tray.
- Firmly hold the Keurig with both hands.
- Give the Keurig a vigorous shake to eliminate trapped air bubbles.
Solution 2: Remove Air Bubbles Using The “Finger Method”
Here’s an alternative method to clear clogs in your coffee maker’s water lines:
- Open the water reservoir.
- Use your finger to cover the connection (opening hole) between the coffee maker and the water reservoir.
- Start a water-only brew cycle without inserting a pod.
- Keep your finger on the water hole throughout the entire process.
- This will force the brewer to pump water through the lines, effectively pushing out any air bubbles causing the clog.
Cause 4: The Handle Is Not Closed Properly
The handle is crucial in puncturing the K-cup and allowing water to flow during brewing. When the handle is securely closed, it can help the brewing process. Therefore, ensuring the handle is appropriately closed is vital for the Keurig K-Supreme to function correctly and brew coffee effectively. Let us see how you solve this.
Solution: Close The Handle Properly.
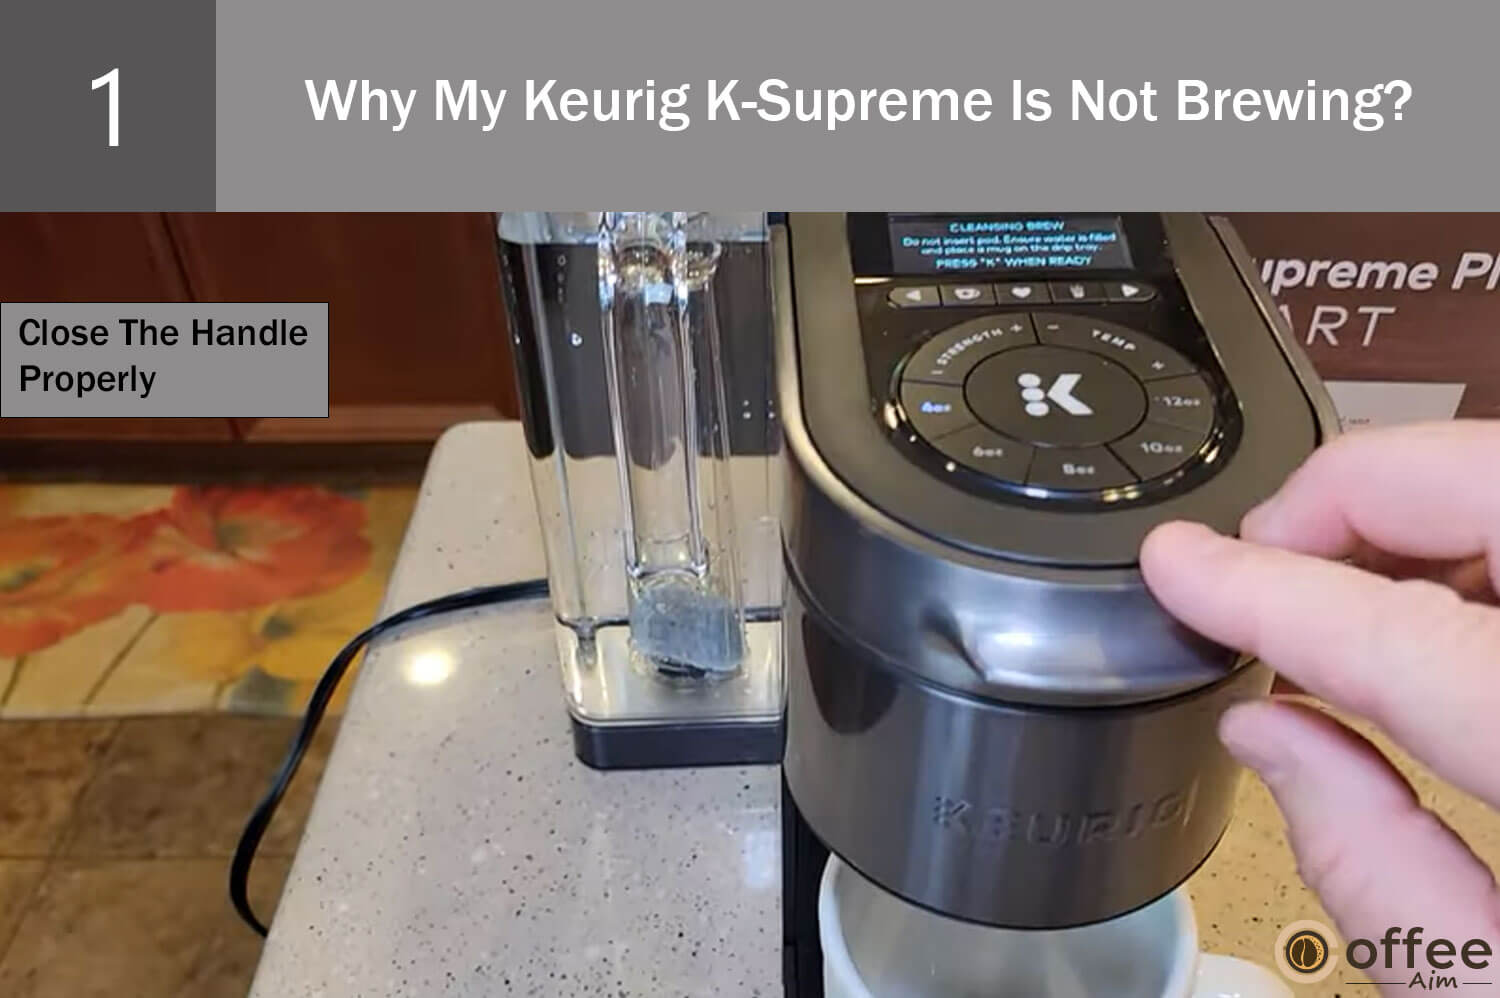
After placing the K-cup in the pod holder, firmly push down and close the brewer’s handle completely.
Having covered the various causes and solutions for a not brewing Keurig, it is now important to address the issue of Keurig K-Supreme not pumping water.
Problem 3: Why Is My Keurig K-Supreme Not Pumping Water?
Despite filling the water reservoir and pressing the button, you’re met with a disturbing grinding noise as the Keurig pump struggles but fails to pump water through. This issue wastes time and money and deprives you of the convenience you rely on, especially if your coffee routine revolves around your Keurig. It’s important to address this problem promptly to restore the proper functioning of your machine and avoid further inconvenience. Are you ready to have a smooth coffee ride with your Keurig K-Superem? Let’s see how you can solve the water pumping issue.
Cause 1: Water Reservoir Valve Is Clogged
Over time, minerals and impurities in the water can accumulate inside the internal components of the coffee machine, including the water reservoir valve. This buildup can disrupt the normal functioning of the pump and restrict or block the flow of water. Consequently, the machine may produce grinding noises or stop pumping water. Do not worry; you can unclog the clogged valve by following the solutions below.
Solution 1: Clean The Water Reservoir Valve
To resolve a Keurig not pumping water, try the following simple steps:
- Remove the water reservoir, empty it, and refill it to about one-third of its capacity.
- Shake the water inside the reservoir and pour it out.
- Locate the opening where the Keurig water reservoir valve pumps the water into the brewer.
- Use a clean dish towel to thoroughly clean the opening, ensuring no debris or obstructions may hinder the Keurig water pump’s action.
Solution 2: Clean The Valve With A Toothbrush
To clean the valve of the water reservoir, follow these steps:
- Remove the water reservoir from the machine.
- Flip the water reservoir upside down to access the valve underneath.
- Take a toothbrush and apply a small amount of liquid detergent to the bristles.
- Gently scrub the toothbrush on the valve to remove clogs or blockages.
- In the last Run, a rinsing cycle removes the detergent residue from the valve completely.
Solution 3: Run A Descale Cycle.
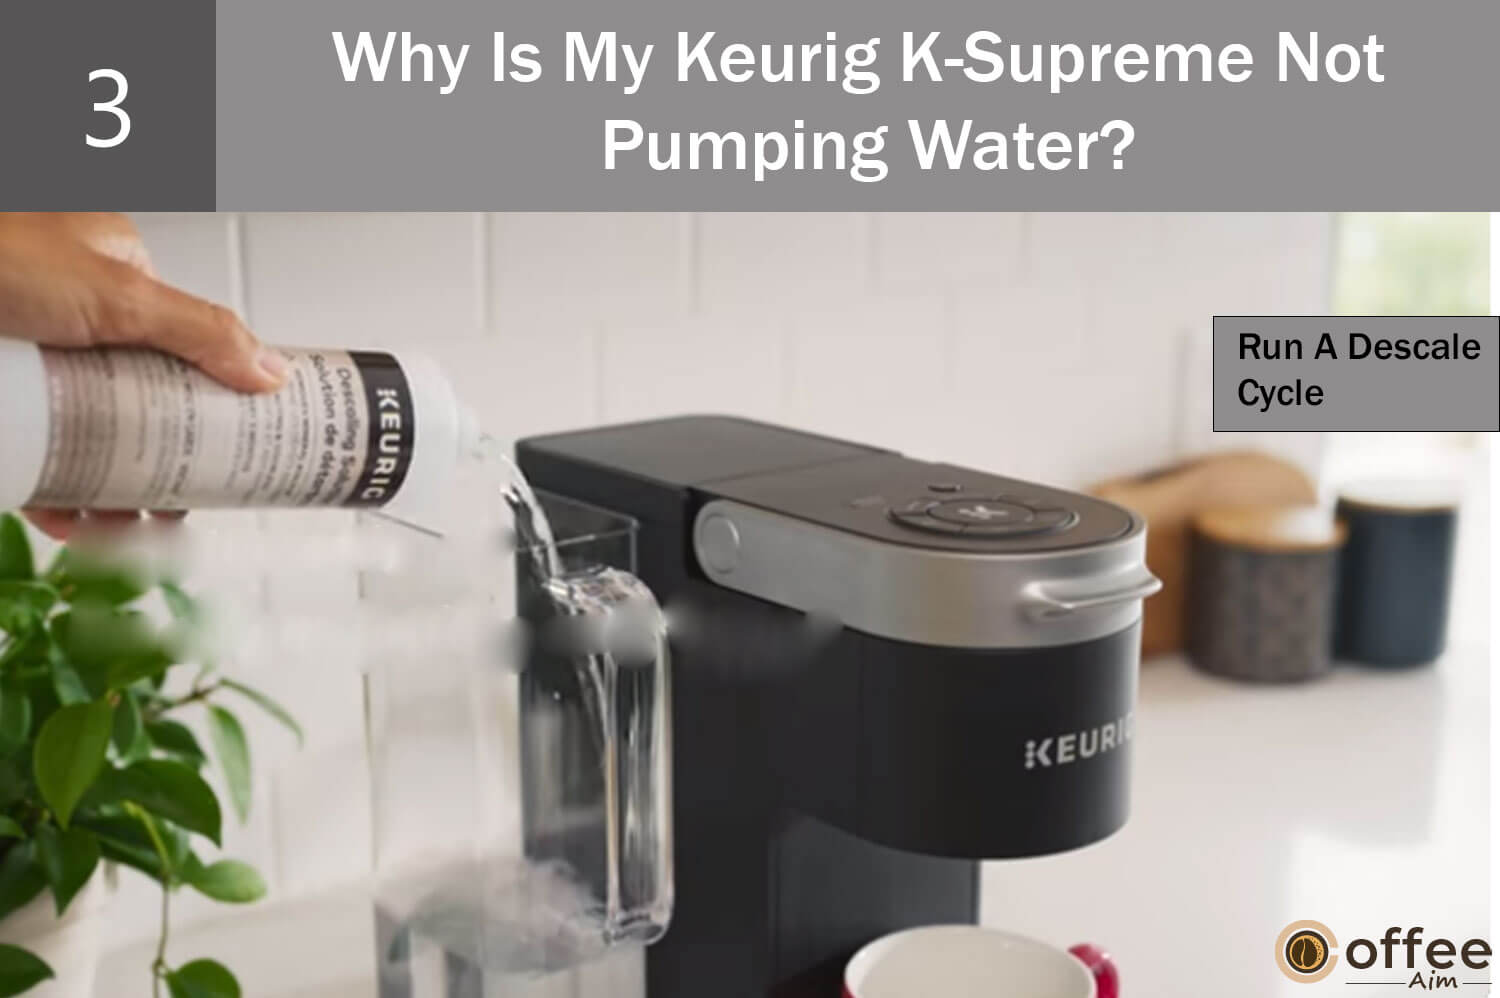
If the issue persists even after attempting the above solutions, it suggests a significant buildup in the water reservoir valve of your Keurig K-Supreme. However, there’s no need to worry! You can easily clean it by running the descaling cycle. For detailed instructions on performing a thorough descaling procedure, please refer to this article’s “Descaling the Keurig K-Supreme” section below.
Cause 2: Low Water Level
More water in the reservoir can contribute to difficulties with water pumping. When the water level is too low, the machine will struggle to pump water into the heating system effectively, resulting in water flow and brewing issues. Without waiting, Let us see how you can resolve this matter.
Solution: Fill It To Max Fill Level

This is necessary because the machine requires sufficient water to operate effectively. By filling the reservoir to the maximum fill level, you ensure the machine has ample water to pump into the heating system, allowing optimal performance.
Cause 3: Water Reservoir Is Not Properly Placed
Correctly aligning the water reservoir in your Keurig machine is vital to prevent issues with water flow. When the water reservoir is not aligned correctly, it can cause malfunctions or prevent water from being pumped into the heating system. It is crucial to ensure that the water tank is securely and correctly attached to the machine to maintain smooth operation. Without wasting a single moment, let’s delve into finding a resolution for this matter without delay.
Solution 1: Place The Water Reservoir Correctly

Placing the water reservoir in the correct position is essential for proper alignment with the rest of the machine. This alignment ensures a seamless and uninterrupted flow of water from the reservoir to the heating system.
Solution 2: Recheck The Position Of The Water Reservoir Base
The Keurig K-Supreme offers the convenience of two positions for its water reservoir, allowing you to choose the one that suits your ease and preference. If you have recently adjusted the position of your water reservoir, it is important to verify its proper alignment, as an improper adjustment may hinder the flow of water through the reservoir. To learn the step-by-step process of repositioning your water reservoir, please refer to the section titled “How to Reposition the Water Reservoir on Keurig K-Supreme,” provided at the end of this article.
Cause 4: Air Lock Problem
If you accidentally ran a brew cycle with insufficient water in the tank, air may have entered the water tubes. When the air gets trapped in the water tubes, it creates a blockage that disrupts the water flow and prevents the machine from operating properly. It is important to address this issue as it can impact the brewing process. The urgency of this situation demands immediate attention and action. Let’s start resolving it without any further delay.
Solution: Remove The Air Lock
Refer to Problem 2( Cause 3) to see the detailed procedure for removing the airlock.
Cause 5: The Needles Are Clogged
When brewing a K-cup, the needles inside your Keurig pierce it, allowing hot water to flow through the K-cup. Over time, this buildup can block the water flow inside your Keurig, leading to a clogged needle and a machine that won’t pump water properly. It is important to regularly clean and remove any coffee grounds to prevent this issue from occurring. Let’s not procrastinate any longer and instead focus on finding a quick and effective solution to resolve this matter.
Solution: Clean Needles

Cleaning the needles would solve this problem. To know the Needles cleaning process, refer to the “Cleaning the Exit Needle” and “Cleaning The Entrance Needle” sections below in this article.
Cause 6: Water Reservoir Magnet Is Faulty
The detection magnet is a sensor inside your Keurig that monitors the water level in the tank. However, if the magnet gets stuck or misaligned, it can prevent the machine from pumping water. See the method below to adjust the magnets of the water reservoir.
Solution: Adjust The Magnet
To fix a Keurig that is not pumping water properly, follow these steps:
- Turn off the Keurig.
- Remove and empty the water reservoir.
- Refill the water reservoir at one-third capacity and turn on the machine again.
- If the issue persists, proceed to the next step.
- Tap or gently shake the tank to dislodge the magnet. This may realign it.
- If tapping or shaking doesn’t work, empty the water reservoir again.
- Using your hand, reach into the tank and try adjusting the magnet with your finger.
- Once you have adjusted the magnet, refill the water reservoir and place it back in position.
- Turn on the machine and initiate a water-only brew cycle to test if the issue is resolved.
If the issue still needs to be resolved, there is no best option than to call Keurig customer care. For contact information, check the section “When to Seek Professional Help” in this article.
I hope you have resolved the Keurig K-supreme not pumping water, but what if your Keurig starts making weird loud noises? Do you want to see this problem’s troubleshooting methods too? Let’s dive in, then.
Problem 4: Why Does My Keurig K-Supreme Coffee Maker Make A Loud Noise?
The pleasant sound of a brewing coffee maker can be a delightful experience for coffee lovers in the morning. However, when your Keurig K-Spreme coffee maker starts making loud and unsettling noises, it can disrupt the peaceful atmosphere of your morning routine. These unexpected sounds can raise concerns about the coffee maker’s proper functioning and require immediate attention. It is important to identify and address the root causes of these noises to restore the tranquility and performance of your beloved coffee maker. Are you interested in learning about the causes and solutions?
Cause 1: Wrong Placement
If your Keurig is producing extreme noise while brewing, the first thing to investigate is its placement and the surface it rests upon. Consider the material on which the Keurig is placed. If it is a hard surface like granite or an uneven material like tile, the vibrations and rattling during brewing may contribute to the loud noise.
It’s time to delve into the solution-seeking
Solution: Place It On A Steady Surface

To resolve this issue, you have a few options. You can place a layer of styrofoam, a rubber plate, a corkboard, or a mouse pad under the Keurig to provide cushioning and absorb the vibrations during brewing. This will prevent the brewer from rattling against the hard surface.
Cause 2: Keurig Is Clogged
Tap water contains various chemicals, minerals, and microorganisms. Certain minerals, such as calcium, can accumulate and form deposits inside the Keurig coffee maker when heated water. Keurig advises using filtered or bottled water for brewing to prevent this buildup. Without hesitation, let’s jump into action and work together to find the best possible solution to resolve this matter promptly.
Solution: Descale

To obtain comprehensive instructions on effectively describing your Keurig K-Supreme, please consult the “Descaling The Keurig K-Supreme” section in this article.
Cause 3: The Entrance Needle Is Dirty
A potential reason for the clicking noise in your Keurig K-Supreme could be a dirty entrance needle. The entrance needle is responsible for puncturing the K-Cup during brewing. If this needle gets clogged with coffee grounds or debris, it can result in the machine making a clicking noise. You must address this matter before you can afford any delays; implement the solution written below.
Solution: Clean The Entrance Needle
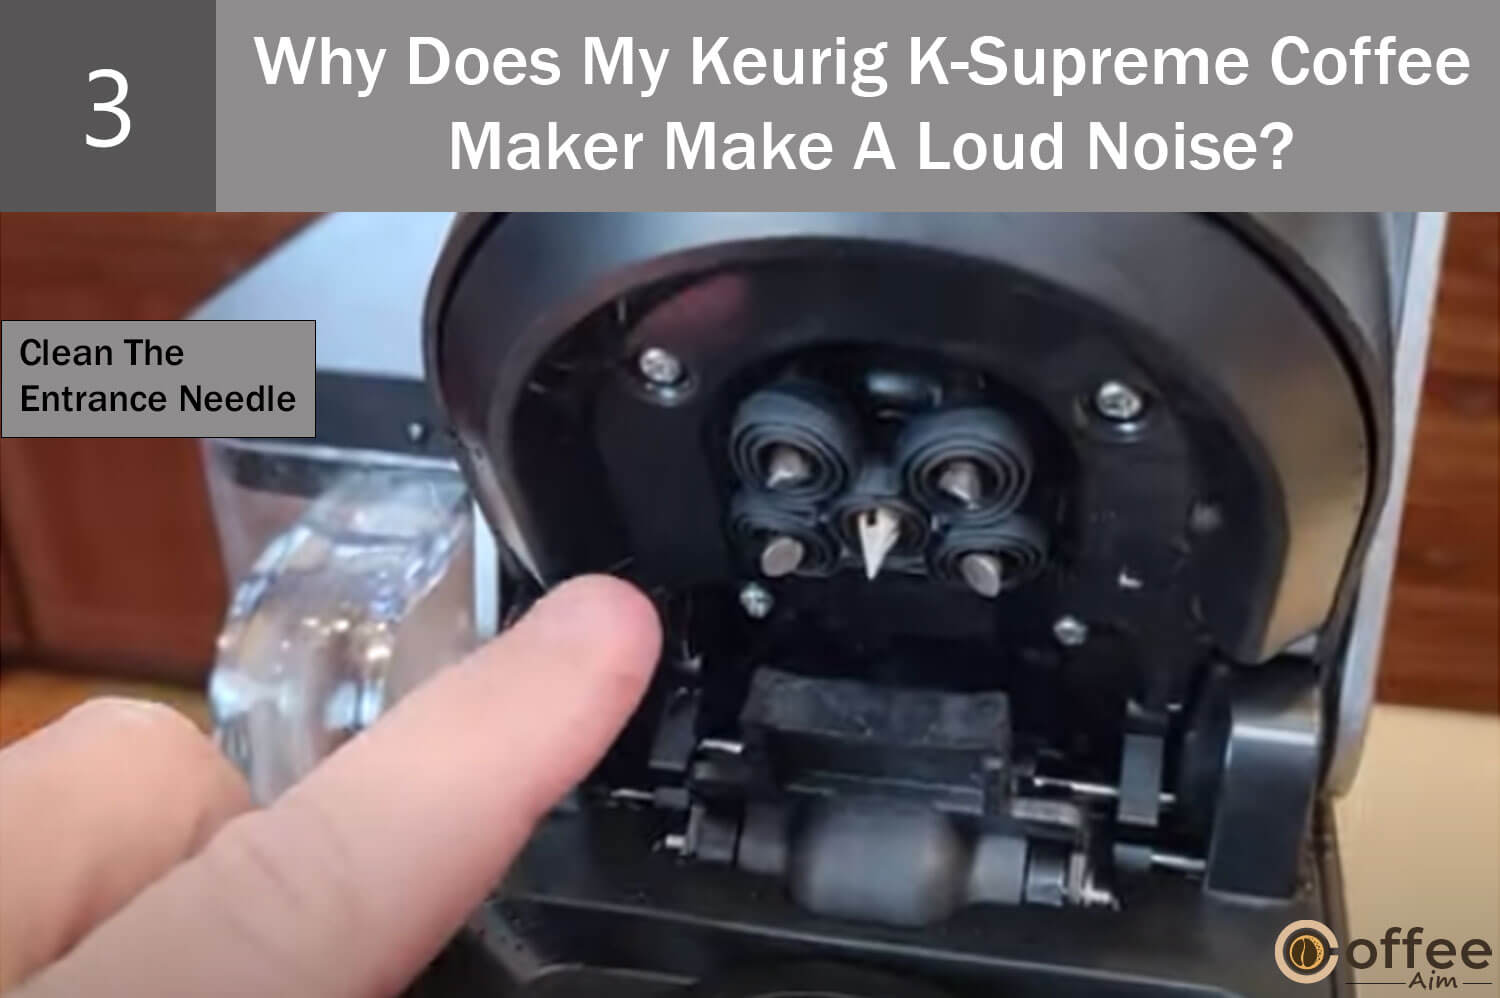
Regularly cleaning the entrance needle is crucial to prevent debris and clogging issues. To find detailed instructions on how to clean the entrance needle effectively, please refer to the “Cleaning the Entrance Needle” section in this guide.
Cause 4: Your Keurig Is Broken
If your Keurig coffee maker remains excessively loud during brewing, despite trying remedies like placing it on a soft surface and descaling it, and if it’s a relatively old model, there is a possibility of a broken component within the machine. Let us see what you can do in this situation.
Solution: Contact Keurig Customer Care
If you are experiencing persistent loudness issues with your Keurig K-Supreme despite troubleshooting steps, it is recommended to contact Keurig customer care for further assistance. Mainly if your machine is still covered under warranty, inquire about the possibility of a replacement. You can find the contact information in the “When To Seek Professional Help” section mentioned later in this article.
Now that we have summarized the Keurig K-Supreme making loud noises let’s explore the steps you can take to address this problem of Keurig flashing lights.
Problem 5: Why Is My Keurig K-Supreme Light Flashing?
The control panel of the Keurig K-Supreme coffee maker, located on the top of the machine, includes various buttons that can blink or display different signals to convey important information to the user. Let’s explore these signals and their meanings below.
Cause1: Low Water Level
When the Keurig K-Supreme detects a low water level in the reservoir, the ADD WATER light on the control panel will illuminate. This serves as an indicator for the user to refill the water reservoir before proceeding with brewing. It’s important to add water up to the required level indicated on the reservoir to ensure the proper functioning of the machine. Refilling the water reservoir to the appropriate level will resolve the issue and allow you to brew your desired cup of coffee.
Solution: Fill It To The Max Fill Level
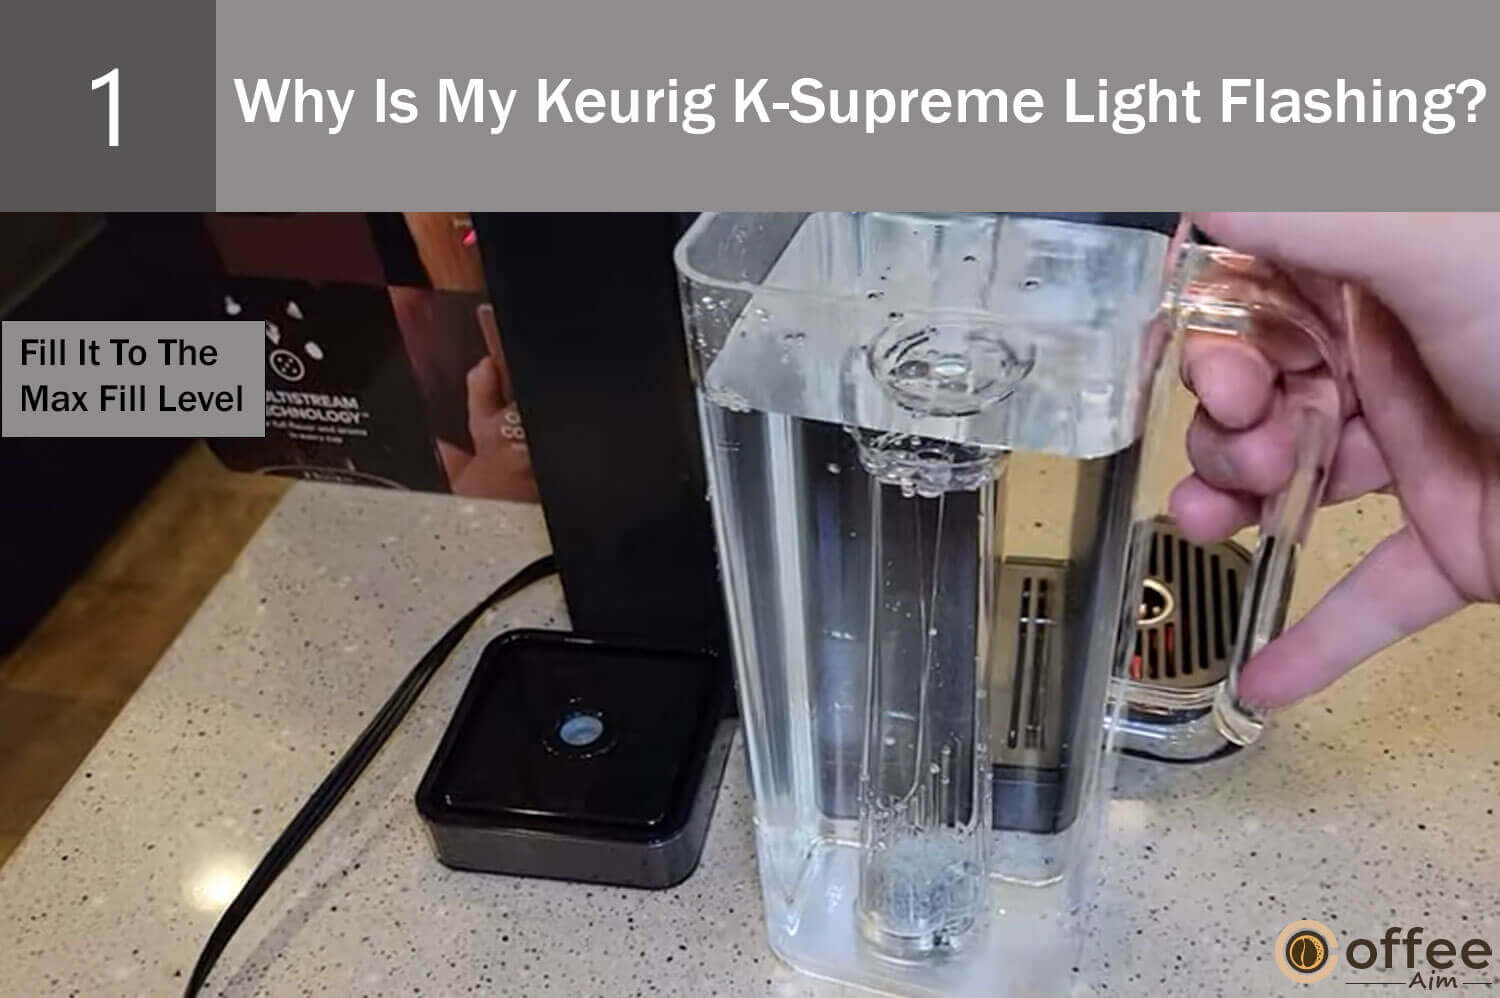
To deactivate the “ADD WATER” light on the control panel of your Keurig K-Supreme and continue with the brewing process, you need to ensure that the water reservoir is filled up to the MAX FILL line. Once you have filled the reservoir up to the MAX FILL line, the light on the control panel will automatically turn off, signaling that the water level is sufficient for brewing.
Cause 2: Need Descaling
When the Keurig K-Supreme detects significant mineral deposits or scale buildup, it will activate the “DESCALE” light on the control panel. This light serves as a visual indicator to alert the user that the coffee maker needs to undergo the descaling process. Descaling is necessary to remove the accumulated mineral deposits and scale, which can affect the performance and functionality of the machine.
Solution: Run A Descle Cycle

To address the “DESCALE” light displayed on the control panel of your Keurig K-Supreme, it is necessary to run a descaling cycle. Detailed instructions specific to your model can be found in the “Descaling The Keurig K-Supreme” section of the article. Following the step-by-step guide in that section, you can effectively descale your coffee maker and eliminate the descaling light.
Now that we have examined the reasons behind your Keurig K-Supreme flashing lights let’s delve into troubleshooting methods for the issue of the presence of coffee grounds in your coffee.
Problem 6: Why Are There Coffee Grounds In My Coffee?
Weak coffee can be incredibly disappointing and ruin your entire coffee-drinking experience. It not only fails to provide the necessary caffeine boost to start your day but also needs more flavor, leaving you feeling dissatisfied and annoyed. Dealing with weak coffee can negatively impact your mood and overall productivity. It is important to identify the underlying causes of weak coffee and take immediate action to address the issue.
Cause 1: Clogging
Coffee grounds coming out of a Keurig are often due to a blockage in the exit needle. This blockage occurs when coffee grounds or tea residue accumulate on the needle, leading to clogs. Consequently, the accumulated grounds can make their way into the brewer and potentially end up in subsequent beverages, impacting the flavor and quality of the coffee. Let’s explore potential solutions to rectify this situation without wasting any time.
Solution: 1. Clean The Exit Needle
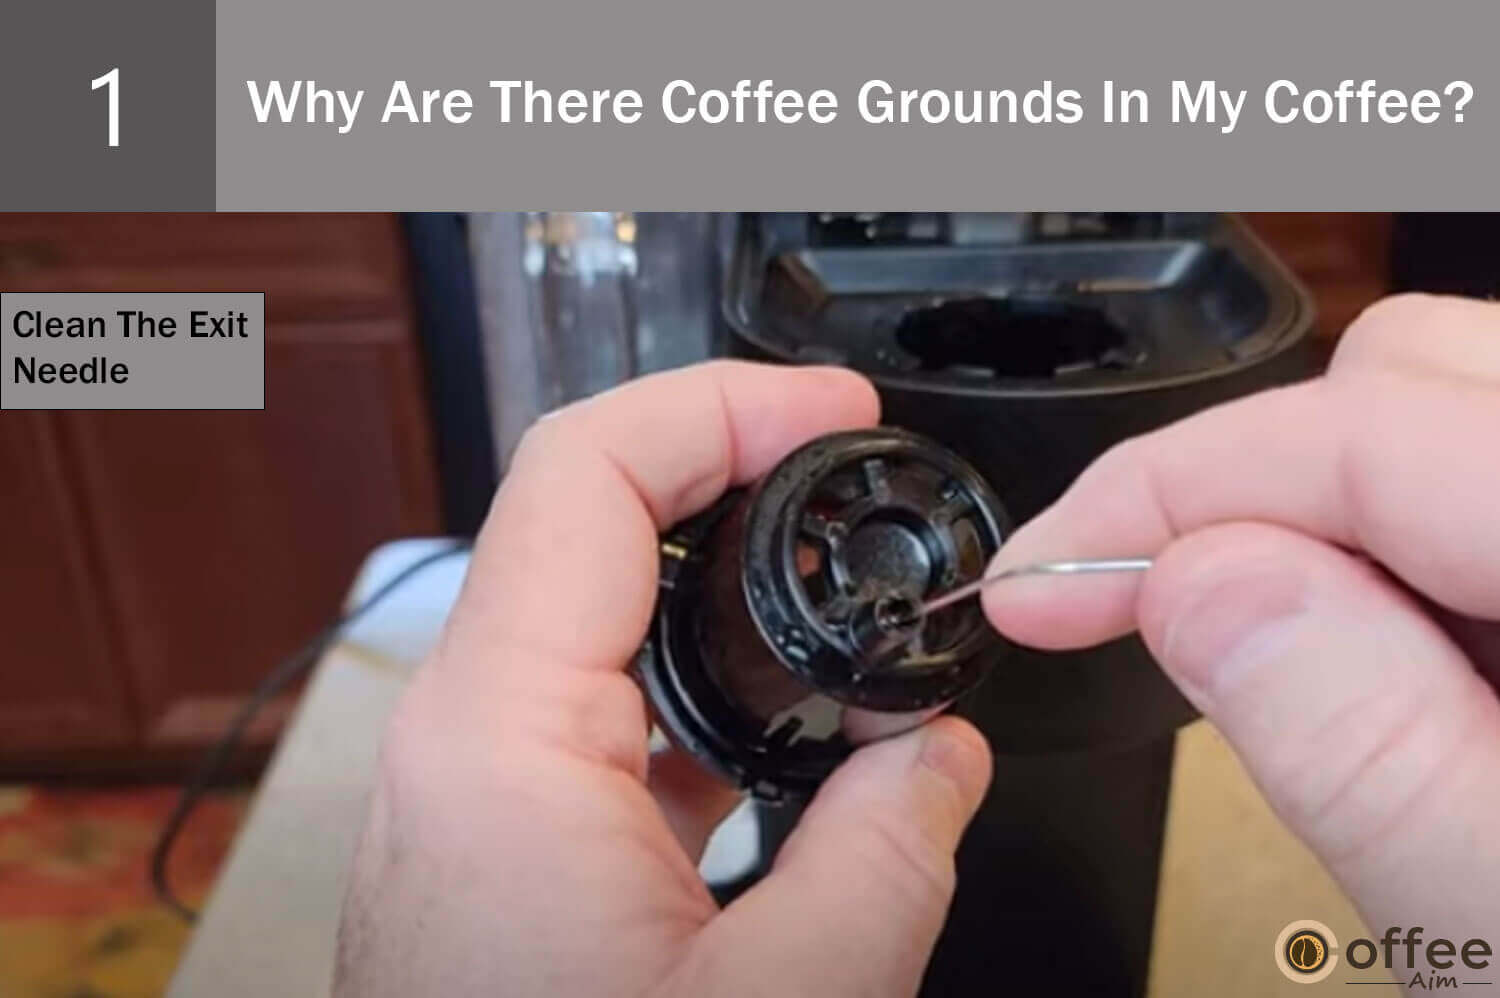
Cleaning the exit needle is an essential step in resolving this issue. The cleaning process for the exit needle can be found in the “Cleaning the Exit Needle” section of this article.
Solution 2: Run A Cleansing Brew

To clear out any stuck coffee grounds in the Keurig K-Supreme, it is recommended to perform a cleansing brew. This procedure helps flush out the accumulated ground and clean The internal components of the machine. For detailed instructions on running a cleansing brew, please refer to the “How To Run A Cleansing Brew” section in this article.
Solution 3: Run A Descaling Cycle.
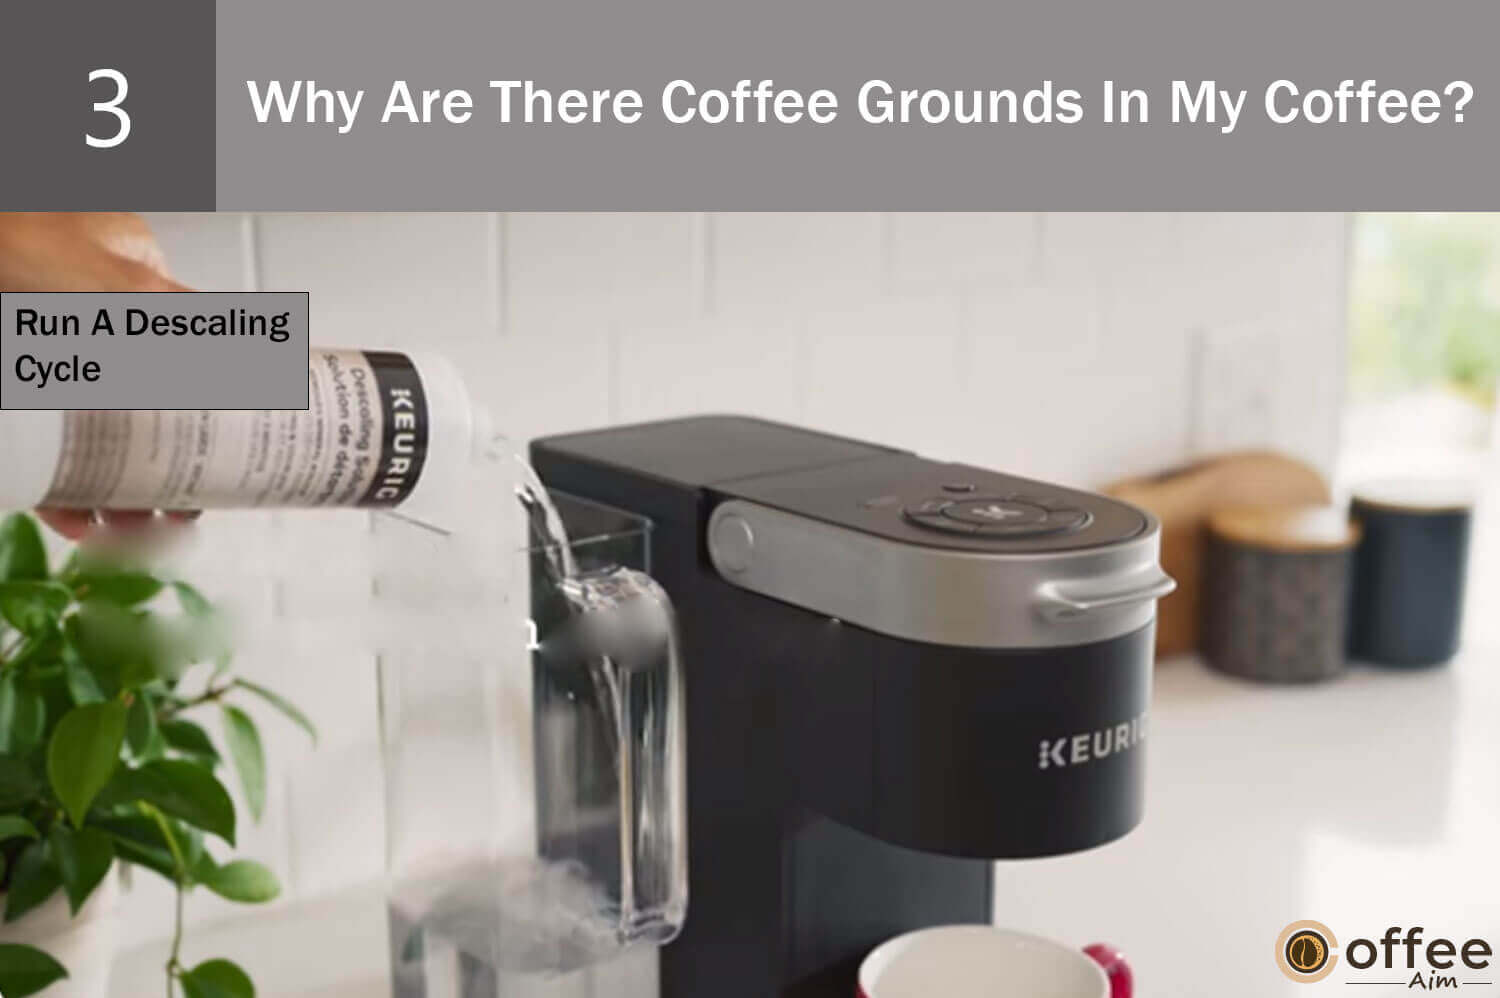
If the previous solutions do not yield any results, it is recommended to perform a descaling cycle. To obtain comprehensive instructions on effectively describing your Keurig K-Supreme, please consult the “Descaling The Keurig K-Supreme” section in this article.
Moving on to a different issue, let’s explore the troubleshooting methods for addressing the problem of the Keurig K-Supreme brewing a partial cup of coffee.
Problem 7: Why My Keurig K-Supreme Is Brewing A Partial Cup?
Experiencing a situation where your Keurig machine doesn’t brew a full cup of coffee even after pressing the button can be highly frustrating. This problem signifies a malfunction in the machine, significantly reducing your satisfaction and overall coffee-drinking experience. Owning a Keurig machine is all about enjoying the convenience of a complete cup of coffee. It’s important to address the issue promptly by troubleshooting the problem, identifying its root cause, and restoring the machine’s ability to brew a full cup of coffee.
Cause 1: Keurig-Supreme Is Clogged
One potential reason for a partial cup of coffee in your Keurig is the accumulation of minerals or water scaling within the machine. This buildup can block the water line, causing insufficient water flow. Regular descaling is essential to prevent this issue from occurring.
Solution: Run A Descaling Cycle.

By descaling periodically, you can maintain the optimal functioning of your Keurig and avoid any problems caused by scaling buildup. For detailed and comprehensive instructions on how to descale your Keurig K-Supreme effectively, please refer to the “Descaling The Keurig K-Supreme” section available at the end of this article.
Cause 2: Dirty Needles
In some cases, more than descaling, Keurig may be required to address the issue of not brewing a full cup of coffee. The problem may be related to the needles puncturing the K-Cup during brewing. Surprisingly, debris like foil from the K-Cup can become stuck in these needles, causing blockages that disrupt the water flow.
When the water flow is impeded, the machine may struggle to extract the desired amount of coffee from the K-Cup, resulting in a partial cup. It is important to regularly inspect and clean the needles to prevent debris buildup and ensure proper water flow during brewing.
It is imperative that we address this matter without any unnecessary delay.
Solution: Clean The Needles
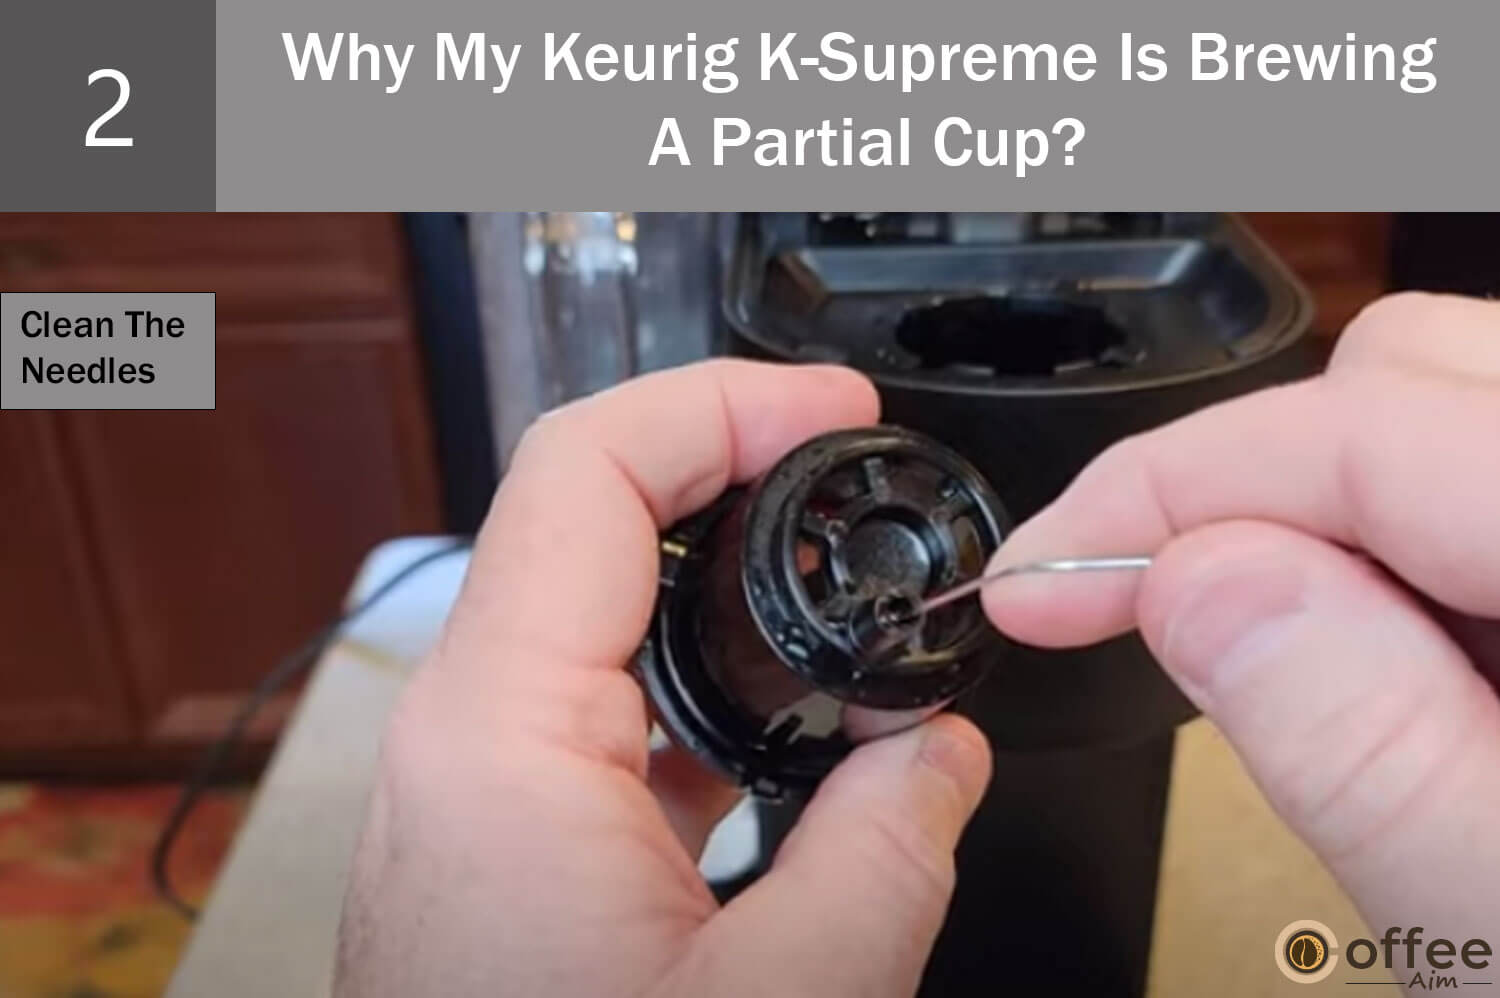
Detailed instructions on how to perform the cleaning processes can be found in the sections titled “Cleaning the Entrance Needle” and “Cleaning the Exit Needle.”
Cause 3: Water Reservoir Tube Is Blocked
In addition to mineral buildup and needle blockages, a potential cause of partial cup brewing in your Keurig is an obstruction in the tube that connects the reservoir to the machine. While descaling is often effective in resolving this issue, if it doesn’t solve the problem, there are alternative steps you can take to address it.
Solution: Remove The Blockage
To address debris-related issues, there are several methods you can try. First, swirl some water around the reservoir and clean the area where the reservoir connects to the machine using a cloth to remove any debris.
Another option is to use a high-pressure tool like a turkey baster to force water into the tubing. This increased pressure can dislodge debris and improve water flow.
Alternatively, you can use a can of compressed air. Empty the reservoir and blow air through the tube to clear any potential blockages.
By employing these methods, you can effectively remove debris from your Keurig and restore proper water flow, ensuring a full cup of coffee during brewing.
Cause 4: Air Locked
When air enters the water tubes, it displaces the water and creates an air pocket. As a result, Keurig may need help to draw in water properly, leading to decreased water flow or no water flow at all. This can prevent the machine from brewing coffee as expected. The urgency of this matter requires immediate attention and decisive action.
Solution: Remove The Airlock
If you want to know the detailed process of removing the airlock, refer to “Problem 2(Cuase3)” of this article.
Now that we have discussed all possible causes and their solutions for coffee grounds in your coffee, we will see what you should do if you encounter an unexpected shutting off Keurig-K Supreme.
Problem 8: Why Does My Keurig K-Supreme Shut Off Unexpectedly?
Encountering an abrupt shutdown of your Keurig coffee maker while brewing can be frustrating and disrupt your daily coffee routine. This unexpected interruption can delay the brewing process and leave you without your desired cup of coffee. However, there are troubleshooting steps you can take to address this issue. In the following discussion, I will outline possible causes and provide solutions to help you resolve the problem effectively.
Cause 1: Keurig Is Overheating
At times, Keurig coffee makers may unexpectedly shut off due to overheating. This can occur when the machine is operating under an excessive workload, triggering an automatic shutdown to prevent potential damage. Additionally, frequent use can contribute to overheating as it wears down the coils over time. Fortunately, there are several solutions available to tackle this problem and restore your Keurig K-Supreme to its full functionality. To learn how to prevent overheating in your Keurig, please refer to the solutions provided below.
Solution: Let It Rest

To address an overheating Keurig that frequently shuts off, a simple yet effective approach is to provide the machine with a cooling period. If you have been using the Keurig for an extended period or excessively, take the initiative to turn it off and unplug it. Allowing the Keurig to rest and cool down enables it to reset itself, mitigating the risk of further overheating. This temporary break can be beneficial in restoring proper functioning to your Keurig and preventing recurring shutdowns.
Solution 2: Replace Or Repair The Coils
If allowing the Keurig to cool down doesn’t resolve the issue, it may indicate worn-out coils. Replacing them requires technical expertise, so it’s advisable to contact Keurig Customer Care for assistance. Refer to the “When To Seek Professional Help” section of this article for their contact information.
Cause 2: Faulty Thermostat
When the thermostat of your Keurig coffee maker malfunctions, it can result in unexpected shutdowns. The thermostat is responsible for regulating the water temperature; if it is faulty, it can cause the machine to turn off abruptly. To address this issue, you can consider the following solution.
Solution: Contact Keurig Customer Care

You should contact Keurig customer care for this purpose. They can advise you on troubleshooting to diagnose the issue and recommend appropriate solutions. In cases where a repair or replacement of the thermostat is required, they can guide you through the process.
If your Keurig K-Supreme is still covered under warranty, it’s important to inquire about the available options for a replacement or any compensation that may be applicable. To find the contact information for Keurig’s customer care, refer to the “When To Seek Professional Help” section of the article or the official Keurig website.
Cause 3: Low Water Level In Water Reservoir
When the water level in your Keurig is below the required amount, the “ADD WATER LEVEL” light on the control panel will begin to blink, indicating that the water reservoir needs to be refilled before brewing can resume. If Keurig detects insufficient water in the reservoir, it will automatically shut off to prevent any damage or issues.
Solution: Refill The Water Reservoir.
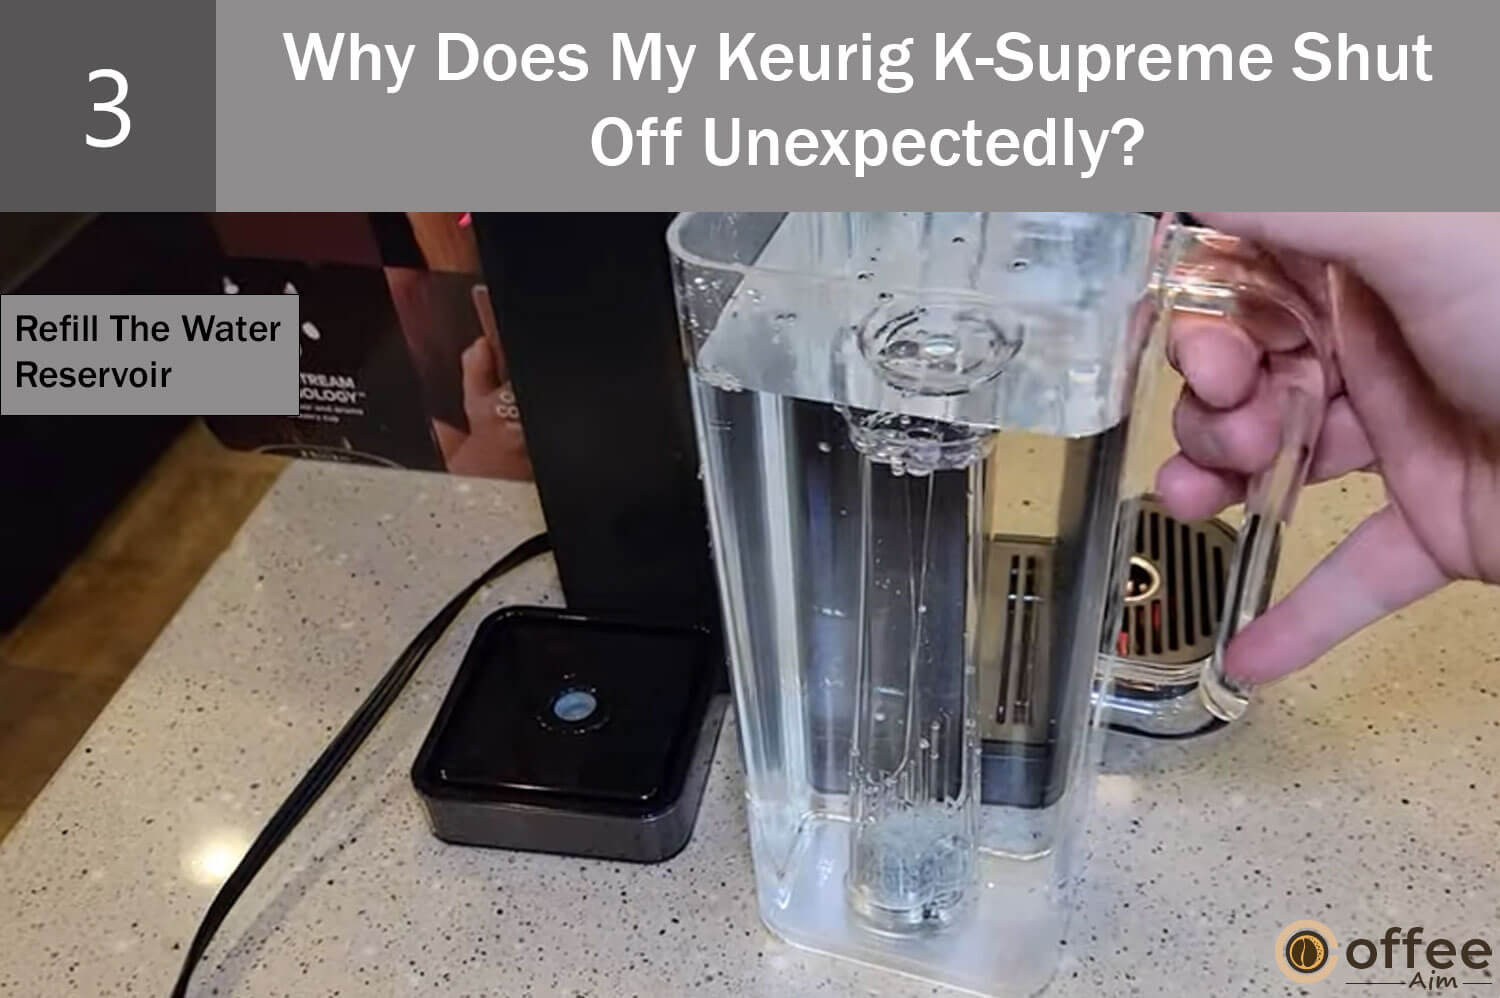
Before brewing your coffee, it is crucial to ensure that the water reservoir has an adequate amount of water. If the water level is low or the reservoir is empty, add water to the MAX FILL level indicated on the reservoir. This ensures that the Keurig has sufficient water to brew your desired cup of coffee.
Cause 4: The K Cup’s Bottom Is Unpunctured
If your Keurig coffee maker shuts off during the brewing process, one potential cause could be the failure to pierce the bottom of the K-Cup. When the machine is unable to puncture the cup, it cannot effectively brew the coffee, resulting in the automatic shutdown. To resolve this issue, consider the following solution.
Solution: Contact Keurig Customer

Reach out to Keurig Customer Care or seek assistance from a qualified professional. They have the expertise and knowledge to diagnose the problem accurately and provide appropriate solutions. To find the contact information for Keurig Customer Care, refer to the “When To Seek Professional Help” section mentioned in the article or visit the official Keurig website.
Cause 5: Brewing Process Was Interrupted
Sudden interruption could be the cause behind your Keurig K- Supreme’s unexpected shutting off. This interruption can be caused by factors such as a power outage or a malfunction in the machine. To resolve this issue, you can try the following solutions.
Solution: Ensure A Stable Electric Connection
First, make sure that your Keurig coffee maker is directly connected to a dedicated electrical socket. Avoid using power strips or extension cords, as they can weaken the electrical connection and increase the risk of the machine shutting down.
By plugging your Keurig directly into an electrical socket, you provide a more stable and reliable power supply to the machine. This reduces the chances of any interruptions or fluctuations in power that could result in Keurig shutting down while in operation.
Cause 6: Clogged Exit Needle
When coffee grounds accumulate around the needles in your Keurig machine, it can hinder the piercing process and cause issues with brewing. This can result in only one hole being made in the K-cup instead of the necessary multiple punctures. As a result, the hot water cannot flow through the K-cup properly, leading to the Keurig not brewing and shutting off automatically.Taking swift steps will help us reach a resolution and prevent any further complications.
Solution: Clean The Exit Needle

To diagnose and address the issue of your Keurig repeatedly shutting off during brewing, you can perform a simple check. Remove the K-cup and inspect the bottom of the pod. If you notice an incomplete or insufficient hole, it indicates that the bottom needle of your brewer may be causing the problem. Cleaning the exit needle can help resolve this issue. Refer to the “Cleaning The Exit Needle” section in the article for detailed instructions on how to clean the needle before brewing your next cup of coffee.
Cause 7: Bent Needle
Another potential reason for your Keurig repeatedly shutting off during brewing is damaged or bent needles. While it’s less common for the needles to break or bend, it can occur if excessive force is applied. This often happens when attempting to use a K-cup that is too tall for the Keurig machine and forcefully inserting it, resulting in needle damage.
There are two areas where the needles can be broken or bent: the top entrance needle, where the hot water enters the K-cup holder, and the exit needle, where the brewed coffee flows into your cup. Mishandling or applying excessive force can cause damage to these needles.
Solution: Contact Keurig
You will need to inspect the needles for any signs of damage. If you notice a bent or broken needle, it’s recommended to contact Keurig Customer Care or a qualified professional for assistance. They can guide you through the process of repairing or replacing the affected needles to restore proper functionality to your Keurig machine.
Cause 8: Water Reservoir Magnet Alignment Is Wrong
A possible reason for your Keurig shutting off during brewing is a misaligned or stuck magnet in the water reservoir. The magnet is responsible for detecting the water level in the reservoir, but it can become displaced or stuck due to the vibrations produced during the brewing process. This can result in inaccurate water level detection, causing the Keurig to shut off instead of brewing the coffee. By taking decisive and immediate steps, you can swiftly reach a resolution while minimizing the chances of further complications.
Solution: Gently Tab The Water Reservoir
If you believe that a misaligned magnet in the water reservoir is causing your Keurig to shut down during brewing, there are several steps you can take to resolve the issue. Firstly, tap the water reservoir near the magnet housing with a gentle force to see if it realigns the magnet. If this doesn’t work, you can try shaking the reservoir gently to help move the magnet into the correct position. If the magnet remains unresponsive, empty the reservoir and clean it using a mild soap. Once cleaned, refill the reservoir with water and resume using your Keurig.
Problem 9: Why Is My Keurig K-Supreme Coffee Not Hot Enough?
Encountering an issue where your Keurig K-Supreme needs to brew a hot cup of coffee can be disappointing, particularly for those who rely on a warm and comforting start to their day. Several factors can contribute to this problem, and it’s important to understand them in order to find suitable solutions. Let’s delve into the possible causes and explore potential remedies to address this situation.
Cause 1: Malfunctioned Water Pump
If you encounter a situation where your Keurig coffee maker is unable to brew coffee at the desired temperature, it could be attributed to a malfunctioning pump. When the pump fails to function properly, it disrupts the normal water flow, causing the heating element to shut off and prevent overheating automatically. Unfortunately, this interruption in the brewing process leads to the water not reaching the optimal temperature for brewing. As a result, your coffee is brewed at a lower temperature, resulting in a less satisfying cup. Now, let’s focus on identifying and implementing the necessary steps to resolve this issue.
Solution: Repair The Water Pump
Instead of attempting to address this challenging issue on your own, I suggest reaching out to Keurig’s customer service for expert assistance. Their knowledgeable team can offer valuable advice and, if required, facilitate a repair or replacement of your Keurig coffee maker. If your Keurig is still covered by warranty, you may even be eligible for a replacement. To find the contact information for Keurig’s customer service, kindly refer to the “When to Seek Professional Help” section provided in the article.
Cause 2:Use Of Cold Cup
When your Keurig brewer dispenses hot coffee into a cold cup, the temperature of the coffee can quickly drop due to heat transfer to the cup. This is especially noticeable during colder months when there is a notable temperature difference between the hot coffee and the cold cup. To address this issue, let’s explore some potential solutions to help maintain the coffee’s temperature for a more enjoyable drinking experience.
Solution: PreHeat The Cup
To help maintain the temperature of your coffee for a longer duration and enhance your coffee-drinking experience, preheating your cup can be a simple yet effective technique. This method minimizes heat transfer and ensures that your coffee stays hot. There are two convenient ways to preheat your cup:
Microwaving method:
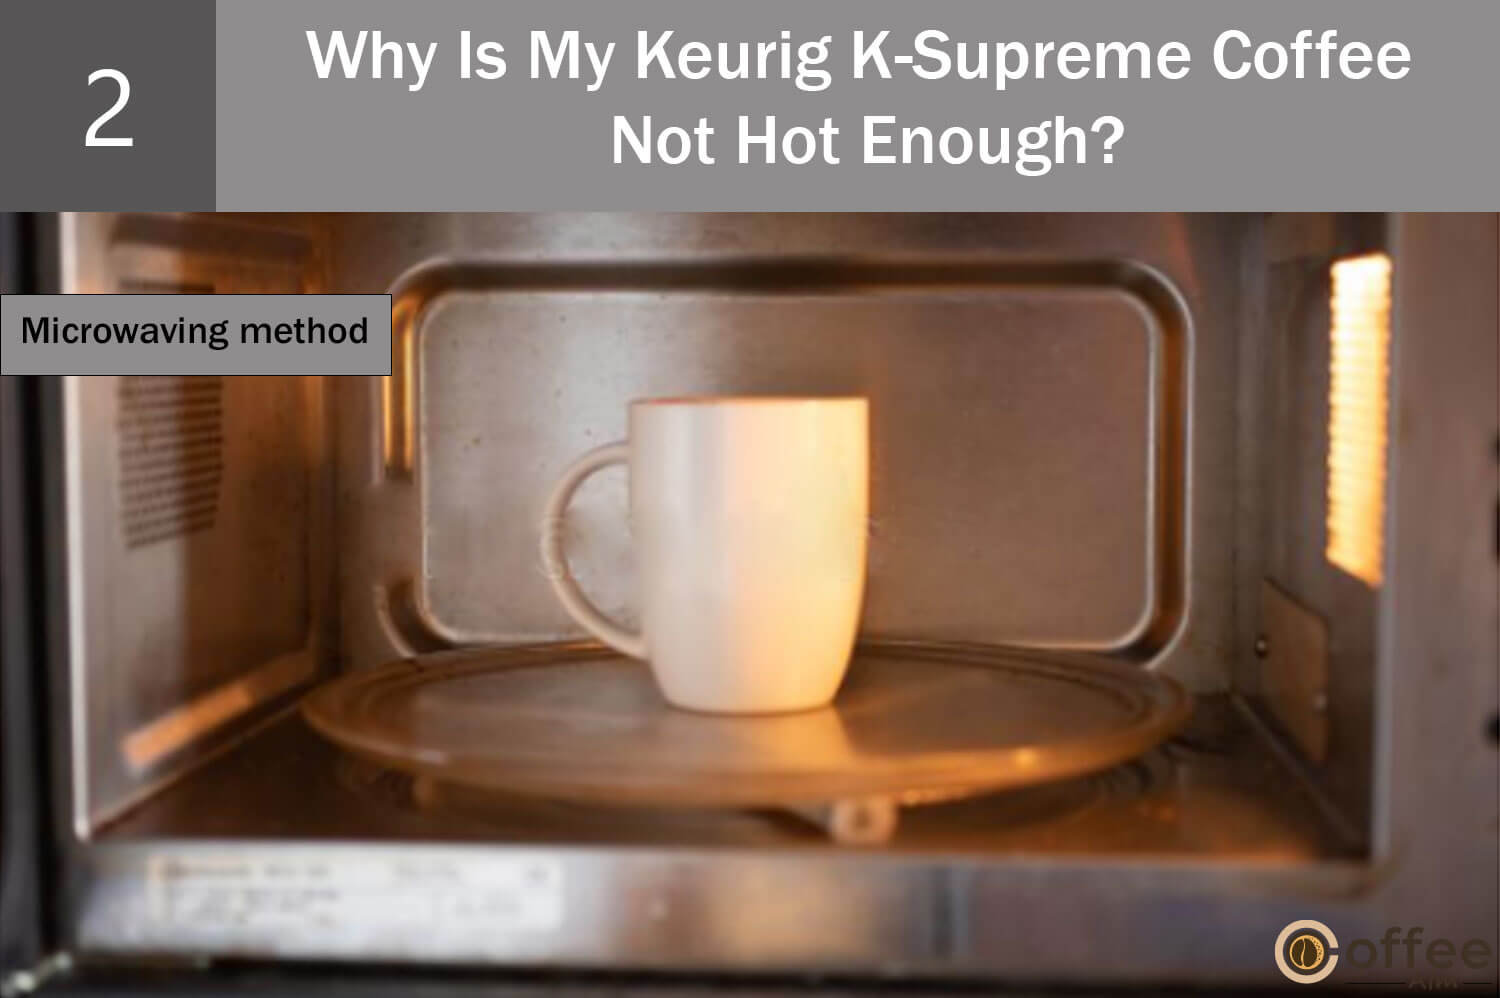
- Add some water to your cup and place it in the microwave.
- Heat the cup for approximately 30 seconds to a minute, adjusting the time based on your microwave’s power.
- Once the cup is heated, carefully discard the water and proceed to brew your coffee directly into the preheated cup.
Boiling water method:

- Boil water separately in a kettle or on the stovetop.
- Pour the boiling water into your cup and allow it to sit for about 30 seconds to a minute.
- After preheating the cup, carefully pour out the water and immediately brew your coffee into the preheated cup.
Descaling The Keurig K- Supreme
To descale your Keurig brewer hassle-free, follow these steps:
Gather the necessary items first;
- A large ceramic mug
- Freshwater
- Keurig Descaling Solution
- Access to a sink.
- Ensure you have a durable cup that can withstand the heat of the descaling solution, avoid using a paper cup.
- Allocate enough time, as the descaling process usually takes approximately 75 minutes.
Descaling Instructions:
Step 1: Prepare the Brewer
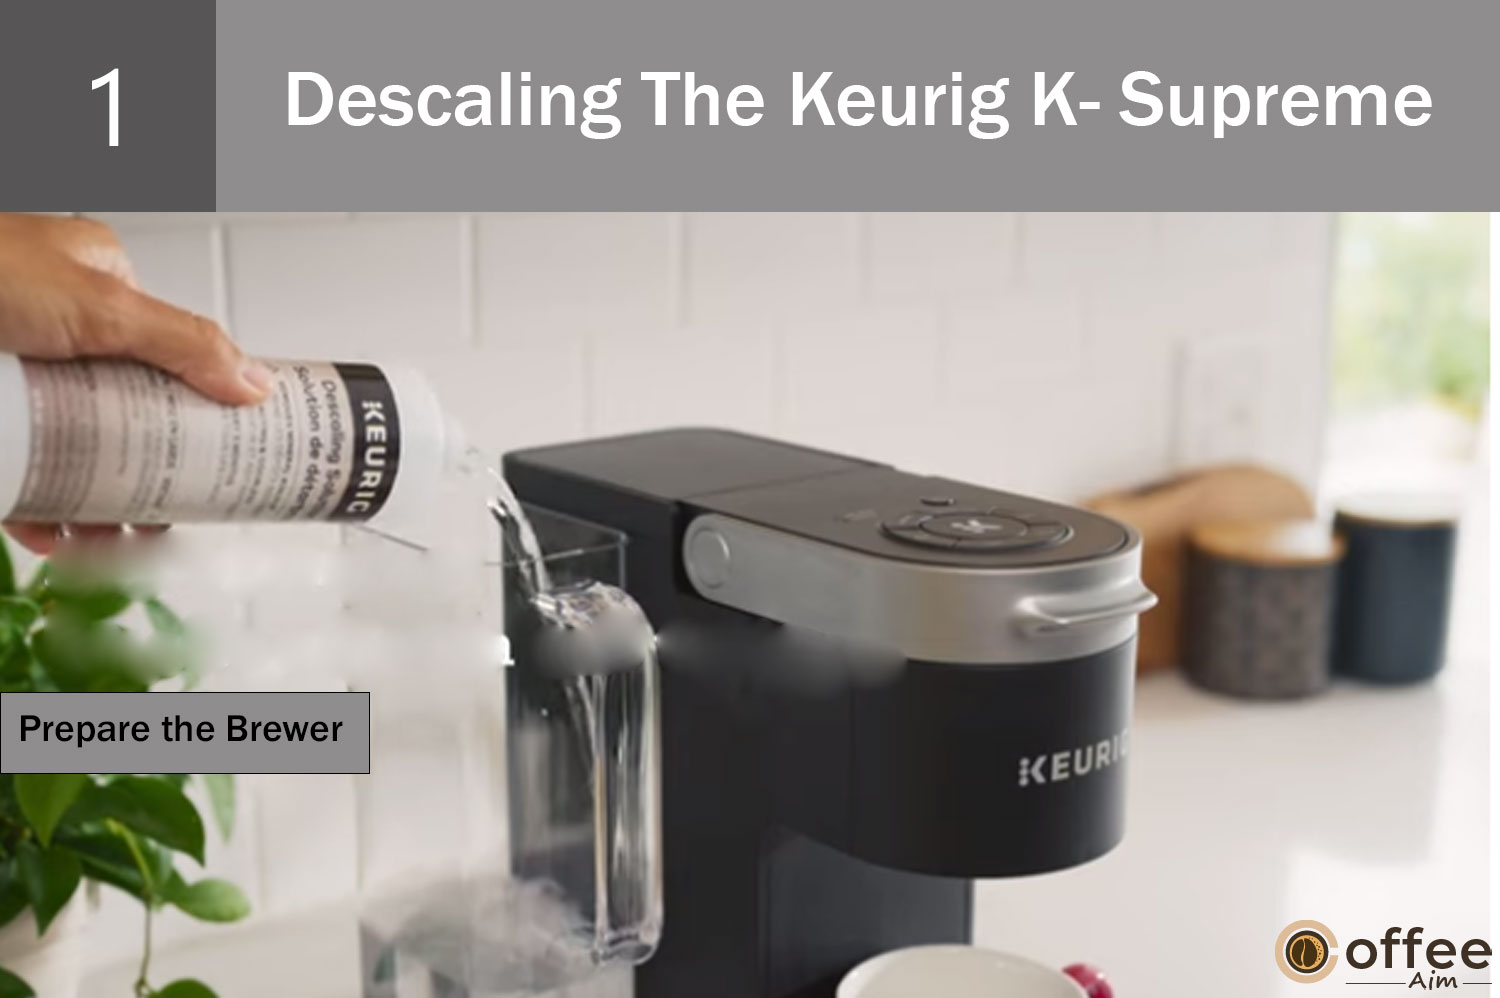
- Empty the water reservoir and pour the entire bottle of Keurig Descale Solution into it.
- Fill the empty bottle with water and pour it into the water reservoir as well.
- Make sure not to insert a K-Cup pod.
- Place a large mug on the drip tray.
Step 2: Descale The Brewer
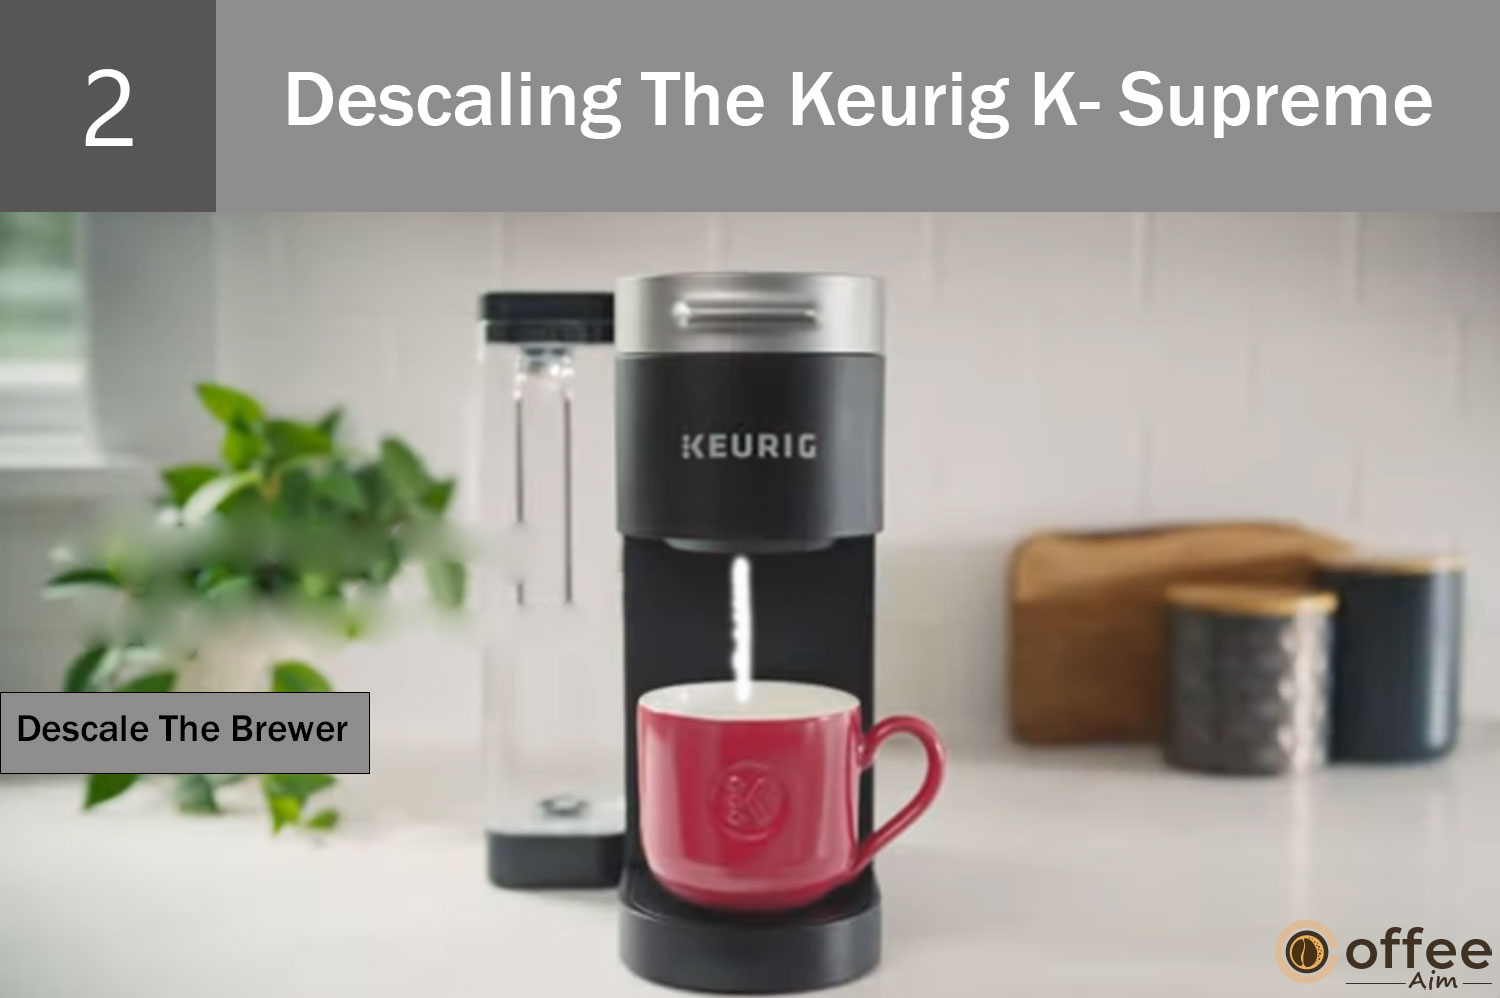
- Ensure that the brewer is plugged in and powered off.
- Press and hold the 8oz and 12oz buttons simultaneously for 3 seconds.
- When the buttons start flashing, press the brew button to initiate the descaling process.
- Once the brewing is complete, pour the hot liquid into the sink.
- Repeat this step until the ADD WATER light illuminates, indicating that you need to add more water to continue the descaling process.
Step 3: Fresh Water Rinse
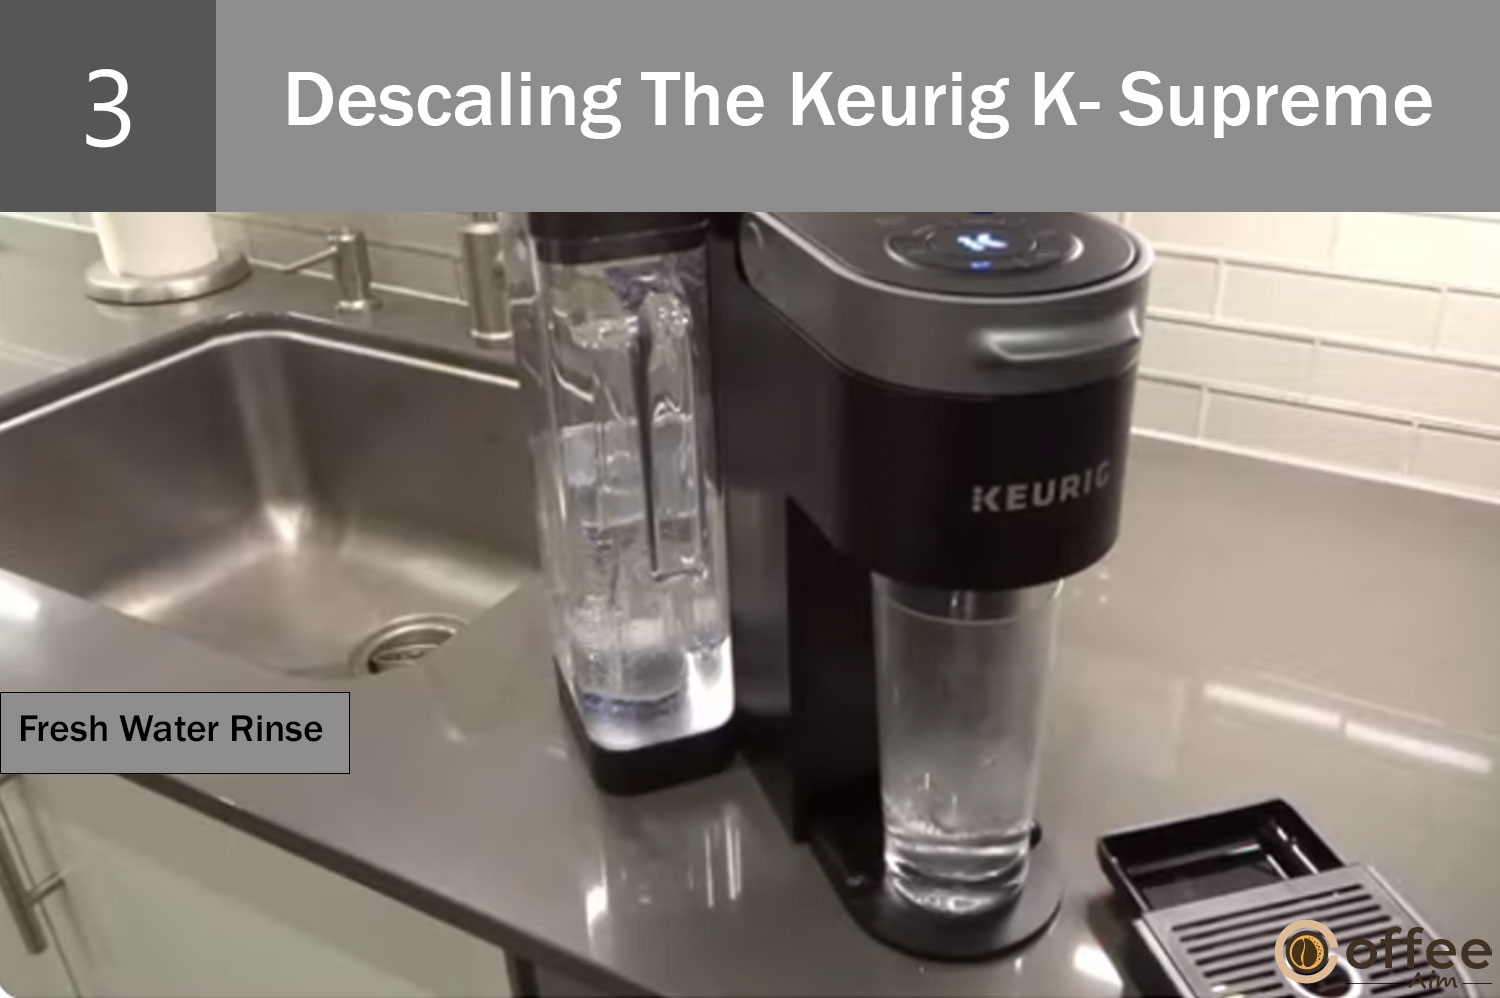
- Empty and rinse the water reservoir thoroughly.
- Refill the water reservoir with fresh water up to the MAX fill line.
- When the brewer’s display is flashing, press the brew button to begin the rinsing process.
- Once the brewing is complete, pour the hot liquid into the sink.
- Repeat this step until the DESCALE notification on the display turns off.
- Your brewer has now exited Descale Mode and is ready for use!
How To Run A Cleansing Brew
- Remove the water reservoir lid.
- Lift the reservoir straight up to remove it from the brewer.
- If you have a Keurig Water Filter, follow the instructions in your Water Filter Starter Kit to install it.
- Rinse the reservoir with fresh water and fill it up to the MAX FILL line.
- Lift and lower the handle of the brewer without inserting a K-Cup pod.
- The brewer will power on automatically, and the 4-cup sizes will blink.
- Press the 8oz button.
- Press the blinking brew button to start a cleansing brew.
- Pour the hot water from the cleansing brew into the sink.
Cleaning The Funnel Of Keurig K-Supreme
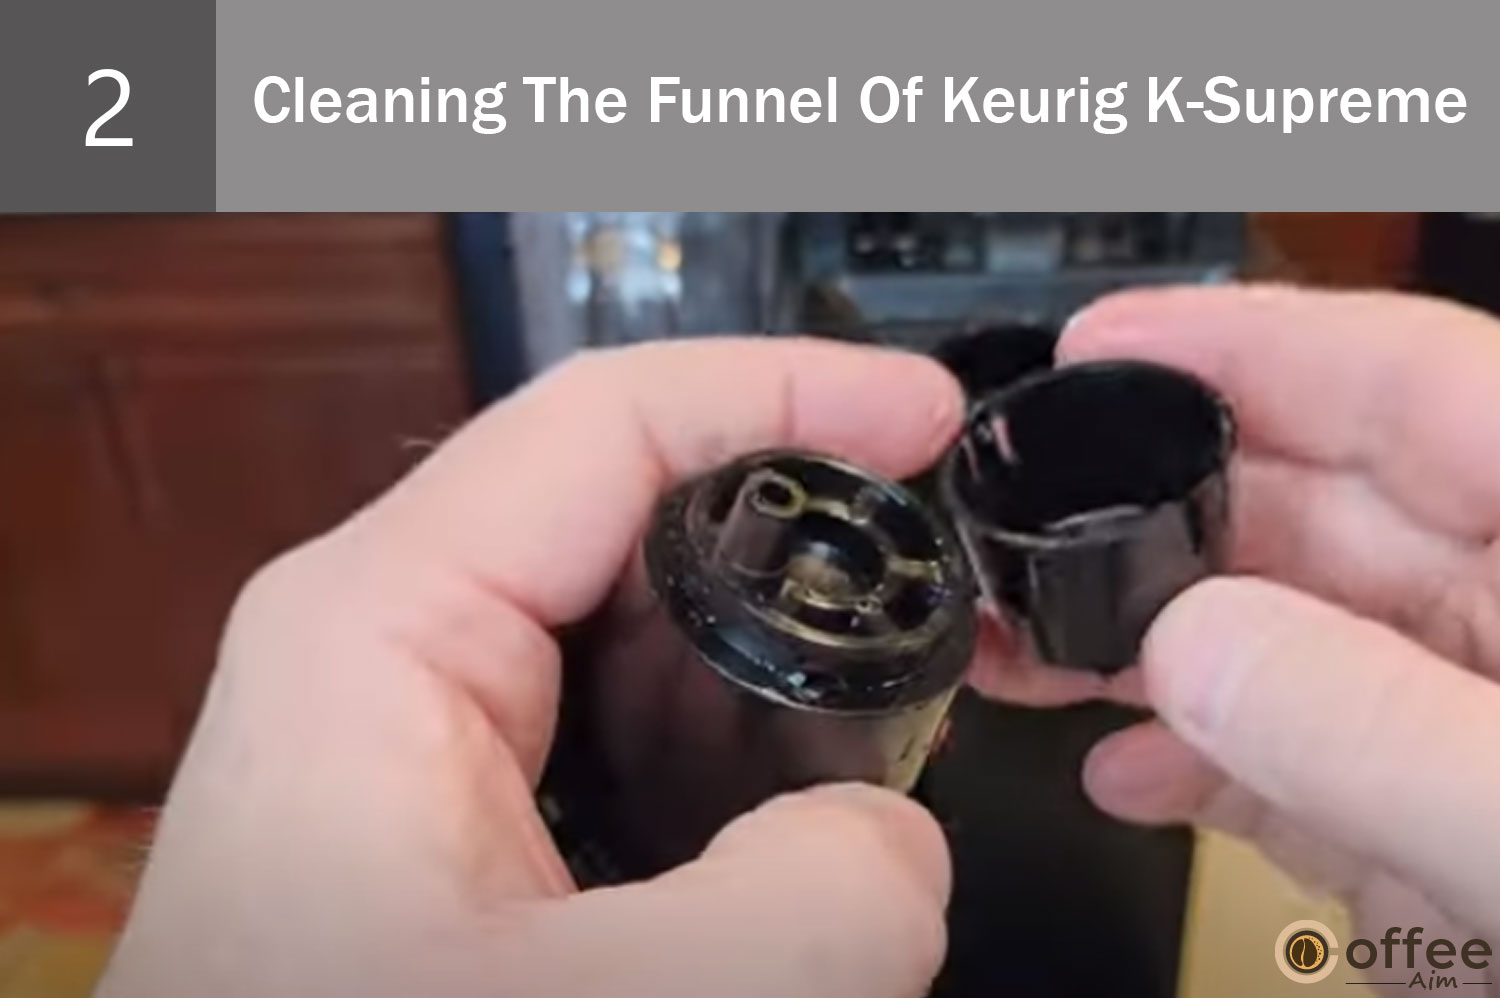
- Remove the funnel from the K-Cup pod holder by pulling on it until it pops off.
- When replacing the funnel, align the snaps with the indent on the K-Cup pod holder.
- Snap the funnel back onto the K-Cup pod holder securely.
Cleaning The Exit Needle Of Keurig K-Supreme
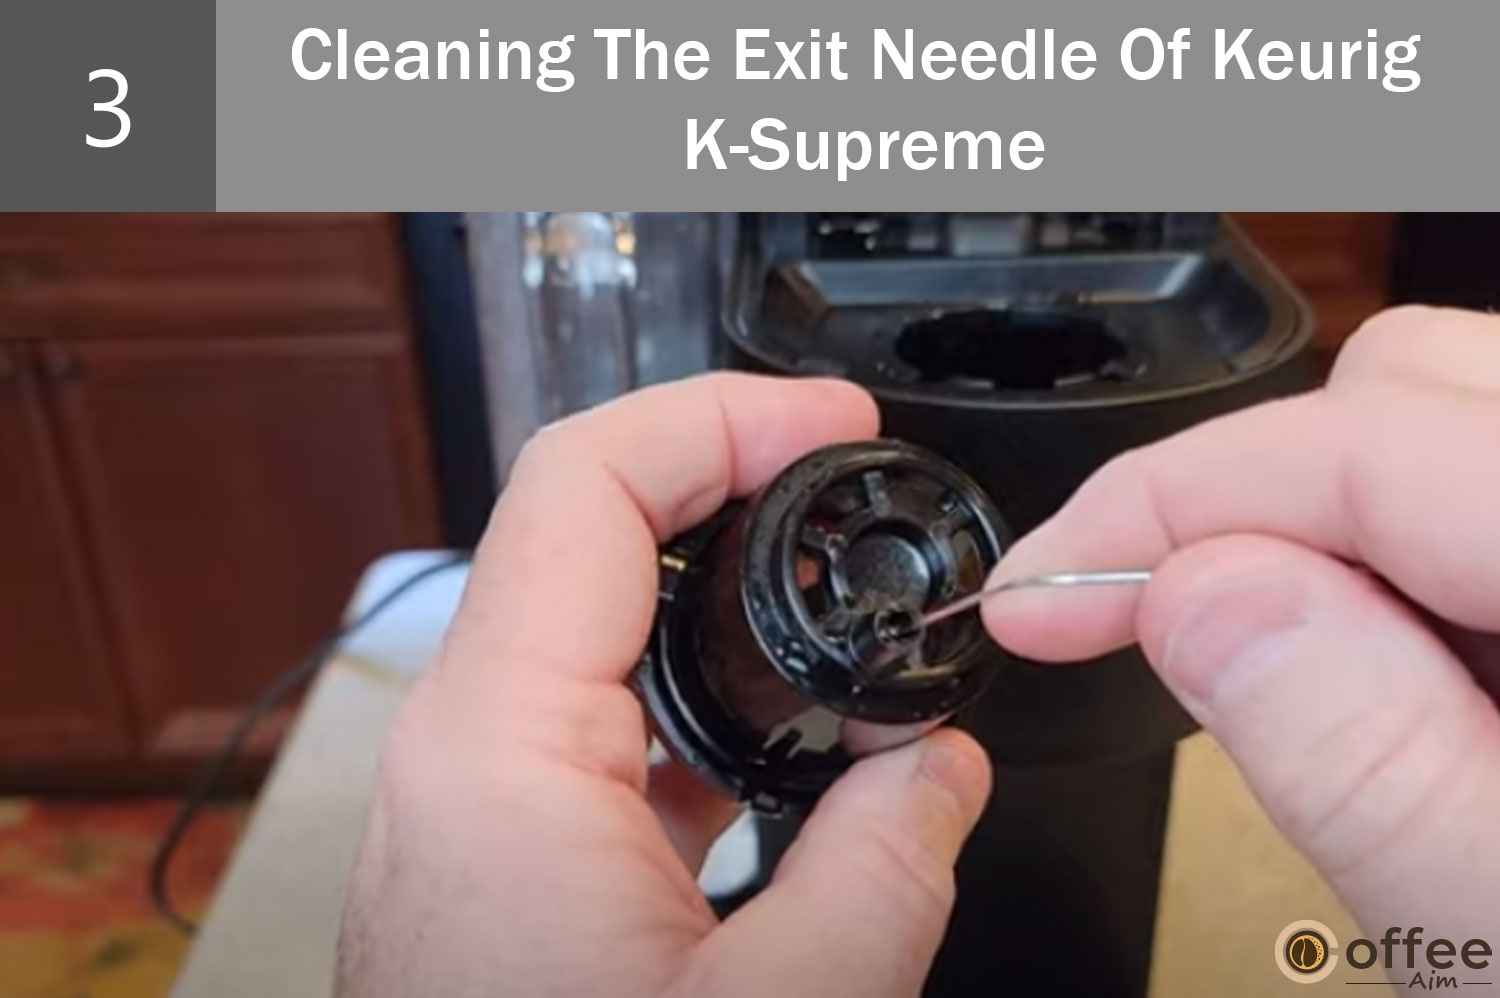
- Remove the pod holder assembly.
- Detach the funnel from the pod holder.
- Locate the exit needle on the inside bottom of the K-Cup® pod holder.
- Insert a straightened paper clip into the exit needle.
- Use the paper clip to loosen any coffee grounds.
Cleaning The Entrance Needle Of Keurig K-Supreme

- Lift the brewer handle and locate the entrance needles on the underside of the lid.
- Hold the brewer handle in the upward position.
- With your other hand, carefully insert a straightened paper clip into all the holes in the needles.
- Gently move the paper clip around to loosen any coffee grounds.
- Lower the handle completely.
- Run a cleansing brew two times without inserting a K-Cup pod.
How To Reposition The Water Reservoir On Keurig K-Supreme
Flip Brewer Over
- Take out the drip tray and water tank from the brewer and place them aside.
- Carefully turn the brewer over so that the base is facing up. Ensure that you have a flat surface to work on.
Identifying the Parts:
Once the brewer is flipped, you will see two distinct parts. One is the water tank base, referred to as Part B. The other is the locking tab, referred to as Part A.
Remove Part A
Slide Part A out of the brewer, ensuring that it releases smoothly and without significant resistance.
Lift, Pivot Part B
- Gently pull outward on Part B to disengage it from the brewer. Ensure that it separates smoothly.
- Rotate Part B upward, following the provided instructions or visual cues. It should remain attached to the brewer during this process.
- Once in the upward position, Part B should pivot freely to the second position. Confirm that it moves without obstruction. Be mindful to move the power cord, if necessary, to prevent it from getting caught.
Insert B, Replace A
Repositioning Part B:
- Disengage Part B from the Brewer: Gently pull outward on Part B to disengage it from the brewer. Ensure that it separates smoothly.
- Rotate Part B Upward: Rotate Part B upward, following the provided instructions or visual cues. It should remain attached to the brewer during this process.
- Allow Part B to Pivot Freely: Once in the upward position, Part B should pivot freely to the second position. Confirm that it moves without obstruction. Be mindful to move the power cord, if necessary, to prevent it from getting caught.
Maintenance Tips For Keurig K-Supreme
Regular maintenance is crucial to keep your Keurig K-Supreme coffee maker in good working condition. Proper care and maintenance can prevent future problems and extend the life of your machine. Here are some simple tips to help you clean and maintain your Keurig K-Supreme:
- Descale your machine regularly: Over time, mineral deposits can build up inside your Keurig K-Supreme, affecting the quality of your coffee and the performance of the machine. Descaling your machine with a descaling solution or white vinegar can help remove these mineral deposits and keep your machine running smoothly. It is recommended to descale your machine every three to six months, depending on the hardness of your water.
- Clean the external parts regularly: Wipe down the external parts of your Keurig K-Supreme regularly with a damp cloth to remove any dust, dirt, or coffee residue. This will not only keep your machine looking clean and new but also prevent any contaminants from getting into your coffee.
- Clean the needle: The needle in your Keurig K-Supreme can become clogged with coffee grounds or other debris, affecting the flow of water and the quality of your coffee. To clean the needle, turn off the machine and unplug it. Use a paper clip or a cleaning tool to gently clear any debris from the needle.
- Replace the water filter: The Keurig K-Supreme comes with a water filter that should be replaced every two months or every 60 tank refills. The water filter helps remove impurities from your water, improving the taste and quality of your coffee.
By following these simple tips, you can keep your Keurig K-Supreme coffee maker in good working condition and enjoy a delicious cup of coffee every time.
When To Seek Professional Help For Keurig K-Supreme
While Keurig K-Supreme coffee makers are designed to be user-friendly and easy to maintain, there may be instances where seeking professional help is necessary. Here are some situations where you should consider calling a professional to fix your Keurig K-Supreme:
- If your coffee maker is not brewing or is producing weak coffee, this may indicate a problem with the water pump or the heating element. A professional technician can diagnose the issue and repair it quickly.
- If your coffee maker is leaking water or producing excessive steam, this may be a sign of a faulty valve or seal. A professional technician can help you replace these components and prevent further damage to your coffee maker.
- If you notice any strange smells or noises coming from your Keurig K-Supreme, it’s best to get it checked by a professional technician. These issues may indicate an electrical problem, which could be dangerous if left unchecked.
- If your coffee maker is still under warranty, it’s best to contact Keurig’s customer service for repairs. However, if your warranty has expired or you’re looking for a faster turnaround time, you can contact a reputable repair service that specializes in Keurig K-Supreme coffee makers.
Here are some reputable repair services that you can contact:
- Keurig Customer Service: You can contact Keurig’s customer service by phone at 1-866-901-2739 or through their website at keurig.com/support.
- RepairClinic: RepairClinic is a reliable repair service that specializes in fixing Keurig K-Supreme coffee makers. You can contact them through their website at repairclinic.com or by phone at 1-800-269-2609.
- Mr. Coffee Repair: Mr. Coffee Repair is another reputable repair service that can fix Keurig K-Supreme, coffee makers. You can contact them through their website at mrcoffeerepair.com or by phone at 1-877-804-5383.
It’s important to note that some repairs may be covered under your Keurig K-Supreme warranty, so it’s best to check with the manufacturer before contacting a third-party repair service.
Final Thoughts
In conclusion, the Keurig K-Supreme is a popular coffee maker that can experience common issues and malfunctions that can affect its performance. However, with the right knowledge and tools, many of these issues can be easily resolved by users themselves.
Throughout the article, I highlighted some of the most common problems that Keurig K-Supreme owners may encounter, including the machine not turning on or brewing, weak coffee, leaks, and inconsistent brewing. We also provided practical solutions for each issue, including cleaning the needle, performing a reset, and replacing damaged parts.
It is important to address these common problems to ensure a satisfactory coffee-drinking experience, prolong the lifespan of the machine, and avoid expensive repairs. By taking the time to understand the common issues and their causes, users can take proactive steps to prevent problems from occurring and optimize the performance of their Keurig K-Supreme.
I encourage readers to try troubleshooting the issues on their own before seeking professional help. With the right tools and knowledge, many issues can be resolved easily, saving time and money. However, if the issue persists or seems too complex, it is always a good idea to seek professional help.
In conclusion, maintaining a Keurig K-Supreme requires regular maintenance and prompt resolution of any issues that may arise. By following the tips and solutions provided in this article, users can take control of their brewing experience and enjoy a hassle-free cup of coffee every time.
FAQs
Where Is The Reset Button On My Keurig K Supreme?
The Keurig K-Supreme does not have a reset button because it does not offer customizable beverage sizes like some other coffee makers. Its factory settings provide beverage sizes of 6 oz, 8 oz, 10 oz, and 12 oz, which cannot be altered. Thus, the coffee maker cannot be reset.
Why Is My Keurig Supreme Not Pumping?
There are several reasons why your Keurig Supreme may not be pumping:
- Water Reservoir: Ensure that the water reservoir is properly seated and filled with enough water to make coffee. The machine will not function properly if the reservoir is not seated correctly.
- Clogged Needles: The needles that pierce the K-Cup can become clogged with coffee grounds or other debris. You can clean the needles with a paperclip or a needle-cleaning tool.
- Mineral Buildup: If your Keurig has been used for some time, mineral buildup may occur within the machine, preventing it from pumping water. You can try descaling the machine to remove mineral buildup.
- Power Supply: Check that the machine is properly plugged in and that the outlet is functioning correctly.
- Malfunctioning Pump: If none of the above steps work, there may be a malfunctioning pump. In this case, it is best to contact Keurig customer support for assistance or to have the machine serviced.
How Long Is The Life Expectancy Of A Keurig Machine?
The life expectancy of a Keurig machine can vary depending on several factors, such as usage, maintenance, and model. However, on average, a well-maintained Keurig machine can last for approximately 3 to 5 years.
Regular maintenance, such as descaling the machine, cleaning the needles, and replacing the water filter, can help prolong the life of the machine. Additionally, the frequency of use and the type of water used can also affect the machine’s lifespan.
It is important to note that the life expectancy of a Keurig machine is not guaranteed, and individual results may vary. If you notice any issues with your machine, it is best to address them promptly to prevent further damage and potentially prolong the machine’s lifespan.
What Could Be Wrong With My Keurig?
There are several issues that could be causing problems with your Keurig machine:
- Clogged Needles: If the needles that pierce the K-Cup are clogged with coffee grounds or other debris, the machine may not function properly. You can try cleaning the needles with a paperclip or a needle-cleaning tool.
- Mineral Buildup: Over time, mineral buildup can occur within the machine, preventing it from brewing properly. You can try descaling the machine to remove mineral buildup.
- Insufficient Water: If the water reservoir is not filled with enough water or is not seated properly, the machine may not function.
- Power Supply: If the machine is not properly plugged in or the outlet is not functioning, the machine may not turn on.
- Malfunctioning Pump: If the pump in the machine is not working correctly, the machine may not be able to pump water to brew coffee.
- Faulty Circuit Board: If the circuit board in the machine is damaged, the machine may not function properly.
- Brew Temperature: If the brew temperature is too low or too high, the coffee may not brew correctly.
If you are experiencing issues with your Keurig machine, it is best to troubleshoot the issue by checking for the above-listed problems or by contacting Keurig customer support for assistance.