Quick Navigation
Welcome to the comprehensive guide on how to use the Keurig B-50 coffee maker. If you are a coffee enthusiast looking to brew your favorite beverages effortlessly, you’ve come to the right place. The Keurig B-50 offers convenience and quality with its single-cup brewing system. In this article, we will walk you through the step-by-step process of using the Keurig B-50, from setup to brewing your perfect cup of coffee or tea. Get ready to enjoy a delightful coffee experience with this user-friendly and versatile brewing machine. Let’s get started!
Electrical Safety Precautions for Keurig B-50: Important Guidelines for Safe Operation
- Read and understand all instructions before using the Keurig B-50 coffee brewer.
- Use handles and knobs to avoid touching hot surfaces.
- Properly install and place the appliance according to the provided instructions before use.
- Use only Keurig-approved accessories to prevent potential injuries.
- Keep the brewer away from hot gas or electric burners and heated ovens.
- Avoid using the appliance outdoors.
- Do not immerse cords, plugs, or the appliance in water or other liquids to prevent electric shock.
- Refrain from overfilling the Water Reservoir with water.
- Use only water in the appliance and avoid adding any other liquids or foods except as instructed for cleaning.
- Always unplug the coffee brewer before cleaning or making repairs. Allow it to cool down before handling parts or cleaning.
- Plug the appliance into its dedicated electrical outlet to prevent flickering of lights or circuit breaker issues.
- Avoid using the appliance with a damaged cord or plug. In case of malfunction or damage, contact Keurig Customer Service for assistance.
- Keep the power cord away from hot surfaces and prevent it from hanging over the edge of the table or counter.
- To disconnect, turn the Power Button to ‘OFF’ and remove the plug from the wall outlet.
- Always supervise children when using the appliance.
- Do not lift the Handle to open the Lid while the brewing process is in progress.
- Keep the Water Reservoir Cover on the Water Reservoir, except when refilling it.
- The appliance is equipped with a grounding wire and plug. Properly ground the appliance using a 3-hole grounded outlet to reduce the risk of electric shock in case of a short circuit.
- If the outlet is a 2-prong wall outlet, replace it with a properly grounded 3-prong wall outlet to ensure safety.
- Never cut or remove the third (ground) prong from the power cord or use an adapter.
- If you are uncertain about the grounding instructions, consult a qualified electrician for proper grounding.
- Use the appliance only for its intended purpose and avoid any other use.
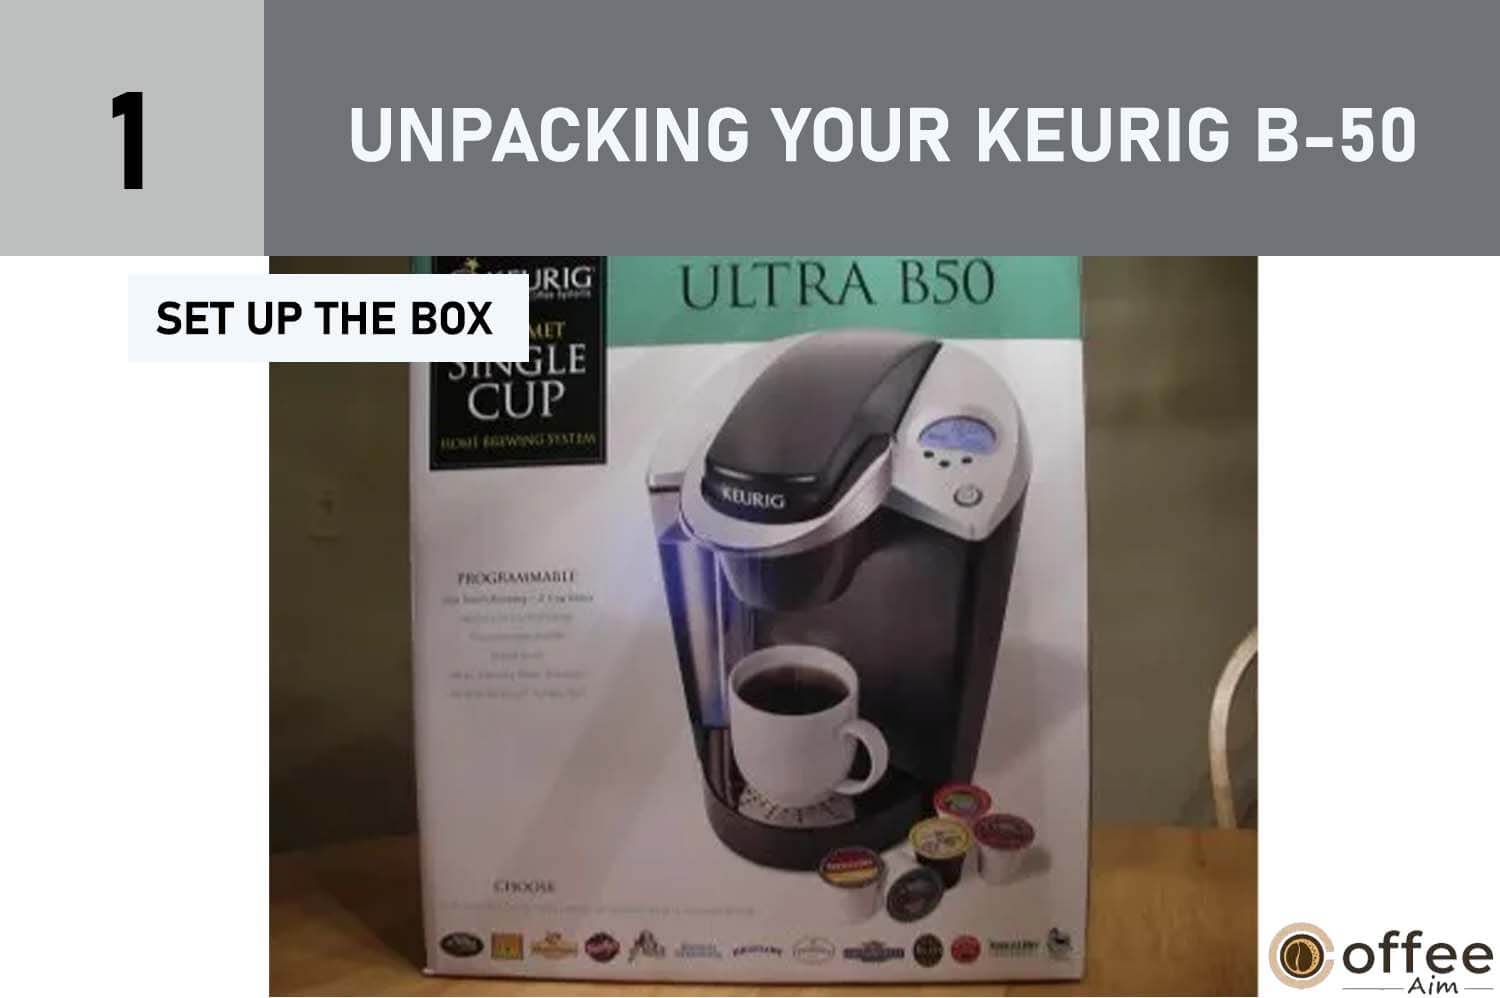
UNPACKING YOUR KEURIG B-50
- Set Up the Box: Find a stable surface (table, countertop, or floor) and place the Brewer box there.
- Remove Guides and Literature: Take out the Quick Start Guide, Use & Care Guide, and other included materials.
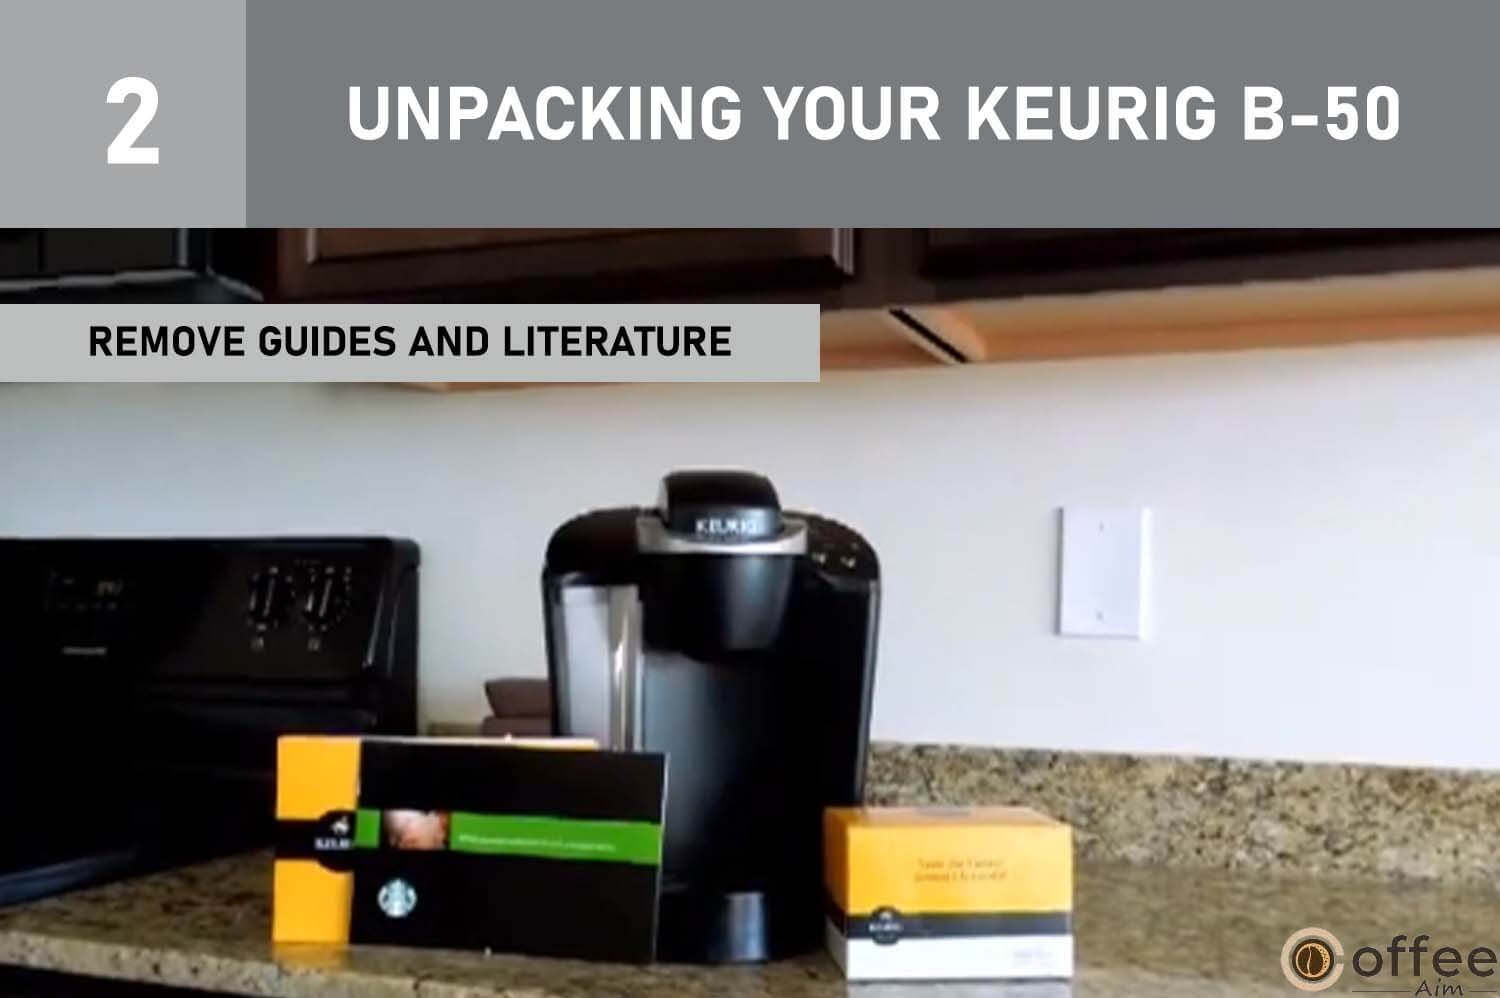
- Take Out Complimentary K-Cups: Remove the package of complimentary K-Cups.

- Turn the Box: Turn the box on its side, so you can access the Brewer inside.

- Retrieve the Brewer: Reach into the box and carefully grasp the plastic bag containing the Brewer.

- Unpack the Brewer: Gently pull the plastic bag and packaging materials towards you to extract the Brewer, still encased in polyfoam and on its side.

- Remove Top Packaging: Eliminate the top polyfoam packaging material.

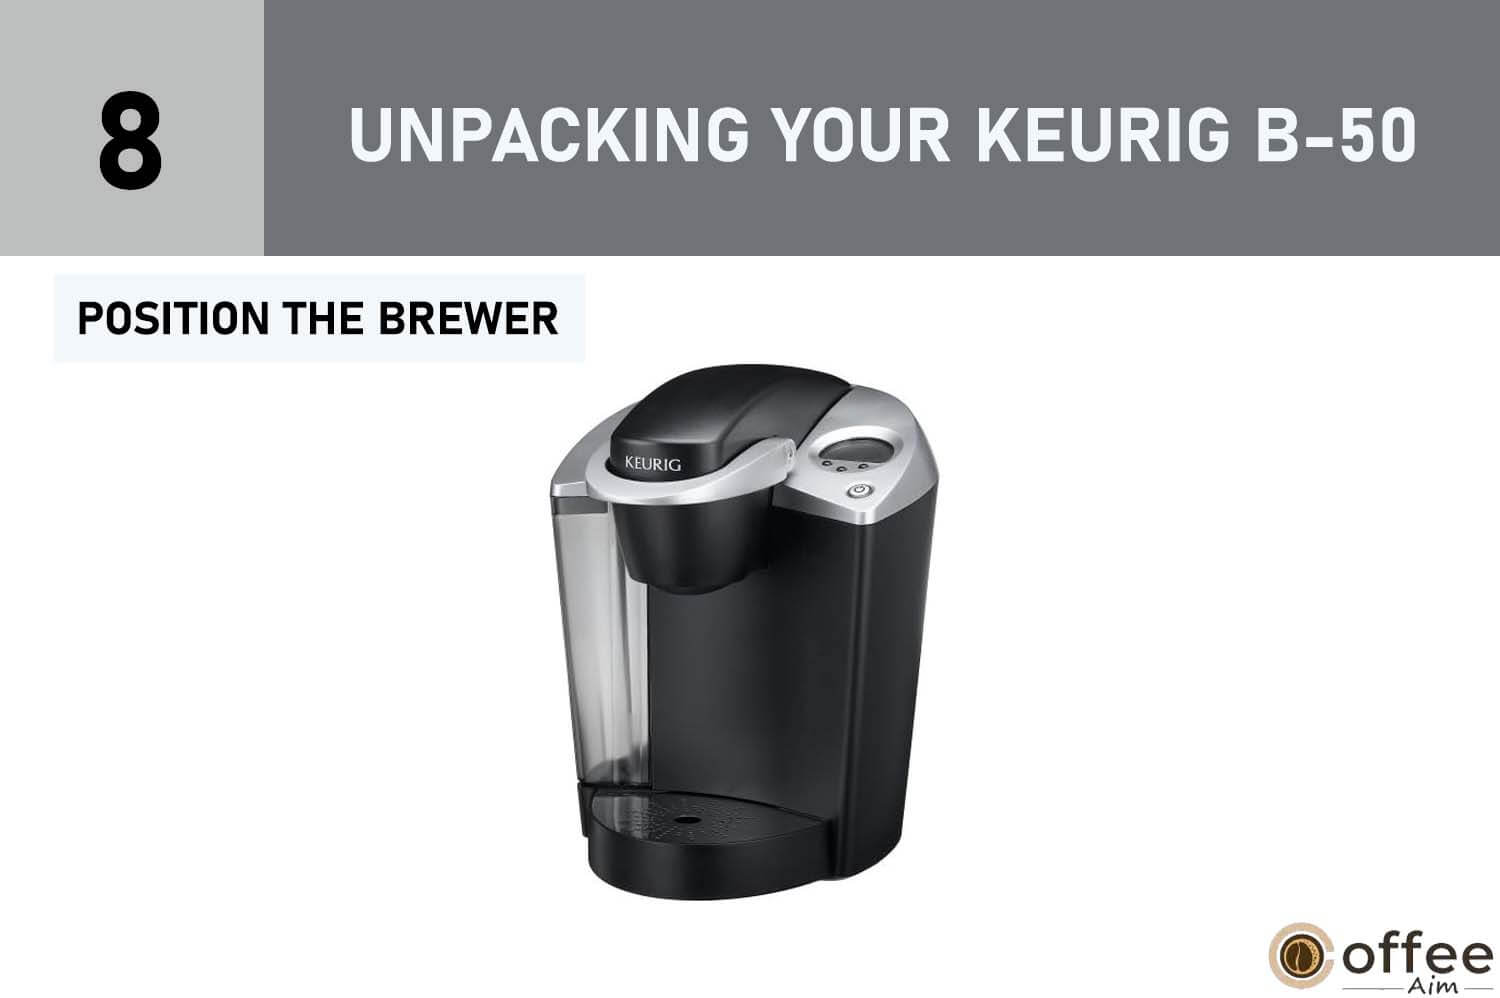
- Position the Brewer: Lift the Brewer carefully from the bottom polyfoam and place it upright on a flat, steady surface.
- Unwrap the Brewer: Open the plastic bag and lift the assembled Brewer out of the bag.

- Final Placement: Set the Brewer upright on a flat, steady surface. Keep the packing materials in case of future shipping needs.
WARNING:Keep all plastic bags away from children.
SAVE THESE INSTRUCTIONS
- WARNING: The K-Cup Holder contains sharp needles both above and at the bottom. Avoid injury by not touching the K-Cup Chamber with your fingers.
- CAUTION: The K-Cup Holder holds extremely hot water during brewing. Prevent injury by refraining from lifting the Handle or opening the K-Cup Chamber while brewing.
- GUIDELINES FOR SHORT POWER CORD
- A shorter cord is included to minimize the risk of entanglement or tripping. If an extension cord is used, ensure its electrical rating matches or exceeds the appliance’s rating. Additionally, arrange the cord to prevent it from hanging over countertops or tabletops where children could pull on it or trip over it accidentally.
Keurig B-50: Parts Overview
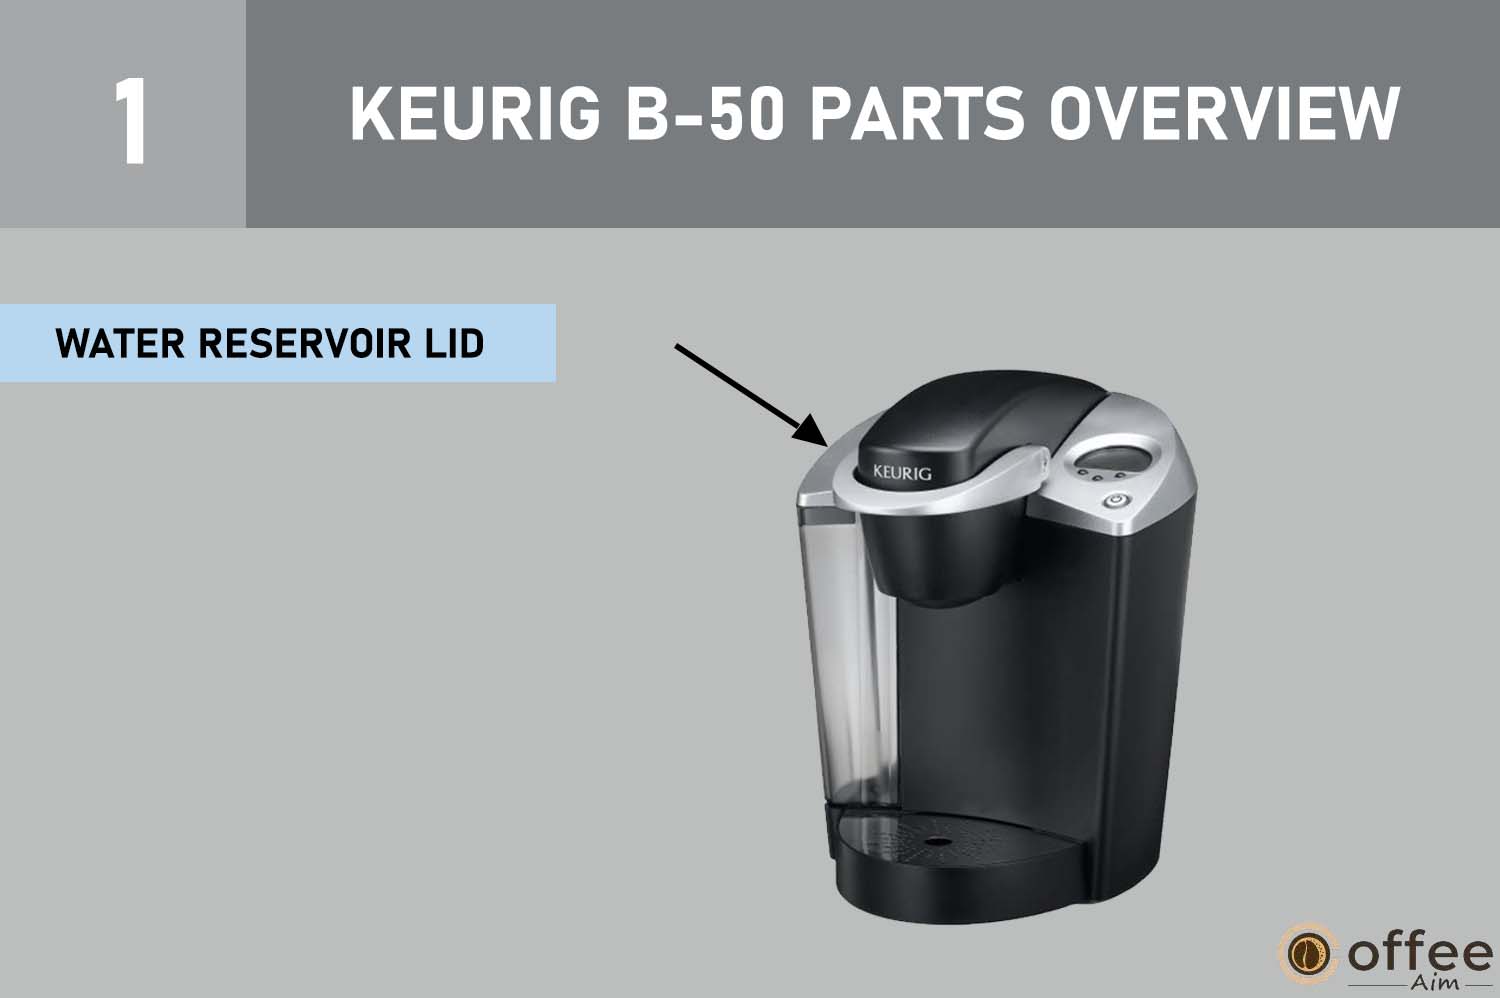
1. Water Reservoir Lid
The Water Reservoir Lid covers the water tank securely for brewing convenience.
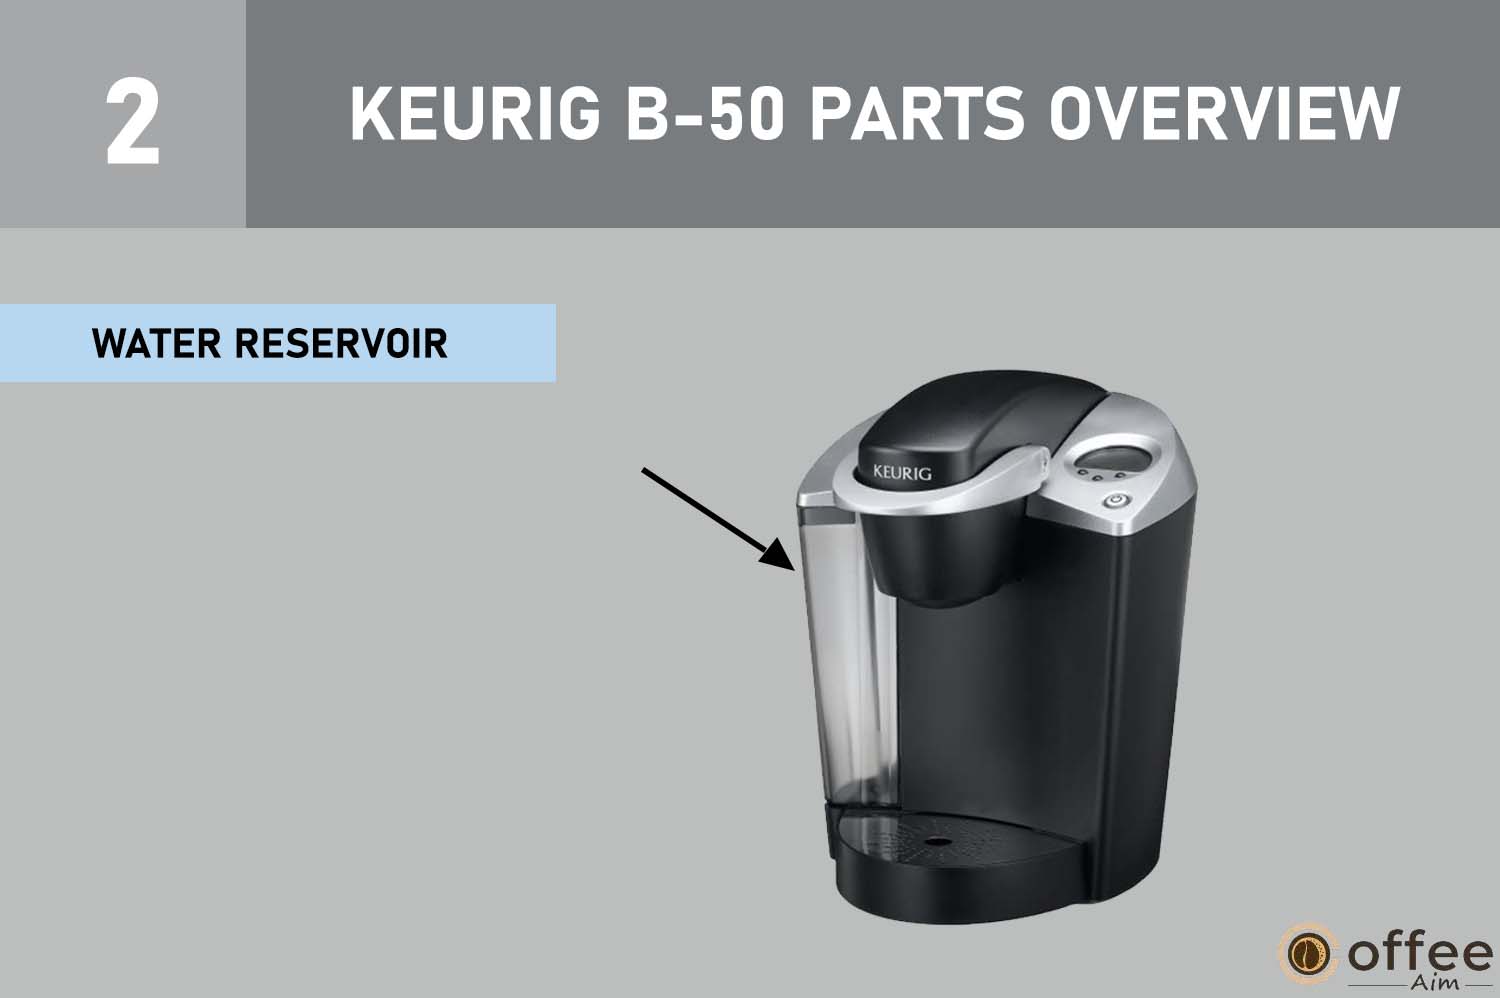
2. Water Reservoir
The Water Reservoir Handle allows for easy lifting and carrying of the Water Reservoir Lid for refilling water.
3. Handle
The handle is used to open and close the K-Cup® holder, allowing you to insert and remove K-Cup® pods easily.

4. K-Cup Holder
The “K-Cup Holder” stores coffee pods for easy access and brewing convenience in compatible machines.

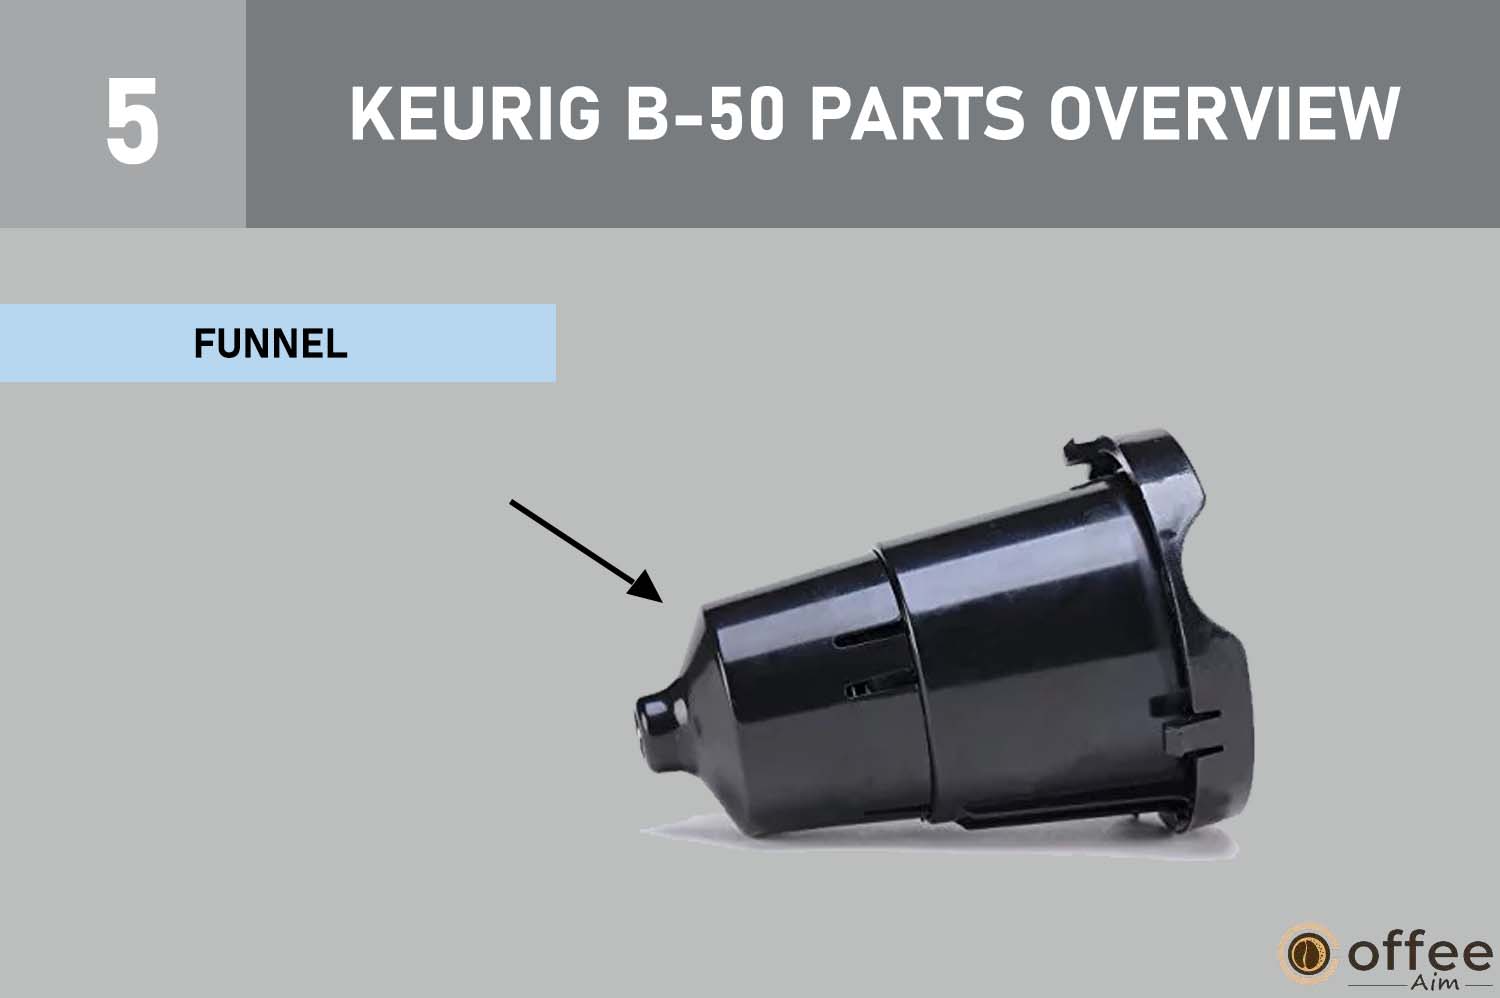
5. Funnel
Part of the K-Cup Holder Assembly.
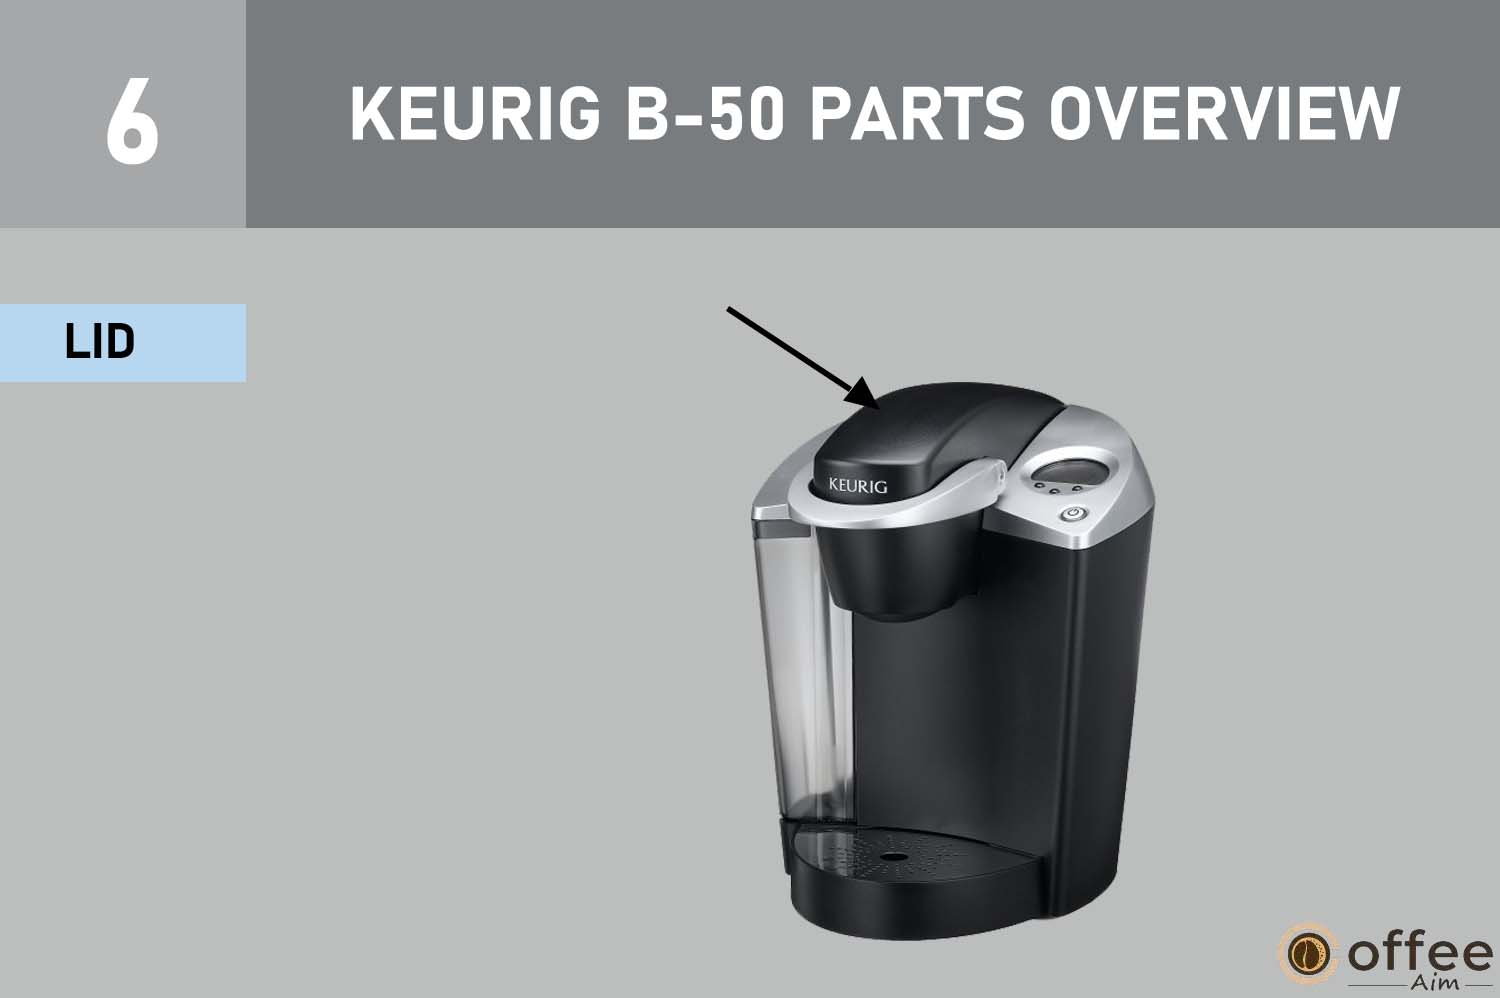
6. LID
Covers the K-Cup Portion Pack Holder
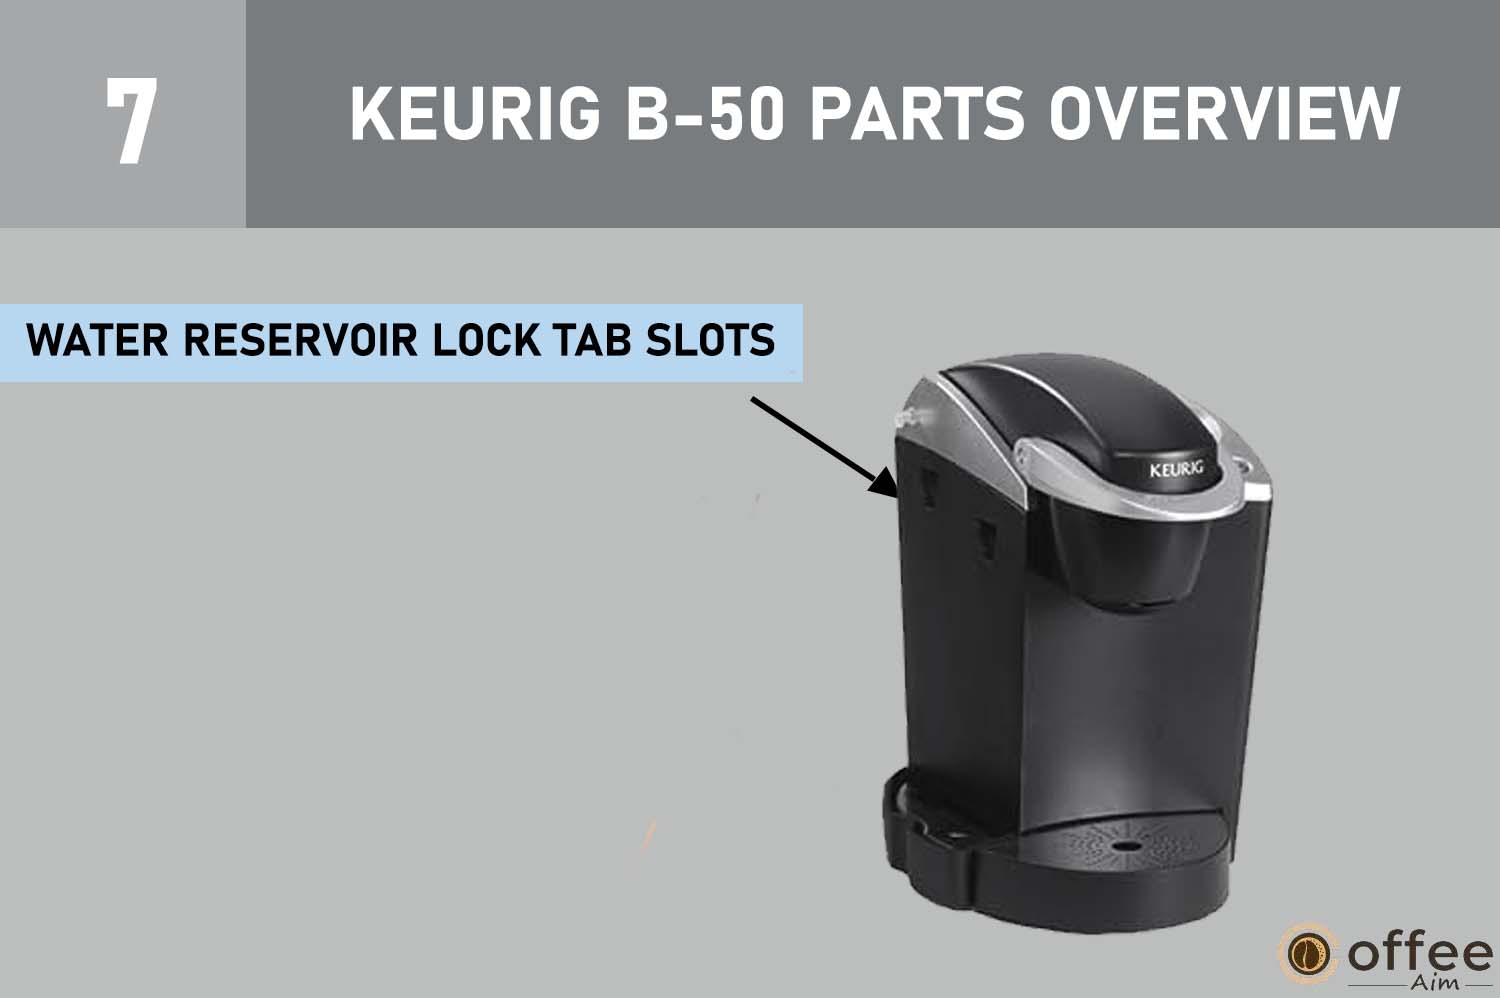
7. Water Reservoir Lock Tab Slots
The Water Reservoir Lock Tab Slots secure the reservoir in place for safe and convenient usage.
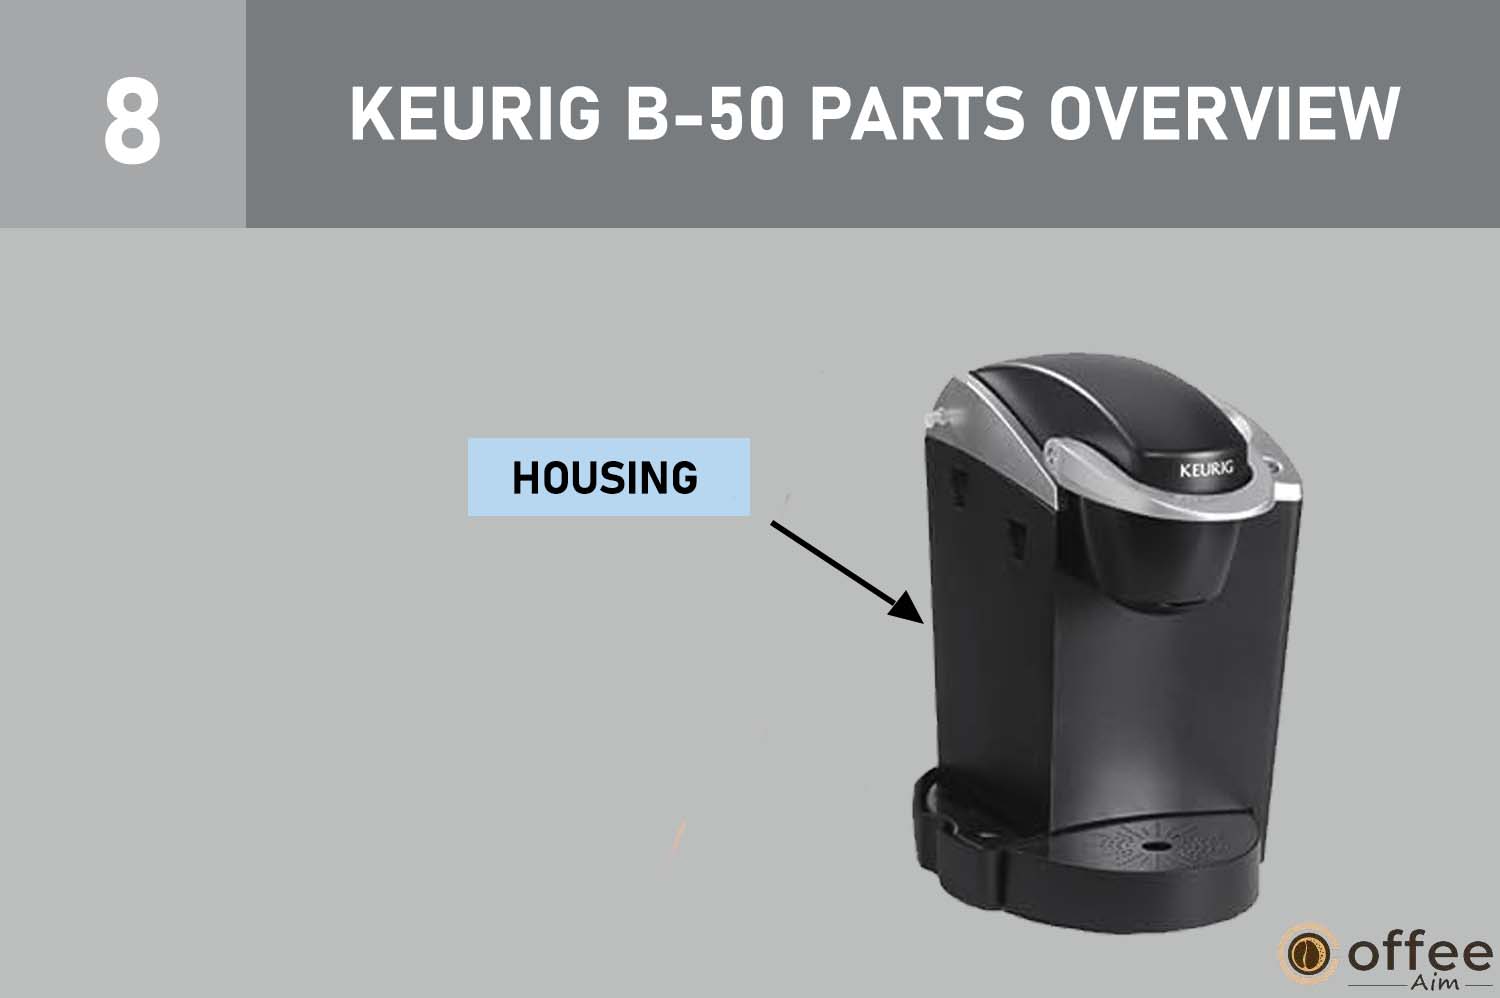
8. Housing
The housing of Keurig B-50 provides a protective and sturdy enclosure for the internal components.
9. K-Cup Holder Assembly
The K-Cup Holder Assembly holds the coffee pod for brewing in the Keurig B-50 coffee maker.

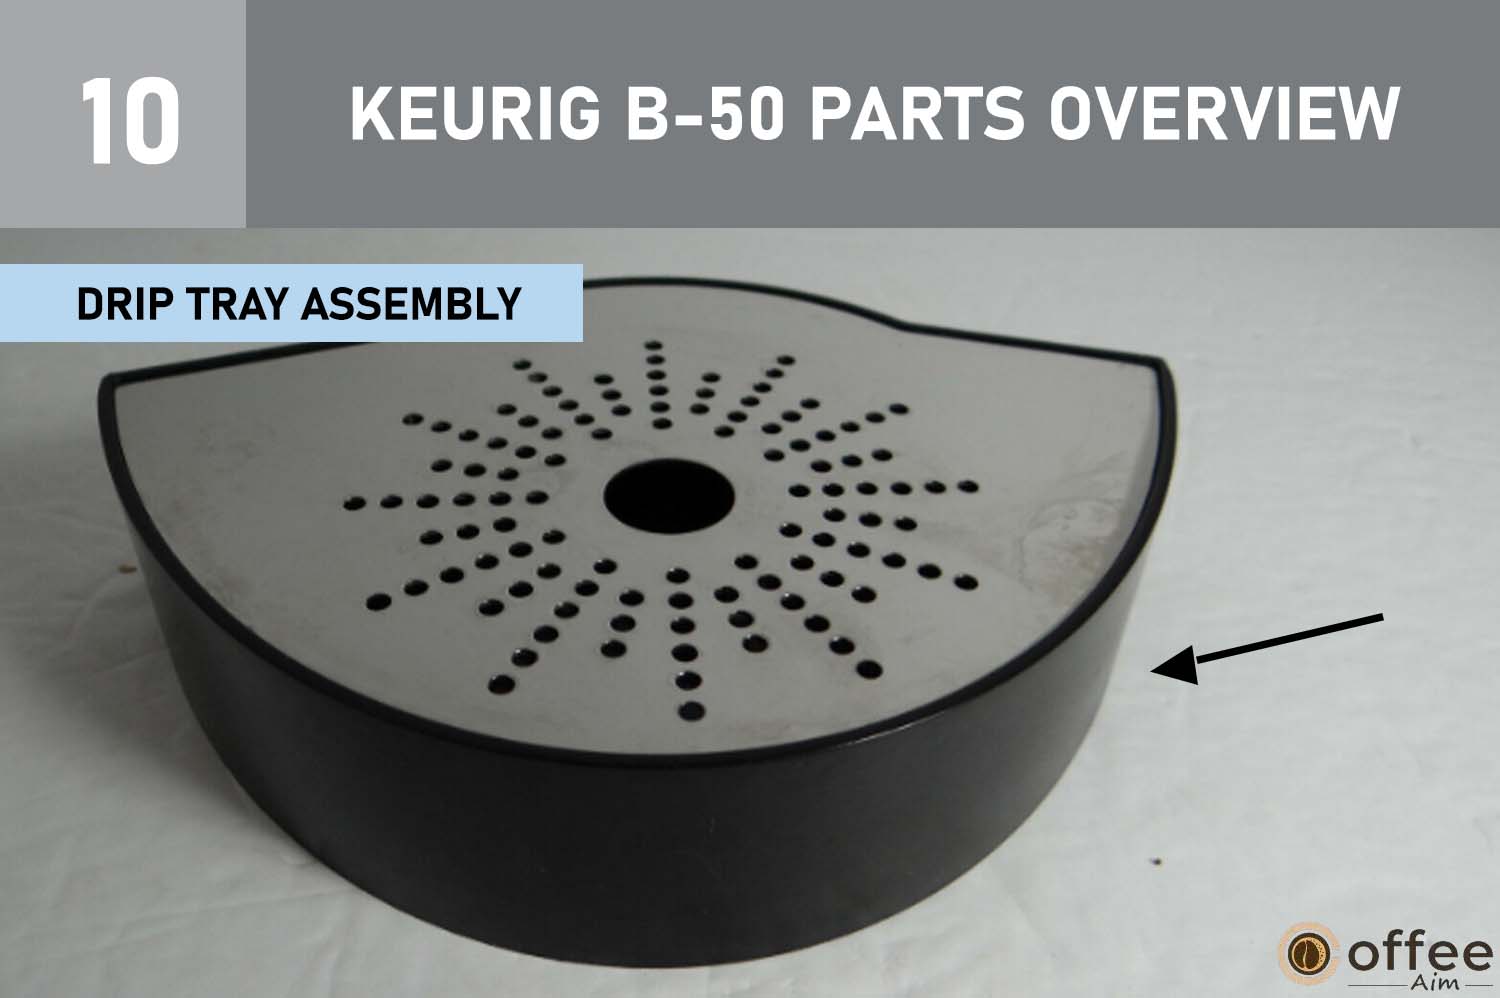
10. Drip Tray Assembly
The Drip Tray Assembly collects excess liquid and keeps the brewing area clean and mess-free.
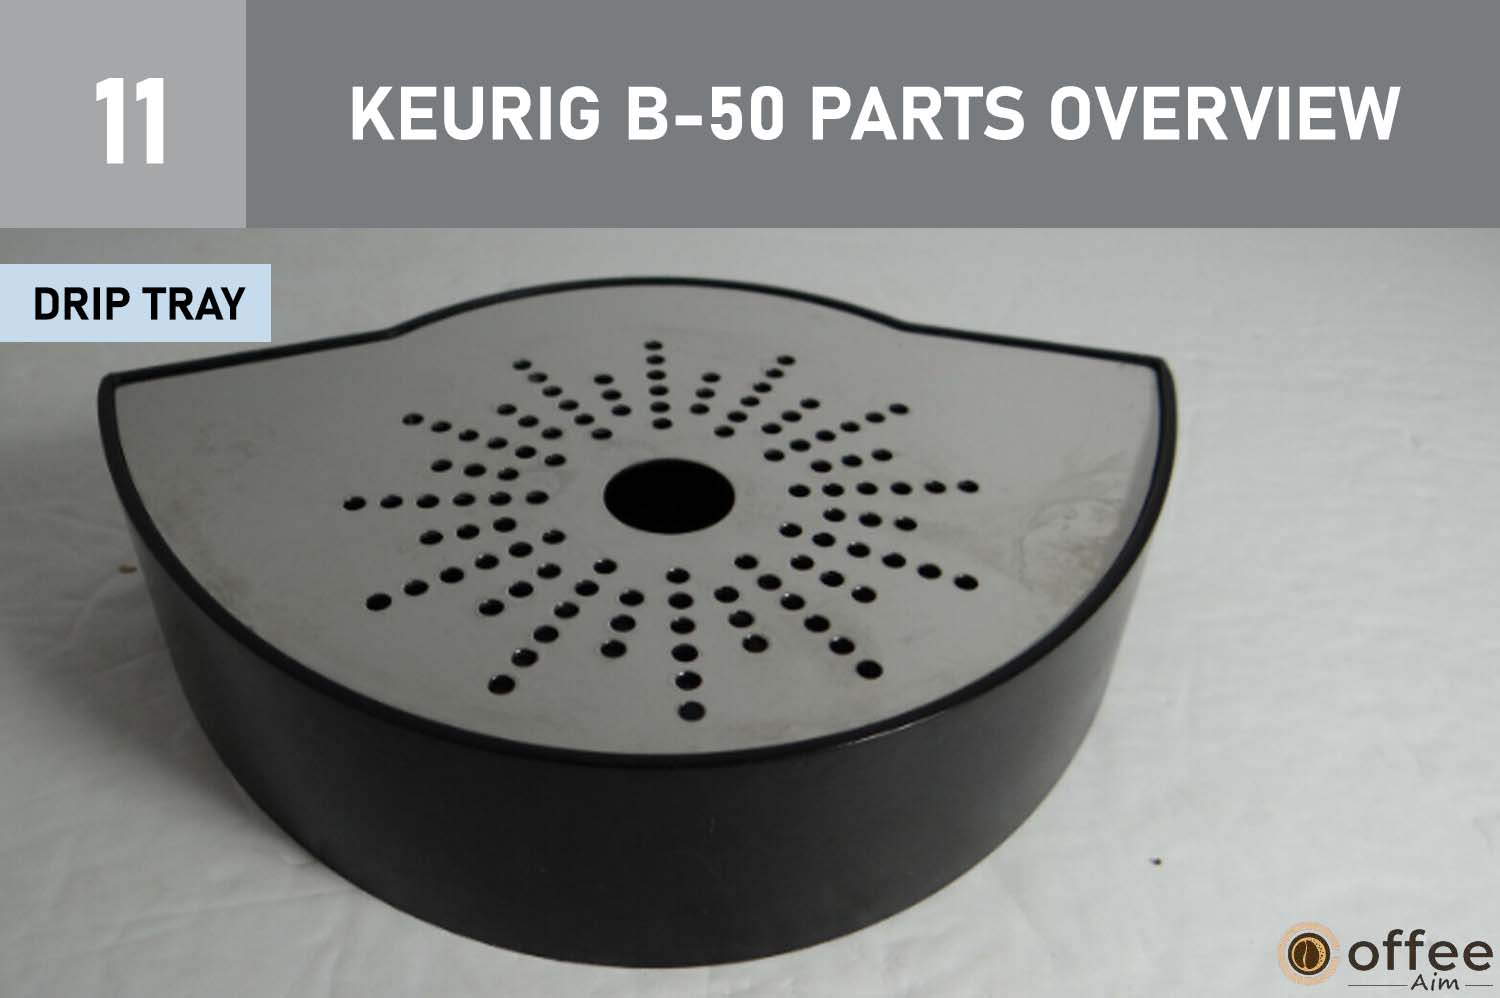
11. Drip Tray
The Drip Tray collects any excess liquid and prevents spills.
12. Drip Tray Base
The Drip Tray Base collects any excess liquid during the brewing process.

13. Vent
The vent allows proper airflow within the Keurig B-50, ensuring optimal brewing performance.

14. Power Cord
The “Power Cord” supplies electricity to the Keurig B-50, enabling it to function efficiently and safely.

These essential parts ensure smooth and efficient brewing for a delightful coffee experience with your Keurig B-50.
Control Panel Overview:
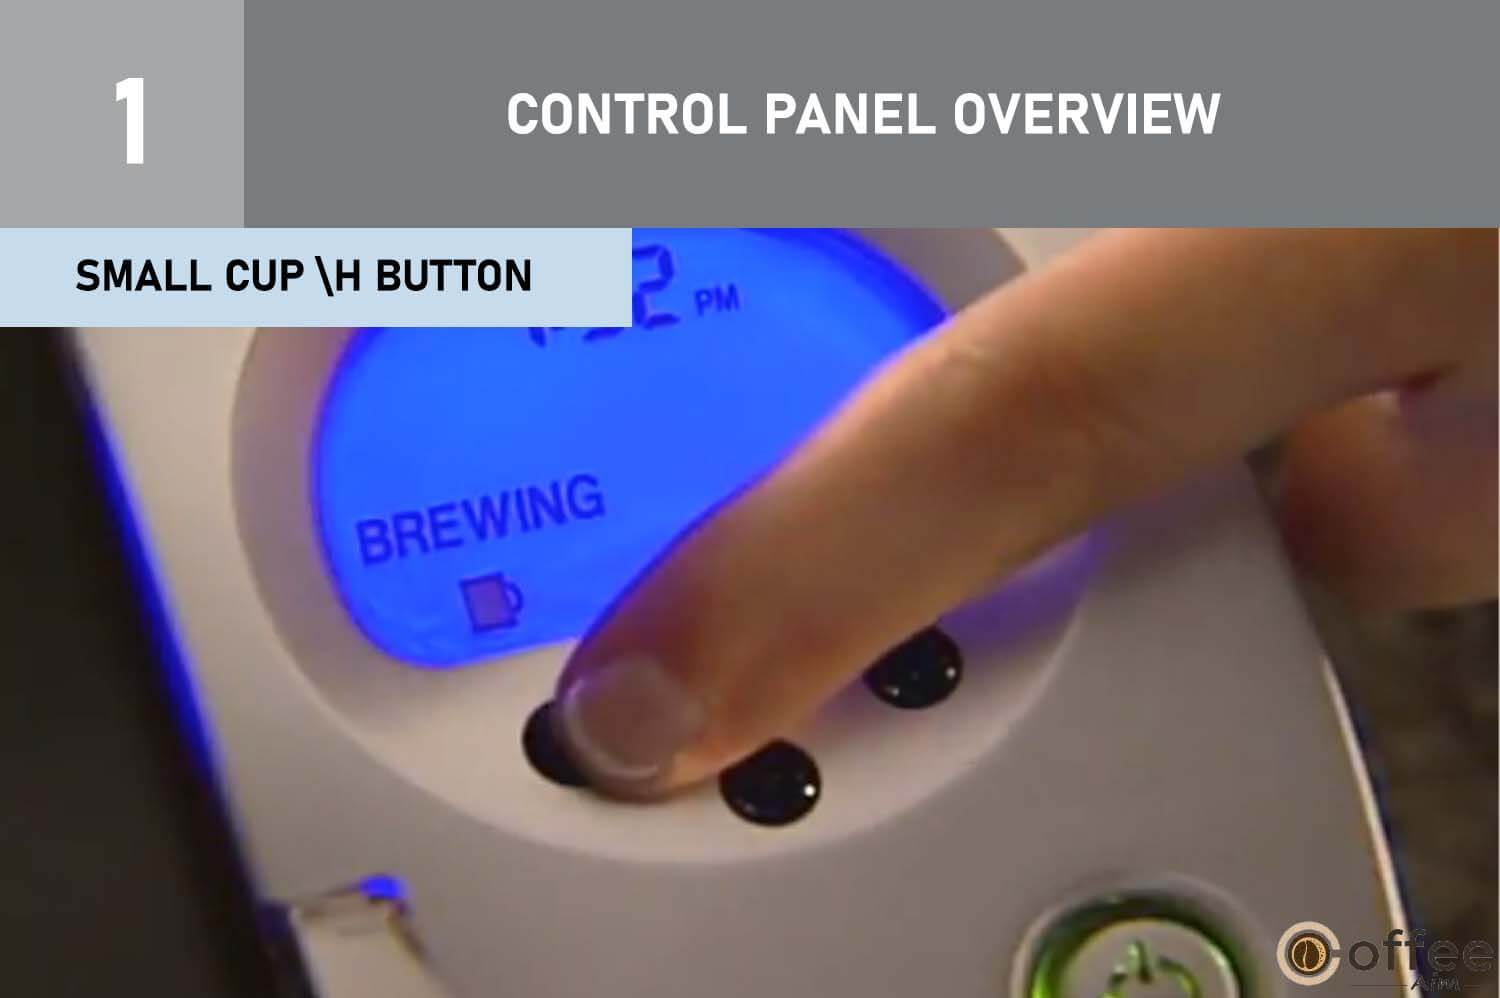
1. Small Cup/H Button
2. Menu Button

3. Large Cup/M Button

4. LCD Message Center

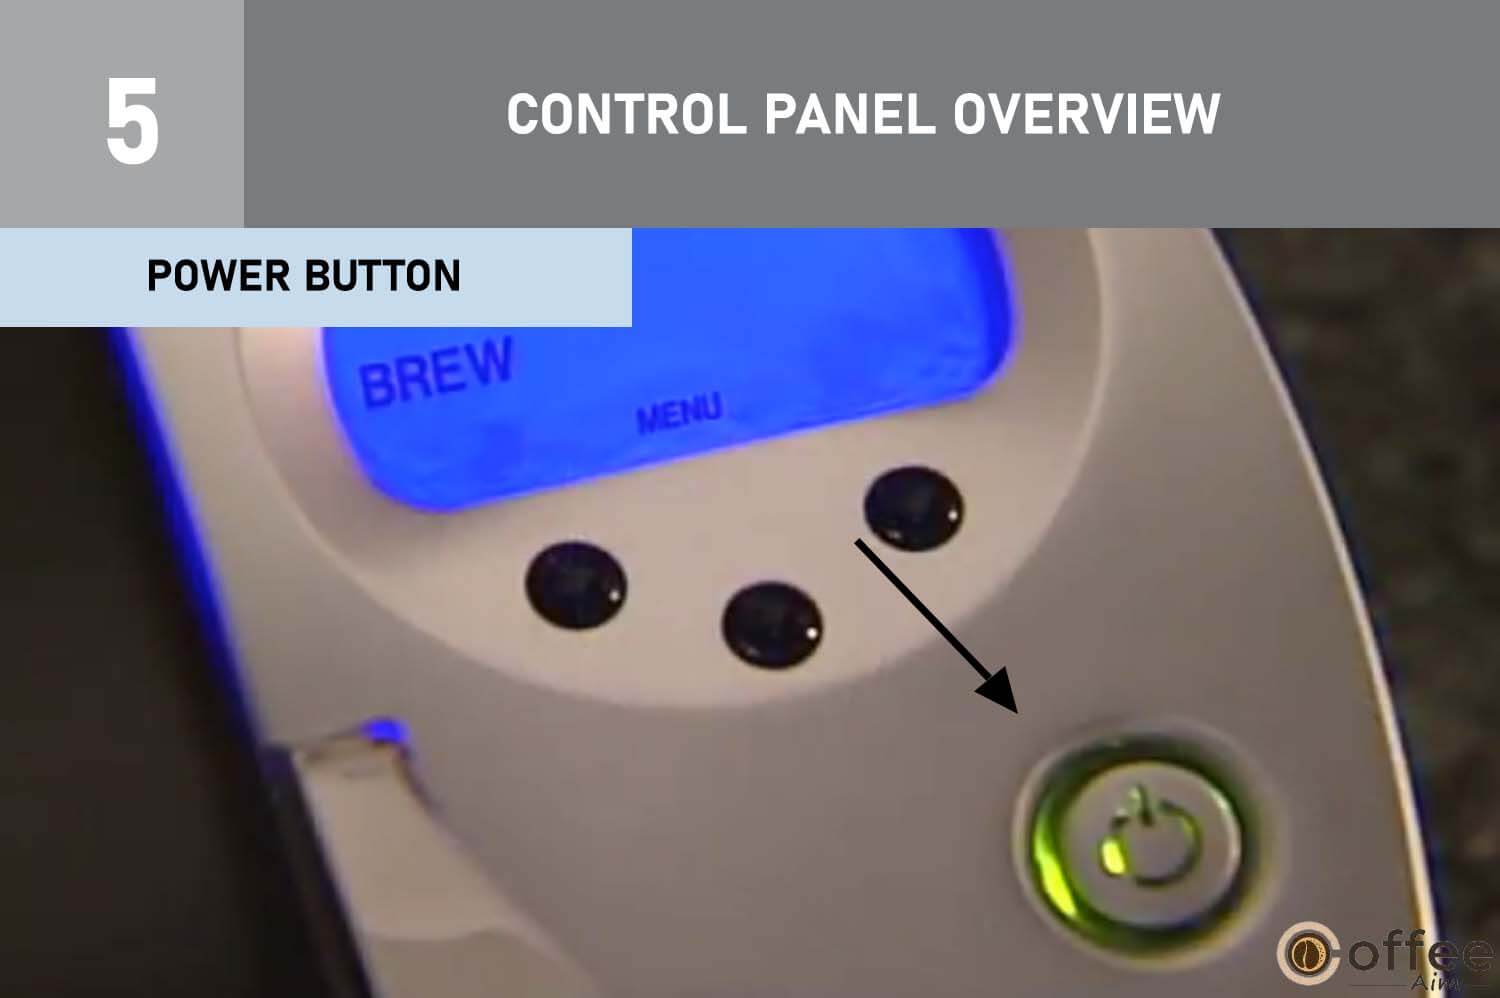
5. Power Button
SET-UP & OPERATION
Helpful Tips for Your Keurig B-50
- Keep the Brewer On: For on-demand coffee or tea, leave your Brewer turned on continuously. You can also program it to turn on and off automatically or set it to auto-shut-off after a specific duration.
- Use Quality Water: For the best taste, Keurig recommends using bottled or filtered water. Water quality can affect the flavor, so consider using a filtration system like Brita® if you notice any undesirable taste.
- Choose Your Cup Size: Enjoy the perfect cup tailored to your preferences. With options for a regular large cup (7.25 oz) or a stronger small cup (5.25 oz), you can customize your brew to perfection.
- Dedicated Outlet: To ensure proper functioning, plug the Brewer into its own outlet. Avoid overloading the circuit with other appliances.
- Travel Mug Brewing: Easily brew into a travel mug by removing the Drip Tray Assembly and placing the mug on the Drip Tray Base. Perfect for coffee on the go!
Set-Up & First Brew
CRUCIAL: Your Keurig brewer must undergo priming before its initial use, as described below.
Priming Your Brewer for First Use
1. Connect the brewer to a grounded outlet.

2. Place a cup on the Drip Tray Plate.

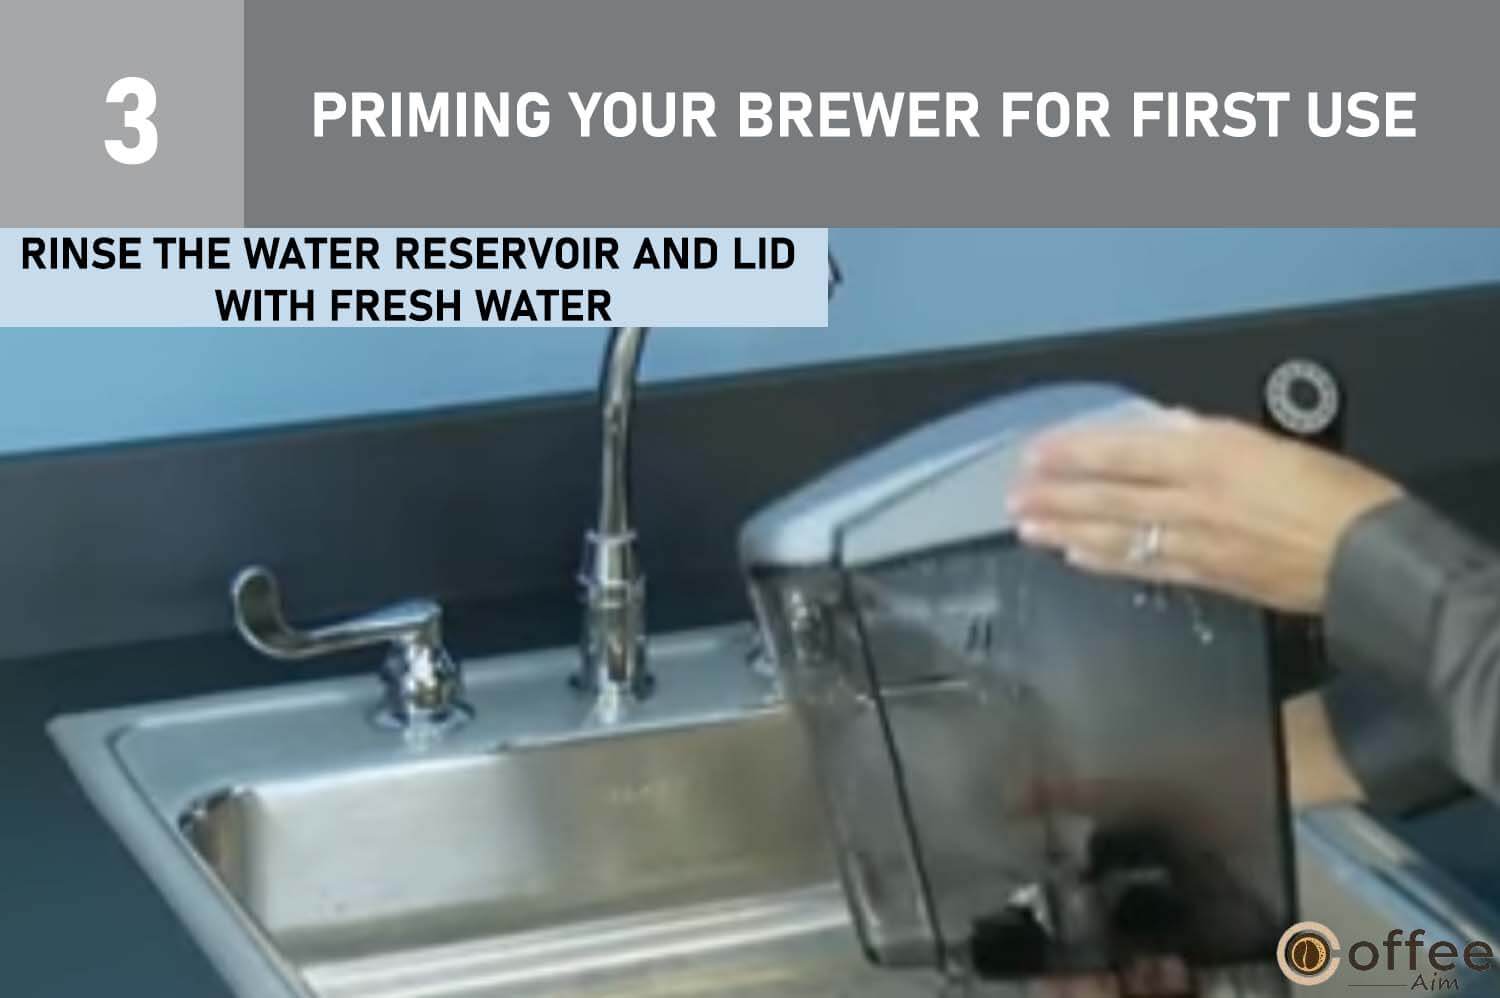
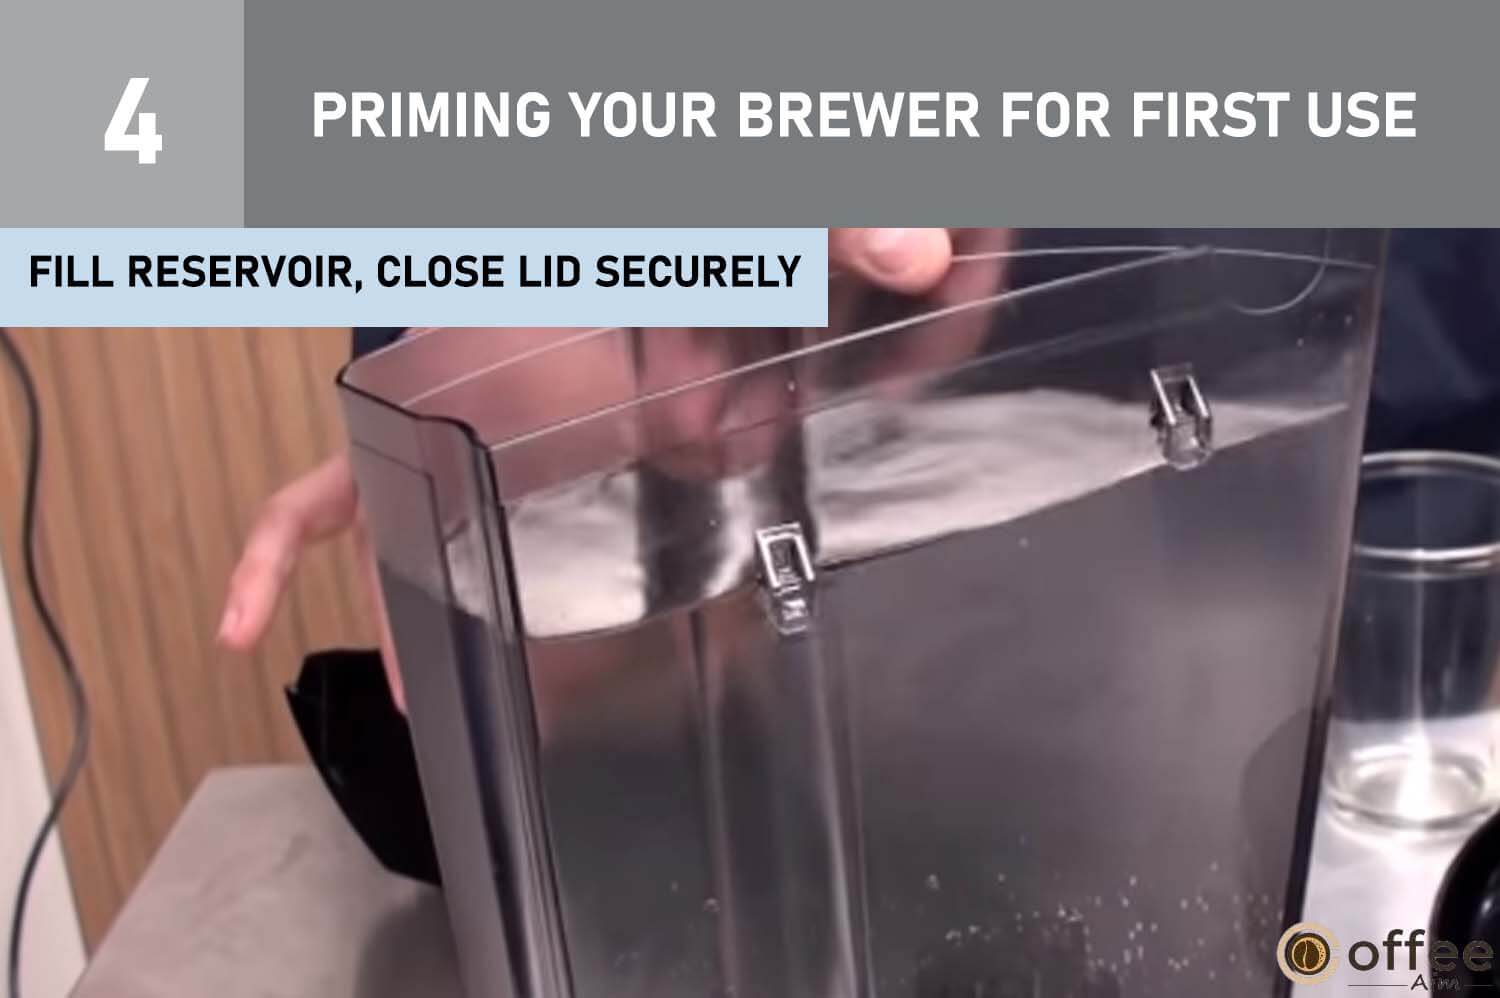
3. Rinse the Water Reservoir and Lid with fresh water.
4. Fill the Water Reservoir with water up to the clear viewing area’s top edge, then close the Lid.
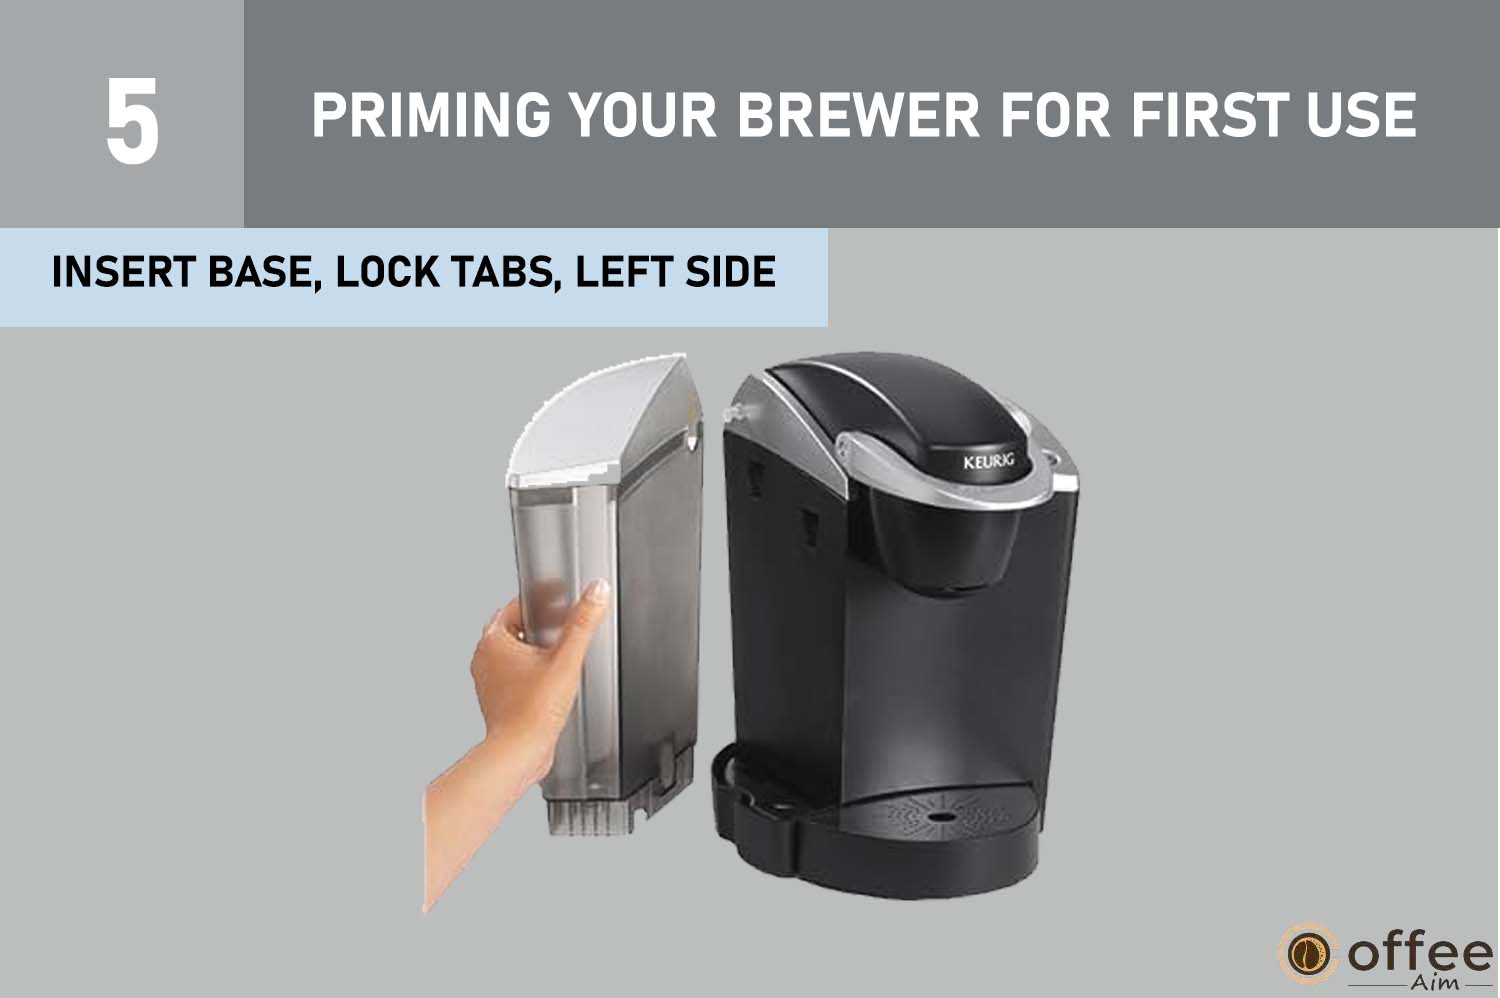
5. Insert the Water Reservoir base into the left side of the Brewer, ensuring the Lock Tabs engage.
6. Press the Power Button on the upper right panel, indicated by the green light.

7. The LCD Message Center will display ‘PRIME’ with the flashing Large Cup icon.
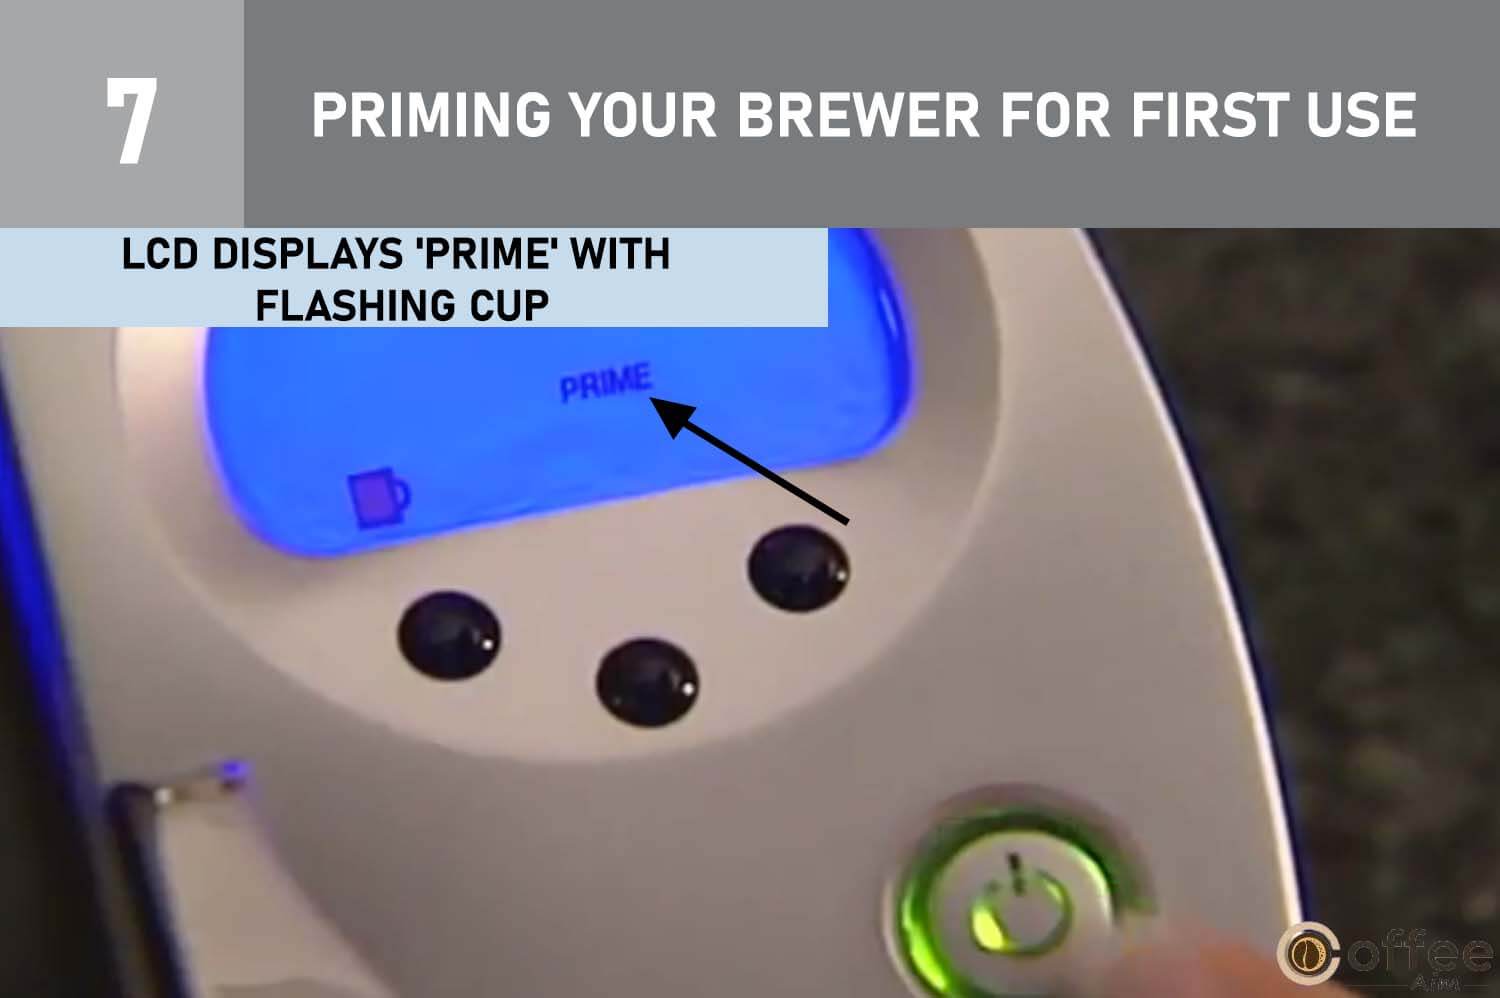
8. Press the Large Cup Button to start priming and heating the water (about 3 minutes).

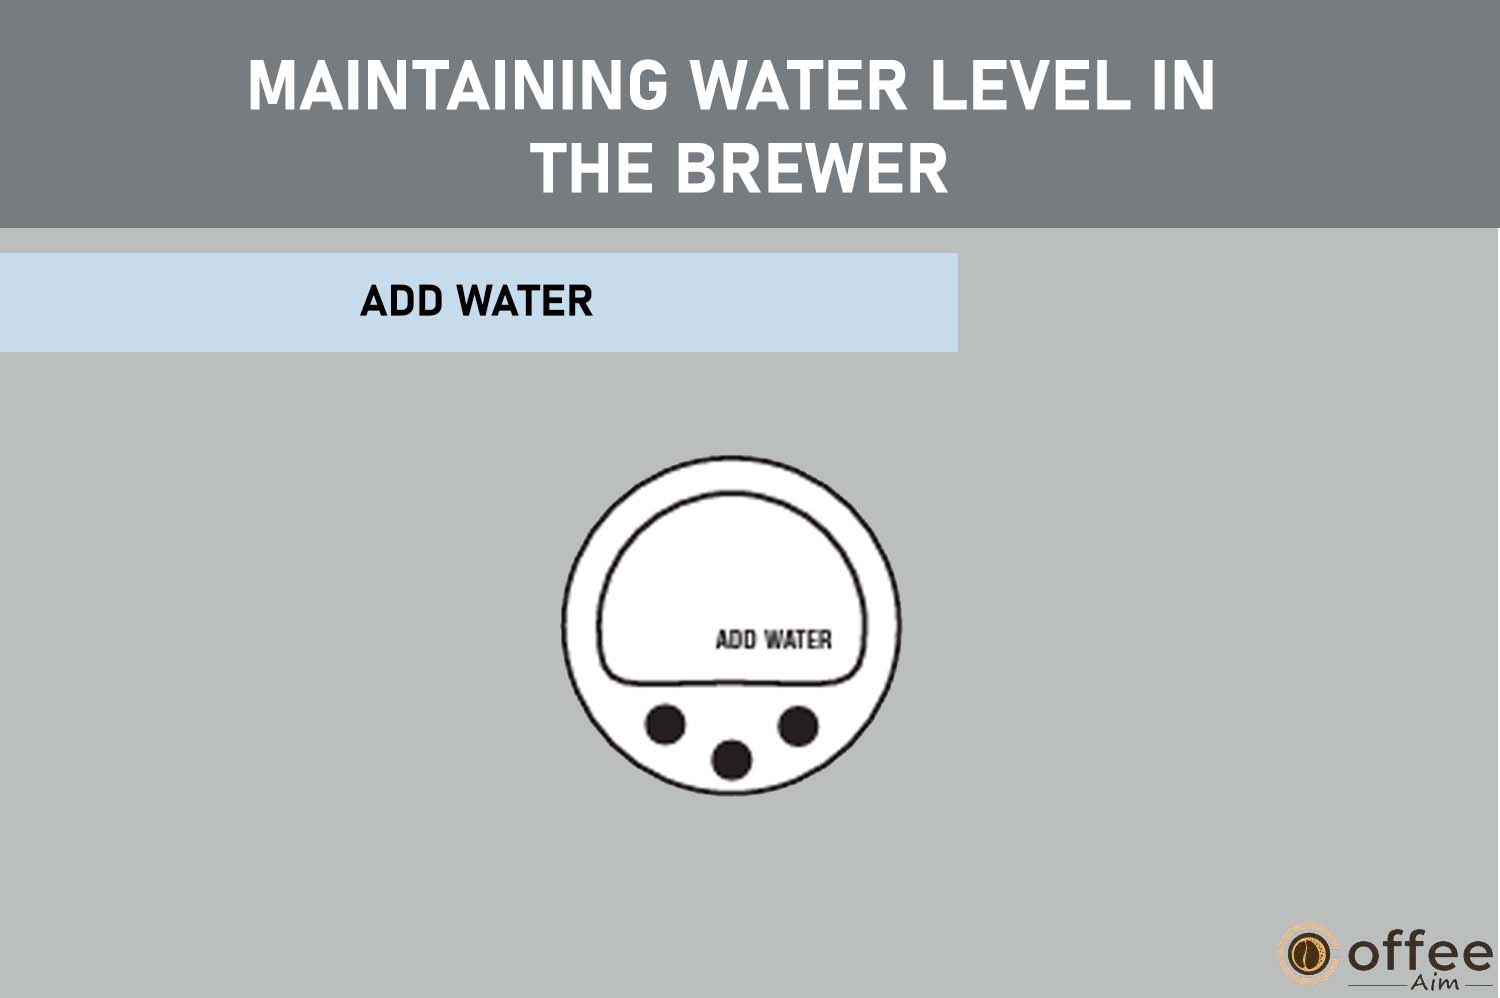
IMPORTANT: The LCD Message Center will display ‘ADD WATER’ and no buttons will function if the Water Reservoir is empty or not properly placed on the Brewer. It is necessary to add water to the Water Reservoir for the buttons to activate.
9. The ‘READY’ indicator will display once the water is heated.
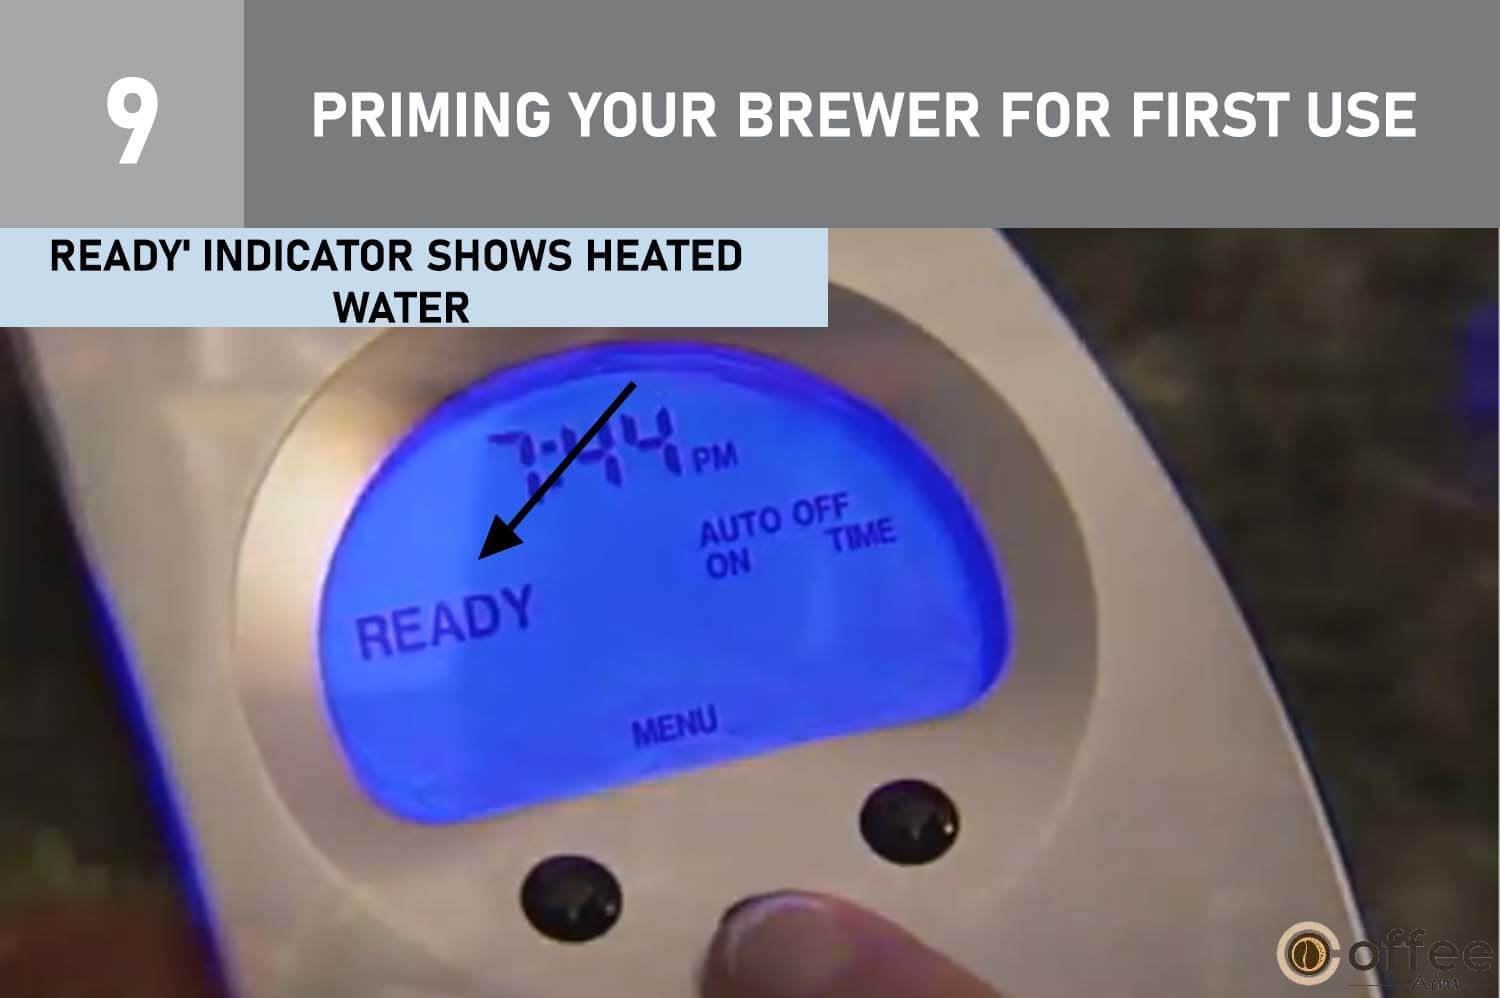
IMPORTANT: It is normal to observe small amounts of water coming from the Vent and dripping into the Water Reservoir during the heating process and subsequent brews.
Ready to Brew your First Cup
1. LCD Message Center indicates ‘READY’.

2. Place a cup or mug on the Drip Tray Plate.

3. Lift the Handle to open the K-Cup Holder.
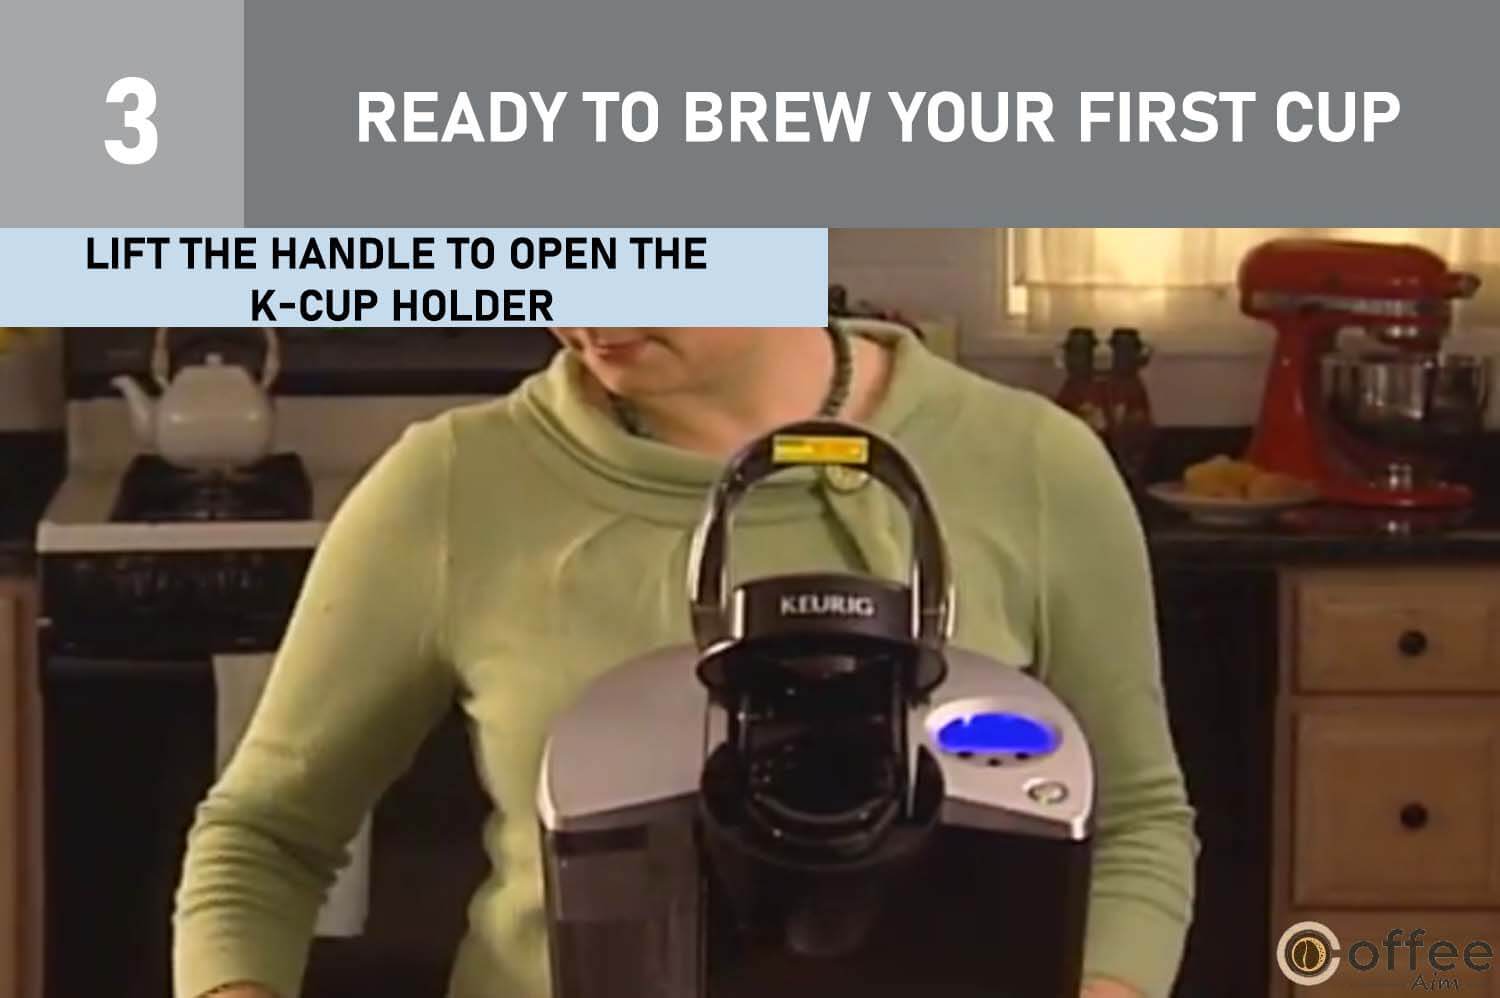
WARNING: The K-Cup has sharp needles that pierce both above and below the K-Cup Holder.
CAUTION: Do not open the foil lid or pierce the K-Cup.
4. Choose a K-Cup.
5. Insert the K-Cup into the K-Cup Holder.

IMPORTANT: If the Brew Button is not pressed within 60 seconds, the LCD Message Center will reset to ‘READY,’ and the Brew Button will become inactive to prevent unintended activation. Reactivate the Brew Button by lifting and lowering the Handle again.
6. Lower the Handle to close the Lid (LCD shows ‘BREW’).
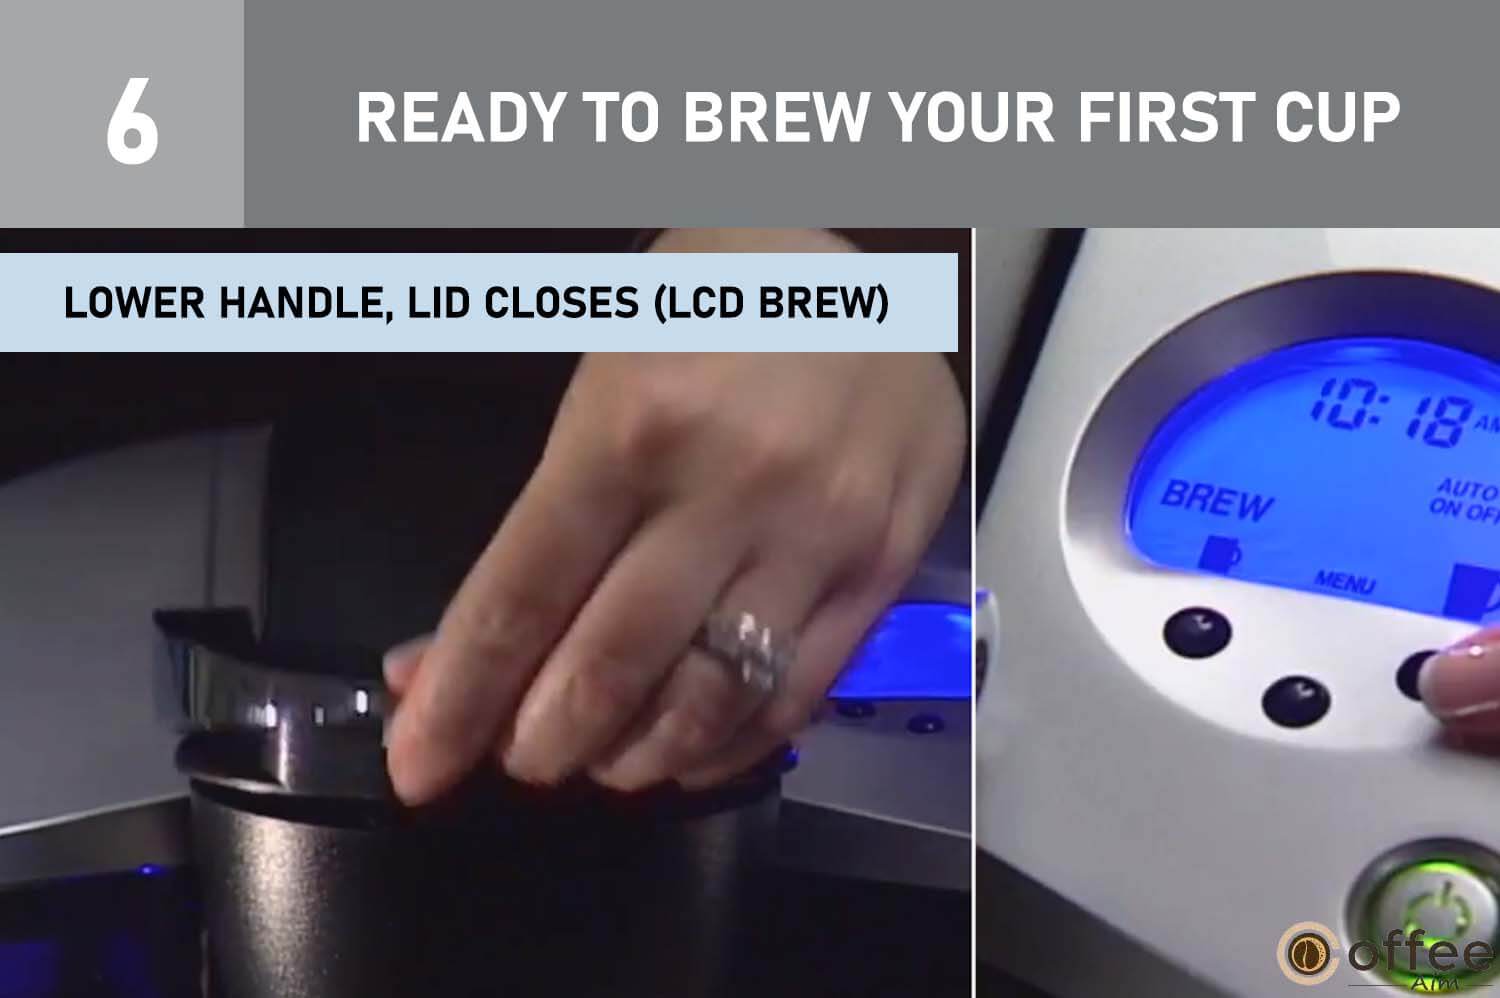
7. Select the desired cup size by pressing Small or Large Cup Icon.

WARNING: The K-Cup Holder contains extremely hot water while brewing. For your safety, refrain from lifting the Handle or opening the K-Cup Chamber during the brew process to avoid the risk of injury.
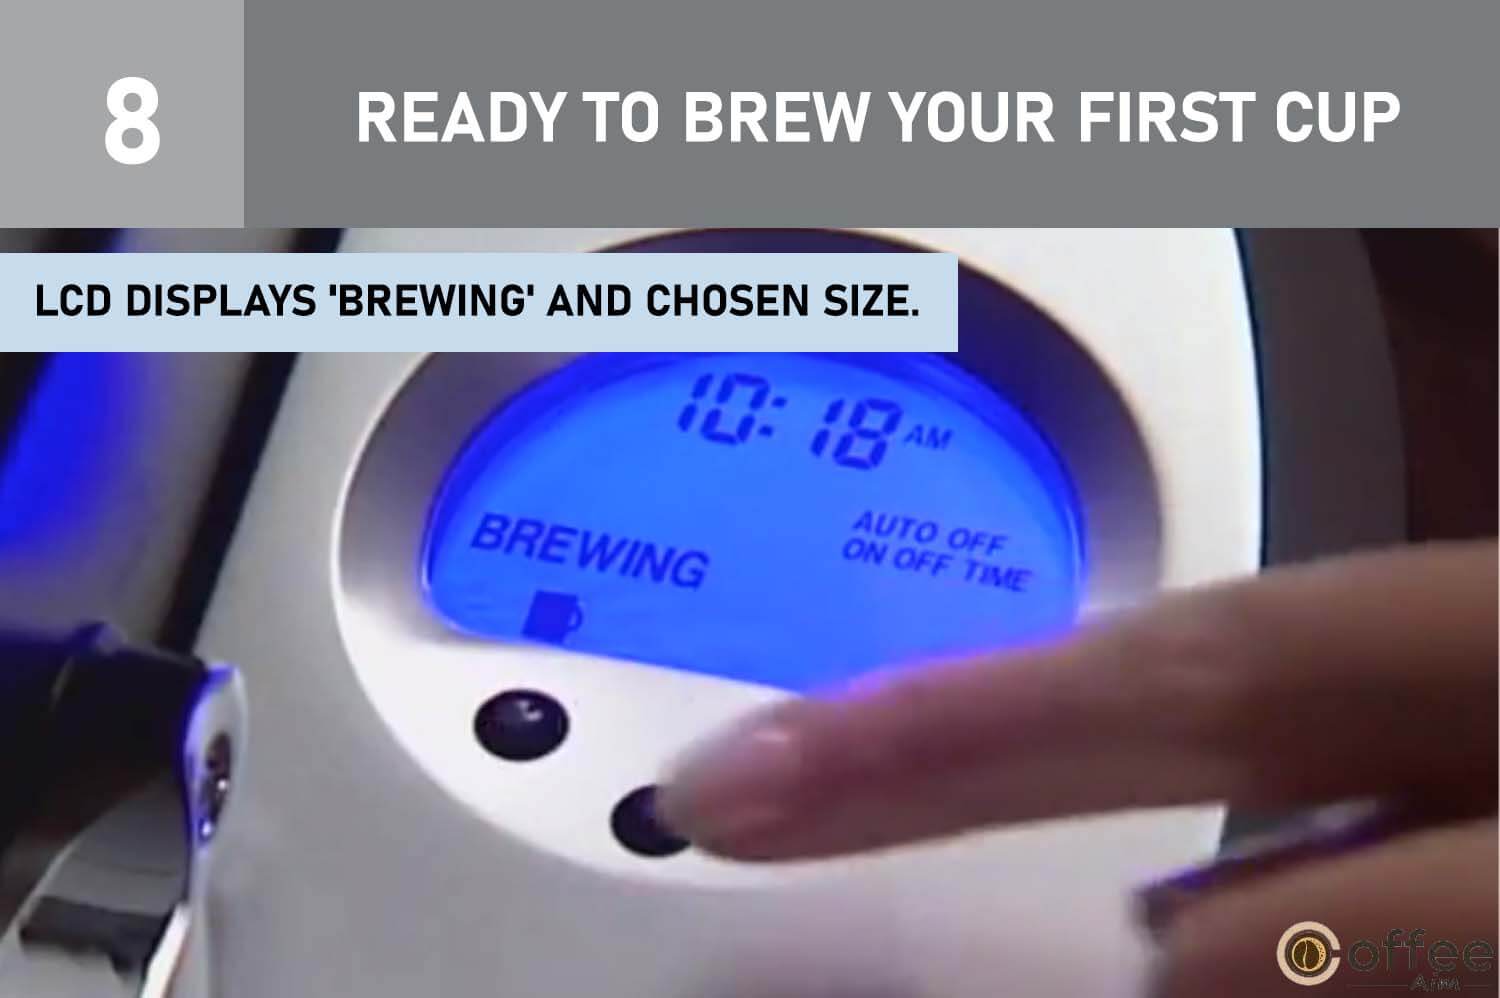
8. LCD displays ‘BREWING’ and chosen size.
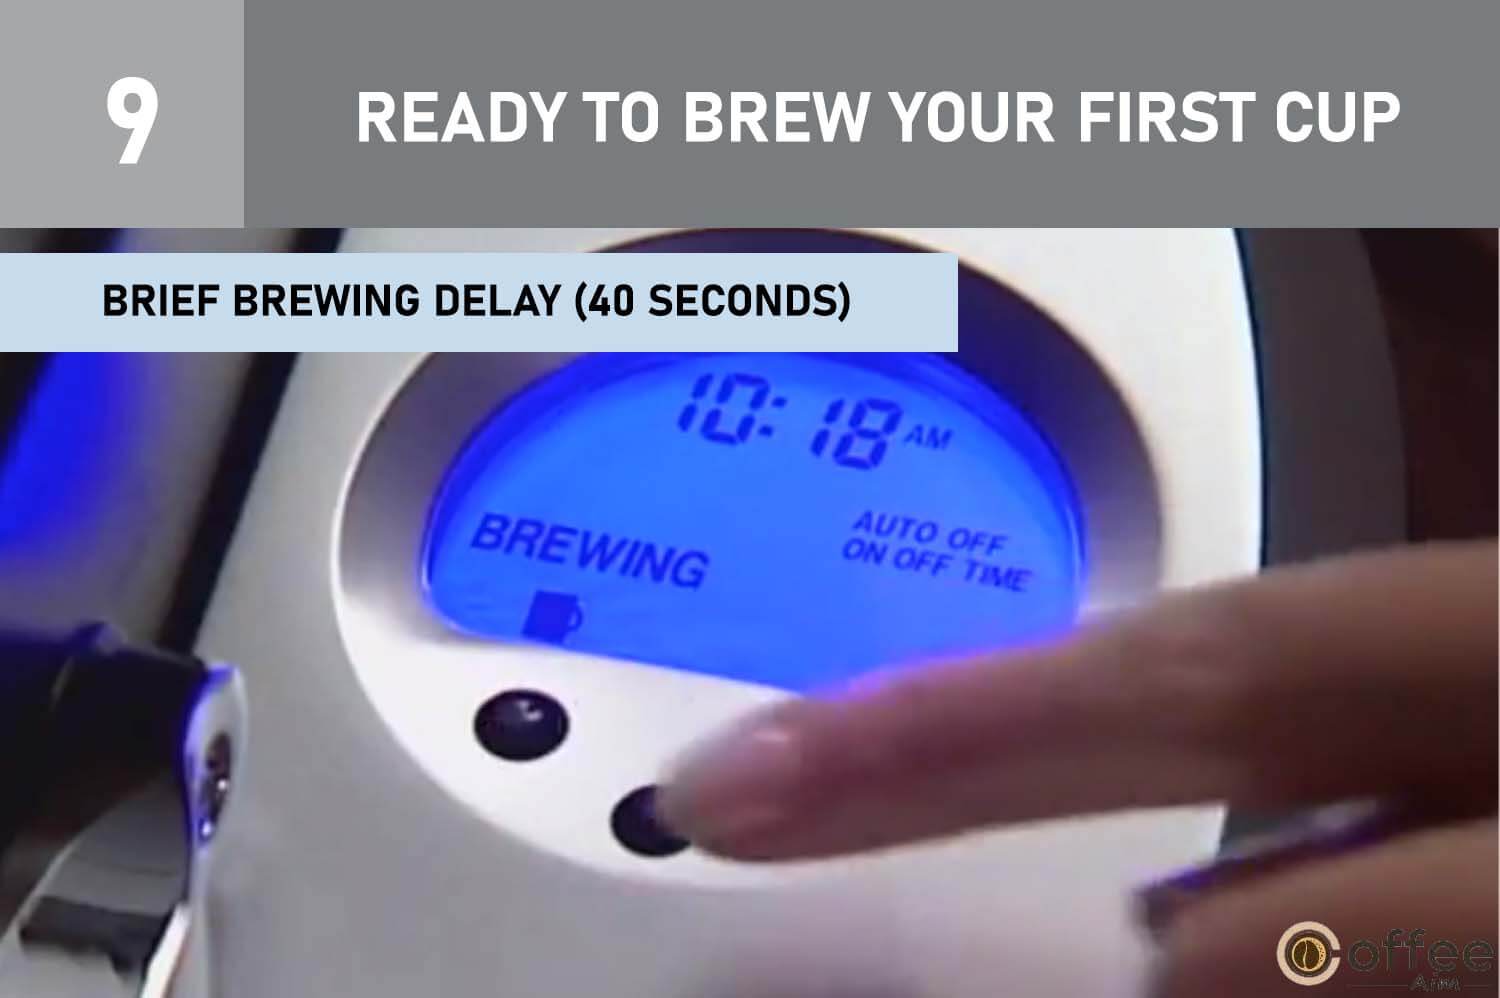
9. A short pause may occur before brewing (about 40 seconds).
10. Lift Handle and discard used K-Cup.

11. Enjoy your Keurig Brewed™ coffee or tea!

12. ‘NOT READY’ may display briefly as it heats water for the next cycle. ‘READY’ returns in 15 seconds.

Stopping the Brewing Process and Cleansing Brew
If you need to stop the brewing after the process has started, press the Power Button and turn the Brewer ‘OFF’. The flow of coffee or tea will stop and the heating element will shut off and the green light illuminating the Power Button will disappear
Important Tip: After an interrupted brew, your cup may have less coffee or tea. To ensure the desired volume for your next brew, we advise running a cleansing brew with water only before your next brewing cycle.
Maintaining Water Level in the Brewer
The LCD Message Center on your Keurig B-50 will indicate when the water level in the tank is low or if the Water Reservoir has been removed by displaying the message ‘ADD WATER’. Brewing is not possible when the ‘ADD WATER’ indication is flashing.
You have two options to fill the Water Reservoir:
1. While the Water Reservoir is still attached to the Brewer, lift off the Water Reservoir Lid and pour water directly into it, then replace the Lid.

2. Alternatively, remove the Water Reservoir by lifting it up and away from the Brewer, then fill it with water. After filling, replace the Lid and place the Water Reservoir back in its base.
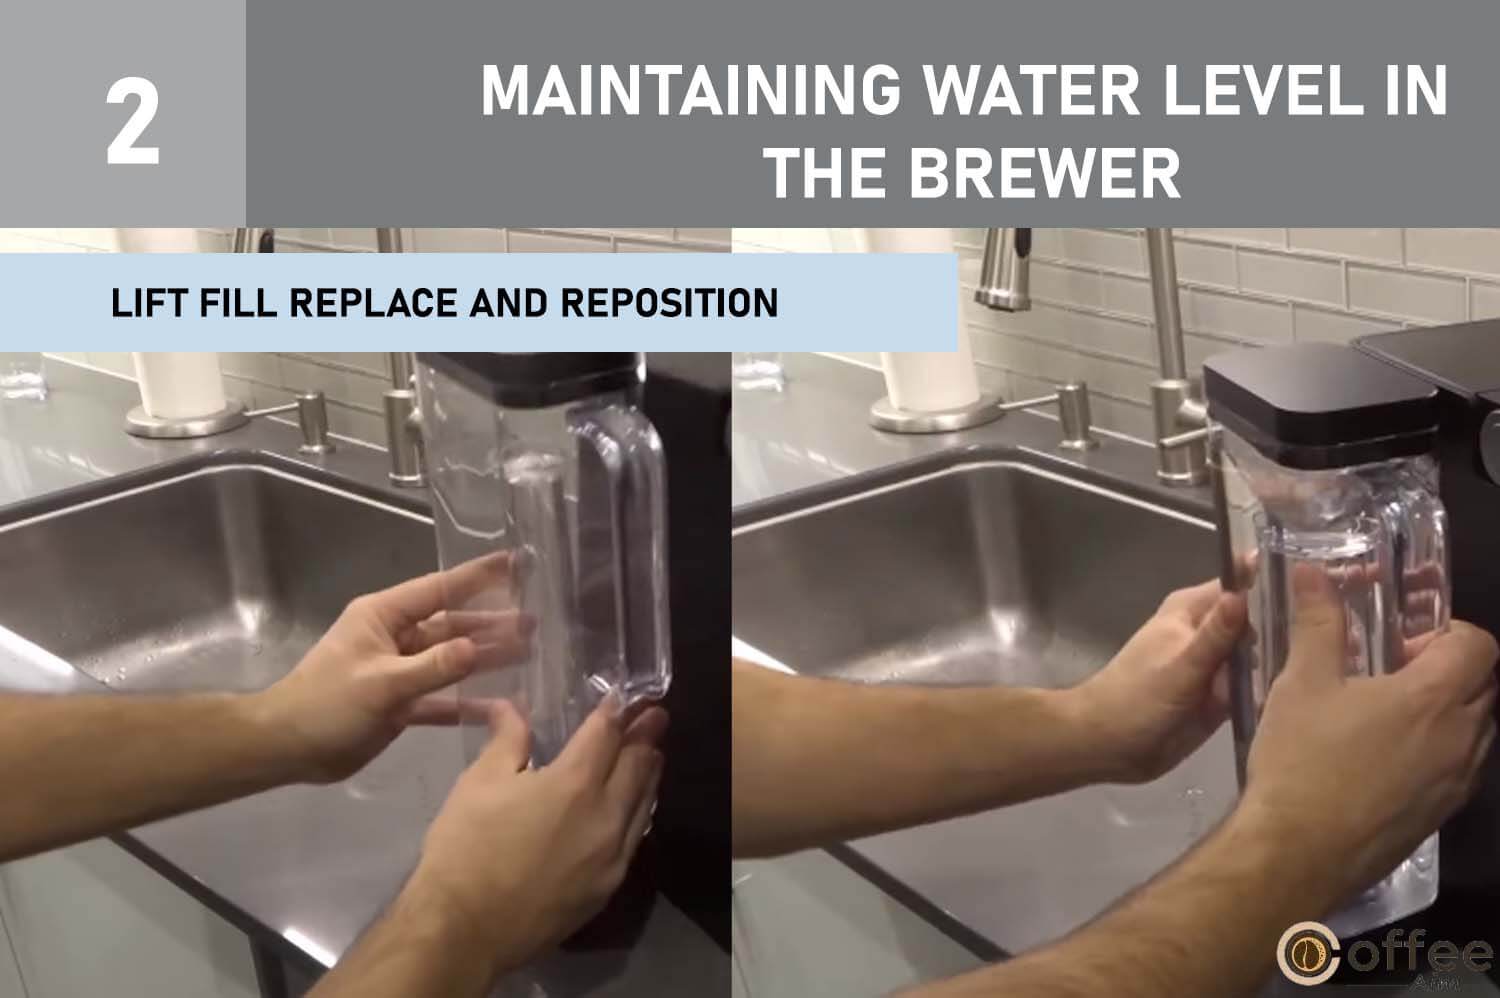
IMPORTANT: It is essential not to remove the Water Reservoir while the brewing process is underway.
Brewer Operation Modes and Time Programming
- Leave it ON all the time (recommended)
- The Brewer offers the option to stay ON continuously, ensuring it is readily available to brew a fresh cup of gourmet coffee or tea at any moment. If you prefer, you can set the time on the clock, although it is optional. To turn off the Brewer, simply press the Power Button. Although the clock will remain on, brewing will be disabled. When you want to use the Brewer again, press the Power Button to restore power. However, it’s important to note that you’ll need to wait for the water to heat up before the Brewer becomes fully ready to brew.
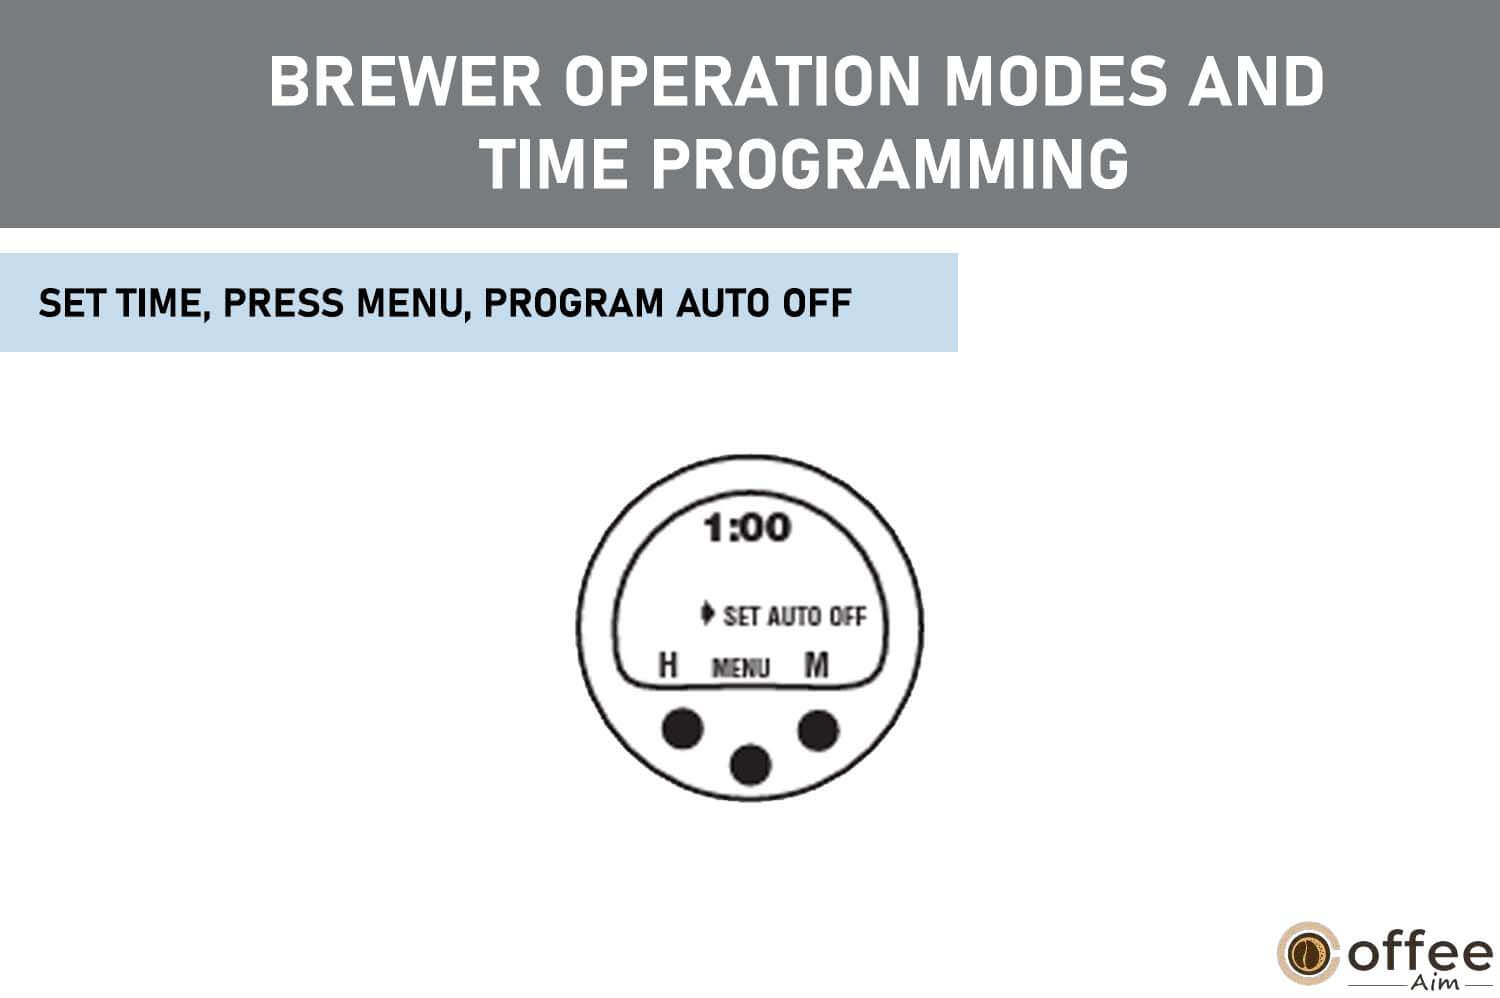
- Program Auto Off Feature
- important Note: To utilize the programming feature, ensure the clock displays the correct time. The clock will not appear unless you set the time following the steps provided in #4 on page 10.
- Set the correct time, then press Menu Button to program Auto Off.
- Use H Button to set the desired shut-off time (up to 9 hours).
- Press Menu Button to save and exit.
- To cancel, set time to ‘OFF’.
- Program Auto On/Off Time
- Important Note: For the programming feature to work, it is essential to set the clock to the accurate time. The clock display will not be visible until you set the time following the instructions in #4 on page 10
1. Set the correct time, press Menu Button thrice for Auto On/Off programming.
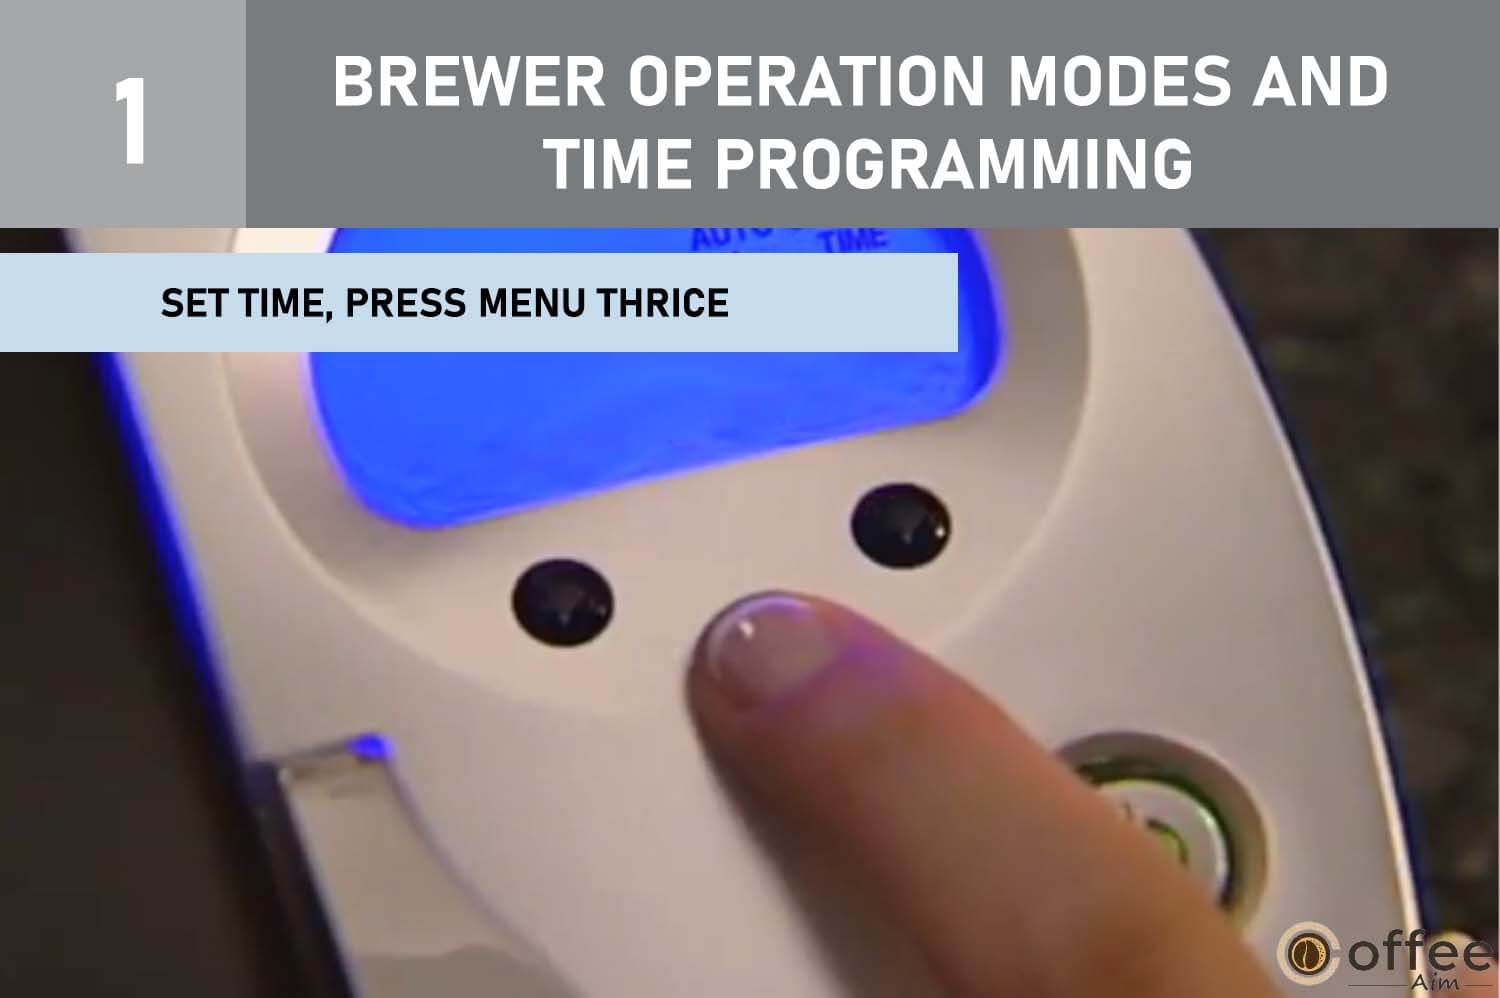
2. Use H and M Buttons to set desired On and Off times.
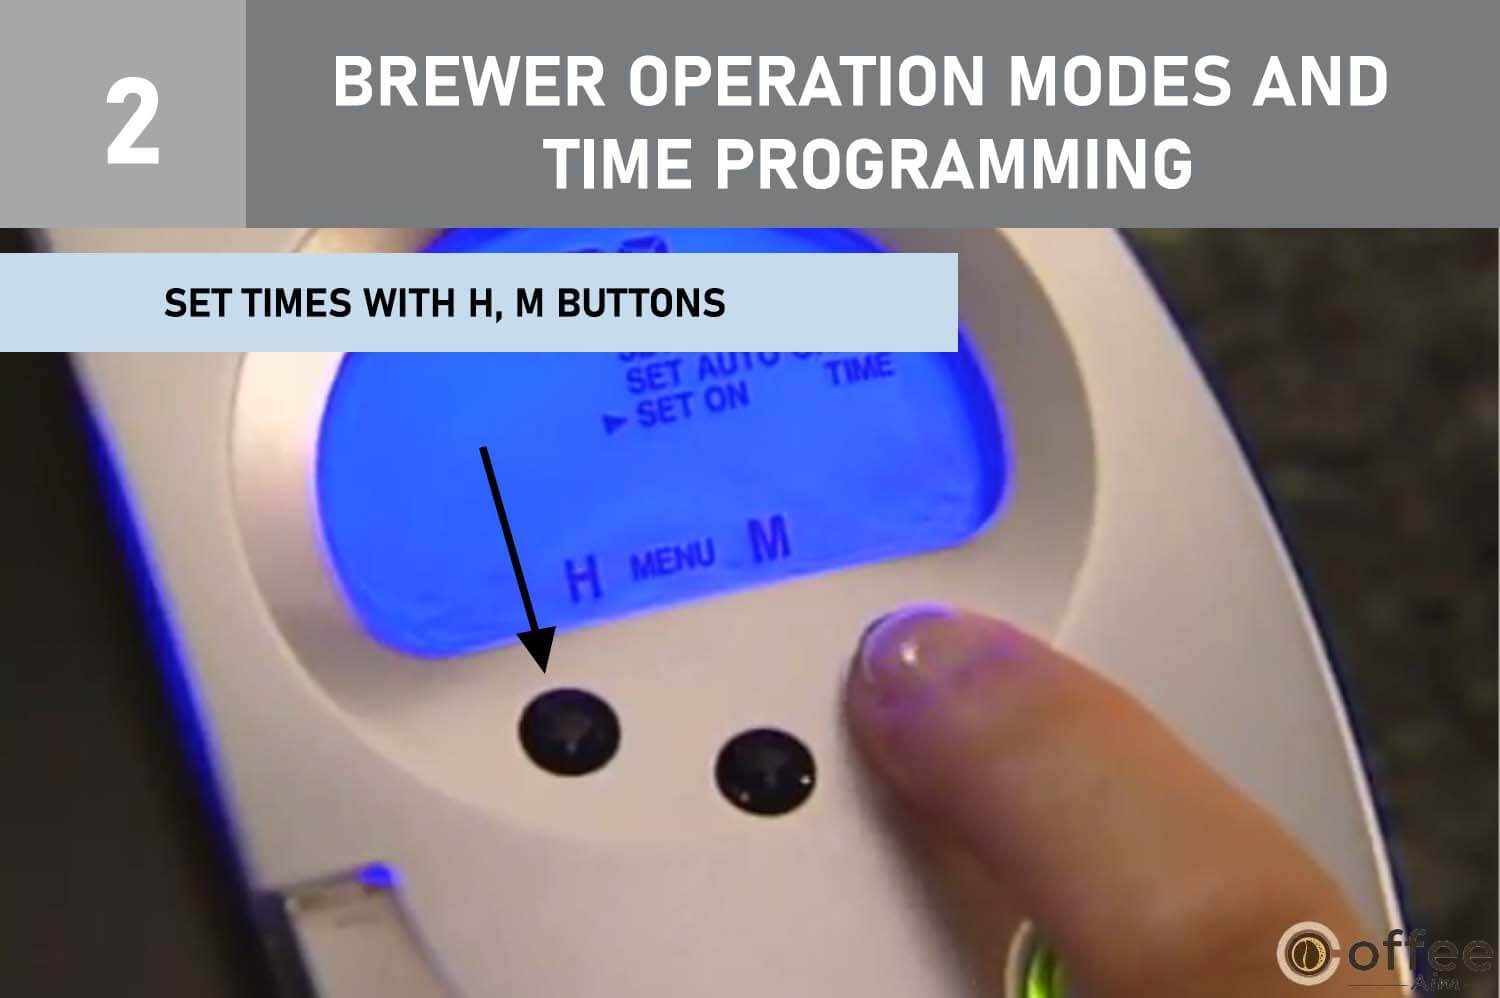
3. Press Menu Button to save each time.

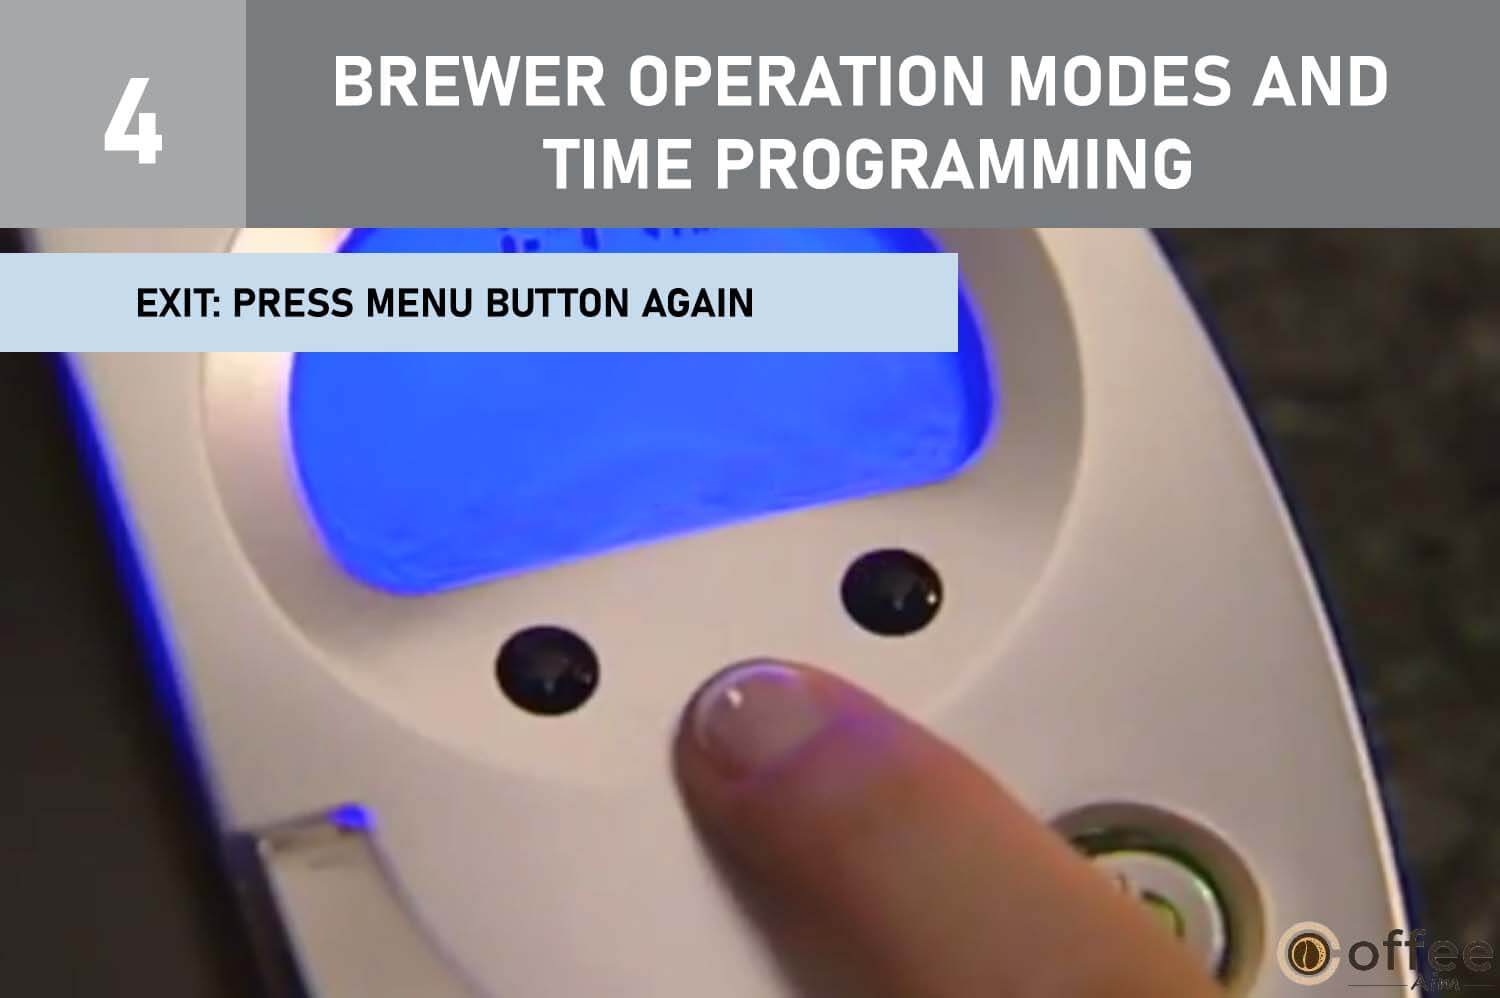
4. Press Menu Button again to exit programming mode.
- To cancel, set both On and Off times to 12:00 AM.
For instance, if you set the Brewer’s On Time at 6:15 AM and the Off Time at 10:00 PM, it will keep the water in the tank hot within that time frame, ensuring it’s always ready for brewing coffee or tea. However, if you desire a cup outside this schedule, you can press the Power Button, and once the water is heated and the ‘READY’ indicator appears on the LCD, you can brew immediately. In this scenario, the Brewer will automatically turn off at the preset Off Time.
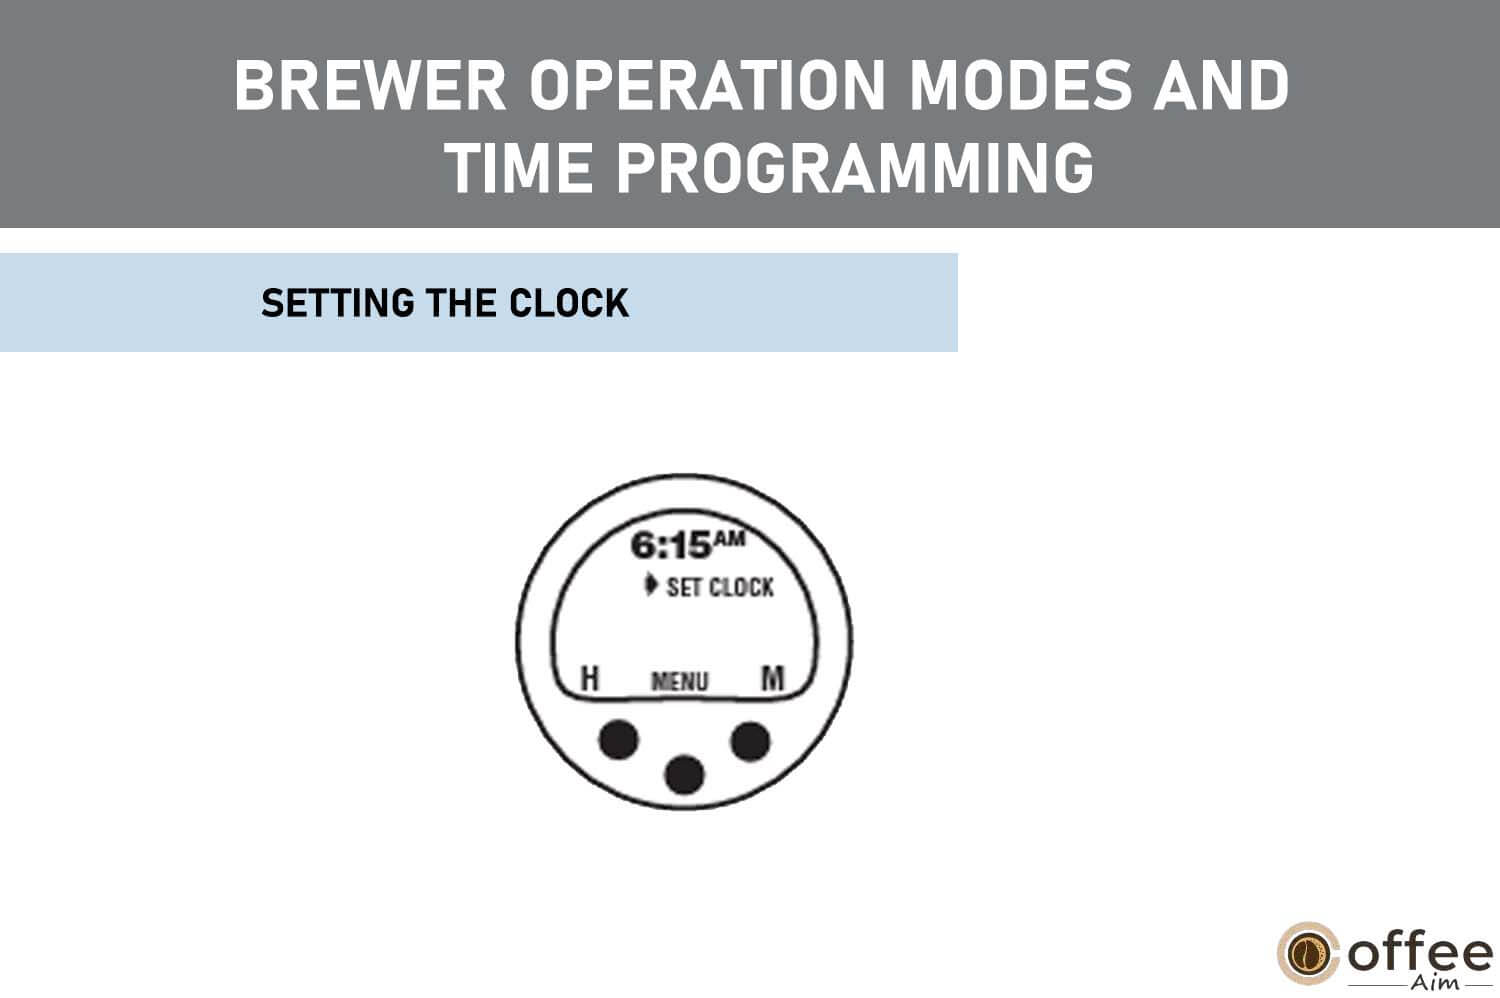
4. Setting the Clock
Press the Menu Button.
The words, ‘SET CLOCK’ will appear on the upper right side of the screen and H and M will blink above the two black buttons.
- Press and Hold the H Button to scroll through the hours quickly.When the number displayed nears the actual time, press and release the button to advance one hour at a time. If the number count passes 12, the indicator switches between AM and PM on the LCD.
- Press and hold the M Button to scroll through the minutes quickly. When the number displayed nears the actual time, press and release the button to advance one minute at a time.
Cleaning and Maintenance of Keurig B-50
Cleaning External Components
Regular cleaning of the external parts of your Keurig B-50 Brewer is recommended to maintain its performance and appearance.
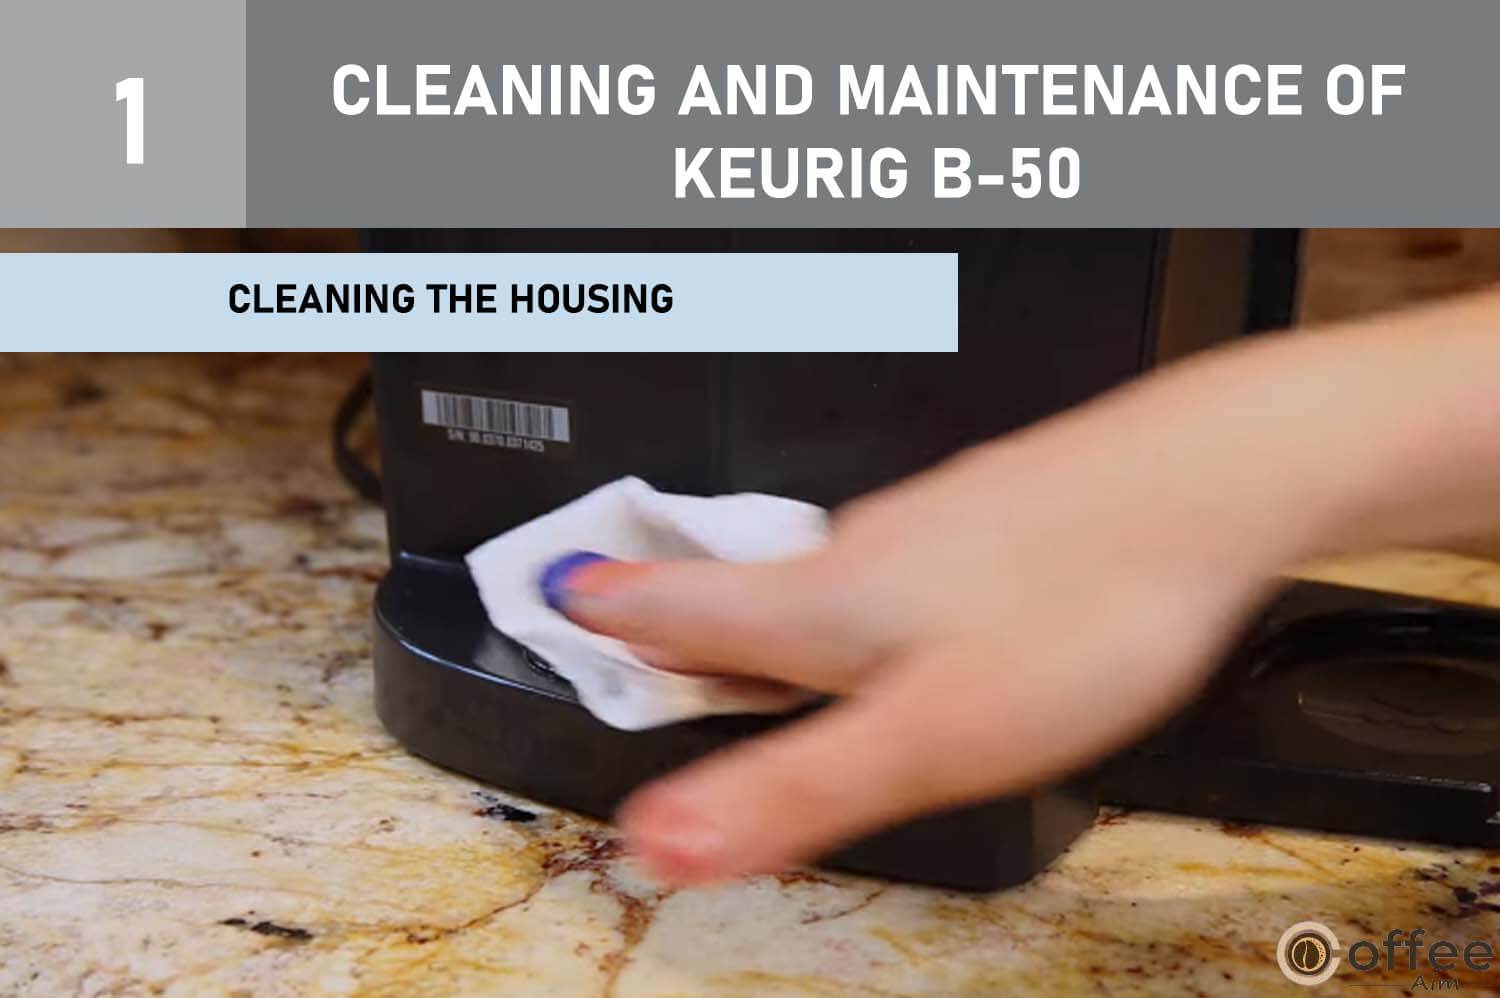
1. Cleaning the Housing
Never submerge the base unit in water or other liquids. You can clean the Housing and other external components with a soapy, damp, non-abrasive cloth.
2. Cleaning the Drip Tray Assembly
The Drip Tray can accumulate overflow, up to 8 ounces. Periodically inspect and rinse the Drip Tray and Drip Tray Plate. To remove the Drip Tray Assembly, slide it toward you while keeping it level to avoid spilling. Both the Drip Tray and Drip Tray Plate are dishwasher safe.

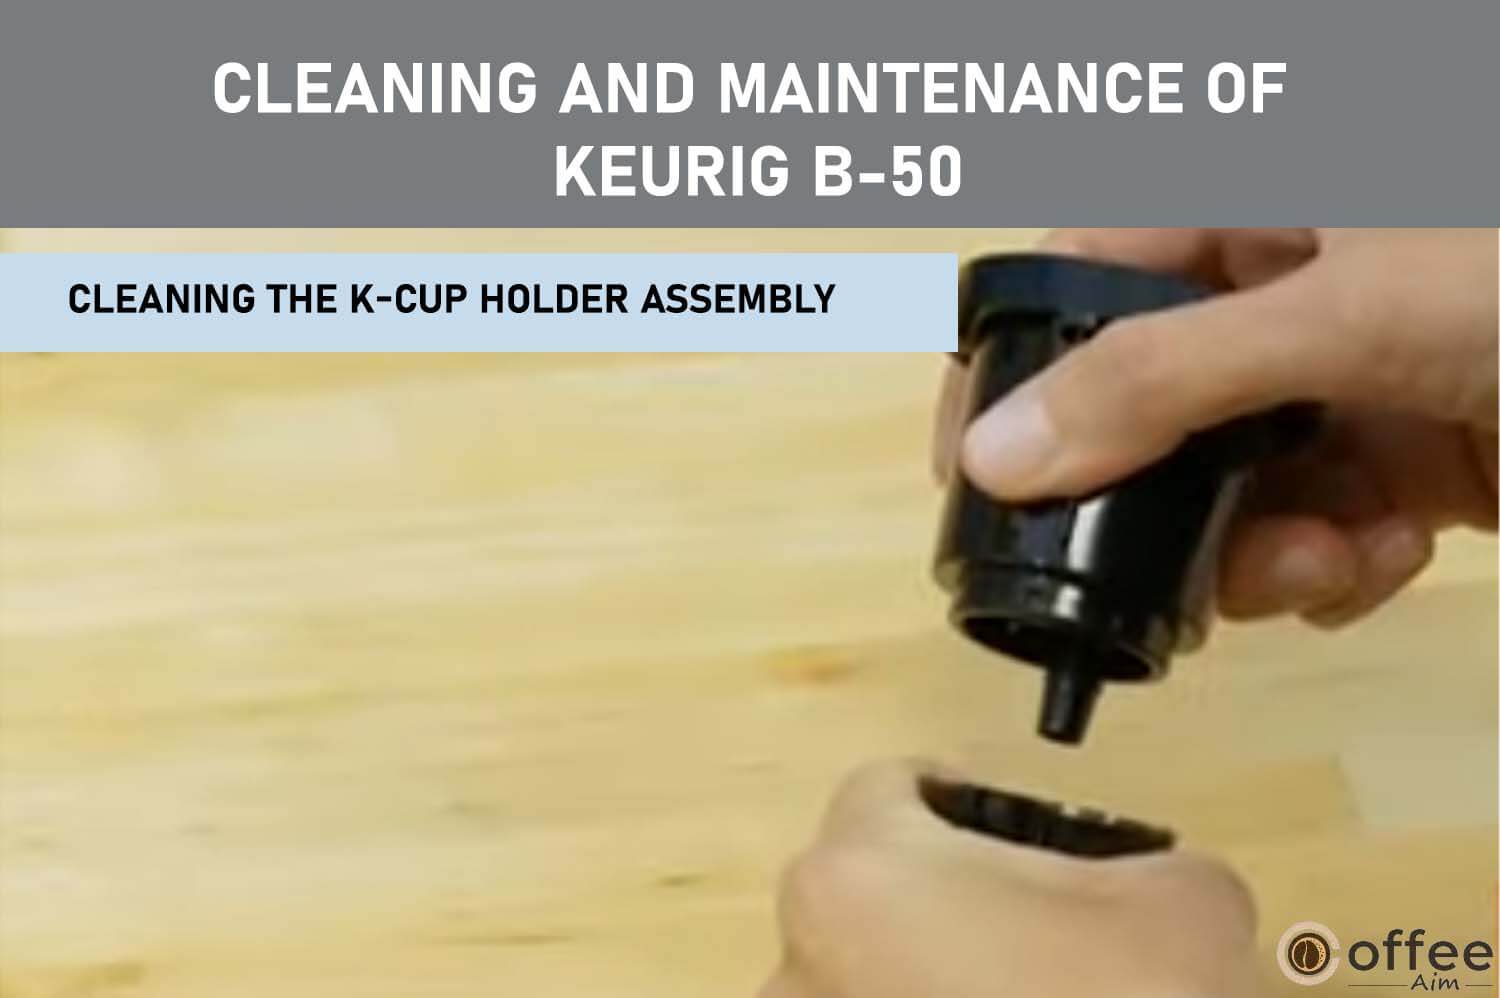
Cleaning the K-Cup Holder Assembly:
1.Cleaning the Parts
The K-Cup Holder Assembly is dishwasher safe. To remove it from the Brewer, lift the Handle to open the cover. Grasp the outside housing of the K-Cup Holder with your thumbs and the bottom of the Funnel with your fingers. Push the Funnel straight up with your fingertips while holding the housing firmly. To replace the K-Cup Holder Assembly, align it with the slots and press until it snaps into place.
2. Cleaning the Funnel
The Funnel can be removed from the K-Cup Holder by pulling on it until it snaps off. The Funnel is dishwasher safe. To replace it, snap it back onto the K-Cup Holder Assembly.

3. Cleaning the Exit Needle
The Exit Needle is located on the inside bottom of the K-Cup Holder Assembly. If a clog occurs due to coffee grinds, use a paper clip or similar tool to clean it. Insert the paper clip into the Needle to loosen the clog and push it out. Wash the Needle with warm soapy water and rinse thoroughly.
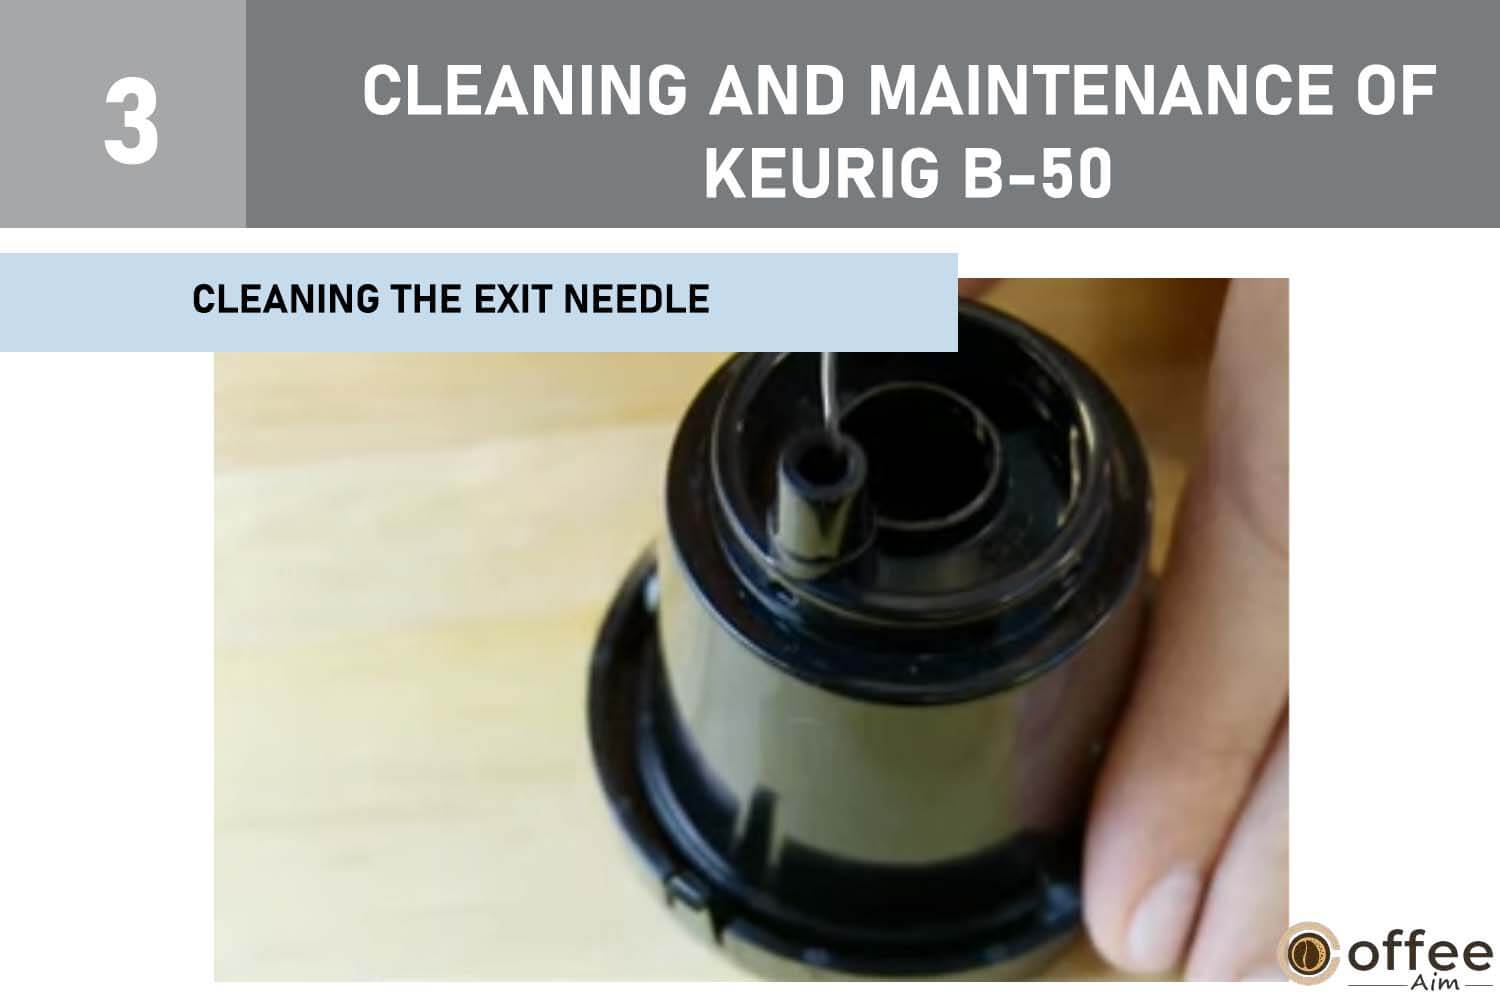
WARNING: The K-Cup Holder contains sharp needles that puncture the K-Cup both above and at the bottom. Exercise caution to avoid injury.
Cleaning the Water Reservoir and Water Reservoir Lid:
The Water Reservoir Lid should be cleaned with a damp, soapy, non-abrasive cloth and should not be put into the dishwasher. The Water Reservoir can be cleaned with soapy water and rinsed thoroughly. It is safe to place the Water Reservoir into the dishwasher for cleaning. Avoid drying the inside of the Water Reservoir with a cloth to prevent lint from remaining.

WARNING: After cleaning, make sure to thoroughly rinse the Water Reservoir to eliminate any traces of cleaners or cleaning solutions, as they may taint the water used in the Brewer
De-Scaling Your Brewer: Maintenance for Optimal Performance
Maintaining Water Quality: The mineral content in water can vary, and depending on your location, calcium deposits or scale may accumulate in your Brewer over time. While scale is not harmful, it can affect the performance of your Brewer if left unattended. To preserve the heating element and internal components in contact with water, it’s essential to regularly de-scale your Brewer. We recommend de-scaling every 6 months for optimal performance, but more frequent de-scaling may be required in areas with higher calcium buildup. The Brewer is equipped with sensors to detect scale buildup, indicated by the De-Scale indicator on the LCD Message Center. When lit, it’s time to de-scale following the procedure described below.

IMPORTANT: Even when the De-scale indicator is illuminated, your Brewer will continue to work. However, it is crucial to de-scale promptly after the indicator lights up to prevent potential damage caused by continued scale buildup. If de-scaling is not performed promptly, the De-Scale indicator will start blinking, indicating the urgency to de-scale immediately to avoid any harm to the Brewer.
DESCALING PROCEDURE FOR KEURIG B-50
Step 1: Gather the Supplies
- Ensure you have at least 48 ounces of undiluted white vinegar on hand.
- Prepare an empty sink and a ceramic cup (avoid using a paper cup).

Step 2: Empty the Water Reservoir
- Remove any water present in the Water Reservoir.

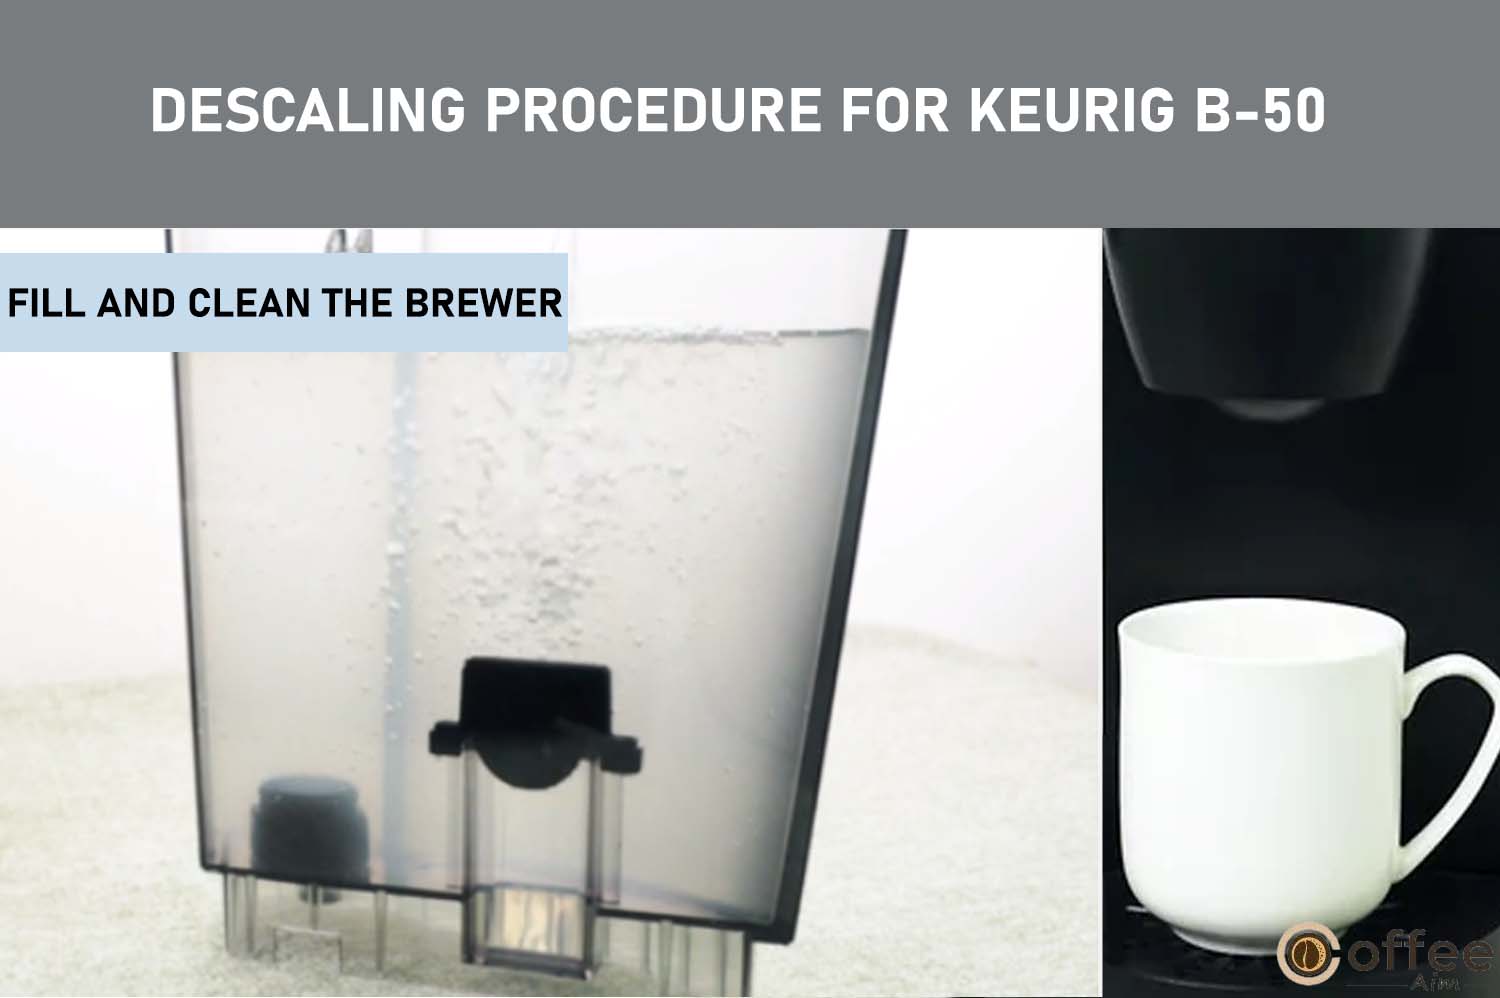
Step 3: Fill and Clean the Brewer
- Pour the white vinegar into the Water Reservoir, filling it to the top edge of the clear viewing area.
- Place a ceramic cup in the Drip Tray and run a brew cycle. Press the Large Cup Button, but do not use a K-Cup. Pour the contents of the cup into the sink.
- Repeat the brew process until the Water Reservoir is empty, emptying the contents of the cup into the sink after each cycle. Remember to open and close the lid between each cycle.
- Thoroughly rinse the Water Reservoir and fill it with fresh water.
- Let the Brewer stand for 4 hours while it remains turned on.
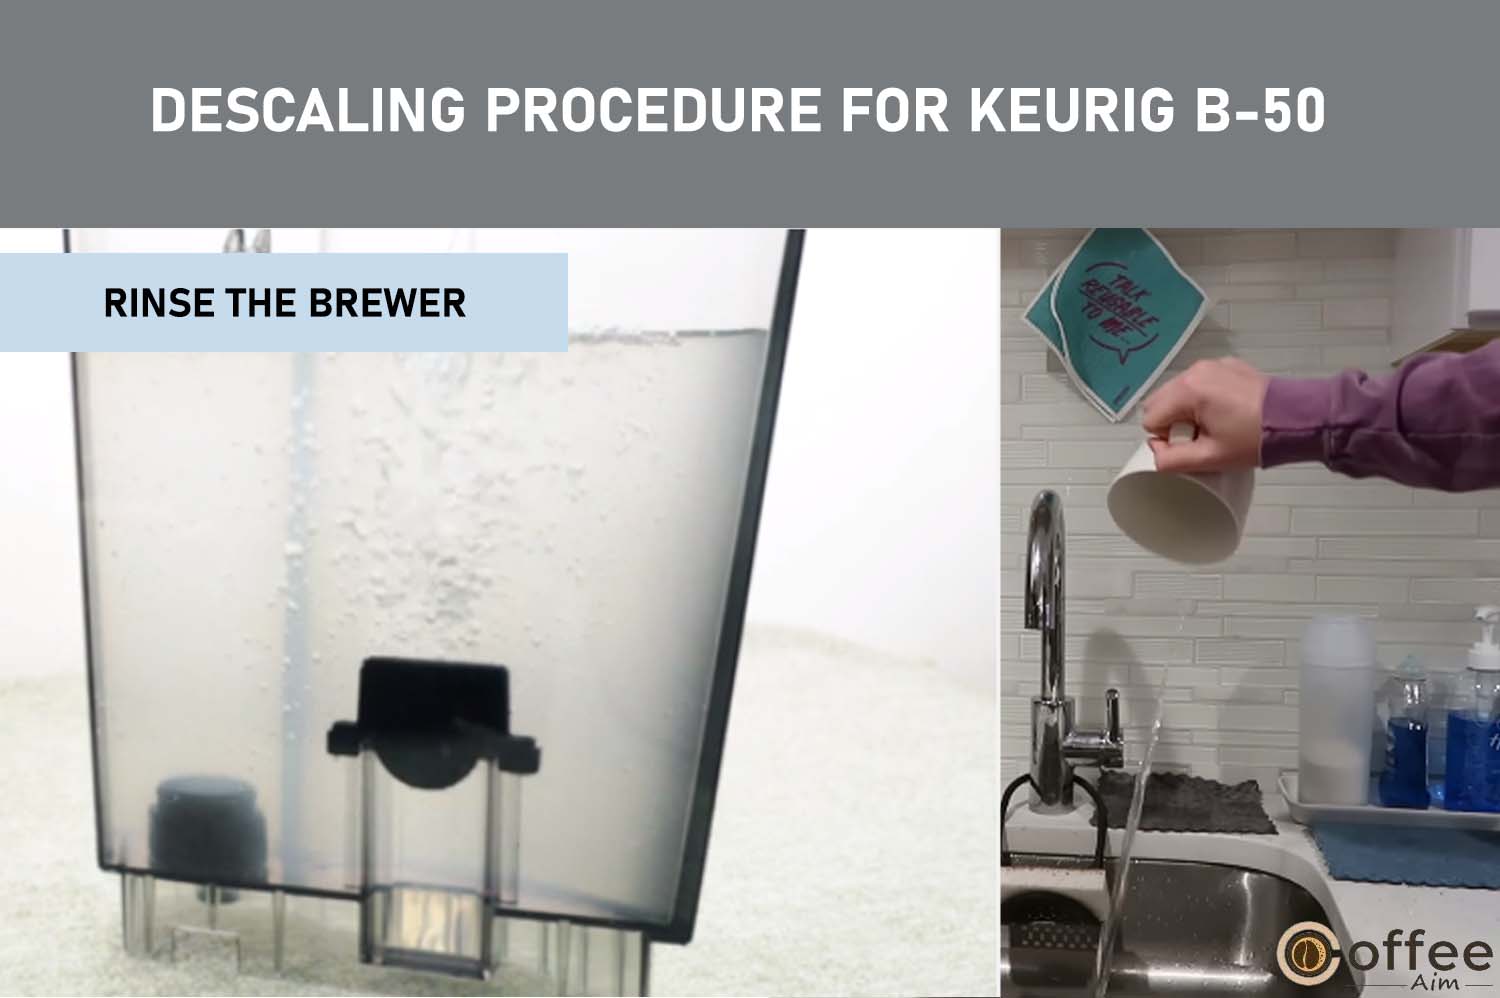
Step 4: Rinse the Brewer
- Ensure the Water Reservoir is filled with fresh water.
- Place a ceramic cup on the Drip Tray and run a regular brew cycle. Pour the contents of the cup into the sink.
- Repeat the brew process until the Water Reservoir is empty.
- If any residual taste remains, perform additional rinse cycles as needed.
IMPORTANT: If the De-scale indicator on the LCD Message Center continues to display after finishing the procedure, you should repeat the de-scaling process outlined above.
Storing and Moving the Brewer: Precautions and Recommendations
Proper Storage and Moving Precautions: To ensure the longevity of your Brewer, it’s essential to empty the Water Reservoir before storing it and select a safe, frost-free environment for storage. Avoid storing the Brewer in extremely cold conditions, as water freezing inside the unit can lead to damage. When you’re ready to use the Brewer after storage, remember to rinse the Water Reservoir with fresh water and perform three cleansing brews to prepare it for brewing again. If you need to move your Brewer to a different location, be sure to turn it off, unplug it, and empty the Water Reservoir for safe transportation.
Troubleshooting Guide: Brewer Issues and Solutions
| Situation | Solution |
| Brewer Does Not Have Power | • Check to be sure that it is plugged in securely. • Plug into a different outlet. • Reset circuit breaker if necessary. • Make sure that the Power Button has been turned on and the green light shows. |
| Brewer will not brew when used for the first time | • The Brewer must be primed for use by filling the internal hot water tank before the first brew. ‘PRIME’ will be displayed on the LCD Message Center (refer to page 6). |
| Brewer will not brew | After placing the K-Cup in the K-Cup Holder, ensure that the Handle is firmly pushed down, and the LCD Message Center changes from ‘READY’ to ‘BREW’. Then, press either the Large Cup or Small Cup Button.If the LCD Message Center indicates ‘ADD WATER’, add water to the Water Reservoir or ensure it is seated properly in its base.If the ‘ADD WATER’ message persists even after refilling, contact Customer Service at 1-866-901-BREW (2739). |
| Brewing a partial cup | Check if the Exit Needle is clogged (refer to page 11).Clean the K-Cup Holder if necessary and rinse it under the faucet (refer to page 11).Ensure the Water Reservoir was not removed during brewing. If it was, replace it and perform a cleansing brew.If the LCD Message Center displays ‘De-Scale’, descale the Brewer (refer to page 11).If you have descaled the Brewer twice and the message persists, contact Customer Service. |
| The time is not displayed on the LCD Message Center | • The time will not be displayed on the LCD unless you have set it. To set the clock, follow the procedure on Page 10. • If power is interrupted to the Brewer, you will need to set the clock again using the procedure on page 10 |
WARRANTY
Keurig Limited One Year Warranty
- Warranty Coverage: Keurig warrants your Brewer to be free from defects in materials or workmanship under normal home use for one year from the date of purchase.
- Repair or Replacement: Keurig will repair or replace the Brewer without charge upon receiving proof of purchase date. If a replacement Brewer is necessary, it may be new or reconditioned, carrying the remaining warranty of the original product.
- Shipping Costs: Keurig covers all shipping costs for authorized returns.
- Coverage Area: This warranty applies only to Brewers operated in the United States and Canada.
- Exclusions: The warranty does not cover consequential or incidental damages, misuse, abuse, or damages caused by non-authorized service providers or use of non-genuine Keurig parts.
- Duration of Warranty: This warranty is exclusive and in lieu of any other express warranty. The duration of any implied warranties, including merchantability or fitness for a particular purpose, is limited to the period of this limited warranty.
- Warranty Service: For warranty service, contact Keurig Customer Service at 1-866-901-BREW (2739) to obtain an Authorization to Return number (ATR) before returning your Brewer. Brewers returned without an ATR number will not be serviced.
Please note that this warranty provides specific legal rights, and you may have additional rights that vary by state or province of purchase.
Conclusion
In conclusion, using the Keurig B-50 coffee maker is a simple and enjoyable process. With its user-friendly design and programmable features, you can easily brew your favorite gourmet coffee or tea anytime you desire. Remember to follow the instructions for priming, brewing, and descaling to ensure optimal performance and longevity of your Brewer. Whether you prefer a regular large cup or a stronger small cup, the Keurig B-50 offers versatility and convenience to meet your coffee needs. Embrace the ease and efficiency of this remarkable brewing machine, and savor every sip of your perfectly brewed cup of joy. Cheers to delightful coffee moments with Keurig B-50!
Faqs
How Do You Use A Keurig For Dummies?
Using a Keurig is easy! Just follow these steps:
- Place the Brewer on a steady surface.
- Fill the Water Reservoir with fresh water.
- Turn the Brewer on and wait for it to heat up.
- Lift the Handle and insert a K-Cup.
- Close the Lid and select your desired cup size.
- Press the Brew Button and wait for your coffee or tea to be ready.
- Enjoy your freshly brewed beverage!
Remember to keep the Brewer clean and follow the instructions in the manual for maintenance and descaling. Happy brewing!
How Do You Use A Keurig Coffee Maker For The First Time?
To use a Keurig coffee maker for the first time:
- Place the Brewer on a steady surface.
- Fill the Water Reservoir with fresh water.
- Turn on the Brewer and wait for it to heat up.
- Lift the Handle, insert a K-Cup, and close the Lid.
- Select your desired cup size.
- Press the Brew Button and wait for your coffee to brew.
- Enjoy your first cup of delicious coffee!
What Is The H And M Button On Keurig?
The “H” and “M” buttons on a Keurig refer to the Hour and Minute buttons used for setting the time on the clock of the coffee maker. These buttons are typically used during the initial setup process to set the correct time on the Keurig. They are also used when programming the Auto On/Off feature, allowing users to set specific times for the Keurig to automatically turn on or off. By using the “H” and “M” buttons, users can easily adjust the time settings on their Keurig to suit their preferences and schedule.
How Can I Get My Keurig To Work?
- Prepare: Make sure you have enough water in the Water Reservoir.
- Power On: Press the Power Button to turn on the Keurig.
- Prime: If it’s the first time using, prime the brewer by following the setup instructions.
- Place K-Cup: Lift the Handle and insert a K-Cup into the K-Cup Holder.
- Position Mug: Put a mug on the Drip Tray Plate to catch the brewed coffee.
- Select Brew Size: Choose your desired brew size using the Large Cup or Small Cup button.
- Brew: Press the selected button to start the brewing process.
- Enjoy: Once brewed, remove the mug and enjoy your freshly brewed coffee.
If you encounter any issues, refer to the Keurig user manual or contact Keurig customer service for assistance.