Quick Navigation
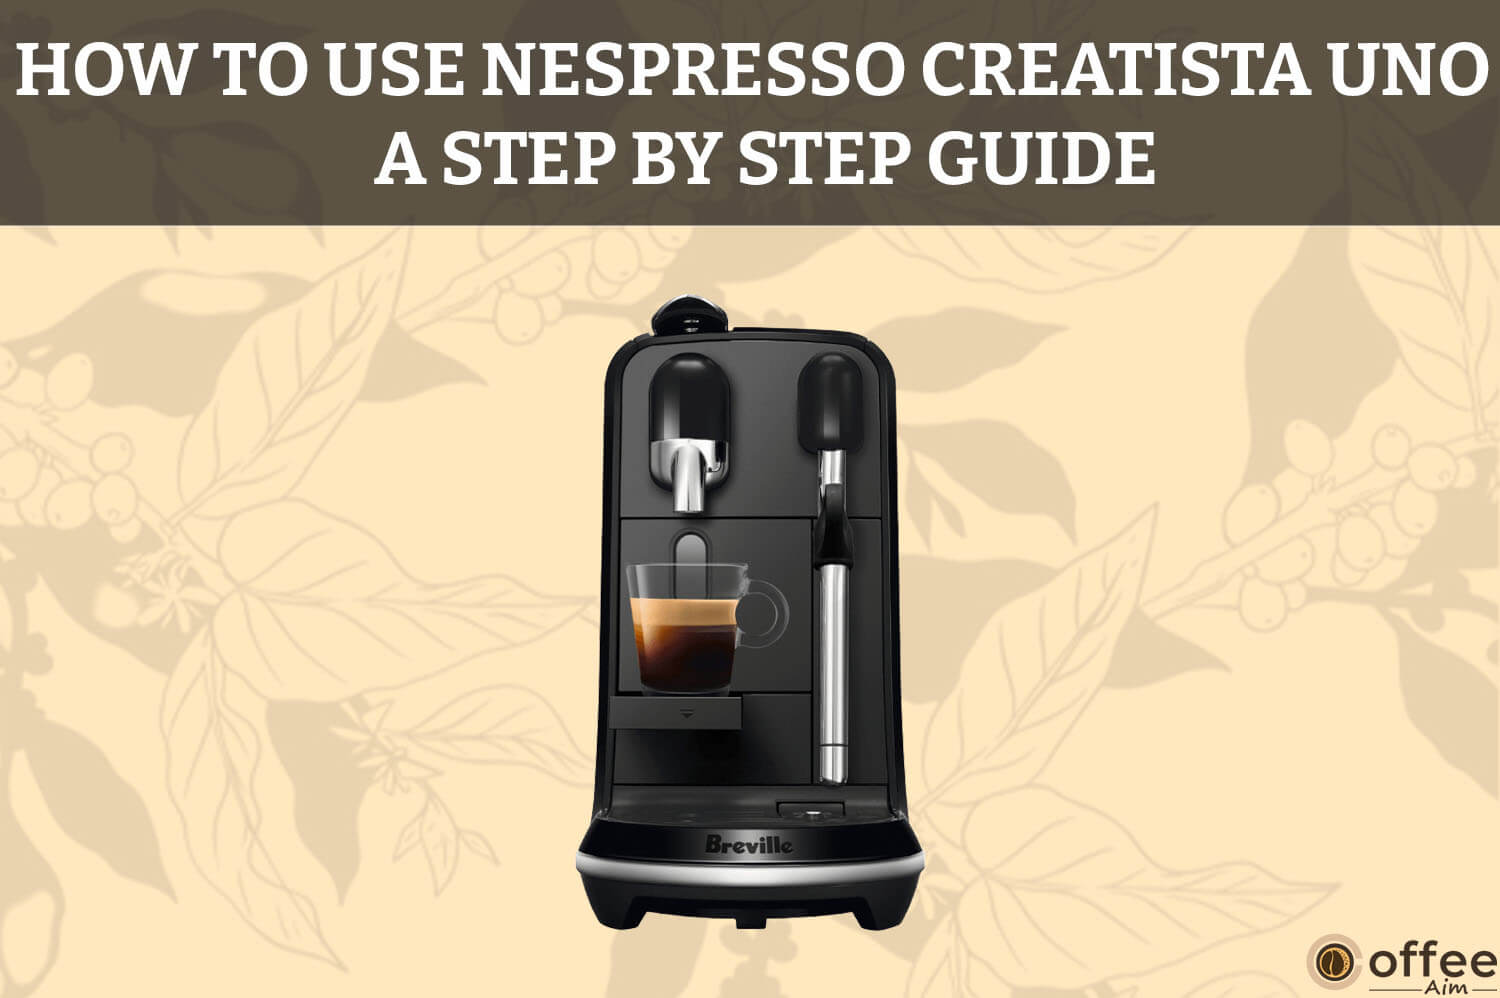
If you have recently bought a Nespresso Creatista Uno coffee machine or have had it for a while but are having trouble operating it, don’t worry; I’m here to tell you all about this machine. Yes, from the beginning to the very end. So, get ready.
Safety Precautions
Read the precautions carefully before going to make coffee. Because like any appliance, the Nespresso Creatista machine has to be handled with care or it will not only spoil your coffee but also prove to be dangerous for you (electrical shock, etc.).
So if you want to drink a cup of coffee with family and friends every morning without any accidents, read all the safety precautions.
Features Of Nespresso Creatista Uno
So guys, let me tell you one thing for your information the features of the Nespresso Creatista Uno coffee machine are unique. It works easily on normal voltages, and the water tank capacity is just above the board. If these specifications are not suitable for your home, you may choose to return the coffee maker for a refund or exchange.
The features of the Nespresso Creatista Uno coffee machine are given below.
| Features | Description |
| Voltage | 220-240 V |
| Frequency | 50 Hz |
| Power | 1300-1600 W |
| Maximum pressure | 19 bar / 1.9 MPa |
| Weight | 5.2 kg / 11.4 Ibs |
| Water tank capacity | 1.5 L / 50fl.oz |
| Dimensions in cm(WxDxH) | Width: 17 cm Depth: 30.9 cm Height: 40.9 cm |
| Dimensions in inch (WxDxH) | Width: 6.7 in Depth: 12.2 in Height: 16.1 in |
What’s Inside The Box
Now it’s time to unbox your Nespresso machine, but before that, it’s important for you guys to know in detail what things come in the box because when using anything for the first time, it’s good to start with basics. One thing more, if any part of your machine is missing or damaged, then you can avail of the replacement policy. To know further about this, see the limited guarantee section. There are six items included in the pack; a description of each is given below:
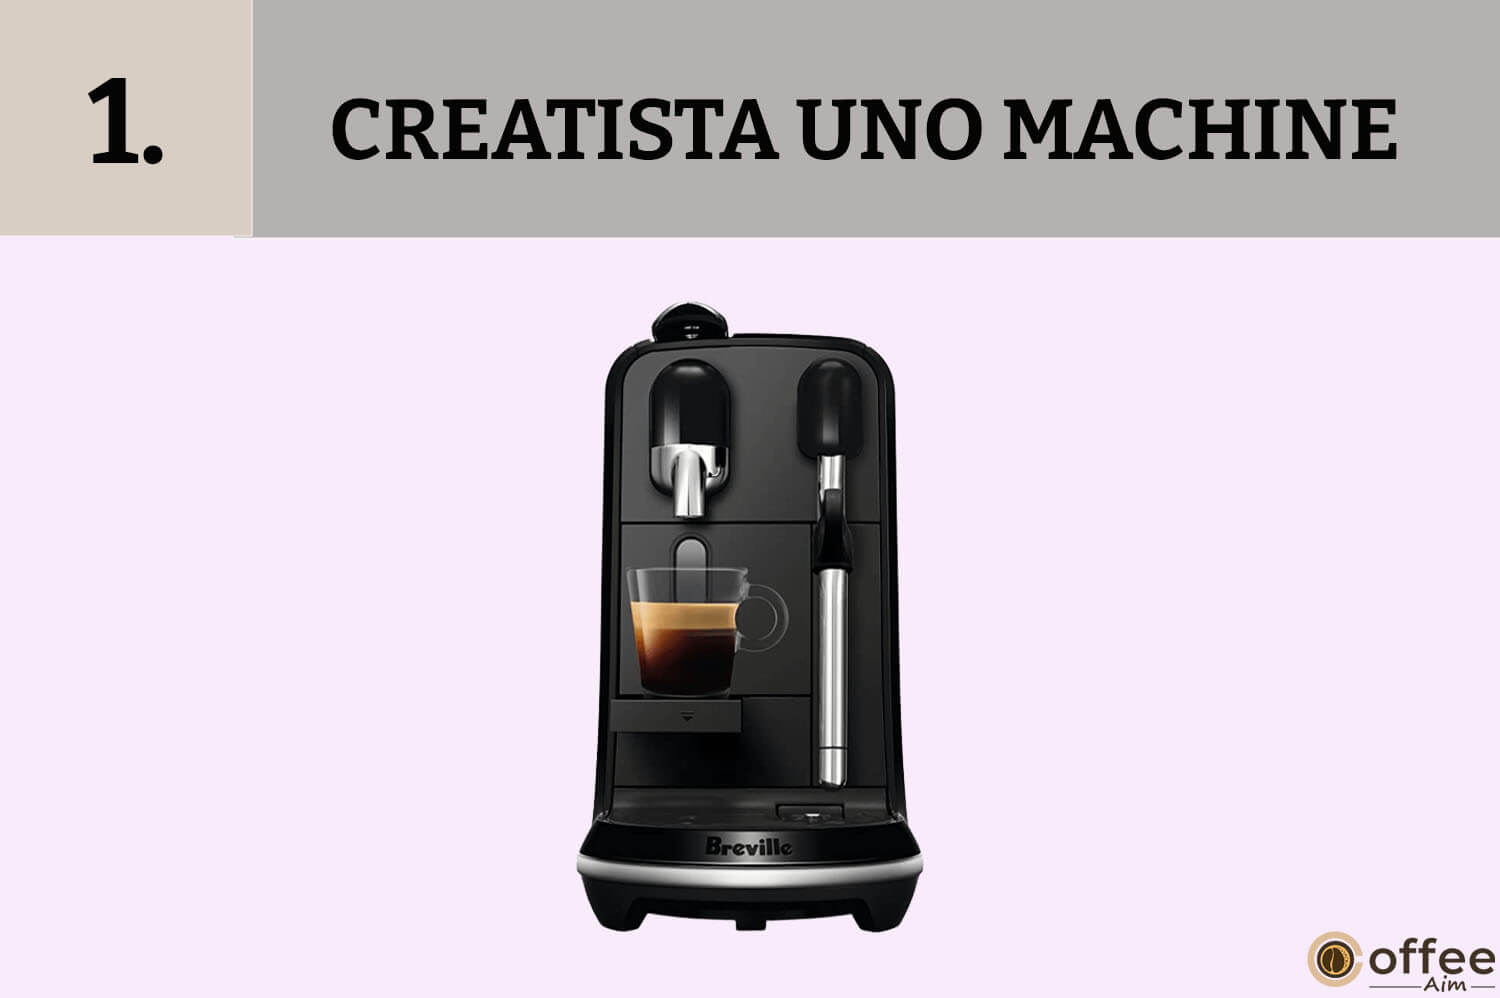
1. Creatista Uno Machine
The first thing you will find in the box is your favorite brewer Creatista Uno Machine. This is the centerpiece and main body of the brewer and consists of all features and the control panel on its interface.
2. Tasting Box Of Nespresso Capsules
A tasting box of Nespresso capsules typically includes a selection of Nespresso’s popular coffee capsules in various intensities and flavors. The exact contents of the box can vary, but it usually includes a variety of capsules, each with a different aroma and taste profile.

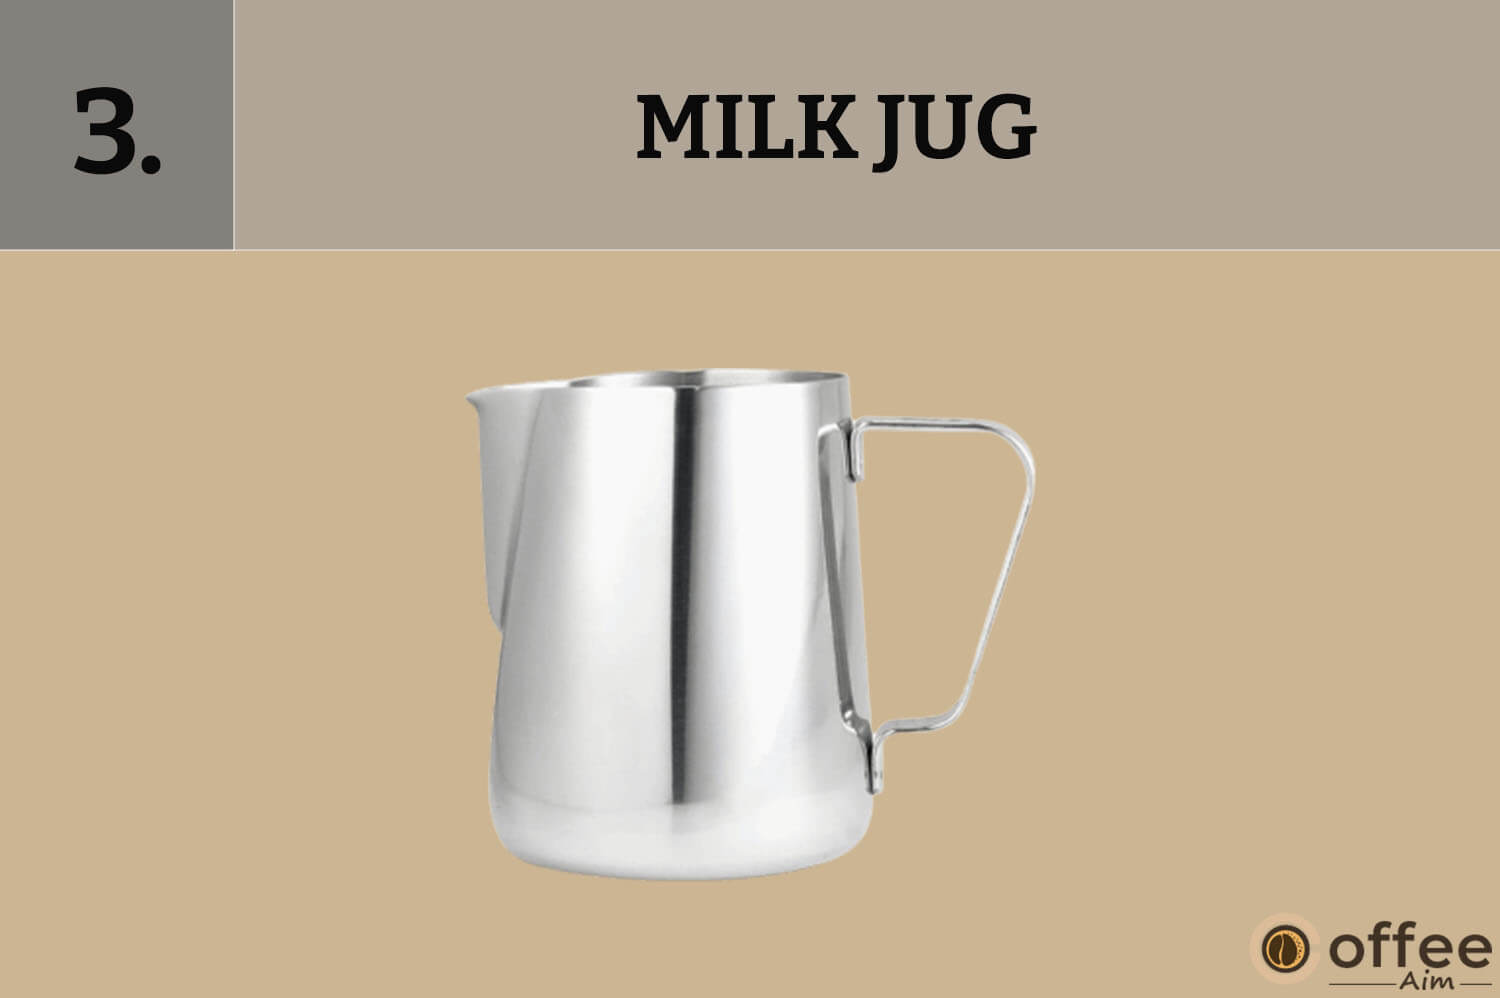
3. Milk Jug
The next thing you will find in the box is the milk jug of Nespresso Creatista Uno which is a stainless steel jug with a capacity of 16 oz (480 ml) that is used to froth milk for creating creamy, frothy milk-based coffee drinks such as cappuccinos and lattes.
4. Nespresso Welcome Brochure
The Nespresso Welcome Brochure is a printed guide that comes with Nespresso Creatista Uno, introducing users to the Nespresso system and providing information on how to use and maintain their machines.

5. User Manual
A user manual is a document that comes with Nespresso Creatista Uno. It provides detailed information on how to use and maintain a product. It provides instructions on how to properly use the machine, including how to make coffee, how to program settings, and how to clean and maintain the machine.

6. 1 × Water Hardness Test Strip
Nespresso Creatista Uno also comes with a water hardness test strip which is a small paper or plastic strip that is designed to test the hardness of the water. The strip is coated with chemicals that react with the minerals in the water and change color in response to the level of hardness.

Basic Parts Of Nespresso Creatista Uno Coffee Machine
The Nespresso Creatista Uno coffee machine consists of eleven parts. I am going to discuss each part in detail. So after reading this guideline, all parts become easy to comprehend, and you can effortlessly assemble parts together and make coffee easily without having any kind of trouble. Let’s start!
1. Control Panel
The control panel is the central interface that allows the user to interact with the machine. It typically features buttons or touchscreens for selecting the desired coffee or milk beverage, adjusting settings, and initiating the brewing process.
2. Water Tank And Lid
The water tank is a removable reservoir that holds the water used for brewing coffee or steaming milk. It typically features a lid to prevent debris or contaminants from entering the tank.
3. Removable Pin Cleaning Tool
The pin cleaning tool is a small, thin metal or plastic tool used to remove any debris or buildup that may accumulate in the small holes or nozzles of the machine, such as the holes in the coffee or milk frothing wand.
4. Lever For Capsule Insertion
The lever for capsule insertion is a mechanism that holds and pierces coffee capsules or pods, allowing hot water to flow through the capsule to brew a single serving of coffee or espresso.
5. Capsule Container
The capsule container is a removable bin or drawer that collects used coffee capsules after brewing. It is typically located beneath the lever for capsule insertion and must be emptied periodically.
6. Pop-Out Cup Support
The pop-out cup support is a small platform or tray that can be extended to support a coffee cup or mug during brewing. It is typically located beneath the coffee spout or nozzle.
7. Removable Drip Grip
The drip grip is a plastic or rubber piece that attaches to the coffee spout or nozzle and helps to prevent drips or spills when brewing. It is typically removable for cleaning.
8. Removable Drip Tray With Full Indicator
The drip tray is a removable tray located beneath the pop-out cup support that collects any spilt coffee or water during brewing. It typically features a full indicator or sensor that alerts the user when the tray needs to be emptied.
9. Easy Clean Steam Wand
The steam wand is a small nozzle used to froth or steam milk for milk-based coffee drinks. An easy-clean steam wand typically features a non-stick coating or self-cleaning mechanism that makes it easier to clean and maintain.
10. Milk Jug Temperature Sensor
The milk jug temperature sensor is a small device that can measure the temperature of milk inside the milk jug. It typically communicates with the machine’s control panel to ensure that milk is heated to the desired temperature.
11. Milk Jug
The milk jug is a container used to hold and froth or steam milk for milk-based coffee drinks. It is typically made of stainless steel or other materials that can withstand high temperatures and is designed to fit beneath the steam wand or nozzle.
Initial Setup Of Nespresso Creatista Uno
I know you are excited to make your first cup of coffee, but before heading towards brewing your coffee, you must assemble the machine properly for a smooth experience. So without wasting time let’s set up your Nespresso Creatista Uno and explore how to make delicious coffee. Let’s start!
Step 1: Cleaning
The initial step when you use the machine for the first time is to clean the water tank with water thoroughly.

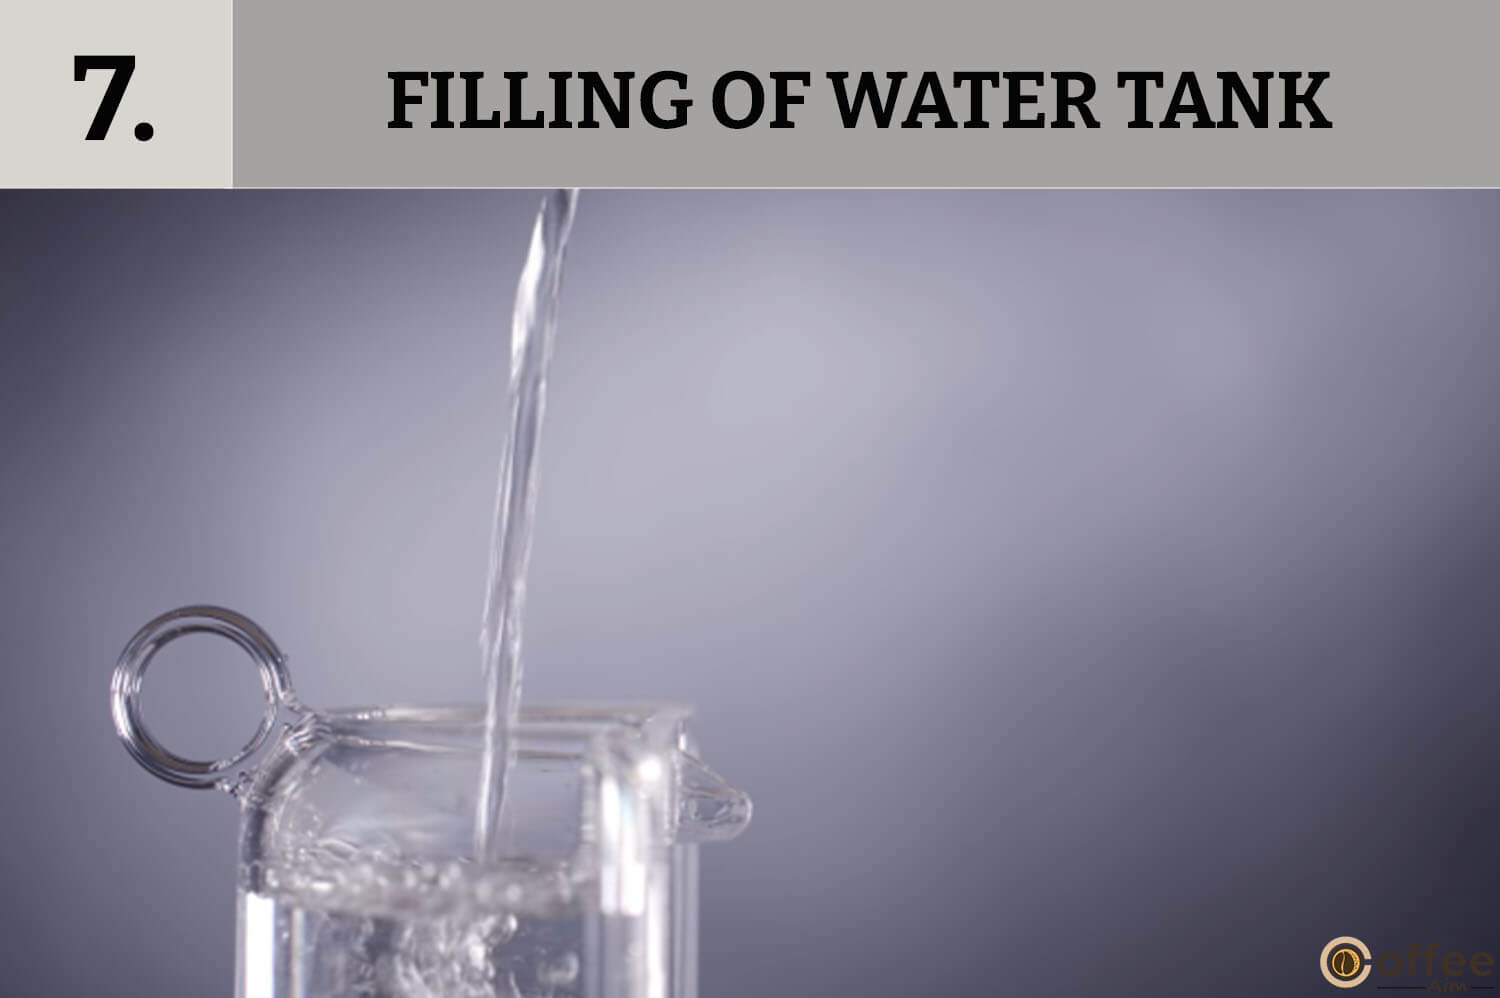
Step 2: Filling
Then fill the water tank with clean potable water.\

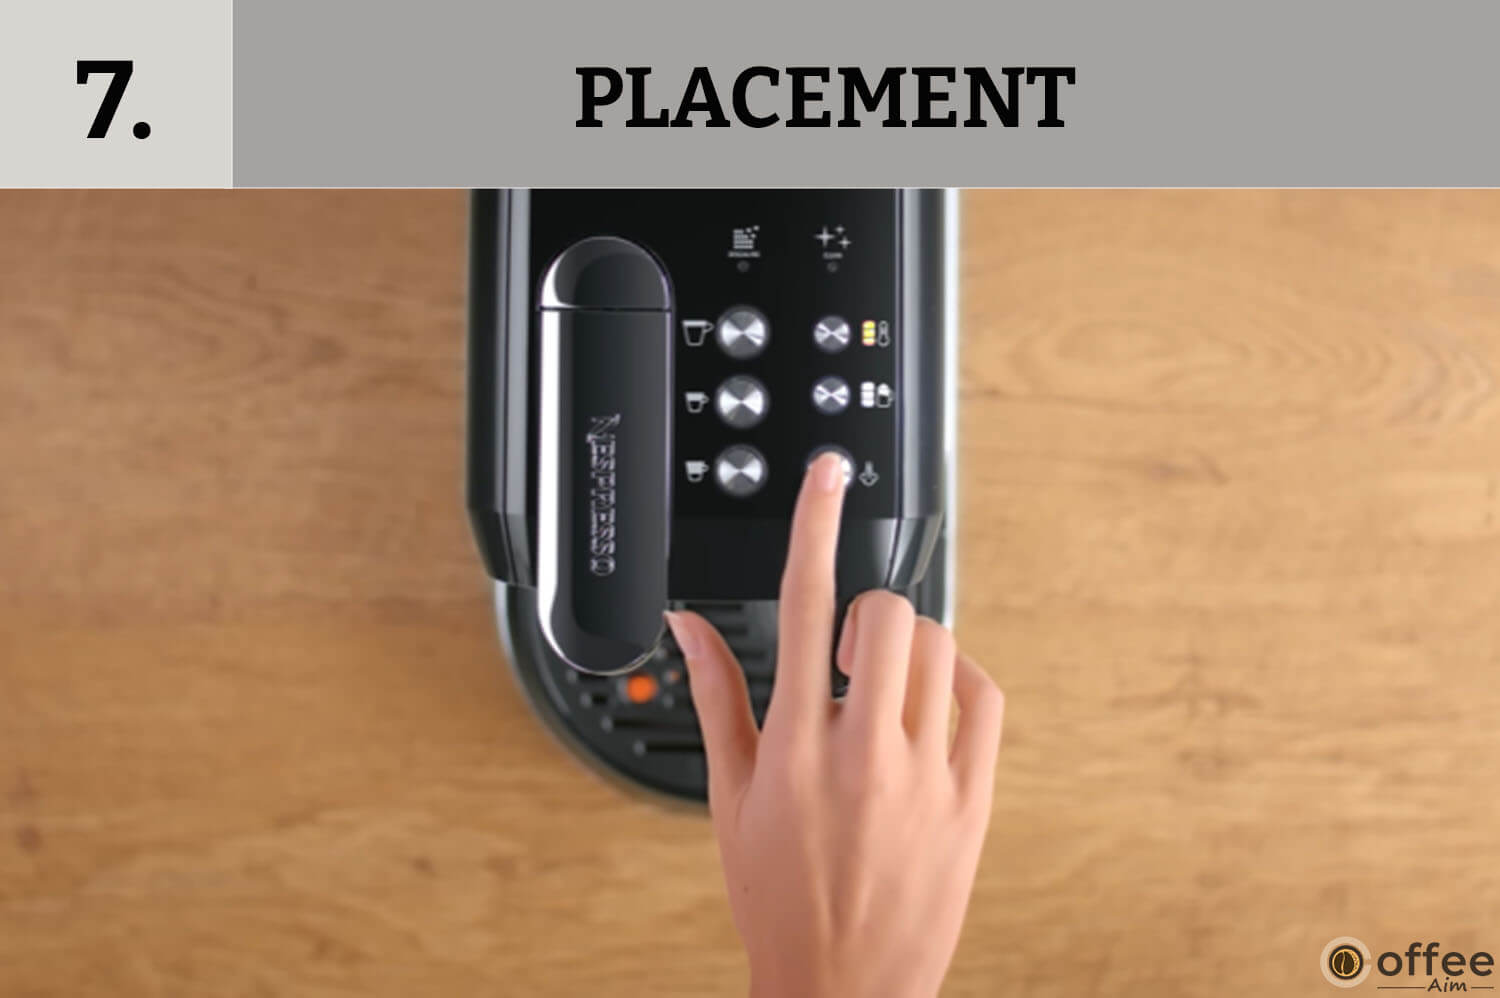
Step 3: Placement
Once you finished the cleaning process, place the water tank at the appropriate site, then fit the drip tray and capsule container.

Step 4: Plugin
Then, plug the machine into the power outlet.

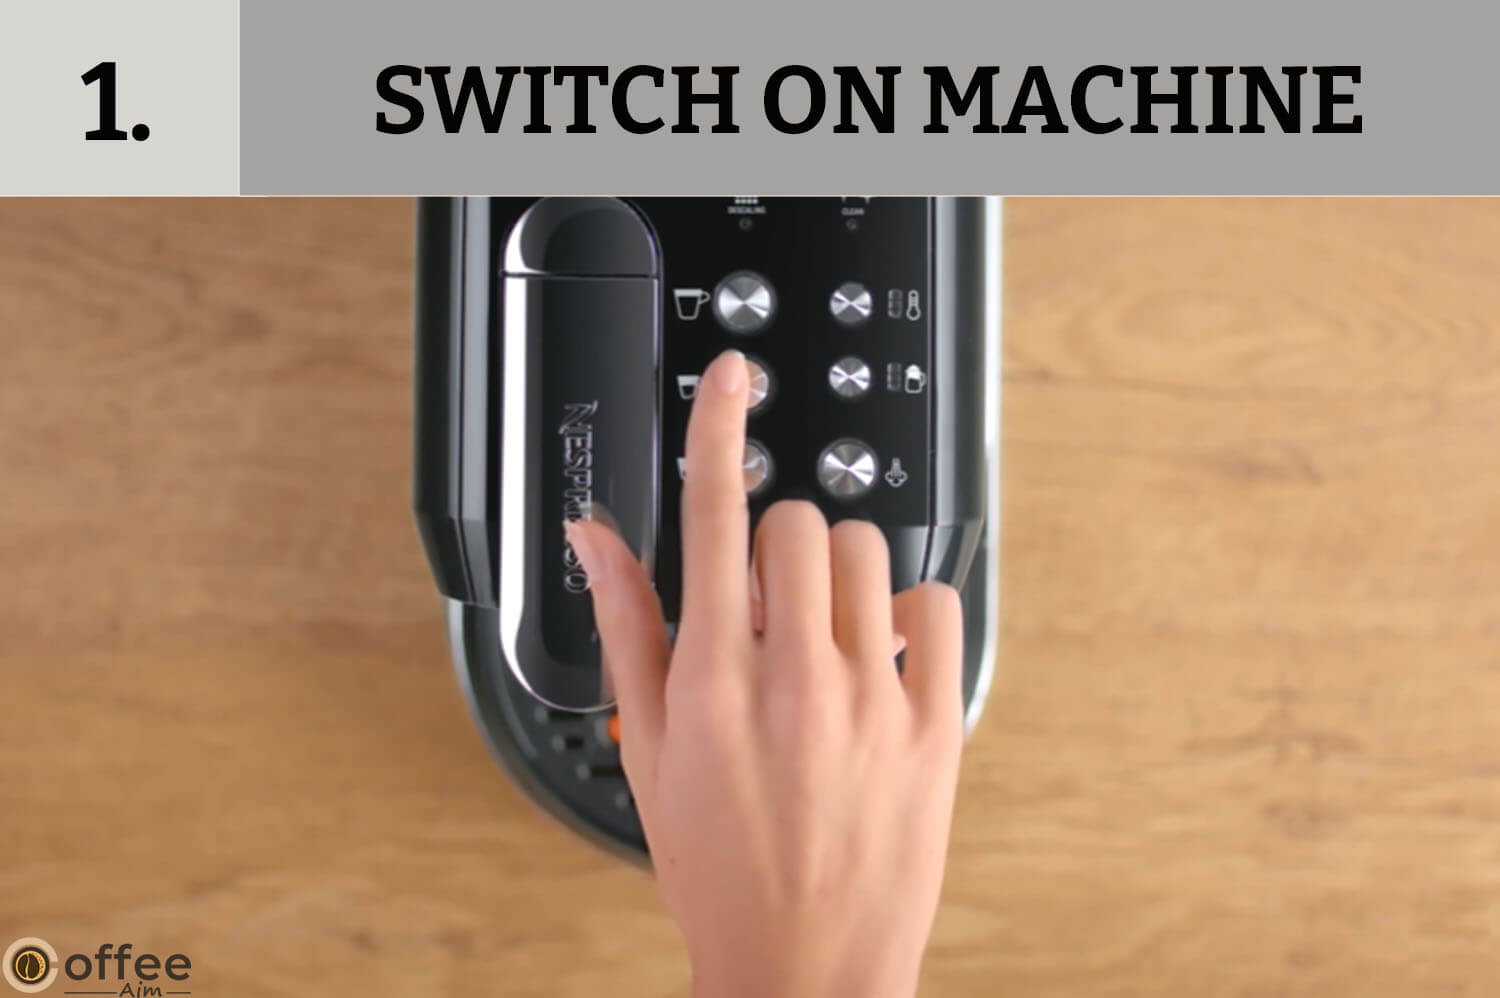
Step 5: Switch On The Machine
Afterward simply turn on the coffee machine by pressing (any of the buttons) the Lungo, Espresso, Ristretto, or Steam buttons. You must have to do every step and especially this one, with concentration because once the machine heats up, the Lungo button will flash. In general, heating action occurs in around about 3 seconds, so be attentive during the whole procedure.

Step 6: Placement Of Empty Jug
Place the empty jug beneath the coffee outlet. Then press the lungo button to start the cycle. Once the procedure is completed remove the liquid from the jug, and at last, rinse the jug.

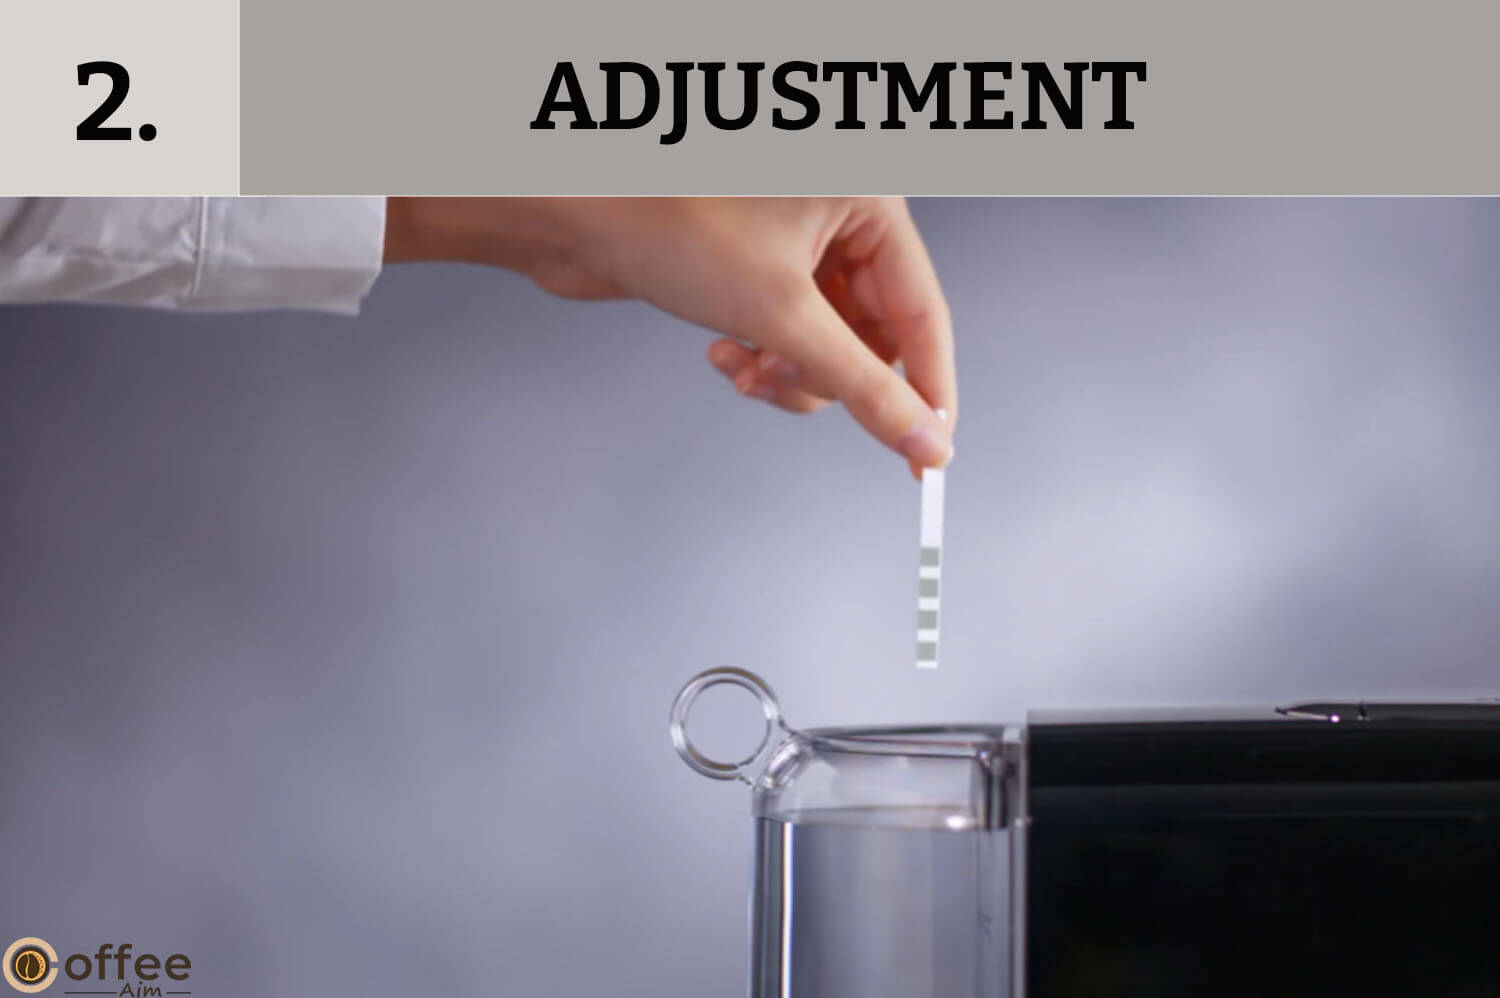
Step 7: Adjustment Of Water Hardness
As I mentioned previously in the packaging content section, the one item that comes with the Nespresso Creatista Uno Coffee machine is a water hardness test strip. With its help, you can easily adjust the hardness level of the coffee maker according to your choice by following simple steps.
First, dip the Water Hardness test Strip inside and out of the Water tank. Then wait for 1 minute. Afterwards, press and hold the temperature button and the milk froth level button for 5 seconds to set the water hardness level according to the result on the test strip. The functions of these two buttons are different. Pressing the temperature button increases the level, and pressing the milk froth button decreases the water hardness level.

Step 8: Turn Off The Machine
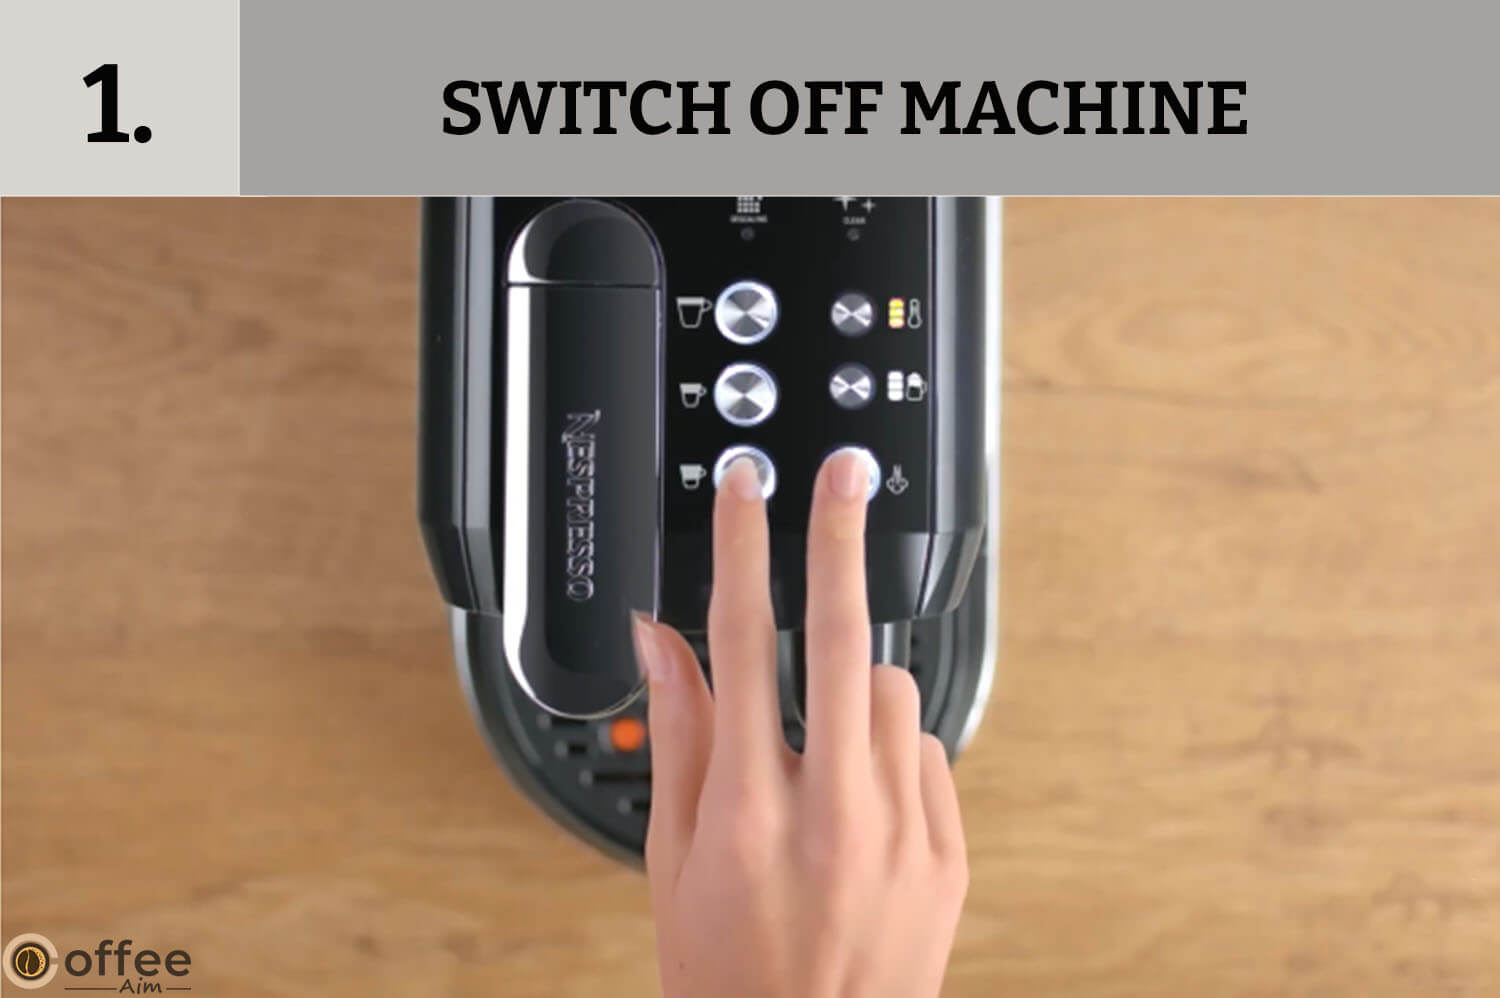
To shut down your machine, press the Ristretto and Steam buttons together and hold for 0.5 seconds till the device turns off. One thing to notice is that once the machine turns off, the steam wand removes.

Daily Coffee Making
You can easily use your Nespresso Creatista Uno coffee machine to make coffee on a daily basis without investing too much time and energy. So let’s start the journey of making coffee.
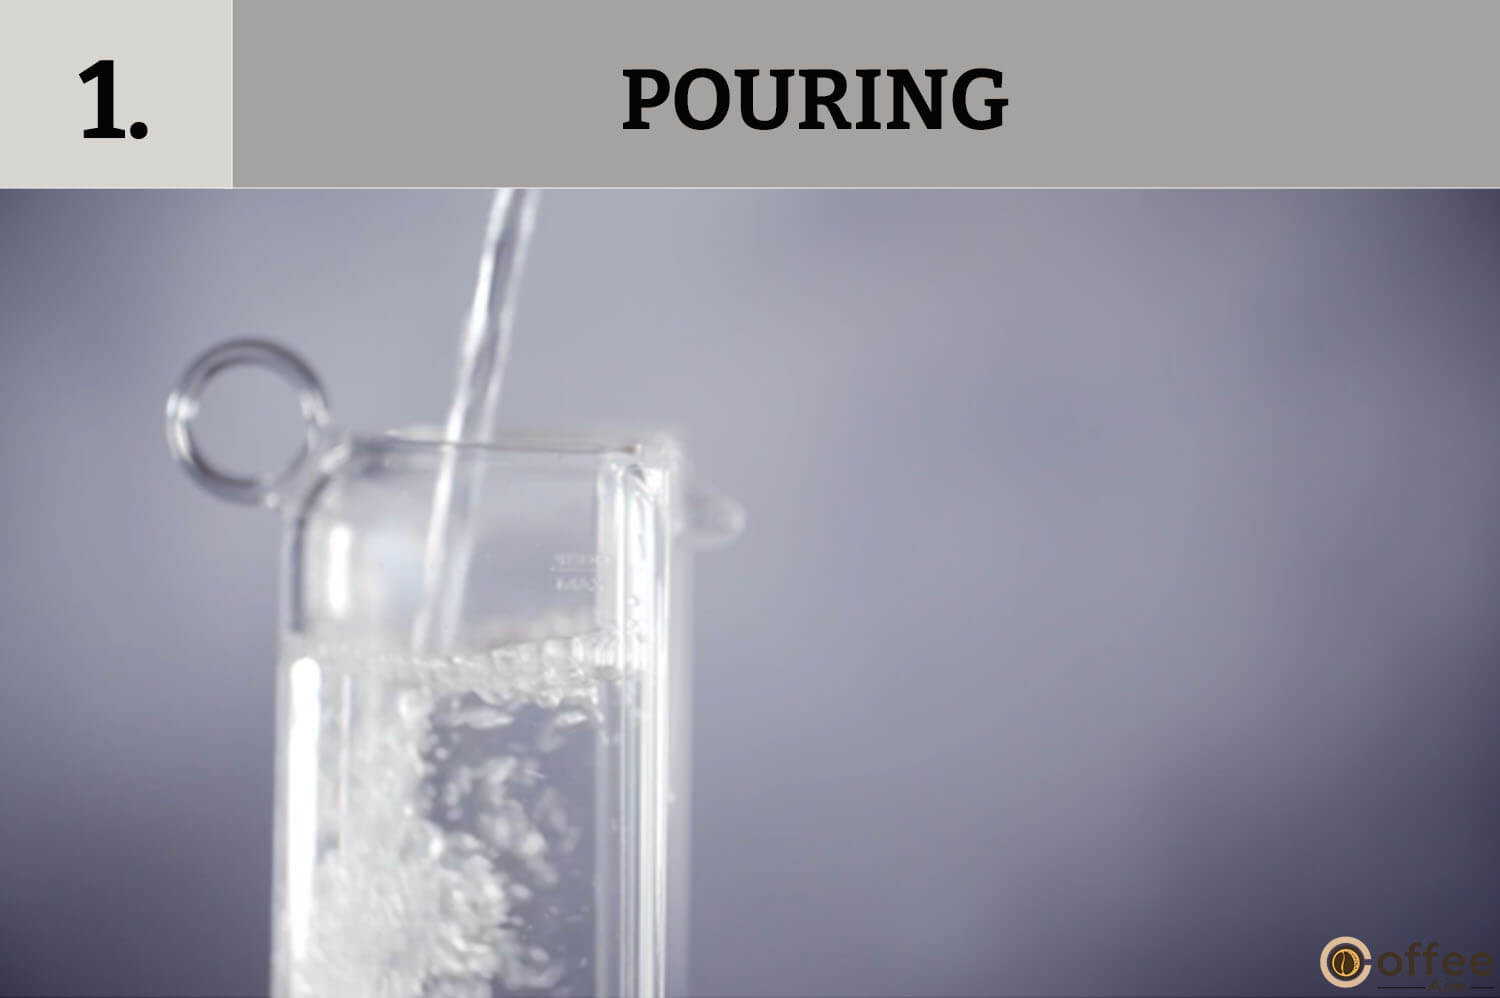
Step 1: Pouring
To make coffee, firstly fill the water tank with clean and potable water, but be careful not to overflow the tank.
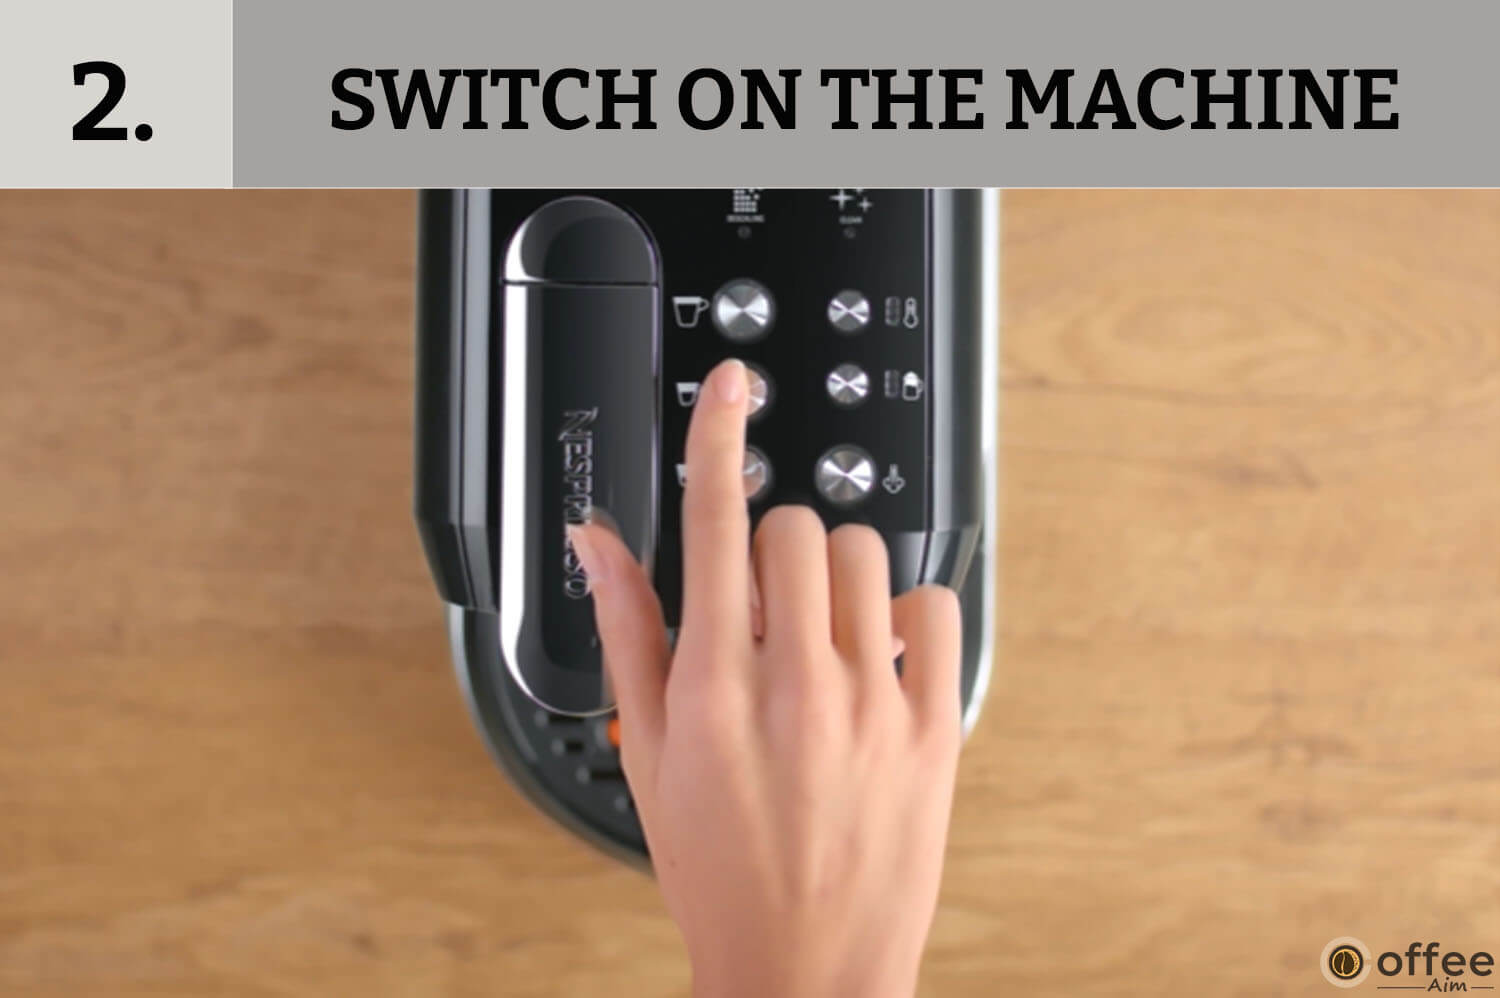
Step 2: Switch On The Machine
Afterwards, simply turn on the coffee machine by pressing the Lungo, Espresso, Ristretto, or Steam buttons. Once the machine heats up, the buttons will flash. In general, the heating action is completed in 3 seconds, so be attentive during the whole procedure.
Step 3: Placement
After turning on the machine, place a cup beneath the coffee outlet. You can also use cup support if it is required by pressing the cup support to unlock it.

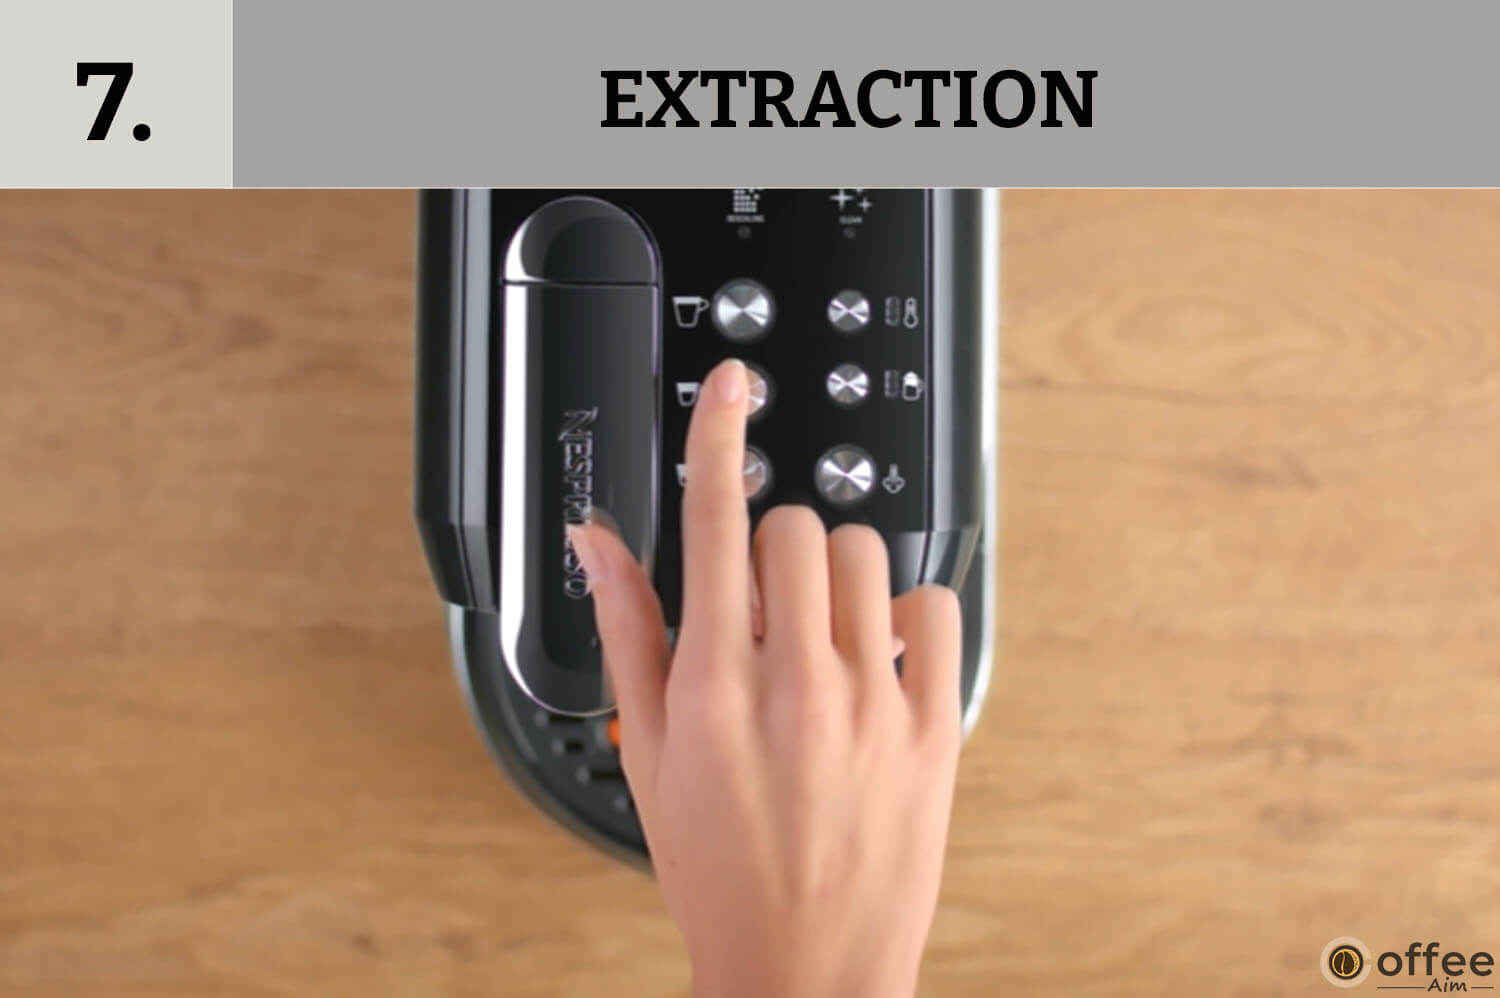
Step 4: Extraction
To start the extraction process, lift the lever and place the capsule and finally close the lever. Afterwards, push one of the coffee buttons to extract the coffee.

Nespresso OriginalLine Cup Sizes
| Ristretto | 25 ml / 0.85 fl. oz |
| Espresso | 40 ml / 1.35 fl. oz |
| Lungo | 110 ml / 3.7 fl. oz |
Step 5: To Stop The Extraction Process
Stop the coffee flow manually by pressing the coffee button before the extraction process finishes. If you don’t do this, the machine will automatically stop the extraction process.

How To Make Perfect Milk Coffee?
You can make flavorsome milk coffee with the help of the Nespresso Creatista Uno. You need to do just one thing, follow the steps in the correct order as given below:
Step 1: Fill The Water Tank
To make coffee, firstly fill the water tank with fresh and potable water, but be careful not to overflow the tank.

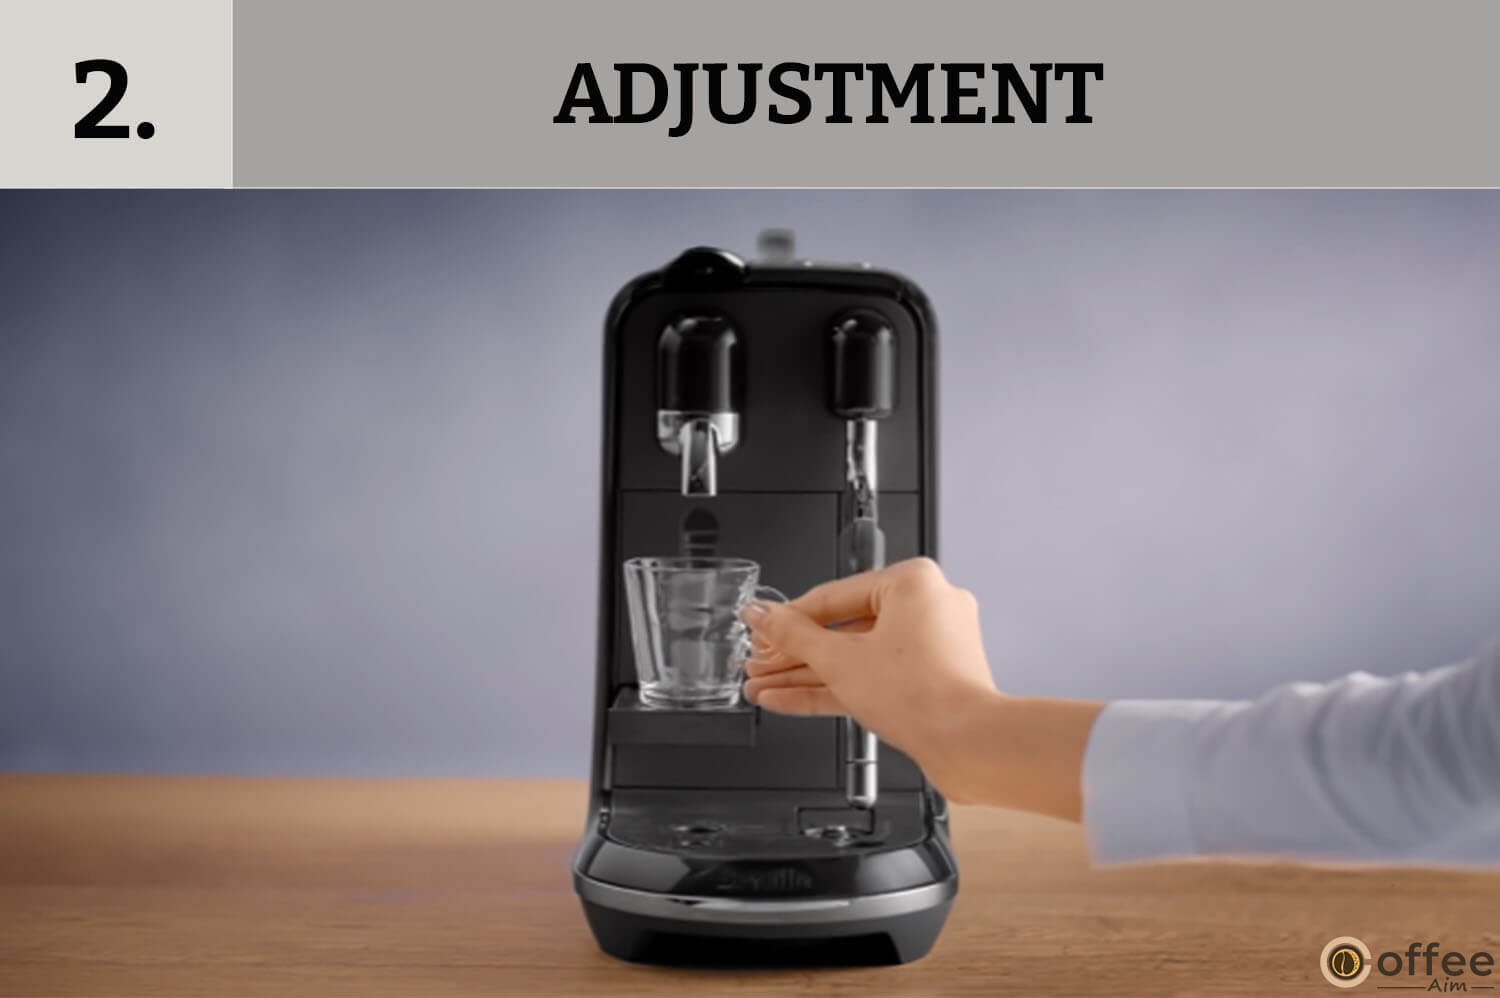
Step 2: Adjustment
Place the cup beneath the coffee outlet. If you want to adjust a small cup, then you can easily do it with the help Of cup support. You just need to press the cup support to unlock it.
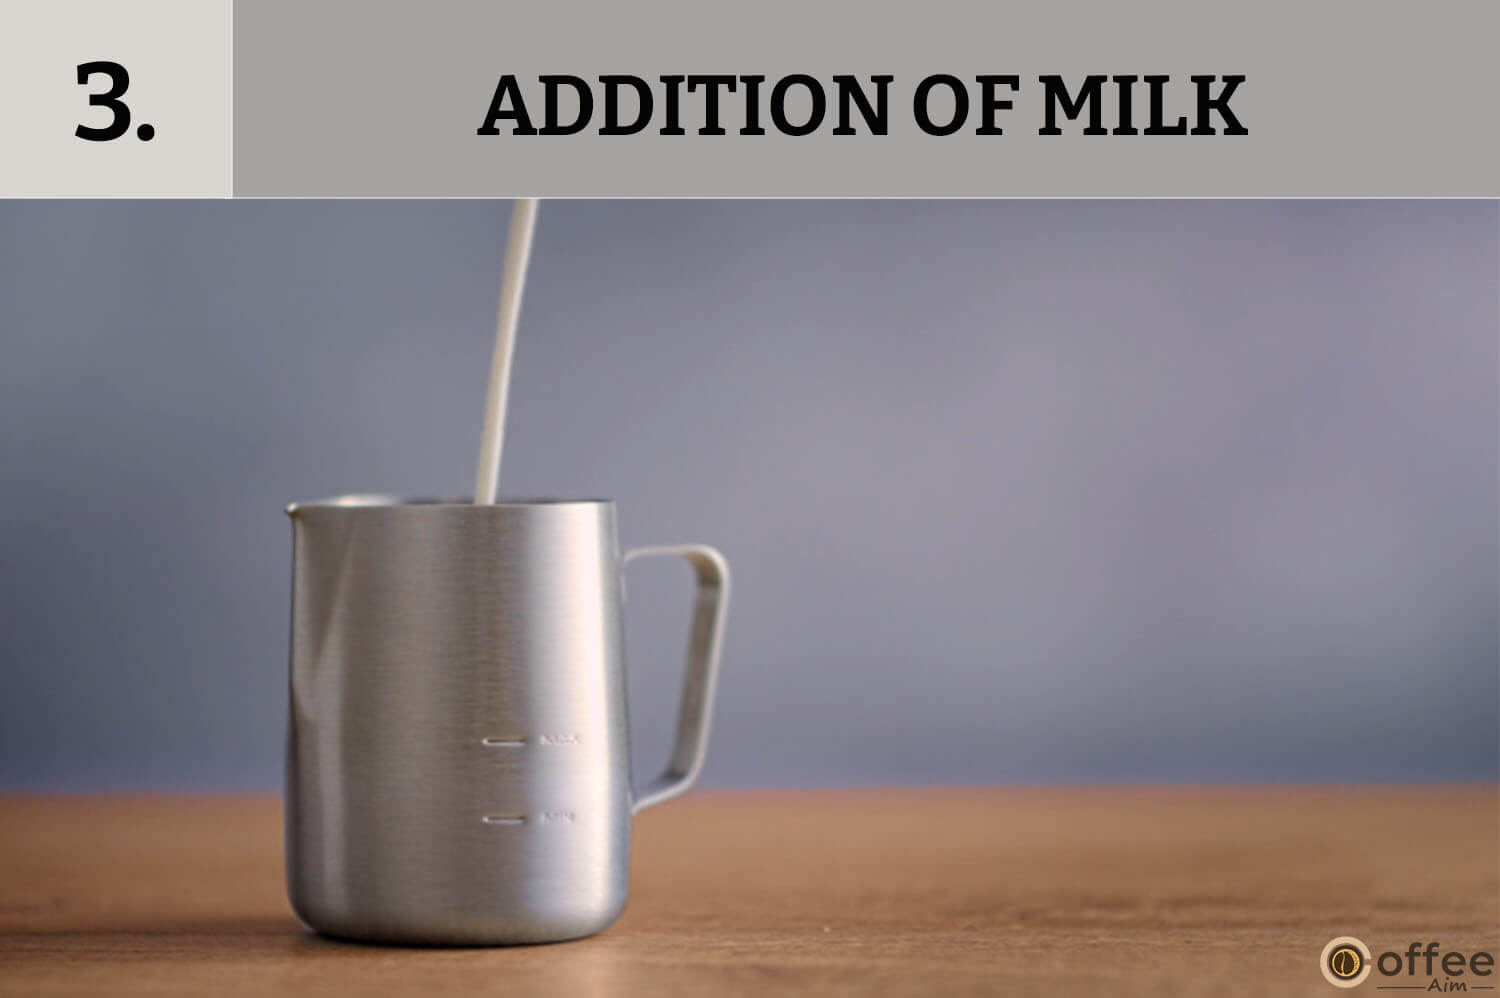
Step 3: Addition Of Milk
Next, take out some fresh milk from the refrigerator and pour it into a milk jug. Maximum and minimum levels are marked on the inside, and outside of the milk jug, so you can fill the jug with milk without any hesitation.
Step 4: Lift The Steam Wand
After filling the jug with milk, raise the steam wand and place it in the middle of the milk jug.

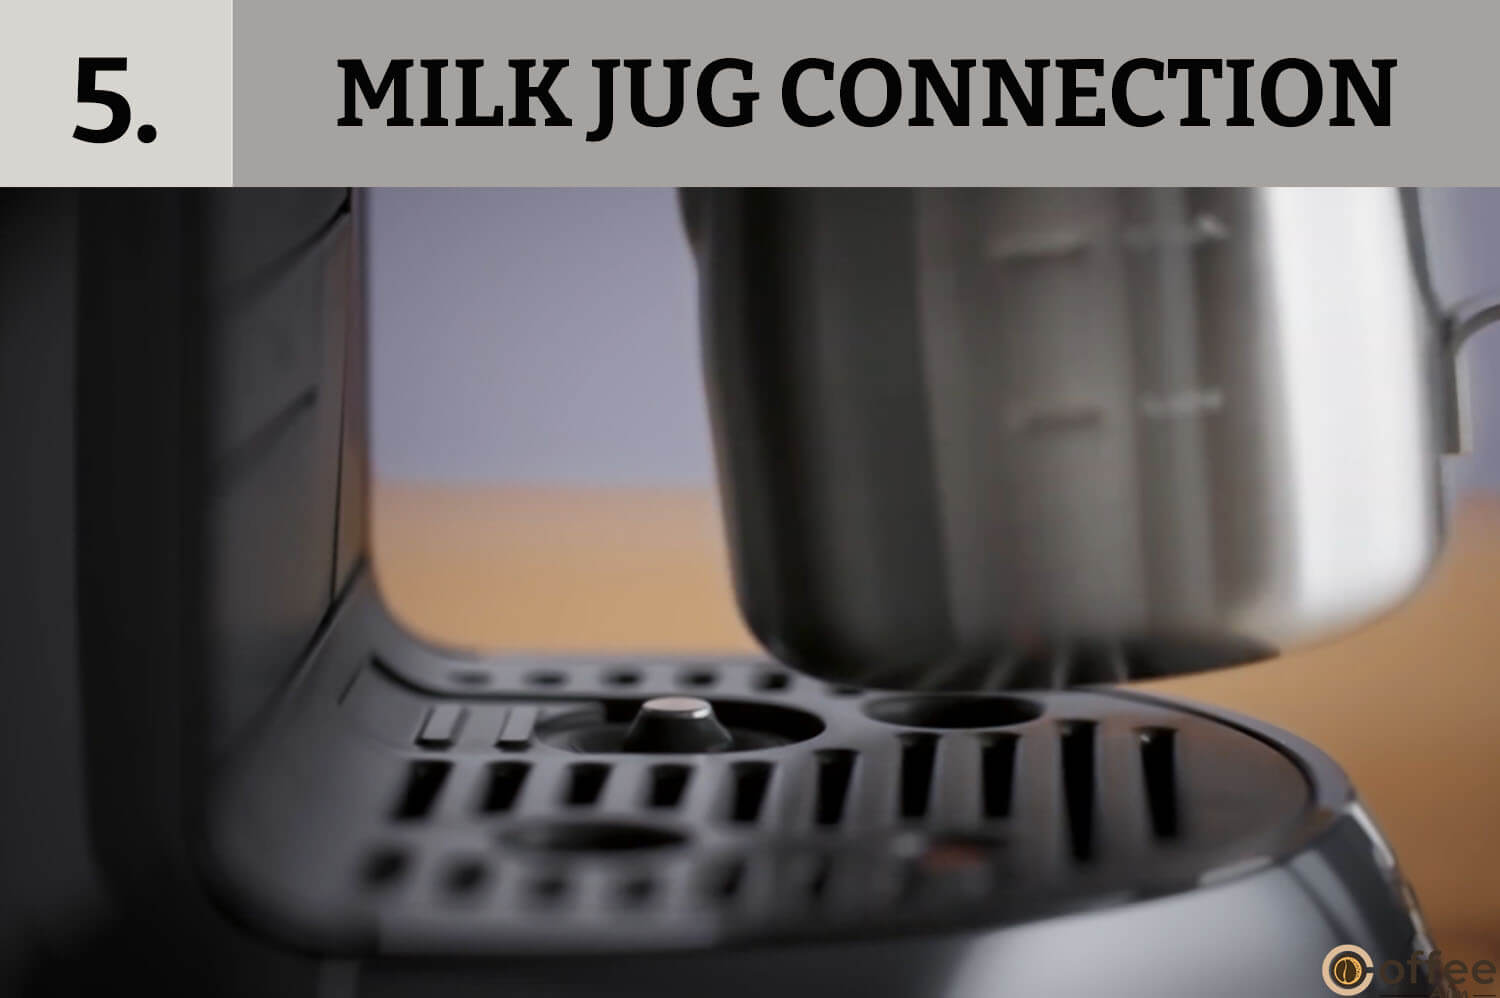
Step 5: Connection Of Milk Jug
Before placing the steam wand into a milk jug, make sure that the milk jug makes the connection with the temperature sensor present in the drip tray.

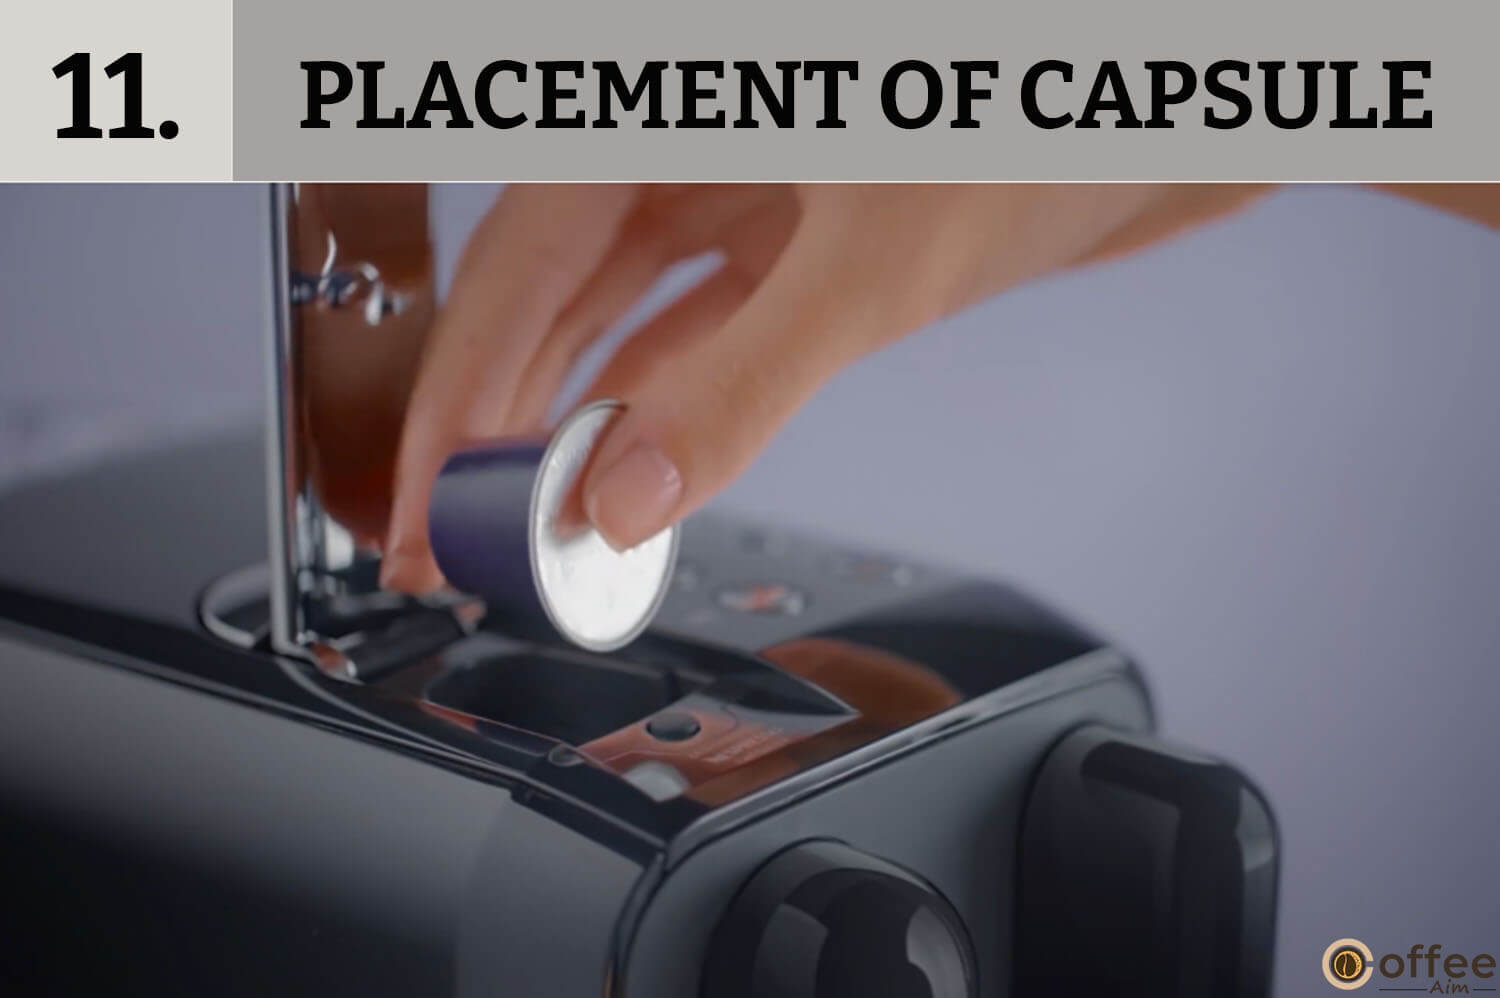
Step 6: Placement Of Capsule
To extract the coffee, lift the lever and insert the capsule and then close the lever.

Step 7: Extraction
After the placement of the capsule, press one of the coffee buttons to begin the extraction process of coffee.
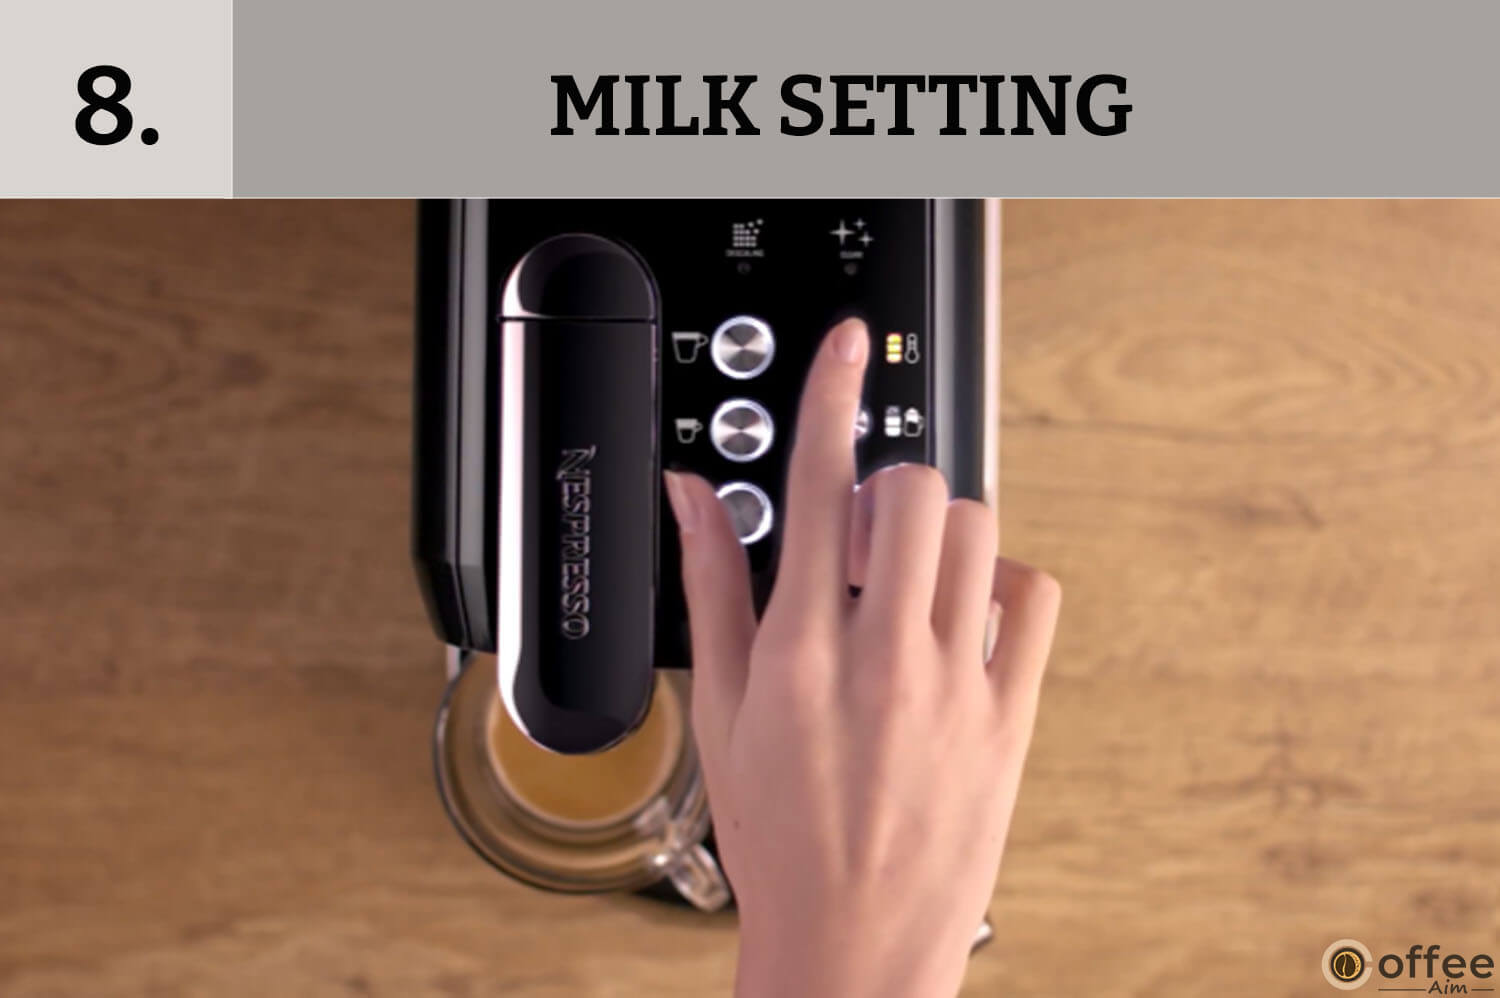
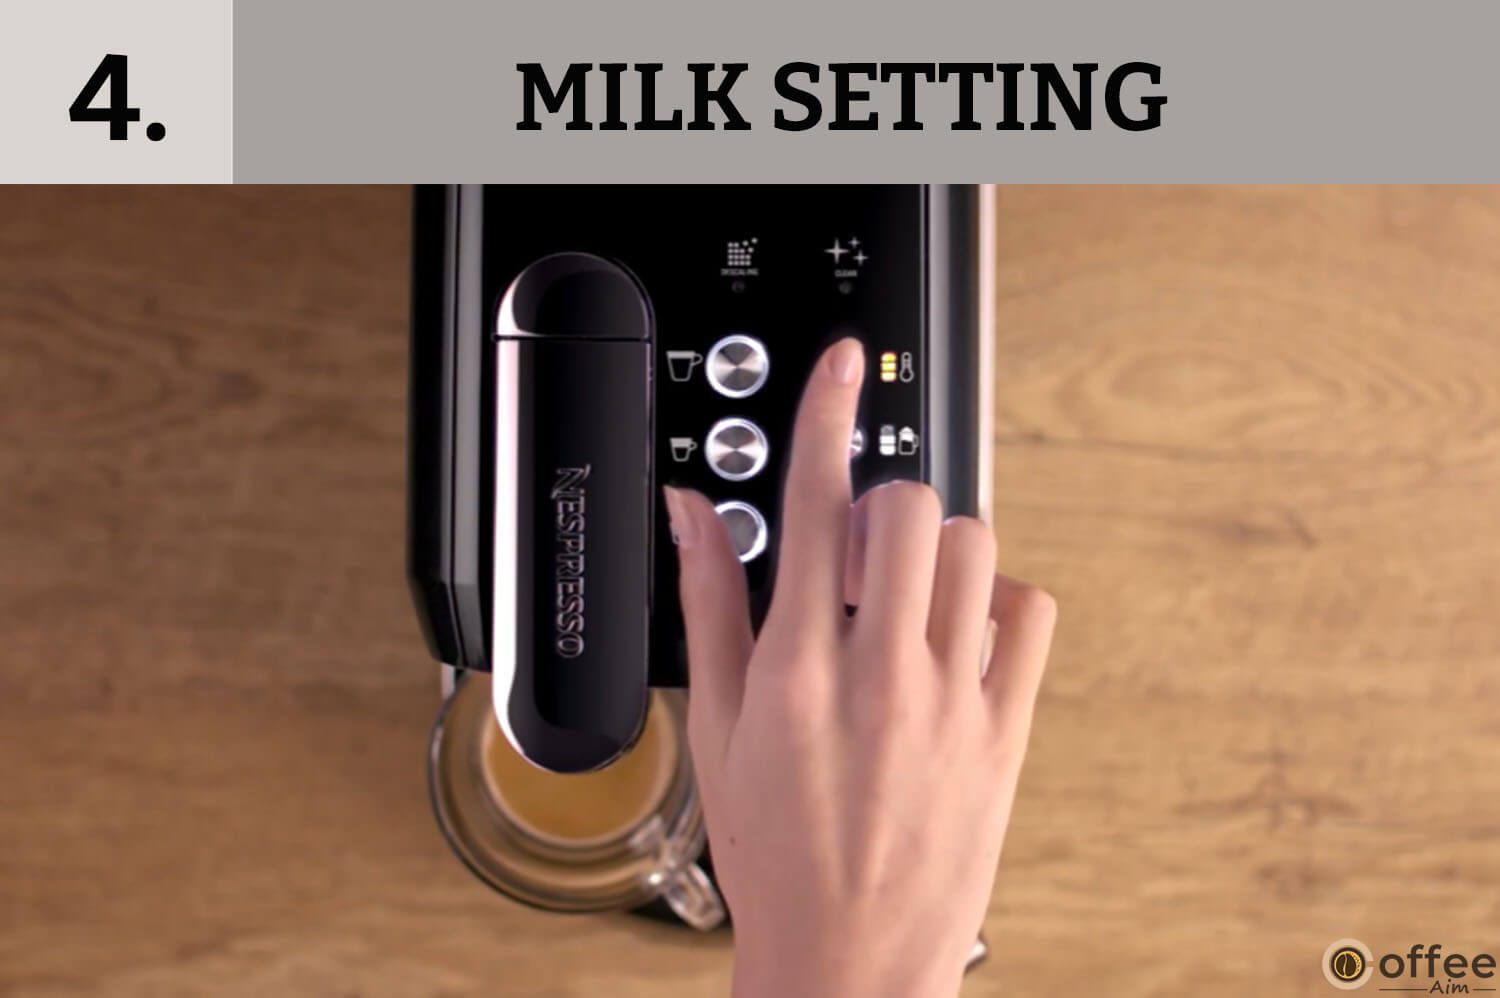
Step 8: Milk Setting
When the extraction process is ended, select the milk setting to adjust the coffee according to your taste. So are you guys ready to take the first sip of your coffee? You are just a few steps away from it. Be patient!
Different levels of milk temperature and froth level settings are shown below:
Milk Temperature Setting
To adjust the milk temperature, you can set levels 1, 2, or 3 accordingly. If you like cold coffee, you have to press level 1, but if you want to drink hot coffee, set level 3 and level 2 for the ideal temperature.
| Level | Description |
| 1 | Cool |
| 2 | Ideal / idéal |
| 3 | hot / Chaud |
Milk Froth Level Setting
Similar to the milk temperature setting, you can easily adjust the milk froth level according to your choice and preferred drink.
| Level | Description |
| 1 | Flat White |
| 2 | Cappuccino |
| 3 | Latte Macchiato |
Step 9: Milk Frothing Process
After adjusting the milk setting, begin the frothing milk process by pressing the steam button.

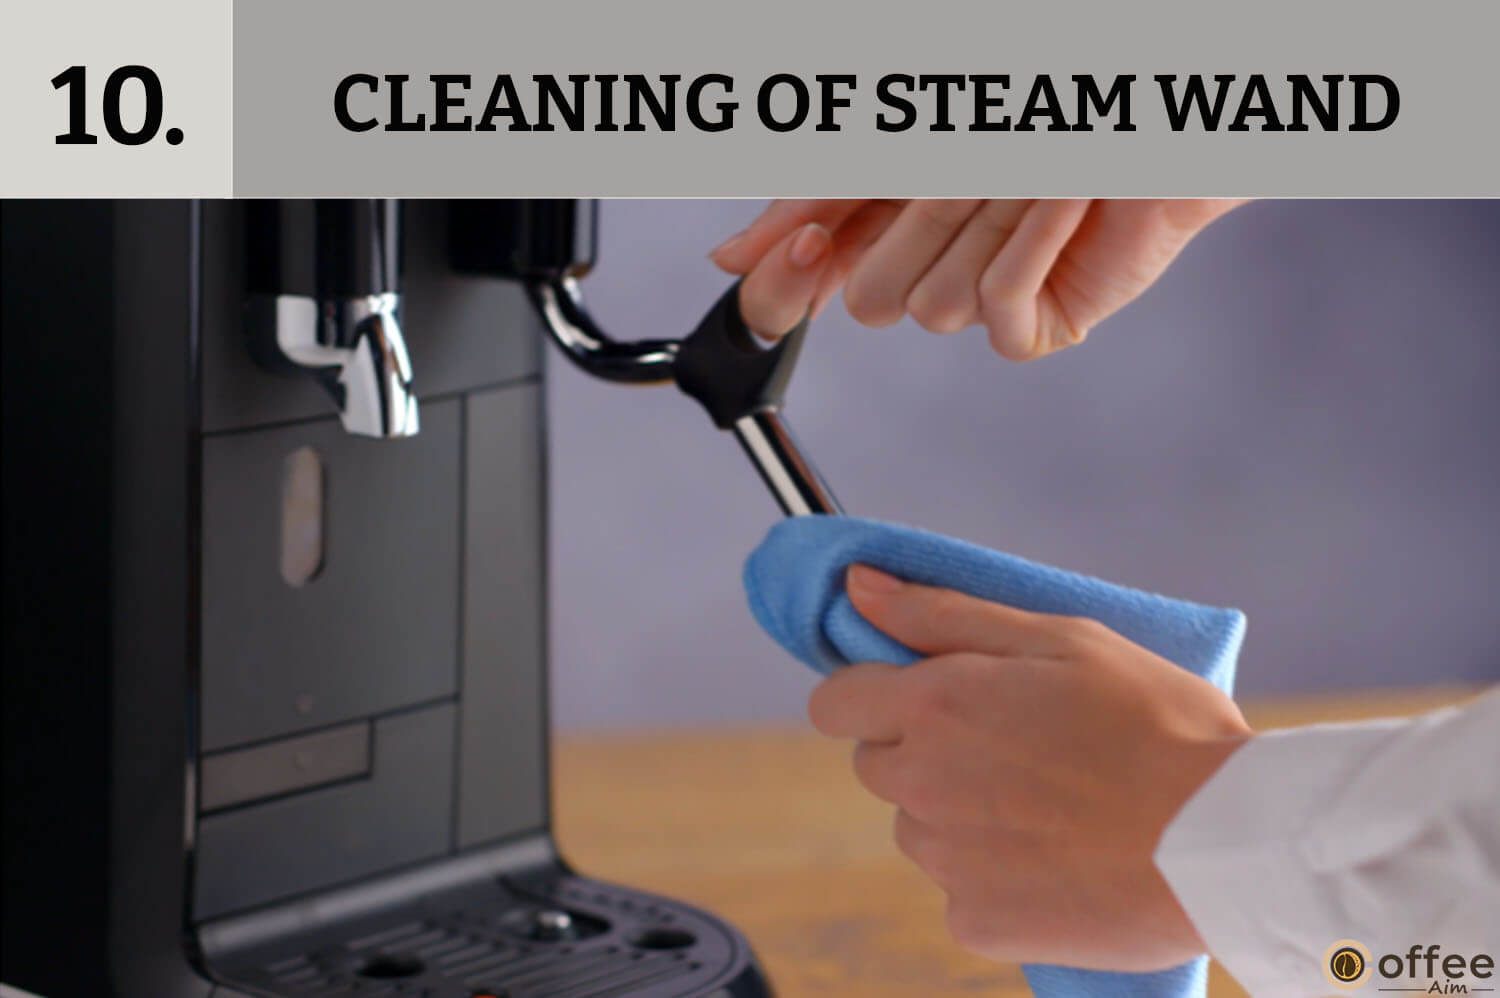
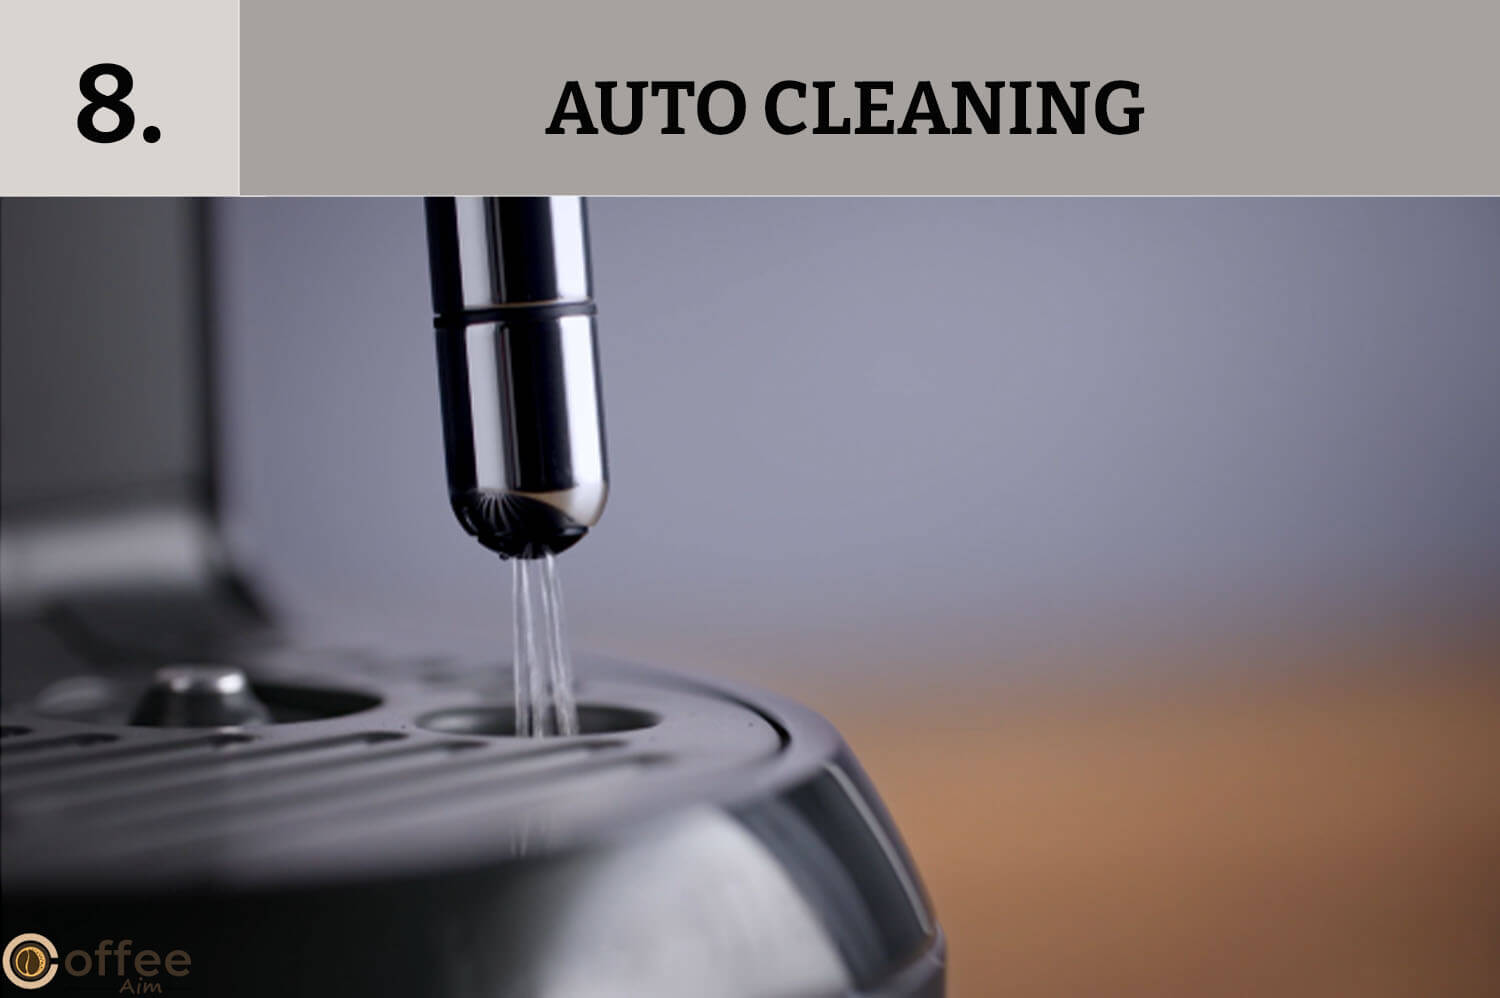
Step 10: Cleaning Of Steam Wand
When the frothing process is completed, raise the steam wand and wipe it with a moist cloth, and then remove the milk jug.
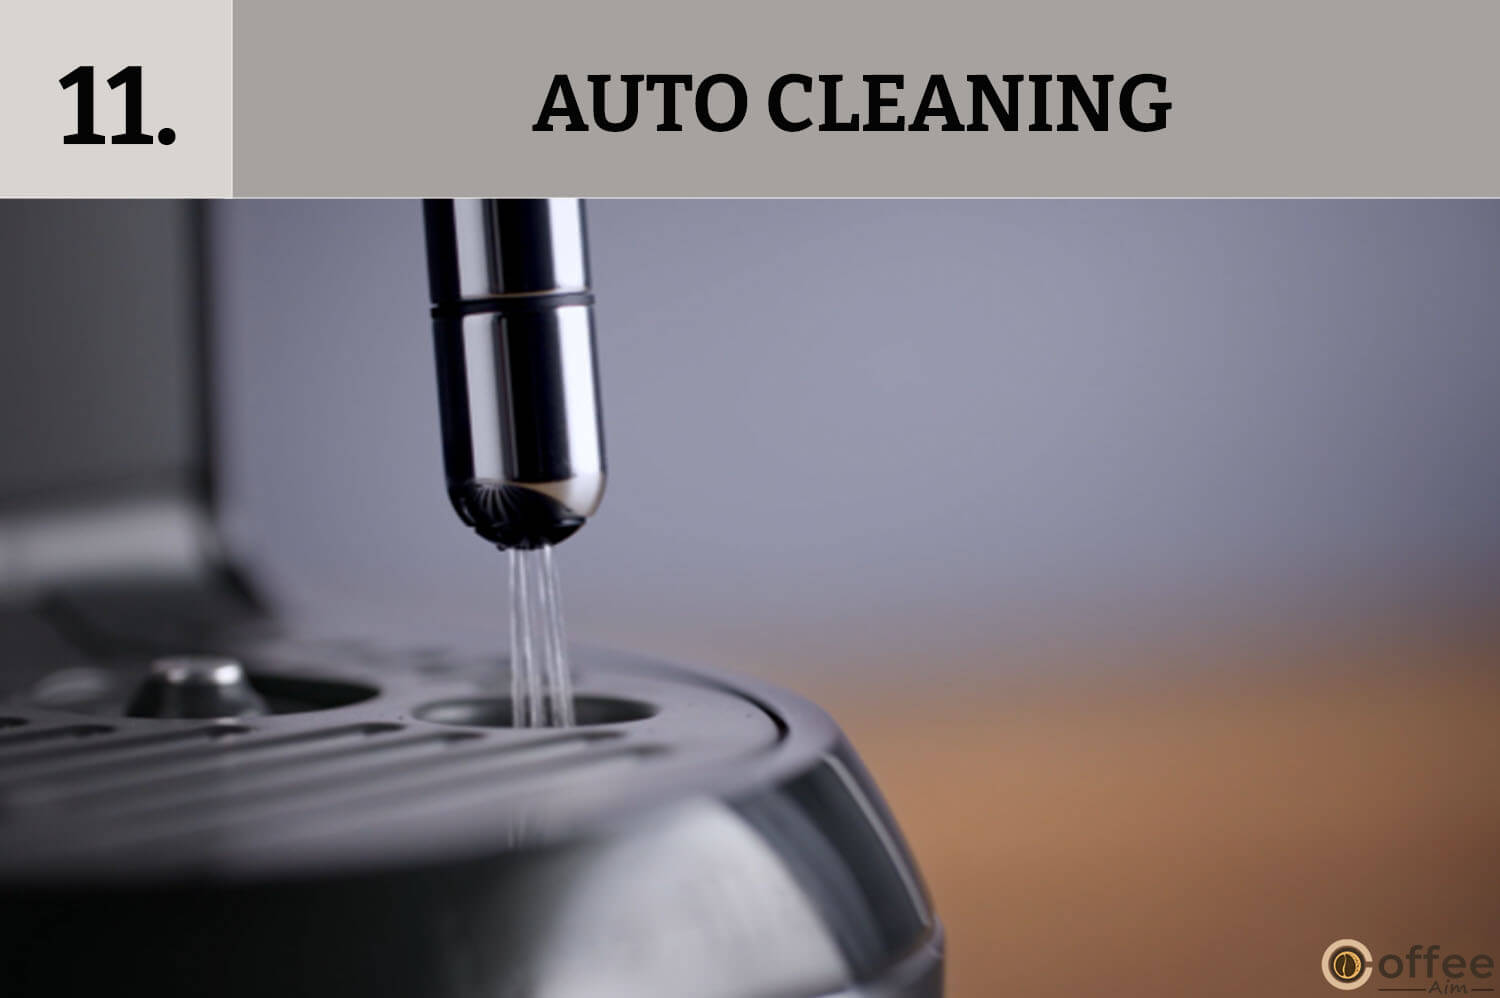
Step 11: Auto Cleaning
After wiping the steam wand, allow the steam wand to return to its normal position, and it will auto-purge to rinse itself.
Step 12: Addition Of Milk Into Coffee
Finally, to complete the milk coffee-making procedure, pour milk into the coffee cup and enjoy your coffee.

Making Of Latte Macchiato
If you want to enjoy a delicious cup of Latte Macchiato, then you can effortlessly make top-notch quality by following simple steps with the help of the Nespresso Creatista Uno coffee machine. Some steps are the same as for simple coffee preparation, so be relaxed. The detail of each step are given below. Let’s start!
Step 1: Pouring Of Water
For making Latte Macchiato fill the water tank with clean water, but be careful not to overflow the tank.

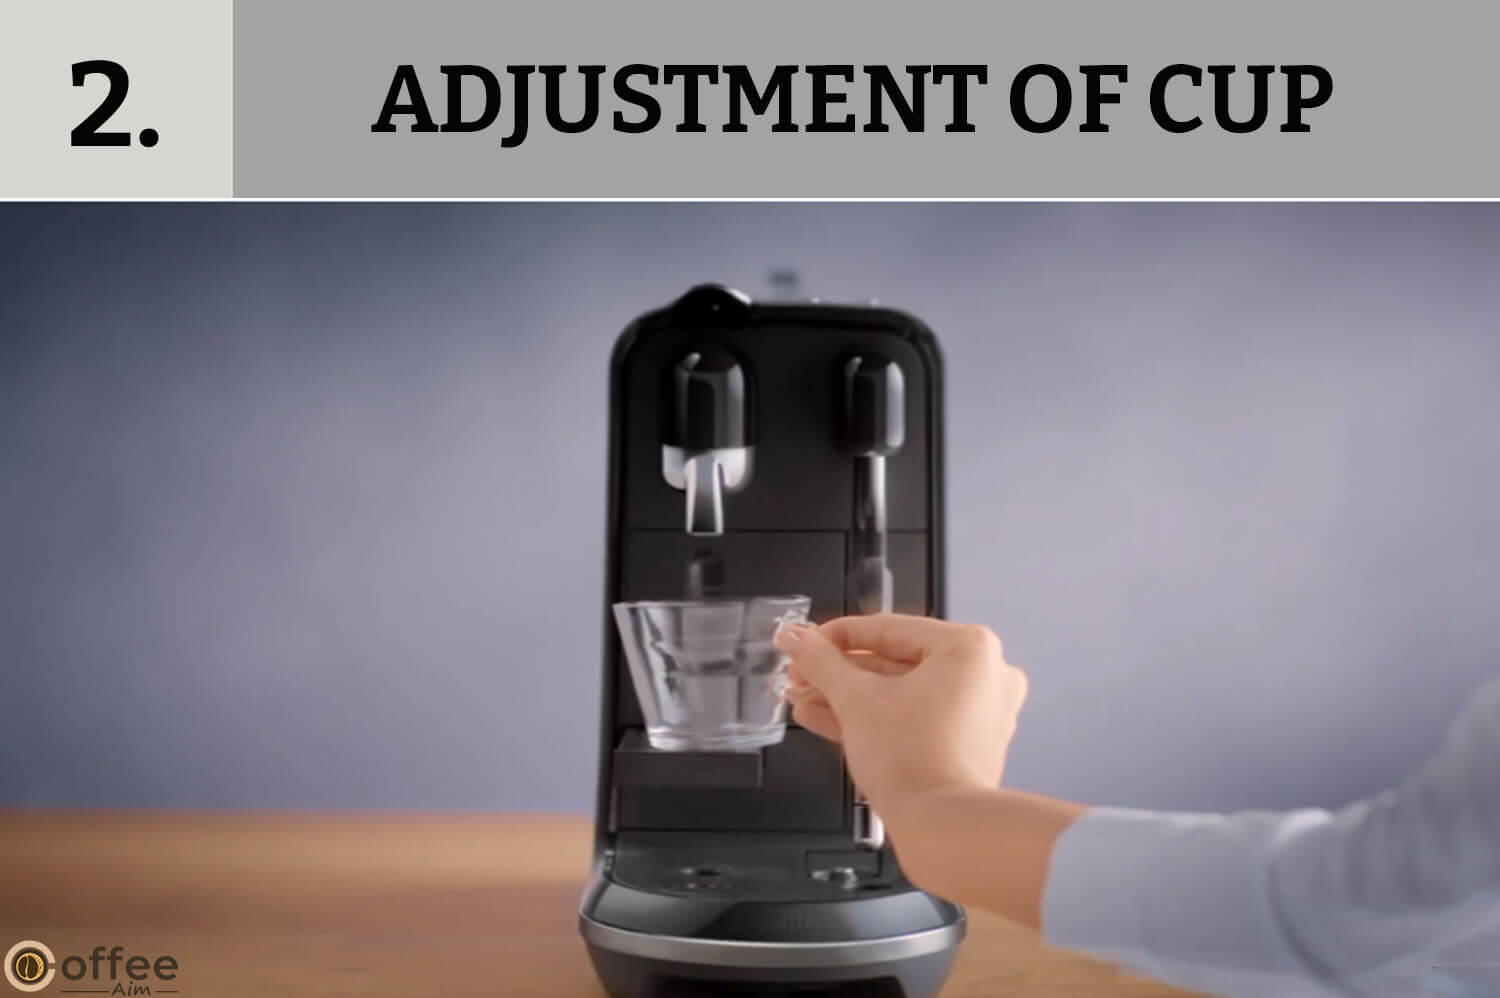
Step 2: Adjustment Of Cup
For adjusting the Latte Macchiato glass, push the cup support in until it locks properly.
Step 3: Addition Of Milk
After placing the cup, take out some fresh cold milk from the refrigerator and pour it into a milk jug up to maximum level.

Step 4: Milk Setting
As I mentioned in the section “milk coffee making”, you can adjust the milk temperature and frothing level manually. For Latte Macchiato preparation, set the milk froth level at 3 and the temperature level at 2.
Step 5: Milk Jug Connection
Next, make sure that the milk jug makes a connection with the temperature sensor present in the drip tray.
Step 6: Placement Of Steam Wand & Frothing Process
Then, raise the steam wand and place it in the middle of the milk jug. After the placement of the steam wand, begin the milk frothing process by pressing the steam button.

Step 7: Cleaning Of Steam Wand
When the frothing process is completed, raise the steam wand and wipe it with a moist cloth, and then remove the milk jug.

Step 8: Auto Cleaning
After wiping, allow the steam wand to return to its normal position, and it will be auto clean to rinse itself.
Step 9: Transferring Of Milk
Transfer milk from the milk jug to the Latte Macchiato glass and wash the milk jug properly.

Step 10: Placement Of Latte Macchiato Glass
After pouring milk into the Latte Macchiato glass, place it beneath the coffee outlet.

Step 11: Placement Of Capsule
Then lift the lever and insert the capsule and close the lever.
Step 12: Extraction Of Coffee
To extract the coffee, press the Espresso button.

How To Modify Your Coffee Drinks
One of the interesting features of the Nespresso Creatista Uno coffee machine is that you can easily adjust the taste of your coffee according to your wish. Every coffee lover can do it by following simple measures.
- For this, first, lift the Lever and place your capsule in the correct spot. Then, push and hold one coffee button you wish to adjust among Ristretto, Espresso, and Lungo.
- Then release the button after a desirable short duration.
- The adjusted coffee volume will be saved for further use.
Note: Any kind of coffee can be adjusted
| Coffee type | Volume in ml | Volume in ounce |
|---|---|---|
| Ristretto | 15-30 ml | 0.5-1 oz |
| Espresso | 30-70 ml | 1-2.3 oz |
| Lungo | 70-130 ml | 2.3-4.4 oz |
Reboot To Factory Default Settings
If you want to restore the coffee machine settings, then like other appliances, you don’t need to be distressed about the complex procedures. Because the operating mechanism of your Nespresso Creatista Uno coffee machine is very simple, and once you read the steps given below carefully, you can reset your machine in a few minutes.
Step 1: Switch On The Machine
To reset to the factory default setting, first, turn on the machine.
Step 2: Press The Buttons
Then press the lungo and ristretto buttons and hold for 5 seconds.
Step 3: Confirmation
To verify, press the lungo button or ristretto buttons. Press any button not blinking to go out of the mode.
Step 4: Use After Resetting
For future use, refer to the initial use instructions.
Emptying The System Prior To Time Of Inactivity To Protect From Frost
If you are thinking about not using your coffee machine for a while, and want to save it from frost, then do proper cleaning of the whole coffee machine in order to protect the Nespresso Creatista Uno coffee machine from any kind of damage. You can do it by following the easy procedure.
Step 1: Switch Off Your Machine
To shut down the machine press and hold the ristretto and steam buttons together for 0.5 seconds.
Step 2: Placement
Then, detach the water tank and put the empty Milk Jug beneath the coffee outlet.

Step 3: Press And Hold
Subsequently, press and hold the espresso button and lungo button together for 5 seconds.

Step 4: Emptying Process
To begin the emptying process, press the espresso button or the lungo button. Press any button not blinking to exit the mode.

Step 5: Wiping
Once the pump shuts down, empty & wipe the capsule bucket & drip tray.

Energy Economizing
One of the most significant things about your Nespresso Creatista Uno coffee machine is that it is very budget-friendly. It is designed in such a way that the machine minimizes power consumption when not making a drink, and after ten minutes of no use, the machine goes into sleep mode. To turn your machine ‘ON’, press any of the buttons Ristretto, Espresso, Lungo, or Steam.
Regular Cleaning
Now it’s time to discuss the cleaning process of your Nespresso Creatista Uno coffee machine. Cleaning the coffee machine on a regular basis is important not only for the proper functioning of the machine but also for hygiene. So, stay with me because I am going to throw light on the cleaning procedure in detail.
Step 1: Cleaning:
- Empty the drip tray and the capsule container on a regular basis. You can rinse and clean the drip tray with a soft damp cloth.
- Remove the cup support by first separating the capsule bucket.
- Then unlock the cup support.
- At last, pull the cup support forward & lift it upwards to separate it from the system.
- Once you remove the cup support, clean it properly and wipe the interior system with a moist cloth.
- Afterwards, clean the water tank and lid with odorless and good-quality detergent and wash them with warm water.
- Finally, fill the water tank with fresh, pure water.
Note: If you are thinking of using the dishwasher for cleaning purposes, then be careful because
the drip tray, grid, cup support, and capsule bucket, except the milk jug, are not dishwasher friendly.
Also, keep the drip tray level maintained to avoid spilling coffee and sliding it toward you.

Step 2: Rinse The Milk Jug
Wash the milk jug after each use and let it dry for a while. You can also rinse the jug with mild detergent. The jug is dishwasher safe, so you can also consider this option too.

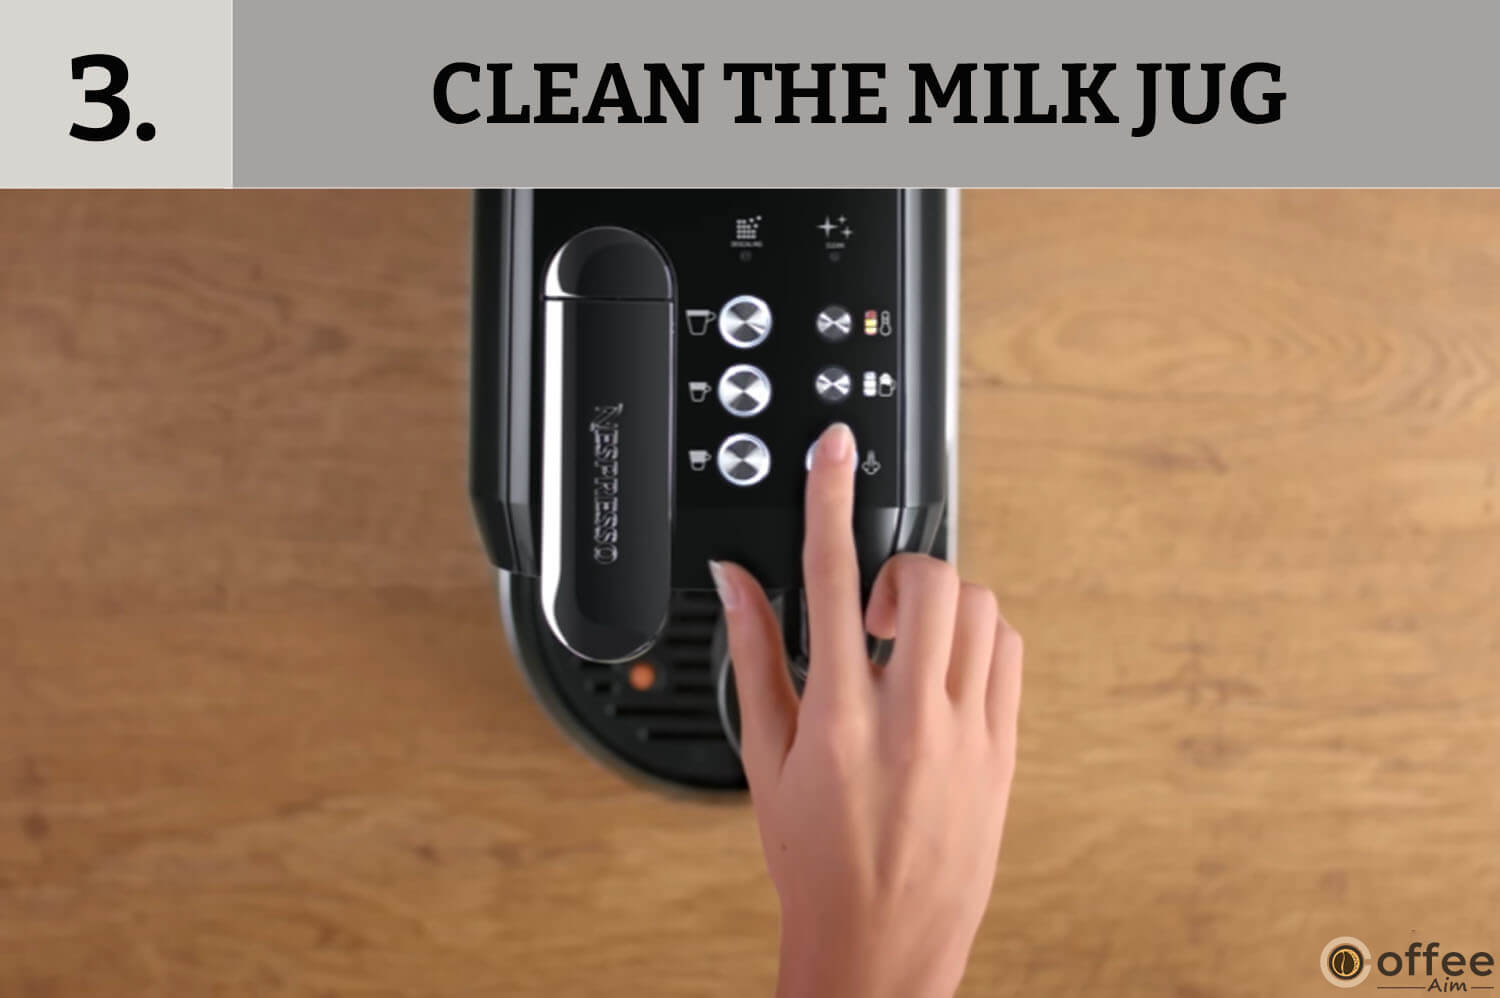
Step 3: Clean The Milk Jug
Afterwards, add potable water in a milk jug between maximum and minimum marks. Push the Steam button to begin the steaming process. Once finished, remove the hot water, then clean the steam wand with a moist cloth.
Step 4: Drying Of Parts
After washing, wipe all the parts of the machine with a cloth and let it dry for some time, and then reassemble the parts together. Make sure that you clean the coffee outlet and interior of your machine on a daily basis with a clean damp cloth.

Step 5: Important Points To Remember
Use of strong detergent, sponge, or any kind of harsh cleaner are totally prohibited. Avoid the use of a dishwasher to clean parts of your machine, except in the case of cleaning a milk jug, and not at any cost dip the machine or any part of it into water or any kind of liquid.
How To Clean Steam Wand
It is important to clean the steam wand monthly; otherwise, there are chances of the steam wand tip getting blocked. For user convenience, the Clean Alert LED turns on when the steam wand needs cleaning. When it flashes, do manual steaming by pressing and holding the steam button for 3 seconds. Here I am going to explain the cleaning process of the steam wand in detail, so you guys can easily do it at home.
Step 1: Remove
For steam wand cleaning, first detach the pin cleaning tool situated in the back of the machine, beneath the water tank.

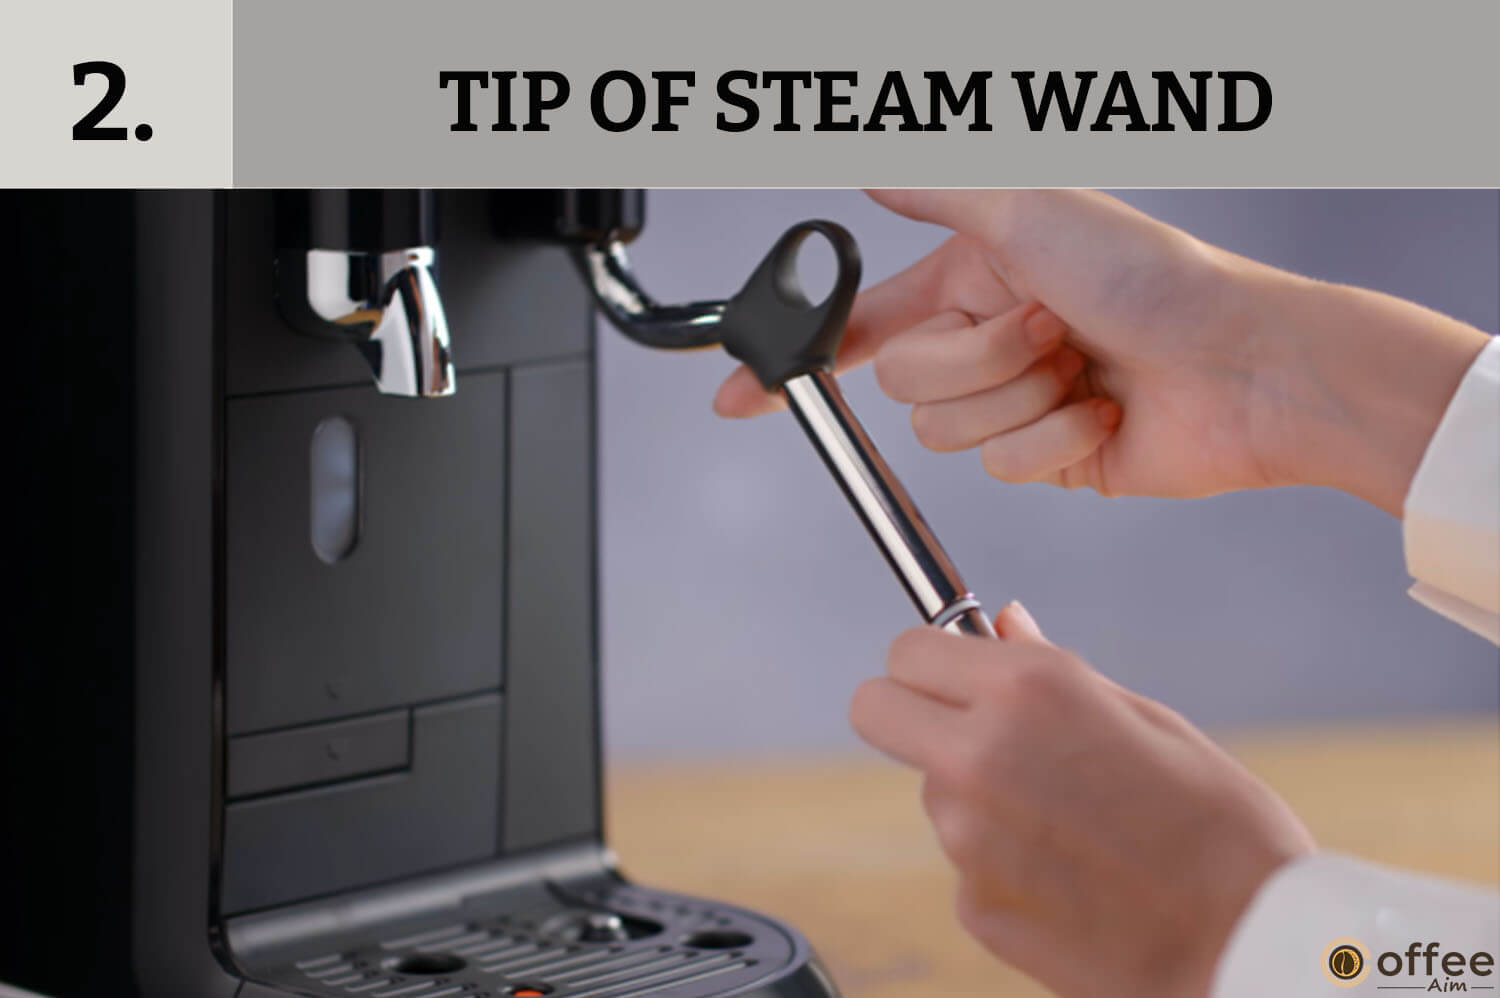
Step 2: Tip Of Steam Wand
Then unscrew and separate the tip of the steam wand.
Step 3: Cleaning Of Steam Tip
Next, clean the steam tip. To effectively clean each hole of the steam tip, use a pin-cleaning tool.
Step 4: Separation Of Cap
Then separate the cap of the steam wand tip using the pin cleaning tool.

Step 5: Rinse
Afterwards, wash the steam tip and cap carefully to clear any milk, then wipe them with a dry cloth. Examine the seal for damage. Keep one thing in mind do not place these parts in the dishwasher.

Step 6: Assembling
Subsequently, assemble the steam tip and bring it back onto the steam wand.

Step 7: Placement
Place the pin-cleaning tool and water tank back on site. Press and hold the Steam button for 3 seconds to start steam cleaning.
Descaling Of Nespresso Creatista Uno Coffee Machine
What is descaling? Why is it important to do it? How does this scale build up in the Nespresso Creatista Uno Coffee Machine?
Don’t worry about these questions because I am here to give answers to each one, so everything will become easy to understand for you guys.
Let’s begin with the first one. Descaling is to remove the scale which is built up in machine heating elements. The descaling is important to maintain the standard taste of your coffee and to keep your coffee machine running smoothly.
Scaling is actually the deposition of minerals, especially calcium. It is not toxic at all, but if it remains uncleaned, then it can cause problems in the working of the coffee machines. It’s wise to do descaling after every 3 months.
Descaling Procedure
The number of times you have to do descaling depends upon your water hardness level and how often you use the machine. The descaling procedure takes 15 minutes to complete. For user convenience, the Descale Alert LED on the Nespresso Creatista Uno Coffee Machine turns on when descaling is required to do. If you continue to use the descale alert LED will be solid, and the machine will stop you from using it.
Note: Keep one thing in mind always use a descaling solution carefully because it can be proved harmful. Avoid contact with eyes, skin, and surfaces. For the descaling procedure, always use the Nespresso descaling kit available at the Nespresso Club. If you guys are still confused, then please contact Nespresso Customer Service.
Step 1: Removal And Cleaning
First, remove any used capsule by opening the lever. After that, shut the lever by lowering it. Then empty and clean the capsule bucket, drip tray, and water tank. And place them back on the machine.

Step 2: Place Descaling Agent In Water
When you are placing the descaling agent in the water make sure there is 500ml / 17 fl. oz. of water and the drip tray is placed.

Step 3: Placement Of Container
Then place a 1L / 34 fl. oz. container beneath the coffee outlet and steam wand.

Step 4: Descaling Process
Make sure the machine is turned off. Press and hold the Ristretto button and Steam button together for 5 seconds to enter descaling mode. Ristretto and the steam buttons will become solid. Press any button that is not lit to exit. Then Press the Ristretto button or Lungo button to start the descaling action.

Step 5: Progress
The progress of the descaling process will be indicated by the milk froth level LED.

Step 6: Removal Of Water
Once the process ends, remove the liquid from the container. Then remove water from the water tank and wash it.

Step 7: Filling Of Water Tank
Afterwards, add pure, clean water into the water tank up to the Max Fill mark.
Step 8: Rinse Cycle
First, place a 1L / 34 fl. oz. container beneath the coffee outlet and steam wand. Then push the Ristretto button or the Steam button to begin the rinse cycle.

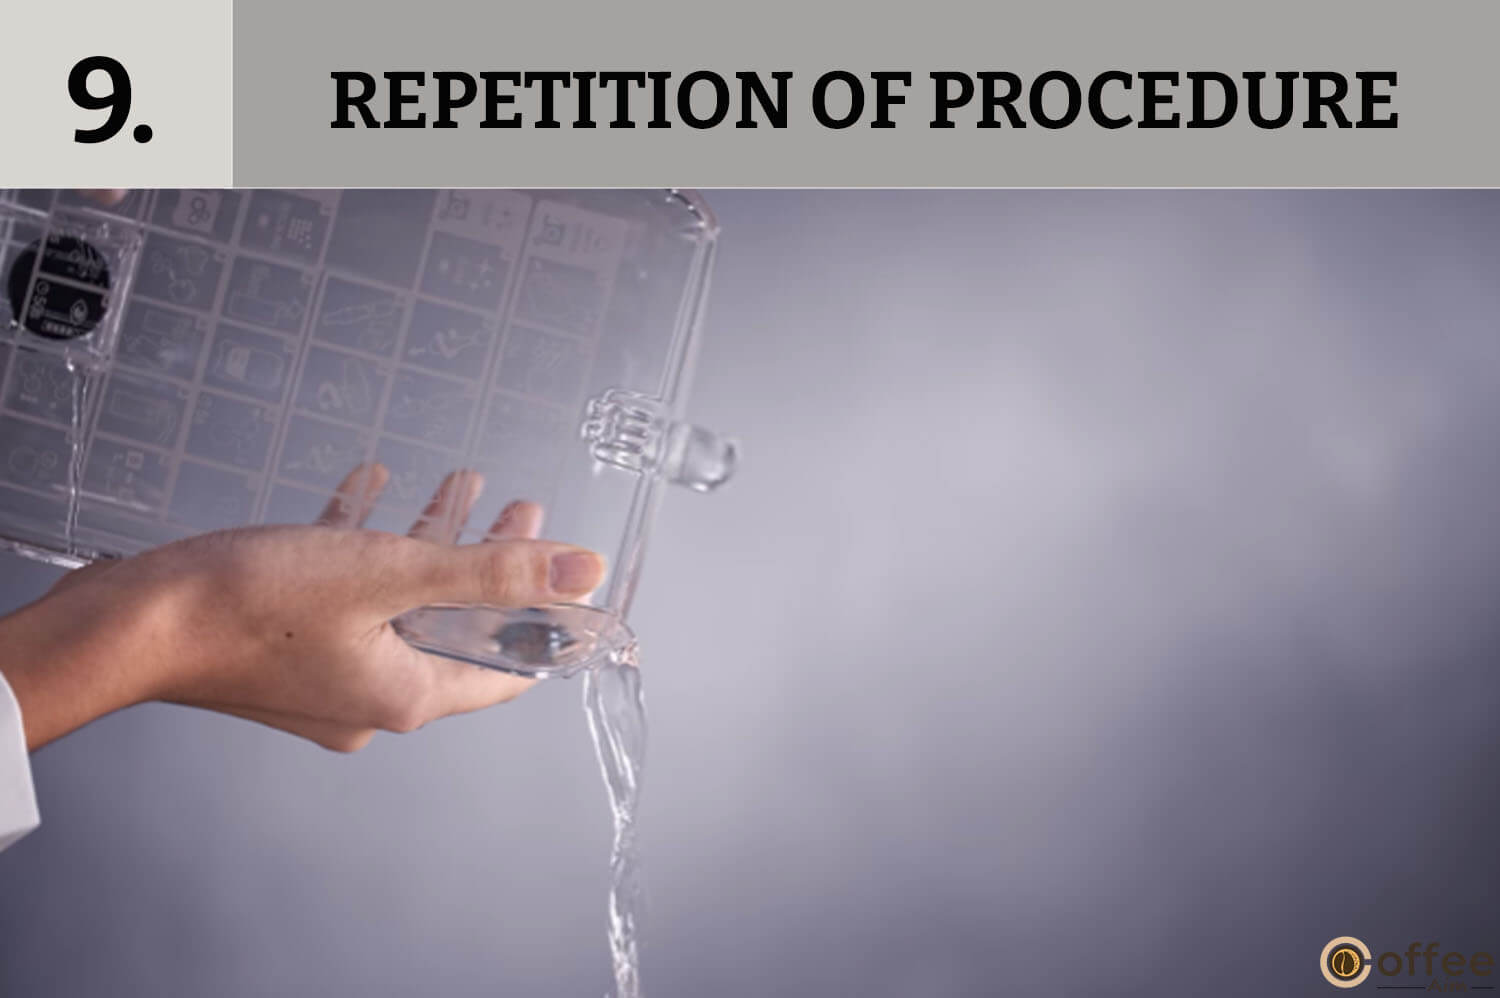
Step 9: Repetition Of Procedure
Once the rinse cycle ends, remove the liquid from the container. Repeat this six to eight times. As soon as the second rinse cycle is finished, the Ristretto button and the Steam button will flash 3 times, and the machine will be shut down.
Step 10: Placement Of Dip Tray And Water Tank
Lastly, wash the drip tray and water tank. And place it back on the machine.

How To Check Water Hardness Level?
With the help of a test strip that comes with your Nespresso Creatista Uno coffee machine, you can easily check and set the water hardness level. You just need to follow the simple steps given below:
Step 1: Switch On The Machine
First of all, turn ON the machine by pushing the Lungo, Espresso, Ristretto, or Steam buttons.
Once the machine starts operating, heating up takes approximately 3 seconds.
Step 2: Adjustment
To adjust the water hardness, first dip the water hardness test strip in and out of the water tank.
After dipping, wait for 1 minute. Then press and hold the temperature button and the milk froth button for 5 seconds to set the water hardness level.
The temperature button and milk froth button have different functions, the former button raises the level while pressing the milk froth button lowers the level. One thing to keep in mind is that set the water hardness according to the result of the test strip. Press any button to save and exit.
Different levels of water hardness according to the test strip.
| App. | German grade (dH) | Calcium carbonate | capacity | |
| Level 1 | < 3 | < 50 mg/I | 2200 | |
| Level 2 | > 4 | > 70 mg/I | 1800 | |
| Level 3 | > 7 | > 130 mg/I | 1400 | |
| Level 4 | > 14 | > 250 mg/I | 1000 | |
| Level 5 | > 21 | > 380 mg/I | 600 |
Troubleshooting
Now I am going to explain the problems you may face while operating this coffee maker and the possible solutions to these problems, just for your convenience.
| Problems | Solutions | If You Still Face A Problem |
| 1. If buttons do not illuminate | If buttons do not illuminate, first check the water tank. If empty, add clean water to the tank. The machine turns OFF automatically.Then press the Ristretto, Espresso, or Lungo button to turn to ON mode.Note: For further assistance, See the paragraph on Energy Saving Concept. | Check the coffee outlet thoroughly: plug, voltage, and fuse. |
| 2. No steam or hot water | First press the Ristretto, Espresso, or Lungo button to turn to the ON Mode.Then inspect the descale alert LED or the steam wand cleaning alert LED to see whether it is on or not. If on, then descale or clean the steam wand. Manually clean by pressing and holding the steam button for 3 seconds. | Check the outlet: plug, voltage, and fuse. |
| 3. Hindrance in coffee flow or unusual coffee flow, no water | For this, first, inspect the position of the water tank to determine whether it is correct or not. If the water tank is empty, fill it with potable water | If the problem is not resolved, descale the machine. |
| 4. Coffee is not hot enough | To make your coffee hot, preheat your coffee cup | If the problem is not resolved, descale the machine. |
| 5. If you close the capsule lever, but it does not close completely | To get rid of this problem, empty the capsule container. | If still the lever does not close properly, carefully check that no capsule is blocked inside the machine Note: But be careful, do not put your finger inside the machine. |
| 6. If there is any kind of leakage or water under the machine. | First, empty the drip tray completely.Then check the drip tray is securely inserted. | If a problem is still present, call the Nespresso Club. |
| 7. If there is no coffee flow despite the insertion of the capsule or water goes directly into the capsule bucket. | Make sure that the capsule lever is closed. | If the problem not solves, empty the capsule bucket and then check that no capsule is blocked inside the machine. NOTE: do not put your finger inside the machine At last, call the Nespresso Club, if the issue is not resolved. |
| 8. If there’s a problem with the buttons flashing | First, check the water tank; if empty, add clean water to it and brew a coffee.Then check the steam tip for any blockages.To unblock each of the holes at the tip of the steam wand, use a pin-cleaning tool present under the water tank. | If the problem persists, do a descaling of a coffee machine.If necessary, do a clean Steam Wand cycle completely. |
| 9. If descale alert LED is on | Descale your machine. | |
| 10. If the machine is ‘ON’, but it still not working | Turn off the machine.Wait 60 minutes and press the Ristretto, Espresso, or Lungo button to turn to «ON-mode». | Visit Nespresso.com or call the Nespresso Club to contact your local service centre. |
| 11. If your machine switches to OFF mode | To save energy the machine will turn to OFF mode after 10 minutes of non-use. See paragraph on «Energy Saving Concept». | Press Ristretto, Espresso, or Lungo to turn to «ON-mode». |
Troubleshoot Milk Froth Preparation
If you are facing any problem in milk froth preparation, then the following table will help you to resolve all of these problems.
| Problems | Solutions | If You Still Face A Problem |
| 1. If the milk steam cycle does not start. | First, inspect the position of the water tank either it is correct or not. If the water tank is empty, fill it with clean waterThen check the steam tip for any blockages and make sure that the steam wand is lowered | |
| 2. If you observe that the quality of the froth is not up to standard | First, make sure that the milk you are using is pasteurized or semi-skimmed milk at a temperature of about 4-6 °C / 39-43 °F. For excellent results, use newly opened milk.At last, check the milk froth setting. | If the problem is still not resolved, use the Breville milk jug provided.Clean both the milk jug and steam wand o a regular basis. |
| 3. If the steam is very wet | For this, use chill. clean water. Avoid using highly filtered, demineralized, or distilled water. | |
| 4. If milk overflows | Try to add an appropriate amount of milk to the jug. Note: Minimum and maximum fill levels as marked on the inside & outside of the milk jug for your convenience. | If the problem of milk overflow is still present, either reduce the initial volume of milk or minimize the froth level. Note: These adjustments depend on milk type. |
| 5. If the milk temperature is too hot | Make sure to use the Breville milk jug provided. Then, check the position of the milk jug to see whether it is correctly positioned or not on the temperature sensor.Afterwards, check the temperature sensor in the drip tray is clean. | If the problem is not resolved, then decrease the milk temperature setting |
| 6. If the milk is not hot enough | The solution to this problem is to preheat the coffee cup.Use the Breville milk jug provided.Then check the position of the milk jug, whether it is correctly positioned or not on the temperature sensor. | If the problem is not resolved, then increase the milk temperature settingThen Check the steam tip for blockages. |
| 7. If the clean Steam Wand alert LED is on | It is usually ON when the machine detects that the steam wand is blocked or once the machine has done 90 cycles | Clean the Steam Wand. |
Contact The Nespresso Club
In case of any additional information or to ask any questions to clarify anything about the Nespresso Creatista Uno coffee maker, you can call the Nespresso Club or your Nespresso authorized representative.
Discarding And Environmental Preservation
To keep your surroundings clean and actively participate in reducing environmental pollution, you must discard your appliance properly when it is no longer in use. Keep one thing in mind your appliance contains valuable materials that can be recycled and reused.
Separating the remaining waste materials into different categories facilitates the recycling of valuable raw materials. You can also leave the appliance at the point from where you purchased it. You can get further information about disposal from your local authorities.
Limited Guarantee
Breville guarantees this product against defects in materials and workmanship for two years of domestic use or 3 months of commercial use. This time limit of the year will start from the day of purchase. I will recommend you register your machine. During the period of two years, if there is a defect in any of the parts then Breville is responsible for this, and it is up to Breville to either give you a new one or replace the defective part. The interesting thing is that it will be free of cost.
The guarantee on the repaired product will expire after two years from the purchase date of the original product, not two years from the date of repair.
Things Not Included In Guarantee
This guarantee excludes liability for consequential loss or any other loss or damage caused to property or persons arising from any cause. It also excludes defects caused by the product not being used in accordance with instructions, accidental damage, misuse, being tampered with by unauthorized persons, improper maintenance, consumable items, or normal wear and tear and does not cover the cost of claiming under warranty.
How To Claim Under The Breville Warranty
Nespresso is handling product inquiries and product servicing on Breville’s behalf. If you believe your product is defective or any part is missing, then contact the Nespresso customer service team directly for instructions on where to send or bring it for repair by a Breville authorized service agent.
Contact Nespresso
Australia: 1800 623 033
New Zealand: 0800 234 579
Note: This product is imported and distributed by Breville, and this warranty is provided by Breville. To the extent permitted by law, Nespresso has no liability for the product, and all guarantees, warranties, and conditions by Nespresso are excluded.
This was all about the Nespresso Creatista Uno coffee machine. But if you still have any curiosity or any kind of problem operating the machine, you can contact the helpline and can get the answers to all of your questions.
Conclusion
In this article, I tried my best to explain everything from coffee making to cleaning your coffee machine in detail. I am over the moon that you have visited this article to learn about your Nespresso Creatista Uno coffee machine. I am sure that after reading this article you will not face any problems in operating the machine and assembling the parts together. However, if you are still confused about anything, then inform me. I will try my best to clear your queries. If you want to know more about coffee or different coffee makers, then visit “CoffeeAim” and scroll through the pages.
Have a nice cup of coffee!
FAQs
How Long Does It Take For Creatista Uno To Heat Up?
One of the most remarkable features of this Nespresso machine is its incredibly fast 3-second heat-up time, making it one of the quickest warm-up times available. This machine has the capability to brew three different sizes of espresso drinks, including ristretto (0.85 oz), espresso (1.35 oz), and lungo (3.7 oz), all of which are set as the default brewing sizes.
Can A Nespresso Overheat?
Yes, it can overheat due to excessive or a long period of use. If you suspect that the machine is overheating, turn it off, unplug it, and open the head to allow it to cool down for 30 minutes.
What Is The Life Expectancy Of A Nespresso Machine?
With proper care and maintenance, it is possible for a Nespresso® machine to last for 5-10 years, which is great news for those who want to get the most out of their investment.
Can You Run A Nespresso Pod Twice?
Nespresso does not recommend that their capsules be used more than once, as each capsule is designed to be used only once to ensure optimal flavor and quality. However, some users may choose to use the capsules more than once through other methods, such as by reusing the grounds to make a second cup of coffee.