
Quick Navigation
Your coffee machine is sure to help you start your day out right. But It’s also possible to feel hesitant when you are relatively new to using your Nespresso Lattissima Pro. Besides new users, an experienced person can sometimes get stuck while operating the machine. No problem if you need help figuring out how to manage it because you are at the right place. We will provide you with step-by-step guidance on how to use a Nespresso Lattissima Pro. This guide will explain the entire process with a quick and easy guide. Let’s start!
Safety Precautions
Don’t you read the safety precautions before operating your coffee maker? Isn’t it dangerous?
What if you face an accident because of the mishandling of any part of your machine? Therefore, it is beneficial for you to read all the safety precautions first before using your Nespresso Lattissima Pro.
Nespresso Lattissima Pro Specifications
You have bought your Nespresso Lattissima Pro, but now you are listening to comments from people that you have invested wrong. Don’t bother at all! It is really very common. Be confident in your investment, as you have bought the best coffee maker having excellent specifications.
| Specifications | Details |
| Voltages | 120V |
| Hartz | 60Hz |
| Watts | 1300W |
| Pump Pressure | Max.19 bar |
| Weight | 6.5 kg |
| Water Tank Capacity | 1.3 liters (43.9 ounces) |
| Milk Container Capacity | 0.5 liters (16.9 ounces) |
| Used Capsules Container | 13-16 capsules |
| Dimensions In Centimeters | (W x D x H) 19.304 cm, 33.02 cm, 35.56 cm |
| Dimensions in Inches | (W x D x H) 7.6 x 13 x 14 in |
Related: Nespresso Descaling Solution Review →
Time To Unbox Your Nespresso Lattissima Pro
Finally! The time has arrived to inaugurate your newly bought Nespresso Lattissima Pro. One of the best feelings ever! I know! But what will you get inside the box? If you order a Lattissima Pro coffee maker from amazon or any other online store, it contains the following essential parts. Let’s unbox your one to check whether it includes these parts; otherwise, contact the machine supplier and ask for a new piece.
- Coffee Machine

- «welcome To Nespresso Folder»

- User Manual

- Important Safeguards

- Capsules Set

Related Content: How to Use A Nespresso Machine →
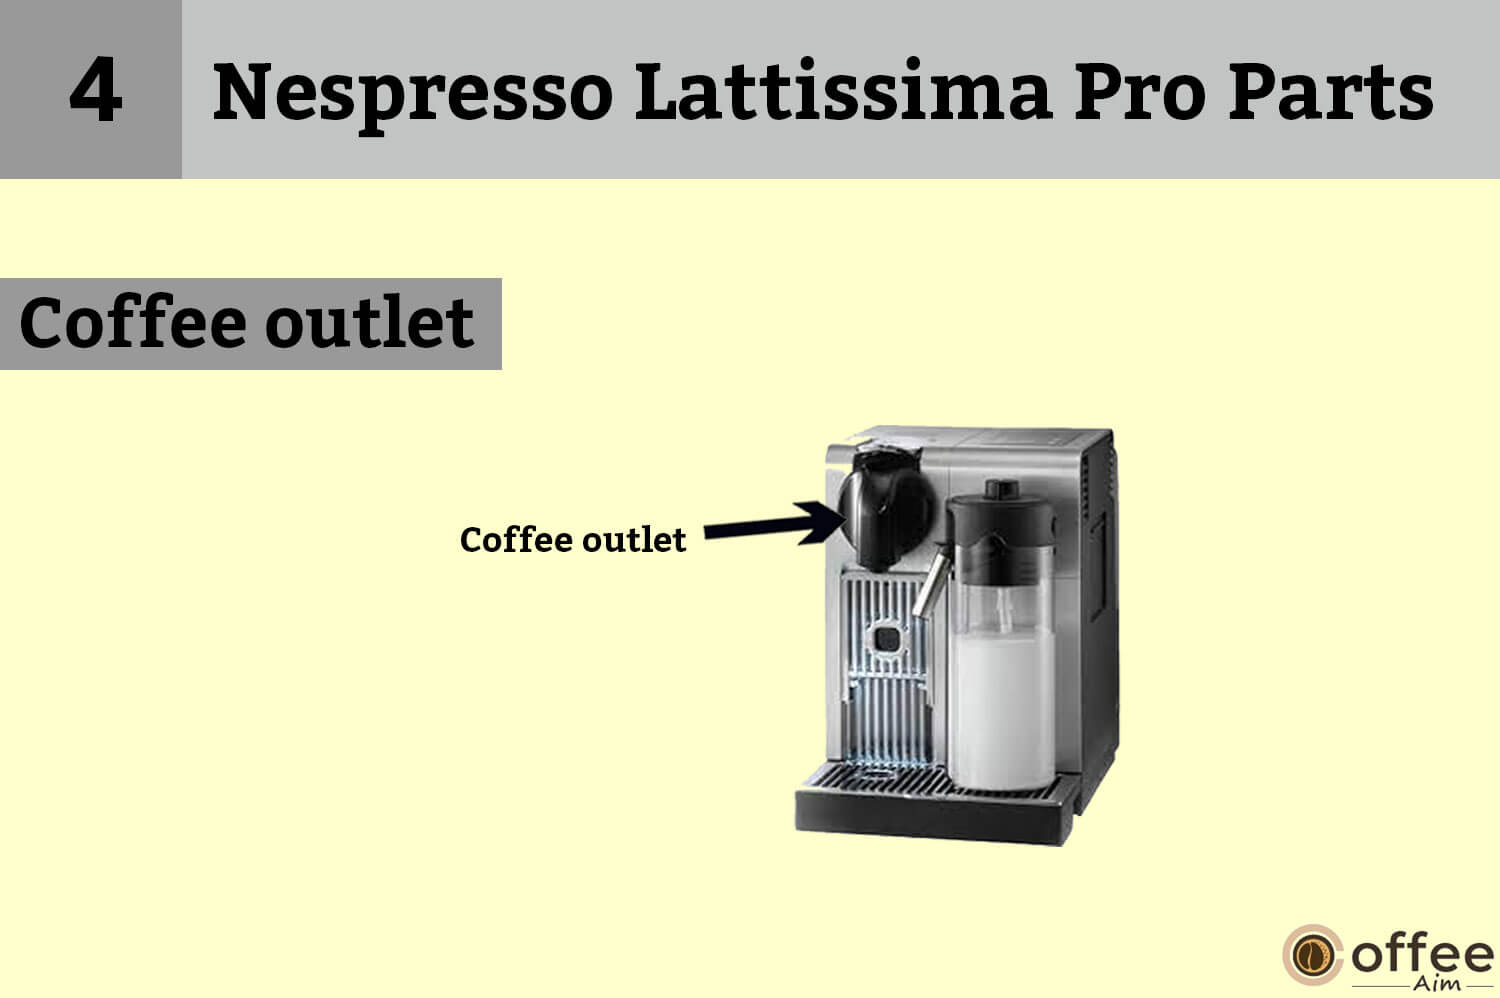
Nespresso Lattissima Pro Parts
How is it possible to be an expert user without knowing its basic parts? Of course, It is impossible. Therefore, Here’s a list of essential parts of the Nespresso Lattissima Pro which play the role of building blocks.
1. Lever

2. ON/OFF button

3. Water tank

4. Coffee outlet
5. Drip grid

6. Drip tray

7. Pivoting cup support (not removable)

8. Used capsule container

9. Steam connector door

10. Telescopic hot water spout

11. Hot water spout storage area

12. Steam connector

Types Of Nespresso Lattissima Pro
Through the Nespresso Lattissima Pro, you can make quality beverages in your own home with its rapid cappuccino system and the additional option of the hot water spout. This machine will surely be a good addition to your kitchen.
- Machine in coffee-only configuration

- Machine with Rapid Cappuccino System (for Cappuccino)
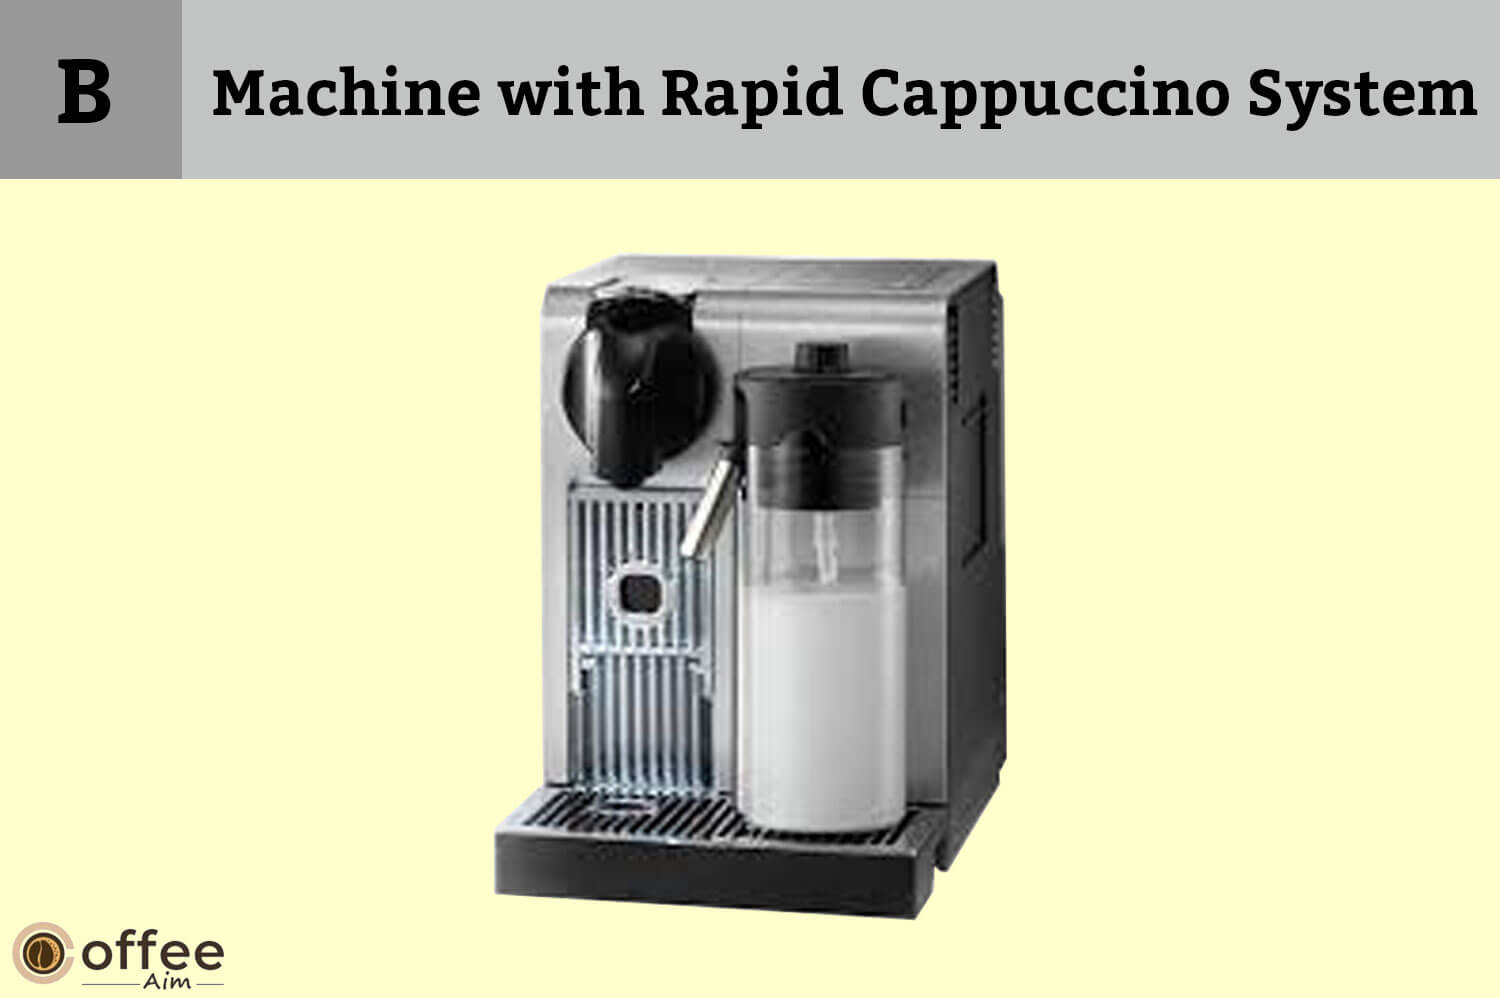
- Machine with hot water spout

Nespresso Lattissima Pro (Preparations) Display
Are you also fed up with the daily issues of manual buttons? Ahh! They become super dirty and often get damaged. Just relax your nerves. Now, it’s time to be modern with the digital Lattissima pro, as it has a touchscreen display with various machine settings and seven different coffee options.
- Lungo
- Espresso
- Ristretto
- Hot water
- Warm milk
- Cappuccino
- Latte Macchiato
Nespresso Lattissima Pro (Navigation) Display
Various settings and options in the Nespresso Lattissima Pro navigation display help you to get the best results.
- Menu
- Scroll up when the Menu is activated
- Option selection when the Menu is activated
- Scroll down when the Menu is activated
- Text display
Nespresso Lattissima Pro Rapid Cappuccino System (R.C.S.)
Are you getting late and want a quick cup to keep you going? No problem! Lattissima Pro, with its rapid cappuccino system, can deliver authentic cafe-style beverages in seconds.
- Milk froth regulator knob

- Insert position for milk froth regulator knob

- Minimum froth

- Maximum froth
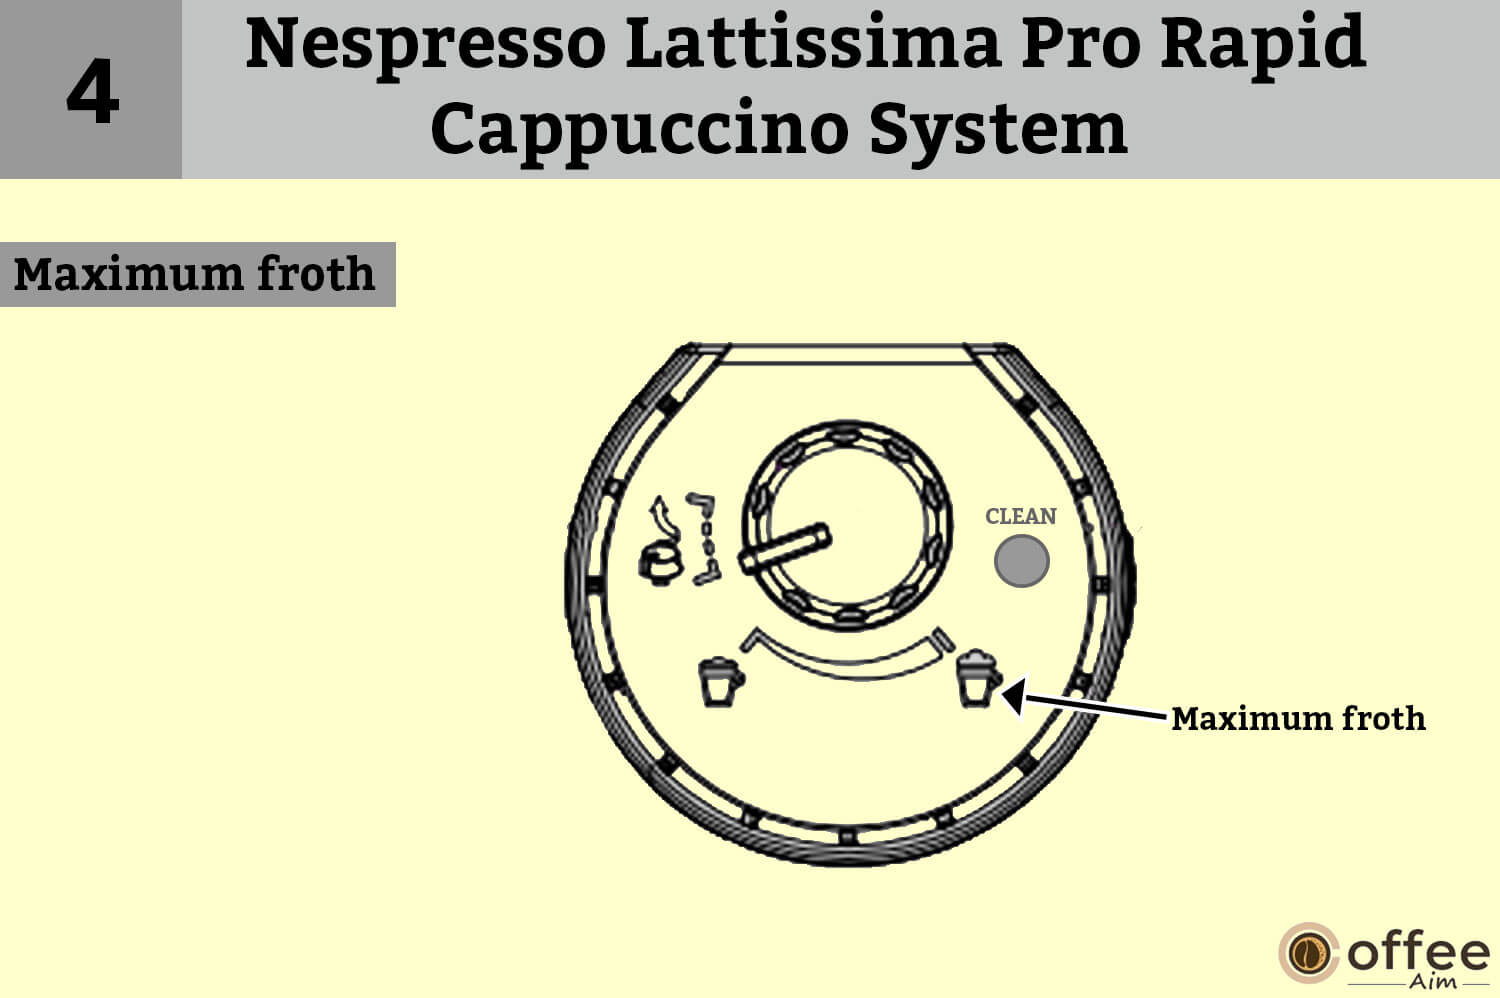
- «CLEAN»: automatic rinsing function

- Milk container lid

- Milk spout

- Milk container

- Milk aspiration tube

- R.C.S. connector

Important:
- To keep your coffee machine working effectively and efficiently for a long time. You must follow safety precautions. This sign
warns you to take safety measures to avoid possible harm and damage.
- If the machine is used incorrectly and unsafely, it can pose significant risks. In this way, the information symbol
allows you to take a piece of information for the correct usage of the Nespresso Lattissima Pro coffee machine.
Nespresso Lattissima Pro Menu Navigation
Menu navigation helps you to navigate different options, guides you in the right direction, and finally gets you where you want to go.
Image content:
To enter the Menu List, press the symbol.
To exit from the Menu List, scroll to the [exit] option and select. Or quickly press the symbol.
To browse the options, pressthe symbol.
To exit from the options and return to the Menu list, scroll to the [exit] option and select. Or quickly press the symbol.
To select the option, press the symbol.

How To Enter The Lattissima Pro Menu List?
You can quickly enter the Lattissima Pro menu list by pressing this symbol.
How To Exit From The Lattissima Pro Menu List?
To exit from the Lattissima Menu List, scroll to the [exit] option and select. Or quickly press the symbol.
How To Browse The Lattissima Pro Options?
To browse the Lattissima options, pressthe symbol.
How To Exit From The Lattissima Pro Options?
To exit from the options and return to the Menu list, scroll to the [exit] option and select. Or quickly press the symbol.
How To Select The Nespresso Lattissima Pro Options?
To select the option, press the symbol.
Menu List

From the menu list, you can customize different settings; you can set water hardness level, volume settings, auto power off, and many more options. Details are given below;
| Functions | Details |
| Language | Whenever you need, You can change the language of your coffee machine. Choose this option, which will allow you to operate your Lattissima Pro in whichever language you are most comfortable with. |
| Descaling | If Scale buildup is not removed, it can stop your machine from working. In this situation, you should select the descaling option when the descaling alert appears on display.The complete descaling process is discussed under the “Descaling Heading.” |
| Water Hardness | To keep the balance in your coffee, you can adjust the desired amount of water. By selecting this option, you can test the water hardness using an included sticker; also, It will optimize the descaling frequency. Please also read the content under the “Water Hardness Setting.” |
| Auto Power Off | If you have not touched your Nespresso Lattissima Pro within nine minutes of its last use, it will shut down automatically. After selecting this option, you can set the time after which the machine switches off automatically (Available options are 9 minutes, 30 minutes, 2 hours, and 8 hours). |
| Factory Settings | Sometimes you save irregular settings by mistake. If it is so, choose this option to reset the machine to factory settings. |
| Empty Fluid System. | If you are using your machine after a long time or shipping it to an espresso repair shop, it is preferable to empty the water inside the machine. You can do this by choosing this option. To use your machine again, you should wait for 10 minutes after this process. Text display will guide you further. |
| Volume Programming | With the Nespresso Lattissima Pro, the coffee, water, and milk options all can be set according to your preferred volume. When you choose this option, the text display will further give you instructions. Moreover, Beverage volume can also reset your machine to the factory settings. |
| Settings Info | To understand the Setting profile on the Nespresso Lattissima Pro, you can simply select this option. It also allows you to get access to all machine settings. |
| Maintenance | Coffee machine maintenance has never been easier, but the Nespresso Lattissima Pro maintenance option updates you on the overall status of your machine. The machine’s 19 characters long serial number is also there, and consumption statistics either from the first use (absolute) or since the last descaling (relative) are also available. |
| Help | While using the machine, If you are stuck somewhere, pressing the help option provides you assistance with its best advice, like (If you want good milk froth quality every day). Click on the provided internet link to learn more about this feature. |
| Exit | You can come back to the machine-ready mode by exiting from the menu list with the exit option. |
First Use Or After A Long Period Of Non-Use
Leaving your machine for a long period of inactivity can be bad for the quality of the output. If you are using Nespresso Lattissima Pro for the first time or after a long period, you should follow our instructions to keep your coffee taste as good as a freshly brewed cup.
1. Initial Setup
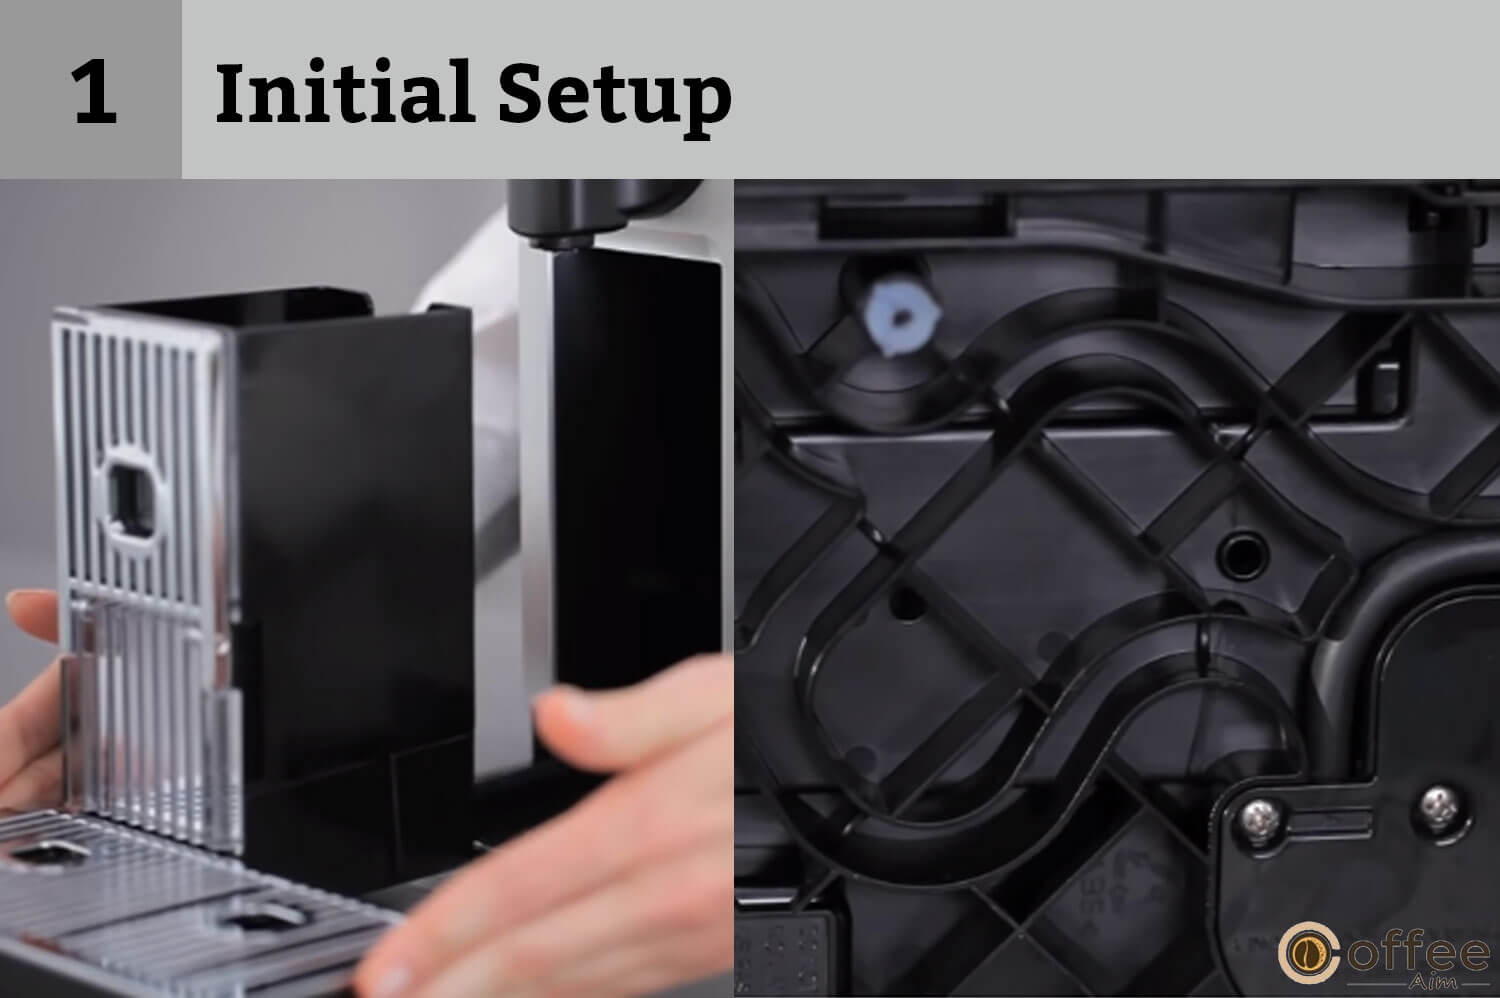
After unpacking the machine, bring out all the detachable parts like the water tank, drip tray, and capsule container. In order to adjust the cable length, store the excess cable in the cable guide, which is present under the machine.
2. Plug & Place
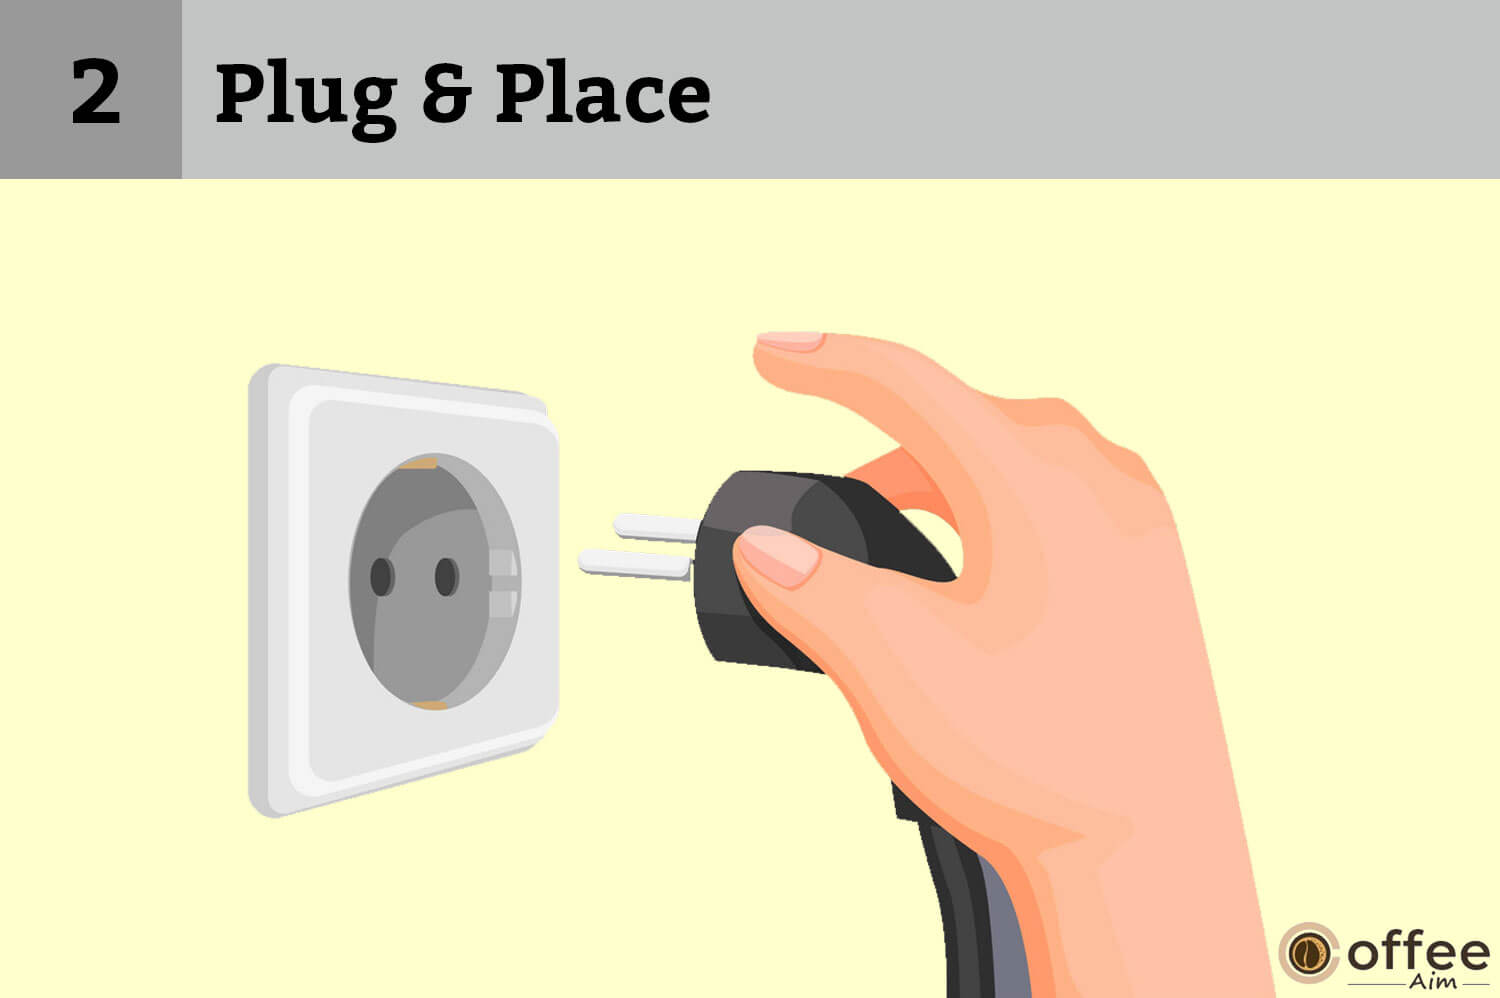
After placing the machine in an upright position, plug it into the main.
Note: You can lift the water tank by its lid. This lid is present on the top of the tank. It lets you refill the tank without removing it.
3. Rinse & Fill

As you are using your machine after a long time, you should rinse the water tank first with clean water and then pour fresh water into it up to Max level.
4. Switch On Your Nespresso Lattissima Pro

Hot water nozzle can turn your Nespresso Lattissima Pro into a tea maker. Install a hot water spout in the storage area present on the right side of the machine and turn the machine ON.
5. Select Language

Nespresso gives you another convenience now; you can also set your language according to your desire on the machine. Tap on the symbol continues.
- By using an arrow
you can scroll through the options and select the language with which you are most comfortable. Press to
confirm your selection.
6. Machine Start Heating

When you press thissymbol, Nespresso Lattissima Pro heats up in seconds, which is one of its best features.
7. Internal Flushing Of Machine

Rinsing: Before using the machine, put a large container under the nozzle and press the lungo button. Repeat this process three times.
- Make sure to wash the hot water spout at least three times. After Rinsing, remove it and store the hot water spout back in the storage area located on the right-hand side of the machine. Finally, Close the steam connector door.
8. Disassembling of Nespresso Lattissima Pro

Now, disassemble the Rapid Cappuccino System (R.C.S.) to clean the components. For this, you can use the dishwasher; separate all the parts and clean them in the upper level of your dishwasher. Otherwise, If you don’t have a dishwasher, you can also clean the parts with your hands. Now you should first soak all the parts in the water with mild soap, then rinse them thoroughly, and after some time, dry the parts with a cloth.
Coffee Preparation
Nespresso Lattissima Pro offers fast and clean coffee preparations. You can prepare a rich and velvety cup of coffee by following these simple steps.
1. You should raise or open your Nespresso Lattissima Pro lever and then pop the capsule into the machine.

2. The capsule you inserted will close the lever of the machine; now, you can place a cup under the coffee outlet.

3. As this machine can make a variety of coffee drinks, you can press the buttons such as Ristretto (25 ml/0.75 oz), Espresso (40 ml/1.35 oz), or Lungo (110 ml/3.7 oz) to prepare the drink of your choice. When it is done, preparation will stop automatically. Press the button again if you want to stop the coffee flow.

4. Now, take a cup. Lift and shut the lever it will throw out the capsule into the container, which is utilized for used capsules

Assembling/Disassembling Rapid Cappuccino System (R.C.S.)
Nespresso Lattissima Pro makes removing the components of the Rapid cappuccino system easier. You can follow the instructions below to easily remove the parts of (R.C.S) for cleaning purposes.
1. When you proceed to disassembly, remove the lid of the milk container and also bring out the aspiration tube, which is used for the milk suction.

2. In order to remove the milk froth regulator knob, rotate it and then pull it up so that you can easily detach it from the machine

3. You can easily remove the Rapid cappuccino system connector by unlocking it and pulling it off.

4. Finally, you can separate the Milk spout by pulling it off.

Preparing Cappuccino And Latte Macchiato
The key to making delicious coffee lies in this technique. In order to make the perfect cappuccino and latte macchiato with Nespresso Lattissima Pro, you should follow these guidelines.
1. You should pour the milk into the container and fill it with a suitable amount of milk.

2. Now, you have to close the milk container with its lid. Slide the steam connector door to the right to open it and attach the Rapid Cappuccino System to the machine..

3. If you need a quick cup to keep you going, this machine is perfect for your needs as it heats up in 15 seconds.

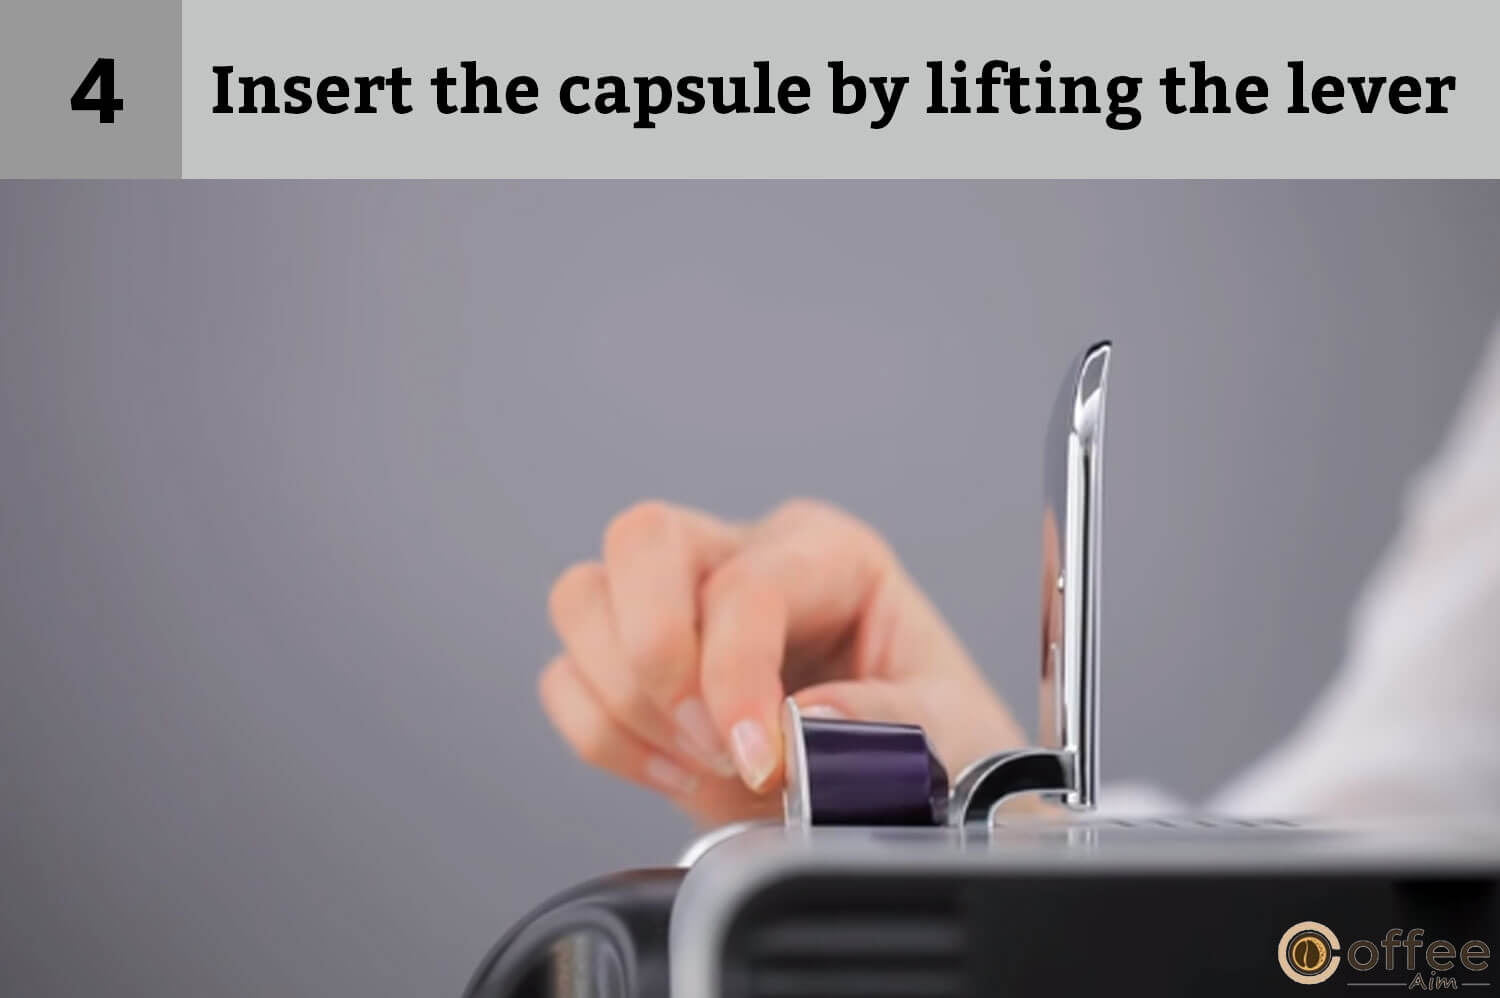
4. You can install the Nespresso capsule by lifting the lever of the machine.
5. You should set the position of a cup or glass of coffee under the coffee outlet and close the lever. Also, set the position of the milk spout.

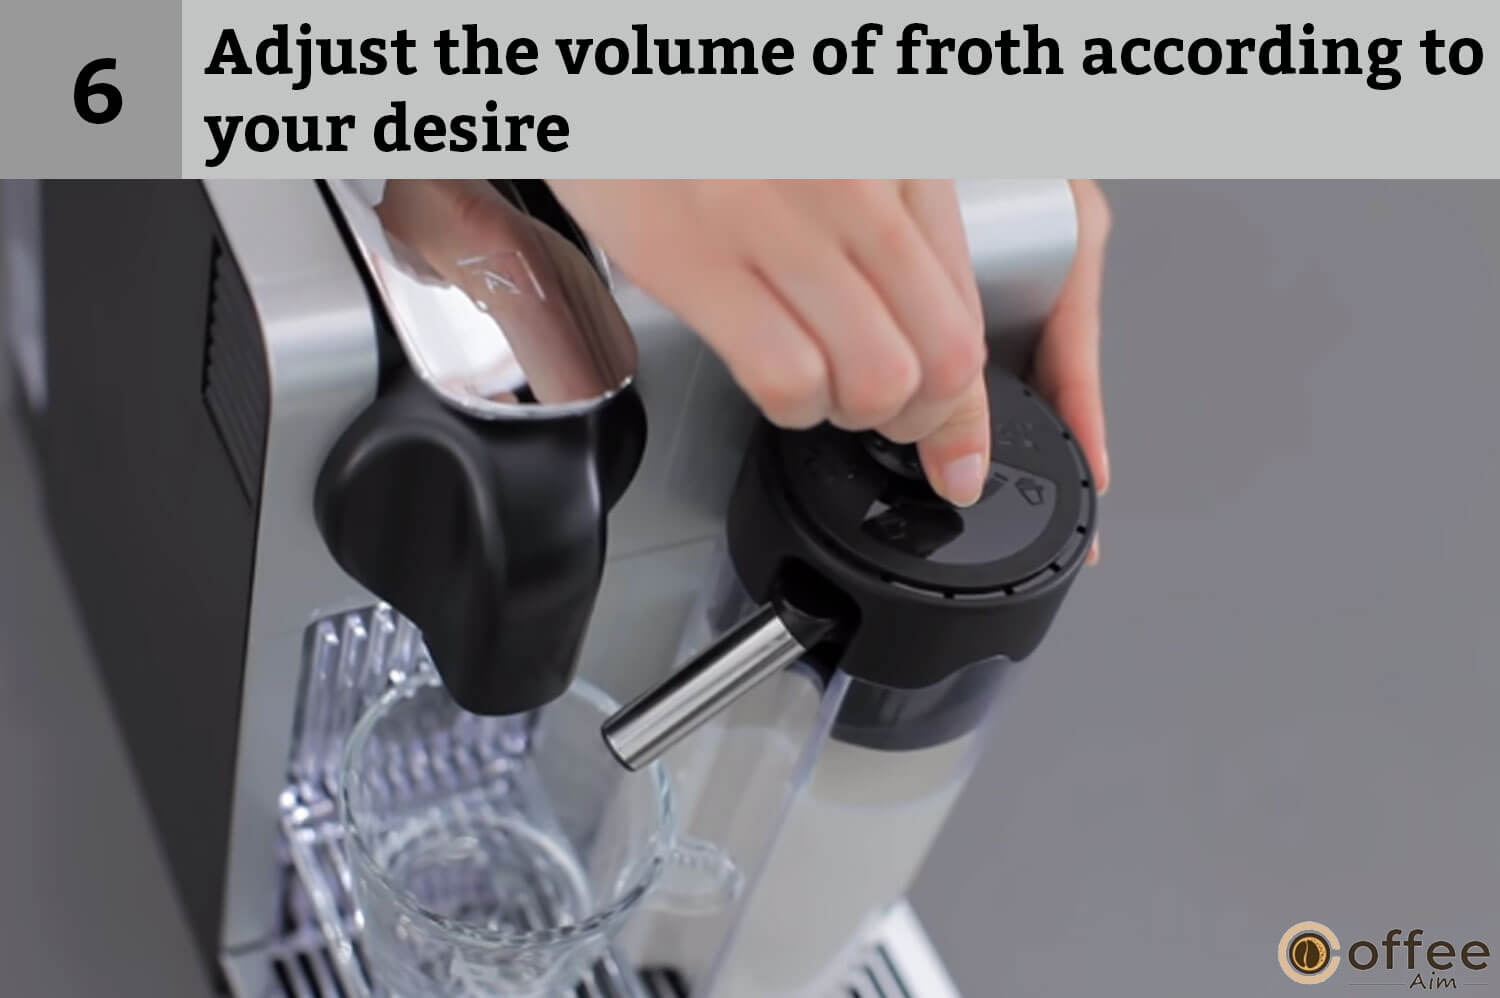
6. You can adjust the volume of froth according to your desire by turning the milk froth regulator knob on the left and right sides.
7. When you tap the cappuccino and Macchiato button, within a few seconds, preparation will start (first milk and then coffee), and it will automatically stop when it is ready.

8. When the preparation has been completed, you have to lift and shut the lever to eject the capsule into the used capsule container.

9. Now, you should place a container under the milk spout.

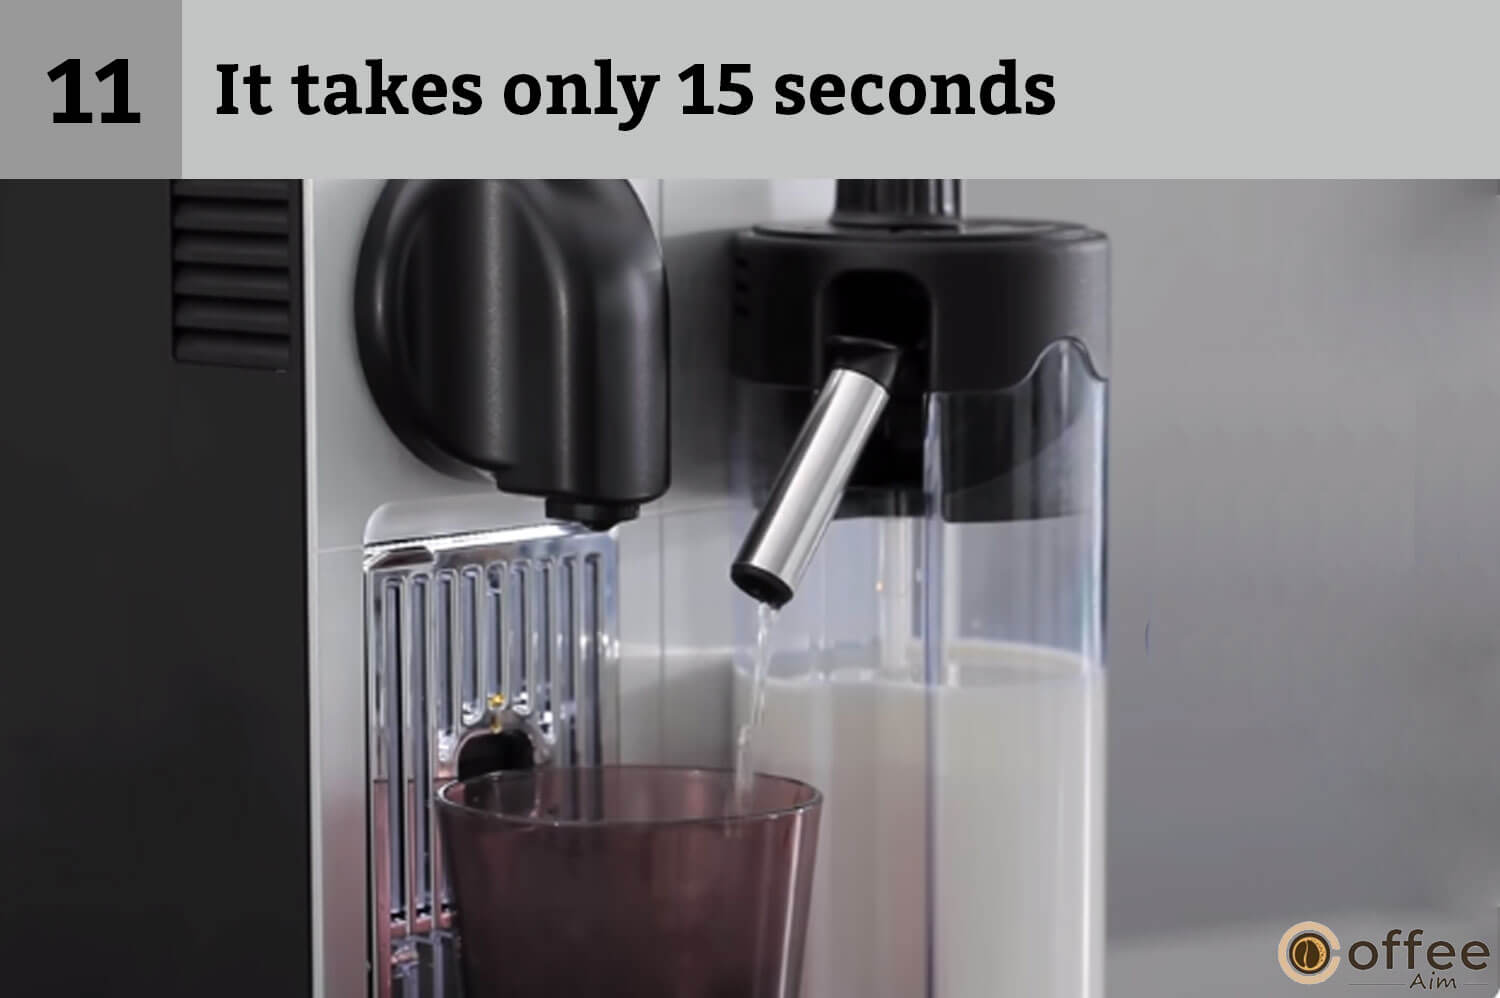
10. Turn the milk regulator knob in the «CLEAN» position. The rinsing process of the milk system will be started. Through the milk spout, hot water combined with the steam flows.

11. Rinsing process won’t make you wait for so long. It takes only 15 seconds. Once it is finished, it will stop automatically.
12. When the rinsing process has finished, you have to position the milk froth regulator knob again in its position.

13. Disconnect the Rapid cappuccino system (R.C.S.) from the machine and place them in the refrigerator. Now you can close the machine steam connector door.

14. You must disassemble the Rapid Cappuccino System every two days.

15. In order to clean the components, place them on the upper side of the dishwasher. If you don’t have a dishwasher, then you can also clean the Rapid cappuccino system with the help of your hands. For a complete process look at the section on Hand washing of the Rapid Cappuccino System (R.C.S.).

Daily Care Of Nespresso Lattissima Pro
Regular upkeep and care allow you to maintain the health of each part of the machine. It ensures that it will last long and well throughout its operational lifespan. Follow the steps below for the daily care routine of your Nespresso Lattissima Pro.
1. The parts of the machine are easily removable when you need to clean them. Bring out the tray and capsule container. Free the water tank, which is present at the back of the machine. Then wash the water tank with clean water and again refill it with fresh water

2. In order to eject the capsule into the closed capsule container, you have to lift and shut the lever of the machine. Position the empty cup under the coffee outlet, and when you tap the lungo button, rinsing will be started.

3. If you find any dirt particles in the hot water spout, you should rinse the hot water nozzle with clean water.

4. You can use a damp cloth to clean the hot water spout and dry it.

Washing Of Rapid Cappuccino System
If you don’t have a dishwasher, you can also clean the Rapid cappuccino system with your hands. For this procedure, follow the given instructions.
1. Begin with the disassembling of the Rapid cappuccino system. For this process, you will move to the section «Assembling/Disassembling of Rapid Cappuccino system (R.C.S.).» The complete procedure is given there.

2. After disassembling, clean the remains of milk particles with the freshwater as they are difficult to remove.

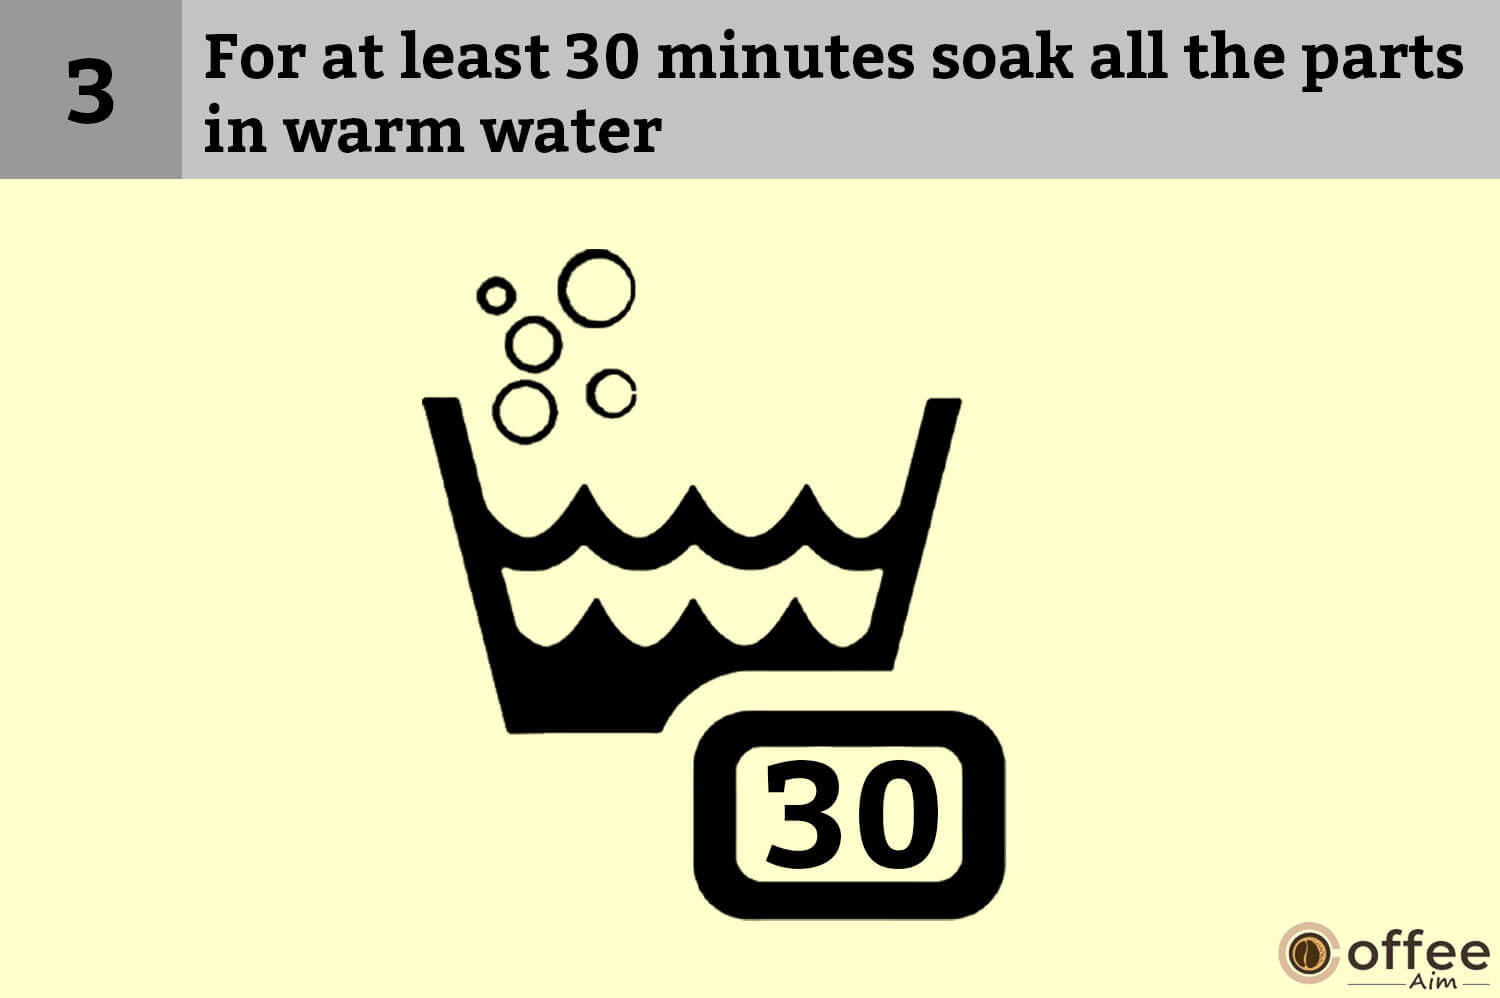
3. Warm water can easily and efficiently remove dirt. For at least 30 minutes soak all the parts in warm water and also add a mild soap and detergent in it.
4. Finally, rinse the parts with clean water and use a damp cloth to dry these parts.

Volume Factory Settings
Volume factory settings allow you to adjust and control the volume settings of a variety of beverages. There are some default settings in Nespresso Lattissima Pro, but you can also customize them.
- Ristretto 25 ml (0.75 oz)
- Espresso 40 ml (1.35 oz)
- Lungo 110 ml (3.7 oz)
- Hot water 125 ml (4.2 oz)
- Cappuccino Milk*: 50 ml (1.7 oz) /Coffee: 40 ml (1.35 oz)
- Latte Macchiato Milk*: 150 ml (5 oz)/ Coffee: 40 ml (1.35 oz)
- Warm milk* 120 ml (4.1 oz)

Descaling
If you want to use your coffee brewer for a long time along with the most optimal taste and quality, Nespresso recommends descaling your machine every 3 months. It’s a simple process that you can easily understand by following these steps.
- Lift and shut the lever to allow the last used capsule to fall into the container which is utilized for used capsules.

2. From the touch screen display, go to the Menu, run your eyes over the different options, and choose the [DESCALING] option. If you follow the display instructions, you can easily complete this procedure.

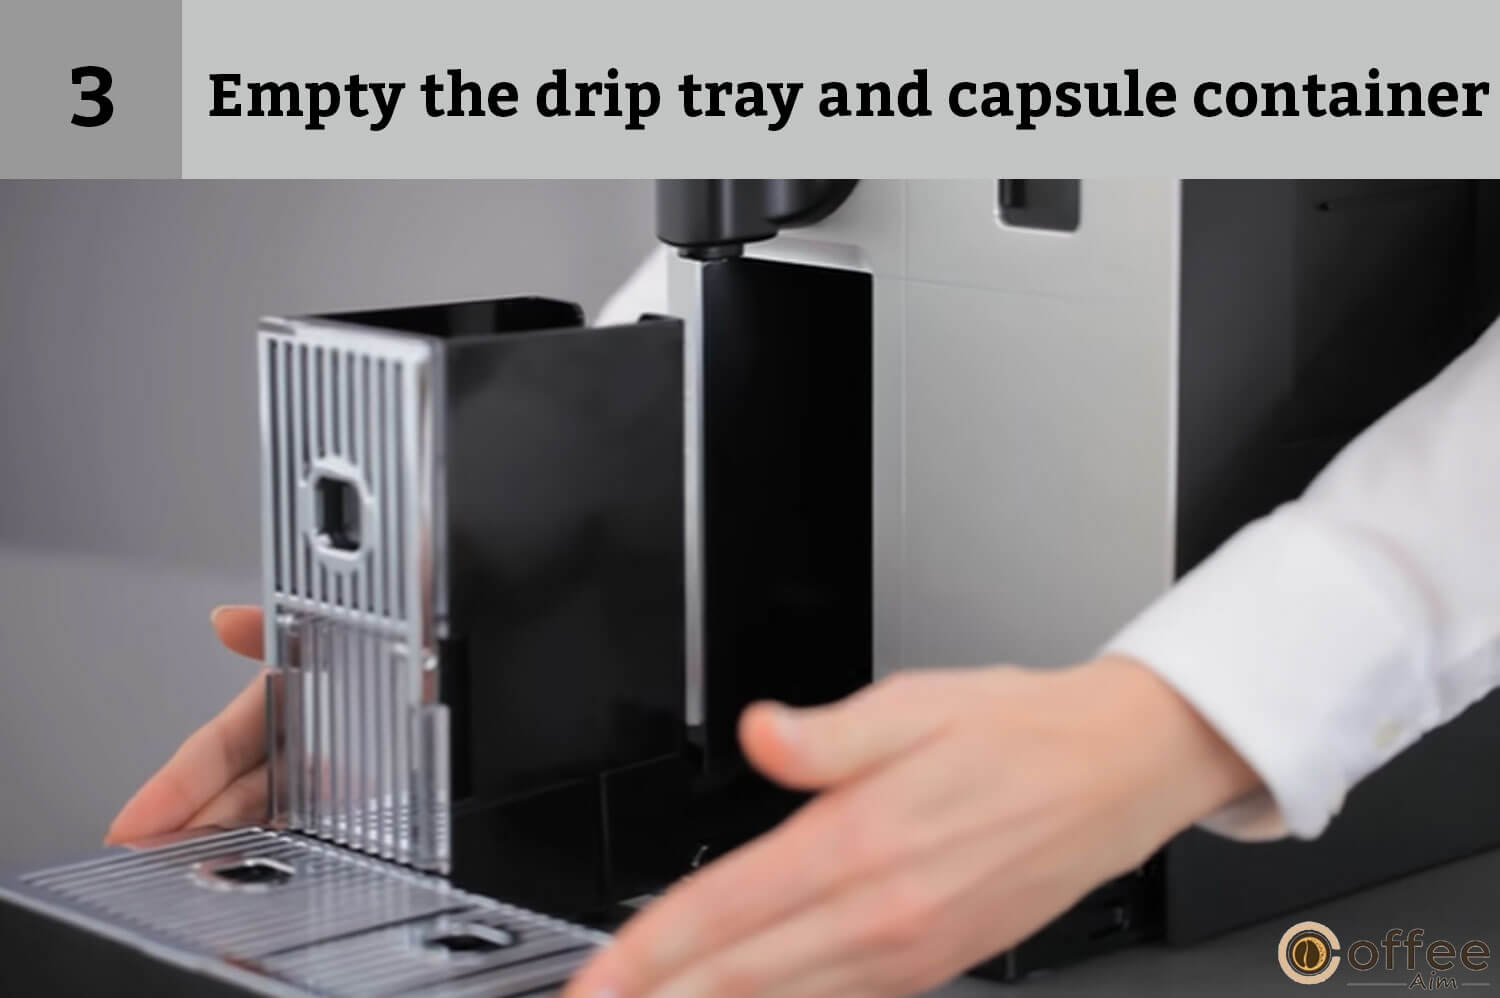
3. Descaling process: First of all empty the drip tray and the used capsules container.
4. Now you should pour water into the tank and fill it with 100 ml (3.4 oz) of Nespresso descaling agent which is given with the descaling kit. Remember to add 500 ml (17 oz) of fresh clean water to the tank and place it back into the machine.

5. Descaling process: Install the hot water nozzle to the machine you can find it on the right side of the machine.

6. Descaling process: Take one container. The container you take must have the capacity to hold 1 liter of water. Place it under both the coffee outlet and hot water spout.

7. When you tapto confirm, the descaling cycle will start. The descaling agent flows alternately through the coffee outlet, hot water spout, and drip tray. The machine will indicate when the descaling cycle is done.

8. A message will appear on display telling you to empty the container for used coffee capsules, the drip tray, and the container under the coffee and hot water outlet.

9. Rinsing process: Take the water tank out from the machine and rinse it thoroughly and again fill it up to the maximum mark

10. Rinsing process: Place the container of at least one-liter capacity under the coffee outlet and hot water spout.

11. The rinsing cycle can start by pressing thissymbol. The rinsing cycle continues alternately through the coffee outlet, hot water spout, and drip tray. The machine will now rinse until the water tank is empty.

12. When the machine is done rinsing, it will turn off automatically. Now rinse the hot water spout and clean it with a damp cloth. Place it back on the right side of the machine.
Your Lattissima pro is ready for use again.

Water Hardness Setting
This coffee maker also allows you to adjust the hardness of the water. It means you can add the right type of water to your coffee.
1. Go to the Menu, Skim through the available options and pick up the [WATER HARDNESS] option. Here you will guidance about how to set the water hardness value just follow the instructions displayed on the machine.

2. There is also a water hardness testing strip that is used to analyze the hardness of the water. Place this strip underwater for 1 second.

3. Water hardness level is indicated by the number of red squares displayed on the test strip.

4. You can set the level of water hardness.

Troubleshooting
If you couldn’t find a solution to your problem above, then no problem! Here you will provide good answers and solutions for the issues you have experienced with your Lattissima Pro.
| Problem | Solution |
| No light on display. | ➔ You should check the mains, plug, voltage, and fuse.➔ Make sure that you have switched On the button present behind the machine display. If these simple solutions don’t work, you can also contact the Nespresso club. |
| If a message appears that the machine is too hot on display. | ➔ Sometimes your machine heater reaches a high temperature (i.e., after emptying the fluid system) in this condition, simply wait for a while, and it will cool down automatically. |
| Coffee comes out very slowly. | ➔ Check out whether you have selected a strong or diluted option because flow speed is different for both varieties of coffee.➔ The issue with the flow of your coffee is likely caused by the scale buildup, which severely influences the pour of your coffee. Descaling can remove the scale buildup and clog. |
| If you experience that your coffee is no longer hot enough as it used to be. | ➔ Avoid brewing coffee in a cold coffee cup.Warm the cup first with hot water.➔ It might be possible that milk residue or dirt clogs it. The Descaling process helps to remove the scale build-up. |
| The capsule area is leaking (water in the capsule container). | ➔ It might be possible that you have not placed the capsule correctly. This issue can be resolved by positioning the capsule correctly; otherwise, call the Nespresso club. |
| If you notice irregular blinking in your machine which may occur due to different causes. Check the solution part. | ➔ Try checking that the lever is fully down.➔ Check the water tank to make sure that it’s not empty.➔ Check the orientation of the capsule.Clean the surroundings of buttons. Turn it off and on again. |
| No coffee, just water runs out (despite the inserted capsule). | ➔ Check the water tank for cracks.➔ Remove the drip tray, empty it and place it again.➔ Also check the pipelines. |
| If you are continually trying to shut the lever but it is not closing. | ➔ Check the capsule container and make sure that it should be empty. Check whether any of the capsules have become accidentally blocked. |
| If you experience any issue with the milk froth quality, that is not up to standard. Look at the solution. | ➔ You should use skimmed or semi-skimmed milk at refrigerator temperature (about 4° C/39.2° F). to make a perfect milk froth.➔ Before your next drink, be sure to rinse. Position a container under the milk outlet, and rotate the milk regulator knob until the «CLEAN» position.➔ Make sure to disassemble the R.C.S., and clean all the parts in the upper level of the dishwasher. |
| If the machine gives you the sign of repair in the display. | ➔ You can Contact the Nespresso Club or Nespresso authorized representative for examination, repair, or adjustment |
Disposal And Ecological Concerns
When you are disposing of your machine, do remember electronic items must not be thrown away in the rubbish bins at homes. Keep in mind that your appliance contains valuable materials that can be recovered or recycled. Some companies can separate the remaining waste materials into different types and facilitate the recycling of valuable raw materials. That’s why you must leave the appliance at a collection point. You can even obtain information on disposal from your local authorities.
Contact The Nespresso Club
If you are experiencing any problems with your Nespresso Lattissima Pro and can’t resolve the problem yourself. You can call the Nespresso Club and get your questions answered. You can also contact us if you want to get additional information and seek advice. Contact details of the Nespresso Club can be found in the «Welcome to Nespresso» folder in your machine box or at nespresso.com
Warranty
If you find any fault in the Nespresso Lattissima Pro you have bought, De’Longhi gives you a warranty which typically lasts about two years from the date of its purchase. To give you complete peace of mind, manufacturers will either repair or replace defective products free of charge within this period.
Replacement products or repaired parts will be guaranteed for only the unexpired portion of the original warranty or six months, whichever is greater. This warranty does not cover any damage caused by accident, misuse, improper maintenance, or normal wear and tear.
This warranty also excludes the damage caused by the usage of non-genuine Nespresso capsules. Except to the extent allowed by applicable law, the terms of this limited warranty do not exclude, restrict or modify, and are in addition to, the mandatory statutory rights applicable to the sale of the product to you.
If you find any defect or fault in your product you can contact Nespresso for instructions on where to send or bring it for repair. To discover more about Nespresso please visit our website at nespresso.com
Conclusion
Our complete guide for the correct usage of Nespresso Lattissima Pro will make your coffee-making process more fun and enjoyable. This article has provided information about everything you need to know about your Nespresso Lattissima Pro from scratch. It will offer exceptional convenience to you.
Moreover, If you want to get any additional information about coffee makers, coffee beans, and espresso machines, you can simply scroll through Coffee Aim’s pages. So, what are you waiting for? Let’s energize your day with a delicious cup of coffee with your Nespresso Lattissima Pro.
FAQs
How Do I Use Nespresso Lattissima Pro?
- Turn on your machine and let it heat up for 25 seconds.
- To prepare a Cappuccino or a Latte Macchiato, fill the milk container with the desired quantity of milk.
- We recommend that you use skimmed or semi-skimmed milk at refrigerator temperature (about 4° C).
- Do not use raw unpasteurized milk, and be sure not to use milk after its expiration date as indicated on its packaging.
- Open the steam connector door and put it in place.
- Lift the lever completely and insert a Nespresso capsule.
- Close the lever.
- Place a Cappuccino cup under the coffee outlet.
- Always orientate the milk spout towards the center of the cup or glass.
- If you want to use a tall glass for a Latte Macchiato, simply lift the foldable drip tray.
- You can adjust the texture of milk froth by turning left or right the regulator knob.
- Press the Cappuccino button.
- The preparation starts after a few seconds and will stop automatically.
How Many Times Do You Press The Button To Start Cleaning The Machine?
To start the cleaning process, you have to push the button thrice within 2 seconds. After pressing the button, an orange light will start blinking, and it remains throughout the process. The cleaning process will automatically stop after 5 minutes.
May I Use Almond Milk In Nespresso Lattissima Pro?
Yes, there is no issue; you can use almond milk in the Nespresso Lattissima Pro.
Can I Use Oat Milk In Nespresso Lattissima Pro?
With a wide range of coffee capsule flavors and blends in the permanent range, there’s something for everyone. Let’s start with the popular Lattissima One coffee machine, choose your coffee capsule, add your milk of choice, almond, soy milk, or oat milk, and before you know it, you have a hot barista-style coffee.
What Are The Three Buttons On Nespresso Lattissima Pro?
On the Nespresso Lattissima Pro, you will find three different buttons: Espresso, Lungo, and Ristretto.
How Do I Make A Large Mug Of Coffee With Nespresso Lattissima Pro?
In the Nespresso Lattissima Pro, you will get different cup size settings. Thus, select your desired cup size, and your coffee maker is ready to brew a large cup of coffee for you.
Do I Need To Clean My Nespresso Lattissima Pro After Each Use?
As your Nespresso Lattissima pro contains a milk container thus, you have to clean it after making every cup of coffee.