Quick Navigation
Step into the world of exquisite coffee with the Nespresso Lattissima One, a machine designed to transform your daily coffee ritual into an extraordinary experience. For coffee lovers, there’s nothing quite like the aroma of freshly brewed coffee and the velvety smoothness of a perfectly crafted latte or cappuccino. With its sleek design and amazing features, the Lattissima One has quickly become a beloved companion for caffeine enthusiasts around the globe.
However, even the most exceptional machines occasionally encounter hiccups, leaving you sipping on disappointment rather than a delicious cup of joe. If you find yourself facing a malfunctioning Nespresso Lattissima One, fear not! I have got you covered. In this troubleshooting guide, we will delve into the common issues that users often encounter while operating their Lattissima One, offering practical solutions to restore its full functionality and bring back the joy of your coffee moments.
Whether facing a machine that refuses to dispense the rich espresso you crave, a stubborn milk frother that won’t froth to perfection, or any other hiccup that disrupts your coffee bliss, this article will serve as your trusty companion. Picture us as your virtual coffee whisperers, guiding you through the intricate world of troubleshooting, ensuring every sip from your Lattissima One is a moment of pure delight.
So, please grab a cup of patience and a dash of curiosity, and let’s embark on this journey together to unravel the mysteries of your Nespresso Lattissima One. With my expert tips and step-by-step instructions, you’ll be back to enjoying heavenly coffee creations in no time. Now say goodbye to frustration and greetings to the aromas and flavors that make coffee genuinely magical. Let’s get started!
Related: How To Use Nespresso Lattissima One
Getting Started
Before diving into the nitty-gritty of troubleshooting your beloved Nespresso Lattissima One, gathering a few tools will aid you in restoring coffee machines. These tools are beneficial and will make troubleshooting smoother and more efficient. So, let’s make sure you have everything you need to get started:
1. Screwdriver
A trusty screwdriver is an indispensable tool for opening up your Lattissima One and accessing its internal components. Whether you need to tighten loose screws or perform a more complex repair, having a screwdriver on hand will enable you to navigate the machine’s intricate mechanisms easily.
2. Cleaning Solution
Regular cleaning is crucial for maintaining the performance and longevity of your Lattissima One. A dedicated coffee machine cleaning solution designed for Nespresso machines will effectively remove any built-up coffee residue or mineral deposits. It will help ensure your machine operates smoothly and consistently delivers exceptional coffee.
3. Soft Cloth Or Microfiber Towel
A soft cloth or microfiber towel is your go-to tool for cleaning the exterior surfaces of your Lattissima One. This gentle cleaning accessory will keep your machine looking sleek and polished, whether it’s wiping away spills, smudges, or dust.
4. Needle Cleaning Tool
The Lattissima One features a piercing needle that punctures the coffee capsule during brewing. Over time, this needle can become clogged with coffee grounds or debris, leading to issues with extraction. A needle cleaning tool specifically designed for Nespresso machines lets you quickly clear blockages and ensure optimal coffee flow.
5. Descaling Kit
Over time, mineral deposits can accumulate inside your coffee machine, affecting its performance and the taste of your coffee. A descaling kit, specially formulated for Nespresso machines, helps remove these deposits, restoring the machine’s efficiency and ensuring every cup of coffee is as delightful as the first.
With these essential tools at your disposal, you can tackle various issues that may arise with your Nespresso Lattissima One. Keep in mind a little preparation goes a long way in resolving troubles and getting your machine back in tip-top shape. So, gather your tools, roll up your sleeves, and embark on the troubleshooting adventure together!
Problem#1: Why Is There No Light Indicator On My Nespresso Lattissima One?
The light indicator of your machine is a signal of hope that you are going to have a delicious coffee in a few minutes. But when you see no light indicator on your Nespresso Lattissima One, it’s a time of concern. There can be various reasons behind it. But fear not; I am here to bring the light to your life by providing solutions for the no-light indicator issue. But first, let’s dig into the causes below!
Cause 1: Dysfunctional Power Outlet
Your Nespresso Lattissima One has no light indicator, which is likely a sign that the power outlet is dysfunctional. A typical dysfunctional result of an issue with the outlet wire, which is broken, or the outlet is dead, which means it has no current supply, or maybe the outlet is supplying voltage to too many devices, which is not letting your coffee machine get the necessary power supply.
Solution: Inspect The Power Outlet
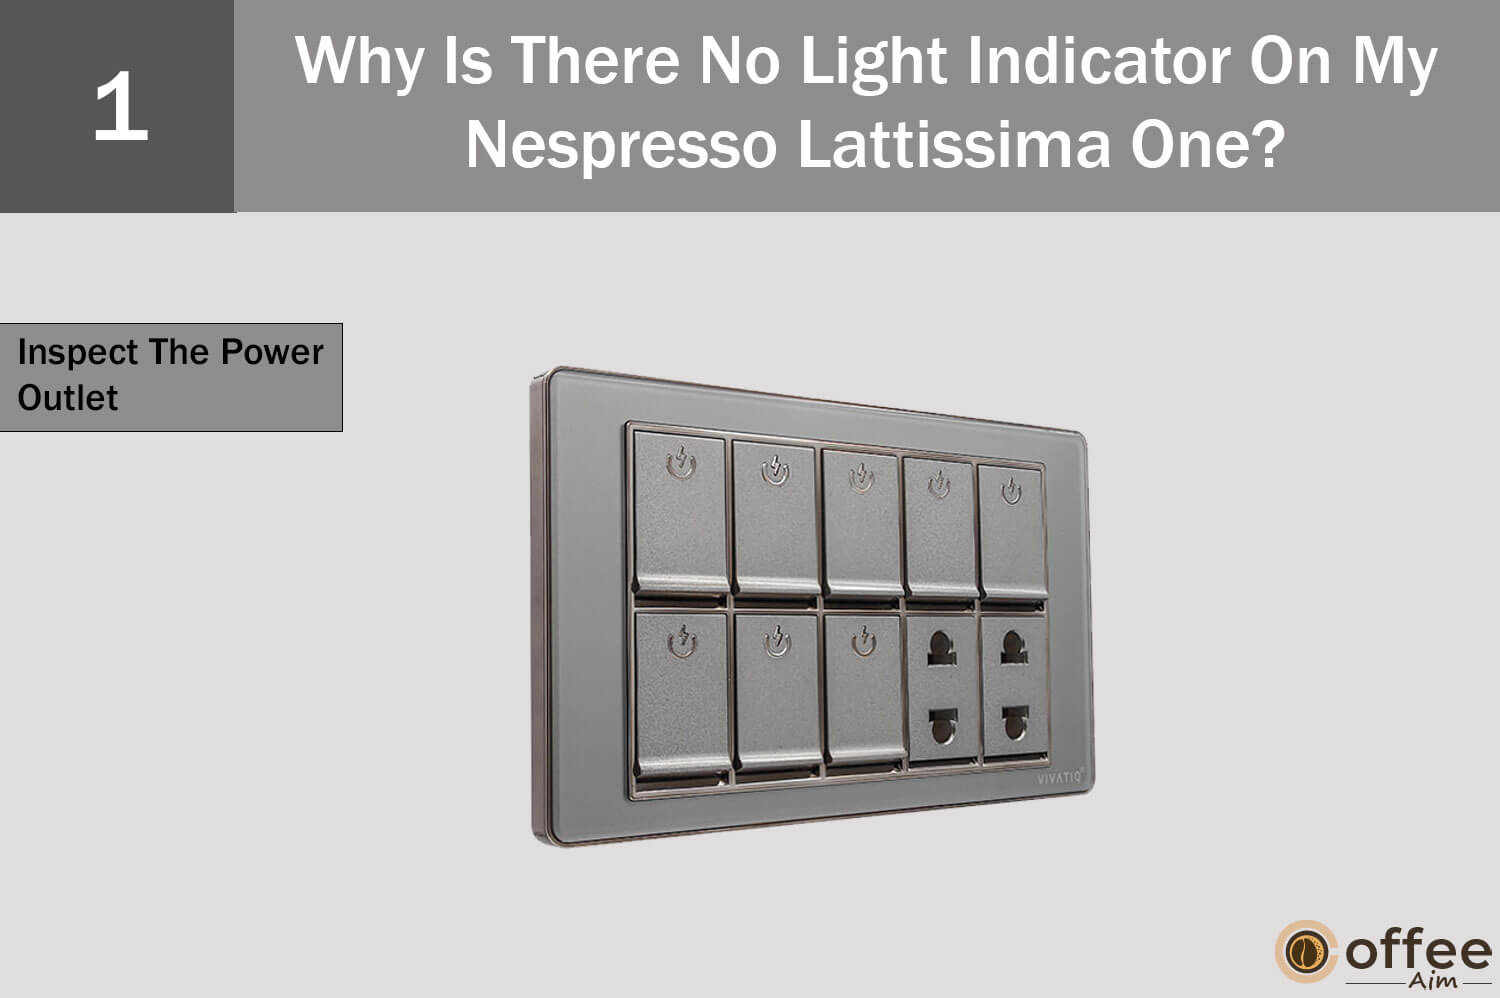
To confirm the working of a power outlet, plug in the power cable to another outlet at your place. If your machine’s light indicator illuminates, it confirms the previous outlet is dysfunctional. Additionally, make sure the outlet is not overcrowded with other devices.
Cause 2: Loose Outlet
A loose outlet is a possible reason behind the no-light indicator on your Nespresso Lattissima One. When the power outlet is loose, it cannot hold the plug firmly, which causes a loose connection and the supply of electricity to get disrupted. That’s how your coffee machine’s indicator is unable to light up.
Solution: Fix The Loose Outlet
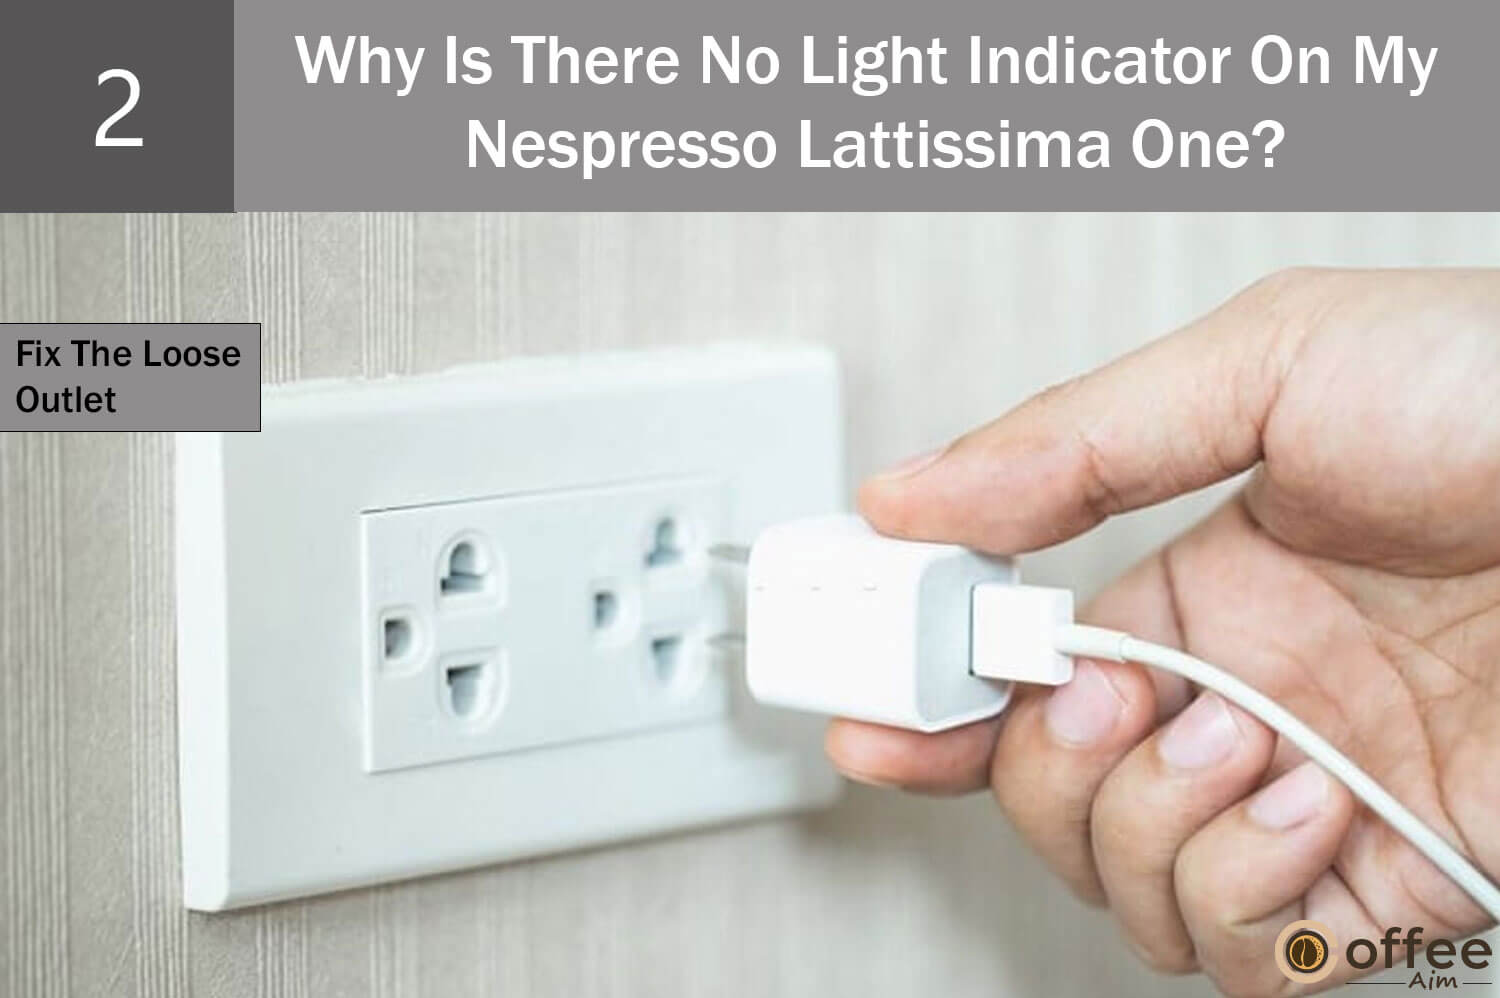
In case of a loose outlet, it’s crucial to have the outlet inspected and fixed by a certified electrician. Once the outlet gets set, plug in the cable securely so your machine can get a consistent power supply to turn on and light up the indicator.
Cause 3: Voltage Incompatibility
The lack of a light indicator on your Nespresso Lattissima One is because of voltage incompatibility with the home voltage supply. The voltage required for your coffee machine differs from the voltage running in the mains of your house. This voltage difference causes the voltage to fluctuate, resulting in an unstable supply. Therefore, your machine cannot turn on and show no light indicator.
Solution: Check The Voltage
Always check the voltage compatibility before plugging the cable into the outlet to avoid voltage fluctuation. The voltage required for your Nespresso Lattissima One is 220-240V.
Cause 4: Blown Fuse
Your coffee machine has no light indicator because the fuse has blown. A fuse is in charge of protecting your machine from any electrical damage. If the fuse blows, the power supply gets disrupted, preventing your machine from turning on.
Solution: Inspect The Fuse
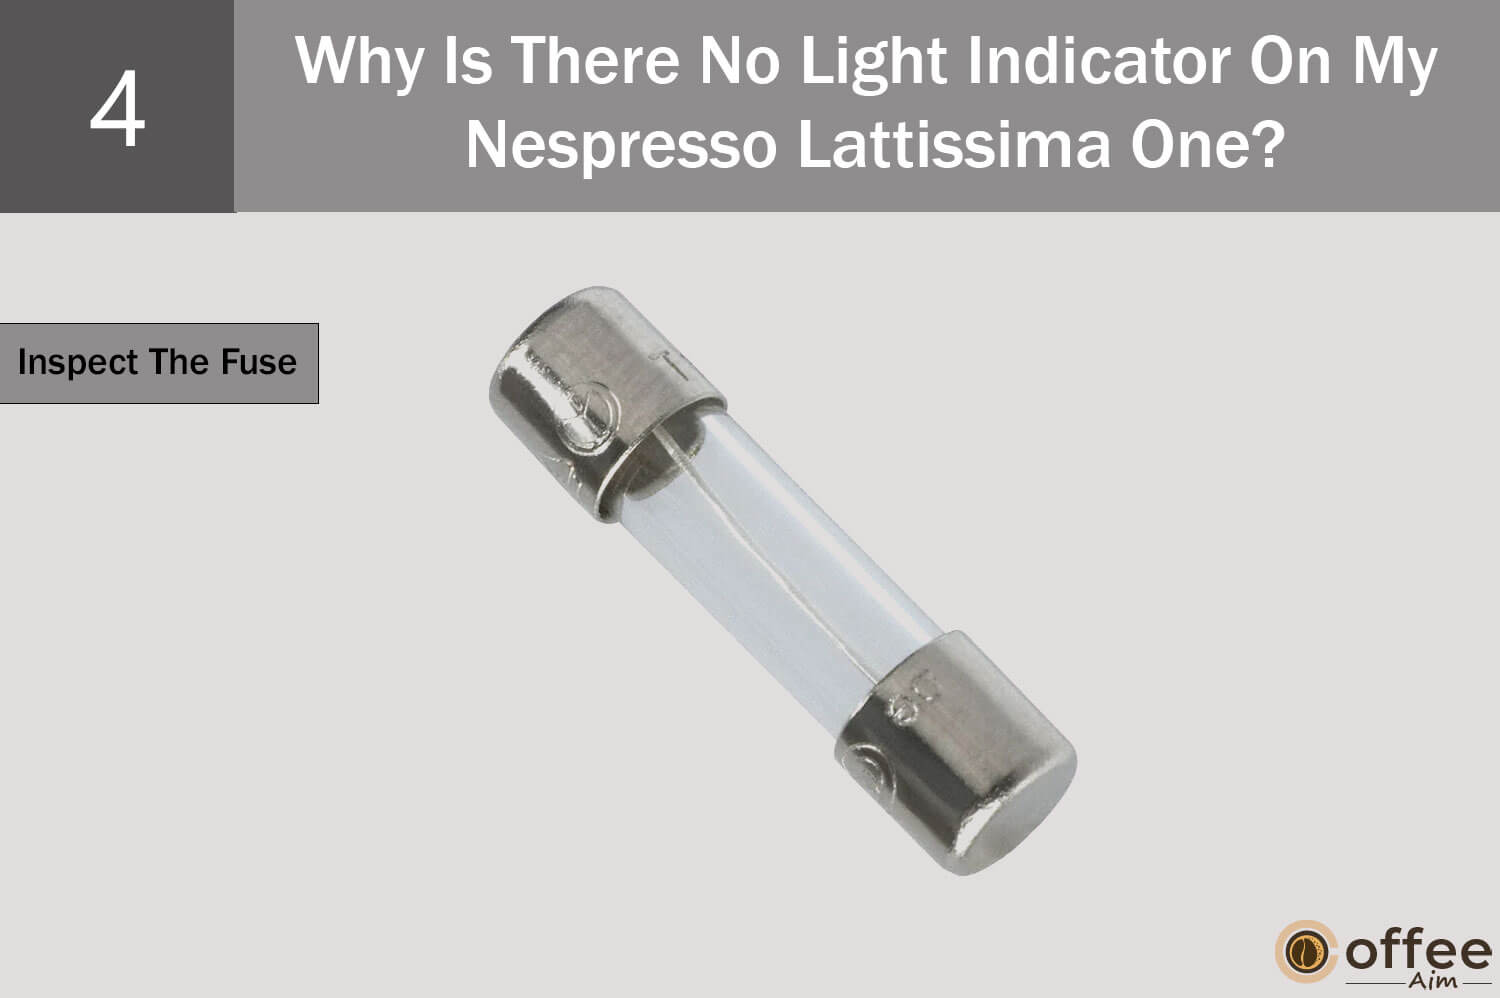
To fix this machine’s fuse, you require replacement of the fuse; do not attempt to do it alone if you are unaware of the electrical knowledge. Please seek expert assistance. For contact details, see the section “When To Seek Professional Help.”
That’s how you can fix the no-light indicator issue. Let’s jump into another problem: no coffee, no water coming out of your Lattissima One. You will find each cause in detail and the easy fix for it.
Problem#2: Why Is No Coffee, No Water Coming Out Of My Nespresso Lattissima One?
Are you facing no coffee, no water issues in your Nespresso Lattissima One machine? Oh, man! A faulty coffee maker is enough to ruin your day. But don’t stress out; you can fix this issue with some troubleshooting tips, which I am going to share with you. But first, you should understand the causes of this issue so it will be easy for you to resolve it. Let’s get started!
Cause 1: Empty Water Tank
Your Nespresso Lattissima One isn’t producing any coffee or water since the tank is empty. Water is necessary to blend coffee beans; if there is no water in the tank, your machine will not produce coffee. Water is also required for cleaning; you cannot begin cleaning without it.
Solution: Fill The Water Tank

First, inspect the water level in the tank. Then fill it with potable water so your machine can use it to brew coffee or for cleaning.
Cause 2: Limescale Accumulation In The Internal Pipes
The cause of your Nespresso Lattissima One inability to produce either coffee or water is limescale, which has clogged the machine’s internal tubes and stopped the flow of both substances. What is the cause of the limescale? The high amount of minerals in the water you use in your machine causes the limescale to form. When water is heated for brewing, the mineral scale will separate out, build up in layers, and eventually harden into a crust.
Solution: Descale Your Machine
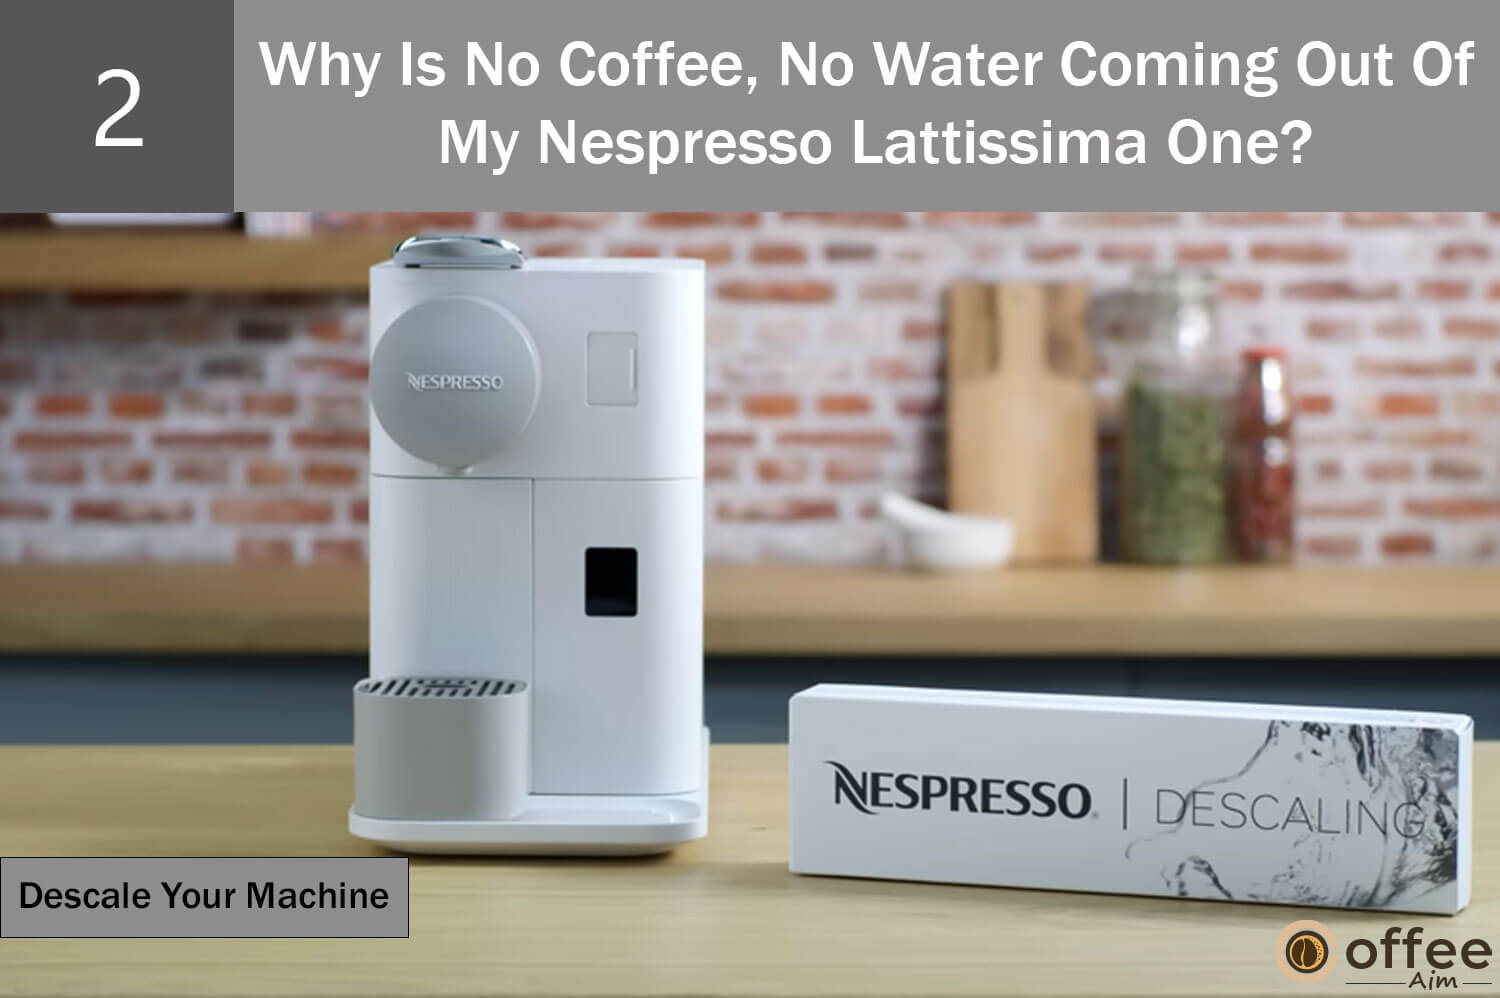
To effectively remove the limescale from your Nespresso Lattissima One, get ready to perform descaling by using the descaling solution of your machine. Descaling is the only method to keep your machine free from limescale and maintain optimum performance. For the descaling procedure, see the section at the end of the problem section, “How To Descale Nespresso Lattissima One?”
Following the fixes mentioned above will help you fix your machine’s no coffee, no water issue. Now, It’s time to reveal the causes of the slow coffee dripping issue of your Lattissima One. Let’s dive into this problem and figure out the possible fixes.
Problem#3: Why Is The Coffee Dripping Out Slowly From My Nespresso Lattissima One?
If your Nespresso Lattissima One is taking too long to dispense coffee from the coffee outlet, then I am sure you do not have an ideal crema on your Espresso shot, and it must make you sad. Oh man, what’s causing the coffee to drip out slowly? If you need help fixing this issue, then you are at the right place to know how you can get rid of slow dripping. Scroll down to explore the causes of the slow coffee flow of your machine and troubleshoot this issue with the effective solutions mentioned below.
Cause 1: Wrong Capsule Type
The cause of the slow flow of coffee is likely because you have inserted the wrong capsule that isn’t appropriate for the kind of coffee you wish to brew in your Nespresso Lattissima One. What does it mean? Let me make it understandable for you!
Suppose you wanted to brew a Lungo coffee but mistakenly placed an Espresso capsule into the holder and pressed the Lungo button as per your choice; what will happen?? Oh, Man! Your drink will pour out slowly. But why is it pouring this slowly? Because you have chosen an Espresso Capsule which is not for the Lungo button. The Lungo buttons work with the Lungo capsule, which is for two espresso shots and takes more time to brew and flow out than an espresso.
Do you want to know what’s the logic behind this cause? Then you must keep reading to learn in detail.
The speed at which your coffee pours out of the outlet depends on the capsule type and the brew button you choose. Each coffee capsule contains grounds of different coffee beans having different densities, ground sizes, and moisture levels, affecting the coffee grounds’ blending speed, such as; the Espresso button takes 25 to 30 seconds to brew an Espresso shot. In contrast, the Lungo button takes 35 to 40 seconds, which is longer than Espresso. That’s why you are experiencing a slow pour issue.
Solution: Use The Appropriate Capsule Type That Matches The Coffee Type

Before inserting a capsule into the capsule holder, ensure the capsule type matches the coffee you will brew. So, if you want to savor a quick Espresso shot, choose an Espresso specific capsule, and if you desire long and smooth coffee, go for a Lungo capsule. You can look for all the information on the capsule box if you need more clarity about the capsule type. As a coffee lover, you must know about each capsule type so you can enjoy it without making blunders.
Cause 2: Mineral Scale Clogging The Machine
Another reason behind slow coffee flow is the clogging of your Nespresso Lattissima One due to mineral scale build-up. During brewing, when water is heated, the minerals from water separate and accumulate inside your machine in the form of layers, and over time, these layers develop into hard crusty layers, which hinder the smooth coffee flow. Therefore, you end up experiencing a slow coffee flow.
Solution: Descale Your Machine

To resolve the slow coffee flow, you need to remove mineral scale layers, and for that, you have to perform the descaling of your machine. So, get ready for descaling! For the descaling procedure, see the section at the end of the problem section, “How To Descale Your Nespresso Lattissima One?”
Hey, wait! The troubleshooting guide does not finish yet. After addressing the slow coffee flow issue, let’s explore the causes and solutions of the No Coffee, Just Water Runs Out issue of your Nespresso Lattissima One.
Problem#4: Why Is No Coffee, Just Water Runs Out From My Nespresso Lattissima One Even After Inserting A Capsule?
Getting water instead of coffee from the coffee outlet isn’t very pleasant, even though the capsule is in the holder. But worry not; just read this guide. You will indeed find your answers here as I am going to uncover the reasons behind this issue and the easy fixes below!
Cause 1: Coffee Grinds Clogging The Grid Plate
You are experiencing a no coffee flow because of the coffee grinds stuck on the grid plate, thereby clogging it. The grid plate is at the bottom of the capsule chamber. When coffee residue builds up on this crucial part, water finds it difficult to squeeze through the tiny holes and pierce the capsule foil. What’s the awful outcome of coffee residue buildup? No coffee flow! Because the water pressure pierces and punctures the capsule foil, a specific grid-like pattern is left behind. So, it’s all about clogged grid plates.
Solution: Clean The Grid Plate
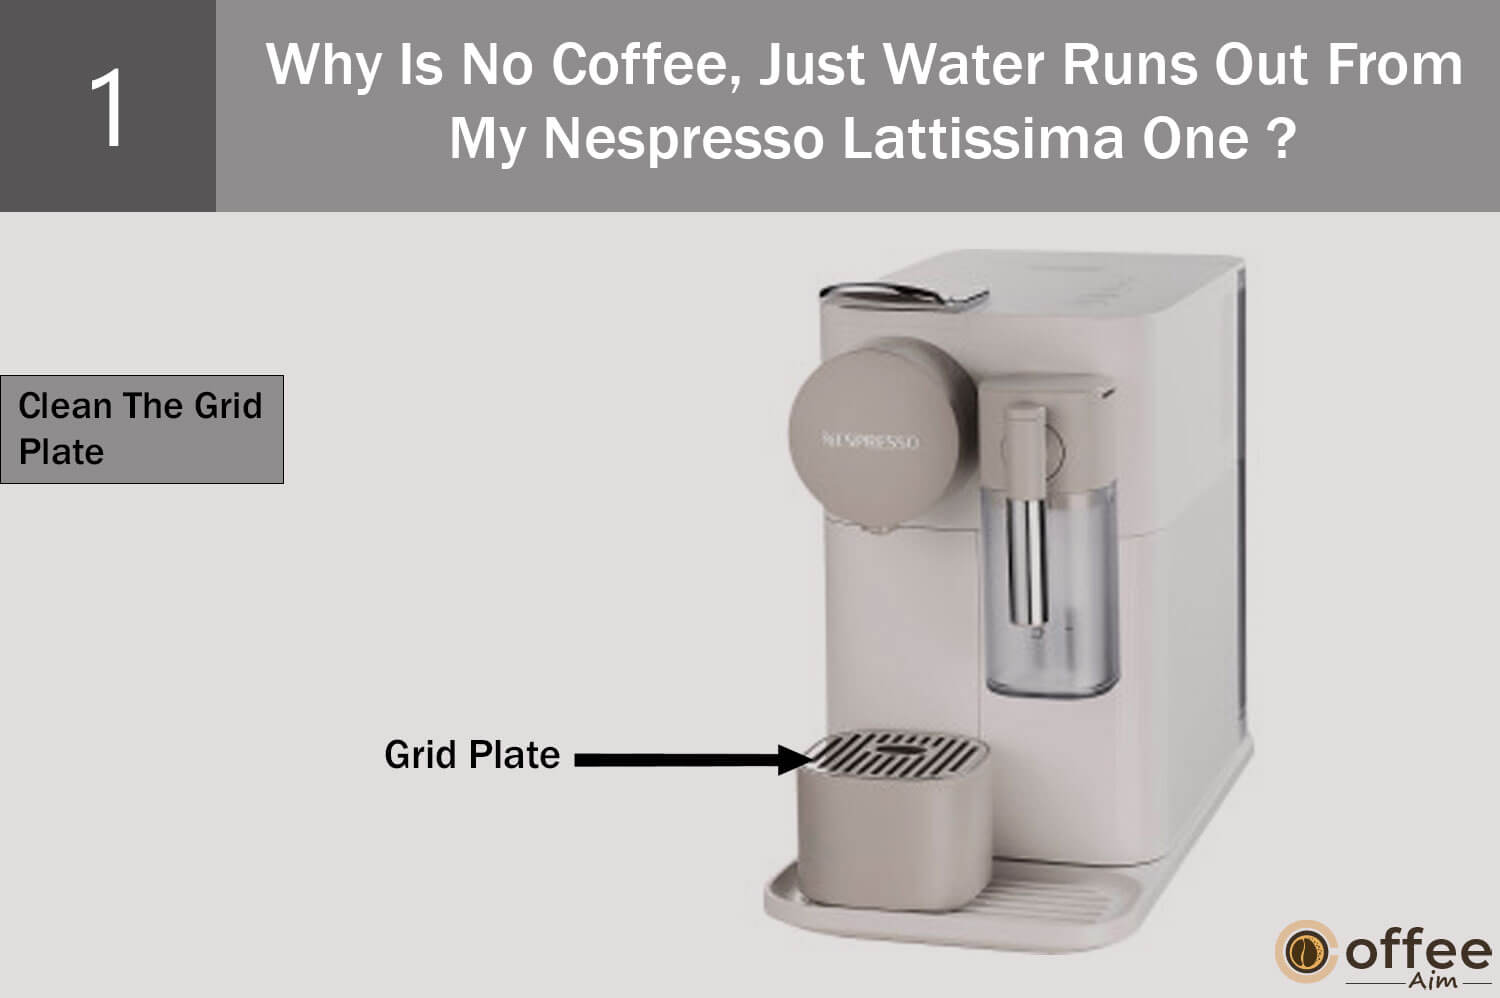
Look for the grid plate by opening the lever; you will find it inside the capsule chamber; if the grid plate has coffee residues, then it’s time to clean the grid plate. Grid plate cleaning is not as difficult as you think. Follow the cleaning steps outlined below:
- Pick up a toothbrush. Make sure it is clean before you start cleaning. Make the brush fibers wet and start scrubbing the grid plate towards the front.
- Once you are done scrubbing of grid plate, close the lever and flush off the coffee residues from the coffee outlet by pressing the brew button. Ensure the water tank is full to run a cleaning cycle.
- If the holes on the grid plate are completely blocked, scrub it several times and use the brew button to pump water through it. The dirty water containing the coffee residues will come from the coffee outlet.
- Repeat the scrubbing process until the water is clear and free from coffee residues.
Cause2: Clogged Coffee Spout
Another cause of no coffee flow is the clogged coffee spout of your coffee machine. It happens when users don’t clean it daily; coffee grounds accumulate and clog the spout. Also, when the grounds are uneven, they can cause a buildup within the spout and stop the coffee flow.
Solution: Clear The Blockage
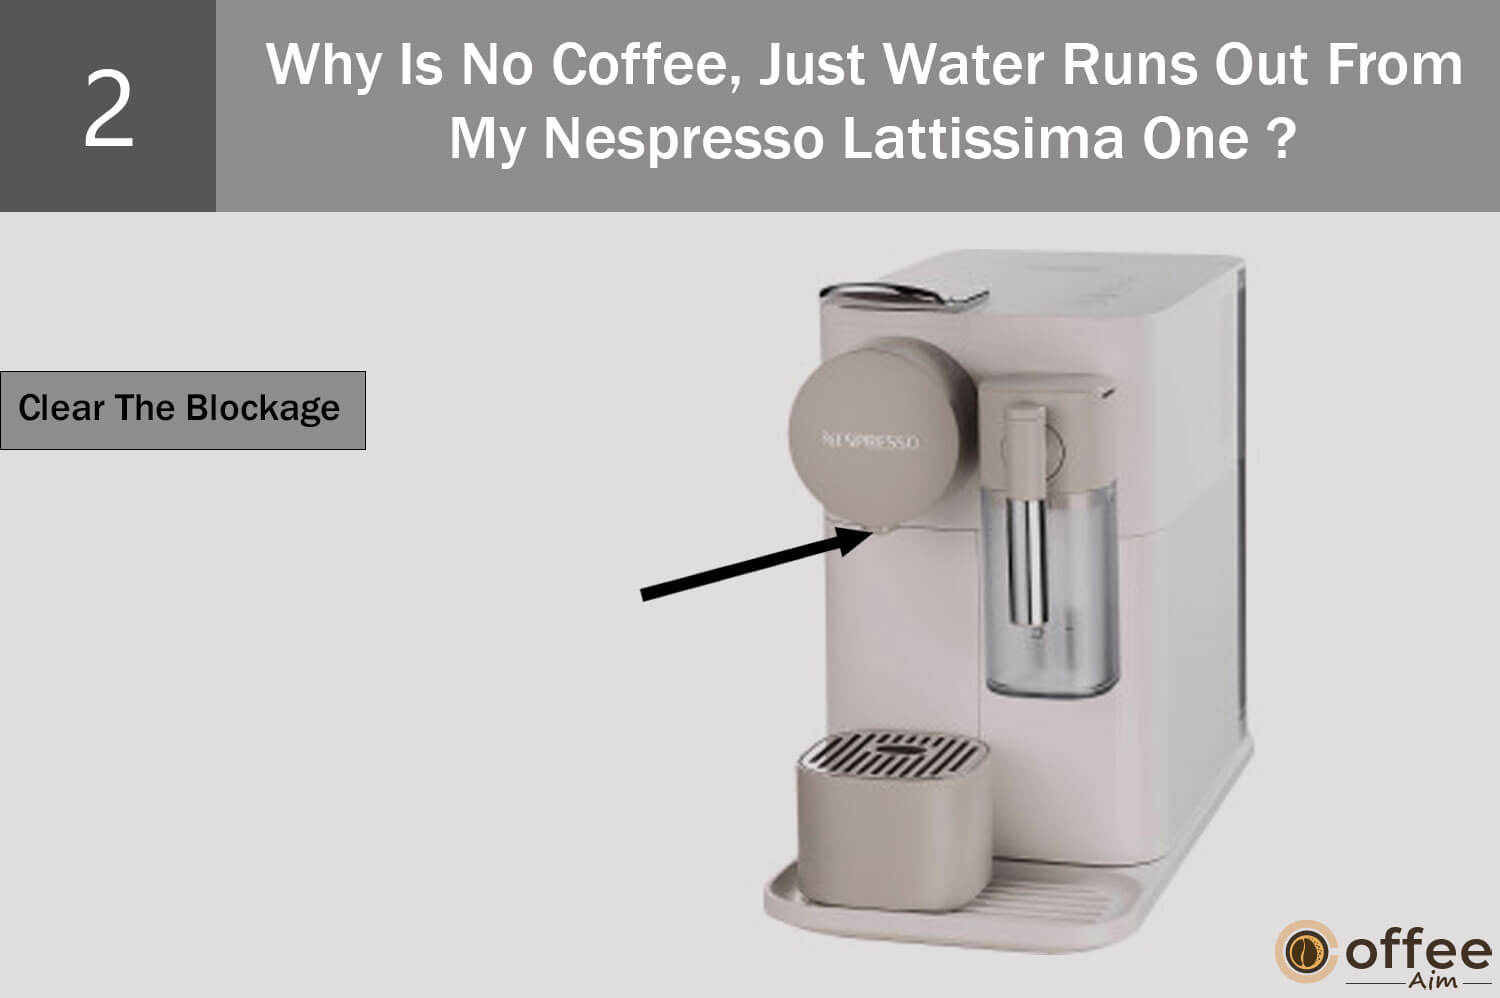
Clean the coffee spout by clearing the blockage to fix the no-coffee flow. You only have to take a paperclip and poke it into the coffee spout. It will go up about five centimeters; keep poking in, then flush water through it. Open and close the lever and ensure you have not placed a capsule inside and the water tank is full. Now, press the button and flush it well.
Hold on a minute! It would be best to learn more troubleshooting tips for different problems with your coffee maker. So, let’s dive into another problem, coffee not being hot enough in your Nespresso Lattissima One, and learn the potential causes and fixes.
Problem#5: Why Is The Coffee In My Nespresso Lattissima One Not Hot Enough?
Are you sipping on a lukewarm coffee on a cozy winter’s morning? Uh-oh, I can understand how frustrating it is. There could be various reasons behind less hot coffee. And I will explain the potential causes and fixes for your Nespresso Gran Lattissima’s inability to produce hot coffee; if you are looking for the reason,
Cause1: Heat Transfer To Cold Cup
The temperature of the cup in which you make your coffee is cold, which is the leading cause of why you are not getting hot coffee. How is the temperature critical to the brewing process? If you pour it directly into a cold cup, the heat from your coffee will transfer to the cold cup to make it warm, and that’s how it will diminish the warmth of your freshly brewed coffee. So, the cause is not directly related to your coffee machine.
Solution: Preheat Your Cup

You don’t have to fix your coffee machine to troubleshoot this lukewarm coffee issue, as this cause is not directly related. Preheating the cup will help you prevent heat transfer from your hot coffee to the cold cup. You can do preheating in the following ways:
- Add hot water into the cup, let it stay for a few minutes, and then empty it. Pour your just-brewed coffee after this; doing so will assist you in keeping the coffee warm and provide a good brewing experience.
- Rinse your cup with hot water.
- Use a cup warmer to keep your coffee warm.
Cause2: Mineral Accumulation On Heating Element
The mineral accumulation on the heating element is another cause of why you are not getting a hot coffee. These minerals precipitate out of the water while heating, accumulate on the heating elements, and form hard layers, thereby impairing the normal function of achieving an optimum temperature to brew a hot coffee. This issue arises due to the high mineral concentration of water you use in your machine for brewing.
Solution: Descale Your Machine

The only solution to remove mineral scale from the heating element is descaling your coffee machine. For the descaling procedure, see the section at the end of the problem section, “How To Descale Your Nespresso Lattissima One?” And if you are using tap water in your machine without being aware of its mineral concentration, you must avoid it and start using filtered water to prevent these issues.
Let’s move forward and look into the detail of a very common capsule area leaking problem of your Nespresso Lattissima One.
Problem#6: Why Is The Capsule Area Of My Nespresso Lattissima One Leaking?
Are you encountering a leaky machine whenever you brew coffee in your Nespresso Lattissima One? Damn, you are dealing with a mess and couldn’t even cherish the first sip of your delicious coffee. If you are concerned about a leaky capsule area, don’t worry. I have the answer to all your concerns, and the solution involves checking a few components in your machine. Let’s look into why there is water in the capsule container.
Cause 1: Incorrect Capsule Position
Incorrect capsule positioning is one possible cause of leaks around the capsule region on your Nespresso Lattissima One. The manufacturers of Nespresso capsules have carefully crafted the capsules to fit tightly into the holders. If the capsule is not aligned according to the shape of the holder, water may escape through the edges of the capsule rather than pass through the capsule’s center to blend with coffee grinds for brewing. As a result, water leaks from the capsule area and finds its way into the container meant to hold the used capsules.
Solution: Check The Capsule Position

Examine the position of the capsule by looking inside the capsule holder. Position the capsule correctly if it is not already there in accordance with the holder’s shape. Also, ensure the capsule is perfectly fitted each time you brew coffee.
The solution mentioned above will help you fix the leakage issue of your Lattissima One. Now, head on to the irregular blinking issue and check out the cause and solution so you can help yourself fix this issue singlehandedly.
Problem#7: Why Is My Nespresso Lattissima One Blinking Irregularly?
Are you trying to find the reason for the irregular blinking of your Nespresso Lattissima One? Seem likes you have a rough time dealing with your coffee machine, as it is consistently blinking irregularly and not letting you brew coffee. Fear not; I am here for the rescue, as I will enlighten the cause underlying this issue and provide you with a solution.
Cause: Technical Fault
The irregular blinking indicates a technical fault in your Nespresso Lattissima One. A “technical fault” refers to a malfunction with a system’s functionality or operation, including heating element failure, a dysfunctional pump system, and other electrical problems related to your machine’s power cable or fuse. So if one of these faults occurs, your machine starts acting up and gives you an alert by blinking irregularly.
Solution: Call The Nespresso Club

To get rid of blinking lights, you need to fix these technical faults, and for that, you must contact Nespresso Club, as you cannot fix them by yourself. You may have to send your machine for repair. The Nespresso service is available 24/7 to assist you in identifying any issue and offers possible fixes, including repair and exchange of any part of your machine. Add. For contact details, see the section “When To Seek Professional Help.”
I have just finished discussing the mystery behind the irregular blinking of your coffee machine; it’s time to uncover the causes and potential solution of another blinking issue where all the buttons blink for ten seconds simultaneously, and then the machine switches off. Let’s get into this!
Problem#8: Why Do All Buttons Of My Nespresso Lattissima One Blink Simultaneously For Ten Seconds, And Then The Machine Switches Off Automatically?
When all the buttons of your Nespresso Lattissima One blink simultaneously for ten seconds, followed by a shutdown, it is pretty confusing when you don’t know how to handle such a problem. But don’t worry; with this guide, you can identify the cause of this problem and how to fix it. So, let’s dive in and find the solution to it!
Cause: Error Alarm
Blinking all the buttons of your Lattissima One with a shutdown is a definite indication of an error alert.
- The Rapid Cappuccino System is dirty.
- An electrical problem, such as an improper power source or a voltage difference between the socket and the machine, could be the cause.
- An unstable power supply is caused by your machine’s fuse, which is not working.
- Your machine’s interior is entirely covered with mineral scale, making it difficult to initiate any operations.
Solution: Fix The Error
To fix the error alarm, first, you must try out the possible solutions to the above-mentioned predictable causes.
- Clean The Rapid Cappuccino System. For the cleaning procedure, see the section at the end of the problem section, “How To Hand Wash The Rapid Cappuccino System Of My Nespresso Lattissima One?”
- For optimum operation, your machine needs a consistent power supply and voltage compatibility between the socket and the machine. Do check the socket’s current supply is consistent; the wires must be in good condition and not broken. Also, ensure the voltage is compatible.
- Check the fuse in your machine, and if it’s burned, replace it with the help of a professional, as a burnt fuse can stop it from getting an appropriate power supply.
- Descale your machine, as it is the only effective procedure to remove mineral scales from the internal parts of your machine. For descaling process details, see the “Descale your Nespresso Lattissima One” section below.
Solution 2: Send The Machine For Repair
If you cannot resolve the error alarm, call the Nespresso Club for assistance with this issue and send your Lattissima One for repair. It’s better if your machine gets repaired by the hands of its manufacturers. For contact details, see the section “When To Seek Professional Help.”
The troubleshooting journey of Nespresso Lattissima One doesn’t end here. Get ready to discover the causes behind the fast blinking of all the coffee buttons before returning to ready mode and finding the solutions.
Problem#9: Why Do All The Coffee Buttons Of My Nespresso Lattissima One Blink Fast Three Times, And Then The Machine Returns To Ready Mode?
Do you have a confusing situation where the coffee buttons of your Nespresso Lattissima One are rapidly blinking three times and quickly go to ready mode? You seem trapped in these blinking lights because you don’t know what message this blinking is trying to convey. But I will not let you worry about it, as I have got the detail of this problem. Let’s not wait for any moment and check out the cause and solution below!
Cause: Empty Water Tank Alert
With this three times fast blinking pattern, your Lattissima One is signaling you about the water tank, which is empty. Your machine is equipped with this blinking alert for empty water tanks. Such a handy feature of your machine keeps you updated about the water level in the tank.
Solution: Fill The Water Tank

When you see this blinking pattern on your coffee machine, check the water level in the tank. And if the tank is empty, then follow the steps below.
- Remove the lid and rinse the water tank before filling it.
- Add potable water to the maximum level, then cover with the lid.
- Place the water tank at the back of your machine.
You have just finished reading the coffee buttons’ blinking issue, which indicates a water tank alert. Next, I will take you into detail about another blinking matter where the descale and clean alert of your Nespresso Lattissima One blinks simultaneously.
Problem#10: Why Does The Descaling And Cleaning Alerts Of My Nespresso Lattissima One Blink?
Are you looking for an answer to why the descaling and cleaning alert of your Nespresso Lattissima One blinking? It must be annoying when you can’t find the answer. But don’t lose hope and roll up your sleeves to fix the blinking issue because I have gathered the possible solution to your problem and how you can troubleshoot this situation. Let’s jump into the details and reach the bottom to resolve this issue.
Cause: Your Machine Is In Menu Mode
The simultaneous blinking of descale and clean alert indicate your Nespresso Lattissima One is in menu mode. The menu mode is the main menu setting of your coffee machine, from where you can perform various functions such as factory resetting and emptying the system. You can access the Auto-off timer settings to change the timer and the water hardness settings to set the water hardness level on your machine.
Solution: Exit The Menu Mode

To eliminate the blinking of descale and clean alert, exit the menu mode by pressing the Milk button for three seconds. Otherwise, usually, your machine leaves the menu mode automatically when you enter the menu mode and don’t perform any action for thirty seconds.
Let’s turn your attention to the most common problem of descaling alert shining orange on your Nespresso Lattissima One. Let’s check out the details below!
Problem#11: Why Do The Descaling Alert Of My Nespresso Lattissima One Shines Orange?
When you have finished brewing a delicious Cappuccino out of your Nespresso Lattissima One, you notice a vibrant orange light shining on the descaling alert, signaling that it’s time for descaling. But have you ever thought about why your machine needs descaling? Then join me to explore the intriguing explanations for the orange shine that indicates a descaling alarm on your Nespresso Lattissima One. Let’s find out below!
Cause1: Mineral Scale Accumulation
Your Nespresso Lattissima One’s descaling alert shines a bright orange, which is a clear indication that your machine is fully loaded with mineral scale, and now descaling is required. This alert is intended to keep an eye on any mineral scale layers that might develop over time. When the mineral scales reach a specific level, the descaling alert activates, alerting you that it’s time to descale your coffee machine. Descaling is crucial because it removes the mineral buildup that prevents your machine from operating at its best and continuing to provide optimal performance.
Solution: Perform Descaling Procedure

The simplest response to this alert is to perform a descaling of your machine. Descaling helps remove the mineral scale from the machine. So, get ready to give descaling treatment to your beloved coffee machine. For the descaling procedure, see the section at the end of the problem section, “How To Descale Your Nespresso Lattissima One?”
Now, let’s move on to the next section and delve into the depth of another problem the descale alert blinking orange with a steady light on the Espresso button. Take a look at the causes below!
Problem#12: Why Is The Descaling Alert On My Nespresso Lattissima One Blinking Orange, And Does The Espresso Button Have A Steady Light?
Are you waiting for the orange descale alert to stop blinking and the steady light on the Espresso button to disappear so you can continue operating your Nespresso Lattissima One?
But it’s been an hour since your machine has been behaving the same way; it must be frustrating. But try not to panic as I have identified the causes and solution to this problem. Let’s look at them below!
Cause: Your Machine Is In Descaling Mode
When the descaling alert blinks orange along with the steady light on the Espresso button, it indicates the first descaling step; hence your machine is in descaling mode. This blinking situation arises when you start descaling your machine but haven’t completed the descaling procedure, which involves the circulation of the descaling solution to rinsing with water. And throughout the process, your coffee maker’s buttons will blink to indicate the various descaling steps.
Solution: Complete The Descaling Process
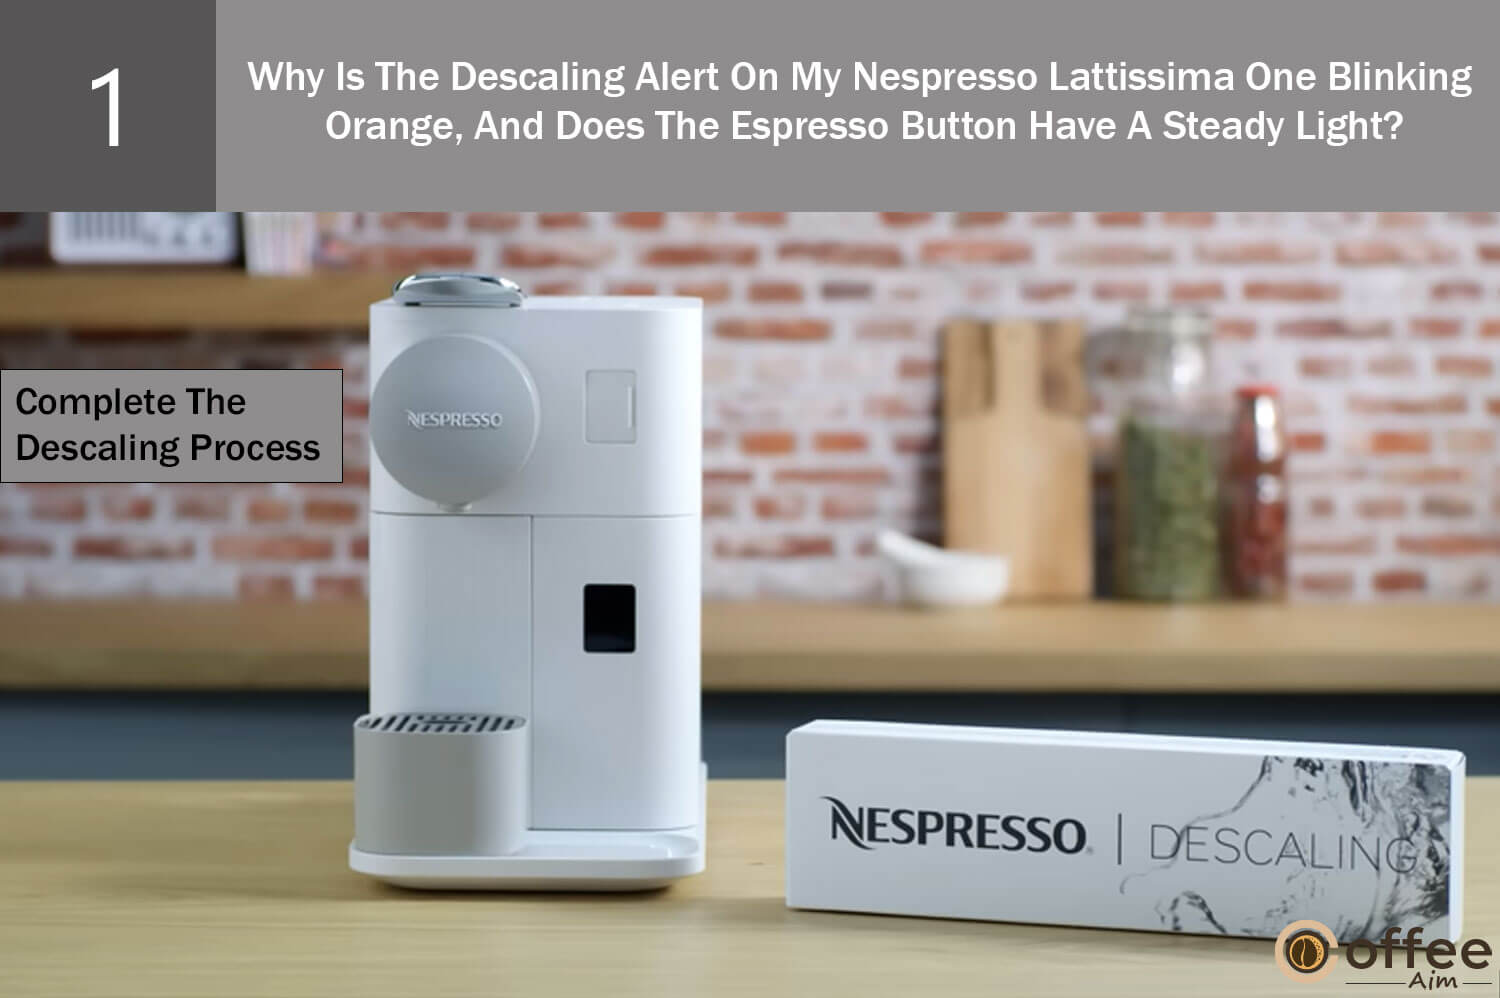
You can resolve this blinking issue by completing the descaling process on your machine. For the descaling procedure, see the section at the end of the problem section, “How To Descale Your Nespresso Lattissima One?”
It’s time to look into the next section to learn troubleshooting tips for the problem clean alert that shines orange. Let’s figure out the causes and solutions below.
Problem#13: Why Do The Clean Alert On My Nespresso Lattissima One Shine Orange?
Cleaning alert of your Nespresso Lattissima One shining orange? Indicating it’s time for cleaning. But what type of cleaning of your machine is required with this alert? If you are unaware of what part of your machine you need to clean to resolve this cleaning alert, there is no need to worry; I’ll explain what you need to do once you read the reason, so scroll down to look!
Cause: Rapid Cappuccino System Is Dirty
The clean alert is shining orange, which indicates your machine’s Rapid Cappuccino System is dirty and needs cleaning. If you leave it uncleaned after preparing milk recipes, the leftover milk residues accumulate and get dried inside, clogging the nozzles and ruining the taste of your coffee. When cleaning is required, your machine will signal you with this clean alert, and skipping this important maintenance can negatively affect your health as this milk residue accumulation serve as a breeding ground for dangerous bacteria.
Solution: Clean The Rapid Cappuccino System
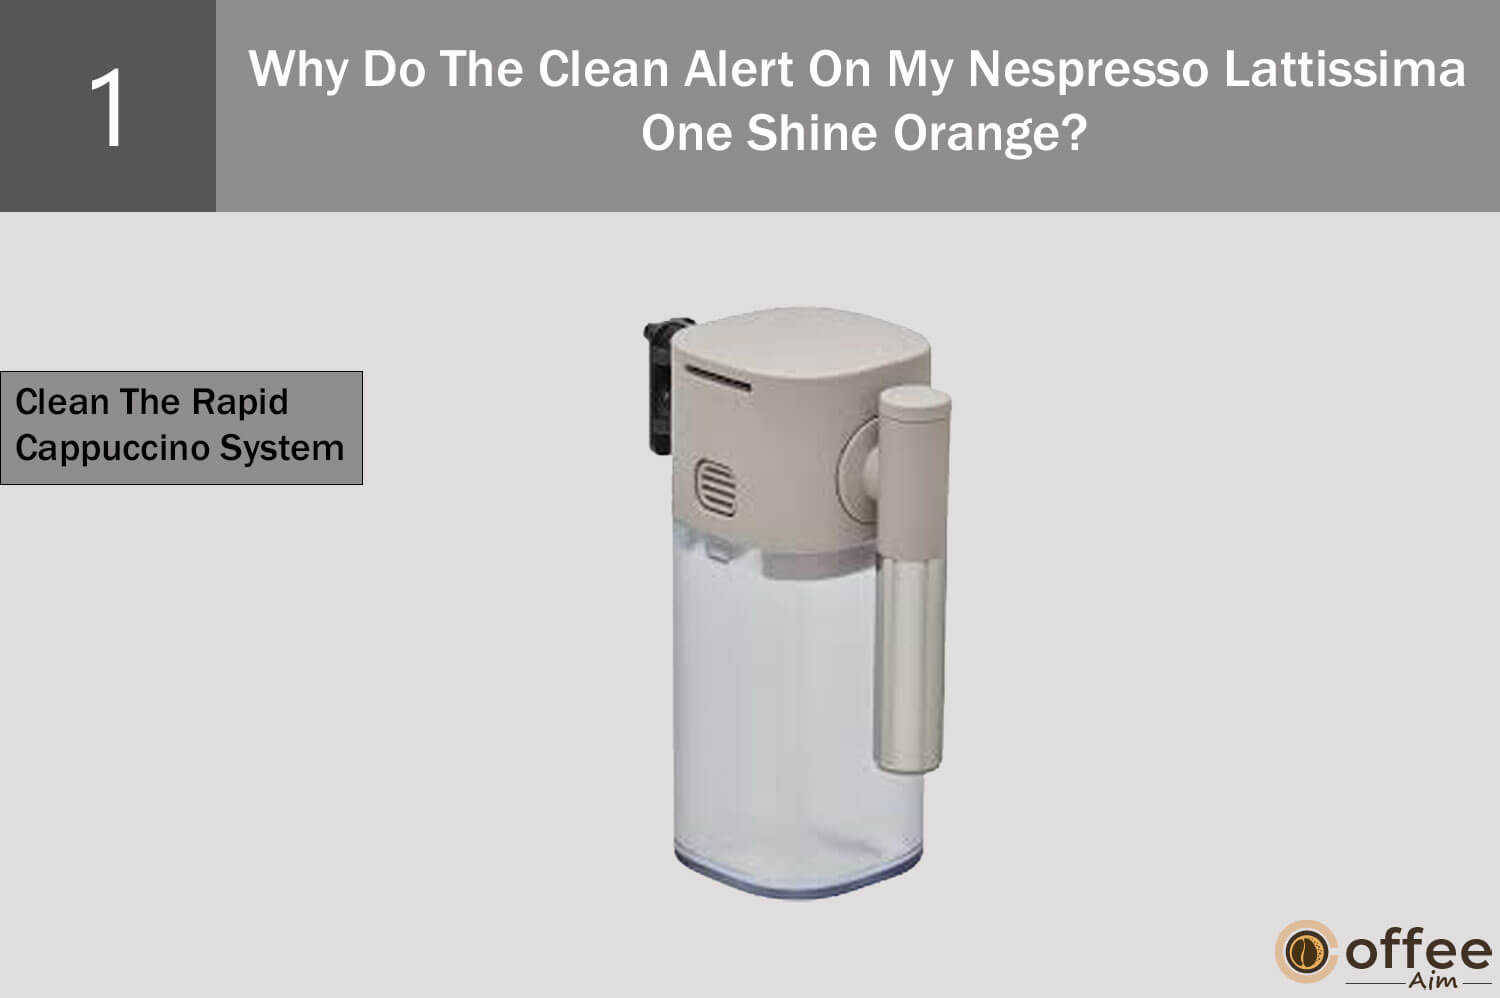
When it comes to resolving the clean alert issue, get ready to hand wash the Rapid Cappuccino System. Hand washing required disassembling of the Rapid Cappuccino System. For disassembling instructions, see the section at the end of the problem section, ‘’How To Disassemble The Rapid Cappuccino System Of Your Nespresso Lattissima One?’’
For the cleaning procedure, see the section at the end of the problem section ‘’How To Hand Wash The Rapid Cappuccino System Of My Nespresso Lattissima One?’’
Hang on a minute! The troubleshooting guide doesn’t end here. I have gathered all the effective solutions for another problem of your Lattissima One, where all the coffee and milk buttons flash alternatively. So keep reading to explore the solutions below!
Problem#14: Why Do All The Coffee And Milk Recipe Buttons Flash Alternatively On My Nespresso Lattissima One?
Are you puzzled by the alternatively flashing coffee and milk recipe buttons on your Nespresso Lattissima One? Seems like you couldn’t find the right reason yet and are frustrated with all the unnecessary solutions. Don’t lose hope; you can resolve this issue. But first, check out the causes behind this unexpected flashing of buttons, and then I’ll tell you what you must do to fix it.
Cause 1: Overheating
The coffee and milk recipe buttons are flashing alternatively because your Nespresso Lattissima One is overheating. Your machine may overheat if used for an extended period without giving a little rest. Such as, making several beverages quickly after one another can stress the heating element and lead to overheating.
Solution: Allow To Cool Down
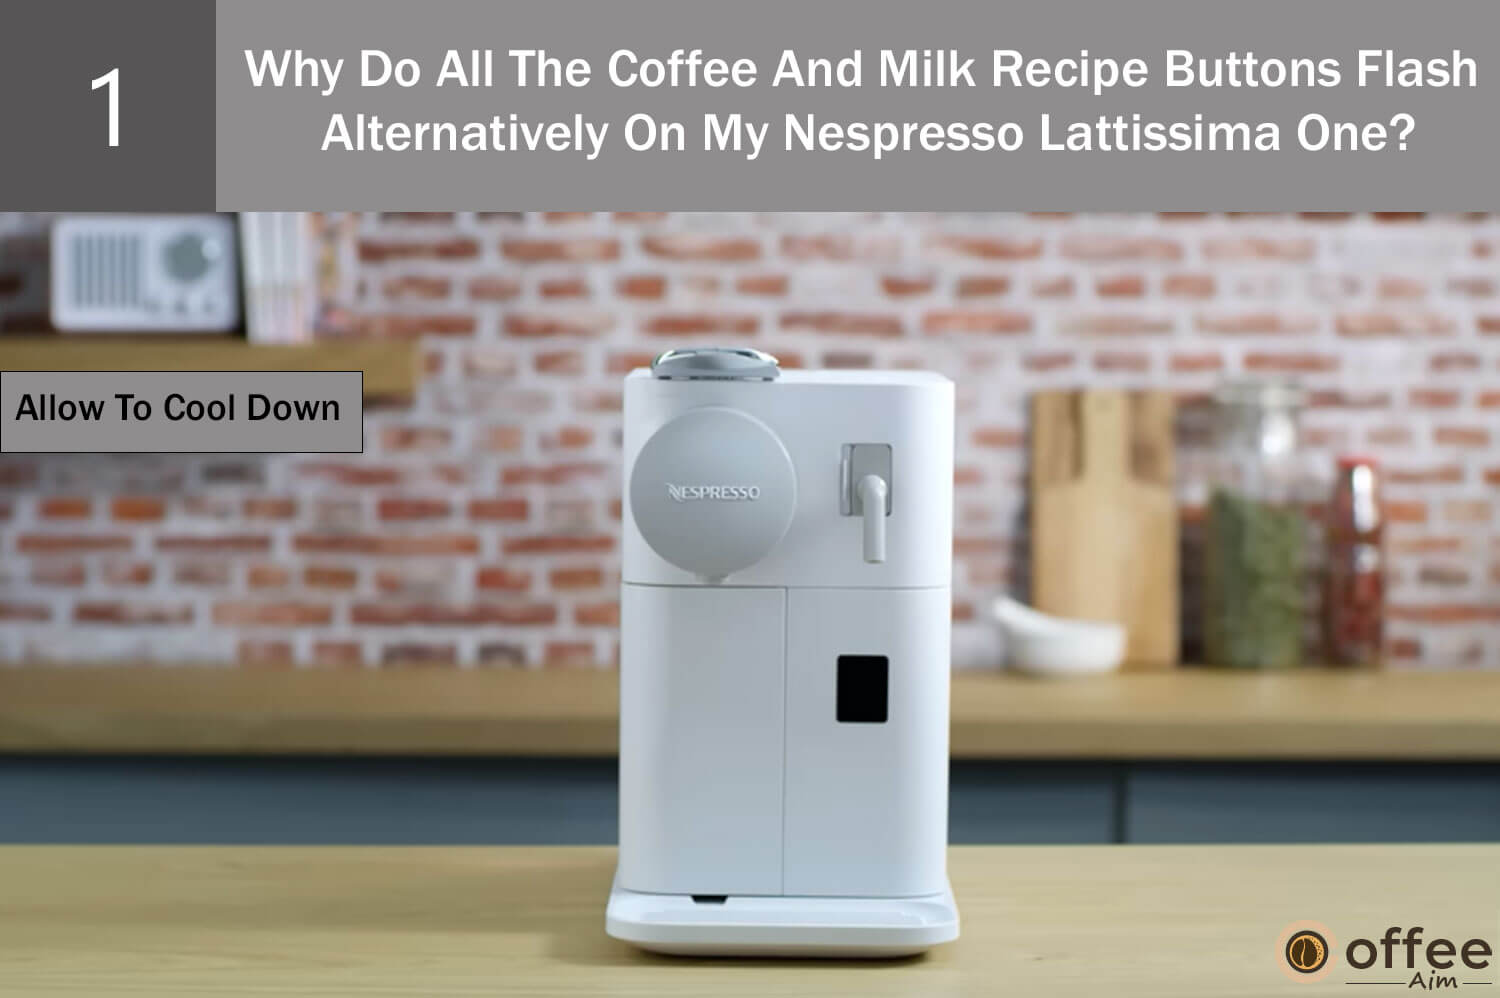
You don’t need to be an expert to solve the overheating issue. Unplug the power line to give your Lattissima One some rest. It is better to wait until your machine has completely cooled down before using it again. Because using an overheated machine can be harmful, if you ignore the flashing buttons and decide to brew coffee while it’s still hot, it could damage your machine severely.
Cause 2: Emptying Process
Your machine has performed a process of emptying, so you may store it or send it for repair, and it may be the source of all the coffee and milk recipe buttons alternate blinking. Your Nespresso Lattissima One enters the blocking phase and restricts usage of your machine immediately following the completion of the emptying procedure and gives you a signal by an alternate flashing pattern.
Solution: Wait For Ten Minutes
The blocking time will end in ten minutes. Therefore, you need to wait that long. Your coffee maker won’t respond to any buttons while it is blocked. The alternate flashing of the coffee and milk recipe buttons will stop after the blocking period ends, and you can use your machine.
Have you ever thought fixing an issue would be this much easy? In some cases, complex problems have the simplest solutions. Let’s jump into the detail of another problem and learn how you can fix the lever, not completely closing the issue.
Problem#15: Why Is The Lever Of My Nespresso Lattissima One Not Closing Completely?
Are you dealing with the annoying problem of the lever on your Nespresso Lattissima One not completely closing? If you are unable to figure out why it’s occurring and not letting you brew your coffee! Then, please have a look at this guide; I will discuss the possible causes and fixes for this lever issue. Let’s check them out below and prevent any obstacles from your way of brewing coffee.
Cause 1: Capsule Container Is Full
The full capsule container is one potential explanation for the lever on your Nespresso Lattissima One not closing completely. Once the container is fully occupied, there isn’t enough space for the next capsule to make its way into it correctly. Hence, the newly added capsule becomes an obstruction that prevents the lever from closing completely.
Solution: Empty The Capsule Container

Remove the capsule container to dispose of the used capsules. As the container gets empty, place it back in the machine and try to close the lever.
Cause 2: Capsule Stuck In Holder
You are having trouble with the lever not fully closing because a capsule is stuck inside the holder, preventing a new capsule from getting inside.
Solution: Check The Capsule Holder
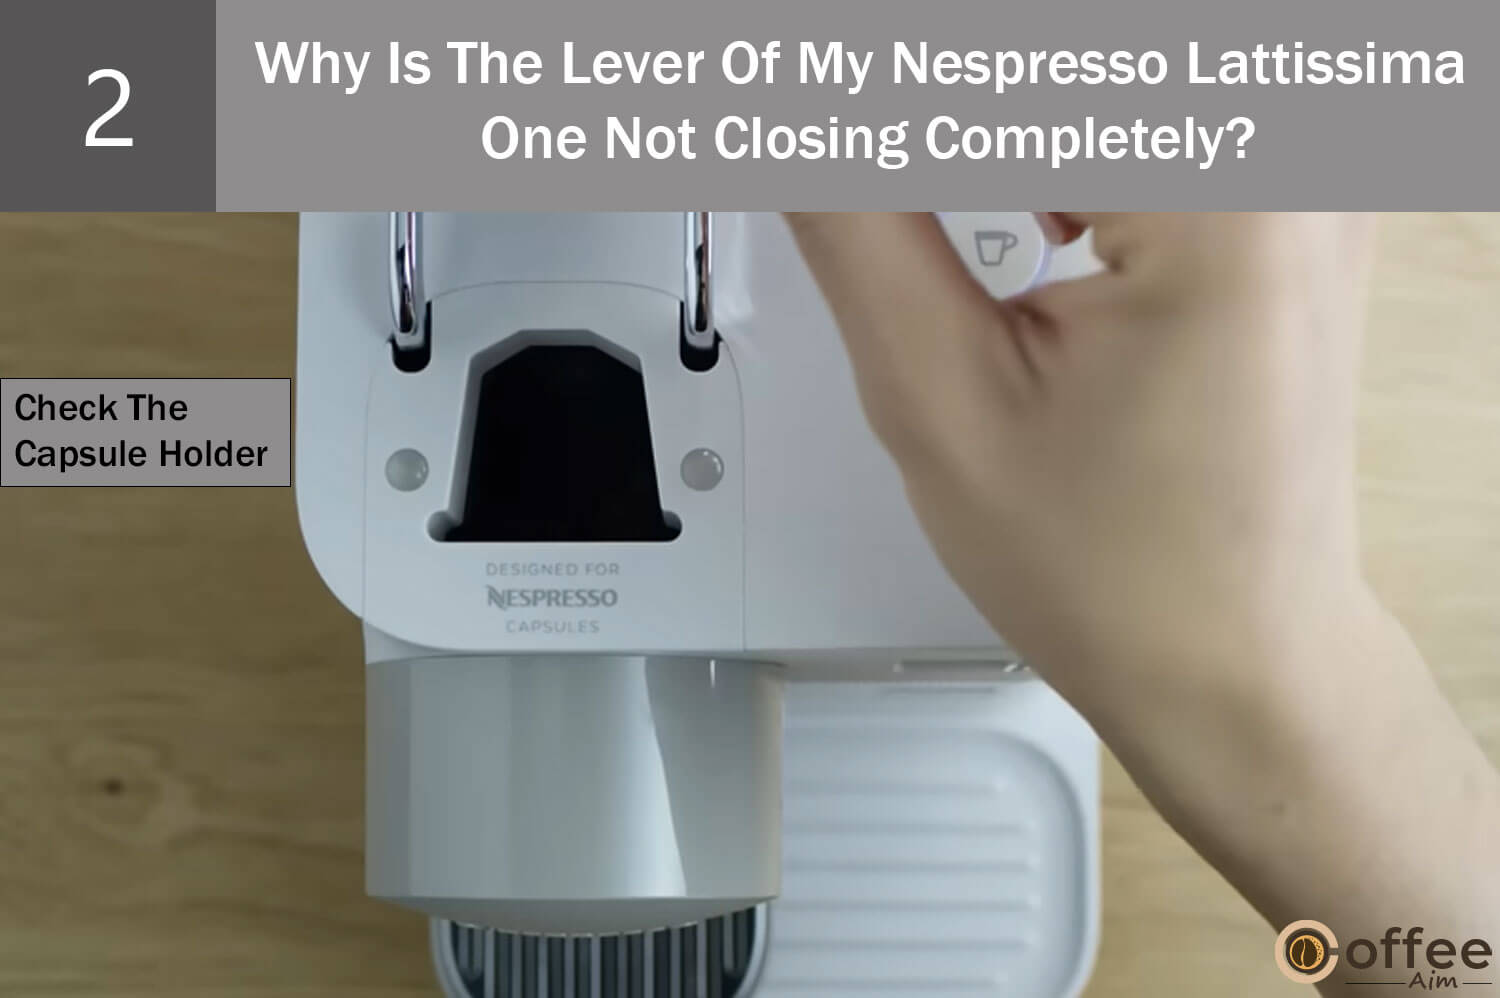
Examine the capsule holder to see if there is any stuck capsule. Use caution when looking inside the holder to avoid slipping your finger inside.
Hope you have fixed the lever issue of your Lattissima One by reading the above fixes! Now, get ready to discover why the milk froth quality is not up to standard in your Lattissima One. Let’s find out the keys to making milk foam to perfection!
Problem#16: Why Is The Quality Of Milk Froth In My Nespresso Lattissima One Not Up To Standard?
Sipping on a thin and less frothy Cappuccino? Oh, that’s the worst thing a coffee lover can experience. But why the froth quality in your Nespresso Lattisima One is not up to standard? And what you can do to resolve the froth problem. There are several causes for the subpar froth quality, and I will discuss each of them and their potential fixes. Let’s explore how to get back that perfect, silky froth you’ve been craving.
Cause 1: Inappropriate Milk Quality
The freshness of your milk plays a crucial role in getting the ideal froth. It might not provide the ideal results during the frothing process if you use a carton of milk in your refrigerator for a while. Since proteins are necessary for producing that frothy texture, the protein level of milk decreases over time. So, you must avoid using poor-quality milk or a pack of milk sitting in the refrigerator for too long. What do you need to do then? Check out the solution below!
Solution: Use Skimmed And Semi-Skimmed Milk

The ideal option is to use skimmed and semi-skimmed milk for frothing because these milk varieties have more casein protein and less fat than other types of milk. Proteins form a network and contribute to stabilizing the froth when stirred, making it simpler to achieve a thick foamy texture. Ensure the milk you’re using is from a newly opened pack, not an old one.
Casue 2: Inappropriate Milk Temperature
Your milk-based beverage’s insufficient frothiness can be related to one very important aspect: the milk’s temperature. Achieving the desired creamy texture in your froth becomes problematic when the milk is not at its ideal temperature. It will not produce the desired velvety smoothness, especially if you are using milk at room temperature.
Solution: Use Milk At Refrigerator Temperature
Achieving a perfect froth is all about choosing the right milk temperature. Use milk chilled at refrigerator temperature (about 4° C/ 39.2°F) because it enables the air bubbles to combine easily.
Cause 3: Rapid Cappuccino System Is Dirty
The reason for not getting a creamy textured froth in your cappuccino is the dirtiness of the Rapid Cappuccino System. If you neglect the cleaning step, milk residues will build up and dry out inside the aspiration tube and milk spout, obstructing the milk flow. Thereby unable to produce ideal foamy froth.
Solution: Clean The Rapid Cappuccino System
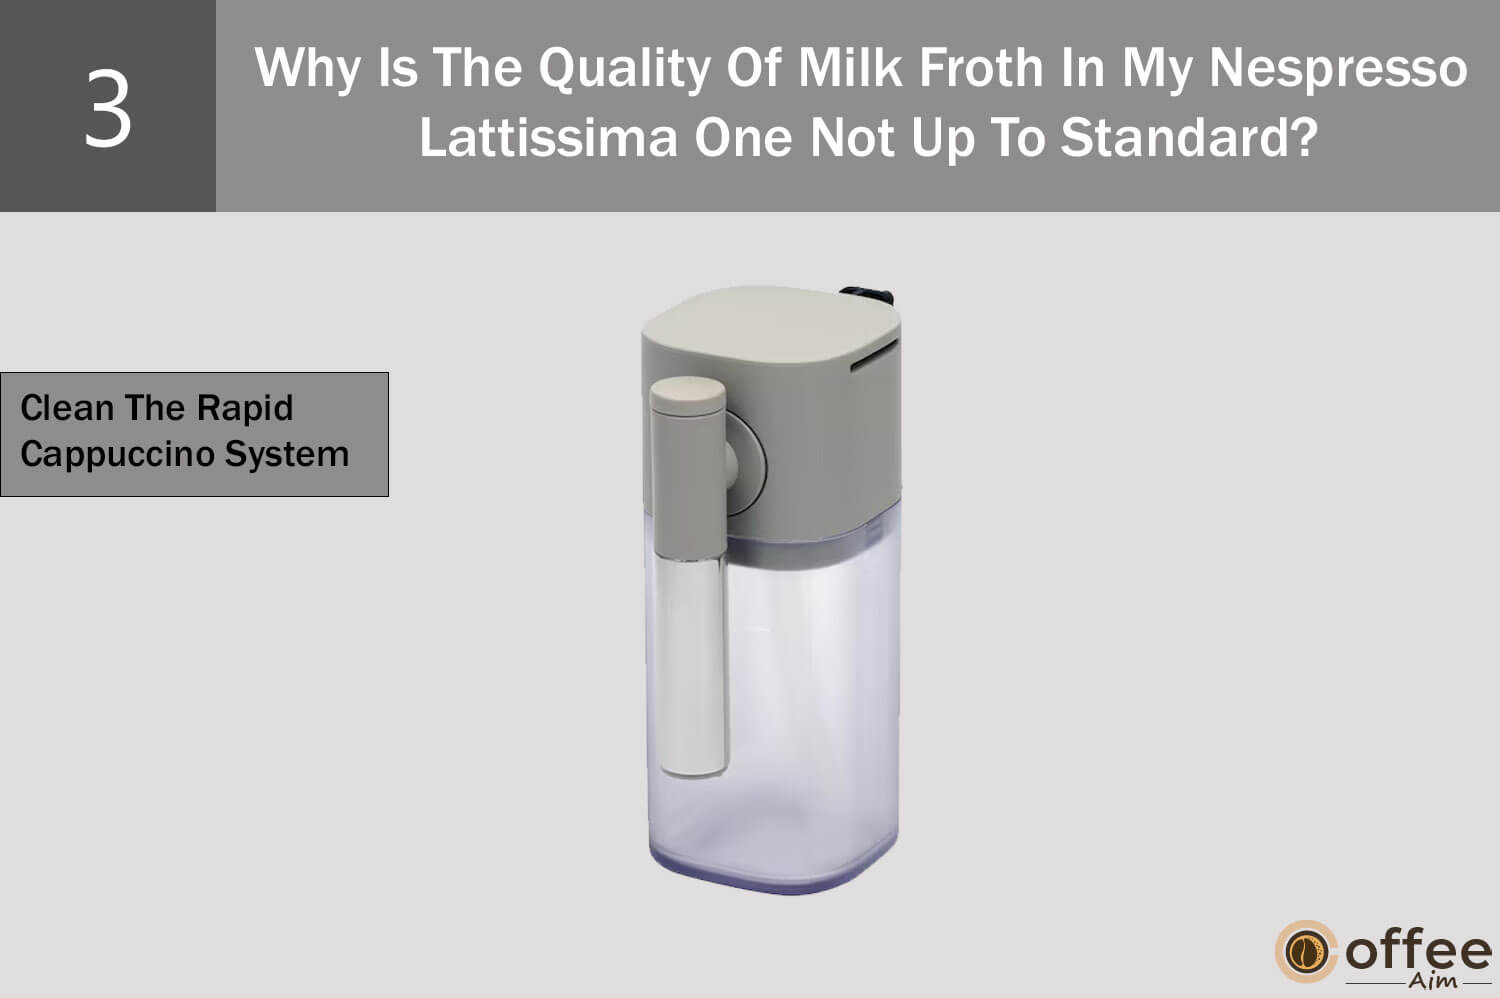
Your Rapid Cappuccino System needs cleaning. For the cleaning procedure, see the section at the end of the problem section, “How To Hand Wash The Rapid Cappuccino System Of My Nespresso Lattissima One?” Ideally, you must clean it after each milk recipe preparation. If you follow this maintenance instruction, you will never face the dirty Rapid Cappuccino System issue in your machine.
Cause 4: Mineral Scale Buildup Inside The Frother
The buildup of mineral scale inside the frothing system of your Nespresso Lattissima One may be the cause of the poor froth in your preferred milk recipe. This mineral scale can accumulate inside the frothing system and obstruct the proper steam flow. It is frequently brought on by high concentrations of dissolved minerals in hard water you use in your machine. Consequently, achieving the correct froth consistency becomes difficult, resulting in thin and less foamy milk.
Solution: Descale Your Machine
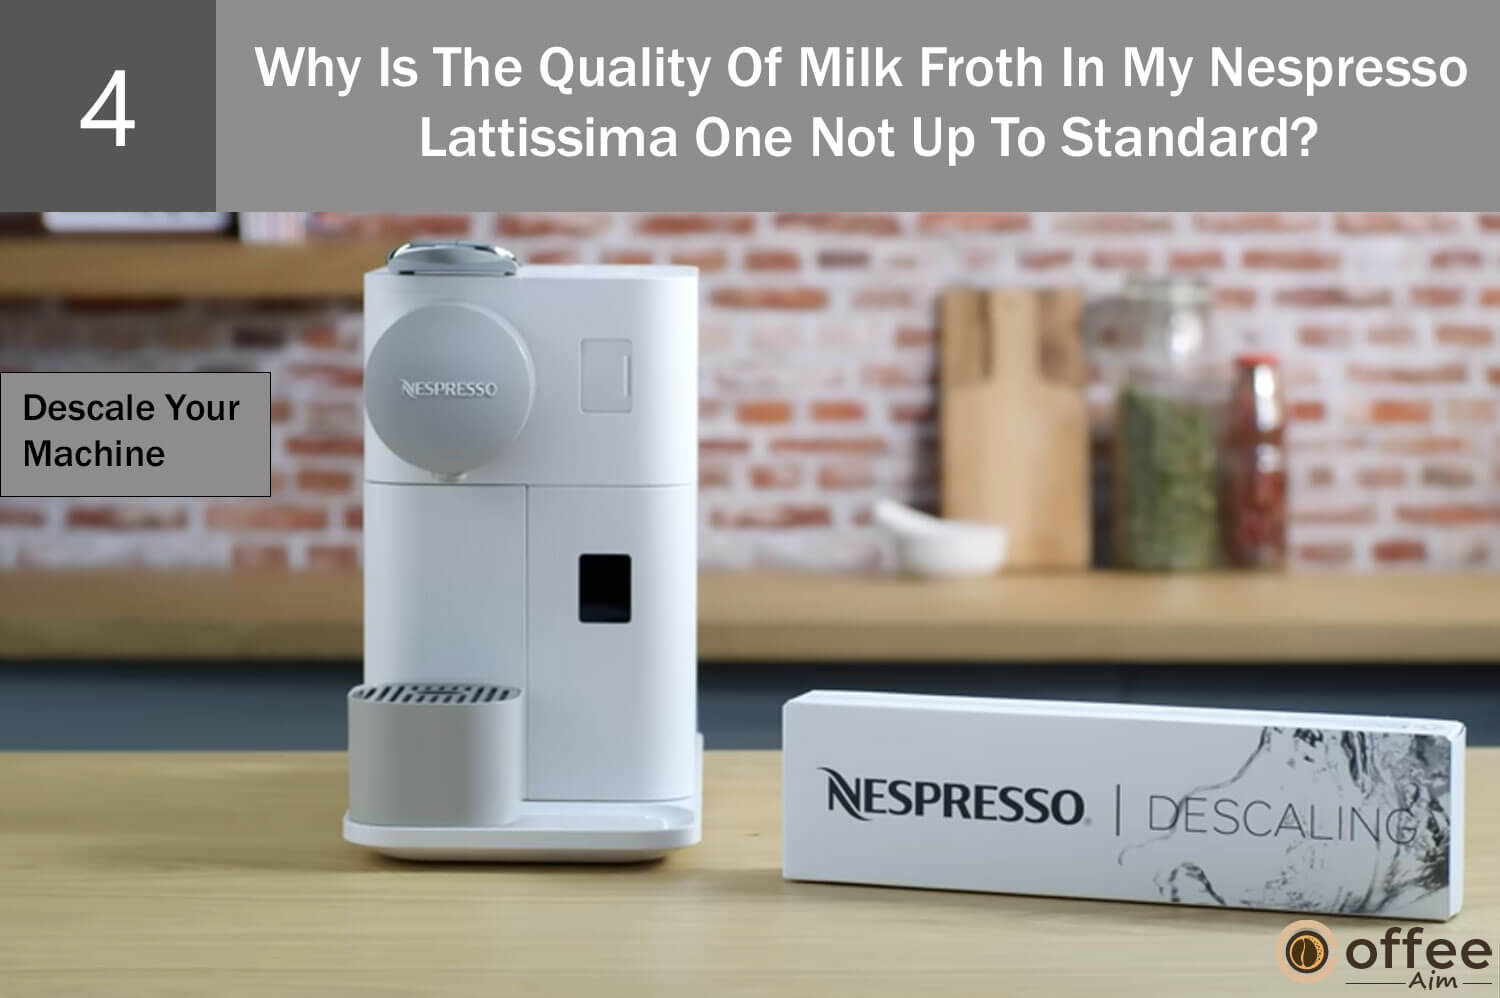
Removing mineral scales by descaling is the easiest thing you can do to fix the poor froth issue of your machine. For the descaling procedure, see the section at the end of the problem section, “How To Descale Your Nespresso Lattissima One?”
Cause 5: Use Of Frozen Milk
Your favorite milk recipe’s froth doesn’t have a creamy feel, likely because you’re using frozen milk. Frozen milk includes ice crystals and frothing of such milk results in clumpy foam that quickly liquify and turn into liquid. It cannot give you a foamy consistency.
Solution: Use Cold Milk

It’s better not to use frozen milk for frothing; instead, use fresh, cold milk since cooler milk steams more effectively than frozen milk. And cold milk produces a silky and creamy froth.
Cause 6: Dirty Air Aspiration Part
A dirty air aspiration part may be why the quality of the froth in your machine is not up to standard. The air inlet supplies air to the system, which is necessary for producing froth. If the air aspiration part is dirty or clogged, it will cause improper aeration and poor froth quality.
Solution: Clean The Air Aspiration Part

To fix the poor froth quality in your Nespresso Lattissima One, clean the air aspiration part of your Rapid Cappuccino System by hand. For the cleaning procedure, see the section at the end of the problem section, “How To Hand Wash The Rapid Cappuccino System Of My Nespresso Lattissima One?”
Check out another common problem with your Nespresso Lattissima One: the user cannot enter the menu mode. Join me in the next section to figure out the causes behind it.
Problem#17: Why Can’t I Enter Menu Mode On My Nespresso Lattissima One?
Are you having difficulty entering the menu mode on your Nespresso Lattissima One? It must be annoying when you can’t figure out the cause. But I am here to guide you on getting out of this situation. Scroll down and discover the underlying causes and effective solutions for this issue.
Cause 1: Milk Jug Is Connected
The reason you are unable to enter the menu mode is that the milk jug is attached. Interestingly, when the milk jug is connected, your Nespresso machine recognizes it and assumes you want to prepare a milk-based beverage. So even if you don’t intend to make a milk-based beverage at that point, it blocks access to the menu mode.
Solution: Remove The Milk Jug

You must take the milk jug out of your Lattissima One. As you remove the milk jug, your machine will recognize its absence and turn off the milk buttons; hence the milk recipe preparation mode is turned off. Now, you are allowed to perform another task on your machine. To enter menu mode, press and hold the milk buttons simultaneously for three seconds.
Cause 2: Descaling Pipe Is Attached
You wish to access the menu mode but cannot do so because you forget to remove the descaling pipe after the descaling process. When the descaling pipe is attached, your coffee machine is in the descaling mode, and during this mode, your coffee machine cannot enter the menu mode or perform any other action.
Solution: Remove The Descaling Pipe

Remove the descaling pipe from your machine to enter the menu mode. Your Lattissima One notices the descaling pipe is disconnected and exits the descaling mode. You may now access the menu mode. Now, press and hold the milk buttons simultaneously for three seconds.
Do you want to know the cause behind the inactive milk system of your Nespresso Lattissima One? Then stay tuned for the next section; you will also find the solutions.
Problem#18: Why Does The Milk System Of My Nespresso Lattissima One Not Start?
The creamy froth of a Cappuccino is all that a coffee lover wants from a coffee machine, but if the milk system refuses to start, all the anticipation of creamy froth turns into disappointment. If the milk system of your Nespresso Lattissima One does not start working, it is indeed a frustrating situation. But worry not, as I am here to explain the causes to you and give you effective solutions so you can fix the milk system and prepare your favorite milk drink topped with creamy froth.
Cause 1: Low Milk Volume
Low milk volume is the reason which prevents the milk system from starting its operation. There is not enough milk in the system to function or start frothing milk for your milk drink.
Solution: Add Milk To 30 ml

For the milk system to function properly, it needs at least 30 ml of milk if the milk container or jug is at least this full, so the milk system can start operating and frothing milk.
Cause 2: Water In The Milk Jug
The presence of water in the milk jug is another reason behind the non-operational milk system. The milk system is not compatible with water because it is made specifically to work with milk. So, If water is used in place of milk, the system does not function as intended.
Solution: Remove Water From The Milk Jug
The cure to this issue is the removal of water from the milk jug and filling it with milk. Always make sure the milk, not water, is put into the milk jug. So, when the compatible liquid is used, the milk system can be able to start and run effectively.
Cause 3: Use Of Vegetable Milk
The milk system does not start probably because you are using other than dairy milk in the milk jug to froth milk. Almond milk, rice milk, and other non-dairy alternatives cannot be used with the milk system because it was created specifically to function with dairy milk. The milk system may not be able to handle the diverse compositions, consistencies, or qualities that these alternate milk kinds may have.
Solution: Use Dairy Milk Only

The use of dairy milk in place of vegetable milk in the milk system would be the answer to this issue. It should be able to start and run effectively if the proper kind of milk is used, which is what the system is made for.
In the upcoming section, I will uncover the tips for the issue of being unable to dismantle the milk jug of your Nespresso Lattissima One. If you want to know how you can dismantle the milk jug correctly, keep scrolling to read the next section.
Problem#19: Why I Cannot Dismantle The Milk Jug Of My Nespresso Lattissima One?
After enjoying the excellent cappuccino, you want to clean the milk jug, but as you try dismantling it, the lid won’t come off. You are worried because you don’t want to damage your beloved coffee machine. But don’t worry; I am here for the rescue as I will tell you why the lid won’t come off and what are the correct instructions for dismantling the milk jug of your Nespresso Lattissima One. So, let’s get started!
Cause: Incorrect Way Of Disassembling
You are unable to disassemble the milk jug, either because you do it improperly or forget which component needs to be taken out first. You are a human, and humans forget things. So don’t worry. And I’ll explain to you how to take the milk jug apart.
Solution: Follow The Correct Procedure
For disassembling instructions, see the section at the end of the problem section, “How To Disassemble The Rapid Cappuccino System Of Your Nespresso Lattissima One?”
Let’s proceed to the next problem; you will find an answer to another problem about how to turn off your Nespresso Lattissima One and the potential reasons that can stop your machine from turning off. So, let’s check this matter!
Problem#20: How To Turn Off My Nespresso Lattissima One?
As you finish brewing your last cup of the day, you turn off your Nespresso Lattissima One. But as you get closer to saying goodbye to it, it refuses to switch off, and the problem of how to turn it off emerges. Please don’t be scared; I am here to give you the simple instructions and professional advice you need to shut down your Nespresso Lattissima One gently. Let’s jump into the causes and uncover the solutions below!
Cause: Internal Issue
You are trying to switch off your machine, but it doesn’t go off. Probably because your machine has some internal issues, but don’t worry; I’ll provide you with an effective solution to this problem. First, Let’s check out how you can turn off your Lattissima One.
Solution: Press The Espresso And Lungo Button For Two Seconds

The trick to shutting off your Lattissima One involves hitting a few little buttons at once! Follow the next step to turn off your machine:
- Press and hold the Espresso and Lungo buttons simultaneously for a magical count of two seconds.
If your machine is still on after pressing the Espresso and Lungo buttons, then it’s time to call Nespresso Customer Service for assistance. For contact details, see the section “When To Seek Professional Help.”
Next, I will unravel the mystery of the sound which your machine produces every time you switch it off. So, Let’s dive into the details below!
Problem#21: Why Is My Nespresso Lattissima One Produces A Sound When It Switches Off?
Are you curious about the sound you hear when switching off your Nespresso Lattissima One? What might that be? Is my machine alright? Why is it behaving this way? Don’t let the sound make you think about the worst outcomes, and read this guide to discover what story holds behind this sound.
Solution:
Your machine produces sounds when you hold the Espresso and Lungo button for two seconds. Consider it a musical goodbye, this sound informing you that your beloved Lattissima One has finished its work and is now resting quietly.
How To Disassemble The Rapid Cappuccino System Of Your Nespresso Lattissima One?
With these detailed instructions listed below, you may learn the tricks of disassembling the Rapid Cappuccino System of your Nespresso Lattissima One.
- Press the side buttons of the milk jug to remove the milk container lid, then unplug the aspiration tube.
- To disassemble the milk spout, position it vertically and press the milk jug’s side button to pull it out. It.
- Press the side button of the milk jug while pulling the rapid steam connector to unlock it.
How To Hand Wash The Rapid Cappuccino System Of Your Nespresso Lattissima One?
Follow these instructions to master the art of hand washing the Rapid Cappuccino System of your Nespresso Lattissima One.
- Thoroughly rinse the milk remains with hot water (40 °C/104 °F).
- For 30 minutes, soak every component in hot water with a mild detergent. Do not use strong detergent. After 30 minutes, give the components a thorough hot water rinse.
- Use a mild detergent to clean the inside of the milk tank. Then rinse with hot water.
- Avoid using anything abrasive that might scratch the tank’s surface.
- To get perfect froth in your coffee, check the air inlet is clean.
- Take a clean towel to dry off all the components, then reassemble them.
How To Descale Your Nepresso Lattissima One?
Get rid of the mineral scale from your Nespresso Lattissima One by following the descaling instructions below:
- Lift the capsule lever to allow the ejection of the used capsule in the used capsule container, then close the lever.
- Empty your Lattissima One’s capsule container and drip tray.
- Add 100 ml of Nespresso descaling agent and 500 ml of water to the tank.
- Remove the descaling pipe from the storage space at the back of your coffee machine and plug it into the steam connector. When you connect the pipe, your machine enters the descaling mode.
- The descaling alert illuminates orange throughout the process, and the espresso button shines white.
- Take an empty container of 1 Liter and place it beneath the coffee outlet and the descaling pipe nozzle. Press the Espresso button.
- During the descaling cycle, the descaling solution first flows via the coffee outlet, then the descaling pipe, and ultimately reaches the drip tray. As the water tank runs empty, the descaling cycle eventually stops, and the Espresso button will illuminate.
- Now, empty and rinse out the drip tray, capsule container, and water tank thoroughly, then fill the water tank with potable water to the MAX line to continue with the rinsing step.
- Press the Espresso Button; as the rinsing starts, the rinsing water passes through the coffee outlet and descaling pipe and ends into the drip tray until the water tank runs empty.
- The machine turns off after the rinsing is complete.
- In the end, the dealing pipe should be removed and stored. Empty capsule container and drip tray.
- Fill the water tank with potable water.
- Use a damp towel to clean the machine’s surface.
- The descaling of your machine is now complete.
Maintenance Tips
Congratulations on successfully troubleshooting and fixing your Nespresso Lattissima One! Now that your coffee machine is running smoothly, it’s important to focus on preventive measures to keep it in excellent working condition for years. Regular maintenance is the secret ingredient to ensure your Lattissima One consistently delivers that perfect cup of coffee. Here are some simple tips to help you maintain your machine and prevent future problems:
- Clean the Milk Frother After Each Use: After indulging in a frothy cappuccino or latte, it’s crucial to clean the milk frother thoroughly. Rinse it with warm water and wipe it with a damp cloth. It prevents milk residue from building up, clogging the frother and affecting its performance.
- Empty and Rinse the Drip Tray: The drip tray catches excess water and coffee spills, keeping your countertop clean. Empty and rinse the drip tray regularly to prevent the accumulation of coffee residue and potential blockages.
- Regularly Descale Your Machine: Over time, mineral deposits from water can accumulate inside your Lattissima One, affecting the taste of your coffee and the machine’s performance. Follow the manufacturer’s instructions and descale your machine at regular intervals using a descaling kit. It will ensure optimal performance and prolong the lifespan of your coffee maker.
- Clean the Coffee Outlet and Capsule Container: Coffee residue can accumulate in the coffee outlet and capsule container, leading to blockages and affecting the quality of your brews. Wipe the coffee outlet and clean the capsule container regularly with a soft, damp cloth to maintain optimal coffee flow.
- Keep the Machine’s Exterior Clean: A sparkling clean machine looks great and contributes to its longevity. Use a soft cloth or microfiber towel to wipe the exterior surfaces of your Lattissima One, removing any spills, dust, or fingerprints.
- Store Your Coffee Machine Properly: If you plan to store your Nespresso Lattissima One for an extended period, ensure it is clean and dry. Store it in a cool, dry place, away from direct sunlight and potential water or heat sources.
Following these simple maintenance tips, you can keep your Nespresso Lattissima One in prime condition, ensuring longevity and consistent performance. Remember, a little effort invested in regular maintenance will reward you with an uninterrupted supply of delightful coffee moments. Cheers to many more cups of pure bliss!
When To Seek Professional Help?
You’ve taken the plunge into troubleshooting and successfully resolved many issues with your Nespresso Lattissima One. However, there may come a time when you encounter a problem that requires the expertise of a professional. Recognizing when to seek professional help can save you time, effort, and potential frustration. Here are a few scenarios that indicate it’s time to reach out to the experts:
- Persistent or Complex Malfunctions: If you’ve tried multiple troubleshooting steps and followed the instructions meticulously, and the issue persists or seems beyond your expertise, it’s wise to seek professional assistance. Complex malfunctions may require specialized tools, in-depth knowledge, or replacement parts that an experienced technician can provide.
- Internal Repairs: Some repairs involving internal components or electrical systems may be best left to professionals. These repairs can be delicate and require specific technical expertise to ensure the safety and proper functioning of your Lattissima One.
- Warranty Coverage: If your Nespresso Lattissima One is still under warranty, it’s advisable to contact the manufacturer or an authorized service center. Attempting repairs yourself may void the warranty, and professional help ensures that your machine receives the necessary attention without any additional costs.
When seeking professional assistance, it’s important to choose a reputable repair service specializing in Nespresso Lattissima One espresso machines. Here are a few reputable repair services in the USA that you can contact:
- Nespresso Customer Service: Nespresso offers customer support for troubleshooting and repair services. You can reach them at [877-964-6299.] or visit their website at [https://www.nespresso.com/us/en/service-customer-care] for more information.
- Authorized Service Centers: Nespresso has authorized service centers nationwide that specialize in repairing Nespresso machines. Contact the nearest service center to your location for professional assistance. You can find the list of authorized service centers on the Nespresso website or by calling customer service.
- Local Appliance Repair Shops: Besides manufacturer-provided services, local appliance repair shops often have technicians experienced in repairing coffee machines. Check your local directory or search online for reputable repair shops that offer Nespresso machine repairs.
When contacting a repair service, be prepared to provide them with detailed information about the issue you’re experiencing and the steps you’ve already taken to troubleshoot. It will help them diagnose the problem more accurately and provide efficient solutions.
Remember, seeking professional help is an intelligent decision when encountering complex or persistent issues with your Nespresso Lattissima One. These experts possess the knowledge, tools, and experience to keep your machine running smoothly. Feel free to contact them when you need that extra boost of expertise.
Conclusion
Congratulations, coffee enthusiast! You’ve reached the end of our troubleshooting guide for the Nespresso Lattissima One. Armed with knowledge, tools, and a dash of determination, you are now equipped to tackle common issues that may arise with your coffee machine.
Throughout this guide, we’ve explored various problems and their possible causes and provided practical solutions to get your Lattissima One back on track. From addressing espresso flow issues to resolving milk frother troubles, you now have a toolbox filled with troubleshooting techniques to bring back the joy of your coffee moments.
Remember, troubleshooting is an adventure that allows you to unravel the mysteries of your beloved coffee machine. By taking the time to understand the issues and following our step-by-step instructions, you have the power to revive your Lattissima One and ensure it continues to deliver exceptional coffee experiences.
While seeking professional help is an option for more complex or persistent problems, we encourage you to embrace the spirit of exploration and try troubleshooting on your own first. The satisfaction of resolving an issue and enjoying that first sip from a perfectly brewed cup of coffee is unparalleled.
Remember the importance of regular maintenance. By implementing the simple tips we’ve provided, you can prevent future problems and keep your Lattissima One in excellent working condition. A little care and attention go a long way in preserving the magic of your coffee machine.
So, grab your screwdriver, cleaning solution, and a sense of adventure. Step into the role of a coffee whisperer and let your troubleshooting skills shine. With perseverance and creativity, you’ll master fixing your Nespresso Lattissima One and delight in the rich aromas and flavors that only a truly exceptional cup of coffee can offer.
Cheers to your coffee adventures and the satisfaction of a perfectly functioning Lattissima One. Now go forth and brew with confidence!
FAQs
How Do I Reset My Nespresso Lattissima One?
To reset your Nespresso Lattissima One, follow these simple steps:
- Switch on your machine.
- Push the milk button for three seconds to enter menu mode. The descaling and clean alert begins blinking.
- Push the milk button. The reset mode is indicated by the milk button blinking.
- To confirm, press the milk button again. All buttons blink three times, which resets all volumes.
- The menu mode automatically exits, and the system switches back to ready mode.
By following these steps, you can easily reset your Nespresso Lattissima One and resolve any minor issues or glitches that may have occurred. Remember, resetting the machine will not affect your customized settings, such as cup size preferences or programmed milk frothing options.
Why Has My Nespresso Coffee Machine Stopped Working?
There can be several reasons why your Nespresso coffee machine has stopped working. Here are a few common factors to consider:
- Power Connection: Ensure your machine is properly connected to a power source and the power outlet functions correctly. Check the power cord and plug for any signs of damage.
- Water Supply: Ensure your Nespresso machine’s water tank is adequately filled. The machine may not function if the water level is too low or the tank is not inserted correctly; the machine may not function.
- Clogged Coffee System: Over time, coffee residue can accumulate and clog the coffee system, including the coffee outlet or the piercing needle. It can hinder the flow of water or coffee, resulting in a malfunction. Regular cleaning and descaling are essential to prevent clogs.
- Capsule Compatibility: Ensure you use Nespresso-compatible capsules designed for your specific machine model. Using incompatible or damaged capsules can cause issues with the brewing process.
- Malfunctioning Components: Like any appliance, coffee machines can experience component failures. If you’ve checked all the external factors and the machine still doesn’t work, there may be an internal issue with a component that requires professional repair or replacement.
- Blockages or Leaks: Check for any blockages or leaks in the machine’s internal or external parts. Blockages can disrupt the water flow, while leaks can indicate a damaged seal or gasket that needs attention.
If your Nespresso coffee machine has stopped working, it’s recommended to consult the user manual for troubleshooting tips specific to your model. Additionally, contacting Nespresso customer support or a reputable Nespresso service center can provide further assistance in diagnosing and resolving the issue. They have the expertise to guide you through the troubleshooting process or arrange for professional repairs if needed.
How Do I Force My Nespresso To Reset?
To force a reset on your Nespresso machine, you can follow these steps:
- Turn off your Nespresso machine: Ensure that the machine is switched off by pressing the power button located on the top panel. The power button will illuminate when the machine is on, so make sure it is not lit.
- Unplug the machine: Disconnect the machine from the power source by unplugging it from the wall outlet. Wait for about 10 seconds to allow any residual power to dissipate.
- Plug the machine back in: After a brief pause, plug your Nespresso machine back into the power source.
- Turn on the machine: Press the power button to turn on the machine. The lights on the panel should illuminate, indicating that the machine has been reset.
- Check the settings: After the reset, verify that the machine’s settings have returned to their default values. If you had any custom settings, you may need to reprogram them.
By performing a forced reset, you can often resolve minor glitches or issues that may have been affecting the functionality of your Nespresso machine. However, if the problem persists or is more severe, it’s advisable to refer to the user manual, contact Nespresso customer support, or consult a professional technician for further assistance.
Why is My Lattissima One Not Frothing?
If your Nespresso Lattissima One is not frothing milk as it should, there are a few potential reasons for this issue:
- Milk Frother Not Clean: A dirty milk frother is a common cause of frothing problems. Milk residue can build up over time, clogging the frother and hindering its performance. It’s essential to clean the milk frother thoroughly after each use. Refer to the user manual for specific instructions on how to clean the milk frother of your Lattissima One.
- Milk Temperature: The temperature of the milk can affect its frothing ability. Ensure you use cold, fresh milk for frothing, as warmer milk may not produce the desired froth consistency. Additionally, using milk that has been previously heated and cooled multiple times may impact frothing results.
- Incorrect Milk Type: Not all types of milk froth equally well. Dairy milk, particularly whole milk, tends to froth best due to its higher fat content. If you are using a non-dairy milk alternative, such as almond or soy milk, it may not froth as effectively. Experiment with different milk types to find the one that produces the desired frothing results.
- Frother Attachment Placement: Verify that the frother attachment is correctly positioned on the machine. Ensure it is securely attached and aligned with the milk spout. If it is not correctly inserted, it may impede the frothing process.
- Scale Build-up: Over time, mineral deposits from water can accumulate in the frother and affect its performance. Descaling your Lattissima One regularly can help prevent scale build-up and ensure optimal frothing results. Follow the manufacturer’s instructions and use a descaling kit for your machine.
If you have checked and addressed these factors and your Lattissima One is still not frothing correctly, it is recommended to consult the user manual for additional troubleshooting steps or contact Nespresso customer support for further assistance.