Quick Navigation
Nothing is fascinating like the aroma of freshly brewed coffee to get you going in the morning. If you are looking for the perfect guidepost to help you make the most delicious latte with your Keurig K-Latte coffee maker, look no further! So, whether you are a new or old user of Keurig K-Latte, this guide is just for you. In this guide post, I will walk you through the steps to use your Keurig K-Latte so that you can make a perfect cup of coffee every time. Learn how to use your Keurig K-Latte coffee maker like a pro!
Precautions For Using Keurig K-Latte
If you are unaware of the safety precautions for using Keurig K-Latte, you can damage your machine or hurt yourself or your loved ones. So, before enjoying a cup of coffee, always consider the following precautions.
- Before using the machine, carefully read the user manual.
- It will help you understand how to operate the machine and properly care for it.
- Ensure that the voltage in your area matches the voltage of the Keurig K-Latte machine.
- The Keurig K-Latte machine works with K-Cup pods and the new Keurig 2.0 pods. Make sure that you only use these types of pods with it.
- Before making your first cup of coffee, run a few hot water cycles through the machine to preheat it. It will help ensure that your coffee brews at the optimal temperature.
- Regularly clean your Keurig K-Latte machine to prevent the buildup of bacteria and other contaminants. Follow the cleaning instructions in the user manual to keep your device in top condition.
That is a summary of precautions. For more details, click the link below.
Related: Keurig K-Latte Precautions
Specifications Of Keurig K-Latte
You must have checked all the specifications once you placed the order, but why not have another look so you can see everything? It will be simple to use if you know the Keurig K-Latte’s specs. Ensure it fulfills your needs before being used for the first time. You can only return it if you have yet to use it, so ensure it’s a good fit for you before using it.
| Specifications | Details |
| Product Line/System | K-Latte |
| Brew Sizes | 6 ounces, 8 ounces, 10 ounces |
| Water Reservoir | 36 ounces |
| Display | Button control panel along with buttons for Brew Size and Latte |
| Temp Control | No |
| Strength Control | No |
| Dimensions | 12.9″Width 13.2″ Depth 12.5″Hight |
| Weight | 7.7 lbs |
| Brews with one push | Yes |
| Keurig frother | Available |
Amazing Feature Of Keurig K-Latte
Keurig K-Latte has many unique features that make it stand out, such as its ability to make lattes and cappuccinos in just minutes. It also has an adjustable temperature control and auto-off feature for convenience and safety. Let’s dive straight into it!
- Froth Milk For You
Keurig K-Latte froths milk to always give you a perfect cup of latte and cappuccino. Frother makes your milk foamy to make your coffee delicious.
- Auto-Off Concept
Keurig K-Latte automatically turns off after 2 hours of the last brew to save energy.
- Smart Start
In one quick step, the Smart Start system heats and brews. You can select the brew size before the brewer has even begun to heat up. Place the mug, insert a K-Cup® pod, and lower the handle of your brewer. Then, choose your brew size. The brewer will heat up before starting to brew automatically.
- Shot
A shot of coffee, using the button, is brewed to create delightful creamy lattes.
What Will You Find Inside The Box?
Now it’s time to unbox your Keurig K-Latte and know what you will find inside the box. If any of the following things are missing from your package, you can replace your Keurig K-Latte with a new one before using it according to the warranty. To know more about the security, go to this article’s warranty section.
1. Keurig K-Latte Single-Serve Coffee Maker And Latte Maker
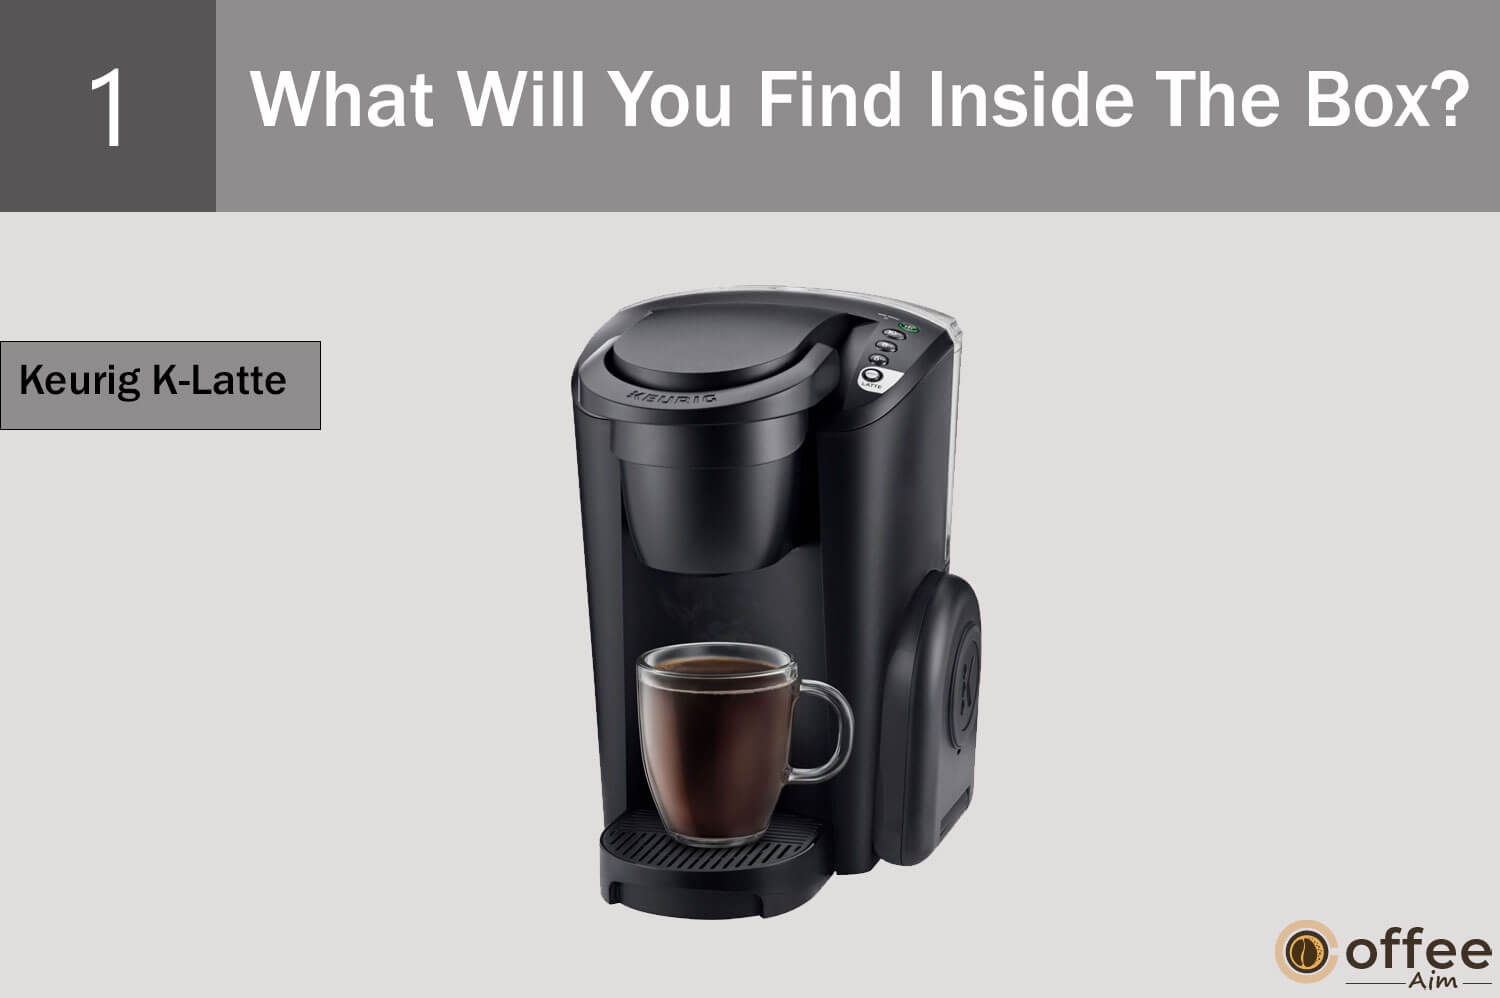
With single-serve coffee and latte maker, you can make your coffee quickly, delicious, and creamy.
2. Keurig K-Latte Milk Frother
Add chilled and unsweetened milk in the frother to get enduring and firm foam for your delicious cup of coffee.
3. User Manual

You will find a user manual in English. This manual includes everything you need to know when using Keurig K-Latte.
4. Warranty Card

It contains a warranty card that ensures about one year of your Keurig K-Latte warranty.
Keurig K-Latte Parts
If you start with Keurig K-Latte, it could look complicated but trust me. It’s not. If you know the fundamentals of your coffee machine, it will be effortless for you to use it. Let’s get started without wasting any time.
1. K-Cup Pod Holder
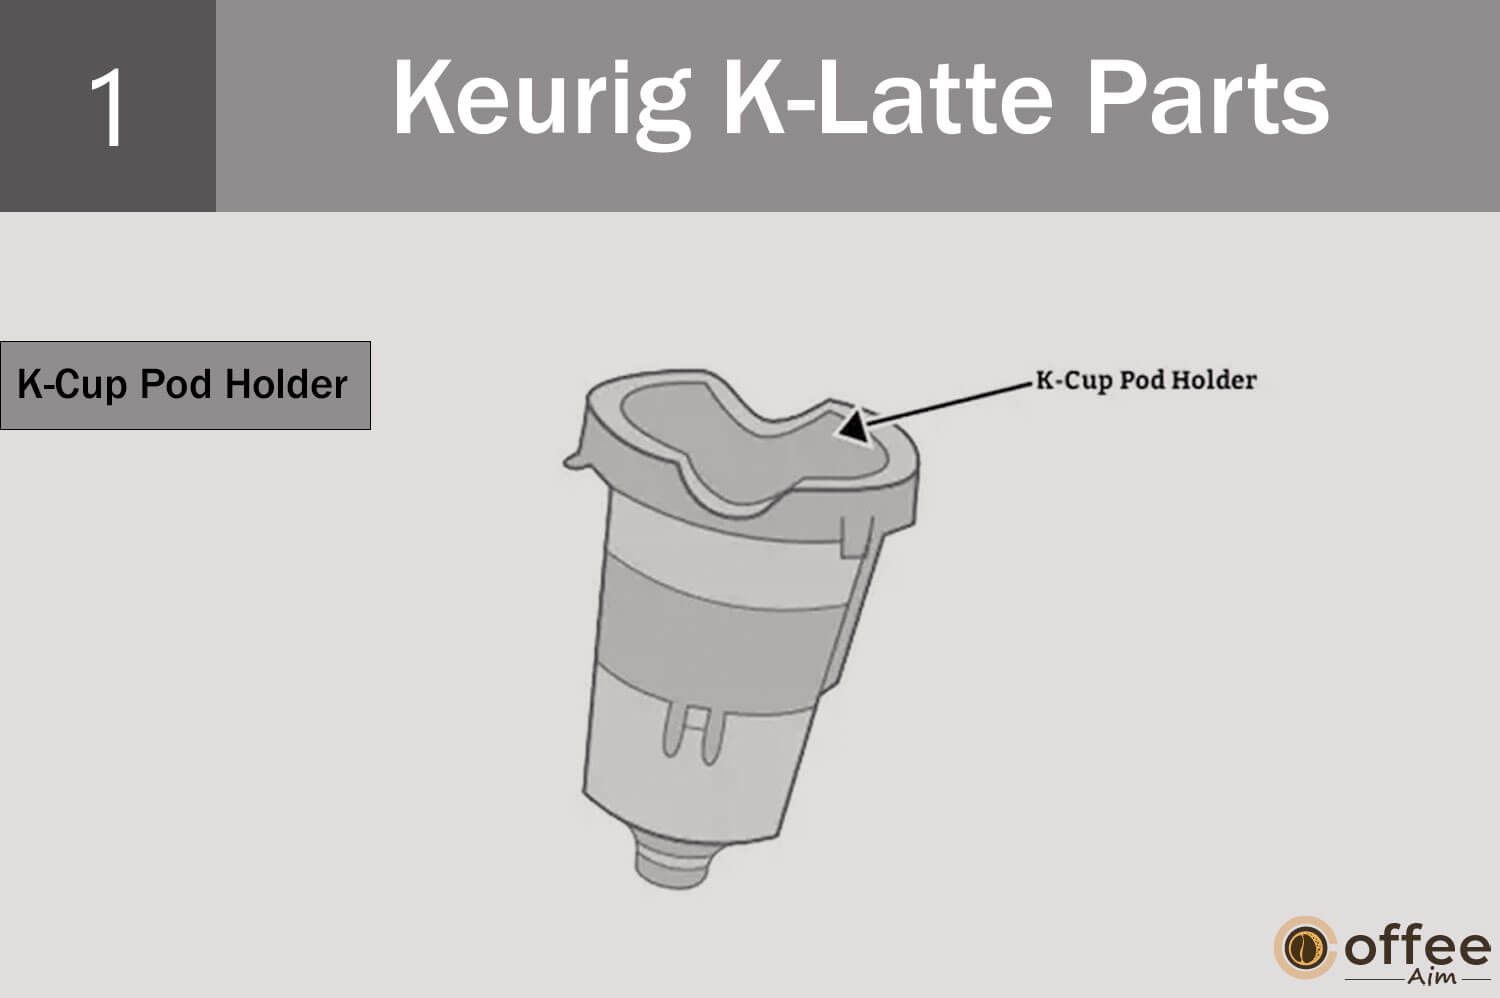
K-Cup Pod Holder holds the K-cup pod needed to make coffee. The funnel is combined with a K-cup pod holder. Assembly is completed.
2. Funnel

is attached to the K-cup pod holder and used to sieve and direct the brewed coffee to the dispensing unit.
3. K-Cup Pod Assembly Housing

The K-Cup Pod Holder Assembly(K-Cup pod holder and funnel) is placed in Pod Assembly housing.
4. Power Cord
A power cord connects your Keurig K-Latte to the electricity source.

5. Drip Tray Plate
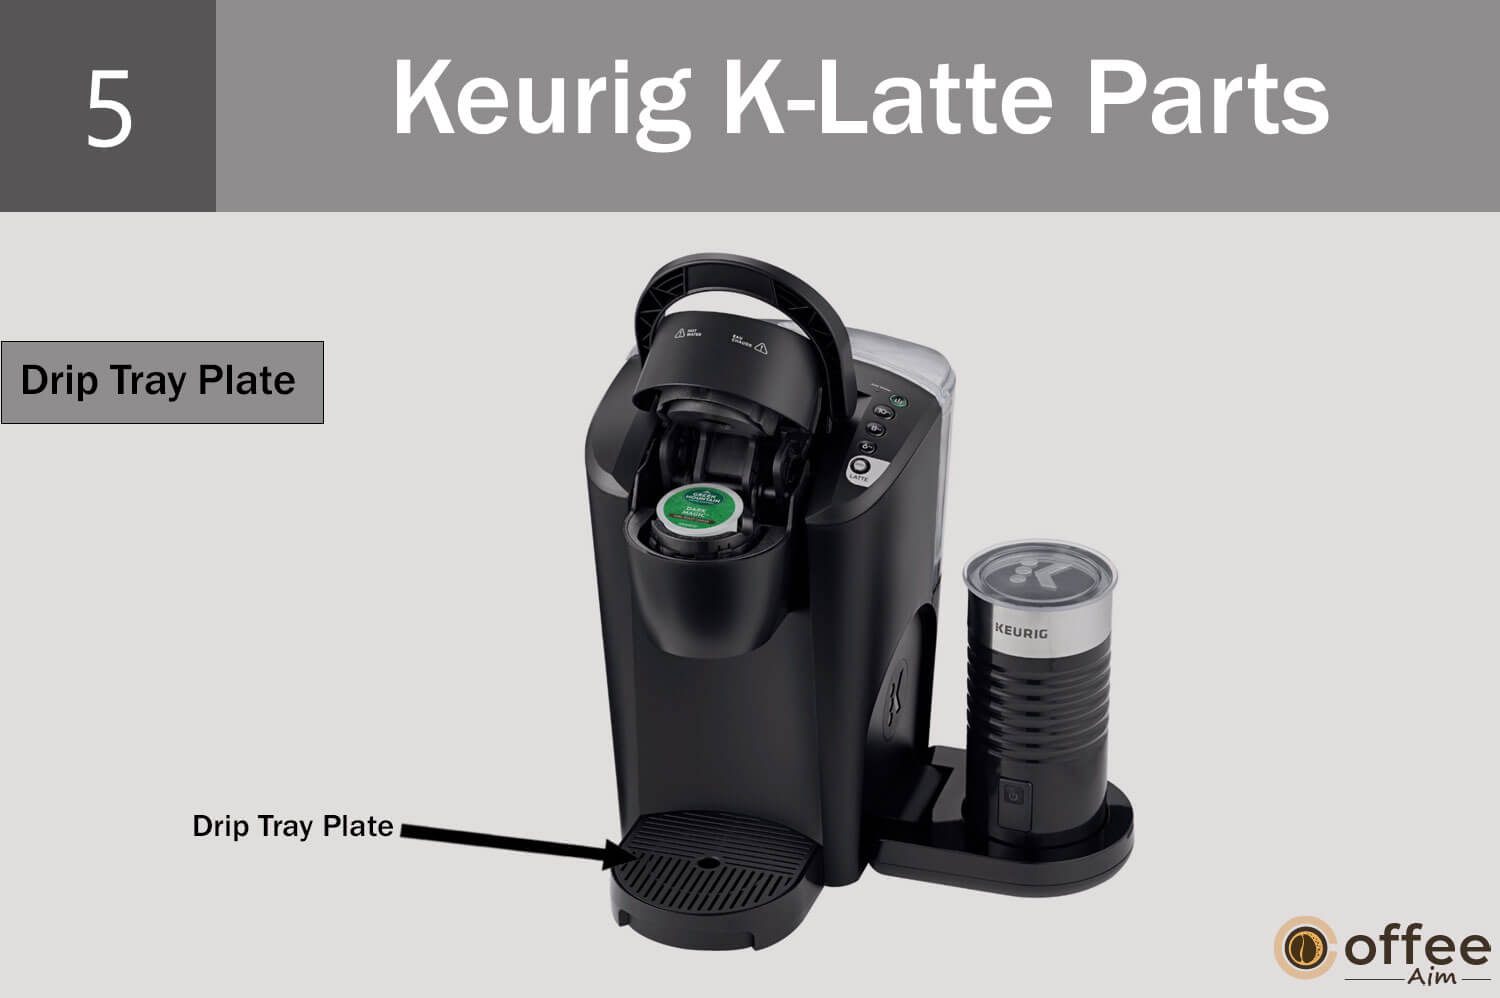
Place your cup on a Drip Tray Plate whenever you want to enjoy coffee. Coffee spills enter the drip tray from holes in the drip tray plate.
6. Drip Tray

The Drip tray is designed to hold the spills of your coffee during dispensing. So make sure to clean and remove them after every time you make an enduring cup of coffee.
7. Drip Tray Base

The drip tray base is the base of the drip tray. It is designed to accommodate a tall mug. Therefore, whenever you want to brew coffee in a tall mug, just remove the drip tray and place it directly on the drip tray base.
8. Handle

Before making your cup of coffee, lift the handle to reach the K-cup pod holder, where you will insert your favorite coffee pod.
9. Water Reservoir Lid

You must always want a nice and delicious cup of coffee. To make such coffee every time, keep your Keurig K-Latte water reservoir lid on the water reservoir. It will keep all the dust and unwanted particles away from the water.
10. Water Reservoir
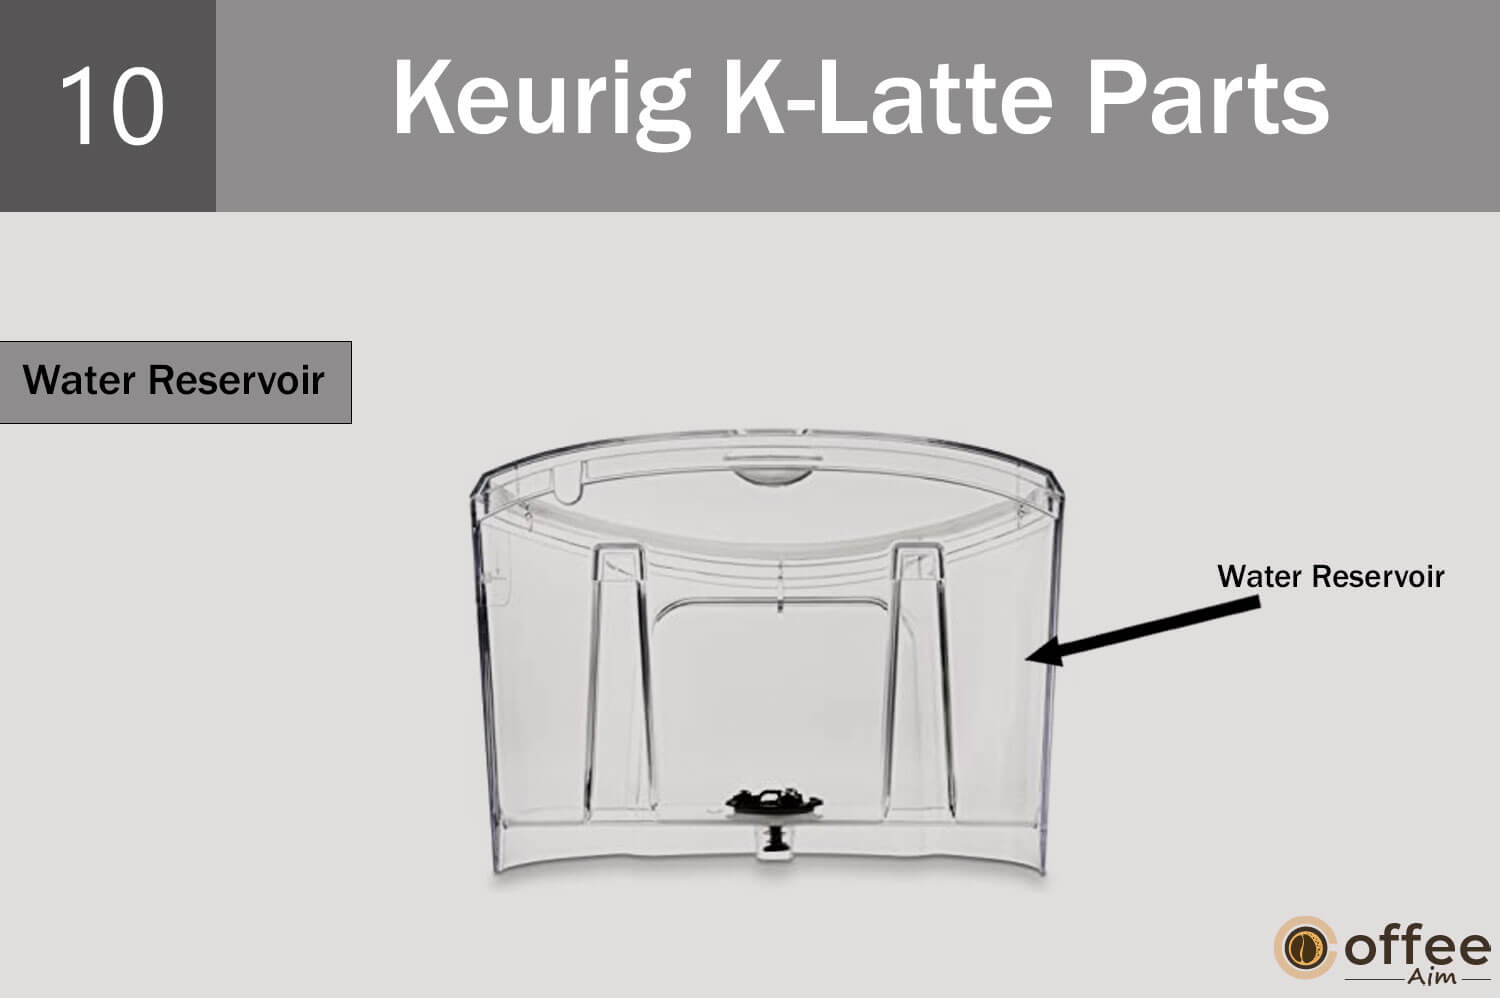
To get refreshing coffee every time you make coffee and without any delay, always keep your water reservoir filled with fresh water. Make sure to use new or bottled water every time.
11. Water Reservoir Tab Slots
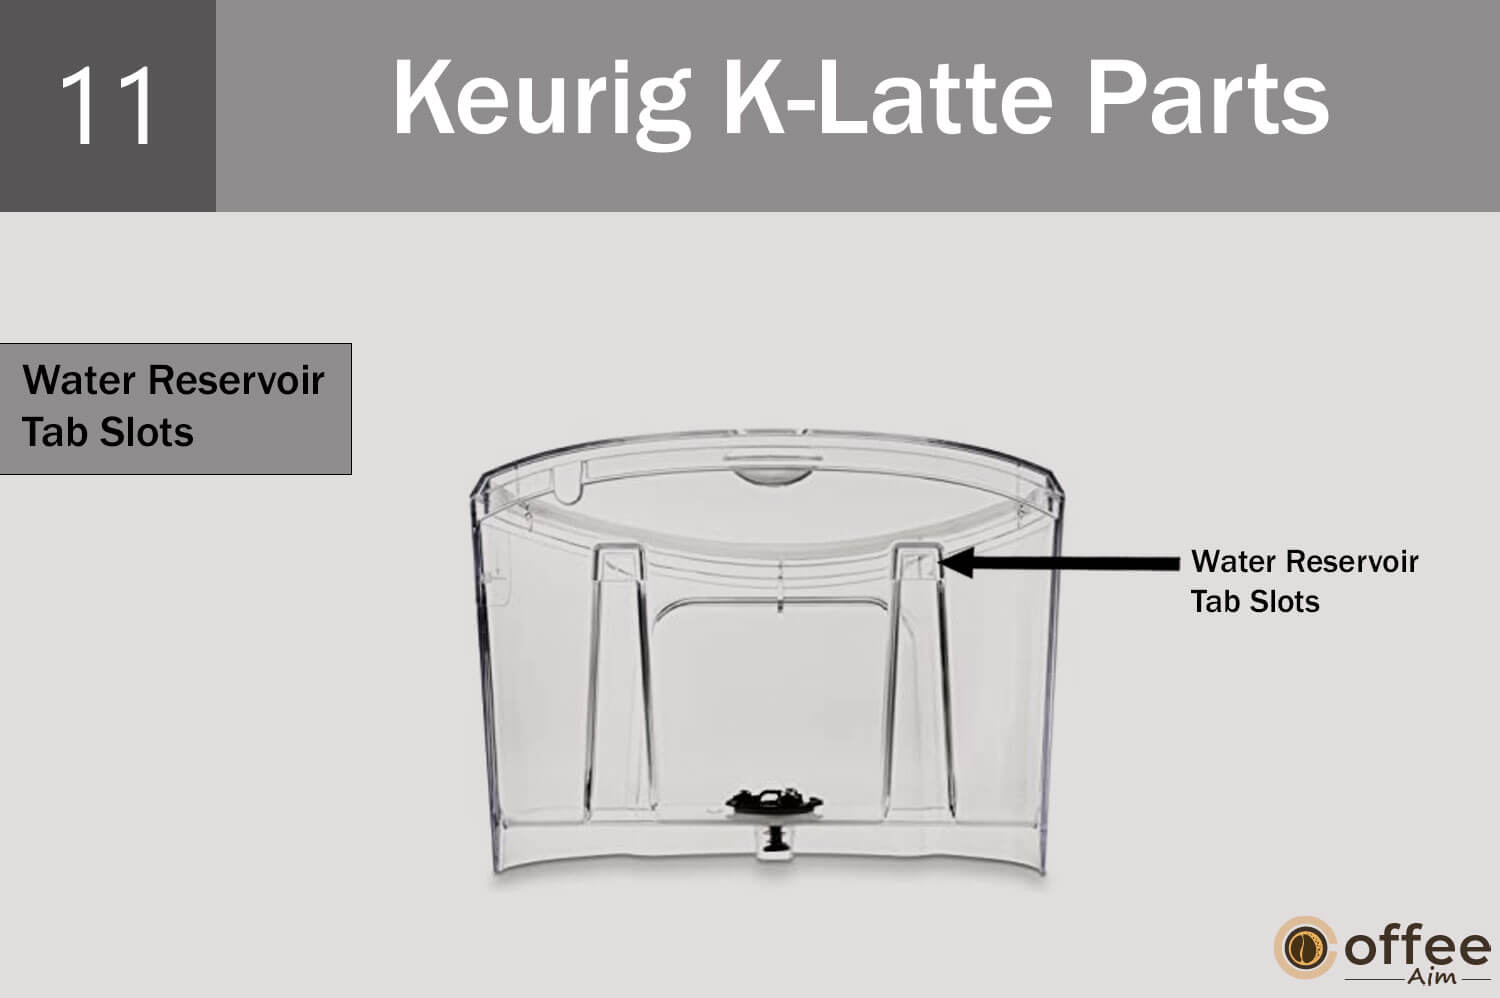
Always ensure that the water reservoir engages with lock tab slots when installing the water reservoir. To make sure it fits well in its place.
12. Frother Lid
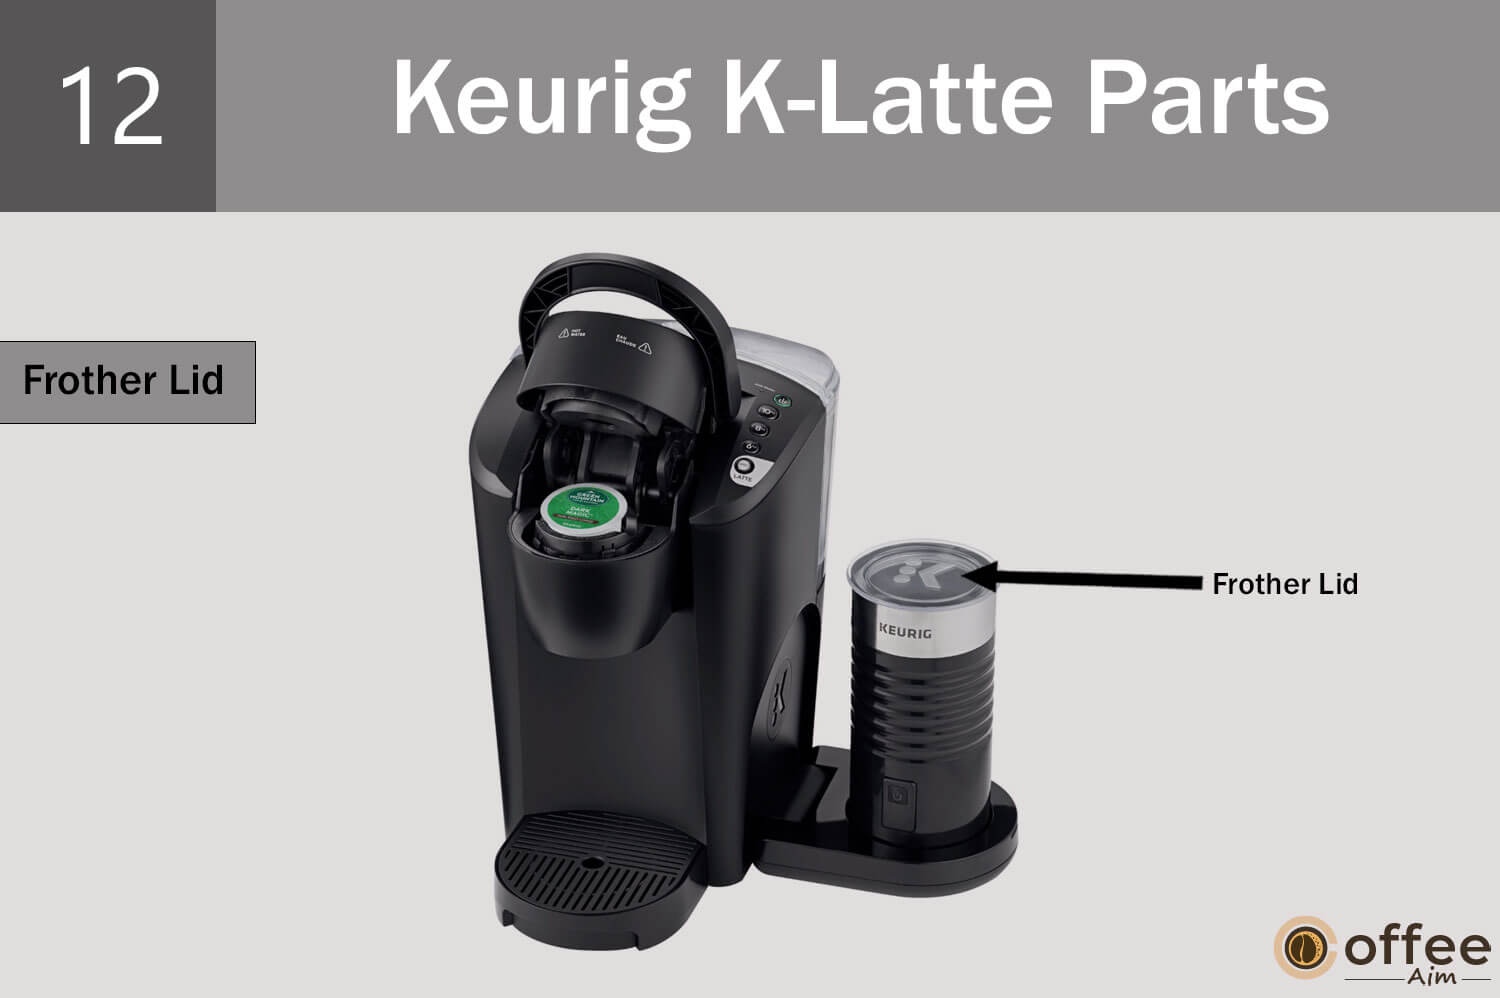
The Frother lid comes with a silicon ring. The Frother lid avoids spilling milk during the frothing of milk.
13. Frother Whisk
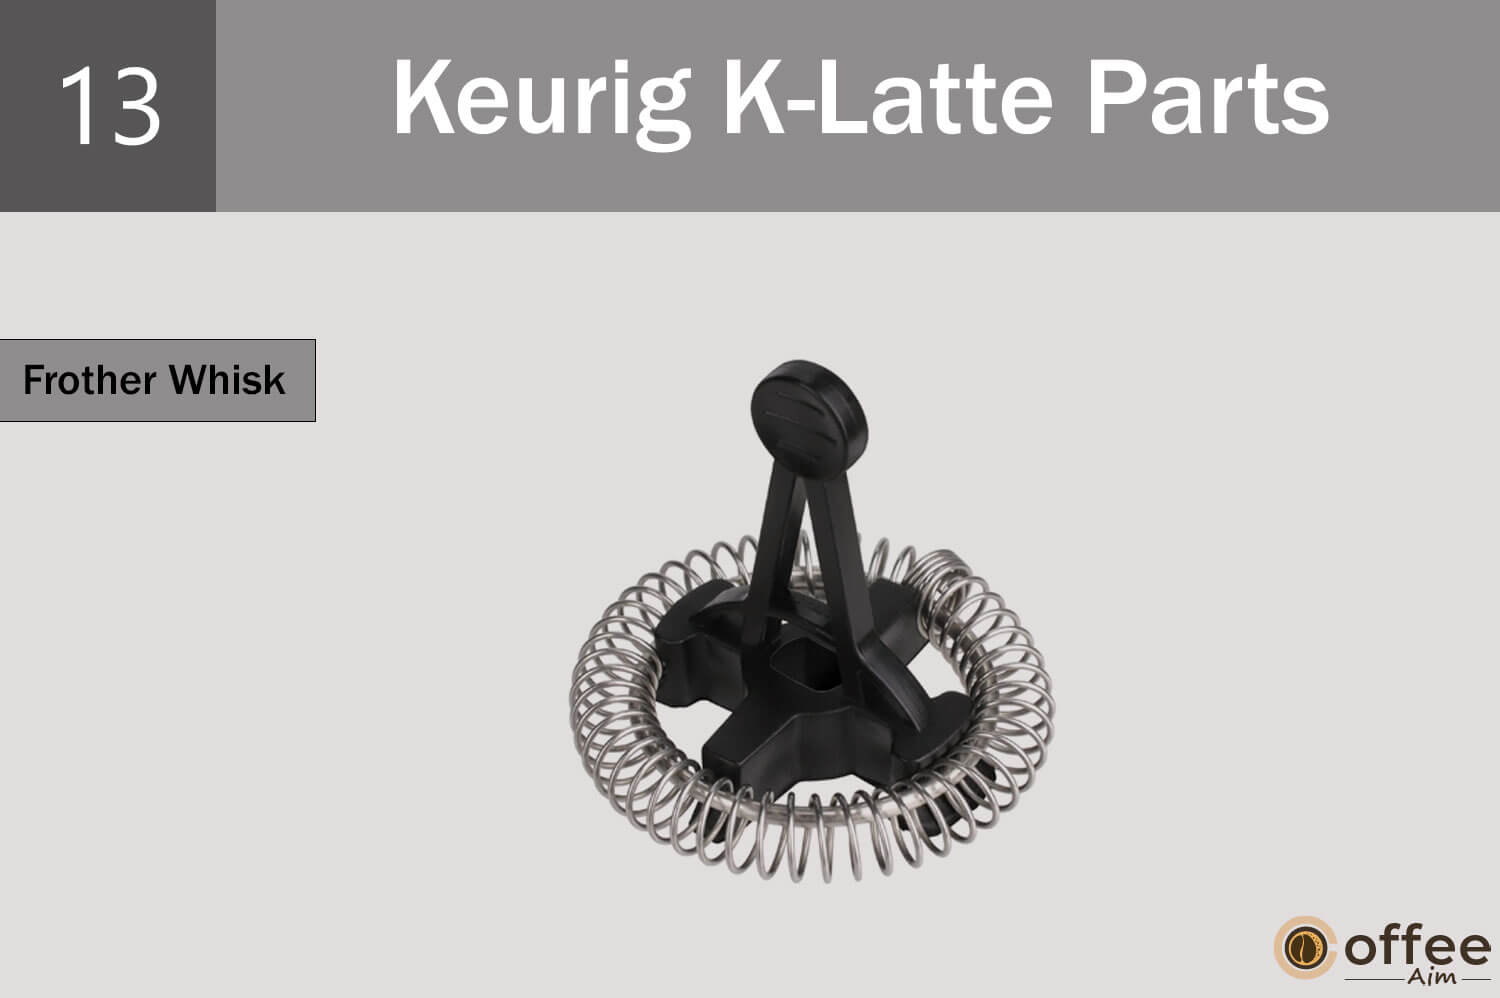
A frother whisk helps in frothing the milk present inside the milk frother. You can use chilled or warm milk, but chilled milk is preferred, and try keeping your frother relaxed also.
14. Frother
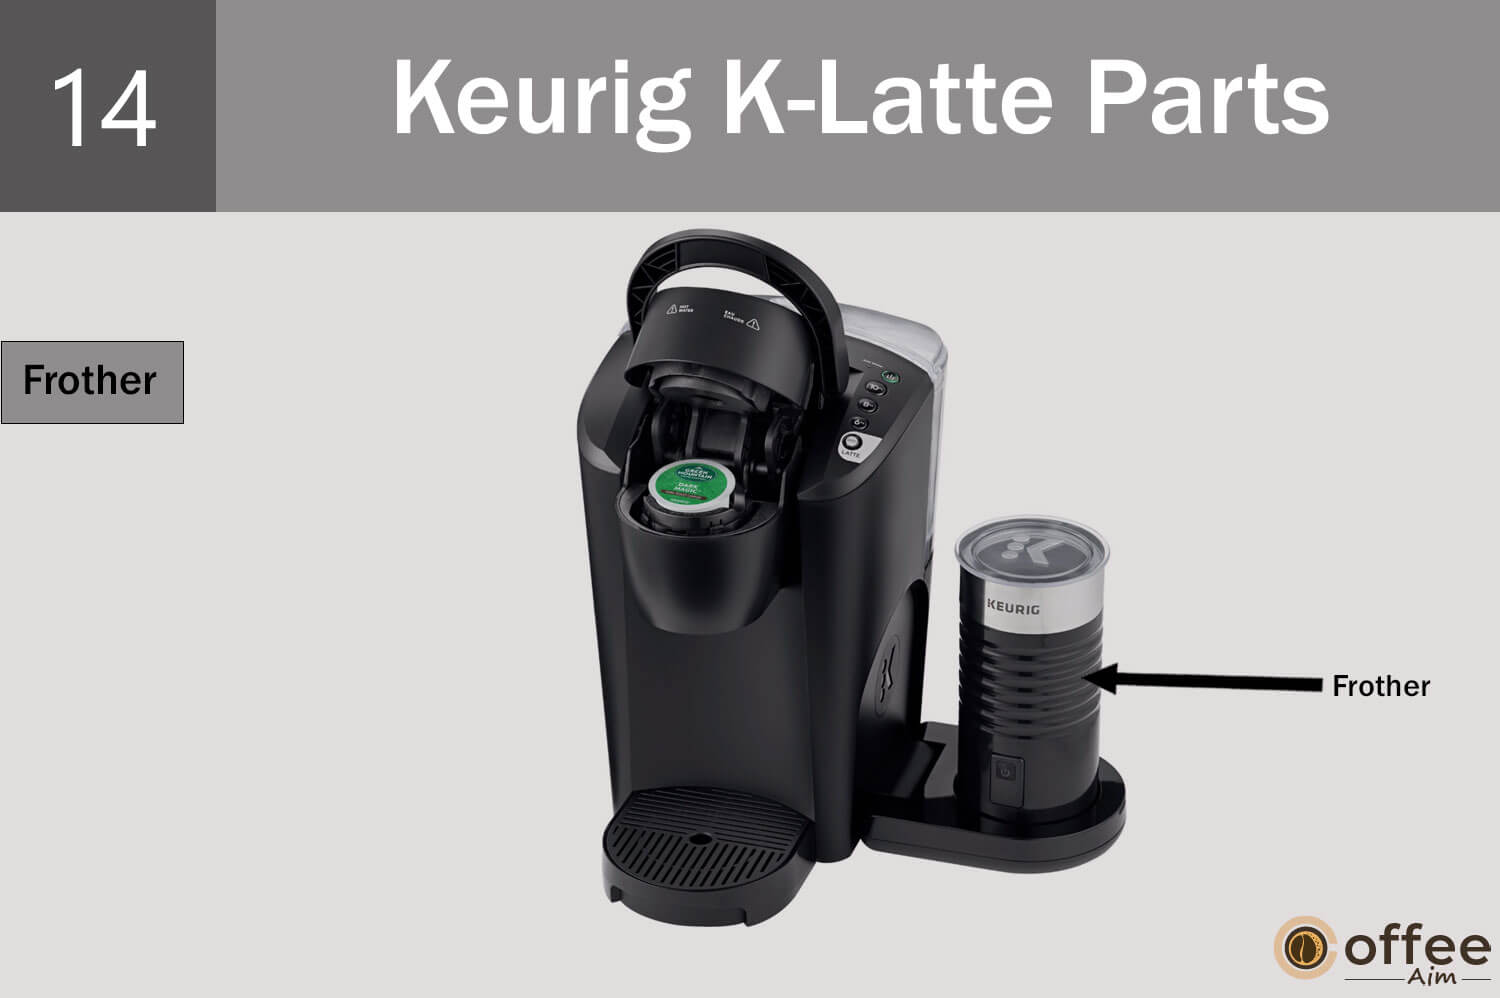
The frother is a device that comes with your Keurig K-Latte. It is used to froth milk for making latte drinks. It may be removed for cleaning and is situated on the machine’s side. With a frother, it would be easier to achieve the same level of frothiness in the milk, which is an essential part of the latte experience.
15. Frother Base
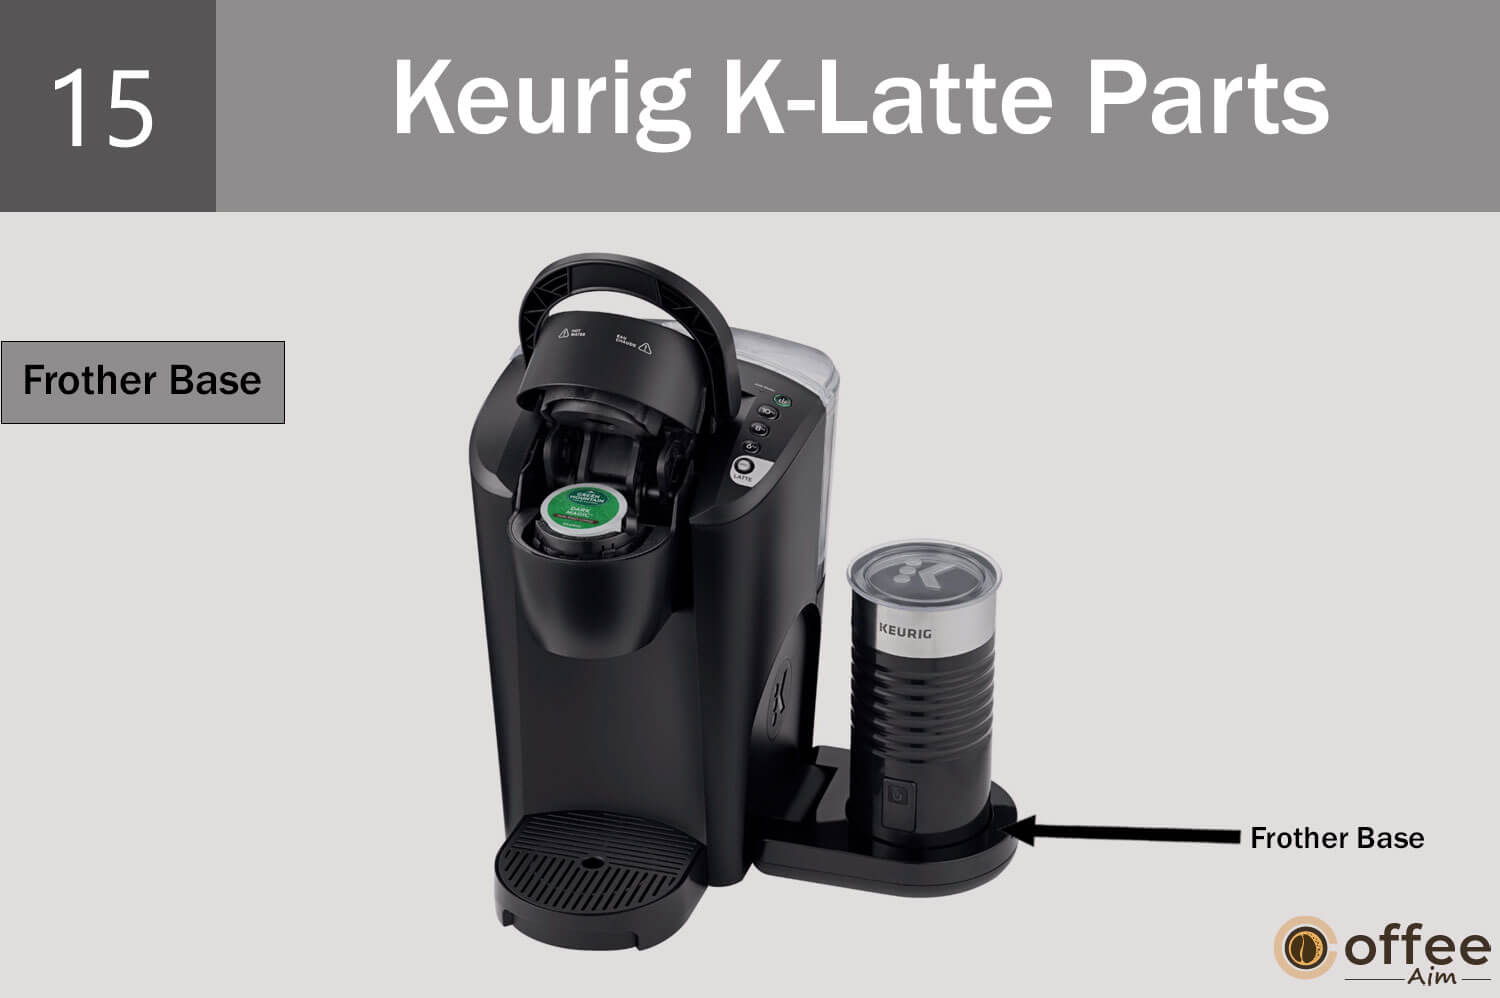
A Frother base is necessary for making Hot Cappuccino and Hot Latte. You will place your frother jug on this base. The milk frothing will not initiate until the base detects the jug. It will beep twice when frothing is complete. It is an attachment that sits on the side of the Keurig K-Latte coffee maker and allows you to froth milk using the steam wand.
What Should You Do Before Your First Brew Or After The Storage Period?
You must be excited about your first brew but don’t know how to do so. That could be problem-creating. But don’t worry. I got you. Read the instructions below and follow them to make your first coffee cup. Let’s start!
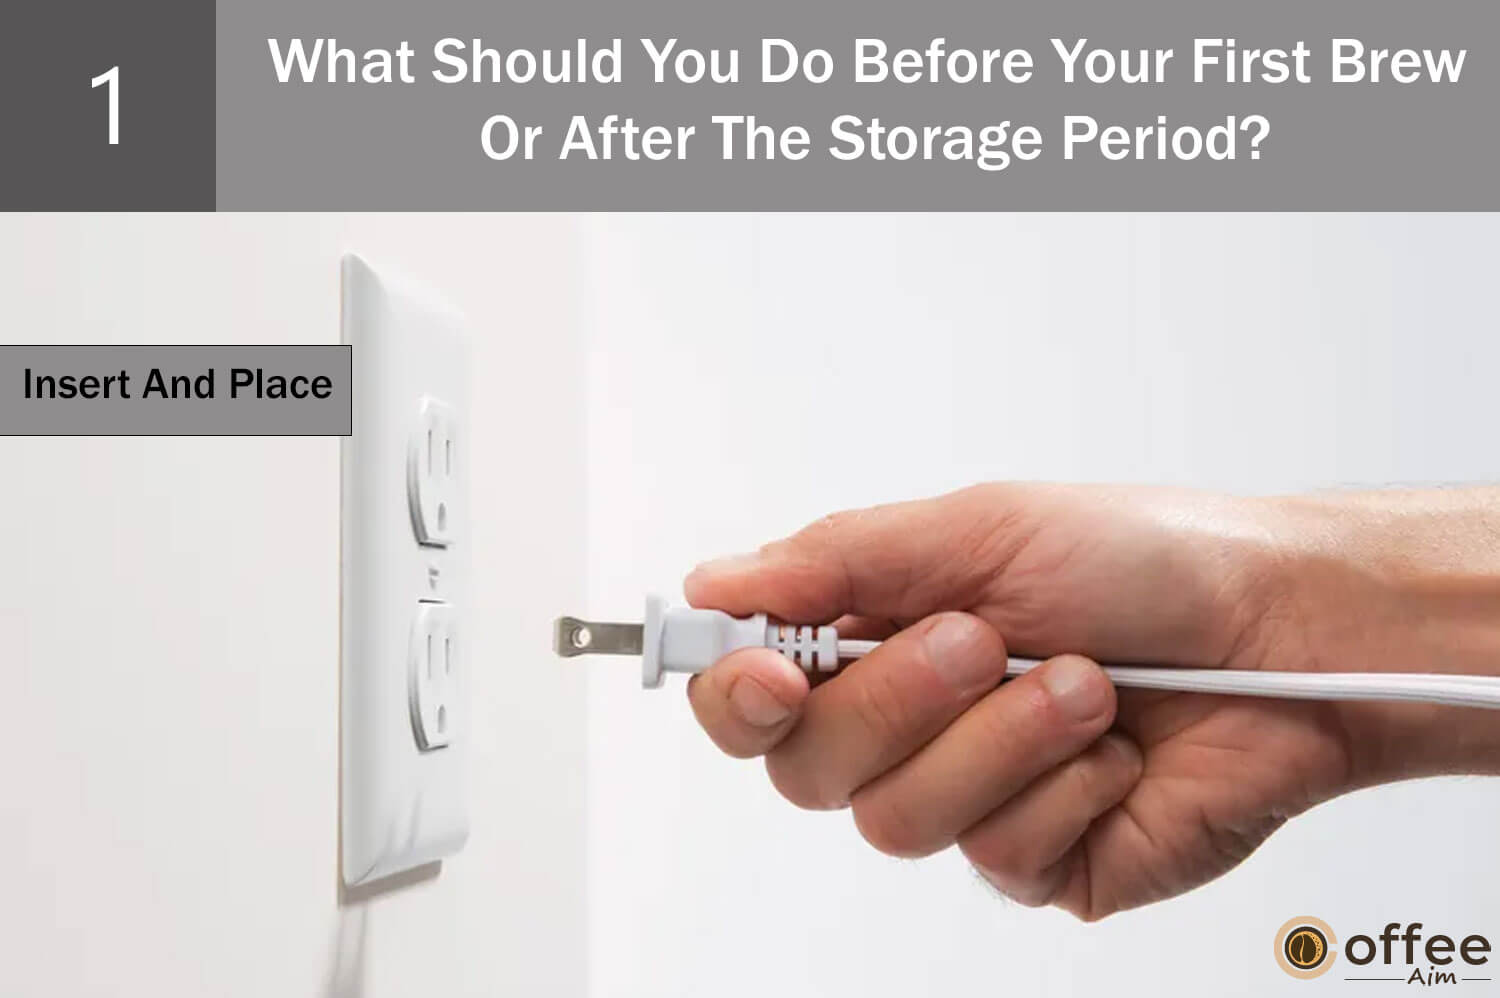
1. Insert And Place
Remove the packing tape and plug it into a grounded outlet. On the side of the brewer, lower the frother base. Put a large cup on the drip ray(at least 10 ounces).
2. Clean And Fill

Before your first brew, wash it thoroughly. It will give you a cup of coffee that is clean and free from unwanted particles—ensuring that your cup of coffee is healthy for you.
To clean, follow the steps below:
- Remove the lid and lift the water reservoir straight to remove it.
- After rinsing with fresh water, fill the reservoir to the MAX fill line.
- Ensure the brewer’s lock tabs are engaged with the brewer before replacing the water reservoir.
NOTE: Avoid using distilled water.
3. Clean Your Frother
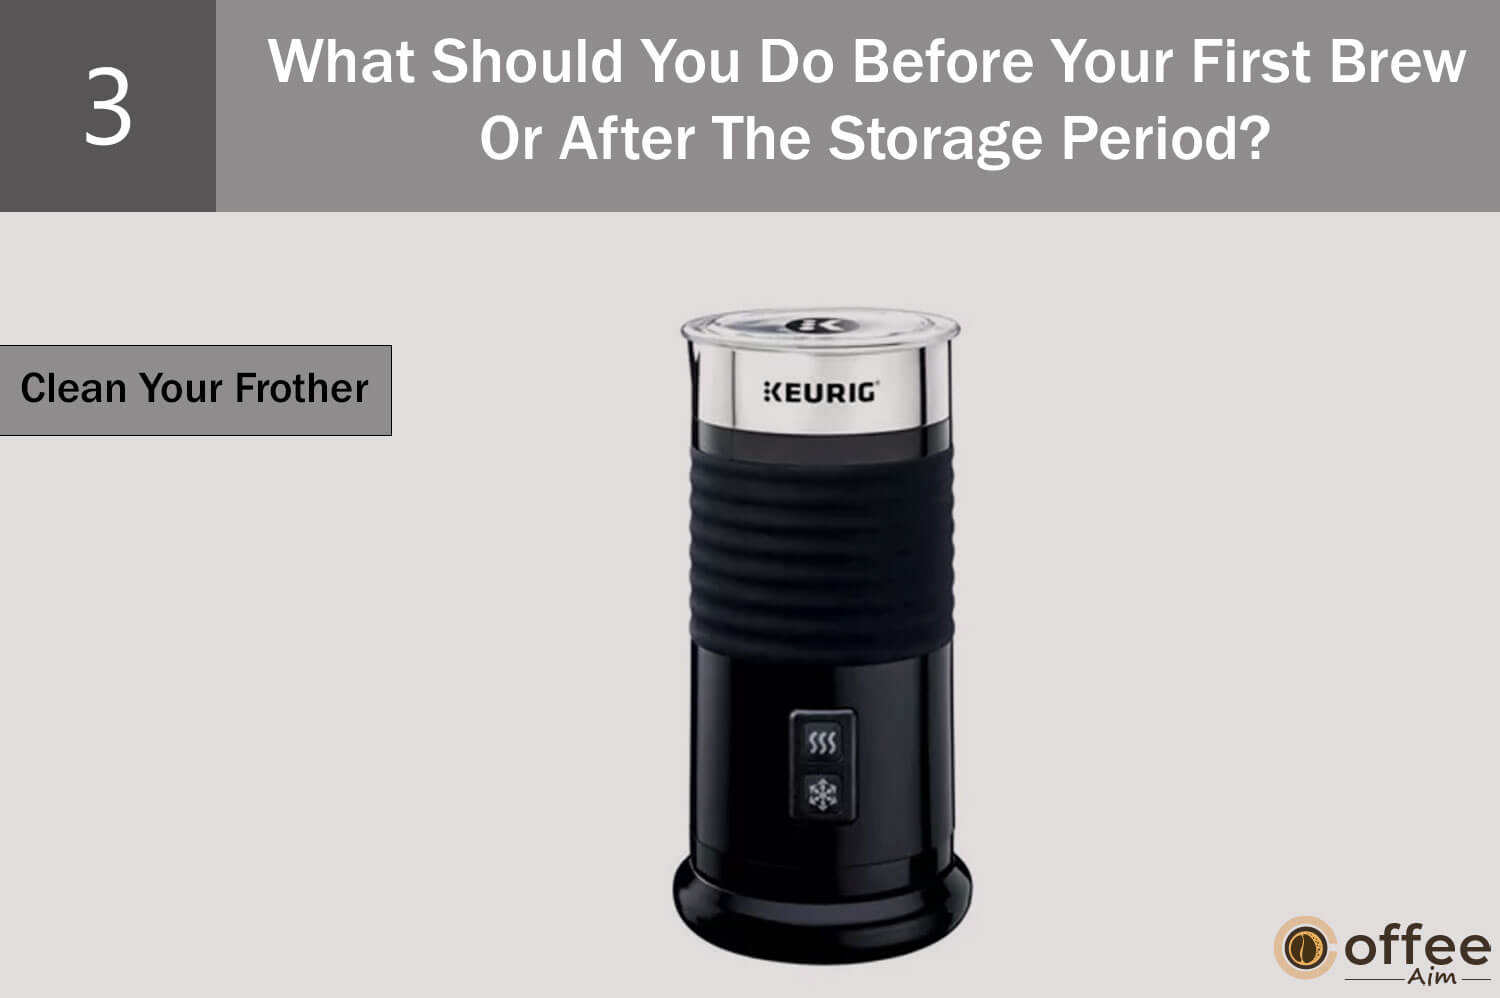
First, separate the whisk and lid from the frother. To clean the interior of the frother, lid, and whisk, Use Warm, soapy water. Reassemble after thoroughly drying all components with a soft, non-abrasive cloth.
NOTE: The frother is not dishwasher safe. Never immerse the frother in water. To avoid harming the frother’s inner surface, only use a non-abrasive, clean cloth for cleaning. After cleaning, use a soft towel to dry the interior of the frother and base.
4. Power On

First, press the power button. The green power light will illuminate when you press it. The water will immediately start to warm up in the brewer. It’s only going to take four minutes. When the heating sound stops, the brewer is ready.
5. Cleansing Brew
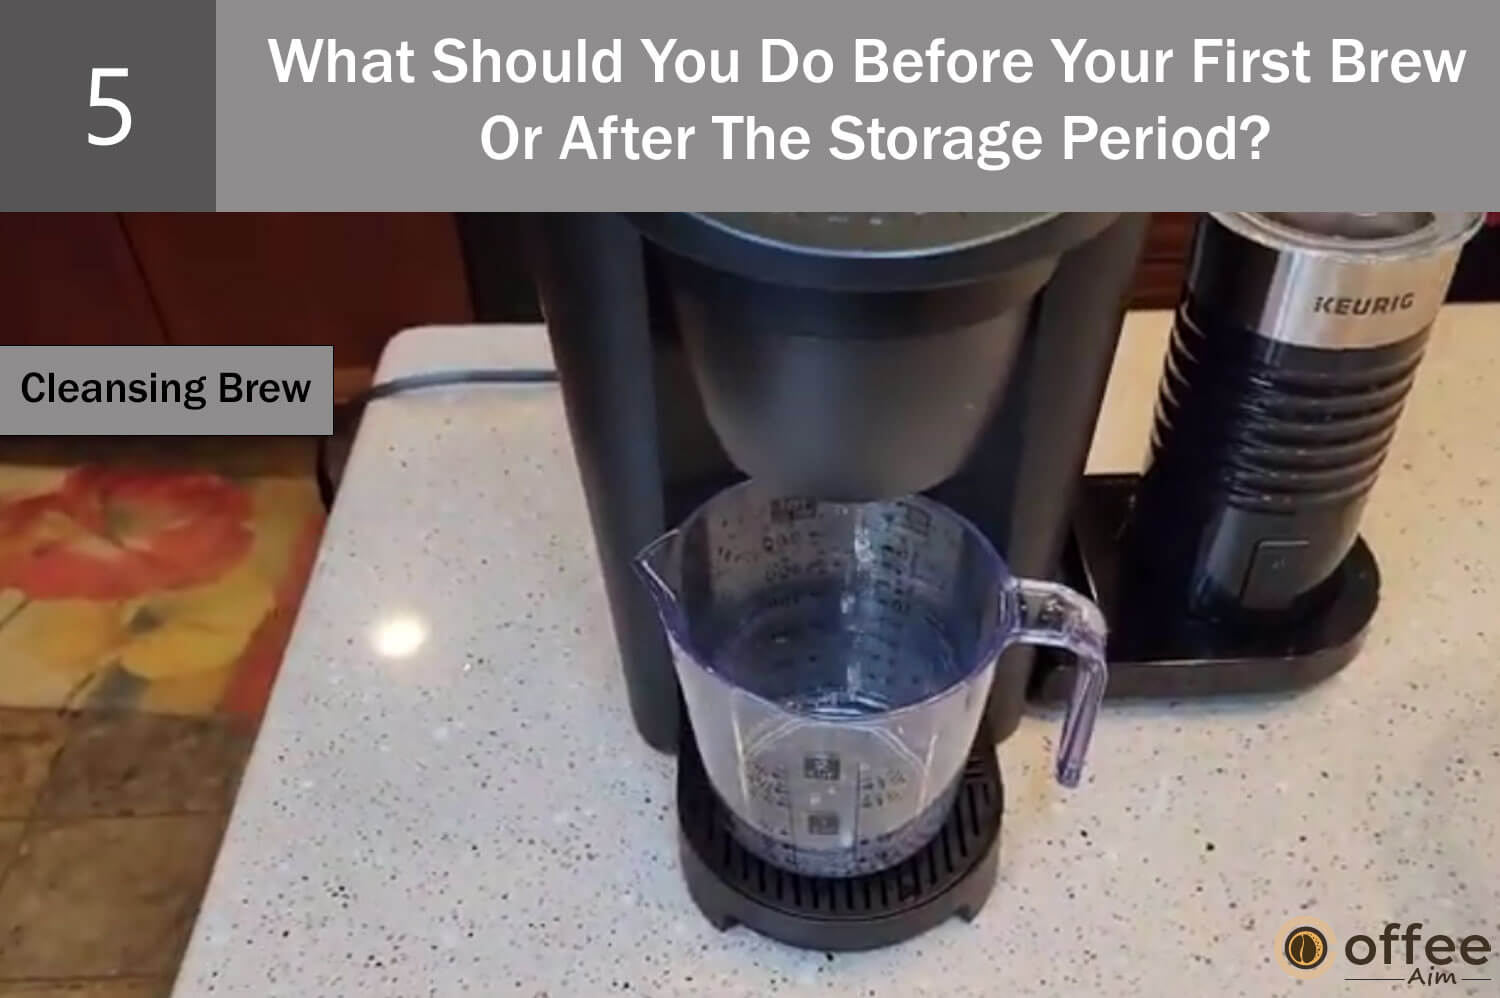
Elevate and lower the handle. Don’t ever put a K-Cup® pod.
The SHOT button and the three brew buttons will blink.
To begin a cleansing brew, press the 6oz button. Pour the hot water into the sink.
You are now ready to brew after completing the one-time setup procedure.
NOTE: The brewer may need a minute to reheat between brew cycles.
Make Your First Cup Of Latte
Whether starting your day or taking a break during your long day, freshly brewed coffee can help you feel refreshed. Thus, to make a perfect coffee cup with your Keurig K-Latte, follow the instructions below to ensure you get the best cup possible.
1. Fill Your Frother

Remove the lid, then pour cold milk into the frother to the MAX line. After replacing the cover, set the frother on the base. On the frother, press the power button. The button will glow while heating for about three minutes. The frothing process is finished when the button flashes and then turns off.
TIP: Are you having difficulties with frothing?
Call 1-866-901-BREW (2739).
CAUTION: The blender should not be used in a microwave or dishwasher.
NOTE: Don’t under or overfill the frother. Operate only after adding the milk.
2. Place Mug And Pod
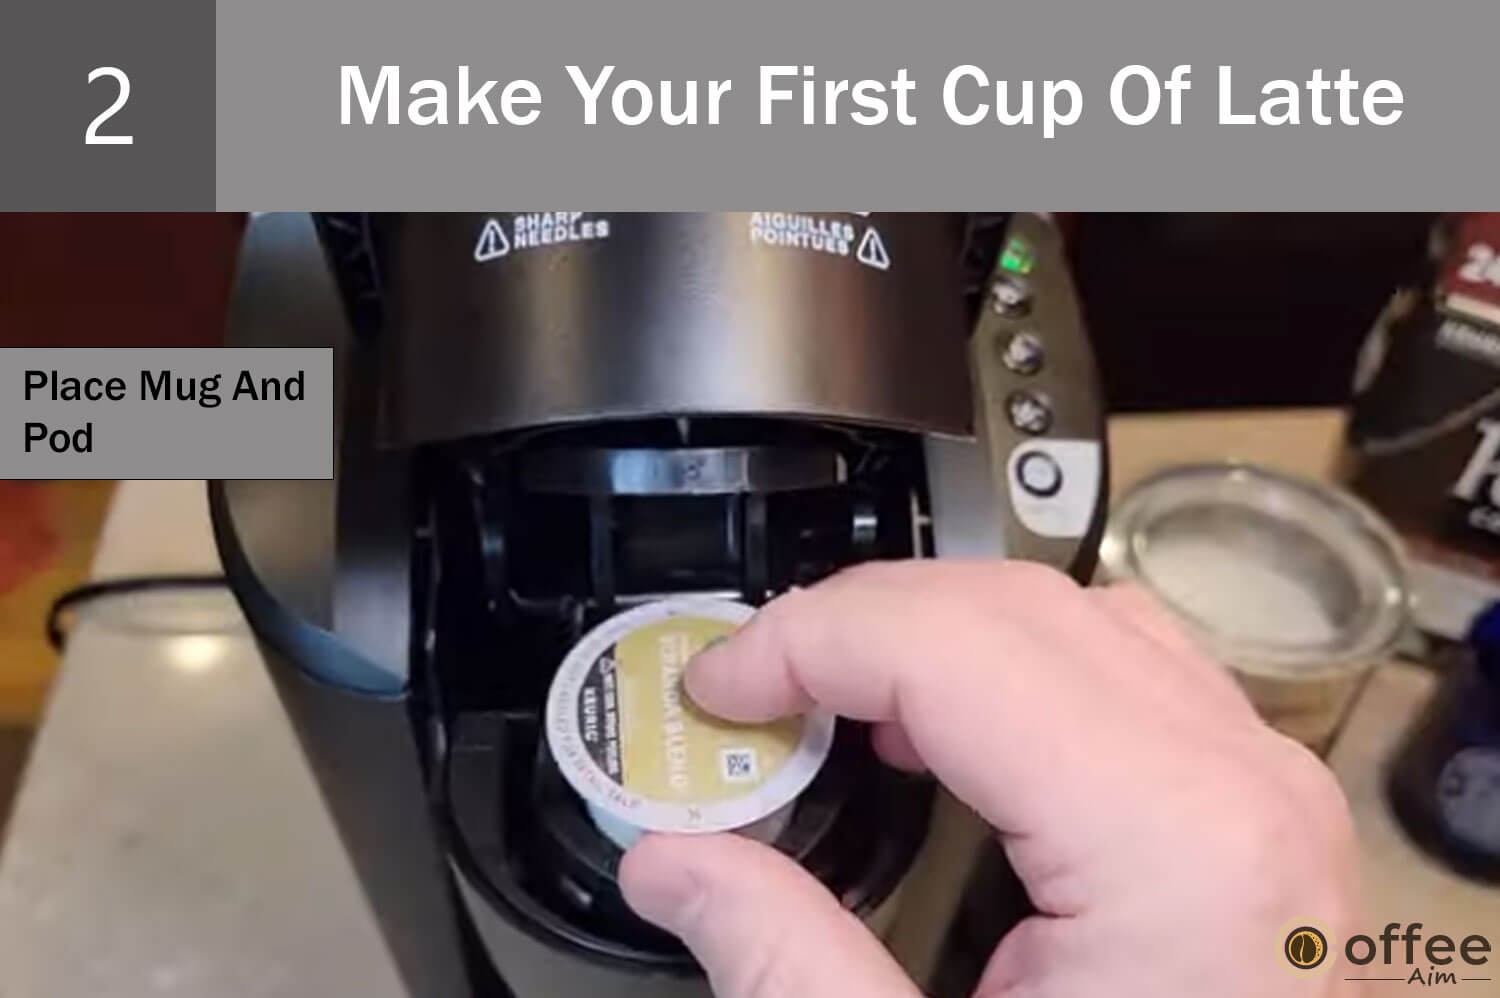
On the drip tray, place a mug. In the K-Cup® pod holder, by lifting the handle, place any K-Cup® pod.
Note: you should not remove the foil lid of the K-Cup® pod.
To close the lid, fully lower the handle.
3. Brew A Shot:

The SHOT and three brew buttons will blink. Press the SHOT button. After the SHOT button stops illuminating, the brew has finished. Lift the handle, and discard the used K-Cup® pod.
Note: The brew buttons will be disabled after 60 seconds. Lift and fully lower the handle to reactivate.
WARNING: The water in the K-Cup® pod holder is boiling while the coffee is brewing. Do not lift the handle while the brewing occurs to prevent injury.
4. Make Your First Latte
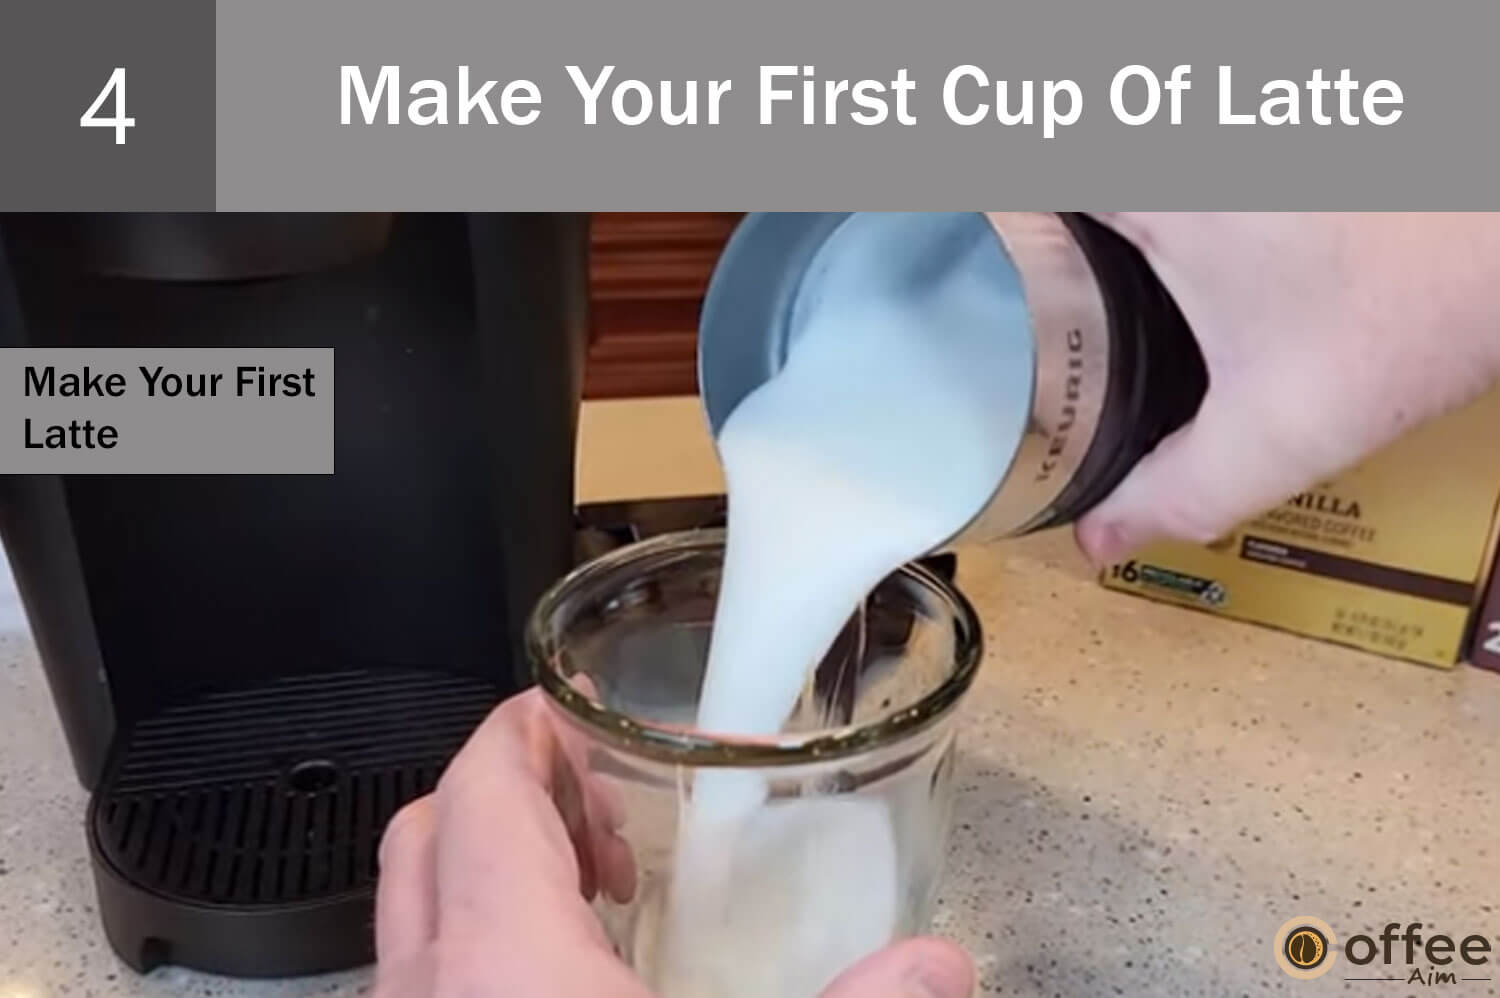
From the base, remove the frother. After removing the lid, add the frothed milk to your shot of coffee.
NOTE: After usage, immediately clean the frother. See the section of this guide, “Caring for your Brewer,” for cleaning guidelines.
Brew Your First Cup Of Coffee
If you want to make your first cup of coffee but don’t know how to make it, don’t worry! I got you. Read and follow the instructions below to make and enjoy your first coffee cup.
1. Place Mug And Pod

On the drip tray plate, place a mug. Remove the drip tray if using a travel mug and place a travel mug on the drip tray base directly. Place a K-Cup® pod by lifting the handle in the K-Cup® pod holder. To close the lid, fully lower the handle.
The K-Cup® pod’s foil lid should not be removed.
High Altitude Brewing: Carefully press down on the K-Cup® pod in the pod holder while holding the brewer handle up until the exit needle punctures the bottom of the K-Cup® pod.
2. Brew And Relish
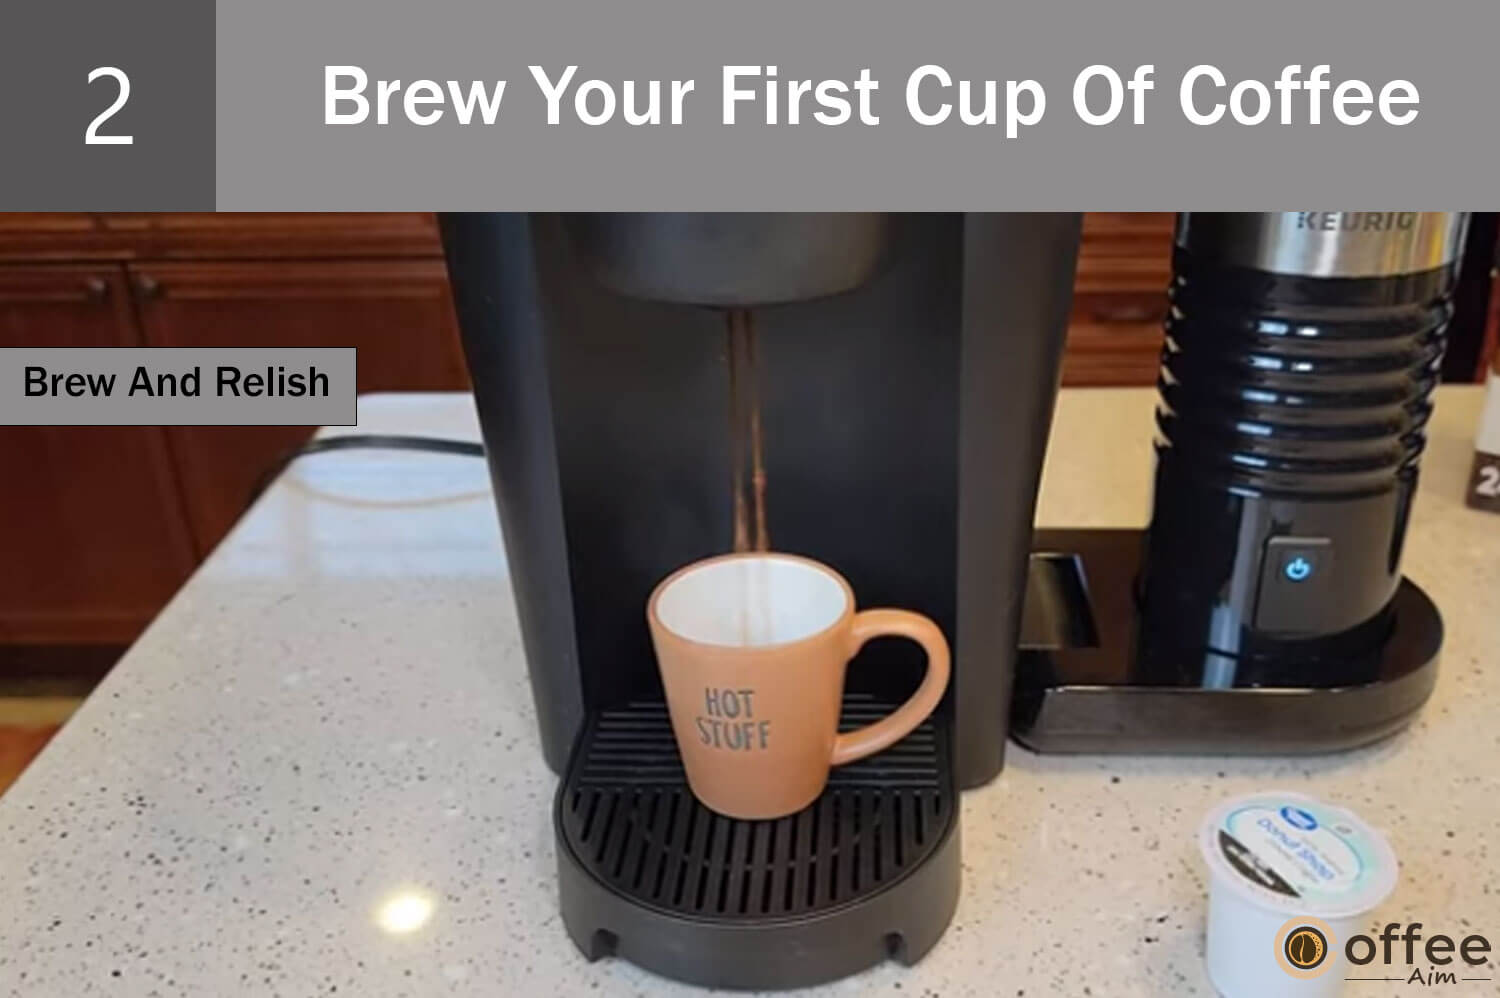
Choose the size of your brew. The button will be illuminated for around a minute while the coffee is brewing.
When the button stops illuminating, the brewing process is over. To discard the used K-Cup® pod, lift the handle.
The brewer will be prepared to brew another cup in approximately a minute.
NOTE: The brew buttons will be disabled after 60 seconds. Lift and fully lower the handle to reactivate.
WARNING: In the K-Cup® pod holder, water is boiling while the coffee is brewing. Do not lift the handle while the brewing occurs to prevent injury.
Caring For Your Brewer
Caring for your brewer is necessary to get a perfect cup of coffee every time you brew. Follow the steps below to clean your brewer without damaging it. Always clean every part of your brewer after each brew.
1. Frother

Before and after using your brewer, clean your frother immediately.
Cleaning Process:
- Remove the frother from the base, remove the silicone ring from the lid, and remove the whisk inside the frother.
- Use soap to wash the frother’s interior, followed by a warm water rinse.
- To avoid harming the inner coating, use a sponge-soft, non-abrasive cloth to prevent damaging the internal layer.
- Use a damp and soft cloth to clean the exterior.
- Reassemble after thoroughly drying all components for subsequent use.
NOTE: Dishwasher safety is not guaranteed for the frother. Never immerse the frother in water. To avoid harming the frother’s inner surface, only use non-abrasive cleaning supplies.
2. Exterior Of Your Brewer
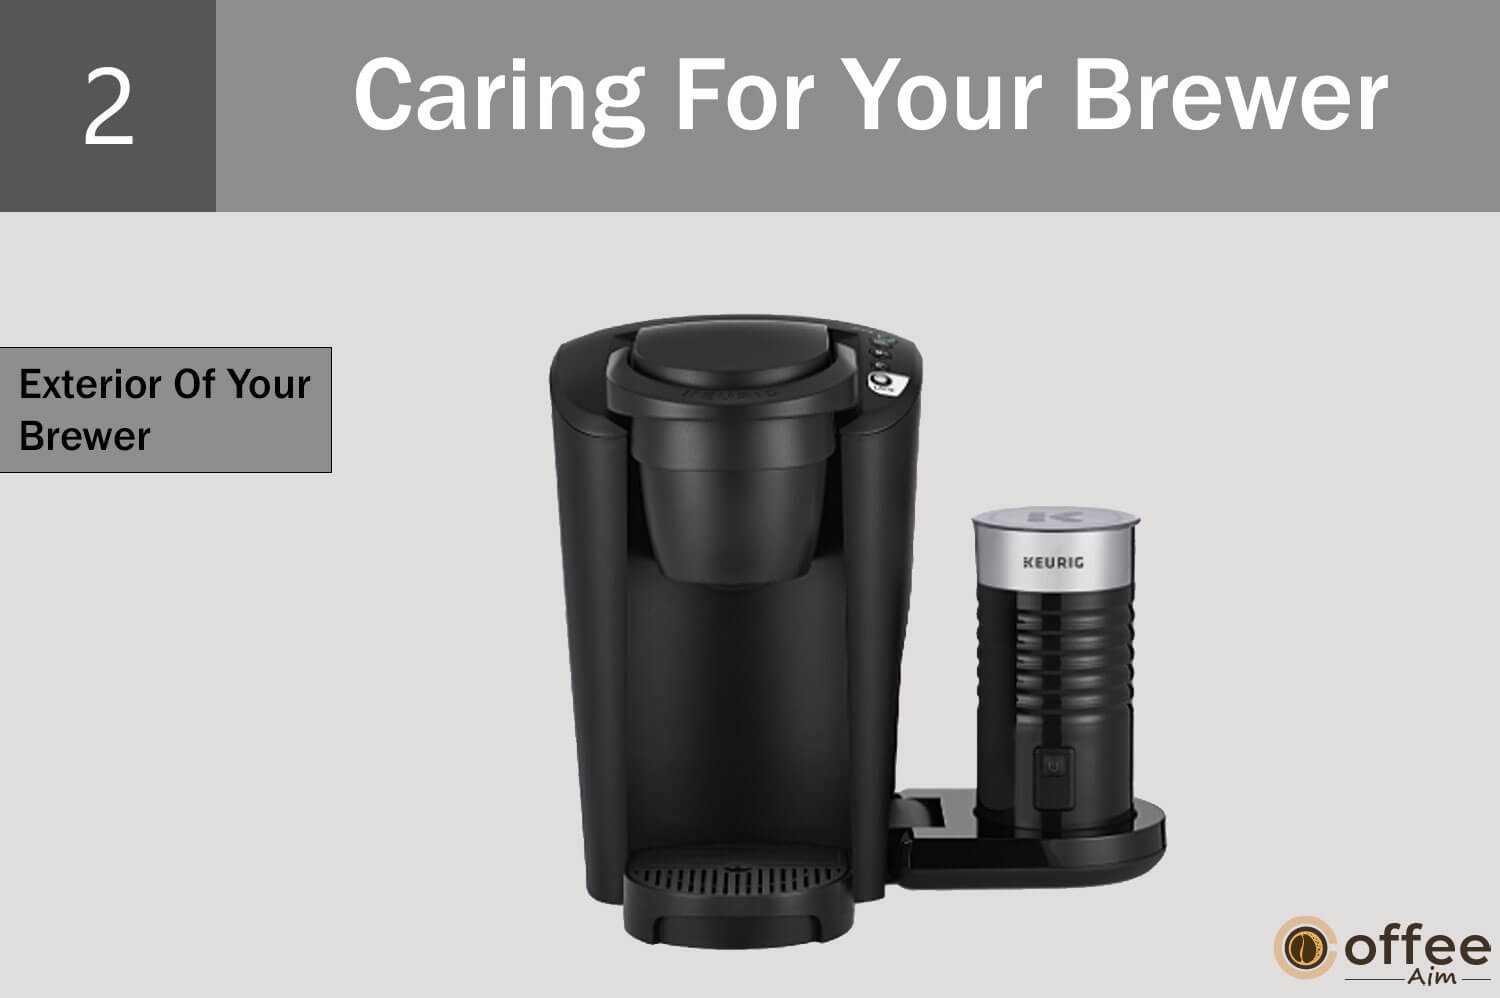
Maintain the appearance of your Keurig® brewer by cleaning the exterior regularly.
Just use a non-abrasive, lint-free, damp, soapy cloth to clean.
Never submerge the brewer in water or any other liquid.
3. Water Reservoir And Reservoir Lid:
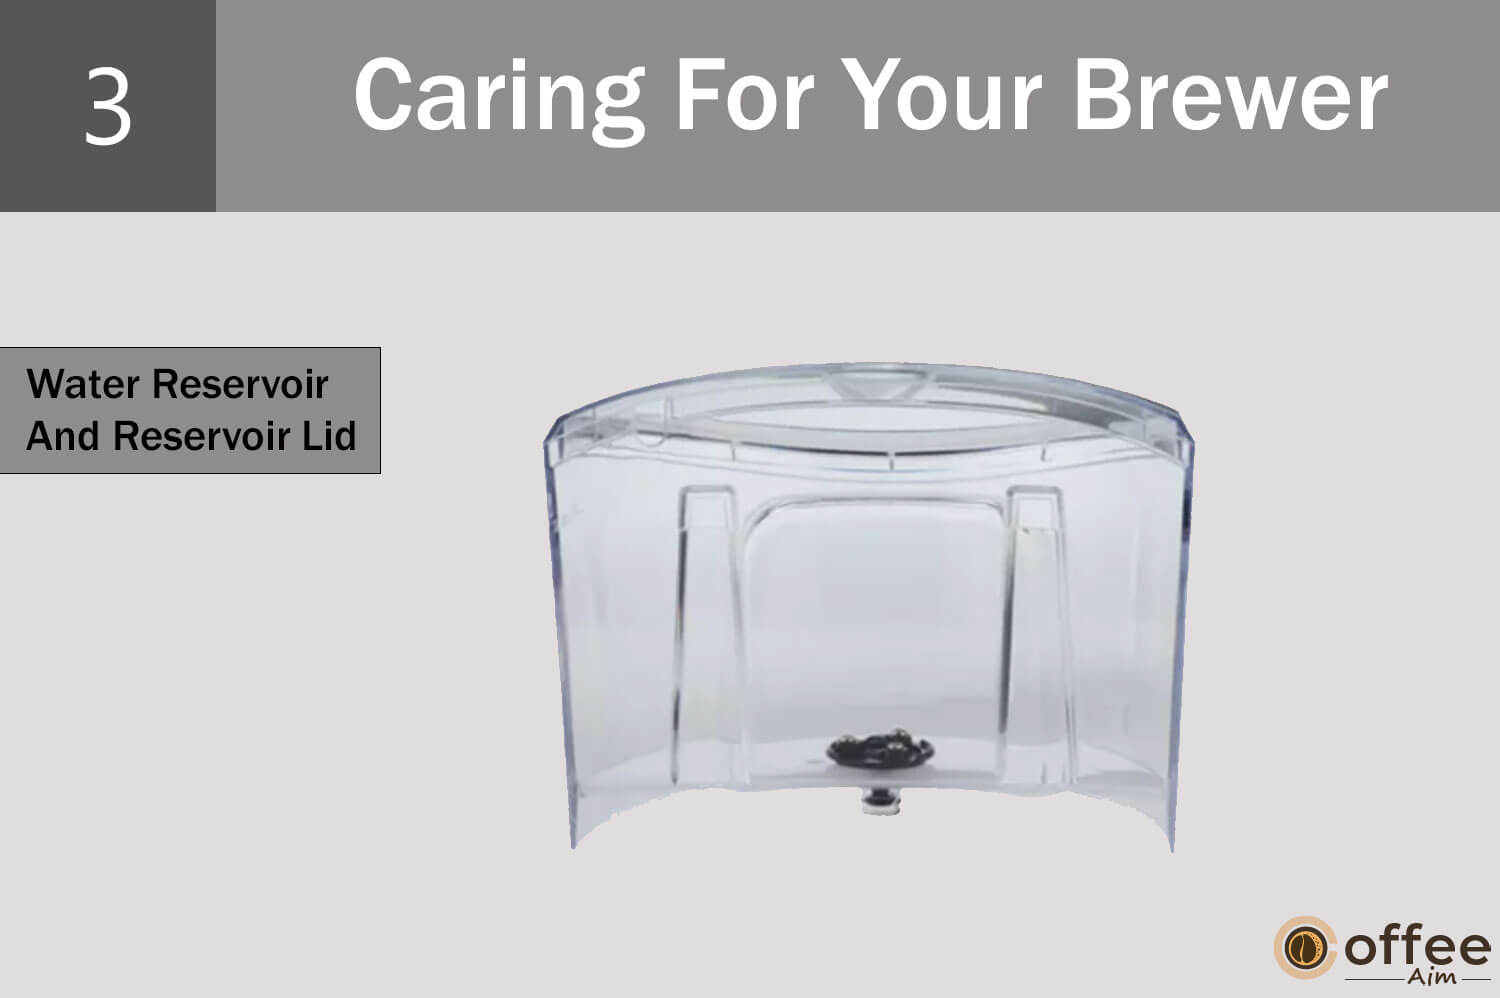
- The water reservoir lid and the reservoir itself must be cleaned occasionally. Use hand wash or top rack only in the dishwasher for cleaning.
- Use a non-abrasive, soapy, and wet cloth for hand washing the water reservoir and lid.
- After cleaning, carefully rinse the reservoir. IT will ensure no cleaning agents are left behind, which could contaminate the water supply.
- After rinsing, fill the reservoir with fresh water, then deliver it back to the brewer.
- Avoid using a cloth to dry the interior of the water reservoir since lint may be left behind. Repeat the previous steps if necessary.
NOTE: Remove the water filter from the reservoir if you use one before cleaning.
4. Drip Tray

The drip tray needs to be periodically emptied and cleaned because it can hold up to 8 ounces of overflow.
Slide it towards you while maintaining a level to prevent spills. Either rinse and clean with a moist, soapy, lint-free, non-abrasive cloth or clean in the dishwasher (top rack only).
5. Holder For K-Cup Pods
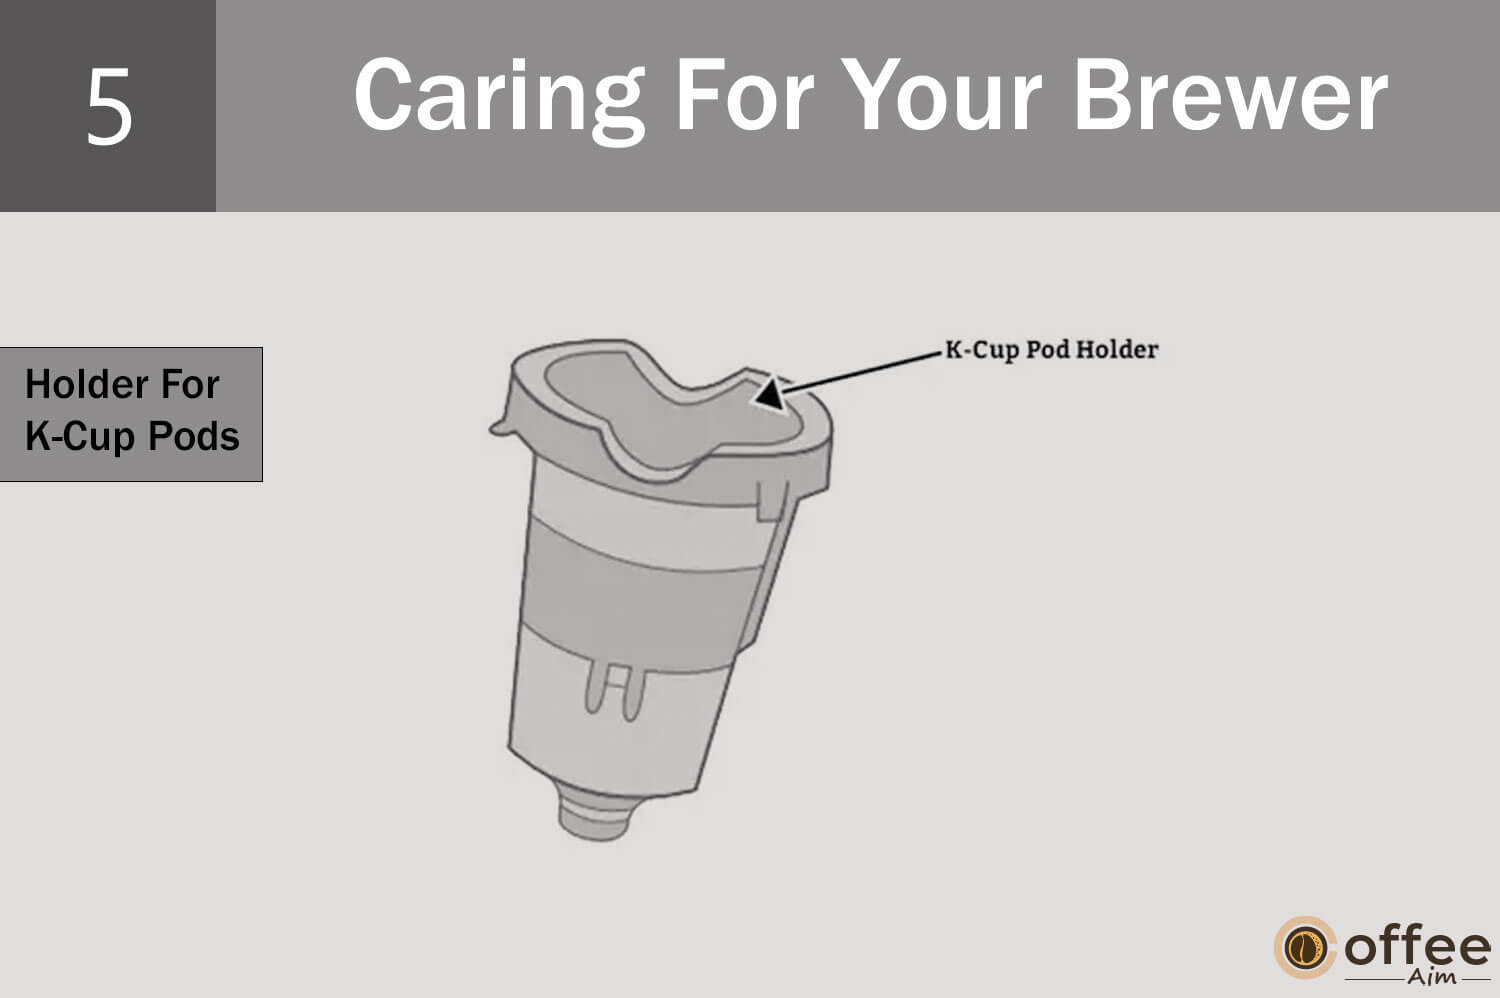
If you don’t want to receive remnants from a previous brew; therefore, always clean the holder for K-Cup Pods.
- With one hand, lift the handle and take hold of the K-Cup® pod holder’s top. Then press up on the bottom of the K-Cup® pod holder from underneath with the other hand until it releases from the brewer.
- After cleaning, use the two front ribs as a guide to line up the K-Cup® pod holder with the opening, and then snap it into place from the top.
CAUTION: In the bottom of the K-Cup® pod holder and above the K-Cup® pod holder, sharp needles puncture the pod. Do not stick your fingers inside the K-Cup® pod holder to reduce the risk of harm.
NOTE: After brewing, always discard the used K-Cup® pod.
6. Funnel

A fresh beverage experience is ensured by washing the funnel. The funnel needs to be cleaned regularly.
A funnel can be removed easily by pulling on it until it pops off from the K-Cup® pod holder. Just snap it back while orienting the snaps to the indent to replace it with the K-Cup® pod holder.
7. Exit Needle
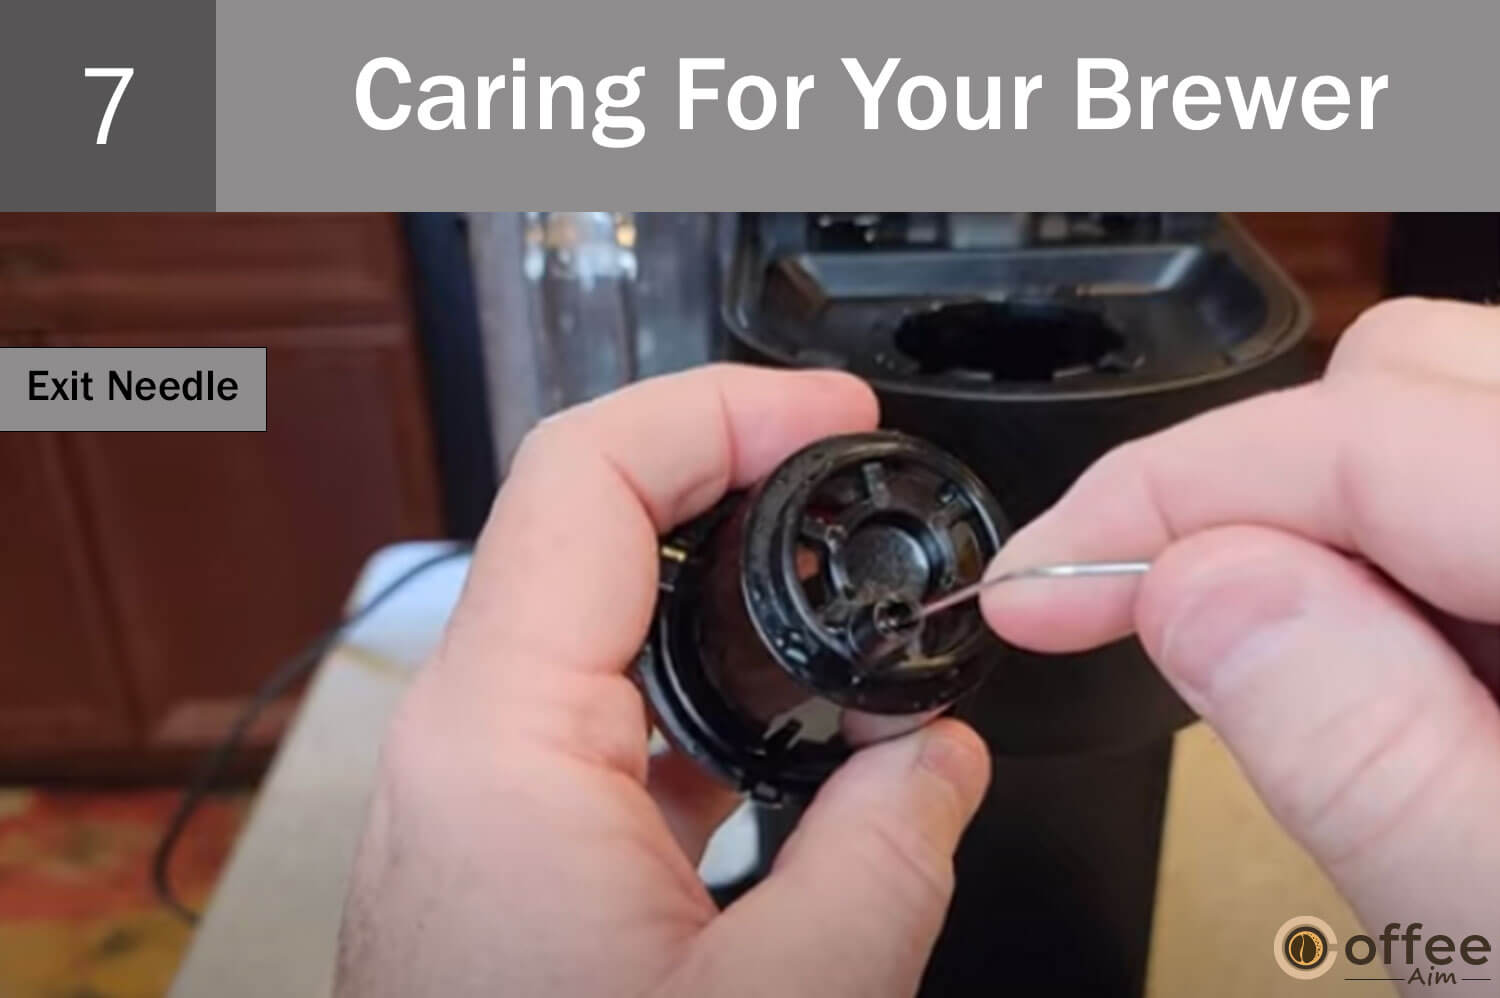
Detach the funnel and take out the pod holder assembly.
Find the exit needle within the K-Cup® pod holder’s bottom.
To remove coffee grounds, insert a straightened paper clip into the exit needle.
8. Entrance Needle

You can find the entrance needle on the bottom of the lid if you lift the brewer handle. With the brewer handle upward, carefully insert a straightened paper clip into both holes with your other hand. Doing this will clean both holes.
Carefully move it around to loosen any coffee grinds. Ultimately lower the handle and do two water-only brew cycles. Never insert a K-Cup® pod.
TIP: For video instructions on cleaning the entrance/exit needles, visit support.keurig.com
Descaling Of Keurig K-Latte
A coffee maker is a fantastic technique for making a tasty coffee cup. But, you must constantly descale them, ideally every three to six months or more frequently as necessary, for them to function flawlessly and produce the best cup of coffee. Depending on the content of your water Scale or calcium deposits may accumulate in your brewer. Although the scale is non-toxic, it can impair the brewer’s performance if not considered. The heating element and other internal components that come into contact with water are maintained with regular descaling of your brewer. This guide will cover the description and tips on how to do it quickly. Then let’s get going!
Pre-Requisites:
- A sizable ceramic mug, fresh water, Keurig® Descaling Solution, and access to a sink are all necessary before you start.
- Use a cup other than paper. Verify that the K-Cup® pod holder is empty of any beverage pods.
- Please wait for the descaling process to take around 45 minutes.
- Remove all of the water from the reservoir. Remove and set away the Keurig® Water Filter if you are using one.
Step 1: Rinse To Clean
- To turn off the brewer, press the power button.
- Fill the water reservoir with the entire bottle of Keurig® Descaling Solution bottle.
- Pour the water into the empty bottle and the reservoir.
- To restart the brewer, press the power button.
- On the drip tray, put a large cup and select the largest brew size while lifting and lowering the handle to run a rinse brew.
Step 2: Internal Tank Soak
Rinse and brew once more till the add water light comes on. Do not use a K-Cup® pod. Brewer should be left on for at least 30 minutes.
After 30 minutes, empty the water reservoir of any remaining solution and give it a good rinsing.
Step 3: Rinse With Fresh Water:
- Add fresh water to the reservoir to the MAX fill line, but this is the maximum.
- On the drip tray, Put a large cup plate and use the largest brew size to run a rinse brew. Do not use a K-Cup® pod.
- In the sink, empty the mug’s contents.
- Run the rinsing brewing by selecting the largest brew size until you have finished at least 12 rinse brews. Throughout this process, you should refill the water reservoir at least once.
NOTE: The Keurig® Descaling Solution’s cleaning action could cause a “foam” to be dispensed from the brewer. It is expected because the scale inside the solution is reacting. After the descaler is introduced, a brewer that has been highly scaled could not fill correctly. If this happens, you might observe little to no output discharge and hear air blowing out afterward.
If this happens, you might observe little to no output discharge and hear air blowing out afterward. If this occurs:
- Shut off and unplug your brewer.
- If the water reservoir contains Keurig® Descaling Solution, remove the contents, thoroughly clean it, and then fill it with water.
- Plug the brewer back in, turn it on, and continue the Step 3 Fresh Water Rinse cycle. Once the solution is dispensed and the scale is eliminated, the brewer will operate Normally. If the brewer still does not brew properly, keep it unplugged for at least 30 minutes before rinsing.
Troubleshooting Common Problems Of Keurig K-Latte
Every morning, you need a coffee! You must be able to solve your coffee maker’s issues. So let’s talk about the issue and its resolution right away.
Frother
It helps in making your coffee creamy and foamy. You must take care of it and contact customer service if you see any problem.
- Please call customer service if your milk isn’t frothing.
- You may not be able to utilize the frother while coffee brewing is in process. If you click the button on the frother and the light doesn’t come on, wait 30 seconds after the brewer has completed brewing. When you press the button on the frother once more, the light turns on. Contact customer service if the frother still needs to be fixed for you.
Grounds In Your Coffee
Use a straightened paper clip or similar items to clear any grounds that may have accumulated in the exit or entrance needles.
- Clean the K-Cup® pod holder’s exit needle. See the care instructions for the exit needle.
- Clean the entrance needle at the brewer. See the instructions for caring for the entrance needle.
Brewer Won’t Brew
Refrain from being scared if your brewer refuses to brew; I am here to assist you. After reading the steps below, you can get your brewer to brew.
If your brewer doesn’t brew,
- Fill the water reservoir with water if the add water light is on. Fill up to the MAX fill line, but this is the maximum.
- Verify that the water reservoir is securely attached to its base. Contact customer service if the add water light remains on even after refilling.
- Remove the K-Cup® pod (if present) by lifting the handle if all button lights (small cup, small mug, large mug, and SHOT button) are on simultaneously.
- On the drip tray, place a large mug and close the handle. One time press the power button. The brewer may dispense hot water.
- Contact customer service if the lights on the SHOT button, small cup, small mug, and large mug all blink simultaneously.
- You might not be able to brew coffee at the machine if the frother is in use at the exact moment. If this occurs, wait 30 seconds after the frother has stopped frothing before trying the brewing process once more. Contact customer service if you are still unable to brew.
Making A Partial Cup Of Tea
- The exit needle can be obstructed. See the care instructions for the exit needle.
- During brewing, you might have taken out the water reservoir. Replace the water reservoir and run water rinsing brew without a K-Cup® pod.
- It might be necessary to descale the brewer. Contact customer service if your brewer is still only producing a 1⁄2 cup of coffee after you have performed the descaling procedure twice.
Brewer Has No Power Or Stops Working
Every machine can malfunction for various reasons, including improper usage. If not appropriately utilized, Keurig K-Latte can also develop any. But not to worry! Here are several steps to get your brewer functioning regularly once more.
- Switch on the power switch. Connect the brewer to a grounded outlet on its own.
- Your brewer might not work correctly if the electrical circuit is sufficiently clean with other appliances. Plug in your brewer in the outlet that is not supplying electricity to other appliances on its grounded circuit.
- The brewer automatically shuts off 2 hours after the last brew for energy saving. When you press the power button, the green power light will come on, and the machine will wake up.
- Contact customer service if the brewer is still without power.
Practical Suggestions
There is a vast range of water quality. I advise using bottled or filtered water if you detect an unpleasant flavor in your coffee (such as chlorine or mineral tastes).
You should use no distilled water.
To assist in eliminating pollutants from water and enhance beverage flavor, you can also install a Keurig® Water Filter.
Service
Beyond these suggested cleaning and maintenance methods, the user needs help to service this brewer. Please read this guide’s Warranty section for information on service.
Storage
When storing or moving your coffee machine to another place, empty the water reservoir and ensure your brewer is in a secure, frost-free location to prevent water leaks from the inner tank. The risk of freezing water within the brewer and causing harm increases if you store it in a freezing environment.
I advise descaling the brewer as described in the “descaling” section above and cleaning the reservoir with soap and fresh water when ready to use it after storage.
- Turn off your brewer, unplug it from the electric socket, and empty the water reservoir before moving it to a new place.
- If your brewer has been in contact with temps below zero, please wait at least two hours for it to reach room temperature before using it.
Click Or Call
Still, Have Questions?
For step-by-step videos on descaling, cleaning, and more, Visit support.keurig.com
Still, Need Help?
Call Keurig at
1-866-901-BREW (2739).
One-Year-Limited Warranty
Keurig Green Mountain, Inc. (Keurig) guarantees that, under regular household use, your brewer will be in no need of manufacturing faults for a year following the date of purchase.
For your purchase data to be saved in the database, register your brewer at keurig.com/new.
Keurig will, at its discretion, repair or replace a broken coffee machine without costing you anything after submitting proof of the purchase date.
To satisfy the requirements of this warranty, a replacement brewer may be either brand-new or refurbished.
A one-year limited contract will cover the replacement brewer. This warranty only applies to breweries in the United States and Canada. Other legal rights you may have also varied from state to state, and in the case of Canada, from province to province.
The proper operation and long lifespan of your Keurig® brewer are only guaranteed by using K-Cup® brand pods and accessories. The use of non-Keurig® pods may cause your brewer to malfunction or sustain damage not covered by this warranty if such usage causes malfunction or damage.
NOTE: A DISHWASHER IS NOT INTENDED TO BE USED TO CLEAN A FROTHER. This warranty does not apply to water damage or other harm to the frother caused by cleaning the frother.
What Does The Limited Warranty Not Covers?
Even though the breach of this warranty was foreseeable, incidental costs and expenses are not covered by this warranty. The guarantee excludes incidental or consequential damages, including harm to property. In some states or provinces, incidental or consequential damages cannot be excluded or limited. As a result, the restriction or exclusion may not apply to you.
Additionally, this warranty does not cover the use of accessories or services provided by Keurig’s authorized service providers or parties other than Keurig or the use of non-Keurig® pods or components other than authentic Keurig® components. Or outside factors like mistreatment, exploitation, improper power sources, or divine intervention.
Other Restrictions
This warranty replaces all others, whether written or oral, and is exclusive.
Besides the implied warranties of merchantability and fitness for a particular purpose, Keurig now disclaims any further assurances concerning your keurig® brewer.
According to the state or province where you made the purchase, such implied guarantees may not be permitted by some states or sections or limit the duration of such implied warranties. As a result, you can be exempt from the indicated restriction.
How Are Warranty Services Obtained?
High-end Keurig® brewers should work satisfactorily for years with proper maintenance and care. If warranty service is necessary, call Keurig Customer Care at Keurig’s toll-free number, 1.866.901.BREW (2739). Before returning your brewer for repair, please contact Keurig Customer Service for a Return Materials Authorization (RMA) number. Keurig® brand brewers returned without an RMA number will be returned to the sender unserviced.
Conclusion
The Keurig K-Latte coffee maker is a great way to make delicious lattes at home. This helpful guide has shown you how to use your Keurig K-Latte coffee maker and get the most out of it. For making the perfect latte or coffee, this guide has given you all the information you need to make the perfect cup of coffee every time. So, you can use your coffee maker like a pro.
Now that you better understand how to use your Keurig K-Latte coffee maker, why not explore other blogs and resources that can help you further refine your skills? Visit www.Coffeeaim.com for more informative blogs about coffee. With more practice and knowledge, you can become an expert in crafting lattes with your Keurig K-Latte coffee maker.
FAQs
What Is A Keurig K-Latte?
The Keurig K-Latte is a coffee maker that uses Keurig K-Cup pods to make coffee, lattes, and cappuccinos.
How Does The Keurig K-Latte Work?
The Keurig K-Latte combines a K-Cup pod and fresh milk to create your favorite coffee drinks. Simply insert a K-Cup pod, add fresh milk to the frother, and press the button.
What Types Of K-Cup Pods Can I Use With The Keurig K-Latte?
You can use any K-Cup pod with your Keurig K-Latte, including coffee, tea, and hot cocoa. For a latte, you need an espresso K-Cup pod.
How Do I Clean My Keurig K-Latte?
By cleaning it regularly, you can make your Keurig brewer look and perform its best Here’s what you’ll need: a large mug, a nonabrasive cloth dish soap and access to a sink. The process will take about five minutes.
- First, clean the exterior with a non-abrasive, damp cloth and soap. To clean the drip tray, avoid submerging the brewer in water or other liquids.
- You’ll also need to clean the lid and water reservoir about once a week. Remove the water filter if you have one. Clean the reservoir and lid with a soapy, non-abrasive, damp cloth and thoroughly rinse both.
Note: Never use a cloth to dry the inside of the water reservoir since lint could be left behind. The drip tray and reservoir are also top-rack dishwasher safe. - After cleaning the reservoir, run a cleansing brew. Place a mug on the drip tray and run a water-only brew using the largest cup size. Do not use a K cup pod when running a cleansing brew.
Note: You may also use Keurig rinse pods, a simple, fast and convenient way to reduce flavor carryover between brews, ensuring the best-tasting beverages every time after each use.
Allow the frother to cool, and then clean the frother. To do this:
- remove the frother from the base, remove the silicone ring from the lid and remove the whisk inside the frother.
- Wash the silicone ring lid, whisk with warm soapy water, and thoroughly rinse.
Note: The frother is not dishwasher safe and should not be submerged in water, so you’ll want to clean the interior of the frother with a damp soapy cloth and rinse with warm water Speaker and a nonabrasive cloth should be used to prevent damaging the inner coating. - Now wipe the exterior with a soft, damp cloth, dry all parts thoroughly and reassemble for subsequent use.
That’s it. Your brewer is now clean, and you’re ready to brew.
Can The Strength Of My Coffee Adjust With The Keurig-K Latte?
A Shot button for cappuccinos and lattes produces 2 ounces of concentrated coffee. Additionally, if you want your coffee to be more robust, you can choose Strong.
What Size Cup Can I Use With The Keurig K-Latte?
Three cup sizes are available on the Keurig® K-Latte coffee maker: 177, 237, and 296 ml. (6, 8, and 10 oz). Additionally, the K-Latte coffee machine has a SHOT button that brews a concentrated SHOT of coffee measuring 59 ml (2 oz)—ideal for making lattes.
How Do I Froth Milk With The Keurig K-Latte?
Follow these steps to froth milk with the Keurig K-Latte:
- Fill the frother to the minimum fill line with milk. It’s important not to overfill the frother as milk expands as it froths.
- Securely place the frother lid on top of the frother.
- To turn on the frother, press the power button.
- Wait for the frother to complete frothing the milk. It will take approximately 3 minutes.
- Remove the frother’s lid once the frothing procedure is complete. Pour the frothed milk into your coffee or other favorite drink.
It should be noted that the Keurig K-Latte frother can only froth milk and cannot heat it. As a result, you’ll need to heat your milk before foaming it with the Keurig K-Latte frother.
How Long Does It Take To Brew A Cup Of Coffee With The Keurig K-Latte?
The water heating procedure in Keurig coffee makers begins quickly at first, within just a few minutes. Your cup of coffee can be brewed in less than a minute after the heated water.
Can I Use Non-Dairy Milk With The Keurig K-Latte?
The milk frother has three distinct frothing settings: latte, cappuccino, and cold froth. The frother uses fresh milk, but any of your preferred options may be used with the frother, and you can use oat, coconut, almond, or cow’s milk.
Does The Keurig K-Latte Come With A Warranty?
Yes, the Keurig K-Latte comes with a one-year limited warranty. It is also ensured that your coffee maker will work perfectly for one year. If your K-Latte has any defects in materials or artistry within one year of purchase, Keurig will repair or replace it for free if you register yours. However, the warranty does not cover damage caused by misuse or unauthorized modifications.