Quick Navigation
Are you a proud owner of the Keurig K-Latte machine but facing some frustrating problems? Don’t worry; you’re not alone. While the Keurig K-Latte is a popular choice for coffee enthusiasts, it has its share of everyday issues. From inconsistent coffee strength to clogged needles and other operational quirks, these problems can dampen your brewing experience. But fear not! In this article, we’ll delve into the most prevalent issues with the Keurig K-Latte machine and provide practical solutions to help you overcome them. So, grab your cup of joe, sit back, and let’s tackle these challenges head-on!
Getting Started
Ensuring you have the necessary tools is essential before we address the common issues with the Keurig K-Latte machine. These tools will prove invaluable in troubleshooting and resolving any problems you encounter with your coffee maker. Here are the necessary tools you should have:
- Cleaning Solution: A cleaning solution for coffee makers is crucial for maintaining the cleanliness and functionality of your Keurig K-Latte machine. This solution helps remove mineral deposits and residues that can produce with time, leading to clogs and subpar performance.
- Descaling Solution: Over time, mineral deposits from hard water can accumulate within the internal components of your coffee maker, affecting its efficiency and taste. A descaling solution is specifically formulated to remove these deposits, ensuring optimal performance and prolonging the lifespan of your Keurig K-Latte.
- Cleaning Brush: A cleaning brush with soft bristles is perfect for reaching those hard-to-access areas of your machine, such as the needle and the coffee pod holder. It helps dislodge any coffee grounds or debris that may be causing clogs or affecting the taste of your brew.
- Paperclip or Needle: A paperclip or a needle can be incredibly handy for unclogging the needle of your Keurig K-Latte machine. Sometimes, coffee grounds or other particles can get stuck in the needle, obstructing water flow and resulting in weak or partial brews. Using a paperclip or needle, you can gently clear any blockages and restore the proper functionality of the machine.
Having these essential tools readily available will empower you to troubleshoot and address the common issues that may arise with your Keurig K-Latte machine. The following sections will explore specific problems and provide step-by-step solutions to help you get your coffee maker back to optimal working conditions.
Now we will discuss some of the issues that you may experience with your Keurig K-Latte Coffee Maker:
Problem 1: Why Is My Keurig K-Latte Machine Not Turning On
Are you experiencing the time when your craving for a steaming cup of coffee is reaching its peak, and you are met with the frustration of discovering that your beloved Keurig refuses to turn it on? The impact of this malfunction can extend beyond a mere inconvenience, seeping into the fabric of your day and potentially affecting your professional life. However, there is no need to despair. I have gathered much information to assist you in troubleshooting this issue. Let us proceed and explore the possible causes of this problem, along with their simple and effective solutions.
Cause 1: Power Connection Problem
If your Keurig K-Latte is not turning on, the issue lies with the power transfer. Here are some detailed solutions to this problem and establish a reliable and secure connection.
Solution 1: Check The Power Source
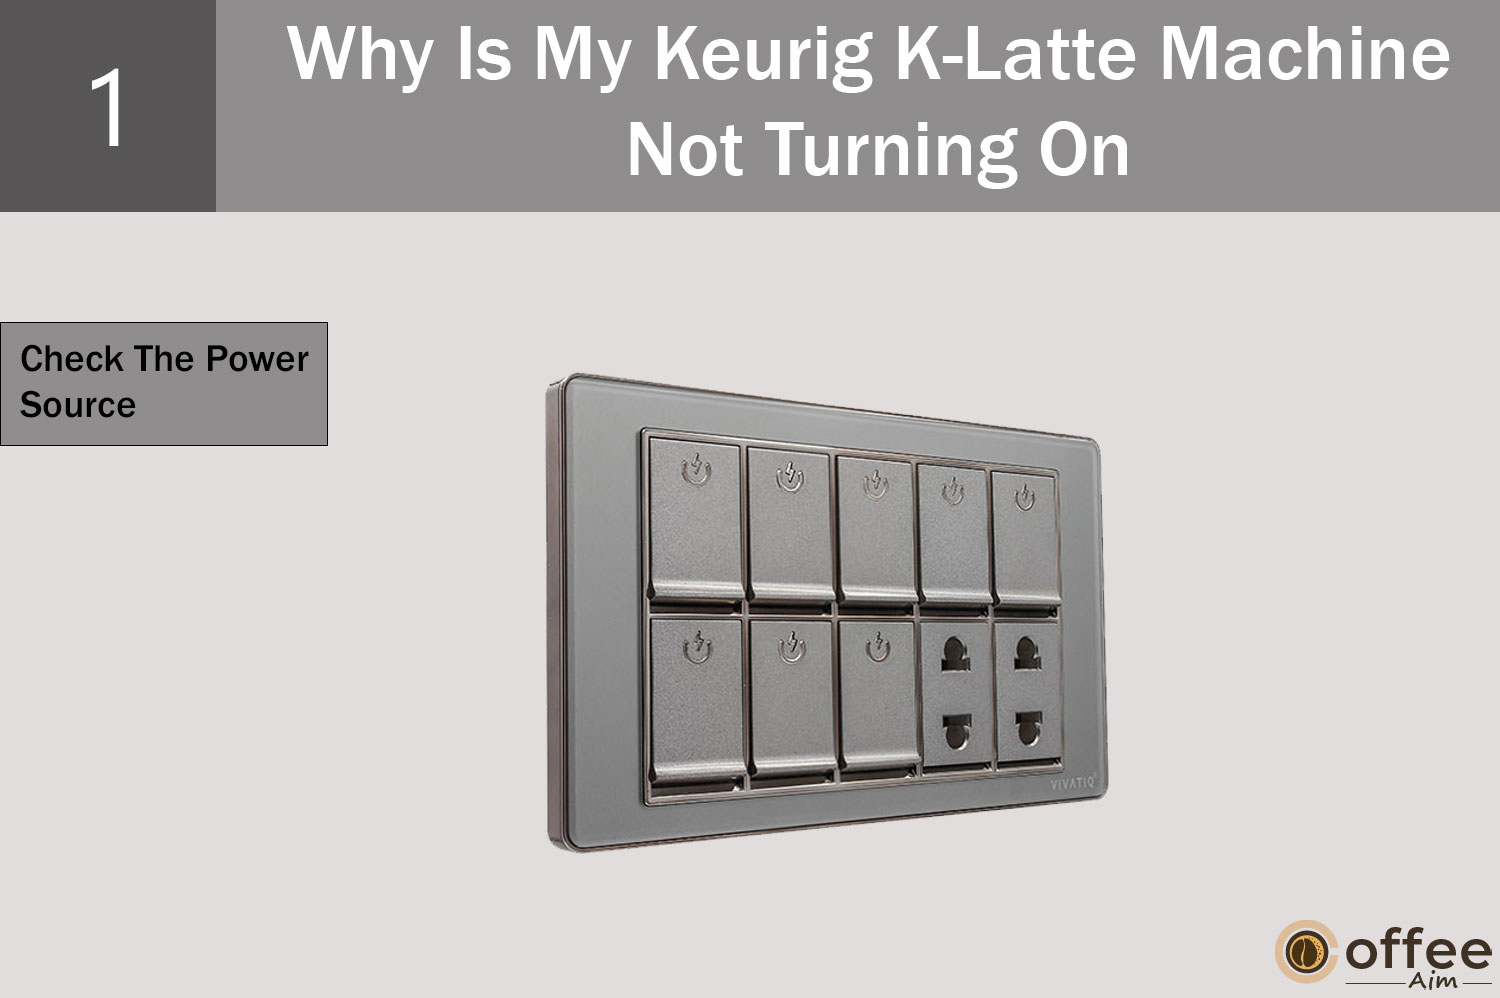
Begin by confirming that the power outlet you are using is functional. Plug in another device, such as a phone charger or a lamp, to ensure electricity flows to the outlet. If the alternate device works, proceed to the next steps. However, if there is no power, check your circuit breaker or contact an electrician to investigate further.
Solution 2: Check The Plug For Any Damage
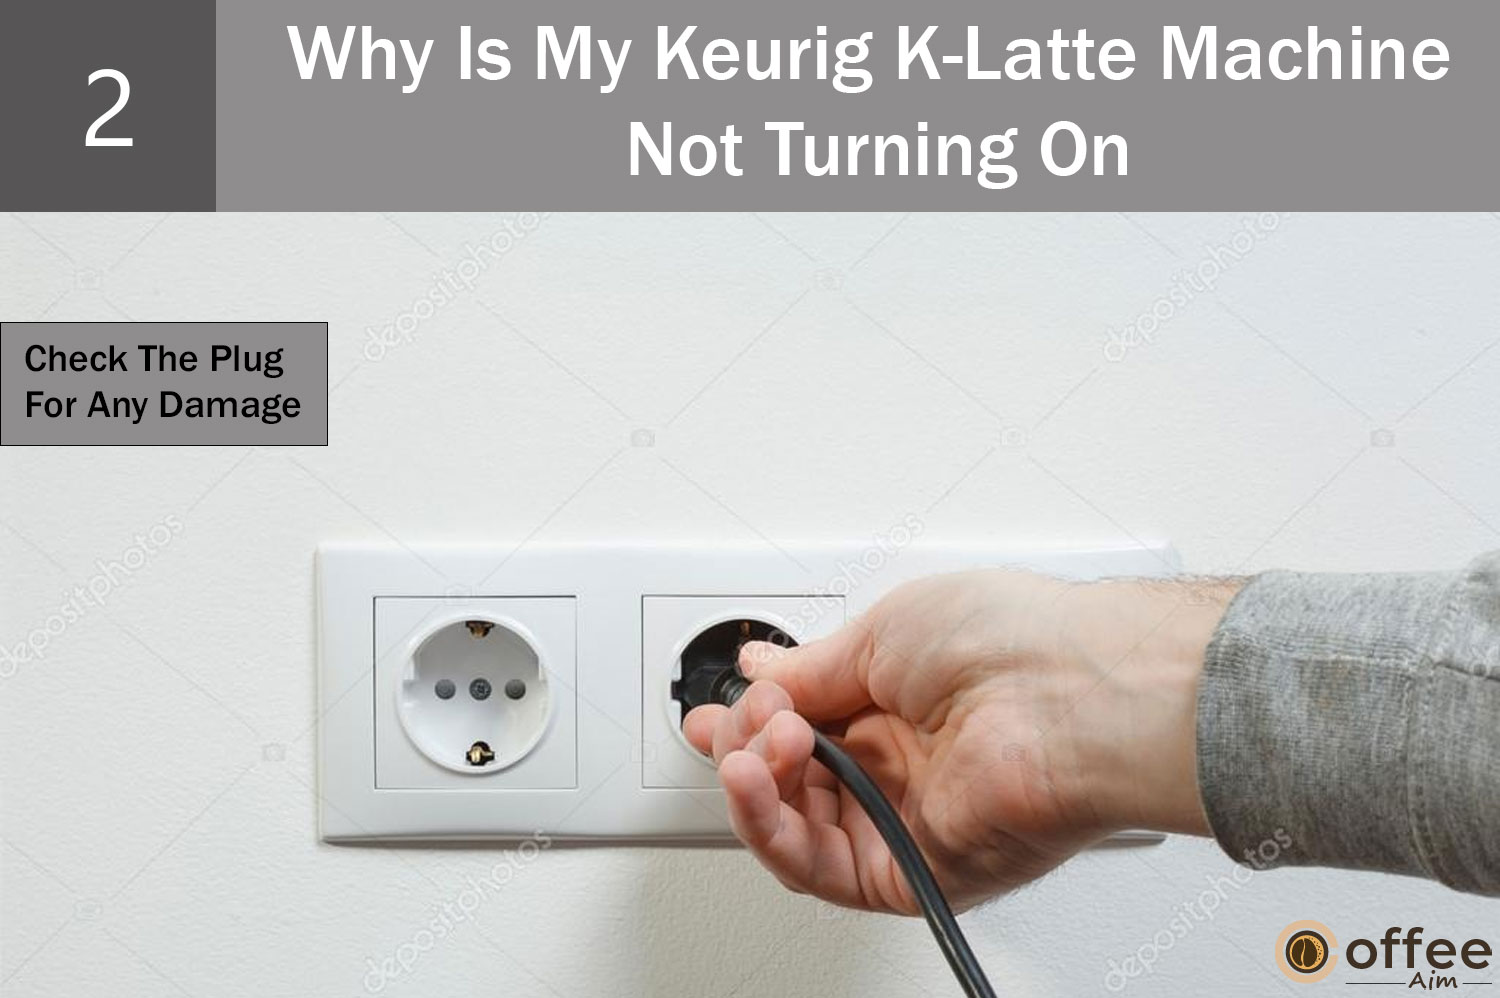
Please verify the plug connecting your Keurig to the power outlet and ensure it is properly inserted. If the plug shows signs of damage or wear, replacing it with a new one is advisable to ensure a secure connection.
Solution 3: Inspect The Power Cord
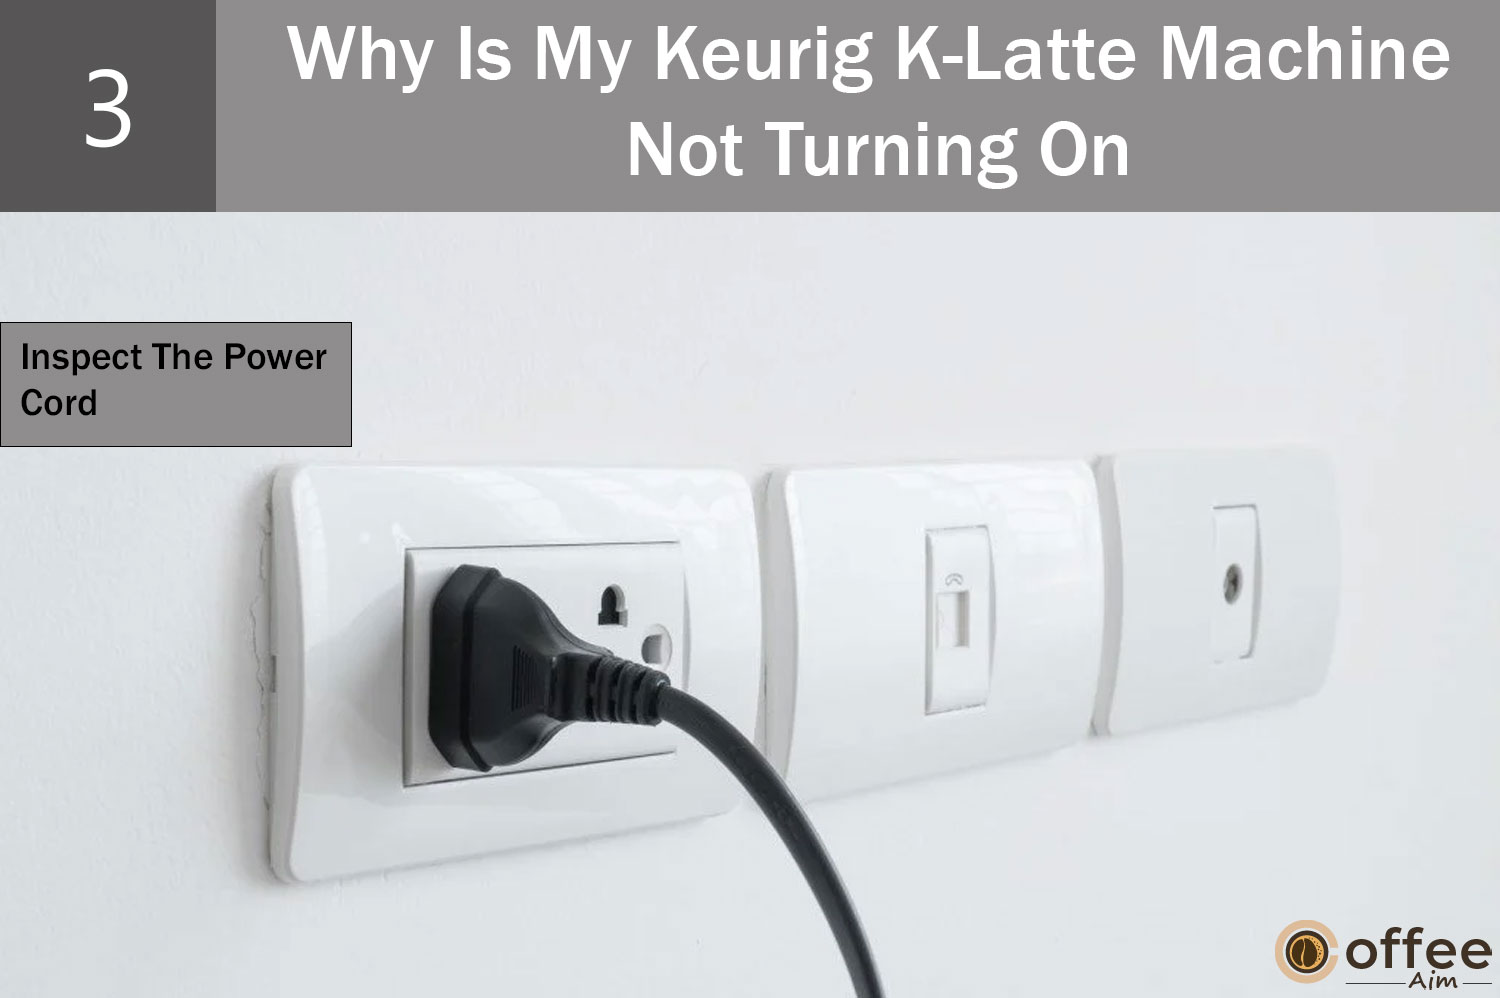
Examine the power cord of your Keurig for any damage, such as frayed or exposed wires. Replacing the power cord is crucial if you notice any such issues. Using a damaged cord can pose safety hazards and cause the machine to malfunction. Contact Keurig customer support or a certified technician for a suitable replacement cord. Contact Information can be found in the “When To Seek Profession Help” section provided below in this article.
Cause 2: Brewer Is Malfunctioning
After going through the previously mentioned steps to ensure a stable power transfer to your Keurig brewer, if you find that the brewer still does not start, it indicates that the problem lies in itself.
Solution: Contact Keurig Customer Care

It is best to reach out to Keurig Customer Care for assistance. You can obtain their contact information from the “When to seek professional Help” section mentioned below in this article.
Now, let’s redirect our attention to another frequently encountered problem among Keurig users: the issue of the presence of coffee grounds in your coffee cup.
Problem 2: Why Is My Keurig K-Latte Dispensing Grounds With Coffee
Discovering bitter coffee grounds in every sip diminishes the pleasure of savouring a delicious brew and raises concerns about your coffee maker’s overall quality and performance. In order to regain the full enjoyment of your coffee experience, it is essential to delve into the root cause of this issue and take prompt action to address it. So, let’s explore to uncover the secrets behind this unwelcome twist and restore the magic of your coffee brewing journey.
Cause 1: Exit Needle Is Dirty
This undesirable situation often arises from a blockage in the exit needle of your Keurig, where a buildup of coffee grounds or tea residue can occur over time. Such clogs can have a detrimental effect on the quality and flavour of your brews. However, fear not! Allow me to guide you in reclaiming that perfect cup of coffee you deserve. Explore the potential solutions below and embark on a journey to restore the delightful coffee experience that awaits you.
Solution: Clean The Exit Needle
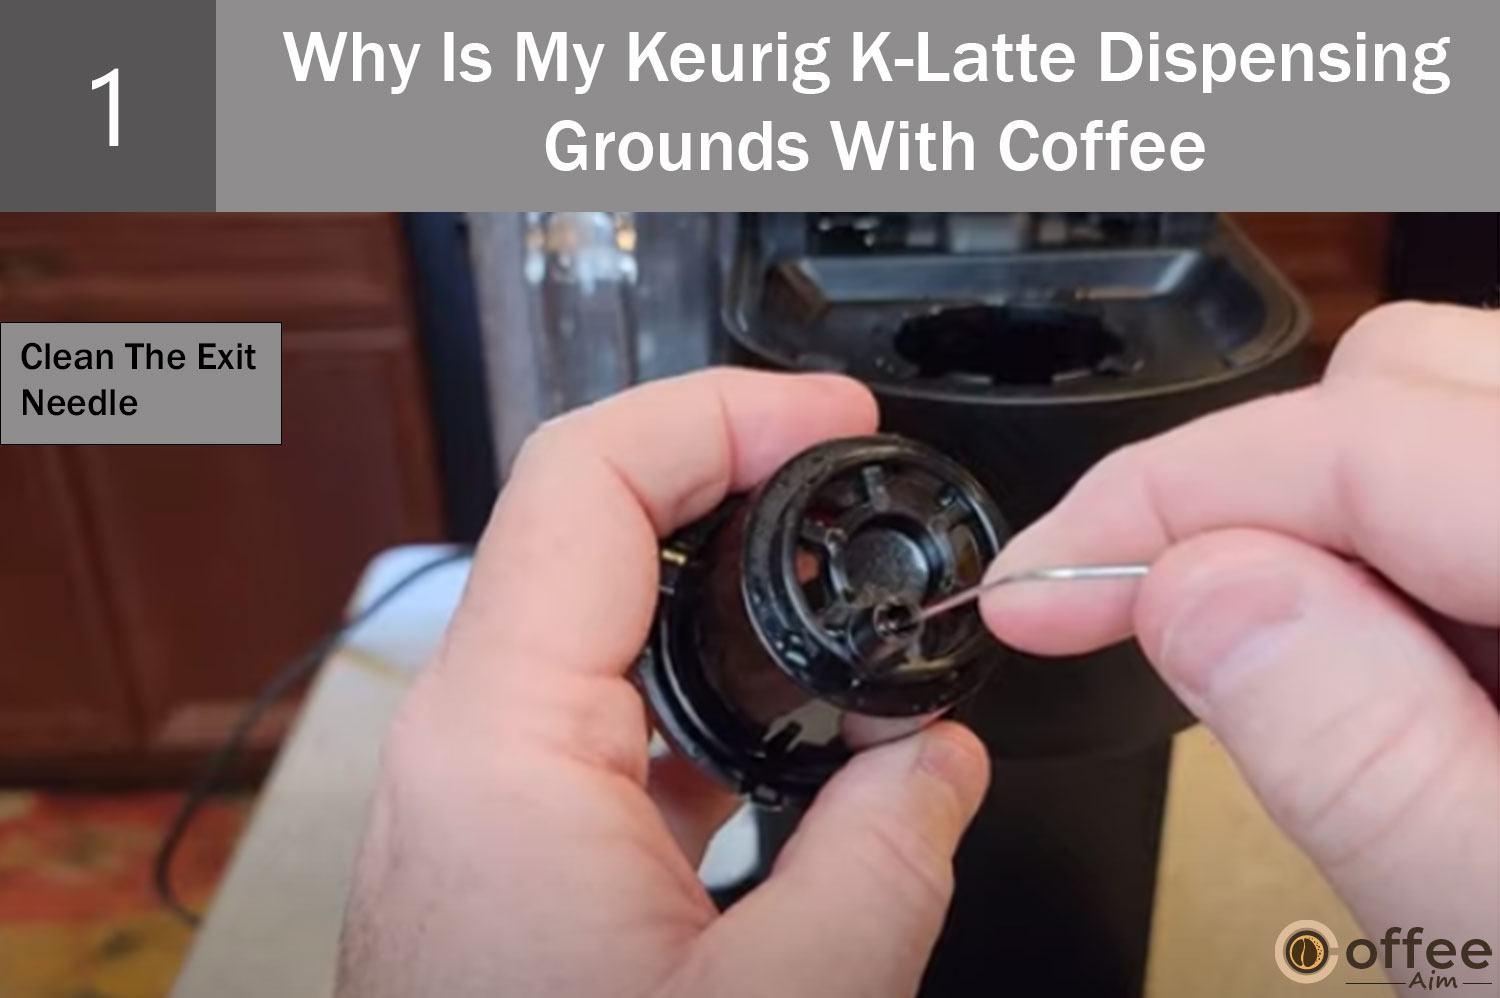
It is important to tackle this problem head-on by removing the blockage from the exit needle. For complete instructions on how to clean the exit needle, please refer to the dedicated “Cleaning The Exit Needle” section in this article.
Cause 2: Keurig Is Clogged
A blockage in the exit needle of your Keurig can cause clogging and the accumulation of coffee grounds. This buildup can subsequently affect the quality and flavour of your coffee, as the grounds may find their way into future brews. The clogged system disrupts the water flow through the machine, resulting in an undesirable mixture of coffee grounds in your cup.
Solution: Run A Descaling Cycle

To descale your Keurig K-Latte effectively, please move to the “Descaling The Keurig K-Latte” section in this article for detailed instructions. Following the step-by-step guide will guarantee a thorough descaling process, allowing you to restore your Keurig’s optimal performance and resolve any lingering issues.
After having delved into the causes and solutions for the presence of coffee grounds in your coffee, it is now time to look into the leaking issue of Keurig K-Latte.
Problem 3: Why My Keurig K-Latte Is Not Brewing?
The Keurig K-Latte coffee machine is a convenient and flexible option for brewing your favourite coffee. However, like any appliance, it can sometimes encounter issues that disrupt your coffee routine. Before assuming the machine is to blame, there are various troubleshooting steps you can follow to resolve the problem proactively. By taking these essential steps, you can get your Keurig K-Latte back to brewing your favourite coffee smoothly and without hesitation. Let’s explore these solutions together.
Cause 1: Keurig K-Latte Is Clogged
Clogging is the most common reason that can easily disrupt your coffee routine. When your Keurig K-Latte is clogged, water flow is hindered, causing disruptions in its functionality. To address this problem, let’s explore the solution below, enabling you to resolve the clogging issue and get your Keurig K-Latte back to brewing flawlessly.
Solution: Descaling Your Keurig K-Latte
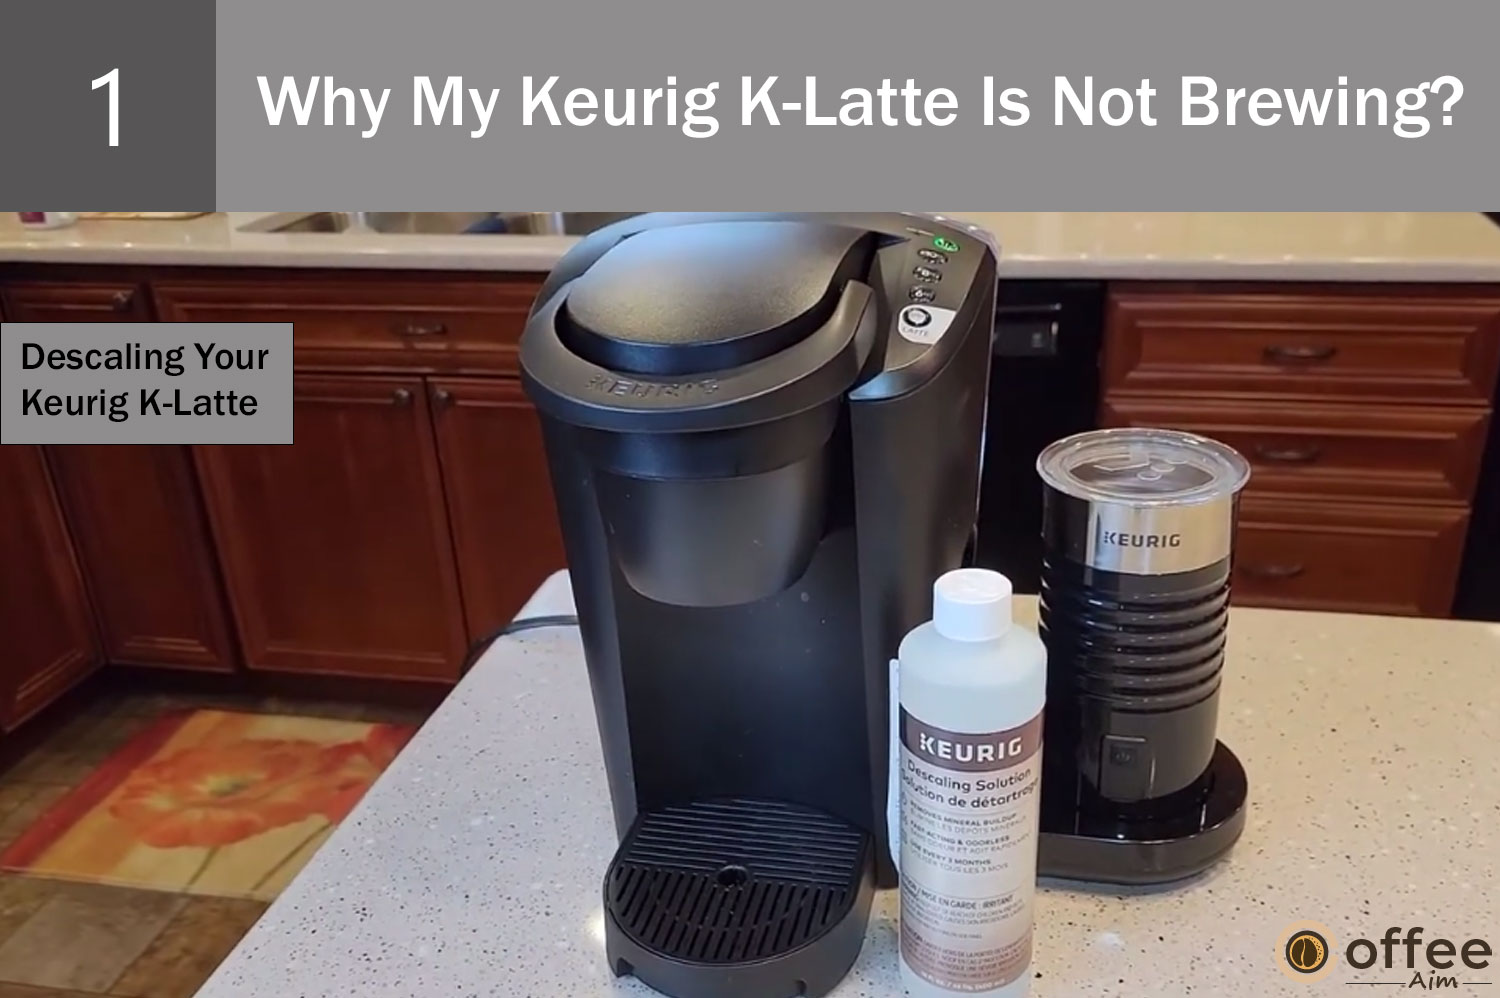
The most effective solution to tackle a clogged Keurig K-Latte machine is to initiate a descaling cycle. You can have the instructions on how to descale your Keurig K-Latte in the section “How To descale Keurig K-latte” provided below in this article.
Cause 2: Air Bubbles
One common reason for a Keurig machine not brewing coffee is the presence of air bubbles in the water lines, which can occur when the water reservoir is not properly filled or positioned on the base. This disrupts the water flow and hinders the brewing process. To address this issue, consider the following two solutions and choose the one you find more feasible.
Solution 1: Shake To Remove Air Bubbles
To eliminate air bubbles from your Keurig and improve its performance, follow these steps:
- Disconnect the brewer from its power source.
- Remove the water reservoir, drip tray, and carafe.
- Firmly hold the Keurig with both hands.
- Give the Keurig a vigorous shake to dislodge any trapped air bubbles inside. Note: This may seem unconventional, but shaking the Keurig helps to remove air bubbles and ensure smoother operation.
Solution 2: The Finger Method
Another method to clear clogs in the water lines of your Keurig is as follows:
- Open the water reservoir of the coffee maker.
- Use your finger to cover both the connection or opening hole of the coffee maker and the water tank.
- Initiate a water-only brew cycle without inserting a coffee pod.
- Keep your finger on the water hole throughout the brewing to maintain pressure. This will force the brewer to pump water through the lines, effectively pushing out any air bubbles causing the clog.
By following either of these solutions, you can remove air bubbles and restore proper water flow in your Keurig, ensuring it efficiently brews coffee.
Cause 3: Problem With Water Reservoir
The water reservoir could also be the reason your Keurig is not brewing. It is important that the water reservoir should be properly positioned on the base of your Keurig K-Latte Coffee Maker and filled up to the Max Fill line. This ensures proper functioning and optimal performance of the machine. This allows Keurig to access the required water for brewing coffee. Additionally, maintaining the water level within the recommended range is essential, as both excessively low and high water levels can affect the performance of the coffee maker. Let’s explore the solution to this problem, which involves straightforward yet vital steps.
Solution 1: Place The Water Reservoir Correctly
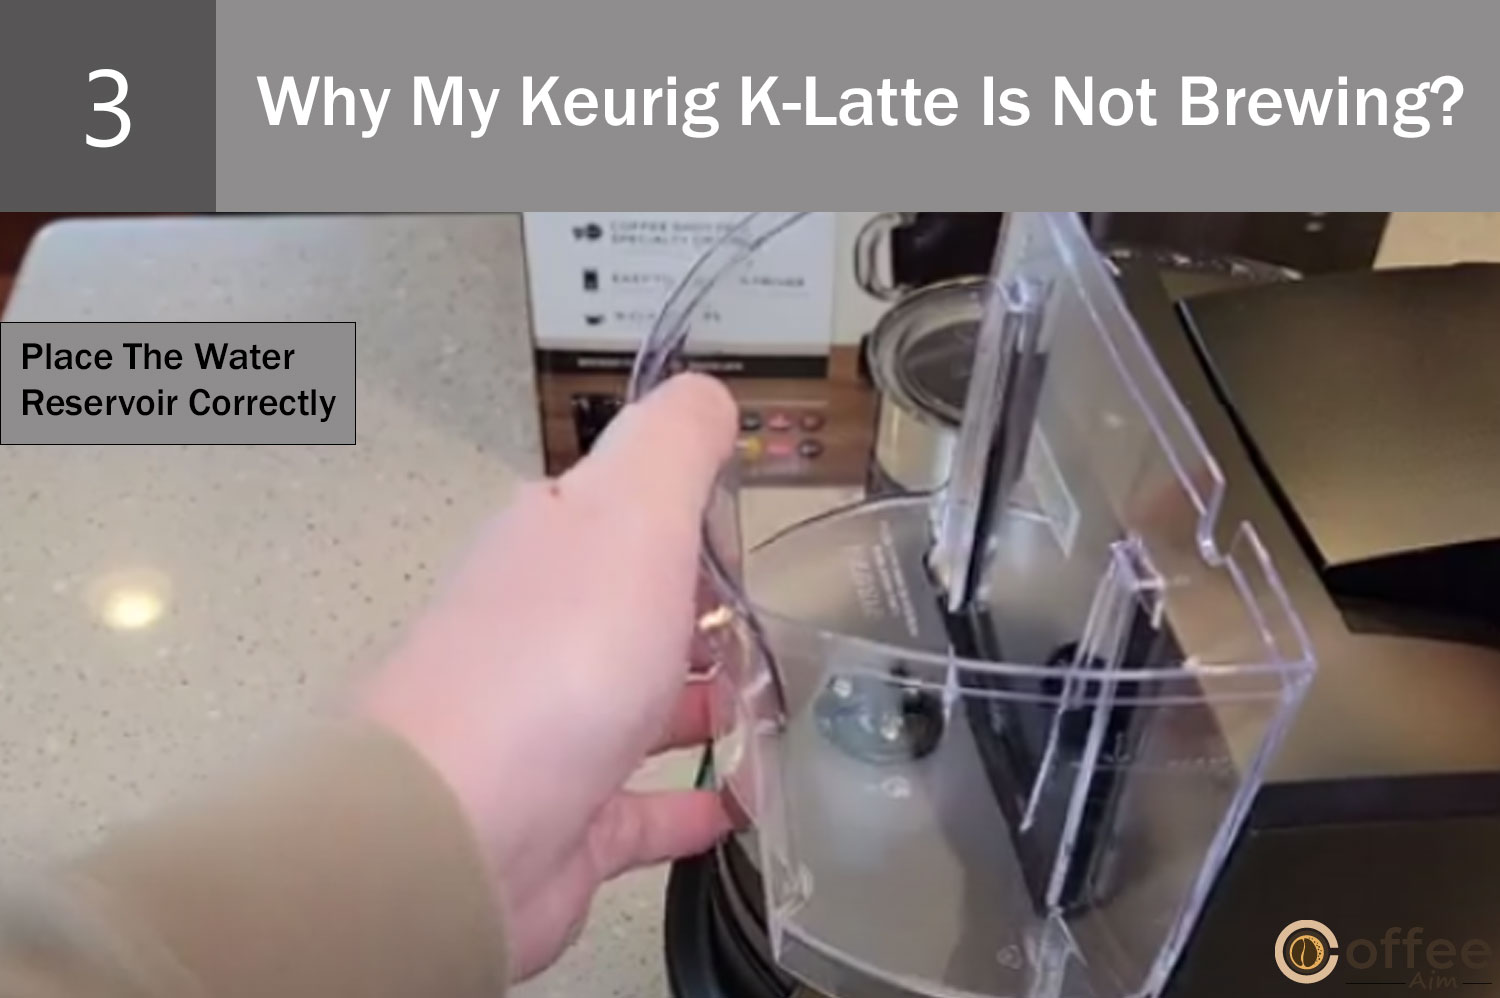
Always make sure to correctly place the water reservoir on its base.
Solution 2: Fill The Water Reservoir

If the water reservoir of your Keurig K-Latte is not filled sufficiently, the “Add Water” light on the display will activate. Moreover, the brewer starts the brewing process. To resolve this problem, simply fill the water reservoir of your Keurig K-Latte Coffee Maker up to the Max Fill level. This action will deactivate the indicator and address the issue.
Cause 4: The Handle Is Not Closed Properly
The handle of your Keurig K-Latte Coffee Maker plays a crucial role in puncturing the K-cup and facilitating the flow of water through it during the brewing process. If the handle is not securely closed, it can prevent the brewing process from starting. Therefore, it is essential to close the handle tightly to ensure proper functioning and brewing with the Keurig K-Latte. Let’s explore the solution to this problem in more detail.
Solution: Close The Handle Properly

After inserting the K-cup into your Keurig K-Latte pod holder, make sure to fully close the brewer’s handle by firmly pushing it downwards. This action creates a secure and proper seal, enabling the brewing process to initiate effectively.
After examining different reasons for your Keurig K-Latte, not brewing, and their respective solutions, it is important to acknowledge another possible problem that coffee enthusiasts like you may face with their Keurig K-Latte making loud and weird sounds during brewing.
Problem 4: Why Keurig K-Latte Is Making Loud Noises During Operation
After pressing the brew button, instead of the familiar hum of the machine, you’re startled by loud and peculiar noises that disrupt the tranquility of your kitchen. Clanks, hisses, or rattles fill the air, leaving you puzzled and concerned about the well-being of your beloved Keurig K-Latte. In such moments, it’s natural to wonder what could be causing the commotion and whether it indicates a more significant issue. So, let’s delve into the world of unexpected noises and unravel why your Keurig K-Latte might produce such loud or unusual sounds during its operation.
Cause 1: Keurig K-Classic Is Clogged
As time passes, mineral deposits can create issues for your Keurig coffee maker. The buildup of these minerals can restrict water flow through narrow passageways, leading to turbulence and resulting in unexpected noises.
Solution: Descale

To access detailed instructions on how to describe your Keurig K-Latte, please refer to the section “Descaling Your Keurig K-Latte” below. This section provides a comprehensive guide with step-by-step directions, enabling you to perform the descaling process effectively and successfully.
Cause 2: Wrong Placement
The placement of your coffee machine plays a crucial role in determining the noise level it produces during operation, and the surface it rests upon is especially important. When your Keurig K-Latte is positioned on an uneven or unstable surface, it can increase the vibrations and magnify the noise emitted by the machine. These vibrations can result in components rattling or resonating, ultimately leading to a louder brewing process.
Solution: Place It On A Steady Surface

In order to solve the noise problem of your Keurig, it is crucial to adhere to a simple guideline: consistently place the machine on a stable surface. Choose a reliable kitchen countertop or table with a solid foundation for your coffee maker. This way, you can minimize vibrations and prevent the machine from rattling or resonating, creating a quieter brewing experience.
Cause 3: The Entrance Needle Is Dirty
Another possible reason for your Keurig K-Latte producing loud, weird noises could be a dirty entrance needle. The entrance needle punctures the K-Cup to allow water to flow during brewing. However, over time, coffee grounds and debris can accumulate, leading to a clogged needle and the clicking sound you are experiencing. Fortunately, you can resolve this issue by cleaning the entrance needle thoroughly.
Solution: Clean The Needle
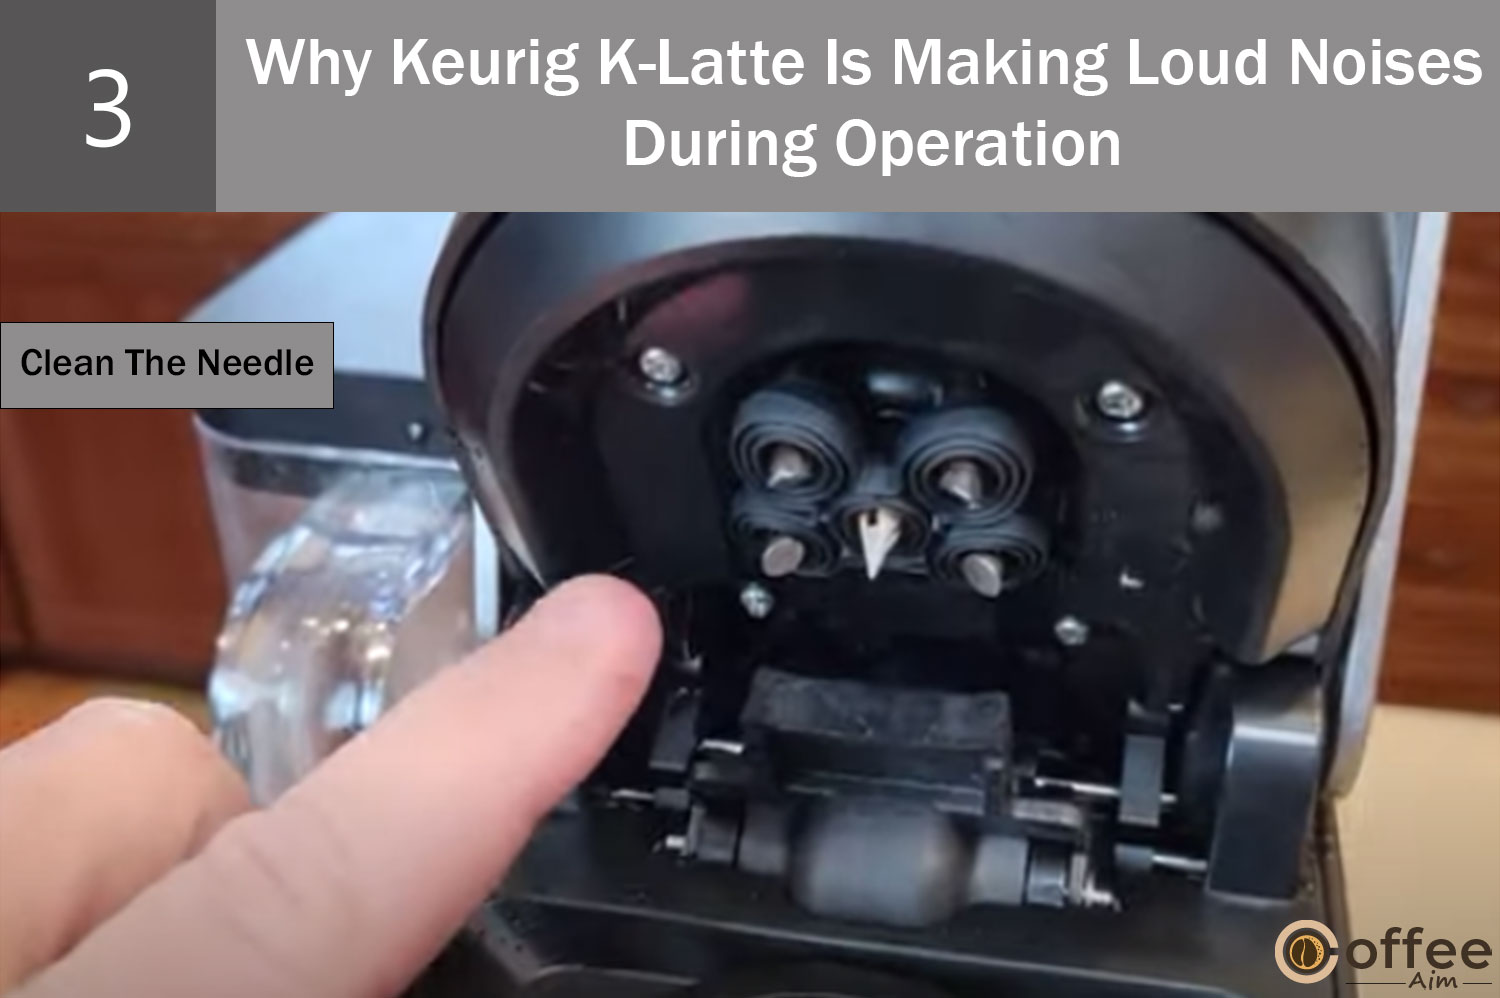
To obtain comprehensive instructions on how to effectively clean the entrance needle, please refer to the “Cleaning the Entrance Needle” section provided in the respective article.
Cause 4: Broken Water Pump
The water pump in the Keurig coffee maker is responsible for extracting water from the reservoir and circulating it throughout the machine for brewing. A damaged water pipe or pump can cause your coffee maker to halt completely. Without water flow, the machine becomes non-functional, starts making weird noises, and prevents you from brewing your favourite cup of coffee. Let’s see how you can solve the broken pump problem.
Solution: Repair The Water Pump
If you require assistance fixing or potentially replacing the water pump, the best solution is to contact Keurig’s customer care team for professional support. In this article’s “When To Seek Professional Help” section, you can find the relevant contact details for Keurig Customer Care.
After implementing the aforementioned solutions, you can successfully address the problem of loud and peculiar noises, but if you encounter a situation where your coffee is brewing weak, there are steps you can take to address this issue.
Problem 5: Why Is Keurig K-Latte Brewing Weak Coffee?
Keurig coffee makers, including the Keurig K-Latte model, are known for their durability and efficient brewing capabilities. It is rare for a Keurig K-Latte to produce weak coffee due to its advanced technology and precise brewing mechanisms. However, if you encounter this issue, you can take steps to fix it. Weak coffee not only has an unpleasant and bitter taste but can also diminish your overall coffee experience, especially if you’re serving it to guests. To prevent encountering such a situation, you can adhere to the troubleshooting methods described below.
Cause 1: Poor Coffee Grounds
Are you using a reusable K-Cup? If yes, I know what is causing the problem of weak coffee. The coffee grounds you are using to make coffee with the help of reusable K-Cup cause the problem. When coffee grounds are exposed to humidity, their real flavours and aroma can deteriorate, resulting in a weaker extraction and a less enjoyable cup of coffee. You will notice a decline in quality, often caused by the contact of the coffee grounds with oxygen, which leads to a loss of freshness and overall flavour. Therefore, it is essential to prevent such degradation by ensuring that the coffee grounds remain in optimal condition.
Solution 1: Grind Only The Required Amount Of Coffee Beans

In order to preserve the freshness of coffee, you need to grind the exact amount required for each brewing session rather than grinding a large quantity in advance.
Solution 2: Store In An Airtight Container

Factors such as exposure to light, air, and moisture can contribute to the development of stale coffee. In order to preserve your coffee’s true essence and flavour, it is important to store the grounds in airtight containers and keep them dry.
Cause 2: Clogged Needles
Another common cause of weak coffee is a clogged needle in the Keurig machine. The needle punctures the K-Cups and allows water to flow through the coffee grounds. With time, the needle can become clogged with substances like old coffee grounds, mineral deposits, or debris, disrupting the water flow. This results in only partially extracting the coffee’s flavour, leading to weak and watery coffee. Let’s explore possible solutions to this issue.
Solution: Unclog The Needles

For a solution, you just need to clean the needles. For a detailed step-by-step procedure on how to clean the needles, refer to the “Cleaning The Exit Needle” and “Cleaning The Entrance Needle” sections of this article.
I hope by following the previously mentioned solutions, you can effectively resolve the issue of weak coffee. Nevertheless, if you experience a situation where your brewer does not dispense enough coffee, you should see the discussion below.
Problem 6: Why Is The Keurig K-Latte Not Dispensing Enough Coffee?
The morning excitement of having a full cup of coffee diminishes when your Keurig does not dispense your desired amount of coffee, leaving you perplexed and disappointed. But fear not! I am here to address this issue and provide effective solutions to ensure that your Keurig K-Latte dispenses the perfect amount of coffee every time. Say goodbye to those moments of disappointment and hello to a consistently enjoyable coffee experience. Let’s dive in and discover the solutions to resolve this frustrating problem once and for all.
Cause 1: Keurig K-Latte Is Clogged
Insufficient coffee output from your Keurig machine may be attributed to the buildup of mineral deposits or water scaling within the device. These deposits can create blockages in the water line, hindering the smooth flow of water and causing incomplete brewing cycles. To address this issue and restore your Keurig’s ability to deliver a full cup of coffee, we will explore effective solutions to tackle these obstructions head-on and overcome this hurdle.
Solution: Run A Descaling Cycle

The only solution to remove the clog in your Keurig is Descaling. To acquire the step-by-step instructions for describing your Keurig K-Latte, please consult the dedicated section “Descaling The Keurig K-Latte” below in this article.
Cause 2: Dirty Needles
Sometimes, the problem of brewing an incomplete cup of coffee in your Keurig goes beyond simple descaling. It could be due to clogged needles that puncture the K-Cup during brewing. These needles can become blocked by debris like K-Cup foil or coffee residues, impeding the water flow necessary for proper extraction. However, fear not, as resolving this issue is relatively straightforward. By following the solution below, you can efficiently address the problem of dirty needles and ensure a full and satisfying cup of coffee every time.
Solution: Clean The Needles
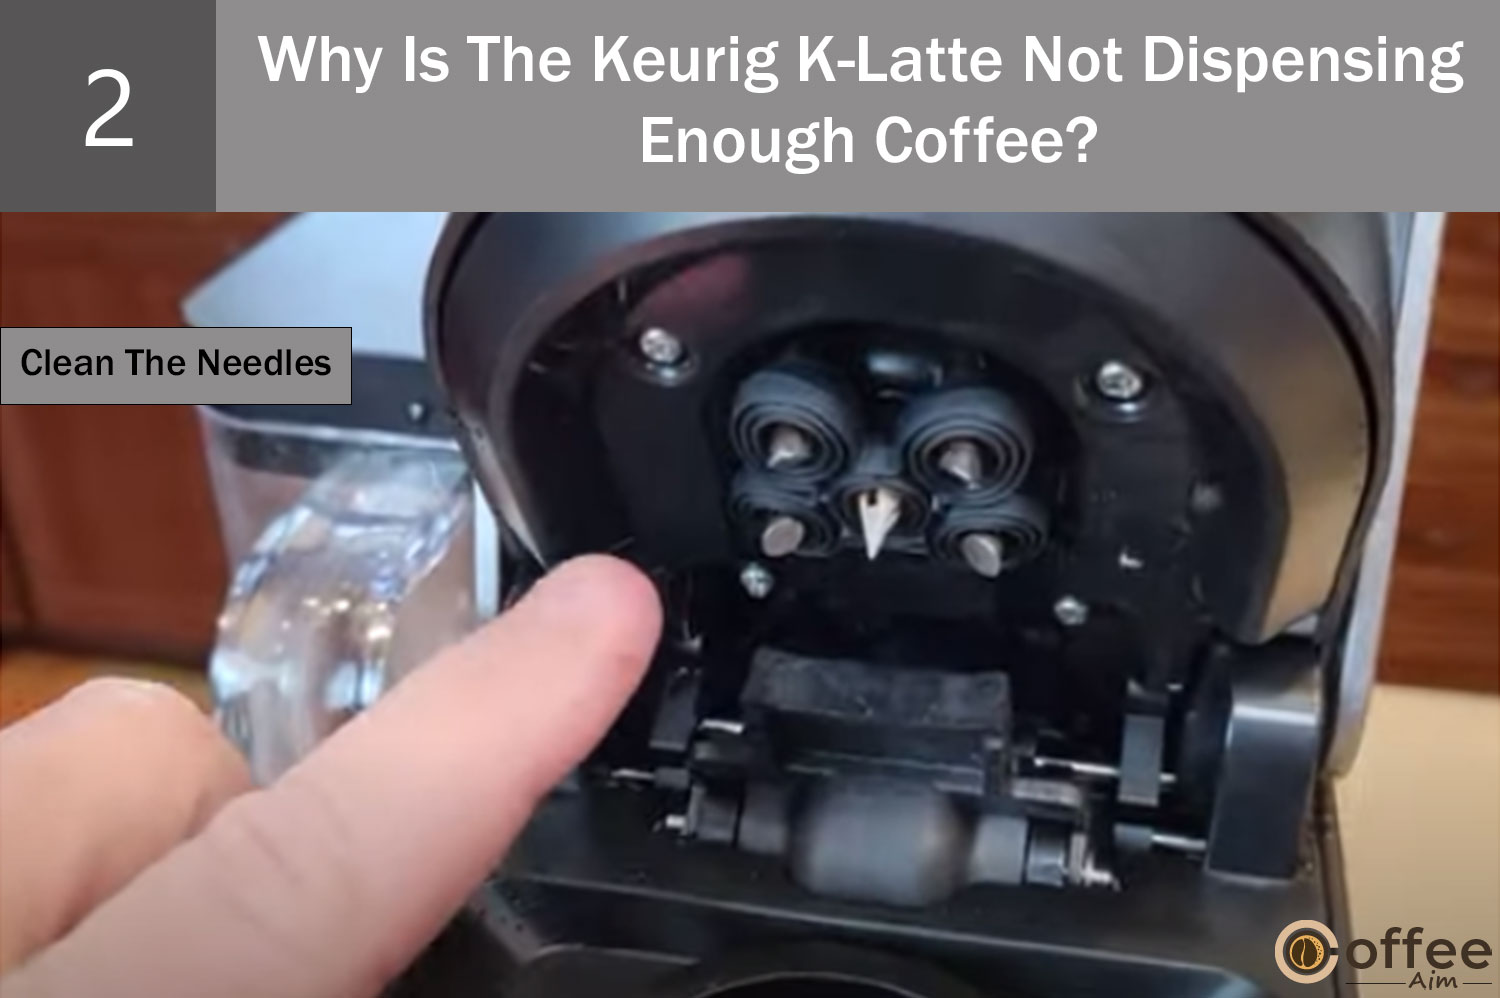
It is imperative to regularly clean the needles of your Keurig K-Latte and ensure they are free from debris. For instructions on how to clean the needle, please refer to the sections titled “Cleaning The Exit Needle” and “Cleaning The Entrance Needle” under the corresponding heading in the provided article.
Cause 3: Water Reservoir Tube Is Blocked
It’s also important to consider the possibility of an obstruction in the tube connecting the reservoir to the Keurig machine. With time and constant usage, debris or mineral deposits can accumulate in this tube, hindering the smooth flow of water and leading to incomplete brewing cycles. To address this problem, you can follow the steps outlined below.
Solution: Remove The Blockage
You can follow these steps to remove the blockage in the water reservoir.
- Swirl the water around the reservoir to ensure any possible blockages or debris are dislodged.
- Use a cloth to clean the part where the reservoir connects to the machine, removing any debris or residue that may be affecting the water flow.
- Use a high-pressure tool, such as a turkey baster, to forcefully introduce water into the tubing. This increased pressure can dislodge any obstructions and improve water flow.
- Empty the reservoir before proceeding. Utilize a can of compressed air to blow air through the tube, helping to clear any blockages.
Cause 4: Air Bubble
If you operate your Keurig with an empty water reservoir or it is not positioned correctly on the base, it can lead to the formation of air bubbles in the water lines. These air bubbles can disrupt the water flow and prevent Keurig from brewing coffee. To resolve this issue, consider the following two solutions carefully and choose the one that seems more feasible.
Solution 1: Remove The Air Bubble
To remove air bubbles from your Keurig, follow these steps:
- Disconnect the brewer from its power source.
- Remove the water reservoir, drip tray.
- Firmly grasp the Keurig with both hands.
- Vigorously shake the Keurig to eliminate trapped air bubbles inside.
Note: While this may seem unusual, shaking the Keurig helps dislodge any trapped air bubbles, allowing for smoother operation.
Solution 2: Use The Finger Method
Here’s another method to clear the air stuck in your Keurig’s water lines.
- Open the water reservoir of the coffee maker.
- Use your finger to cover the connection or opening hole of the coffee maker and the water tank.
- Start a water-only brew cycle without inserting any coffee pod.
- Keep your finger on the water hole throughout the process to maintain pressure.
- This will compel the brewer to pump water through the lines, effectively pushing out any air bubbles causing the clog.
Cause 5: Problem With Water Reservoir
One common reason for improper brewing in a Keurig K-Latte is an issue with the water reservoir. It is always important to correctly position the water reservoir on its base and fill it to the maximum line. This allows your Keurig to access the necessary water for brewing coffee effectively. Let’s explore the solution to this problem, which consists of straightforward yet crucial steps.
Solution 1: Place The Water Reservoir Correctly

Placing the water reservoir correctly on the base of your Keurig is as vital as plugging it into an outlet, as it initiates the brewing process of the brewer. So, make sure that you have properly placed the water reservoir before starting the brewing process.
Solution 2: Fill The Water Reservoir
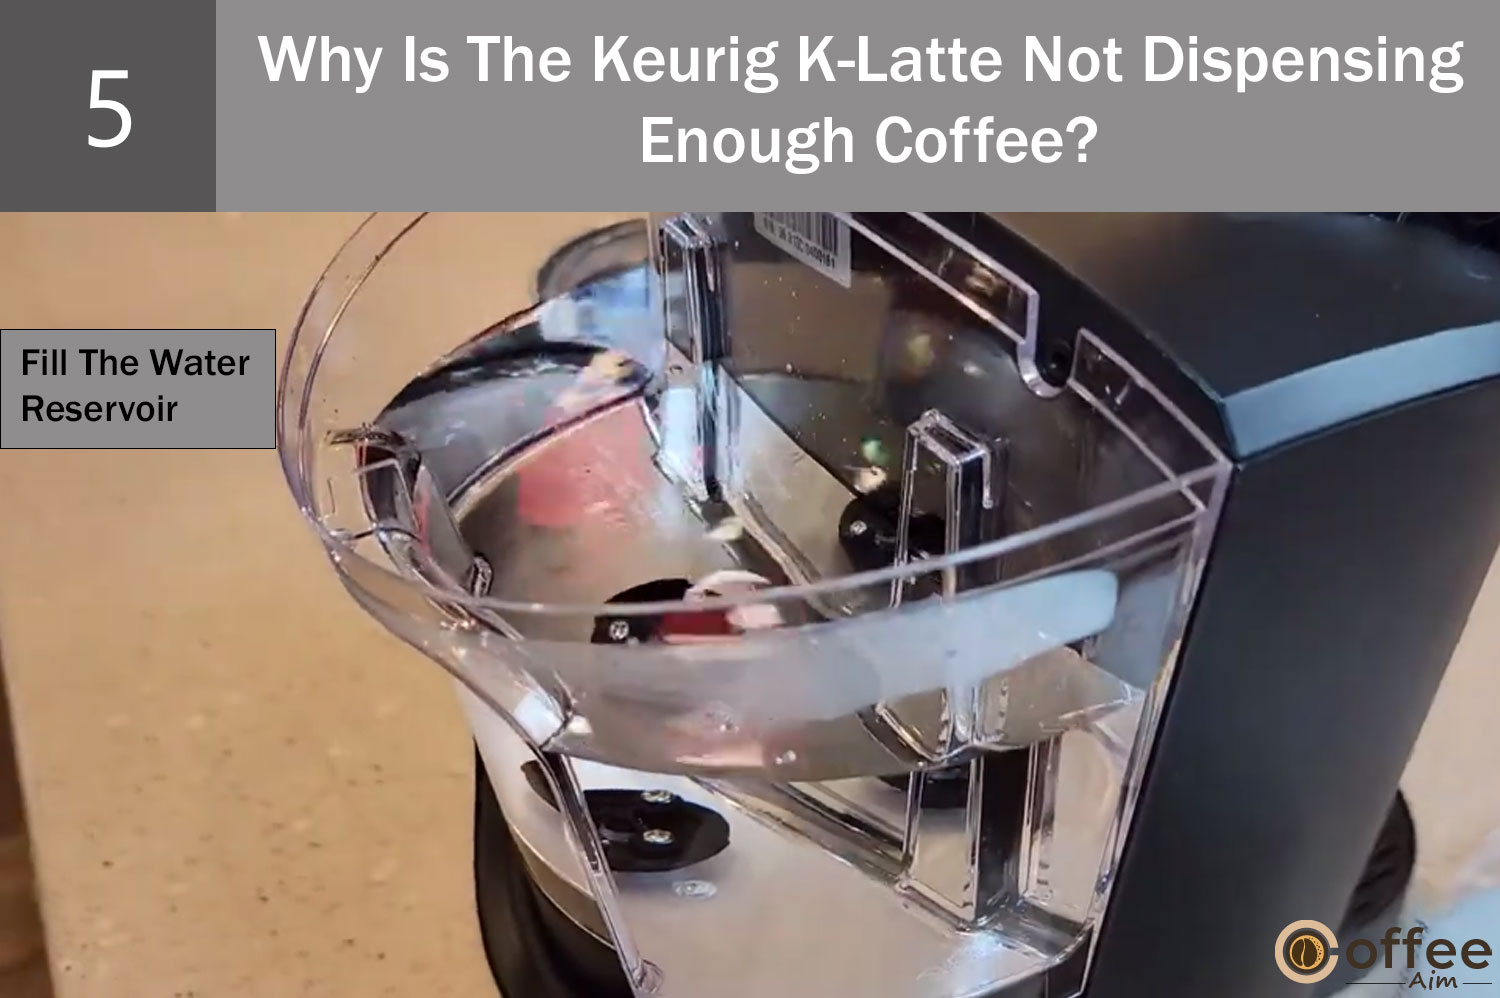
Always fill the water reservoir to the designated Max Fill line.
Cause 6: The Handle Is Not Closed Properly
The handle on the Keurig punctures the K-cup and allows water to flow through it for the brewing process. If the handle is not closed correctly, it can prevent the brewing process from starting altogether. Therefore, ensuring the handle is securely closed is vital to guarantee proper functioning and successful brewing with your Keurig K-Latte.
Solution: Close The Handle Properly

After placing the K-cup in the pod holder, close the handle firmly and completely by pushing it downwards. Double-checking the handle closure is important to ensure successful brewing with your Keurig K-Latte.
By following the solutions mentioned earlier, you can effectively resolve the issue of partial brews. However, if you experience a situation where your Keurig is taking extra time to brew your coffee, there are some methods you can follow to address this problem.
Problem 7: Why Is Keurig K-Latte Taking Too Long To Brewing?
The convenient and quick production of coffee was the main motivation behind your Keurig K-Latte purchase. Still, now your Keurig is no longer brewing coffee as quickly as it once did; it can lead to delays in getting your much-needed cup of coffee, especially during busy mornings when time is of the essence.
A Slow brew cycle may indicate an underlying Keurig issue that could worsen if left unresolved. By addressing the problem and implementing the troubleshooting steps outlined below, you can regain the speedy brewing performance of your Keurig and enjoy your coffee without unnecessary delays.
Cause 1:Inadequate Water In The Water Reservoir
The water reservoir needs to be adequately filled for a smooth and fast brewing process. If the water level is not proper, the Keurig will not be able to pump adequate water, resulting in slow brewing. This problem has a very easy and simple solution. Let us see what that is.
Solution: Fill The Water Reservoir To The Max Fill Level
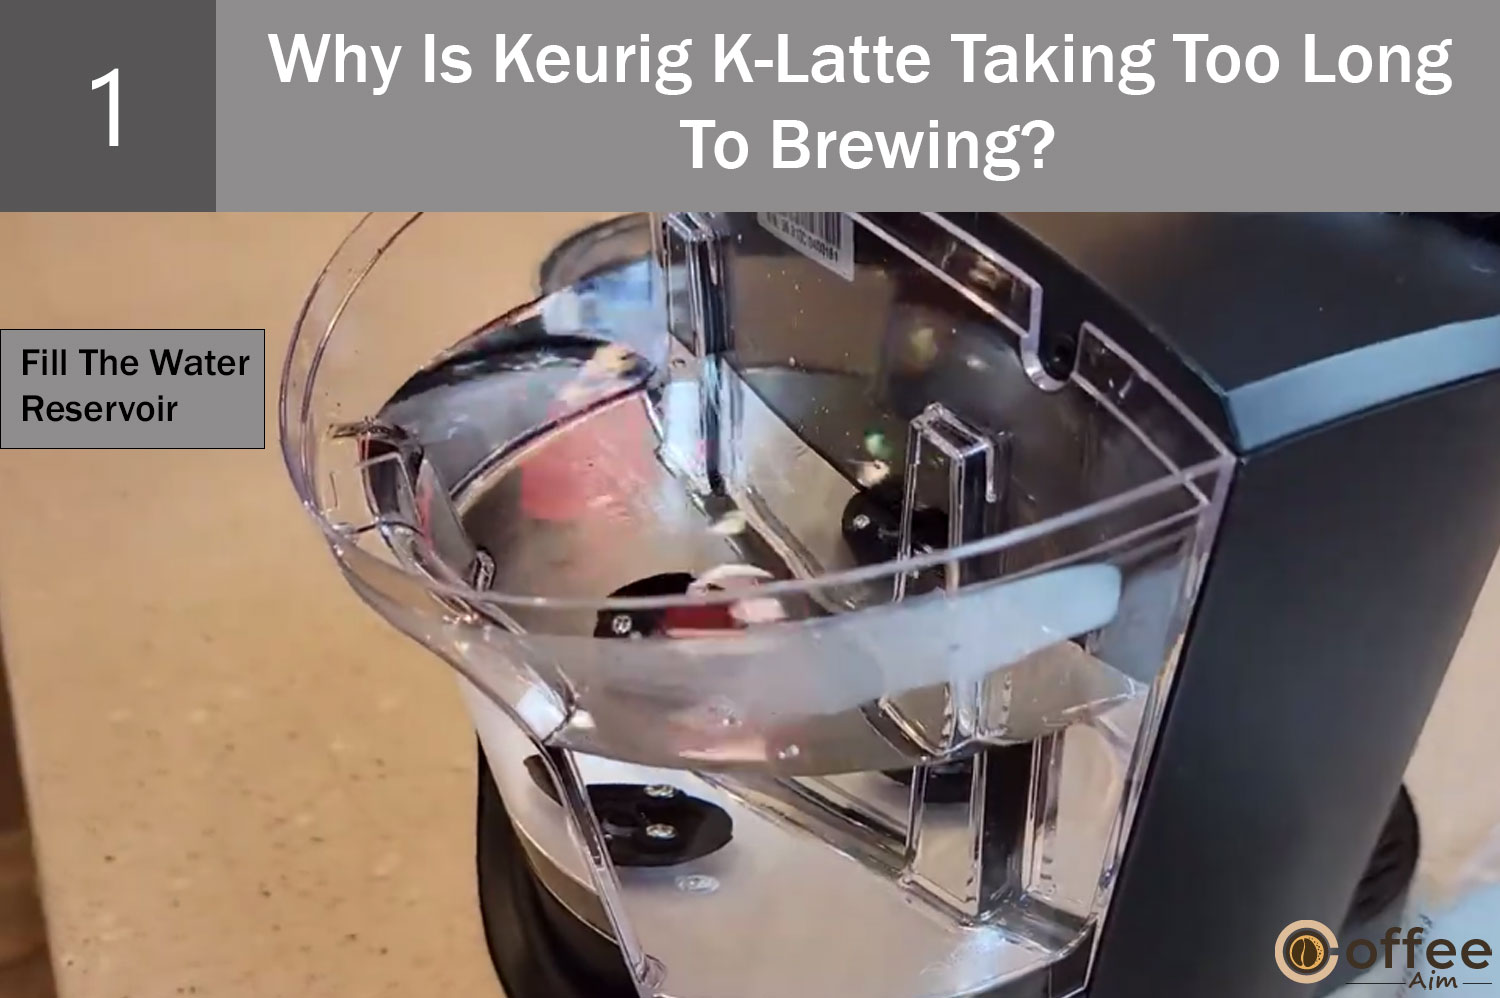
Always make sure to fill the water reservoir to the Max Fill level.
Cause 2: Keurig Is Clogged
A clogged Keurig will never e able to perform its function properly. The coffee debris stuck in the Keurig will affect the water pumping, resulting in slow brewing.
Solution: Desacle
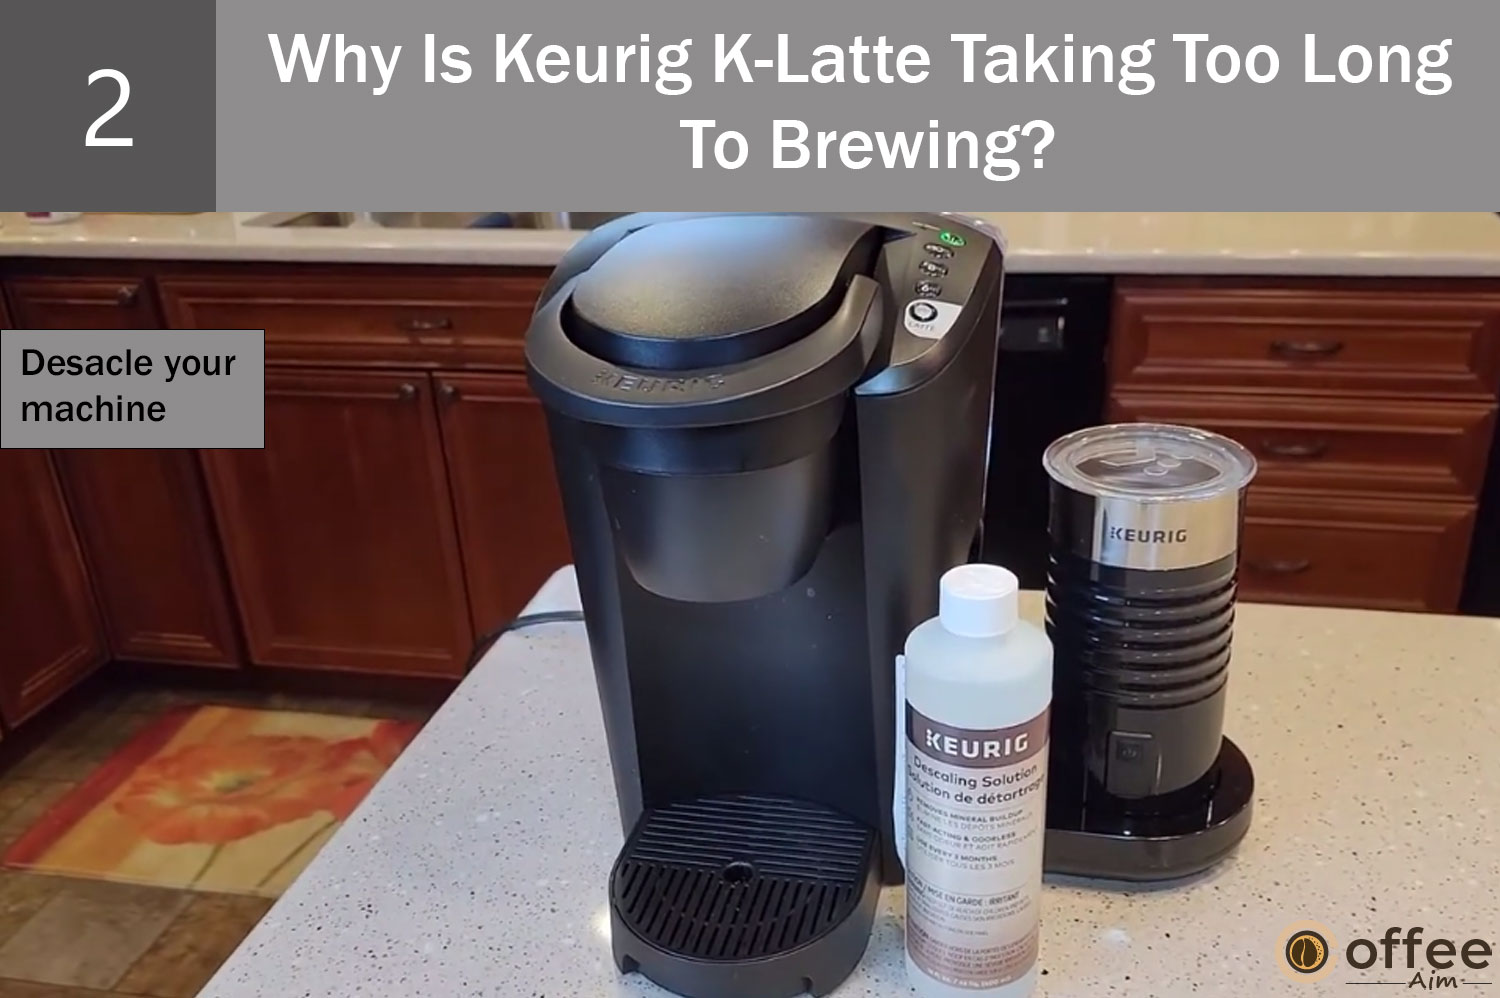
The only solution to eliminate your clogged Keurig is to run a descaling cycle. You can get information about the descaling process from the section “Desacling The Keurig K-Latte” below in this article.
Cause 3: Dirty Needles
When the needles in the Keurig K-Latte become dirty or clogged with coffee residue, it can also significantly slow down the brewing process, leading to longer brewing times.
Solution: Clean The Needles
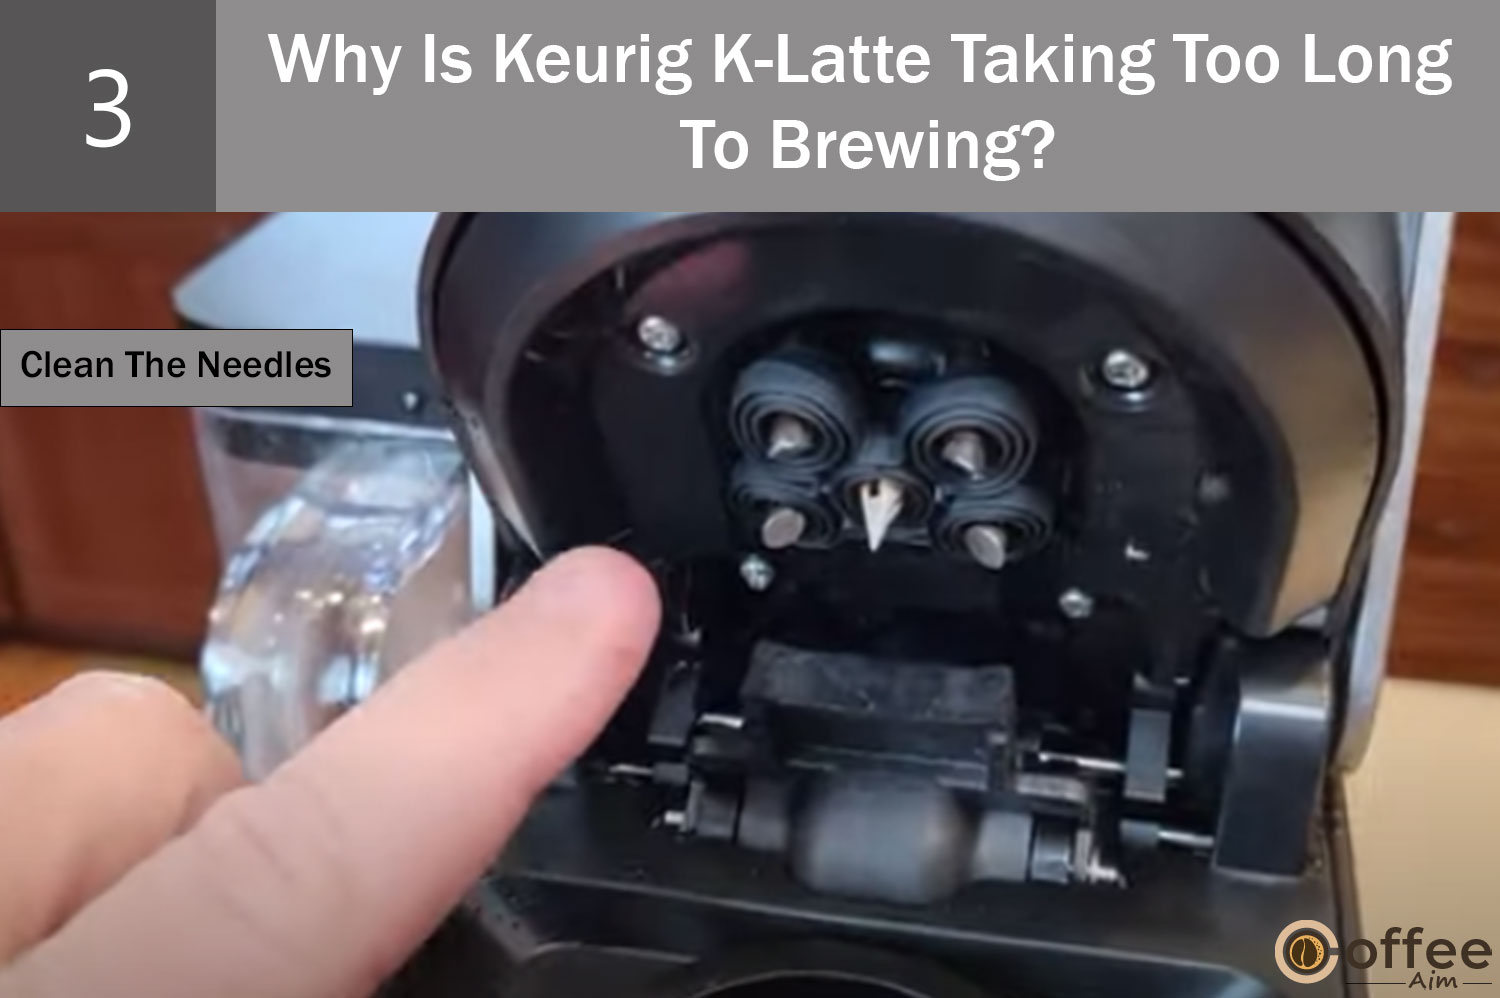
Cleaning the needles is a very simple process; you get information about this process from the “Cleaning The Exit Needle” and “Cleaning The Entrance section” sections provided below in this article.
Cause 4: Malfunctioning Pump
If the solutions mentioned above are not solving the problem, the malfunctioned water pump can be the reason behind the slow brewing.
Solution: Contact Keurig Customer Care

Contacting Keurig Customer Care will be the best option in this situation. They can offer guidance on troubleshooting and provide repair or replacement options. If your Keurig K-Latte is still within the warranty period, you can contact the company to inquire about a potential replacement or any applicable compensation. For contact details, please refer to the “When To Seek Professional Help” section of the article.
Without Further delay, let’s see how to tackle a situation when Keurig goes through unexpected shutdowns during brewing.
Problem 8: Why My Keurig K-Latte Is Shutting Off During Brewing?
Encountering an abrupt shutdown of your Keurig coffee maker while brewing can be disheartening and disruptive to your daily coffee ritual. Such an unwelcome interruption hampers the brewing process and deprives you of your coveted cup of coffee. However, fret not! I am here to guide you through troubleshooting this issue, shedding light on possible causes and offering solutions to help you overcome this problem.
Cause 1: Faulty Wiring
A frequent cause of unexpected shutdowns in Keurig coffee makers is faulty wiring, typically resulting from a damaged plug cable. When the wiring in your Keurig K-Latte is flawed, it can activate an automatic shut-off mechanism to prevent any potential harm. Now, let’s proceed with the solution.
Solution: Repair The Wiring
Attempting DIY repairs for wiring issues can be perilous and may further damage your machine. I would recommend you ask for the assistance of a professional who can safely examine and fix your Keurig. Refer to the “When To Seek Professional Help” section of the article for contact details of experts who can provide the necessary assistance.
Cause 2: Keurig Is Overheating
Occasionally, Keurig coffee makers can unexpectedly shut off due to overheating. This can occur when the machine is subjected to excessive workload, prompting an automatic shutdown to prevent potential damage. Additionally, prolonged and frequent use can contribute to overheating by gradually wearing down the coils. Fortunately, several solutions are available to tackle this problem and restore your Keurig K-Latte to its optimal functioning. To explore preventative measures against Keurig overheating, please refer to the solutions below.
Solution: Let It Rest
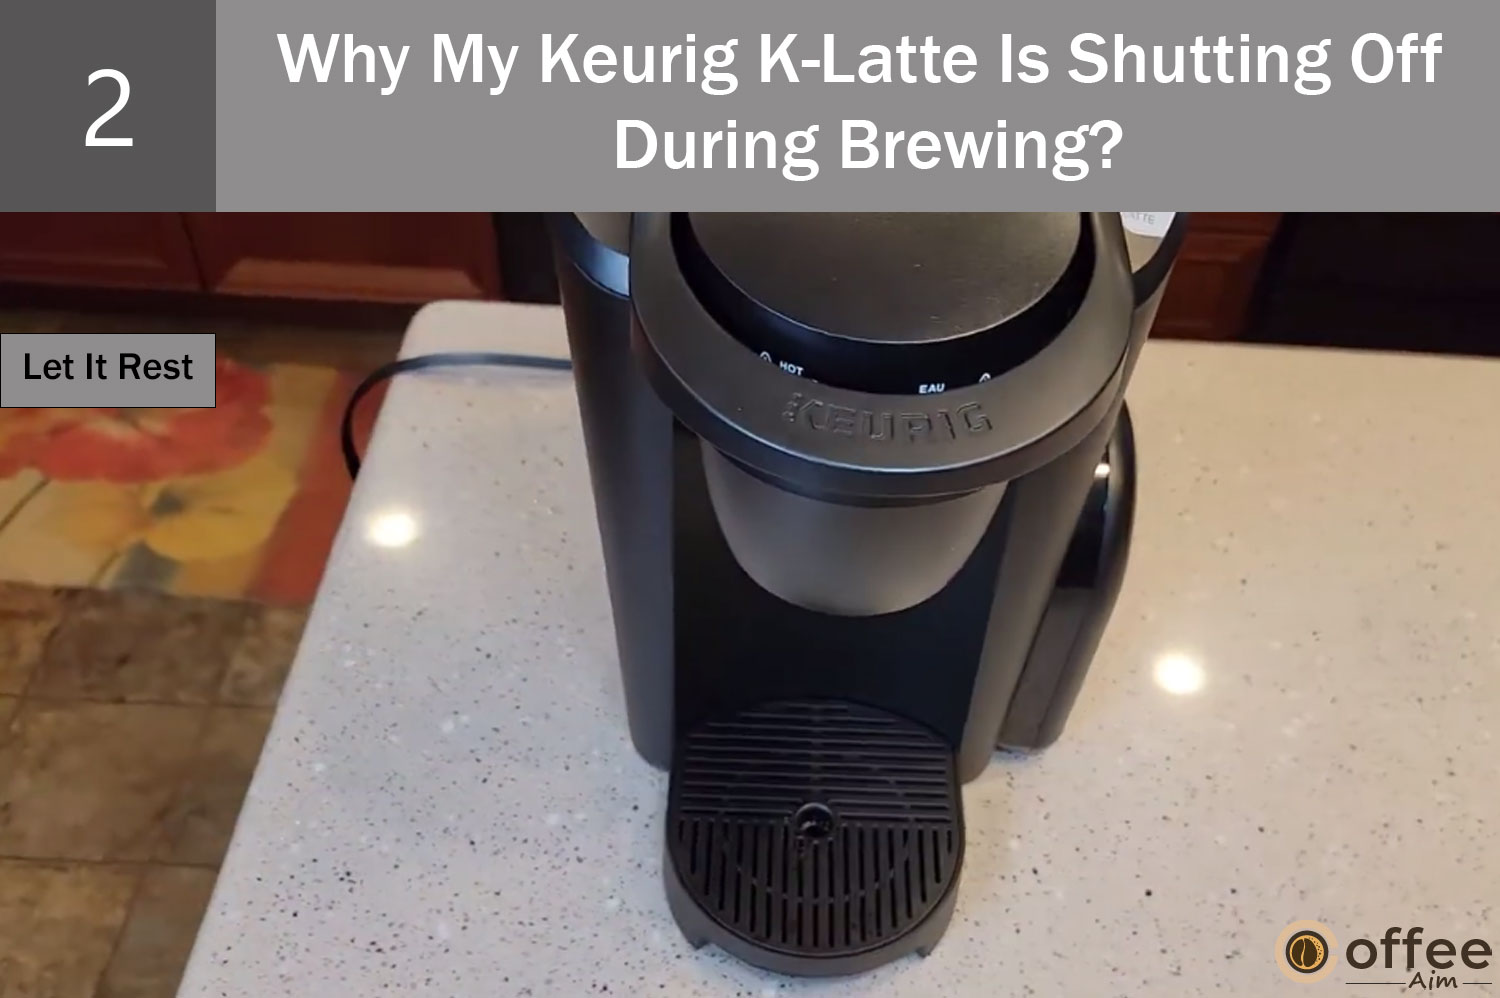
If you have been using your Keurig K-Latte for an extended period or excessively, simply turn it off and unplug it, allowing sufficient time to cool down. By giving your Keurig a well-deserved break, it can reset itself and mitigate the risk of further overheating.
Cause 3: Faulty Thermostat
If you are experiencing unexpected shutdowns with your coffee maker, it is possible that the thermostat is malfunctioning. The thermostat has a vital role in regulating the water temperature, and when it malfunctions, it can cause the machine to shut down unexpectedly.
Solution: Contact Keurig Customer Care.

If you suspect a faulty thermostat in your Keurig, I would recommend you contact Keurig’s customer care for assistance. They can provide troubleshooting advice, as well as options for repair or replacement. If your Keurig K-Latte is still covered under warranty, you can inquire about a possible replacement or any other applicable compensation. For contact details, please refer to the “When To Seek Professional Help” section of the article.
Cause 4: Low Water Level In Water Reservoir
When the water level in your Keurig falls below the required amount, the control panel’s “LOW WATER LEVEL” light will begin to blink. This serves as an indication for you to refill the water reservoir before proceeding with brewing. If Keurig detects an insufficient water level, it will automatically shut off. Now, let’s explore the available solutions to address this issue.
Solution: Refill The Water Reservoir.
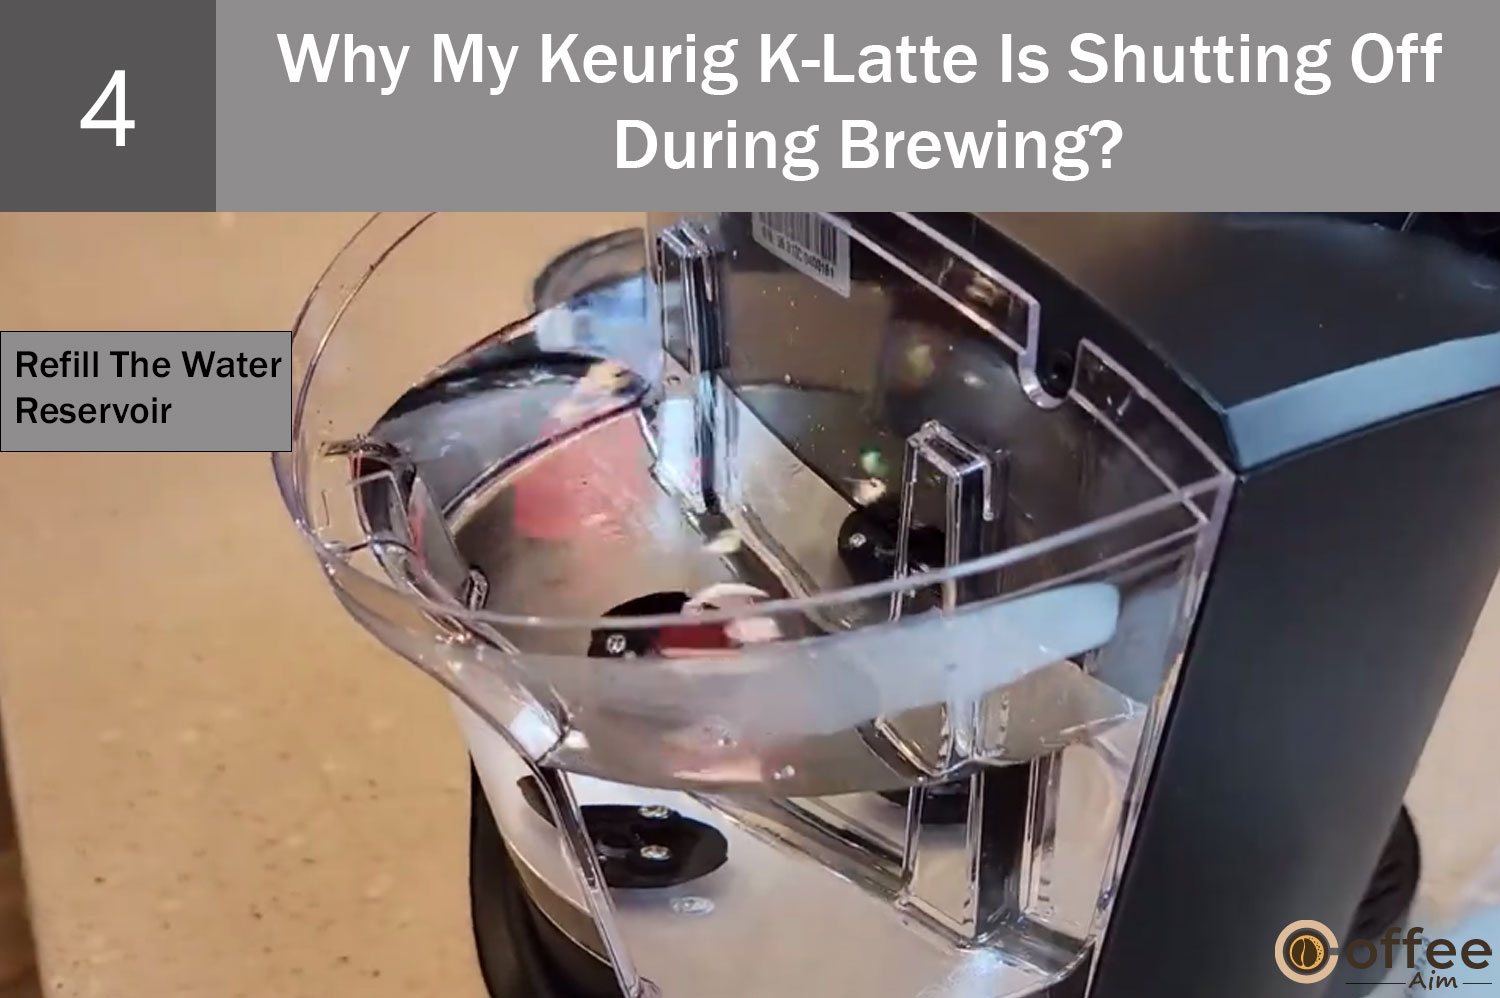
Prior to brewing your coffee, it is always important to check that the water reservoir has an adequate amount of water. If the water level is not as required or the reservoir is completely empty, you must add water to reach the MAX FILL level indicated on the reservoir.
Cause 5: The K-Cup’s Bottom Is Unpunctured
A potential reason for your Keurig coffee maker shutting off during the brewing process is the failure to puncture the bottom of the K-Cup. When the machine is unable to pierce the cup’s bottom, it hinders the proper brewing of coffee, resulting in an automatic shutdown. Now, let’s explore how you can address this issue.
Solution: Contact Keurig Customer
To determine the cause of your brewer’s inability to puncture the K-Cup, reach out to Keurig Customer Care or consult with a qualified professional. Seeking assistance from the appropriate support channels can give you the necessary support and guidance to help resolve the issue you are facing. For the contact information of these experts, please refer to the “When To Seek Professional Help” section.
Cause 6: Brewing Process Was Interrupted
Unexpected setbacks could also occur due to an interrupted brewing cycle. This can be caused by factors like a power outage or a malfunctioning machine causing your Keurig to shutdown during the brewing. Now, let’s delve into the available solutions to effectively address and resolve this issue.
Solution 1: Ensure A Stable Electric Connection
Follow the steps to prevent your Keurig from unexpectedly shutting down during brewing due to an unstable power connection.
Firstly, ensure that your coffee maker is directly plugged into an electrical socket instead of using a power strip or extension cord. Additional connections can weaken the electrical connection and raise the chances of the machine shutting down while in operation. By adhering to this guideline, you can maintain a stable power supply and mitigate the risk of interruptions during the brewing process.
Cause 7: Clogged Exit Needle
If coffee grounds accumulate around the needles in your Keurig machine, it can hinder the piercing process, causing only one hole to be made in the K-cup. As a result, the hot water cannot flow through the K-cup, preventing the Keurig from brewing and triggering an automatic shutdown. Now, let’s delve into the available solutions to address this issue and restore proper functionality.
Solution: Clean The Exit Needle

To diagnose this issue, conduct a simple check the next time your Keurig shuts off during brewing. Remove the K-cup and examine the bottom of the pod for an incomplete or insufficient hole. If you observe this, it indicates that the bottom needle of your brewer is the culprit. Clean the exit needle before brewing your next cup of coffee. Refer to the “Cleaning The Exit Needle” section provided below in this article for detailed instructions.
Cause 8: Bent Needle
Another reason for these unexpected shutdowns could be due to broken or bent needles. This typically occurs when excessive force is applied, such as forcefully inserting a K-cup that is too tall for the machine. The needles at the top entrance and exit points can be damaged in these cases. Now, let’s proceed and explore the steps to resolve this issue.
Solution: Replace The Needle

If you determine that either the top entrance needle or the exit needle in your Keurig requires replacement, it is likely that you have identified the root cause of the issue.
Cause 9: Water Reservoir Magnet Alignment Is Wrong
Another potential reason for your Keurig shutting off while brewing is a misaligned or stuck magnet in the water reservoir. The magnet is responsible for detecting the water level, but it can become dislodged due to vibrations during the brewing process. Consequently, your Keurig may fail to accurately detect the water level, resulting in it shutting off instead of brewing. Without delay, let’s explore the solutions to overcome this challenge.
Solution: Gently Tab The Water Reservoir
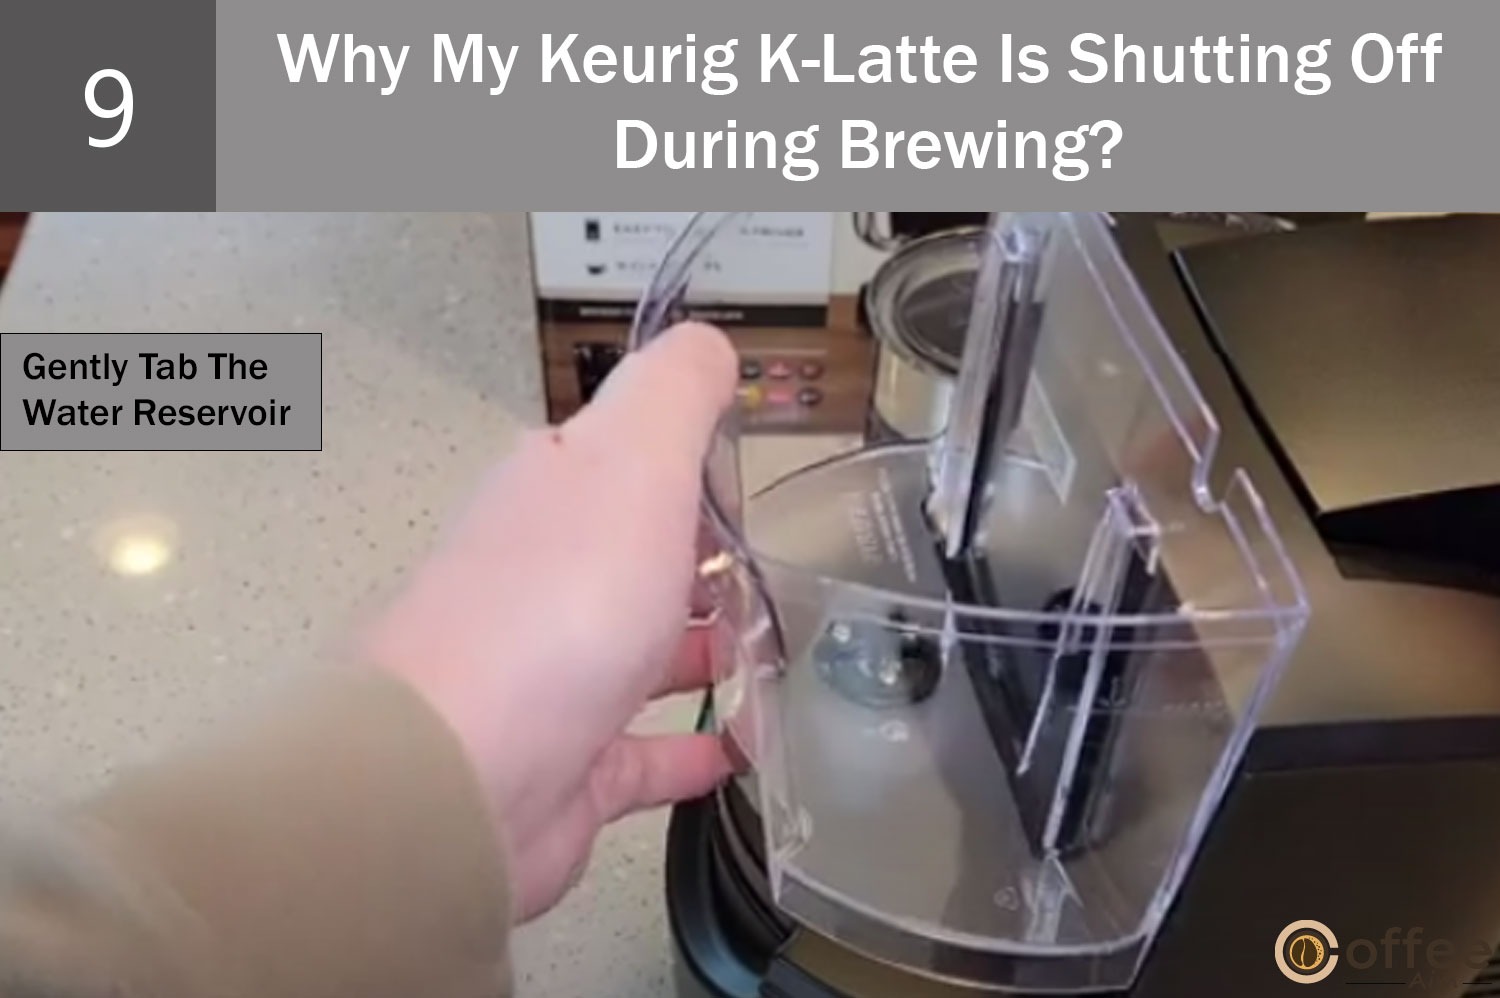
If you believe that a misaligned magnet in the water reservoir is causing your Keurig to shut down during brewing, there are several steps you can take to resolve the issue. First, gently tap the water reservoir near the magnet housing to see if it realigns the magnet. If that doesn’t work, carefully shake the reservoir to move the magnet into the correct position. If the magnet remains unresponsive, empty the reservoir and clean it using mild soap. Afterwards, refill it with water and resume using your Keurig.
Problem 9: Why My Keurig K-Latte Not Dispensing Hot Enough Coffee?
Experiencing the disappointment of your Keurig K-Latte failing to dispense a sufficiently hot cup of coffee can be disheartening, especially for those who cherish the comforting ritual of starting their day with a steaming beverage. However, there are various factors that could contribute to this issue. In this discussion, we will explore these potential causes and provide possible solutions to help you remedy the situation.
Cause 1: Malfunctioned Water Pump
A malfunctioning pump can disrupt the normal flow of water, leading to an automatic shut-off of the heating element to prevent overheating and further damage to the machine. Unfortunately, this means that the brewing process is halted before the water reaches the optimal temperature for brewing. As a result, your coffee is brewed at a lower temperature than desired, resulting in a less satisfying cup. Now, let’s focus on identifying and implementing the necessary steps to resolve this issue.
Solution: Repair The Water Pump
Instead of attempting this challenging task on your own, I suggest reaching out to Keurig’s customer service for assistance. Their knowledgeable team can provide guidance and, if needed, arrange for a repair or replacement. If your Keurig is still eligible for warranty, you may even be eligible for a replacement. For contact details, please refer to the “When to Seek Professional Help” section of the article.
Cause 2: Malfunctioned Heating Element
The heating element is responsible for heating the water to the optimal temperature for brewing coffee. If it malfunctions, it will not be able to heat the water to the desired temperature, resulting in coffee that is not hot enough. Lets us explore the possible solutions.
Solution: Contact Keurig Customer Care
The best decision would be to approach Keurig Customer Care services and seek their help resolving this matter. You can find the contact information in the section “ When to seek professional help” provided in this article.
Cause 3: Use Of Cold Cup
When your brewer pours hot coffee into a cold cup, the heat is rapidly transferred, causing the coffee to cool down almost immediately. This occurrence is especially common during colder months when there is a notable temperature difference between the hot coffee and the cold cup. Now, let’s explore potential remedies to address this issue.
Solution: PreHeat The Cup
Preheating your cup is a simple and effective technique to reduce heat transfer and keep your coffee at a hotter temperature for a longer period. This wonderful trick can greatly enhance your coffee-drinking experience, especially if you prefer your coffee to be piping hot. There are two methods available to preheat your cup.
Microwaving Method:
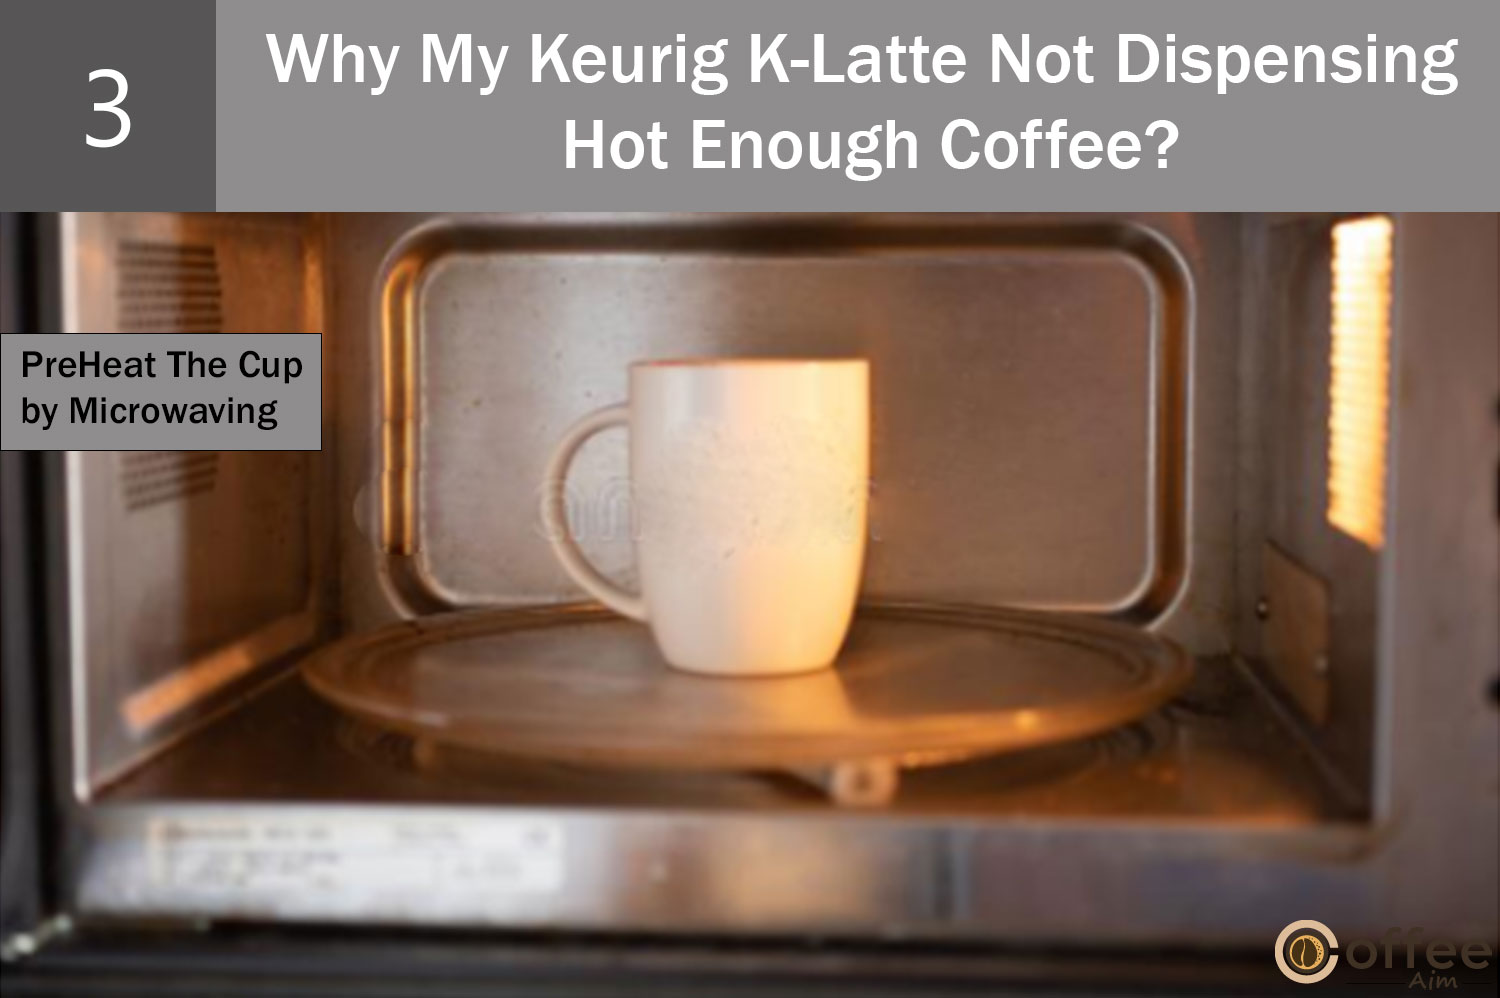
- Pour some water into your mug.
- One way to preheat your cup is by microwaving it for about 30 seconds to a minute, depending on the power of your microwave.
- Once the cup is heated, carefully discard the water and proceed to brew your coffee directly into the preheated cup.
Boiling water method:

- Boil the water.
- Pour the boiling water into your cup, filling it to the desired level.
- Allow the cup to sit with the hot water for approximately 30 seconds to a minute.
- After preheating the cup, carefully pour out the hot water.
- Immediately brew your coffee into the preheated cup.
Cause 3: Keurig Is Clogged
The performance of your coffee machine’s water pump and heating element can significantly diminish when there is a buildup of limescale and clogs within the system. This accumulation hinders the machine’s ability to function properly, resulting in a decrease in brewing temperature. Consequently, you may find that your coffee isn’t as hot as you desire. Now, let’s explore the various solutions available to address and resolve this issue.
Solution: Run A Descaling Cycle

For detailed instructions on how to descale your Keurig K-Latte, please consult the “Descaling Your Keurig K-Latte” section provided in this article.
Now it is time to discuss the situation which causes a lot of mess and inconvenience; yes, you guessed it right, Leaking!
Problem 10: Why My Keurig K-Latte Is Leaking?
Dealing with a leaking Keurig K-Latte can be far more than just frustrating—it can cause significant damage to your kitchen surfaces, such as countertops and floors. This, in turn, leads to additional expenses for repairs or even replacements. Moreover, if the leaked water reaches the electrical components of the machine, it can pose risks of electrical problems and safety hazards. Beyond the physical damages, the persistent dripping also results in water wastage, which is not environmentally friendly.
It is essential to uncover the underlying cause to resolve this issue, as there can be various reasons behind the leakage. Below, you will find our findings listed, along with potential causes and solutions.
Cause 1: Excessive Water In Water Reservoir
One of the most prevalent reasons behind this issue is excess water in the reservoir. Here’s a simple solution to address this problem.
Solution: Pour Out The Excessive Water
Once you have identified that the excess water in the water reservoir is the root cause, follow these steps:
- Lift the water reservoir from its base carefully.
- Empty the extra water into the sink, ensuring it stays within the Max Fill Line.
- Once the excess water has been removed, securely place the reservoir onto its base.
Cause 2: Keurig K-Latte Is Clogged
Another common culprit behind a leaking Keurig K-Latte is often a blockage within its internal components. This obstruction disrupts the smooth flow of water, causing irregular pressure and leaks.
Solution: Desacle your machine
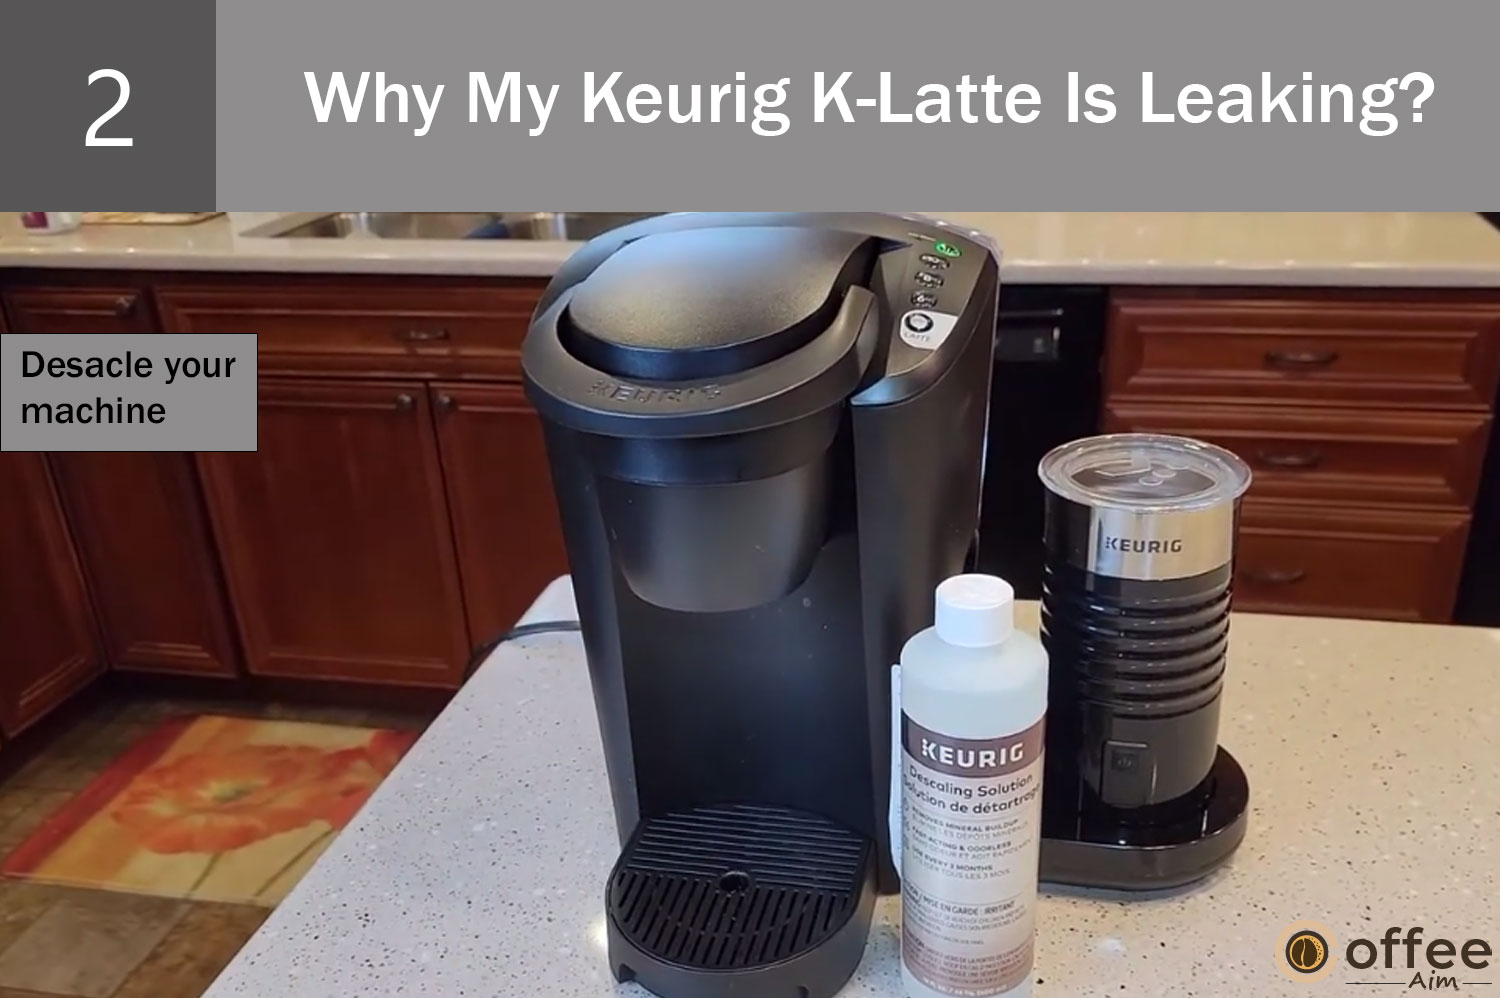
Keurig recommends all its users perform descaling every three months to maintain optimal performance. Please refer to the “Descaling Your Keurig K-Latte” section in the provided article for detailed instructions on correctly describing your Keurig K-Latte.
Cause 3: Dirty Exit Needle
In your Keurig K-Latte, two needles are responsible for piercing the pod; one at the top and another at the bottom. These needles create holes that enable hot water to pass through the pod and into your cup, resulting in a fresh brew. However, if K-cups are left in the pod holder for a prolonged period, it can lead to the accumulation and hardening of coffee grounds around the exit needle.
The buildup of dry and hardened coffee grounds can affect the needle’s ability to puncture the pod effectively. Consequently, during a brewing cycle, coffee may back up in the chamber and eventually leak from the top of the machine. Regular cleaning is important to remove any residue or hardened grounds around the exit needle to ensure smooth and uninterrupted brewing.
Solution: Clean The Needle

Solving this problem is a straightforward process; you only need to clean the exit needle. To have a guideline on how to clean the exit needle, you can visit the “Cleaning The Exit Needle” section written below in this article.
Cause 4: Damaged Exit Needle
Have you noticed that the exit needle of your beloved coffee maker is bent? That clearly indicates that the needle is not where it should be. Ideally, the exit needle should stand tall, proud, perfectly vertical, and straight up. Its purpose? In order to expertly puncture the bottom of your K-Cup during the brewing process. But a bent needle? That could be better. It can cause leaking problems.
Solution: Replace With New Gasket

The best solution is to replace the bent needle with a compatible replacement needle gasket. By purchasing a new needle gasket and installing it correctly, you can ensure the needle functions properly, allowing it to puncture the bottom of the K-Cup securely during brewing.
Cause 5: Use Of Third-Party K-Cups
One possible culprit could be the use of third-party K-Cups. These alternative pods might not fit as well as the standard K-Cups recommended by Keurig, leading to issues like difficulty piercing the lid or leaks. This happens when the lid of the third-party pod is thicker than the standard K-Cup.
Solution: Use Keurig K- Cup
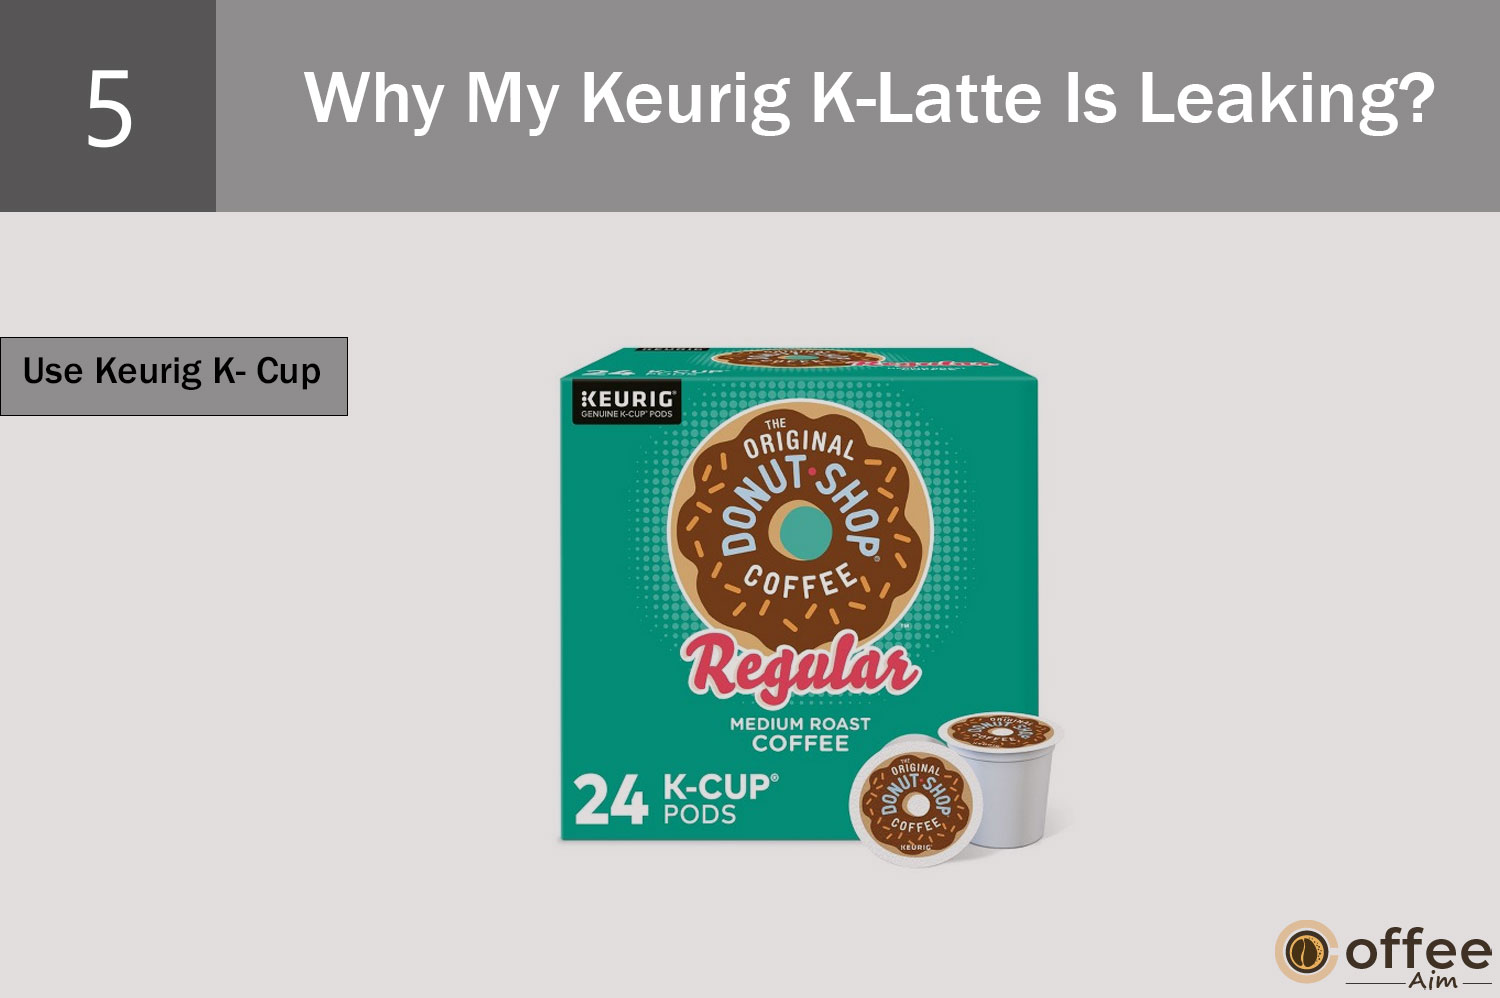
Keurig K-Cup pods are highly recommended to avoid any potential problems, such as leaking. These pods are specifically designed to work seamlessly with Keurig machines, ensuring compatibility and reliable performance. When you choose Keurig’s K-Cup pods, you can be confident that they have undergone rigorous testing and optimization specifically for use with your coffee maker.
Cause 6: The Brewer Does Not Grip The K-Cup
When the lid of your K-cup is not properly closed in your Keurig brewer, it can lead to pressure buildup inside the pod holder. This increased pressure can cause ground coffee and water to be forcefully expelled from the K-cup, resulting in leakage from the top of the machine. Let’s see what are possible solutions for this issue.
Solution: Contact Keurig Customer Support

For such a situation, I would recommend reaching out to Keurig’s customer service team. The article’s section titled “When To Seek Professional Help” includes the relevant contact information to get in touch with them. Engaging their services will provide you with the necessary guidance and support to effectively resolve the issue.
Cause 7: The Upper Gasket Might Be Loose Or Broken
The leakage in Keurig could be due to the problem in the upper gasket. The upper gasket is an essential component that ensures a secure seal between the needle and the K-Cup during brewing. Its main function is to prevent leaks and maintain a tight seal to allow water to flow through the needle and into the K-Cup without issues. However, if the upper gasket becomes damaged, worn out, or improperly installed, it can fail to create an effective seal. This can lead to water leakage during the brewing process.
Solution: Repair The Gasket

Do not stress; you can solve the problem by following the steps below.
- Firstly, Remove the water reservoir and its lid from the coffee maker.
- Now, find the circular screen located at the bottom of the reservoir. Use a screwdriver to unscrew the three screws that hold it in place.
- You need to pay attention to the O-ring attached to the circular screen. Carefully remove the O-ring using a plastic opening tool.
- Replace the old or damaged O-ring with a new one in good condition. Ensure the new O-ring is securely positioned to create a tight seal, preventing leaks or other issues.
- Once the new O-ring is in place, reattach the circular screen to the bottom of the reservoir using the three screws.
- Place the reservoir lid back on the water tank and carefully insert the water reservoir back into the coffee maker.
If you are not sure about performing these steps, I recommend seeking help from a professional technician. In the “When To Seek Professional Help” section, you can find contact details for services specializing in repairing coffee makers.
Cause 8: Entrance Needle Is Dirty
The needle at the entrance of a Keurig coffee maker is important because it pierces the top of the K-cup to allow water to flow through and brew the coffee. However, if this needle becomes dirty or gets blocked by coffee grounds or other debris, it can’t do its job properly. As a result, water won’t be able to enter the K-cup, causing drips from the pod holder area. To troubleshoot this, you can try the solution provided below.
Solution: Clean The Entrance Needle

Cleaning the entrance needle will do the job. To know how to clean the entrance needle, please refer to the “Cleaning The Entrance Needle” section in the provided article. This section contains step-by-step instructions and helpful information to clean the entrance needle, ensuring it works properly.
Cause 9: Water Reservoir Is Cracked
It is time to examine the water reservoir of the Keurig K latte, as it could be cracked and become the reason for persistent leaks from your brewer. You can turn the water tank upside down and visually inspect it to check for cracks. Carefully examine the entire reservoir surface for any damage, such as cracks or breaks. Remember that cracks can vary in size, ranging from noticeable large cracks to tiny hairline fractures that may be harder to spot.
Solution: Replace With A New One
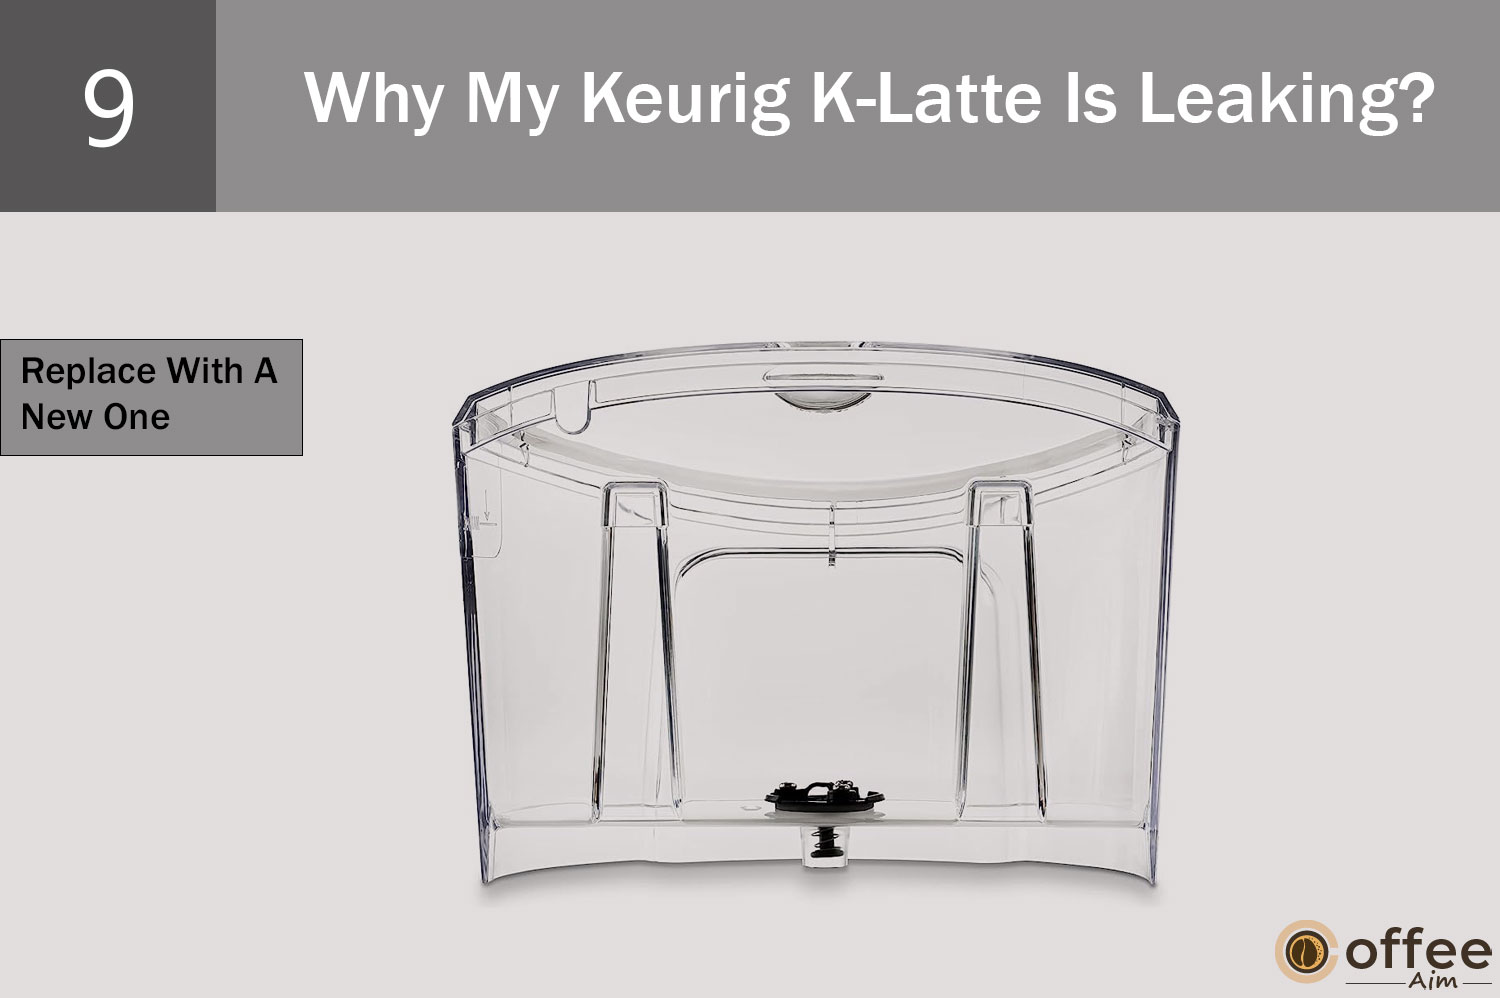
If you discover any cracks or damage in the water reservoir, it is important to replace it as soon as possible. Continuing to use a cracked reservoir can result in more leaks. It can further damage the internal system. Obtain a replacement reservoir as soon as possible to ensure the machine functions properly and avoid any further complications.
I truly hope that you will resolve the leaking issue by following the aforementioned guidelines. Let us further discuss the issue if Keurig K-Latte stops working at all.
Problem 11: Why The Frother of Keurig K-Latte Is Not Working?
The Keurig K-Latte is a beloved coffee machine for those who appreciate speciality coffee drinks like lattes and cappuccinos. However, encountering issues with its milk frothing feature can be more than just frustrating, as it can disrupt your entire day. Without properly frothed Milk, the creamy and silky texture of lattes and cappuccinos may be missing, leaving you unsatisfied. In order to prevent such disappointing experiences, it’s important to know how to troubleshoot problems with the Keurig K-Latte’s milk frother. In this section, we will examine the possibilities of why the milk frother may not be frothing as expected and provide effective solutions to help you address the issue.
Cause 1: You’re Using The Wrong Type Of Milk
The quality of froth can be significantly influenced by the type of milk you use. If you are experiencing issues with your Keurig milk frother not frothing properly, one possible reason could be the type of Milk you are using. You must remember that not all types of milk froth equally, and some are better suited for frothing than others. Let us see what kind of Milk you should use for frothing.
Solution 1: Use 1/2 %, Or Semi Skimmed Milk
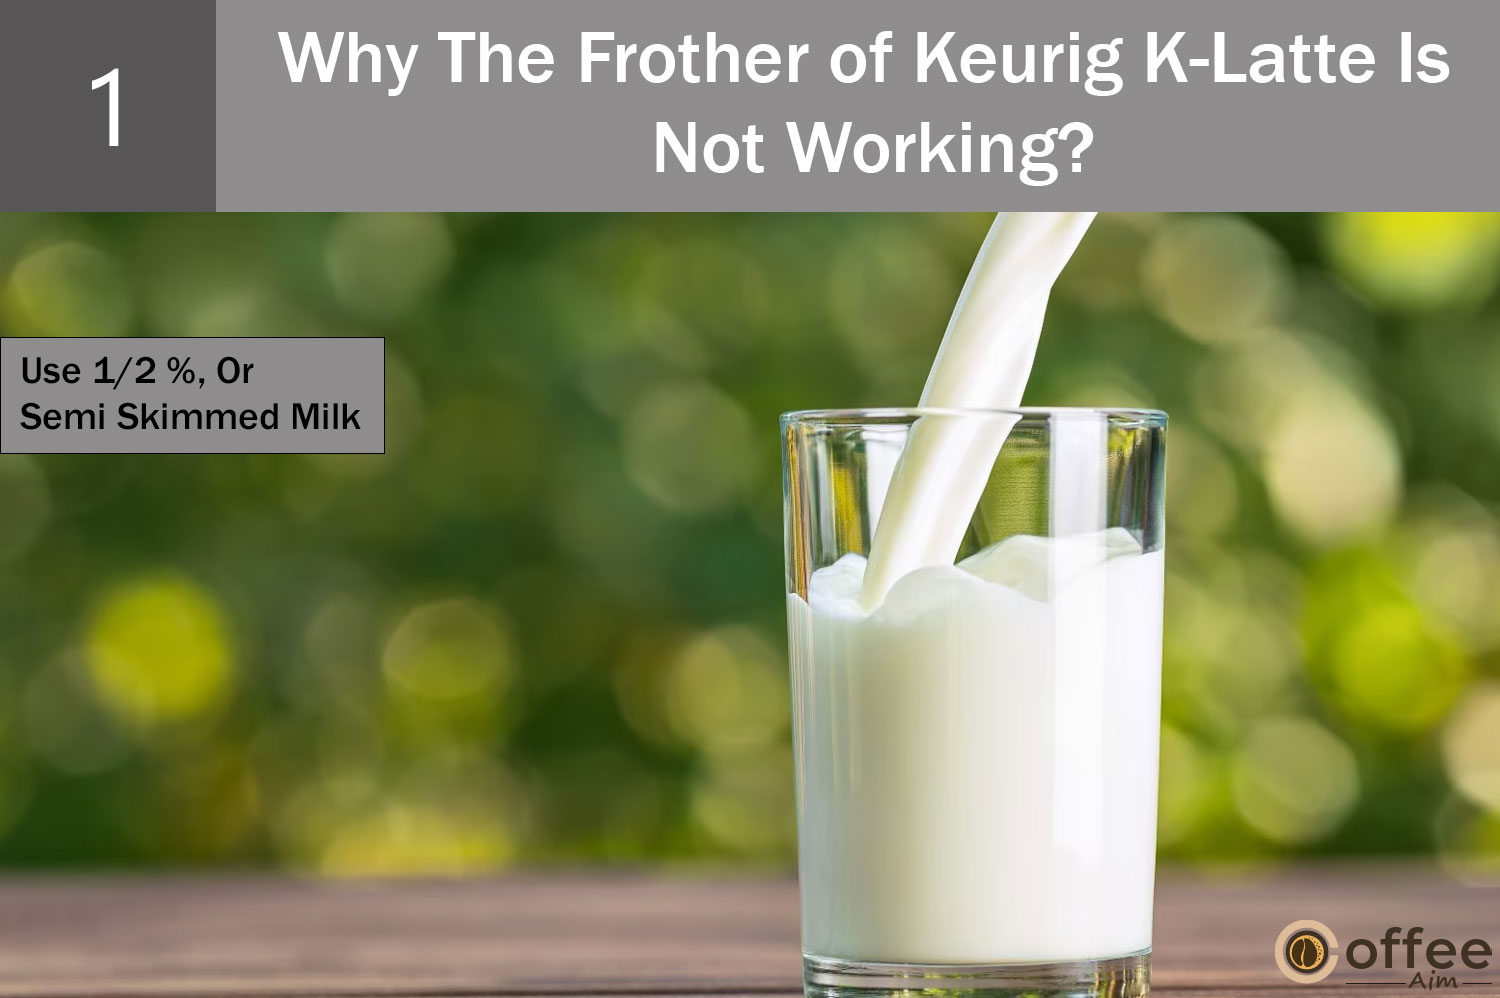
For frothing, it is recommended to use 1% fat milk at room temperature. You can also try using 2% fat or semi-skimmed Milk, although the resulting foam may be slightly less creamy or stable. Your K-Latte machine is capable of handling these milk types effectively. However, it’s important to note that using Milk with very low-fat content, such as oat or skim milk, is not ideal as it can result in a weak and watery froth. To achieve the best frothing results and enhance the taste of your coffee, using Milk with a balanced protein and fat content, such as whole Milk, is generally recommended.
Cause 2: The Whisk Is Stuck
When the whisk in your Keurig milk frother becomes stuck or too stiff, it hampers its ability to rotate freely and create the desired frothy texture in the Milk. Consequently, the frother fails to function as intended. You can also observe that after approximately 10 seconds of operation, it stops working and emits a buzzing sound, while the three lights on the frother start flashing. This indicates a malfunction in the frother and signifies the need for repair or troubleshooting.
Solution: Grease The Whisk

To resolve the issue of a stuck or stiff whisk in the frother of your Keurig K-Latte, you can follow these steps:
- Start by washing both the whisk and the frothing cup with warm, soapy water. Rinse them thoroughly and ensure they are clean.
- After cleaning, take a small amount of butter and apply it to the whisk. Ensure that you use a small quantity, as using too much butter can affect the taste of your frothed Milk.
- Gently rub the butter onto the whisk, coating it evenly. The butter acts as a lubricant, helping the whisk to move freely.
- Once you have applied the butter, test the frother by inserting it into the frothing cup and turning it on. The butter should allow the spinner to rotate smoothly, resolving the issue of the stuck or stiff whisk.
Cause 3: The Frother Is Not Stable On The Base
Due to its design, the base of your Keurig frother may sometimes be slightly unstable. As a consequence, there are situations where the frother may not be properly positioned on the base. In such situations, there is a risk of losing electrical contact, leading to the frother not functioning as intended.
Solution: Place The Frother Properly

Before initiating the frother process, always make sure that the frother is placed correctly on its base.
Cause 4: Magnet Lost Its Strength
Over time and with prolonged use, the magnet inside the frother cup of your Keurig may gradually lose its strength. This can result in the magnet failing to engage the micro switch responsible for activating the frother. As a consequence, the frother cup may not be pulled down sufficiently to make contact with the switch, causing the frother not to start.
Solution 1:Gently Press The Frother.
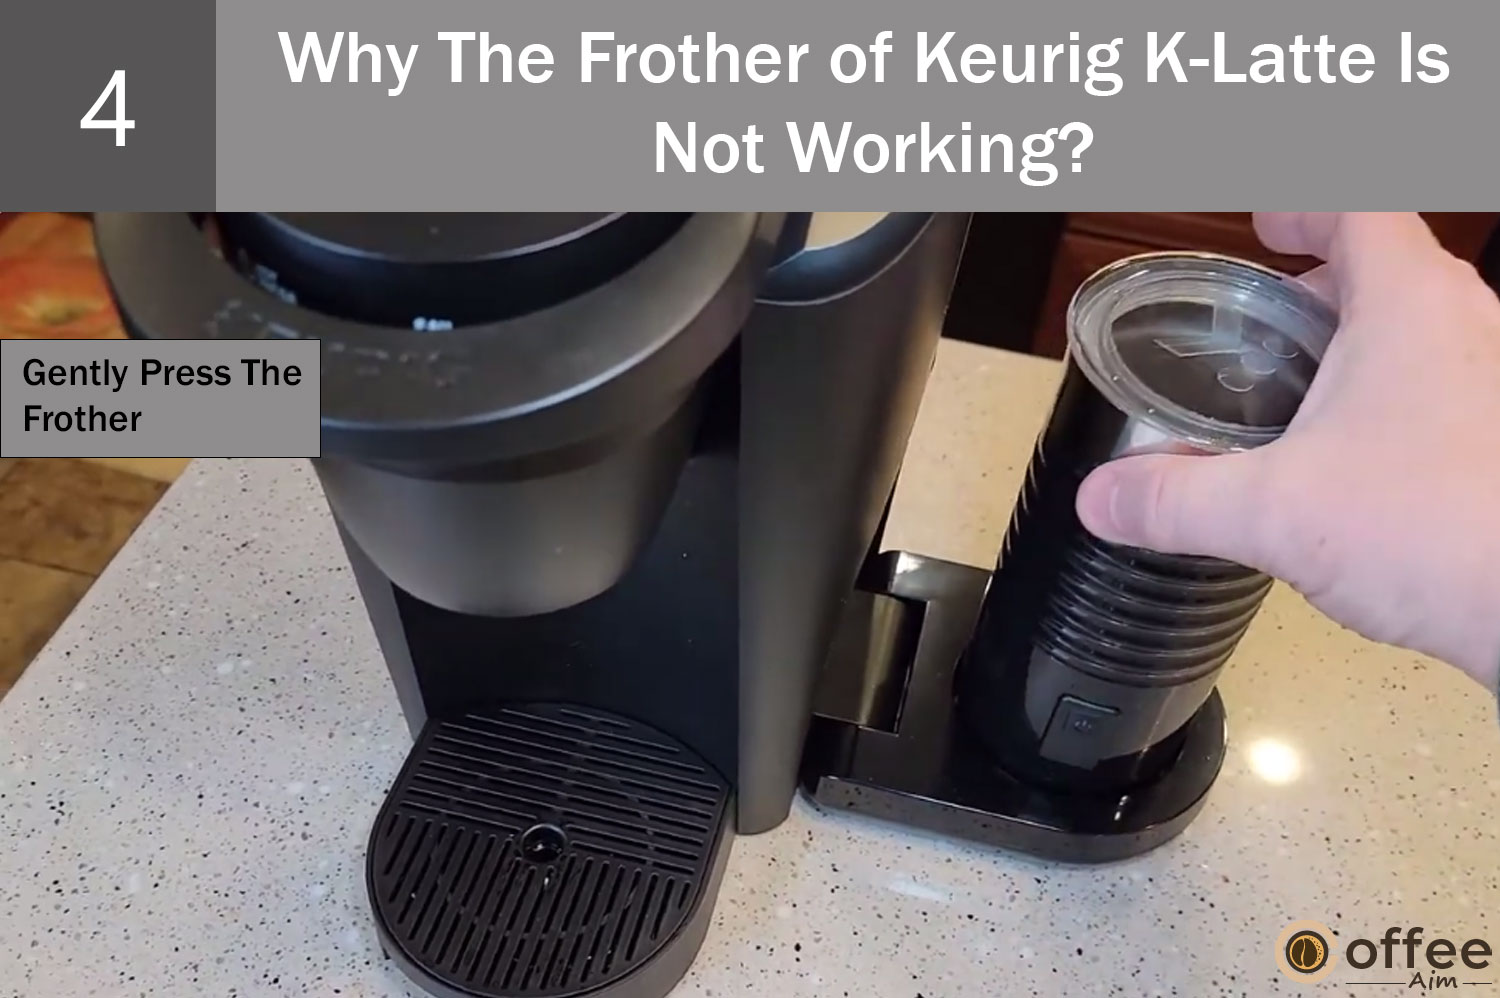
Occasionally, applying gentle pressure to the frothing cup can help ensure proper engagement with the micro switch and activate the frother. However, it is crucial to avoid applying excessive force while doing so.
Solution 2: Buy a New Frother
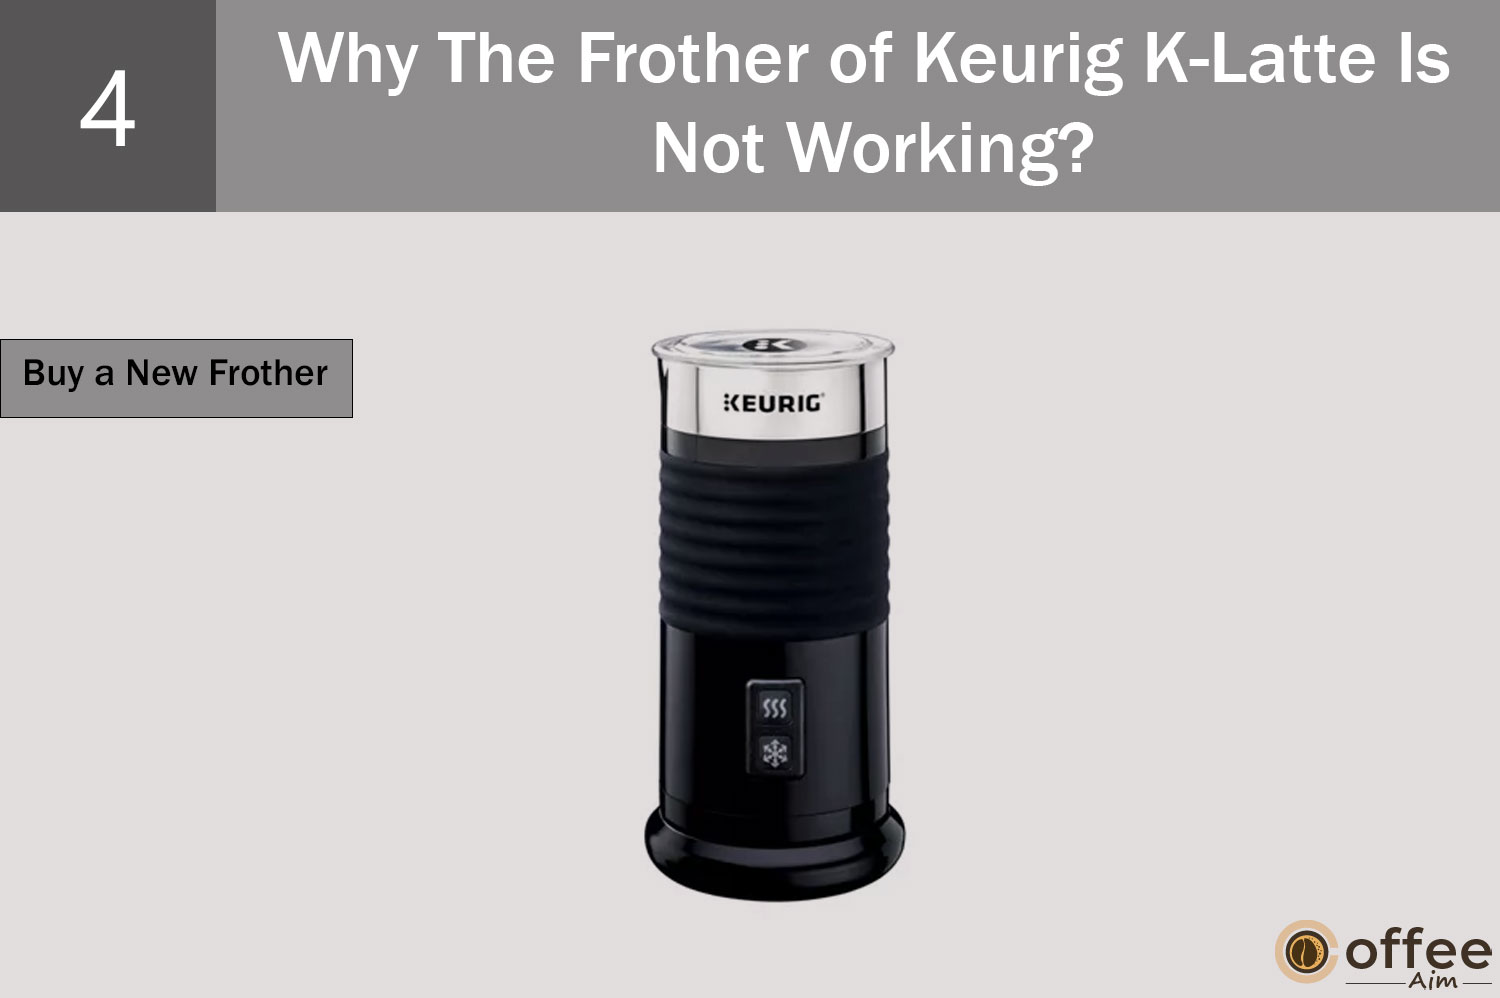
If you have tried the recommended solutions without success, it may be worth considering the purchase of a new frother as a potential solution to the persistent problem. Although pressing the cup down can offer temporary relief, the underlying problem of a weakened magnet is likely to persist and potentially lead to future complications. Moreover, using a frother with diminished magnet strength can result in inconsistent frothing and detract from your overall coffee enjoyment. You can explore purchasing a replacement frother from Amazon.
Without further ado, let us jump on another problem, which is related to the frother of Keurig K-Latte.
Problem 12: Why Is The Keurig Frother Producing Too Much?
Indulging in a frothy cup of coffee is a delight, but what if your Keurig frother goes into overdrive, producing an excessive amount of froth? Not only can this create a messy clean-up situation, but it also means that the balance of flavours in your coffee may be compromised. The excessive froth can overpower the taste, resulting in a less enjoyable coffee experience. Let’s explore the reasons why your Keurig frother may be producing too much froth and discover some solutions to bring back that perfect cup of frothy goodness.
Cause 1: You Are Overpouring The Milk
Keurig K-Latte frother requires a specific amount of Milk in the frothing cup; if you pour less or more Milk in the frothing cup, it will create troubles while frothing. If you pour the Milk exceeding the MAX Fill line marked in the cup, the production of froth will increase, and it will start overflowing from the cup.
Solution: Pour Milk Till The Max Fill Line

You can avoid this problem to occur by simply pouring the Milk into the Max Fill Line.
I hope you will solve the overflowing problem of your frother by following the instructions given above. You also may experience some unusual flashing on your Keurig display. Let us see what we should do when that happens.
Problem 13: Why Are the Keurig K-Latte Blinking Lights?
On the top of the Keurig Latte, you’ll find an array of buttons and lights that not only serve a physical purpose but also provides vital information to ensure a seamless brewing process. These lights are no ordinary adornments; they possess the power to convey valuable messages through blinking patterns, guiding you effortlessly through the coffee maker’s operation. In this guide, we will delve into the secrets of these blinking signals, unravelling their significance and unlocking a world of intuitive brewing with your Keurig K-Latte.
Cause 1: Low Water Level
When it comes to the Keurig K-Latte coffee maker, an amazing feature is in place to alert you when the water level in its reservoir is running low. The ADD WATER indicator light on the control panel will illuminate, providing a timely reminder to replenish the water supply. This ensures that you never run out of water mid-brew and guarantees uninterrupted brewing sessions.
Solution: Fill The Water Reservoir To Max Fill Level

Fill the water reservoir until it reaches the MAX FILL level indicated on the water reservoir. This marked line serves as a visual reference, ensuring you add the right amount of water.
Once the reservoir is filled to the MAX FILL line, the light on the control panel will immediately switch off, enabling you to continue brewing without any disruptions.
Cause 2: Brewing Temperature Issue
If the lights on your Keurig K-Latte are blinking, it may be due to a problem with the brewing temperature. This could be caused by a malfunctioning heating element or an issue with the internal temperature sensors.
Solution: Contact Keurig Customer Care
In order to resolve the issues with the malfunctioned heating element, you should immmeidately contact keurig customer care. You canfinf the contactinformation from the section “ When to seek Professioaal help” written below in this article.
Cause 3: Brewing Size Selection
The blinking lights could also indicate an error in selecting the desired brewing size. Let us sffhee what youcan do solve it.
Solution: Check The Brew Size
Ensure that you have selected the correct cup size or brewing option to prevent the lights from blinking.
Cause 4: Jammed Or Improperly Inserted Pod
If the lights are blinking, it’s possible that the coffee pod is jammed or not inserted properly. Do you want to know how can you resolve this issue. Let us see then.
Solution: ReInsert The Pod
Remove the pod from the holder and trying inserting it again.
Cuase 5: Keurig Is Clogged
Over time, mineral deposits can build up inside the Keurig K-Latte, affecting its performance. The blinking lights may indicate the need for descaling, which involves removing the mineral buildup to restore proper functioning.
Solution: Desale your machine
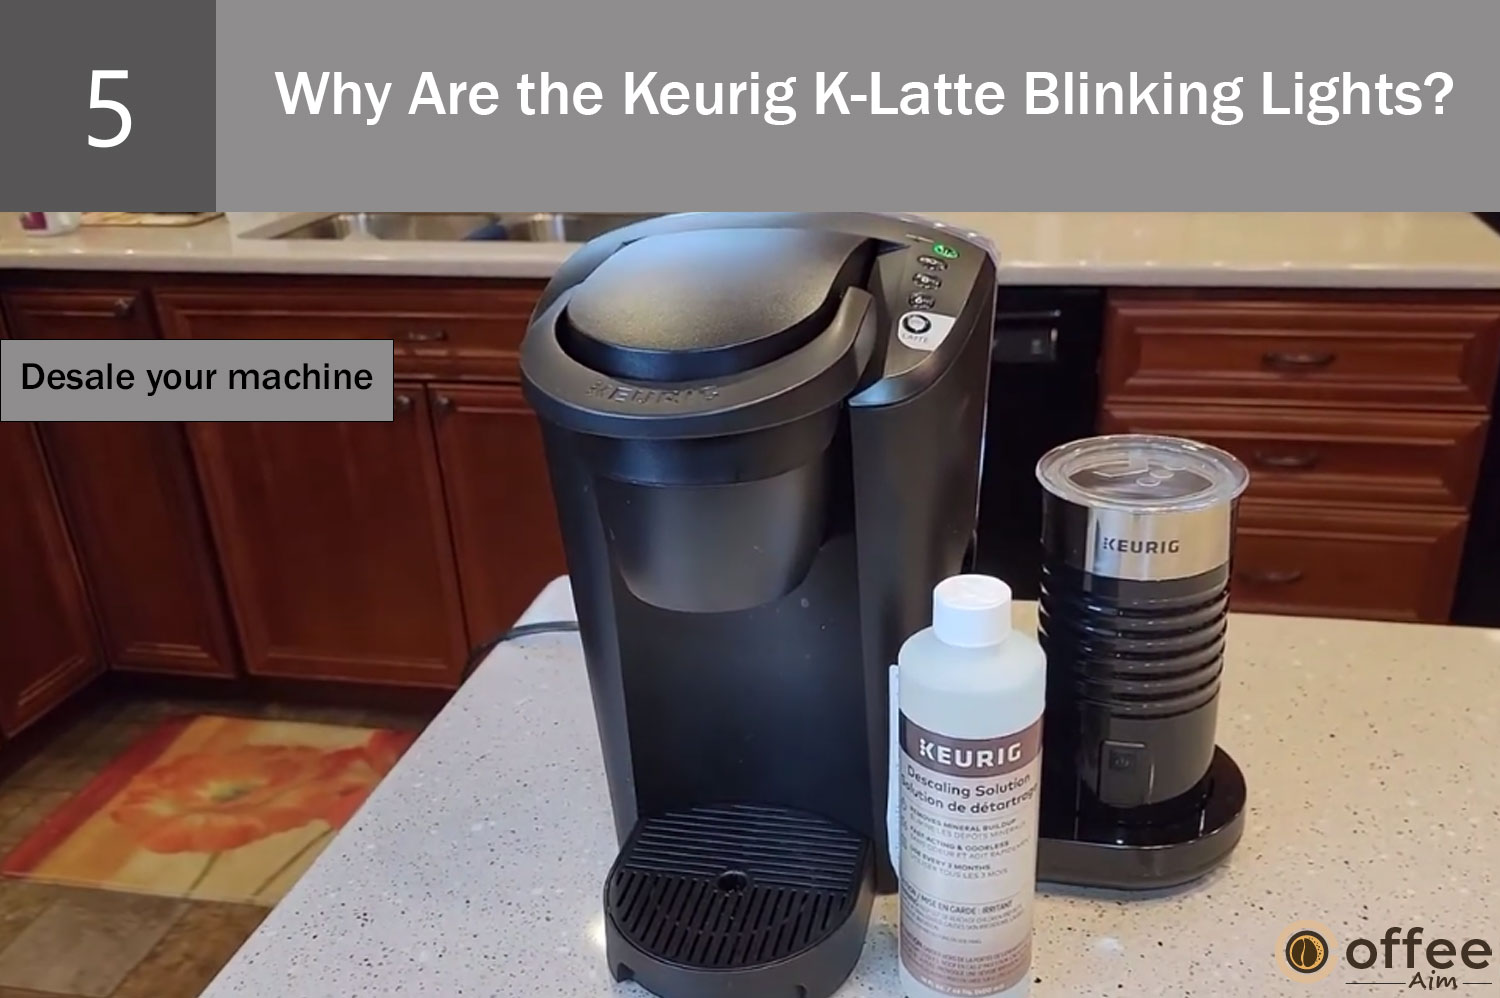
In order to remove clogging form your Keurig K-Latte, you need to run a descaling cycle. Follow the instruction given in “Desacling the Keurig K-Latte” to perform the descaling process.
Cause 6: Maintenance Required
Blinking lights can also be an indication that regular maintenance is required. This may include cleaning the machine, descaling, or replacing certain components.
Solution: Do Maintenance
In order to solve the maniantanec issue, you need to follow the guidelines provided in the section “Maintanance Tips” provided in this article below.
If the light still continues to illuminate, I would advise you to contact Keurig Customer Care.
Problem 14: Keurig K-Latte Not Responding To Button Commands
It can be frustrating when your Keurig K-Latte fails to respond to your button commands, disrupting your coffee routine. Whether you’re trying to brew a cup of coffee or froth milk, unresponsiveness from the machine can put a damper on your morning routine. Now, we will explore the possible causes behind this issue and provide you with troubleshooting tips to help you get your Keurig K-Latte back to functioning properly.
Cause 1: Unidentified Issue
Sometimes, an unidentified glitch in the Keurig could be the reason for the nonresponding button. You need to try the following solution in order to get your Keurig back in order.
Solution: Restart
If you encounter unresponsive buttons on your Keurig K-Latte, begin by pressing the POWER button to turn off the machine, and then press it again to turn it back on. If the issue persists, you can attempt to resolve it by unplugging the power cord, waiting for approximately 30 seconds, and then reconnecting it. Afterwards, attempt to press the POWER button again. These steps may help restore the responsiveness of your Keurig K-Latte.
Solution 2: Contact Keurig Customer Care
If the above solution does not help or solve the problem, then there is a need to contact Keurig Customer Care Services. The information about the contact details is provided in the “When To Seek Professional Help” section written below in the article.
Here are some techniques that can help to restore your Keurig K-Lattes and enhance your coffee brewing experience. By understanding these techniques, you’ll be equipped to resolve common issues, ensuring that your Keurig K-Latte operates smoothly and delivers the hot, delicious coffee you desire.
Cleaning The Keurig K- Latte
Maintaining regular cleanliness of the components in your Keurig K-Latte is extremely important and even more essential than just descaling alone. While descaling helps eliminate mineral deposits and scale buildup, regular cleaning ensures that other contaminants like coffee residues and oils are regularly and thoroughly removed from various parts of the machine. The following are methods for cleaning different components of the Keurig K-Latte.
1. Cleaning The Exit Needle

Below are the step-by-step instructions for cleaning your coffee machine:
- Remove the pod holder assembly and detach the funnel.
- Locate the exit needle on the inside bottom of the K-Cup® pod holder.
- Take a straightened paper clip or a similar tool.
- Gently insert the paper clip into the exit needle.
- Move the paper clip around to loosen any coffee grounds that may be stuck.
- Be careful not to apply too much force or damage the needle.
- Once you feel the obstruction is cleared, remove the paper clip.
- Rinse the pod holder assembly and funnel with water to remove any loosened grounds.
- Dry the parts thoroughly before reassembling them.
- Ensure that all components are securely in place before using the machine again.
2. Cleaning The Entrance Needle

Here is a breakdown of the instructions for cleaning the entrance needle on your Keurig K-Latte:
- Lift the brewer handle to expose the underside of the lid.
- Locate the entrance needle, which is usually found in the centre.
- Hold the brewer handle in an upward position, keeping it lifted.
- With your other hand, take a straightened paper clip and carefully insert it into both holes of the entrance needle.
- Gently move the paper clip around in a circular motion to loosen any coffee grounds that may be clogging the holes.
- Once you feel the holes are clear, lower the brewer handle completely.
- Run two water-only brew cycles without inserting a K-Cup pod.
- This will help flush out any remaining debris or residue from the cleaning process.
3. Cleaning The Frother Of Keurig K- Latte

Taking good care of your frother is essential to ensure its longevity and maintain its performance. After each use and before the first use, it’s crucial to clean it promptly. This simple habit will keep your frother in pristine condition. Remember, the frother should never be submerged in water or placed in the dishwasher, as it’s not dishwasher safe. Instead, opt for non-abrasive cleaning materials to protect the delicate inner surface of the frother. Using soft, non-scratchy materials will prevent any potential damage.
- Start by detaching the frother from its base, removing the silicone ring from the lid, and taking out the whisk from inside the frother.
- Ensure to give the silicone ring, lid, and whisk a comprehensive wash using warm, soapy water. Thoroughly remove any residue or buildup that may be present. It is essential to clean the interior of the frother. Utilize mild soap and warm water for this task. Remember to handle the cleaning process with care, using a soft, non-abrasive cloth or sponge to prevent any potential damage to the inner coating.
- Don’t forget to wipe the exterior of the frother with a soft, damp cloth to remove any dirt or stains.
- Once everything is sparkling clean, make sure to dry all the parts completely before reassembling them for the next use.
Descaling The Keurig K-Latte
Proper care and maintenance are essential for ensuring the long-lasting functionality of any machine, and the Keurig K-Latte is no exception. To guarantee prolonged productivity and reliable operation, Keurig recommends that users descale their Keurig brewer every 3 to 6 months. By following this maintenance routine, you can ensure that your Keurig K-Latte continues to perform optimally over an extended period.
Before Starting The Descaling Process
- Gather the following items: a large ceramic mug, fresh water, Keurig Descaling Solution, and access to a sink.
- Make sure not to use a paper cup for this process.
- Ensure that there is no beverage pod in the K-Cup® pod holder.
- Set aside approximately 45 minutes for the descaling procedure.
- Empty the water reservoir and remove any Keurig® Water Filter if present.
STEP 1: Cleansing Rinse
- Power off the brewer by pressing the power button.
- Empty the water reservoir.
- Empty the entire bottle of Keurig® Descaling Solution into the water reservoir. Refill the empty bottle with water and pour it into the reservoir.
- Turn on the brewer by pressing the power button.
- Position a large mug on the drip tray.
- Lift and lower the handle of the brewer and select the largest brew size to run a rinsing brew.
Step 2: Internal Tank Soak
Continue performing the rinsing brew process until the “add water” light is illuminated. Remember not to use a K-Cup® pod during this step. After completing the rinsing brews, allow the brewer to stand for at least 30 minutes while it remains turned on.
Once the 30 minutes have passed, dispose of any remaining solution in the water reservoir and rinse it thoroughly to remove any traces of the descaling solution. It is important to ensure a thorough rinse to avoid any residual taste or residue.
Step 3: Fresh Water Rinse
To complete the rinsing process, follow these steps:
- Fill the water reservoir with fresh water, making sure not to exceed the MAX fill line.
- Position a large mug on the drip tray plate.
- Initiate a rinsing brew using the largest brew size without using a K-Cup pod.
- Empty the contents of the mug into the sink.
- Repeat this brewing process, conducting a minimum of 12 rinsing brews utilizing the largest brew size.
- During this process, you may need to refill the water reservoir at least once.
Maintenance Tips
Now that you have learned about the common problems and their solutions for your Keurig K-Latte Coffee Maker, it’s time to shift our focus to the preventive side. Regular maintenance is key to keeping your coffee maker in tip-top shape and ensuring a delightful brewing experience every time. By following some simple tips, you can prevent future issues and prolong the lifespan of your machine. So, grab your cleaning supplies, and let’s get started!
- Clean the Water Reservoir: Regularly remove the water reservoir and thoroughly clean it. Use warm soapy water to wash away any buildup or residue that may affect the taste of your coffee.
- Descale the Machine: Over time, mineral deposits can accumulate inside your coffee maker, affecting its performance. Descaling is crucial to remove these deposits and maintain optimal brewing conditions. Follow the manufacturer’s instructions or use a descaling solution specifically for Keurig machines.
- Clean the Needle: The needle that punctures the coffee pod can get clogged with coffee grounds or debris. To clean the needle, use either a paperclip or a specialized cleaning tool designed for this purpose. Take caution to be gentle and avoid damaging the needle while ensuring proper water flow.
- Wipe the Exterior: Give the exterior of your Keurig K-Latte a wipe-down with a damp cloth regularly. Regularly performing this cleaning routine will help maintain a clean and tidy machine, preventing the accumulation of dust or spills.
- Check the Milk Frother: If your machine has a milk frother, cleaning it after each use is essential. Rinse it with warm, soapy water and ensure no milk residue is left behind.
- Replace Filters: If your Keurig K-Latte has a water filter, remember to replace it as the manufacturer recommends. This will help maintain the quality of your coffee and prevent any potential clogging issues.
By incorporating these simple maintenance practices into your routine, you can significantly reduce the chances of encountering problems with your Keurig K-Latte Coffee Maker. Not only will you enjoy consistently delicious coffee, but you’ll also extend the life of your machine, saving you time and money in the long run. Remember, a little regular care goes a long way in ensuring a delightful brewing experience every morning.
So, keep these tips in mind, and cheers to many more perfect cups of coffee from your Keurig K-Latte!
When To Seek Professional Help
While many common problems with the Keurig K-Latte Coffee Maker can be resolved through troubleshooting and basic maintenance, there are instances where seeking professional help is the best course of action. If you’ve followed the troubleshooting steps and tried the suggested solutions but are still experiencing issues with your coffee maker, it may be time to reach out to experts who specialize in Keurig repairs. Here are some situations when professional help is recommended:
- Persistent Malfunction: If your Keurig K-Latte continues to malfunction despite your best efforts to fix it, it’s a sign that there may be an underlying issue that requires professional attention. Don’t let frustration dampen your coffee experience—seeking help from a professional can provide a solution.
- Internal Repairs: It’s advisable to leave the repairs to the experts when it comes to complex internal components or electronic issues. Attempting to fix such problems on your own can cause further damage or void any existing warranty.
- Warranty Coverage: If your Keurig K-Latte is still under warranty and the problem falls within the covered issues, it’s best to contact Keurig’s customer support or an authorized service centre. They will have the expertise and knowledge to handle the repairs while ensuring your warranty remains intact.
Now, let’s talk about some reputable repair services in the USA, specializing in Keurig K-Latte Coffee Makers. These professionals are well-equipped to diagnose and fix any issues you may face. Here are a few reliable options:
- Keurig Customer Support: Keurig offers customer support services for troubleshooting and repairs. You can reach them by visiting their official website at www.keurig.com or their customer support hotline at [insert phone number].
- Local Appliance Repair Shops: In many cities across the USA, you can find local appliance repair shops specializing in coffee maker repairs. It’s worth researching and reading reviews to find a reputable and reliable repair service near you.
- Authorized Keurig Service centres: Keurig has authorized service centres throughout the USA. These centres have certified technicians trained to handle Keurig coffee maker repairs. You can visit the Keurig website or contact customer support to find the nearest authorized service centre.
Remember, when contacting professional repair services, it’s essential to provide detailed information about the problem you’re experiencing. This will help them accurately diagnose the issue and provide the most effective solution.
By seeking professional help when necessary, you can ensure that your Keurig K-Latte Coffee Maker is in capable hands, and you’ll soon be back to enjoying your favourite cup of coffee.
Conclusion
Congratulations, you’ve now become well-versed in troubleshooting and fixing common problems that can arise with your Keurig K-Latte Coffee Maker. Armed with this knowledge, you have the power to resolve many issues and keep your coffee maker running smoothly.
Throughout this article, we’ve explored a range of possible problems and their solutions, from brewing issues to maintenance tips. Remember, the key to tackling these challenges is to approach them systematically, step by step. By identifying the problem, understanding its cause, and following the appropriate solution, you can often restore your Keurig K-Latte to its optimal functioning.
While some problems may require the expertise of a professional, you should try troubleshooting the issues on your own first. Many common issues can be resolved with simple steps, such as descaling, cleaning the needle, or adjusting the brewer settings. Taking the time to troubleshoot can save you time and money, and you might even discover a new sense of accomplishment.
However, it’s important to recognize when a problem is beyond your expertise or falls under warranty coverage. In such cases, don’t hesitate to seek professional help. Keurig’s customer support and authorized service centres are there to assist you with more complex repairs and ensure the longevity of your coffee maker.
By regularly maintaining your Keurig K-Latte, following the recommended cleaning routines, and staying vigilant for any signs of trouble, you can prevent future problems from arising. Remember, prevention is often the best solution.
So, the next time you encounter an issue with your Keurig K-Latte Coffee Maker, embrace your troubleshooting skills and tackle it with confidence. With the knowledge, tips, and determination you possess, you can conquer any challenge that arises. Now, savor your perfectly brewed cup of coffee, knowing that you have the expertise to keep your Keurig K-Latte operating smoothly for many enjoyable mornings to come. Here’s to a delightful coffee experience! Cheers!
Frequently Asked Questions
Why Is My Keurig Latte Not Working?
- There could be several reasons why your Keurig K-Latte is not working. It could be due to a clogged needle, insufficient water level, brewing temperature issues, or a malfunctioning power source. Refer to the troubleshooting section in this article for detailed steps to diagnose and fix the problem.
What Is The Lifespan Of A Keurig K-Latte?
The lifespan of a Keurig K-Latte can differ based on various factors, such as usage, maintenance, and care. Typically, with regular cleaning and proper maintenance, a Keurig K-Latte can last for several years. However, it’s important to keep in mind that the actual lifespan may vary for each individual, as factors like water quality and frequency of use can impact the longevity of the machine.
Why Does My Keurig Latte Maker Keep Shutting Off?
If your Keurig K-Latte keeps shutting off, it may be due to an automatic shut-off feature designed to save energy. This feature is typically activated if the coffee maker remains idle for a certain period. Check the user manual to adjust or disable the automatic shut-off feature according to your preferences.
How Do I Clean The Needle On My Keurig K-Latte?
- Cleaning the needle on your Keurig K-Latte ensures proper coffee flow and prevents clogs. Here’s how you can clean the needle:
- Power off and unplug your coffee maker.
- Lift the handle to expose the K-Cup pod holder.
- Locate the needle, which punctures the K-Cup pods, and use a paperclip or the Keurig needle cleaning tool (if provided) to gently remove any debris or coffee grounds stuck in the needle.
- Once cleaned, run a brew cycle without a K-Cup pod to flush out any remaining residue.
- Regularly cleaning the needle is recommended to maintain the performance of your Keurig K-Latte.
Remember, these answers provide general guidance. For more detailed instructions, refer to your Keurig K-Latte user manual or reach out to Keurig’s customer support for further assistance.