Quick Navigation
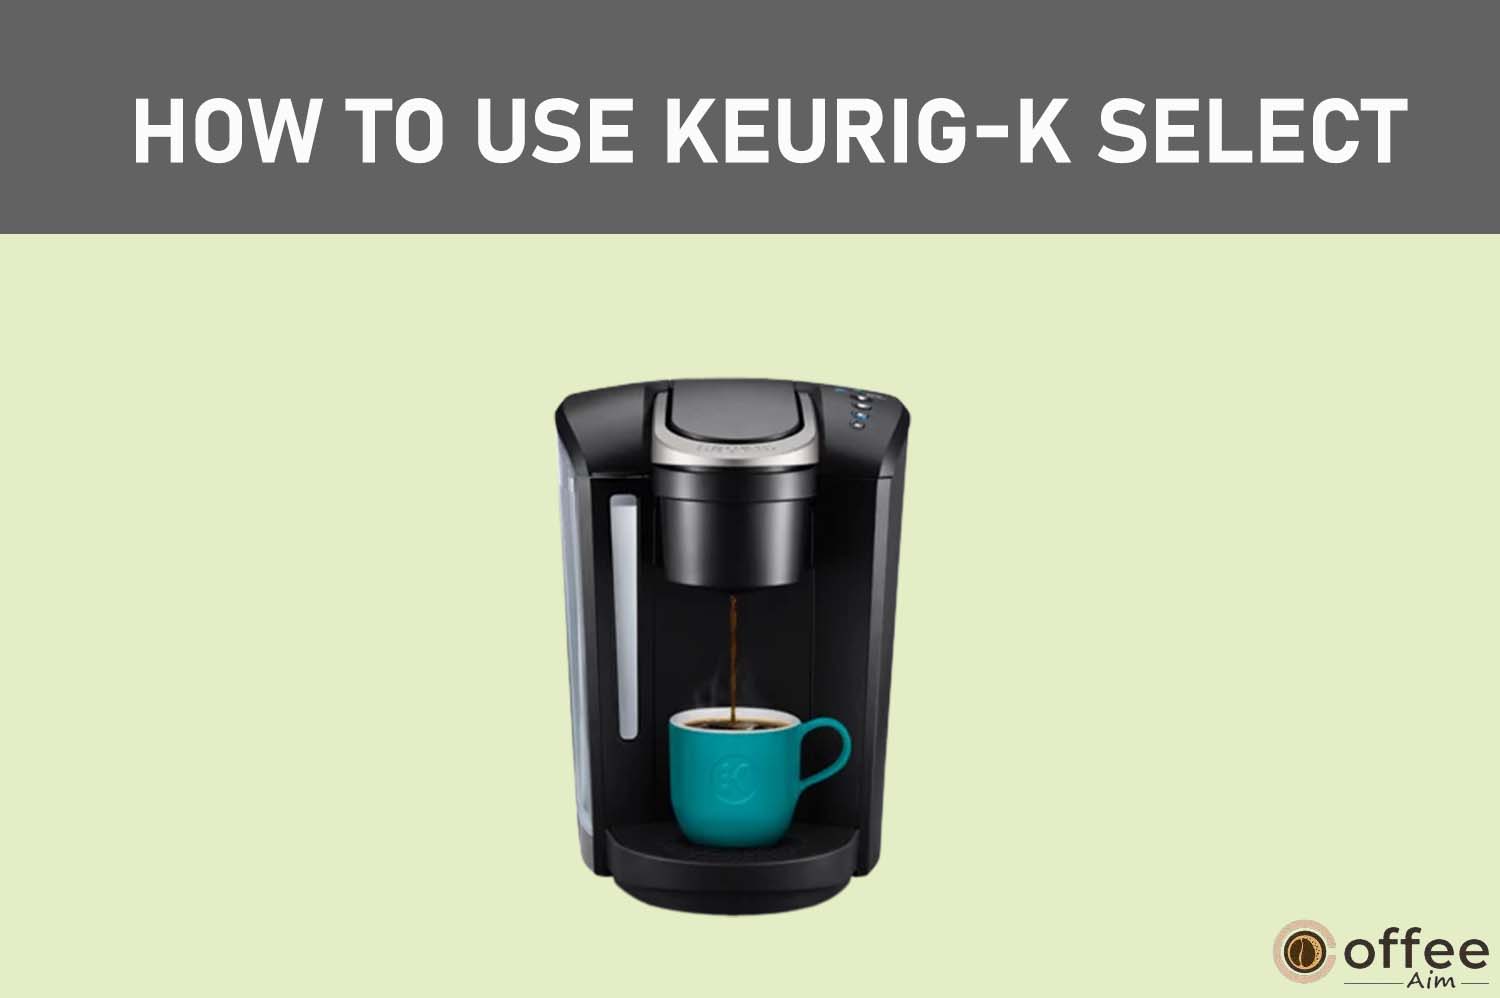
Coffee is everyone’s need to kickstart the day! Therefore, we saw people rushing toward coffee shops before going to the office. Isn’t it tiresome? Yes! That’s why you have bought your new Keurig-K Select and are now in search of an easy user guide to start operating your coffee machine. No? You have been using your coffee maker for the past few months but are now stuck on some procedure (maybe descaling or emptying).
No worries! This user guide will elaborate on each process for you, from “How To Use Keurig-K Select” to “How to clean it”. So, without any further delay, let’s get into the details!
Precautions For Using Keurig-K Select
Let’s discover the coffee world with your Keurig-K Select, but not without taking the essential safety precautions. From placing your coffee maker on a stable surface to plugging it securely, these precautions will safeguard you and your brewer’s life. So, don’t just drink coffee; but also embrace the ritual of taking a step-by-step safety to protect yourself and your beloved Keuring- Select.
Specifications Of Keurig-K Select
Welcome to the Keurig-K Select world and discover all its magnificent specs and functions. Be ready to take your coffee experience to unparalleled heights with the extraordinary features and sleek design of your Keurig. Despite all this, remember that perfection always comes with compatibility between machines and humans. So, if you think these specifications are not aligned with your requirements, then fear not. Keurig offers you to replace your coffee machine before using it. Thus, worry not!
Let’s get started with the specifications!
| Specifications | Details |
| Product Line | K-Select |
| Brew Sizes | Four total brew sizes6oz (177.4ml)8oz (236.6ml)10oz (295.7ml)12oz (354.9ml) |
| Water Tank Capacity | 52oz (1.5L) |
| Machine Display | The button control panel includes;Brew strength buttonsBrew size buttons |
| Temperature Control | No |
| Product Dimensions | 9.2″ (23.4cm) W 11.6″ (29.5cm) D 12.5″ (31.6cm) H |
| Strength Control | No |
| Other Features | Quiet-Brew TechnologyAuto ON/OFF FeatureHigh Altitude FeatureBrewer Maintenance ReminderDrip tray (Removable) |
Features Of Keurig-K Select
Your Keurig-K Select has many features to make your coffee-making journey delightful. Let’s discover the amazing features!
Brew Strong Coffee
The power and intensity of your coffee are increased with Strong Brew. Before choosing your brew size, push the Strong button for stronger coffee.
Smart Start Your Keurig
In a single straightforward step, Smart Start heats and brews. You may choose the brew size before the brewer has heated up. Turn on your brewer, set the cup down, put in a K-Cup pod, and then let go of the handle. Choose your brew size next. The brewer will heat up before starting to brew automatically.
Energy Saving Mode
Keurig has an in-built Auto-off function that shuts off the brewer automatically after two hours of the last brew.
Disable Auto-Off Feature:
1. Switch off your brewer while it is still connected to the power outlet.
2. Now, keep on holding the “Strong” and “10oz” and the “Large mug” buttons for 3 seconds. You will see the green ”Auto-off light” will turn off.
3. Turn the brewer on; you’ll see that the green Auto Off light is no longer on.
Enable Auto-Off Feature
This feature will be enabled by repeating the above steps, and you will see the green Auto-off light will get illuminated again.
High Altitude Brewing
Please follow these brewing instructions and activate the High Altitude Brewing Mode on your brewer to guarantee that your brewer functions correctly at higher elevations (5,000 feet).
Push down carefully on the K-Cup® pod in the pod holder while holding the brewer handle up until the exit needle punctures the bottom of the K-Cup® pod.
Enable High Altitude Brewing Mode:
1. Switch off your brewer while it is still connected to the Power outlet.
2. Press and hold the Strong, 8 oz, and Small Mug buttons for 3 seconds.
3. Both lights will blink three times to indicate the activation of High Altitude brewing mode.
Disable High Altitude Brewing Mode:
1. Switch off the brewer while it is still connected to the power outlet.
2. Hold down the Strong, 8oz, and Small Mug buttons until the lights go off.
What’s Inside The Box
Before starting your journey with Keurig-K Select, first, be aware of what mandatory items are always present inside the box (Keurig parcel) delivered by Keurig. Because without these items, you can’t continue this journey. So, I am enlisting here all the items that you look for inside the box.
Remember, if you find anything missing, then contact your seller and ask for a replacement order.
Let’s begin!
1. Keurig-K Select Coffee Maker

First, you will find your companion, “Keurig-K Select”, which will dance harmoniously with your coffee cravings. It has a sleek design with a sophisticated button control panel through which you can customize your brew size and strength.
2. User Manual
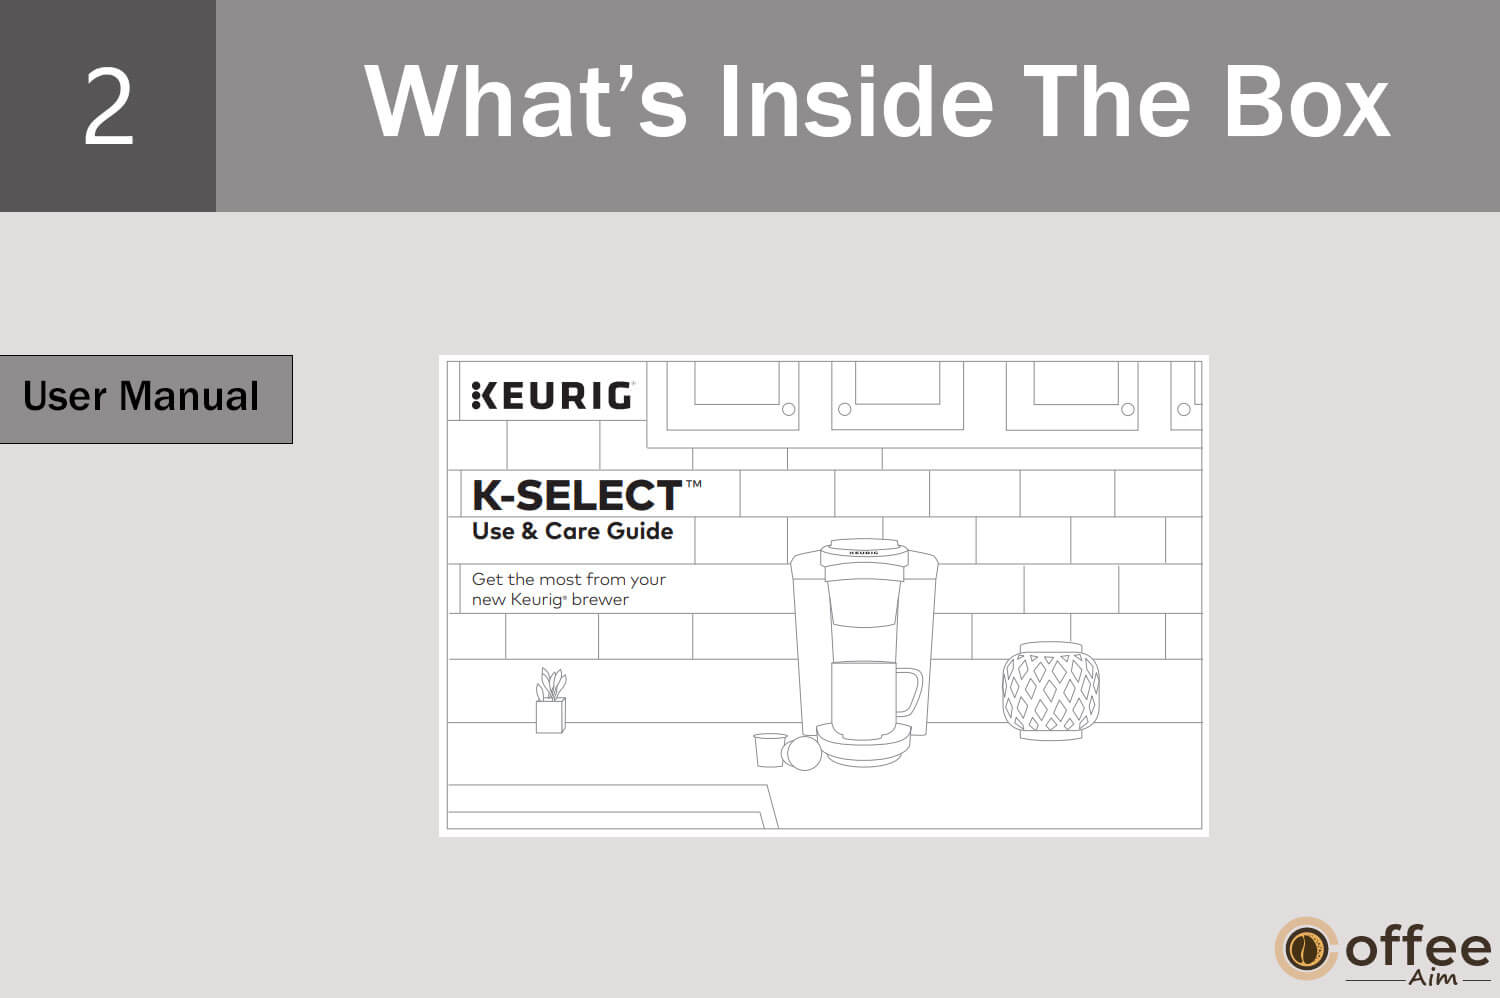
Get to know all about your Keurig-K Select in this user manual, from making the first cup of coffee to cleaning. Take out this literature and start operating your coffee machine.
Quick Start Guide
Here you will get another piece of literature that will elaborate on unboxing and setting up your Keurig-K Select.
“Find Your Taste” Booklet
You know there is a huge range of K-Cup portion packs to satisfy your coffee cravings. But which one should you choose? So, Keurig is again here to resolve your issues. Keurig provides you with a booklet that contains information about all the portion packs and other third-company coffee pods. So you can choose the best for you!
3. K-Cup Portion Pack Box
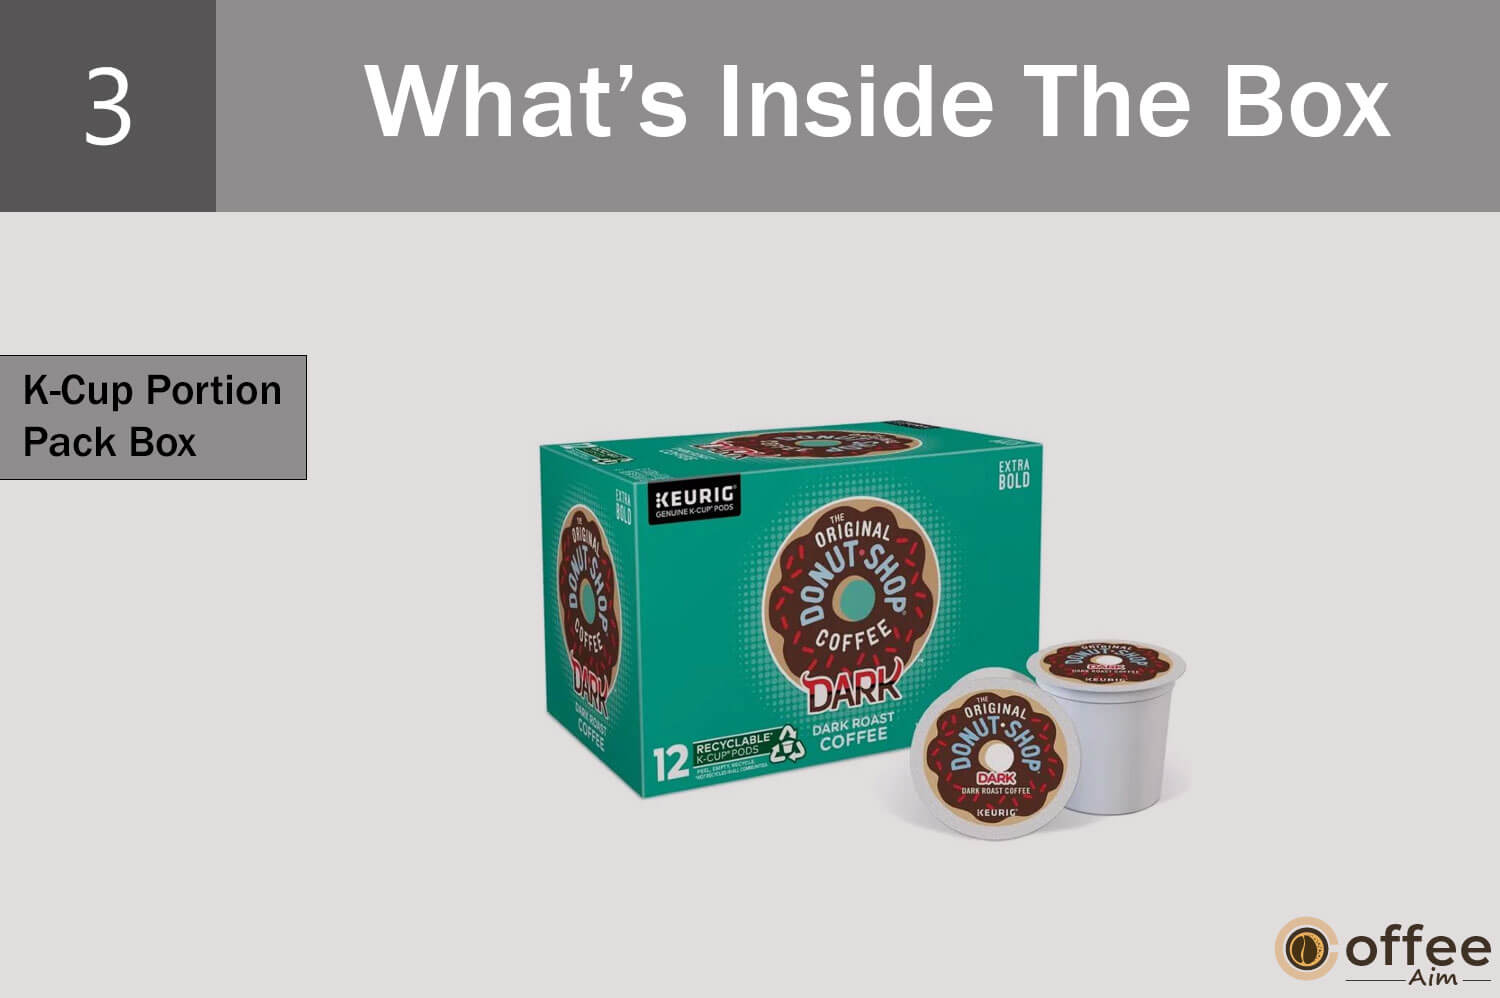
Keurig is always ready to serve you! Here; you will get a box of different taste K-Cup portion packs. So, let’s embark on a delightful journey with your Keurig-K Select using your favorite K-Cup.
4. Warranty Card
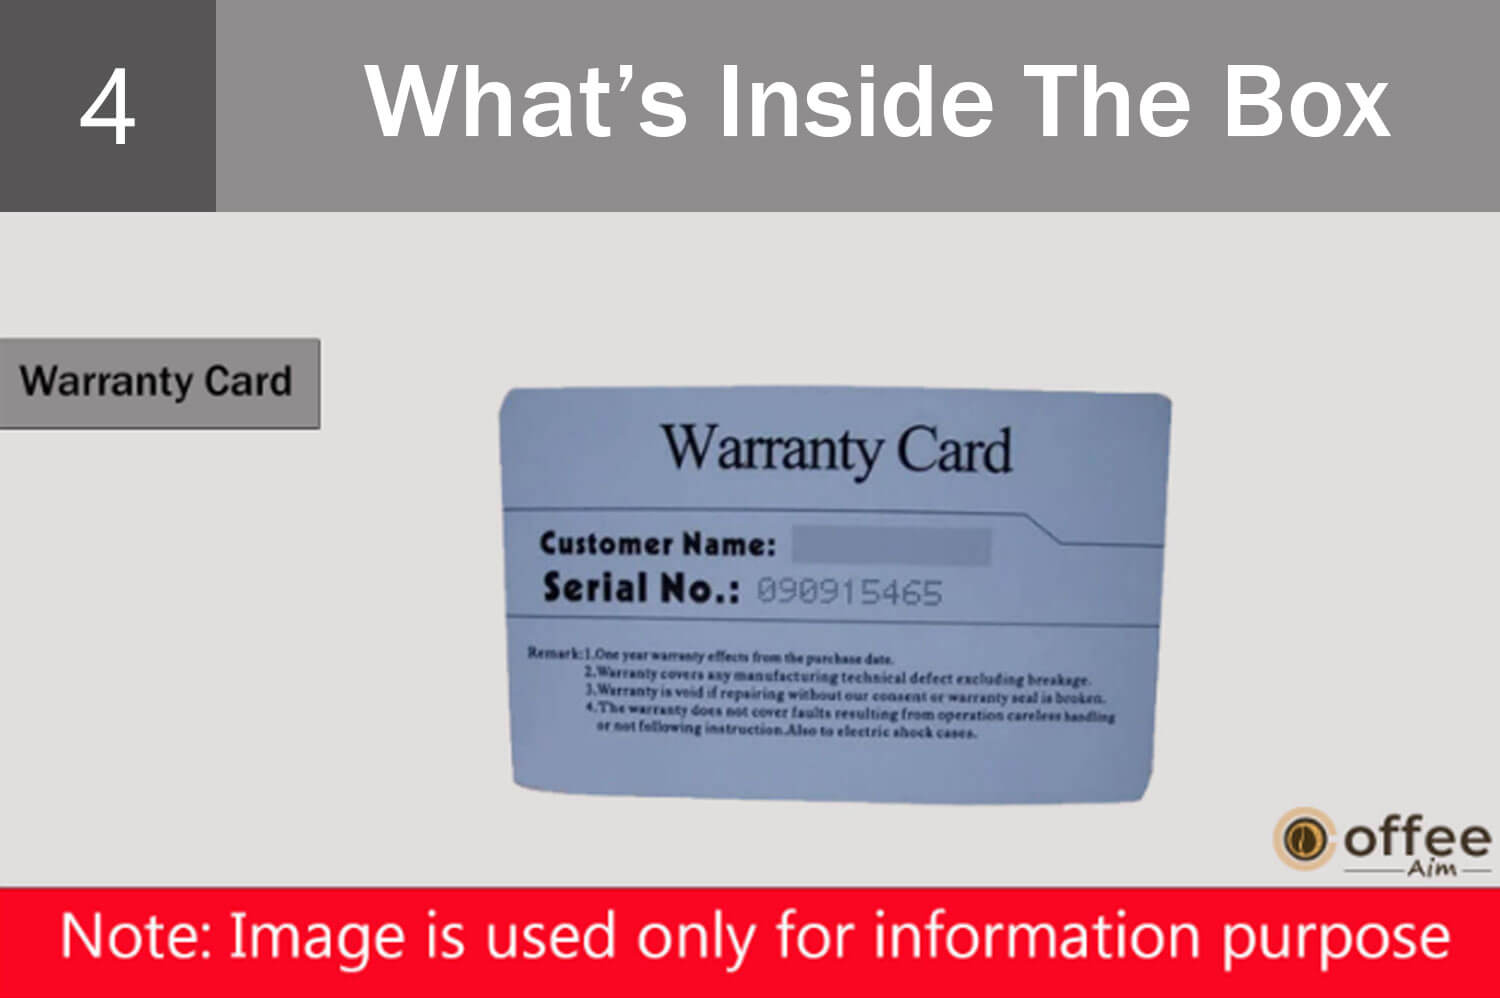
Keurig provides 1 year of exclusive warranty. Always keep the warranty card carefully.
How To Unbox Keurig-K Select
So, the time has reached to unpack your Keurig box. Be careful while unpacking to avoid harm to any part. Let’s get started!
- Place the Brewer box on the floor or a big, stable surface (such as a table or countertop). Open the box.
- Take the included materials out.
- Side-swipe the box so that the front is facing down.
- Reach inside the box and take hold of the Brewer-containing plastic bag.
- Carefully remove the plastic bag from the box by pulling it carefully toward you. The Brewer will remain on its side and enclosed in the polyfoam.
- Remove the top polyfoam packing.
- Carefully remove Brewer from the polyfoam at the bottom and set it upright on a stable, flat surface.
- Remove the plastic bag from Brewer.
- For this Brewer, note the serial number. The serial number is located on the Brewer’s Box bottom or, if the Drip Tray has been removed, on the Brewer itself behind the tray.
- Position the Brewer vertically on a stable, flat surface. Untape Water Reservoir.
Note: keep away all the plastic wraps from your children.
Parts Of Keurig-K Select
To make a perfect cup of coffee, you must be familiar with all parts of your coffee machine and their functions. So, let’s get started!
1. Water Reservoir Lid
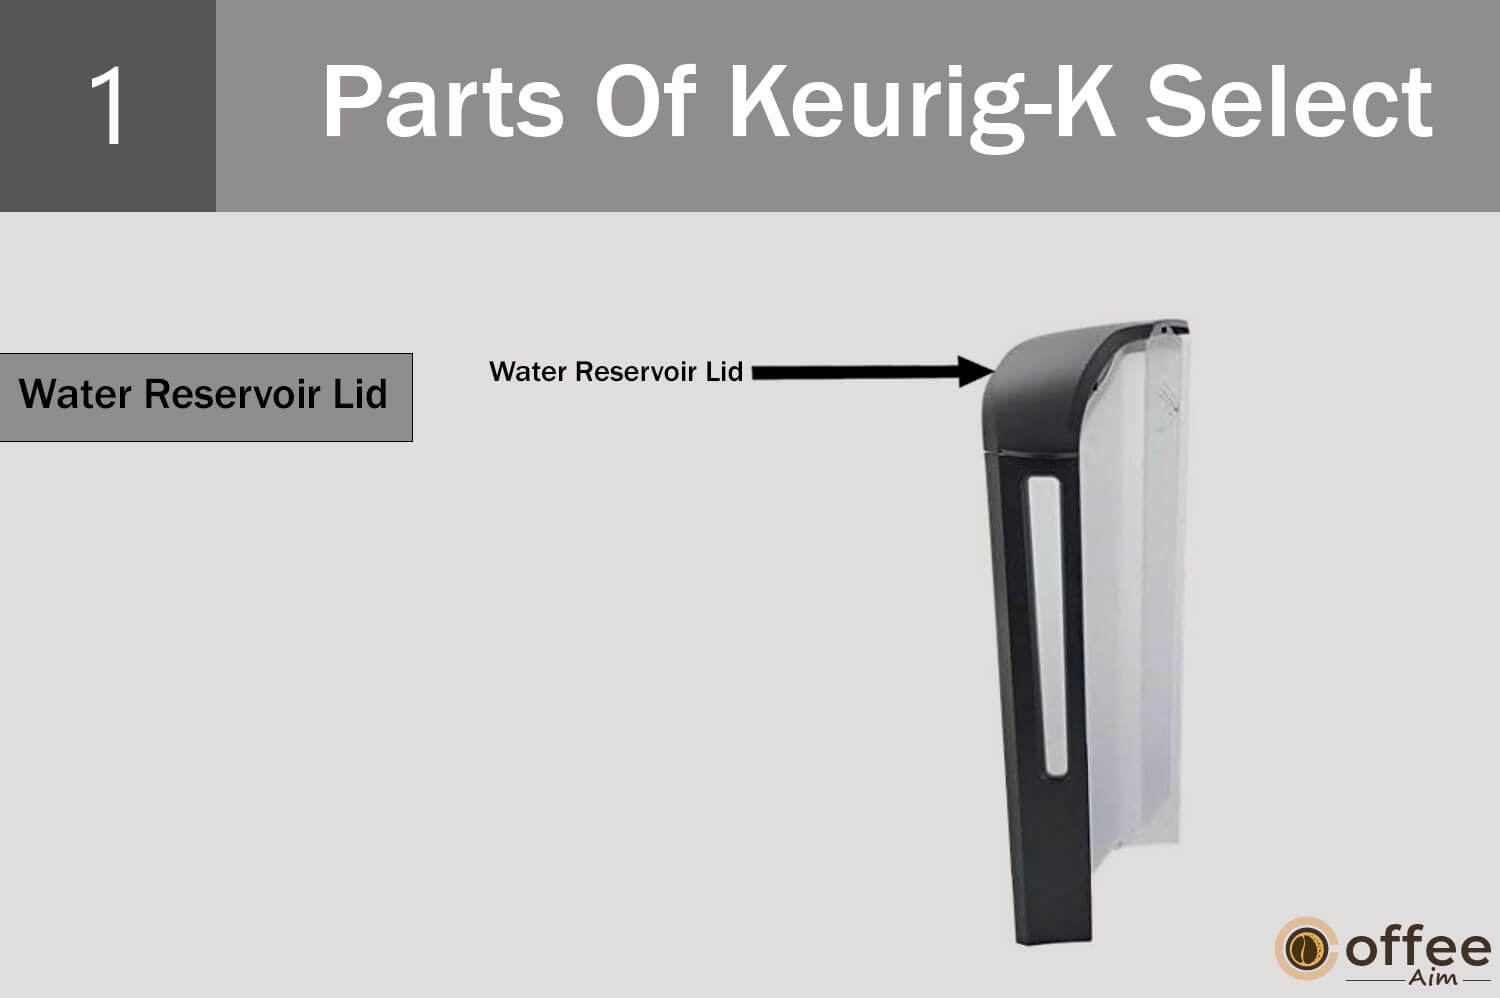
It is present above the water reservoir, and it serves as a guardian to protect water from being dirty and splashing out while brewing. Thus, it offers a seamless brewing experience.
2. MAX FILL line
There is a mark named “Max Fill line” on the water reservoir up to which you have to fill the water before brewing.
3. Water Reservoir
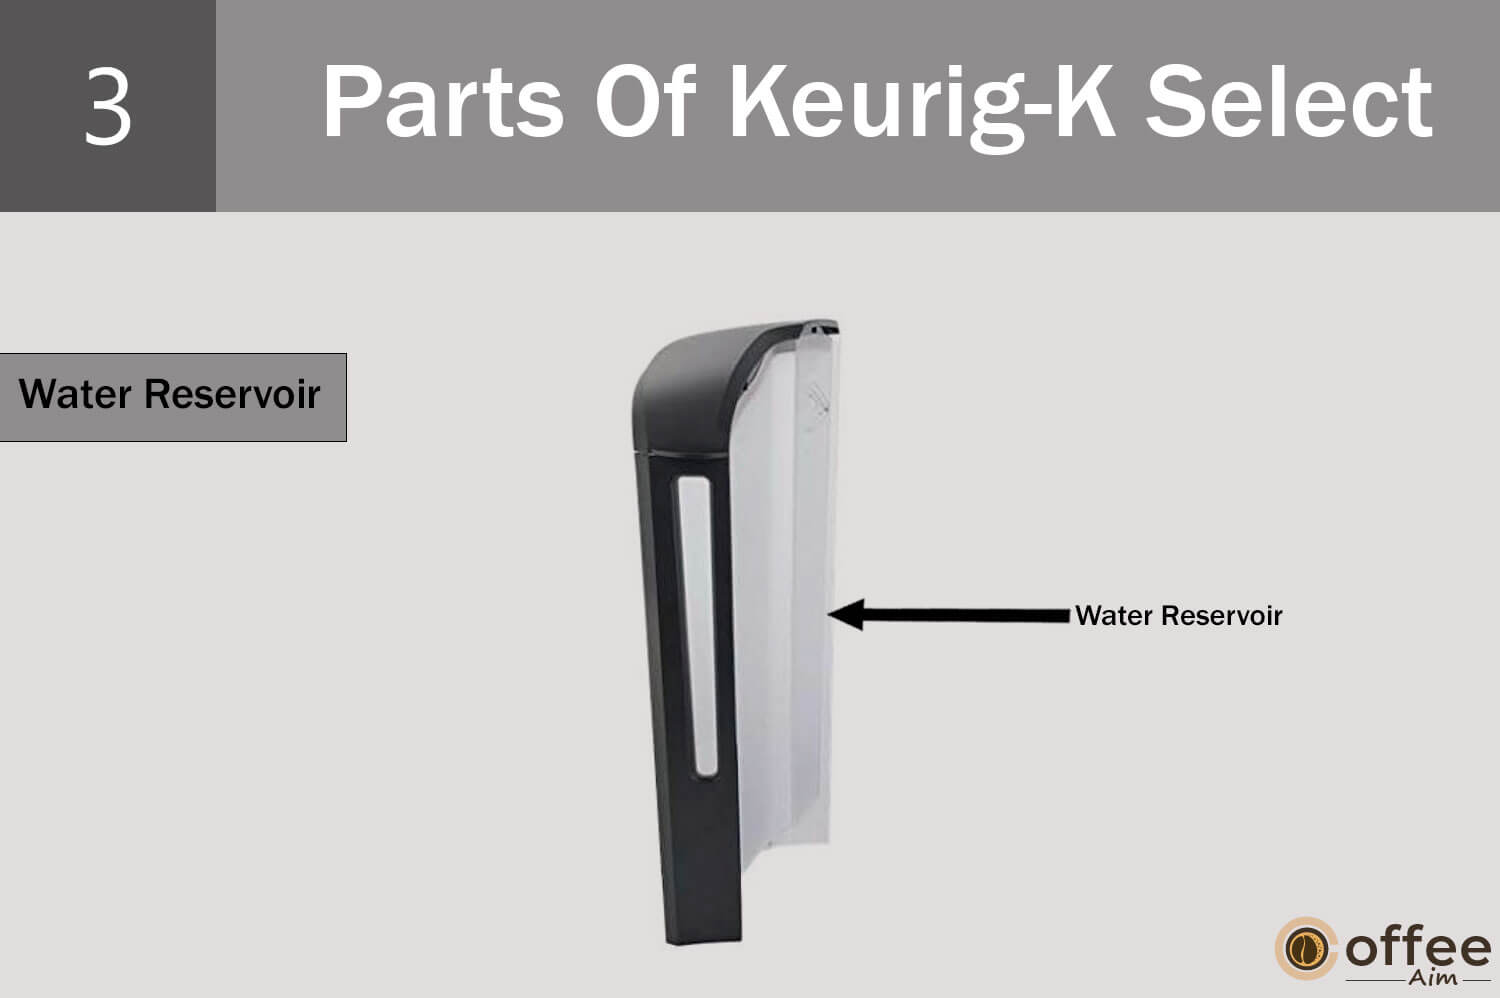
Here is the storage tank in which you will pour water for brewing, cleaning, and descaling purposes. It has a capacity of 1.5L to store water.
4. Water Reservoir Lock Tab Slot
These slots are located on your brewer’s body and are used to connect the water reservoir securely.
5. Power Cord
It is the wire attached to the brewer. This wire is used to plug in the power outlet and transfer the electricity to the brewer.
6. Handle
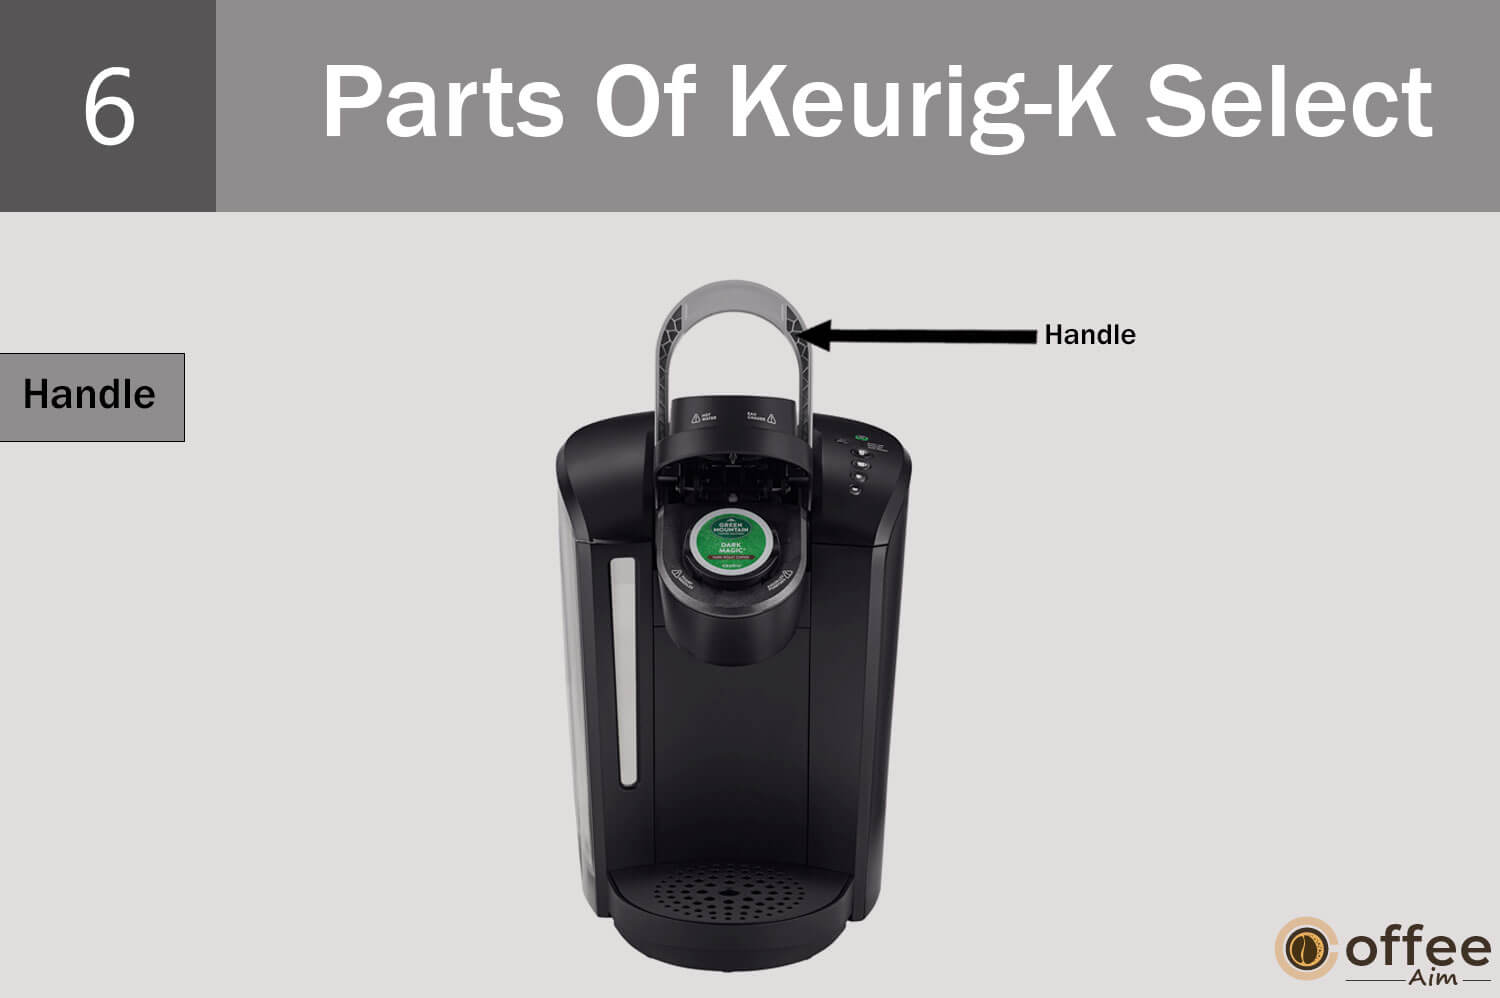
The handle is present at the top of your coffee machine. It is used to open the lid of the K-Cup pod holder. Lift the handle, and the pod holder lid will get open toward you.
7. Lid

This lid is present on the top of your brewer and covers the pod holder brewing assembly.
8. K-Cup Pod Holder
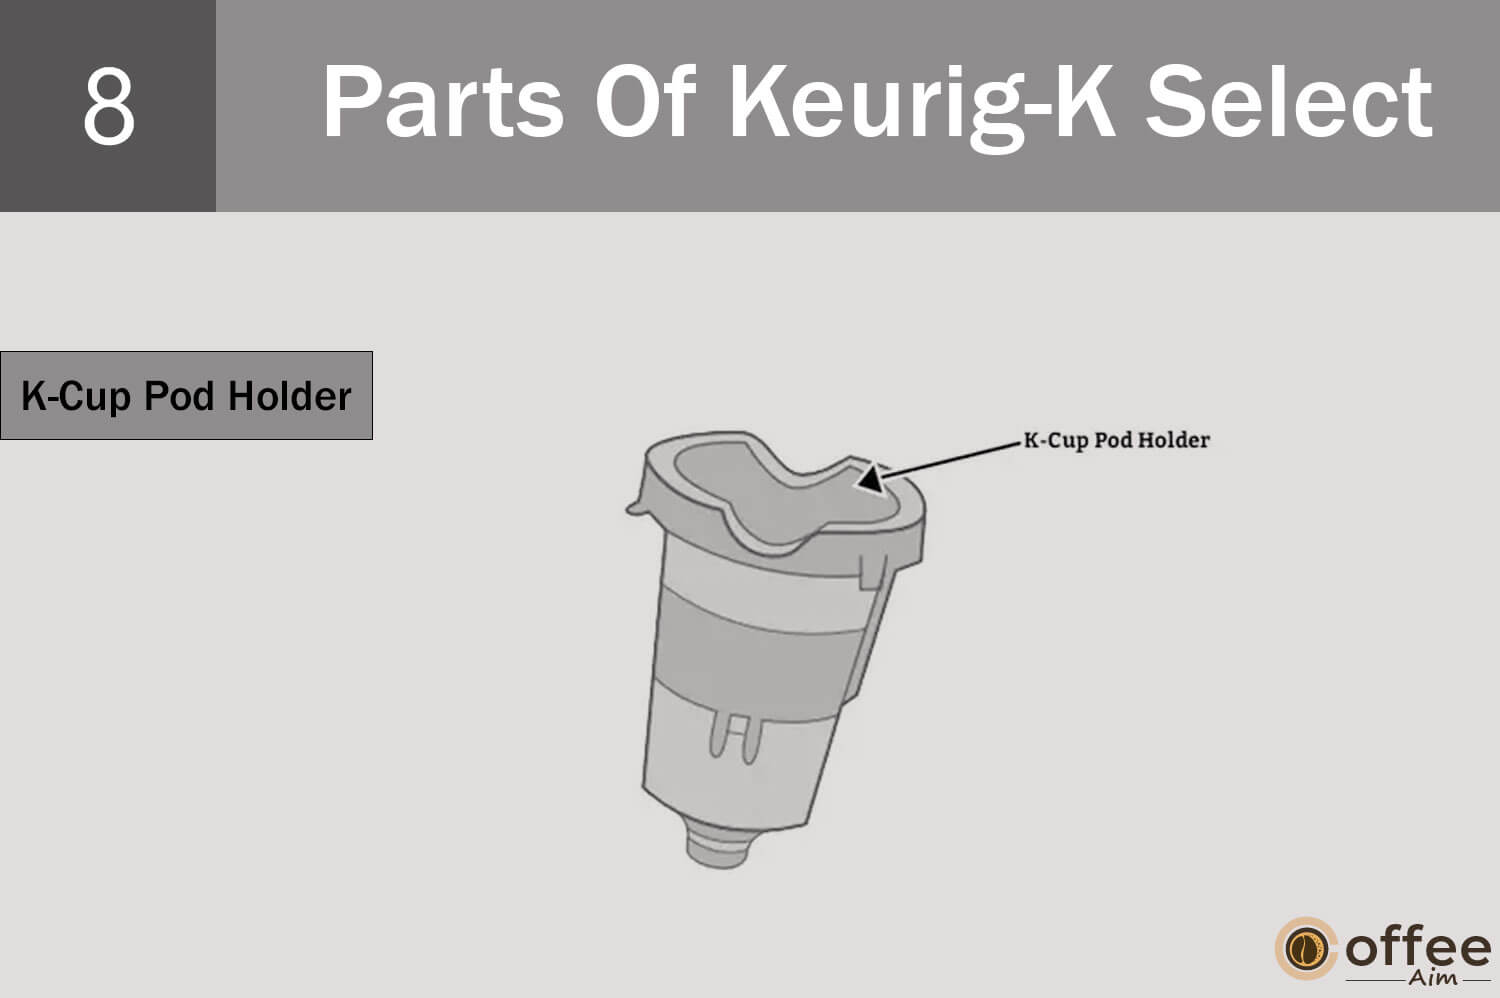
It is the space where you can insert the K-Cup portion pack to get brewed.
9. Funnel
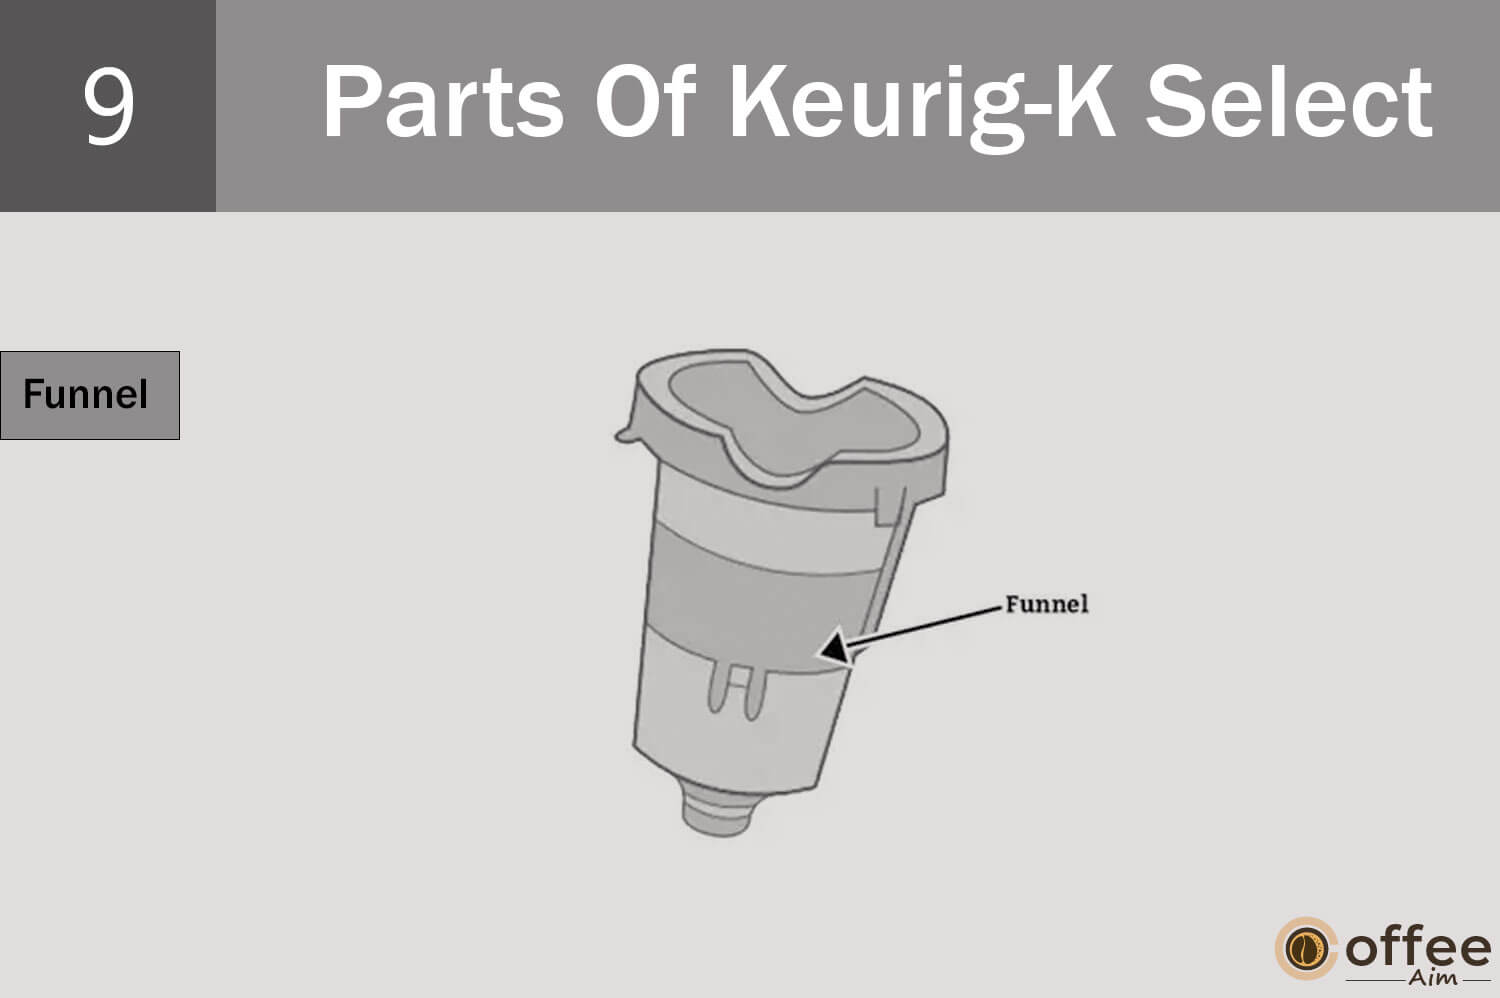
It is attached to the pod holder at the bottom. It is a v-shaped part that channelizes the brewed coffee toward the coffee spout.
10. K-Cup Pod Assembly Housing
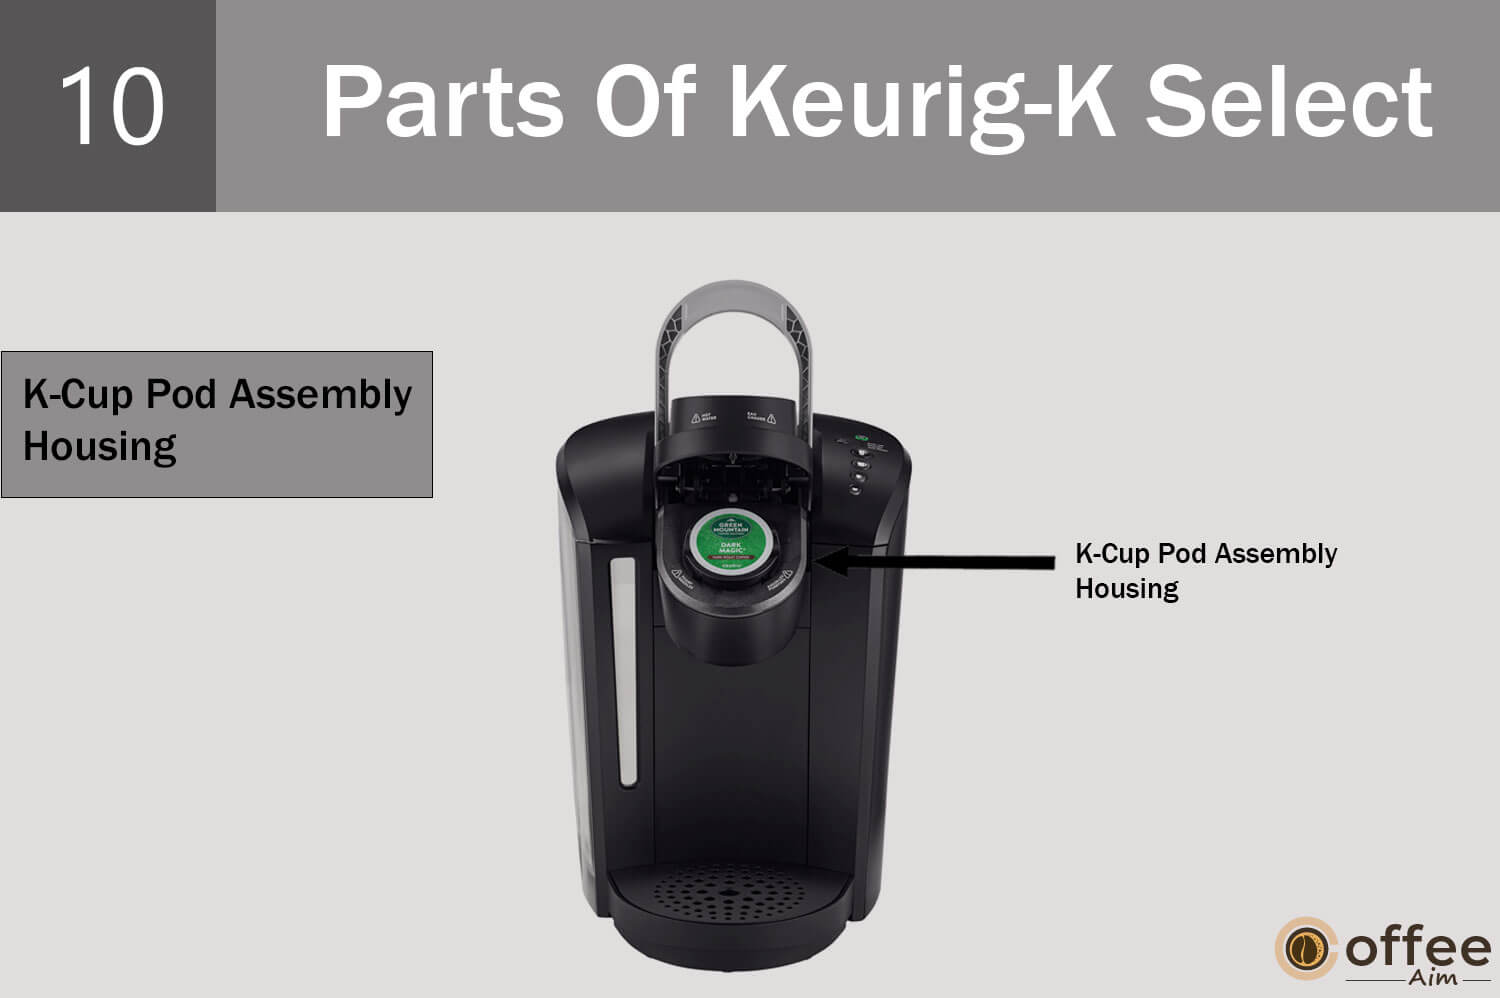
The pod holder and the funnel are collectively called the K-Cup pod holder assembly. The space where these two parts are occupied is called K-Cup Pod assembly housing. It is present at the top front of the brewer under the lid.
11. Drip Tray Plate
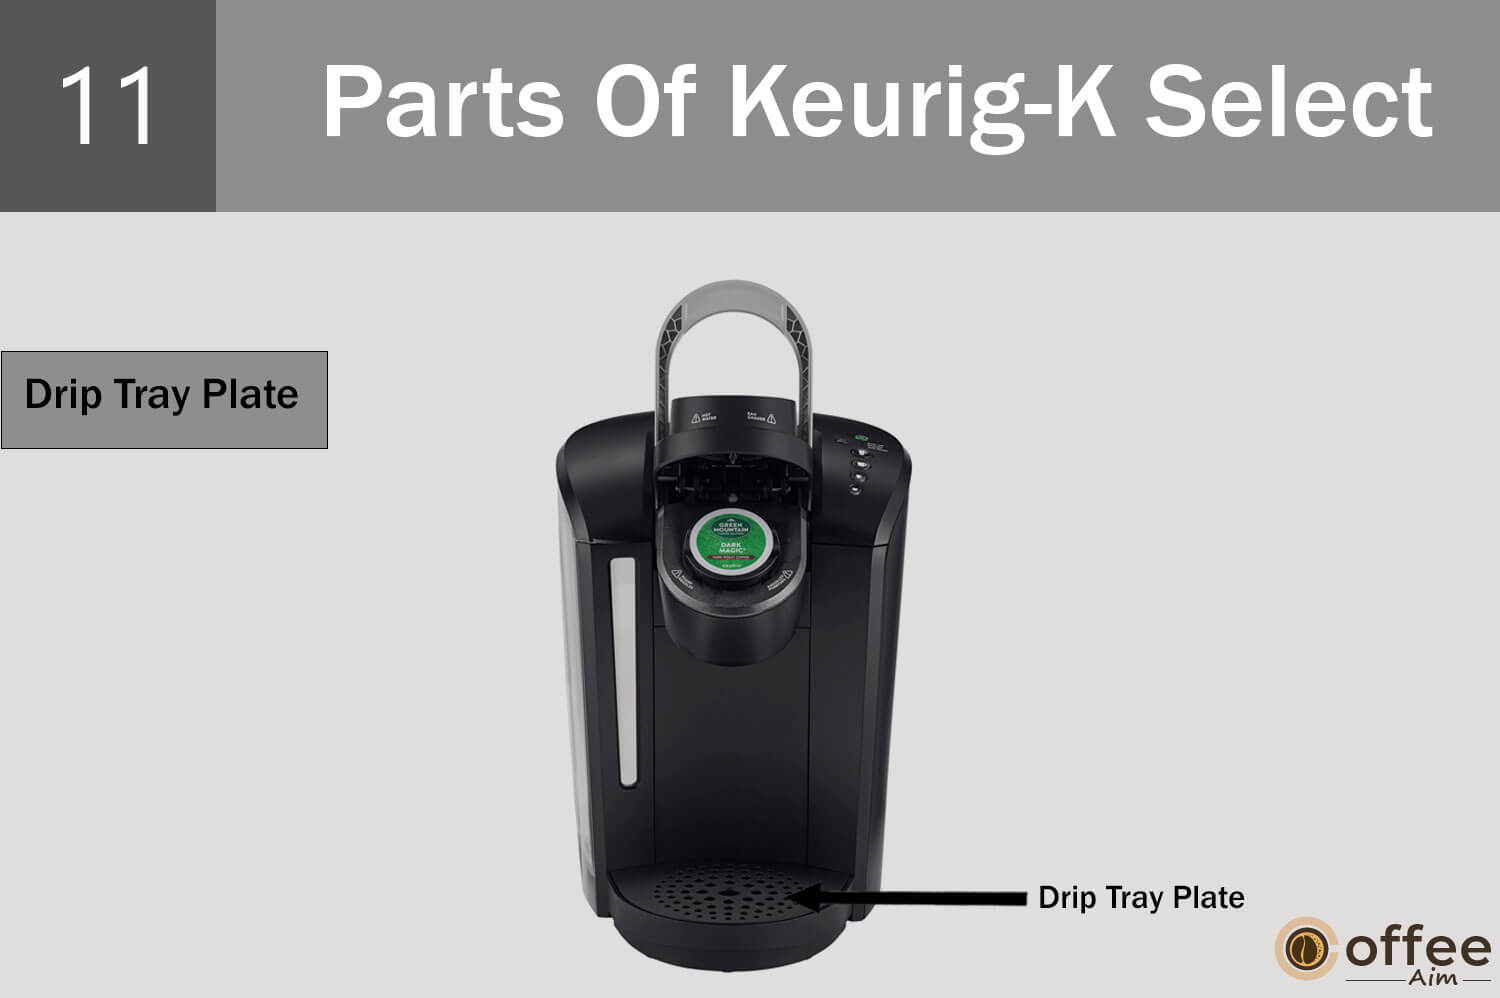
It is like a perforated plate located on the drip tray. It has two purposes; placing the cup on it and catching the coffee/water spills while dispensing. The drip tray plate is detachable.
12. Drip Tray
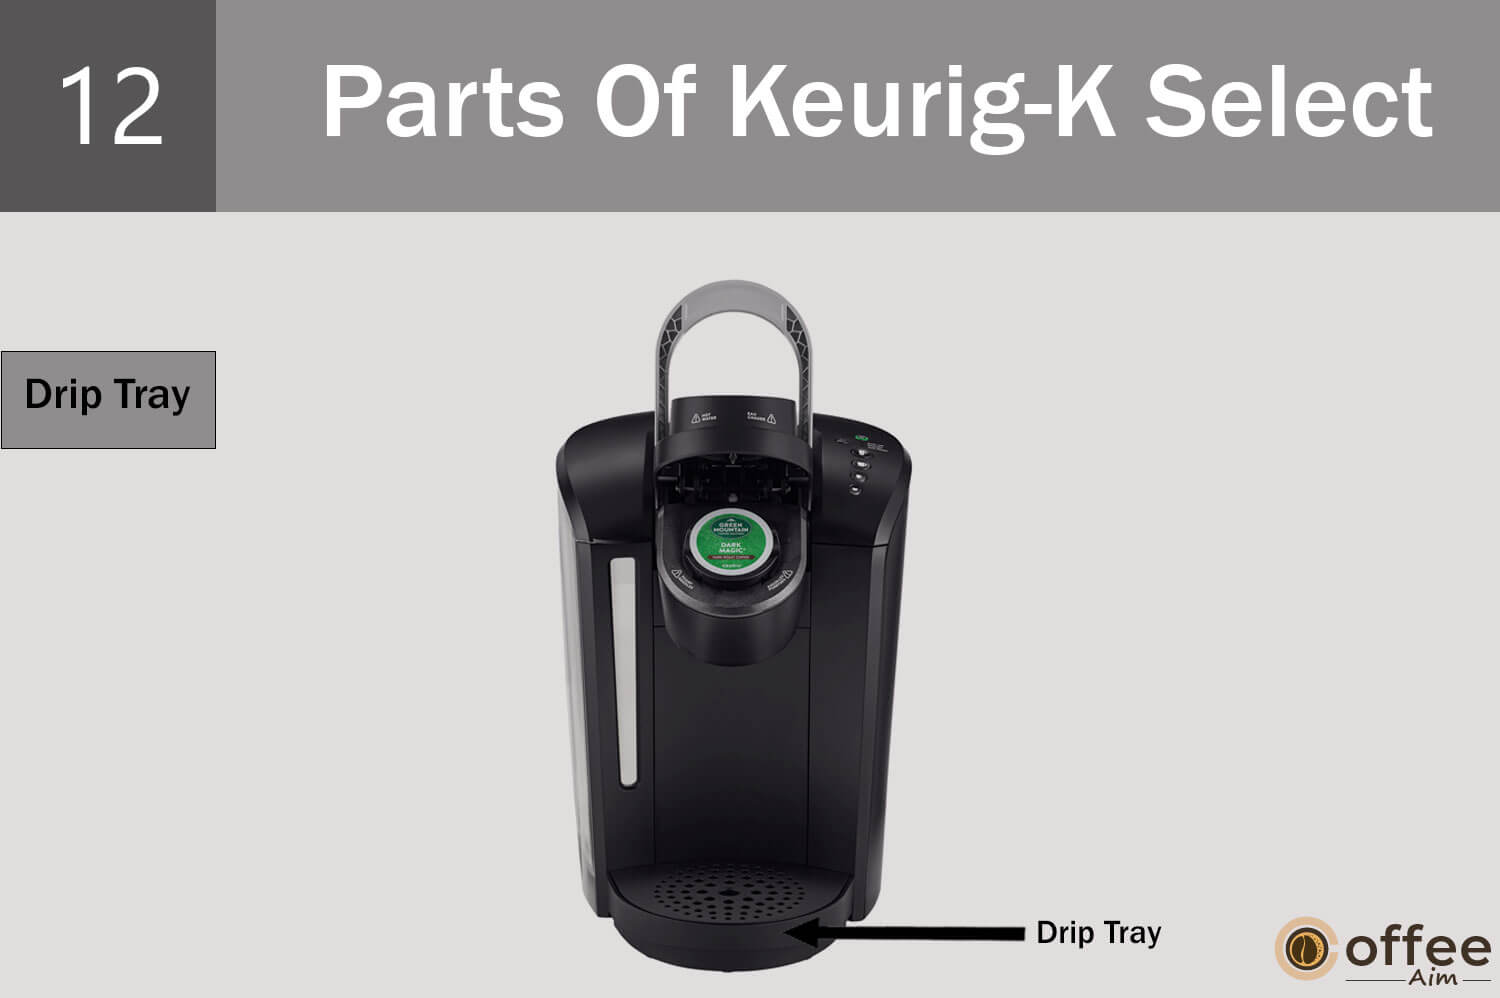
Below the drip tray plate, there presents a drip tray (detachable) that collects the caught water/coffee spills. It has the capacity to hold 8 oz of liquid; thus, you have to empty it periodically.
13. Drip Tray Base
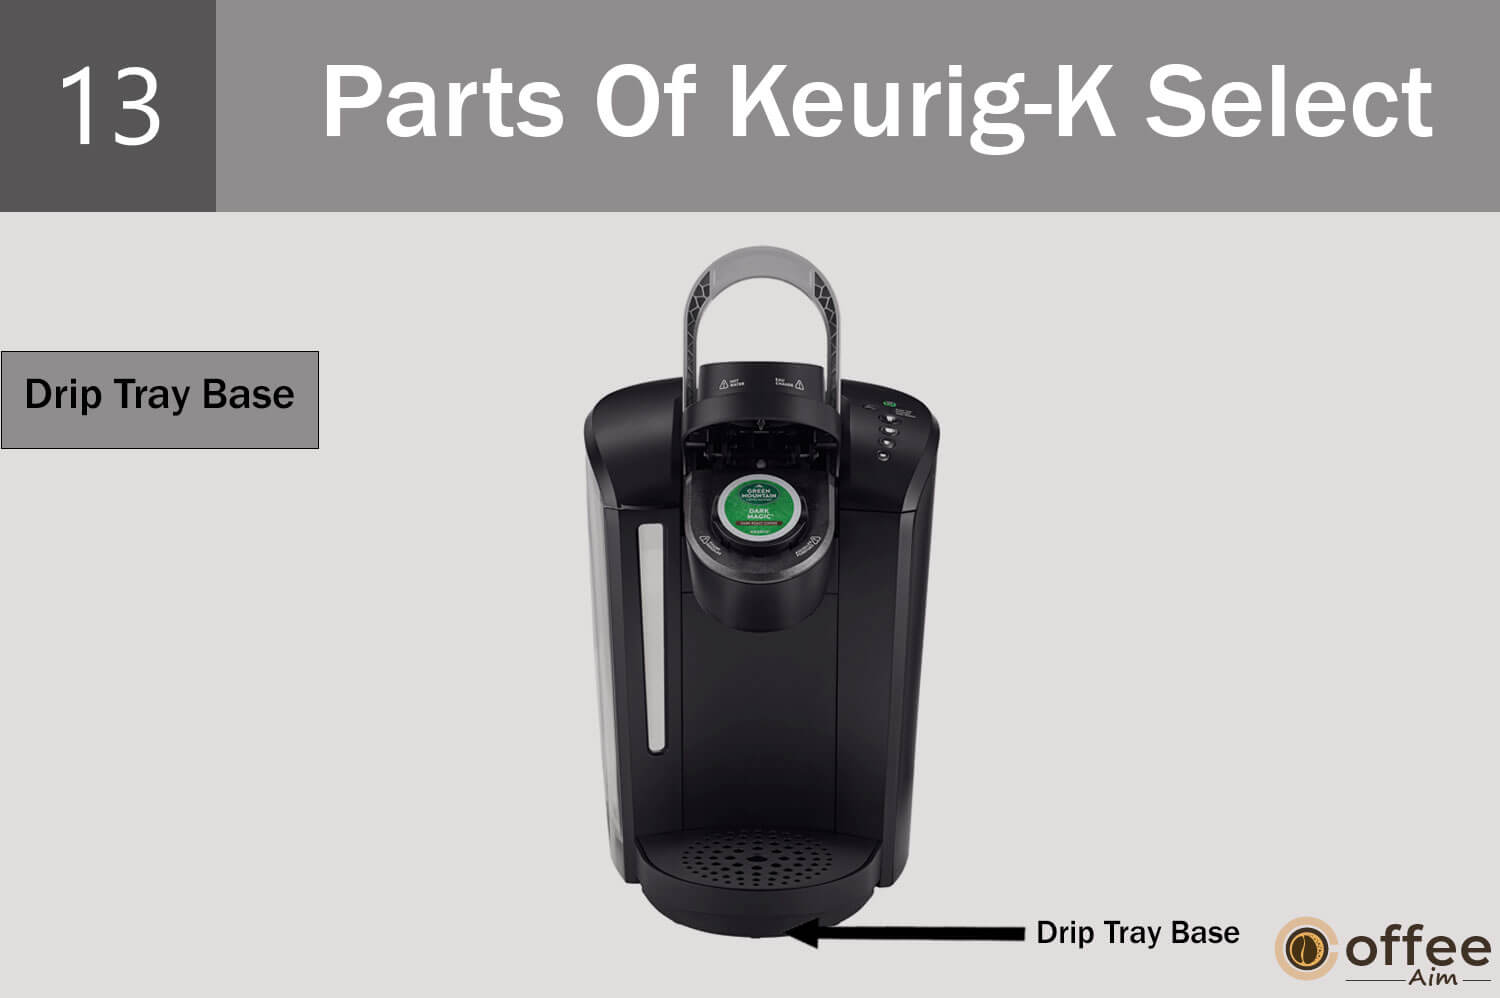
It is present at the bottom of your brewer. It supports the drip tray and is also used to accommodate tall mugs. Thus, if you want to dispense coffee in a travel mug, then remove the drip tray and place it on the drip tray base.
Prime Keurig-K Select Before Using For First Time Or After Storage Period
Ready to use your Keurig-K Select? But before making your first cup of coffee or after using it after a long inactive time, first prime the water pump. Don’t know how to do it? Don’t worry! Let’s dig deep into the process!
1. Plug & Place Your Keurig-K Select
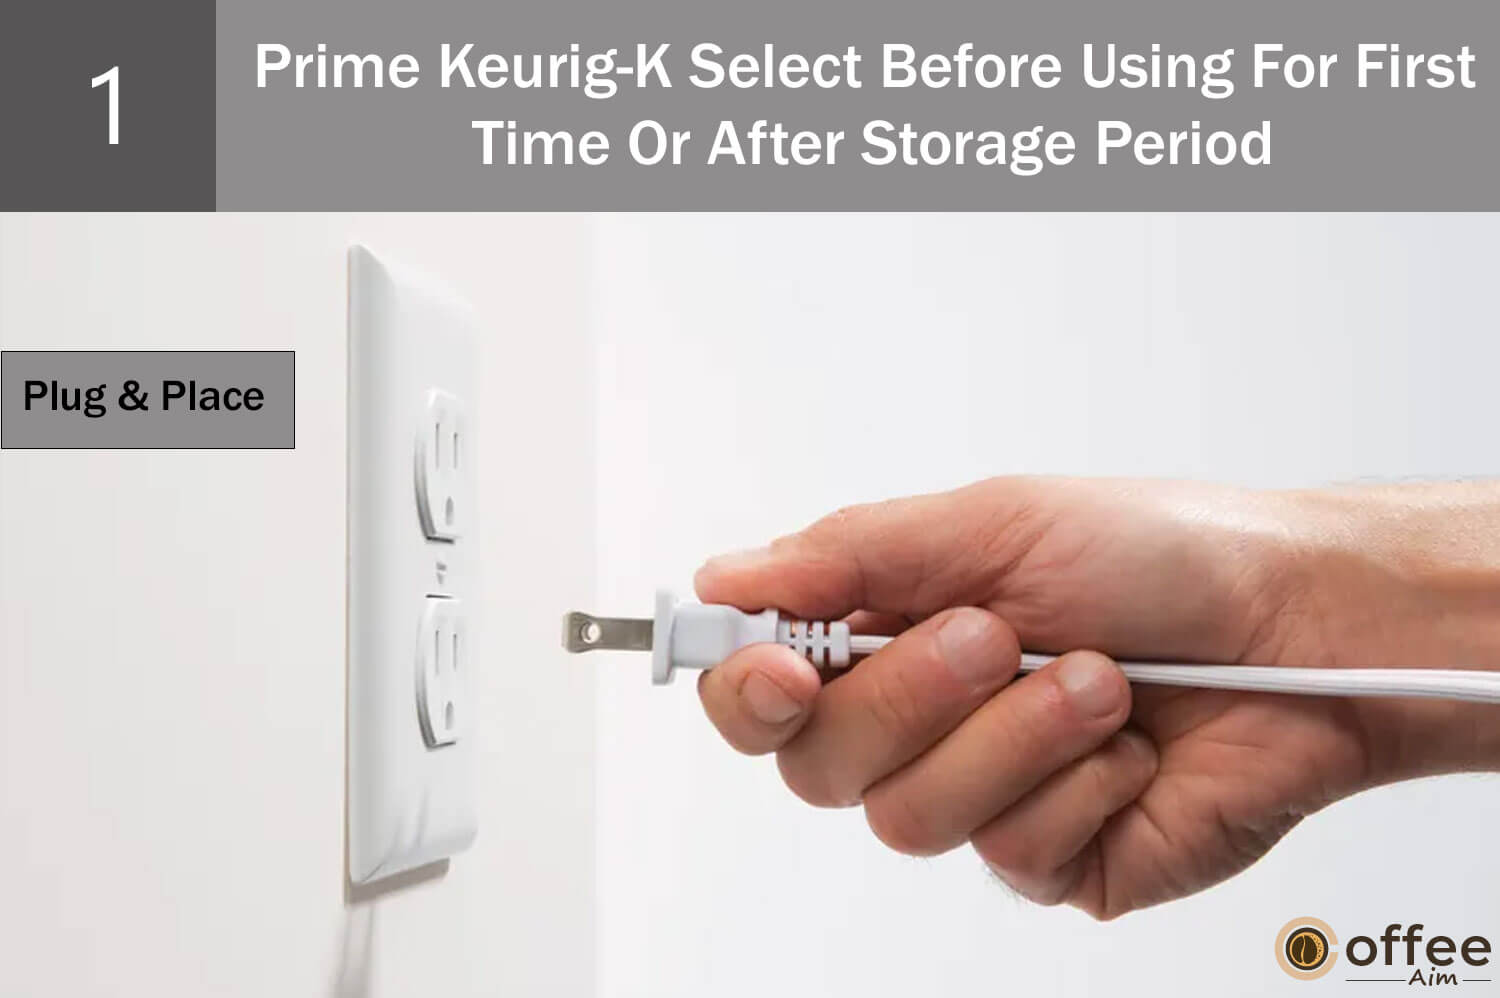
Remove the tap from the brewer if any are left. Plug your brewer into an independent grounded power outlet. Now, place a large mug (at least 10 oz) on the drip tray plate.
2. Rinse And Fill The Water Reservoir
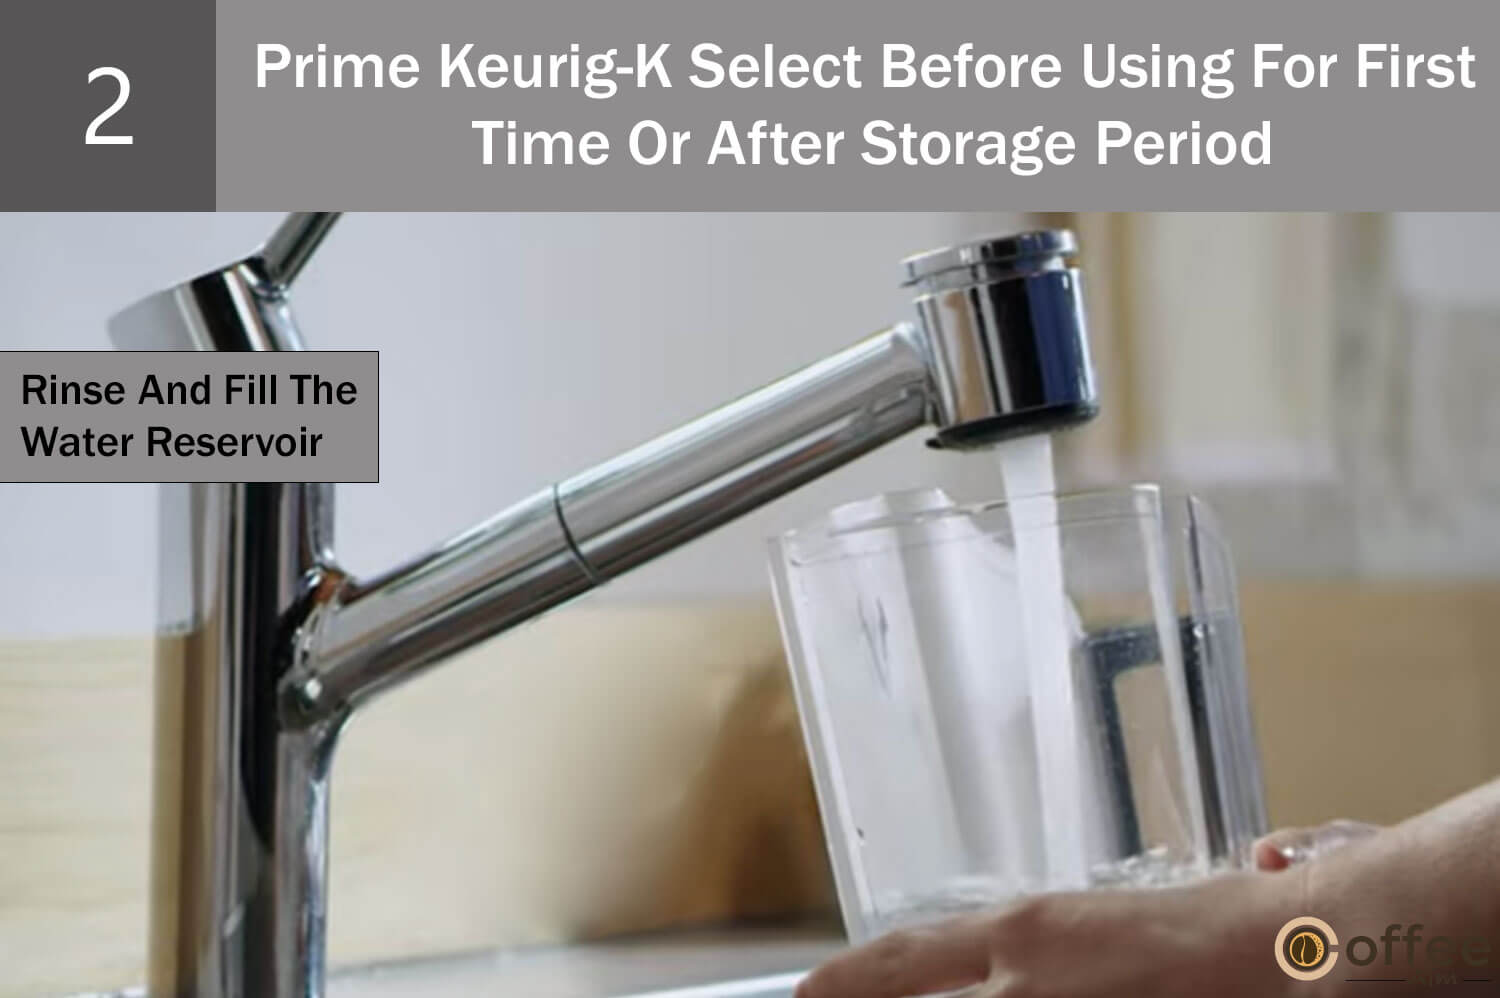
To detach the water reservoir, first, detach the water reservoir lid, then lift the water reservoir straight up and towards you. Insert the Keurig water filter now (if you have it). For the installation instructions, refer to the Water filter starter kit.
Wash the water reservoir and lid with fresh water. Now, fill the water reservoir with fresh potable water up to the Max Fill line. Place the water reservoir on the brewer’s base and make sure lock tab slots are securely engaged with it. Now, replace the lid on the water reservoir.
Note: Using distilled water in your Keurig-K Select is not recommended.
3. Press The Power Button
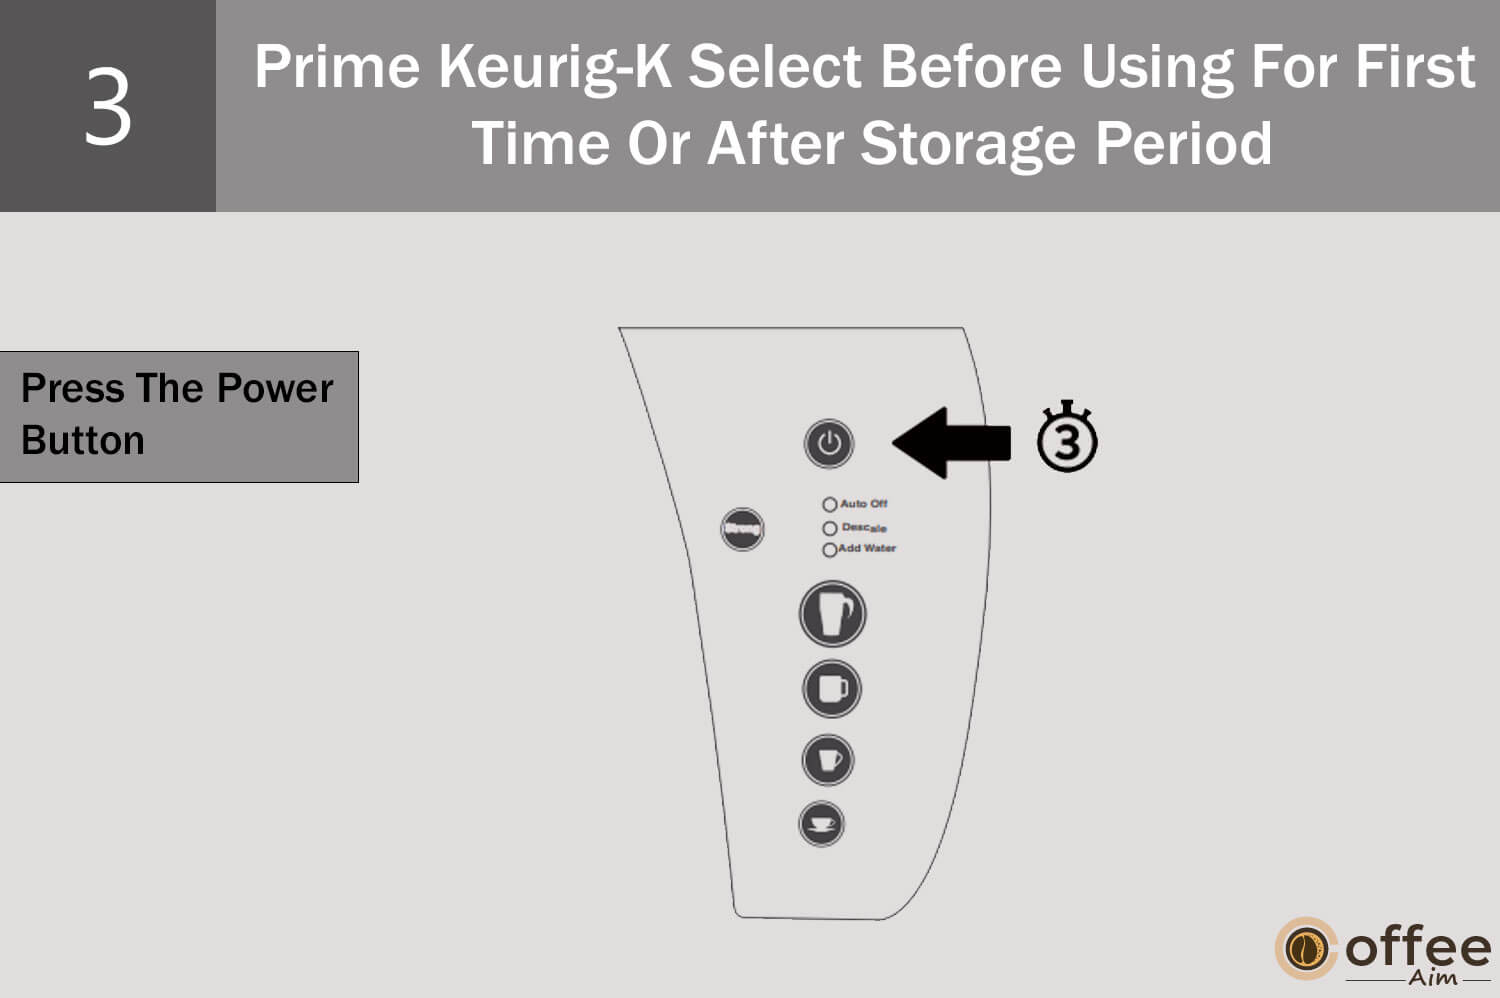
Now, it’s time to switch on your Keurig-K Select. To do this, push the power button, and the power button light (green) and the Auto-off light (green) will turn on also. Your brewer will start heating the water, and it will take approximately three minutes. Your brewer will be ready when the sound of heating the water stops.
4. Lift & Lower The Handle
It’s time to cleanse your coffee maker (with only water). So, raise and lower the handle; in response, four brew buttons and Strong button LEDs will start blinking.
Note: Don’t use K-Cup pods while cleansing.
To start the cleansing brew, push the “Small cup button”. Once the hot water is dispensed into the mug, dump it into the sink.
Priming is done, and now you can brew a delicious cup of coffee for you.
How To Brew Coffee With Keurig-K Select?
You have completed a long journey, and now it’s time to get benefits. What kind of benefit; a delicious hot cup of coffee! Let’s do it and relax your nerves!
1. Place Mug On Drip Tray
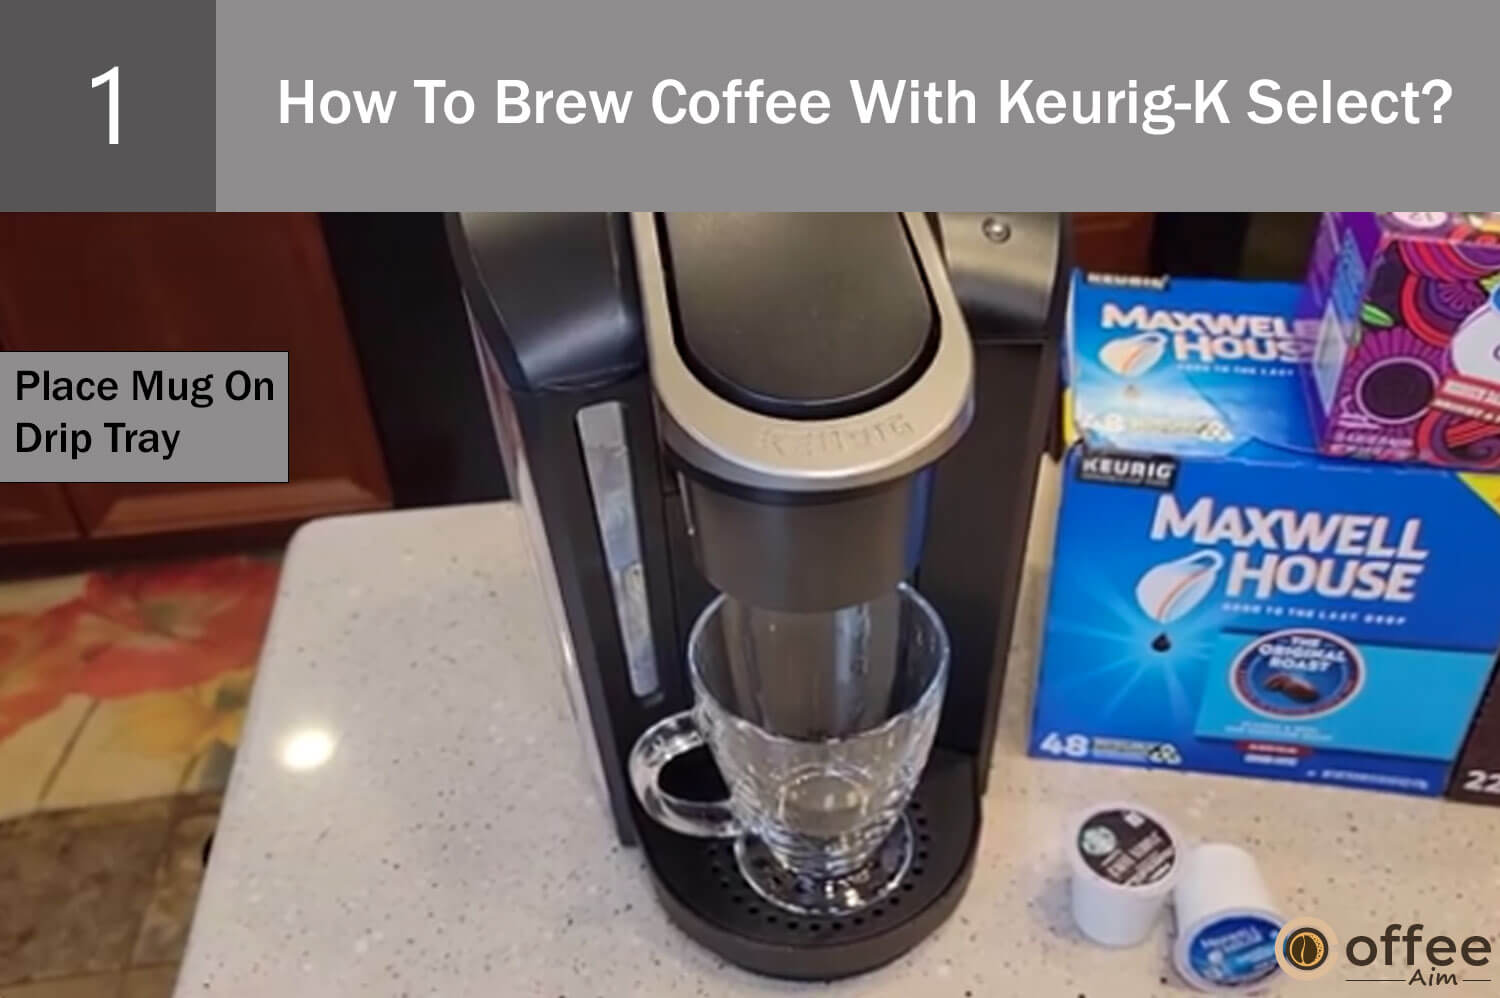
Pick your favorite mug and place it on the drip tray plate. However, if you want to dispense coffee in a travel mug, then remove the drip tray plate and place your mug on the drip tray base.
Note: Keurig-K Select will take approximately 60 seconds between two brew cycles to heat water.
2. Raise And Place
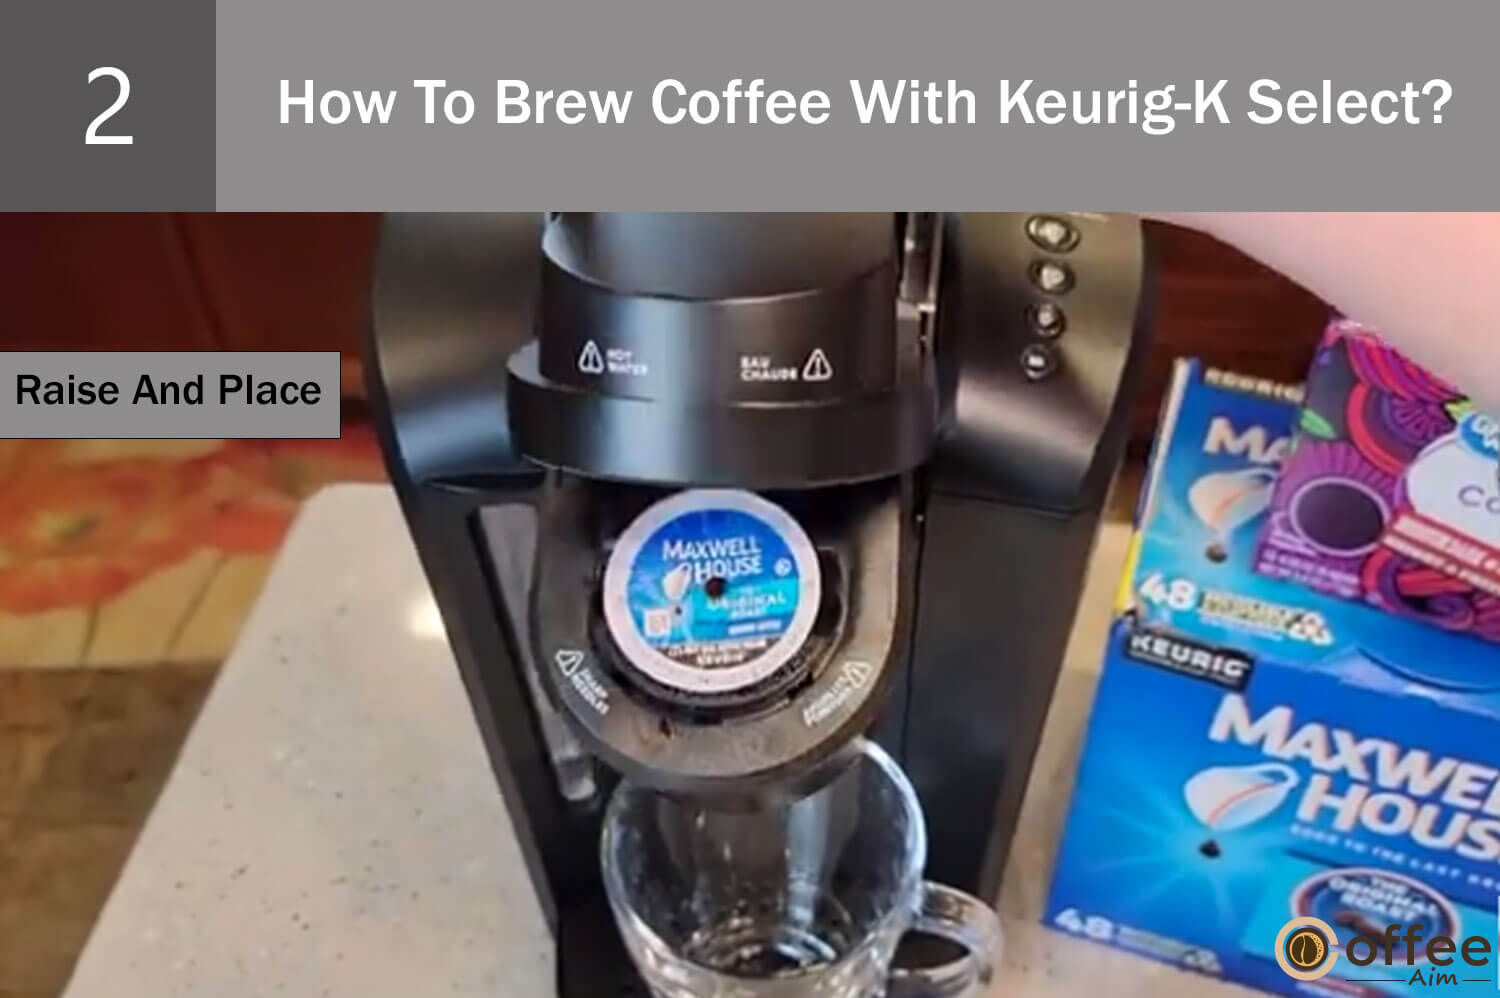
Now, it’s time to insert your favorite K-Cup pod in the pod holder. So, raise the lever to open the lid and place your K-Cup in the pod holder. Now, lower the lever to close the lid completely.
Note: You should not remove the foil lid present on the K-Cup pod.
3. Brew And Have Fun!

Select the brew size you want, but if you want a strong coffee, then push the “Strong button” first. Once you select the brew size, the selected brew size and Strong button (if selected) will light up and remain illuminated during brewing (it will take 1 minute).
Note: After 1 minute of idleness, your coffee maker will become inactive. To reactivate your brewer, lift and lower the lever completely.
Note: Do not open the lid while brewing, as the K-Cup pod holder contains extremely hot water.
How To Care For Your Keurig-K Select?
To maintain the performance of your Keurig-K Select, you should clean it periodically. Cleaning all the parts of your coffee maker ensures the optimal performance and taste of coffee for a long time. So, let’s get started!
1. Cleaning Of Brewer Exterior
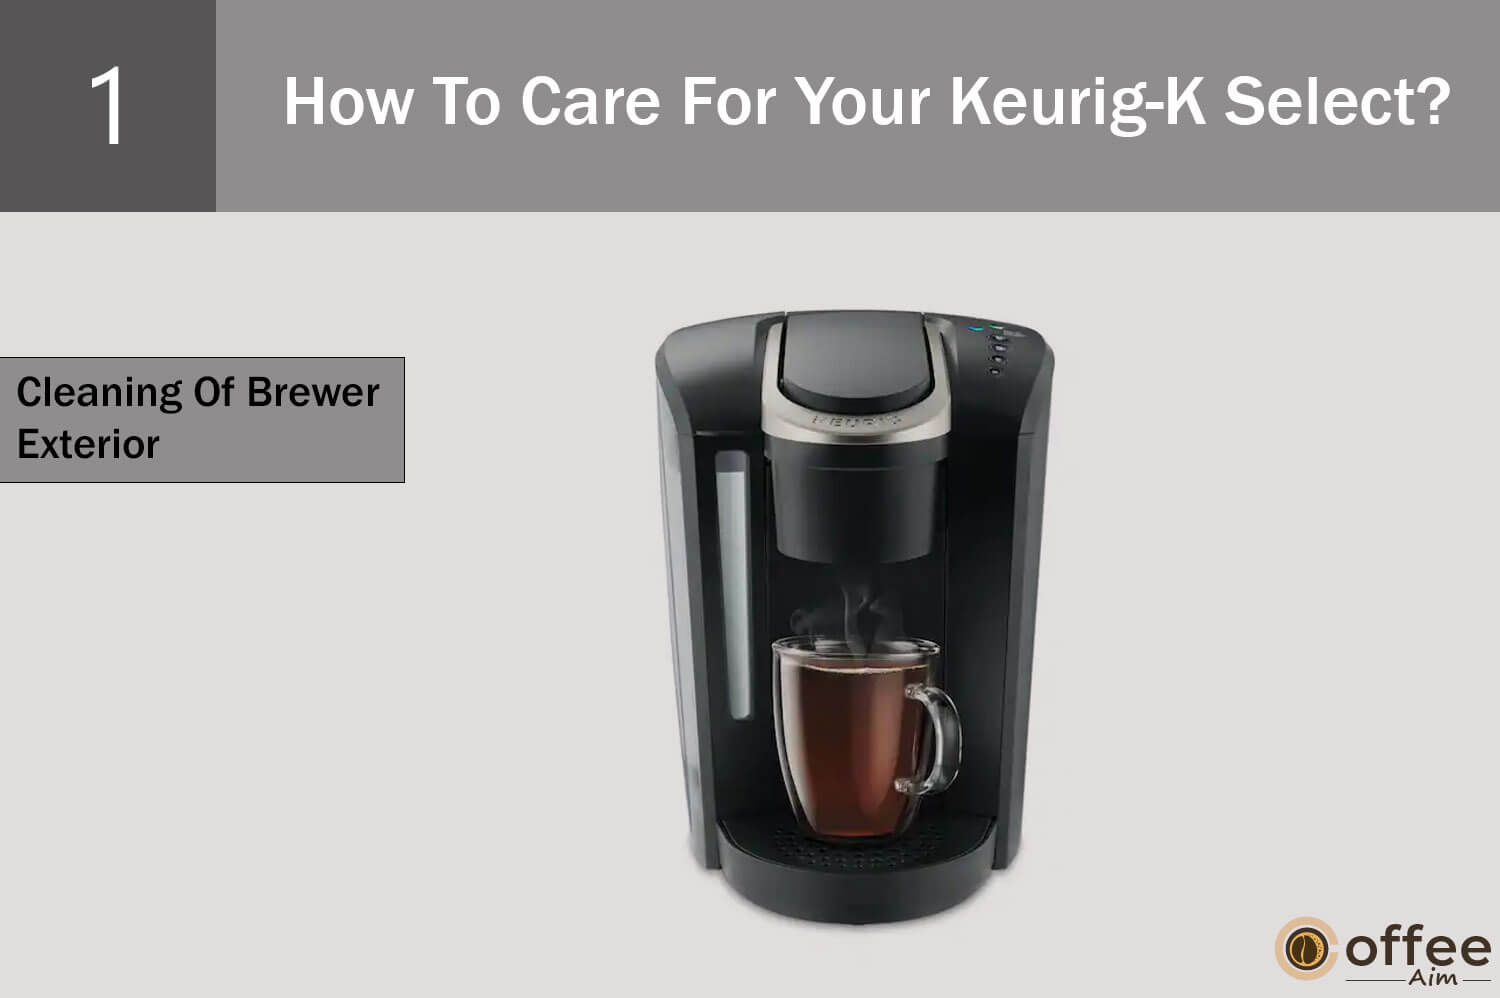
Regularly cleaning the outside will keep your Keurig brewer looking its best. Simply use a non-abrasive, lint-free, moist, soapy cloth to clean.
Never submerge the brewer in liquids, including water.
2. Cleaning Of Water Reservoir And Water Reservoir Lid
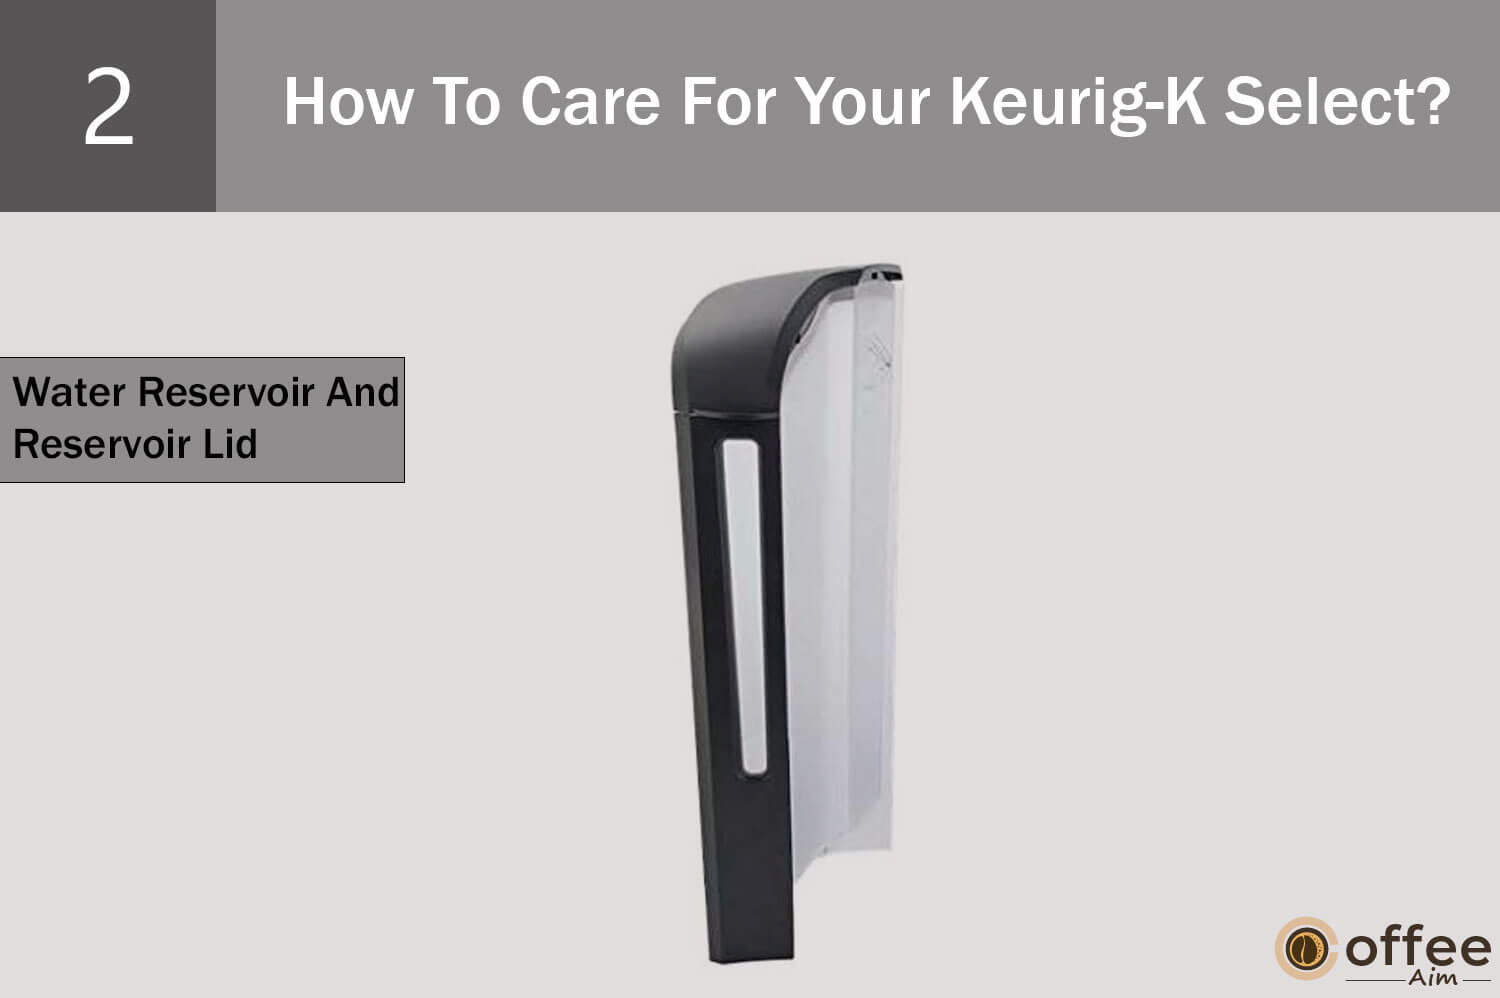
Both the water reservoir cover and the reservoir itself need to be cleaned on occasion. Use the top rack of the dishwasher to clean or wash by hand. Use a non-abrasive, wet, soapy towel to wash your hands. After cleaning, carefully rinse the reservoir. This will make sure that no cleaning agents are left behind, which might contaminate the water supply.
Fill the reservoir with fresh water after rinsing, then deliver it back to the brewer. Avoid using a cloth to dry the interior of the water reservoir since lint may be left behind. Repeat the previous steps if necessary.
Note: Remove the water filter before cleaning.
3. Cleaning Of Drip Tray
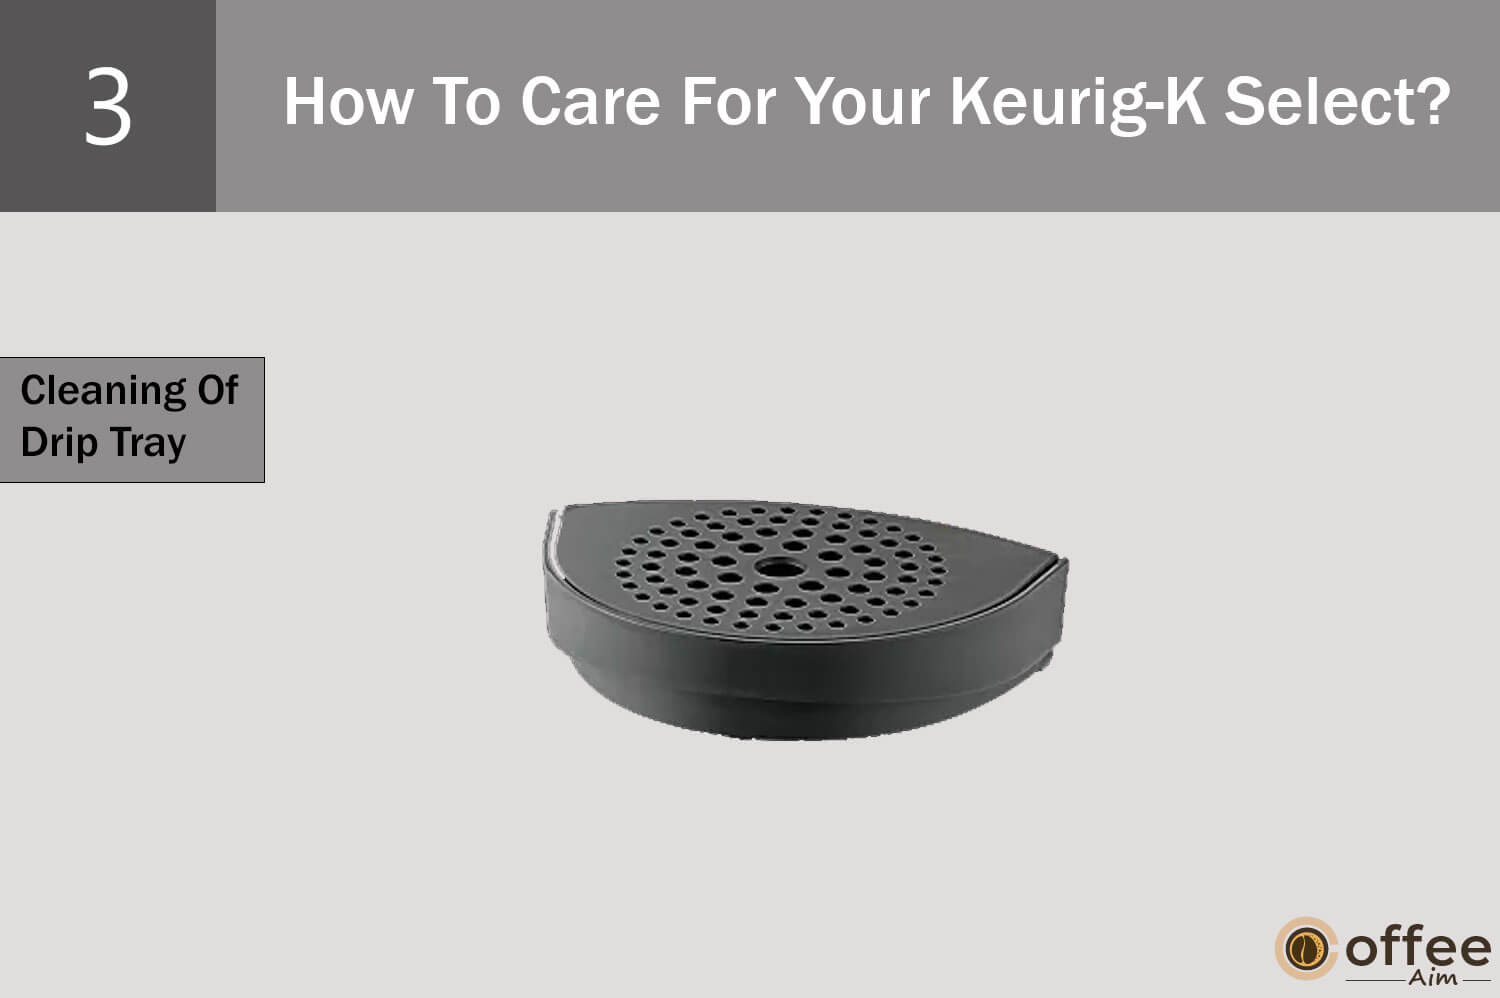
The drip tray needs to be periodically cleaned and emptied since it may store up to 8 ounces of liquid. To remove it, slide it away from you while keeping it level to prevent spills. You may either rinse and clean with a moist, soapy, lint-free, non-abrasive cloth or clean in the dishwasher (top rack only).
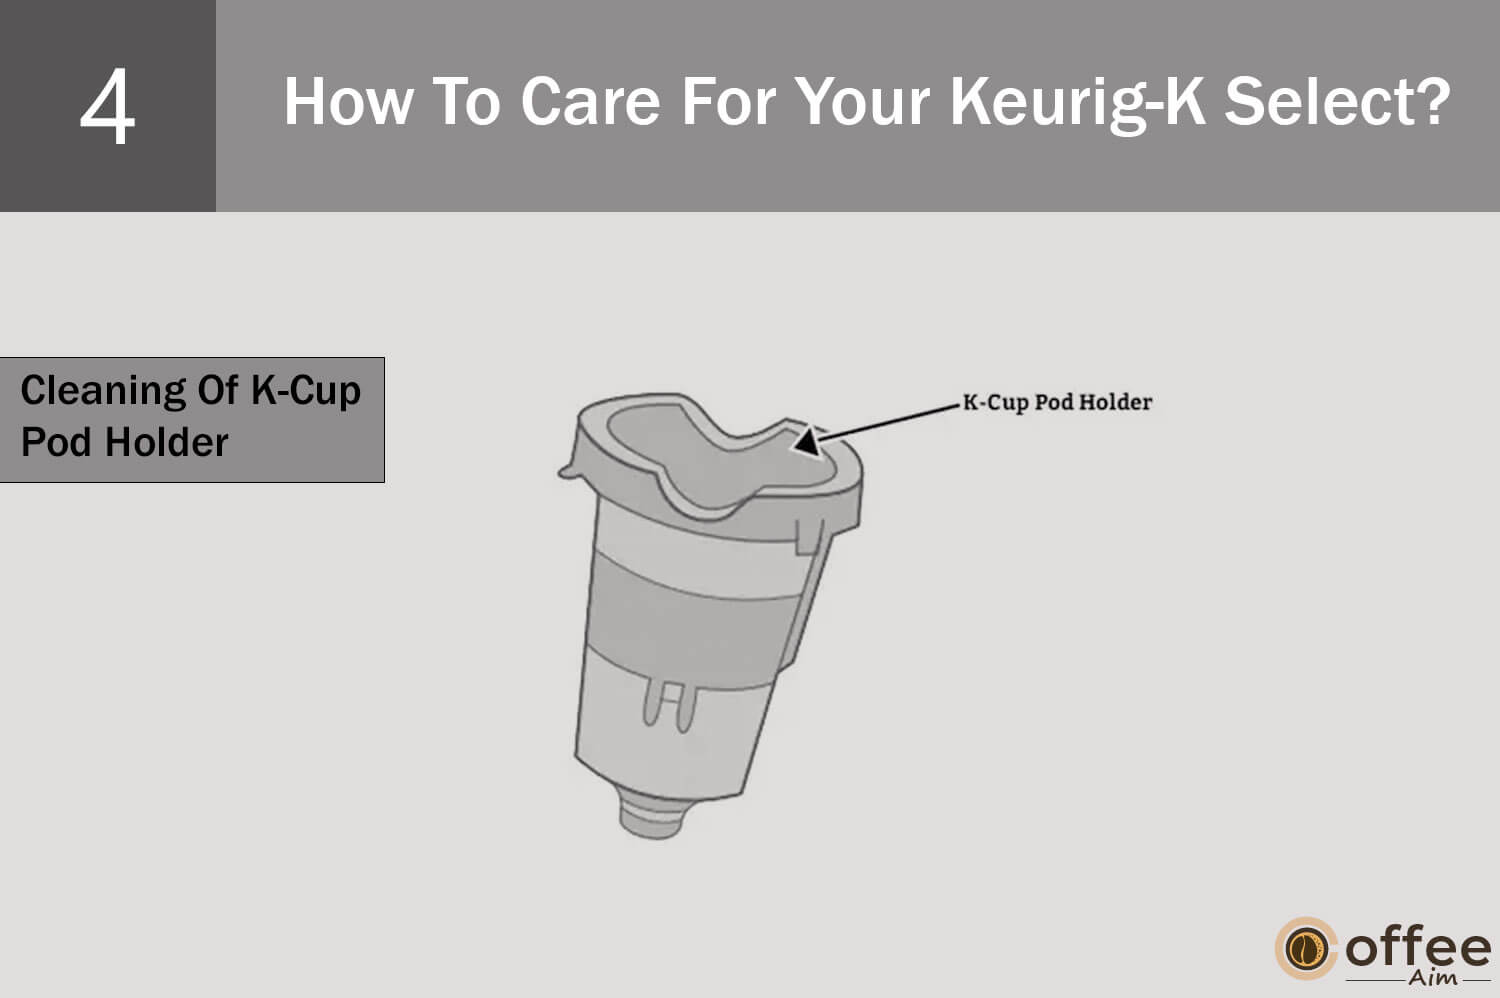
4. Cleaning Of K-Cup Pod Holder
Lift the handle, grip the top of the K-Cup® pod holder with one hand, and press up on the bottom of the K-Cup® pod holder from beneath with the other hand until it releases from the brewer. After cleaning, use the two front ribs as a guide to line up the K-Cup® pod holder with the opening, and then snap it into place from the top.
Note: Both the top of the K-Cup® pod holder and the bottom of the K-Cup® pod holder include sharp needles that puncture the K-Cup® pod. Do not insert your fingers into the K-Cup® pod holder to reduce the risk of harm.
5. Cleaning Of Funnel
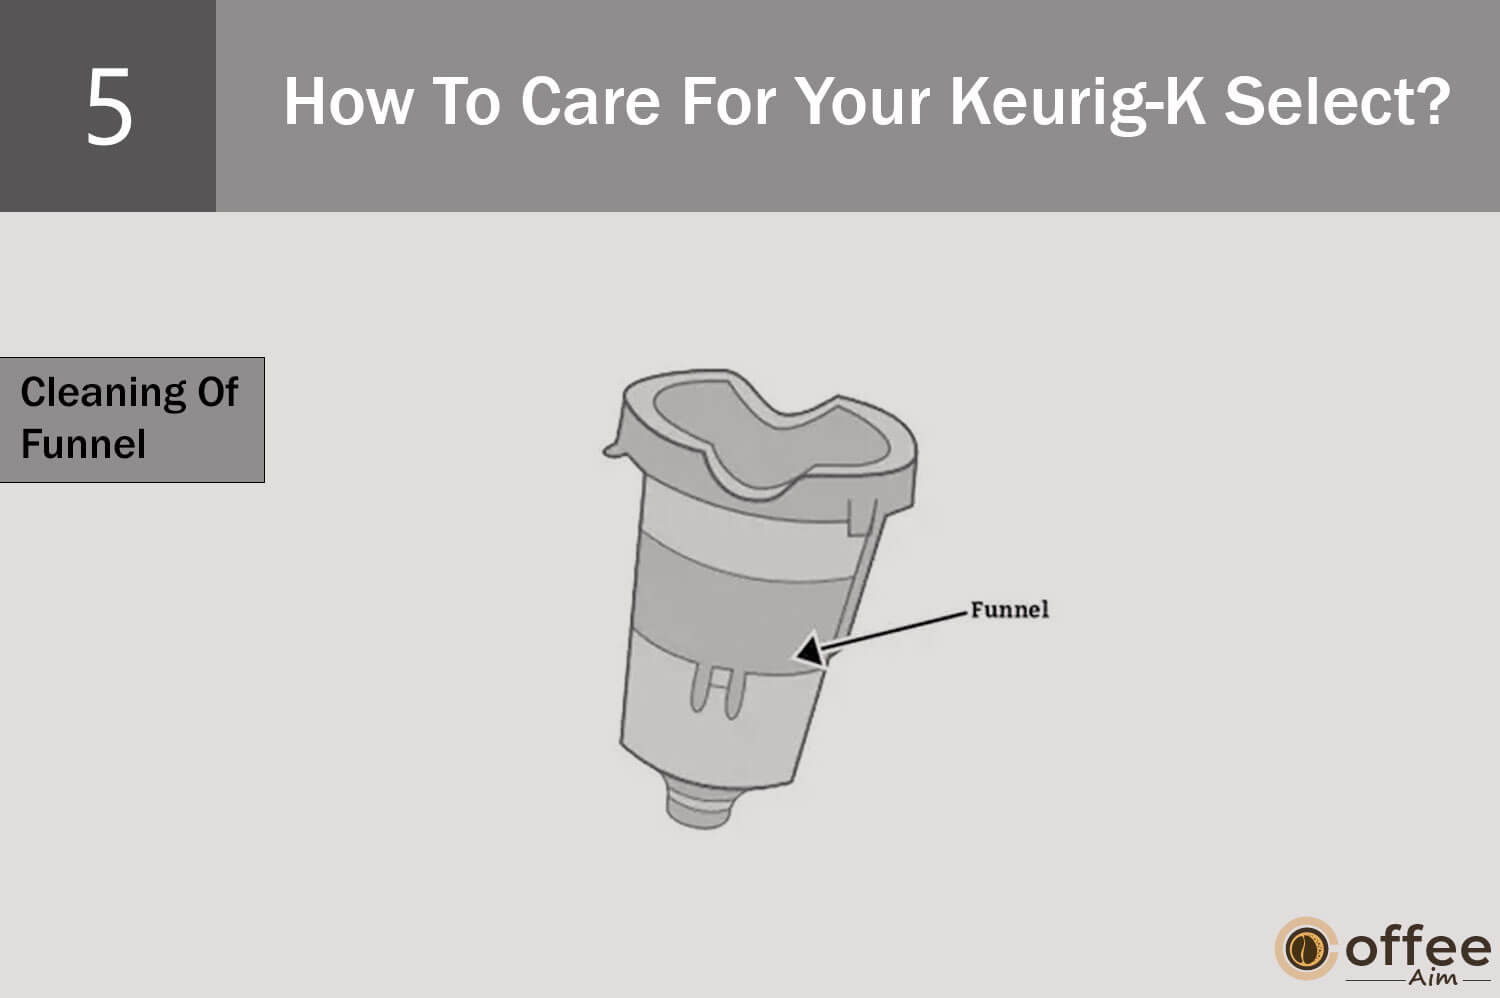
Pulling on the funnel until it pops off the K-Cup® pod holder will allow you to remove it. Simply clip it back into the K-Cup® pod holder to replace it.
6. Cleaning Of Exit Needle
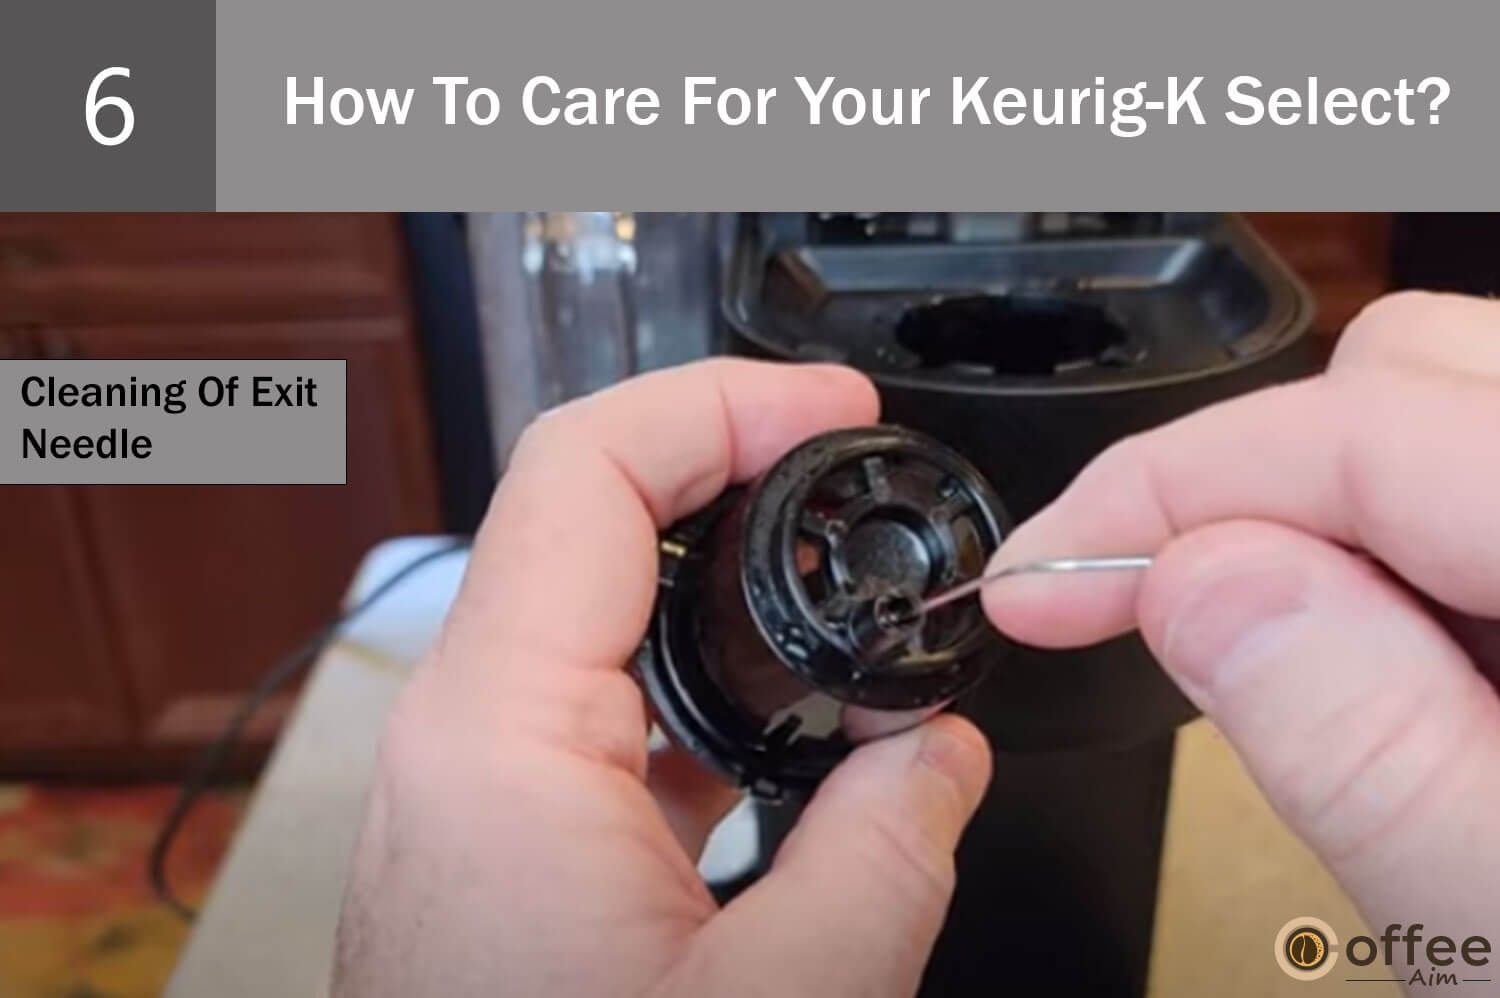
Pull out the pod holder assembly and separate the funnel. Find the exit needle underneath the K-Cup pod holder. Place a straightened piece of a paper pin into the exit needle to loosen the clog and push it out.
7. Clean Of Entrance Needle
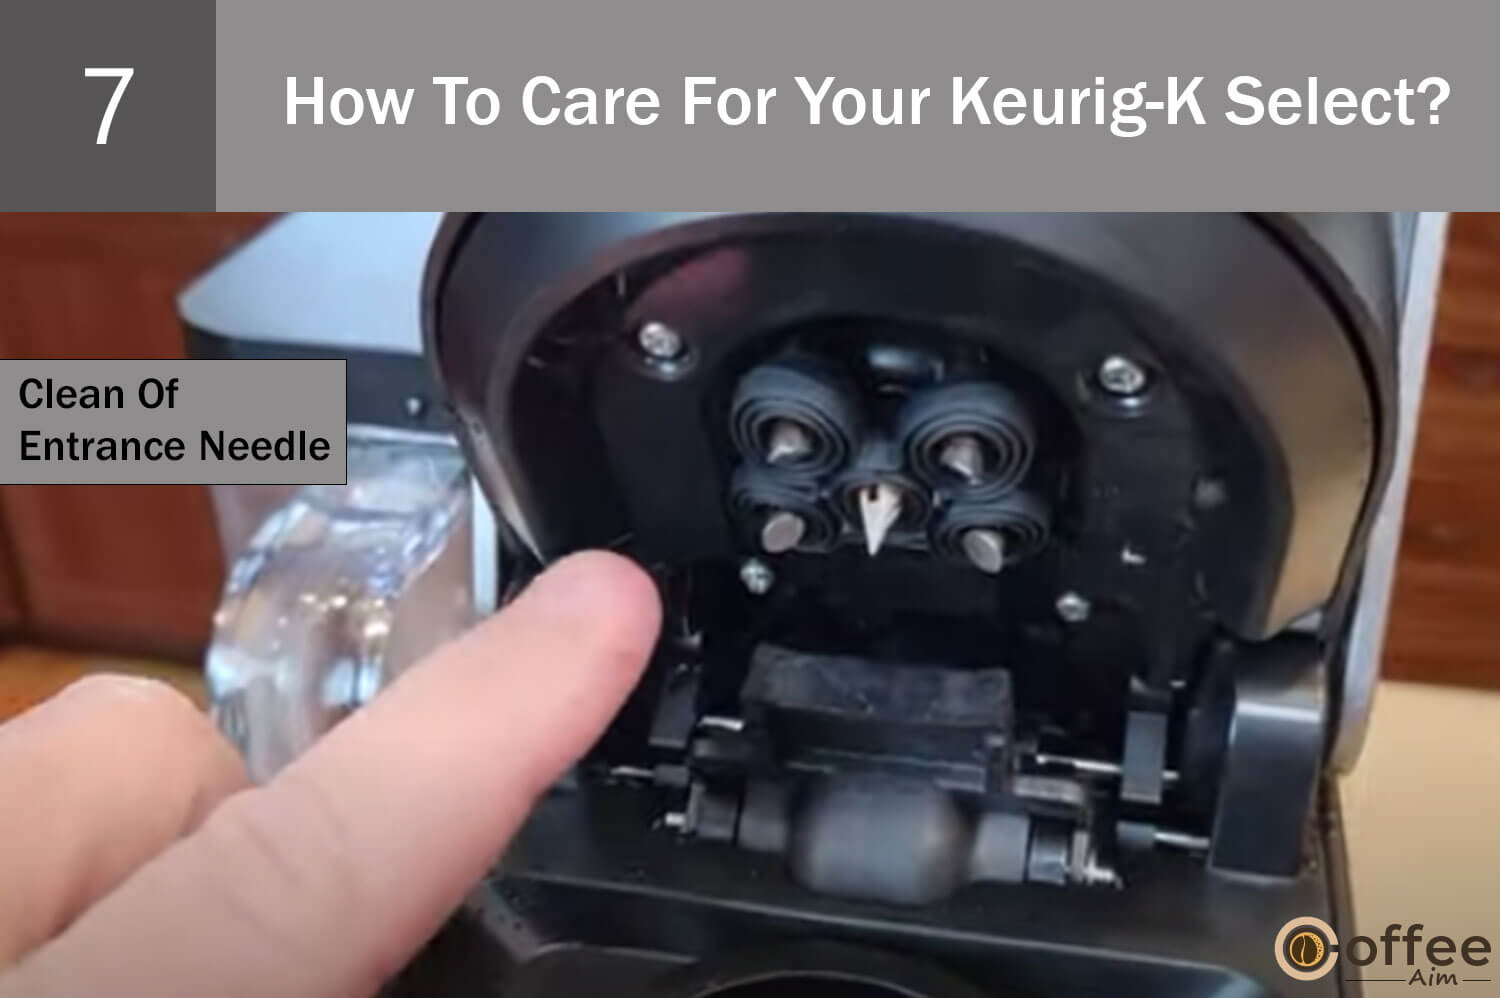
The entrance needle is located on the bottom of the lid if you lift the brewer handle. Holding the brewer handle in the upright position, gently slide a straightened paper clip into each of the needle’s two holes with your other hand and gently move it around to remove any coffee grounds. Completely lower the handle and do two water-only brew cycles.
Note: Don’t use the K-Cup pod during the cleansing cycle.
Descale Your Keurig-K Select
Pamper your coffee machine to get the most out of it. Scale or calcium deposits may accumulate in your brewer depending on the mineral composition of your water. Although the scale is non-toxic, it can impair the brewer’s performance if ignored.
The heating element and other internal components that come into contact with water are maintained with regular descaling of your brewer every 3 to 6 months. Calcium deposits could form more quickly, necessitating more frequent descaling. Let’s do descaling!
Descaling Requirements
To perform descaling, you required the following things;
- Large ceramic mug
Note: Avoid using paper cups.
- Keurig descaling solution
- Freshwater
- Access to a nearby sink
Descaling Preparations:
- Remove the K-Cup pods (any other beverage pod) from the pod holder.
- Empty the water tank.
- Remove the Keurig water filter if you have installed it in your coffee machine.
Note: The descaling process will take 45 minutes.
Let’s get started!
Step 1. Descaling Solution Rinse:
- First of all, switch off your coffee maker by pressing the “Power button”.
- Now, pour the entire bottle of “Keurig Descaling solution” into the empty water reservoir.
- Fill the empty descaling solution bottle with water and pour this water into the water reservoir.
- Now, turn on your coffee maker by pressing the “Power button”.
- Put a large mug on the drip tray.
- To start the descaling process, lift and lower the handle and then press the “Largest brew size button”.
Note: Don’t insert a K-Cup pod during descaling.
Step 2. Repeat The Descaling Solution Rinse
Repeat the process of rinsing continuously until the “Add water light” is illuminated. Do not use a K-cup pod. Once the light is turned on, stop the rinsing and let the brewer stand for 30 minutes (while it is on). After 30 minutes, discard any residual descaling solution from the water reservoir and rinse it thoroughly with fresh water.
Step 3. Fresh Water Rinse
- Pour fresh water into the water reservoir (not fill beyond the MAX FILL line).
- Now, Put a large cup on the drip tray plate.
Note: Do not use a K-cup pod while water rinsing brew.
- Run a rinsing brew by pressing the “largest brew size”.
- Once hot liquid is dispensed in the mug, dump the liquid into the sink.
- Repeat this process about 10 to 12 times using the largest brew size.
Note: You may need to refill the water reservoir once during these water rinsing brew cycles.
Nothing Coming Out After Descaling Process
Keurig Descaling Solution’s cleaning operation might cause a “foam” to be discharged from the brewer. This is expected since the scale inside the solution is reacting. After the descaler is introduced, a brewer that has been highly scaled could not fill correctly. If this happens, you could observe little to no output discharged and hear air blowing out thereafter. If this happens:
- Switch off your coffee maker and unplug it from the power outlet.
- Discard the descaling solution (if any) from the water reservoir, rinse it thoroughly, and refill it with fresh water.
- Now, plug it back in and turn it on, and run the “Fresh water rinse (Step 3)” cycle.
- While the solution is being rinsed out and the scale is being eliminated, the brewer should start to operate properly.
- If the issue still exists, let the brewer sit without power for at least 30 minutes before beginning the rinse.
Keurig-K Select Not Working_Troubleshooting Common Problems
Even the best-manufactured machines can encounter problems. However, fear not, as troubleshooting common problems and finding their solutions can help you revive the coffee-making process again. Let’s get started and savor each sip with triumph and delight!
Grounds In Coffee Cup
If the coffee grounds are appearing in your coffee maker, then the Exit or Entrance needle may have been clogged. However, you can clear the clogs using a paper clip or a similar tool.
- Clean the Exit needle (seek instructions from the section “Cleaning of exit needle”).
- Now, clean the Entrance needle (seek instructions from the section “Cleaning of entrance needle”).
Keurig-K Select Will Not Brew
Make sure that the handle is pressed down properly and the brew buttons are blinking after placing the K-cup pod in the k-cup pod holder.
If the ‘Add water light’ is illuminated, then fill the water reservoir to the MAX FILL line, not beyond with fresh water. Make sure that the water reservoir is properly settled on its base.
Note: if the ‘Add water light’ is continuously flashing after refilling the reservoir, then contact customer service.
Brewing A Partial Mug
There can be several reasons behind your Keurig brewing a partial cup of coffee;
- Maybe the “Exit needle” is clogged. To know the cleaning instructions see the section “Cleaning of exit needle”.
- You may have mistakenly detached the water reservoir during brewing. Thus, replace the water reservoir, fill it with fresh water, and run a water rinsing brew cycle.
- Your machine is demanding descaling.
- However, if you have performed the descaling procedure twice and your coffee maker is still brewing a partial cup, then contact Customer Service.
Keurig-K Select Does Not Have Power Or Shut Off
- Verify that the power switch is switched on.
- Connect the brewer to a grounded outlet. Your brewer might not work correctly if the electrical circuit is overburdened with other appliances. The brewer has to be run on a separate circuit from other appliances.
- For energy conservation, Auto Off instructs the brewer to shut off 2 hours after the previous brew. For information on how to enable and disable this option, see Brewer Features.
- Contact customer service if your Keurig is still without electricity.
Helpful Hints
There is a huge range in water quality. We advise using bottled or filtered water if you detect an unfavorable flavor in your beverage (such as chlorine or mineral flavors). Use non-distilled water instead. To assist in purifying water and enhancing beverage flavor, you may also add a Keurig Water Filter.
Service
Beyond these suggested cleaning and upkeep methods, this brewer cannot be serviced by the user. Please refer to this guide’s Warranty section for information on service.
Storage Instructions Of Keurig-K Select
Before storing or moving, empty the water reservoir, and make sure your brewer is in a secure location free from frost. In order to prevent water leaks from the inner tank, please store your brewer upright. You face the danger of the water within the brewer freezing, which might lead to damage if you keep the brewer in a cold climate. In order to get it ready for use after storage, we advise running three rinse brews without a K-Cup® pod in the water reservoir.
Turn off your brewer, unhook it from the wall, and empty the water reservoir before moving it to a new place. Please be careful to bring your brewer to room temperature for at least two hours before using it if it has been exposed to temperatures below freezing.
Have Questions!!
In case of any questions or problems, visit support.Keurig.com or give a call at 1-866-901-BREW (2739).
1-Year Limited Warranty
For a year from the date of purchase, Keurig Green Mountain, Inc. (Keurig) promises that your brewer will be free of manufacturing flaws under regular household usage. It is advised that you register your brewer on Keurig.com/new so that our system will have your purchase information.
Upon receiving documentation of the purchase date, Keurig will, at its discretion, repair or replace a damaged maker without charging you anything. If a replacement brewer is required to fulfill the terms of this warranty, it may be brand-new or refurbished. A new limited one-year warranty will be applied to the replacement brewer if one is delivered.
Only brewers that operate within the United States and Canada are covered by this warranty. You may also have other legal rights that differ from state to state and, in the case of Canada, from province to province. This warranty offers you certain legal rights.
Only using accessories and pods from the Keurig K-Cup® brand will ensure the correct operation and longevity of your brewer. The use of non-Keurig pods and accessories may cause your brewer to malfunction or sustain damage that is not covered by this warranty. If the malfunction or damage is found to have been caused by such usage, you may also be charged a service fee.
Situations Not Covered By Warranty
This warranty does not cover consequential or incidental damages (property damage) and does not cover incidental costs and expenses resulting from any breach of this warranty, even if predictable.
The aforementioned limitation or exclusion may not apply to you depending on the state or province where the transaction was made because certain jurisdictions or provinces do not permit the exclusion or limits of incidental or consequential damages.
The use of non-Keurig accessories or pods, services rendered by parties other than Keurig or its authorized service providers, the use of non-Keurig parts, or outside factors like abuse, misuse, improper power supply, or acts of God is also not covered by this warranty.
Other Limitations
Keurig provides an exclusive warranty which is in lieu of any other written or oral warranty. Furthermore, Keurig denies all other warranties with respect to your K-Select™ brewer, including any implied warranty of merchantability or fitness for any particular purpose.
According to the state or province where you made the purchase, certain states or provinces may not permit the exclusion of such implied guarantees or restrictions on how long such implied warranty lasts. As a result, the aforementioned restriction might not be applicable to you.
Process Of Obtaining The Warranty
Keurig® brewers are high-end devices that, with careful maintenance, should last for many years with pleasing performance. To contact Keurig Customer Service, please dial the toll-free number 1.866.901.BREW (2739) if warranty servicing is required.
Please call Keurig Customer Service to get a Return Materials Authorization (RMA) number before returning your brewer for service. Brewers returned without an RMA number will be sent back to the sender unserviced.
Conclusion
Undoubtedly, Keurig-K Select is a remarkable brewing companion which will take your brewing experience to the next level. By following the steps mentioned in this user guide, you can unlock a word of exceptional and delightful coffee brewing. To get the most out of your Keurig, remember to clean and descale your brewer regularly. Cheers to a lifetime of delicious moments with your Keurig-K Select!
Want to know more about coffee? Make a visit to Coffee Aim and embark on a journey of brewing mastery, where every cup is a testament to your passion for the perfect coffee experience.
FAQs
How Do You Use A Keurig Step-By-Step?
- Pick a mug and your preferred coffee pod.
- Raise the handle, insert the pod, and then lower it.
- Choose the settings you want for your brew.
- Start brewing by pressing the BREW button and wait until it starts dispensing.
- Enjoy!
Does Keurig K-Select Use K-Cups?
While the K-Select Brewing System may brew any K-Cup Pod, we advise using only goods with the Keurig logo since these have been proven to work in the Keurig Brewer and satisfy the brand’s criteria for flavor, quality, and safety.