Quick Navigation
Are you ready to elevate your coffee game and enjoy quality espresso drinks from the comfort of your own home? Your search for How to use a Nespresso Latissima Touch has already indicated that you are among those who have jumped on the Nespresso Lattissima Touch bandwagon and bought yourself one but do not know how to use it
Whether you’re an experienced user who has lost the manual or a new owner who is encountering some confusion, I am here to help everyone who have stumbled upon my blog and are seeking information about their Nespresso Lattissima Touch.
I will do my best to provide answers and guidance to ensure a successful and enjoyable experience with your machine. Consider yourselves entrusted to me.
Here, in this article, you will find detailed explanations for your unanswered ambiguities. So, let’s start!
Precautionary Measure
Did you know the Consumer Product Safety Commission has reported that in 2020, there were an estimated 9,100 coffee maker-related injuries in the US? These stats should be enough to persuade you to take precautionary measures before using Coffee appliances. Therefore, you must learn all the preventive measures to pursue a safe journey with your Nespresso Lattissima Touch.
Specification Of Nespresso Lattissima Touch
You may know that understanding your new coffee machine’s specifications is crucial after every purchase. This will enable you to use it and take advantage of all its features properly. Familiarizing yourself with the machine’s capacity, brewing methods, and settings will allow you to personalize your coffee experience and make the most of your machine’s capabilities without any difficulties. Let us explore together.If these specifications are not suitable for your home, you may choose to return the coffee maker for a refund or exchange.
| Features | Details |
| Product Line/System | OriginalLine |
| US/CA Partners | Breville, DeLonghi |
| UK Partners | Krups, Magimix |
| Brew Sizes | 0.85 oz/ 25.1 mlristretto1.35 oz/ 39.95 ml espresso 3.70 oz/ 109.44 lungo 3.05 oz/ 90.23 ml cappuccino 6.40 oz/ 189.27 ml.latte |
| Water Reservoir | 44 oz/ 1.3 L |
| Milk Container | 12 oz/ 0.35 L |
| Pressure | 19 bars |
| Frother | Automatic frother included |
| Spent Capsules | 10 capsules |
| Wireless Connectivity | No |
| Wireless Connectivity | ABS plastic |
| Dimensions | Width6.8″W Depth12.6″D Height 10.2″H |
| Weight | 9.9 lbs |
| Watts | 1300W |
| Other Features | Auto-Off after 9 minutes, programmable water hardness |
Unboxing Of Nespresso Lattissima Touch
Ah, the excitement of unboxing your new coffee maker! I can feel your anticipation of unboxing your Nespresso Lattissima Touch and start exploring the delicious world of coffee blends and brewing strengths is obvious. Without further delay, let’s dive into the world of possibilities that your shiny new brewer has to offer.
Coffee machine
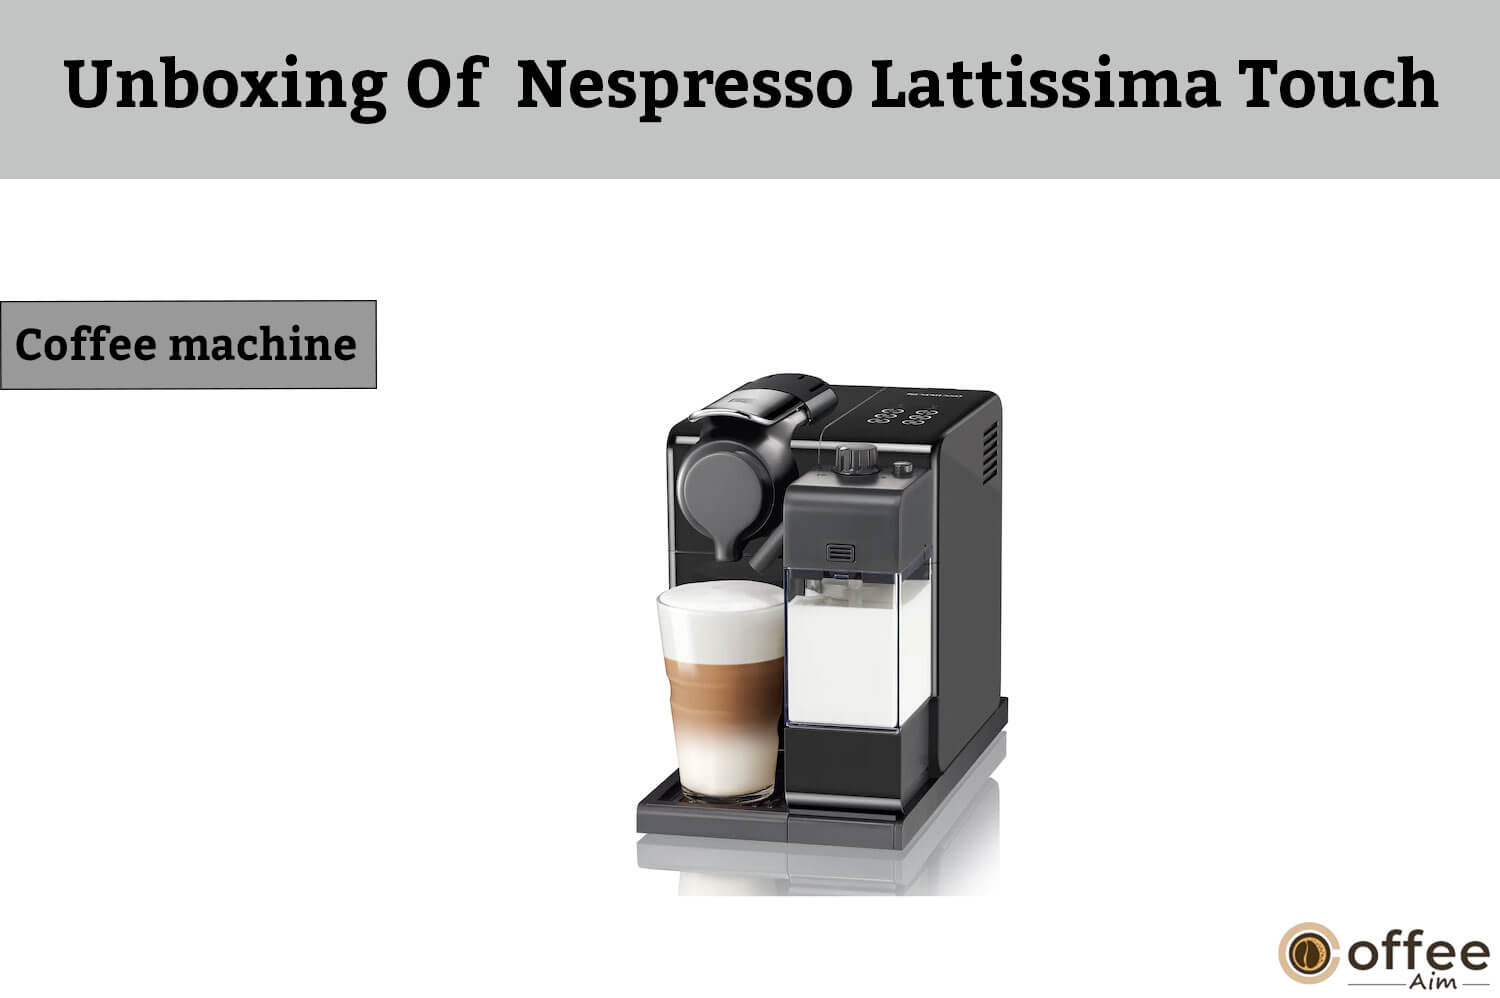
The Nespresso coffee machine is the central appliance that brews your coffee. It typically features a water tank, a capsule compartment, and buttons or dials for selecting your desired drink. Moreover it, also includes a milk frother and other features for customizing your coffee.
User manual

You will get a user manual that explains how to use the Nespresso Latissima Touch properly. It includes instructions for setting up the machine, making coffee, and cleaning and maintaining the machine. It may also provide troubleshooting tips for common issues.
Care of Rapid Cappuccino System leaflet
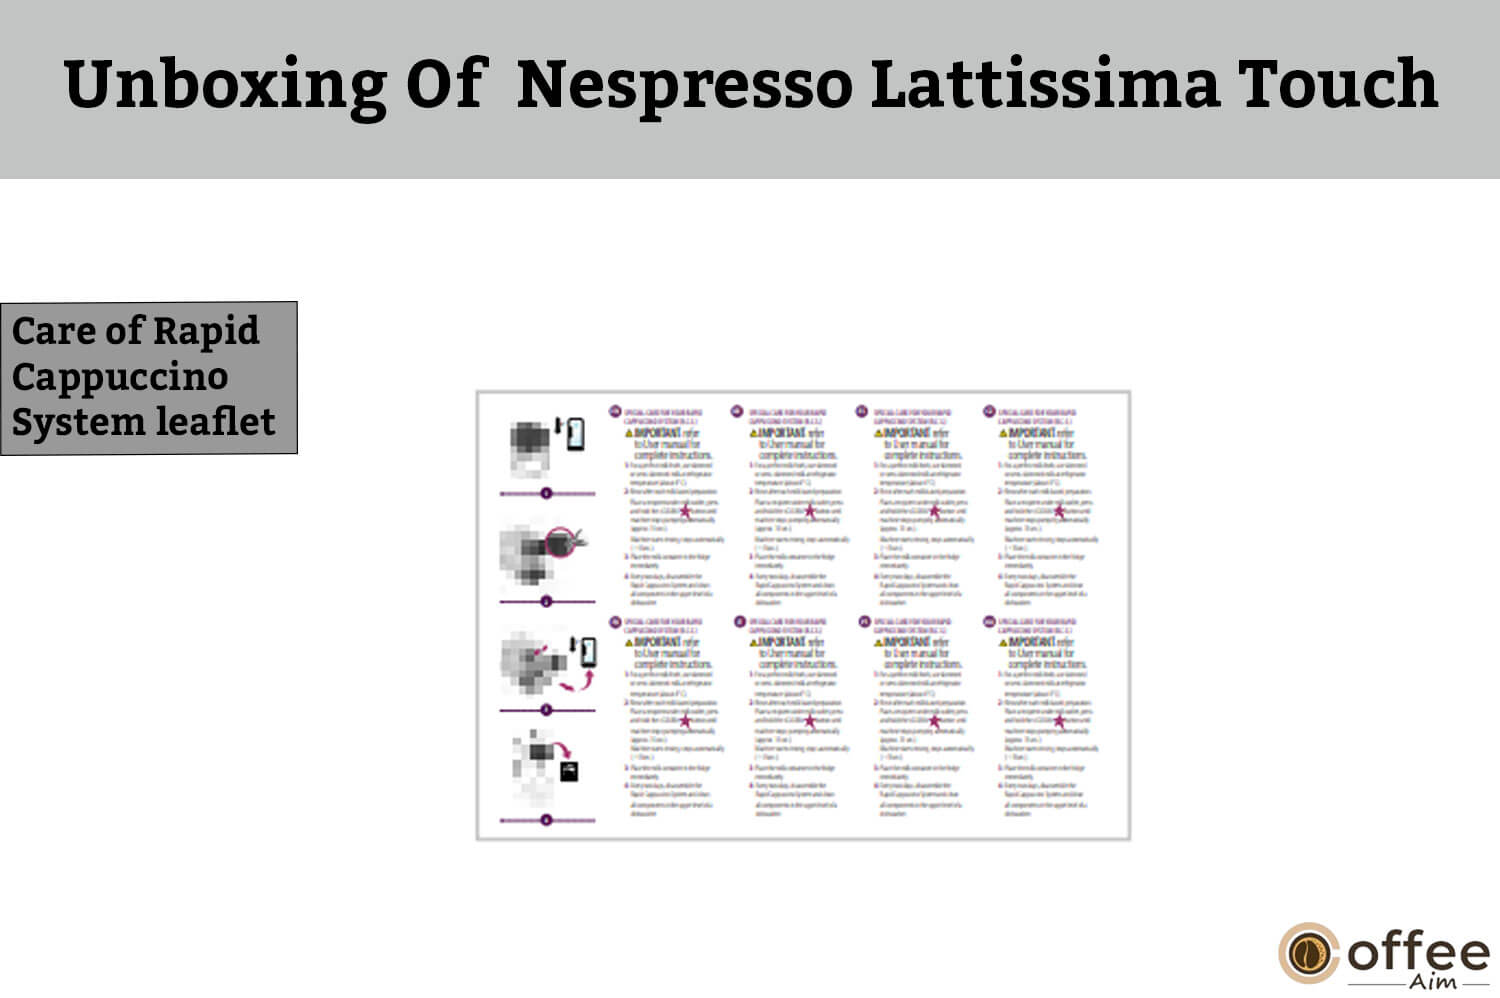
The next thing you will find in your box is the leaflet for the care of the Rapid Cappuccino system. This leaflet is included with Nespresso machines that have a built-in milk frother or steam wand. It provides information on how to clean and maintain the frothing system to ensure that it continues to work properly.
Nespresso capsule-tasting gift

It comes with Nespresso coffee capsules that are packaged together to allow coffee lovers to try a variety of flavors and blends. These sets often include several different capsules with unique flavor profiles, allowing the recipient to sample and discover their favorite blends.
Welcome to the Nespresso folder

Finally, you will find a folder given by Nespresso to its user. This folder is a welcome package that you will find with your Nespresso machine. It may include a variety of materials, such as coupons for free or discounted coffee capsules, information about Nespresso’s recycling program, and other promotional materials.
Types Of Nespresso Lattissima Touch
Nespresso Lattissima Touch come with different systems, each with unique features and capabilities. Here are some details about three common systems of Nespresso machines:
- Machine without Rapid Cappuccino System
- Machine with Rapid Cappuccino System (for Cappuccino
- Machine with Rapid Cappuccino System (for Latte Macchiato and Creamy Latte)
A. Machine without Rapid Cappuccino System
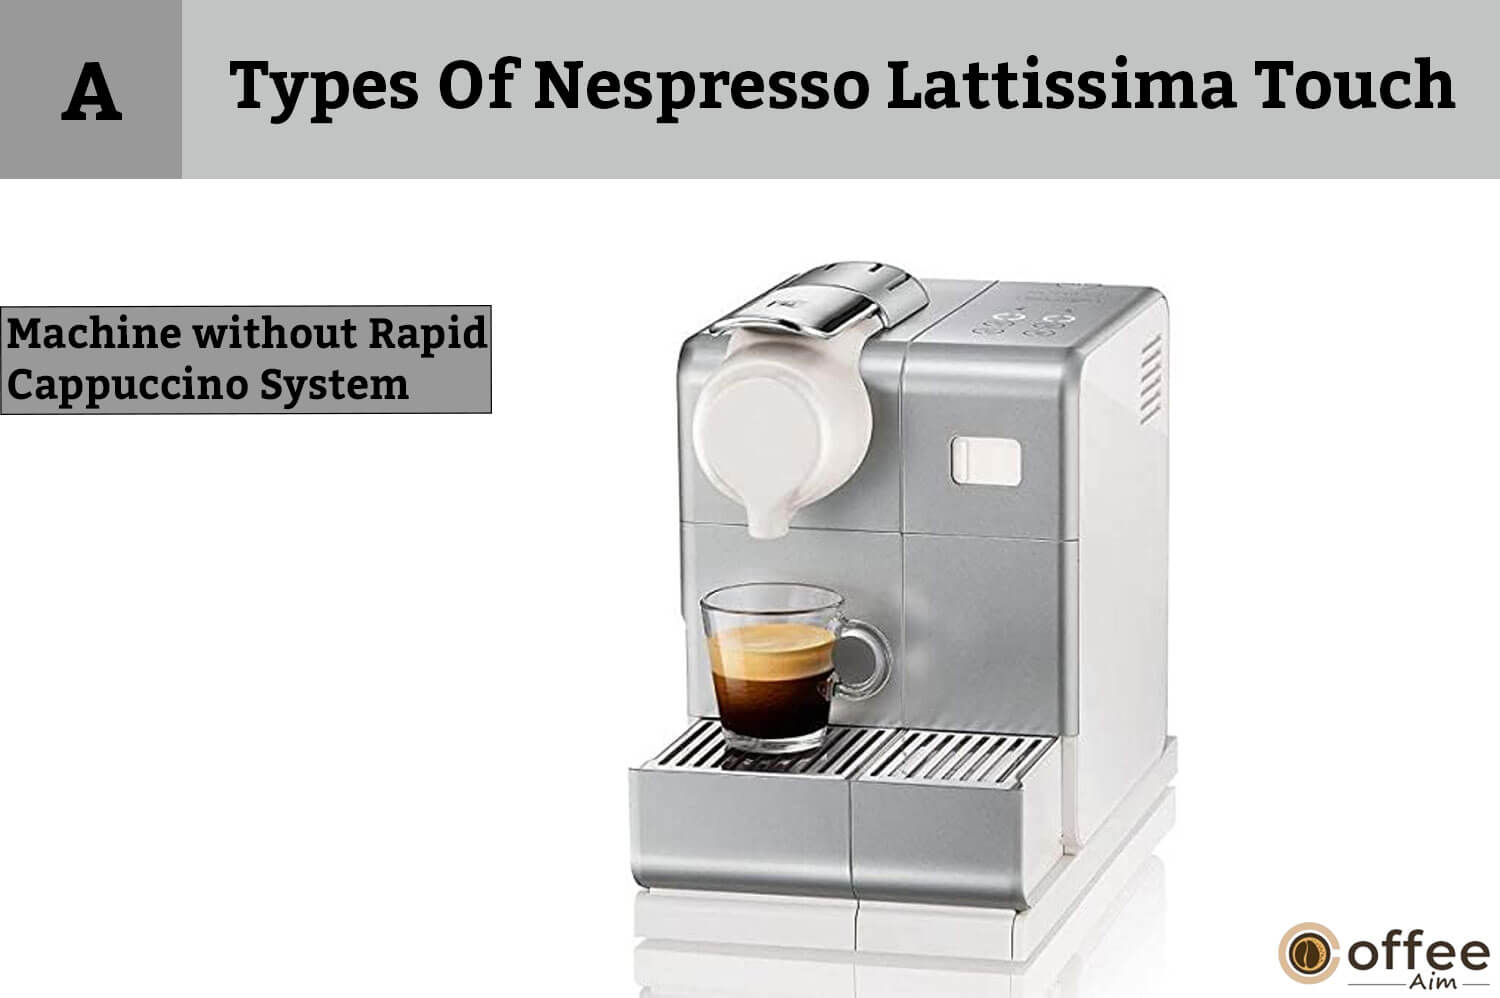
This type of Nespresso machine does not have a built-in milk frother or steam wand. Instead, it brews espresso shots and dispenses them directly into a cup. If you want to add milk or foam, you’ll need to heat and froth the milk separately and then add it to the espresso.
B. Machine with Rapid Cappuccino System (for Cappuccino)

This system of Nespresso Lattissima Touch has a milk frother or steam wand that can be used to create frothy milk for cappuccinos. To use the frother, you’ll need to fill the container with milk and attach it to the machine. Then, simply press the cappuccino button, and the machine will automatically heat and froth the milk, dispense the espresso shot, and add the frothed milk to the cup.
C. Machine with Rapid Cappuccino System (for Latte Macchiato and Creamy Latte)

This system of Nespresso Lattissima Touch is similar to the one described above but has a more sophisticated milk frothing system. In addition to cappuccinos, it can be used to make latte macchiatos and creamy lattes.
Parts Of Nespresso Lattissima Touch
It’s time to take a closer look at every type of Nespresso Lattissima so that you can use your brewer to its full potential. You should not miss any information about the parts, otherwise, you can miss trying many amazing features. So, Are you ready to learn about each part in detail? Let’s get started
1. Lever
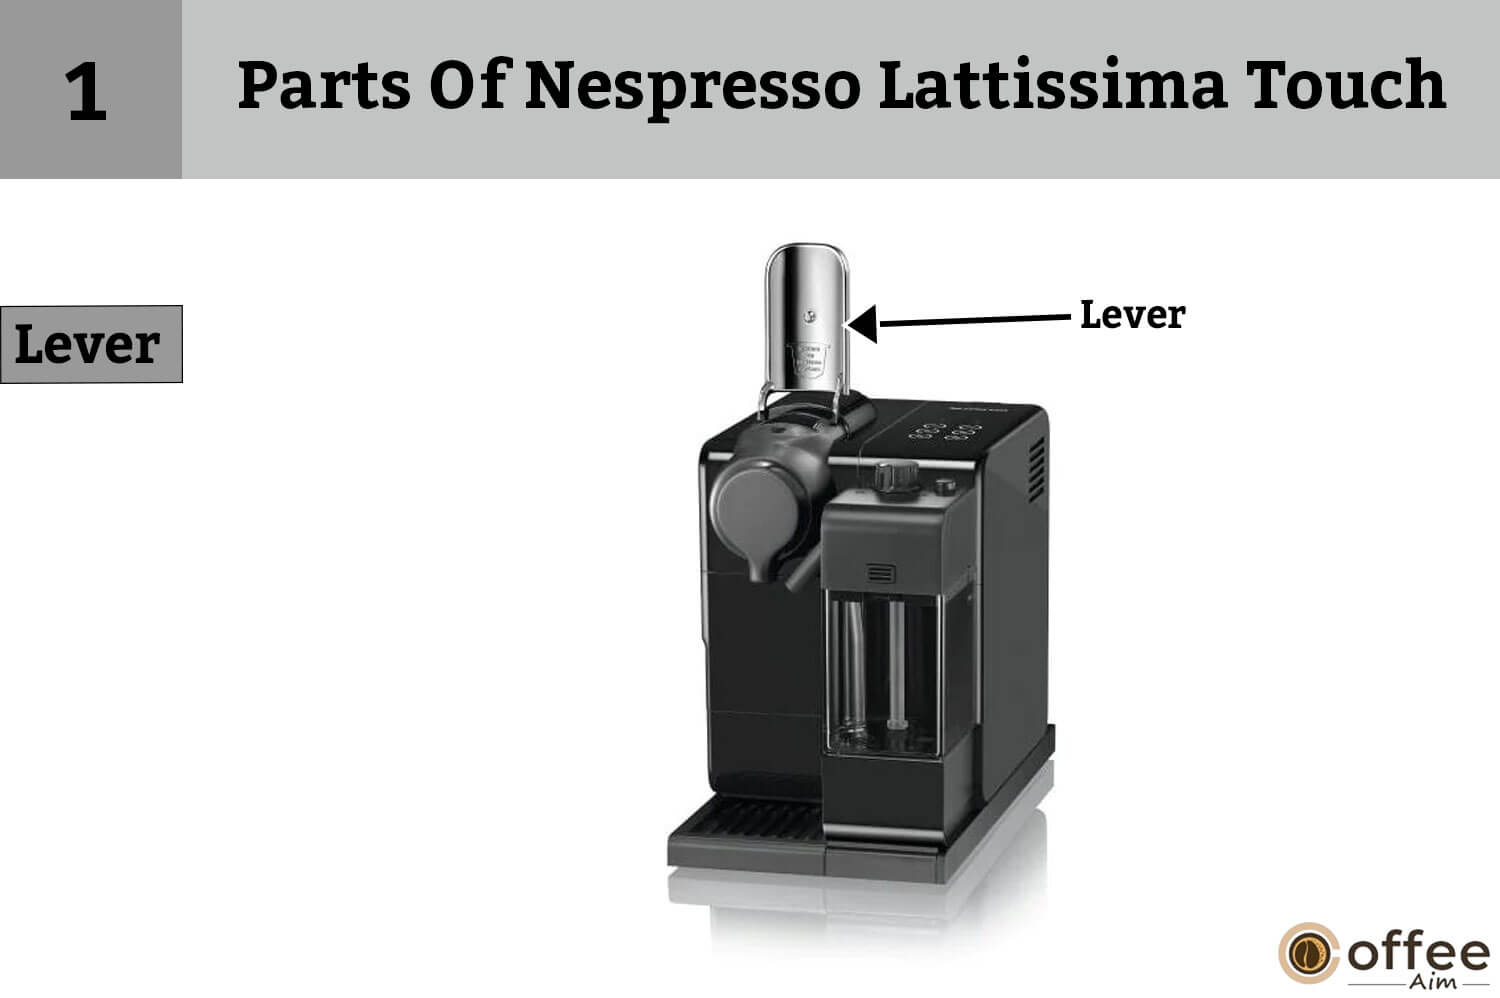
The lever is used to open and close the capsule compartment. When closed, the lever punctures the capsule and starts the coffee-making process.
2. Capsule Compartment:

This is the area where the Nespresso capsules are inserted for brewing.
3. Water Tank (0.9 L)
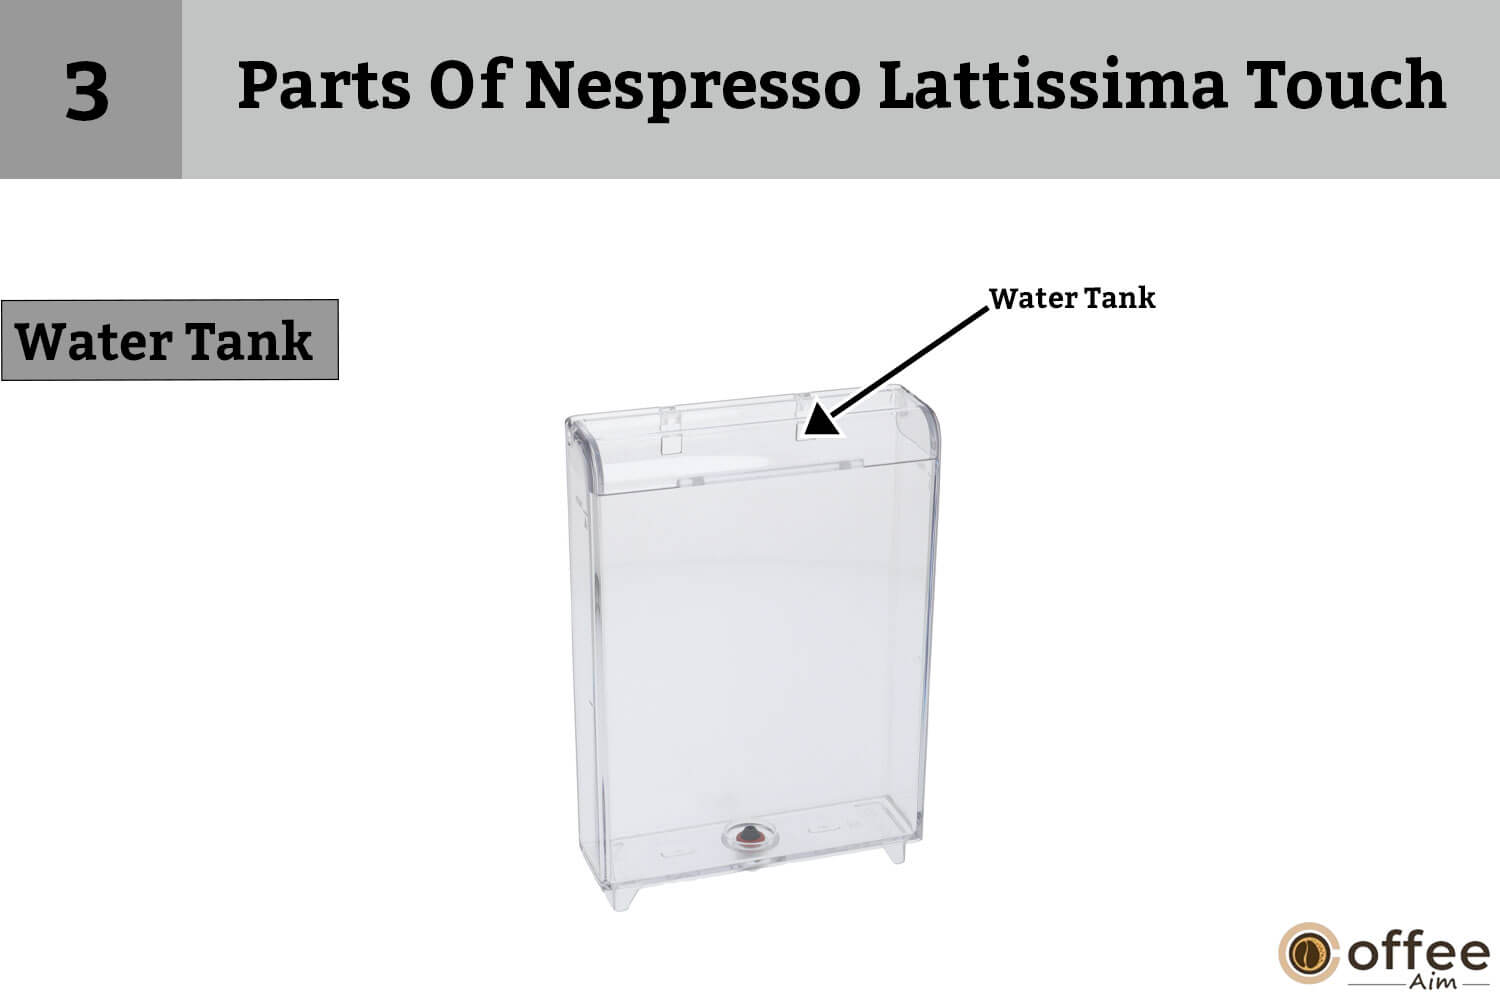
The water tank holds the water that is used to make the coffee. It has a capacity of 0.9 liters and can be easily ber refilled.
4. Coffee outlet
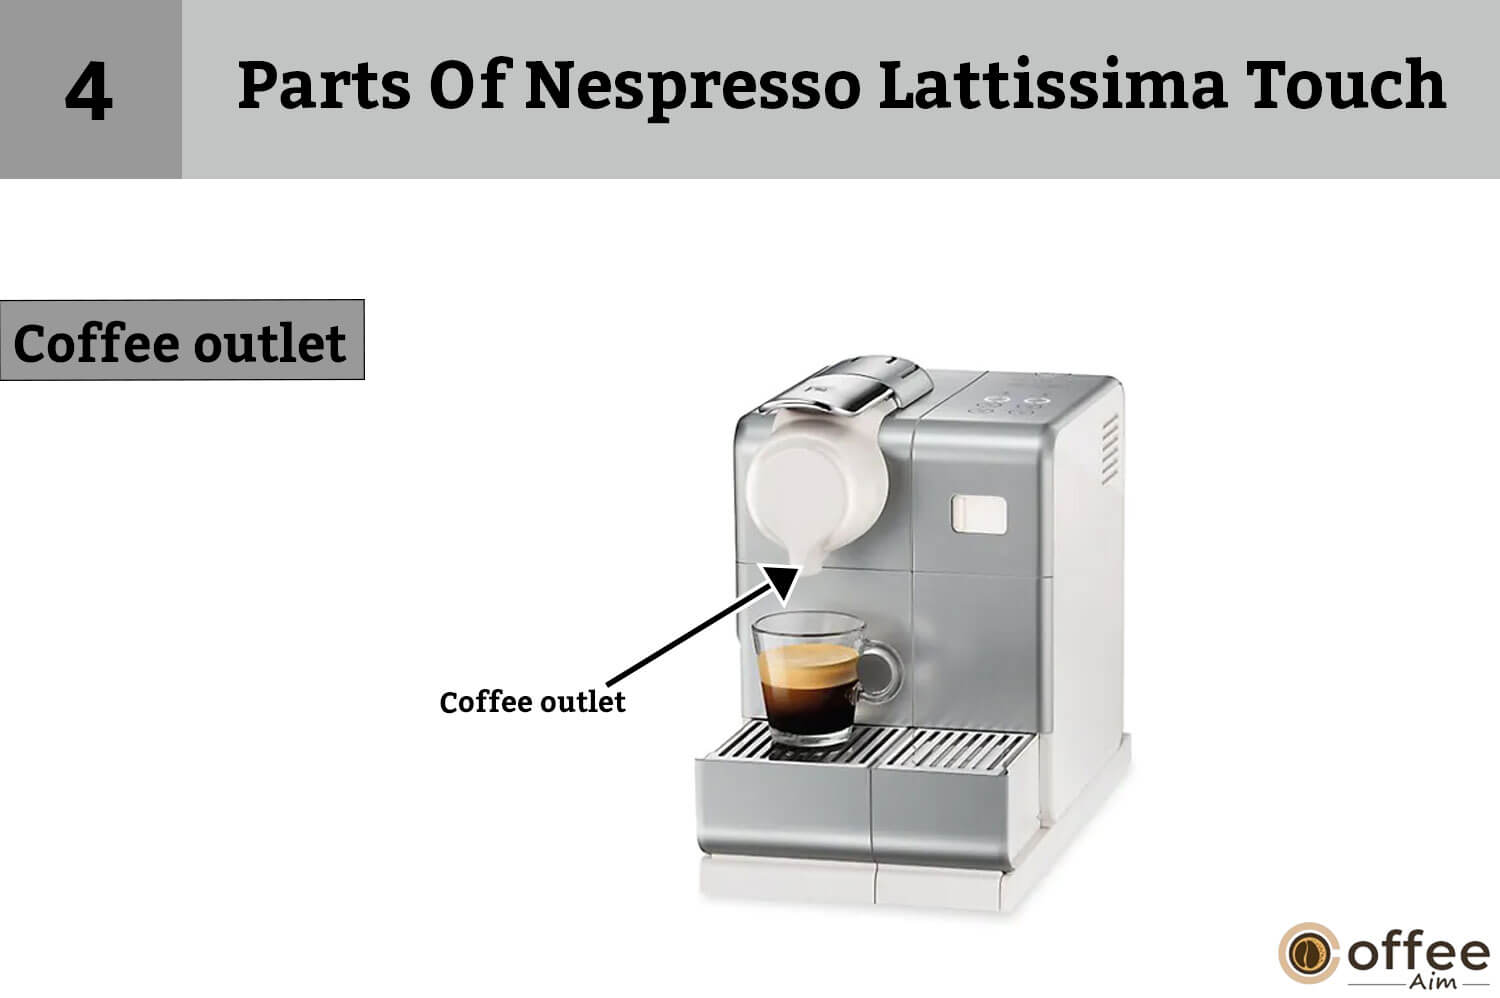
This is the spout through which the coffee is dispensed into the cup.
5. Used Capsule Container
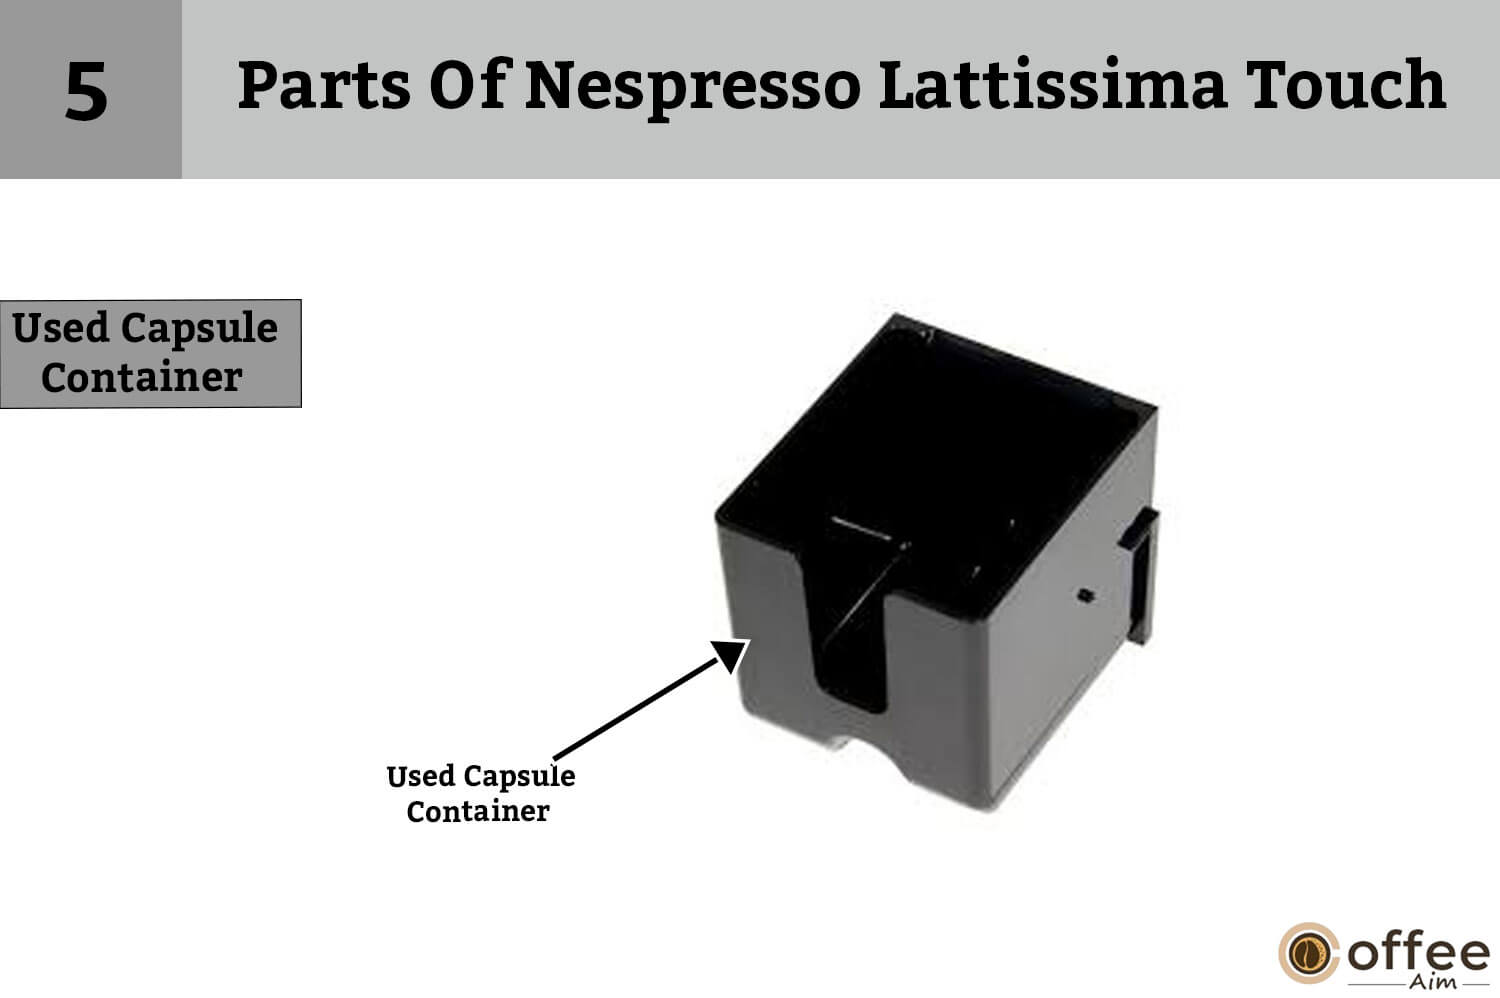
This container holds the used Nespresso capsules and can be easily removed for emptying.
6. Drip Tray (push inside for Latte Macchiato glass):
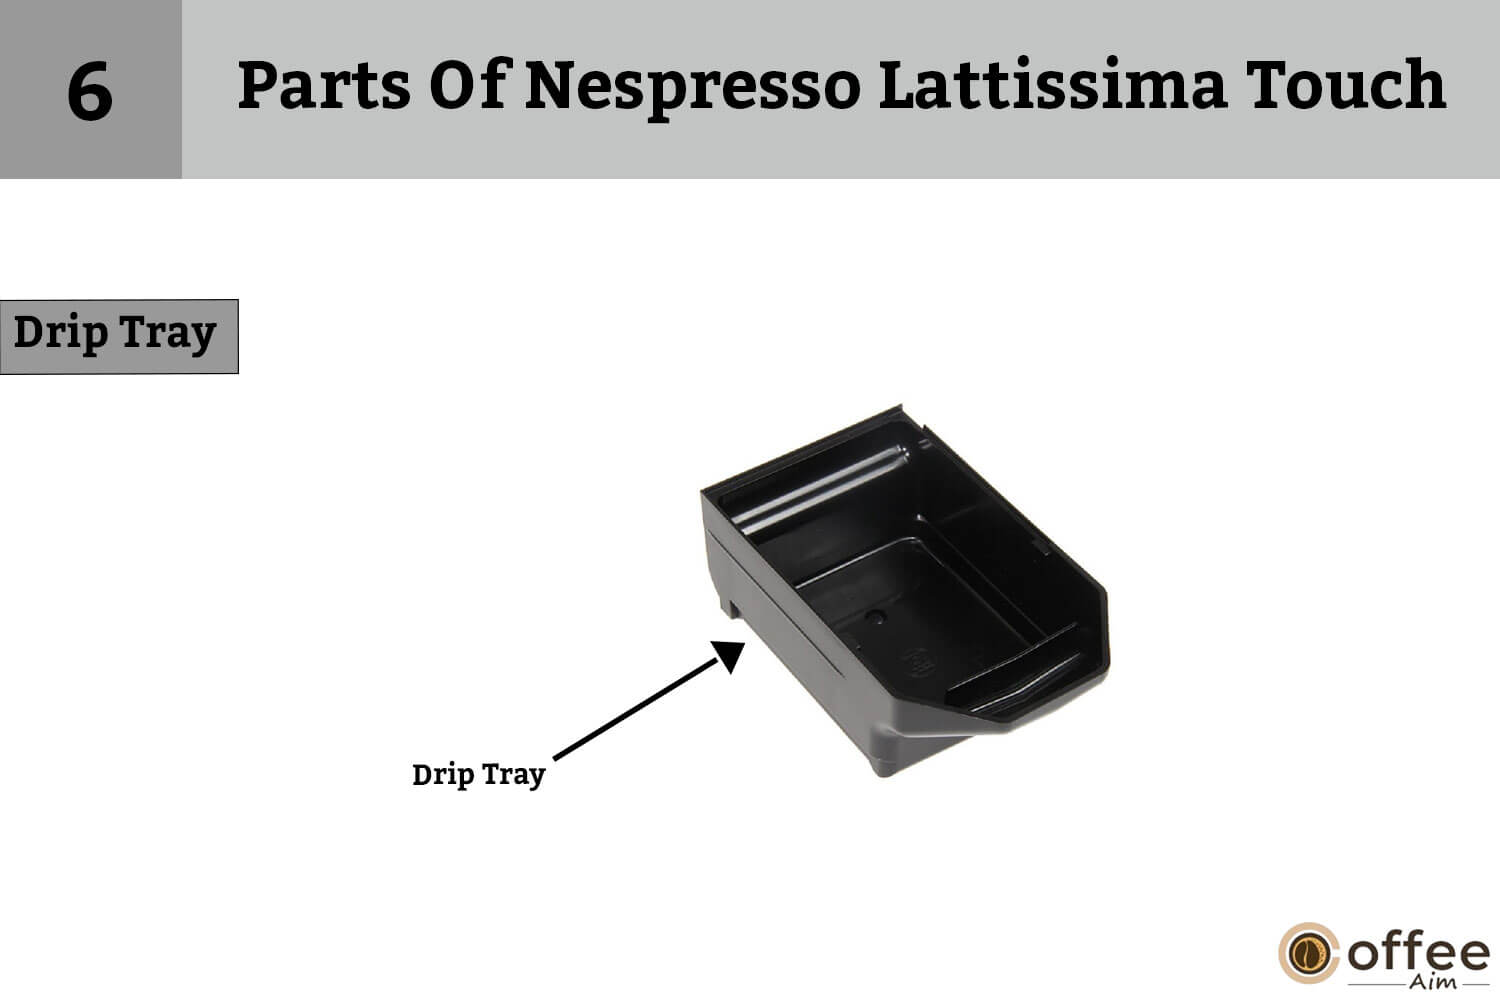
The drip tray catches any spills or drips during the coffee-making process. It can be removed for cleaning and adjusted to accommodate different cup sizes.
7. Left Grid
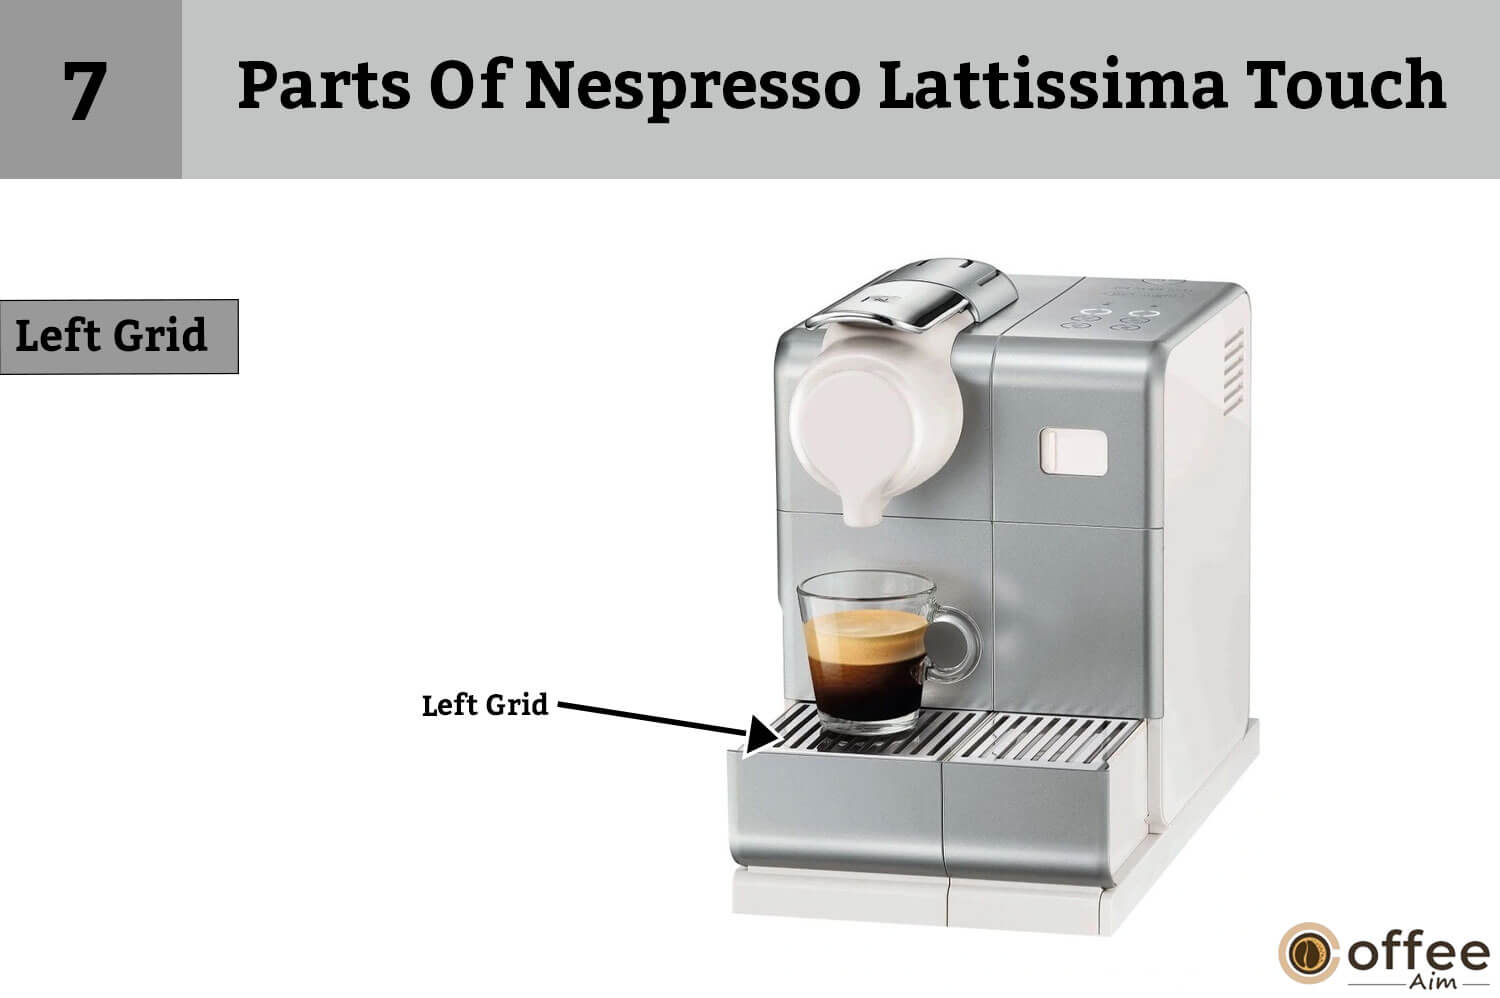
The left grid is a removable part of the drip tray that can be used to catch larger spills or drips.
8. Right Grid

The right grid is another removable part of the drip tray that can be used to catch larger spills or drips.
9. Descaling Pipe Storage Door (pull to open)

This door provides access to the descaling pipe, which is used during the descaling process.
10. Descaling Pipe

The descaling pipe is a flexible tube that is used to facilitate the descaling process.
11. Steam Connector Door

The steam connector door provides access to the steam connector, which is used for frothing milk.
12. Steam Connector
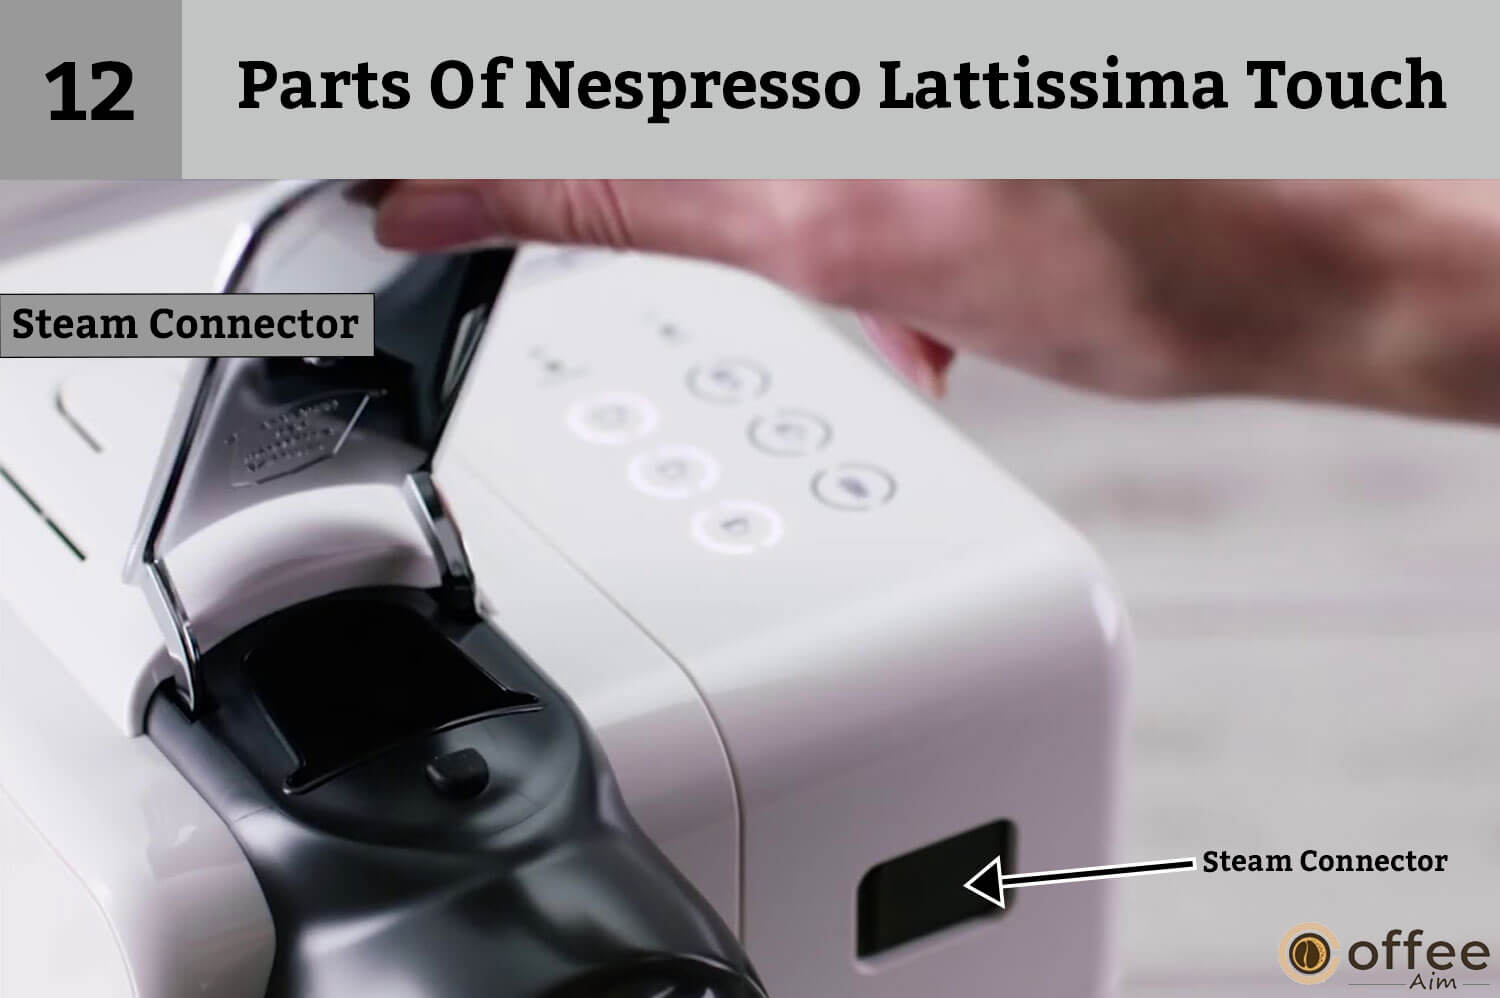
The steam connector is a removable part that is used for frothing milk.
13. On/Off Button

This button is used to turn the machine on and off.
14. Descaling

This function allows the user to descale the machine to remove mineral buildup that can affect the taste of the coffee.
15. Espresso 40 Ml
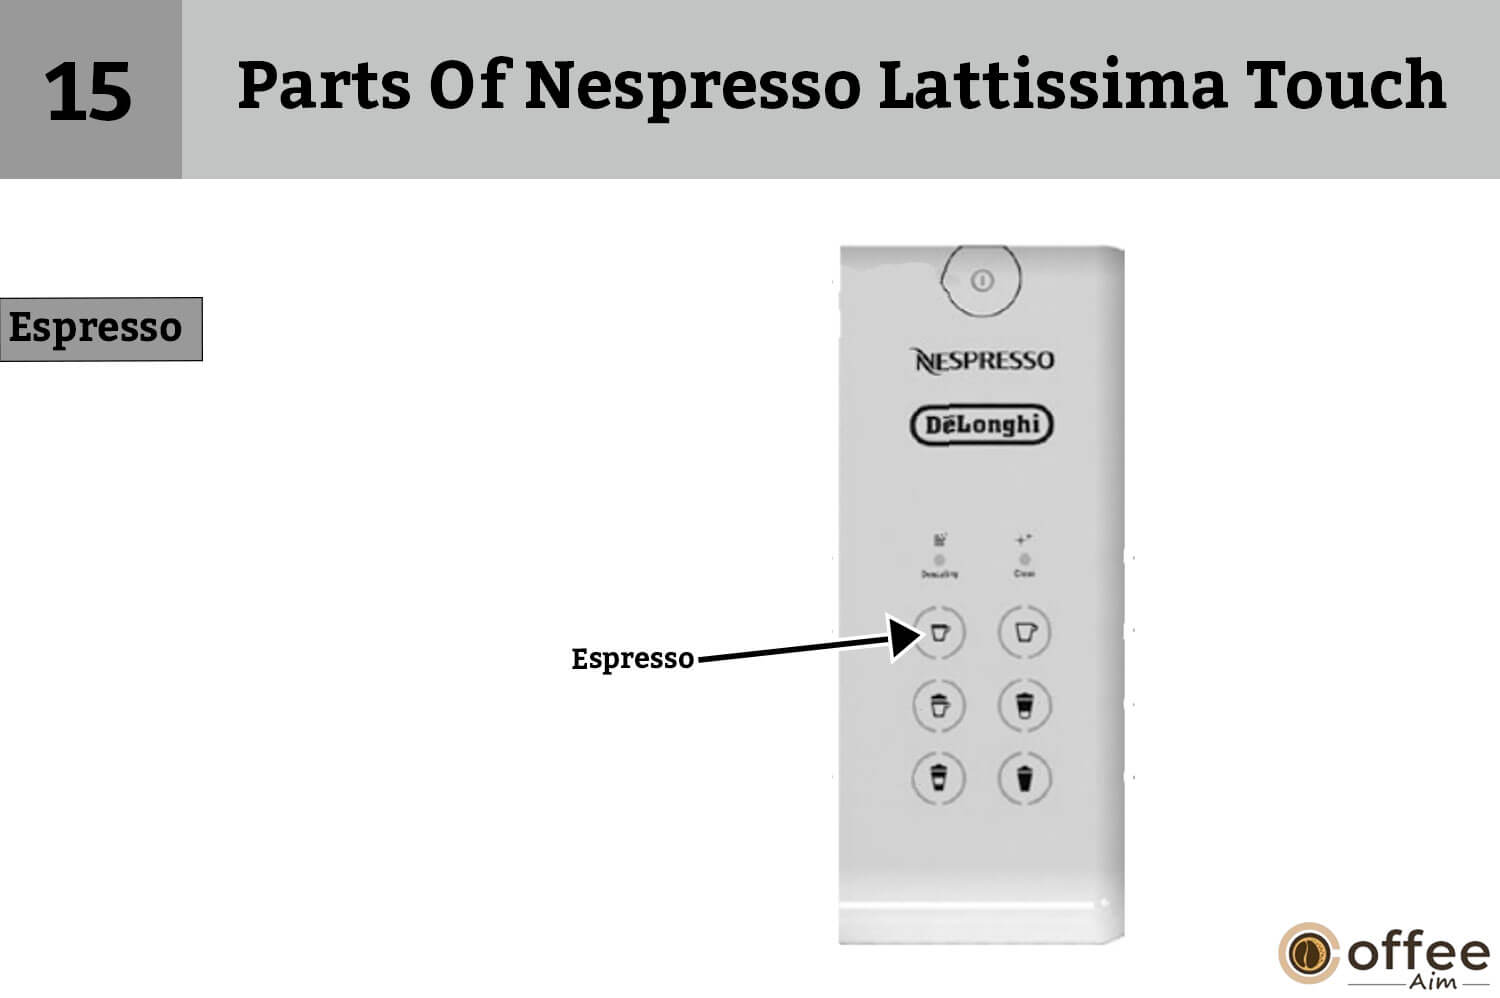
Espresso button is used to prepare a 40 ml shot of espresso.
16. Cappuccino
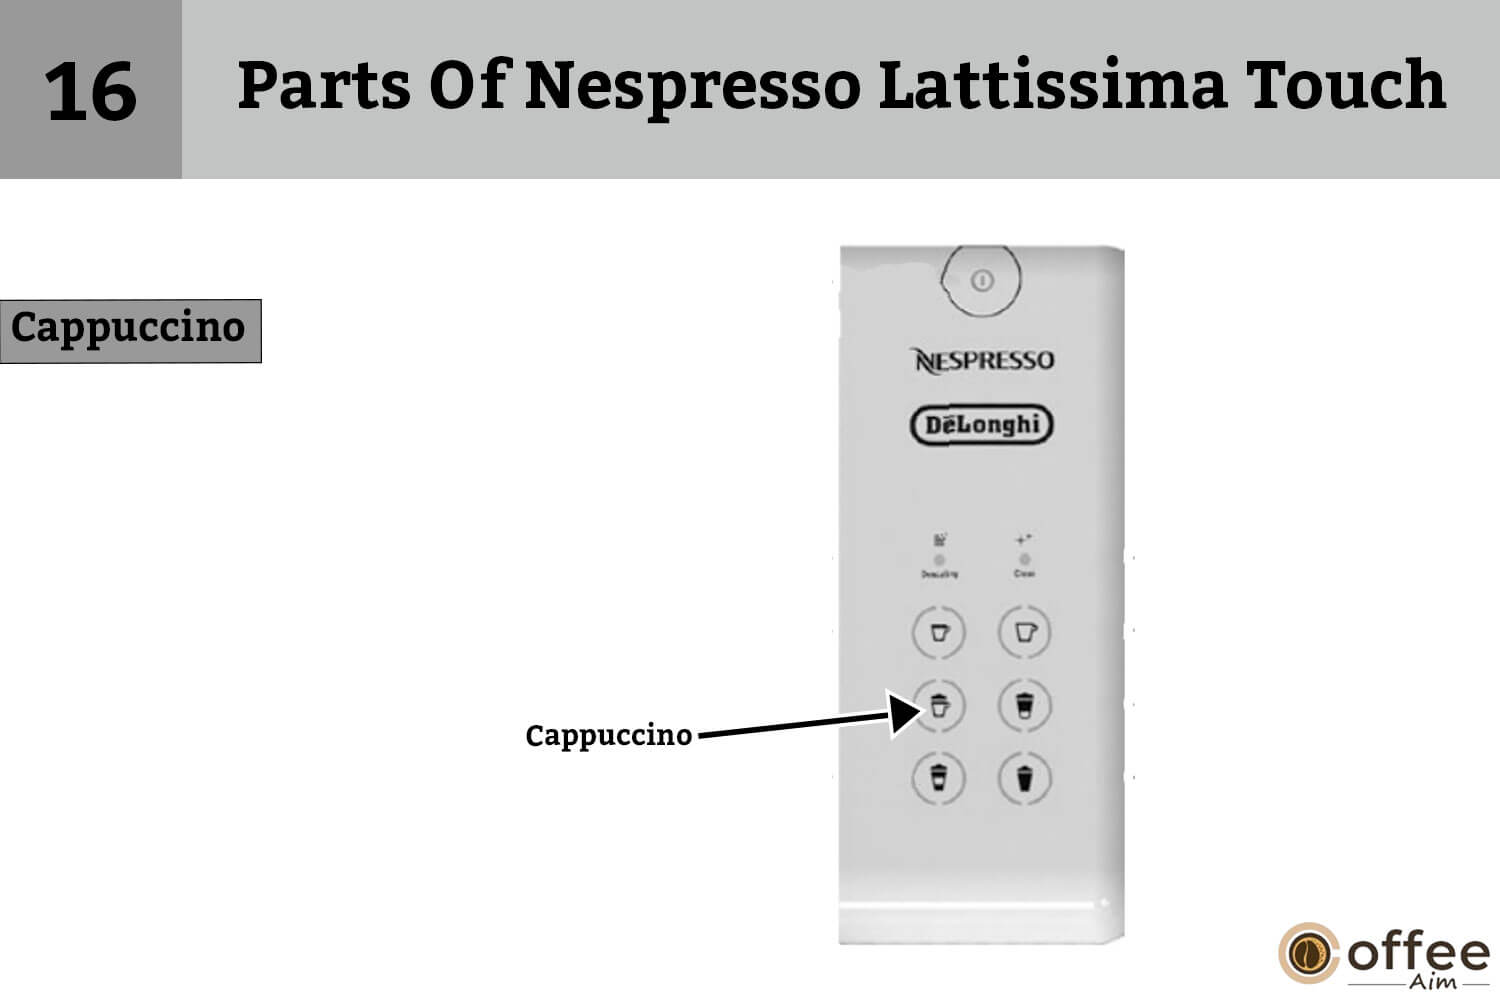
It is used to prepare a classic cappuccino, which is made with equal parts espresso, steamed milk, and milk foam.
17. Latte Macchiato

This button is used to prepare a latte macchiato, which is made with steamed milk, a shot of espresso, and a layer of milk foam on top.
18. Clean

Clean function allows the user to clean the milk system of the machine.
19. Lungo 110 ml:
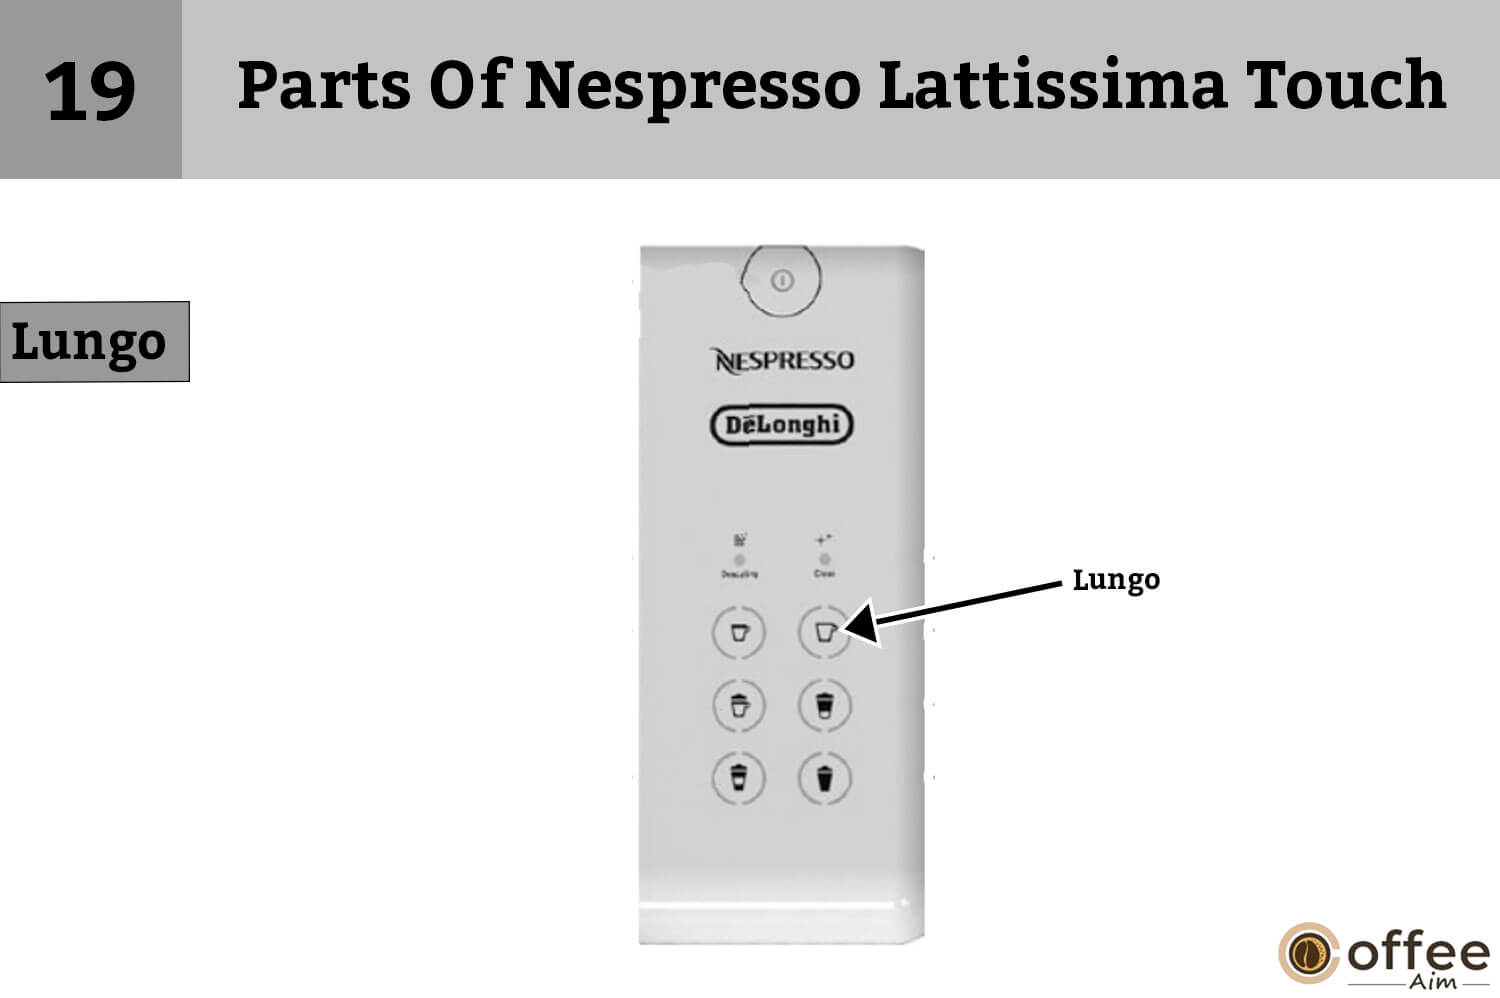
Lungo button is used to prepare a 110 ml shot of lungo, which is a longer, milder coffee.
20. Creamy Latte
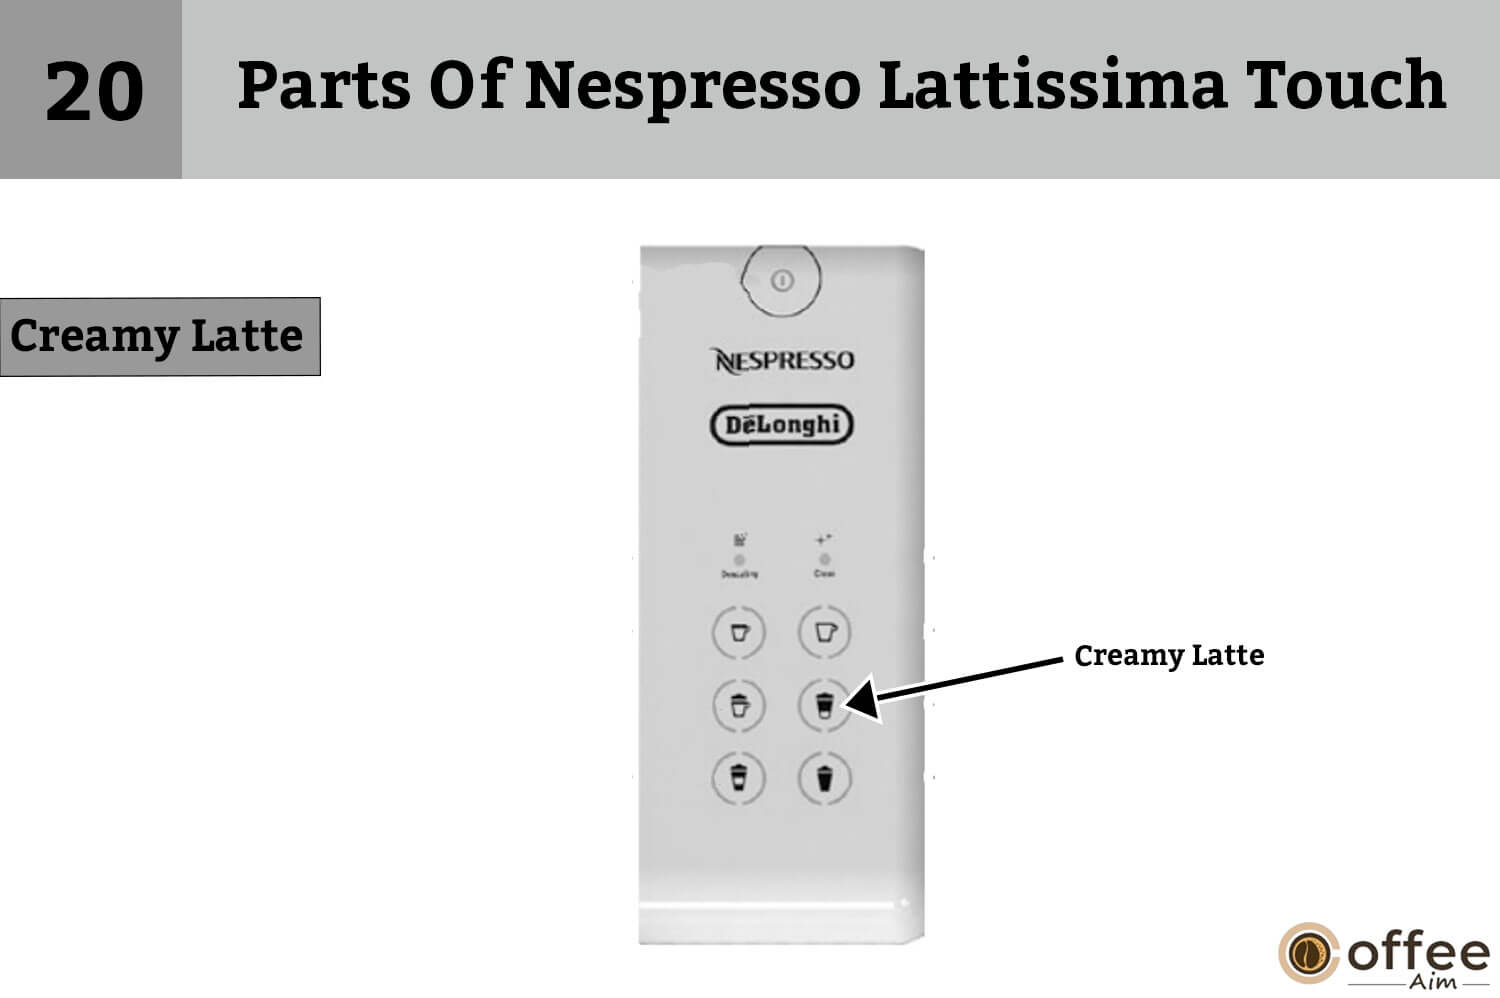
Creamy Latte button is used to prepare a latte, which is made with steamed milk and a shot of espresso.
21. Warm Milk Froth

Warm milk froth button is used to prepare warm milk froth, which can be used to make various coffee drinks.
22. Lid Detach Button
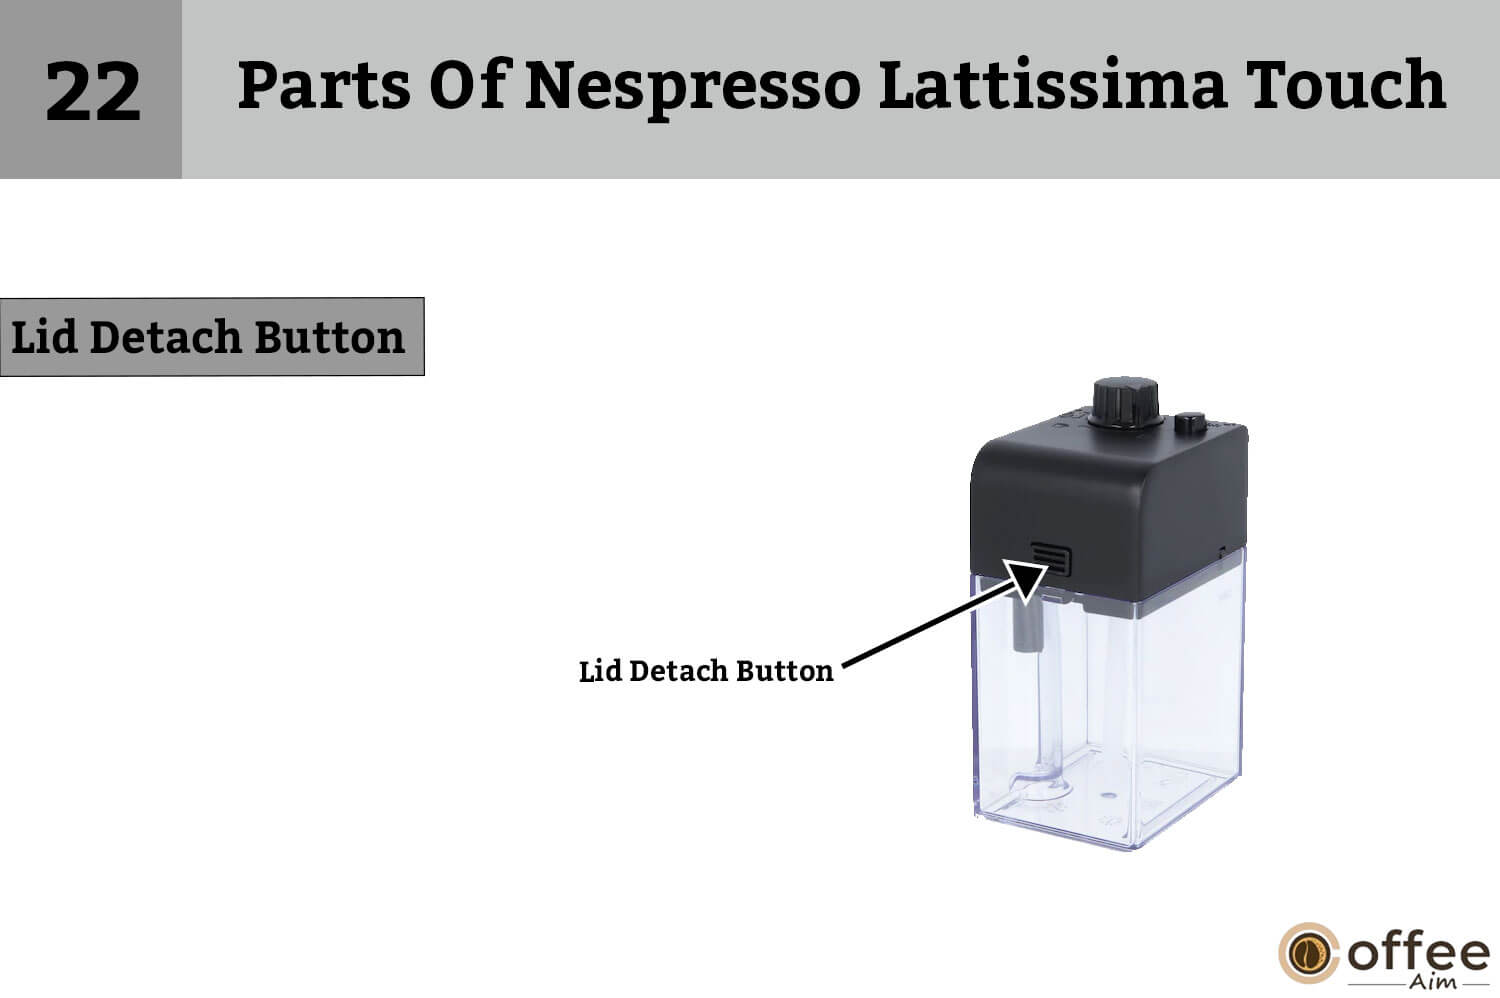
This button is used to detach the lid of the milk container for cleaning or filling.
23. Milk Container
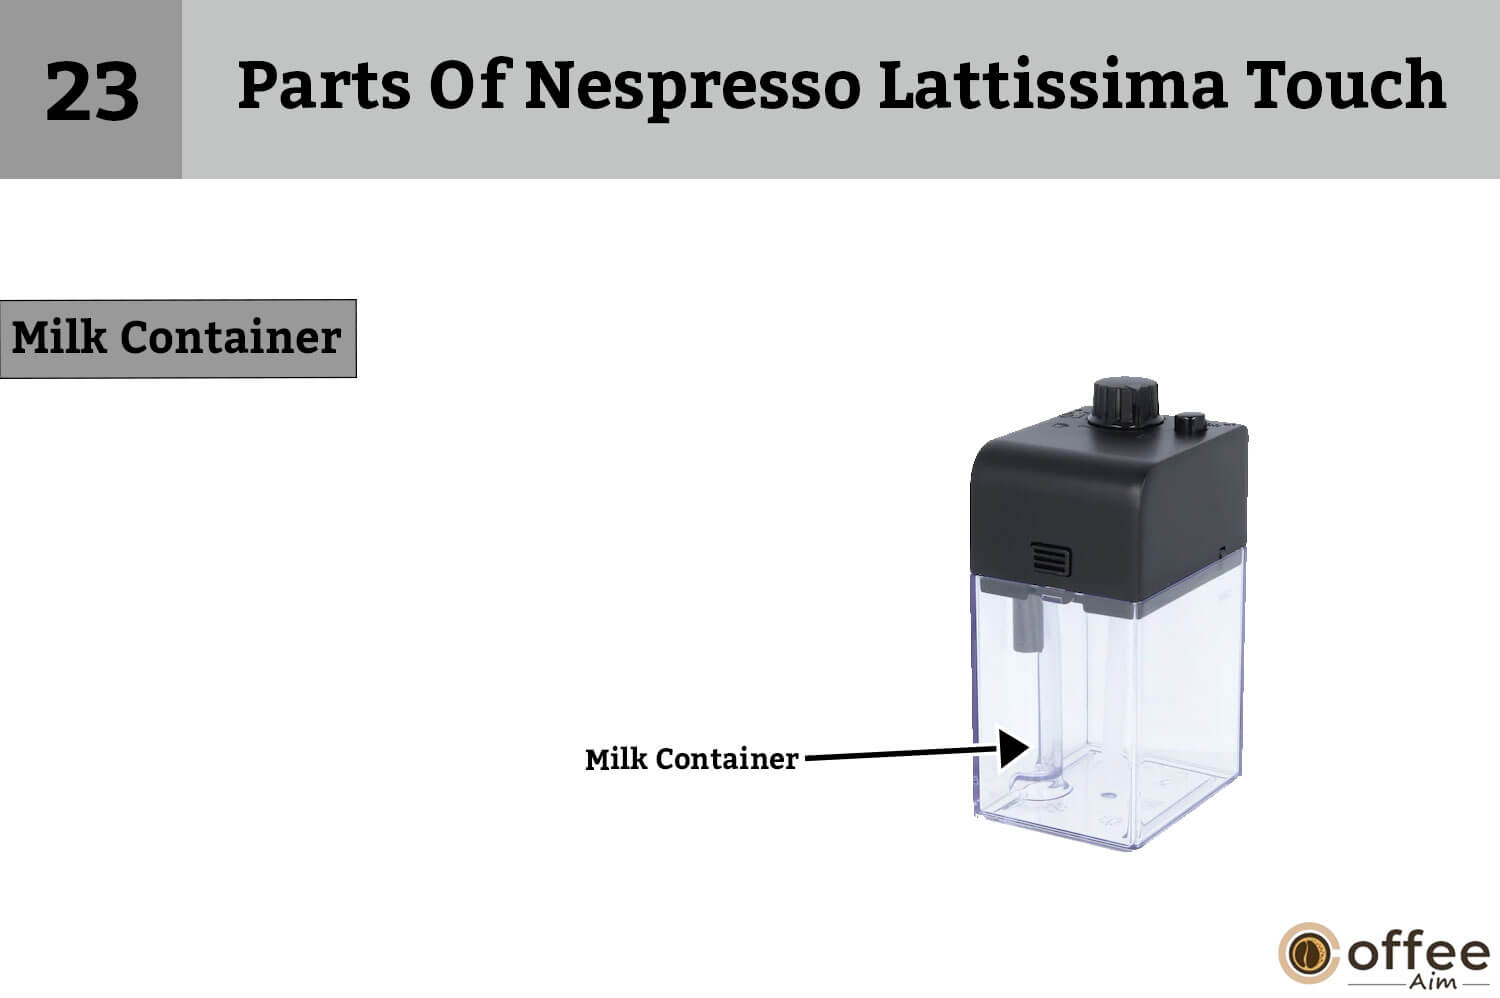
Milk container is a removable container that holds the milk for milk-based drinks.
24. Lid Milk Froth Density

This function allows the user to adjust the density of the milk foam for milk-based drinks.
25. Position For Milk Froth Regulator Knob (insertion/removal):

This is the position for inserting or removing the milk froth regulator knob.
26. Milk Froth Regulator Knob
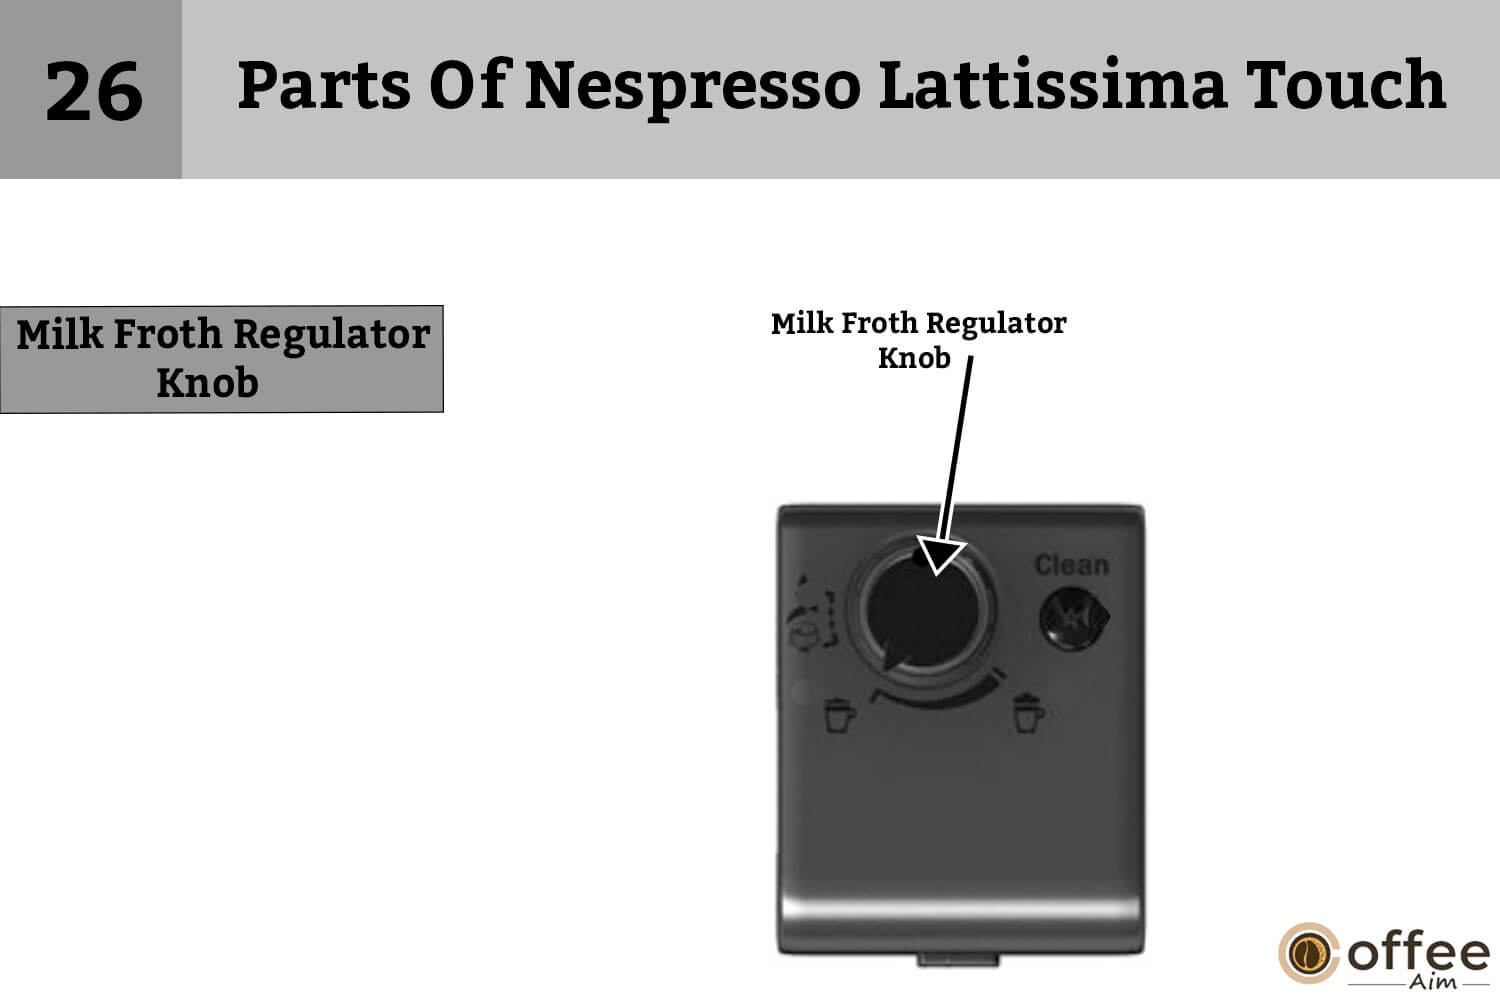
This function allows the user to adjust the amount of milk foam for milk-based drinks.
27. Clean: Rinsing Button:

This button is used to rinse the milk system of the machine.
28. Milk Froth Density: Max Rapid

This function allows the user to quickly adjust the density of the milk foam for milk-based drinks.
29. Cappuccino System Connector:
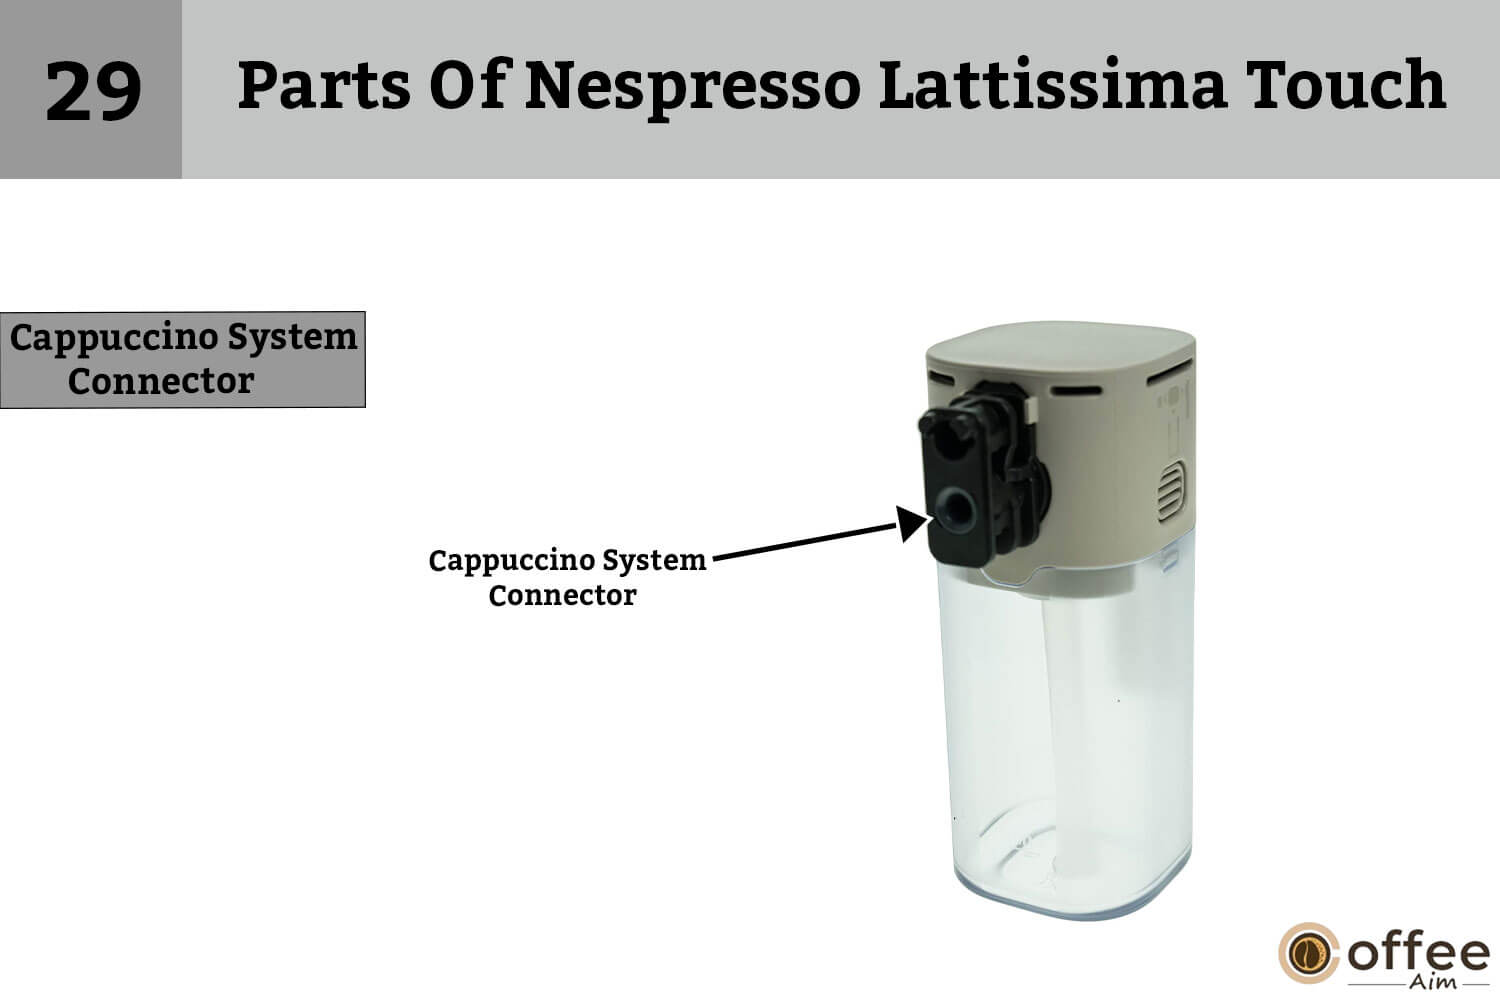
It is a component that connects the milk frother to the main unit, allowing the machine to heat and froth milk as needed
30. Milk Spout:

This is the spout through which the milk is dispensed for milk-based drinks.
31. Milk Spout Lever

A lever is used to open and close the milk spout.
32. Milk Aspiration Tube
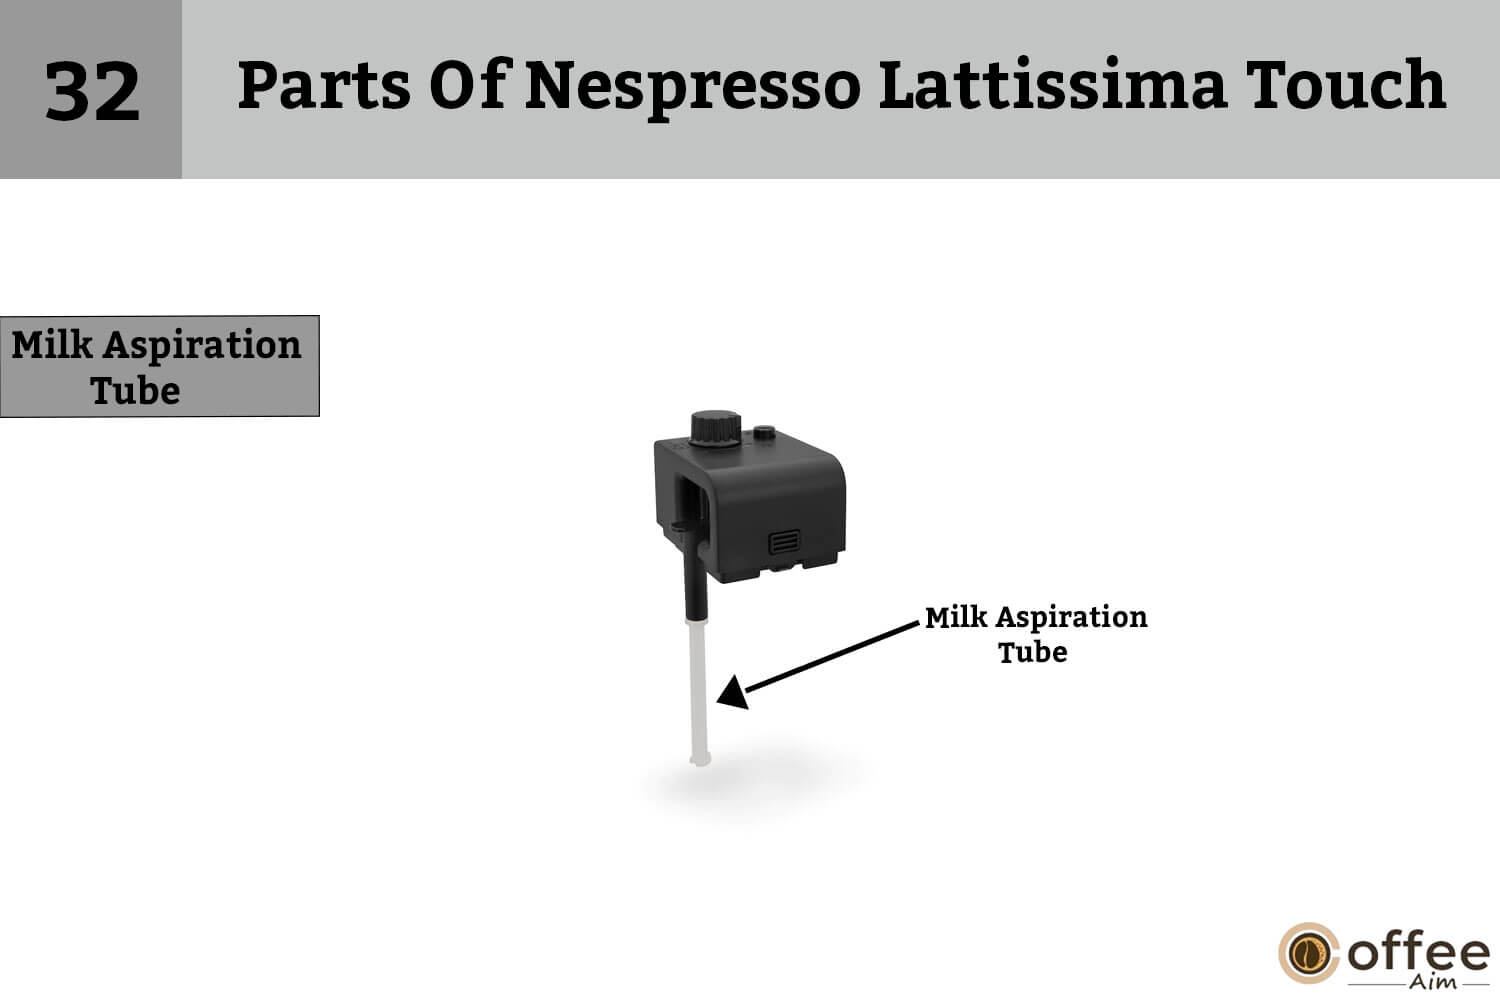
This tube is used to draw milk from the milk container for milk-based drinks.
33. Milk Container (0.35 L)

This container is used to make milk froth by adding milk to it and inserting it into the brewer. The total capacity of the milk container in the Nespresso Lattissima Touch is 0.35 L.
First Use Or After A Long Period Of Non-Use
No matter, if it’s your initial experience or a long overdue reunion, using the Nespresso Lattissima Touch, will evoke a sense of thrill every time. To relive this joy of joy every time, it’s crucial to have a complete understanding of the Nespresso Lattissima Touch’s components, usage, and maintenance.
Are you ready to dive into the world of your favorite Coffee machine? So, begin your journey by following the mentioned steps.
Caution: To avoid the hazards of deadly electrical shock and fire, read the safety precautions.
Step: 1

First of all, remove and dispose of the protective plastic film from your Nespresso, you may find them on both the left grid and right grid, and machine panels.
Step: 2
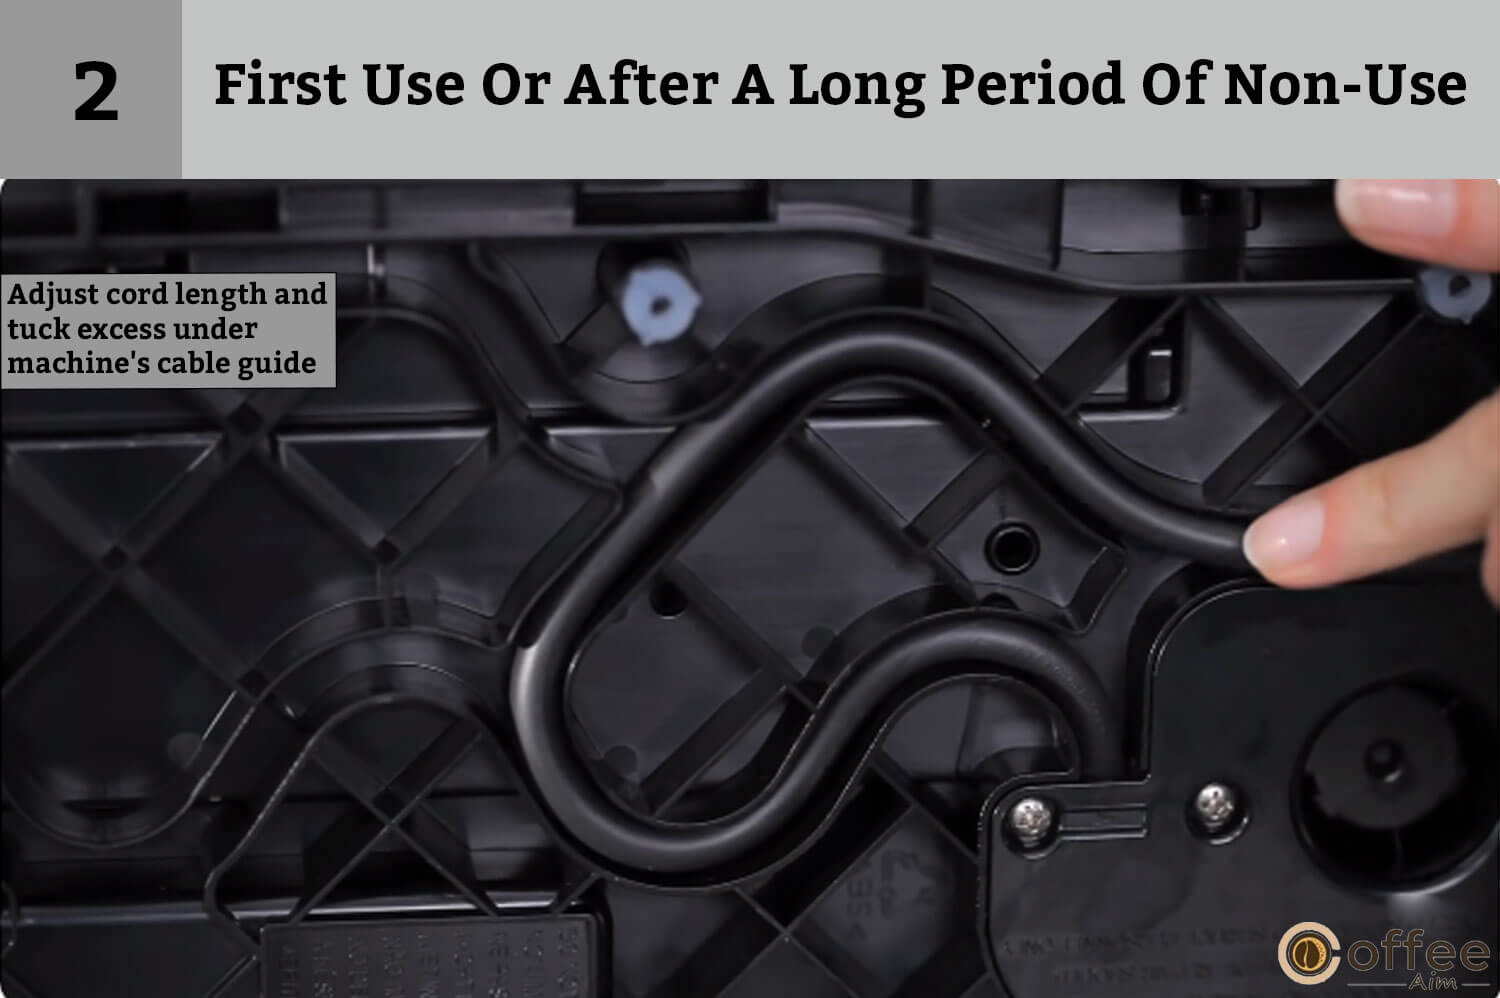
Take out the drip tray, capsule container, and water tank. Adjust the cord length and tuck any excess under the machine’s cable guide.
Step: 3

Now place your Nespresso Latissima Touch in the straight position, and plug it into the main power.
Step: 4

Lift the lids as the lid of the water tank can be lifted for easy transportation.
Step: 5
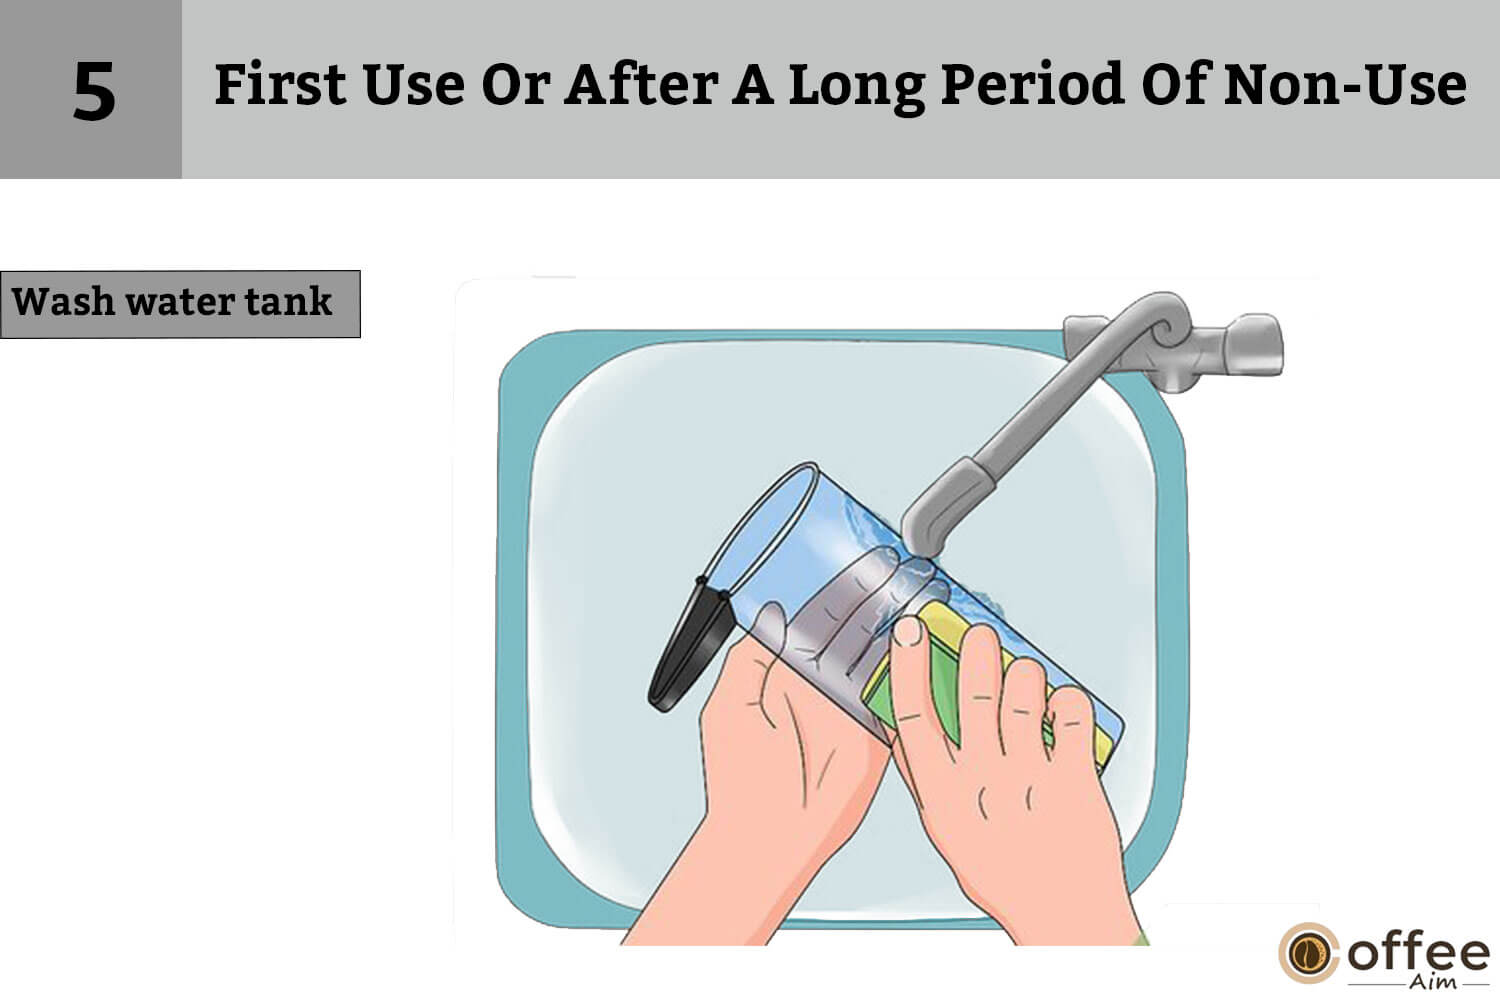
Rinse the water tank well before filling it maximum with potable water.
Step: 6

Turn on the machine. The automated power off and water hardness setting will be indicated with a steady light for the first 2 seconds. Then,the machine will warm up for around 25 seconds after the first 2 seconds and the will blink during this time.When the light turn steady, it is signal that the machine is ready.
Step: 7
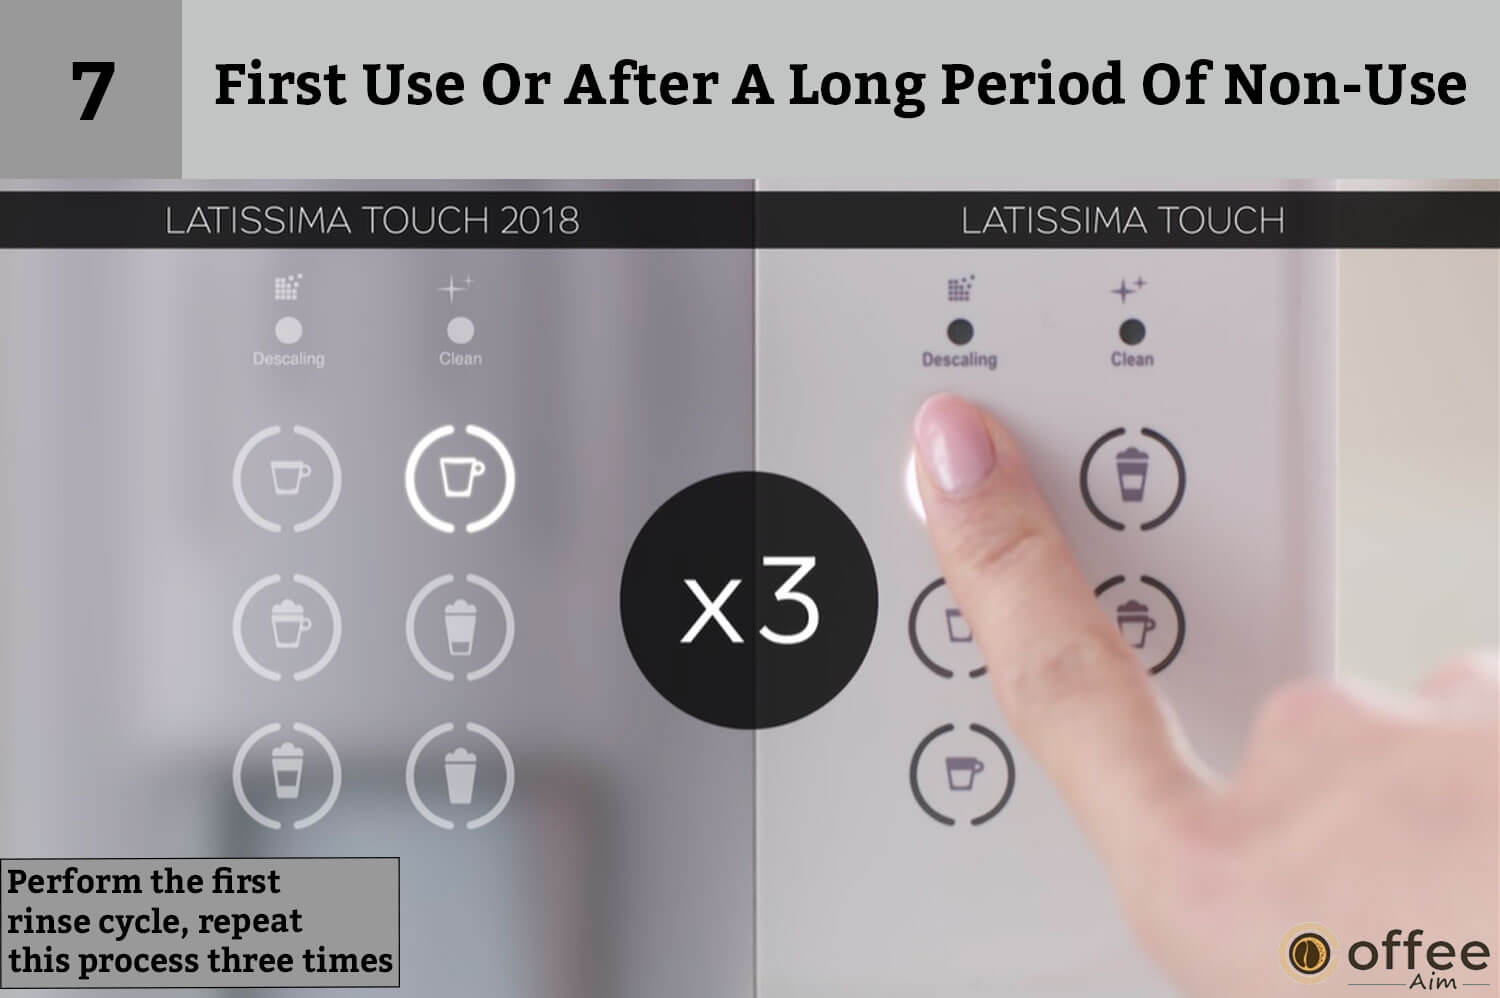
Now, it is time to run the first rinse cycle, to do it place a container beneath the coffee outlet and hit the lungo button. Repeat this process three times.
INFORMATION: After production, Nespresso machines undergo thorough testing. As a result, you may notice small amounts of coffee powder in the rinsing water.
Step: 8

Now clean the Rapid Cappuccino System (R.C.S.), disassemble all six of its components, and place them in the upper level of your dishwasher. If you don’t have a dishwasher, refer to the “Hand Washing of Rapid Cappuccino System (R.C.S.)” section. After reassembling and reattaching the R.C.S. to the machine, press the “Clean” button before making a milk-based beverage.
INFORMATION: Go to the “Assembling/Disassembling of Rapid Cappuccino System” section for more information.
Coffee Preparation
The moment you’ve been waiting for has arrived! Time to savor the rich aroma and taste of freshly brewed coffee. Get ready to embark on a journey of coffee-making bliss with these easy steps.
NOTE: While the machine warms up, go ahead and press any coffee button of your choice. The coffee will flow automatically when it is ready.
Let us start the process!
- Lift the lever entirely, then insert the capsule.

- Close the lever and place a cup below the coffee outlet

- Choose either the Espresso (40 ml/ 2.22 oz) or Lungo (110 ml/ 6.09 oz) option, and the machine will automatically stop once the desired amount is brewed. To stop the flow or add more coffee, simply press the button again.

- Grab your cup and lift the lever to release the used capsule into the designated container. Close the lever to complete the process.

Assembling Disassembling Of Rapid Cappuccino System (R.C.S.)
A great cappuccino or latte can only be made with the Rapid Cappuccino System (R.C.S.). To ensure it is functioning optimally, it may be necessary to disassemble and clean the R.C.S. from time to time. This guide will walk you through the process of assembling and disassembling the R.C.S.
- Remove the cover from the milk container and Unplug the milk aspiration tube.

- Now remove the milk froth regulator knob, then turn it and pull it upward.

- Remove the Rapid Cappuccino System connector by moving it in a circular motion on the left side to unlock it and take it out.

- Pull the milk spout out using your hand.

How to Prepare Cappuccino-Latte Macchiato-Creamy Latte-Warm Milk Froth
Do you want to discover the magic of crafting a rich and creamy latte macchiato with Nespresso? Are you ready to unleash the barista within and treat yourself to a heavenly cup of your favorite latte, anytime, anywhere? Just follow these simple steps if you want to serve yourself a treat to your favorite coffee.
INFORMATION: For a perfect milk froth, it’s recommended to use either skimmed or semi-skimmed milk stored at a temperature of approximately 4°C (fridge temperature).
- Fill the milk container with the required amount of milk.

INFORMATION: Before refilling, thoroughly clean the milk container and the milk aspiration tube with potable water.
- Close the milk container

- To open the steam connector door, slide it to the right.

- Now, connect the Rapid Cappuccino System to the machine, and attach the system to the designated port on the machine.

- The machine will heat up for about 15 seconds, indicated by the blinking lights.

- Now insert the capsule then lift the lever fully, and place the capsule into the designated compartment.

INFORMATION: This step is only necessary for preparing cappuccinos, lattes macchiatos, and creamy lattes. If you are making warm milk froth only, you can skip this step.
- Close the lever, set a Cappuccino cup or Latte Macchiato glass beneath the coffee outlet, and adjust the milk spout position by elevating it to the right level.

- To get the desired amount of froth, turn the milk froth regulation knob.
INFORMATION: I would recommend you these settings: Cappuccino min/Macchiato max/Creamy Latte min

NOTE: It is important not to overturn the milk froth regulator, as this position is reserved for inserting or removing the dial for cleaning purposes.
- To start brewing your cappuccino, latte macchiato, creamy latte, or warm milk froth, press the related button on the machine.

- When the process is complete, you will see that the “CLEAN” indicator will turn orange.

INFORMATION: I recommend you to carefully rinse the milk system after every use.
- To finish the brewing process, lift and close the lever to eject the used capsule into the container. Place a cup or glass under the milk spout.

- To begin the rinsing process, press and hold the “CLEAN” button until the machine stops pumping automatically. This process should take about 16 seconds, and during this time, the “CLEAN” button will blink. The milk system rinsing process will then commence, and a mixture of hot water and steam will flow through the milk spout.

- When the rinse cycle is complete, the “CLEAN” light will flash again.

- Now, disconnect the R.C.S. from the machine and place it immediately in the refrigerator. Close the machine steam connector door.

- After each use, make sure to clean the Rapid Cappuccino System. For this purpose, dissemble the Rapid Cappuccino System (R.C.S.) and clean all its components in a dishwasher on the upper rack. If a dishwasher is not available, refer to the hand-washing instructions in the R.C.S. manual.

INFORMATION: For detailed instructions Refer to the section “Assembling and Disassembling of the Rapid Cappuccino System (R.C.S.) of this article.
CAUTION: Milk should not be stored in the refrigerator for more than 2 days. If the milk container is left out of the refrigerator for over 2 hours, disassemble the Rapid Cappuccino System (R.C.S.) and clean all its components (refer to dishwashing or hand washing instructions).
Programming Coffee Quantity
All of us know that brewing the perfect cup of coffee is an art form, and the key to a delicious cup lies in the precise measurement of ingredients. The programming of coffee quantity is a crucial step in this process, it allows you to control the strength and flavor of your coffee. Whether you prefer a rich and bold coffee or a light and smooth blend, this feature gives you the power to customize your cup to your exact specifications. So let’s dive in and explore the exciting world of coffee quantity programming!
Your Nespresso Lattissima Touch comes with six beverage functions: Ristretto, Espresso, Lungo, Latte Macchiato, Cappuccino, and warm milk froth.
INFORMATION: Follow steps 1-2 of the section “coffee preparation”
NOTE: For minimum and maximum programmable amounts of information, please see the factory settings section.
- To enter the programming mode, press and hold the desired coffee button for at least three seconds. After this, the brewing will start and the button you selected will start blinking fast.

- Keep pressing the button until you get the desired volume

- When the desired volume is attained, release the selected button.

- Now the water volume is stored for future coffee preparations. The button will blink 3 times to confirm the new volume. Now from this moment on, you will get the selected volume with just one press of a button.

Programming Quantity For Cappuccino-Latte Macchiato-Creamy Latte-Warm Milk Froth
Understanding the right programming quantity of milk, coffee, and froth is essential to make a perfect cup of these beverages. In this guide, we’ll discuss the ideal programming quantities for each of these drinks, so you can make them like a pro.
INFORMATION: Follow steps 1-8 of the section “Preparing Cappuccino, Latte Macchiato or Creamy Latte.”
- Open the steam connector door and place the Rapid Cappuccino System in place after filling it with milk. It will take fifteen seconds to heat the milk.

- Then, place the specific cup of the selected beverage under the coffee outlet and arrange the milk spout by raising it to the right level. Then, adjust the texture of the milk froth as wanted by turning the regulator left or right. I recommend minimum froth texture for a Cappuccino and maximum froth texture for Latte Macchiato

- For at least three seconds, press and hold the desired coffee button ( Cappuccino/Latte Macchiato/Creamy Latte/Warm milk froth) from the panel. Milk begins to foam, and the button in the programming mode will start flashing.

NOTE: For min/max configurable amounts, please see the “Factory settings” section.
NOTE: The order of coffee and milk varies on the recipe.
- When the required milk froth volume is obtained, release the button. The button will rapidly blink in the: programming mode. (Cappuccino/Creamy Latte/Latte Macchiato). This is where the programming for the Warm milk froth beverage stops.

- Touch and hold the same button, and it will begin the brewing process. When the required coffee volume is obtained, release the button. Now, the recipe volume is saved for the next preparations. To confirm the new water volume, the button blinks three times.

NOTE: The volume of milk froth produced is determined by the type of milk used, its temperature, and the position of the milk regulator knob.
Daily Care Of Nespresso Lattissima Touch
Daily care of your Nespresso Lattissima Touch is crucial to ensuring it operates efficiently and produces quality beverages every time. Regular cleaning of the machine, descaling and proper maintenance will not only extend the lifespan of the machine but also prevent potential malfunctions and ensure that the taste and aroma of your coffee remain consistent. By taking the time to care for your Nespresso Lattissima Touch on a daily basis, you’ll be able to enjoy great-tasting coffee for years to come.
NOTE: Never Use harsh cleaning agents or solvent cleaners. To clean the machine’s surface, use a clean wet cloth and a mild cleaning product. Except for the Rapid Cappuccino System components, do not put any machine components in the dishwasher.
- First, remove the capsule and drip tray and rinse them out. Then, take out the water tank and empty any remaining water. Before refilling the tank with fresh, potable water, be sure to rinse it out thoroughly.

- To expel the capsule into the used capsule container, raise and lock the lever. Then, to eject the capsule into the used capsule container, lift and close the lever. Next, place a container underneath the coffee outlet and press the Lungo button to initiate the rinsing process..

- Using a clean damp cloth, clean the coffee outlet and then wipe off the machine’s surface.

Hand Washing Of Rapid Cappuccino System (R.C.S.)
If You are too lazy to completely wash the Rapid Cappuccino System of your Nespresso Lattissima Touch, Do not worry, I have a solution for this too, which is handwashing. Hand washing of the Rapid Cappuccino System (R.C.S.) is a simple process that can be done regularly to maintain the cleanliness and proper functioning of the machine. Here are the steps for hand washing the R.C.S. Follow these simple to keep your brewer clean by merely handwashing.
NOTE: When no dishwasher is available, the R.C.S. components can be washed by hand. In that situation, the technique must be repeated daily to be effective.
- First, disassemble the Rapid Cappuccino System. If you want to know the details, see this article disassemble the Rapid Cappuccino System section.
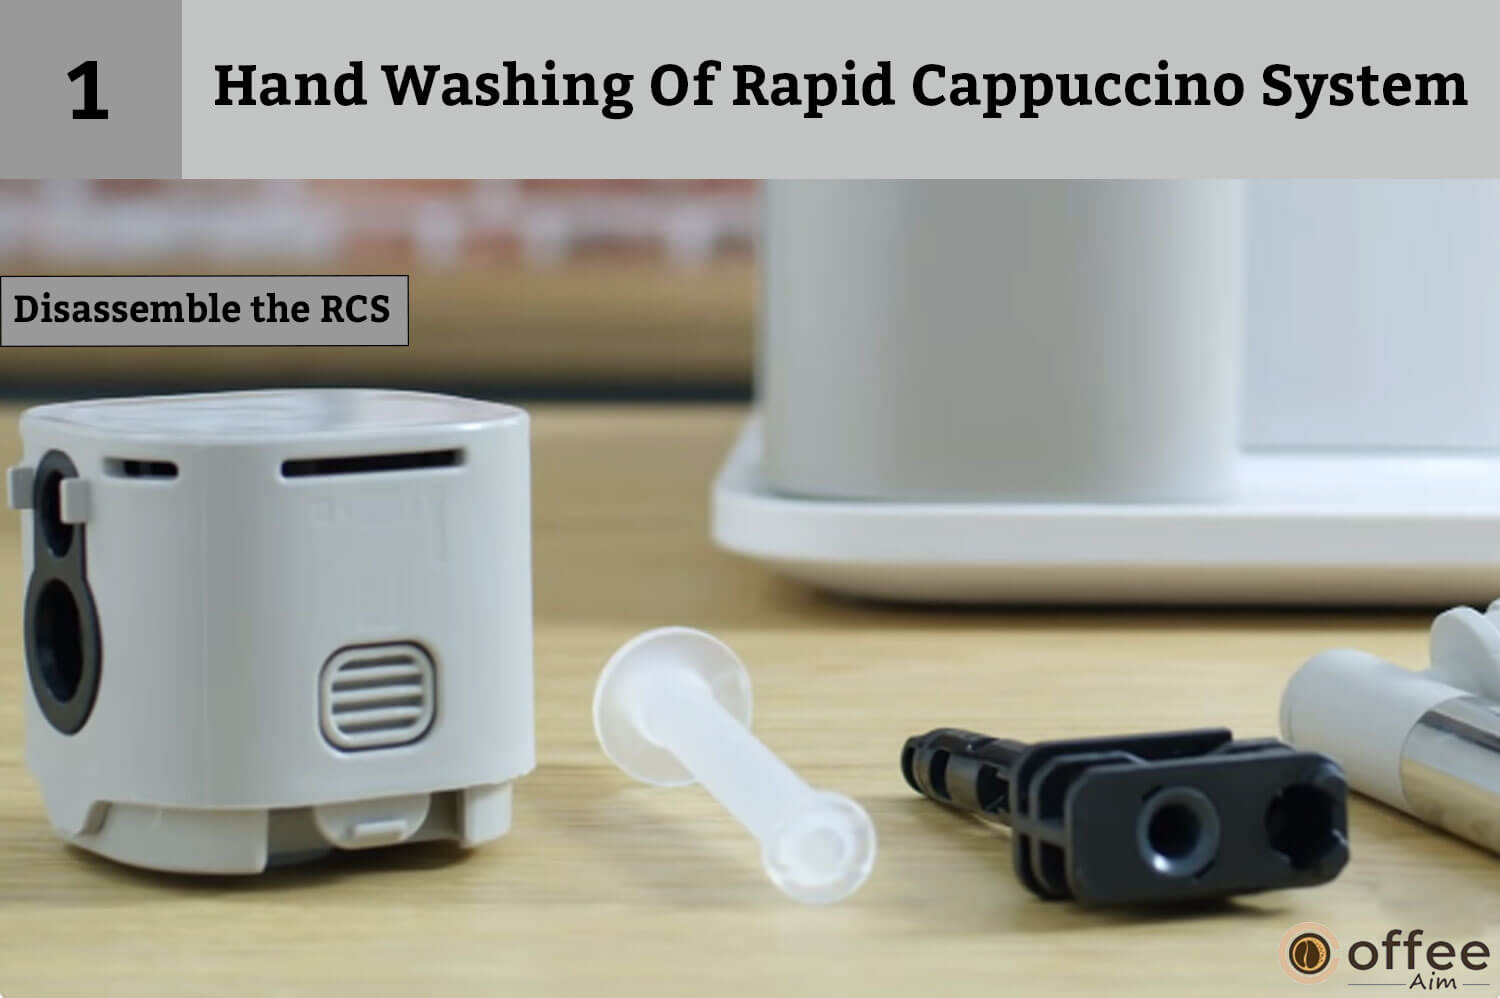
- Soak all of the components in warm or hot potable water along with a mild or soft detergent for at least 30 minutes, then rinse them thoroughly with warm or hot potable water. Be sure not to use strong or strongly scented detergents.

- Clean the Milk tank’s interior with a light or gentle detergent before rinsing it with warm or hot potable water. Never use abrasive materials that might harm the equipment’s surface.

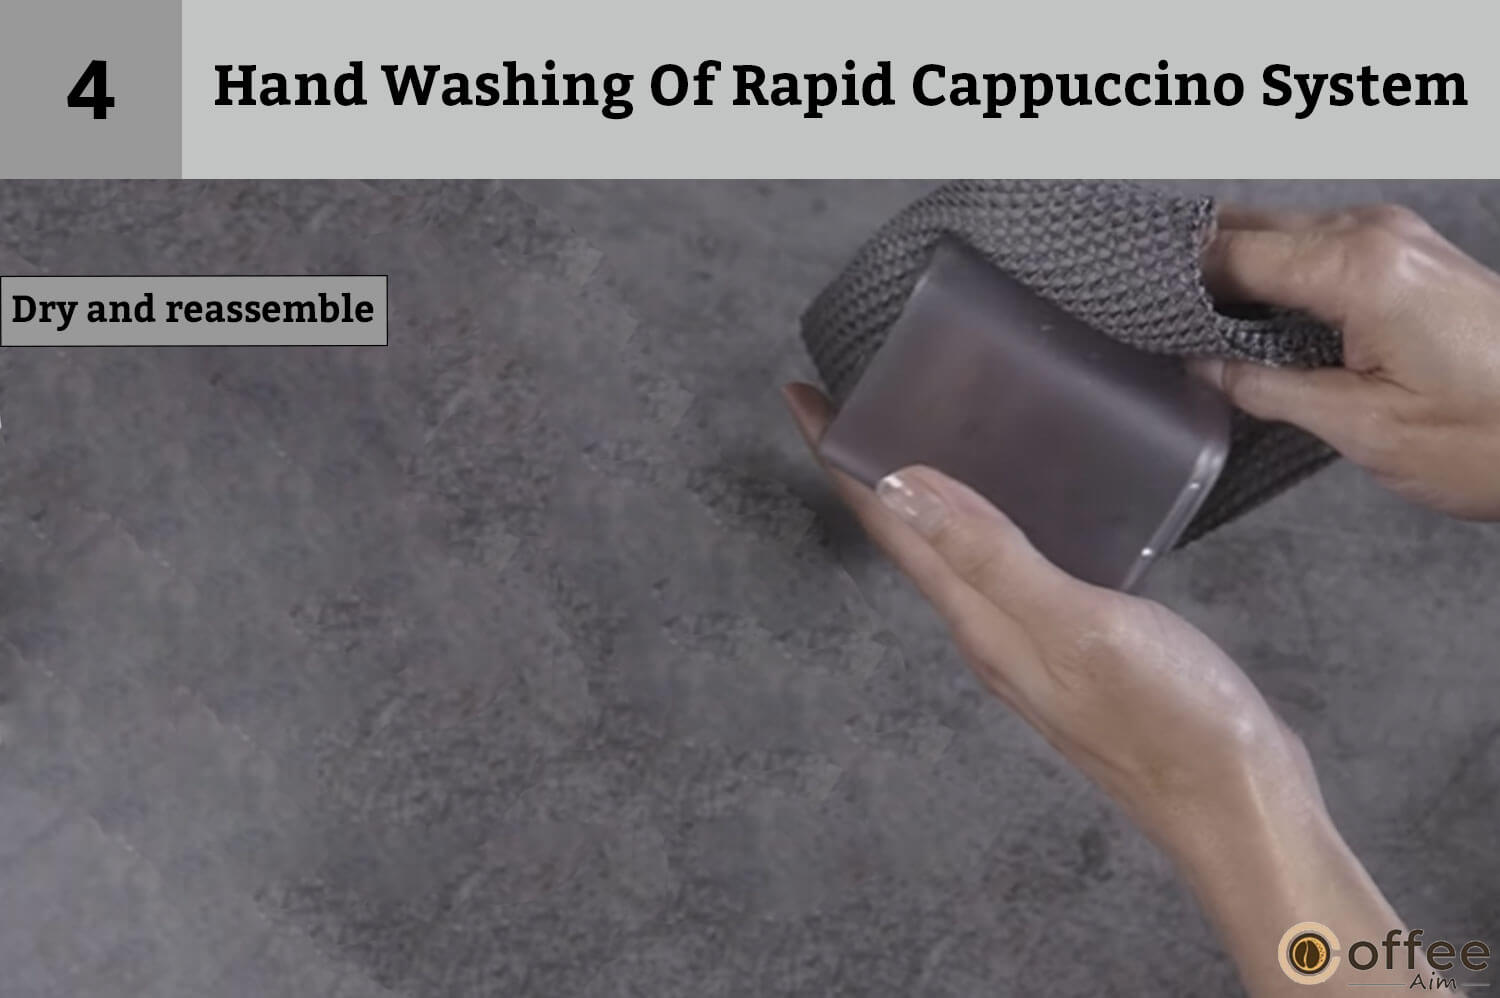
- Dry all components with a new, clean cloth and then reassemble.
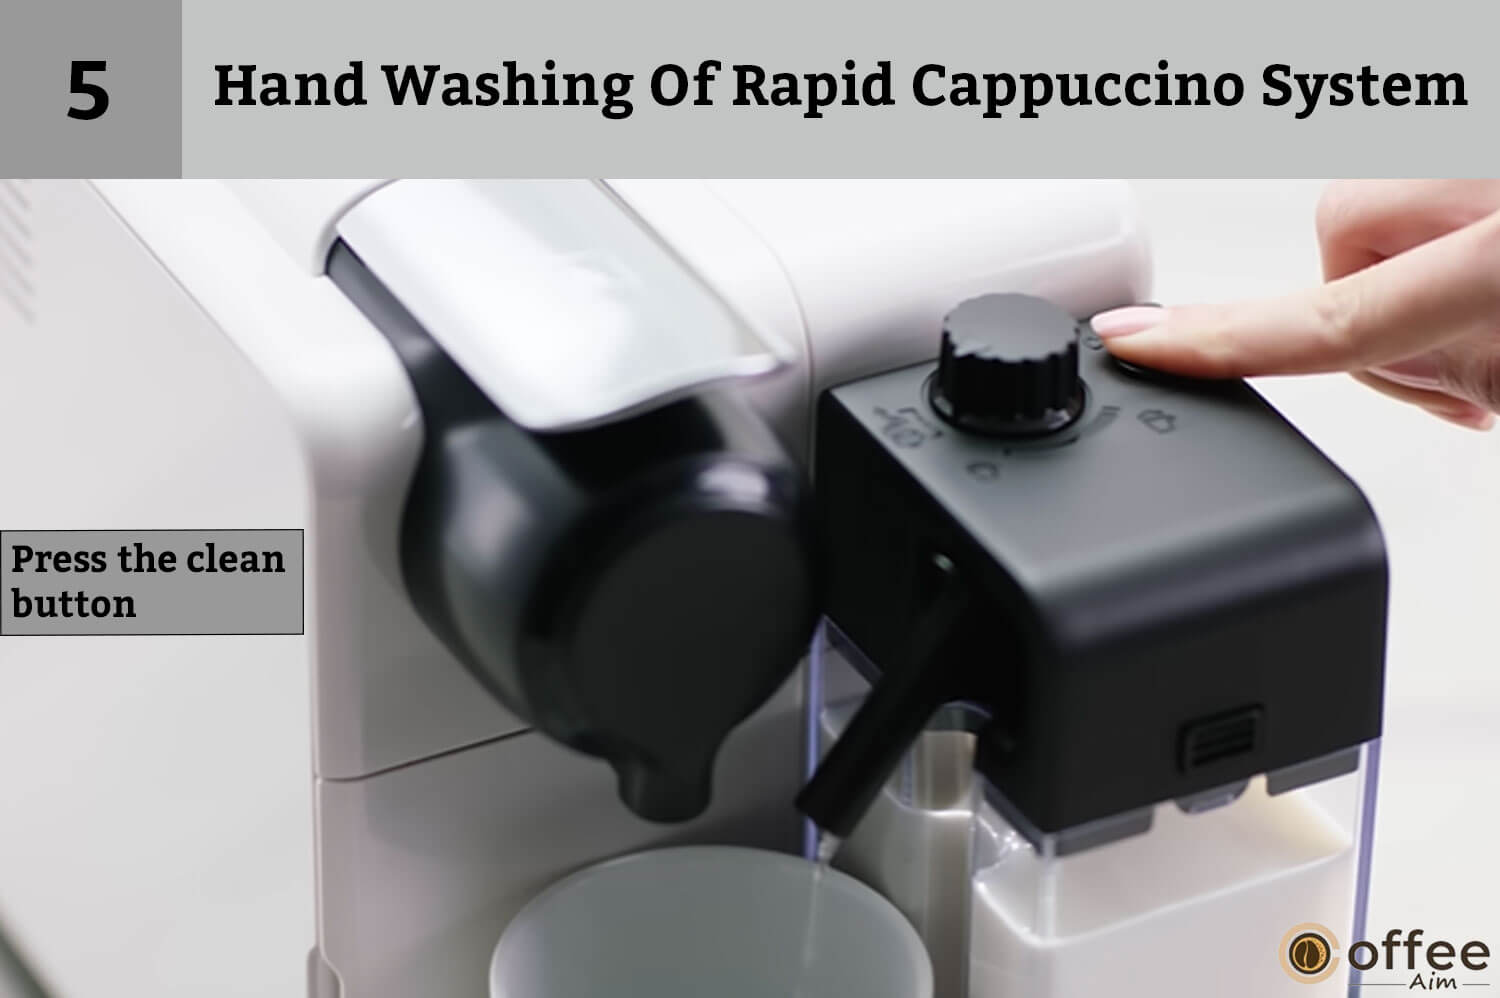
- Use the “Clean” button before preparing the milk beverage after reassembling and attaching the RCS to the machine.
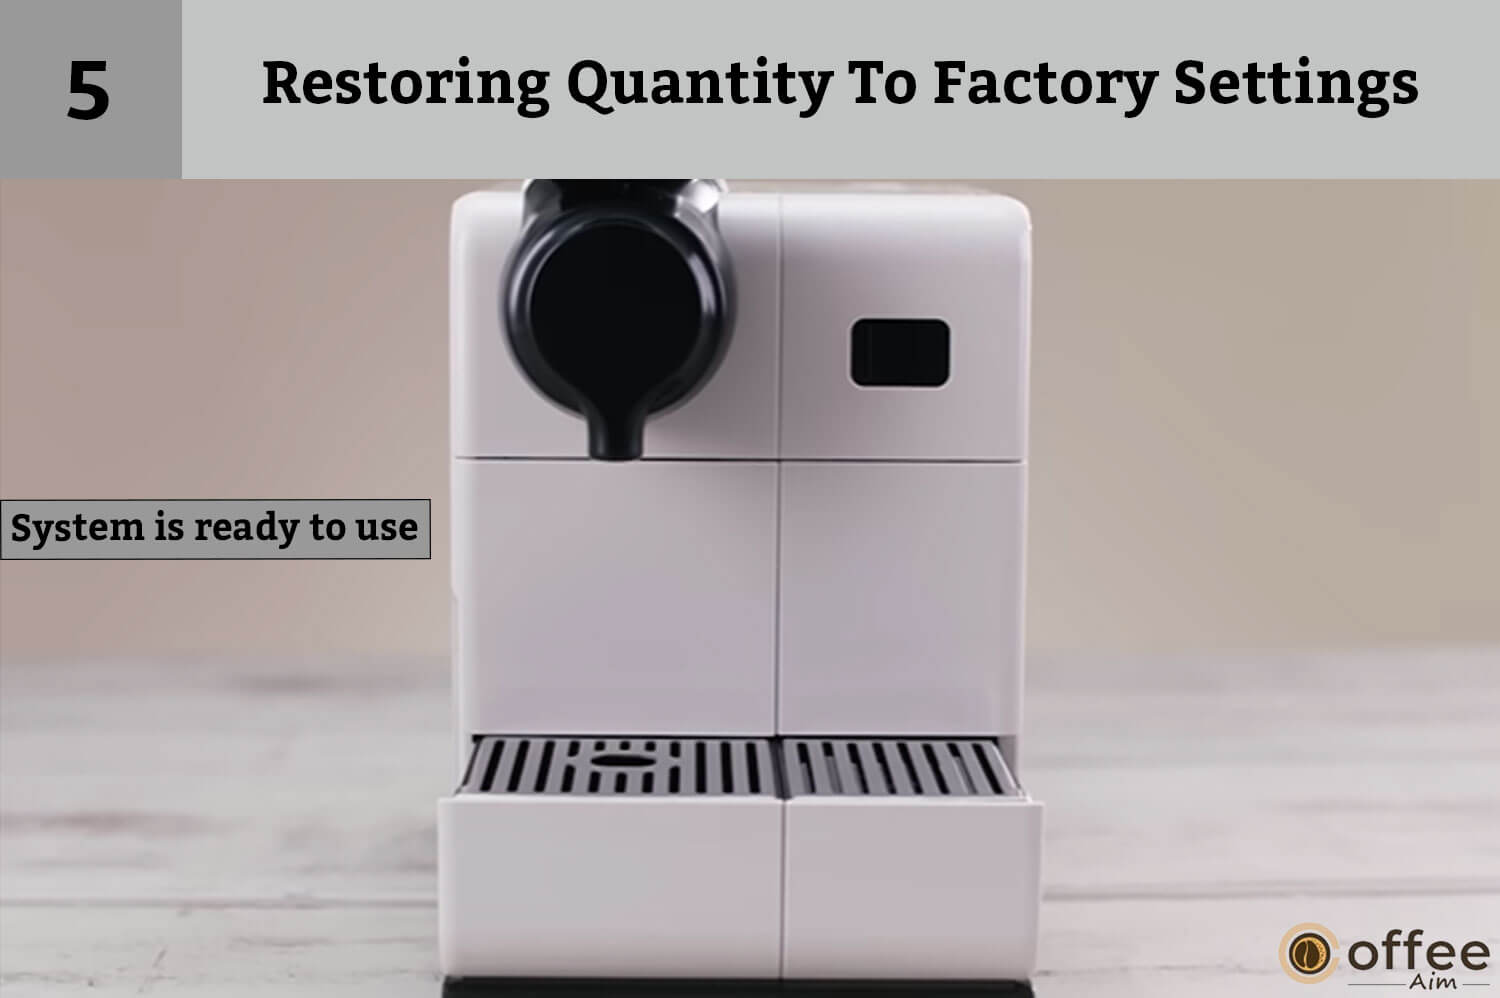
Restoring Quantity To Factory Settings
It’s possible that the programming quantities may become altered and need to be restored to their original factory settings during prolonged use. Restoring the quantity to factory settings is a straightforward process that ensures that your coffee machine is functioning optimally and producing the perfect cup of coffee every time. In the guide below, we’ll walk you through the steps to restore the quantity of your Nespresso Lattissima Touch coffee machine to its factory settings.
NOTE: the Menu mode turns off automatically after 30 sec if no actions are performed or can be turned off manually by pressing the Lungo and Milk froth buttons simultaneously for 3 seconds.
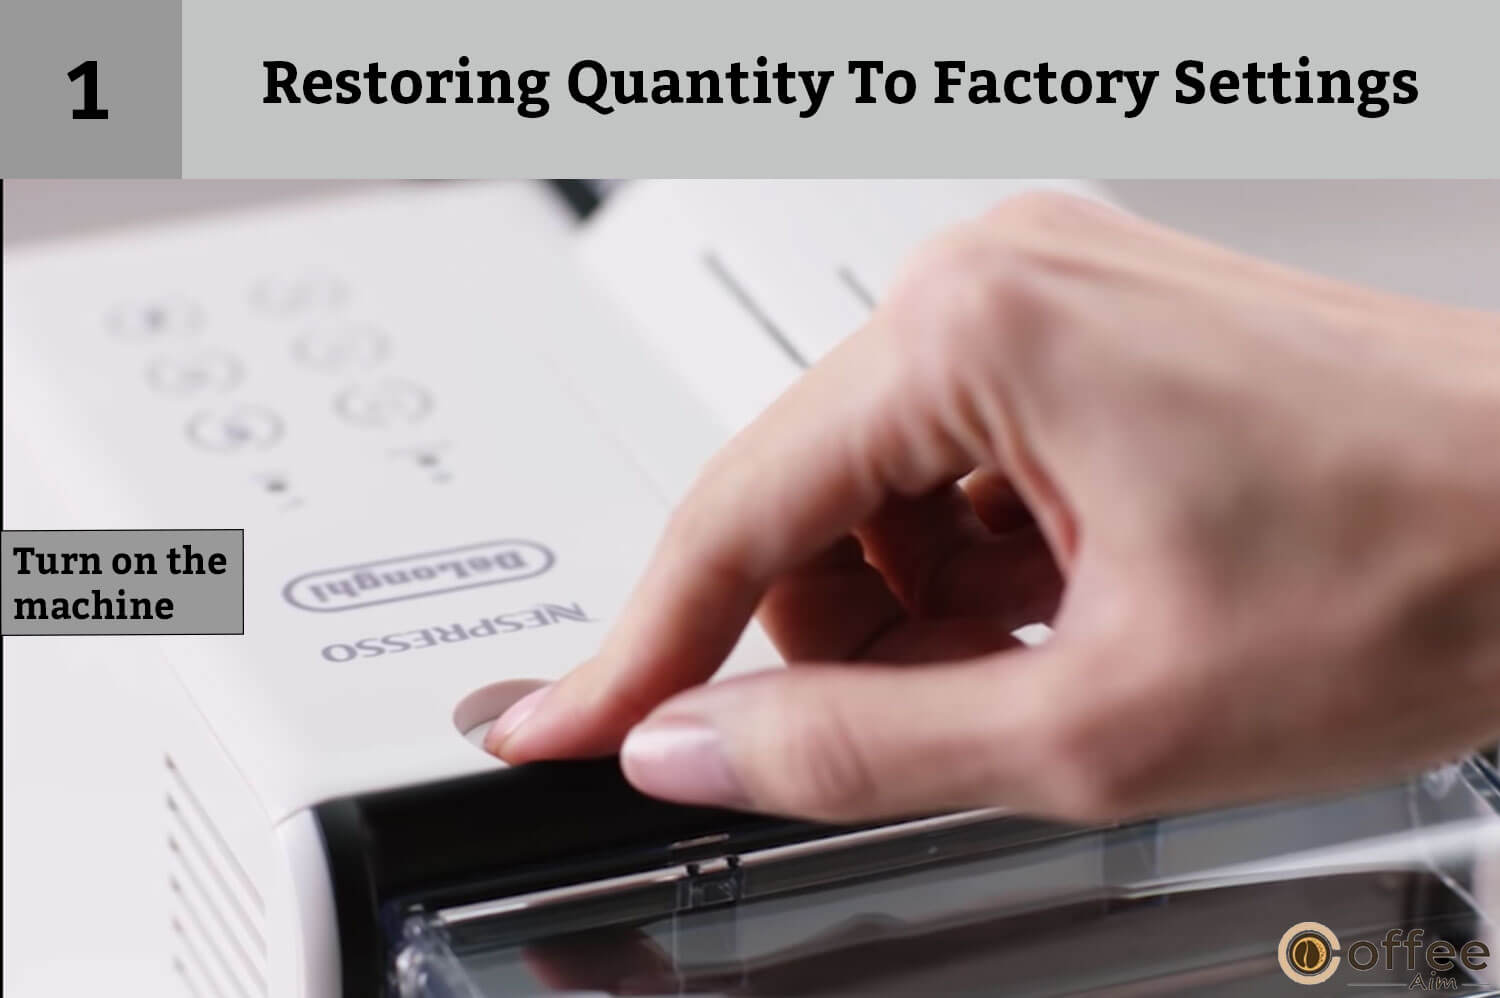
- Turn on your Nespresso Lattissima Touch.
NOTE: Remove the milk jug.
- To enter Menu mode, press the Lungo and Warm milk froth buttons simultaneously for 3 seconds: the descaling and clean alarms begin blinking.
NOTE: If there are no actions performed, the Menu mode will automatically exit after 30 seconds. Alternatively, you can manually exit the Menu mode by pressing the Lungo and Milk froth buttons simultaneously for 3 seconds.

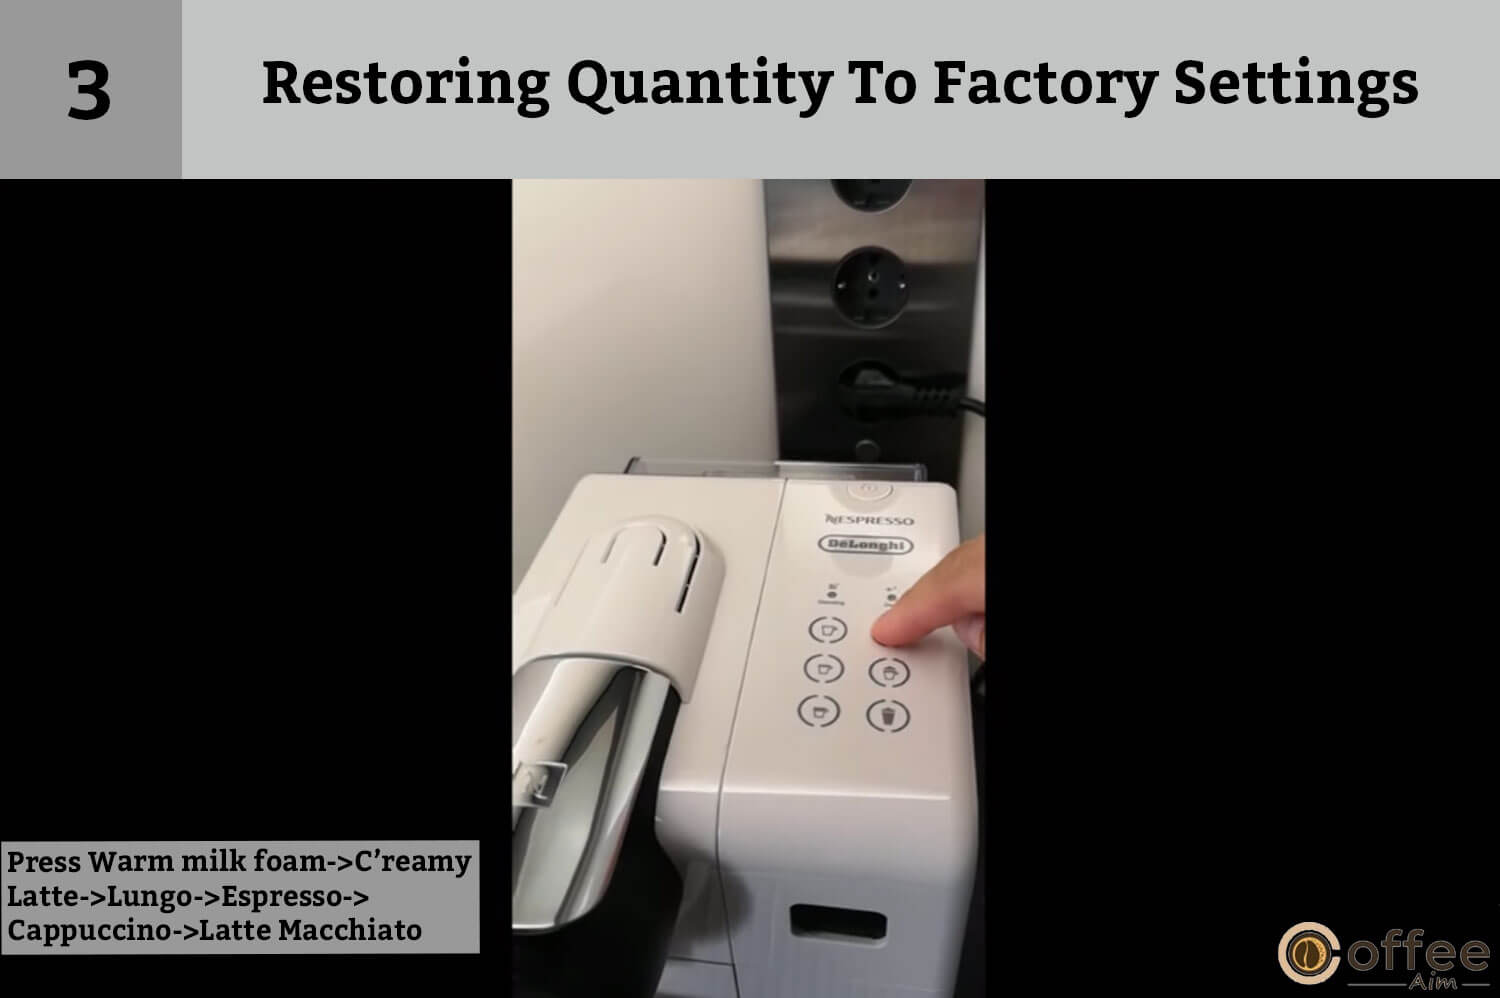
- Touch the following buttons in a single continuous movement: Warm milk foam->Creamy Latte->Lungo->Espresso->Cappuccino->Latte Macchiato.
- The Warm milk froth button blinks to indicate that the machine is in reset mode. Confirm by pressing it. All buttons blink three times, indicating that all volumes have been reset.

- The menu will automatically close, and the system will return to ready mode.
CAUTION: If you have programmed the machine to dispense more than 150 ml of coffee, it is important to allow the machine to cool down for 5 minutes before preparing the next coffee. This will help to ensure that the machine is not damaged and will continue to function properly.
There is a danger of overheating!
Factory Settings
Following are the default settings of your Nespresso Lattissima Touch:
| Espresso: 40 ml | 40 ml/ 1.35 oz |
| Cappuccino | Milk*: 50 ml/ 1.69 oz |
| Coffee: 40 ml/ 1.35 oz | |
| Latte Macchiato | Milk* 150 ml/ 5.07 oz |
| Coffee: 40 ml/ 1.35 oz | |
| Lungo: 110 ml | Lungo: 110 ml/ 3.72 oz |
| Creamy Latte | Milk*: 150 ml/ 5.07 oz |
| Coffee: 40 ml/ 1.35 oz | |
| Warm milk froth | 120 ml/ 4.06 oz |
| Automatic power off | 9 min |
NOTE: We recommend that you retain the factory settings for Espresso and Lungo to provide yourself the best outcomes for each of the coffee variants.
NOTE: The volume of milk froth depends on the type of milk used, its temperature, and the position of the milk regulator knob.
INFORMATION: The Milk volume can be programmed from 30 to 200 ml Whereas the Coffee volume can be programmed from 25 to 200 ml.
Descaling
You have come so far, now it’s time to return the favors to your brewer by descaling your Brewer. Are you thinking why? The reason is, with the passage of time calcium deposits, also known as scale, can build up in your Nespresso Brewer Although the scale is not harmful, yet it can negatively impact the performance of your brewer if not properly cleaned.
To maintain the best performance and ensure your coffee tastes best, it’s important to regularly de-scale your Nespresso Brewer. This process removes any contaminated minerals or other elements that may have accumulated over time. For optimal performance, it is recommended to de-scale your brewer every three to six months. These simple steps can help prolong the life of your brewer and keep it functioning at its best. Let’s get started!
INFORMATION: It will take roughly 25 minutes to descale.
- Make sure to descale your coffee maker when its descaling indicator flashes orange in ready mode.

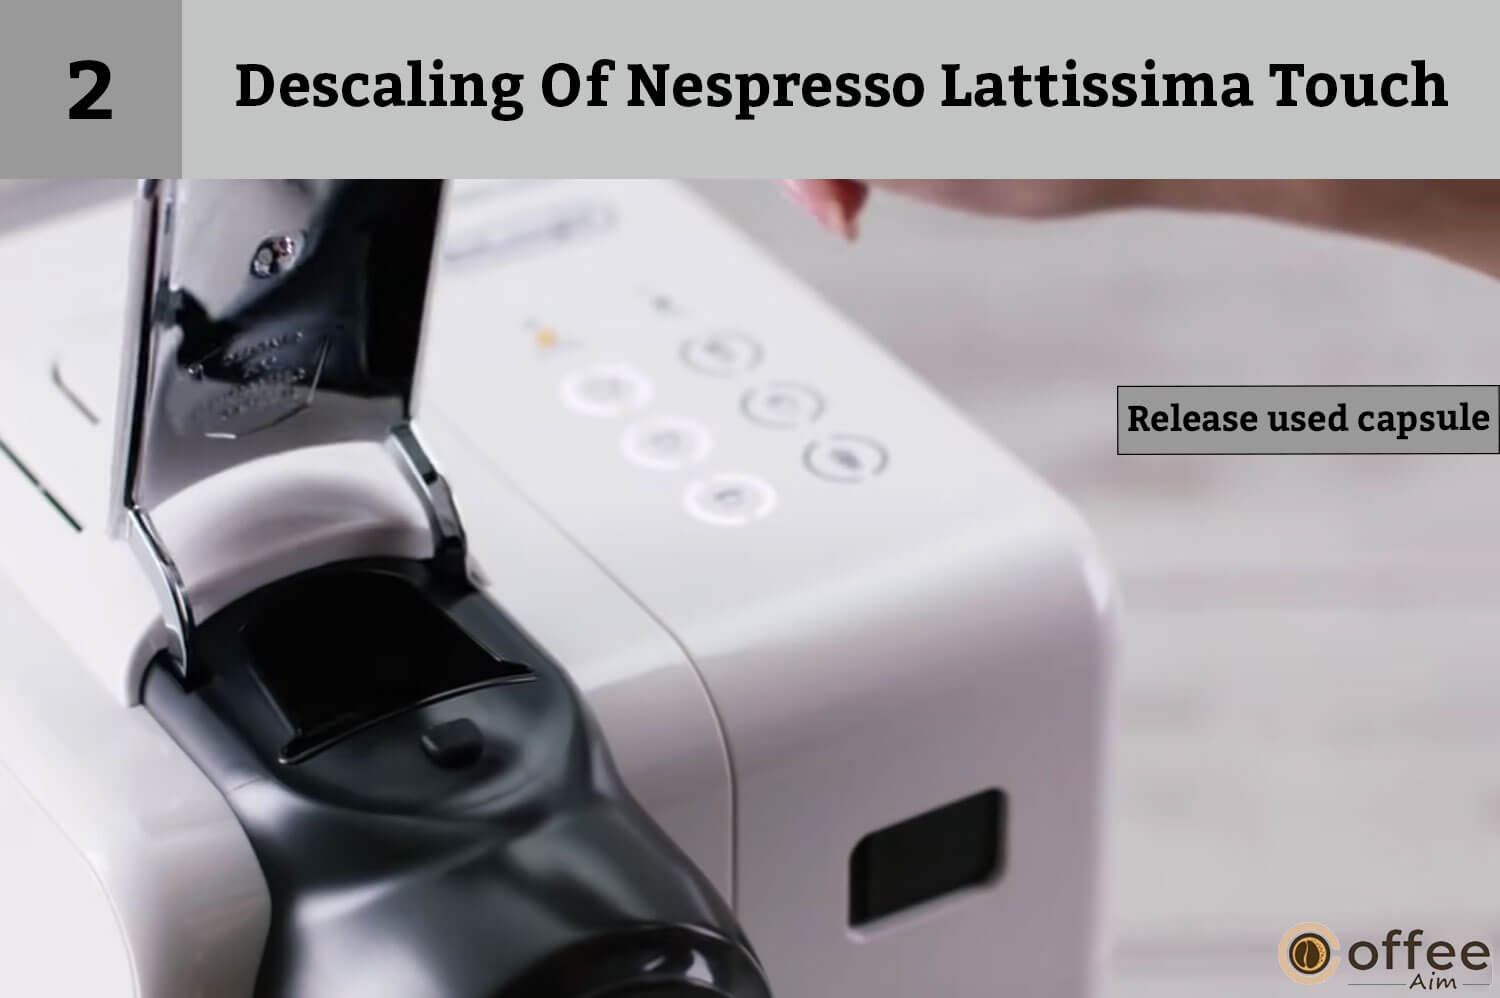
- To release any capsules in the used capsule container, lift and shut the lever.
- Empty the drip tray as well as the capsule container. Fill the water tank with 500 ml of water and 100 ml of Nespresso descaling solution.

- Open the descaling pipe storage door. Insert the descaling pipe into the machine’s steam connection.

- The machine will switch to descaling mode. Throughout the descaling process, the descaling indicator blinks orange. you will see the Warm milk froth button shine white.

- Place a container with a minimum capacity of 1 litre underneath both the coffee outlet and the descaling pipe nozzle.

- Press the Warm Milk Froth from the menu. Descaling fluid alternatively exits through the drip tray, coffee outlet, and descaling pipe.

- The Warm milk froth button will shine after the descaling procedure is finished (the water tank becomes empty).

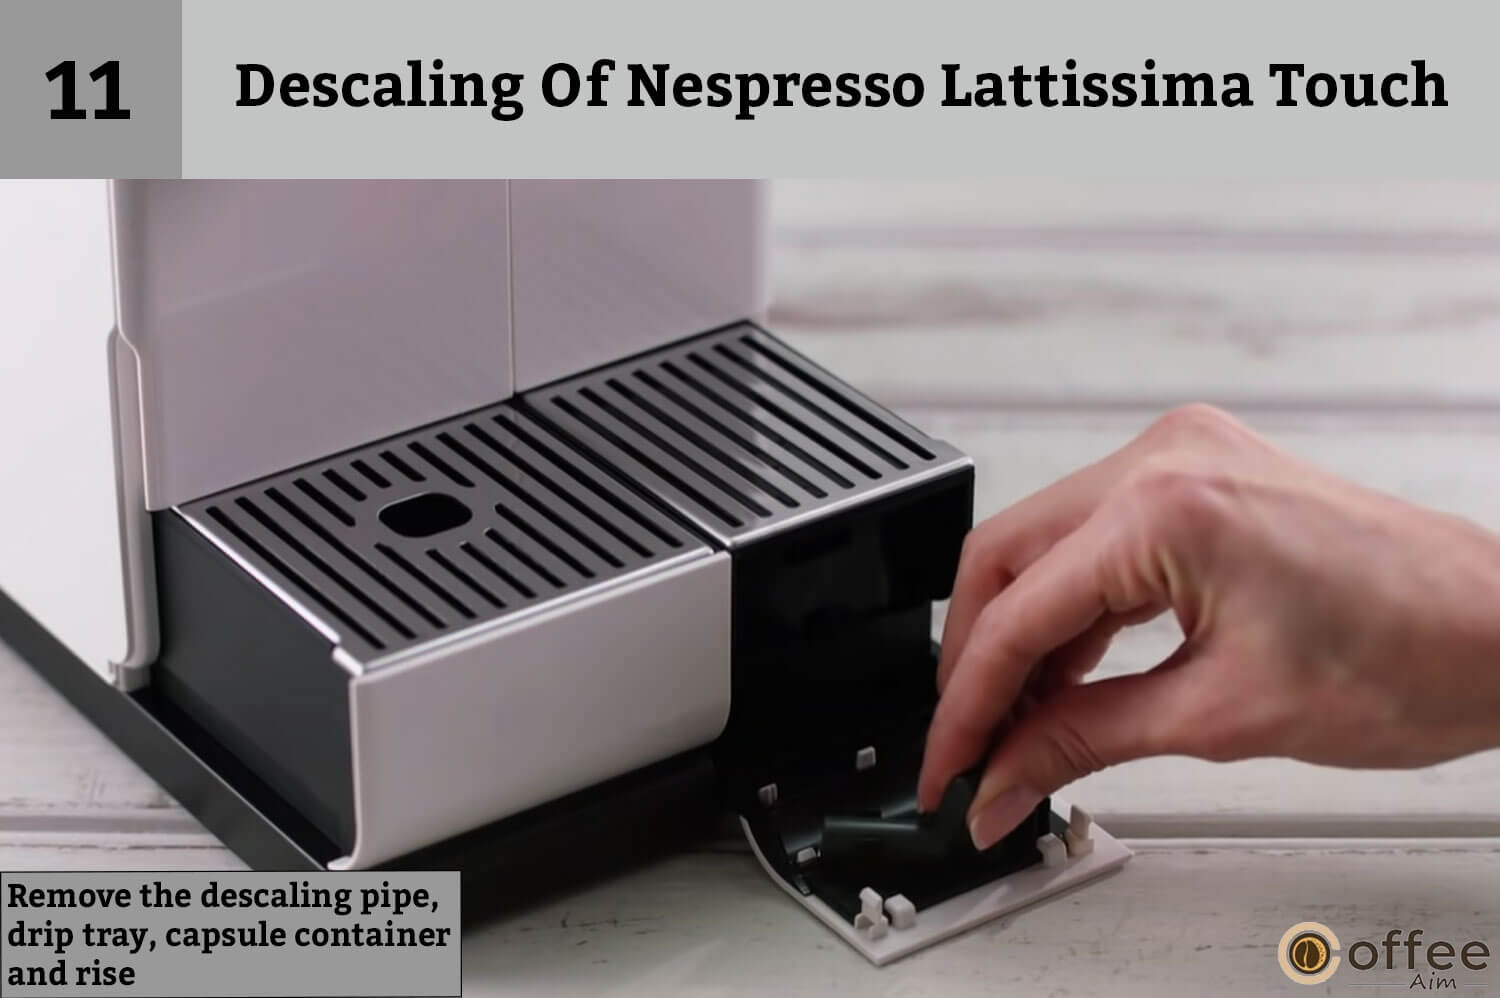
- Fill the water tank with new potable water up to level MAX and empty the capsule container, drip tray, and rinse out.

- To initiate the rinsing cycle, press the Warm milk froth button again. The cycle will continue through the coffee outlet, descaling pipe, and drip tray until the water tank is completely empty. This will help to ensure that all components are properly rinsed and free from any residue or buildup.

- When the rinsing operation is complete, the machine will turn off. After that, the descaling pipe should be removed and stored. Then, remove the drip tray and the capsule container. Rinse and fill up the water tank with clean, potable water.
- Use a damp cloth to clean the machine. Congratulations, you have now finished descaling the machine.

Water Hardness Setting
The water hardness setting is an important aspect to consider when using a coffee machine, as it can affect the taste and quality of your coffee. Hard water can cause mineral buildup in the machine, leading to poor performance and a shorter lifespan. By adjusting the water hardness setting on your Nespresso Lattissima Touch, you can ensure that it’s functioning optimally and producing great-tasting coffee. In this guide, we’ll discuss the importance of water hardness and how to adjust the setting on your coffee machine for optimal performance. Let’s start!
- Place the water hardness sticker underwater for 1 second.

- The number of red squares represents the degree of water hardness.

- Turn on the machine.

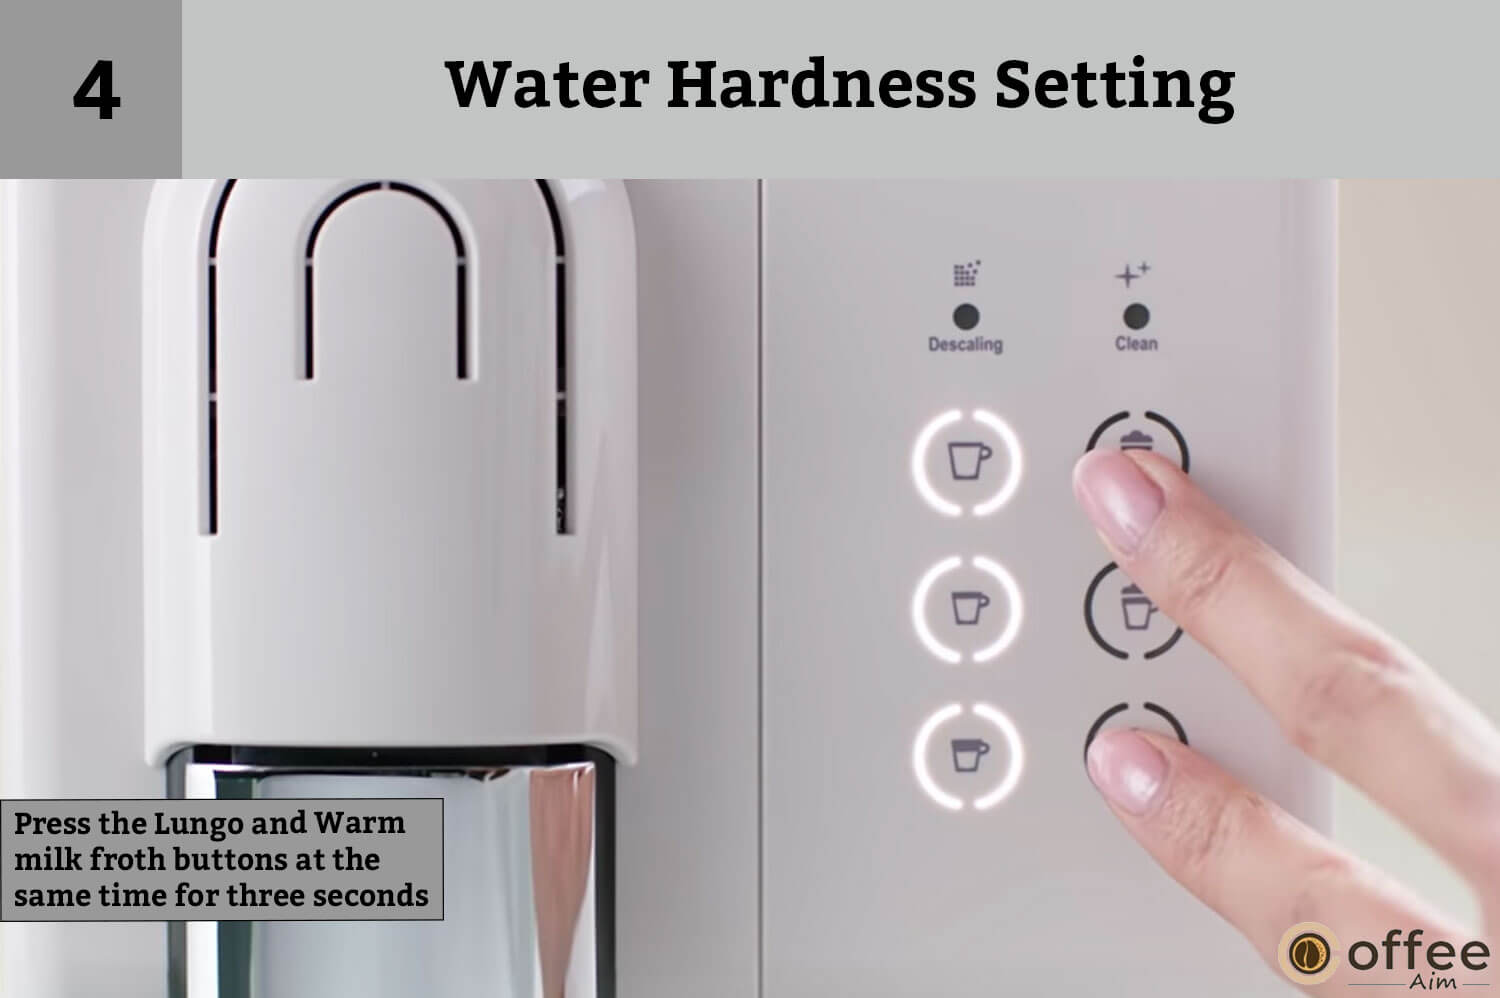
- To enter Menu mode, press the Lungo and Warm milk froth buttons at the same time for three seconds. The descaling and clean alarms will then begin blinking.
NOTE: The menu mode automatically exits after 30 seconds if no actions are taken. It can also be manually exited by pressing the Lungo and Milk Froth buttons simultaneously for 3 seconds
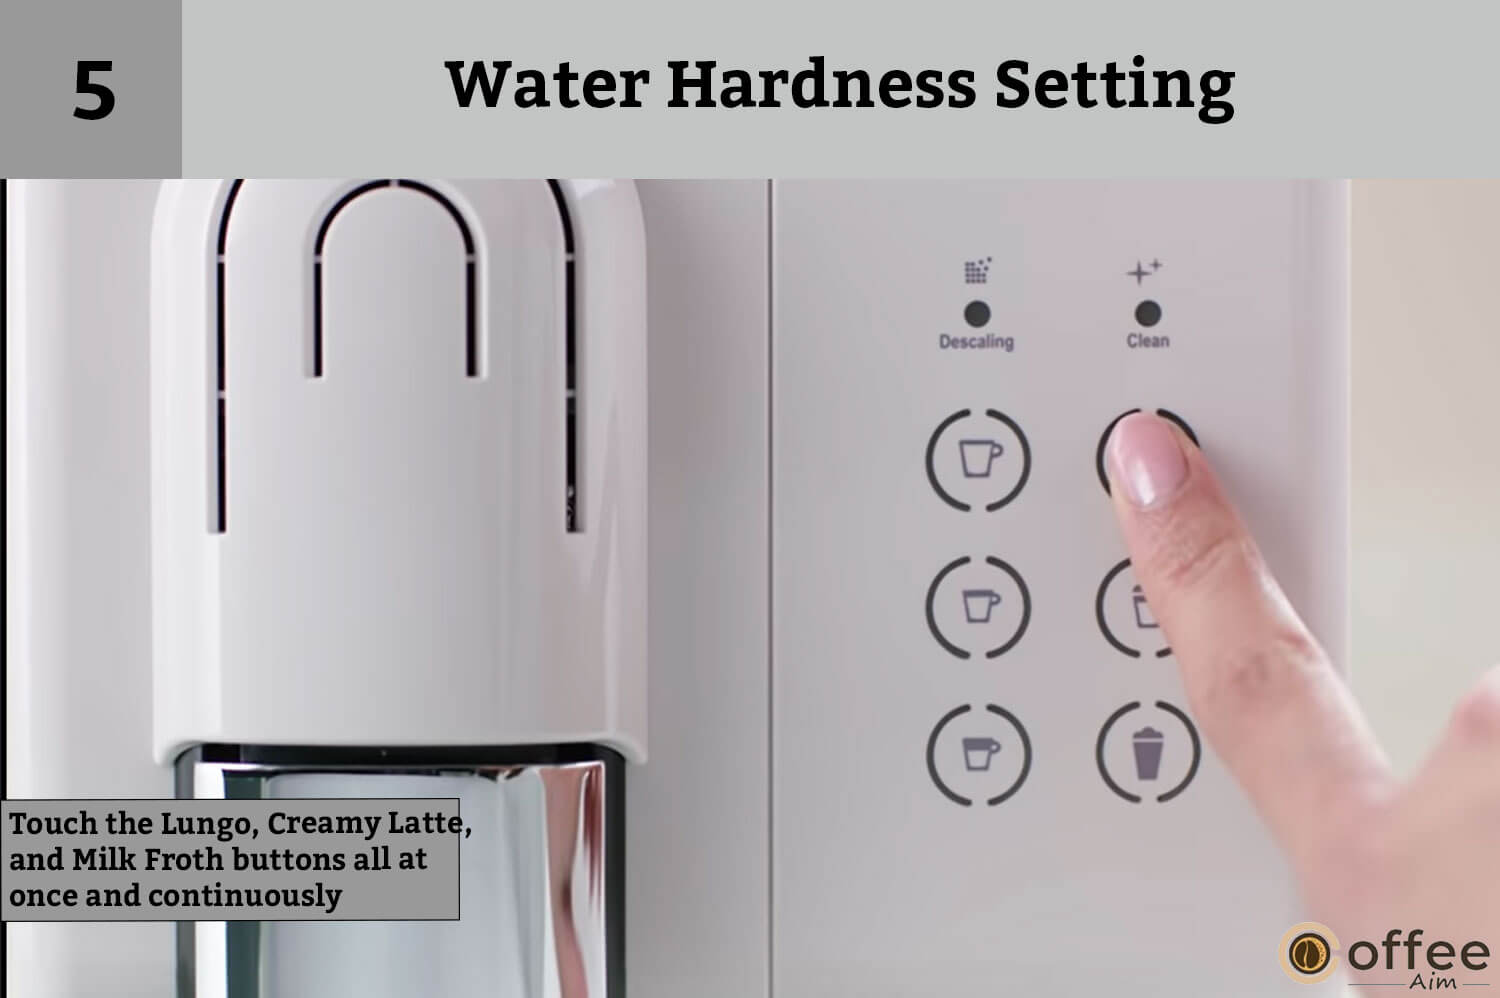
- Touch the Lungo, Creamy Latte, and Milk Froth buttons all at once and continuously. The matching buttons will show the current water hardness setting (steady light).
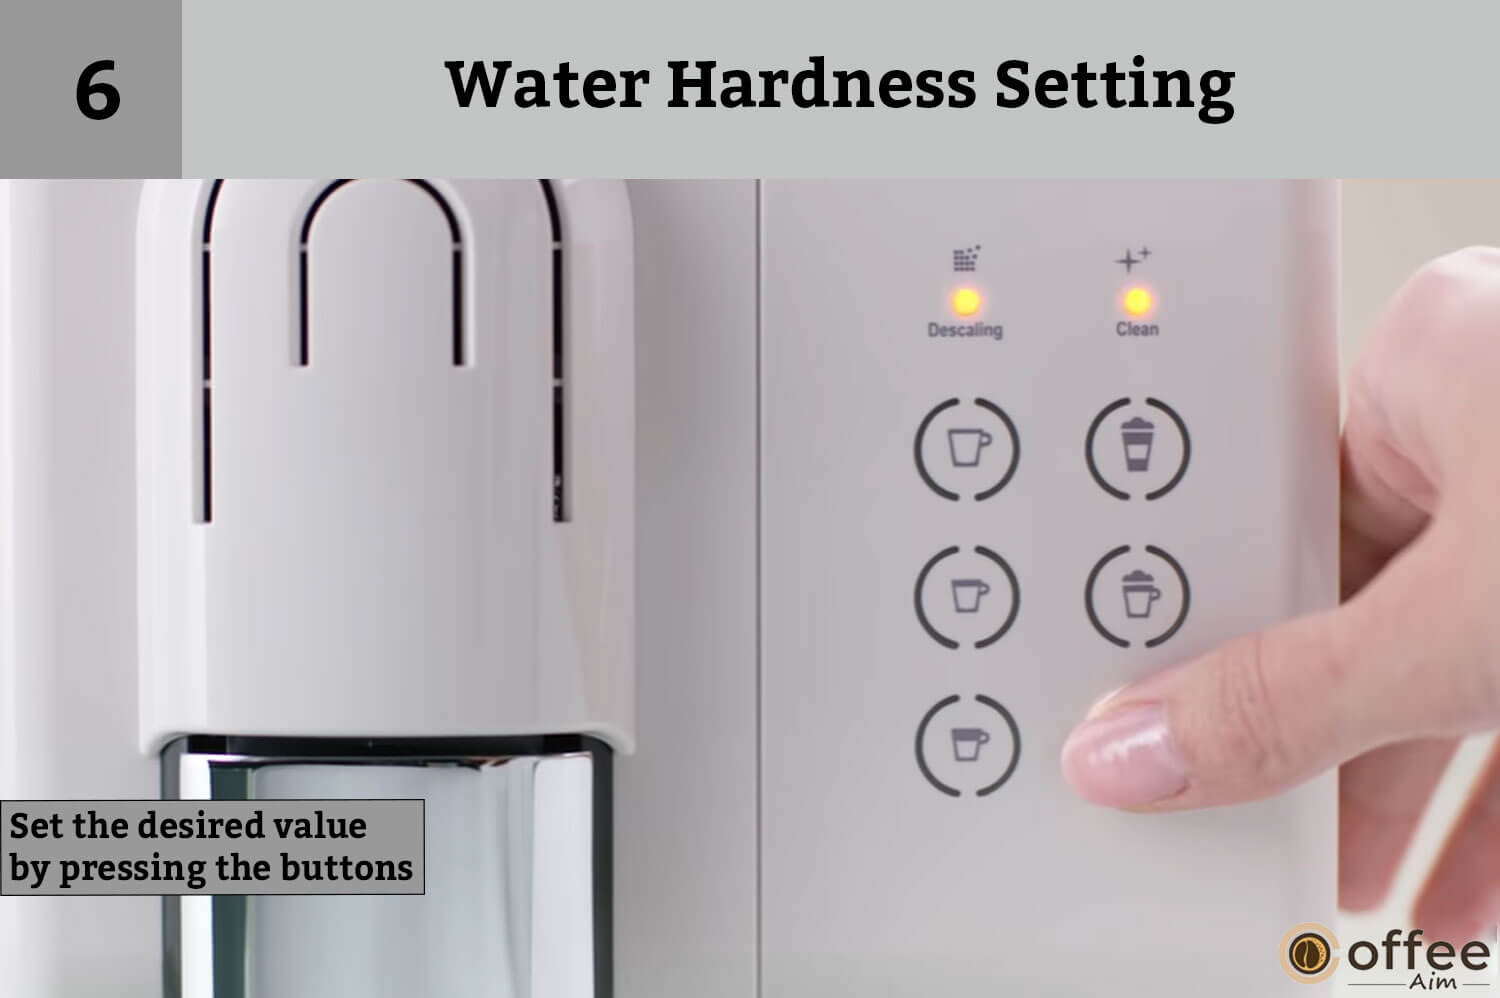
- You can quickly set the desired value by pressing the buttons. The buttons will blink three times rapidly to confirm the new value, all within 15 seconds.
- The system will immediately return to ready mod when the menu ends

| Coffee Setting | Level | dH | fH | |
| Lungo | 0 | >4 | >4 | >50 |
| Creamy Latte | 1 | >4 | >7 | >70 |
| Warm Milk Froth | 2 | >7 | >13 | >130 |
| Warm Milk Froth + Lungo | 3 | >14 | >25 | >250 |
| Warm Milk Froth + Creamy Latte | 4 | >21 | >21 | >380 |
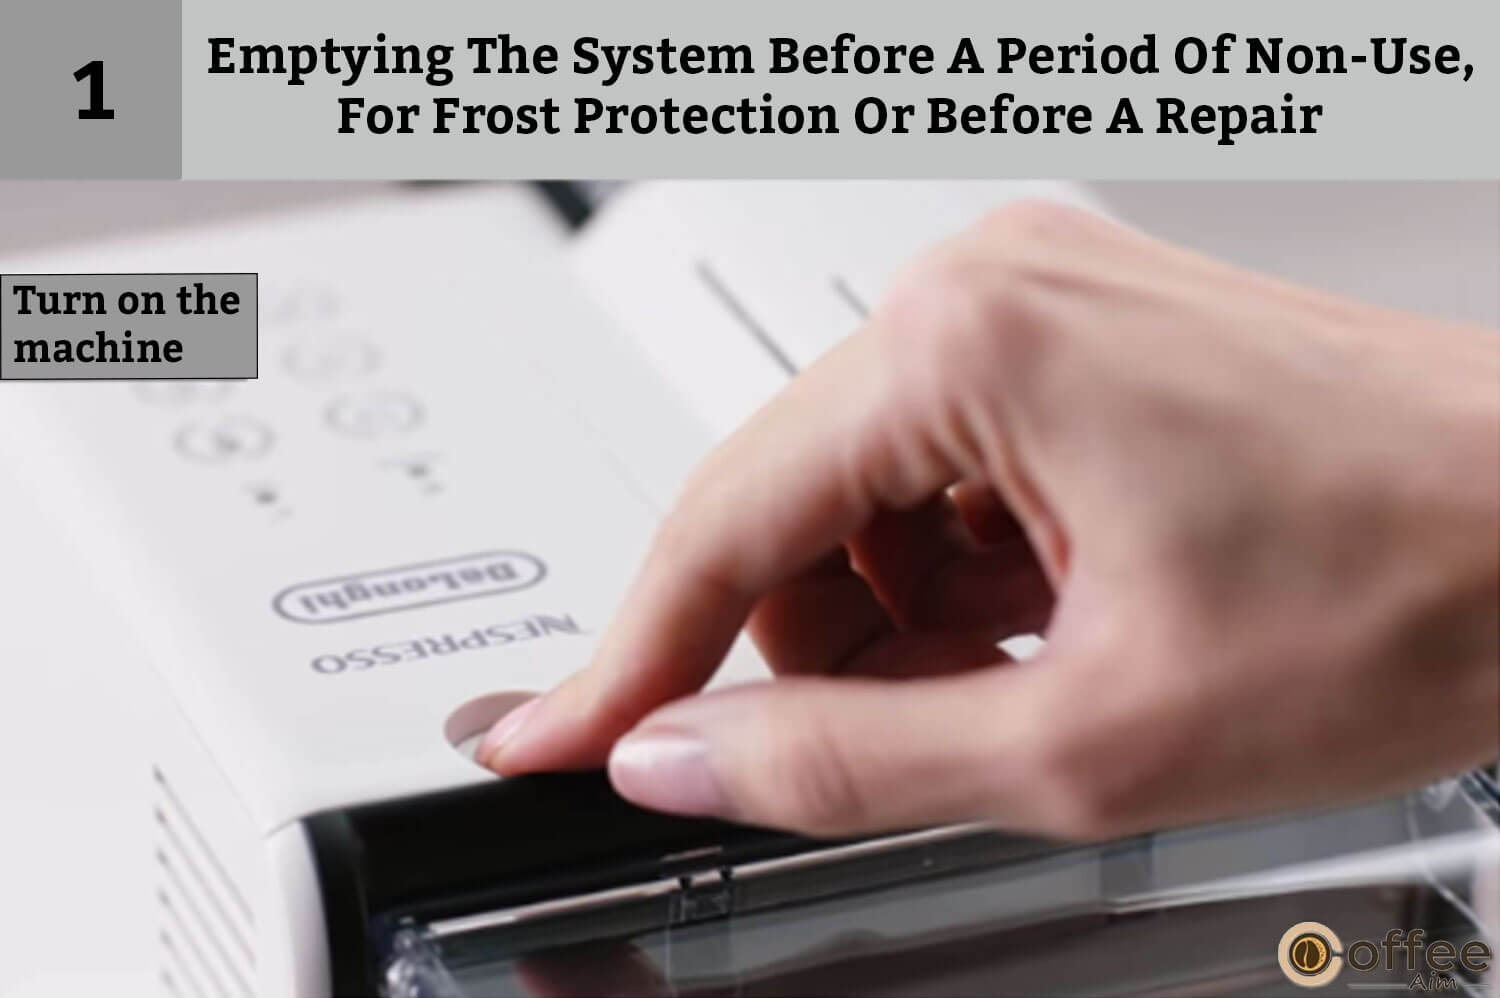
Emptying The System Before A Period Of Non-Use, For Frost Protection Or Before A Repair
I know how much joy and convenience you brewer can bring to your daily routine. But what about when you need to put your machine away for an extended period of time, such as during the winter months or when you’re going on vacation? It’s important to take proper care of your machine during periods of non-use to ensure it stays in good condition and is ready for use when you need it again. I will guide you through every step so you do not have to get tensed.
- Turn on the machine
- To remove the water tank, lift the lever to eject the capsule if there is any, and place a container under the coffee outlet.

- Now, To enter Menu mode, press the Lungo and Warm milk froth buttons simultaneously for 3 seconds: the descaling and clean alarms begin blinking.

NOTE: If no actions are taken, the Menu mode will turn off automatically after 30 seconds. It can also be stopped manually by pushing the Lungo and Milk froth buttons simultaneously for 3 seconds.
- Touch the following buttons in a single continuous movement. Creamy Latte ->Cappuccino.

- The Warm Milk Froth button blinks for confirmation. Once pressed, the emptying process will start, and the coffee buttons will blink alternately, indicating that the machine is in emptying mode.

- When the procedure is completed, the machine will automatically shut off.

Automatic Power Off
Automatic Power Off is a feature in coffee machines that turns off the machine automatically after a set period of inactivity to conserve energy and prevent overheating. This feature is designed to ensure the machine’s safety and longevity and helps save energy by reducing the amount of power it uses when not in use.
INFORMATION: This machine has an outstanding energy consumption profile as well as an automated power-off option (0W) that allows you to conserve electricity. The appliance turns off 9 minutes after the previous usage. (Factory settings).
NOTE: If no steps are taken, the Menu mode will disappear automatically after 30 seconds. It may also be removed manually by pushing the Lungo and Milk froth buttons simultaneously for 3 seconds.
Follow the instruction to enable the Automatic Power Off system, and play your part in conserving energy.
- Turn on the Machine

- To enter Menu mode, press the Lungo and Warm milk froth buttons at the same time for three seconds. The descaling and clean alarms will then begin flashing.
Note: The menu mode will automatically exit after 30 seconds of inactivity. Alternatively, you can manually exit the menu mode at any time by pressing and holding both the Lungo and Milk froth buttons simultaneously for 3 seconds.

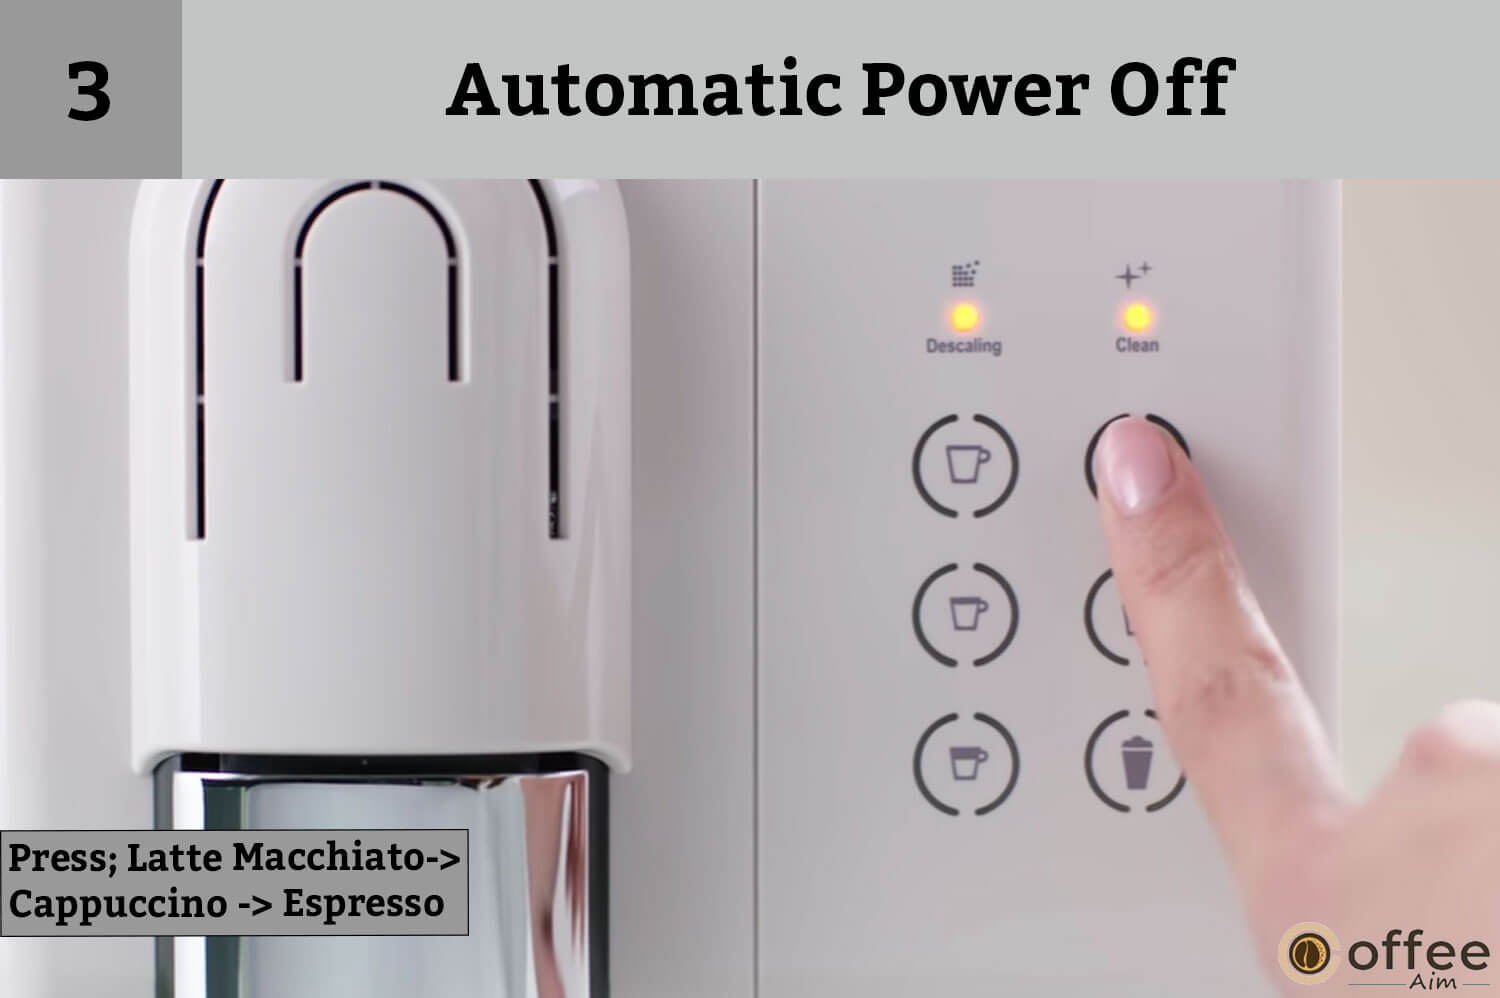
- Press the following buttons in a single movement: Latte Macchiato->Cappuccino -> Espresso.
- Now, within 15 sec, you can set the desired value by pressing the corresponding button. They blink 3 times rapidly to confirm the new value
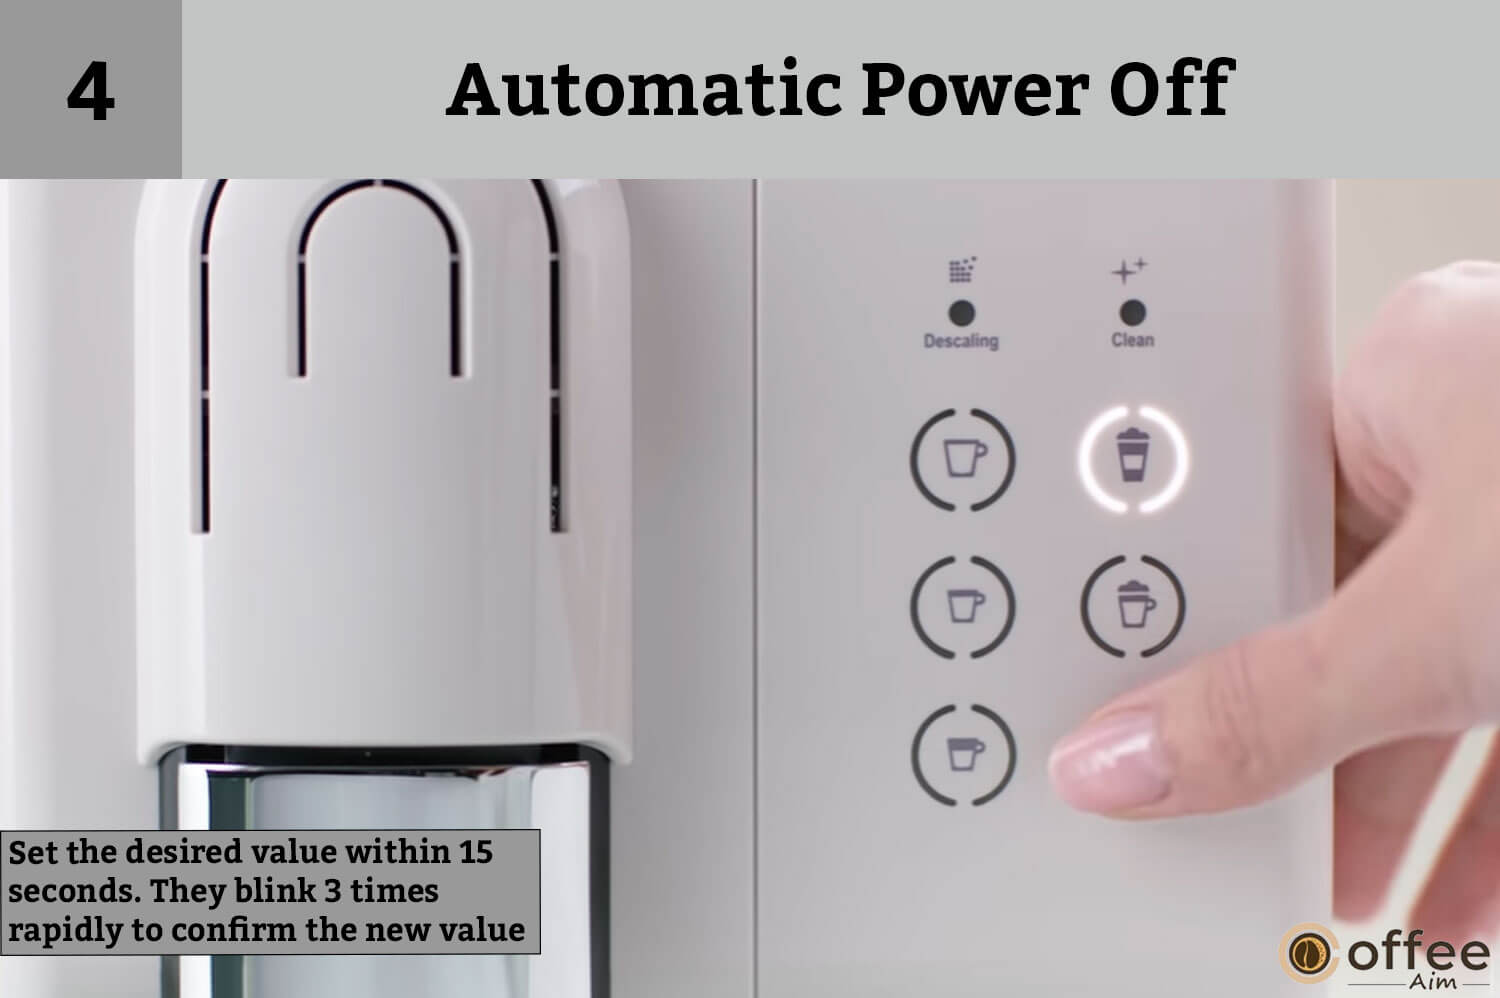
| Automatic power off | |
| Espresso | 8h |
| Cappuccino | 30 min |
| Latte Macchiato | 9 min |
- The menu is now automatically exited, and the system is returned to ready mode.

Troubleshooting
Your taste buds are craving coffee at night and you turn on the Brewer, but encounter a glitch. Don’t worry! Instead of relying on a professional for minor repairs, you can fix it yourself. Understanding how to handle frequent issues saves you from dependence on professionals and saves time. The following table lists common problems with coffee makers and their solutions. Let’s start!
| PROBLEMS | Possible Solutions |
| No light indicator | Check the primary power source, plug, voltage, and fuse. Contact the Nespresso Club if needed. |
| No coffee, no water | The Water tank can be empty. Fill the water tank or descale if necessary. |
| Coffee comes out very slowly. | The speed of flow depends on the coffee type. Descale if necessary; see Descaling section |
| No coffee, just water runs out (despite inserted capsule) | You should send the appliance for repair or contact the Nespresso Club. |
| Coffee is not hot enough. | Preheat the cup and descale if necessary. |
| The capsule area is leaking (water in capsule container). | You should Check the Position of the capsule and place it correctly.Contact the Nespresso Club if needed. |
| Irregular blinking | Send the appliance for repair or contact the Nespresso Club. |
| All buttons blink simultaneously for 10 seconds and then the machine switches o automatically | It could be an error alarm, suggesting that the machine needs repair. |
| All 6 buttons blink fast 3 times and then the machine goes back to ready mode | Water tank is empty |
| Descaling and cleaning alert blink. | The machine is in menu mode. To exit the menu mode on the machine, press the Lungo and milk froth buttons simultaneously for 3 seconds or wait for 30 seconds for the machine to exit automatically. |
| The descaling alert shines orange and beverage buttons available (descaling alert level 1) | It is a descaling alert due to overwhelming usage of your brewer without running through its descaling mode.You should perform descaling when it detects high usage based on the number of beverages consumed. To maintain optimal performance, it is essential to descale the machine regularly. |
| The descaling alert blinks orange and beverage buttons available (descaling alert level 2) | Descaling process is not done correctly. Descale machine. |
| The descaling alert blinks orange and the Warm milk froths steady light | The machine is currently in the descaling mode. To initiate the descaling process, press the Warm Milk Froth button. |
| The descaling alert shines orange, and beverage buttons are unavailable (descaling alert level 3) | Machine is blocked due to the scale level being too high. Descale machine |
| Clean alert shine orange. | Rinse Milk system. |
| All coffee buttons and all milk recipe buttons ash alternatively | Machine is overheated, wait until the machine cools down. Appliance will be blocked for approximately 10 minutes after emptying. |
| The lever cannot be closed completely | Ensure that the capsule container is emptied and no capsule is blocking the container before using the machine. |
| Quality of Milk foam is not up to standard | Use skimmed or semi-skimmed milk at refrigerator temperature (about 4° C/39.2° F ). Rinse after each milk preparation (see p.Hand Washing R.C.S.). Descale the machine Do not use frozen milk |
| Cannot enter Menu mode. | Be sure to remove the milk jug. Be sure to press Lungo and Milk froth buttons for 3 seconds. Remove the descaling pipe |
Contact The Nespresso Club
If you need additional assistance or have questions, contact the Nespresso Club. You can find the contact information in the “Welcome to Nespresso” folder that came with your machine or on the Nespresso website, nespresso.com.
Warranty
Following are the details about the warranty Nespresso Lattissima Touch offers you.
- The product is covered by a 2-year warranty from the date of purchase.
- De’Longhi will repair or replace any defective product for free during the warranty period.
- Replacement products or repaired parts will have a guarantee of either the remaining original warranty or 6 months, whichever is greater.
- The warranty does not cover defects resulting from accidents, misuse, improper maintenance, or normal wear and tear.
- The limited warranty is in addition to mandatory statutory rights applicable to the sale of the product.
- If you believe your product is defective, contact Nespresso for repair instructions.
Conclusion:
Now that you have a thorough understanding of each component of the Nespresso Lattissima Touch Brewer, you can confidently use it to brew your favorite coffee, lattes, and other beverages with ease. With the knowledge gained from this article, you’ll find the brewing experience to be as simple and enjoyable as the taste of a freshly brewed cup of coffee.
For coffee lovers like us, coffee is more than just a beverage, it’s a passion. At coffeeaim.com, you can find incredible content on the subject. Happy brewing!
FAQs
What pressure is Nespresso Lattissima?
Superior Performance: Equipped with a 19-bar high-pressure pump and a rapid heating system (coffee in 25 seconds and milk beverages in 15 seconds), this machine delivers exceptional results.
How can you make my Lattissima touch hotter?
If you prefer your coffee hot, there’s an easy way to increase the temperature of your coffee without having to wait. One way to do this with an Original line machine is by leaving the last spent capsule in the machine and running one or two brew cycles with your cup under the dispenser. This will preheat your cup as well as the machine, resulting in a hotter cup of coffee. By taking this simple step, you can enjoy a hot and satisfying cup of coffee every time.
Which Nespresso is the strongest?
Black Insomnia coffee is known for being one of the world’s strongest coffees, with caffeine levels averaging around 702 mg per 12 fluid ounces. It is important to note that caffeine levels can vary depending on a variety of factors, including the type of coffee bean used, the roasting process, and the brewing method.
What is the size of the Nespresso Lattissima Touch machine?
- Dimensions (W x H x D): 17.3 x 25.8 x 32.0 cm, 6.81 x 10.16 x 12.6 inches.
- Water Tank Capacity: 0.9 L.
- Capsule Container Capacity: 9-10 used capsules.
- Milk Container Capacity: 0.35 L.