Quick Navigation
Keurig B-140 is a single-cup coffee maker designed for home and office use. It is a compact and convenient machine that brews a fresh cup of coffee in just a few minutes. The machine is easy to use and has various features that enhance your coffee brewing experience. However, if you are new to using Keurig B-140, getting started can be unsafe. In this article, you will get a complete guide using a Keurig B-140 so that you can brew an appetizing cup of coffee in no time. Whether you are a coffee enthusiast or a beginner, this article will help you master using your Keurig B-140. So, let’s get started!
Precautions For Using Keurig B-140
Suppose you’re craving that perfect cup of joe, but suddenly an accident occurs, you get injured, or in the worst-case scenario, you accidentally break your beloved coffee maker. Trust me; you don’t want that to happen! But fear not, my friend. Before we dive into the step-by-step guide on how to use your amazing Keurig B-140, let’s ensure we prevent any mishaps and safeguard our precious coffee moments. By taking a few simple precautions, you can brew with confidence and peace of mind. So, let’s get ready to brew the best cup of coffee while keeping everything and everyone safe and sound. Here are the precautions you need to know.
- All the instructions should be read before the use of Keurig B-140.
- Do not touch hot surfaces. Always hold with handles and knobs and other non-conductor surfaces.
- Handles are available on utensils to avoid any damage.
- Before using your Keurig B-140, it must be appropriately located and installed according to the instructions.
- Your Brewer location should be somewhere other than a hot place, electric burner, or oven.
- There will be the risk of electric shock if cords, plugs, or appliances are immersed in water. So users should avoid these things.
- Before cleaning the appliance, allow it to cool to avoid any damage.
- The water reservoir should be maintained.
- Do not, in any circumstances, cleft or remove the third (ground) hook from the power cord or use an adapter.
- The coffee Brewer should be unplugged before cleaning or making repairs.
- Always plug your Brewer into a grounded outlet. If you need help understanding the grounded instructions, then you should consult with a qualified electrician.
It is just a Summary. For more details, click the link below;
Related: Keurig B-140 precautions
Specifications Of Keurig B-140
Electrical appliances have particular qualities. A little bit of change in its required conditions creates extreme conditions. So, you should know all of its specifications because you must know its limitations. You must know that it suits your needs and fits best in your kitchen. If it does not match your requirements, then there is no need to keep it. Return it instantly. Let’s dig deep!
| Key Features | Explanations |
| Product Line/System | Keurig 1.0 Commercial |
| K-Cup Compatibility | Unlicensed K-Cups, Keurig 2.0 licensed K-Cups |
| Brew Sizes | 6 oz (177.44ml)8 oz (236.59ml)10 oz (295.74ml) |
| Water Reservoir: | 48 oz |
| Water Filter | Compatible but not included |
| Display | Button controls with BrewPower Auto-Off Drain Brewer buttonsA brew size selector knobIndicator lights for Brew Size DescaleAdd WaterHeating and Drain Brewer |
| Temp Control | No |
| Strength Control | No |
| Dimensions | 9.5″ W x 12.3″ D x 13.3″ H |
| Weight | 14.0 lbs |
| Other Features | Commercial UL listedAuto-Off Quiet Brew Technology Removable drip trayDrain Brewer functionHeavy gauge material for office use |
What Will You Find Inside The Box?
You must know about the things found in the box. Because if any of the essential items need to be included, then your Keurig B-140 can not be used properly. In case of any missing things, you should contact the seller. Let’s uncover the items present inside the box.
Keurig B-140 Coffee Maker
The first thing you will find is an electronic machine Keurig B-140 inside the box, the main element used in brewing coffee.

2. Quick Start Guide
It is a manual with all information about machine setup from basic to advanced level for your guidance.

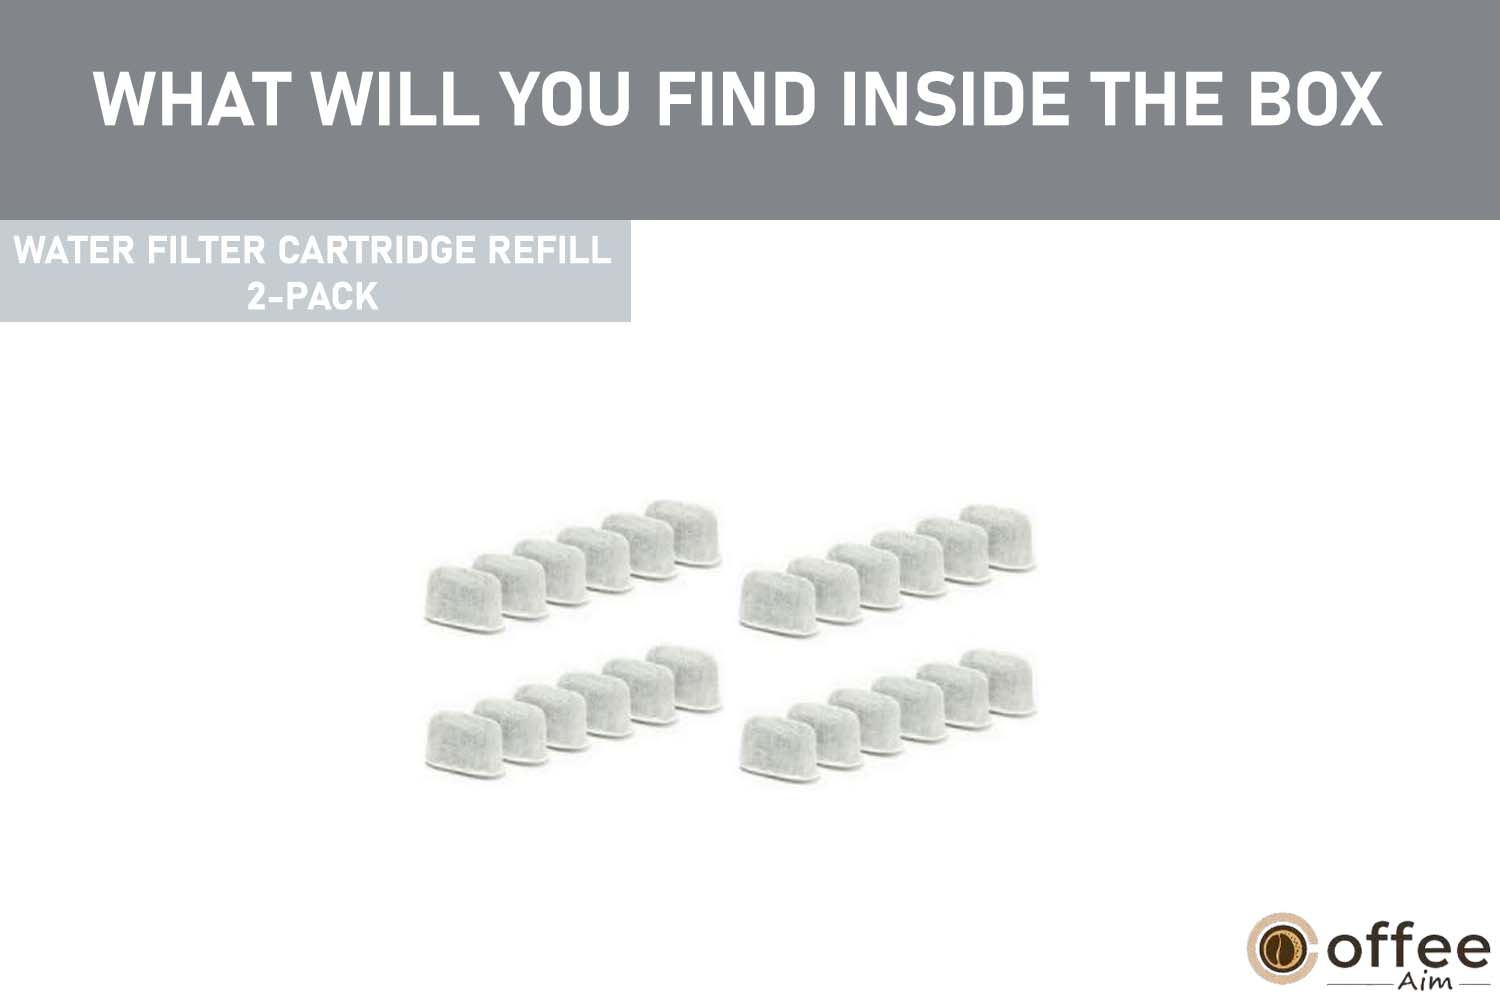
3. Water Filter Cartridge Refill 2-Pack
This water filter cartridge refill pack includes two replacement filters for your Keurig water filter starter kit accessory. You can also buy these cartridges separately because every cartridge should be replaced at least every four weeks.
4. Warranty Card
You will also find a warranty card inside the box of Keurig B-140. In this card, this warranty ( a product manufacturer or service provider’s documented guarantee of quality as compared to a customer) will be given to you that your Brewer will be free of defects in materials or quality under everyday domestic use for one year from the date of buying.
5. Use And Care Guide
Your protection and the safety of other users are of great importance. All information regarding your safety is provided in this manual about using Keurig B-140.

How To Unpack Keurig B-140?
You need to know about the unpacking techniques of Keurig B-140 because knowledge of this makes it easy for you to open and set up. This process consists of the following steps;
- A sizable smooth surface is required to place Brewer, like a table, countertop, or floor. Then Open the box.
- All the accessories pasted on it, like the quick start guide, use, and care guide, must be removed first.
- Change the direction of the box in such a way that its top is towards you.
- Hold the plastic bag into which the Brewer is wrapped.
- Bring the plastic bag out of the box with great care. A polyfoam will be present on the brewer.
- Unwrap the polyfoam packaging material.
- Keep the position of Brewer upright and place it on a smooth and steady surface.
- Remove the plastic bag of Brewer.
- You will find the serial number of Brewer on the manual on page no. 3.
- The location of the serial number will be on the label found on the back of Brewer. (It is necessary for you to know your Keurig coffee maker serial number so that you can prove your ownership in case of Theft or loss. It will prove helpful if you want to submit an insurance claim or police report).
- Spot Brewer conscientious on a smooth surface.
- Discard the tape used to keep the water reservoir in its place.
NOTE: It is recommended to save all the packing material because it will be helpful while shipping your Brewer for future product shipping.
Warning: Keep all plastic bags away from children.
Parts Of The Keurig B-140
It’s time to explore its various parts before operating it, as it consists of various parts that are joined to complete it. So, you should have complete knowledge about all these parts you will explore on opening the box.
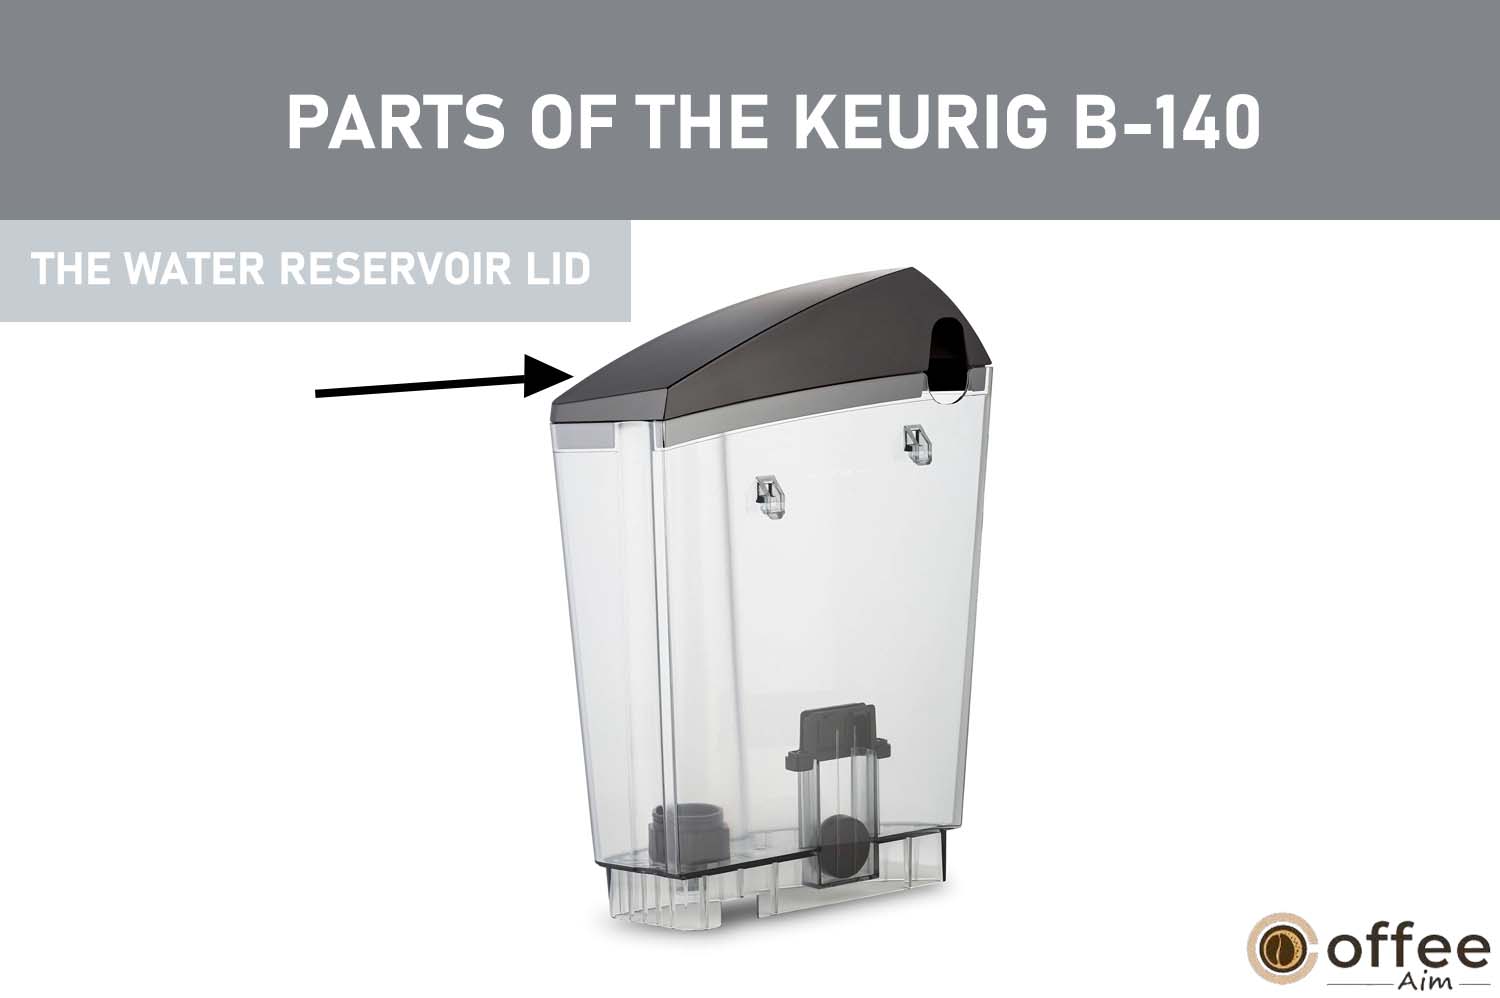
1. The Water Reservoir Lid
It is an essential part of the Keurig B-140. It is used for the covering of the water reservoir.
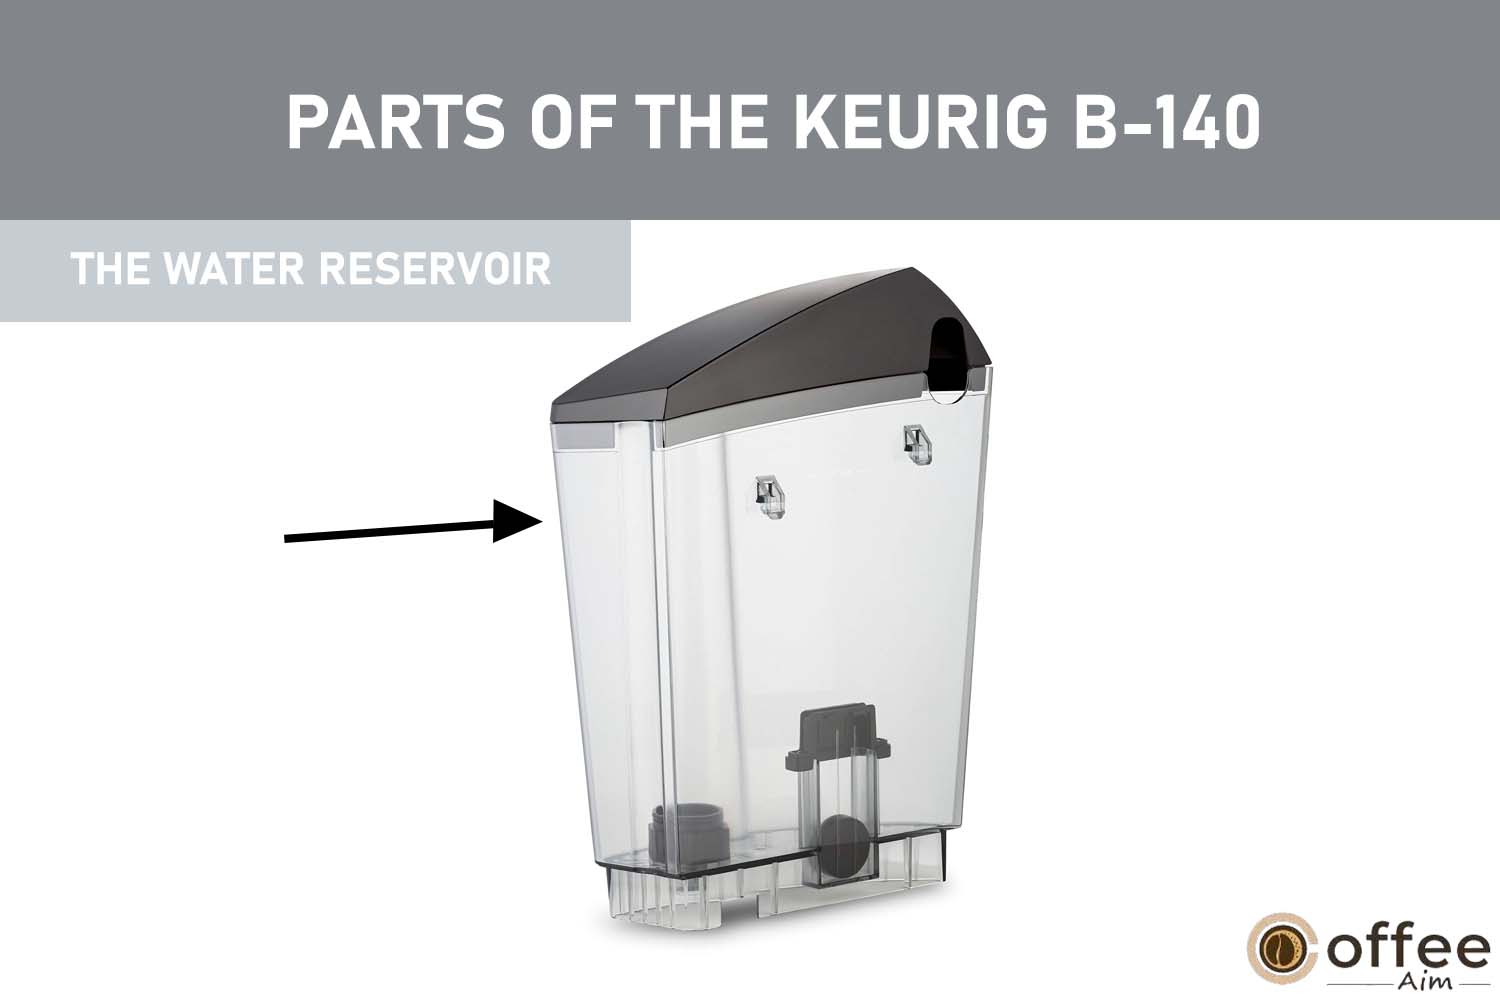
2. The Water Reservoir
The water reservoir is transparent and found on the left side of your Keurig B-140 machine. It is used to store water which will be used further in brewing coffee and other processes such as cleaning.
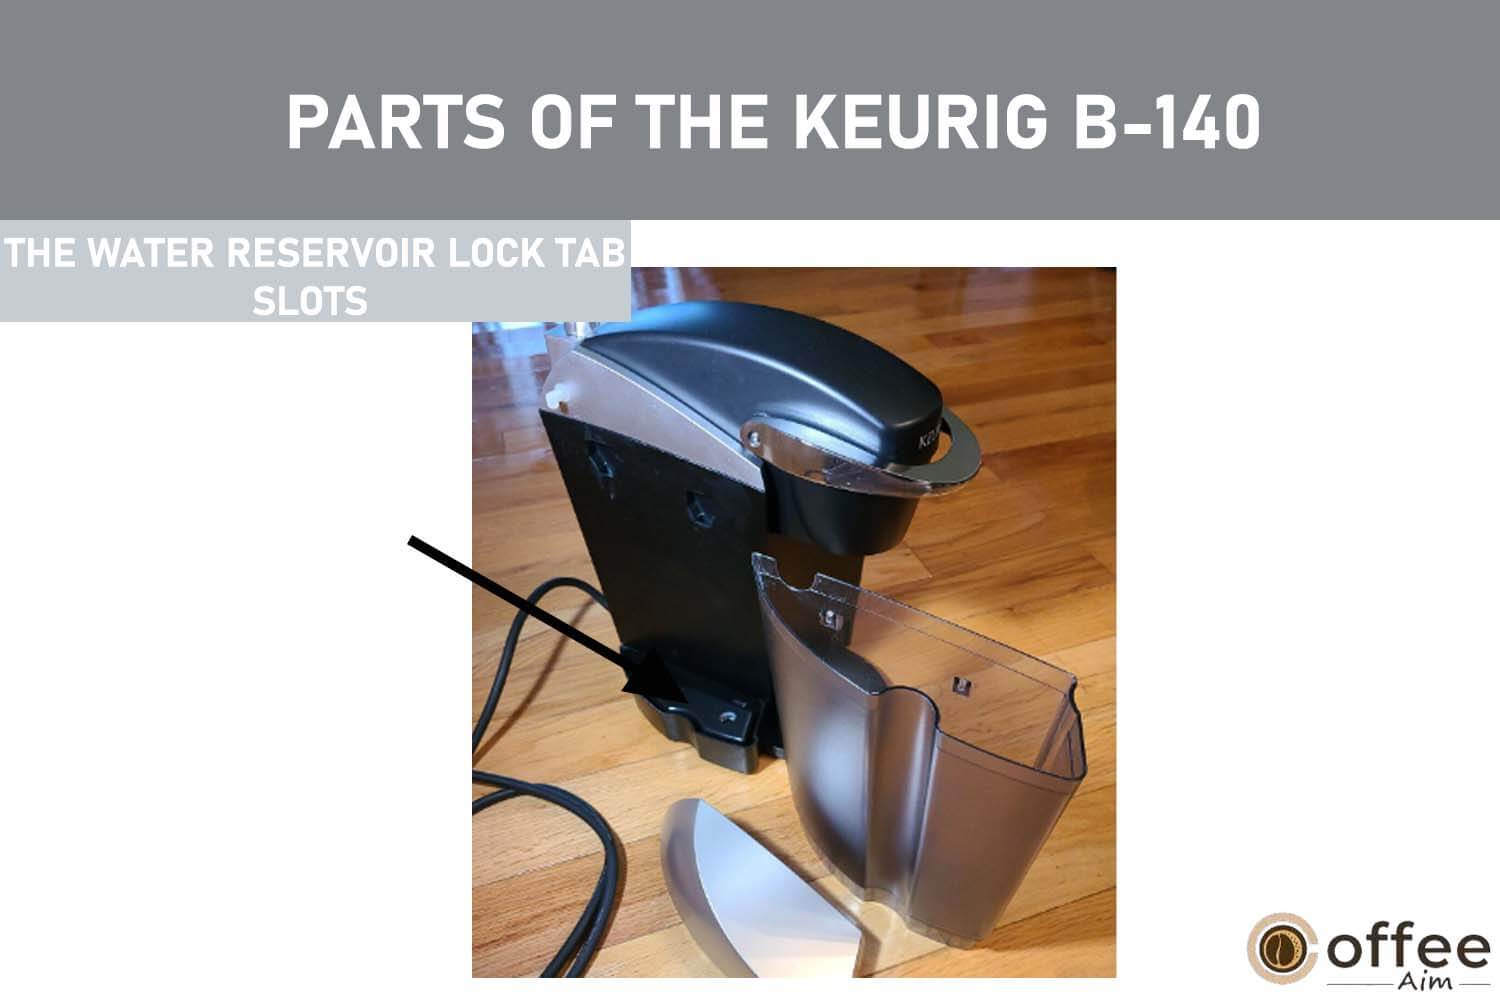
3. The Water Reservoir Lock Tab Slots
These locks are used to attach the water reservoirs with Brewer appropriately. These slots are present on Brewer’ser’s body.
4. Handle
The Handle of your Keurig coffee maker is helpful in opening and closing the Lid of the K-Cup pod holder compartment.

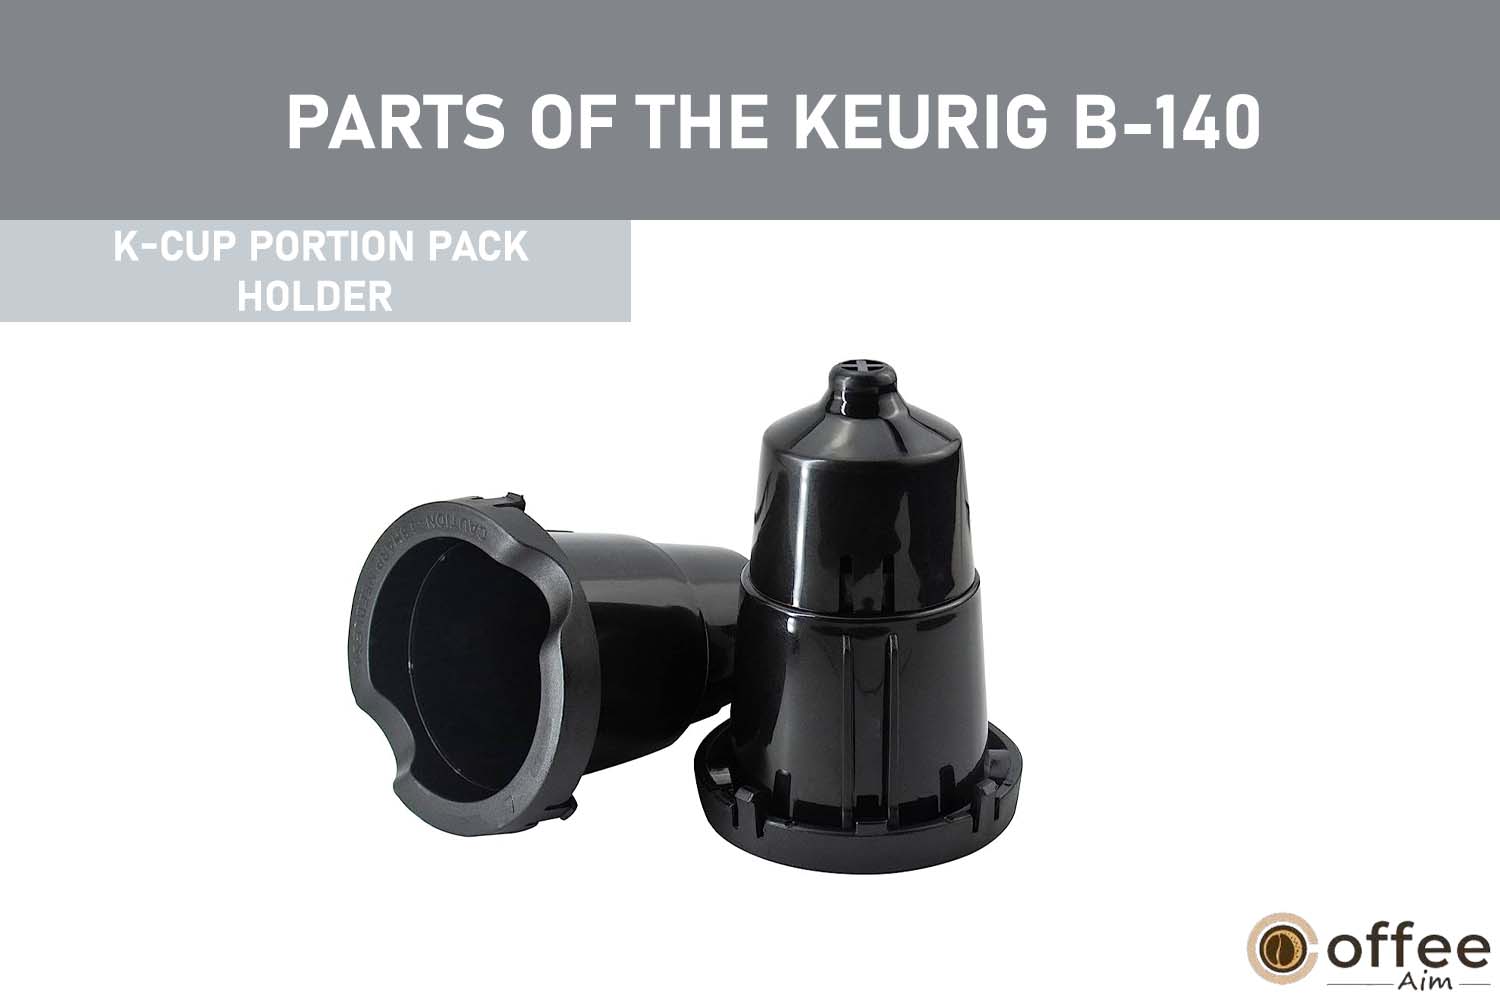
5. K-Cup Portion Pack Holder
It is part of the Keurig B-140, which is designed in such a way that you can insert the K-Cup portion pack for brewing.
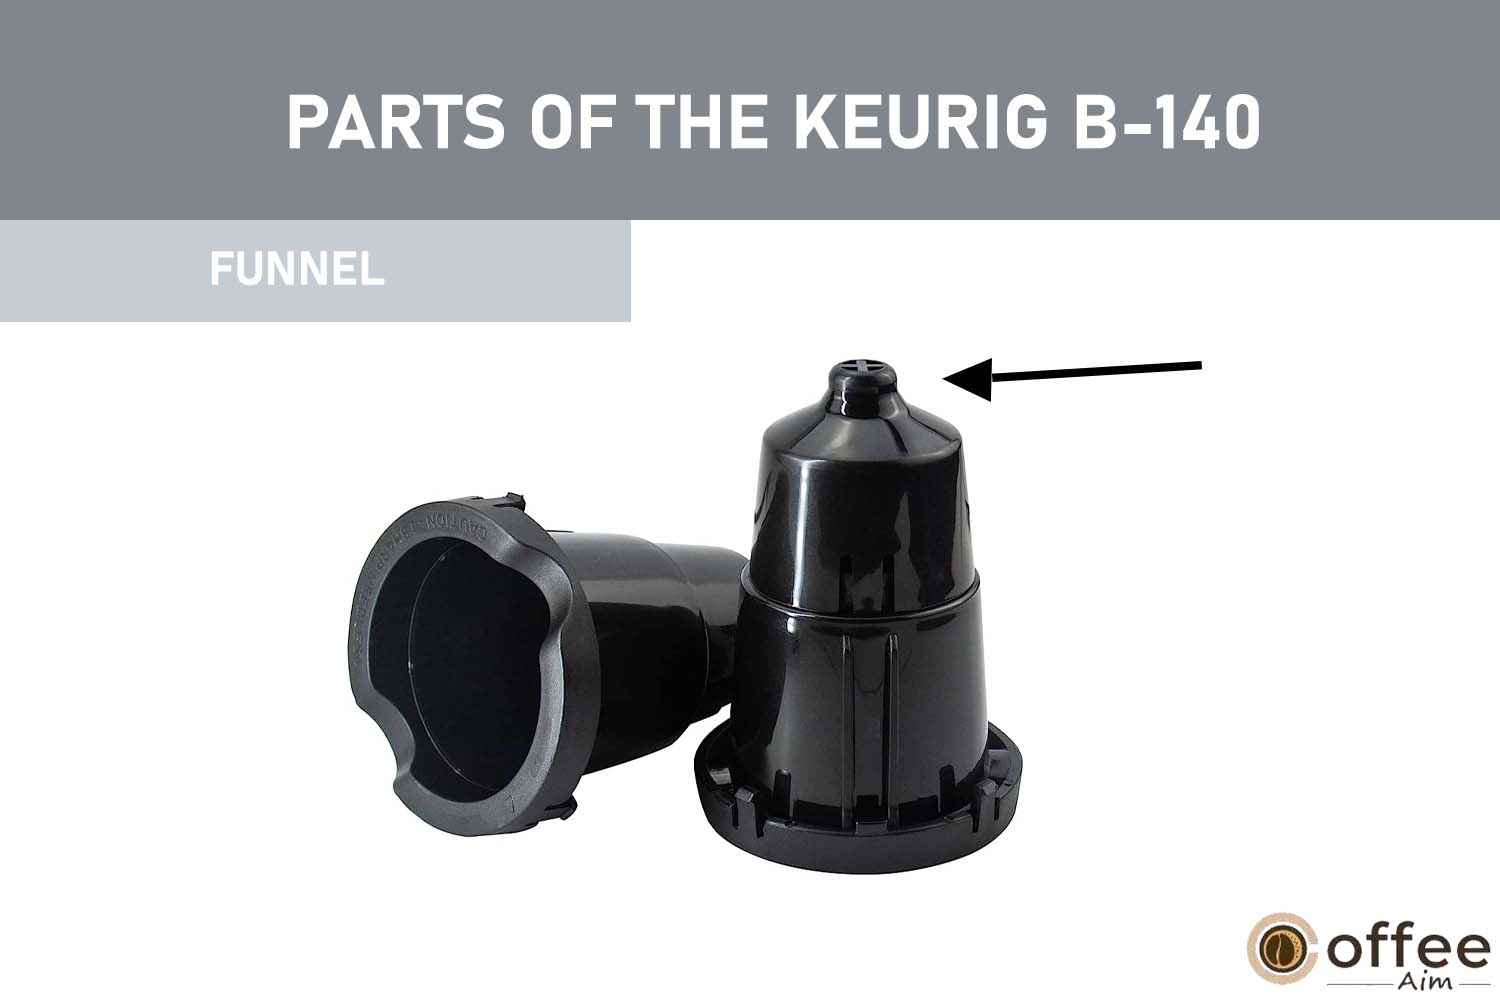
6. Funnel
A funnel is wide at the top and narrow at the bottom. It is used for guiding liquid or coffee into the coffee outlet.
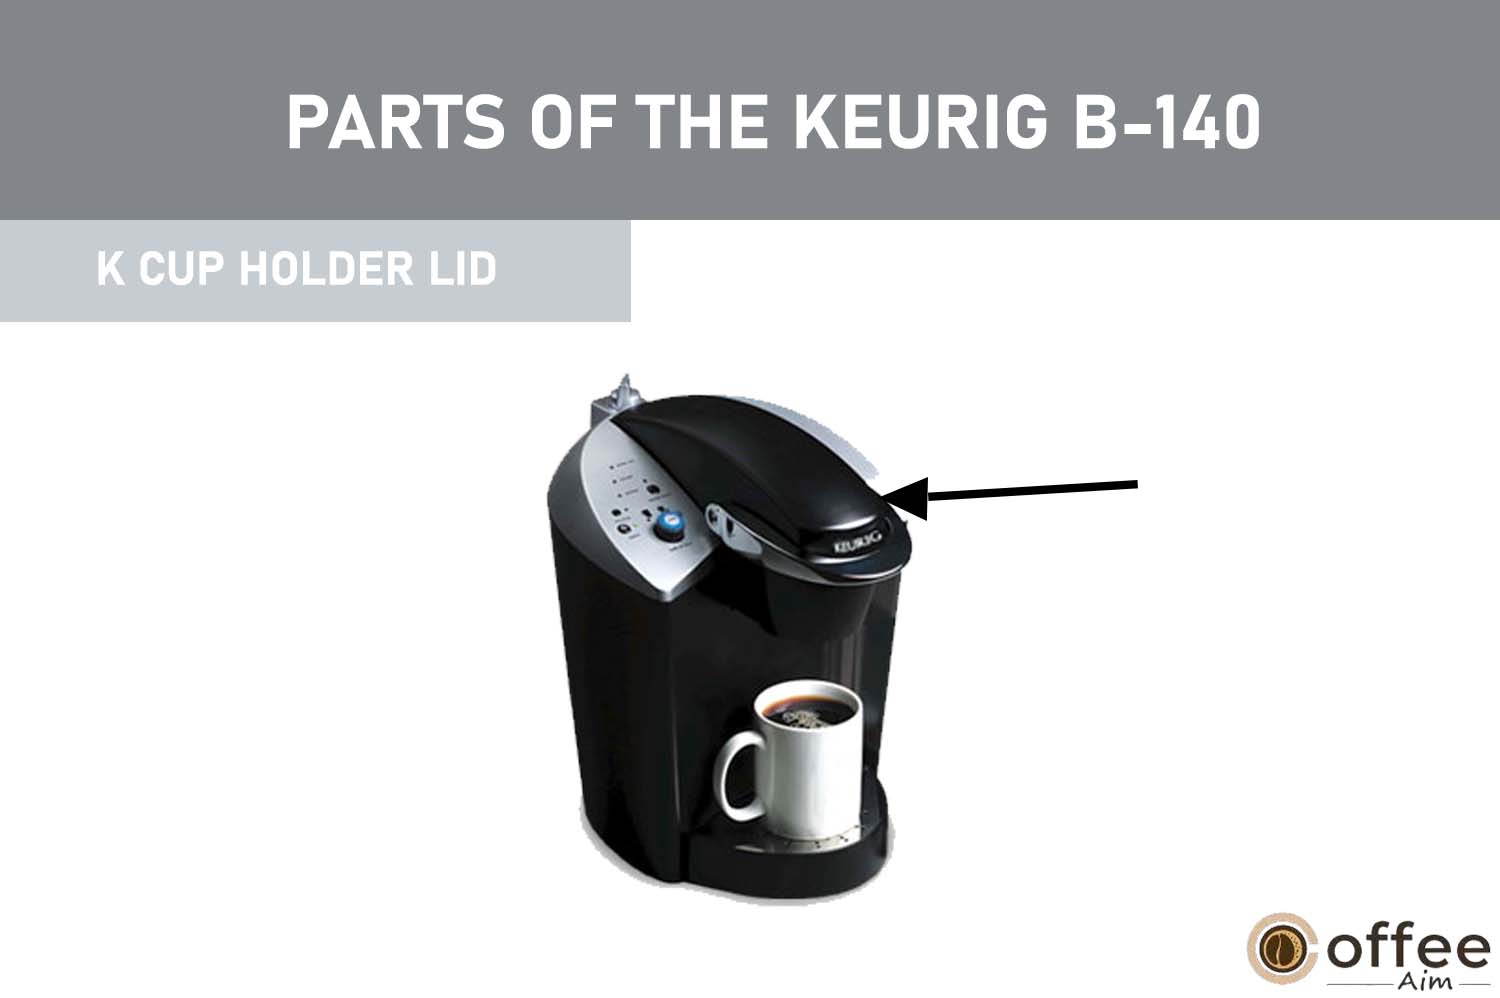
7. K Cup Holder Lid
The Lid is a cover stuck over the K-Cup pod holder of a Keurig B-140. It opens up to the limit of one inch only, and it prevents the splashing of water.
8. K-Cup Portion Pack Assembly
K-Cup pod holder and funnel are collectively called K-Cup pod holder assembly. You put your favorite K-Cup pod; it interacts with the water, gets brewed, and is poured into your coffee cup after being brewed.

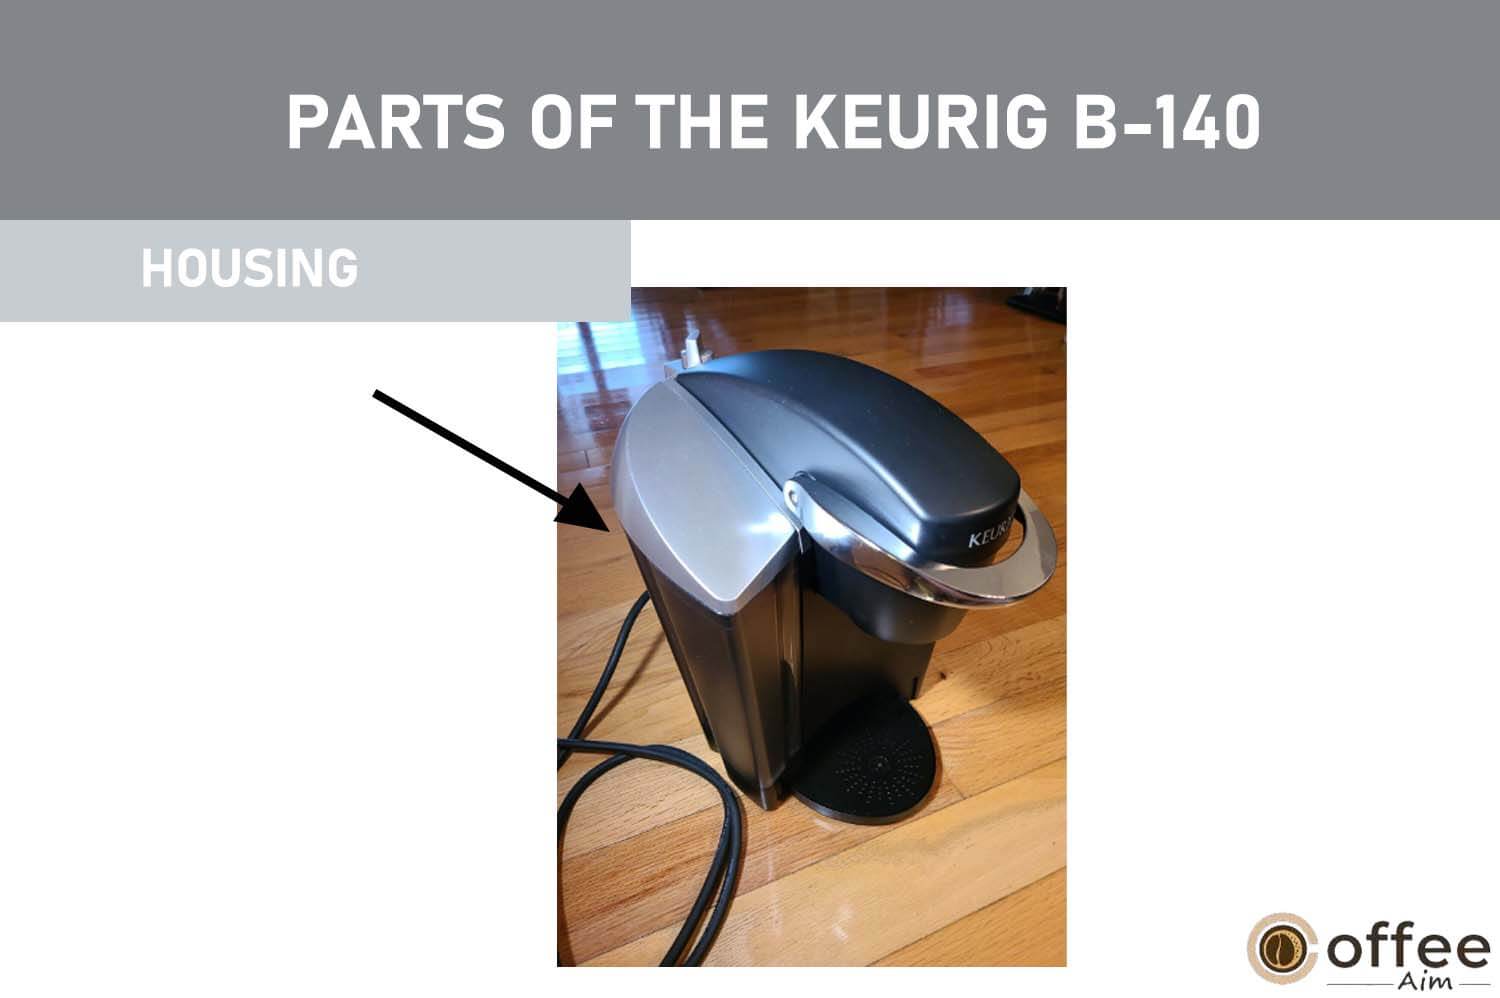
9. Housing
It is a part of Keurig B-140, which accommodates all internal parts like the pump, thermostat, etc. It consists of all the delicate parts of the machine.
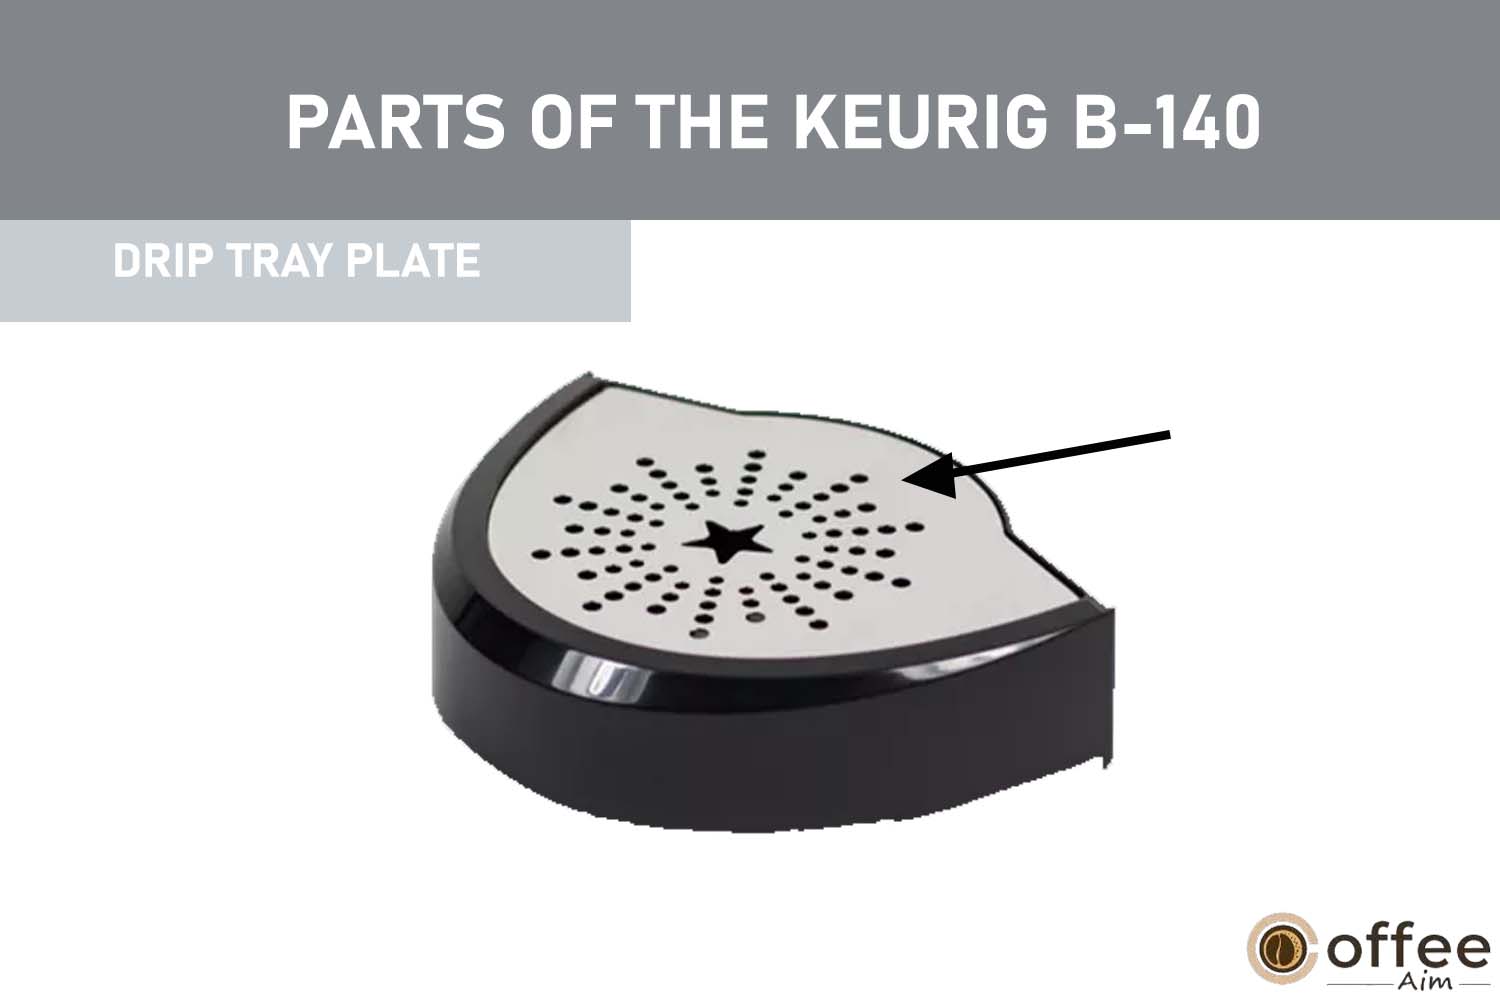
10. Drip Tray Plate
It is used to cover the drip tray. It has a sieve-like structure. Spillage of coffee occurs while dispensing gets caught by it. It is also used to place the coffee cups.
11. Drip Tray
The drip tray receives the surplus water/coffee from your Brewer during dispensing. It can accumulate 8 oz of Overflow, so you must empty it periodically.

12. Drip Tray Base
The Drip Tray base is used to accommodate tall mugs. So, if you want to dispense coffee in the travel/tall mug, then remove the drip tray and place it directly on the drip tray base. It holds the drip tray in its place.

13. Vent
It prevents the machine from overheating. It performs the role of the ventilator for your Keurig B-140.

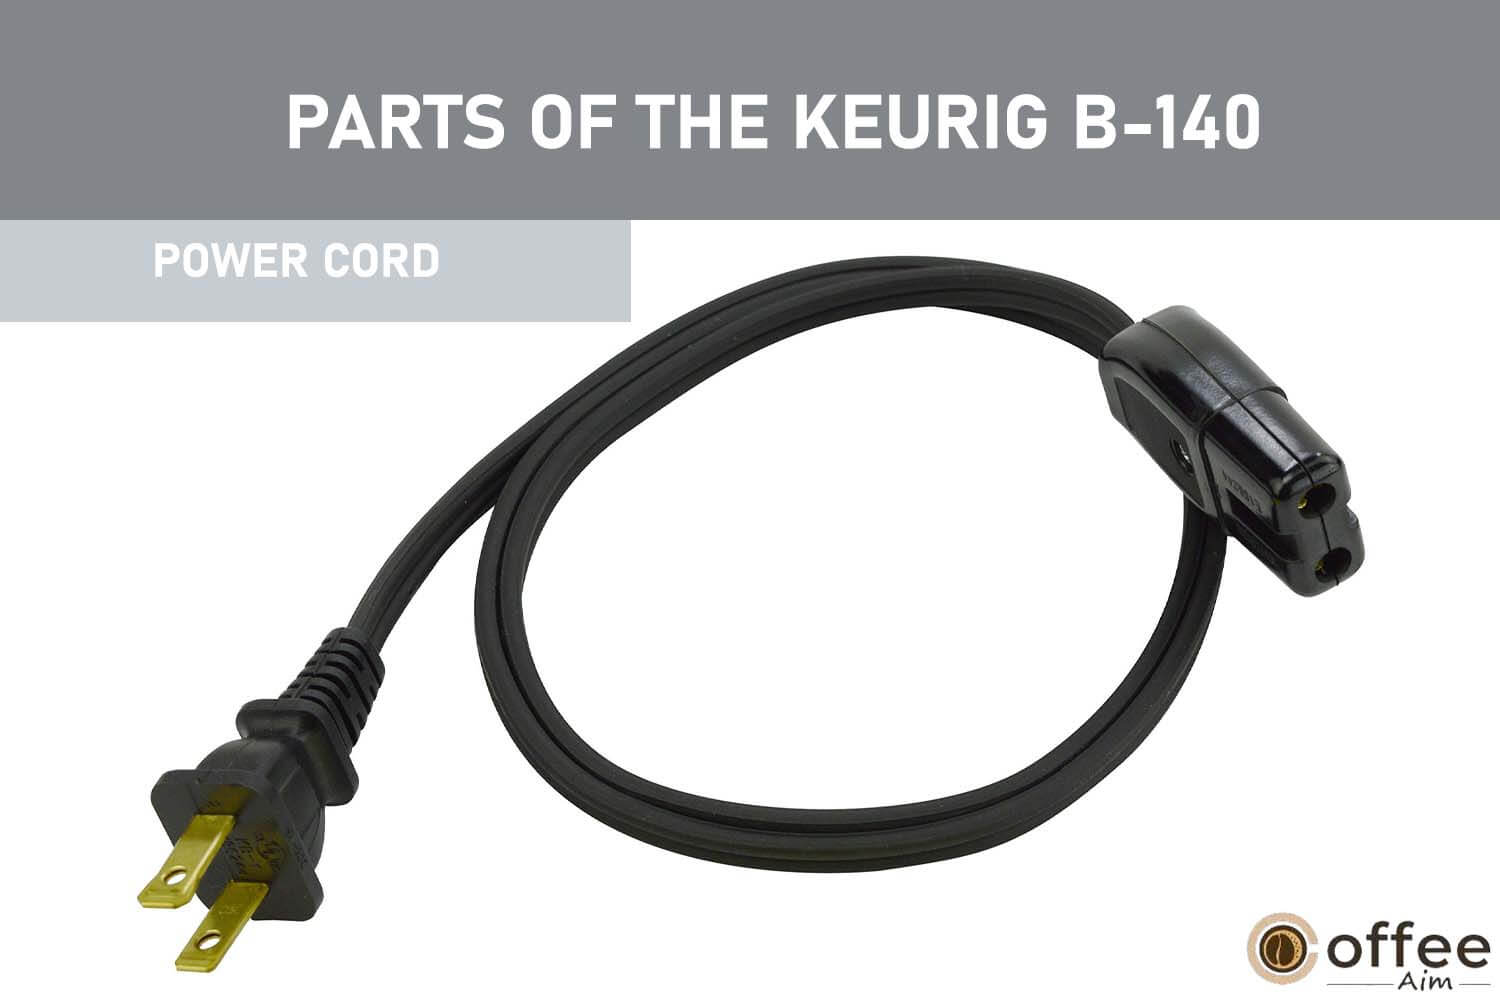
14. Power Cord
The power cord of your Keurig B-140 is an electric cable used to transfer the electricity from the power outlet to Brewer.
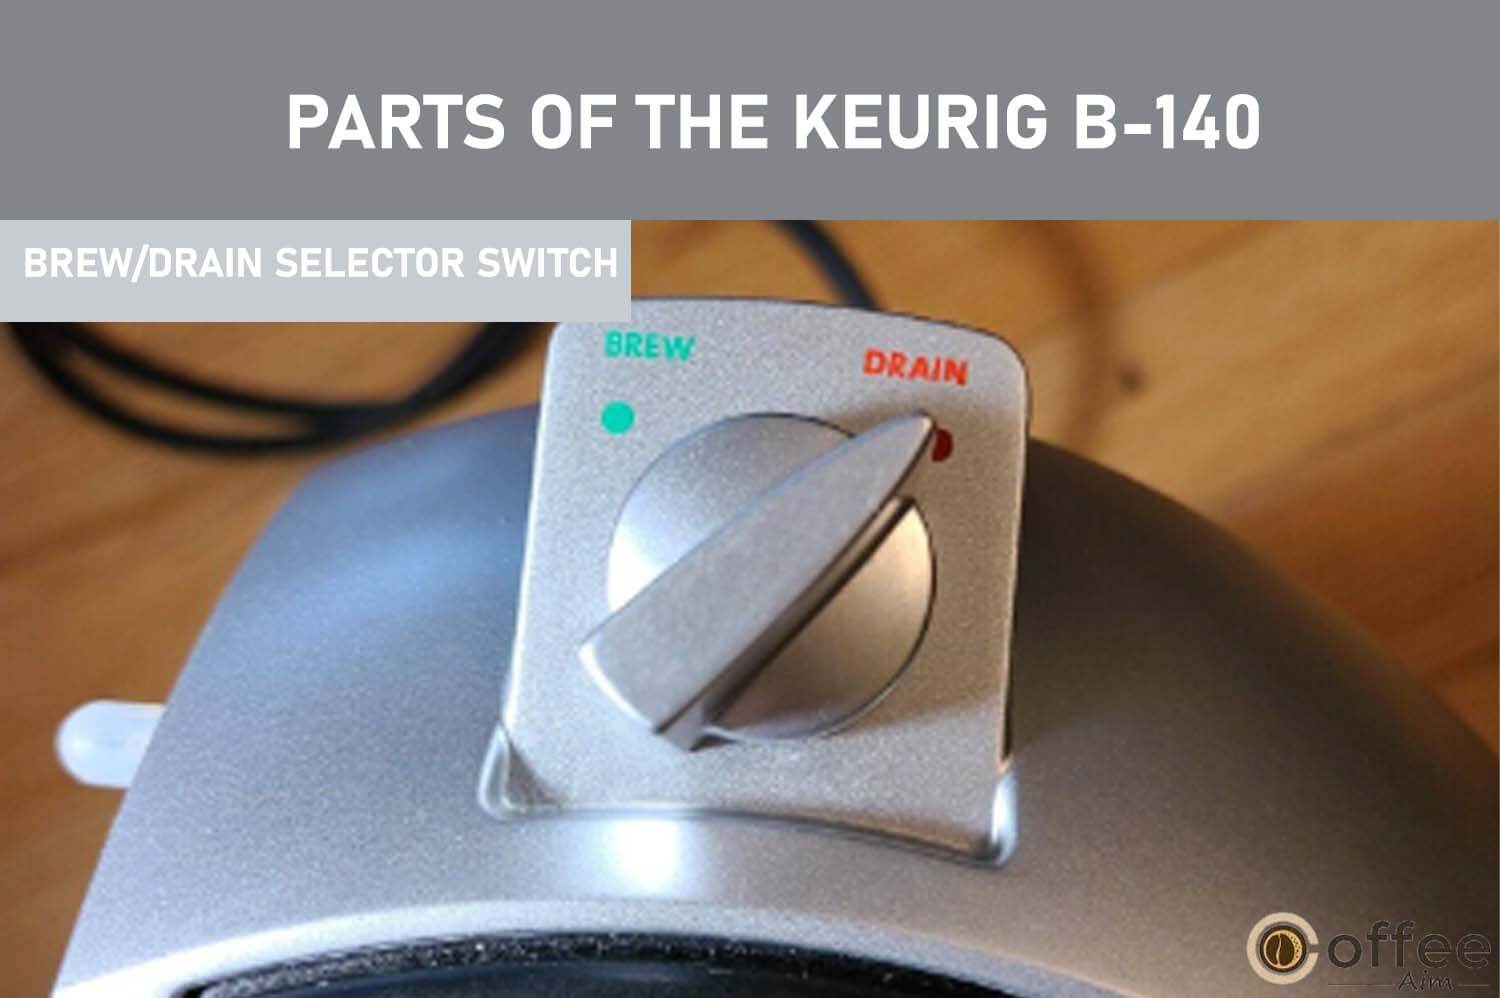
15. Brew/Drain Selector Switch
This switch is rotateable and it has two modes; Brew and Drain. So, if you want your machine to brew, then turn the switch towards “Brew mode” and vice versa.
Lights And indicators
To fully understand your Keurig B-140, it is essential to know about all the indicators and buttons and also their functionalities. Let’s begin!
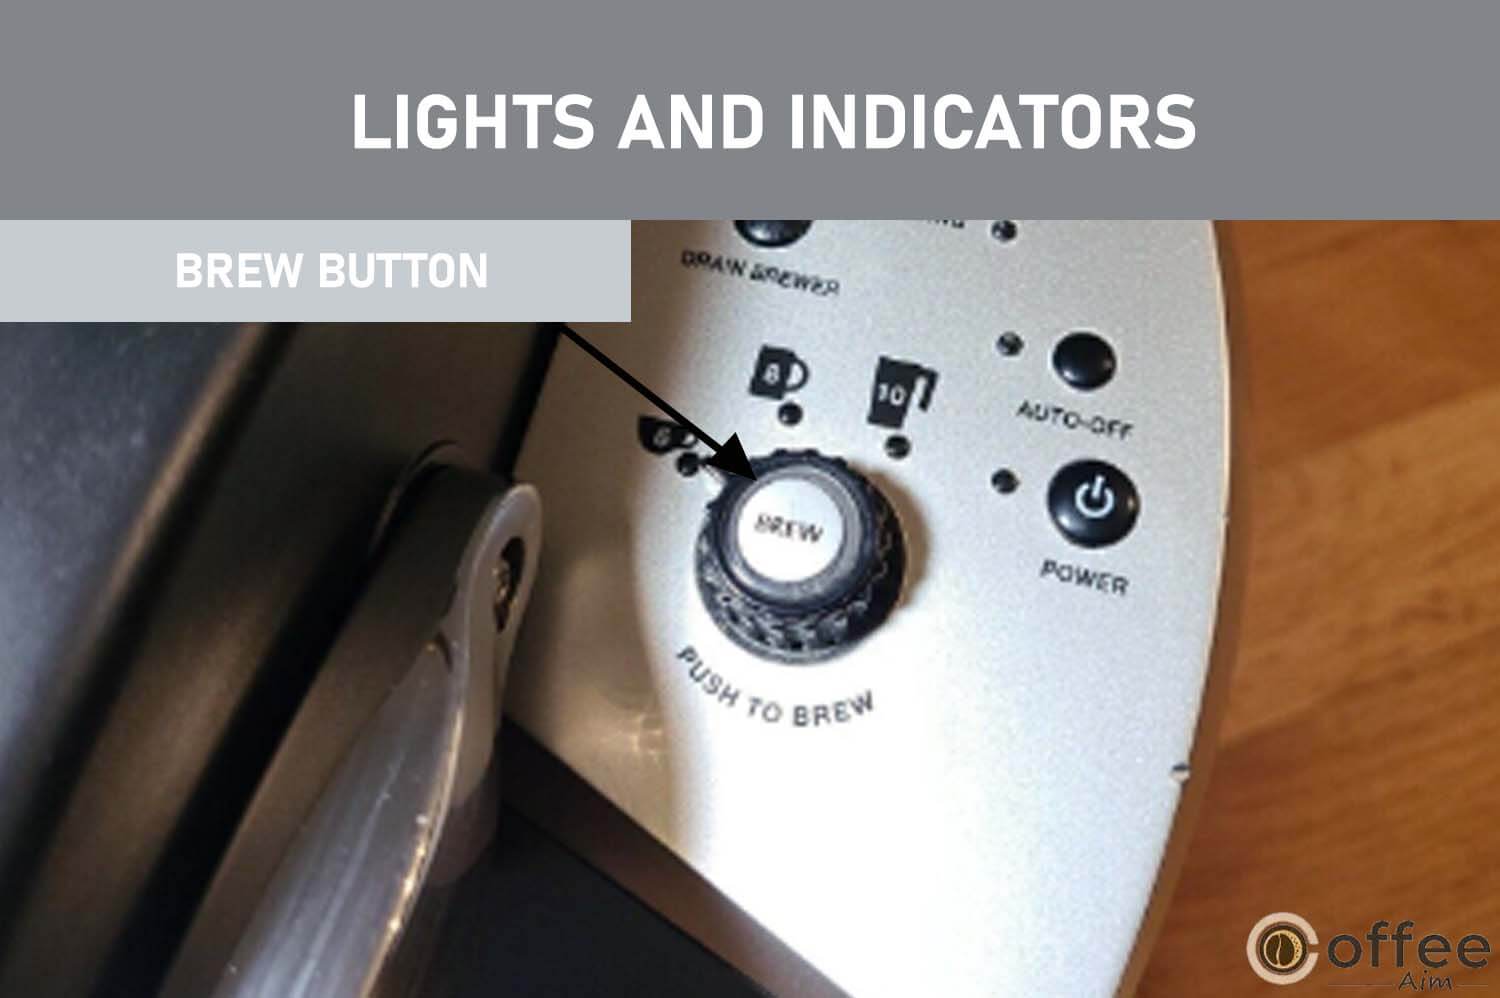
16. Brew Button
The button is used to start the brewing process. Press this button to brew to enjoy a fuller, bolder cup.
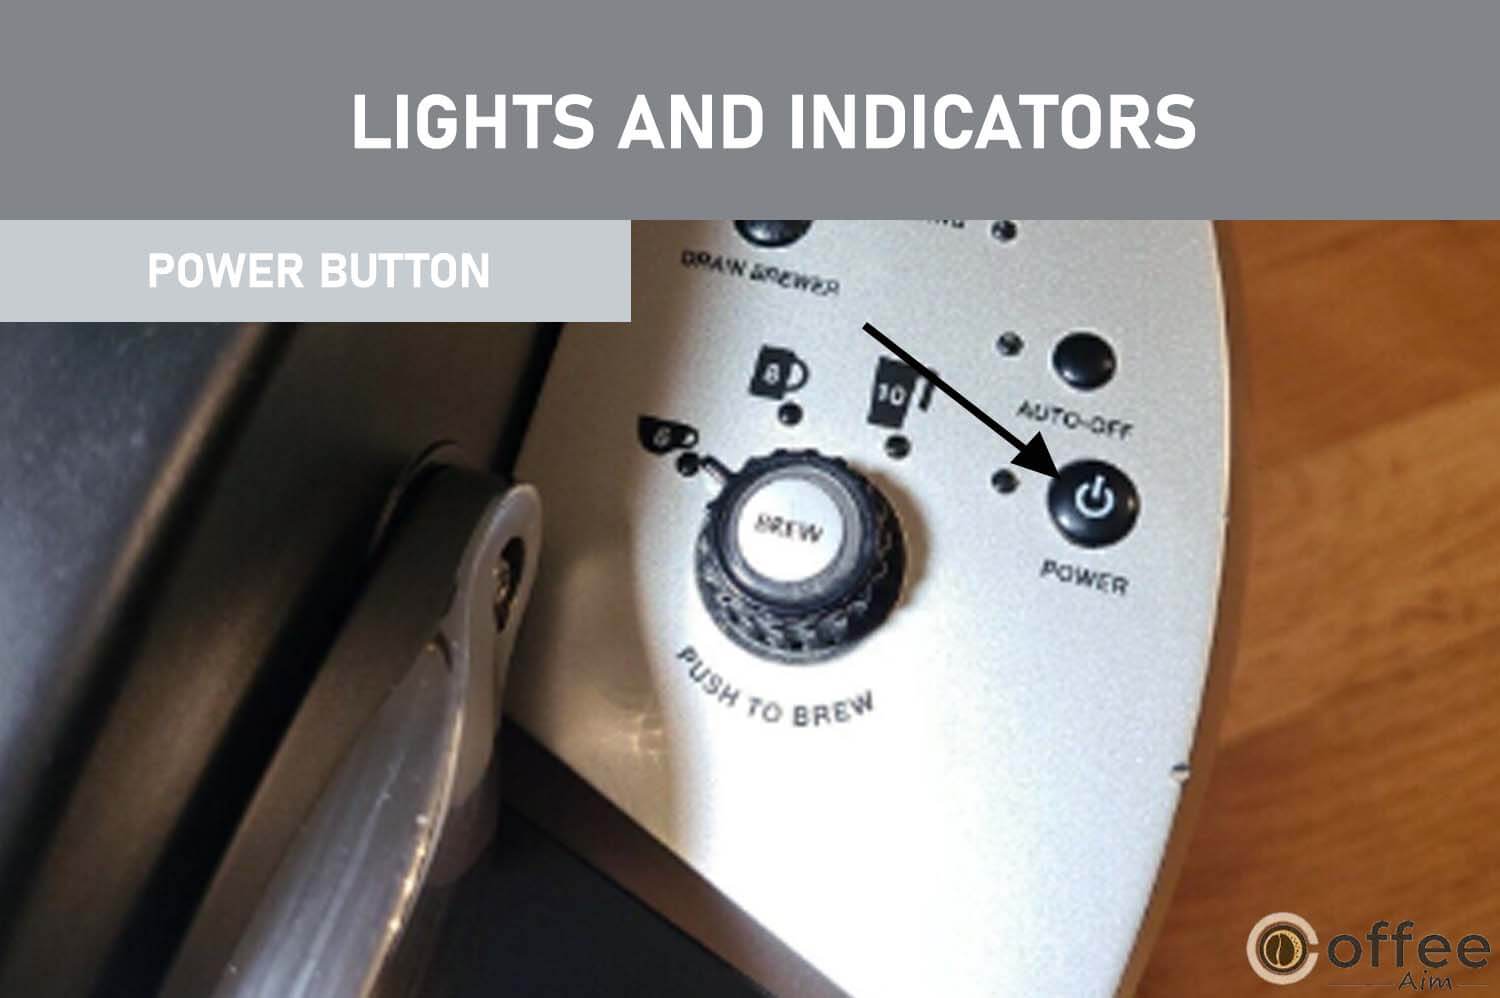
17. Power Button
The power button is a round or square button used to turn on/off your Keurig Coffee maker.
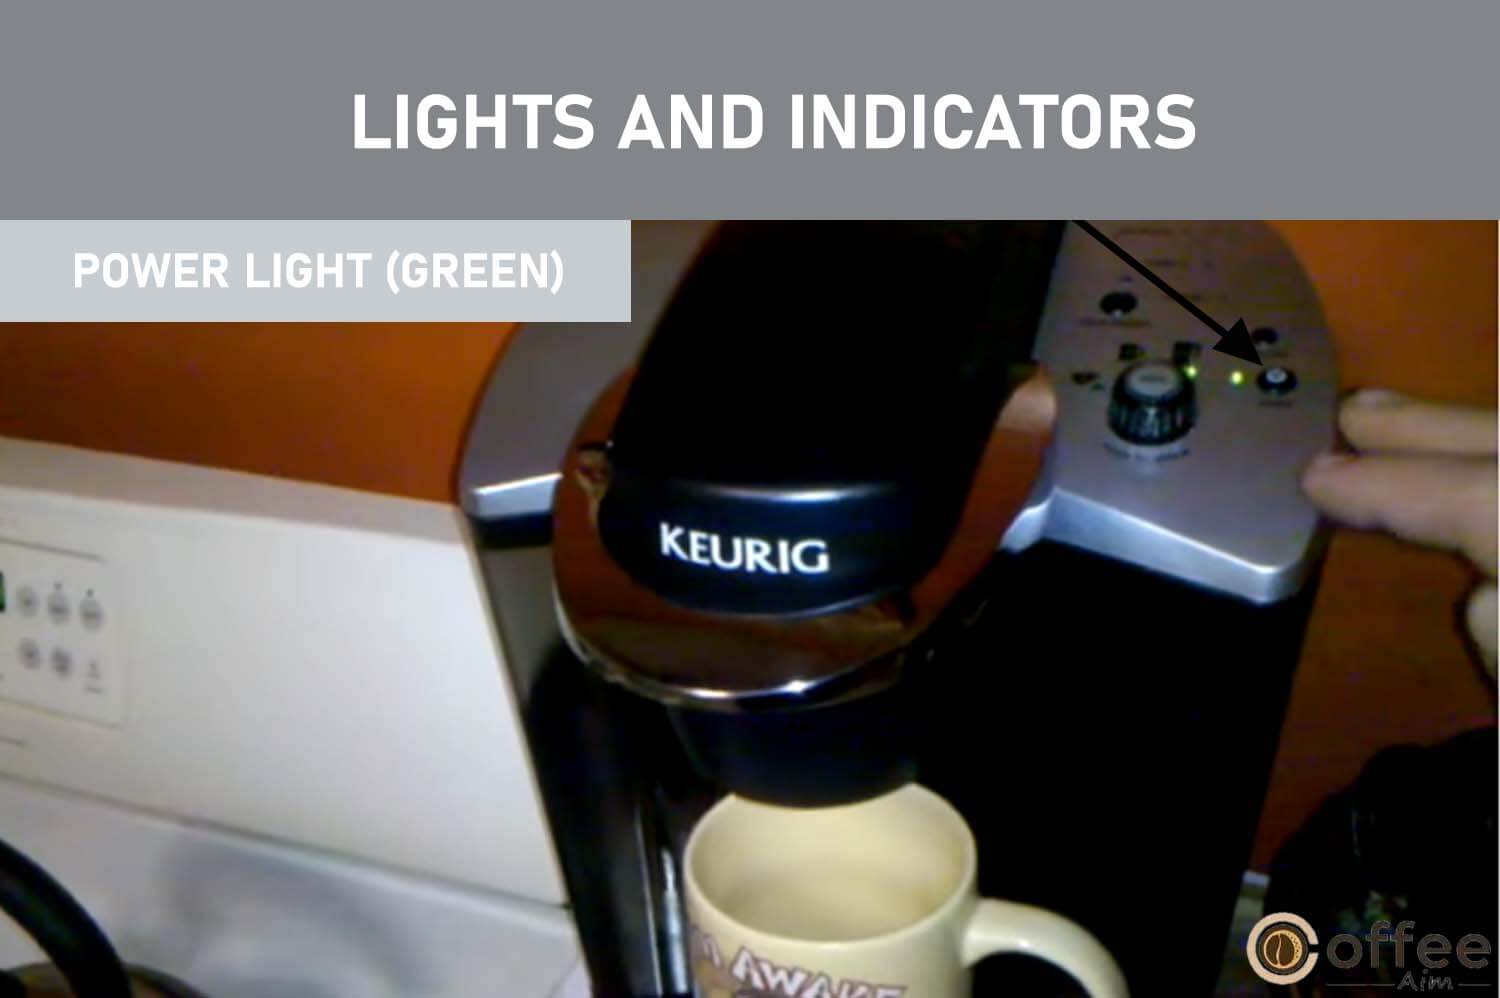
18. Power Light (Green)
Push the power button; the green power light will flash. The Breaker will automatically begin heating the water. It will take about 3 minutes. Once the heating sound stops, Brewer is ready.
19. Auto Off Button
It is a black color button above the power button and is used to turn on the auto-off feature. Through this feature, your Keurig will automatically turn off to save energy after 2 hours of the last brew.

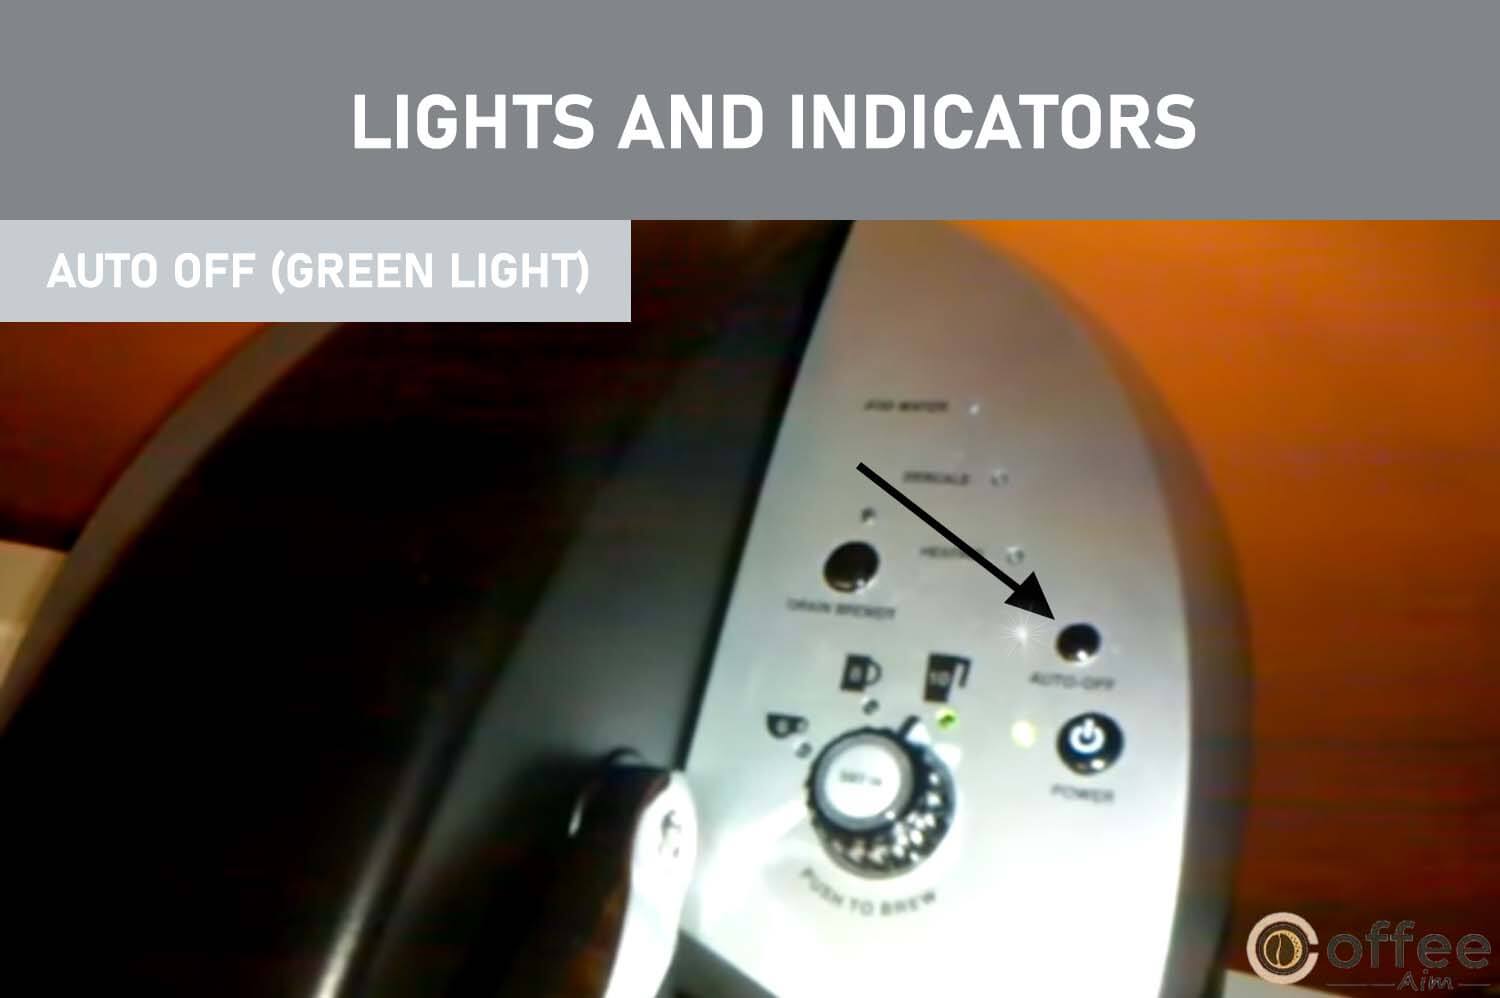
20. Auto Off (Green Light)
This button of Keurig B-140 enables it to turn off automatically after brewing. When the color of this button becomes green, it represents that the Auto-off feature is activated, and when the light is not illuminated, it means the Auto-off feature is disabled.
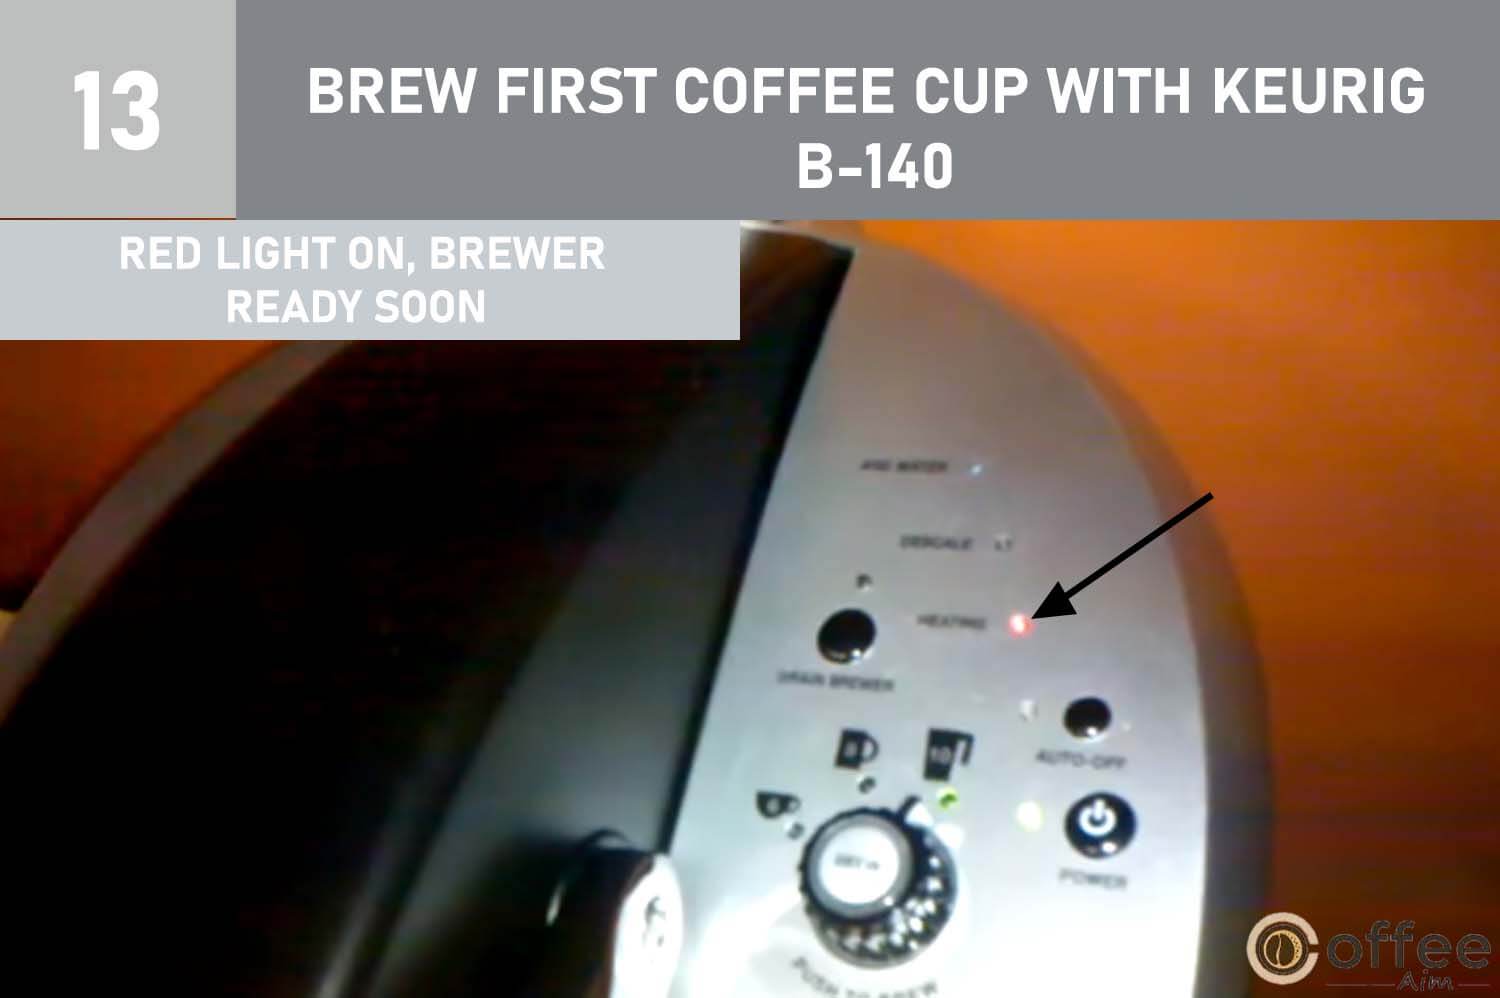
21. Heating Light (Red)
The heating light means that the elements of the coffee maker are heating up. The Brewer will automatically fill with water; then, the water will be heated. It will take less than 5 minutes. The red light that is located next to HEATING on the LED control center will be illuminated during heating.

22. Descale Light (Amber)
Calcium deposits or scales can be built up inside your coffee maker over time when you use your coffee maker. Calcium and scale are non-toxic but left unattended these can hinder Brewer’s performance. Thanks to Keurig technology that descale light becomes amber when your B-140 needs to be descaled.

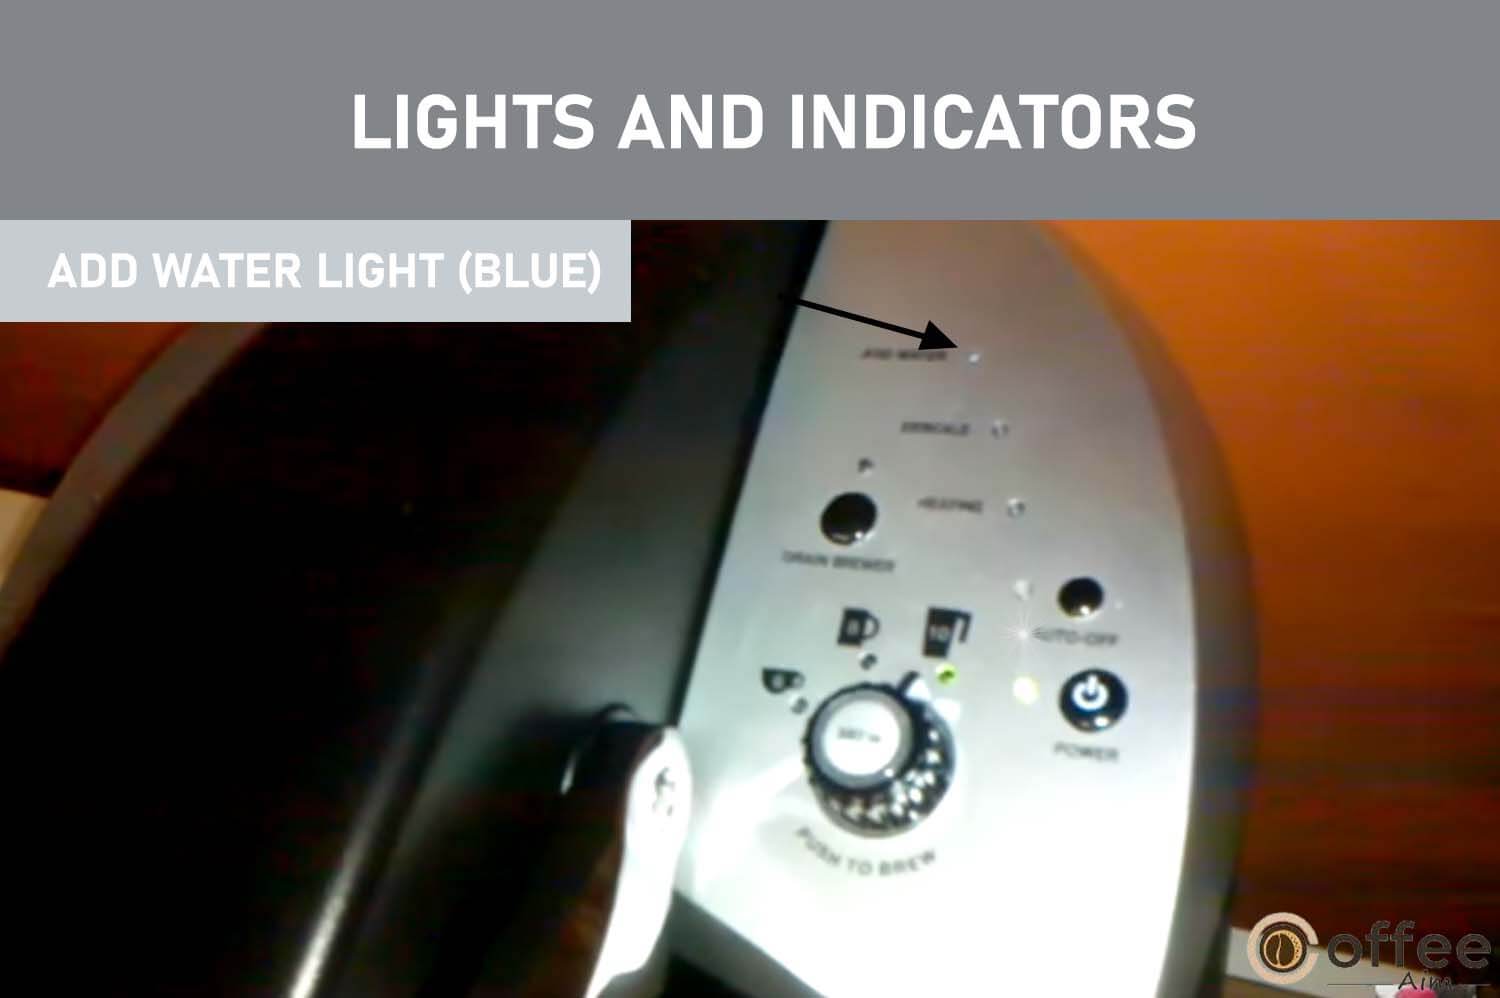
23. Add Water Light (Blue)
“Add water light” will illuminate “Blue” to express that either water has finished in the reservoir or the reservoir is not placed correctly.
Helpful Hints For Using Keurig B-140
You must know all the helpful hints that must be followed while using your Keurig B-140. If you follow these helpful hints, your coffee-making experience may enhance. The following steps will prove helpful for you.
Keep Your Brewer ‘On’ At All Times
It would be best always to keep your Brewer ON to brew a fresh cup of tea or coffee anytime.
You can also set your Brewer so that it turns off automatically two hours after your last Brew.
For The Best and Gourmet Coffee Or Tea, Keurig Recommends Using Bottled Or Filtered Water.
The quality of water varies in different areas. Suppose you feel that the taste of coffee is undesirable, like the taste of any mineral like chlorine in your coffee. Then it is recommended to use bottled or filtered water.
Plug Brewer Into Its Own Grounded Outlet
Use only a few electrical appliances in one circuit. Because if the circuit is overloaded with many electrical appliances, then the function of the Brewer will be affected. So, Brewer should operate its circuit separately from other appliances.
Brewing Into A Travel Mug
Dislodge the drip tray assembly and place the travel mug on the tray base to brew into a travel mug.
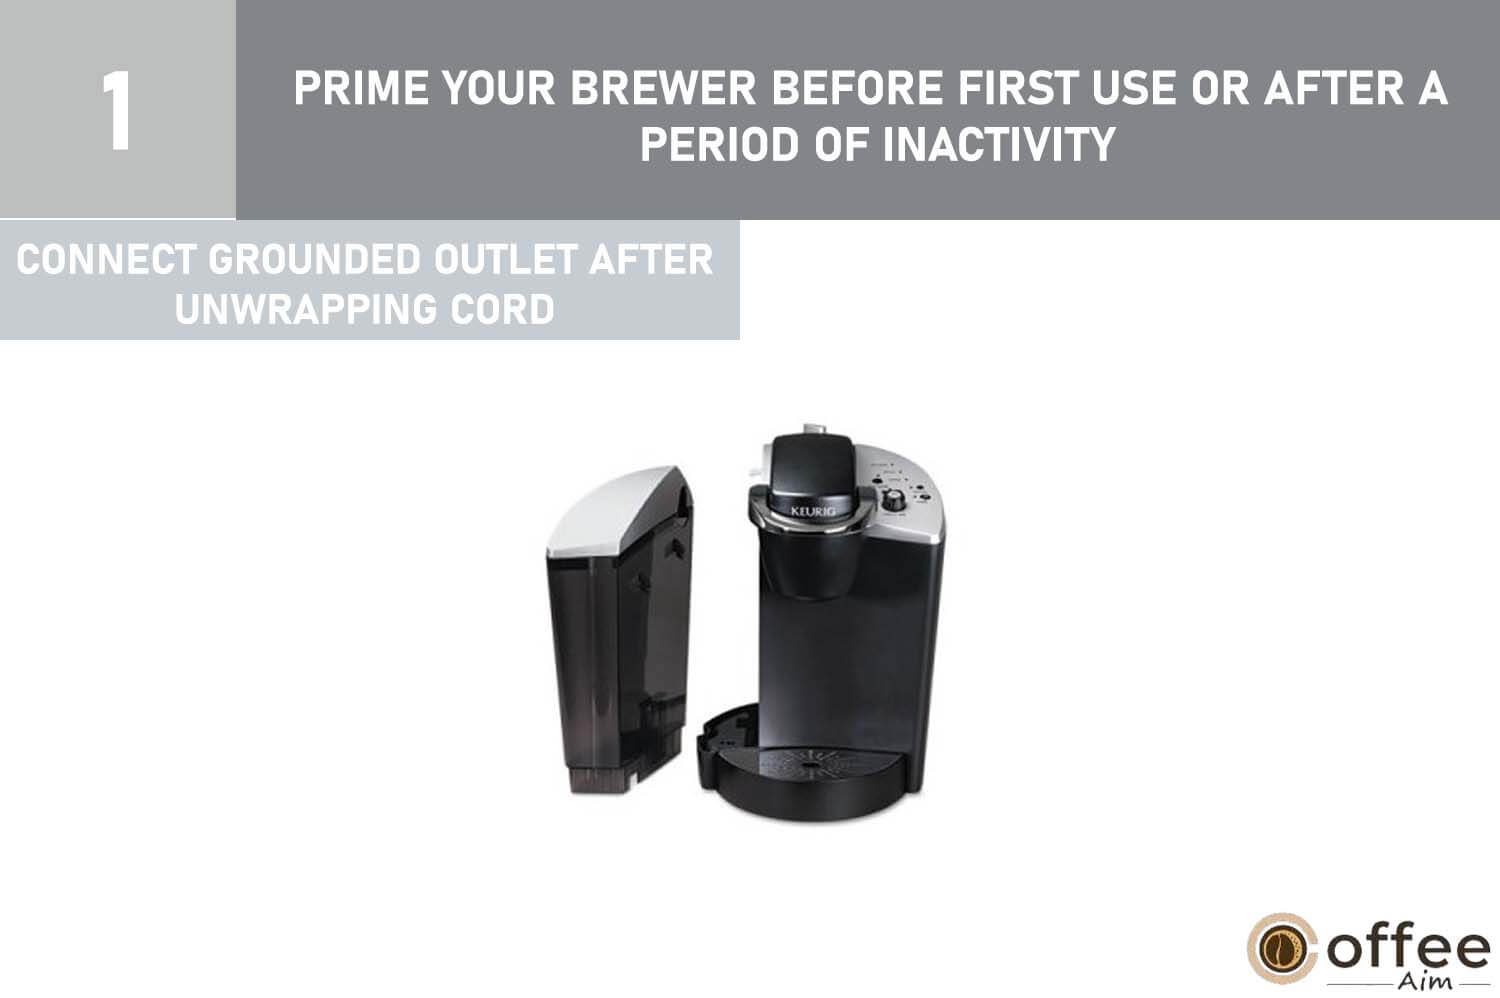
Prime Your Brewer Before First Use or After A Period of Inactivity
Keurig B-140 needs to be prime before its first use or after its inactivity. During the preparation of Keurig B-140, no doubt the companies followed all the rules of cleanliness, but still, chemicals used during preparation were left behind in the Brewer. If you do not prime keenly, you will feel the taste of chemicals in the cups of coffee that you will brew at the start.
Similarly, After a long period of inactivity, many germs and dust will accumulate in your Brewer, affecting your taste of coffee if you do not perform the priming process. You should follow all the steps below to receive an excellent cup of coffee from your Keurig B-140. This process of setting the Brewer for brewing is called priming. Let’s start!
- Connect Brewer with the grounded outlet after unwrapping the cord.
- Ensure the brew/drain is set to brew according to instructions.

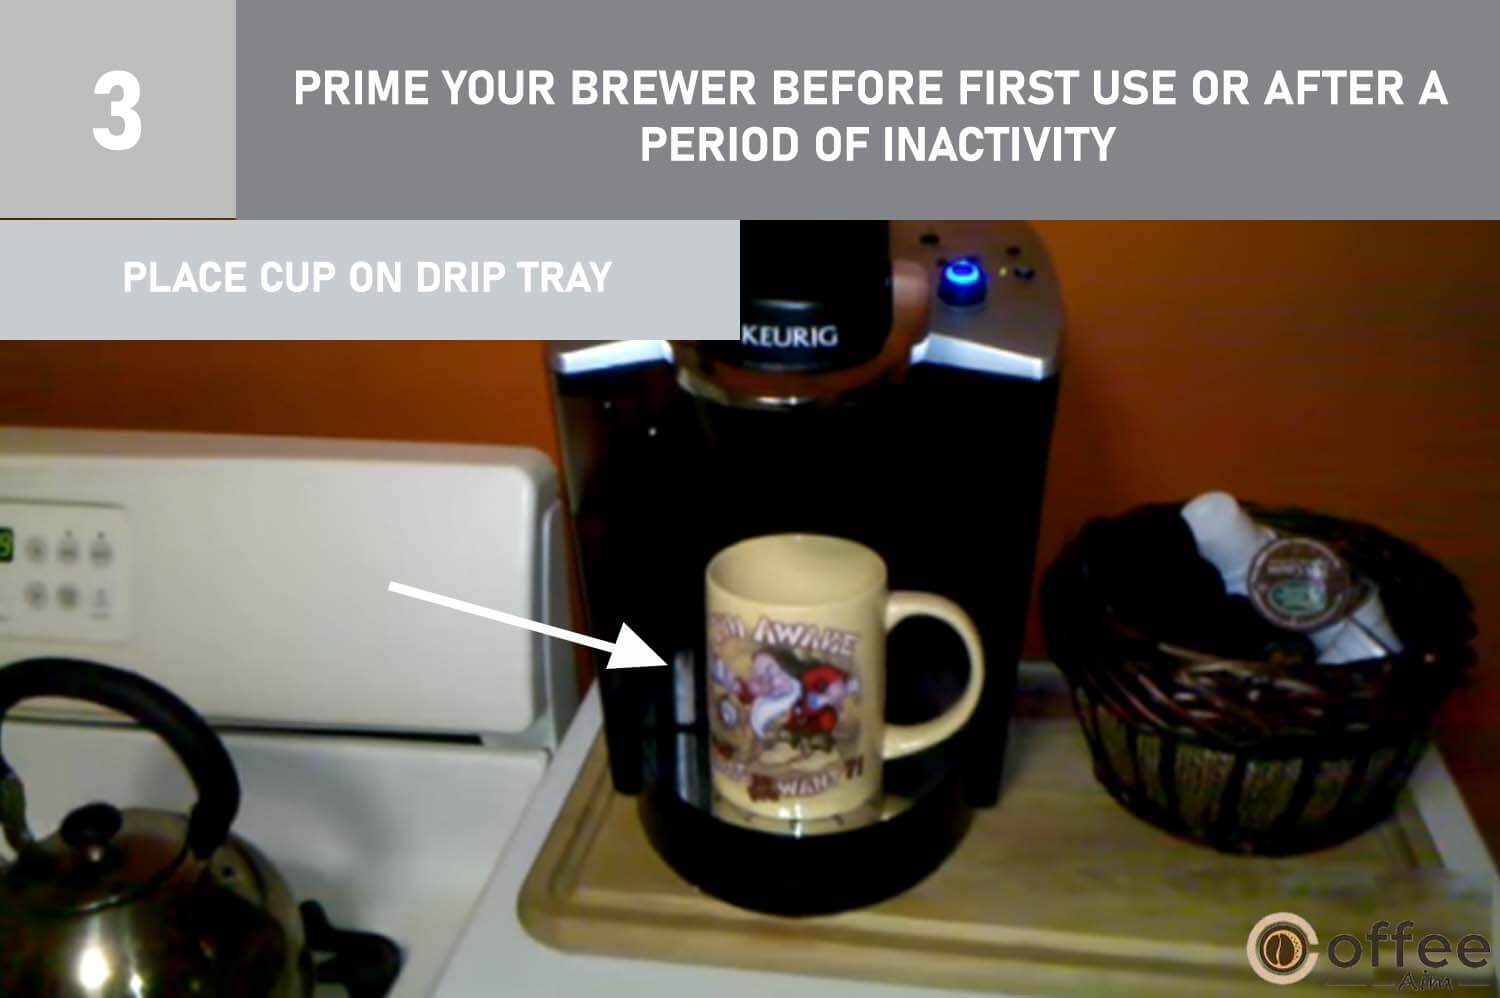
- Locate a Cup or mug on the drip tray plate.
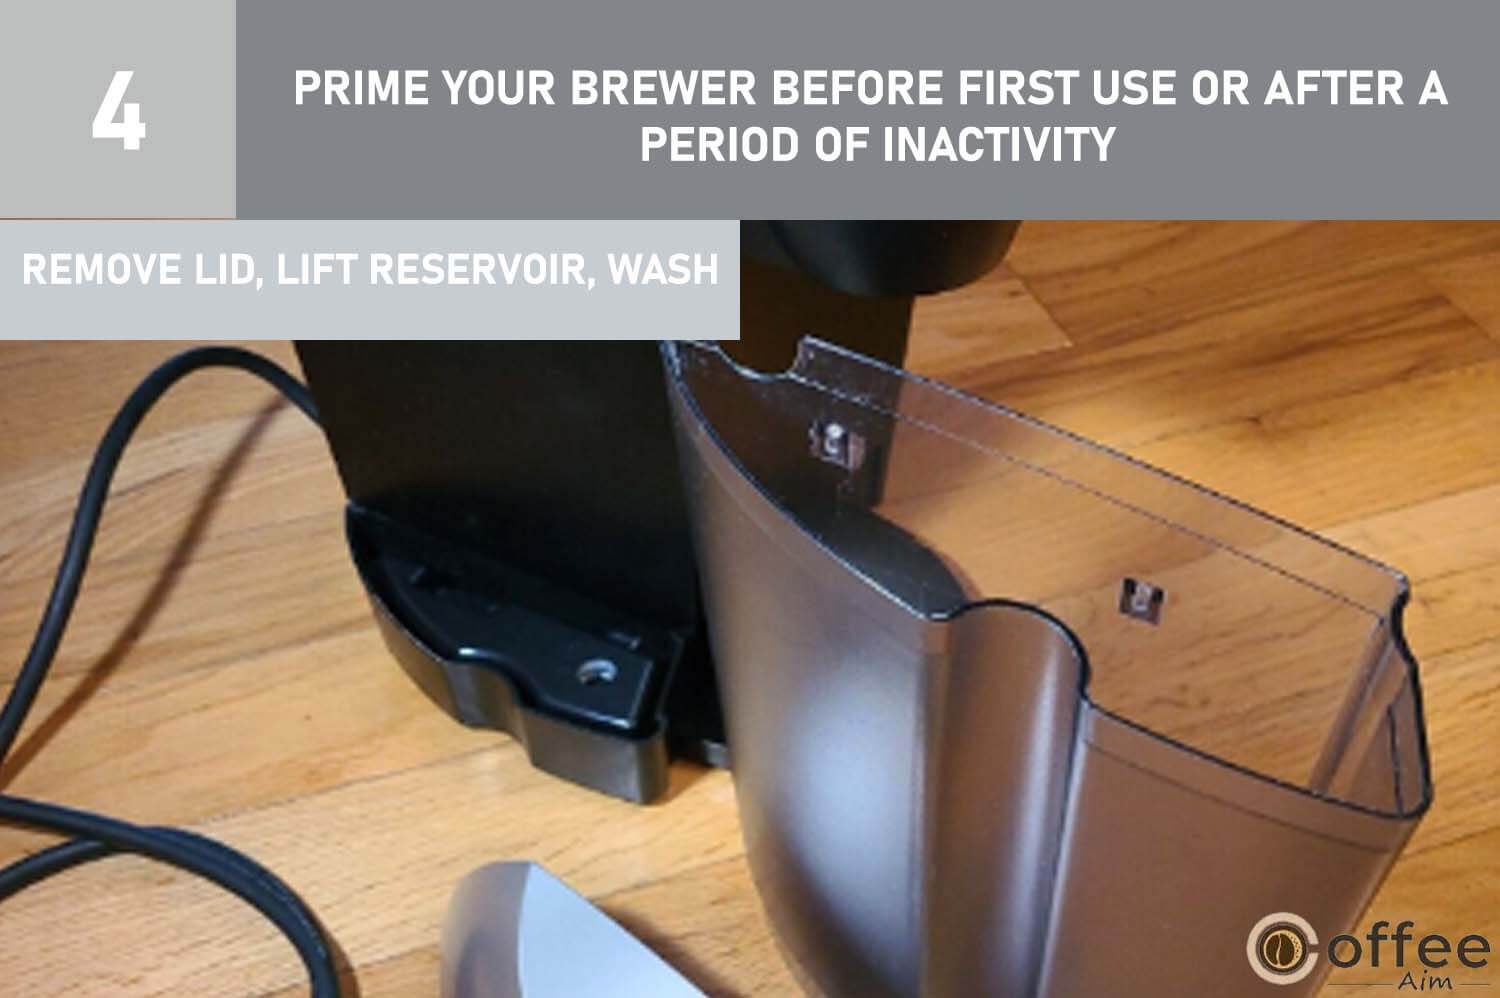
- Remove the Lid from the reservoir and then detach the water reservoir from Brewer by lifting it straight up and away from Brewer (it may be tight). Wash it with fresh water.
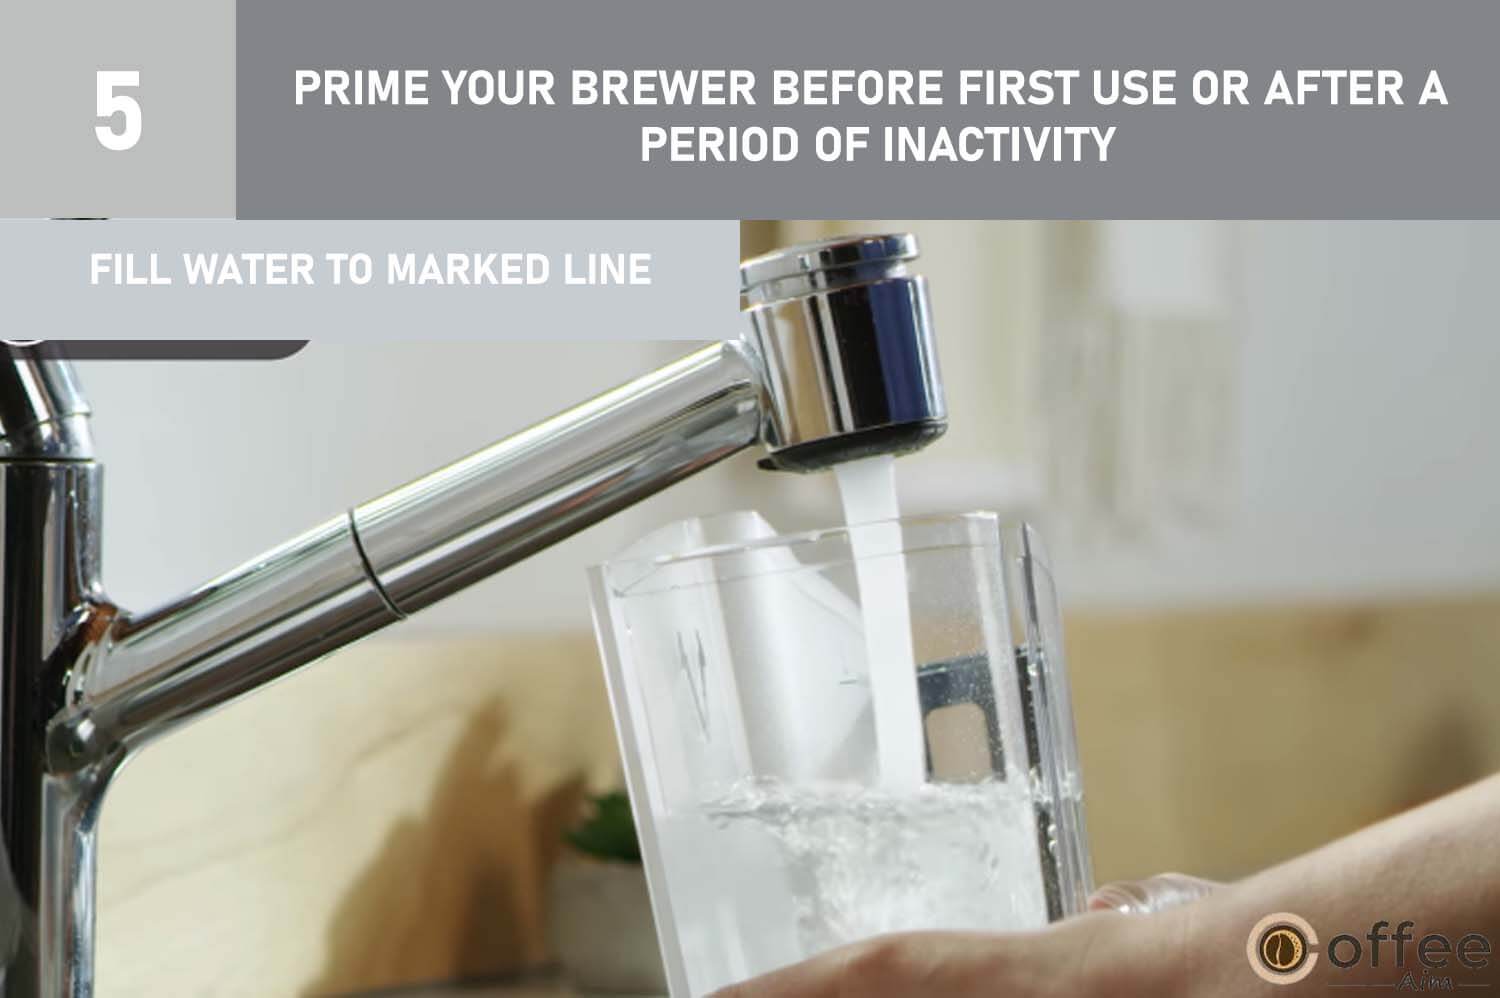
- Fill the fresh water in the water reservoir to the marked line just below the top edge of the transparent viewing area. (Overfilling should not be done).
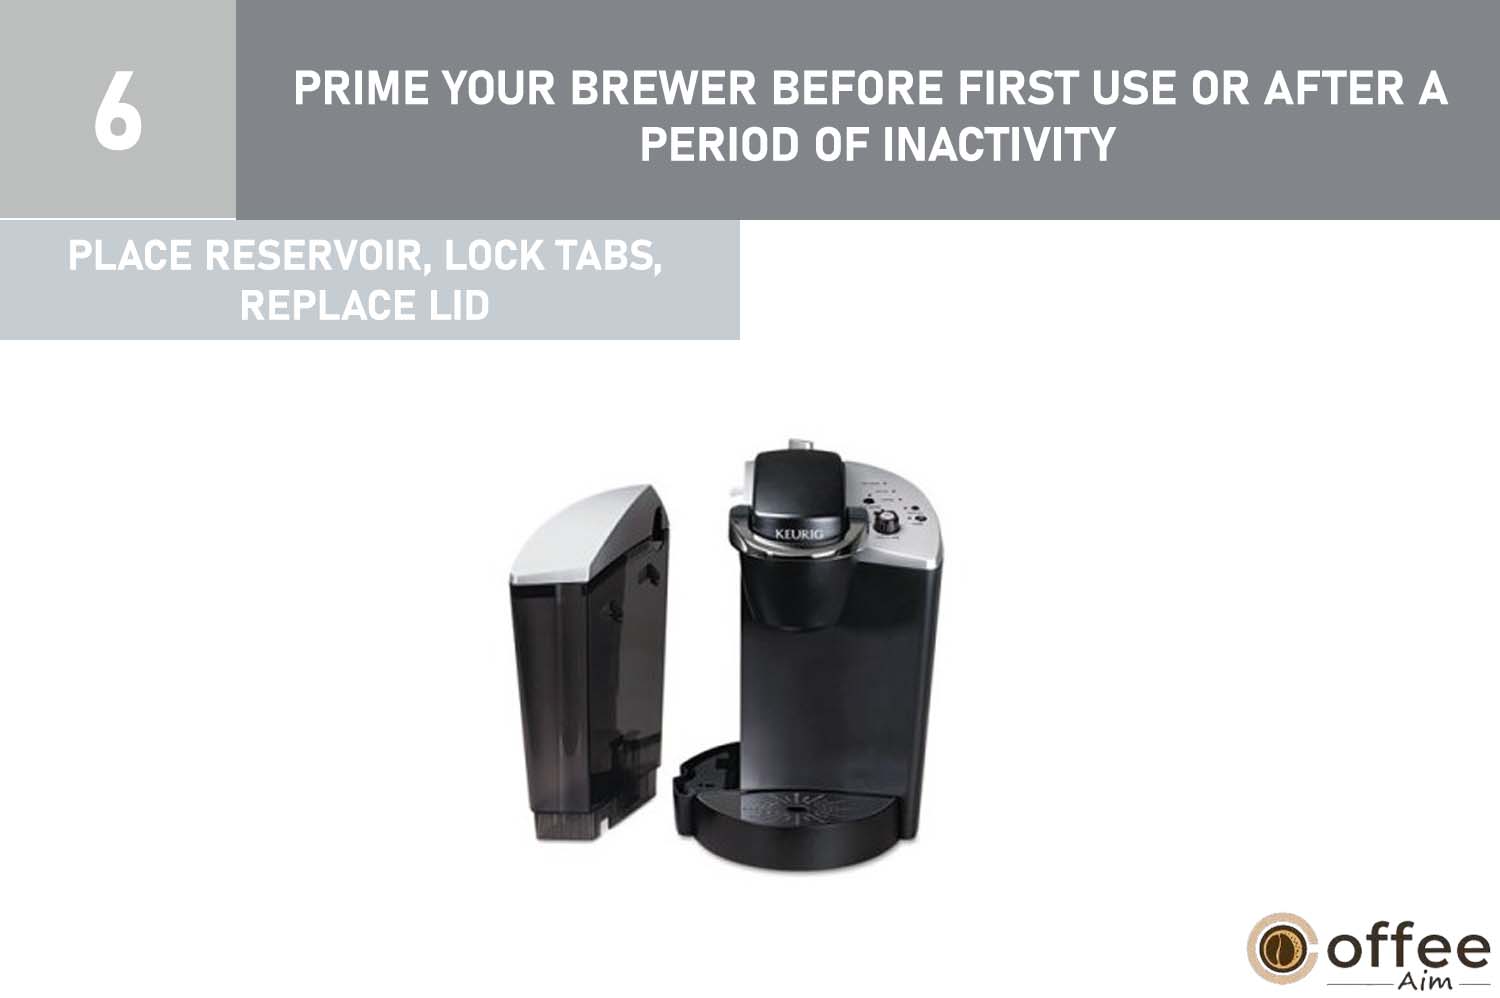
- Place the base of the water reservoir on the left side of your Brewer and correctly fix the bottom into the base. Make sure the lock tabs of the water reservoir engage with Brewer. Don’t forget to replace Lid on the Water Reservoir.
- Press the power button(found on the upper right panel of the Brewer). The green light will illuminate ( found next to the power button).
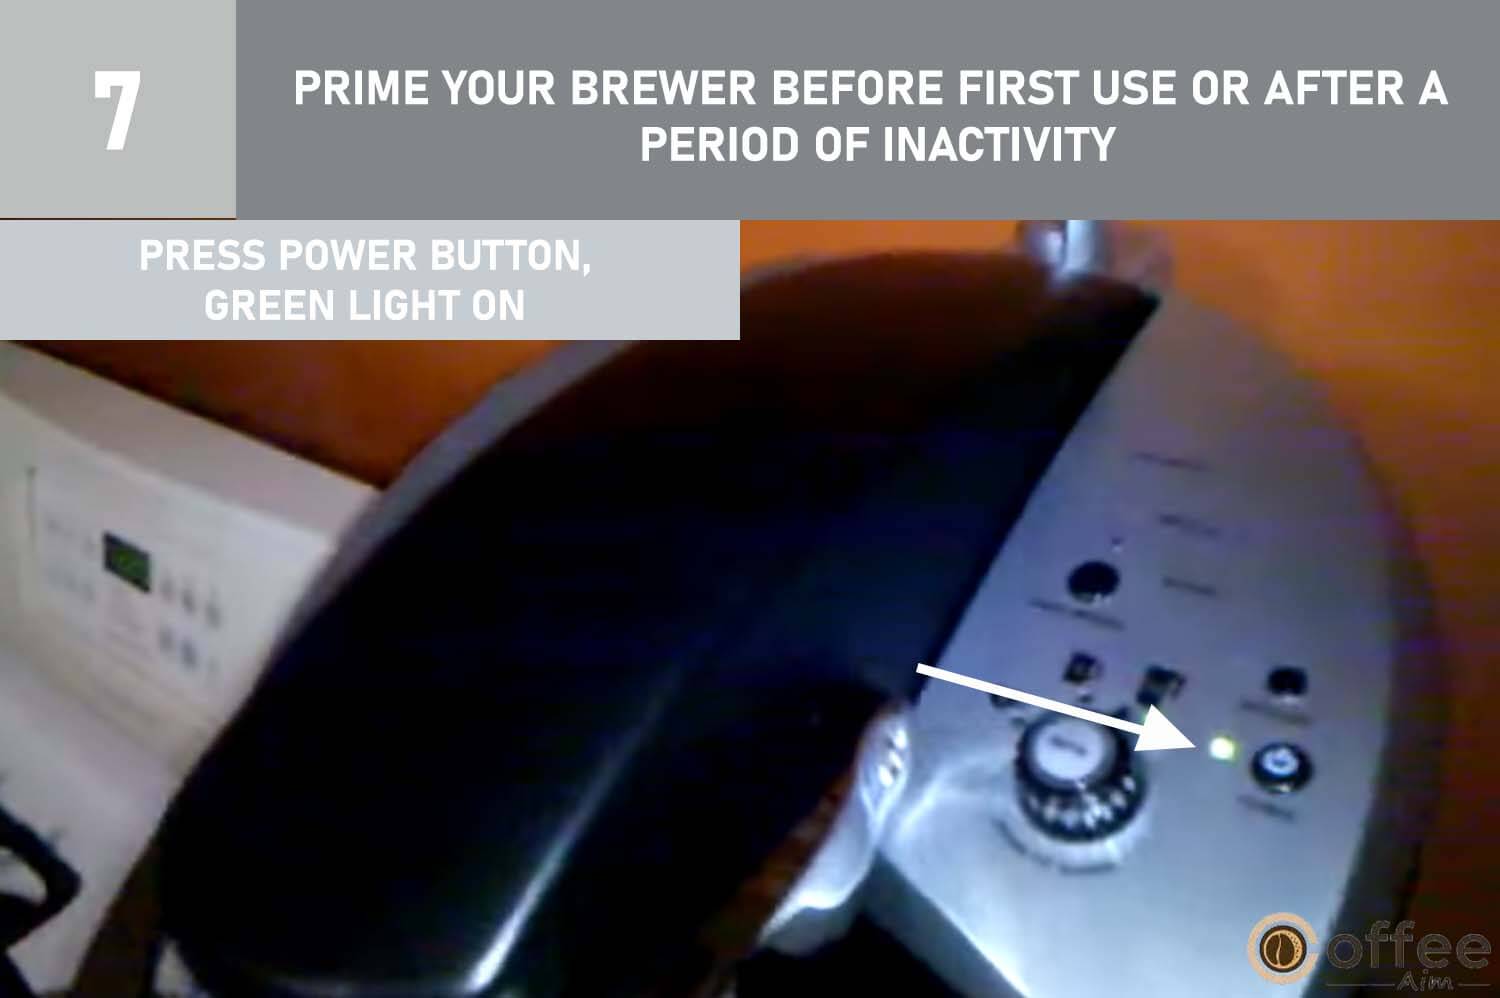
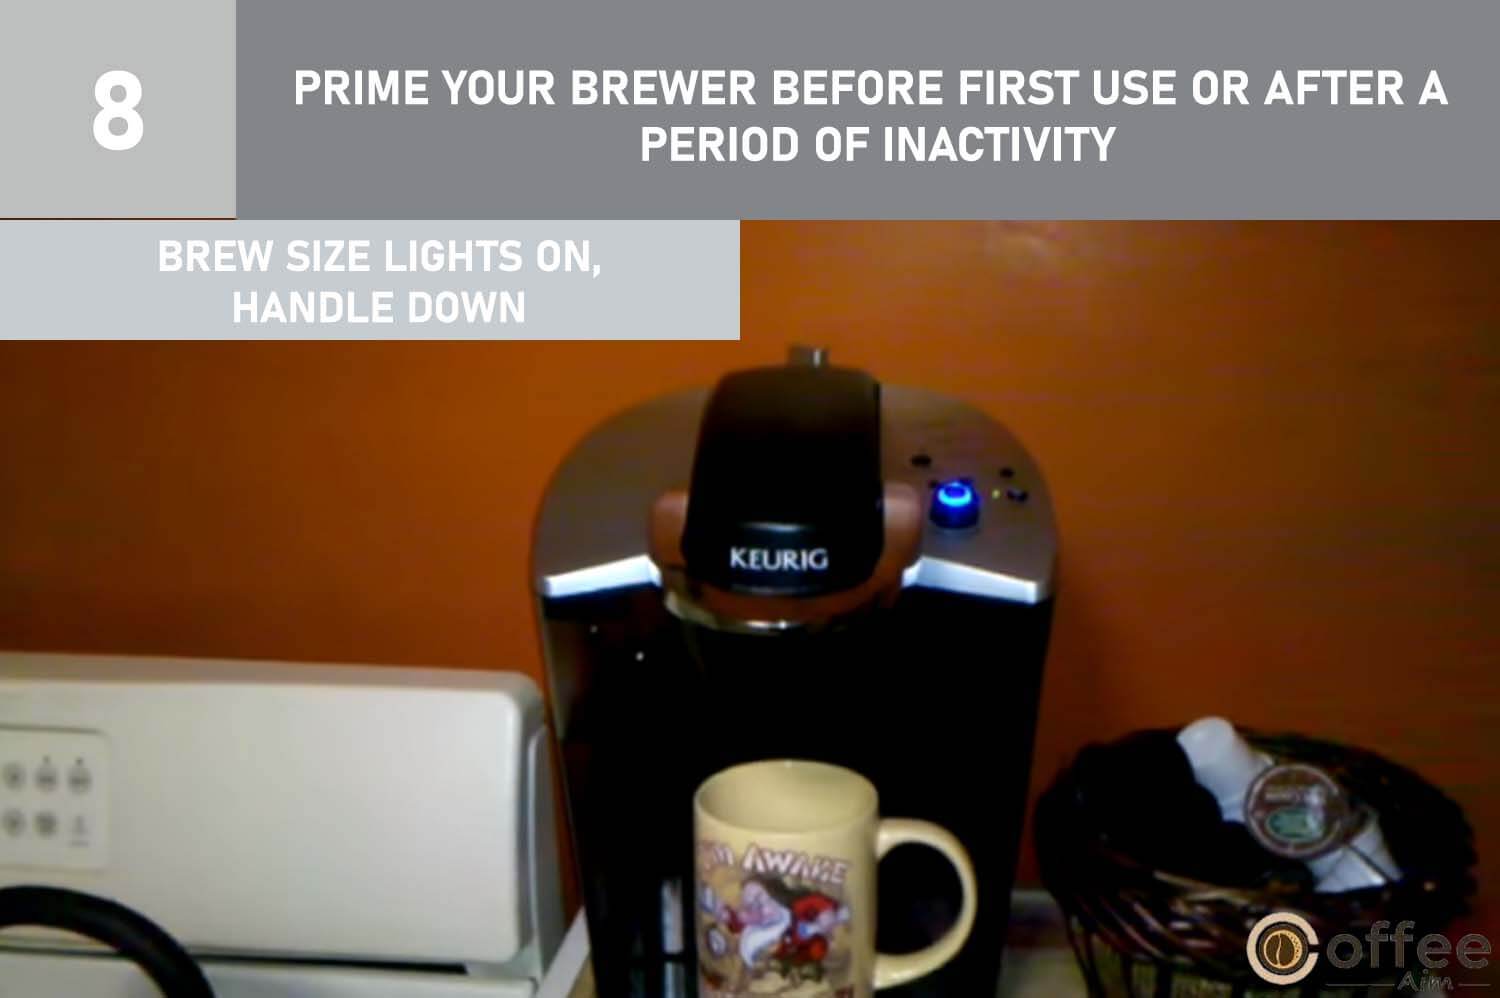
- The green brew size selector lights (found on the LED Control Center) will illuminate to represent that the Brewer needs to be primed. Before continuing, make sure that the Handle is down.
Note: Do not use a K-Cup should not be used for the Priming Sequence.
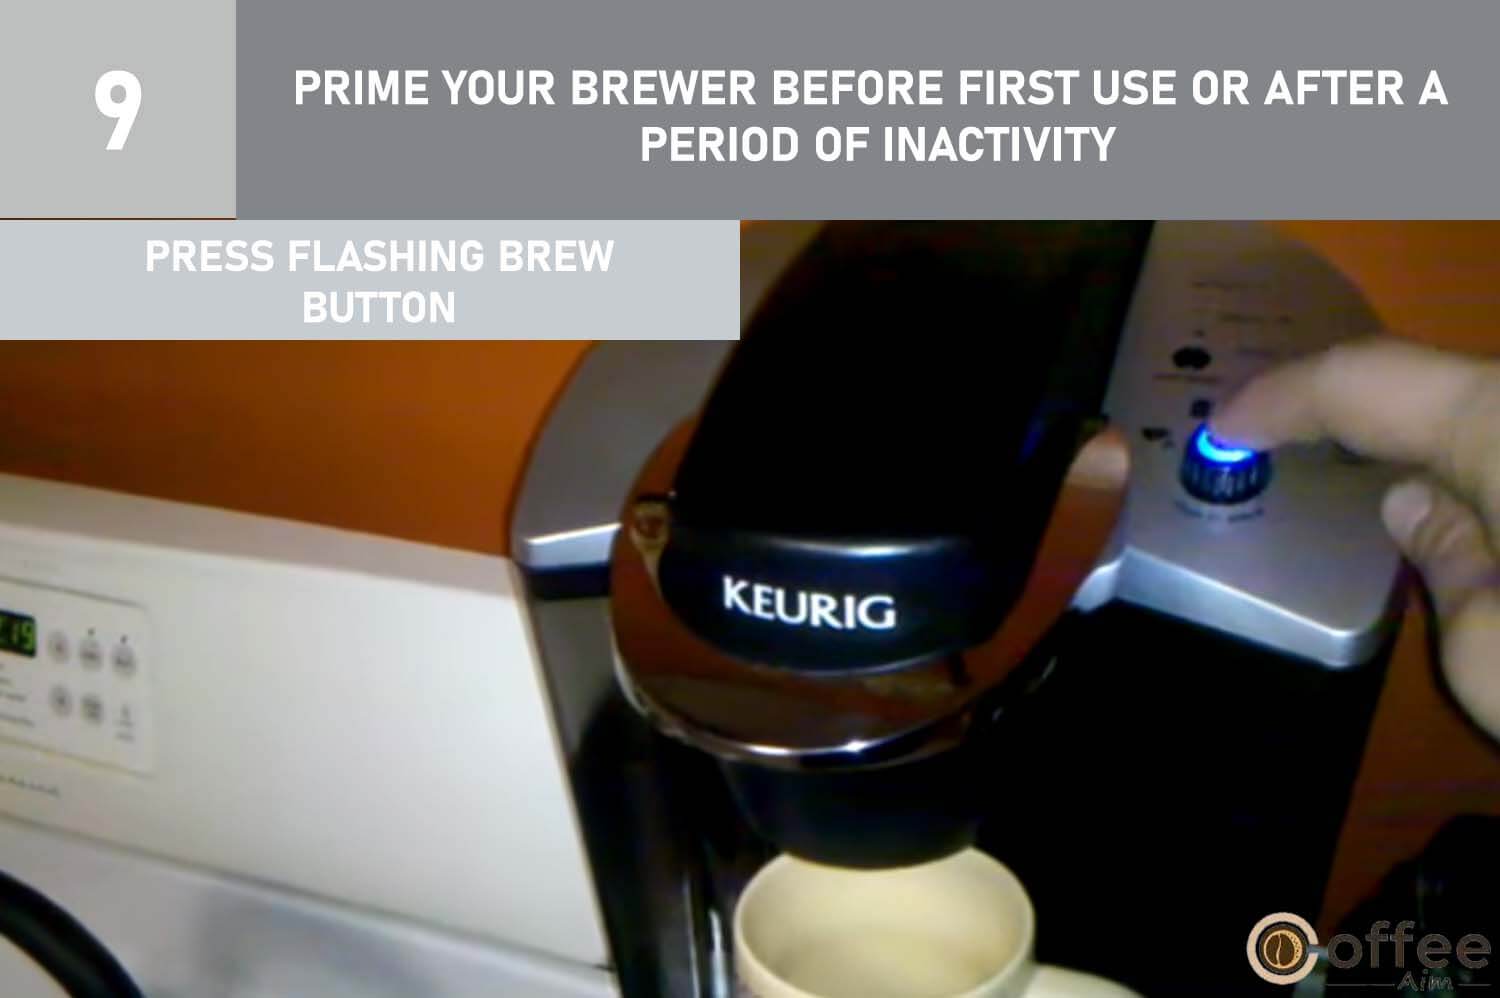
9. Now press the flashing Brew Button.
Note: If there is no water in the reservoir or it is not in its place on the Brewer, the blue light (found next to ADD WATER on the LED control center) will illuminate. The Brew button will activate once you add water to the water reservoir.
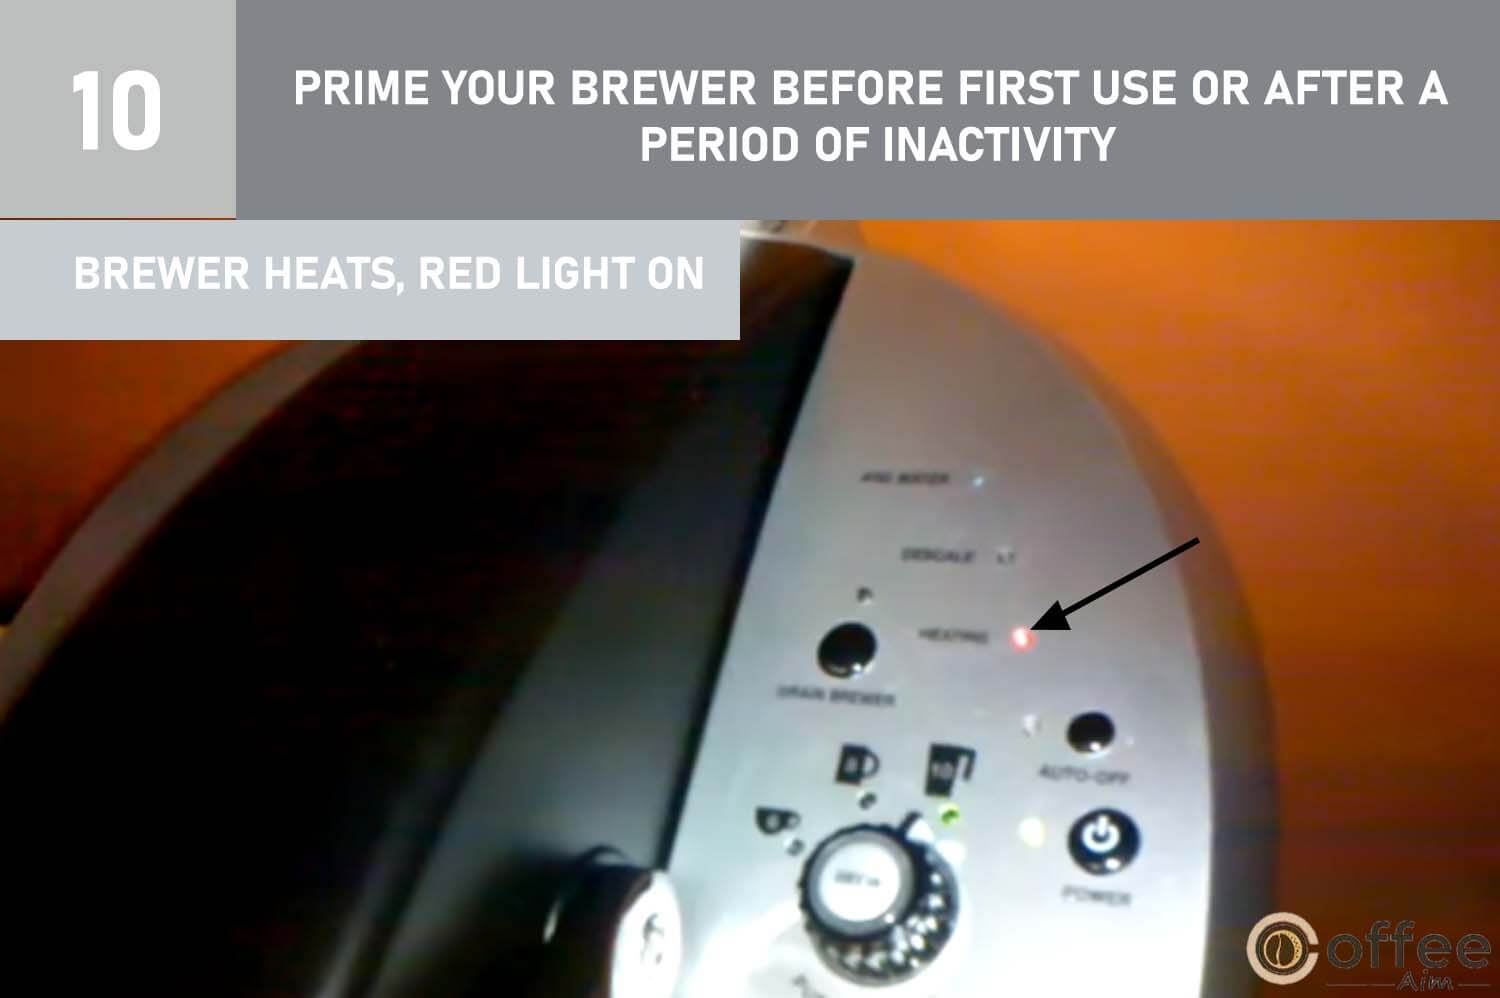
10. The Brewer will automatically start filling with water, and the water will be heated. At most, 5 minutes will be required for it. The red light located next to ‘HEATING’ on the LED Control Center will become illuminated during heating. The red light will shut down when the water is heated up.
Note: You will notice a small amount of water appearing from the vent and falling into the reservoir during this phenomenon and subsequent heating. Do not worry about it; it is a regular thing.
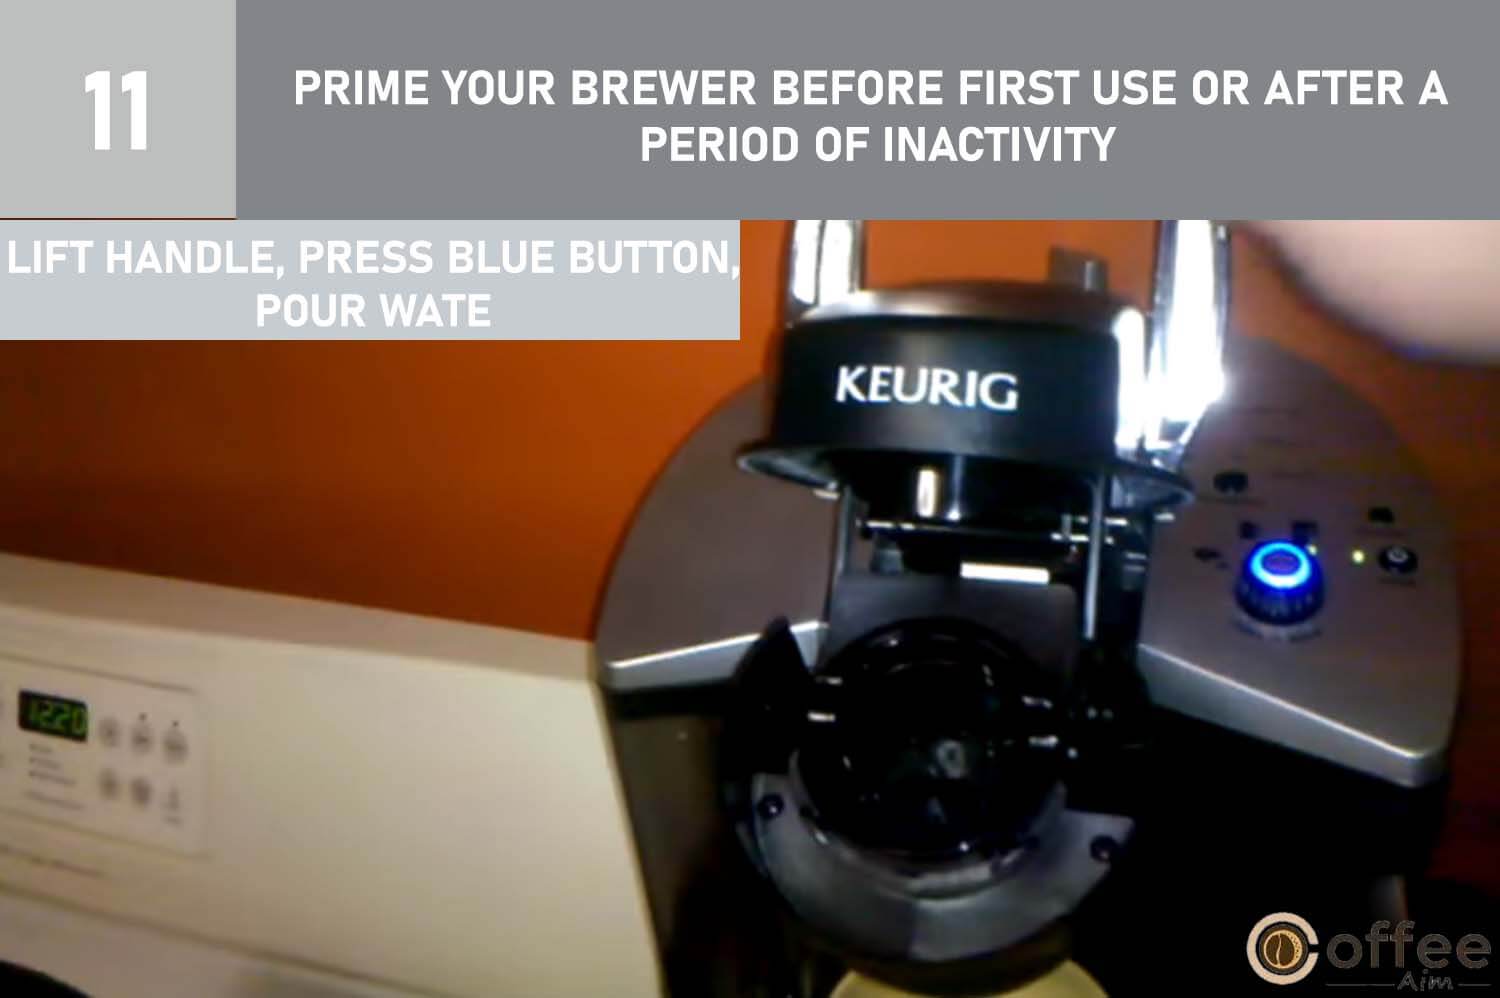
11. Lift the Handle, and press the flashing blue light button to start a cleansing brew. After brewing completion, the hot water will start dispensing into the cup or mug from the coffee outlet. Pour the hot water into the sink.
12. Refilling and reheating between brews will take 20 seconds. The red light may be lit up (next to “HEATING” on the LED control center). The red light will turn off after the heating process is completed.
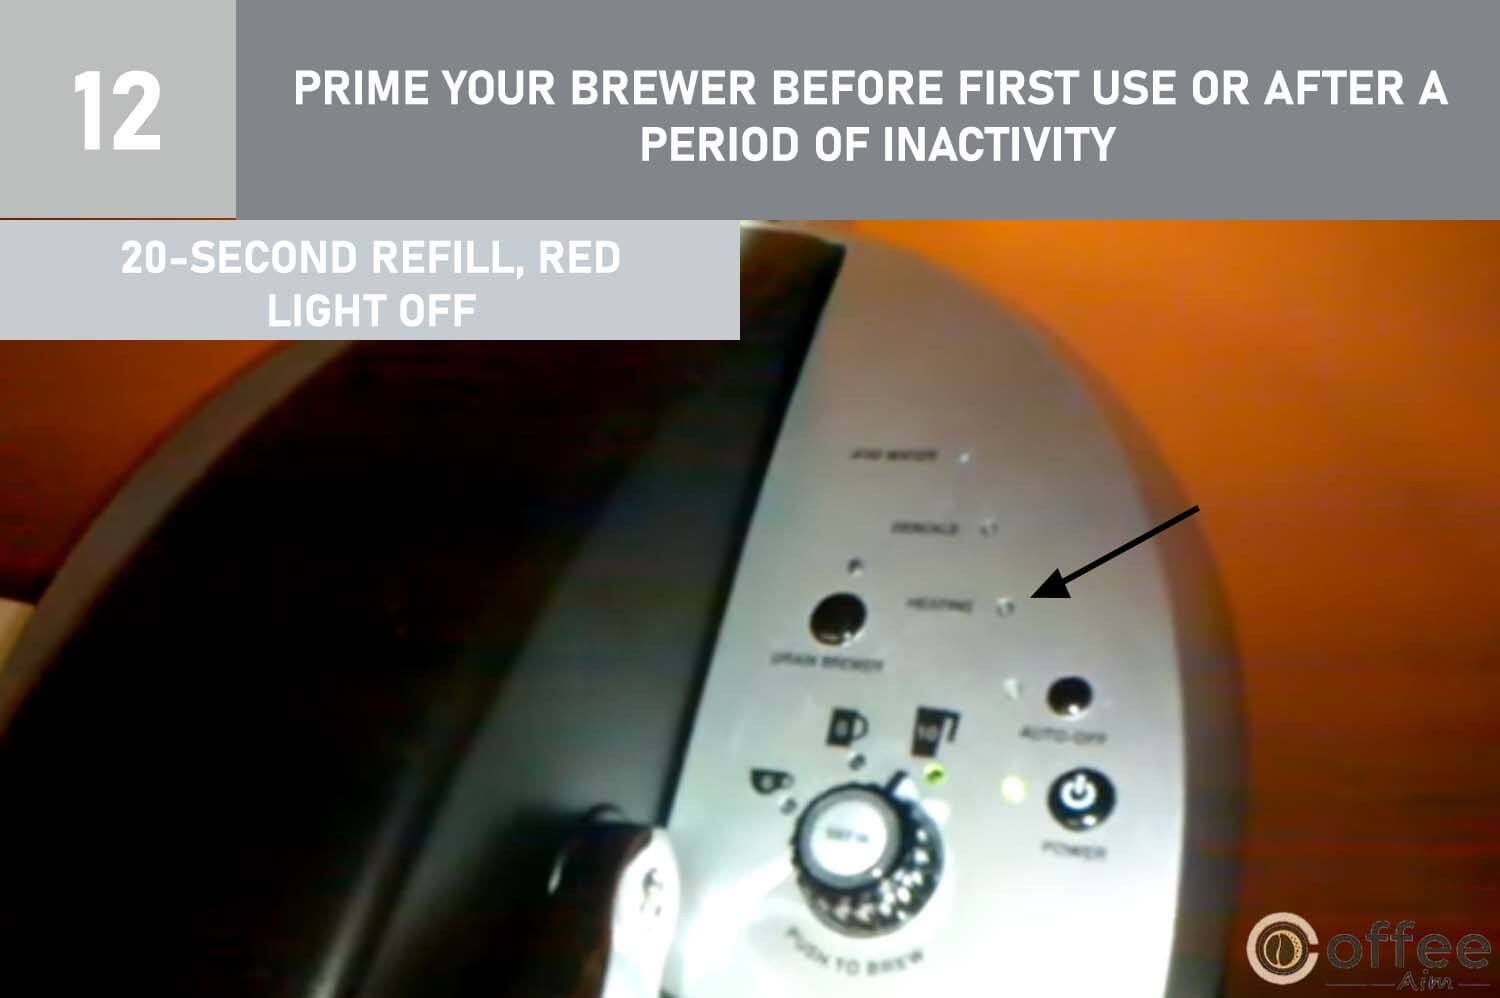
13. Finally! The priming process has been completed, Now brew a perfect Cup of coffee for you and enjoy.

Brew First Coffee Cup With Keurig B-140
Ah, the excitement of brewing your first cup of coffee with the mighty Keurig B-140! We all know that tackling a new gadget for the first time can seem a bit technical, but fear not, my fellow coffee adventurer. Like any other electrical appliance, the Keurig B-140 has its own unique set of functions and working steps. But worry not because I’ve got you covered. In the following lines, I’ll walk you through the necessary steps to achieve that perfect cup of coffee. So, let’s leave hesitation behind and dive right into the brewing procedure for your first cup.
- Turn on Brewer, and the green light will be illuminated (located next to the power button).

- Locate a cup or mug on the drip tray.

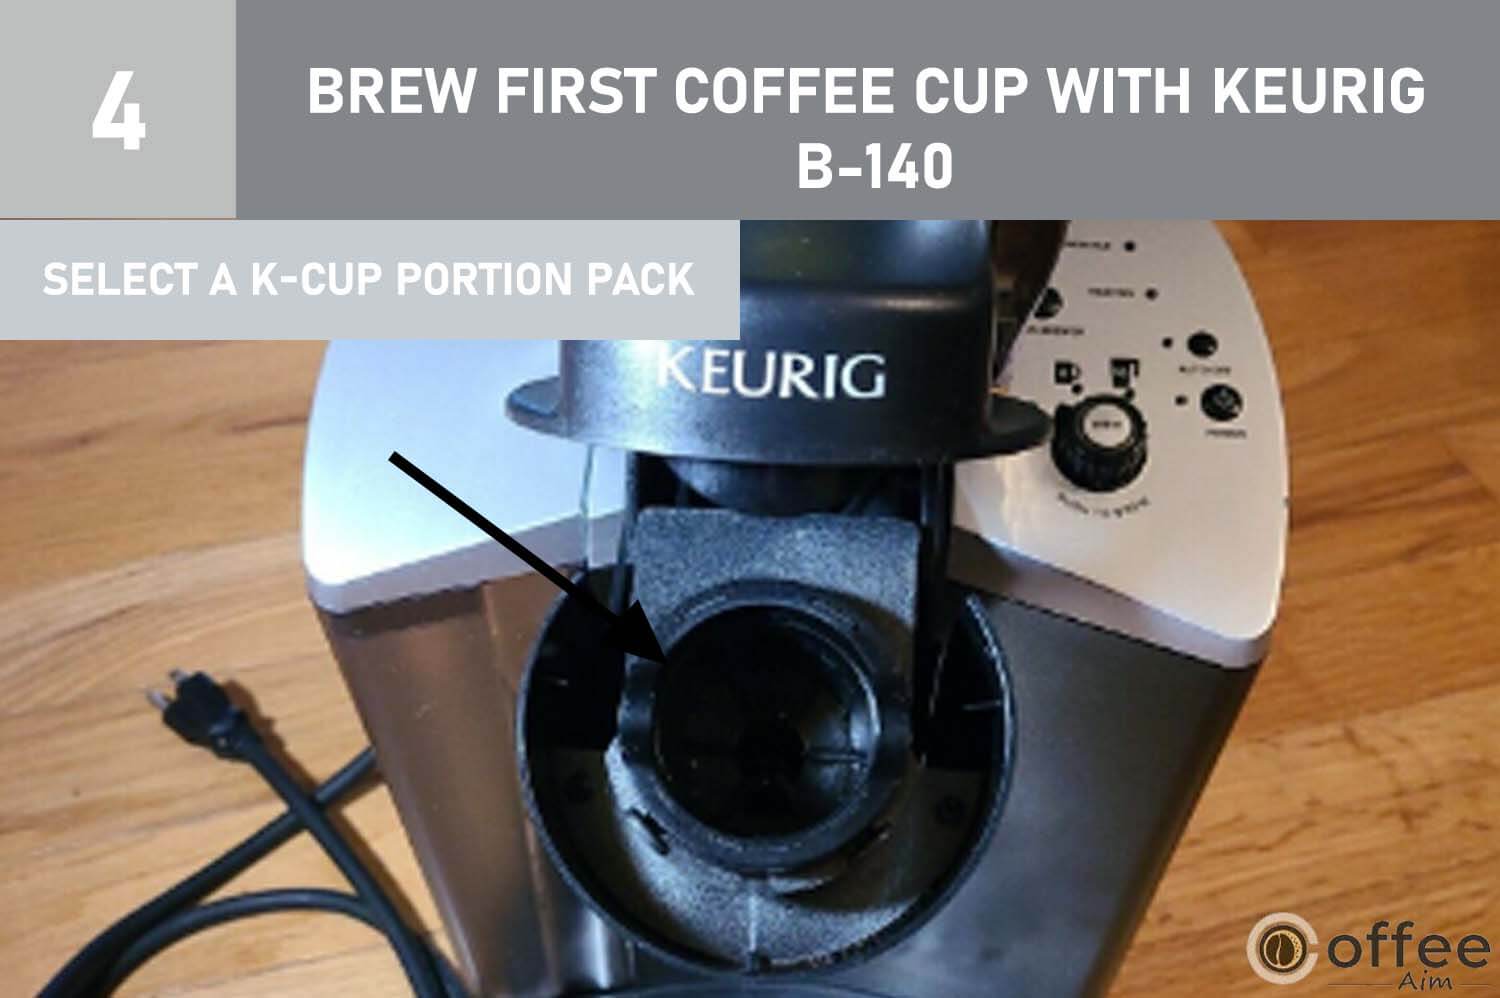
- Open the K-Cup pod holder by lifting the Handle; the K-Cup holder will open in your direction.
Note: Two sharp needles can puncture the K-Cup portion pack; one is located above the K-Cup holder, and the other at the bottom of the K-Cup holder. Do not insert your fingers in the K-Cup chamber to avoid the risk of injury.

4. Select a K-Cup portion pack.
Note: Do not remove the foil cover or puncture the K-Cup portion pack.
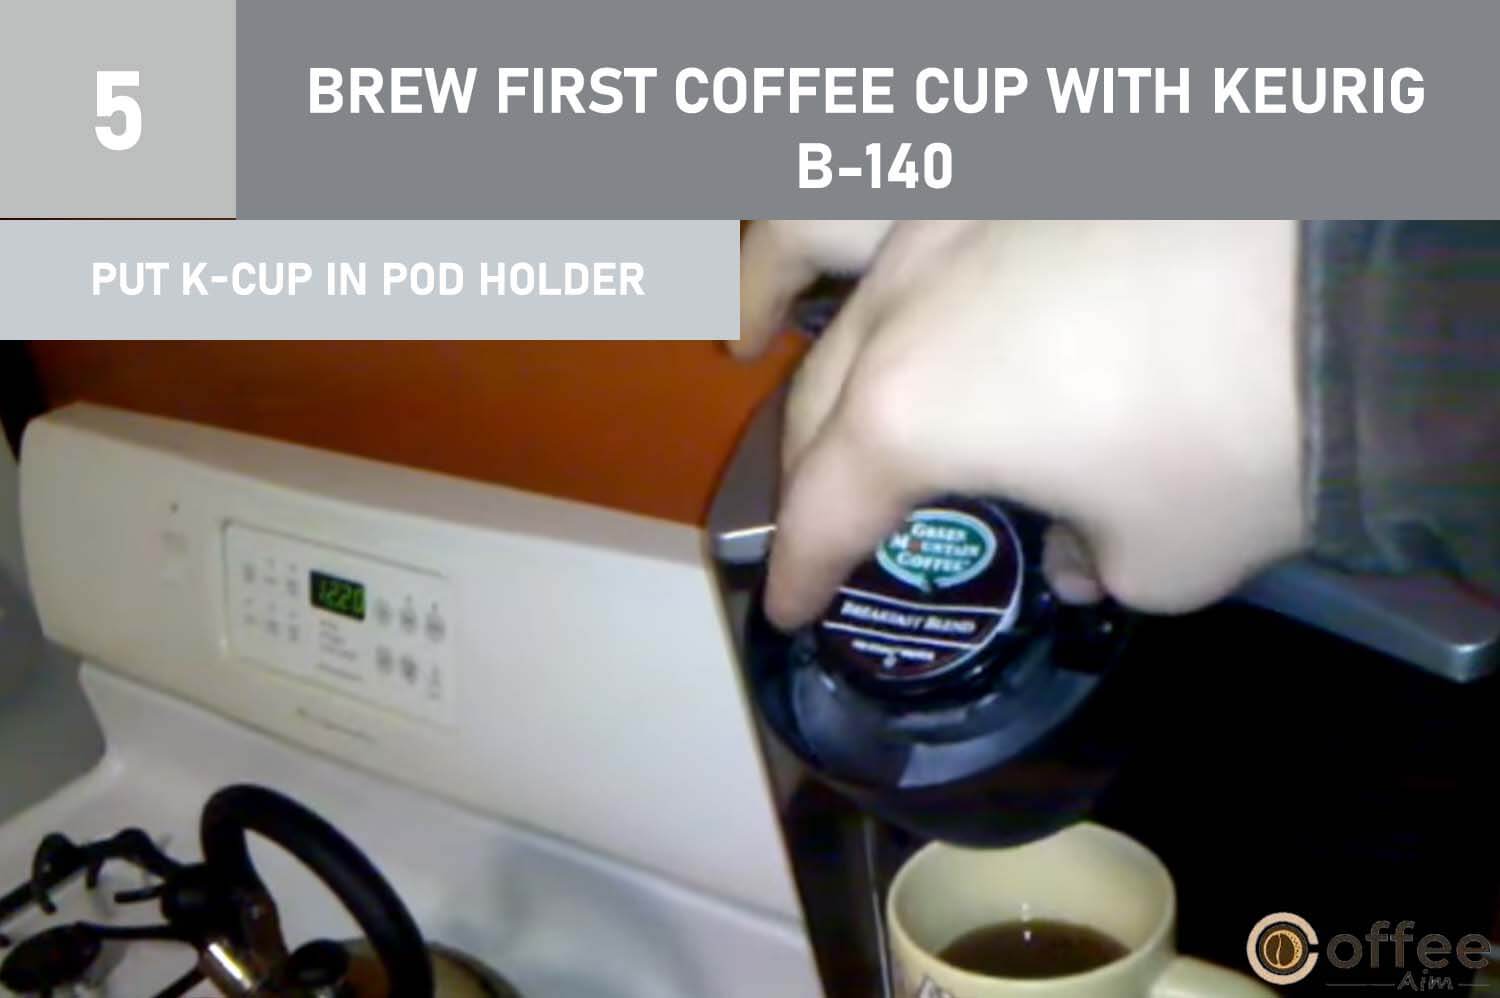
5. Place your selected K-Cup pod in the pod holder.
6. Now close the Lid by lowering the Handle ultimately.
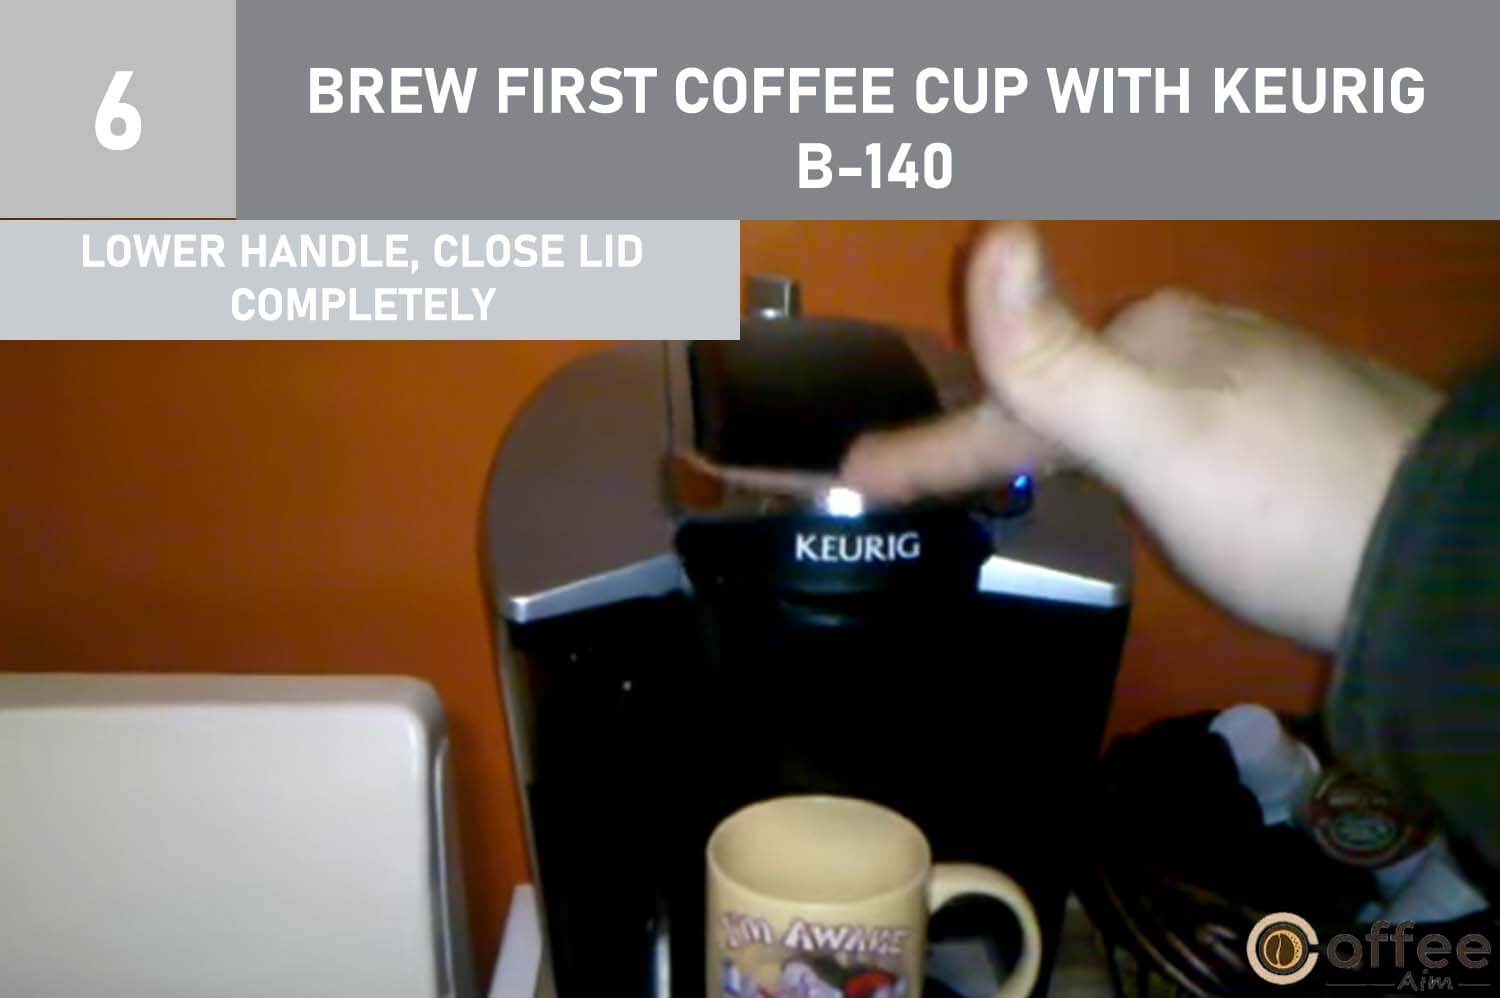
7. Use the rotary selector switch to select your desired brew size.
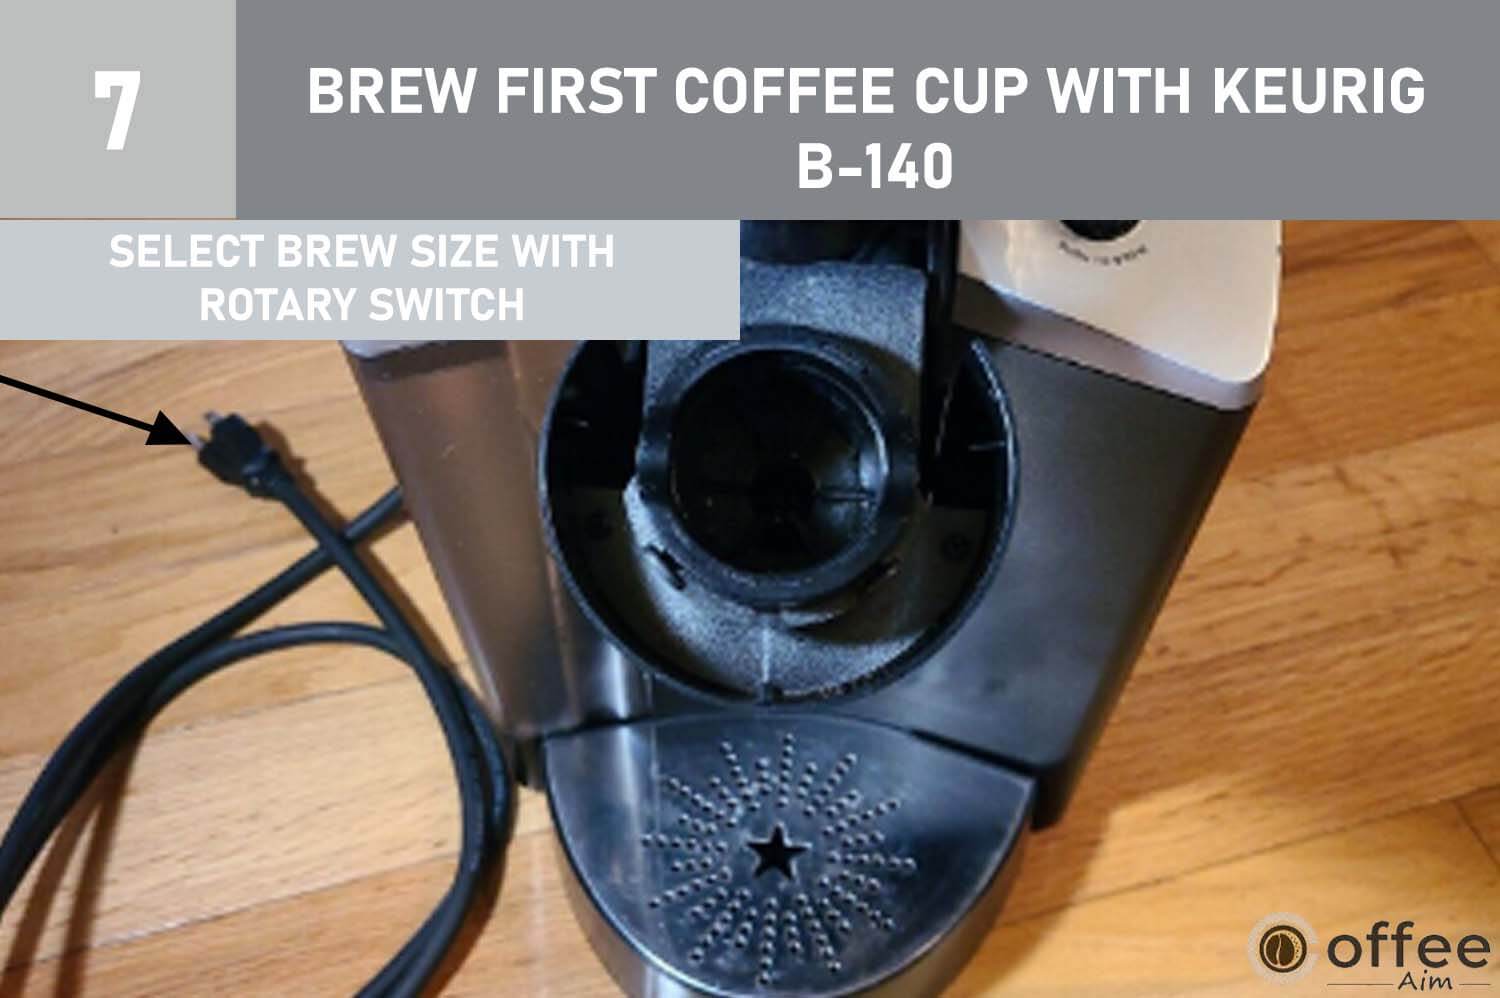
8. Press the blue flashing brew button (located on the LED control center). It will yield a serving of the selected size; a small 6 oz. Medium eight oz. And a hefty 10 oz. Nominal size.
Note: If you do not push the flashing button within 60 seconds, the brew button will become disabled to protect against accidental activation. You can re-activate the brew button by raising and lowering the Handle entirely without removing the unused K-cup.
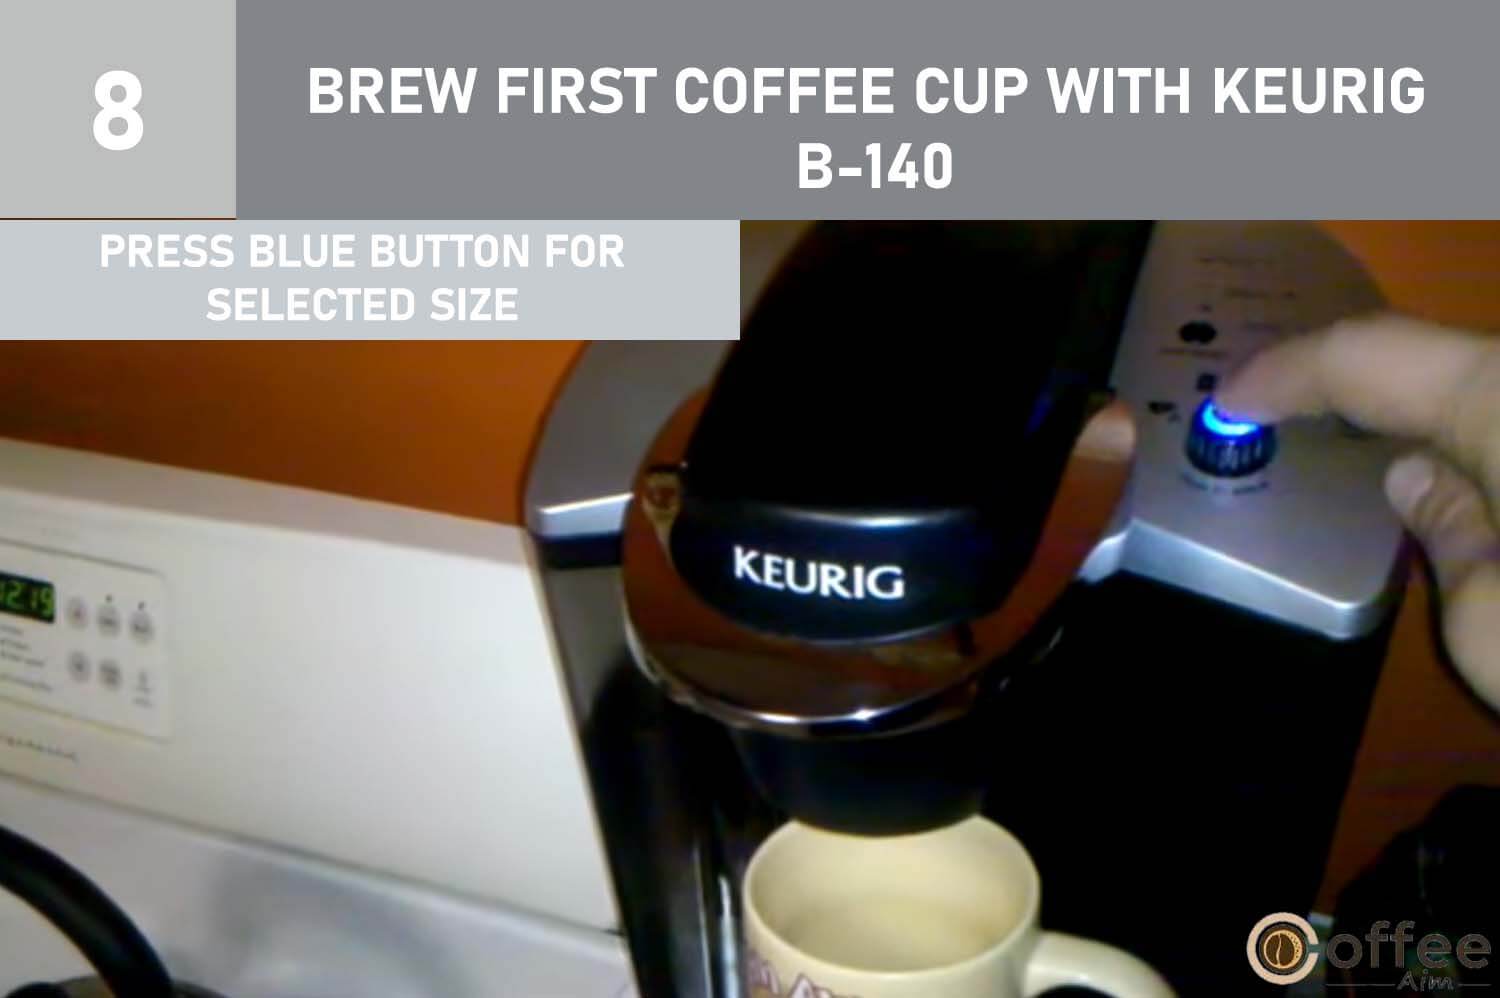
9. During brewing, the blue brew button will remain on.
Note: There is boiling water in the K-Cup holder during brewing. Do not uphold the Handle or open the K-Cup chamber during brewing to avoid the risk of injury.

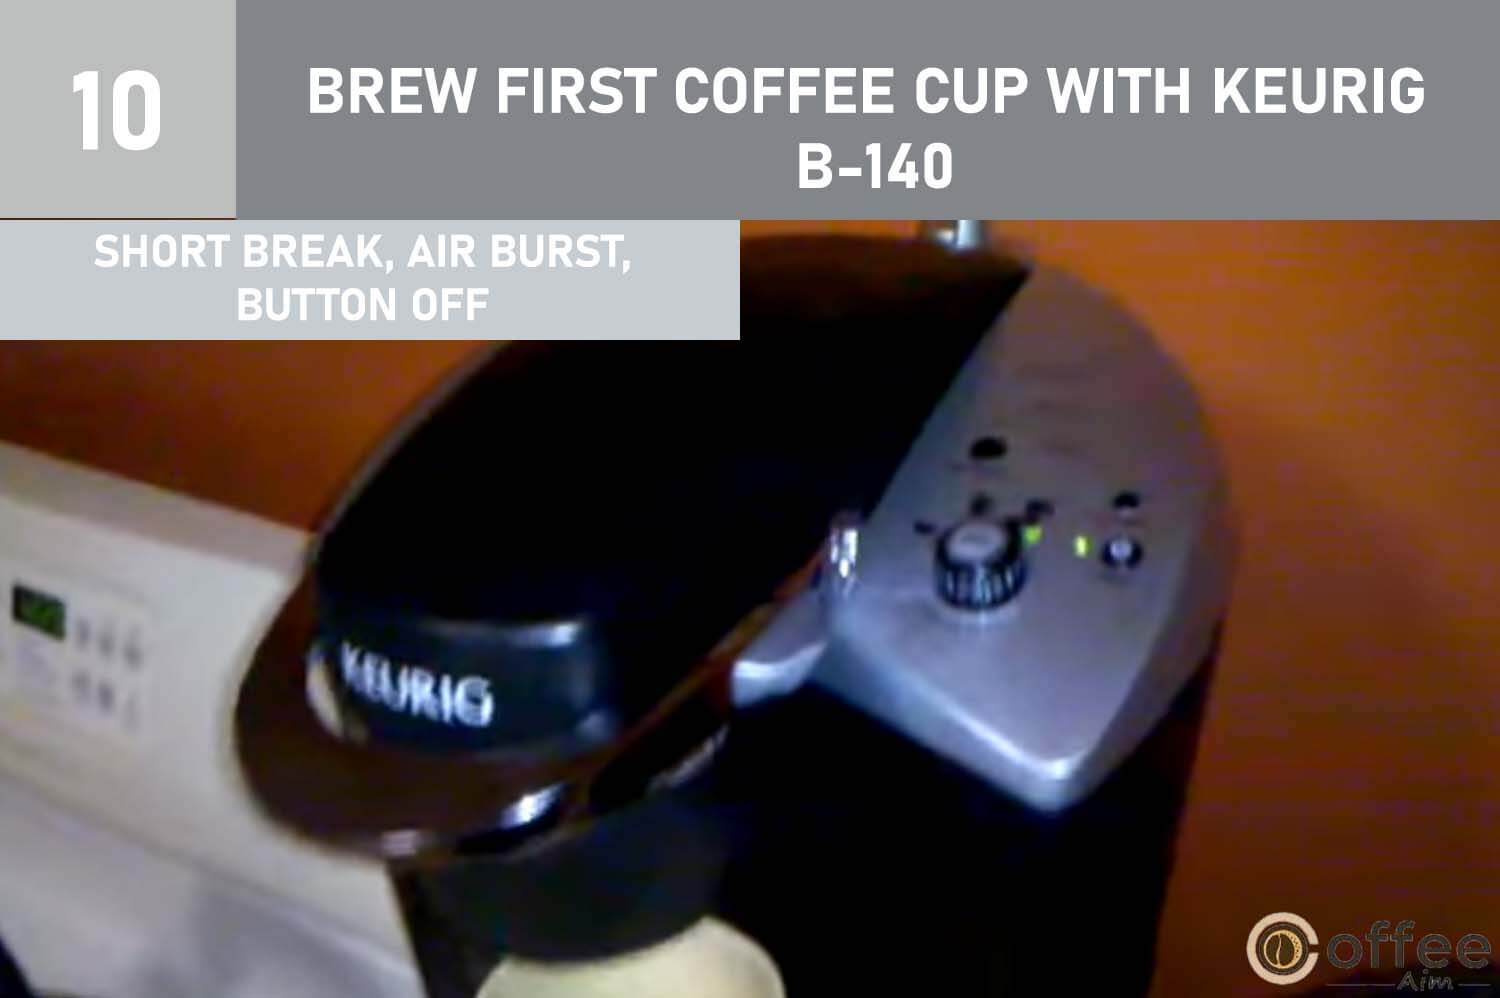
10. Before the initiation of the brewing process, there will be a short break. The brewing process will end in 40 to 50 seconds with a burst of air to remove all liquid coffee or tea from the K-Cup. The blue button will turn off.
11. Lift the Handle to remove the used K-cup.
Caution: The K-Cup will be hot.
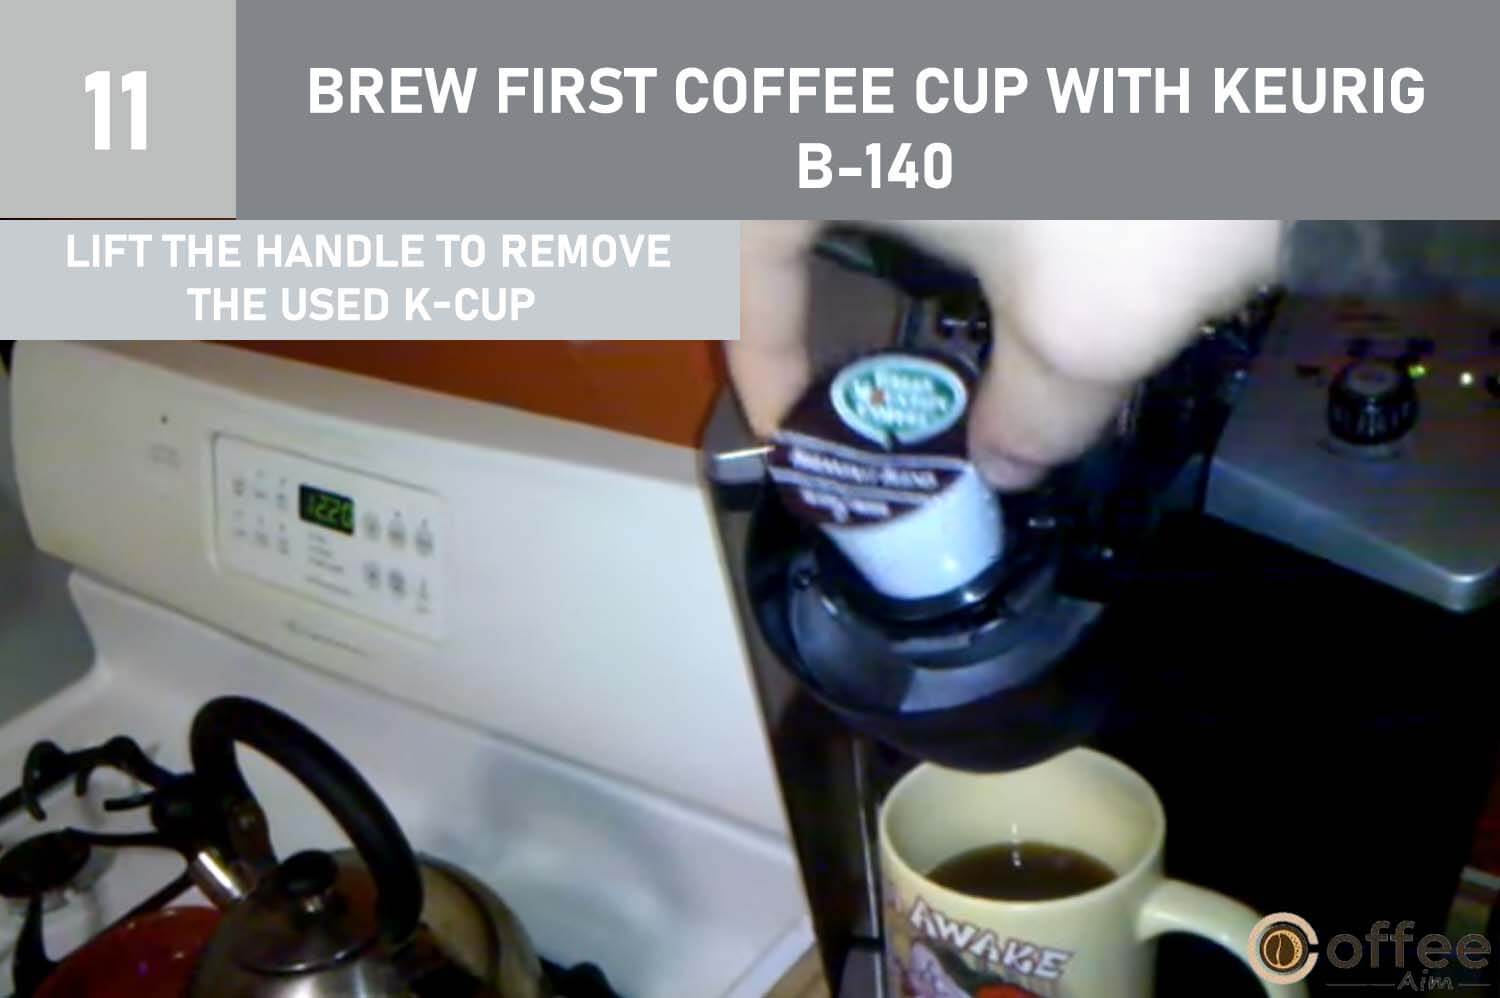
12. Now enjoy your first cup of Keurig brewed Coffee or tea.

13. ready to u The red light (present in the LED control center)may lighten up as the water starts heating for the next brew cycle. Brewer will becomese again in approximately 20 seconds.
Note: After the Brew, your Brewer will fill in preparation for the next Brew. The pump makes a vibrating sound. It is a regular thing.
How To Stop The Brew Process?
You can turn off Brewer by pressing the power button. It will stop the flow of coffee or tea. The heating element is also turned off, and the green light also become extinguished (located next to the power button)
NOTE: During your next Brew, the coffee in your cup will be less volume. It is recommended that cleansing brew be performed (without a K Cup) after a terminated brew or on the completion of the prime sequence. Then your next Brew will be of a selected volume.
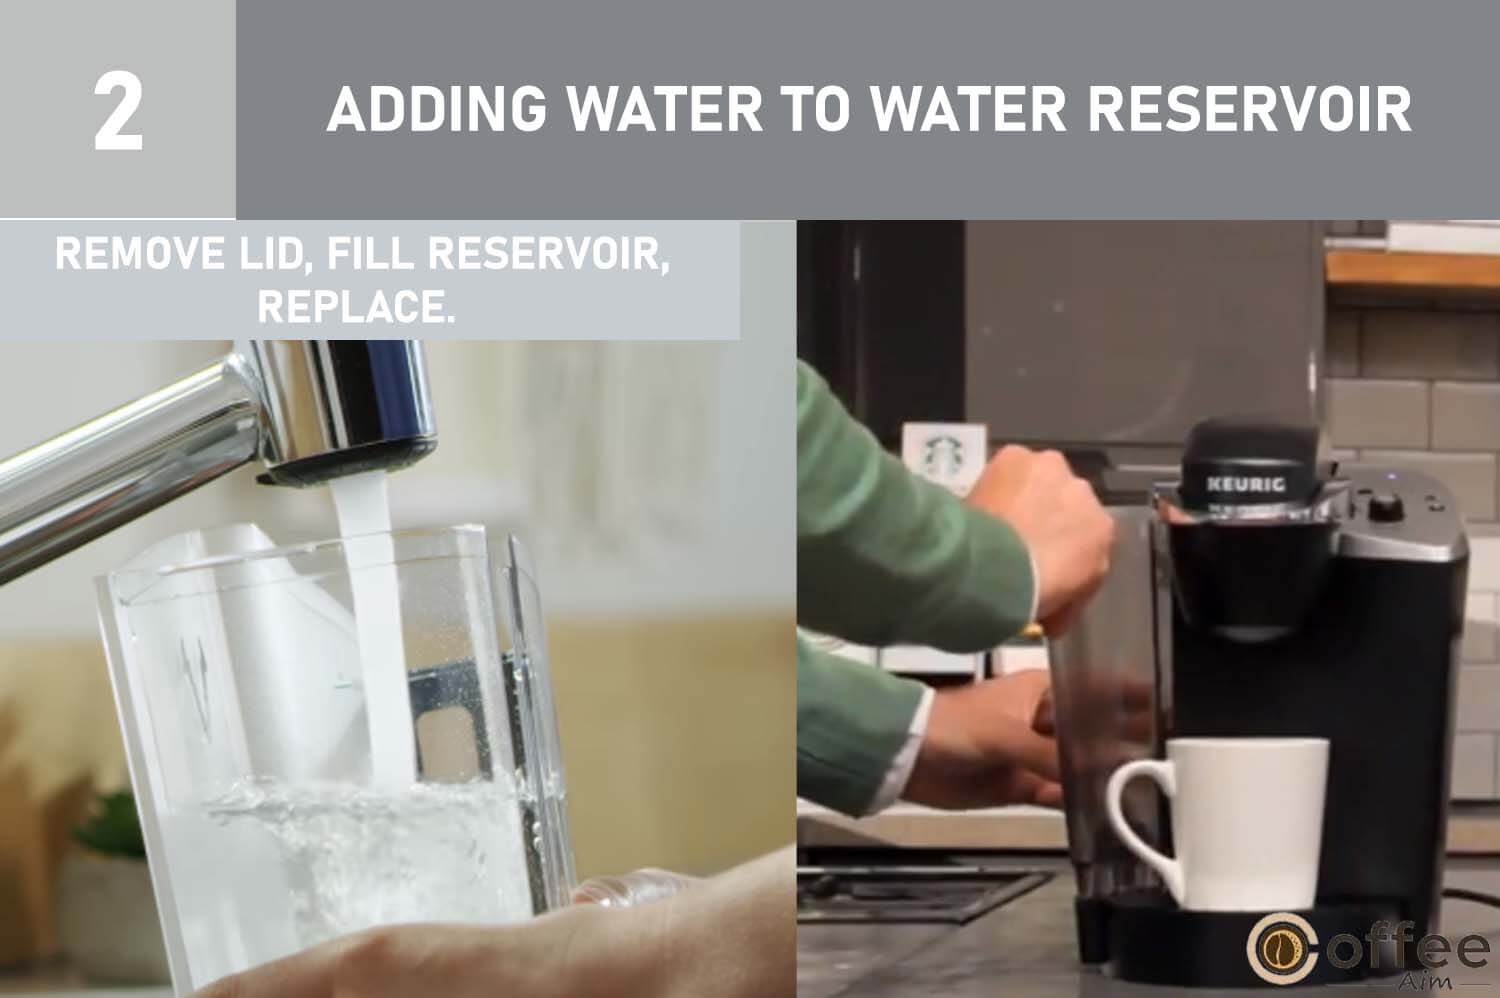
Adding Water To Water Reservoir
A blue light (located next to “Add water”) will illuminate if the water level in the reservoir is low or in case of removal of the water reservoir from Brewer. Brewer will not brew in case of illumination of blue light. Thus, first, refill the water reservoir or attach it to Brewer.
There are two methods of filling the water reservoir.
- Pour water directly into the reservoir by lifting off the Lid of the reservoir while it is still connected to the Brewer and placing the Lid in its place again.

- Remove the Lid from the reservoir and then remove the water reservoir from Brewer. Fill it with water. Again place the water reservoir into Brewer and cover it with a water reservoir lid.
The blue ADD WATER light will disappear for 3 seconds after installing or refilling the water tank/reservoir. This delay is expected.
NOTE: Do not take out the water reservoir during the brewing process.
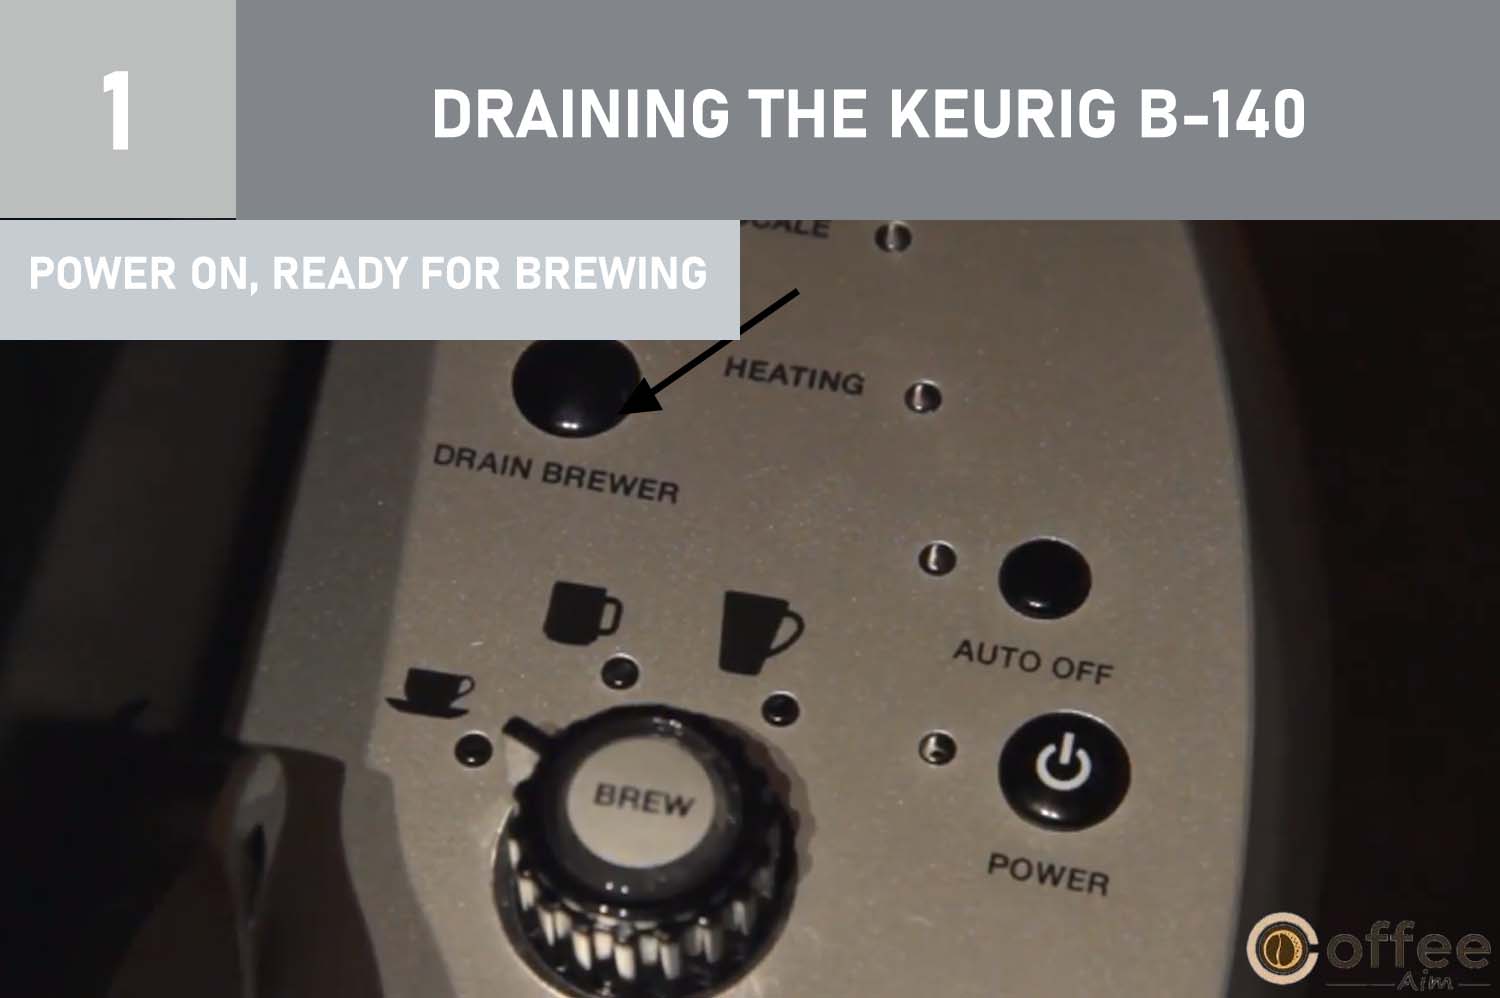
Draining The Keurig B-140
If you have a Keurig B-140, using it around the year is optional. Sometimes you want to have a gap in the use of Keurig B-140, and you want to store it, or you want to move it somewhere along with you during your tour or visit during your vacation. Then it is necessary to drain the hot water tank of your Brewer before it’s turned off.
- Power on the Brewer and make it ready for brewing.
- Empty the Cold Water Reservoir and place it back into Brewer. The LED light will illuminate that represents the water demand.
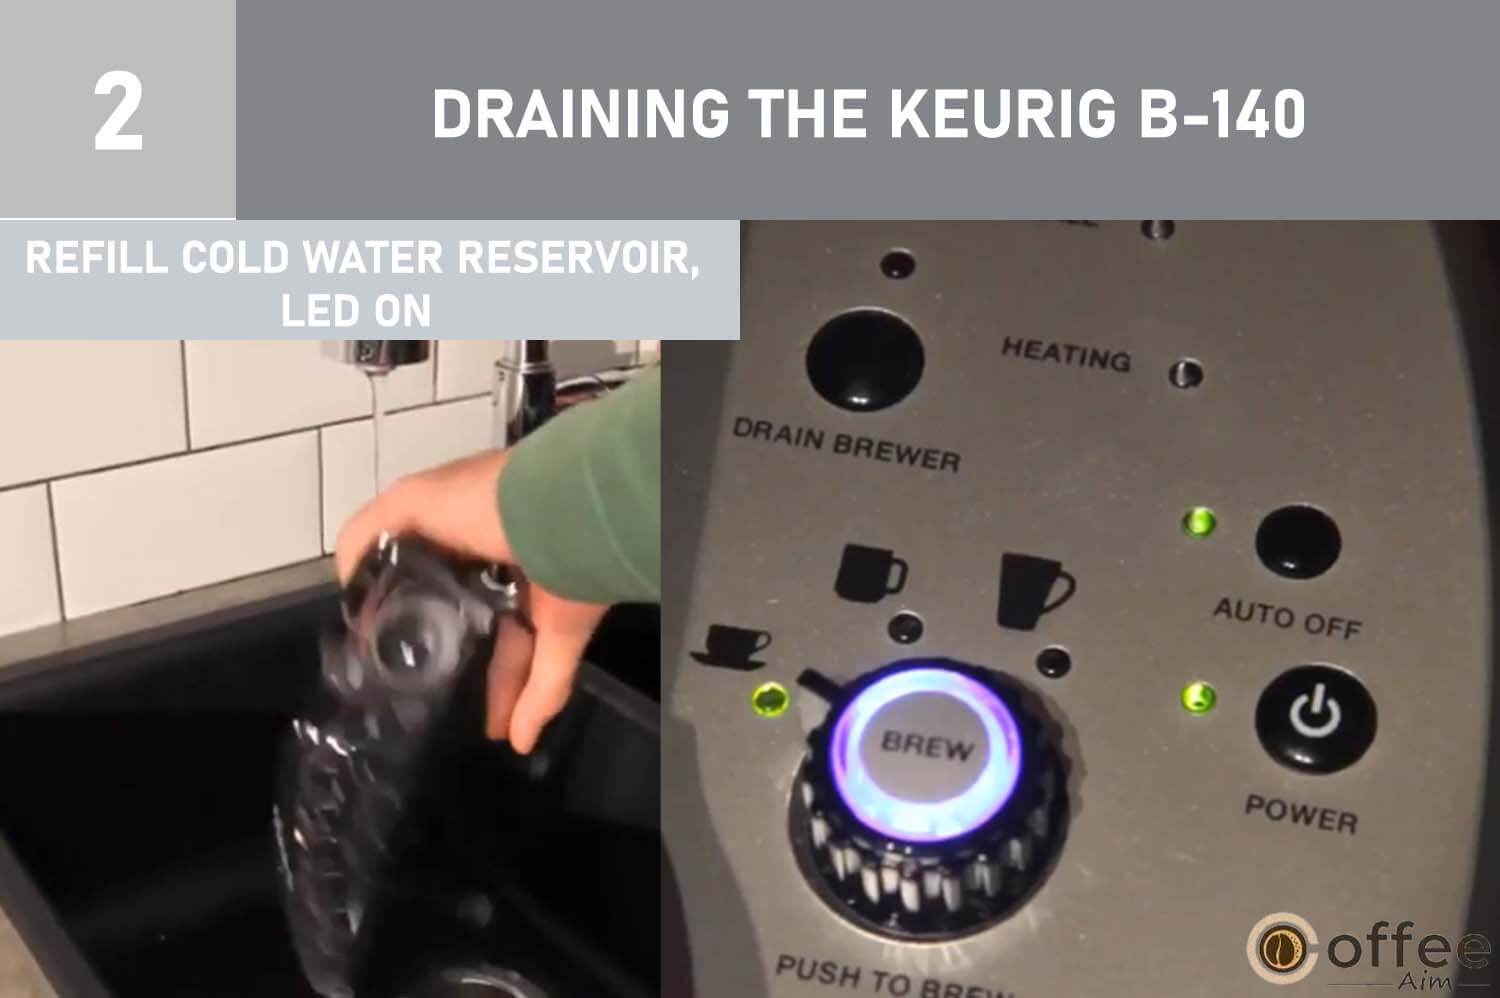
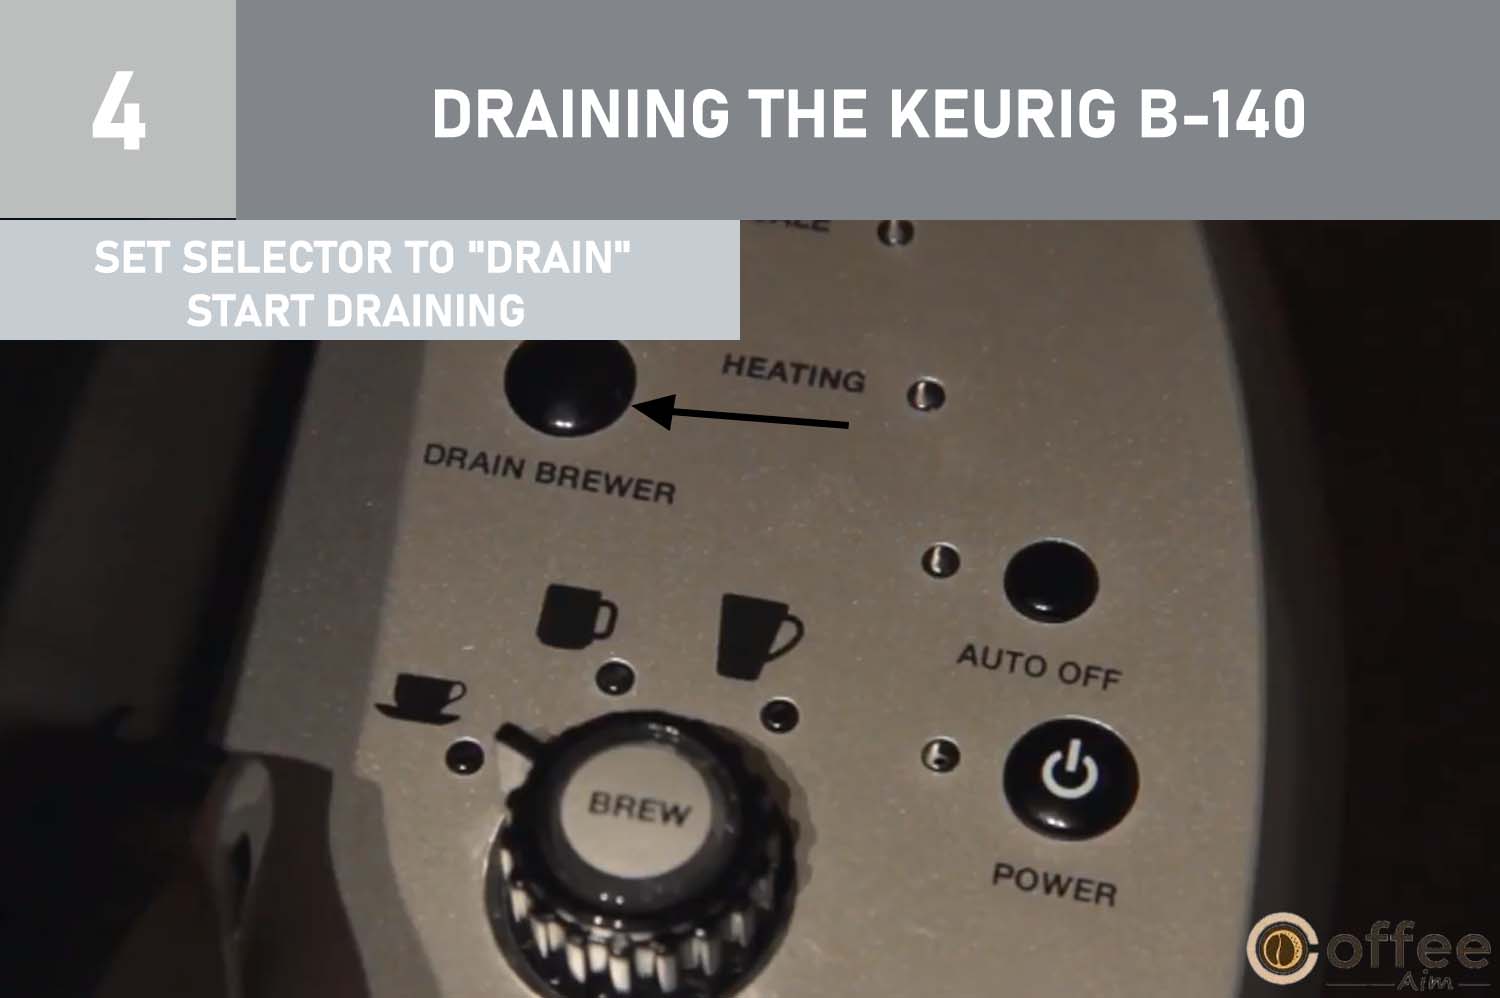
- Turn the Brew / Drain selector at the rear of the Brewer to the “DRAIN” position. It indicates that now your Brewer is ready, and you can start the draining process.

- Press and hold the drain button. Water will start to flow from the vent nozzle to the water reservoir. As you continue to press the drain button, water will also continue to flow. When you release the drain button, water also stops flowing.
CAUTION: The water can be boiling!
NOTE: Draining the hot water tank will complete in a minute.
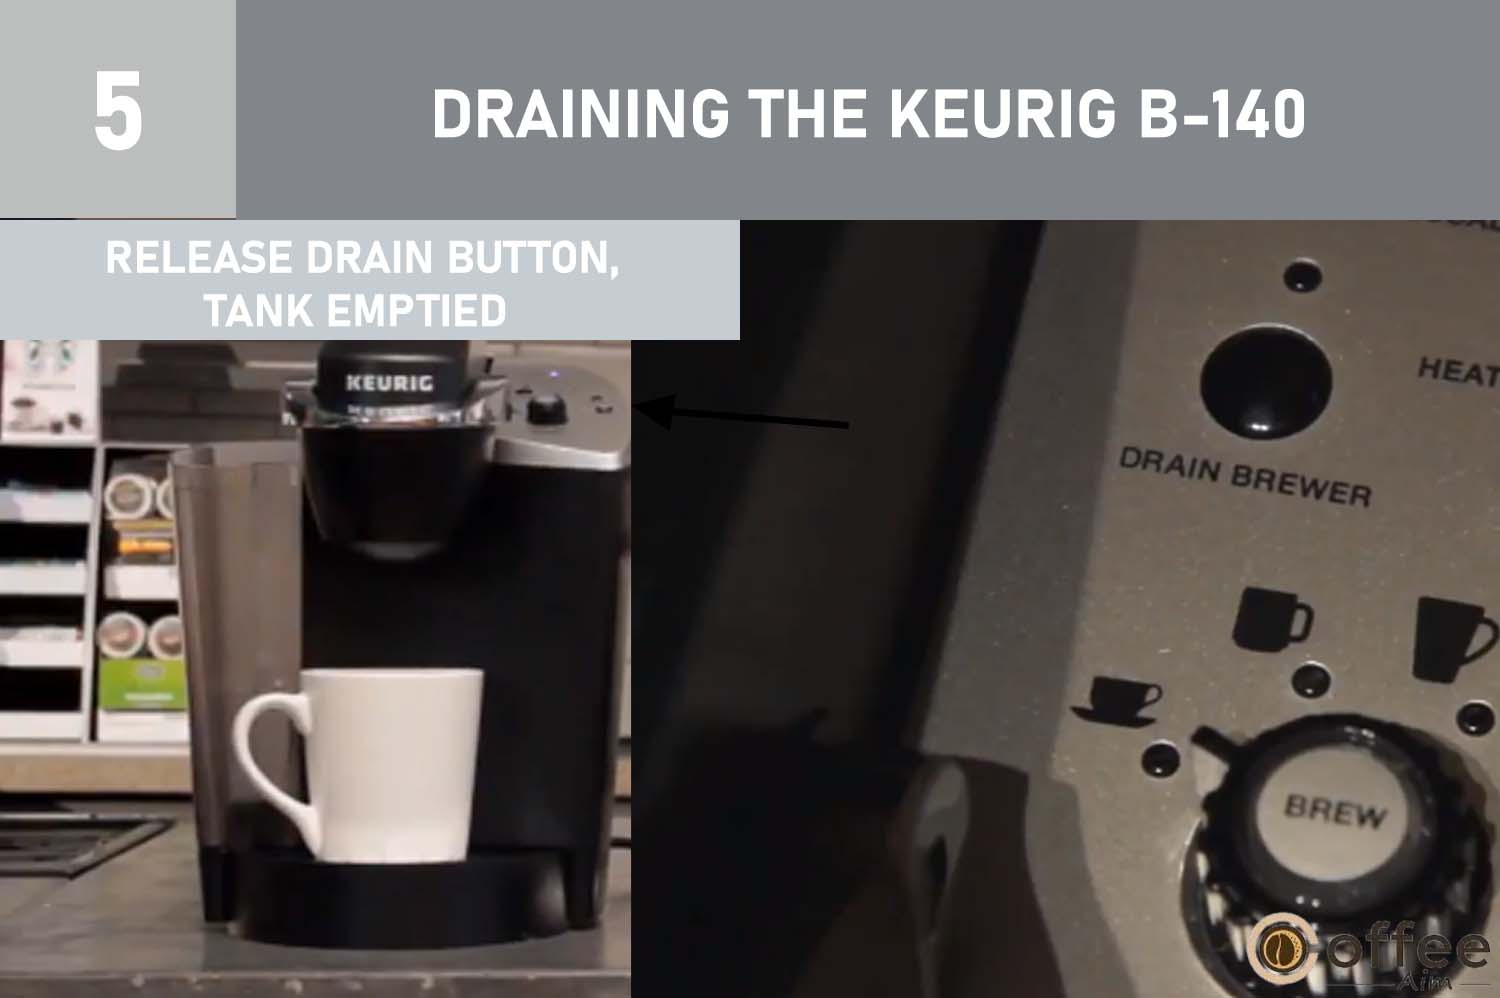
5. When the flow of water stops, release the drain button. Brewer’s internal hot water tank is now empty.
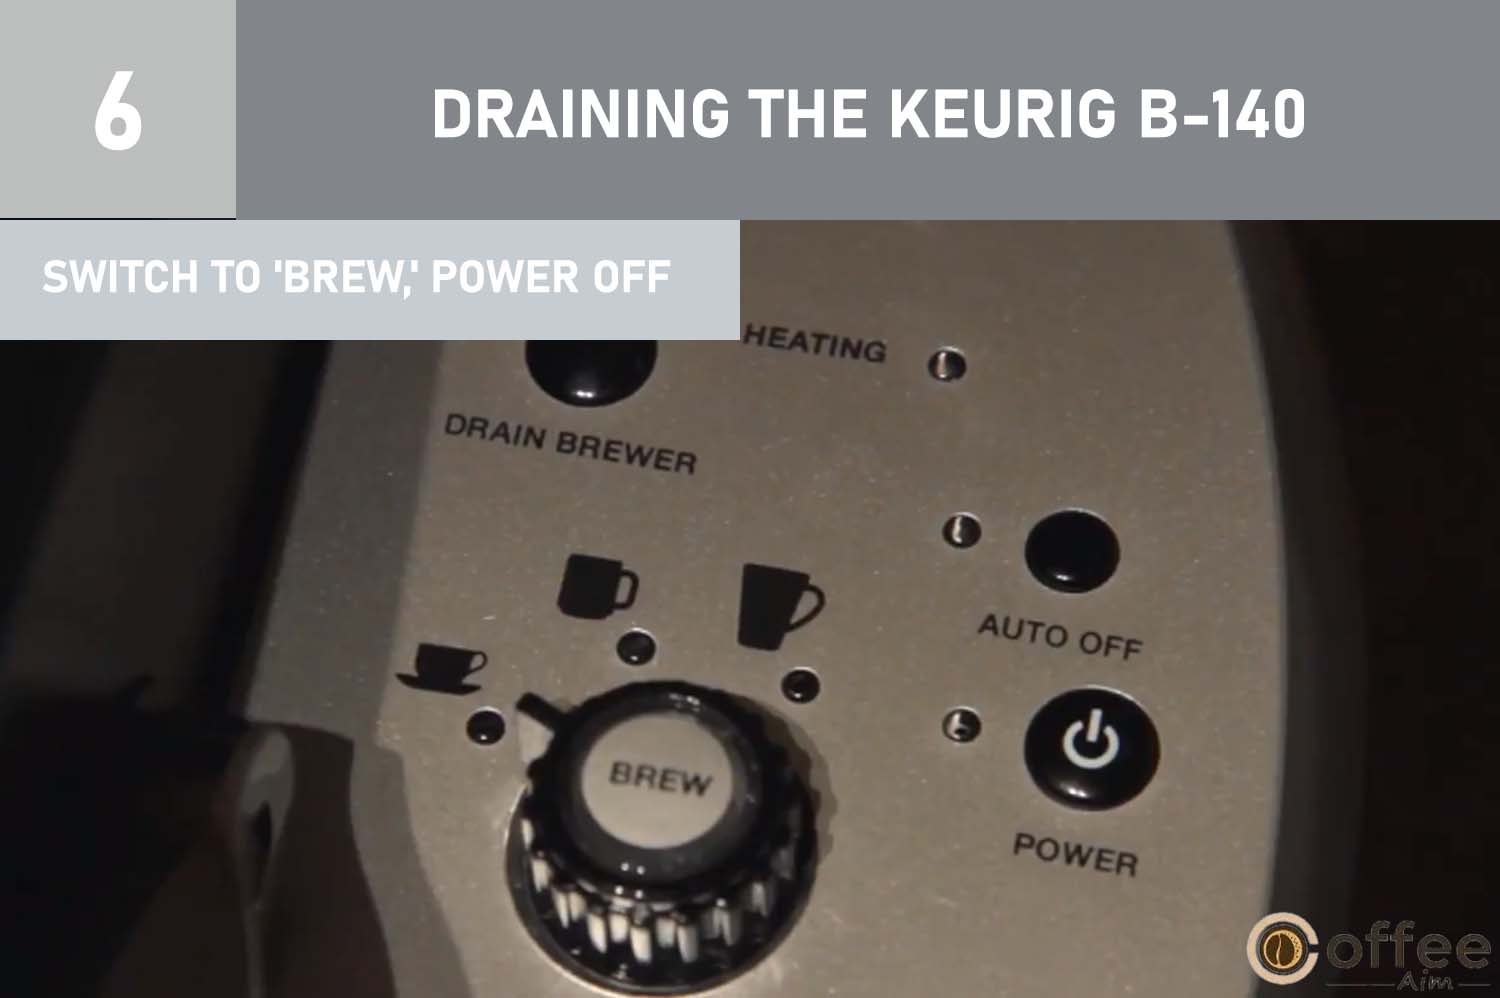
6. Turn the valve to the ‘BREW’ position and turn off Brewer.
Brewing Hot Water In Keurig B-140
Your Brewer can produce a cup of hot water for making hot chocolate, cooking, making soups, etc. Only lift and lower the Handle of the Brewer without the addition of the K-Cup portion pack. The light of the brew button will illuminate in blue color. You should have a cup or mug on the drip tray, choose a brew size, and press the brew button.
If you need help with your Brewer, contact customer service at 1-888-CUP-BREW (287-2739).
Activating The Auto-Off Timer Feature
This amazing Auto-off feature will turn off your brewer 2-hour after the last brew. If the auto-off-timer feature is not activated, your Brewer will keep working. Sometimes, it can also happen that you forget to turn off your Brewer, and an extreme condition can occur along with the wastage of electricity. So, you should activate the auto-off timing feature of your Keurig B-140.
- To turn off the Auto-off feature, turn on Brewer by pressing the power button.
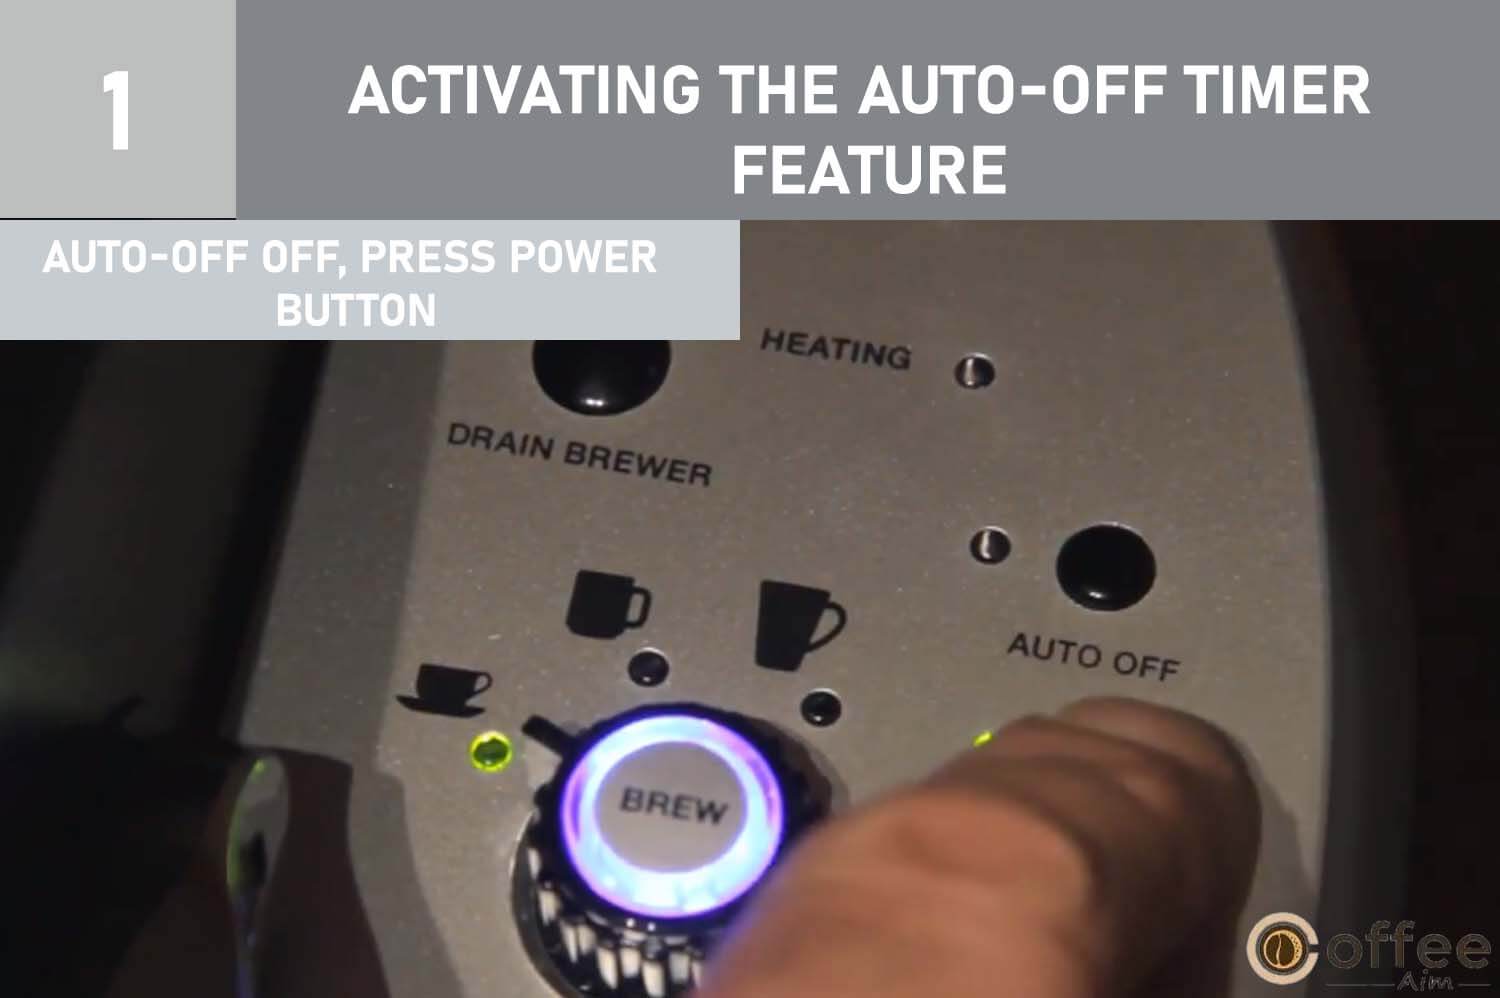
- Now turn on the auto-off timer features by pressing the black button (located above the power button).
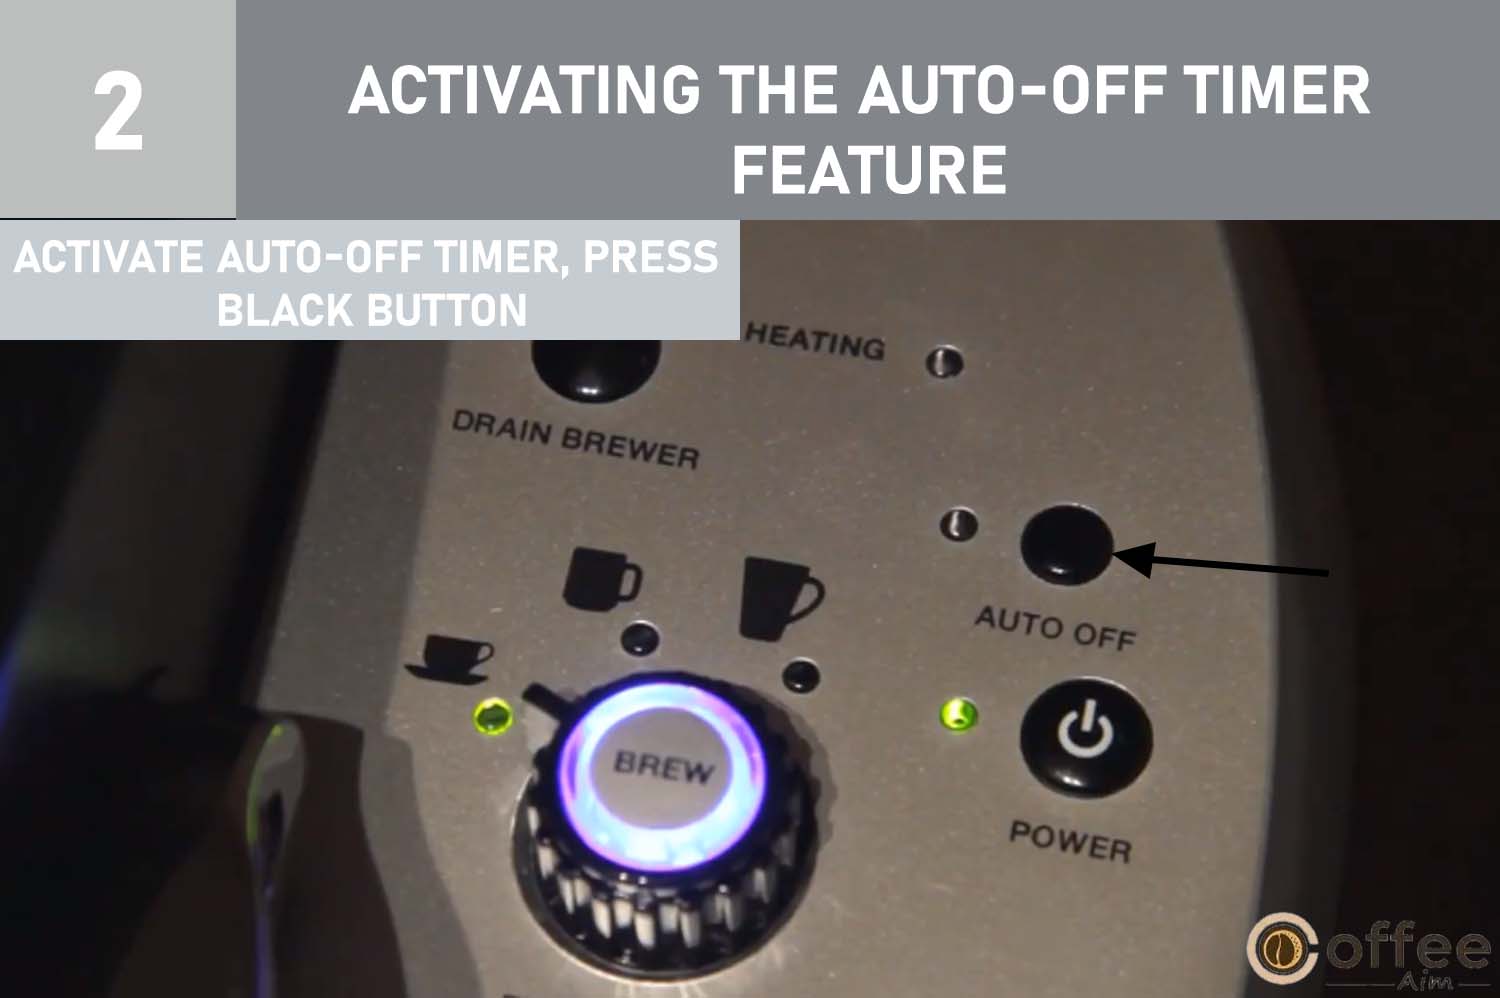
- The green light will lighten up (located next to the “Auto off”).
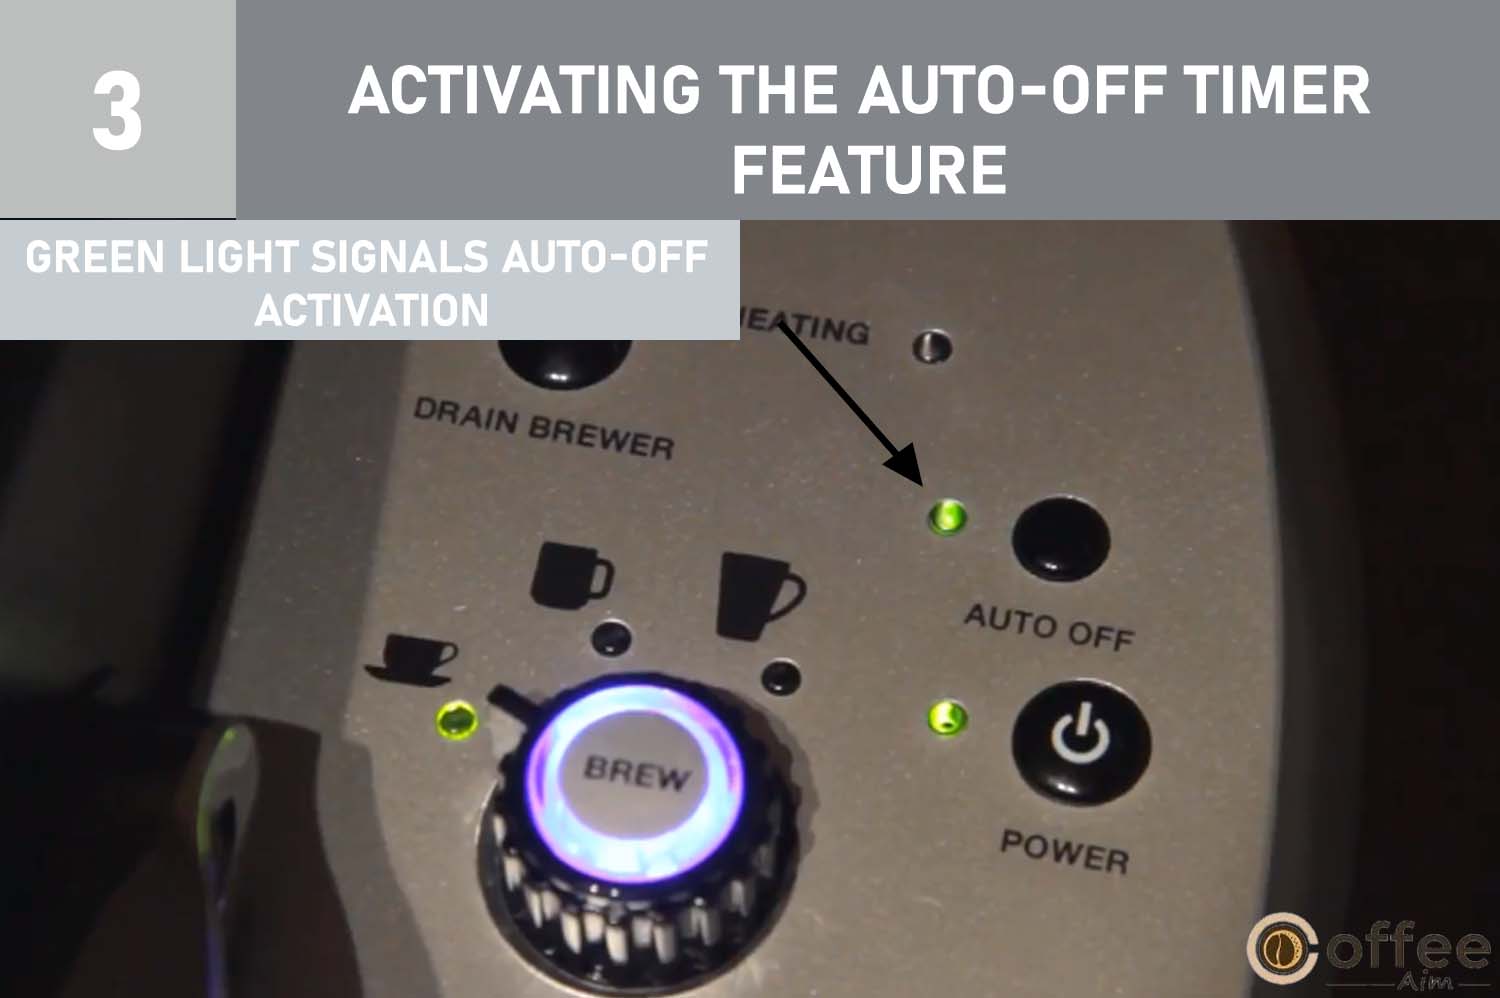
- When you enable the Auto-off timer, your Brewer will automatically turn off for two hours after your last Brew.

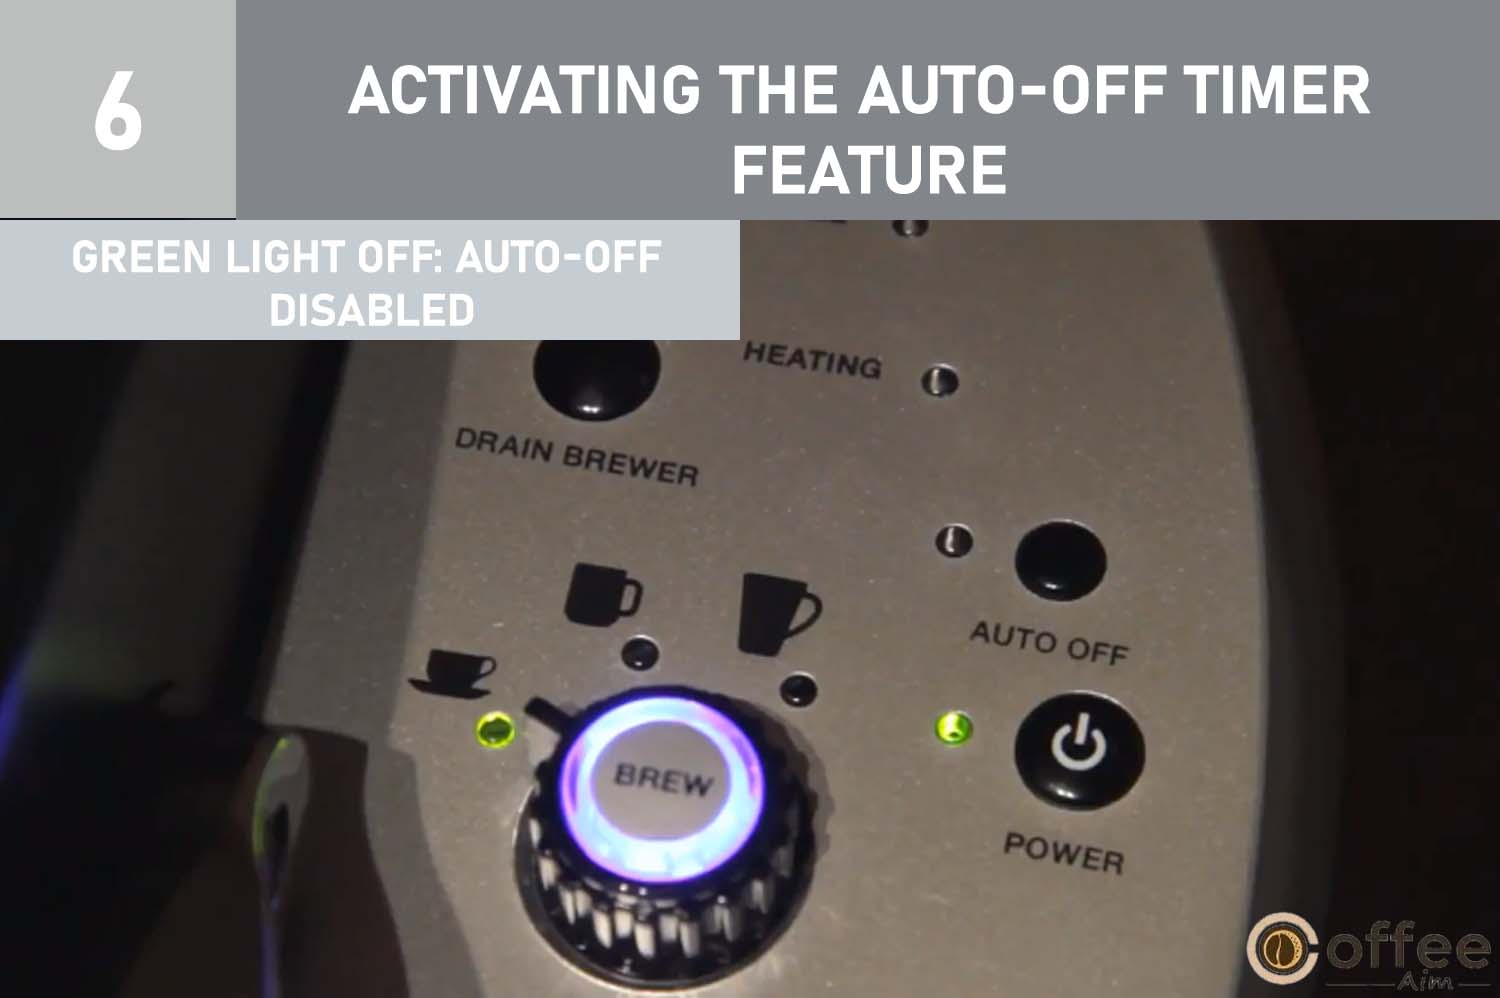
- If you want to turn off the auto-off timer, press the black button again, and the green light next to “Auto-Off” will turn off.
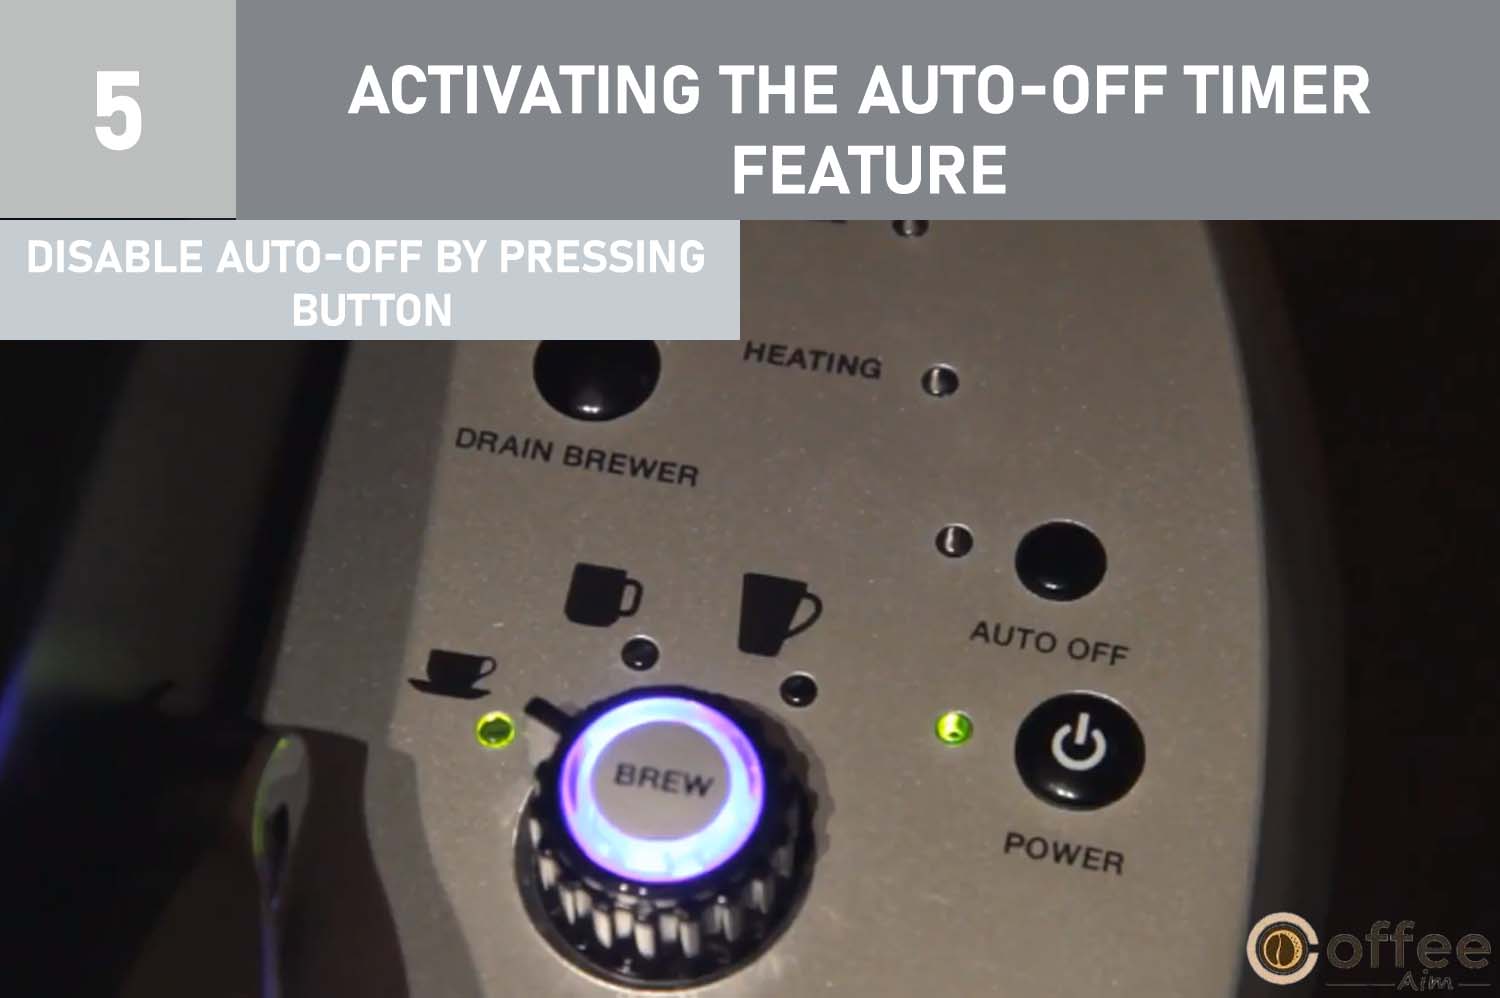
- Turning off the green light is a sign of disabling the auto-off timer.
How To Care For Your Keurig B-140?
Care of Keurig B-140 is mandatory for its proper functioning. You should follow all the steps below to protect your Brewer so that it works properly. So, let’s get started!
1. Cleaning External Parts
It is recommended to periodically clean the external parts of your Brewer to keep it in good working condition. Let’s start cleaning!
- Avoid immersing the base unit in water or any other liquid. A soapy, damp, or nonabrasive cloth must clean all external components and housing.
- Up to 230ml of Overflow can be accumulated in the drip tray. Therefore, the Drip Tray and Drip Tray Plate should be inspected and cleaned after regular intervals. Removal of drip tray assembly can be done by simply pulling it towards you and keeping it level at all times to avoid splashing. Both the Drip Tray and the Drip Tray Plate are Kitchen Porter safe.
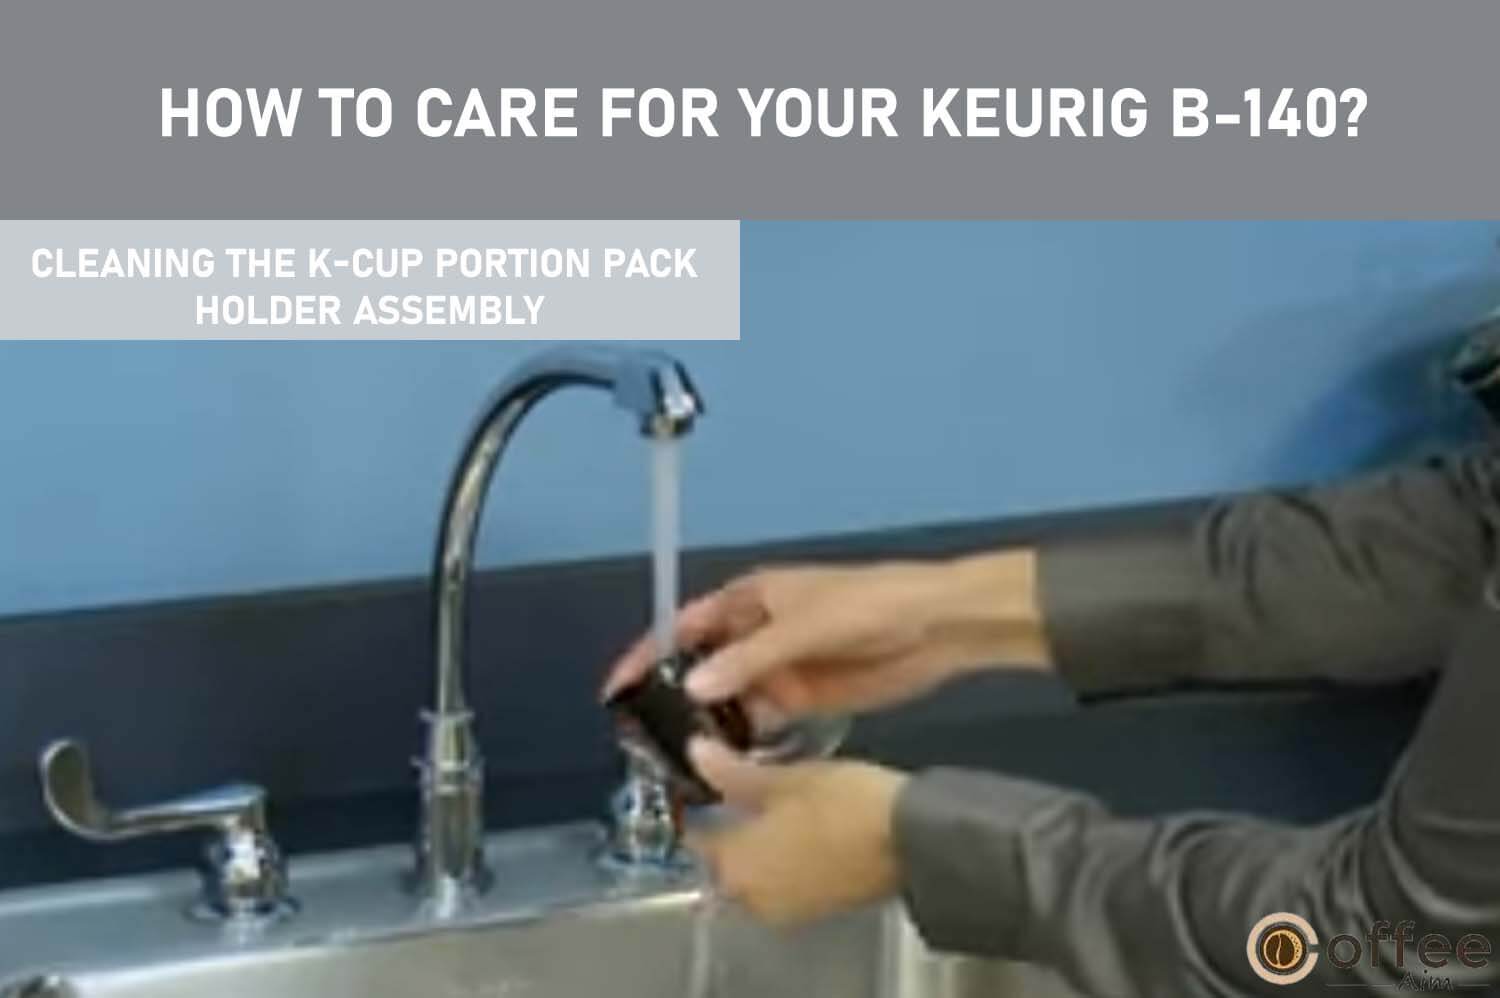
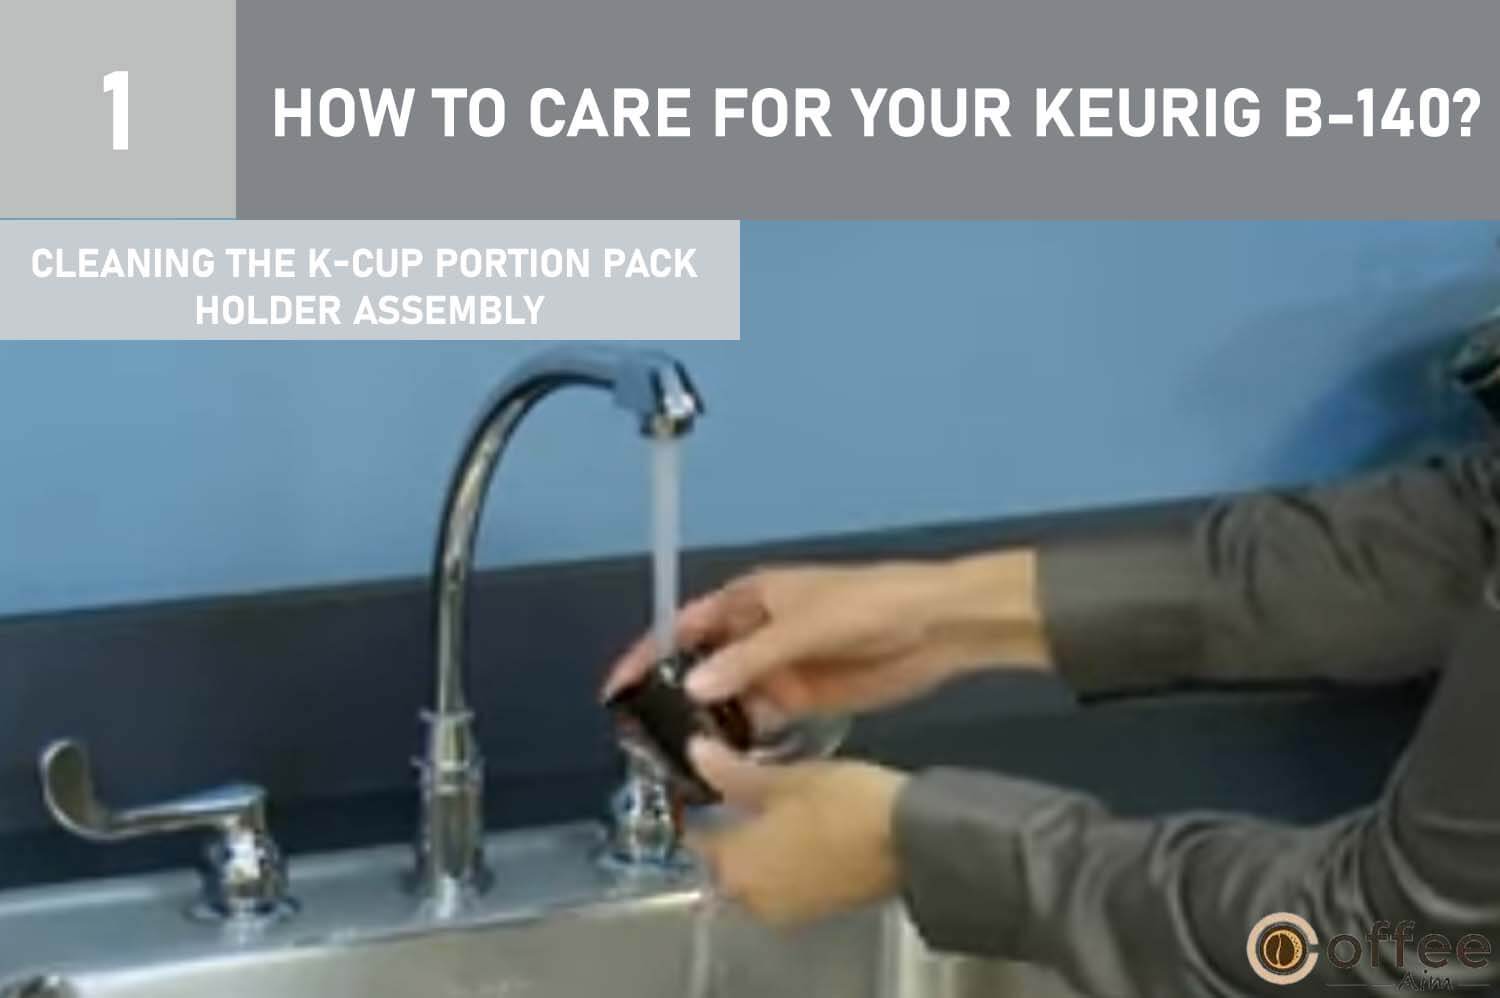
2. Cleaning The K-Cup Portion Pack Holder Assembly
You should clean The K-Cup portion pack holder assembly after regular intervals of time. This cleaning will make your appliance more effective and increase its lifespan. Let’s get into its detailed cleaning!
1. Cleaning The Parts
The K-Cup Holder Assembly is dishwasher safe. Open the cover and lift the Handle to remove the K-Cup holder assembly from Brewer. Hold the top of the K-Cup holder with one hand and push up on the bottom of the K-cup holder from underneath with another hand until it releases. When the cleaning process is done, align the K-Cup holder with the opening by using two front ribs as a guide to fix it in its place from the upper side.
2. Cleaning The Funnel
Pull the funnel to remove it from the K-Cup holder until it separates. The funnel is dishwasher-safe. If you want to replace it, snap it again on the K-Cup holder assembly.
3. Cleaning The Exit Needle
Exit needle is found at the bottom of the K-Cup holder assembly. If a needle gets clogged by the coffee grinds, then a paper clip and another similar tool can resolve the issue. Remove the K-Cup holder, and introduce the paper clip into the needle to loosen and remove the clog. The K-Cup Holder is dishwasher safe.
CAUTION: The needles are very sharp and puncture the K-Cup holder from the top and the bottom. Therefore, please do not put your fingers in the K-Cup chamber; it can be dangerous.

4. Cleaning The Water Reservoir And Water Reservoir Lid
A wet, soapy, and smooth piece of cloth is used to clean the Lid of the water reservoir. Refrain from placing the Lid into the dishwasher. The dishwasher can be used for cleaning water reservoirs, or it can also be cleaned with soapy water and then rinsed utterly. The cloth should not be used to dry the inner side of the water reservoir as the lint may remain inside.
Note: Make sure to wash the water reservoir entirely after cleaning so that no cleaners or cleaning solution is left in this area because these cleaners can pollute the water supply in Brewer.

How To Descale Keurig B-140?
The water type and quantity of minerals/metal ions vary from region to region. Based on the mineral content of water in your area, calcium deposits may form layers inside your Brewer. This deposit is not toxic, but if not treated timely, it can affect the performance of your Brewer. Removal of the scales is necessary to maintain the heating element and many other internal parts of your Brewer that directly interact with water. Your Brewer should be descaled after regular intervals (every 3-6 months) so that its performance remains maximum. Scaling of calcium deposits occurs very quickly, so Keurig b-140 should be descaled periodically.
A sensor is connected to your Brewer that can detect the problems occurring in your Brewer due to the accumulation of calcium deposits. When this is detected, the amber light next to ‘DESCALE’ will be illuminated.
NOTE: The functioning of your Brewer will continue even after the illumination of Descale light. If you do not descale it instantly, the scale will build up continuously, damaging your Brewer. In this case, the Amber light will begin to blink, which is a sign that if you do not descale your Brewer immediately, then some potential damage can occur in your Brewer.
Descaling your machine using the method below after seeing the DESCALE light brighten up on the LED control center is necessary. So, let’s get started!
1.Prepare
The preparation consists of the following two steps;
Step 1:
1. Take almost 48 ounces(1.4L) of concentrated vinegar.
2. An empty sink and a ceramic cup (avoid using paper cups) are also needed.
Step 2: Empty the Water Reservoir by removing water from it.

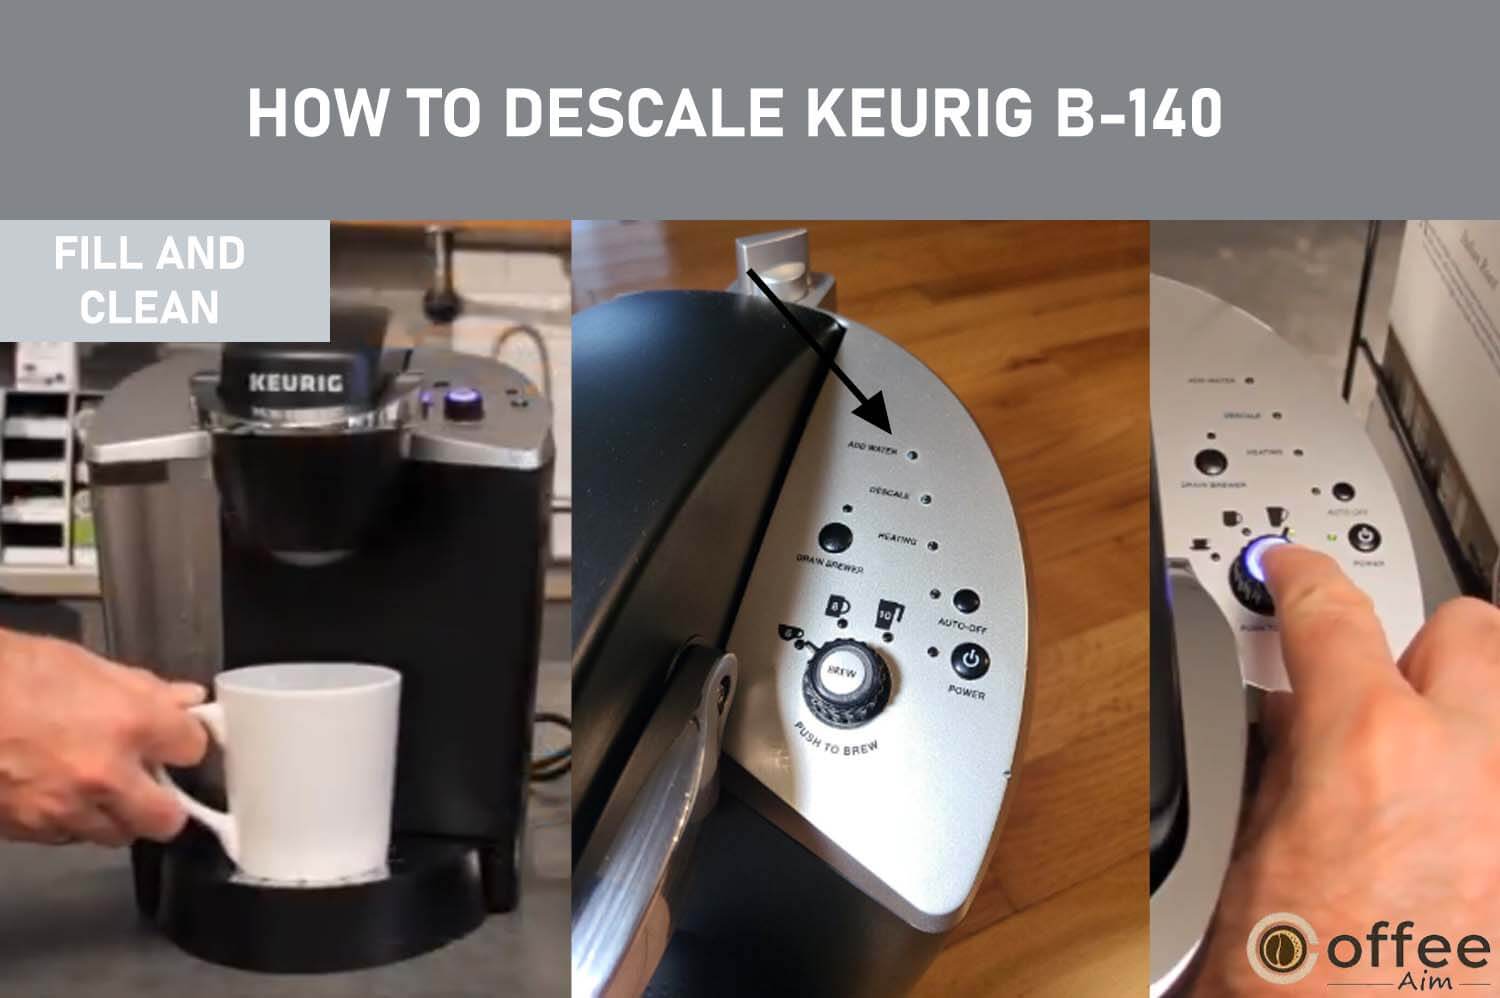
2. Fill And Clean
Step 1: Pour the white vinegar into the water reservoir and fill it to the line a little below the top edge of the clear viewing area.
Step 2: Place the ceramic cup on the drip tray. You Should not insert the K-Cup portion pack. Now press the brew button to start the descaling rinse. Pour the content of the cup into the sink.
Step 3: Perform the descaling Brew again unless the LED “ADD WATER” becomes ON because the water reservoir is empty. Pour the hot liquid from the cup into the sink after completion of each cycle. I suggest using the largest brew size to speed up the process.
NOTE: You should open and close the Lid between each cycle so the blue Brew light will flash.
Step 4: Wash the water reservoir thoroughly and fill it with fresh water.
Step 5: Turn off the auto-off feature of your Brewer and leave Brewer for four hours while it is on.
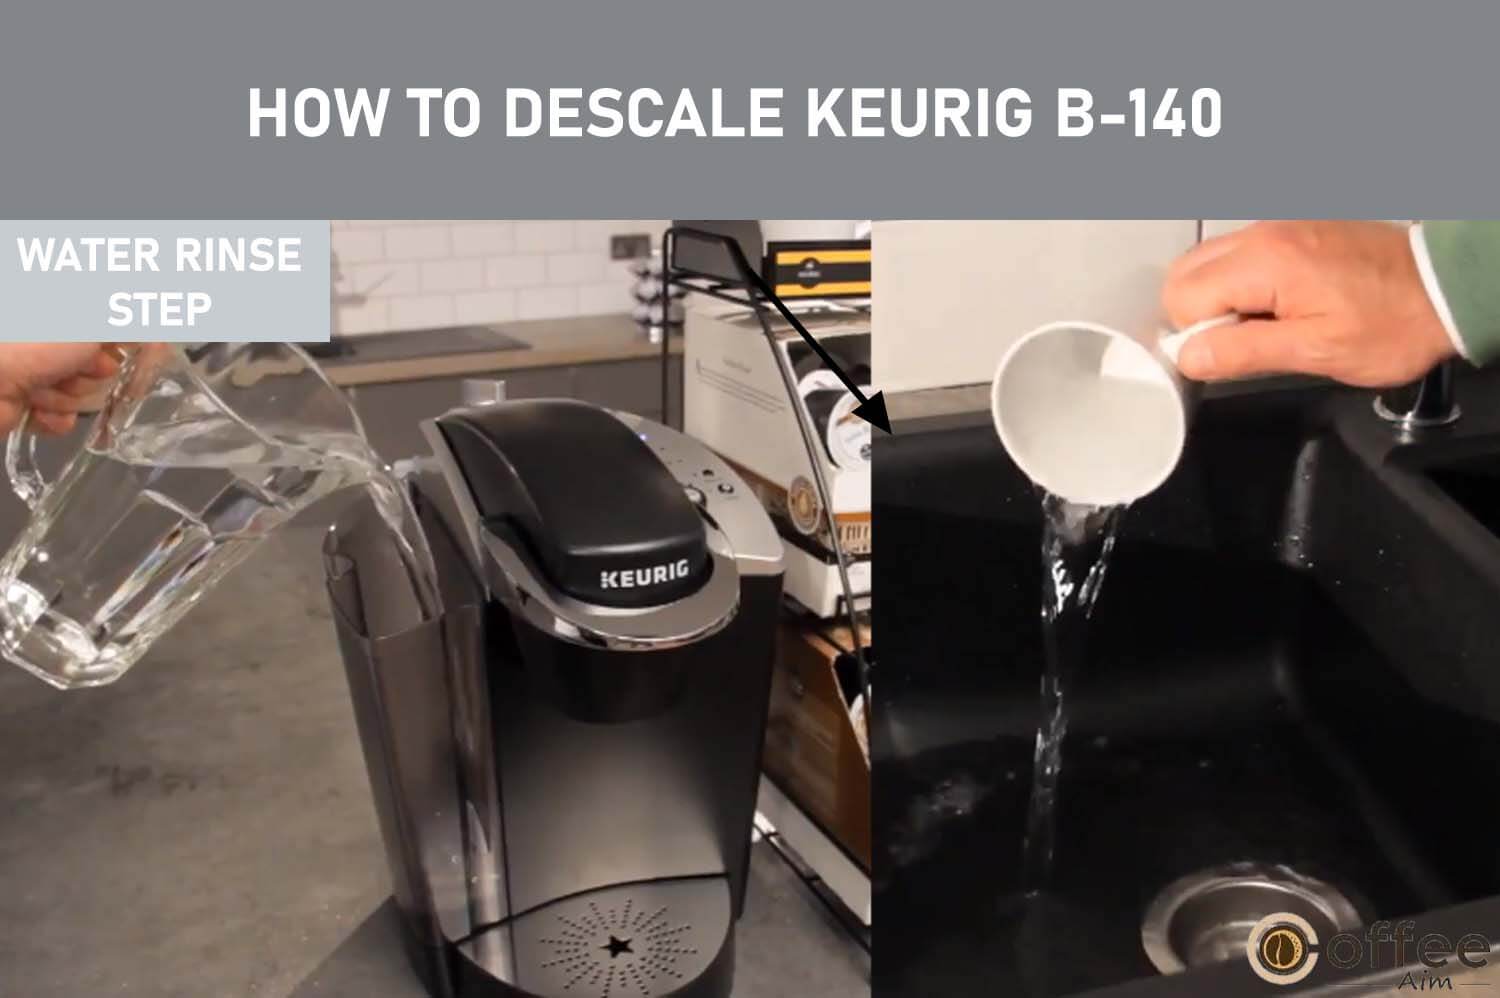
3. Water Rinse Step
The last step is to finish the descaling!
Step 1: Now, perform the draining process (See the “Draining the Keurig B-140” section above).
Step 2: Empty and fill the water reservoir with fresh water again.
Step 3: Re-prime Brewer and refill the water reservoir
Step 4: Place the ceramic cup on the drip tray and allow the regular brew cycle without using K-Cup. Empty the cup content into the sink. It would be best if you kept in mind that the hot water tank still has white vinegar contents in it.
Step 5: You should do the brewing again unless the water in the water reservoir is finished, pouring the liquid content of the cup into the sink after every cyclical process. You should use the largest brew size for a fast process. Open and close the Lid during each cycle and wait for the flashing of the blue brew light.
Step 6: If you feel any residual taste of vinegar in your coffee, then you have to perform an additional water rinse cycle.
NOTE: If the amber ‘DESCALE’ light is still illuminated on the LED Control Center after the completion of the procedure, repeat the descaling procedure mentioned above.
Storage Of Keurig B-140
Keurig B-140 is a very delicate and technical electrical appliance. A little bit of ignorance at the time of its storage can disturb the working of your Keurig B-140. So, You should have complete knowledge about its storage if you want to store your Brewer before going on a trip during your vacation or want to ship it somewhere. It would be best to store your Brewer by emptying its water reservoir and keeping it in a frost-free environment. Let’s see the necessary instructions regarding the storage of Keurig B-140.
- Empty the Water Reservoir and drain your brewer before storing and make sure you store your brewer in a safe and frost-free environment.
- Store your brewer in an upright position. If your Brewer is stored in a cold environment, then you will have the danger of water freezing inside the Brewer, which causes harm to it.
- After storage, when you are going to use your Brewer, wash the reservoir with fresh water and do the cleansing brewing without K-Cup three times.
- If you want to take your Brewer somewhere else, turn the Brewer off, unplug it, empty the Water Reservoir, and drain the Brewer.
- If the surrounding temperature where Brewer is placed is below freezing, then allow Brewer to set it at room temperature before its use.
- If Brewer is exposed to freezing temperatures, you should drain the hot water tank.
Troubleshooting Common Problems
During the use of Keurig B-140, you can face a few common issues. You need to know the solution to these problems to tackle them easily and quickly.
| Situation | Solution |
| Brewer does not have power. | Brewer should be plugged into a separate outlet in which no other machine is plugged or connected.Make sure that the plug connection is secure.Connect your brewer to a separate wall outlet.If you feel something wrong with power outlets or circuit breakers, then reset them.Keep an eye on the power button of your brewer and make sure that the power button is illuminated. |
| Brewer will not brew if used for the first time. | The brewer should be prepared before use by filling the internal hot water tank before your first brewing practice. All the LEDs will flash on the LED control center. (See the section ”Prime your brewer before first use or after a period of inactivity”).The location of the brew/drain switch must be at the brew position.If the temperature of the brewer is too cold, wait for two hours until its temperature becomes equal to the room temperature before turning it on. |
| Brewer will not brew | The location of the brew switch must be at the brew position.When you place the K-Cup portion Pack in the K-Cup holder, Keep an eye that the handle of the brewer must be pushed carefully in the downward direction, and the blue brew button on the back side of the LED control center must be flashing. A blue light located next to “ADD WATER” on the LED control center is illuminated. Then add water into the water reservoir. Make sure that the water reservoir is seated properly in its base.If the blue light that’s located next to ADD WATER on the LED control center keeps on flashing even after filling the water tank, then you should contact Customer Service at 1-888-CUP-BREW (1-888-287-2739). |
| Brewing a partial Cup | If you have completed the priming process without doing any cleansing brew, then the First cup of coffee will be larger than the actual size of the selected brew size. The next brewed cup will be of the actual size that was chosen for brewing.The exit needle may be clogged. (visit the exit needle cleaning section).If you feel the need to clean, then clean the K-Cup holder and wash it under the tap. (see the “K-Cup pod holder assembly cleaning” section above).You may have performed a partial draining process. The brewer will brew the next cup at the selected size.You may have detached the water reservoir while the brewing was in process. So, replace the water reservoir and perform the process of water cleansing.If you notice the illumination of AMBER Descale light, then the descaling of your brewer should be performed. If you have done the descaling process two times on the brewer and the descaling light is still ON, then contact Customer Service at 1-888-CUP-BREW (1-888-287-2739). |
| My brewer Shuts off automatically. | Check that the auto-off feature of your brewer is not on. If the green light next to auto-off on the LED control center is lightened, then turn off the auto-off timer feature by pressing the black button. |
| Drain Process Notes | Drain / Brew Valve turned during a brew cycle: If this occurs, the brewing cycle is immediately stopped. Recovery: The brew that immediately follows may provide an improper volume, so perform a brew without a K-Cup. The next brew will be of the properly selected size.Drain / Brew Valve turned to drain and back to brew: Brewer will start draining when you press the drain. In case of not pressing the drain, brewing will happen. Now the brewer will not require a prime.Drain/Brew Valve turned to ‘DRAIN’: The drain button was pushed before emptying the tank. Now to brew, a prime will be required, and then perform a cleansing brew. |
Warranty
It is warranted that your Keurig B-140 will be free of any fault in its material and quality if you use it generally under the tenure of one year after purchasing. If anything is wrong with your Brewer during the tenure of one year, Keuring will replace or repair the Brewer without any charge upon receipt of proof of its date of purchase.
If it is mandatory to provide a replacement brewer to service this warranty, the remaining warranty of the original product will be given to the replacement brewer. Keurig will pay all shipping costs for authorized returns. This warranty applies only to brewers in the United States and Canada. This warranty will provide you with exceptional legal rights, and some other rights are also given to you, but these rights can vary from state to state. If Keurig is purchased in Canada, these rights will differ in different provinces.
What Is Not Involved in The Limited Warranty?
If any substantial or incidental damage occurs, like property damage, then Keurig will not be responsible for giving its services for replacement or recovery. Suppose you do not follow the rules and regulations of using Keurig or you do any opposition to Keurig’s recommended rules or warranty. In that case, Keurig will not be responsible for providing its services in case of any damage.
The limitation, as mentioned earlier, or banishment may not employ you depending on the state or Province of purchase because some states and provinces need to follow these limitations. This warranty is also not responsible for the damages caused by the services by someone other than Keurig or its approved service providers. In case of use of parts other than original Keurig parts, or extrinsic reasons such as abuse, misuse, improper power supply, or acts of God, this warranty will not be nullified.
Other Limitations
It is an express warranty, and it is used in place of any other express warranty, whether it is in written or oral form. The duration of any implied warranties involved is not restricted to any implied warranties of merchantability or fitness for a particular purpose and is expressly limited to the time period of this limited warranty. Some states or Provinces do not permit restrictions on how long an implied warranty stays, so the limitation that is mentioned above may not be applicable to you depending on the state or the Province of purchase.
Method Of Obtaining Warranty Service?
All appliances of Keurig are of excellent quality, manufactured with proper care, and provide many years of satisfying performance. However, if you need warranty Servicing, call Keurig Customer Service at their toll-free phone number 1-888-CUP-BREW (1-888-287- 2739). It is a humble request not to return your Brewer for servicing without your first conversation with the Keurig customer service agent to obtain an Authorization to Return number (ATR). That Keurig Brewer, sent for repair, an ATR number is not mentioned on it, will be returned to the sender without doing any service.
Conclusion
I have mentioned complete details from the opening of the box to the descaling process regarding Keurig B-140 in this article. After reading this article, you will become an expert on “How to use Keurig B-140?” and get more experience preparing a delicious cup of coffee. But If you do not understand any point in this article, reread the article deeply or get help by contacting the support service of Keurig B-140.
If you want to know about coffee beans and makers, visit the Coffee Aim website. It is a website that can satisfy all your confusion regarding coffee.
It’s time to enjoy yourself by sipping delicious coffee brewed in your Keurig B-140. Just brew it and have fun!
FAQs
How Do I Use My Keurig B-140 Coffee Maker?
Here is how you can use your Keurig B-140 coffee maker.
NOTE: For The K-Carafe pods, you will need to use the Keurig Carafe.
- Turn On Brewer. Place the cup or mug on the drip tray.
- Lift the Handle, insert the pod, and lower the Handle.
- Select the desired settings for your Brew.
- Press the Brew, which will last 40 to 50 seconds.
- Now lift the Handle and remove your used K-Cup.
- Enjoy your cup of coffee.
How Do I Turn “ON” My Original Keurig?
The location of power button on a Keurig coffee maker is usually on the front of the machine near the top. If you cannot find it there, look at your Keurig coffee maker’s sides or the back of the machine. Once you have found the power button of the Keurig coffee maker, press it, and your coffee maker will be turned on.
How Do I Get My Keurig Coffee Maker To Work?
- First of all, you should select your desired pod.
- Lift the Handle, insert the pod in the pod holder, and lower the Handle.
- Choose the settings of Brew according to your liking.
- Press the BREW and wait for the process to complete.
- Enjoy!
Why Is My Keurig Not Brewing?
The primary reason for the inactivity of the Brewer is that your brewer water scales have built up in your Brewer that interfere with the water pump. There are many methods by which your issue can be resolved. The simplest solution to this problem is descaling. Perform all the steps in the descaling process to make your Brewer active again.