Quick Navigation
Being a Coffee enthusiast, having a coffee Brewer at home is no less than a blessing because it opens the doors to many flavorsome customized coffee drinks which you can make at your chosen time.
Do you come under the same umbrella and have bought your Keurig B-41? But what is the problem now? Let me guess whether you are that old user of Keurig B-45 who has lost the manual or you are a new user who cannot comprehend the instructions given in Brewer’s literature. Do not worry if you’re facing either of the problems; consider this article as the encyclopedia on Keurig B-41.
I will provide detailed instructions and explanations for setting up, using, and troubleshooting your coffee Brewer and tips and tricks for getting the most out of your Keurig B-41.
Safety Precautions And Recommendations
Yes, we can unanimously agree that coffee appliances bring us the utmost joy by brewing our hot coffee and other beverages.
Nevertheless, we should also take into account the reality of the dangers it comes. It’s important to remember that these appliances use high temperatures and pressurized systems that can be dangerous if not used properly.
I recommend you take all precautionary measures because the safety of your family and fellow beings should always come first.
You can get all information by clicking on this link.
Related: “Keurig B-41 safety precautions”.
Specifications Of Keurig B-41
Every user of an appliance must accumulate information about its specifications and features. It’s important to know the specifications of your Keurig B-41 because it helps you understand the machine’s capabilities and limitations, which in turn allows you to use it correctly, optimize performance and make the right choice when it comes to brewing the desired coffee.
| Features | Details |
| Product Line/System | Keurig 1.0 Elite |
| K-Cup Compatibility | Unlicensed K-Cups, Keurig 2.0 licensed K-Cups, and ground coffee with the My K-Cup |
| Brew Sizes | 5.25 oz/ 155.261ml , 7.25 oz/ 214.4081 |
| Water Reservoir | 48 oz |
| Water Filter | Compatible but not included |
| Dimensions | Width: 9.8″ W Depth: 13.0″ D Height: 13.3″ H |
| Display | Button controls for Brew Size and Power; LED indicators for Add Water, Descale, Heating, Auto-Off, and Power |
| Temp Control | No |
| Strength Control | No |
| Weight | 12.0 lbs |
| Other Features | Auto-On/OffRemovable drip trayK-Cup variety pack |
Unpack Your Keurig B-41
I know for all of us, unpacking is the favorite part of any of our purchases. However, it is also a time to check that your box is not missing anything. When you open a Keurig B-41 after purchasing, you must know what things must be inside the box. If you find anything missing listed below, I recommend contacting the seller.
1. The Main Body Of A Brewer
When you unbox, the most significant thing you will find in the box is the main body, also called the housing. Lift the housing out of the box through the handle and place it on a steady surface.

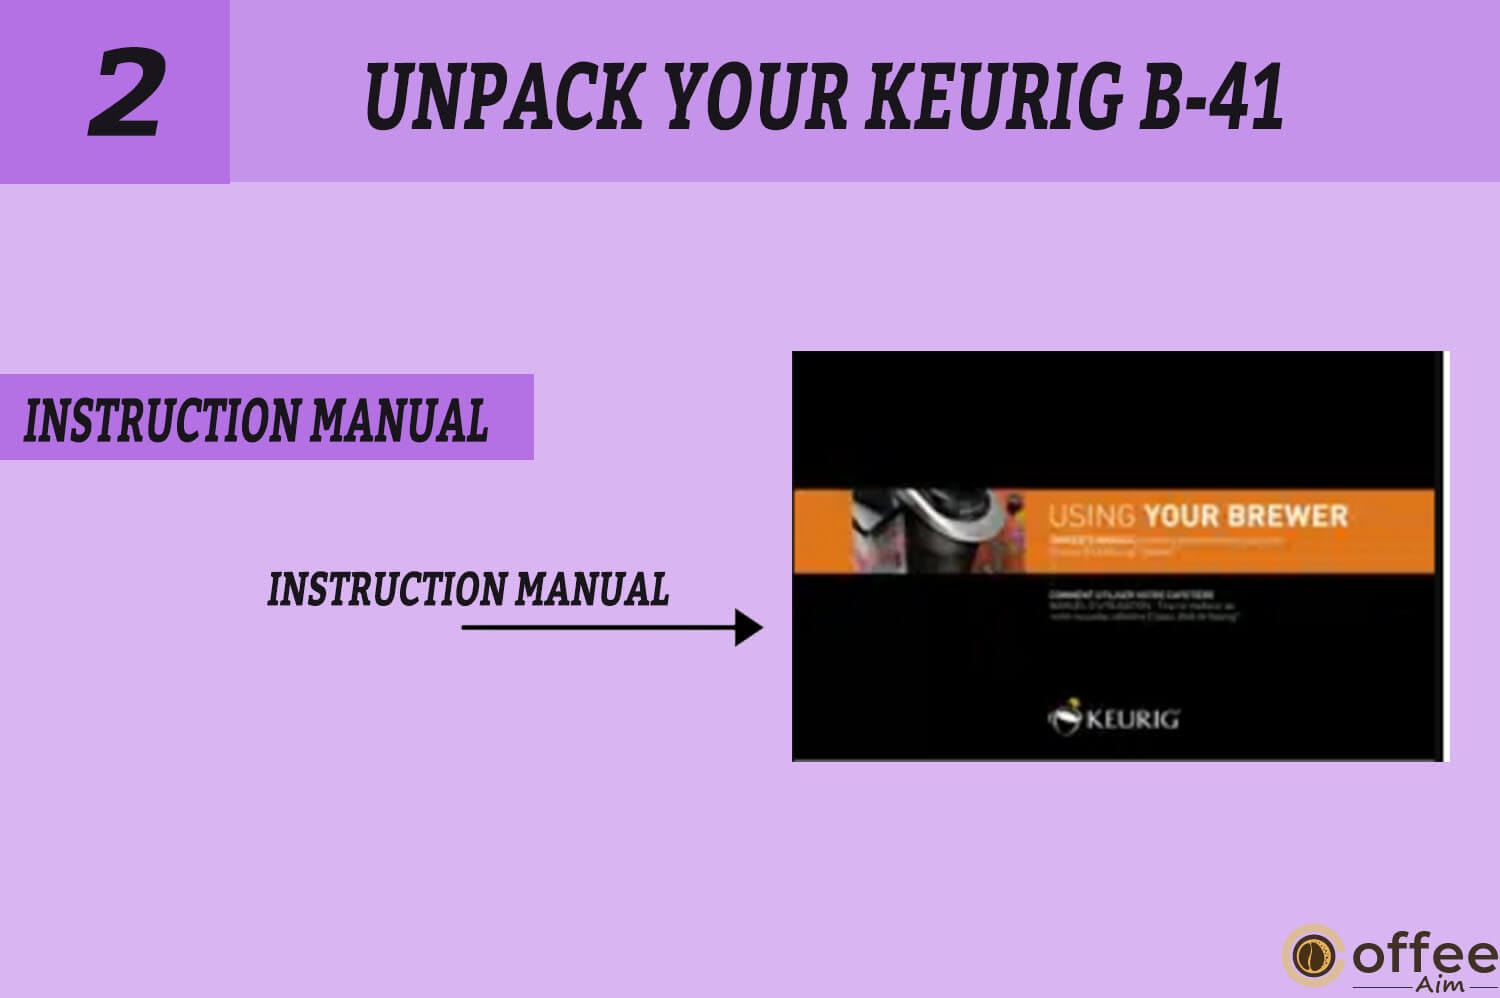
2. Instruction Manual
The Instruction Manual of the Keurig B-41 provides detailed information about how to operate and maintain the coffee maker. It includes instructions on how to set up the coffee maker, how to brew a cup of coffee using K-Cups, and how to clean and descale the coffee maker. The manual also provides information on the various control buttons and indicator lights on the coffee maker, as well as troubleshooting tips for common issues that may arise.
Unpacking Instructions
The process of using an appliance begins with unpacking and assembling it. Unpack your Keurig B-41 by following the instructions chronologically.
- Lift off the box carefully and set it upright on a table.
- Flip the box over, so its front is facing you.
- Now open the box.
- Take out the enclosed literature.
- Grab the plastic bag from the box.
- Pull the plastic bag (and any packaging materials) slowly. The Brewer will still be on its back and enclosed in the polyfoam.
- Take out the polyfoam.
- Put the Brewer on a large surface to keep the big box on it, such as a kitchen counter, a table, or a floor.
- Remove the Brewer from the plastic bag.
- Behind the Drip tray Assembly, a serial number is on the bottom of the box. The serial number can also be found on page 3 of the guidebook.
- Place your Brewer straight and remove the tape holding the Water reservoir.
Note: Remain vigilant about the plastic bag. They should be kept away from children.
Parts Of Keurig B-41
Put your excitement on hold after unpacking your Brewer because now it is time to get informed about every part of your Keurig B-41, and this task needs your undivided attention. Are you ready to know every part of your Brewer? Let’s start!
1. A Water Reservoir Lid

This is the cover that fits on top of the water reservoir to prevent spills or contamination of the water inside. This lid needs to be removed in order to fill the Water Reservoir with water.
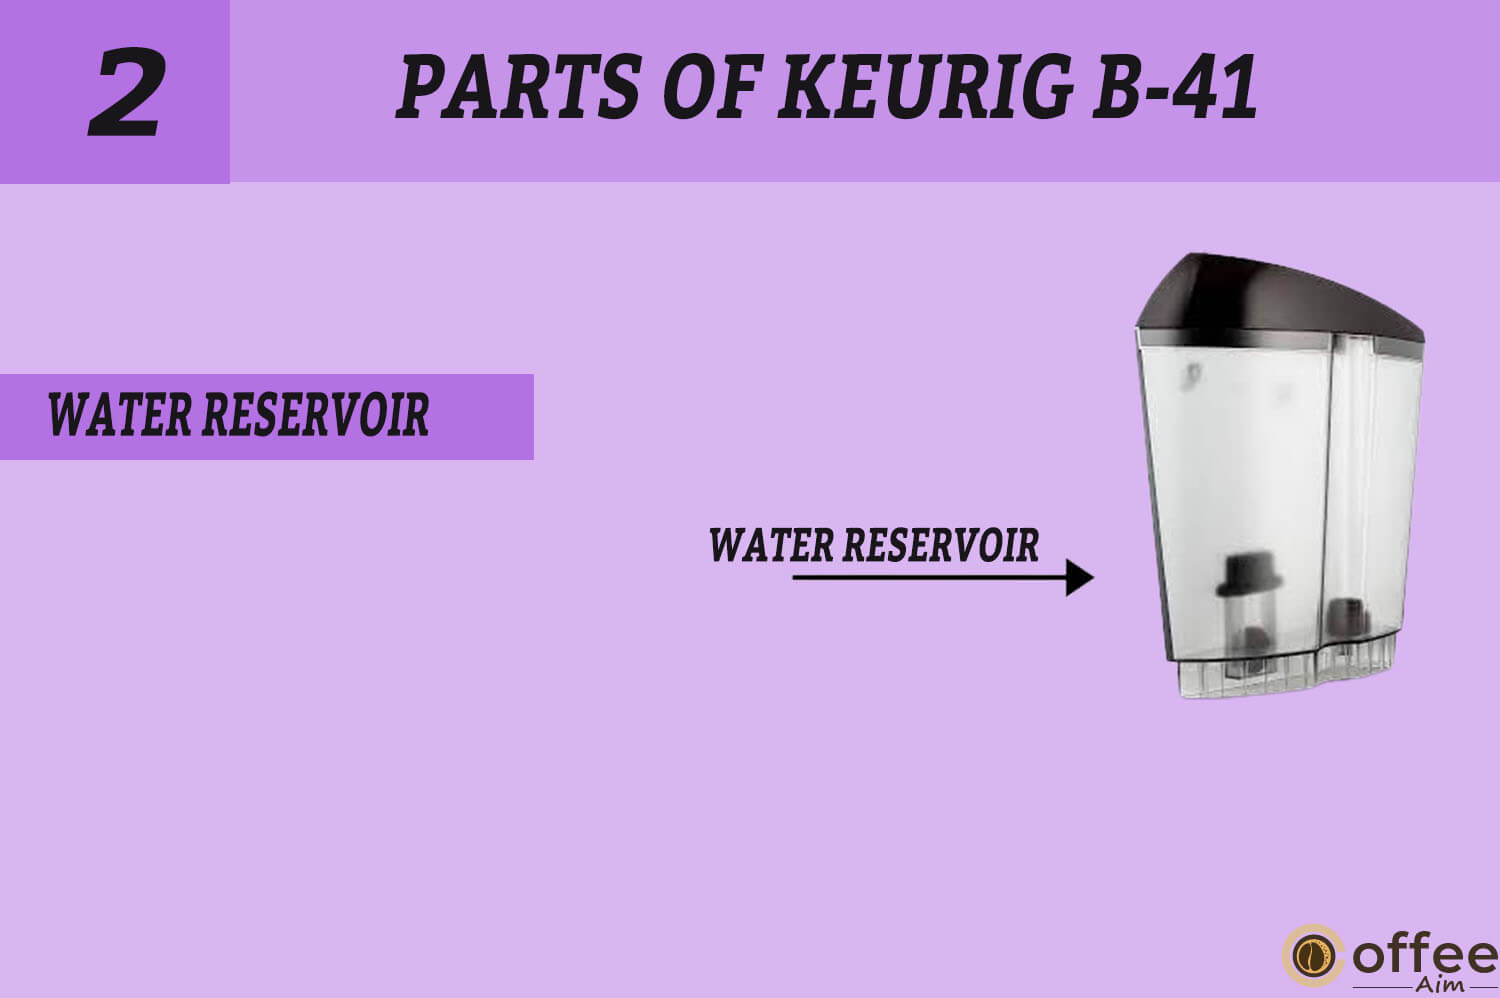
2. Water Reservoir
This is the container that holds the water for brewing. It typically holds around 48 ounces of water. It is a portable container; you can lift it, pour water in it and then place it again on the machine before brewing. During the brewing process, sometimes it turns hot, so you should remain cautious while using it.
3. Two Lock Tabs Slots
These are the slots on the Keurig B-41 body that the Water Reservoir clips onto, securing the reservoir to the machine.

4. Handle
The Handle is located on the K-cup cover lid. Using the Handle, you can remove the cover from the K-cup.

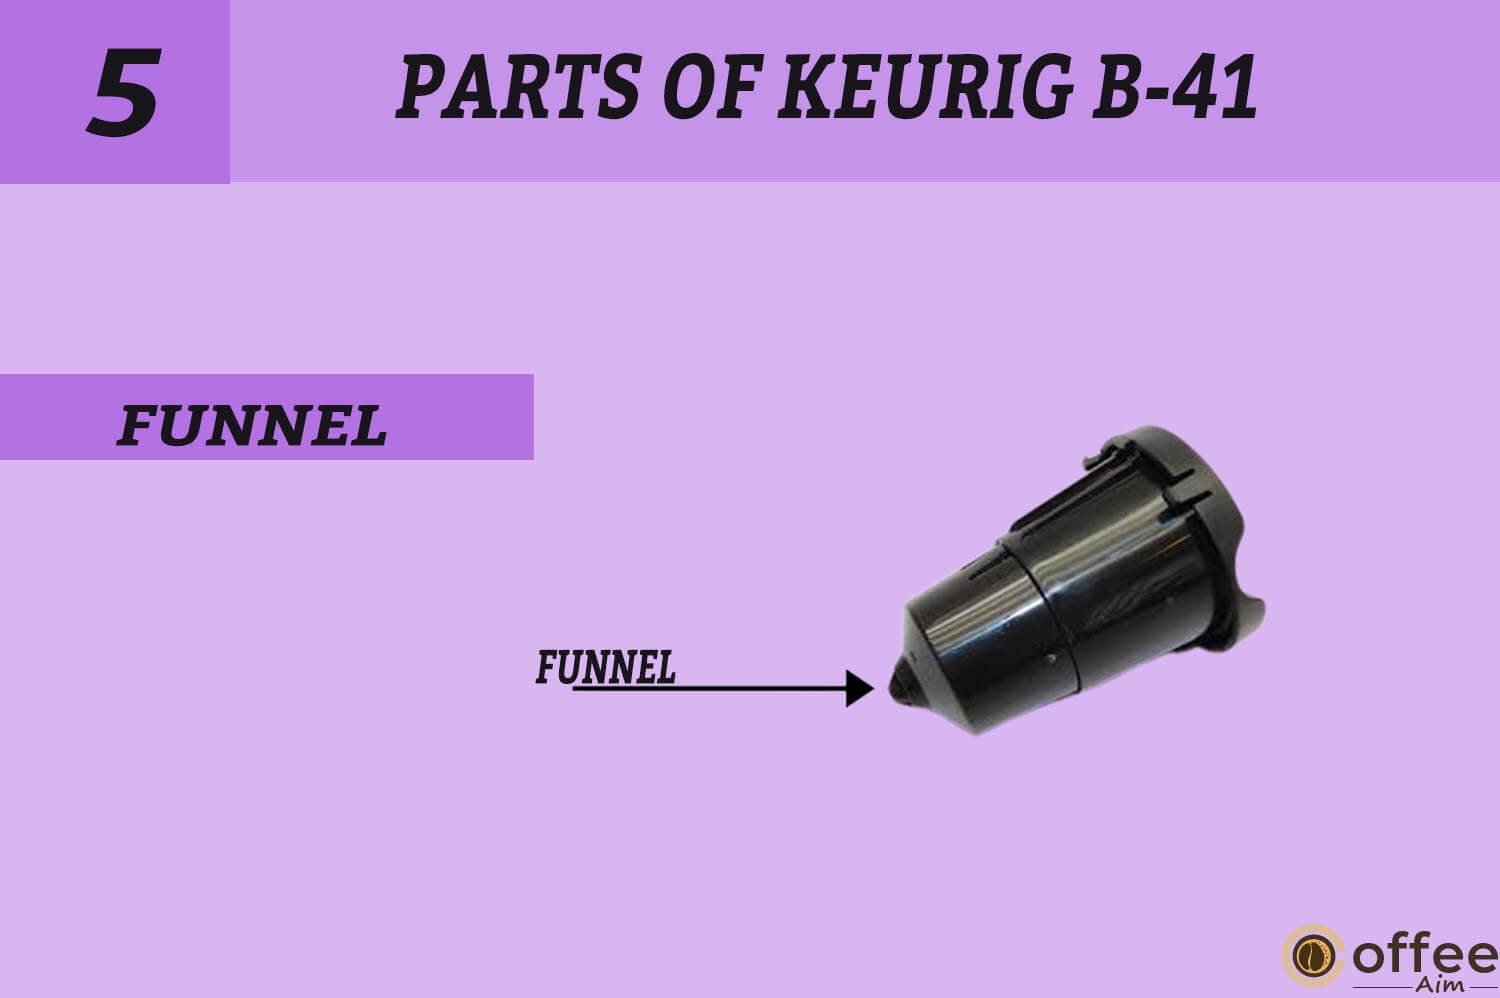
5 . Funnel
The Funnel is part of the coffee maker that guides the water and coffee grounds into the K-Cup portion pack.
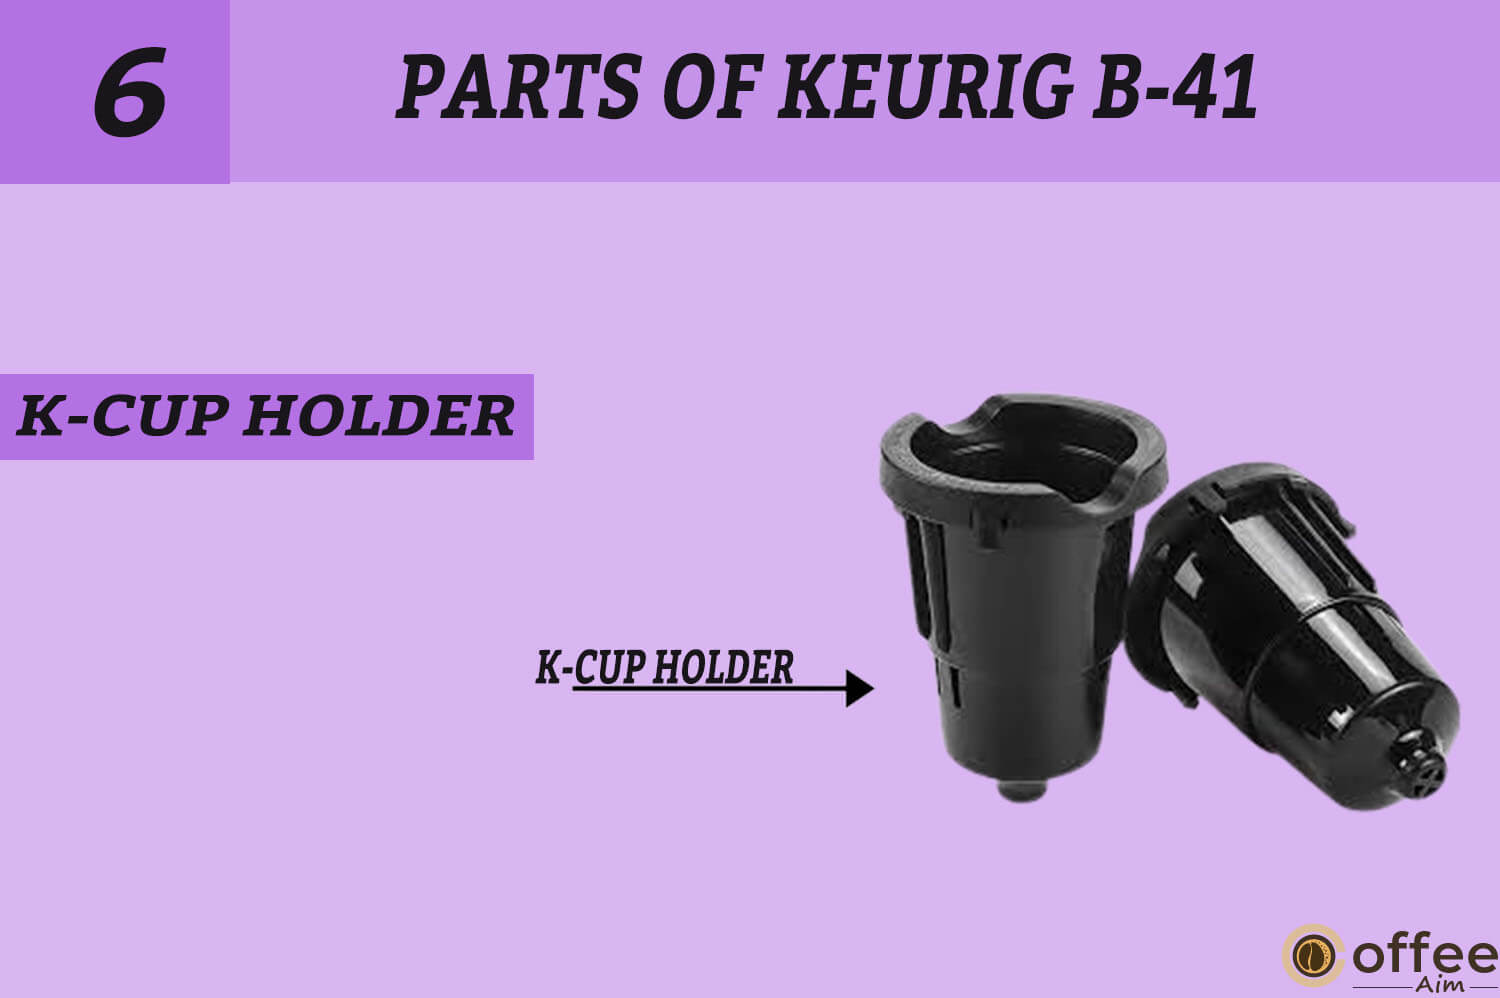
6. K-Cup Holder
The K-Cup pack holder serves as the designated spot for inserting the K-Cup for brewing. Its purpose is to puncture the K-Cup, allowing hot water to pass through and extract the coffee.,
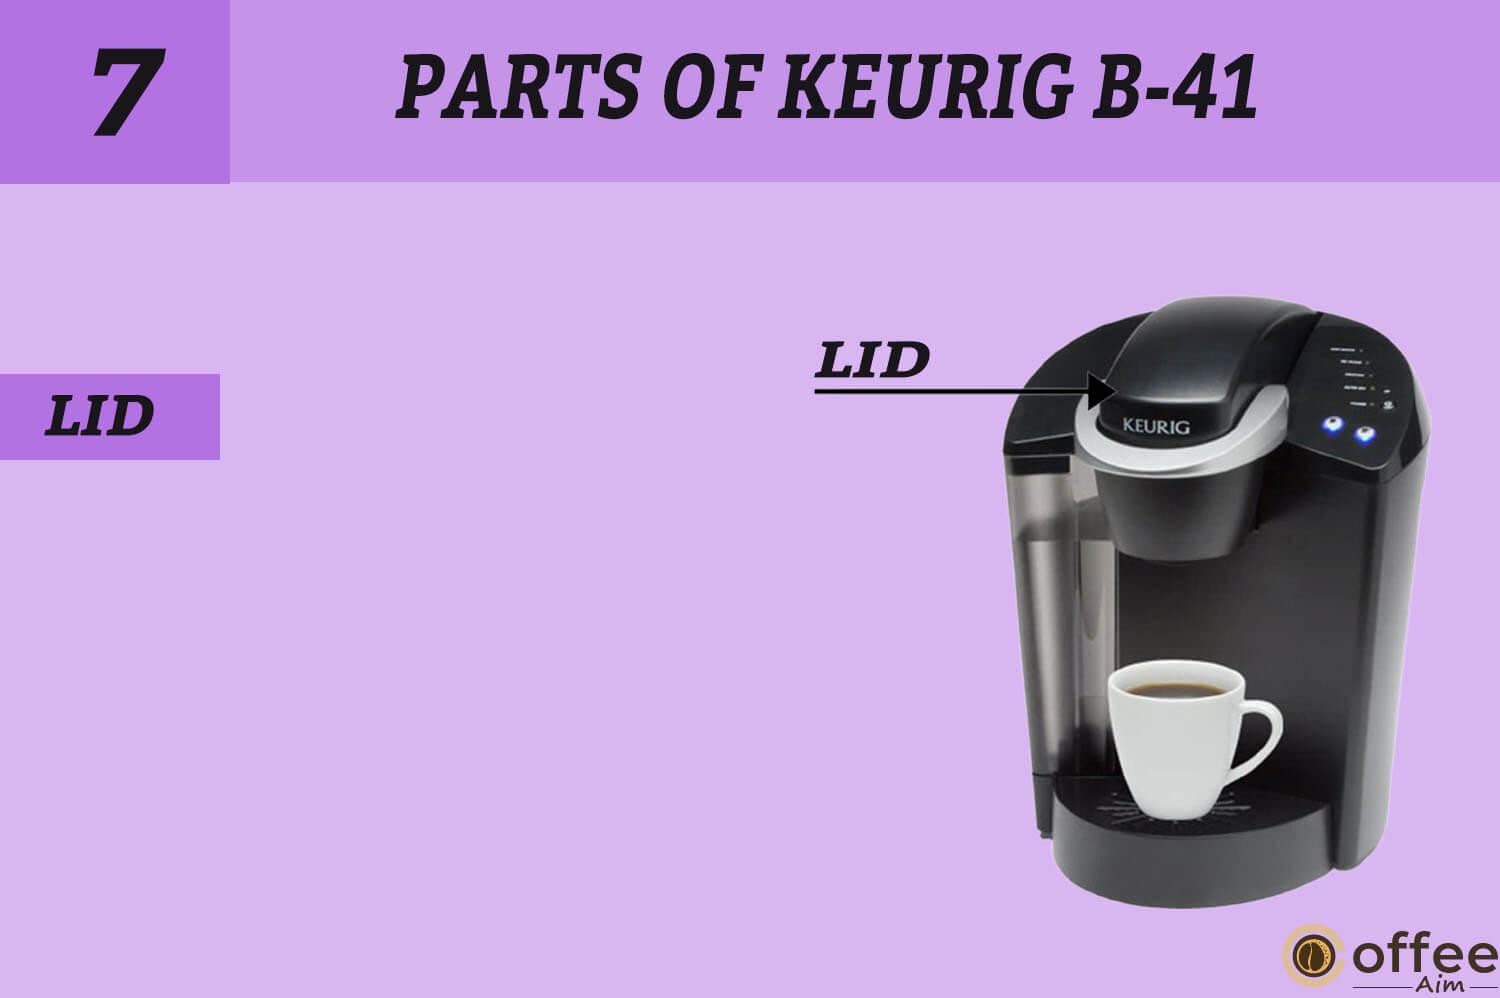
7. Lid
The K-cup Lid is the cover for the K-Cup portion pack. To be removed to insert the K-Cup portion pack into the coffee maker.
8. K-Cup Portion Pack Assembly Housing
It is part of the coffee maker that holds the K-Cup portion pack.

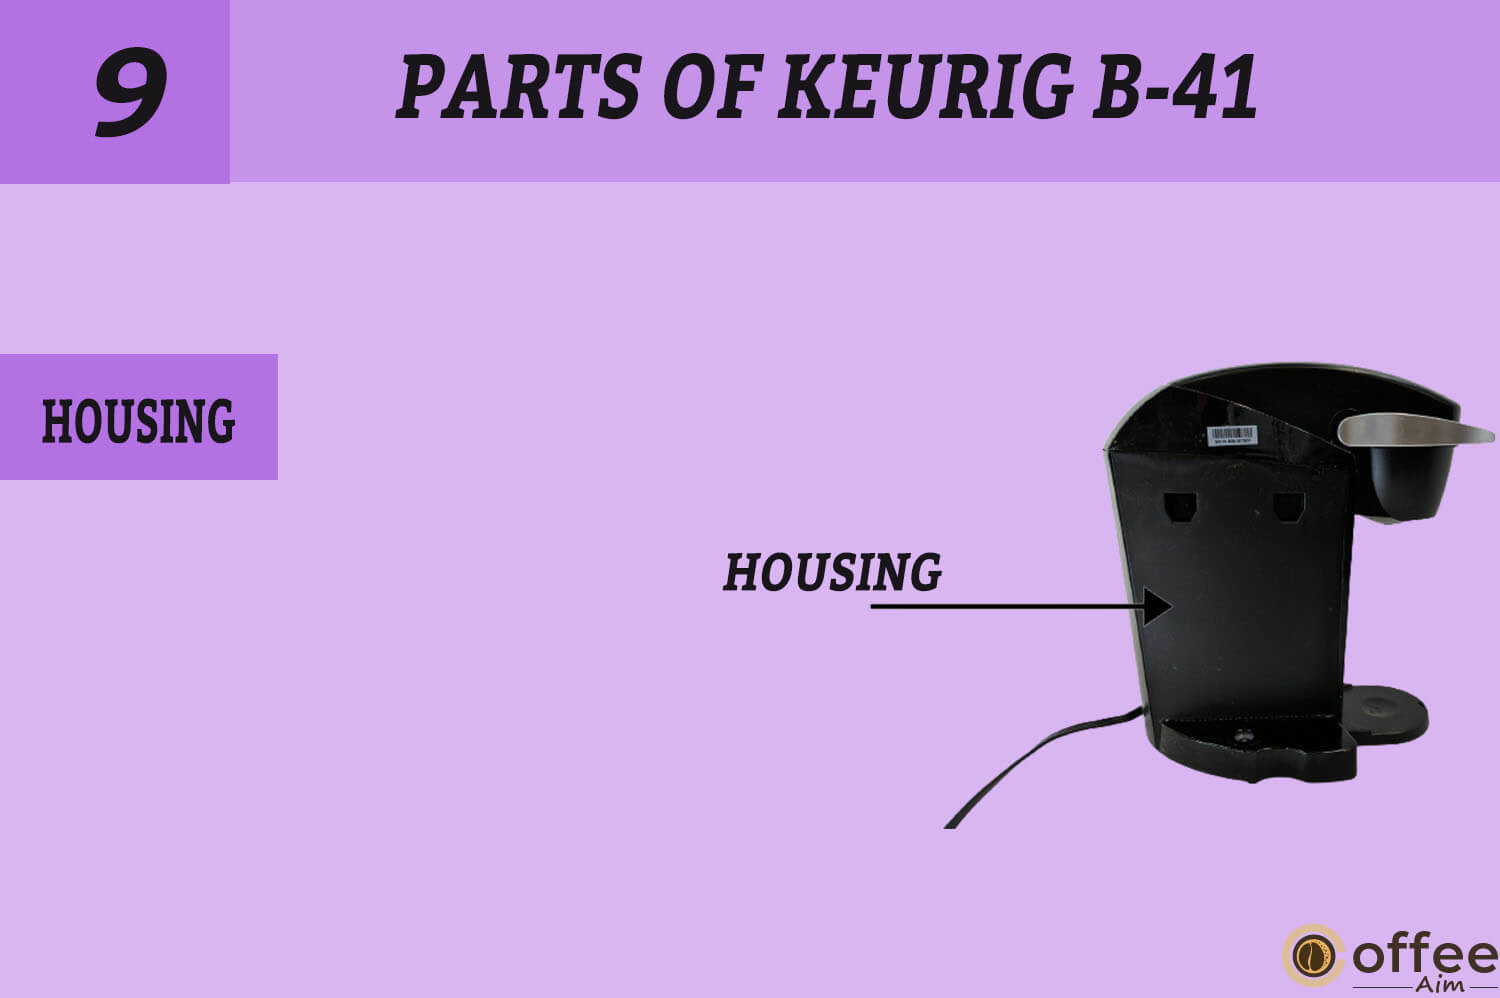
9.Housing
Housing is the main body of the coffee maker. It contains the K-Cup portion Pack Assembly Housing and the Water Reservoir.
10. Drip Tray Plate
The Drip Tray plate is the surface on which the coffee mug is placed during brewing. It is designed to catch any spills or drips that may occur during the brewing process.

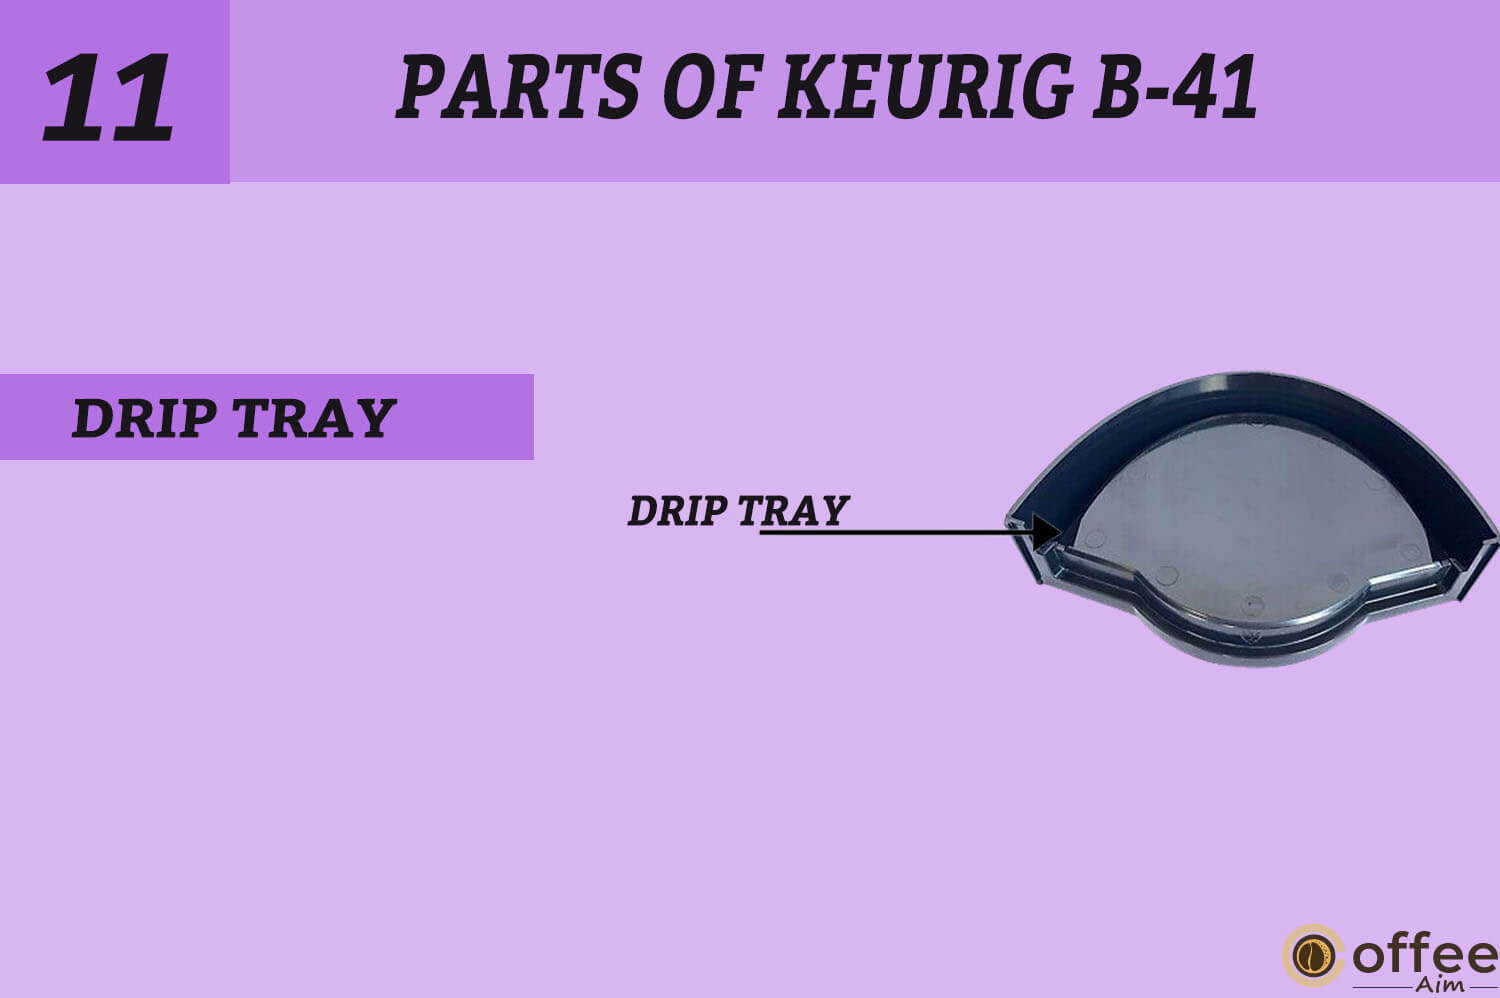
11. Drip Tray
The Drip tray is the removable part of the coffee maker that sits beneath the Drip Tray plate. It gathers the coffee/water spills during dispensing; therefore, it must be emptied periodically to avoid overflowing.
12. Drip Tray Base
The Drip Tray Base is part of the coffee maker that holds the Drip Tray. If you want to place a tall mug, remove the drip tray and place the mug directly on the drip tray base.

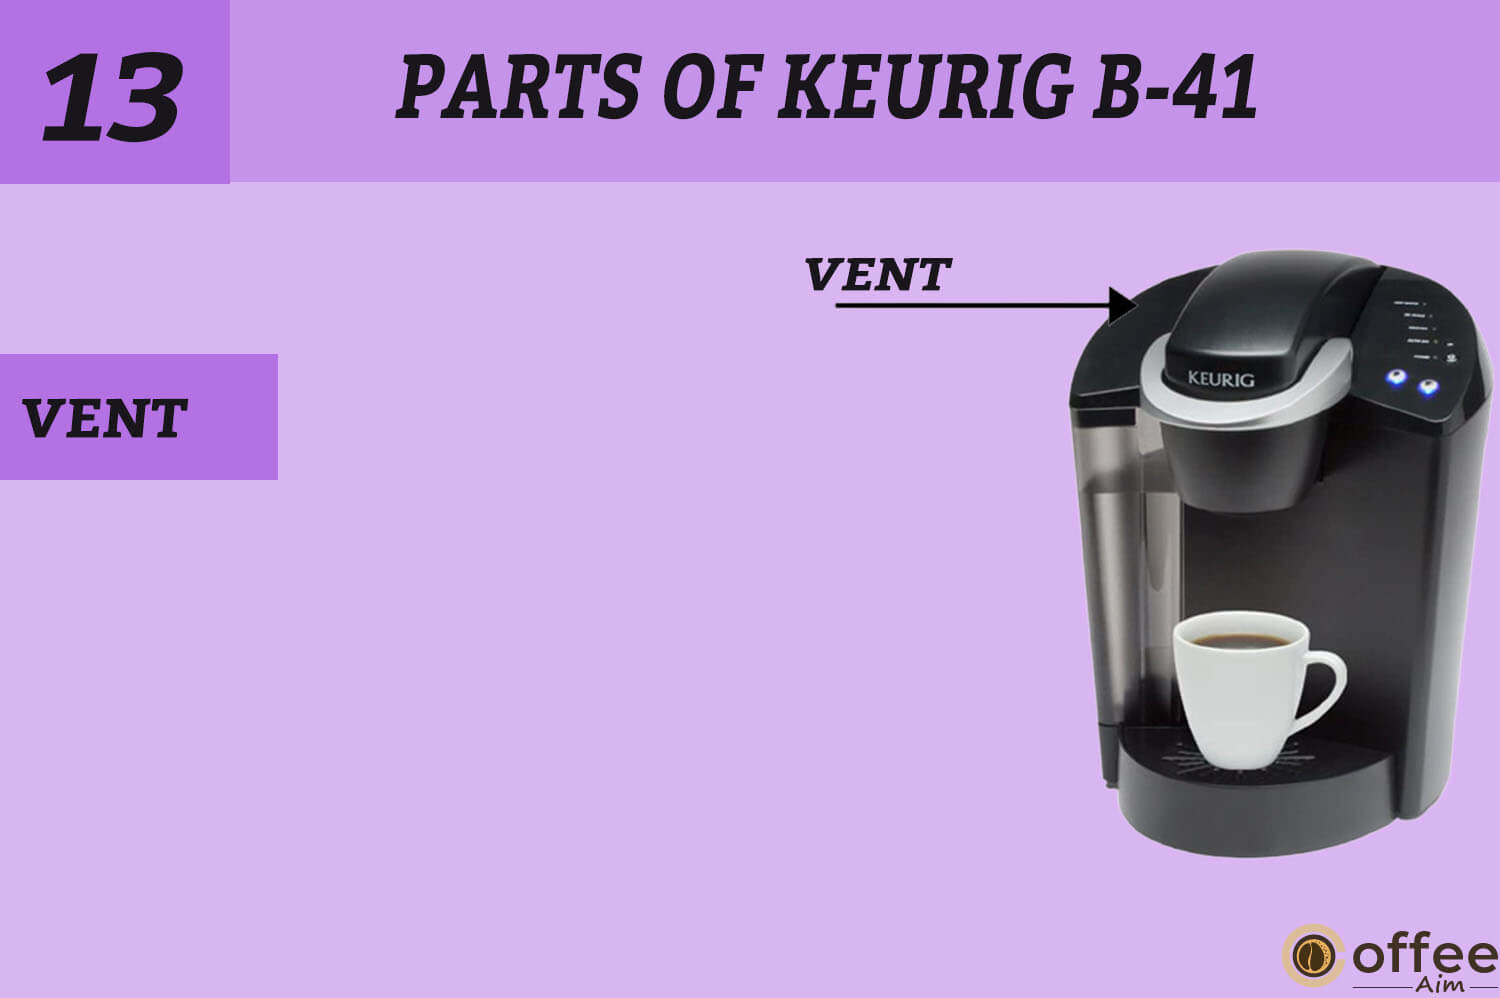
13 . Vent
The Vent is the small opening in the top of the coffee maker that allows steam to escape during brewing.
14 . Power Cord
The Power Cord is the electrical cord that plugs into the wall to provide power to the coffee maker.

Controls And Indicators
Now we will discuss the control and indicators, a panel that allows you to adjust settings such as temperature, brew strength, and time and provide information on the status of the machine, such as power, brew progress, or errors.
Add
1. Small Cup Buttons
The Small Cup Buttons are used to brew a small cup size of 5.25 oz / 155.2 ml coffee or other hot beverages. These buttons are located on the Keurig B-41 and are labeled with a small cup icon.
Add

2. Small Mug Buttons
The Small Mug Buttons are used to brew a larger cup size of 7.25 oz / 214.4 ml coffee or other hot beverages. These buttons are located on the Keurig B-41 and are labeled with a small mug icon.

3. Power Button
The Power Button turns the coffee maker on and off.
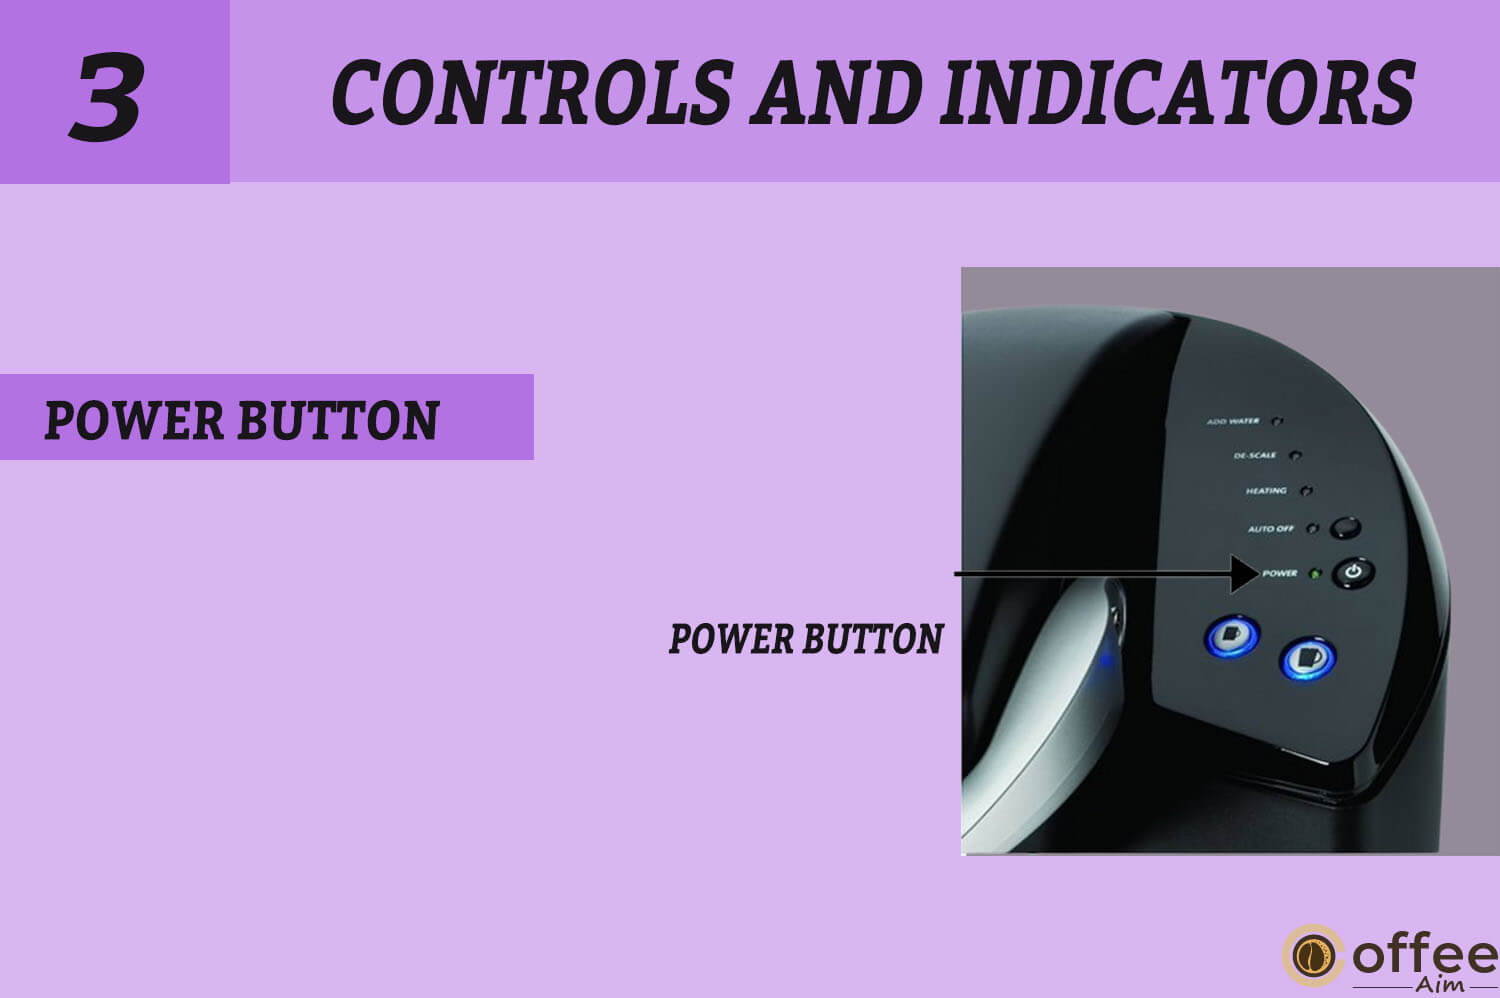
4. Power Light (Green)
The Power Button turns the coffee maker on and off. It is located in front of the Keurig B-41. It will illuminate green when the Brewer is turned on.

5. Auto Off Button
The Auto Off Button program the coffee maker to turn off automatically after a certain period. This feature helps to save energy and reduce the risk of accidents.

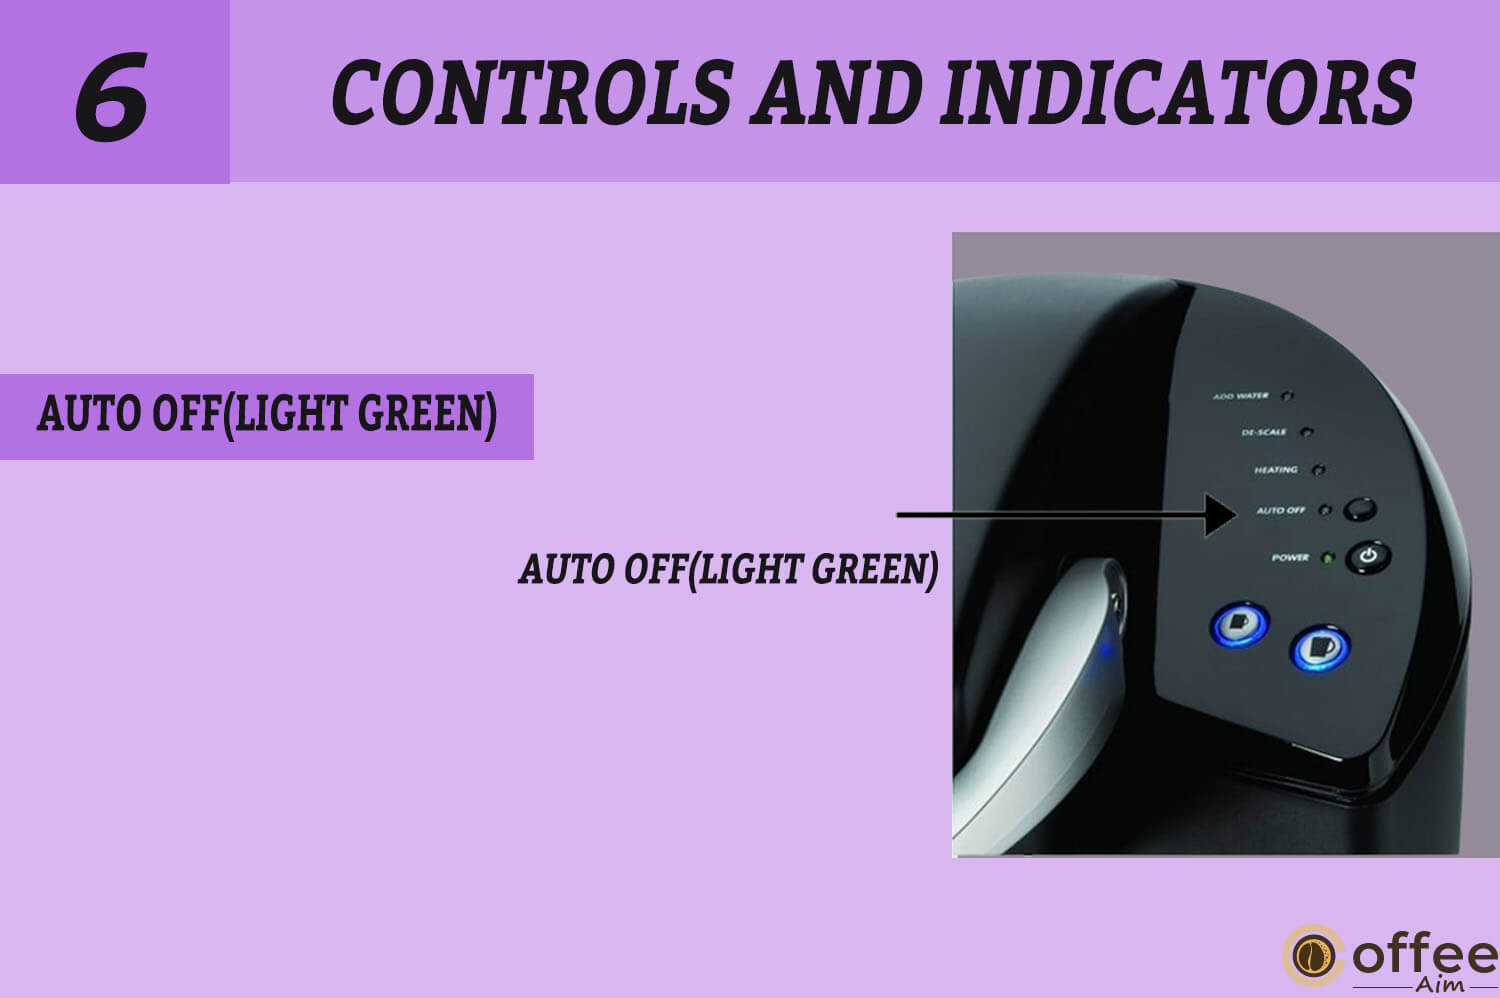
6. Auto Off(Light Green)
The Auto Off Light is located on the front of the coffee maker and illuminates green when the Auto Off feature is activated.
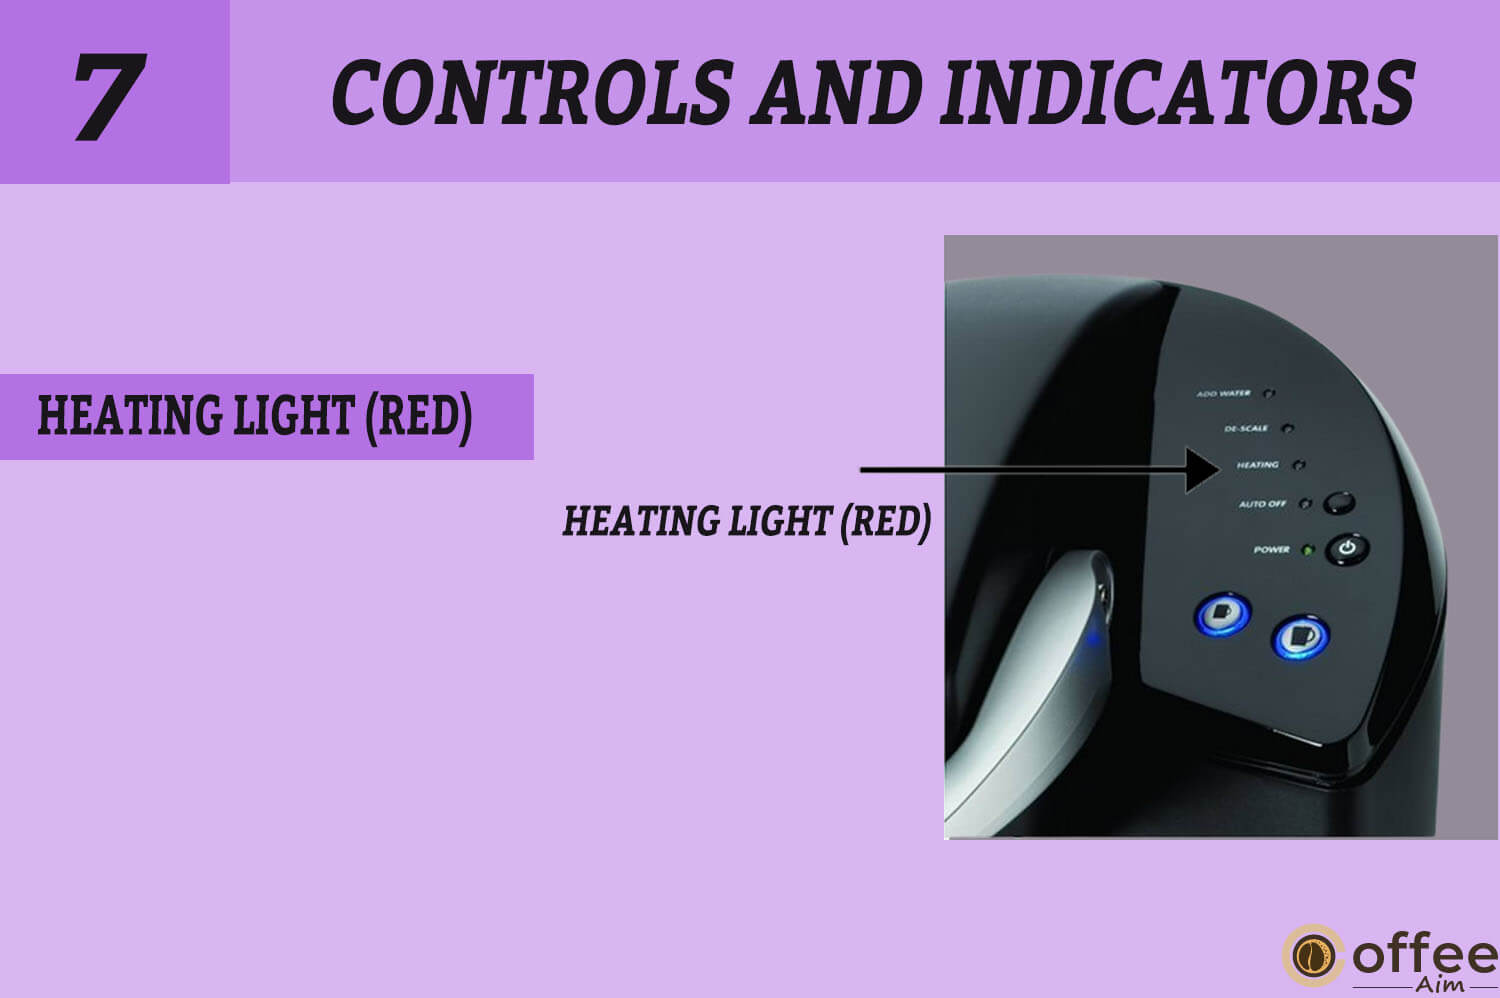
7. Heating Light (Red)
The Heating Light is located on the front of the coffee maker. It illuminates red when the water in the coffee maker is heated to the appropriate brewing temperature.
8.Descale Light ( Red)
The Descale Light is located on the front of the coffee maker and illuminates red when it is time to descale the coffee maker. Descaling is the process of removing mineral buildup from the coffee maker’s internal components.

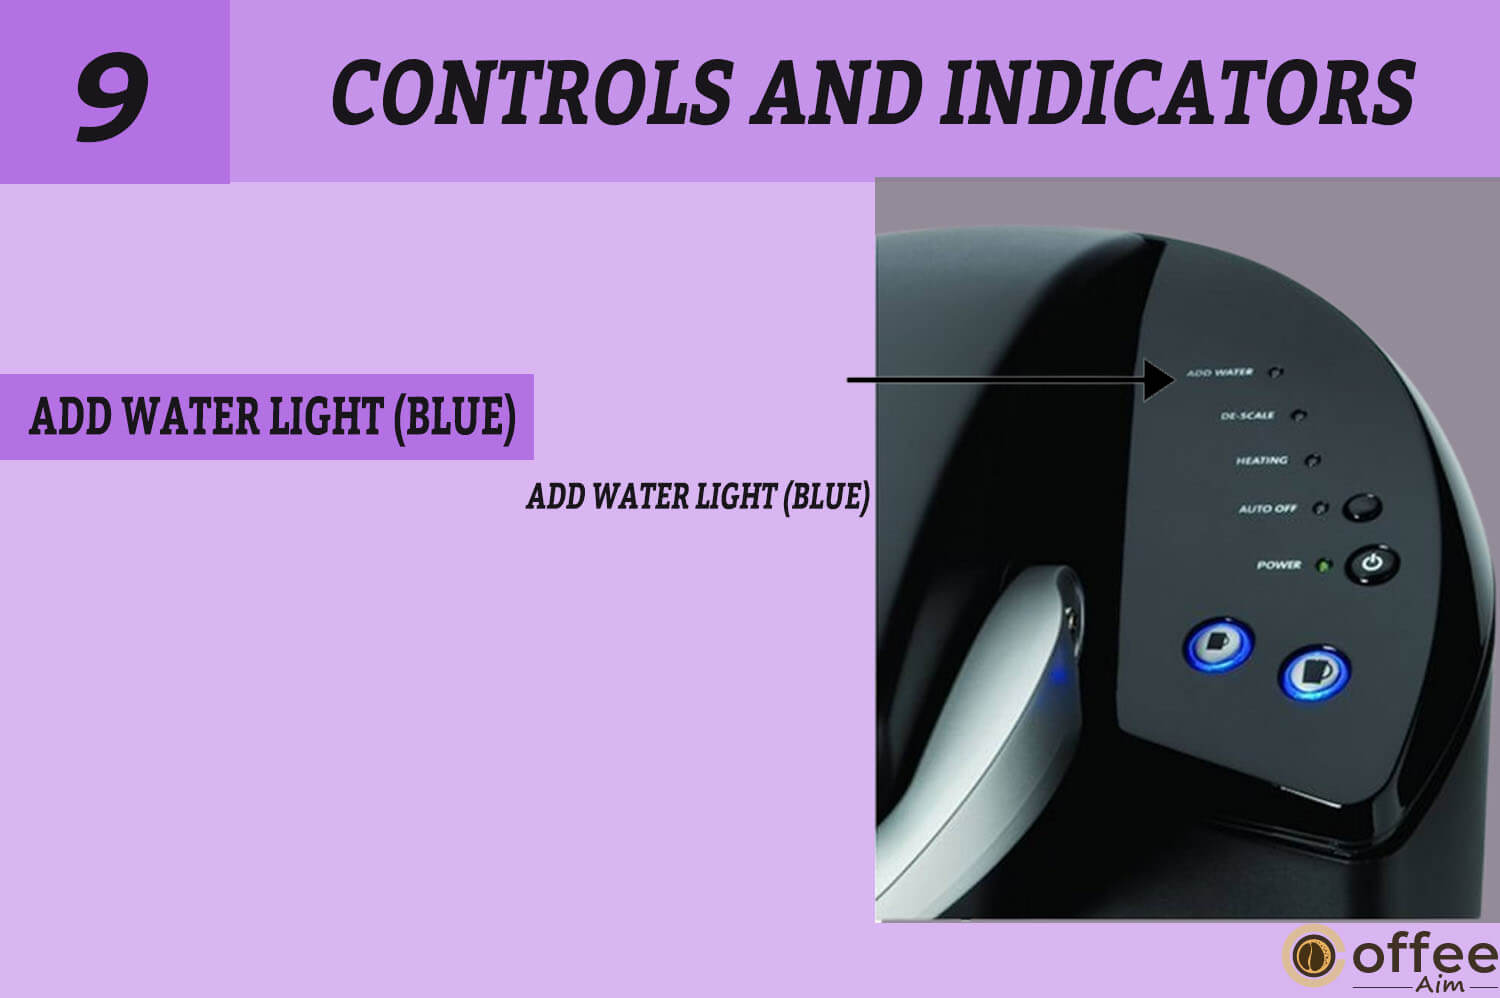
9. Add Water Lt (Blue)
The Add Water Light is located on the front of the coffee maker and illuminates blue when the water level in the Water Reservoir is low and needs to be refilled.
Setup And Activation Of Keurig B-41 For First Use Or After Storage Period
Now, before you get confused while setting up your Keurig B-41, I want to remind you that we are already here to help you. You only need to follow the set-forth guideline that is compiled to help you set up the machine accurately.
Note: Before setting it up, if your Brewer has been exposed to freezing temperature, it should be kept at room temperature for two hours before the subsequent brewing. A Brewer which is extremely cold will not be able to operate.
Assemble Your Brewer
Understanding how to assemble a Brewer is essential for getting the best performance and enjoying the perfect cup of coffee. You need to follow the instructions correctly if you want the same results.
Image content:
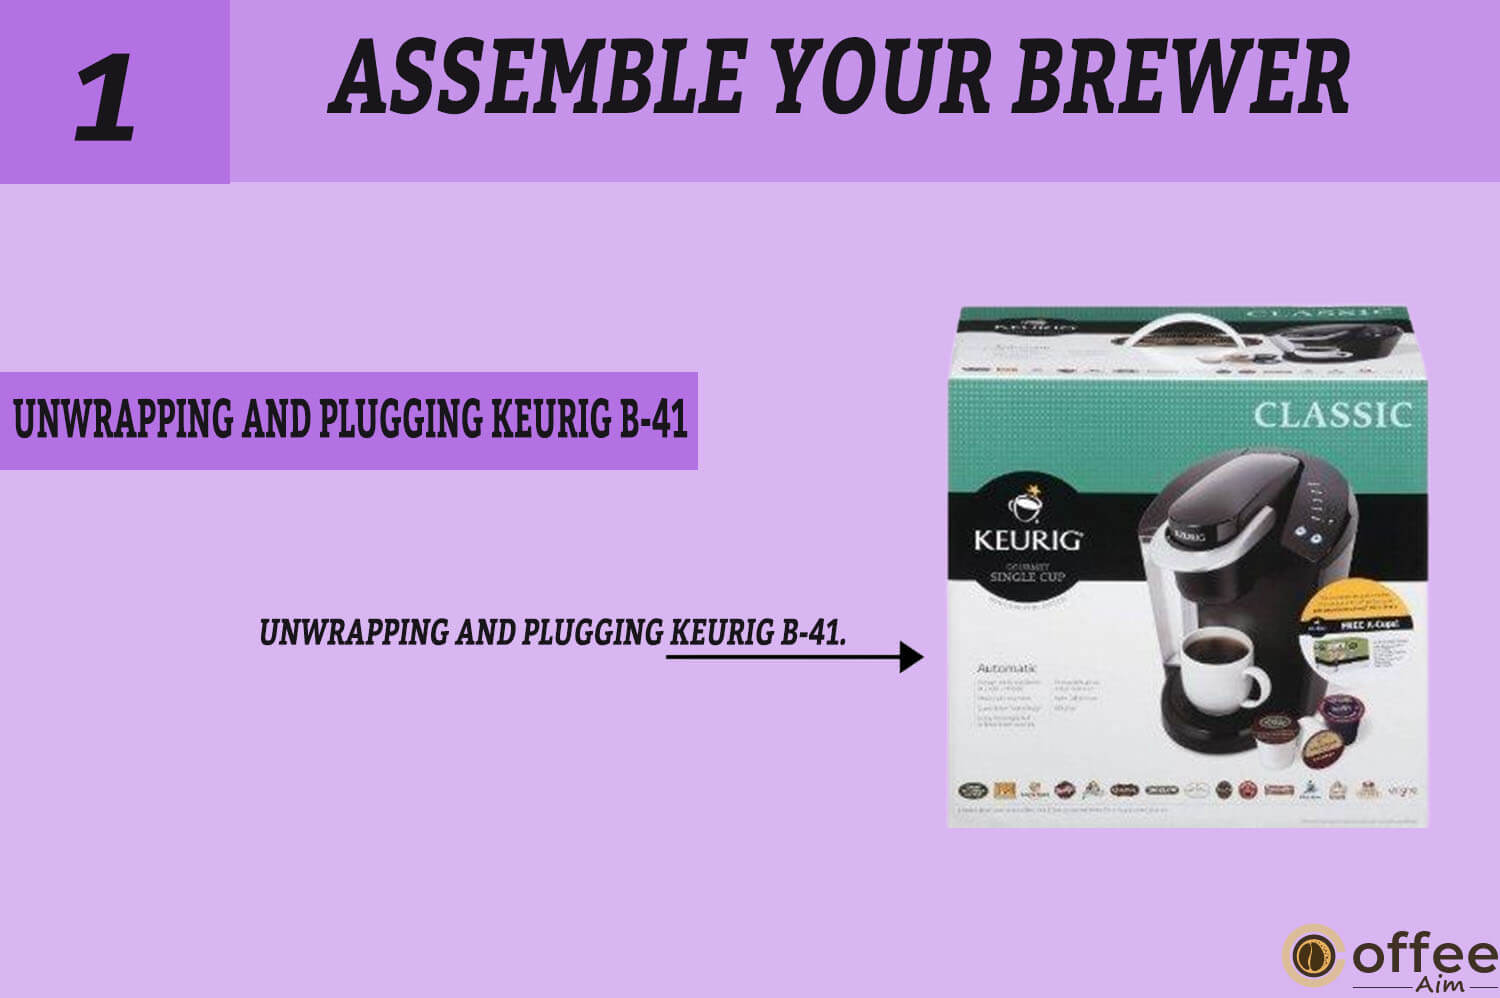
- Unwrapping and plugging Keurig B-41.
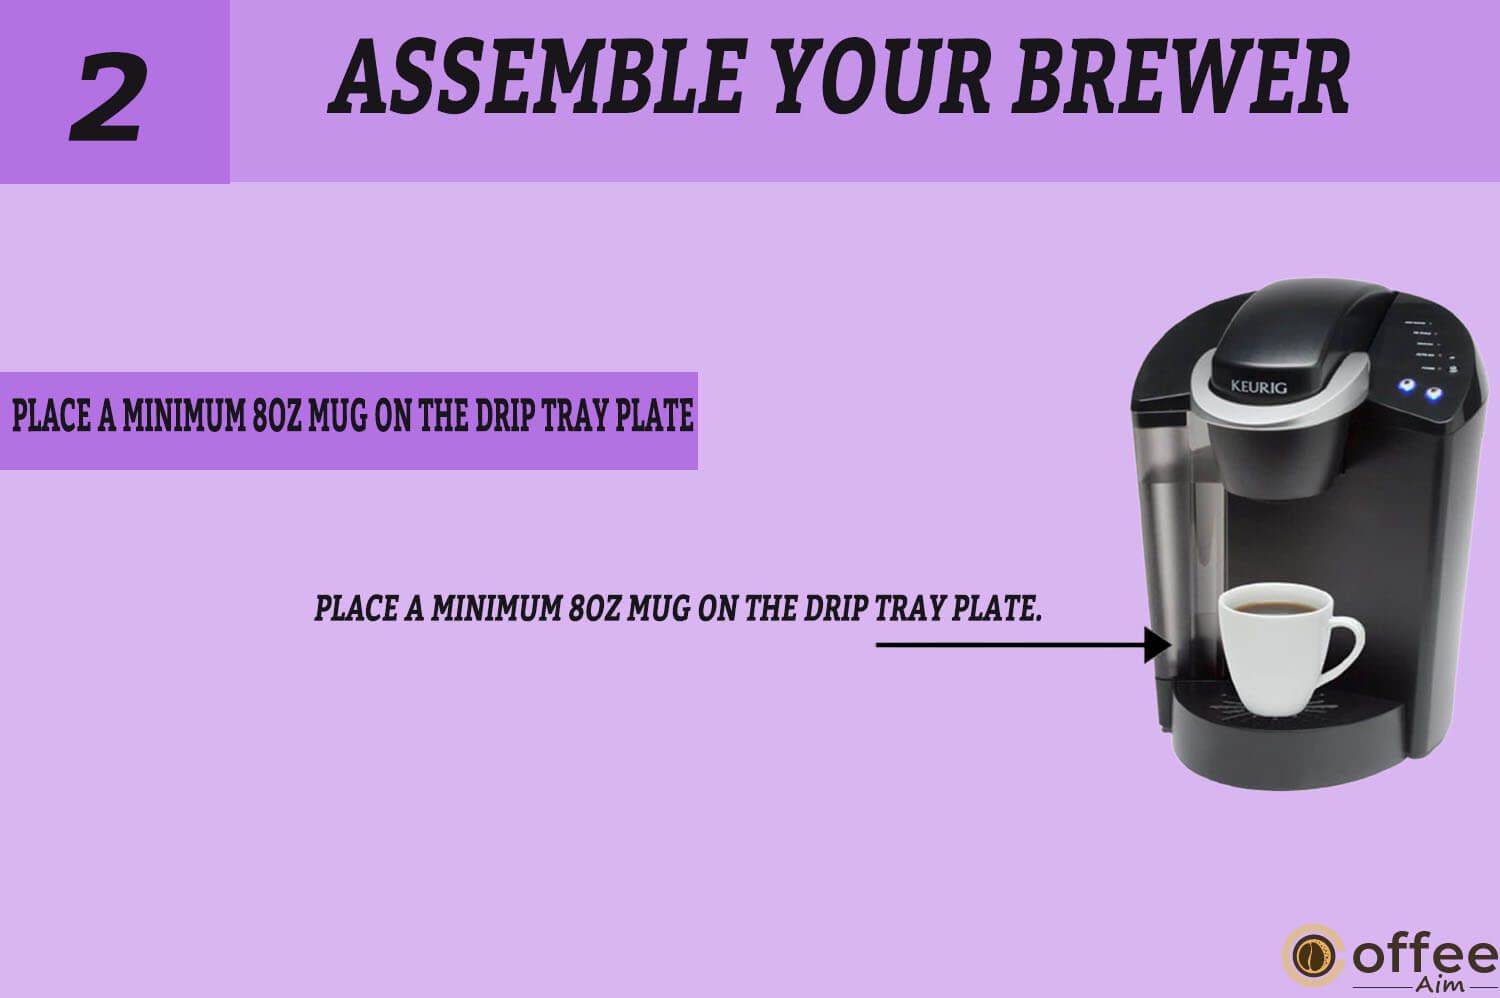
- Place a minimum 8oz mug on the drip tray plate.
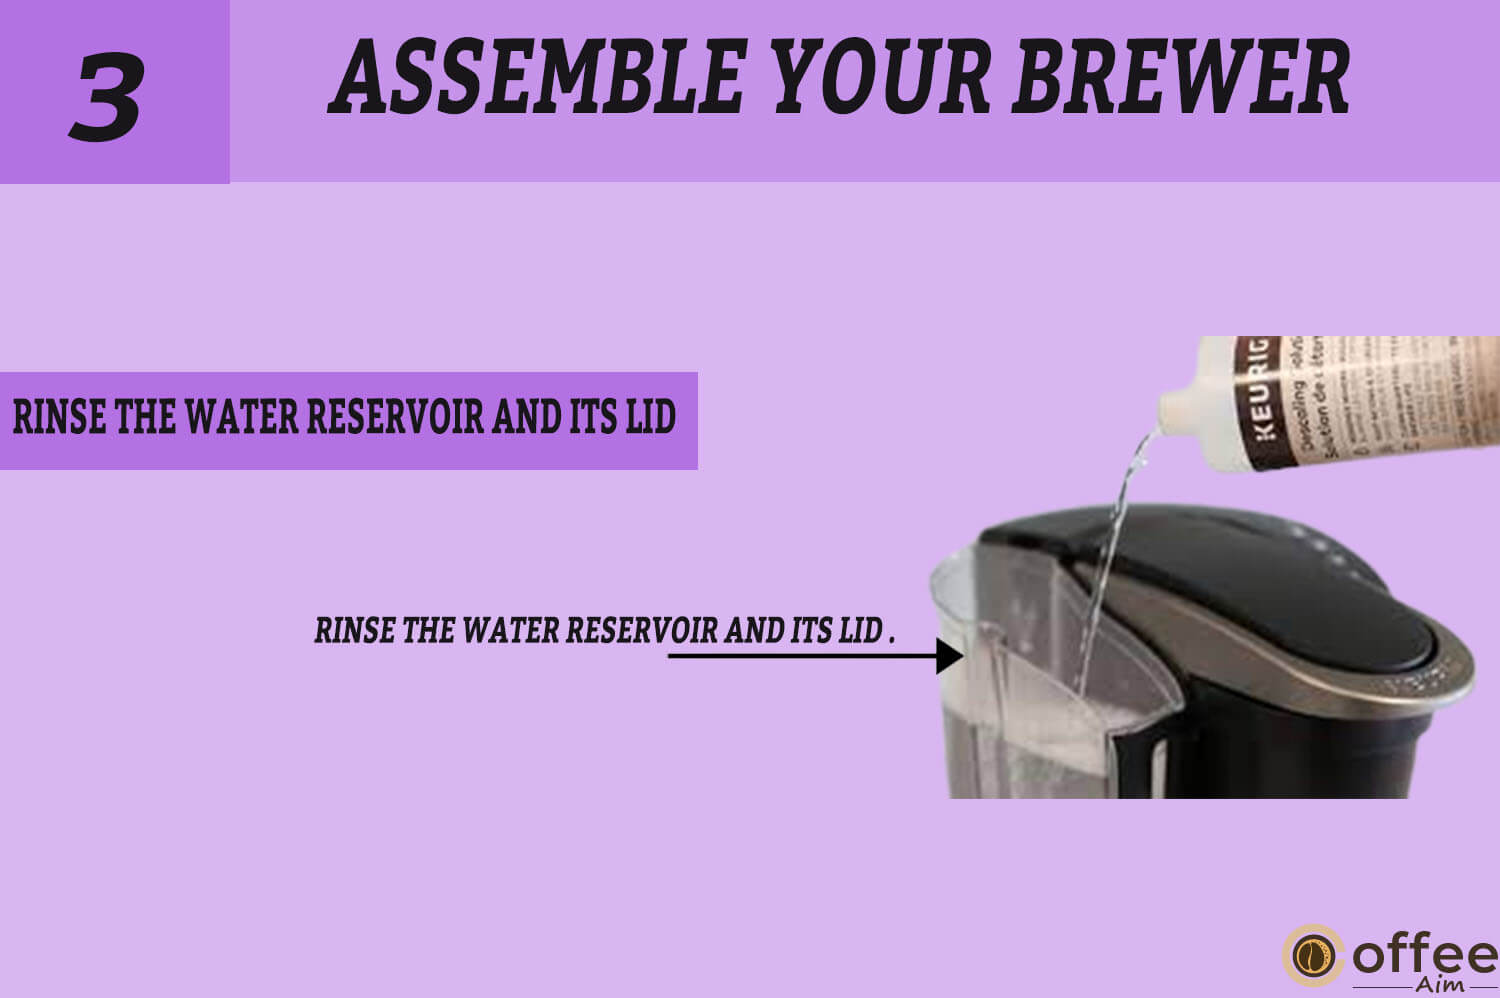
- Rinse the Water Reservoir and its Lid .
- Fill it with filtered/ bottled water up to the max line.
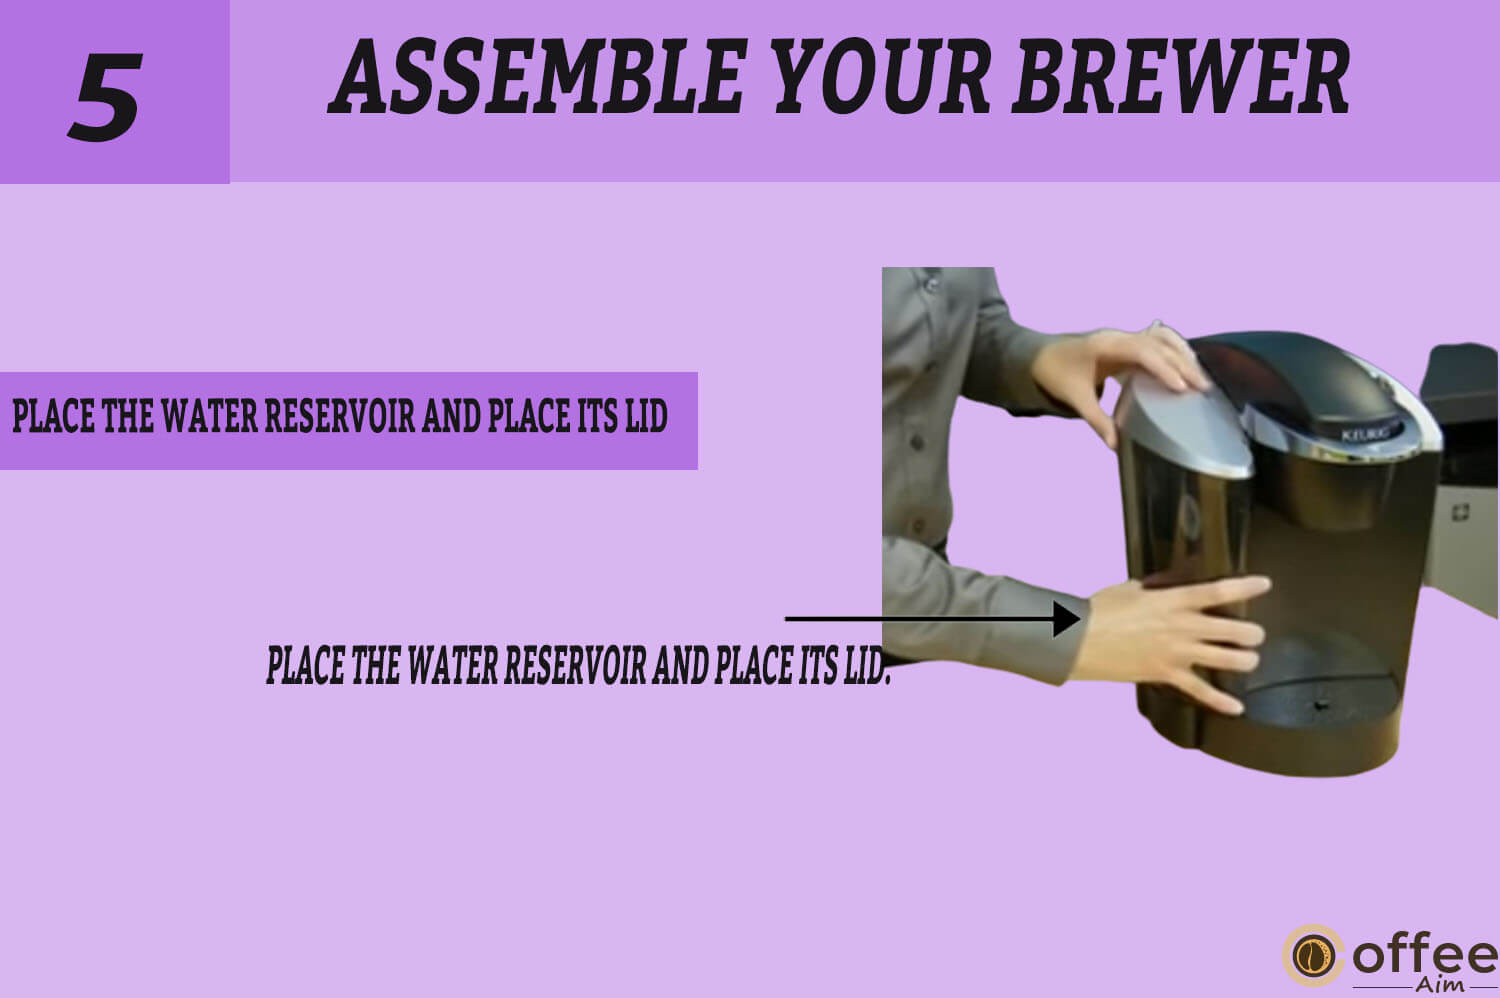
- Place the water reservoir and place its lid.
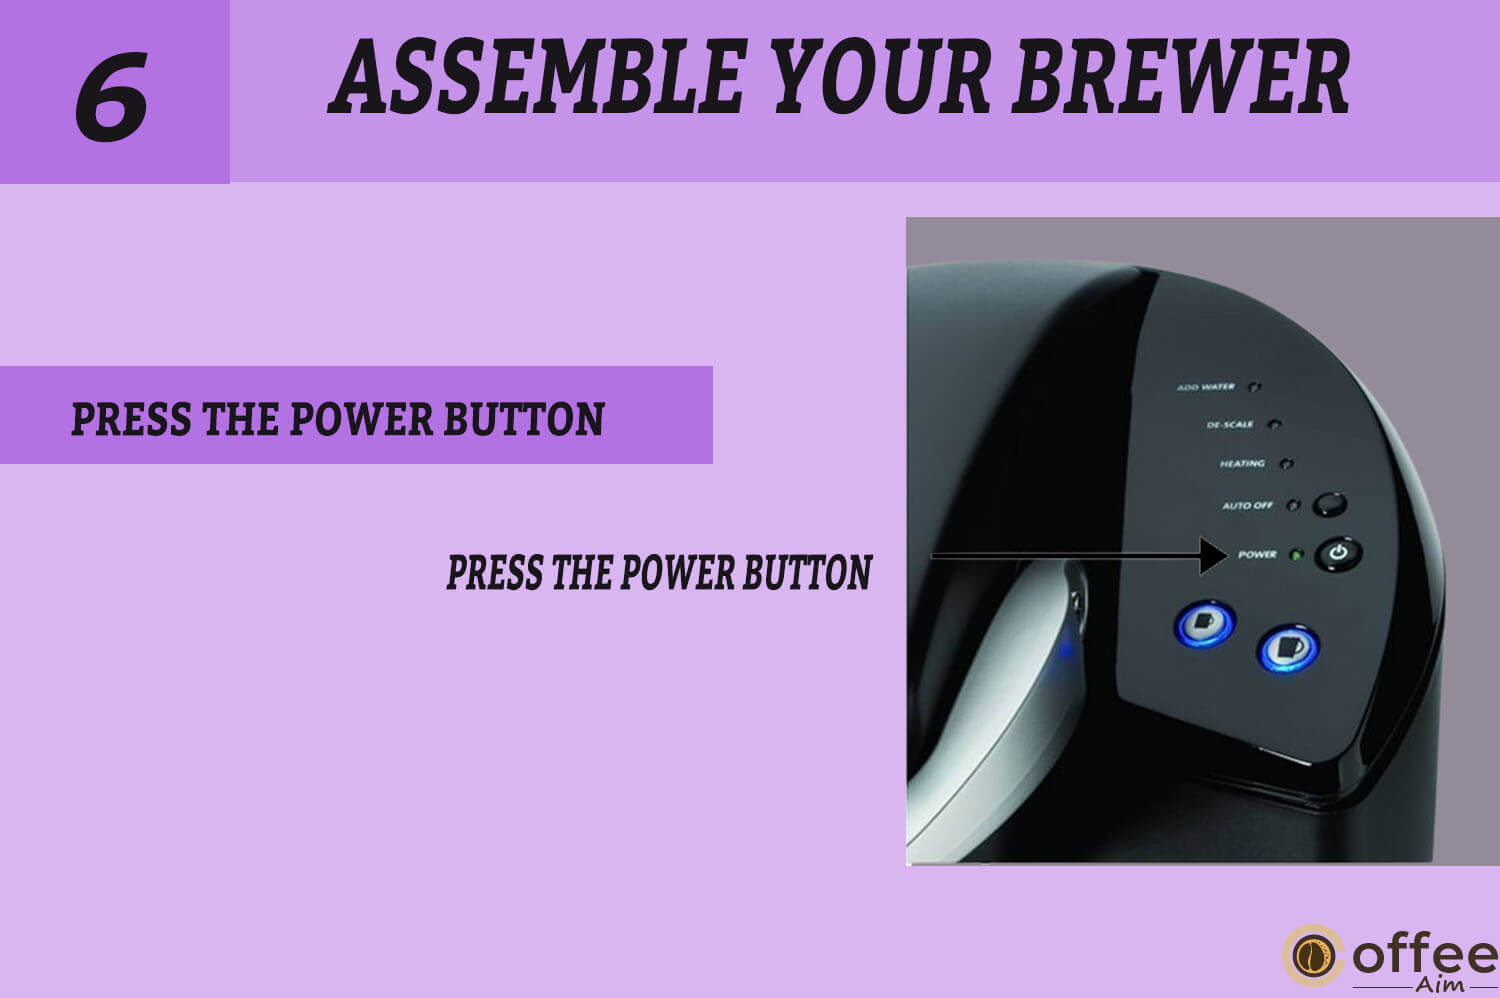
- Press the power button.
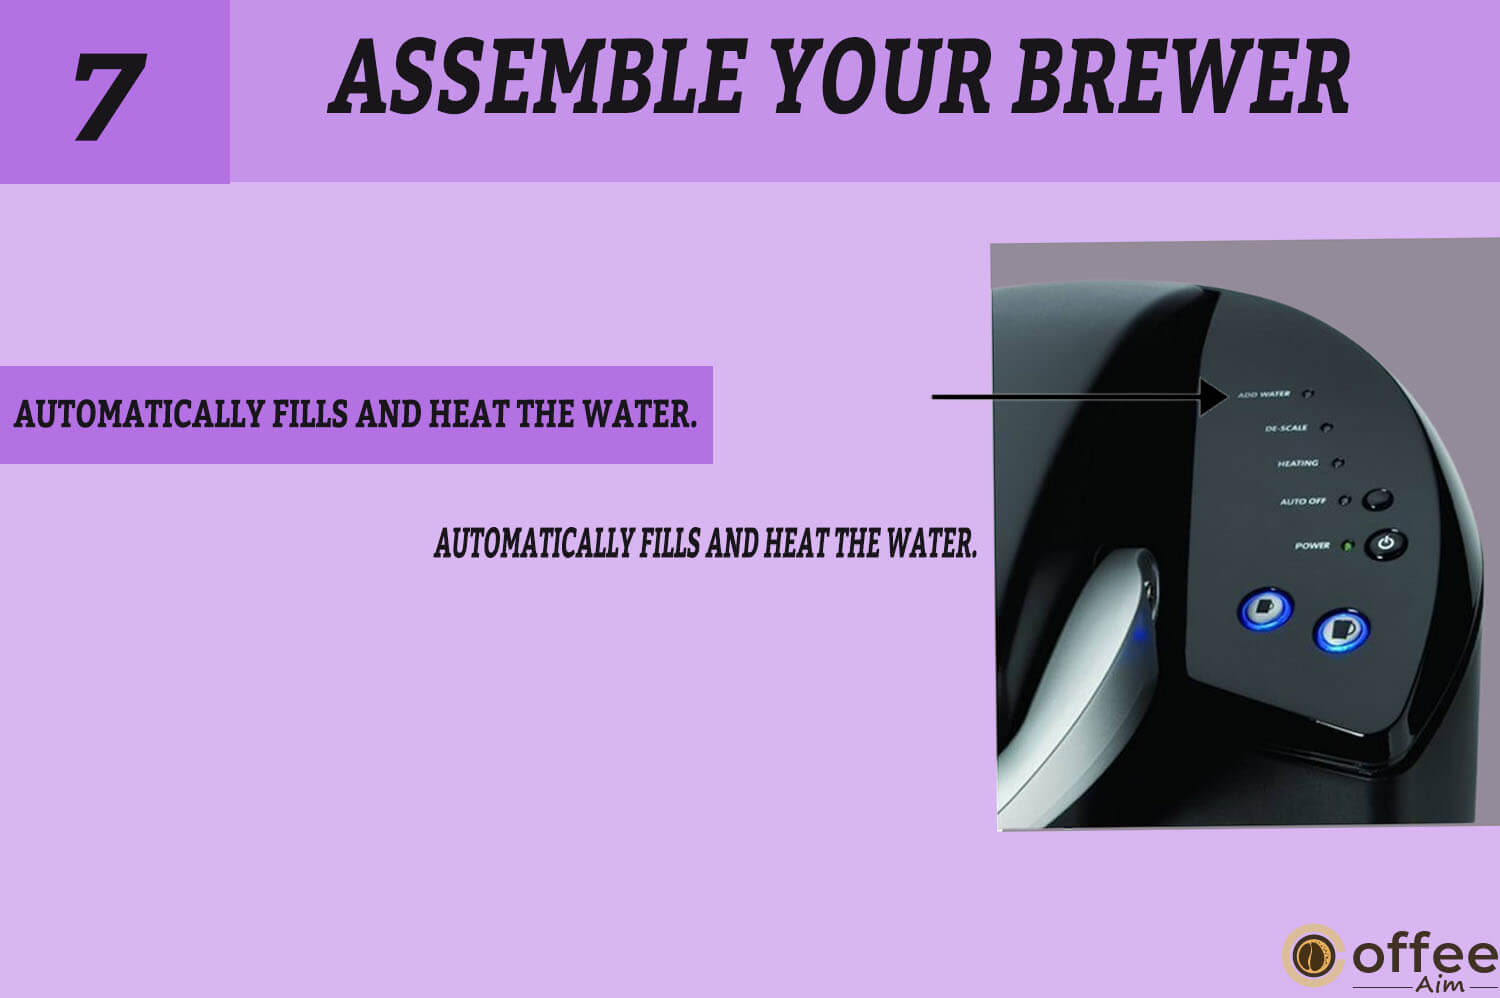
- Automatically fills and heat the water.
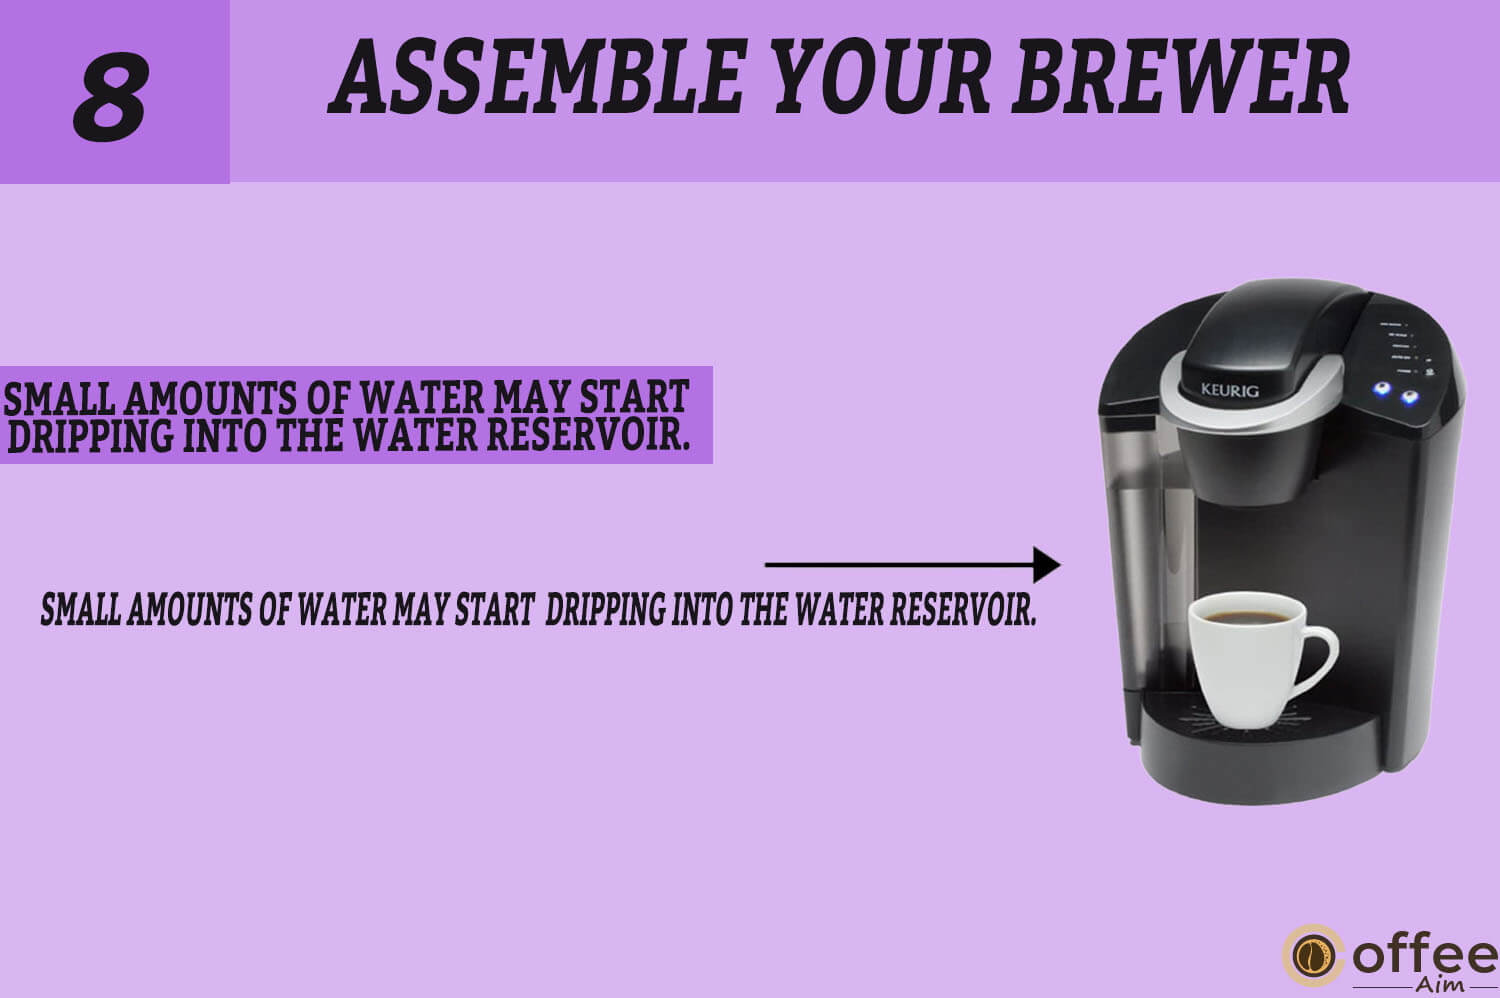
- Small amounts of water may start dripping into the Water Reservoir.
- Press the “Small Mug Button” and dispense the hot water.
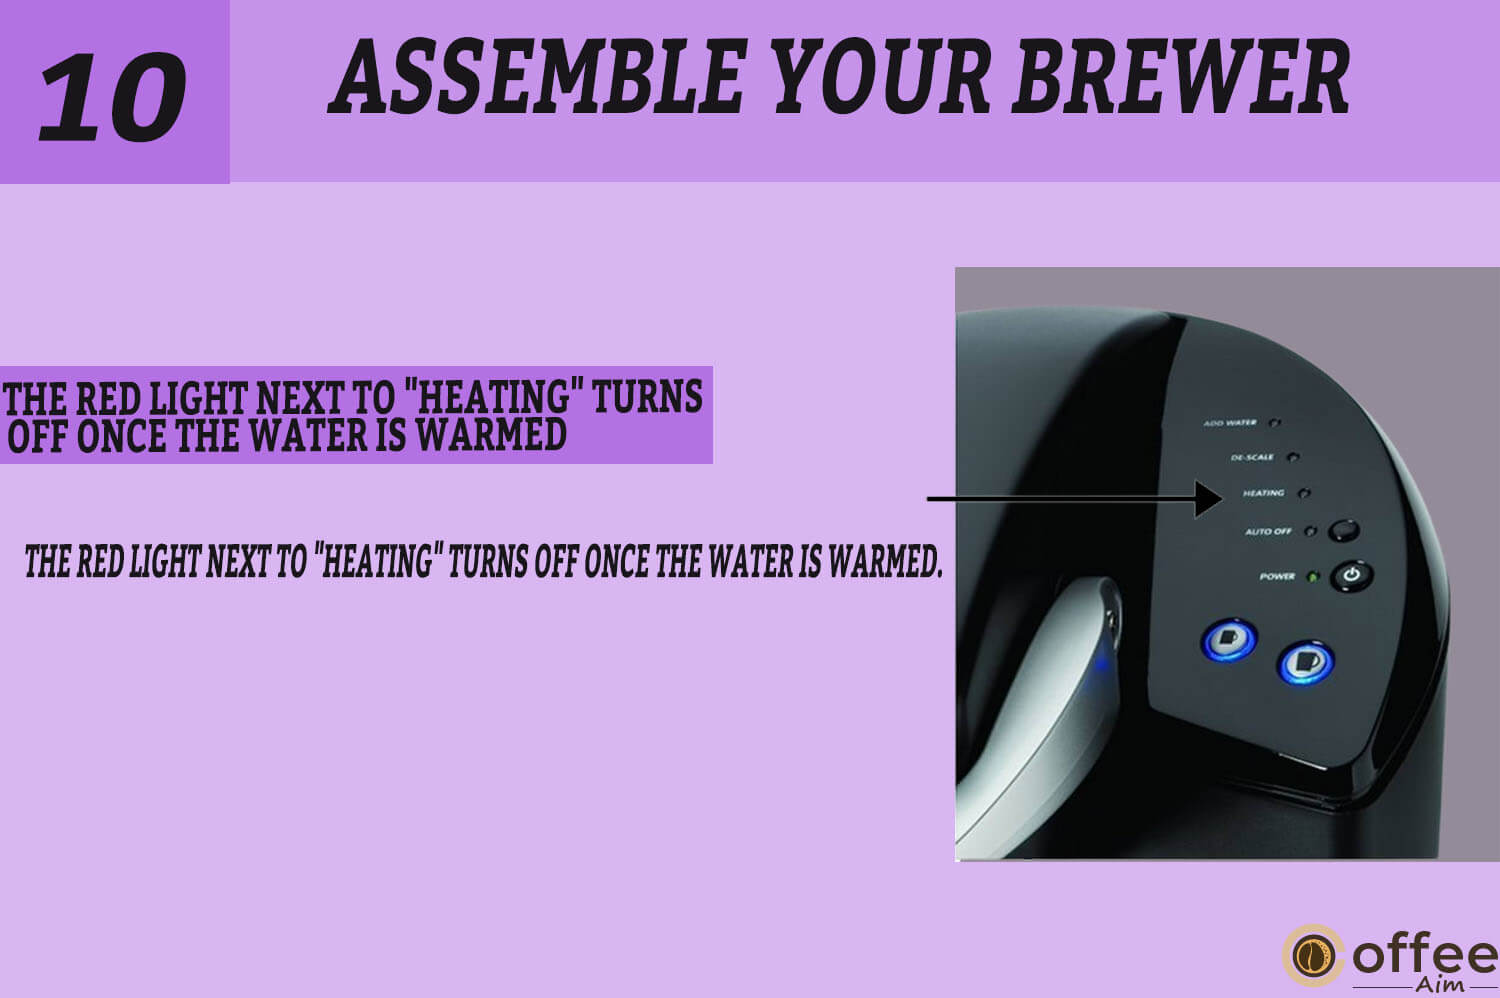
- The red light next to “HEATING” turns off once the water is warmed.
- First, remove the plastic wrap from the cord, plug the Brewer into a grounded outlet, and remove all the packing tape.
2. Now, place a large mug of minimum size eight oz on the Drip Tray Plate.
3. Then remove the water reservoir lid, followed by the water reservoir from the Brewer (Fig.1). Lift the reservoir straight up and rinse it thoroughly with fresh water.
- Carefully add bottled or filtered water to the Water Reservoir until it reaches the line just below the top edge of the clear viewing area. Also, remain cautious while filling the water. It should not be overfilled.
5. Make sure the Water Reservoir Lock Tabs are engaged with the Brewer before inserting the Water Reservoir base into the left side of the Brewer (fig. 2). Now, re-place the water reservoir’s lid.
6. Press the Power button given on the upper right panel of the Brewer Press this button to start the Brewer. A green light will illuminate as an indication that the Brewer is in Functional mode.
Note: This should be kept in mind that a K- Cup should not be used for this sequence
Note: You will see a blue light next to ADD WATER that will start illuminating If the water reservoir is emptied or not placed on the Brewer. The Small Mug Button will turn on once the water is added to the Water Reservoir.
7. In your Keurig B-41, the water-filling process is automated. The Brewer will fill up automatically, and then the water will be heated. It will just take four minutes to heat up. The red light next to “HEATING” on the LED Control Center will turn on during heating. The red light will go off when the water is heated, and the small mug button will flash.
Note: During water heating, do not lift the Brewer.
8. You may notice water in small amounts start coming from the vent and dripping into the Water Reservoir during this and another heating process; you should not worry about this because it normally happens during this process.
9. A “Small Mug Button” is located on the bottom left corner of the control panel. Press the Small Mug Button as shown in the figure (Fig.3) and begin the cleansing brew process. Dispense the hot water into the sink.

10. The reheating process will take up to 15 seconds, and the red light next to “HEATING” on the LED Control Center will remain on. The red light will turn off once the water is warmed.
Make Your First Cup Of Coffee In Keurig B-41
Image Content:
- Turn on the Keurig B-41, and the green light will illuminate.
- Place your cup on the drip tray plate
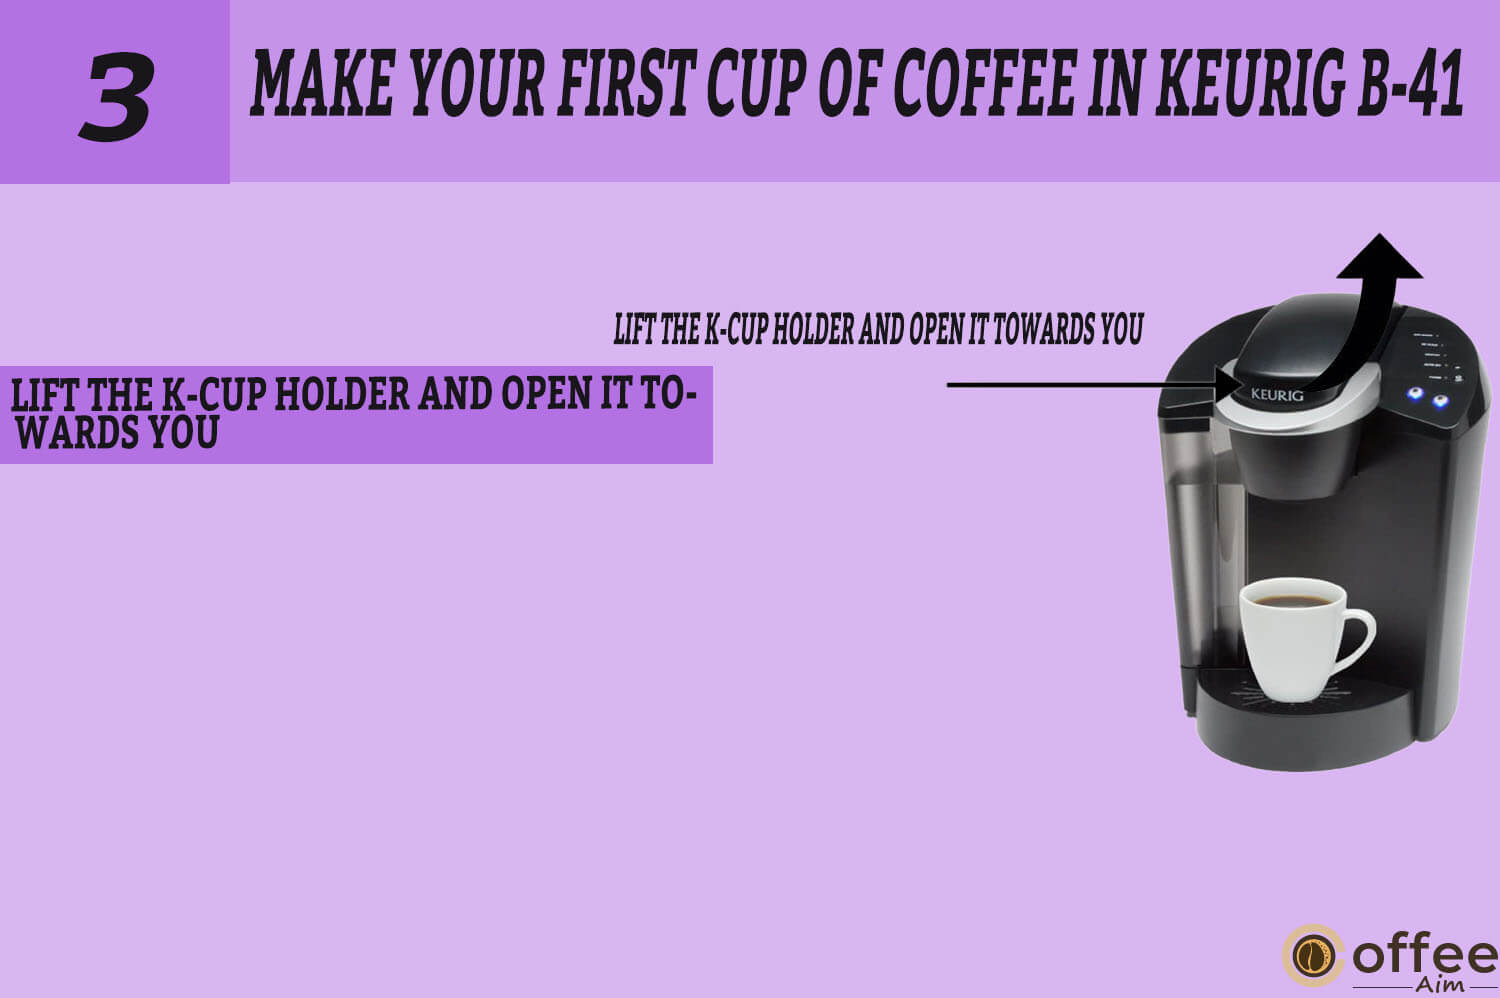
- Lift the K-Cup holder and open it towards you.
- Select a K-Cup Portion pack.
- Place the K-cup in the K-Cup holder.
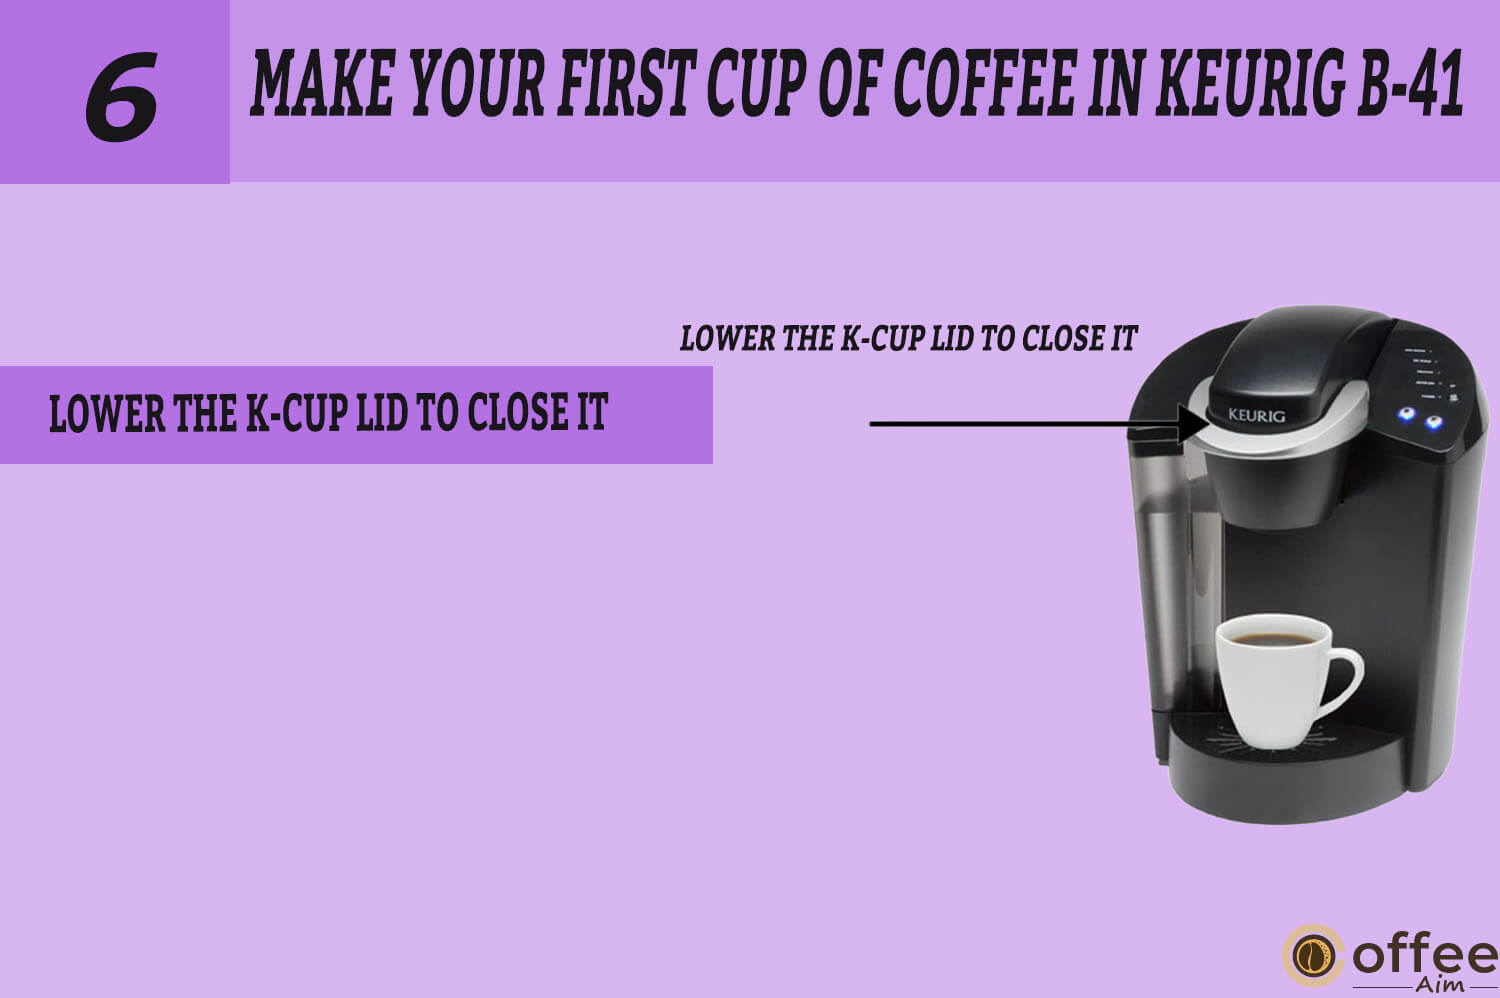
- Lower the K-Cup lid to close it.
- Choose between Small Cup (5.25 oz) or Small Mug (7.25 oz)
- The button will turn on while brewing.
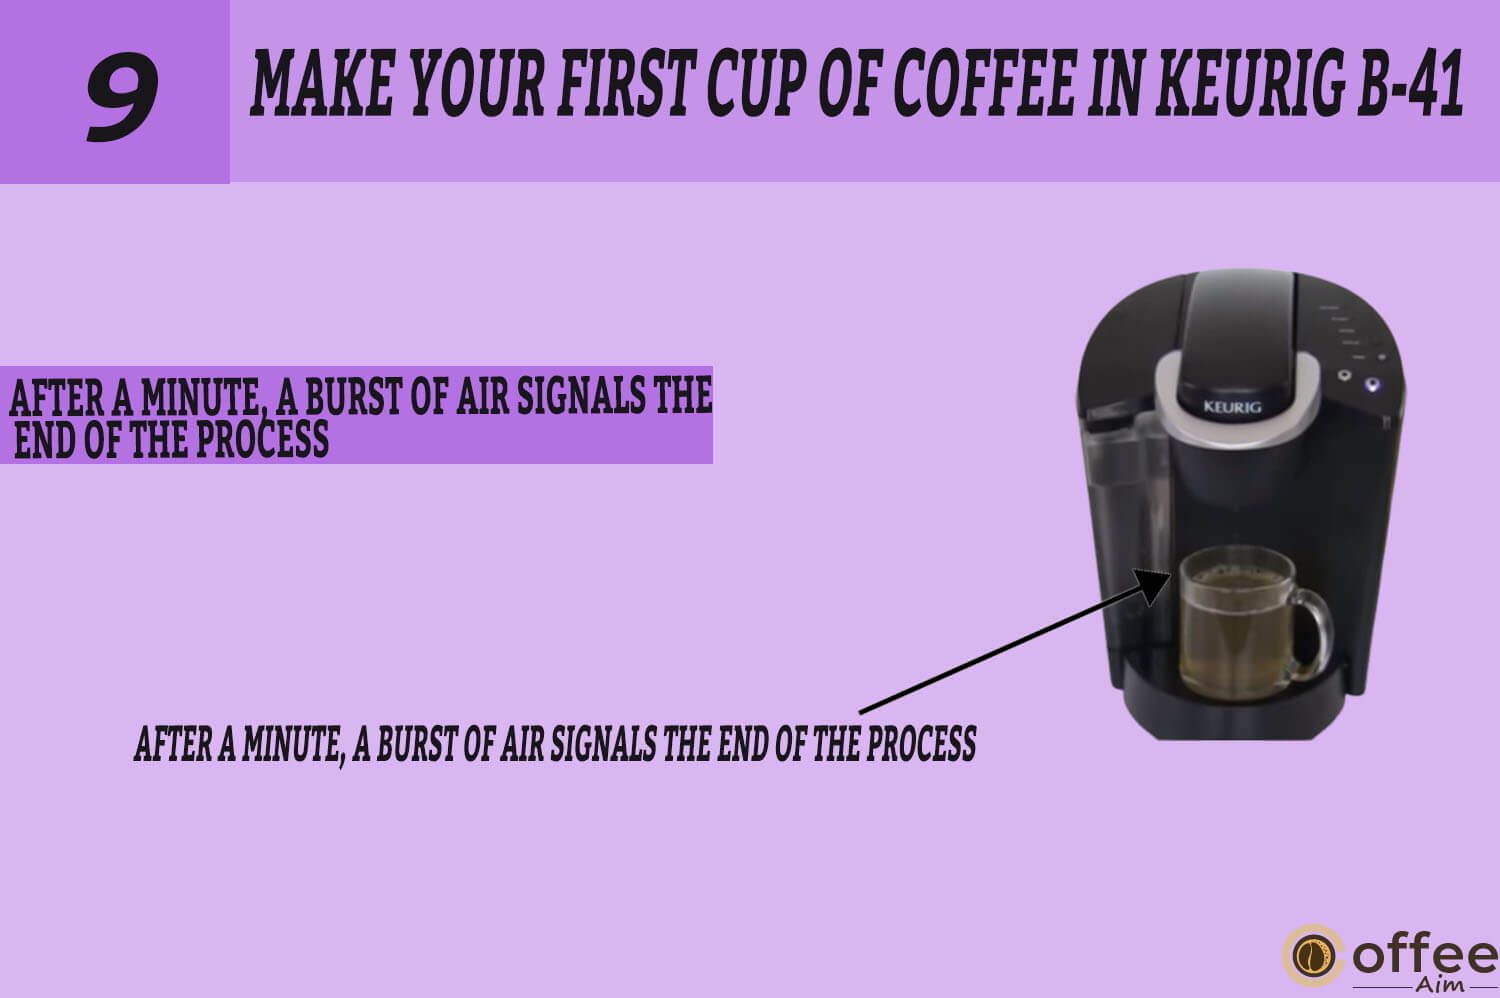
- After a minute, a burst of air signals the end of the process
- The coffee is ready, and it is Tasting time
- Red light flashes when water is heated for the next brew cycle.
Are you Ready to brew your First Cup with Keurig B-41? Let’s start the process without any delay. Follow the instructions chronologically to have a delicious coffee.
1. Turn on your Keurig B-41. When you do this, the green light next to the power button on the control center will start illuminating. It is an indication that your Brewer has now turned on.

2. Place a cup or mug on the Drip tray plate

3. Open the K- Cup holder. It will open towards you when you lift the handle, as shown in figure (Fig.4)
4. Choose a K-Cup portion pack.

Note: Avoid puncturing the K-Cup or removing the foil cap.
5. Now, put a K-Cups portion pack in the K-Cup Holder as shown in the figure (Fig.5).
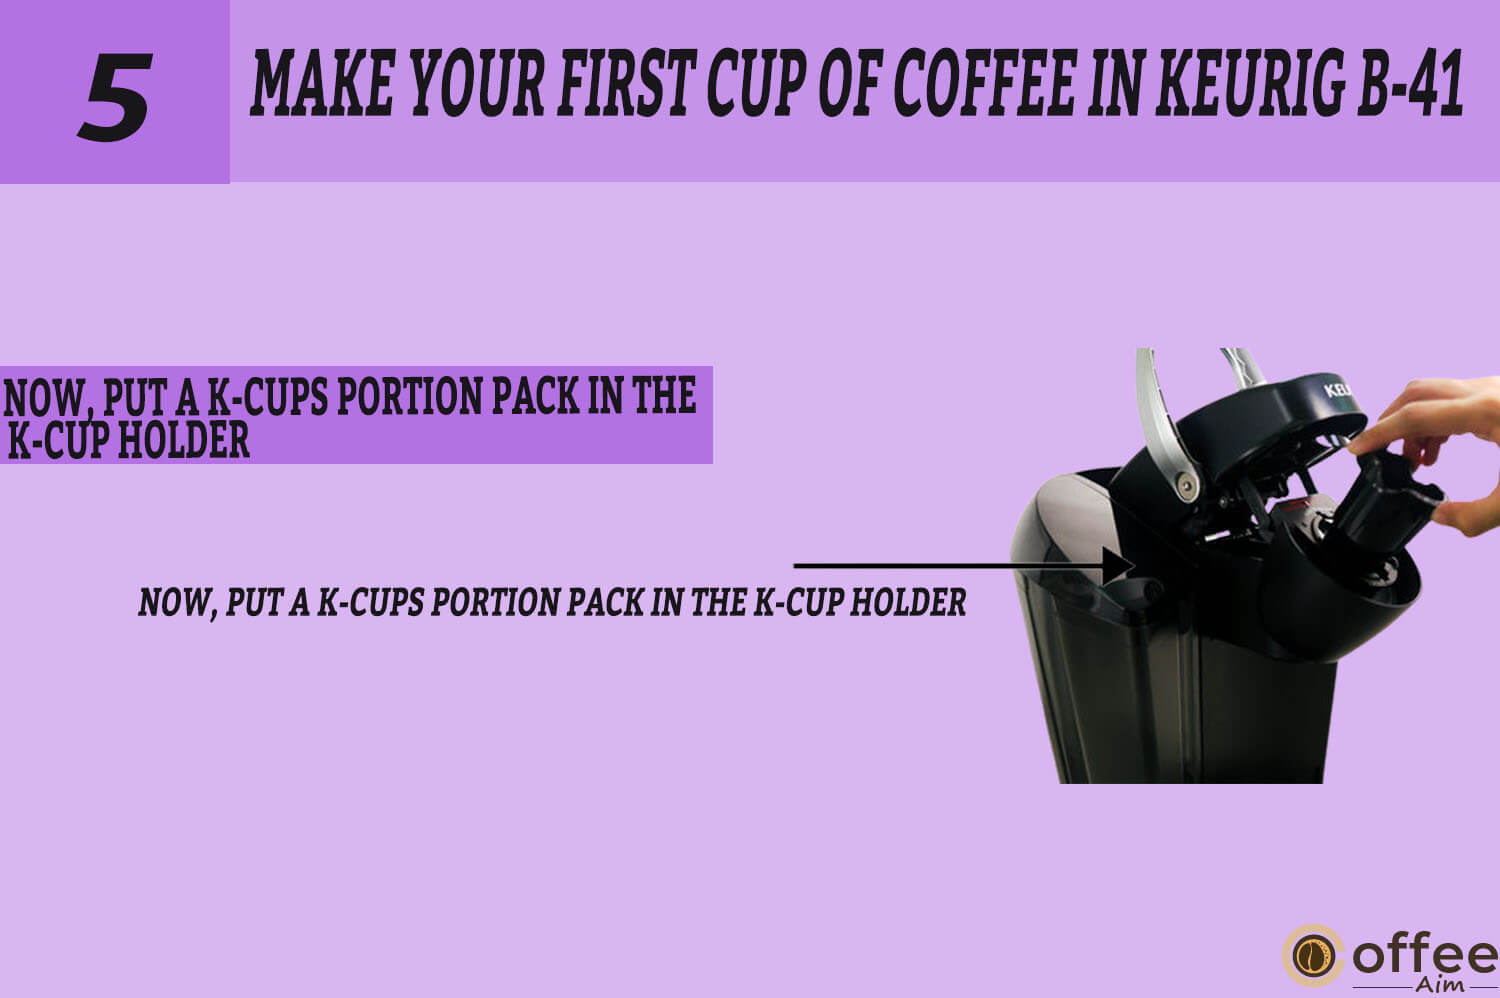
Note: You should be careful of the needles as there are two pointed needles to puncture K-Cup, one of which is located above the K-Cup Holder and the other at its base. Do not stick your fingers in the K-Cup Holder to reduce the risk of injury.
6. Completely close the lid by lowering the handle.
7. Choose the size of your brew: The Small Cup option will make a 5.25-ounce serving, while the Small Mug option will brew a 7.25-ounce serving. To prevent unintentional activation, the Brew Buttons will be disabled if you do not press a brew button in 60 seconds. Reset the Brew Buttons by entirely raising and lowering the Handle.

8. The blue light behind the Brew Button on the LED Control Center will be activated during brewing.

Note: You should remain careful because the water in the K-Cup Holder is extremely hot. It is dangerous to Lift the Handle or open the K-Cup Assembly Housing during the brewing process; it can cause serious injuries.
9. Remain patient because there can be a little delay before the brewing process begins. Now, after an approximately one-minute-long brew, the procedure will end with a burst of air indicating to empty all the liquid from the K-Cup
10. Now lift the Handle, take out the used K-Cup, and throw it away.

Note: You should remain careful because the K-Cup will be very hot.
11. It is time to taste and enjoy your first cup of Keurig B-41Brewed Coffee, tea, or hot cocoa.

Note: If the pump starts vibrating after your brewing, there is no need to panic because This normally happens when your Brewer starts filling in preparation for the next brew.
How To Stop The Brewing Process In Keurig B-41?
Image Content
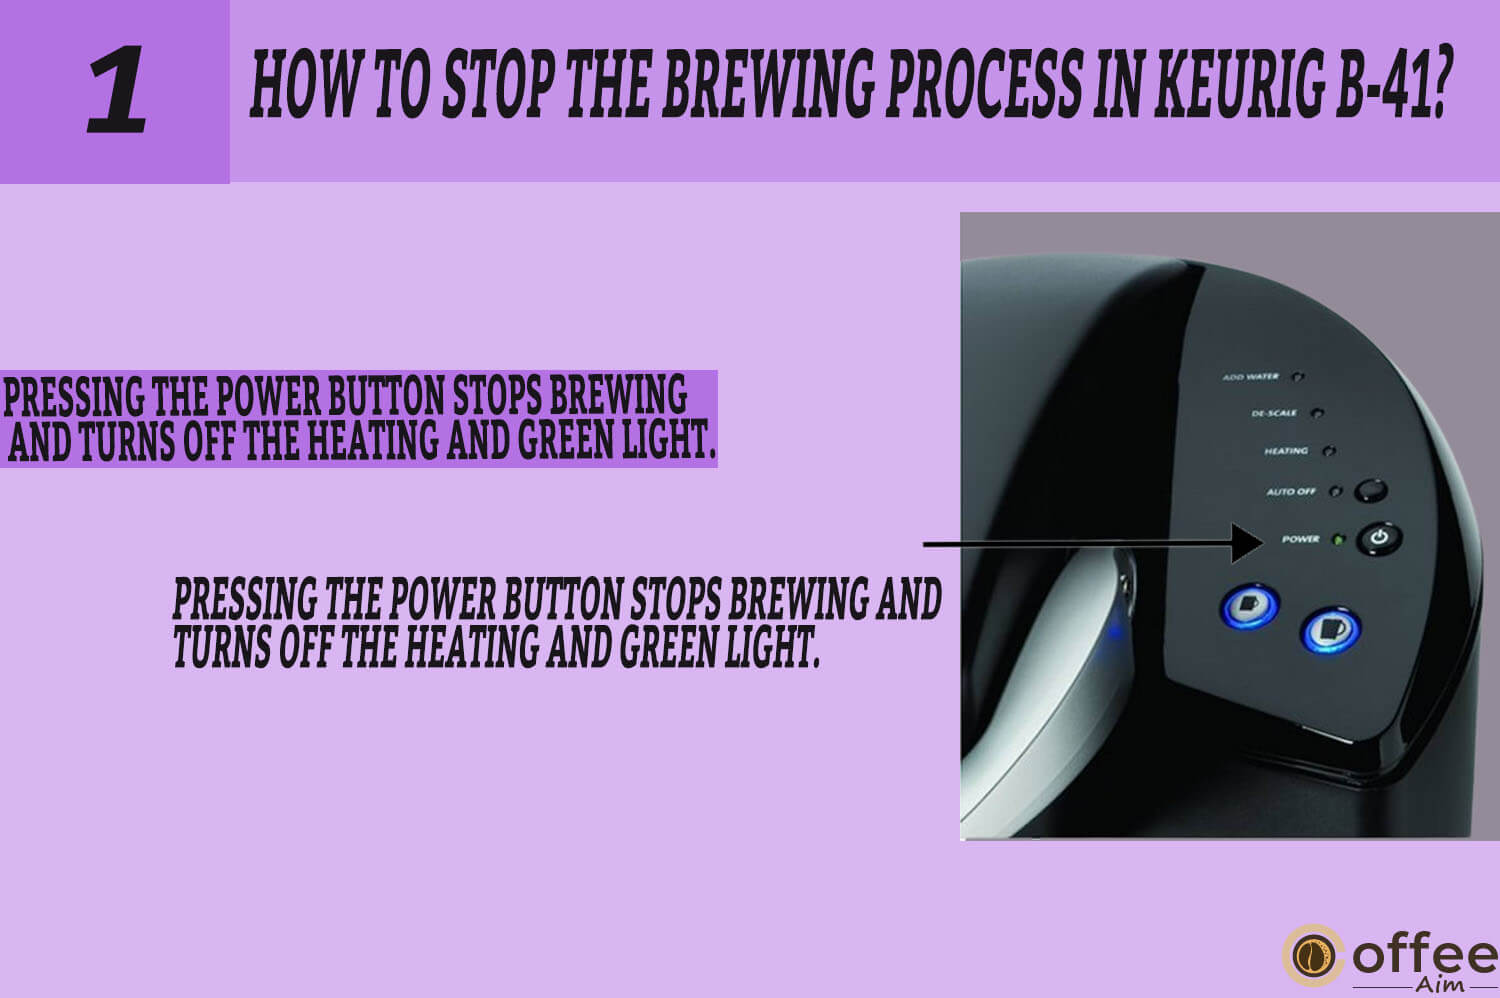
1. Pressing the power button stops brewing and turns off the heating and green light.
You have received an important call from your work while brewing, and you want to stop the brewing process. Well, there is no need to panic. You only need to press the Off Button to discontinue the process. As soon as you press the power button, the heating process will turn off, the coffee or tea will stop flowing, and the green light will stop flashing.
Note: During the next brew, you might get less coffee, tea, or hot cocoa in your cup. We advise you to only make a water-based cleansing after finishing a brew. Your NEXT brew will then be the correct volume.
When To Add Water In The Water Reservoir?
Image Content:
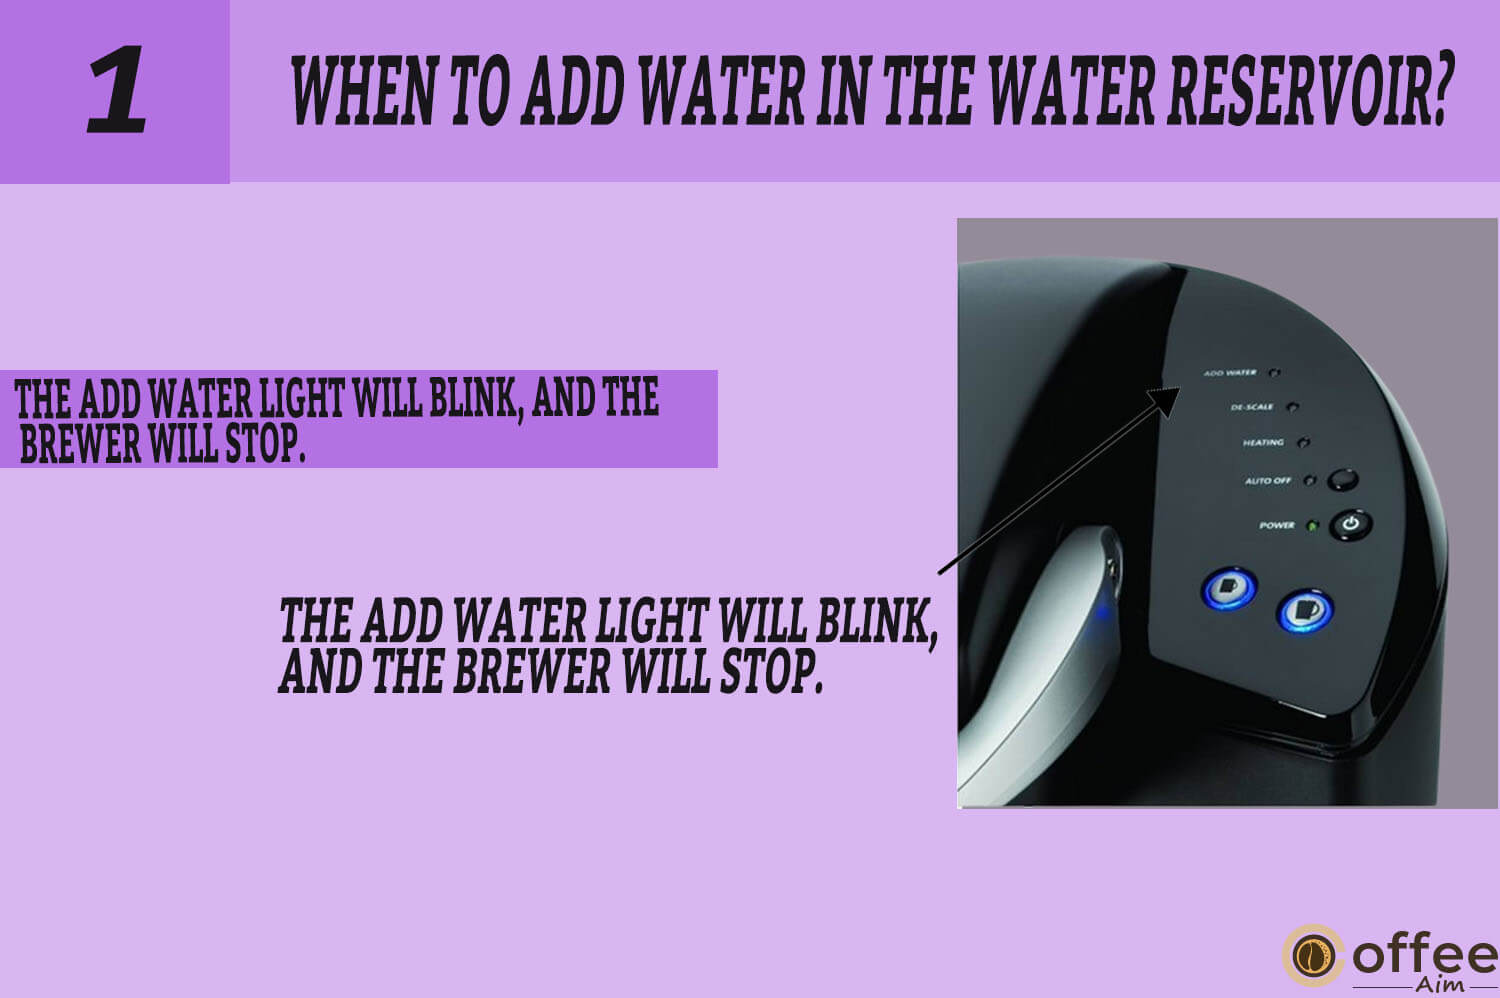
1. The Add water light will blink, and the Brewer will stop.
Keurig B-41 comes with this amazing feature that tells you when there is a need to add water to the water reservoir. You will see the blue light next to “ADD WATER” in the LED Control Center of your Brewer will turn on when the water level in the Water Reservoir is low or if the Water Reservoir is removed (fig. 6). When The blue “ADD WATER” light on the Brewer will flash, the Brewer will stop working.
How To Add Water In The Water Reservoir?
Image content:
1. Fill the Water Reservoir with water.
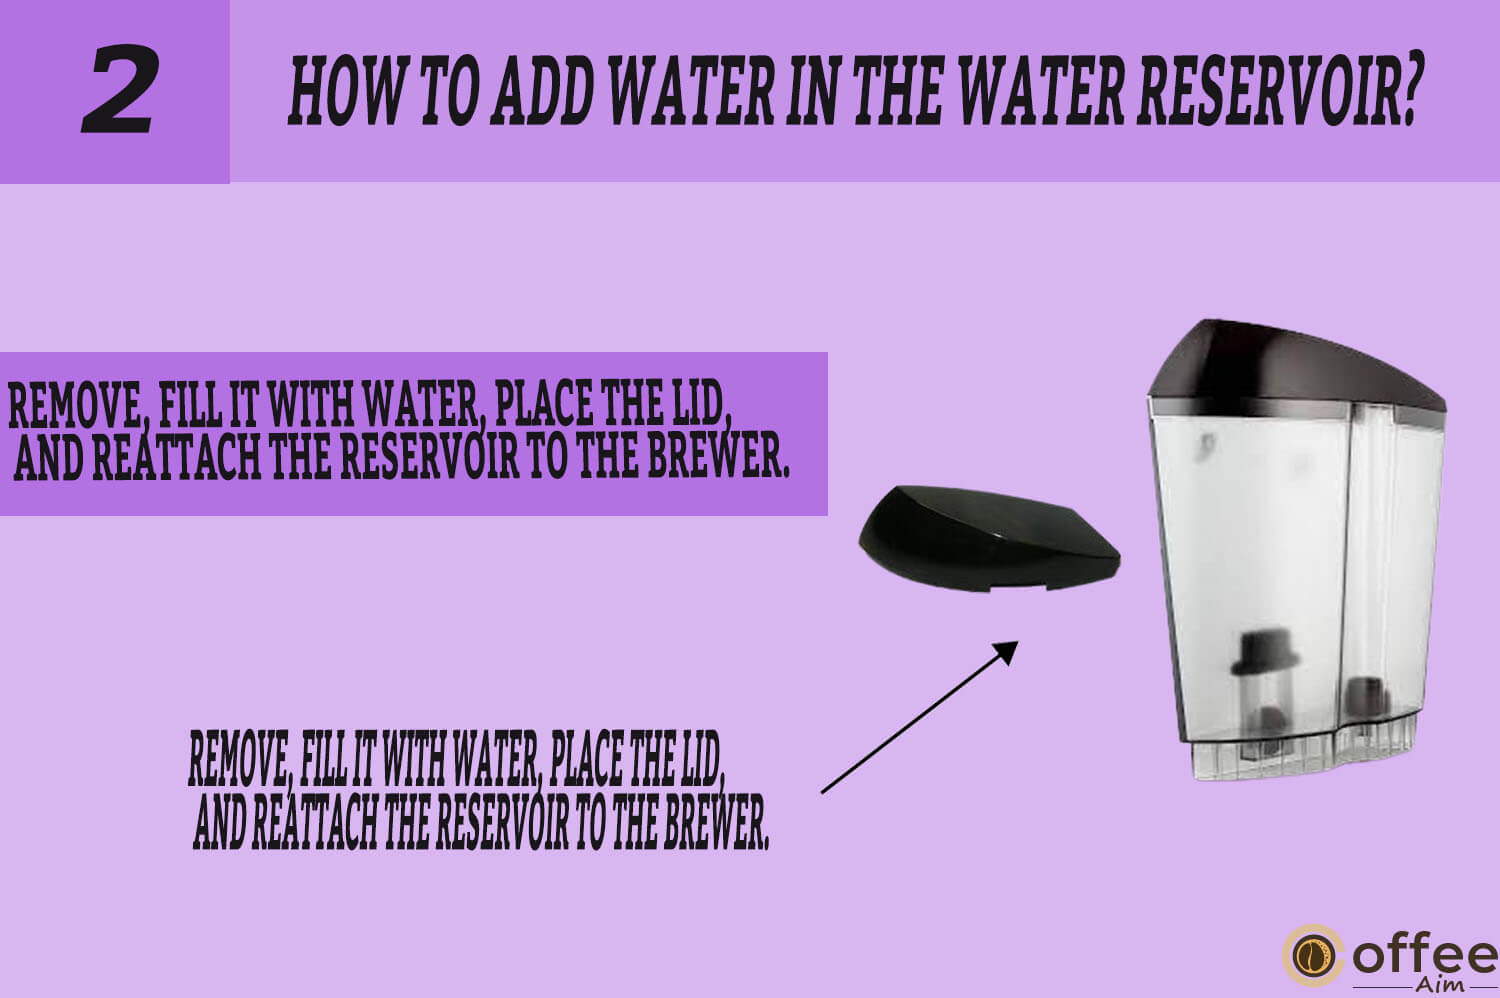
2. Remove, fill it with water, place the lid, and reattach the reservoir to the Brewer.
You can easily add water to your Brewer by following the instructions below.
There are two ways to fill the Water Reservoir.
1. While it is still attached to the Brewer, remove the lid, fill it with water through a jug, and then put it back on.

2. First, remove the lid from the water reservoir before lifting the Water reservoir from the Brewer. Fill up with water. Put the Lid back on and reattach the Water Reservoir to the Brewer. It is important to remember that the Water reservoir should always be kept during the Brewing process.
How To Brew Hot Water In Keurig B-41?
Image Content:
1. Raise and lower the Handle without the K-Cup portion pack.
2. The blue light on the LED panel will blink.
3. Place your cup on the drip tray plate and press the brew button.
Brewer Keurig B-41 has the feature of brewing hot water, which can ease your life. You can use this to boil water and use it in cooking, preparing soups, producing instant hot chocolate, etc. Let’s do it!
You can operate the Brewer by following simple steps;
1. Simply raise and lower the Handle without the K-Cup portion pack. 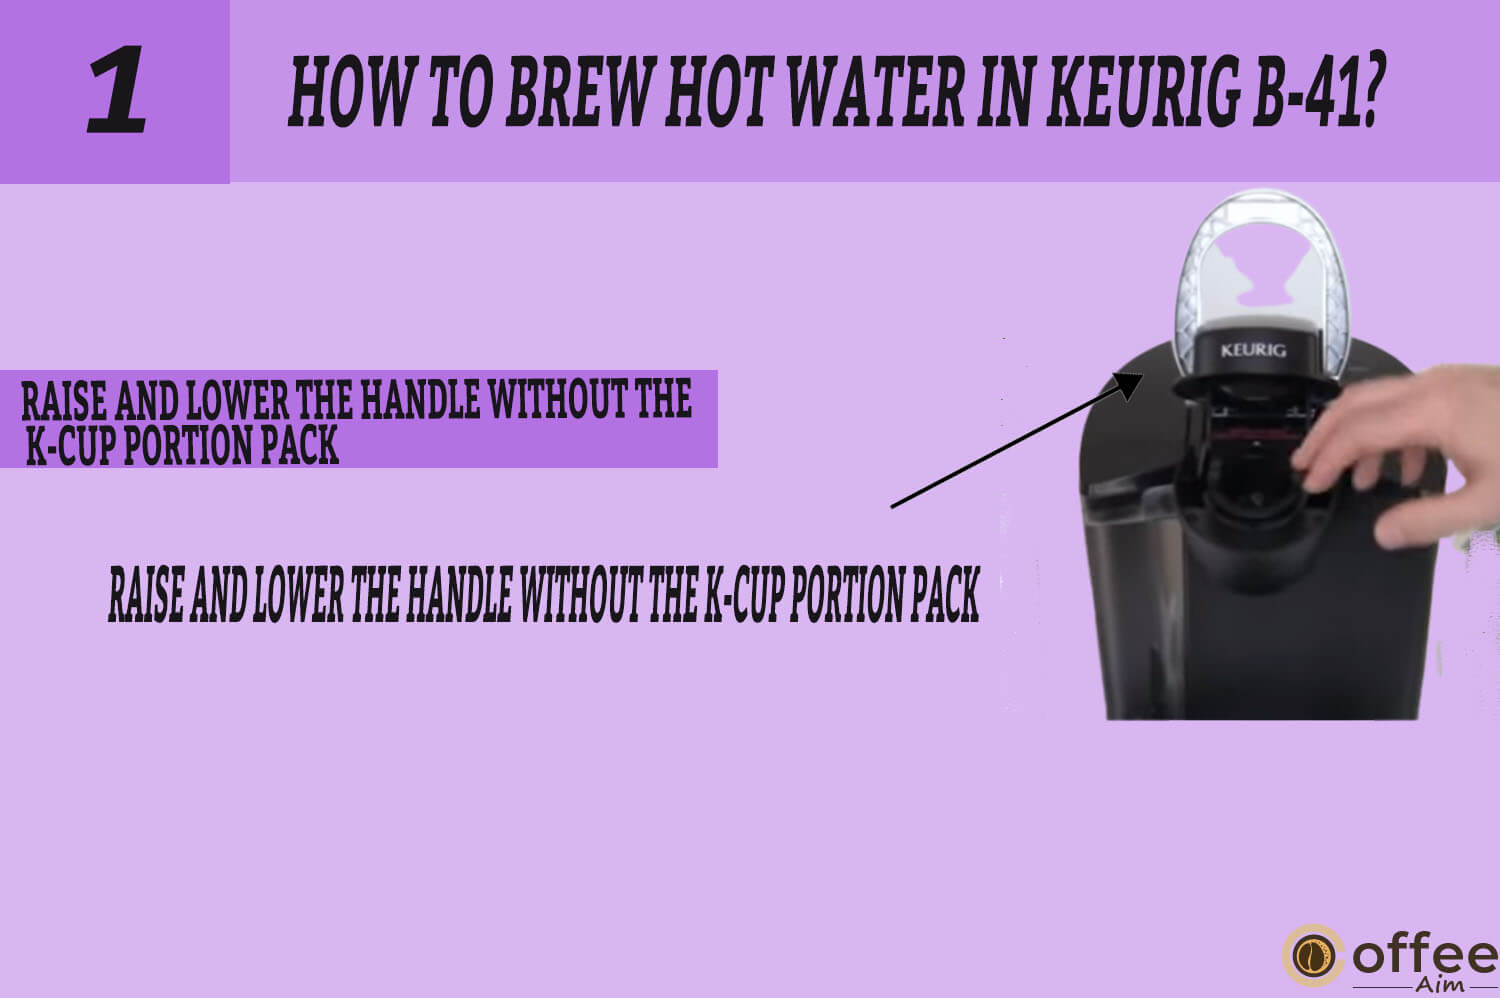
2. The LED Control Center’s blue LEDs behind the brew buttons will flash.

3. Place a mug or cup on the drip tray plate before pressing the brew button.

Note: Run a hot water brew cycle without a K-Cup after brewing a hot cocoa K-Cup to prevent malfunctions.
How To Purge The Brewer?
Image Content
- Rinse, refill the reservoir, reattach the lid, and place.
- Switch on the Brewer, and wait for a red light to go off.
- Place a cup on the drip tray plate.
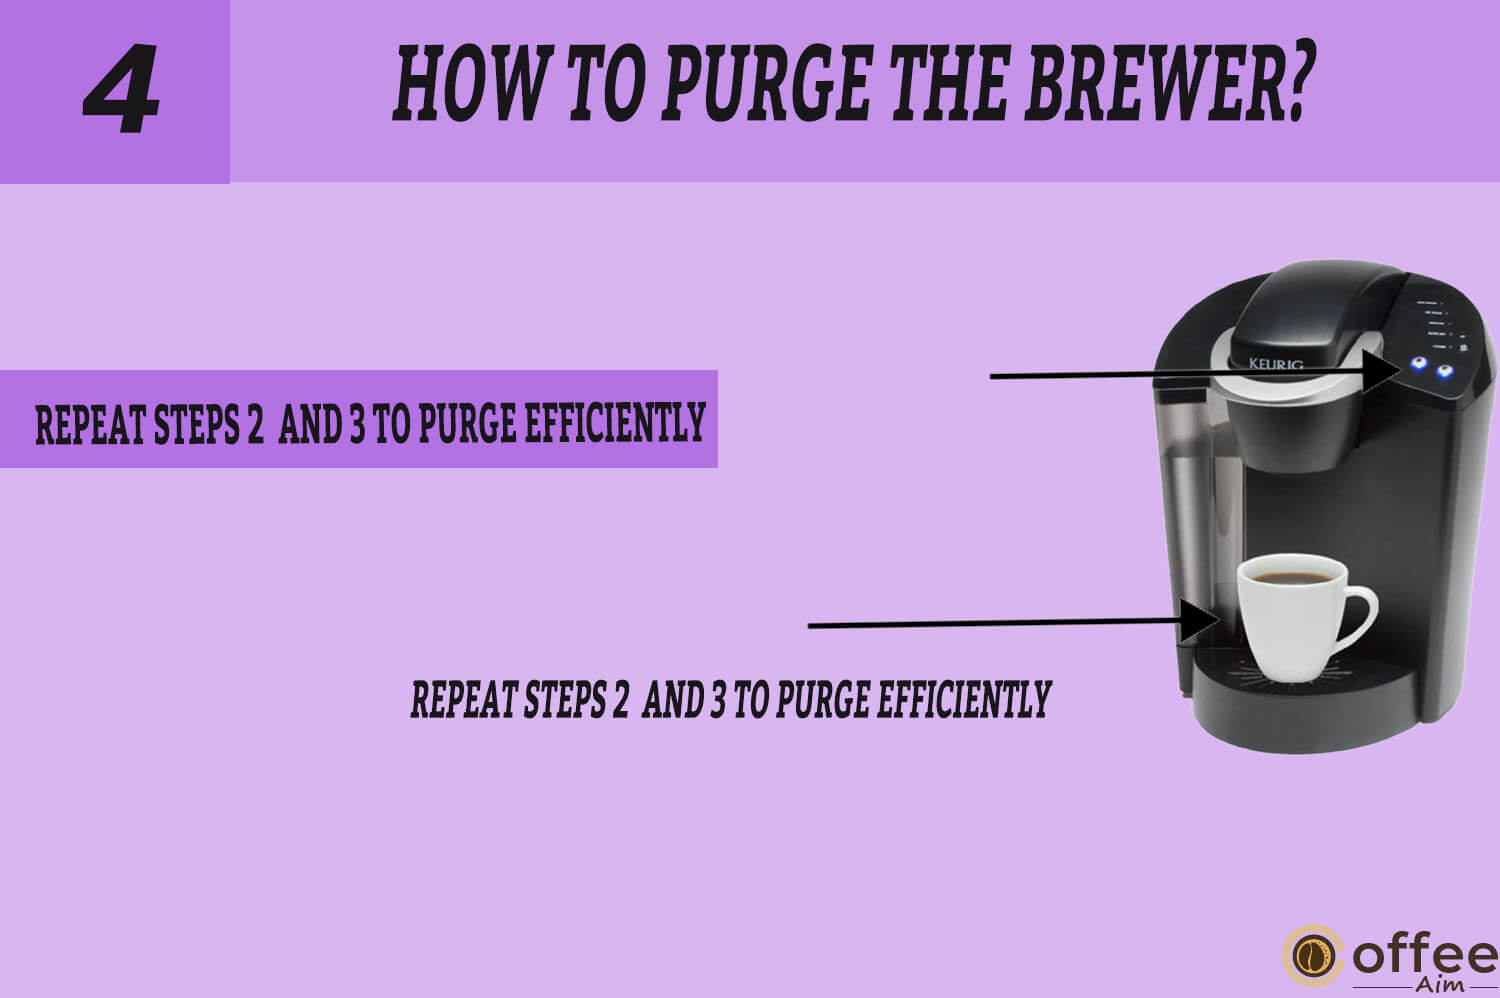
- Repeat steps 2 and 3 to purge efficiently.
If your Brewer has not been used for more than a week, I recommend purging the water from the inner tank.
1. Remove the lid and water reservoir and fill it with fresh water. Now place the Water Reservoir and Lid, making sure they are properly fastened. If there is no water left in the reservoir, simply replenish and proceed as instructed.

2. Make sure to switch on the Brewer. Wait until the red light next to “HEATING” goes off before raising and lowering the handle on the Brewer.

3. The blue lights on the LED Control Center behind the Brew Buttons will flash. Before pressing a brew button, place a cup or mug on the drip tray plate.

4. To purge the water effectively from the inner tank, repeat Steps 2 and 3 two more times.
Control And Indicators
As you might have noticed, your Keurig B-41 is a user-friendly Brewer. To make it more convenient, it comes with a control and Indicators panel with all the features, including an Auto Off timer feature. The idea stems from the concept of conversing energy. All other functions of Keurig B-41 will be operated manually, whereas the Auto Off feature is run automatically after being set up. The method below will help set up the Auto Off timer feature.
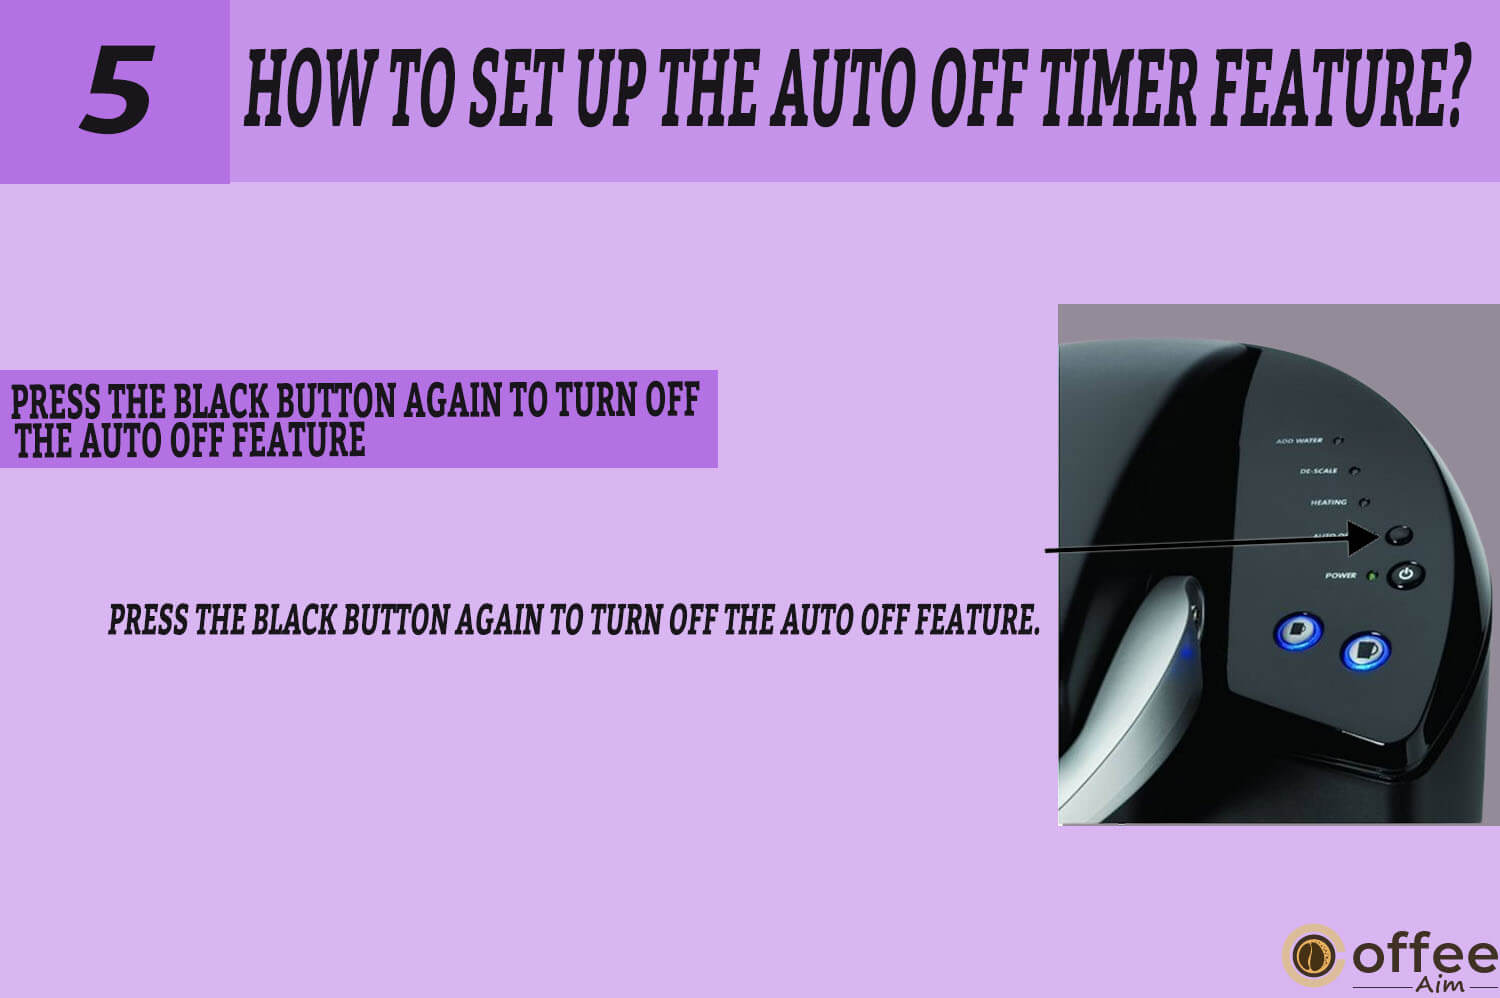
How To Set Up The Auto Off Timer Feature?
Image Content:
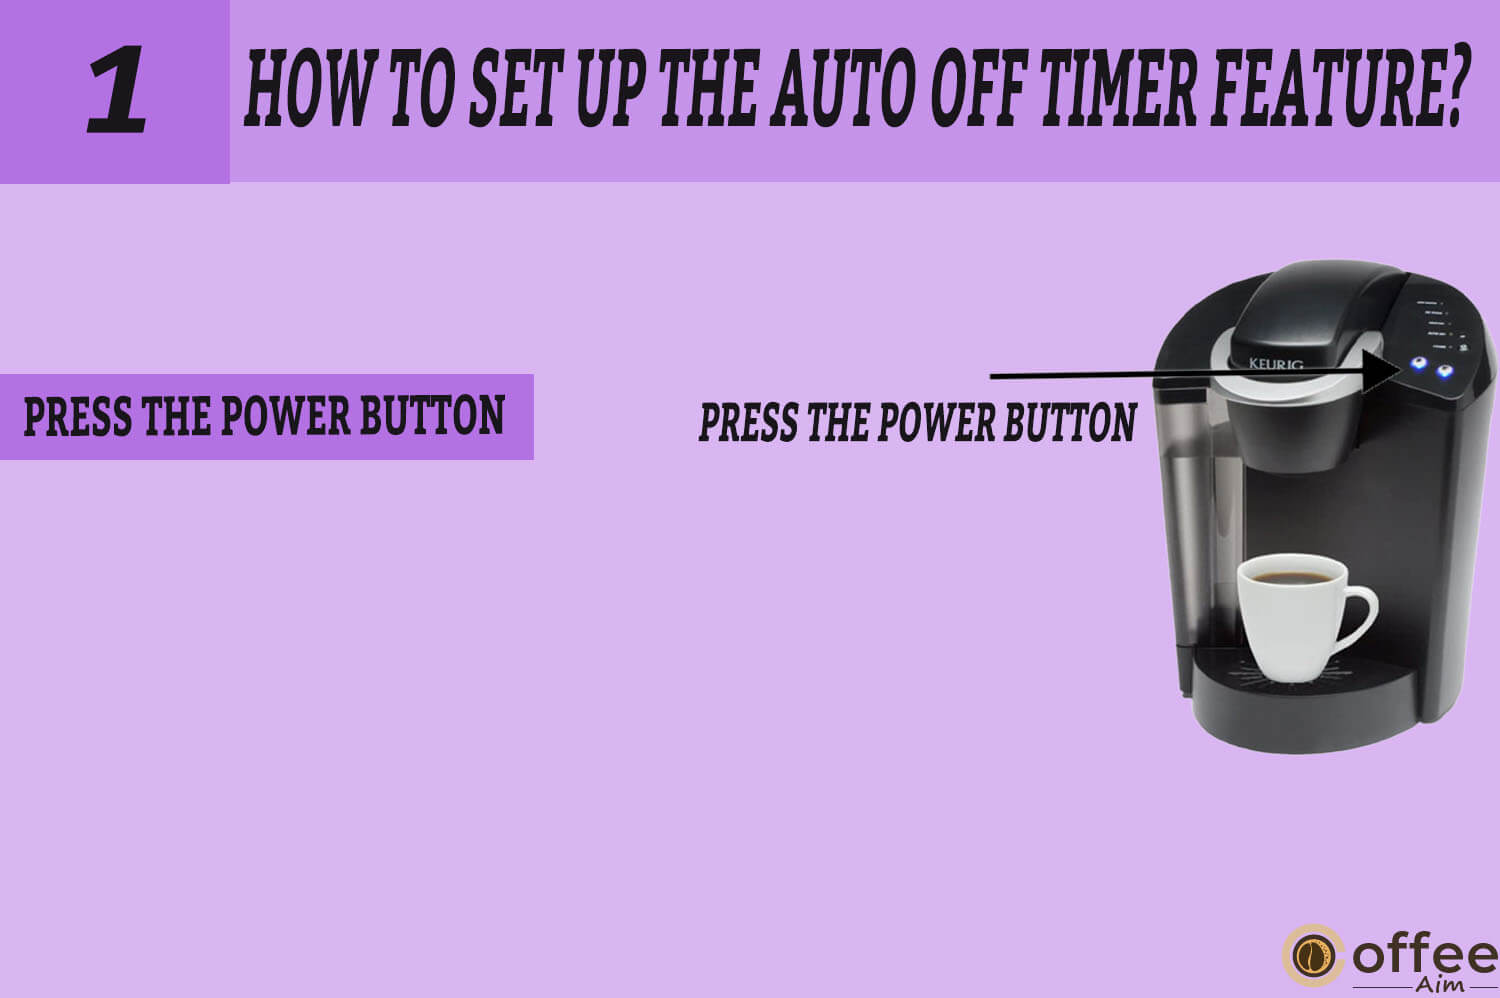
- Press the Power button
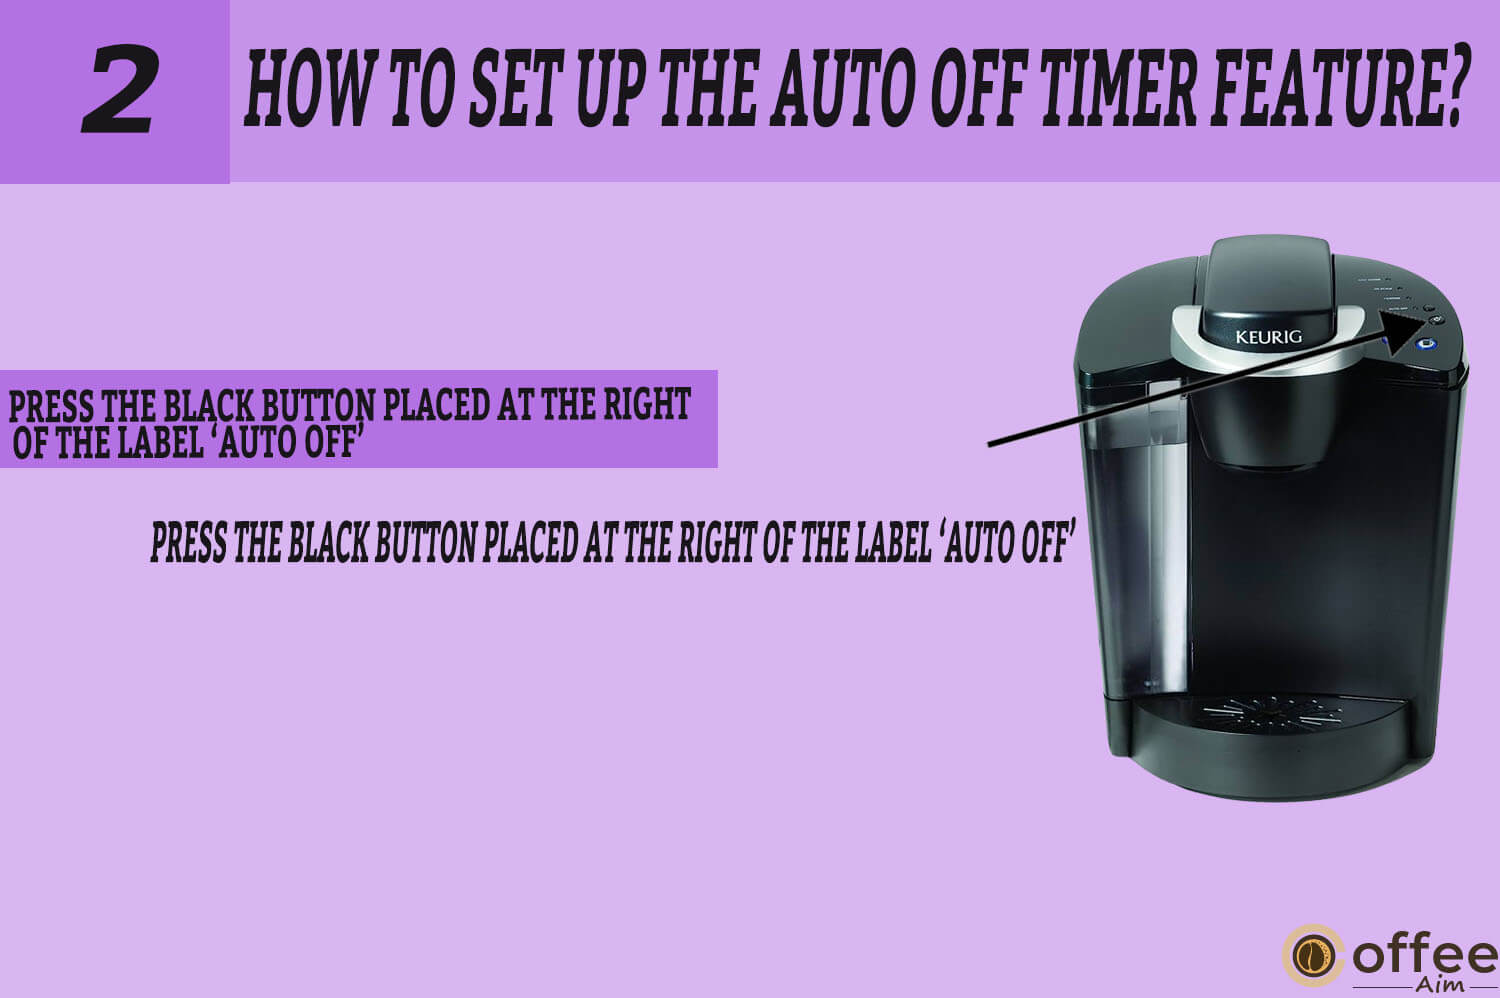
- Press the black button placed at the right of the label ‘Auto Off’
- The Auto Off Green light will turn on
- Auto Off Timer is set, and the brew will automatically turn off after two hours of use.
- Press the black button again to turn off the Auto Off feature.
Set up the Brewer to turn off automatically after two hours of the last brew.
1. To start the Brewer, press the Power Button.
2. On the LED Control Center, press the black button to the right of the text that reads “AUTO OFF.” (Fig. 7)
3. It will turn on the green light next to “AUTO OFF.”

4. Your Brewer will shut down automatically after two hours of your last brew if the Auto off Timer is turned on.

5. Press the Button again to turn off the Auto Off Timer, and the green light next to ‘AUTO OFF’ will turn off.
Cleaning & Maintenance Of Your Keurig B-41
Do you know that if a Brewer is not cleaned regularly, it can lead to a buildup of coffee oils, minerals, and other residues? It can affect the taste and quality of the coffee, make the machine less efficient, and, most importantly, affect your health.
Are you sure the coffee you make in your Keurig B-41 is hygienic? You can only claim that if your Brewer is perfectly cleaned. Also, cleaning will help your Brewer to have a long life. To help you clean your Brewer, I provide complete information that will ensure a hygienic coffee life.
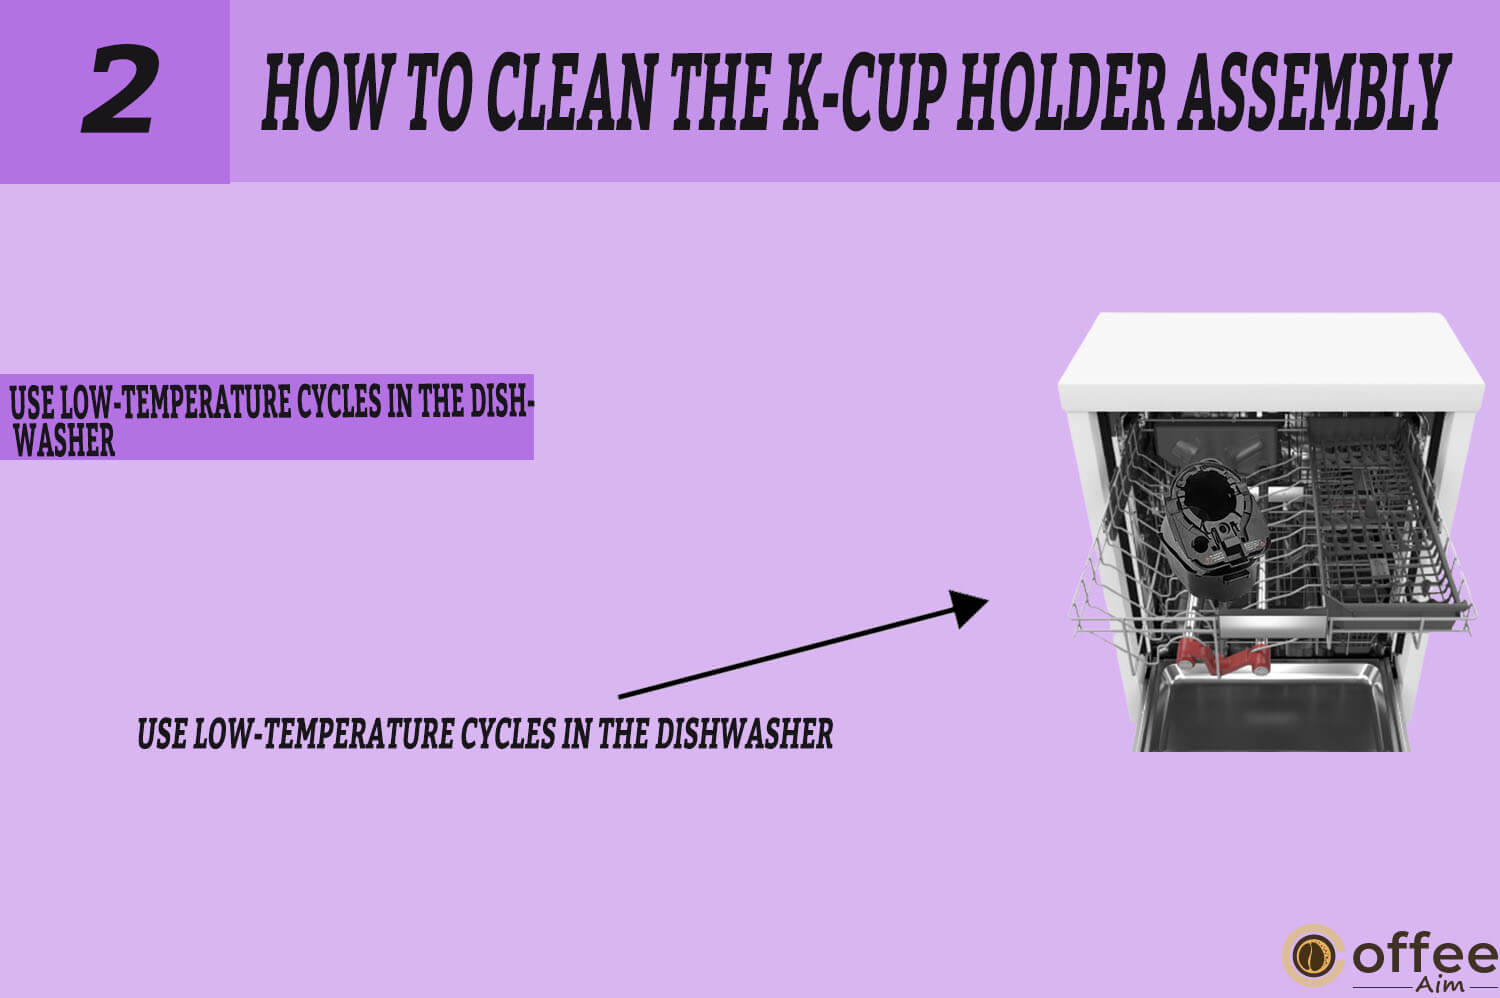
How To Clean The External Parts
Image content:
- Clean the external parts of Keurig B-41
- Regularly clean the Drip tray and Drip tray plate(Dishwasher safe).
It would be better to regularly clean Brewer’s external parts. Let’s start the cleaning of external parts.
1. First, you have to make sure that your Keurig B-41 should never exposed to water. Now all external parts, such as the Housing and other exterior parts, can be cleaned with a soapy, wet, non-abrasive cloth.
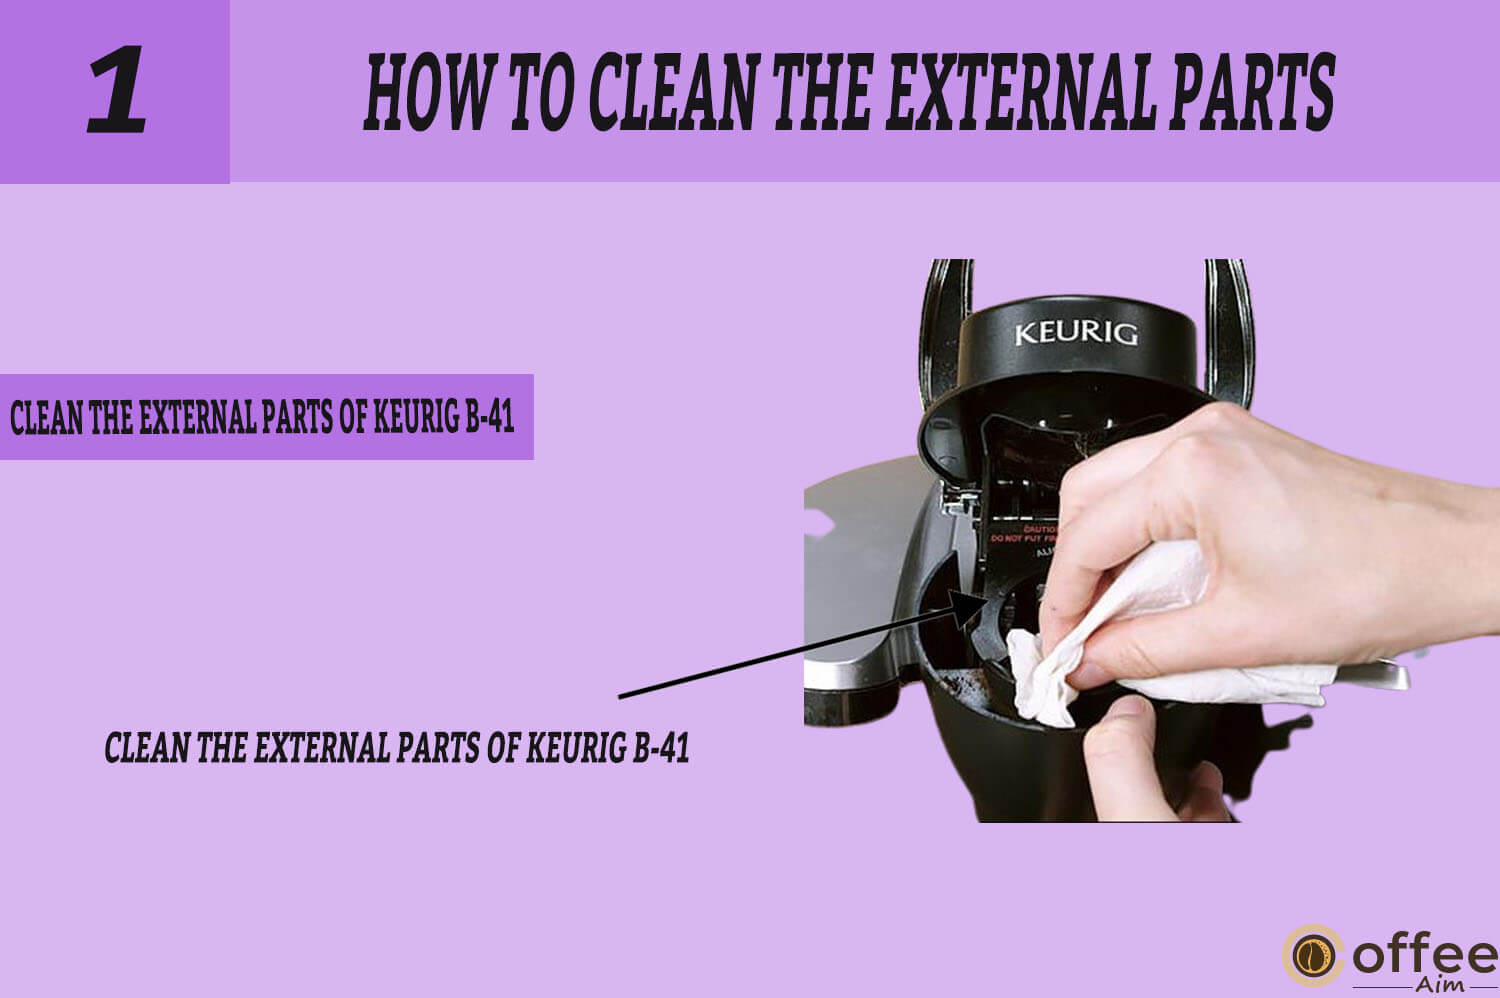
2. The Drip tray has a maximum 8-ounce capacity; otherwise, it will overflow. The drip tray and drip tray plate need to be examined and cleaned up regularly. Slide the drip tray assembly toward you and remove it; keep it level at all times to prevent spills. You can wash the Drip Tray and Drip tray plate in a dishwasher.
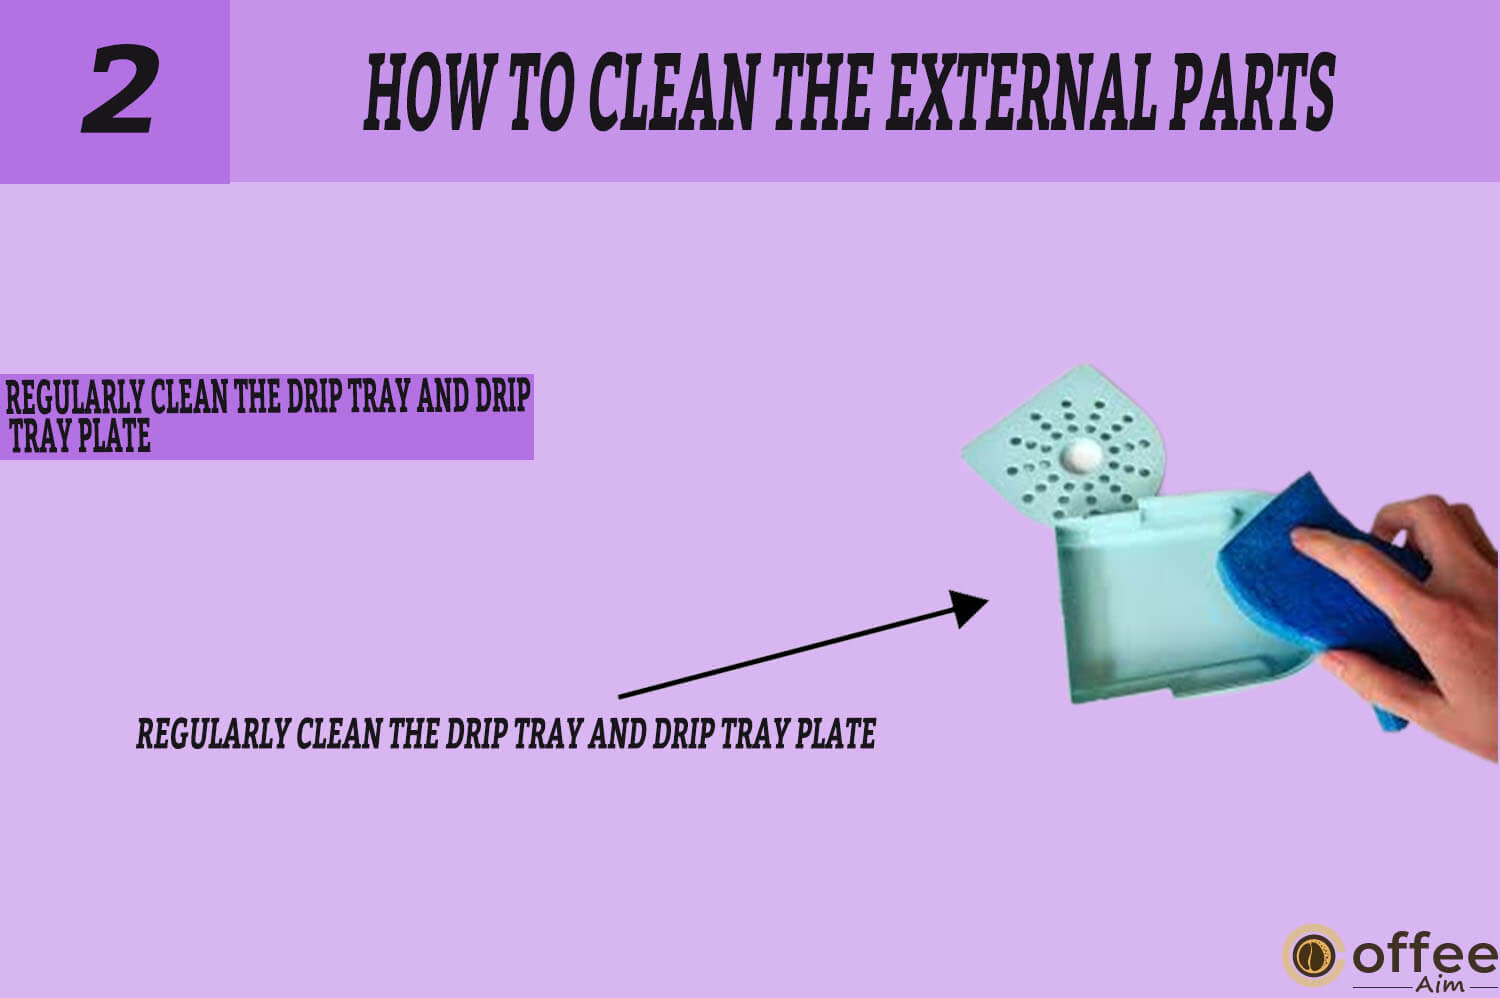
How To Clean The K-Cup Holder Assembly
Now that you have cleaned the outer part, now it is time to clean the K- Cup Holder Assembly. Let’s start the cleaning process.
Cleaning the Parts
Image Content:
- K-Cup Holder Assembly in Dishwasher Safe
- Use low-temperature cycles in the dishwasher
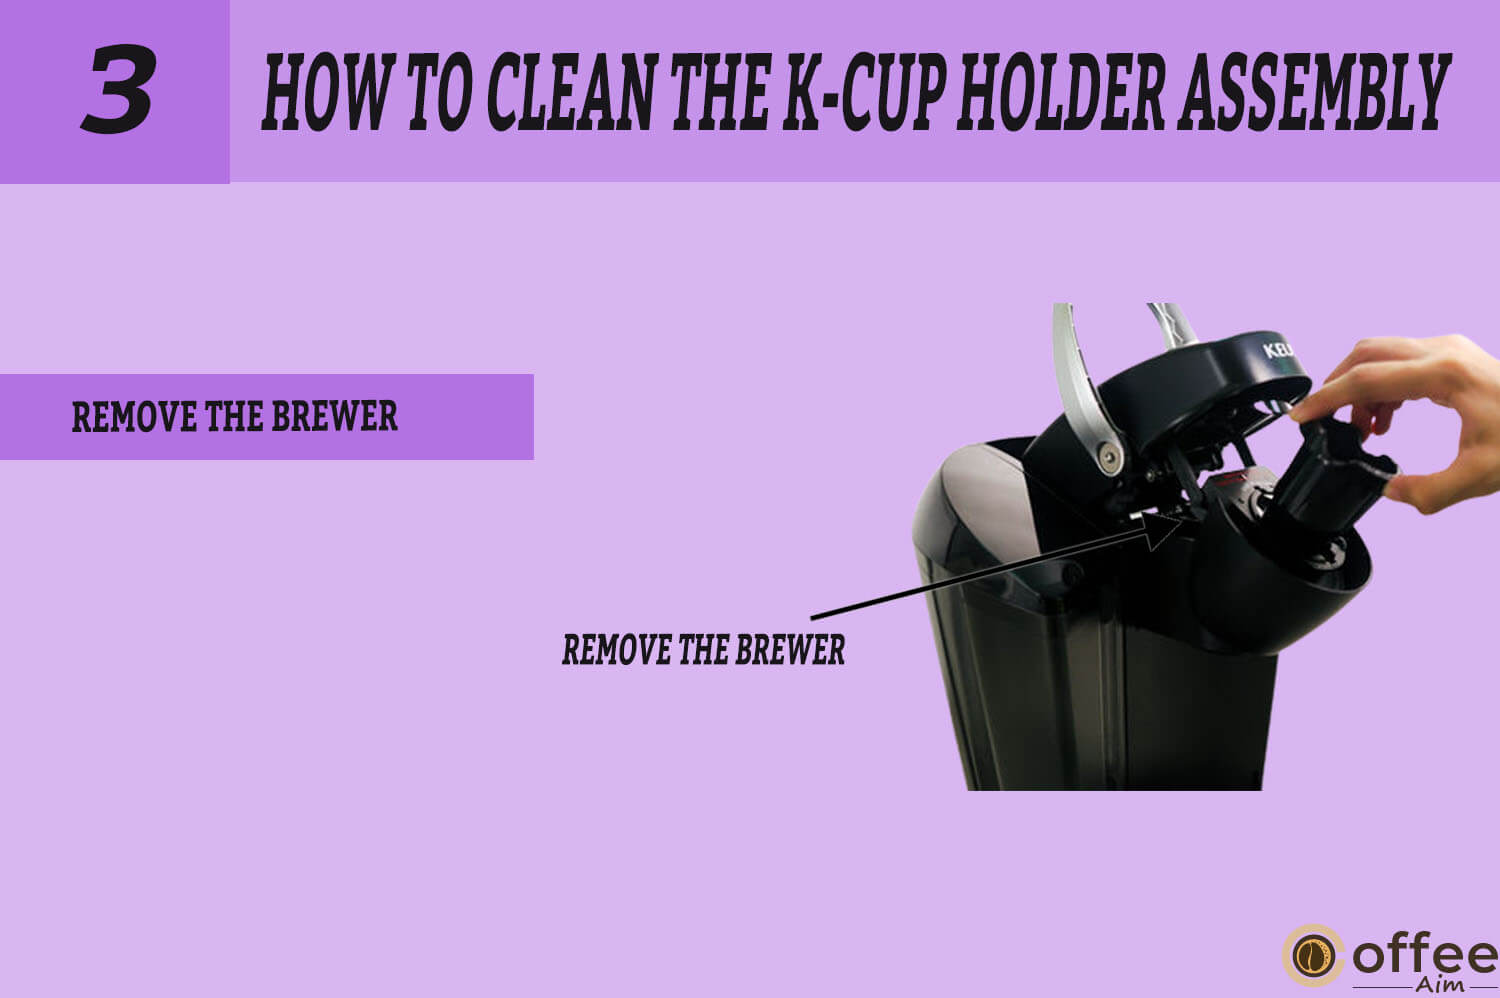
- Remove the Brewer
- Align the K-Cup Holder using the front ribs as a guide and snap it into place from the top after cleaning.
To clean the parts of the K-cup Holder Assembly, follow the guidelines below.
1. You can wash the K-Cup Holder Assembly in the dishwasher.

2. Place it on the top shelf of a dishwasher and use low-temperature cycles in the dishwasher.
3. Now, remove it from the Brewer. To do this, lift the handle to open the cover. Hold the top of the holder with one hand and push up on the bottom with the other hand until it releases., as it is shown in the figure (Fig.8).
4. Once it is cleaned, use the two front ribs as a guide to line up the K-Cup Holder with the opening and snap it into place from the top.

Cleaning the Funnel
Image content:
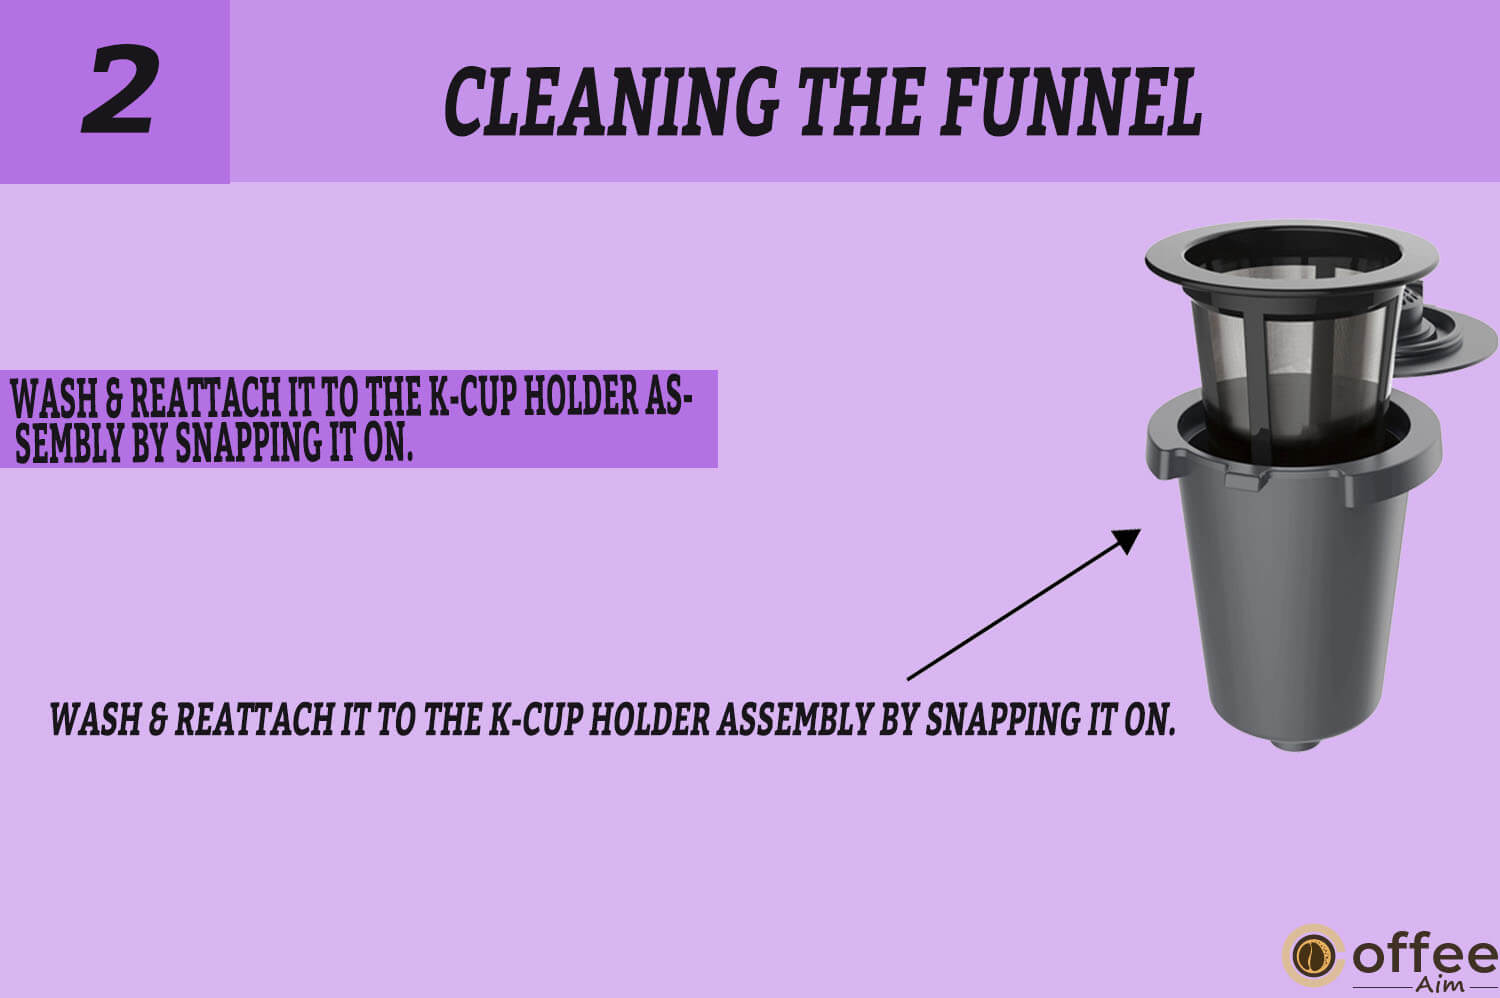
- Remove the Funnel from the K-Cup holder. Pull it until it pops out.
- Wash & reattach it to the K-Cup Holder Assembly by snapping it on.
You also know that the funnel is one of the main parts which is mostly exposed to the residuals of your drinks. To clean the funnel in a perfect manner, follow the given instruction.
1. To remove the Funnel from the K-Cup holder, pull it until it pops out, as shown in the figure( Fig.9)

2. You can also wash the funnel in a dishwasher. Simply reattach it back onto the K-Cup Holder Assembly by snapping it on.
Cleaning The Exit Needle
Image Content:
- The Exit Needle clogs can be cleared using a paper clip or similar object.
- Remove the K-cup holder assembly and detach the funnel
- Insert the paperclip into the needles to unclog it.
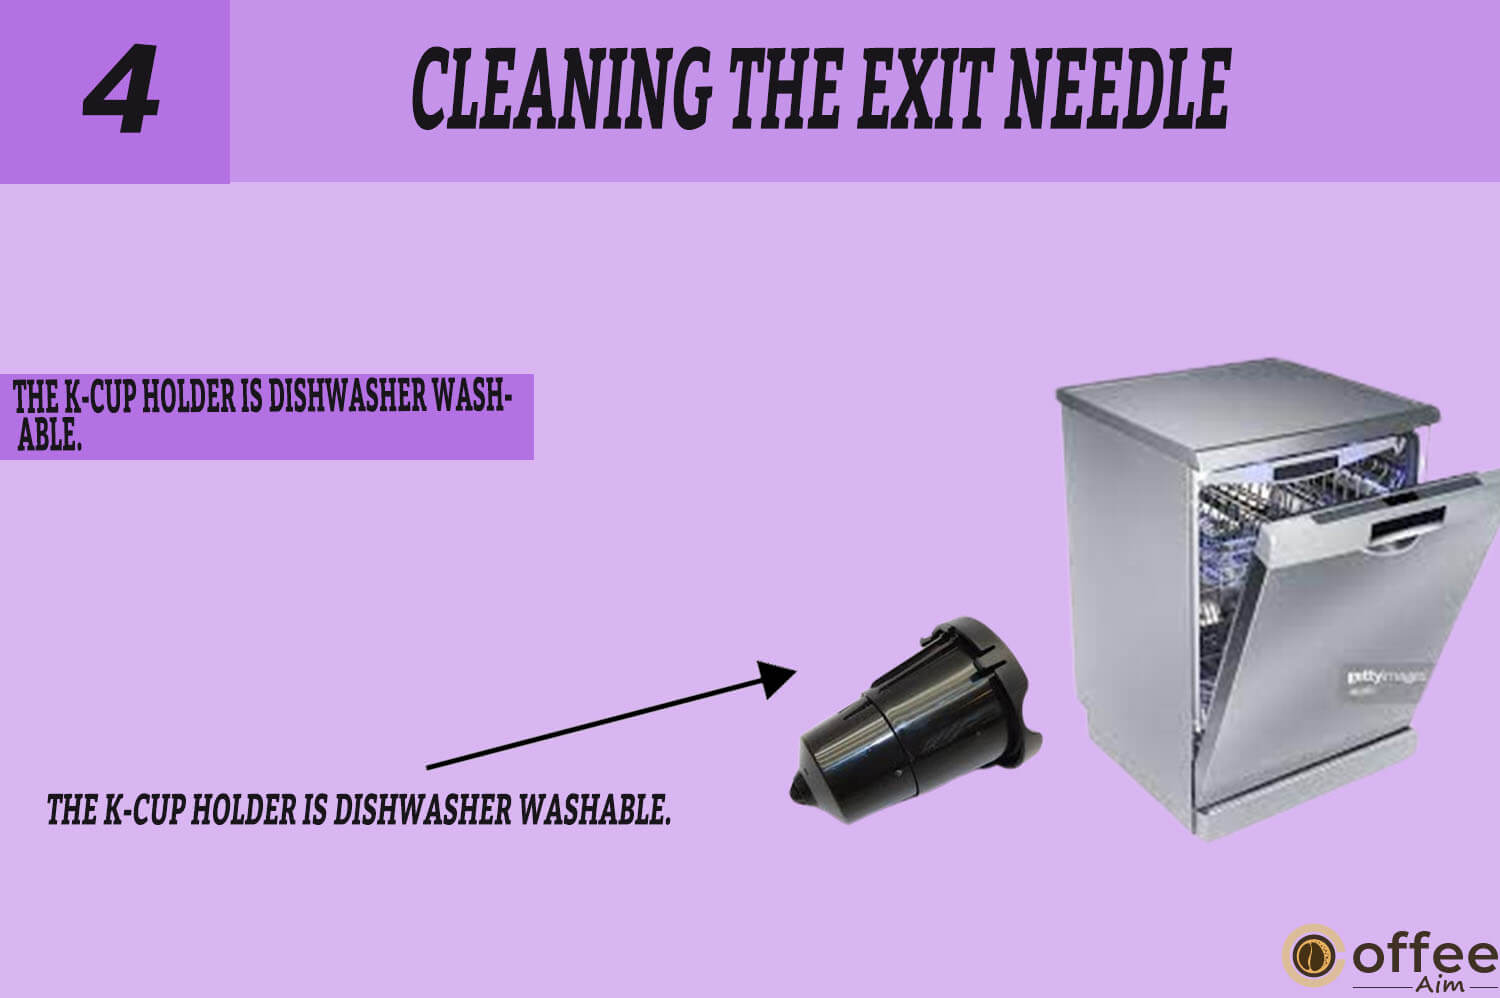
- The k-cup holder is dishwasher washable.
The Brewer needles can become unhygienic for your health if they are not cleaned well. Let’s start cleaning the exit needle.
1. The Exit Needle is at the bottom of the K-Cup Holder Assembly. Coffee grinds can cause clogs but can be cleared using a paper clip or other similar things.

2. Now remove the K-cup holder assembly and detach the funnel.

3. To unclog and remove the obstruction, insert the paper clip into the needle (as seen in fig. 9)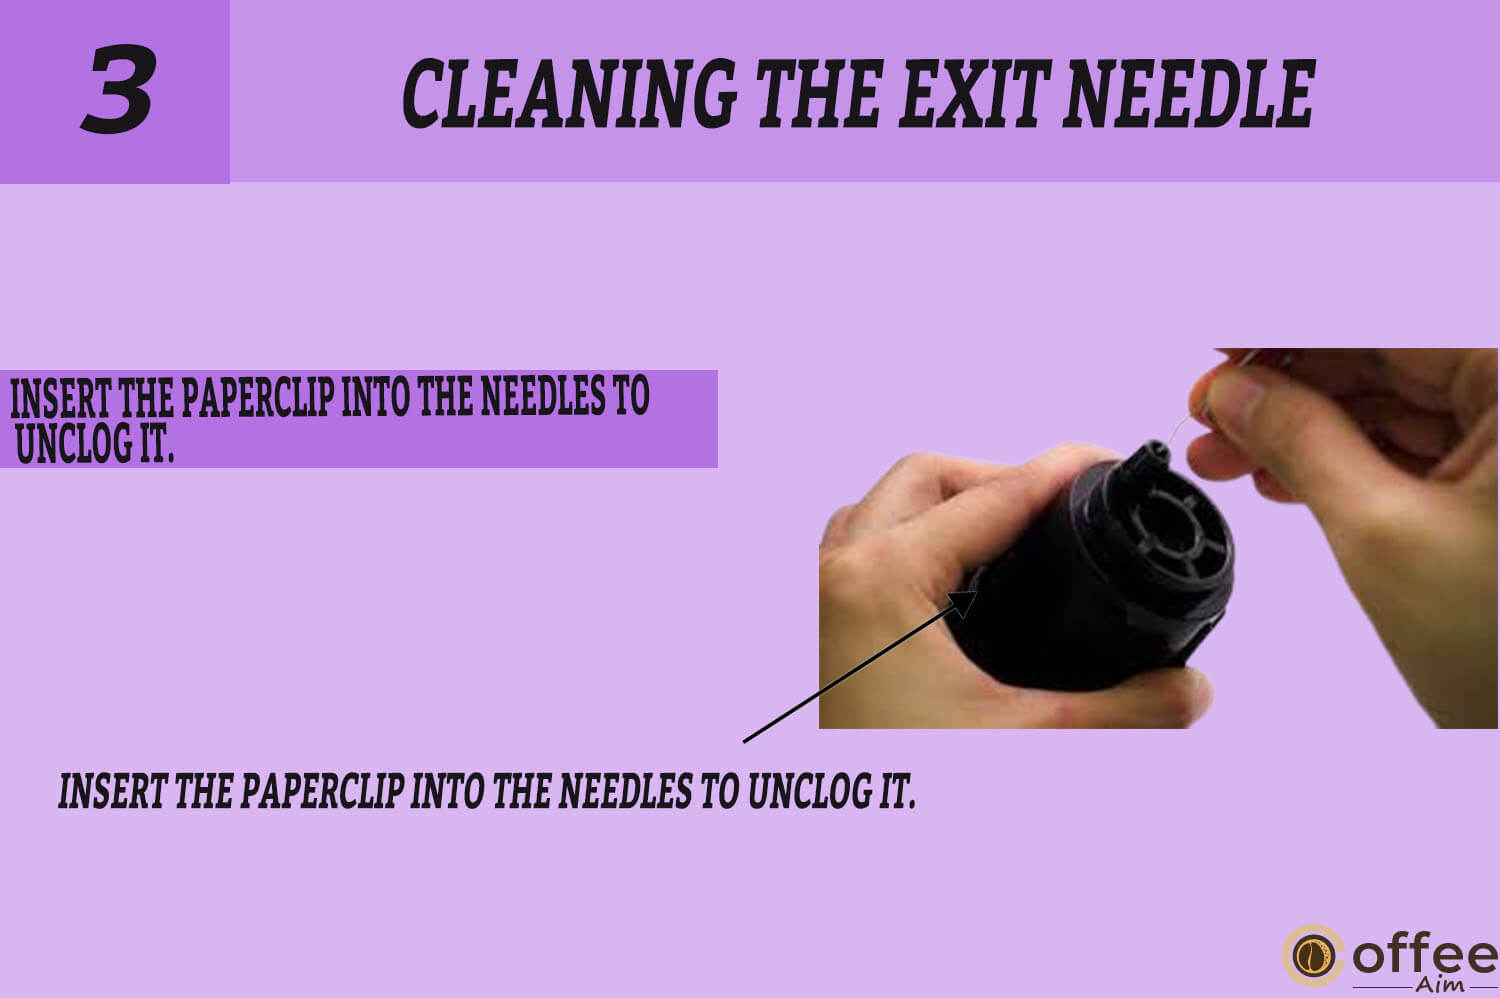
4. The K- Cup holder can be washed in the dishwasher.
Note: Be very cautious while cleaning because sharp and pointed needles are in the bottom of the K-Cup Holder, and above the K-Cup Holder, pierce the K Cup. Put your fingers away from the K-Cup Assembly Housing to reduce the chance of harm.
How To Clean The Water Reservoir & Water Reservoir Lid
Image Content:
- The Water Reservoir Lid and Water Reservoir are not dishwasher safe.
- Rinse the water reservoir well.
- Don’t use a cloth to dry the water reservoir’s outer surface
If you wonder whether the water reservoir and lid are safe for dishwashers. Stop thinking! The answers to your questions are given below in the instructions.
1. The Water Reservoir Lid and Water Reservoir are not dishwasher safe, so you should never put them in a dishwasher. Clean them with a damp and moist cloth and rinse them properly.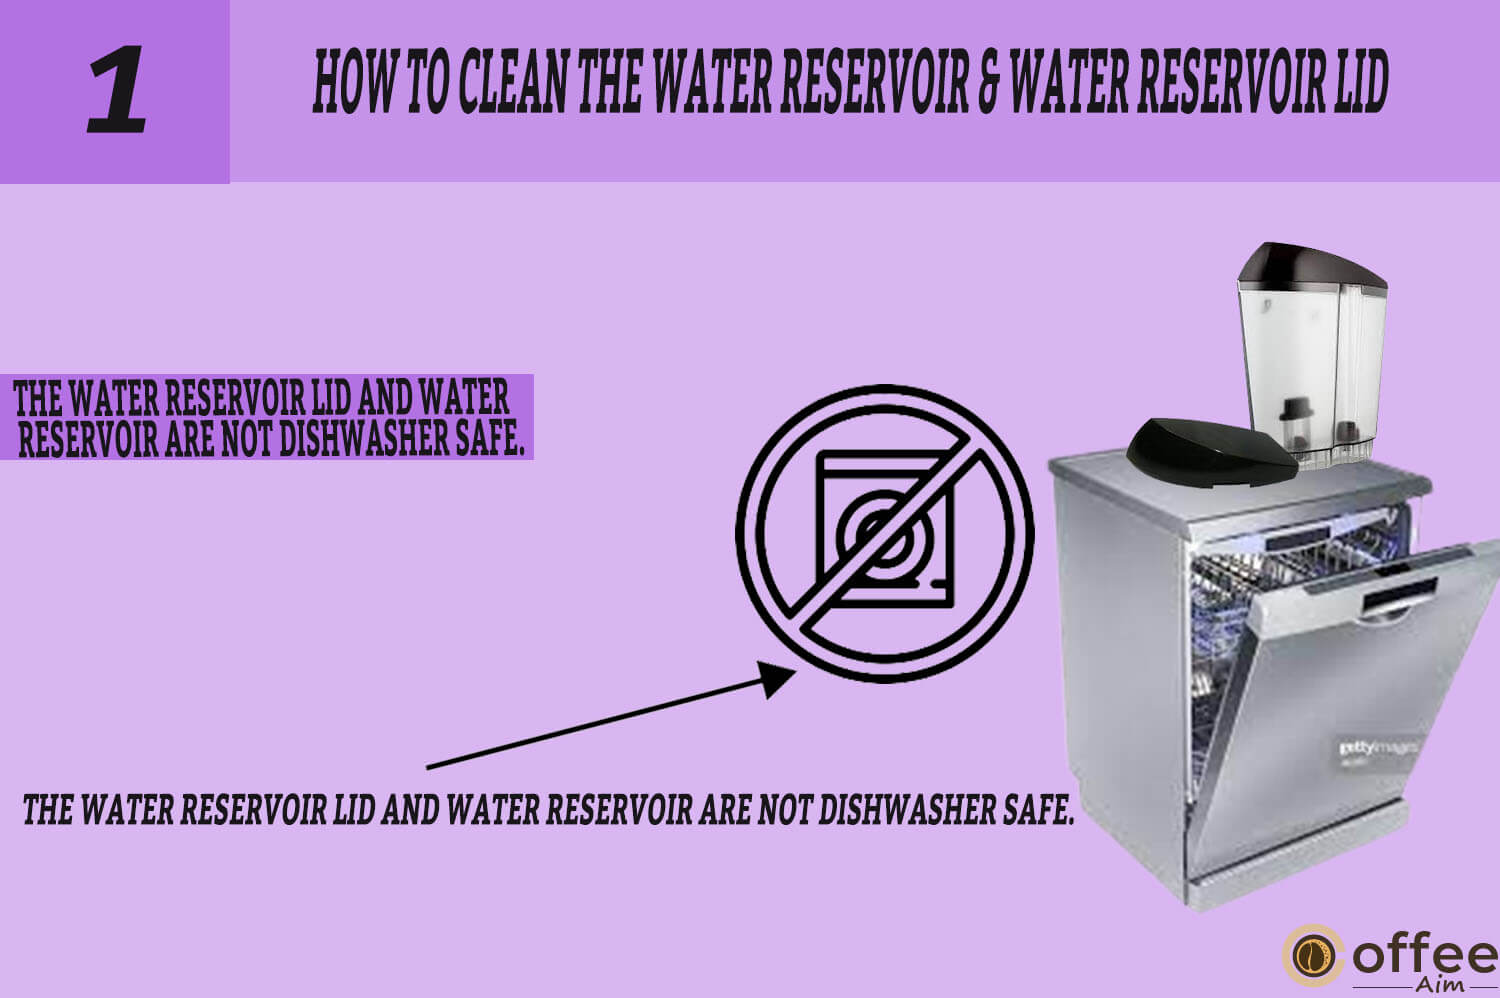
2. Ensure the water reservoir is wholly rinsed to prevent cleansers or cleaning solutions from contaminating the water supply in the Brewer
3. Avoid using a cloth to dry the outer surface of the water reservoir since lint may still be present.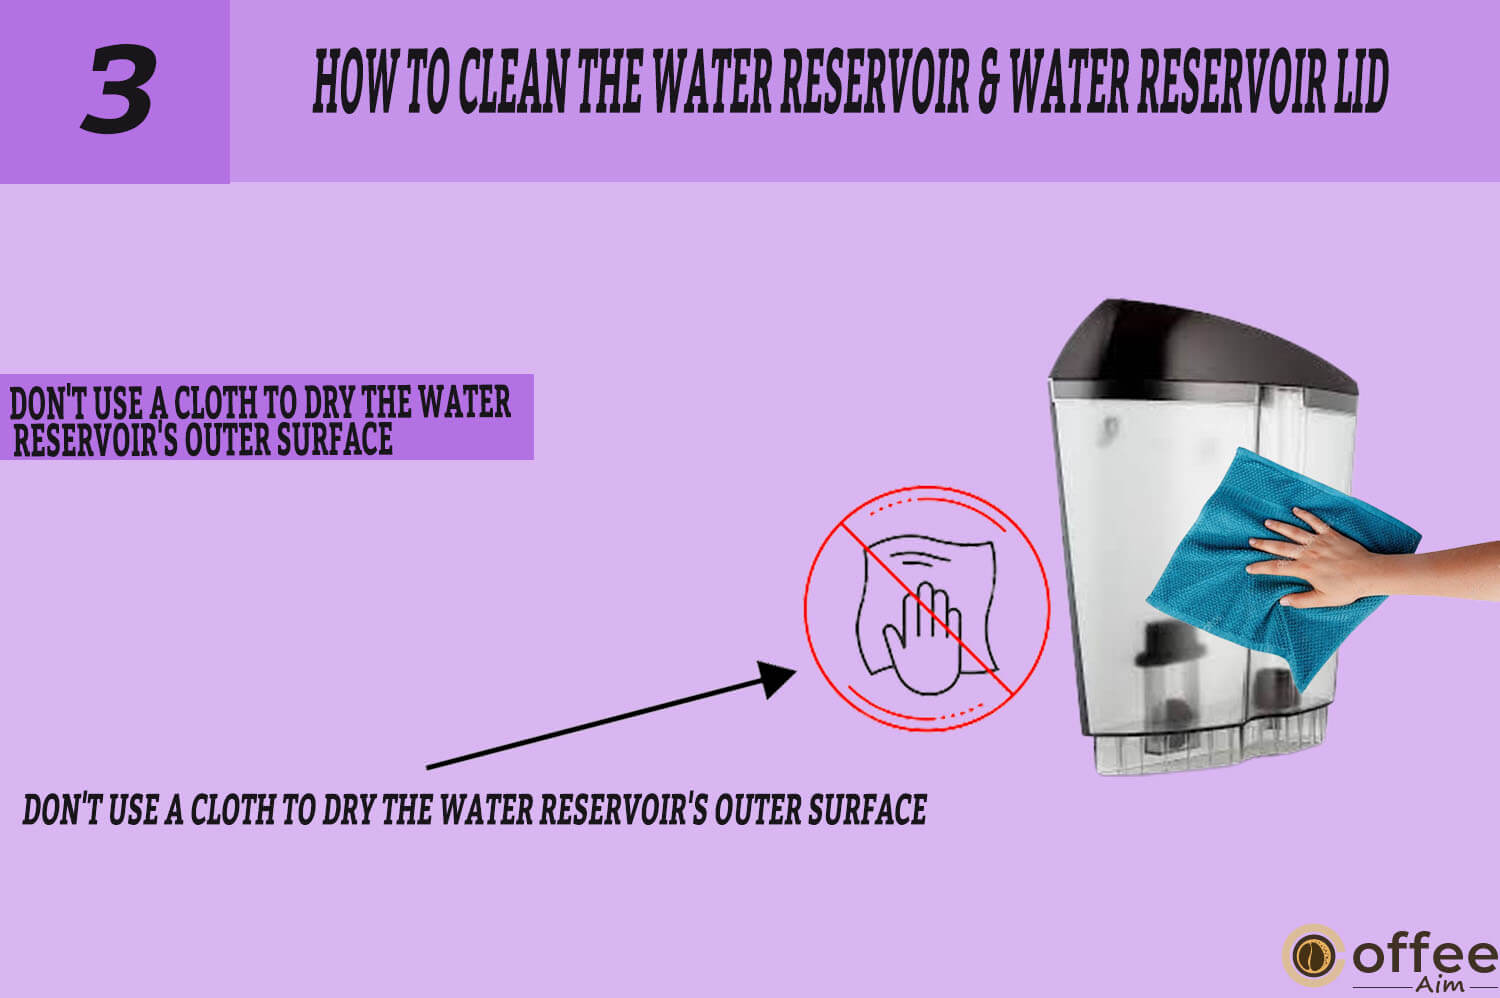
Descale Your Brewer
Your concern for your health made you clean your Brewer; now it’s time to Descale, as this step is even more critical for your health. Why? Because every type of water, whether filtered or unfiltered, includes minerals like calcium and magnesium, which travel through your coffee maker and build a gunk on the heating element. This mineral accumulation can be removed by descaling a coffee machine.
Why Is It Important To Descale Your Brewer?
Image content:
1. When descaling is required, the “DESCALE” indicator light will turn on and appear red.
The mineral composition of water varies from one place to another. Calcium deposits or scales may be produced in your Brewer, depending on the mineral concentration of the water. Although the scale is non-toxic, it can damage Brewer’s performance if not attended.
Descaling your Brewer helps keep the contaminated minerals and other elements away from your Brewer. The Brewer should be descaled every three to six months to guarantee optimum performance.
If calcium deposits start forming more quickly, they must be descaled more often. This Brewer can identify when scale buildup is affecting its performance. The red light next to “DESCALE” will turn on when the descaling becomes necessary, as shown in figure (fig. 10).

Follow the below instructions to Descale your Brewer completely.
Note: You should know that Brewer will still work, even though the word “DE-SCALE” is displayed. The Brewer can become damaged if you wait too long to descale once it is displayed. When this happens, the word “DE-SCALE” will start to flicker to warn you that the Brewer could sustain harm if you don’t descale right away.
Descaling Process
Is this your first time descaling, or have you forgotten the descaling instruction in the middle of the process? If YES, you must follow the step guide to describe yourself adequately. Let’s start this.
Prepare
Image content:
- Requirements: 8 oz Viniger, a little mug, and an empty sink.
- Empty the water reservoir
- Disable the Auto Off mode.
Make sure that you have all the things you need to start the descaling process. Now start the process as the instructions are given below.
1. Make sure you have at least 48 ounces of pure white vinegar available with you. You’ll also need a little mug (do not use a paper cup) and an empty sink.
2. First, empty the Water from Water Reservoir
3. Turn off the Auto Off feature
Fill And Clean
Image content:
- Add vinegar to the water reservoir.
- Place the cup on the drip tray plate and press the small bug button.
- Repeat this process three times.
- Don’t turn it on for 4 hours.
Now you are going to Fill the water reservoir with vinegar to clean it. Read the instruction below to learn about this process
1. First, add Vinegar to the Water Reservoir
Note: It must be kept in mind that the K-Cup should not be used for this purpose.
2. Place a big cup on the Drip Tray Plate and start a water brew cycle by pressing the Small Bug Button, and then pour the mug’s contents into the sink.
3. Repeat this process a total of three times.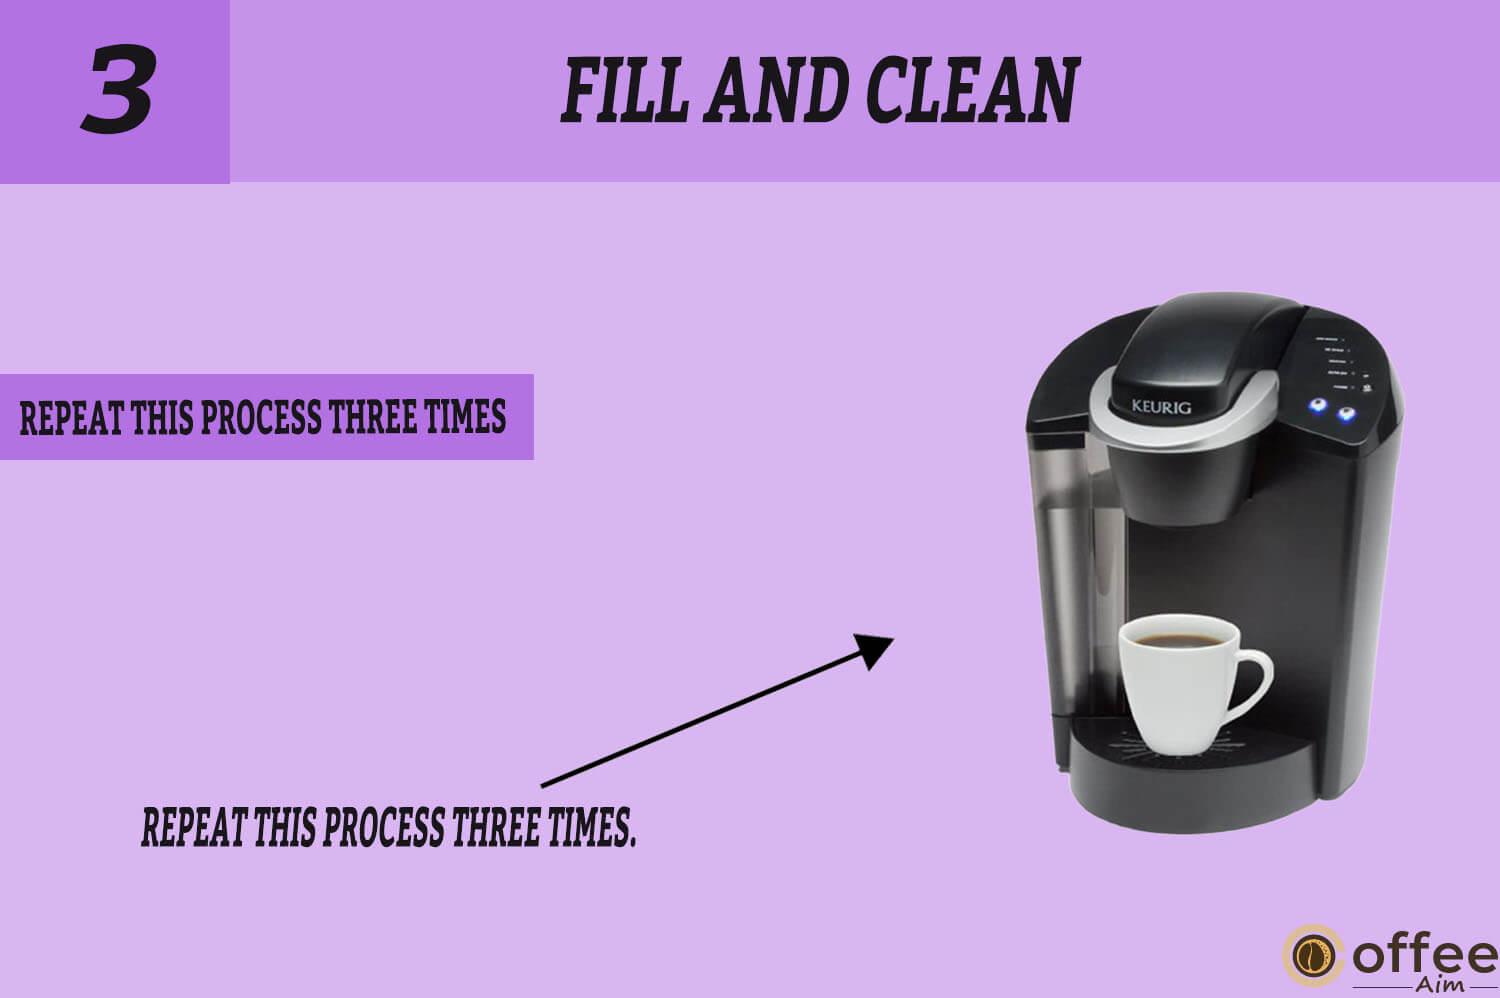
4. Leave the Brewer to stand without turning it off for at least 4 hours.
Rinse
Now, after the filling and cleaning process; the rinsing process will start. You need to follow the instructions to rinse it properly.
Image content:
- Add fresh water to the water reservoir
- Place a mug on the drip tray plate, start a new brew cycle without K-cup, and Empty the mug.
- Brew until the water reservoir is empty
- Run another cycle if residue is found
- Repeat the descaling technique if the red ‘DESCALE’ light stays lit after the procedure.
1. Fill the Water Reservoir with fresh water
2. Put a small mug on the drip tray plate and start a water brew cycle without a K-Cup. Empty the contents of the small mug into the sink.
3. Continue brewing until the water reservoir is empty.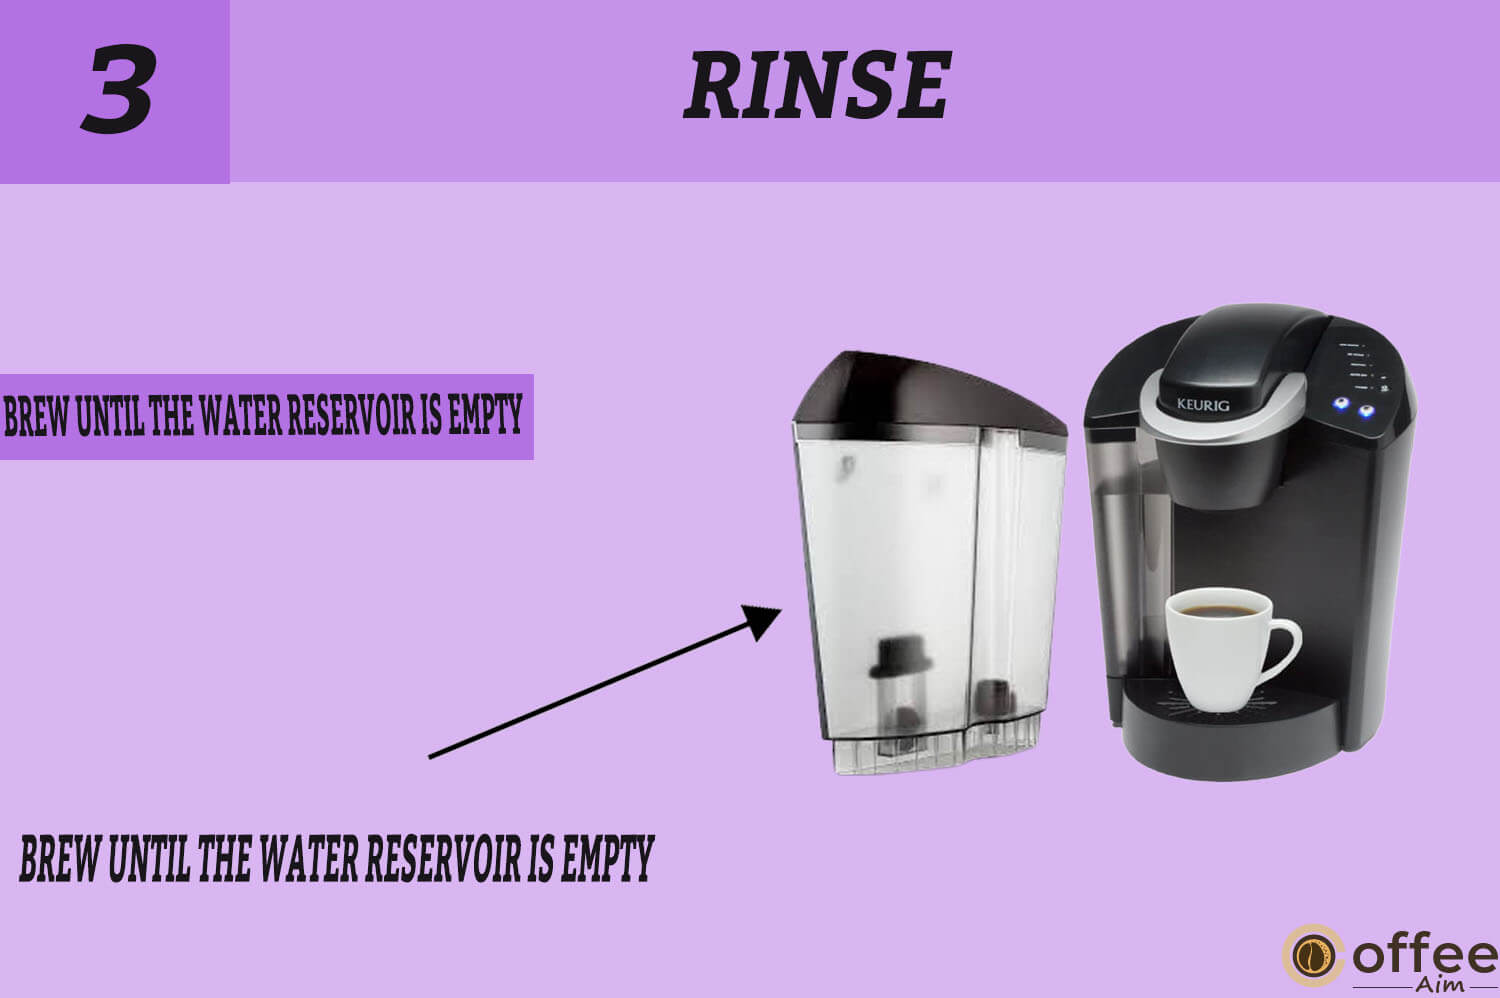
4. You must run extra water brew cycles if you detect any residual flavor.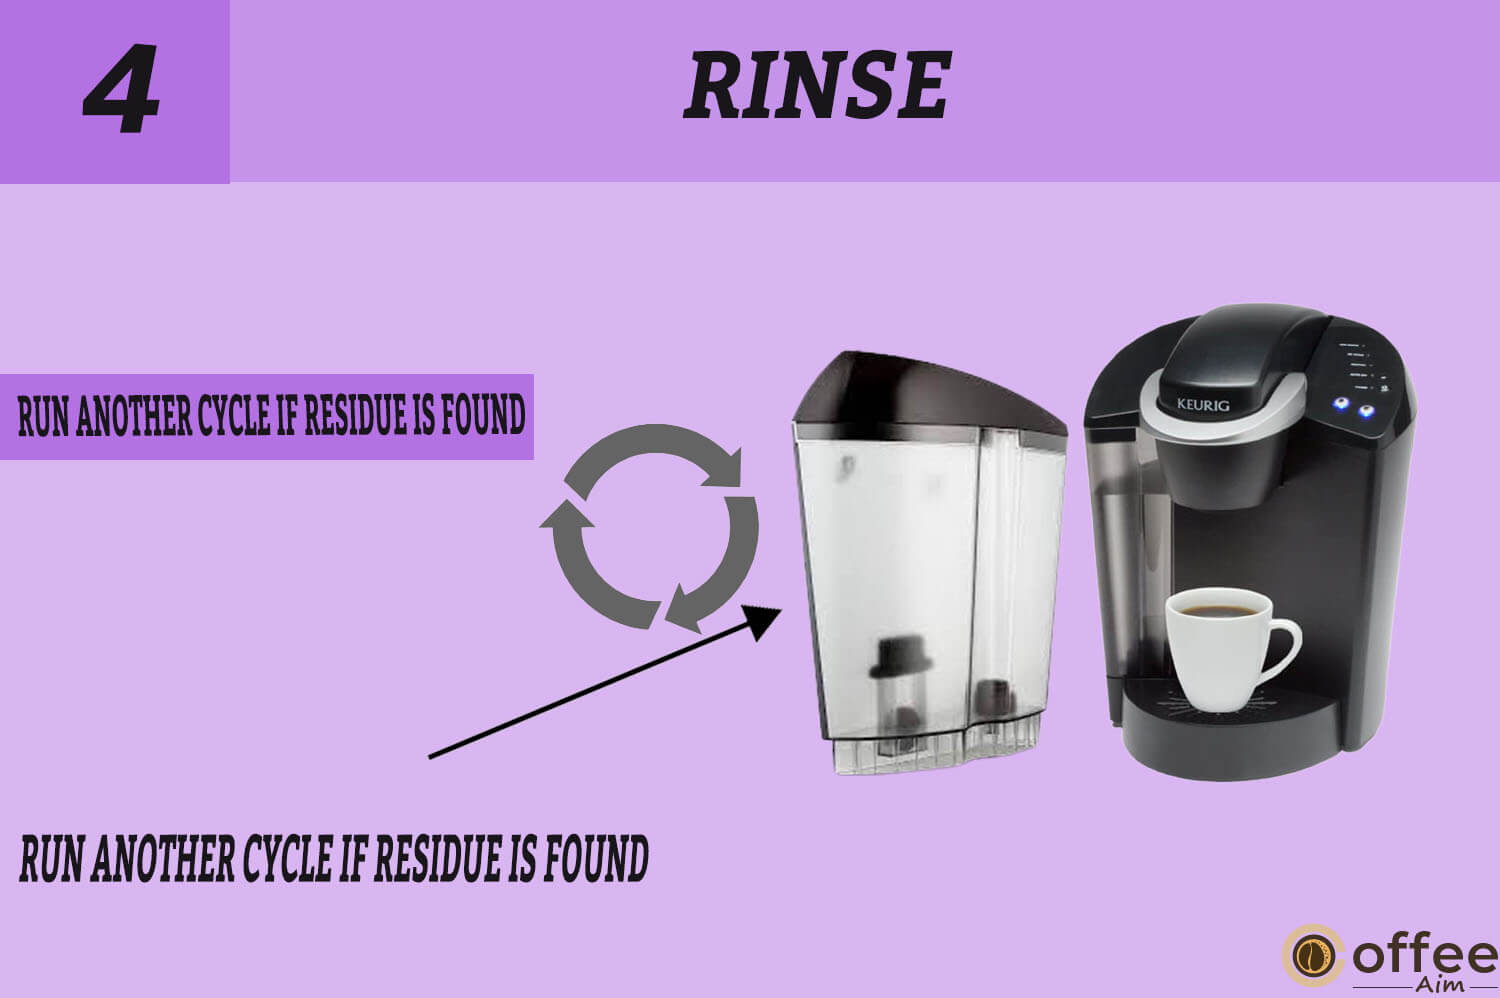
5. Repeat the de-scaling technique described above if the red ‘DESCALE’ light on the LED Control Center remains lit after finishing the procedure.
How To Store Your Keurig B-41?
If you are taking an extended vacation and concerned about your Keurig B-41, storing it rather than ruining it in the dust is better. To store it properly, you must take all these mandatory steps
- Before storage, you must empty the water reservoir and ensure your Brewer is in a secure and dry atmosphere.
- Please make sure to keep your Brewer in its upright position to prevent water leakage from the inner tank.
- Make sure to place your Brewer at room temperature. If you place it at a cold temperature, the residual water in the reservoirs may freeze.
- Turn off your Brewer, unhook it from the wall, and empty the water reservoir before moving it to a new place.
- Please wait at least two hours for your Brewer to get up to room temperature if it has been exposed to below-freezing temperature
- If you use your Brewer after a long time, I advise you to run three cleaning brews without a K-Cup and rinse it with fresh water when ready to use them after storing them.
Troubleshooting
It’s nighttime, and your taste buds start craving coffee; you turn on the Brewer, but there is a glitch. There are rare chances that you will find a professional who can repair this glitch. So are you going to miss your dose of night Coffee? Not because you can repair it by yourself.
So it’s beneficial to understand how to handle frequent issues rather than becoming dependent on professionals even for minor glitches. The following frequent issues are usually the root cause of your coffee maker’s malfunction. The following Table shows the possible troubleshooting problems and their solutions.
| Problems | Solutions |
| If Brewer does nothave power. | Connect Brewer to a separate outlet. Make sure that the plug is inserted firmly. Use an alternative outlet. If required, reset the circuit breaker in your house. Verify to see if the power button has been activated and the power light is on. |
| If Brewer is notbrewing when used forthe first time. | Before making the first brew, the Brewer must be primed by filling the internal hot water tank. On the LED Control Center, the red light next to “DESCALE” will flash.Allow the Brewer to get up to room temperature for at least two hours before turning it on if it is cold or frozen. |
| If Brewer is not brewing. | Ensure that the K-Cup portion pack is securely inserted into the K-Cup Holder and that the blue lights beneath the brew buttons on the LED Control Center are blinking.If the blue light next to the phrase “ADD WATER” on the LED Control Center is on, fill the water reservoir with water or check that it is firmly placed in its base. |
| Brewing a Single Cup. | Possibly Exit Needle is clogged. If necessary, clean the K-Cup Holder and rinse it. During brewing, the Water Reservoir may have been taken out. Replace the water reservoir, and then brew water without using a K-Cup. If the red “DESCALE” indicator light is on, descale the Brewer. |
| If Brewer shuts offautomatically. | Ensure that the Auto Off Timer function is not activated. Press the black button to disable the Auto Off Timer function if the green light next to “AUTO OFF” on the LED Control Center is on. |
Helpful Hints
In the end, I would love to drop some helpful hints with you, so you can also use them during your brewing experience.
- Keep Your Brewer Turned ‘on’ At All Times
To enjoy a fresh cup of coffee, tea, or hot cocoa whenever you want, I would recommend you keep your Keyrig B-41 turned on all the time. So you won’t have to wait in case your taste buds badly crave it. Or, you can also use the option to set the Brewer to automatically turn off two hours after your last brew.
- Use Bottled Or Filtered Water
I would highly recommend you to use filtered or bottled water to enjoy a better taste of your coffee. As The quality of water varies depending on location, you may notice an unpleasant taste in your coffee, such as chlorine or other mineral taste. So, in order to prevent this, you should prefer filtered or bottled water.
- Customize The Size, Flavor & Brew That’s Perfect For You
You do have endless options available in K-Cup and two in the size of the cup; however, I would recommend if you want to achieve a strong and intense cup of coffee, use an Extra Bold K-Cup, which contains up to 30% more ground coffee than regular varieties. And The most pro Tip is that a smaller brew size will result in a more intense flavor, while a larger brew size will result in a less intense flavor.
- Plug Brewer Into Its Own Grounded Outlet.
Always use a separate grounded outlet to plug your Brewer, as this is a matter of your and your loved ones’ safety. If the outlet is overloaded with the burden of other appliances, your Brewer may not work properly. You should install a separate circuit and outlet for your Brewer.
- Brewing Into A Travel Mug
To brew coffee into a travel mug, remove the Drip Tray Assembly and place the travel mug on the Drip Tray Base.
- De-Scale Brewer Regularly
It is extremely important to descale your Brewer regularly to maintain the quality of your Brewer and Coffee.
Service
Beyond these suggested cleaning and maintenance methods, the end user cannot service this Brewer; for assistance, see this section on warranties.
Warranty
Are you afraid that any malfunction may happen in your new Keurig B-41? You do not need to worry about this matter. As a buyer, you have put your trust in Keurig appliances and invested your money by purchasing their appliance. Likewise, to retain your trust, Keurig Appliances provides a warranty. Suppose you find any functional error in your Brewer within one year. As a user of Keurig B-41, you should know about the terms and conditions of its warranty policy.
Limited One-Year Warranty
I advise you to return the warranty card that came with your Keurig B-41 after filling it with details so that your purchase details can be stored in Keriug’s System. Keurig assures you that your Brewer will be free of faults in material under regular home usage for one year from the date of purchase. Keurig will repair or replace the Brewer free of charge upon receipt of proof of purchase.
If you want a replacement Brewer under the terms of the warranty, you must meet the requirements outlined in the warranty. Maybe a brand-new or repaired Brewer will be given to you. A fresh, restricted one-year warranty will be applied if a replacement Brewer is delivered. Keruig only offers this Guarantee to the only Brewers in the United States and Canada. You May also have other legal rights, which differ from state to state and, in the case of Canada, from province to province. This warranty offers you certain legal rights.
What Are The Things That Are Not Covered In The Warranty
There are certain limitations in this warranty because Keurig does not offer a warranty for every kind of damage or malfunction in your Keurig B-41. This warranty excludes consequential or incidental damages, including damage to property, as well as incidental costs and expenses if you breach this warranty, even if foreseeable.
This limitation rule also varies from state to state because certain states or provinces do not allow the exclusion of accidental or incidental damages; the previous limitation or exclusion may not apply to you depending on where you purchase your Brewer.
Moreover, this warranty does not cover harm from services provided by companies other than Keurig or its. Approved service providers, using parts other than genuine Keurig parts, or outside factors including overuse, abuse, improper power supply, or acts of God.
How Can You Obtain The Facility Of Warranty?
Keurig Brewers are high-quality appliances that must last for years with careful maintenance. However, if warranty service is required, contact Keurig Customer Service at 1.866.901.BREW (2739), which is a toll-free number. It’s important to note that you should only return your Brewer for servicing after first obtaining an Authorization to Return (ATR) number from Keurig Customer Service.
Any Brewers returned without an ATR number will be returned to the sender without the company’s service.
Conclusion
Now you can savor your life with as many hot cups of coffee as you want to be made in your Keurig B-41 without any complication, as this article has provided and presented a comprehensive answer to every ambiguity you can have related to your Keurig B-41.
I hope you brew your coffee as quickly as coffee beans melt in hot milk.
For more information about Coffee, Visit the website https://coffeeaim.com/ to devour yourself from enriched articles about Coffee. Explore the world of Coffee with us.
Make yourself a delicious Espresso in Keurig B-41 because you rightly deserve it.
FAQs
What Causes A Keurig To Stop Working?
If your Keurig is not brewing, it could be due to overfilling, using the wrong pods, or clogging of the needle by debris. To fix this, empty the drip tray and ensure the recommended water amount is in the reservoir. Then, place a cup under the dispenser and try to brew again.
Can You Put Dawn Dish Soap In My Keurig?
It’s acceptable to use dish soap, but it’s essential to thoroughly rinse out any leftover soap before putting the reservoir back into the machine.
Can You Use Milk Instead Of Water In My Keurig?
Although adding milk to your Keurig for hot chocolate may seem like a good idea, it’s essential to avoid it. Putting milk in a Keurig or any other drip coffee maker can cause damage to the machine and may be difficult to clean. It’s best to use your Keurig as intended and follow the recommended guidelines to ensure its proper functioning and longevity.
How Do You Tell If Your Keurig Is Clogged?
If your Keurig isn’t making a full cup of coffee, it could be due to a clog, which is a common issue. Wash all the removable parts using dish soap and hot water to fix them. Clogs caused by coffee grounds can be quickly cleared using a paperclip and a plastic straw.
Is A Descaling Solution Better Than Vinegar?
Both vinegar and commercial descaling solutions have advantages and disadvantages. However, a commercial solution is the better option if you prioritize effectiveness. These solutions are specially formulated to eliminate mineral buildup and are less harsh on your coffee maker than vinegar.