Quick Navigation
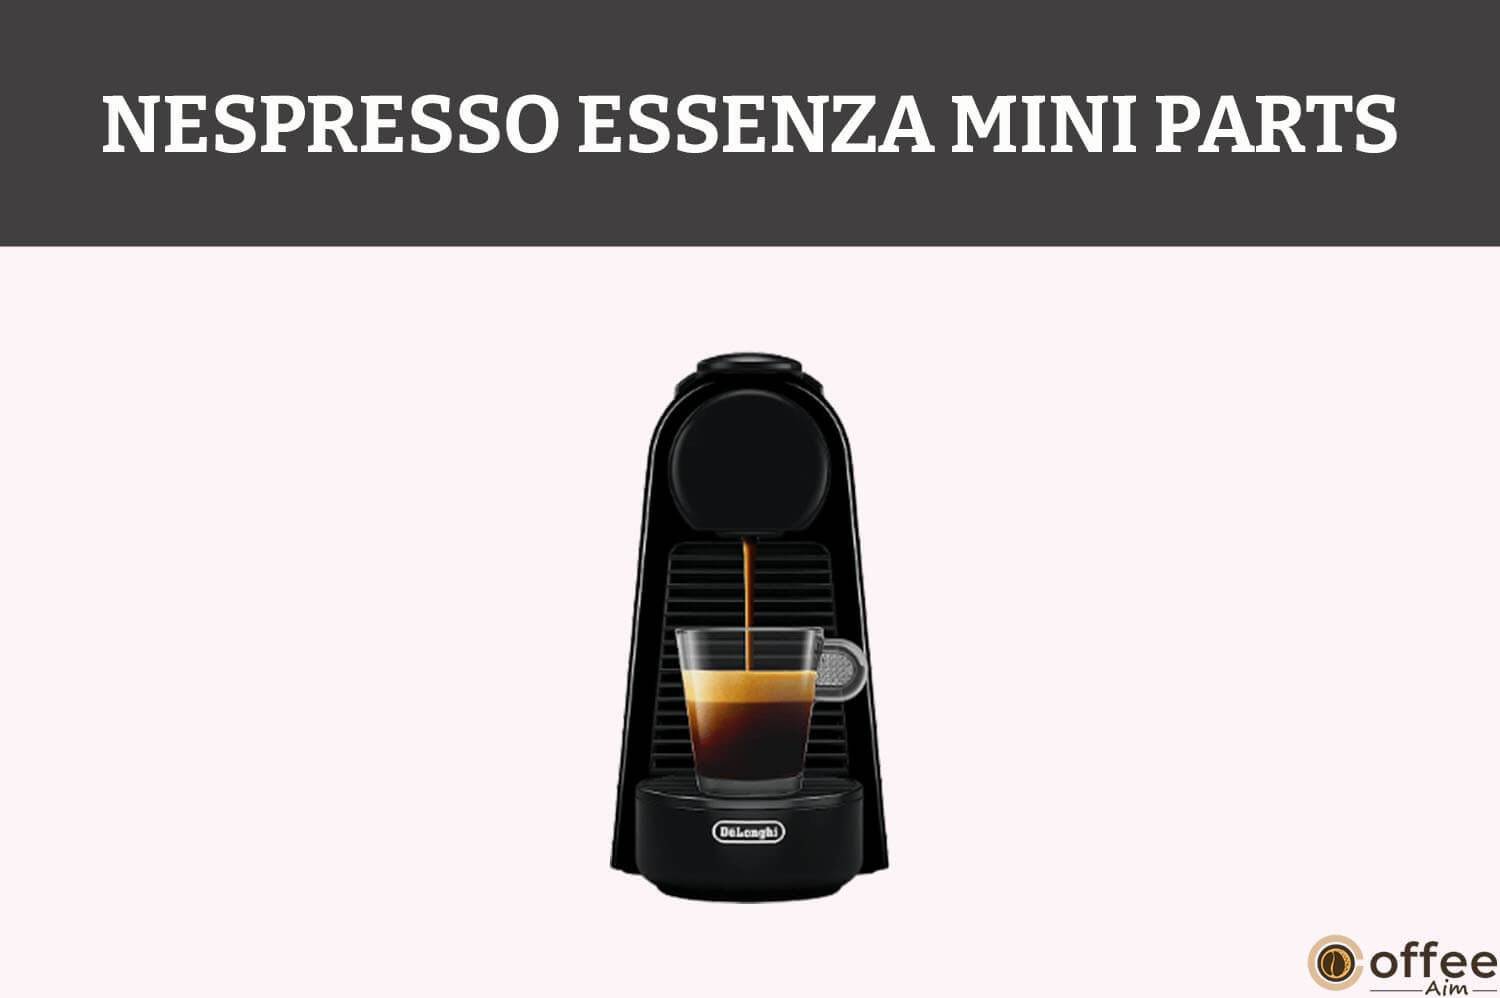
Having the knowledge of Nespresso Essenza Mini parts and the function they perform is crucial if you own Nespresso Essenza Mini or other Nespresso Coffee machines.
Hey Coffee Lovers,
Besides brewing coffee, I have spent a good quality time learning how Nespresso Essenza Mini works and what parts are there to let it brew such soothing beverages. For I believe if you are a Nespresso Machine holder, you must have a knowledge of its parts, what function they perform, and how you can replace them when the time comes. Today I am here to share my knowledge with you so you can take light from it.
- If you want to buy a machine for yourself but don’t know which one to choose, then the only guide I will recommend worth reading is Best Nespresso Machines.
Let’s grab your machine and keep in mind the Safety precautions; here we go;
List Of Nespresso Essenza Mini Parts
Nespresso Essenza Mini owns several parts that function together in brewing coffee. Let’s go through each of the parts thoroughly.
- Coffee Buttons; Espresso & Lungo

Nespresso Essenza Mini has two buttons; one is Espresso, and the other is Lungo. Both buttons are located at the top of the machine, just behind the lever. The button on the left side is for Espresso, and the right one is for Lungo.
What Are Its Uses?
Although Nespresso Essenza Mini has two buttons, they perform several functions. Let’s discuss their functions;
In Turning The Machine On And Off:
- To turn ON the machine, press either Espresso or Lungo button
- To turn the machine OFF, simultaneously press the Espresso and Lungo button.
For The First Time Use Or After A Long Time Cleaning Of Nespresso Essenza Mini:
- With the machine being turned ON, press the Lungo button to rinse the machine.
For Coffee Preparation:
- When you press the Espresso button, 40 ml or 1.35-ounce Espresso coffee shots will be poured into the placed mug/cup.
- When you press the Lungo button, a 110 ml or 3.72-ounce Lungo coffee shot will start pouring into the placed mug/cup.
For Programming Water Volume:
- Press and hold the beverage button whose volume you want to change.
- Let go of the button until the desired volume is achieved.
In Energy Saving Mode:
- To enter energy-saving mode, press and hold the Espresso button for five seconds.
- To exit energy-saving mode, press and hold the Lungo button for 5 seconds.
- Press the Espresso button one time to change the auto-off after 30 minutes.
- Press the Espresso button twice to change the auto-off after 9 minutes.
For Resetting To Factory Settings:
- Press & hold the Lungo button for 5 seconds to reset the machine.
In Descaling:
- To enter the descaling mode, both Espresso & Lungo button is used. (press both the Espresso & Lungo button simultaneously to enter the machine in descaling mode)
- To start the descaling process, the Lungo button is used.
- To enter the descaling mode, both Espresso and Lungo button is used (Press both the Espresso and Lungo button simultaneously to exit the descaling mode).
In Emptying The System:
- With the machine turned off, press & hold the Espresso and Lungo button for 5 seconds to enter the emptying mode.
Can You Replace It?
Yes, Nespresso Essenza Mini buttons are replaceable. You can replace them by yourself with the help of a few tools, or you can call for technician help.
Can You Buy It From Online Stores?
Unfortunately, it’s difficult to get spare buttons from the online store, but you can check your nearby repair shops and ask them if they have any.
- Water Tank/Water Reservoir

The water tank/reservoir is also one of the crucial parts of the Nespresso Essenza Mini. Without it, no coffee-making is possible. It is located on the back side of the machine.
What Are Its Uses?
- Nespresso Essenza Mini has a 0.6 L or 20.3 ounces water storage capacity
- During coffee brewing, water is taken from the water tank through a water hose.
- The cleaning/rinsing/descaling process requires water which is again provided through the water tank.
Can You Replace It?
Yes, you can easily replace the water tank. Just remove the old water tank from its place and place a new one on the machine.
Can You Buy It From Online Stores?
You can buy Nespresso Essenza mini water tanks from online stores such as Amazon, eBay, etc.
Check the Nespresso Essenza Mini water tank on eBay →
- Water Tank Lid

On the water tank, you will see a moveable plastic lid. Let’s see the purpose of this.
What Are Its Uses?
- It keeps the water intact in the tank.
- Preserve the water quality by keeping the insects or dirt out.
Can You Replace It?
Yes, you can replace the lid at home.
Can You Buy It From Online Stores?
The Nespresso Essenza Mini water tank lid is available on online shops such as Amazon or eBay, etc.
Check the Nespresso Essenza Mini water tank lid on eBay →
- Lever

Nespresso Essenza Mini has a lever on top of the machine. Let’s see the purpose of this.
What Are Its Use?
- Lever has covered the capsule compartment; when you lift it upward, the space is spotted where you can insert your capsule.
- It is used to eject the used coffee capsule into the capsule container.
- It keeps the capsule area close as it could be dangerous if left exposed during the brewing process due to the hot water presence for saturating the capsule.
Can You Replace It?
Yes, you can replace the lever, but for this, you have to open the machine up to the brewing mechanism part. The whole tearing process will need proper guidelines.
Can You Buy It From Online Stores?
The Nespresso Essenza Mini lever is difficult to find in online stores; however, you get a brewing mechanism part that has a lever as well; you can replace the brewing mechanism part if you can. Otherwise, you can check out your nearest repair shop for the spare lever.
Check the Nespresso Essenza Mini lever on pgservice →
- Capsule Container

The capsule container is present inside the machine at the front facing you. It is placed upon the drip base. Let’s see why it is there.
What Are Its Use?
Capsule containers can store up to 5 to 6 used coffee capsules at a time. When you remove the capsule by lifting the lever, the used capsule falls into the capsule container, so you don’t have to take the used capsule out each time.
Can You Replace it?
Yes, you can easily replace them. Just remove the old capsule container and insert a new one in the old one’s place.
Can You Buy It From Online Stores?
You can easily find them on online stores such as Amazon, eBay, etc.
Check the Nespresso Essenza Mini Capsule container on eBay →
- Coffee Outlet

Nespresso Essenza Mini also has a coffee outlet which is a plastic nozzle from where the freshly brewed coffee is poured into the placed mug/cup. Let’s see its usage.
What Are Its Use?
- Your Espresso, Lungo, large cups, and all types of coffee come out through the coffee outlet.
- During the descaling process, the descaling solution also comes out through the coffee outlet.
- The coffee outlet performs its task in rinsing, programming water volume, or emptying the system.
Can You Replace It?
You can replace the nozzle, but you have to teardown your Nespresso Essenza mini first.
Video Link: Nespresso Essenza Mini Teardown →
Can You Buy It From Online Stores?
You can get lucky enough to find the nozzle in online stores.
- Drip Base

The drip base is present below the capsule container. It is made of hard plastic. To know why it is present there, let’s see its usage.
What Are Its Use?
- It supports and places the capsule container on top of it.
- It attaches the protruding drip tray so the drip tray keeps intact with the machine.
Can You Replace It?
You can replace It at home with no such difficulty.
Can You Buy It From Online Stores?
Drip base is available in online stores such as Amazon, eBay, etc.
Check Nespresso Essenza Mini drip base on etsy →
- Drip Tray

The drip tray is present at the bottom front of the machine. It is a protruding plastic tray that has a drip grid on it, and it is attached partially to the drip base.
What Are Its Use?
- It gives a space to place the cup/mug.
- It stores the hot coffee/water spillage and protects the user from hot brew or water splashing.
Can You Replace It?
Yes, you can replace them easily at home.
Can You Buy It From Online Stores?
Drip trays are easily available in online stores. To check the price and place from where you can buy it, see the table below (scroll down a bit).
- Drip Grid

The drip grid is placed on top of the drip tray. It has small holes in it, which gives it a grid-like appearance, and that’s why it is called a drip grid.
What Are Its Use?
- It lets the coffee spillage drip through the holes into the drip tray, not on your countertops
- Give support for placing the cup.
Can You Replace It?
Yes, you can replace it in no minute.
Can You Buy It From Online Stores?
You can find drip grids in online shops; to see from where check the table below (scroll down a bit).
Explore Nespresso Essenza Mini Parts & Accessories For Your Nespresso Essenza Mini Machine
This table will give you a comprehensive idea of all the things related to your Nespresso Essenza Mini parts, like price, where you can buy them, etc. It’s a great and quick way to know about the parts.
| Nespresso Essenza Mini Parts Image | Nespresso Essenza Mini Parts Name | Nespresso Essenza Mini Parts Bottom Line | Price for Nespresso Essenza Mini Parts | Get Nespresso Essenza Mini Parts |
| Nespresso Breville Essenza Mini Replacement Water Tank Reservoir Clear | A transparent water tank with a 0.6 L storage capacity with a plastic lid on top keeps the water supply steady for your beverages. | $28.00 | Check its latest price on eBay → | |
| Nespresso Essenza Mini – Replacement Liquid Recovery Tray By Breville ONLY | A plastic drip tray is a great guide for supporting the capsule compartment, and it also keeps the drip base intact with the machine. | $14.99 | Check its latest price on etsy → | |
| Nespresso For Breville Essenza Mini Replacement Drip Tray / Cup Rest | The drip tray allows not only cup support but also store spillage to prevent splashing of hot coffee. | $24.00 | Check its latest price on eBay → | |
| Lower Drip Tray for Nespresso Essenza Mini – De’Longhi Edition | A lower drip tray gives an extra place for placing heightened mugs/cups. Although the drip tray is removable as well for placing the container during descaling/cleaning | $11.95 | Check its latest price on Etsy → | |
| Nespresso ESSENZA MINI Replacement Water Tank LID ONLY for DELONGHI & BREVILLE | The plastic lid on top of the water tank keeps the tank’s water safe and clean. | $17 | Check its latest price on eBay → | |
| Drip Tray Krups Nespresso Essenza Mini Xn110 Plastic Cup Rest Genuine | The drip grid allows accidental spillage to fall into the drip tray through its holes. It also allows you to place a cup/mug on it just under the coffee outlet. | $19.68 | Check its latest price on eBay → |
How To Repair A Nespresso Essenza Mini Coffee Maker
With the passage of time, machines can get a little out of track. To bring the machine back to its working order, repairing becomes necessary. As I own a Nespresso Essenza Mini machine so, when the issue comes (which needs repairing), I’m able to solve it easily at home without taking the help of a technician. Today I want you to know how you can repair your Nespresso machine at home by yourself without struggling to get help from outside.
To Fix Or Repair You Have To Open The Machine:
- You should check and proceed with repairing only when the machine is unplugged and cool.
- Remove all the removable parts, such as the water tank, drip base, drip tray, used capsule, and capsule container.
- Turn your machine upside down, and you will see two screws; unscrew them both.
- Also, remove the coffee outlet covering through prying.
- With the help of a prying tool such as a flathead screwdriver or spudger, pry the side covering off.
- You will see two buttons just behind the lever.
If The Buttons Are Not Working, Then Keep Following The Instructions To Fix Them:
- Remove the buttons cover, and underneath, you will see PCB (printed circuit board).
- Corrosion can form on the PCB, which makes the buttons not work.
- Unplug the wire connection from the PCB by just pulling with a little force, and it will be removed from its place.
- To remove the corrosion, use isopropyl alcohol.
- Spray a little isopropyl alcohol on the PCB and let it sit for 5 minutes.
- Then use a small brush to scrub the corrosion off.
- Also, clean the rubber cover of the buttons with a soft cloth.
To Repair The Water Leakage Problem, Keep Following The Instructions:
- To solve the leakage problem, you have to remove the brewing unit.
- Pry off the plastic cover upon which the PCB was placed.
- Pry off the plastic cover present on the water tank base.
- Also, disconnect the back plastic outer covering of the machine using a spudger or flathead screwdriver.
- From the back, you will then have access to the water pump
- From the back, you will find two screws present inside the corresponding sides of the brewing unit. (use a flashlight or torch light to see the screws)
- Unscrew both screws. (recommended using a magnetic screwdriver to easily pull the screws out)
- Push the brewing unit back a little; you will hear a click sound, and then pull it apart from its place.
- To disconnect the water pipe from the brewing unit, you will see a retainer inside the brewing unit where the water pipe is connected. Remove the retainer to free the brewing unit from the water pipe connection.
- Now the brewing unit is completely removed, you can easily remove the nozzle.
- Use a spudger or a flathead screwdriver to remove the nozzle.
- Behind the nozzle, you will see the grid plate; clean it using a brush, or you can also remove it using a flathead screwdriver and then clean it using a needle.
- If you see any coffee deposits or gunk inside the nozzle, then rinse the nozzle to clean it. This will solve your leakage issue.
Finishing:
- Now place back all the parts and secure them with the screws. Place back the covering as well.
- Give your machine a few rinse cycles with fresh water, and your machine will be repaired and ready for work.
You can also check out the videos on
How to repair Nespresso Essenza Mini,
How to fix Nespresso Essenza Mini.
How To Disassemble Nespresso Essenza Mini?
A technical issue where you have to disassemble the machine to remove or repair the internal parts requires teardown or disassembling procedure knowledge. So to teardown your Nespresso Essenza Mini, follow the below steps.
Instructions:
- Check and proceed with the teardown only when the machine is cool and unplugged.
- Remove all the removable parts, such as the water tank, drip base, drip tray, used capsule, and capsule container.
- Turn your machine upside down, and you will see two screws; unscrew them both.
- Also, remove the coffee outlet covering through prying.
- With the help of a prying tool such as a flathead screwdriver or spudger, pry the side covering off.
- You will see two buttons just behind the lever.
- Remove the buttons cover, and underneath, you will see PCB (printed circuit board).
- Unplug the wire connection from the PCB by just pulling with a little force, and it will be removed from its place.
- Pry off the plastic cover upon which the PCB was placed.
- To remove the brewing unit, pry off the plastic cover present on the water tank base.
- Also, disconnect the back plastic outer covering of the machine using a spudger or flathead screwdriver.
- From the back, you will then have access to the water pump.
- From the back, you will find two screws present inside the corresponding sides of the brewing unit. (use a flashlight or torch light to see the screws)
- Unscrew both screws. (recommended using a magnetic screwdriver to easily pull the screws out)
- Push the brewing unit back a little, you hear a click sound and then pull it apart from its place.
- To disconnect the water pipe from the brewing unit, you will see a retainer inside the brewing unit where the water pipe is connected. Remove the retainer to free the brewing unit from the water pipe connection.
- Now the brewing unit is completely removed, you can easily remove the nozzle.
- Use a spudger or a flathead screwdriver to remove the nozzle.
- Behind the nozzle, you will see the grid plate; remove it using a flathead screwdriver.
- Use a prying tool to remove the side plastic covering parts to have access to internal parts such as the water pump.
- Nespresso Essenza Mini teardown has been done.
You can also check the video on How to Nespresso Essenza Mini Teardown.
How to Replace Nespresso Essenza Mini Parts? A Step-By-Step Guide
As we have learned all the Nespresso Essenza Mini machine parts, what function they perform, and whether they are replaceable or not, it’s time to learn how you can replace them. I will help you with how you can easily and properly change the parts without hurting yourself or the machine. Here we go;
Nespresso Essenza Mini Drip Base And Drip Tray Replacement
Nespresso Essenza Mini has a plastic drip tray and drip base, which can be easily replaced. Remove the drip tray and slide out the drip base. Place the new drip base first by sliding it on, then place the new drip tray as well back on the machine.
Nespresso Essenza Mini Buttons Replacement
Nespresso Essenza Mini has two buttons; Espresso and Lungo. If any of the buttons or both get some problem and stop working, then you can surely replace them. Here’s how you can do it.
Instructions:
- You should check and proceed with the repairing task only when the machine is cool and unplugged.
- Remove all the removable parts, such as the water tank, drip base, drip tray, used capsule, and capsule container.
- Turn your machine upside down, and you will see two screws; unscrew them both.
- Also, remove the coffee outlet covering through prying.
- With the help of a prying tool such as a flathead screwdriver or spudger, pry the side covering off.
- You will see two buttons just behind the lever.
- Remove the buttons cover, and underneath, you will see PCB (printed circuit board).
- Unplug the wire connection from the PCB by just pulling with a little force, and it will be removed from its place.
- Replace the PCB and the plastic button cover with the new ones.
- Place the machine’s removed parts back and secure them using screws.
- Buttons replacement has been done.
Nespresso Essenza Mini O-Ring Replacement
O-ring plays an important part in preventing the water from escaping. It is present either around the water tank nozzle or on the water tank base where the tank’s nozzle is attached. Let’s see how to replace it.
- To replace the o-ring, firstly, you have to remove the water tank base covering.
- Use a prying tool such as a flathead screwdriver or spudger and pry the plastic cover off.
- Then use tweezers to pull the o-ring out and insert the new o-ring in place of the old one.
- The O-ring replacement has been done.
Nespresso Essenza Mini Brewing Unit Replacement
Nespresso Essenza Mini, like all Nespresso coffee machines, owns a brewing unit. The brewing unit has a lever, capsule compartment, and nozzle. The water pipe is internally attached to the nozzle for the water supply. Let’s see how you can replace it.
- You should check and proceed with the repairing task only when the machine is cool and unplugged.
- Remove all the removable parts, such as the water tank, drip base, drip tray, used capsule, and capsule container.
- Turn your machine upside down, and you will see two screws; unscrew them both.
- Also, remove the coffee outlet covering through prying.
- With the help of a prying tool such as a flathead screwdriver or spudger, pry the side covering off.
- You will see two buttons just behind the lever.
- Remove the buttons cover, and underneath, you will see PCB (printed circuit board).
- Unplug the wire connection from the PCB by just pulling with a little force, and it will be removed from its place.
- Pry off the plastic cover upon which the PCB was placed.
- To remove the brewing unit, pry off the plastic cover present on the water tank base.
- Also, disconnect the back plastic outer covering of the machine using a spudger or flathead screwdriver.
- From the back, you will then have access to the water pump.
- From the back, you will find two screws present inside the corresponding sides of the brewing unit. (use a flashlight or torch light to see the screws)
- Unscrew both screws. (recommended using a magnetic screwdriver to easily pull the screws out)
- Push the brewing unit back a little, you hear a click sound, and then pull it apart from its place.
- To disconnect the water pipe from the brewing unit, you will see a retainer inside the brewing unit where the water pipe is connected. Remove the retainer to free the brewing unit from the water pipe connection.
- Now the brewing unit is completely removed.
- Place the new brewing unit in the old one’s place and secure it with screws.
- Attached all the parts back, and the brewing unit replacement has been done.
Nespresso Essenza Mini Replacement Water Tank
The water tank is also easily replaceable. Just remove the old water tank from its base and place the new one there. There you have your replaced water tank.
Nespresso Essenza Mini Parts Guide
This further guide will help you explore more about the Nespresso Essenza Mini machine and its parts. Further, I will do my best to answer your hidden queries. Here we go
What Is The Difference Between The Buttons On Nespresso Essenza Mini Machine?
Nespresso Essenza Mini has two buttons. One is Lungo, and the other is Espresso. The button on the left side is Espresso, and when you press it, a 40 ml or 1.35-ounce Espresso shot will be poured into the placed cup/mug. The button on the top right side is Lungo. It gives 110 ml or 3.72 ounces of Lungo shot. Besides coffee brewing, both buttons play a vital role in performing other functions such as descaling, resetting, turning the machine on/off, programming water volume, etc.
What Is The Lungo Button On Nespresso Essenza Mini?
The Lungo button is located on the top right side of the machine. When you press it, 110 ml or 3.72 ounces of Lungo shot will start pouring into the place cup.
How Do I Wake Up My Nespresso Essenza Mini Machine?
To wake up or turn your Nespresso Essenza Mini machine ON, press any beverage button (either Espresso or Lungo). The LEDs will then start blinking and will keep on blinking until the machine is ready for brewing.
What Pressure Is Essenza Mini?
The pressure is required to make concentrated and signature flavor espresso coffee. The pressure in Essenza mini is 19 bar or 1.9 MPa. It means 19 bar pressure is passed through coffee grounds in making coffee in an Espresso machine like Nespresso Essenza Mini.
Can You Factory Reset A Nespresso Essenza Mini Machine?
To factory reset your Nespresso Essenza Mini machine follow the below steps.
- Turn OFF your machine by simultaneously pressing the Espresso or Lungo button.
- Then press & hold the Lungo button for up to 5 seconds.
- The machine’s LED will blink speedily three times
- Resetting has been done.
- After this, the LEDs will continue to blink normally for approx 25-30 seconds then it will become steady means the machine has been heated up and is ready for brewing.
How Do You Clean An Essenza Mini?
To clean your Nespresso Essenza Mini, follow the below steps.
- Empty the capsule compartment by lifting the lever.
- Empty, rinse, and clean the drip tray, drip base, drip grid, and water tank.
- Empty the capsule holder as well.
- Fill the tank with fresh water and brew a few water cycles.
- Use a clean, soft damp cloth to clean the machine’s outer covering.
Conclusion
Congrats, as we have gone through each part of the Nespresso Essenza Mini machine. Now I hope you are fully aware of all the parts the Nespresso Essenza Mini machine has, what functions they perform, whether they are replaceable, and if yes, then where can you get the replaceable parts. So best of luck on your coffee brewing journey 😊
To know more about the Nespresso Essenza Mini machine, check out Nespresso Essenza Mini Review & How to use Nespresso Essenza Mini guides.
Faqs
Why Is My Nespresso Essenza Mini Leaking?
Leakage in your Nespresso Essenza mini mostly occurs due to gunk or coffee deposits in the brewing unit (specifically between the nozzle and grid plate area). You can clean the brewing unit by tearing down the machine, separating the rewind unit, removing the nozzle, and cleaning the gunk.
Can You Fix A Nespresso Essenza Mini Machine?
Minor troubleshooting can be solved by simple resetting, descaling, or cleaning, but other issues like water leakage or internal parts replacement (if they got damaged) need some technical work. You can fix the issues at home as well if you are aware of using basic tools; otherwise, you can contact Nespresso Club to fix your Nespresso Essenza Mini machine.
OriginalLine: 800-562-1465
VertuoLine: 877-964-6299
Is Essenza Mini Worth It?
Nespresso Essenza Mini has an excellent outer design which gives a modern touch to the place. Besides, it brews delicious coffees too and takes less counter space. It has an automatic power-off system as well. All these qualities are available to you at an affordable price, so yeah, one can definitely say Essenza Mini is worth it.
How Do I Reset My Nespresso Essenza Mini?
To reset your Nespresso Essenza mini, follow the below steps.
- Turn OFF your machine by simultaneously pressing the Espresso or Lungo button.
- Then press & hold the Lungo button for up to 5 seconds.
- The machine’s LED will blink speedily three times.
- Resetting has been done.
- After this, the LEDs will continue to blink normally for approx 25-30 seconds then it will become steady means the machine has been heated up and is ready for brewing.