Quick Navigation
Do you have a Keurig K-40 at home but still need to head toward a coffee shop for your morning dose of coffee? But why? You have lost the user manual and are unsure how to use your Keurig K-40. Then what is the point of having this machine? Hang on a minute! It is not a big problem; I will not let you hang out there.
I have good news for you! Now, you don’t need to go to a coffee shop. I have written this guide to make it easy for you to use Keurig K-40 effectively and savour your delicious morning coffee on your couch. Ready to dive into the details and brew your first cup with Keurig K-40? Let’s get rolling!
Safety Measures
Electronic appliances undoubtedly make our lives easier, but taking precautions is necessary for everything, which we often fail to do. Our slight negligence can harm both us and the machine. How? You may burn your hand if your coffee spills out or suffer an electric shock if you plug in the cable with wet hands. So, It is better to handle your Keurig K-40 with care by taking the correct safety precautions.
Specifications Of Keurig K-40
NOTE: If the specification of the Keurig K-40 is not up to your liking, then you should return the Keurig parcel.
Suppose you have a lot of people in your family. In that case, Keurig K-40 is a perfect machine for you as it has three different brew options, a small cup, a small mug, and a large mug, and can prepare a variety of drinks for you at once, such as tea, coffee, latte macchiato as well as hot chocolate. Sounds good? It’s like a complete package for you. Let’s take a look at other features of your machine.
| NO | Features | Specifications |
| 1. | Product Line | Keurig 1.0 Elite |
| 2. | Water Reservoir Capacity | 48 oz |
| 3. | Weight | 12 lbs |
| 4. | Brew Size | 6 oz, 8 oz, 10 oz |
| 5. | Dimensions | Width – 9.8-inchDepth – 13.0-inchHeight – 13.3-inch |
Unboxing Of Keurig K-40
It’s time to unbox your Keurgi K-40. When you unbox the parcel, you will get some necessary items in the box. Do check the parcel carefully and make sure you get all the things. If any item is missing, then you must ask for a replacement. Let’s check it out.
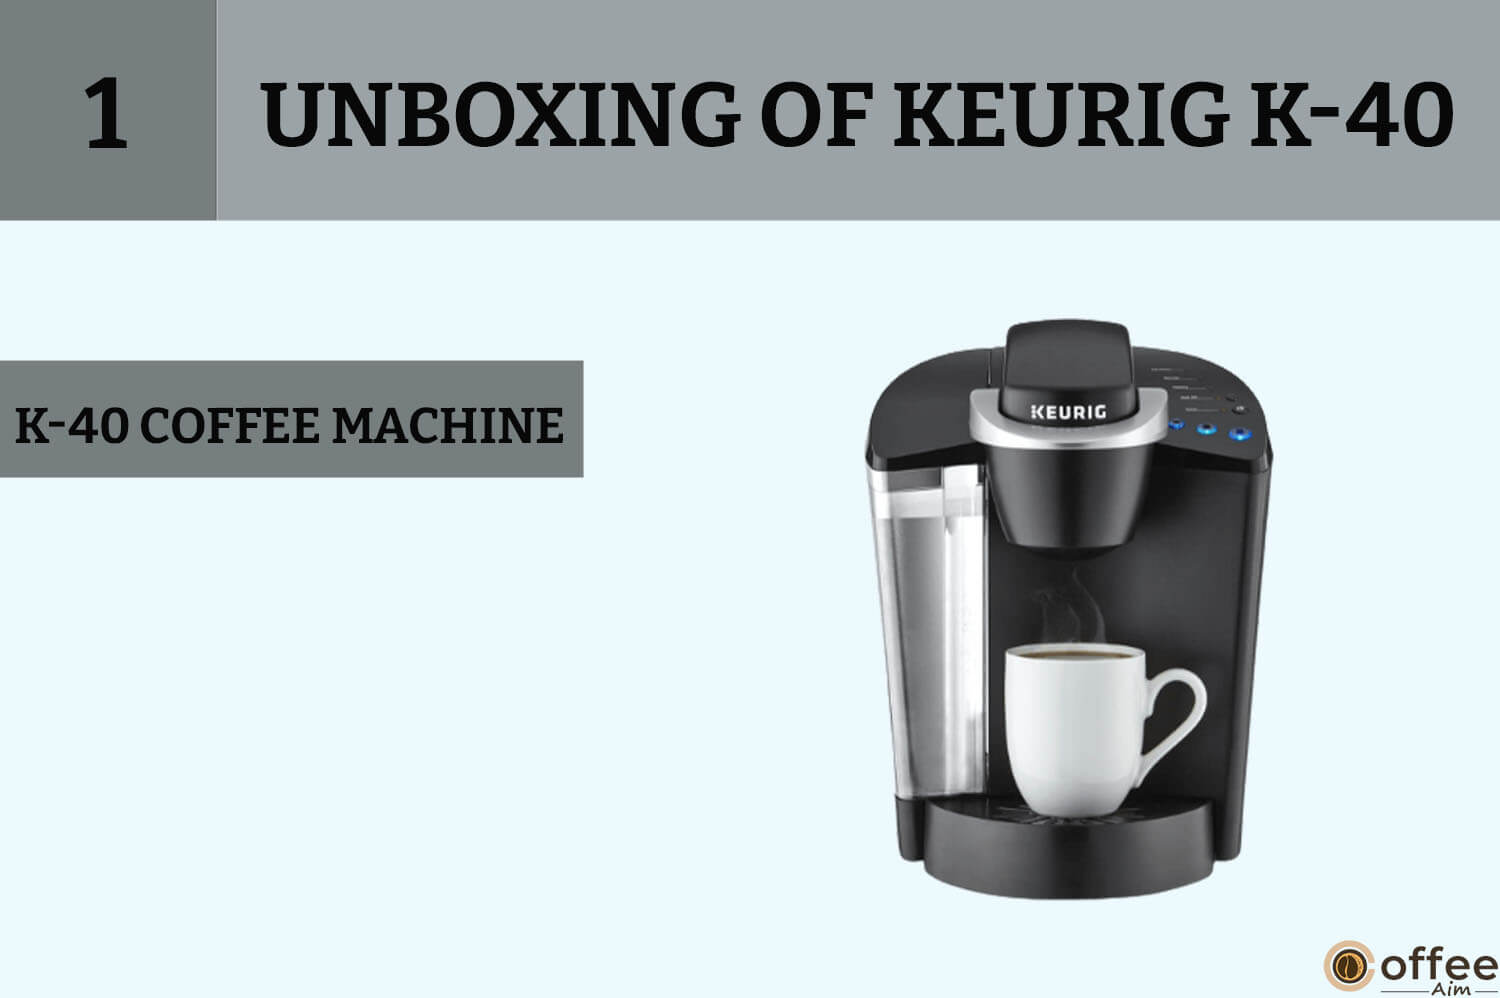
1. Coffee Machine
The first and most important thing you get is your Keurig K-40. Now, you can savor delicious coffee anytime you want.
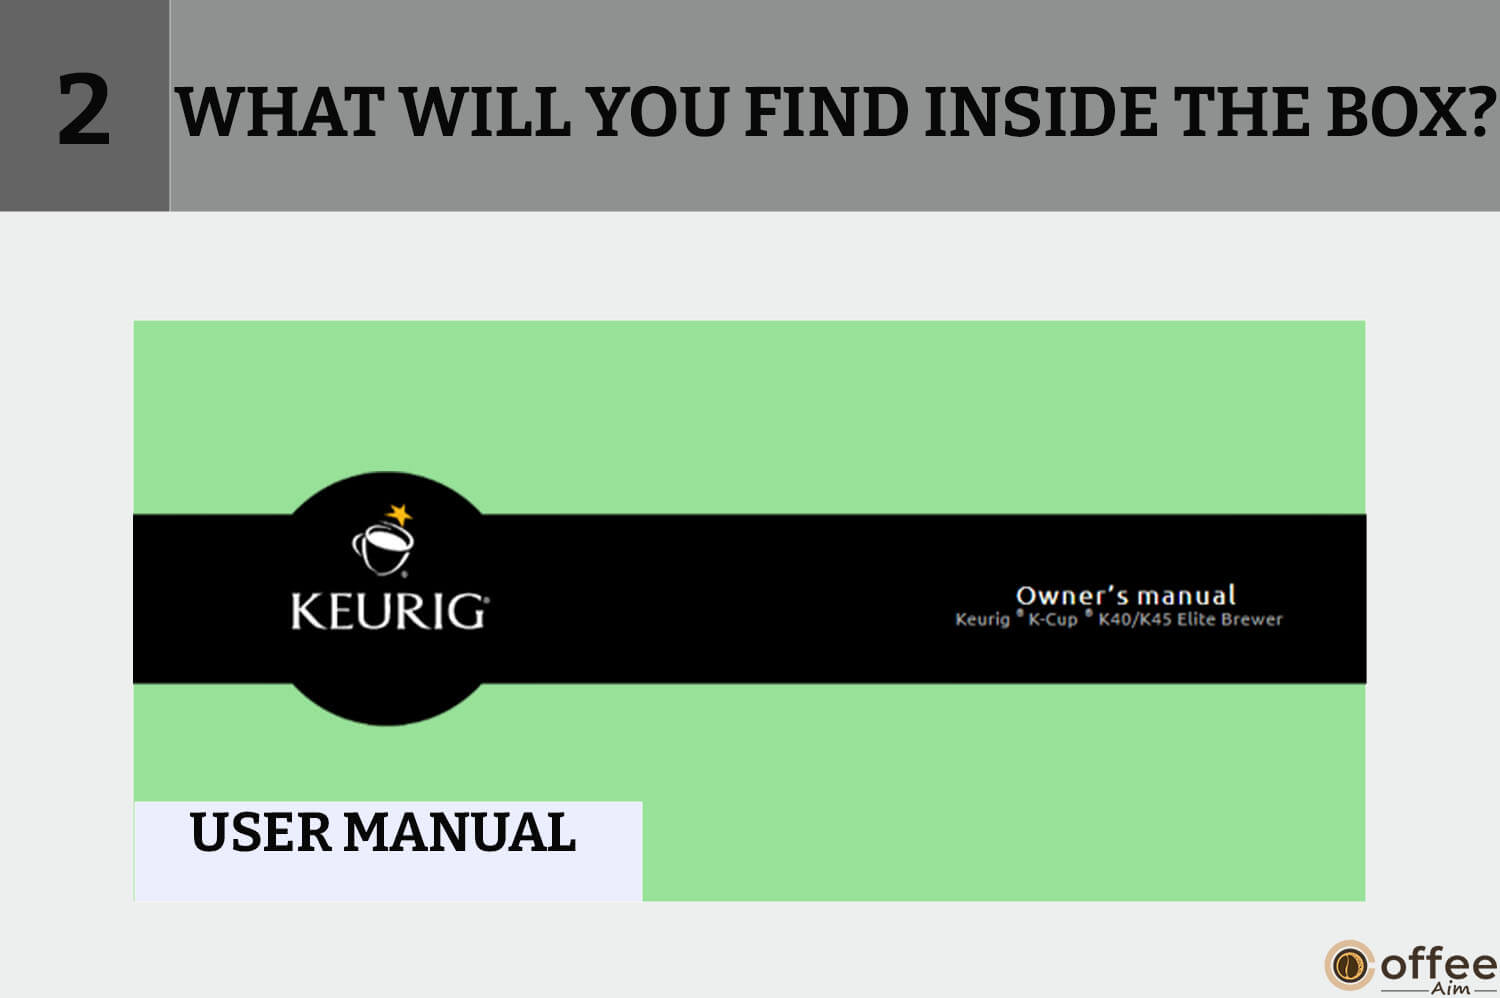
2. User Manual
You get this user manual with your Keurig K-40. It has all the operating instructions of your Keurig K-40, which you might need to operate your machine with the right instructions.
3. Free K-Cup Packs
Here you have the pack of free K-Cups, which came as a compliment for the user. It has six K-Cups inside, each has a distinct flavor inside. You can experience these flavors without purchasing K-Cups for the first brew.

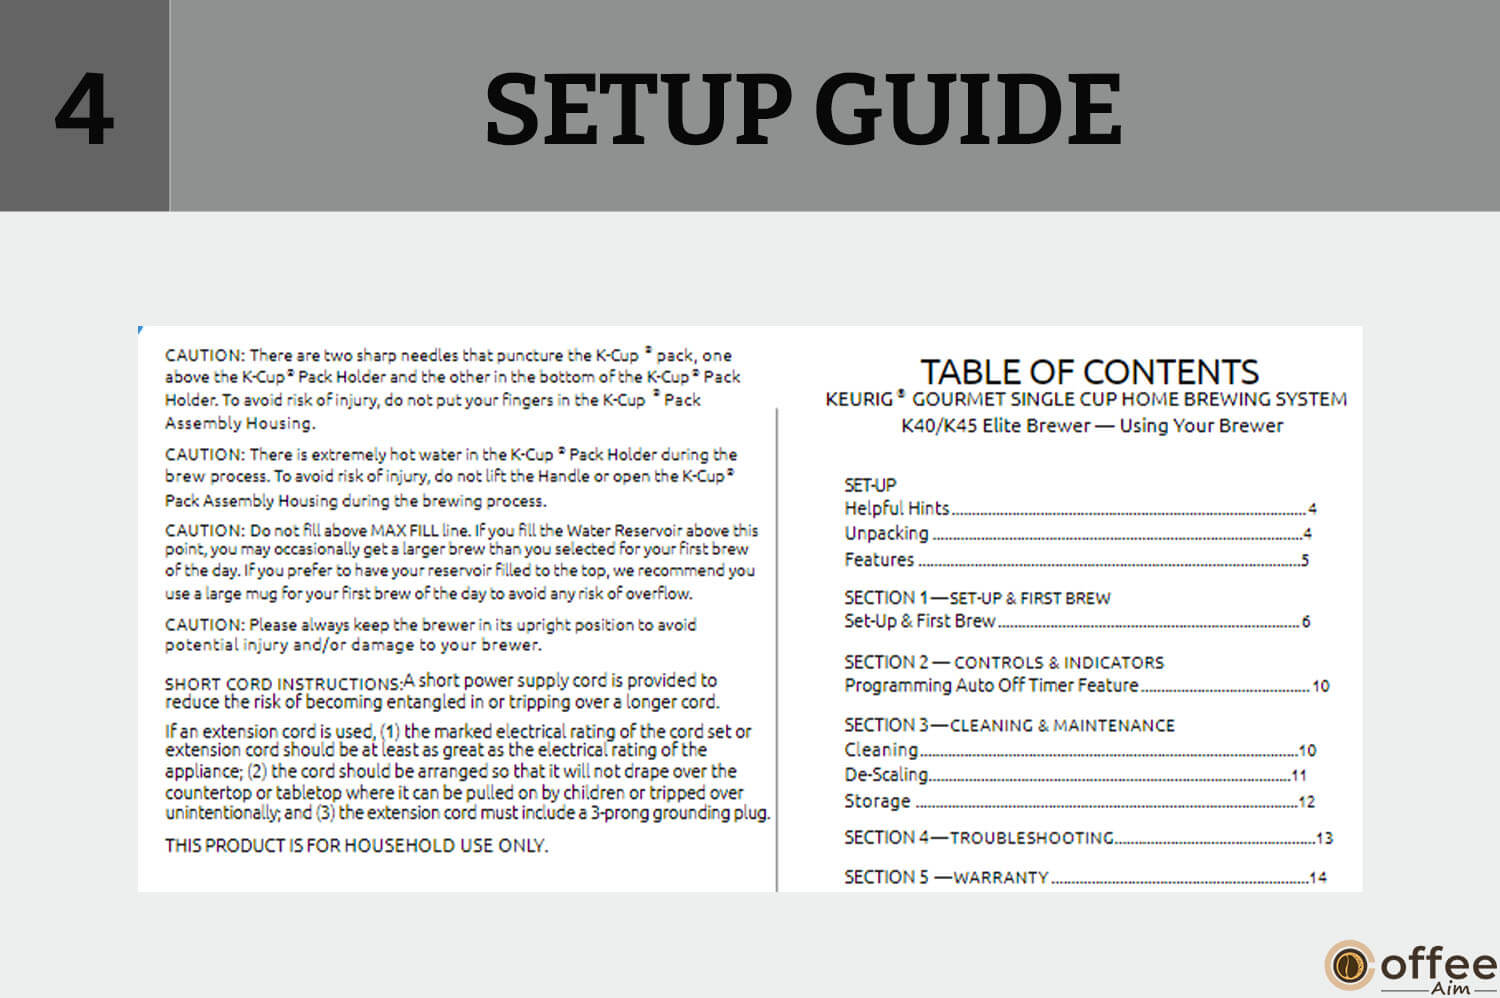
4. Setup Guide
A mandatory setup guide is also in the box, with setup instructions for your Keurig K-40. It guides you in setting up your brewer in the right way.
Unpacking Instructions For Your Keurig K-40
You have got the parcel of Keurig K-40, and now you will unbox it. If you want your Keurig K-40 not to get damaged during unboxing, you must know the correct instructions to unbox it. Here’s a quick guide to unboxing your Keurig K-40.
- Place the parcel box of Keurig K-40 on a stable surface (such as a table or kitchen countertop) or the floor. Let’s open the box.
- What’s inside of it? There is literature inside the box, along with your machine. Take it out.
- The front should face down as you turn the box on its side.
- Look inside the box and hold the plastic bag containing the brewer.
- Please remove the plastic bag by carefully pulling it in your direction; the brewer will remain on its side and enclosed in the polyfoam.
- Take off the top layer of píolyform packaging.
- Lift the machine from the bottom carefully and set it upright on a flat, stable surface.
- Take off the plastic bag from the brewer.
- Note the serial number of your brewer; you can find the serial number at the bottom of the box or under the drip tray when you remove it. Both contain serial numbers.
- Remove the mounting tape from the water reservoir.
Note: We recommend you keep all the packaging material in case the machine needs to be shipped again.
Important: Discard all the mounting tapes and wrapping plastic to protect your children as they may cause suffocation.
Parts Of Keurig K-40
Before we jump into the coffee-making process, you must know about parts of your Keurig K-40. And what is the function of each part when you brew your coffee? What role do they play when you brew coffee? Let’s examine the parts of your Keurig K-40 and move forward to brew your first cup of coffee.
A. Water Reservoir Lid

The lid is to cover the water reservoir.
B. Water Reservoir
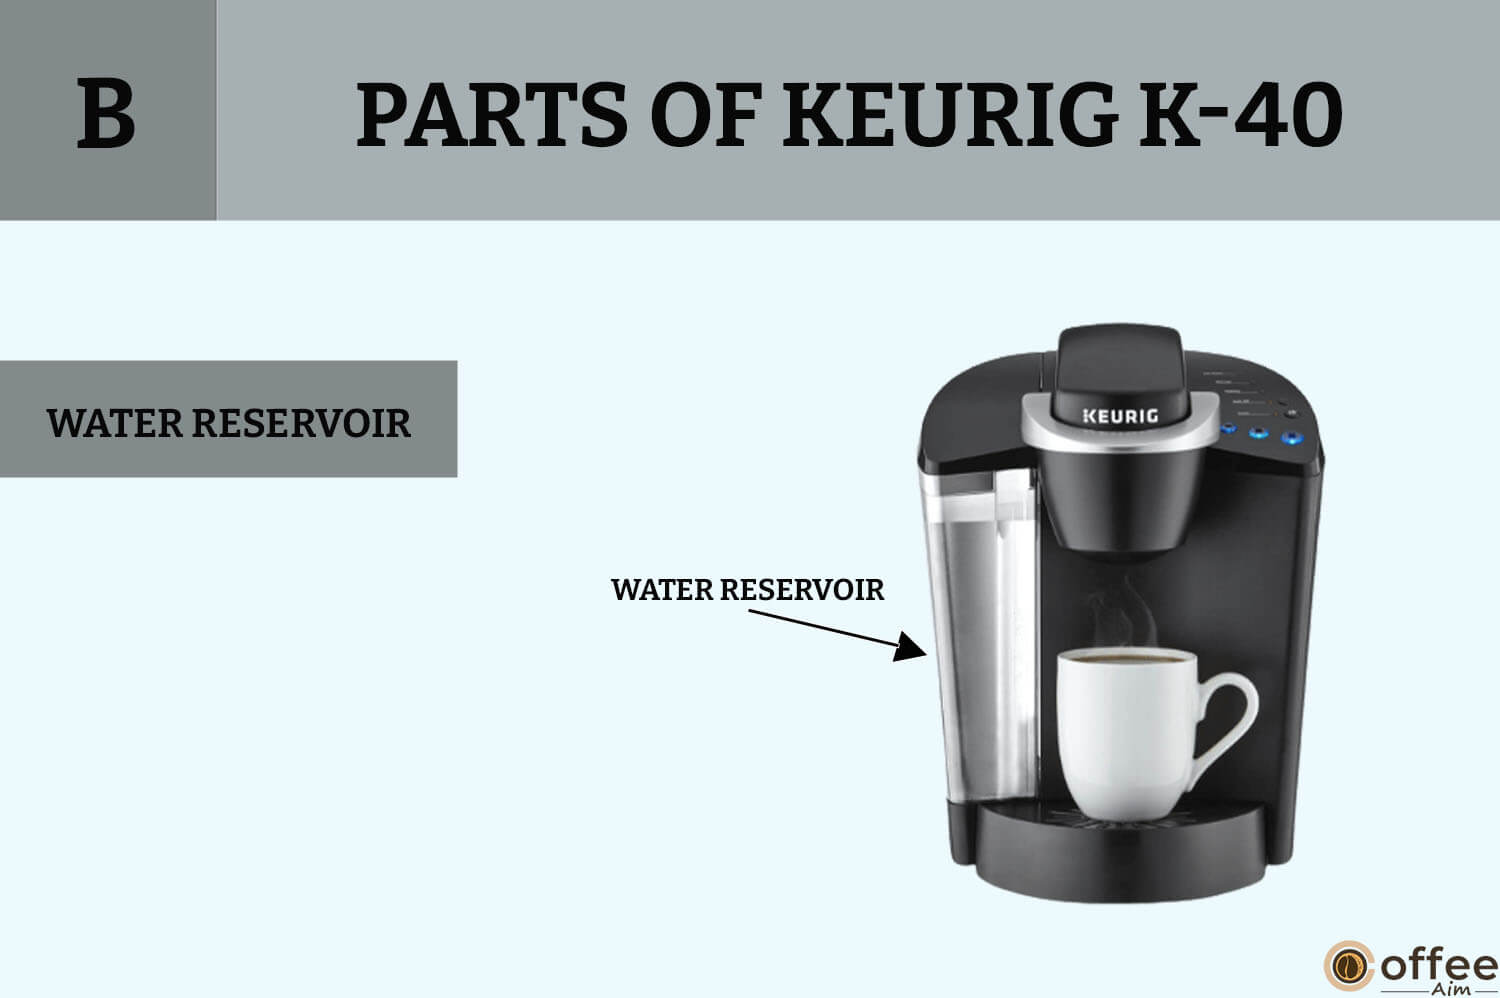
The water reservoir is located on the left side of your Keurig K-40, attached with the help of lock tabs on your brewer. It can hold 48 oz / 1.4 L of water.
C. MAX FILL

It indicates filling the water reservoir to the MAX FILL line. Do not fill above the MAX FILL line.
D. Water Reservoir Locks Tab Slots.
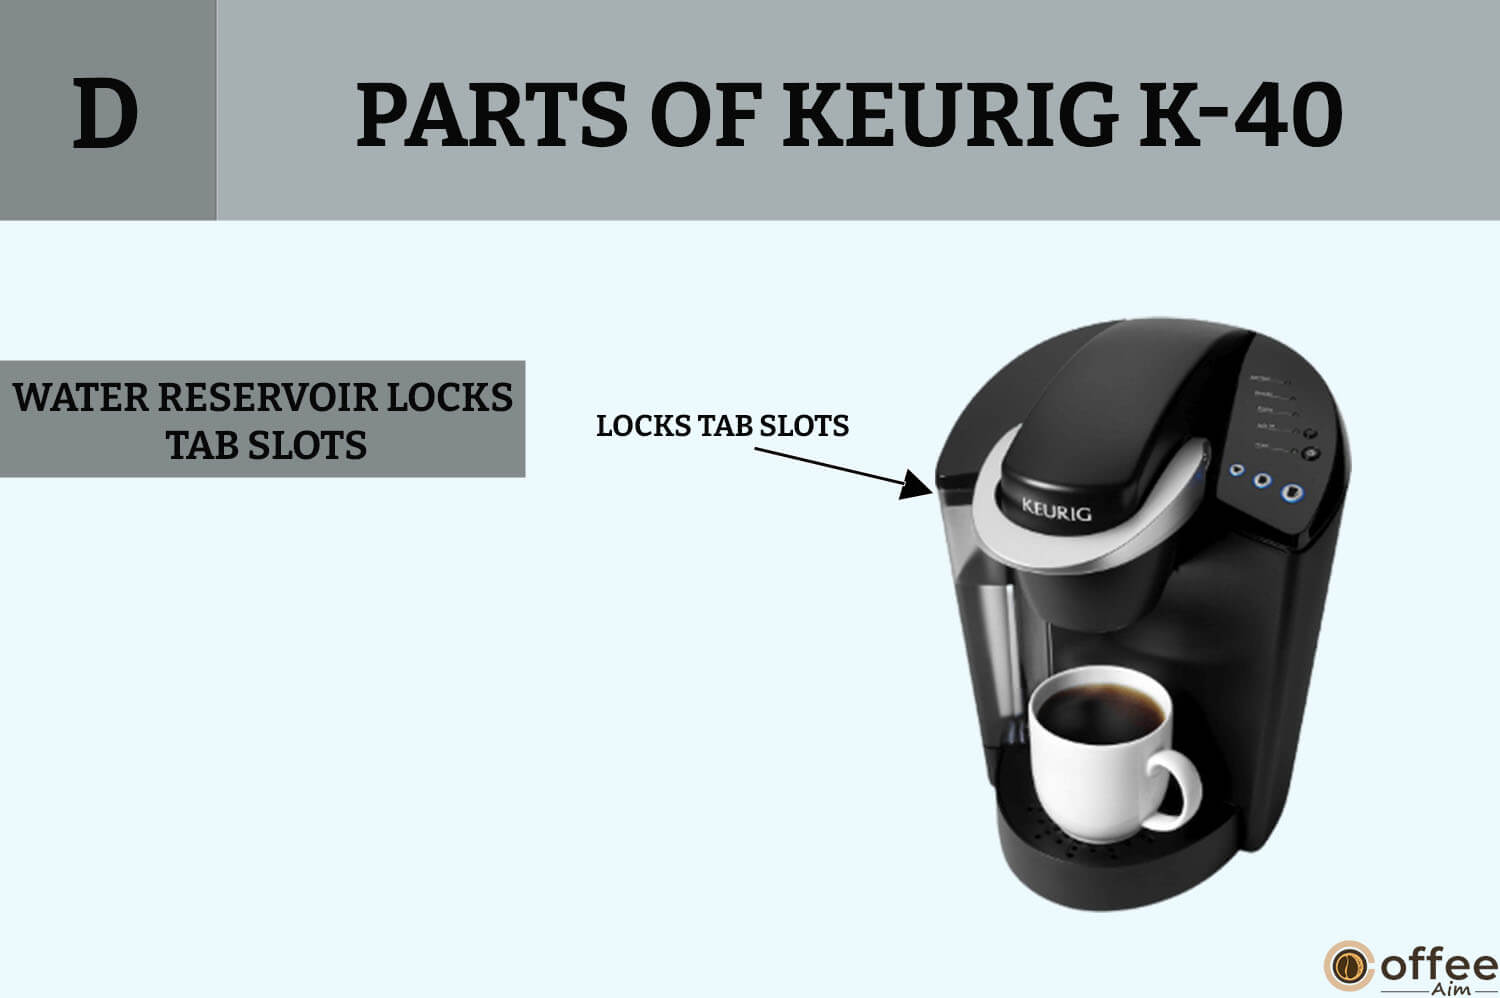
Lock tabs are on the left of your Keurig K-40, which attaches the water reservoir to your machine and keeps it in position.
E. Handle

The handle is the center part of your machine, used to open the lid where the K-Cup pack holder is present.
F. Funnel

The funnel is the inner bottom part of the K-Cup holder. It covers the exit needle hole inside.
G. K-Cup Pack Holder

The K-Cup pack holder is to hold the K-Cup pack inside. It is in the center under the lid. You can insert a K-Cup pack in the K-Cup pack holder by lifting the handle to open the lid and remove the K-Cup holder easily, pull it out by holding it from the top, and push it up the K-Cup holder on the bottom of it from underneath until it releases.
H. Lid

The lid is in the center to cover the K-Cup Pack holder. You can open the lid by lifting the handle.
I. K-Cup Pack Assembly Housing

The K-Cup pack assembly housing encloses the K-Cup pack holder inside.
J. Housing
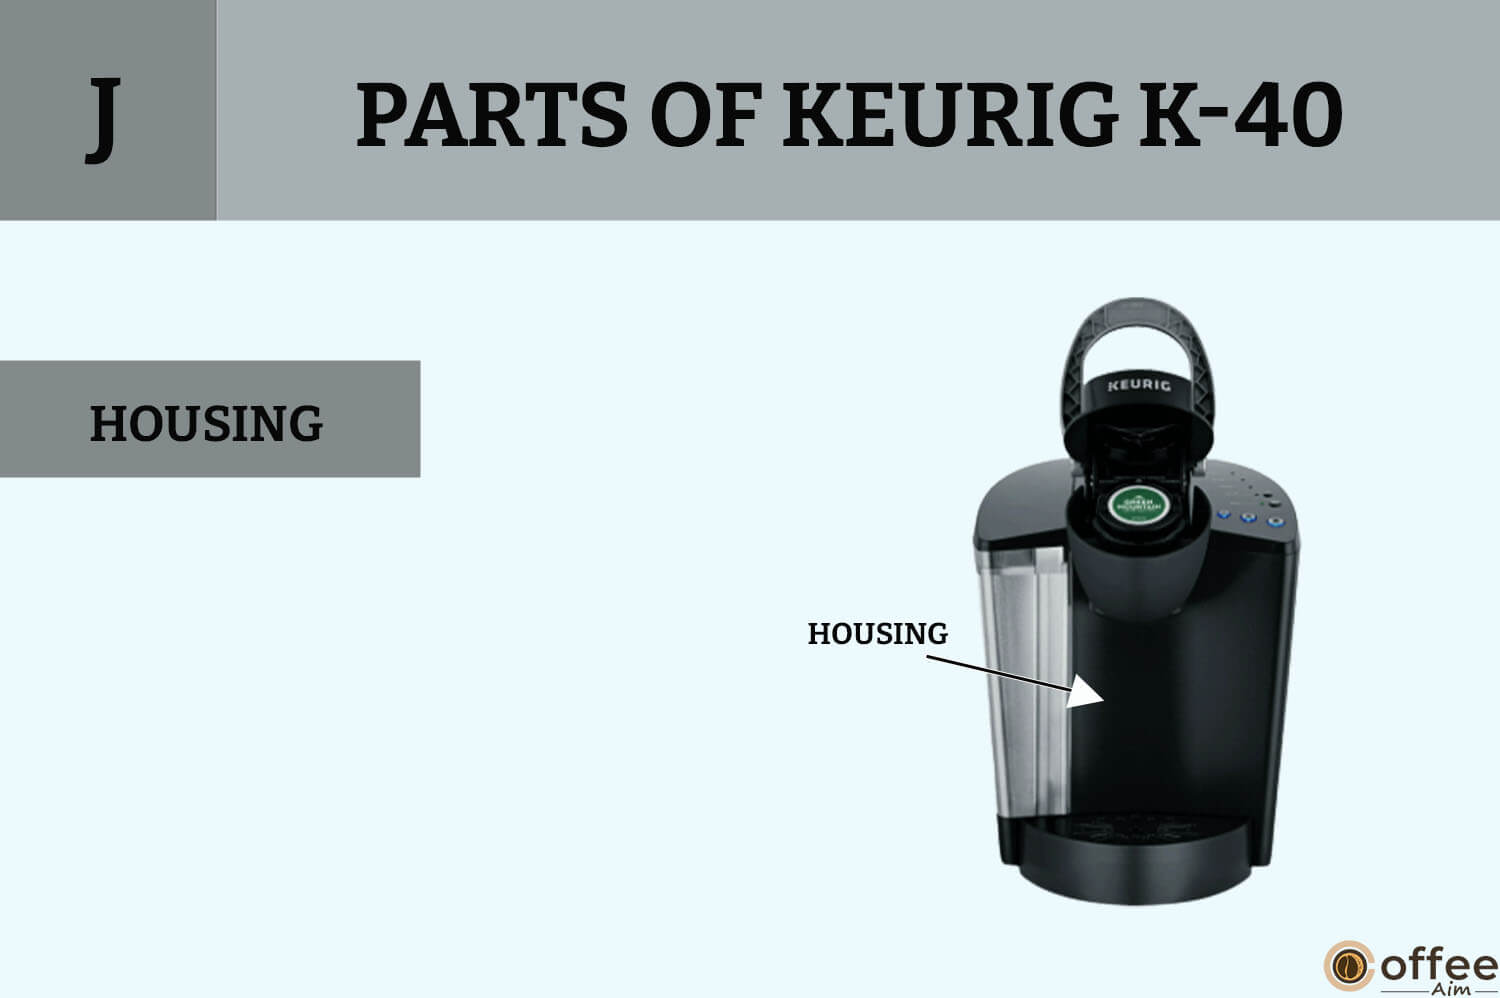
The housing consists of the main body of your Keurig K-40, such as the brewing unit, and the water reservoir where you add water while making coffee, tea, or hot cocoa.
K. Drip Tray Plate

The drip tray is at the bottom of your machine. It is where you place your cup or mug while brewing coffee. The good thing is it is removable. Thus, you can place a travel mug by removing the drip tray plate, as you get more space to put a large travel mug.
L. Drip Tray

The drip tray is placed underneath the drip tray plate to catch spills, it is to store spills, so there won’t become a mess when a cup gets overfilled or you forget to place it before you start brewing.
M. Drip Tray Base

The drip tray base is where the drip tray is positioned.
N. Vent

The purpose of the vent is to clear any bubbles that may develop inside the machine’s hot water tube when it becomes clogged. It occurs only when the machine is not correctly descaled.
O. Power Cord

The main electrical cable you connect to an outlet to switch on your machine is the power cord.
Controls And Its Indications
The controls are a crucial part of your Keurig K-40. Each light gives you a different signal.
Note: Please don’t press the button without recognizing the signal it is showing you; it will lead you into trouble.
Do you want a clear idea regarding lights that flash on different buttons of your machine? Here I will give you a detailed interpretation of each blinking light. Let’s move forward and see what each button is telling you.
P. Small Cup Button
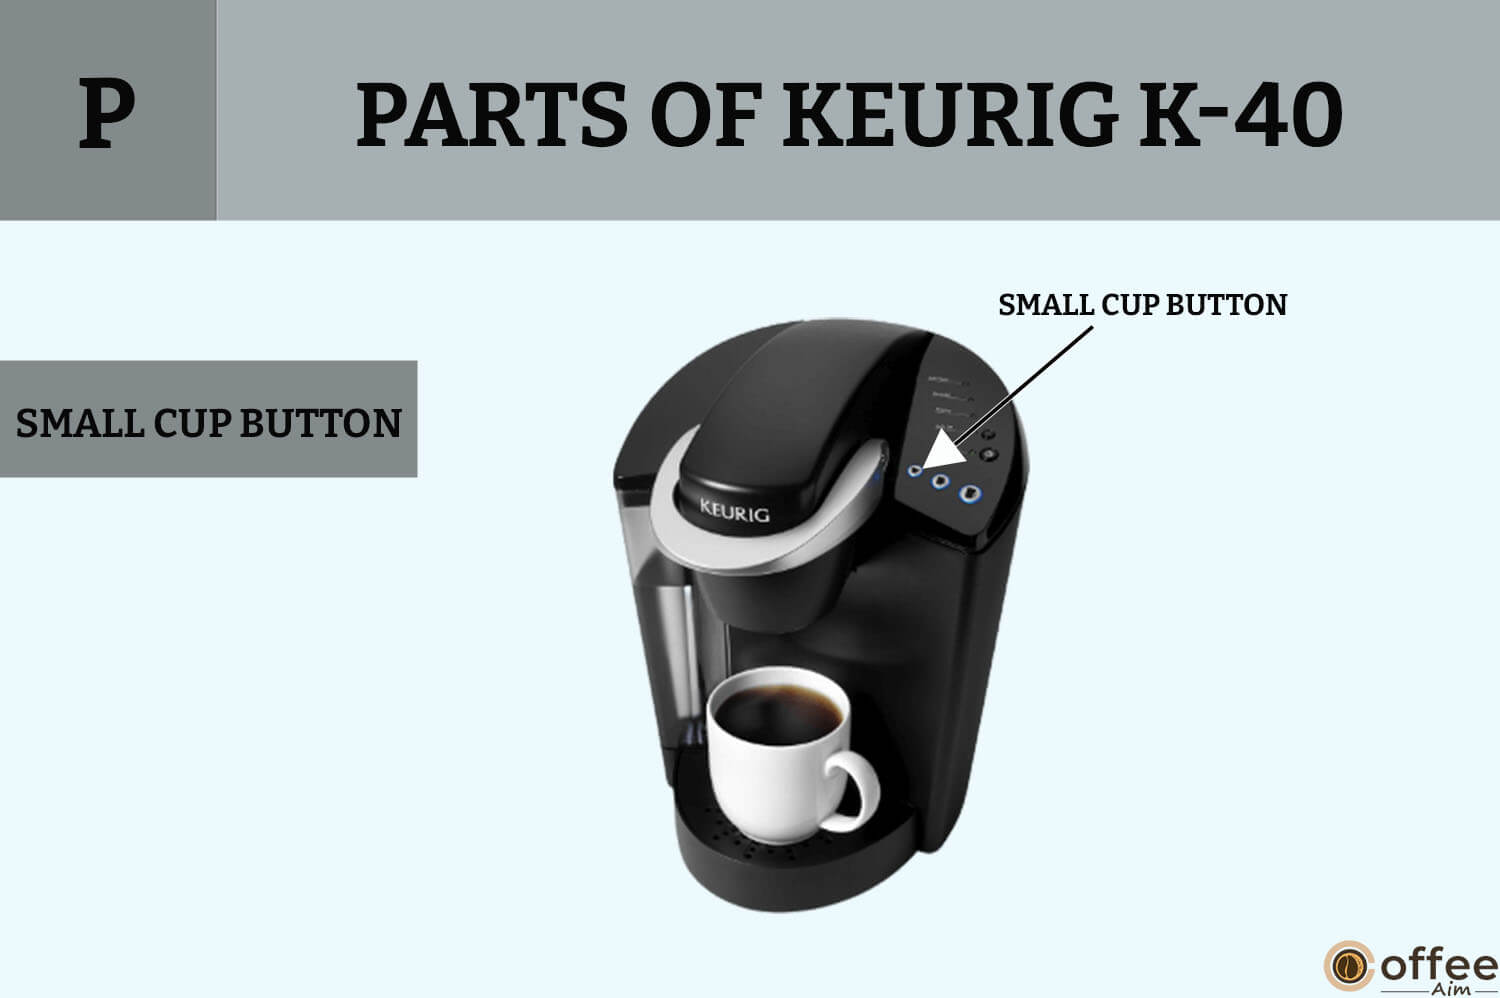
The small cup button can brew at least 5.25 oz / 155ml of coffee, so use a small cup when you want to brew less.
Q. Small Mug Button
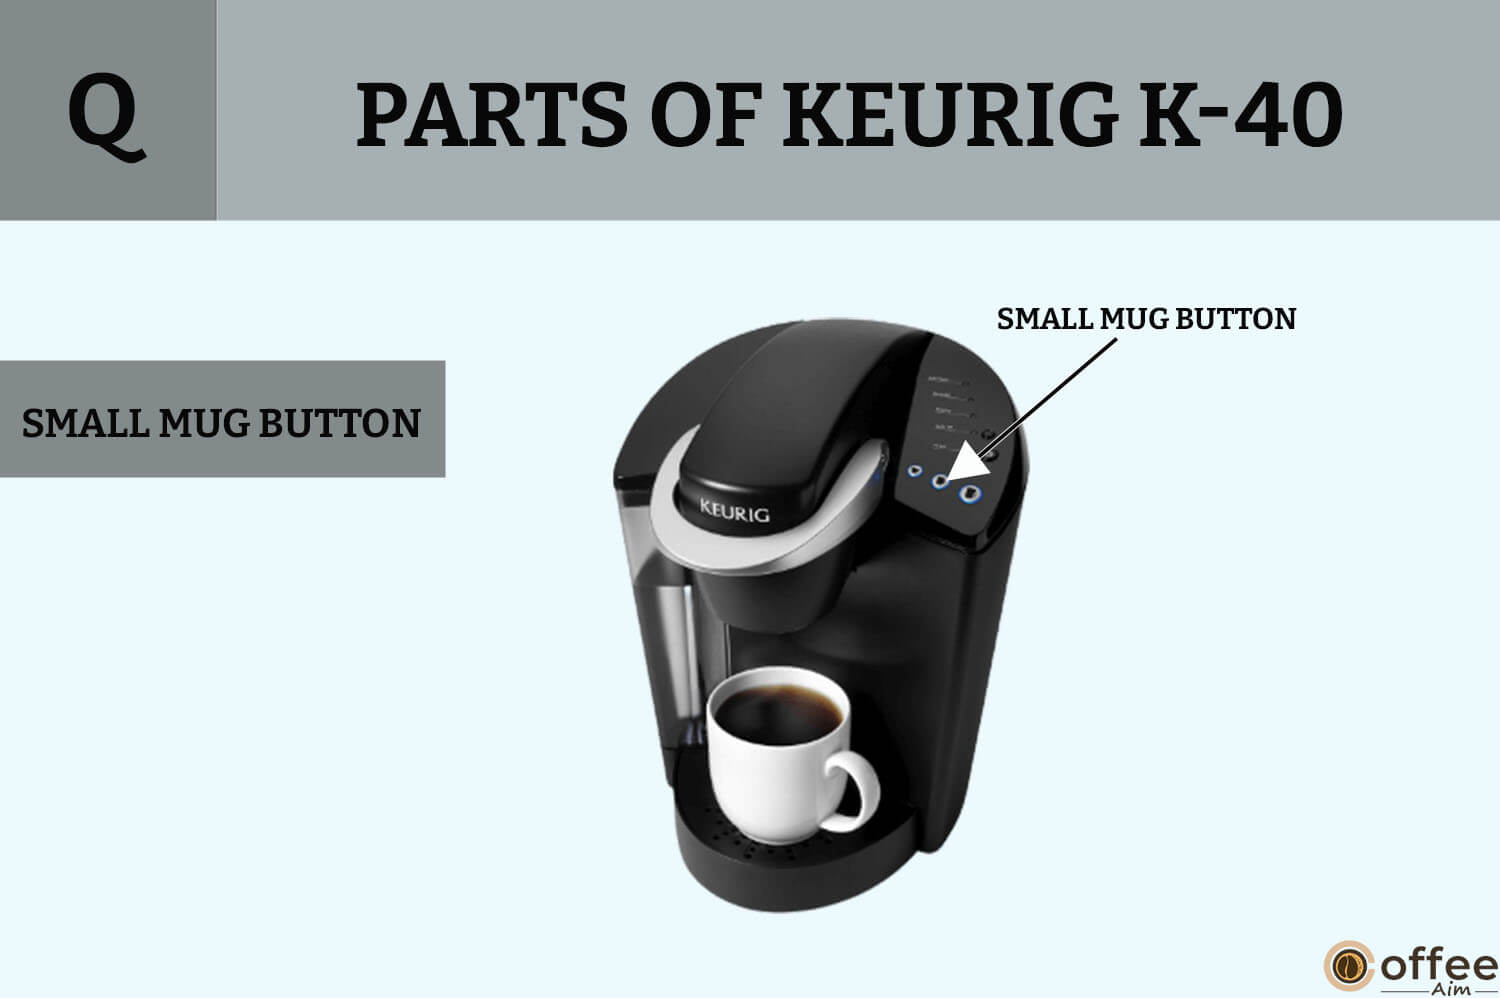
The small mug button can brew 7.25 oz / 214ml of coffee; use a small mug while brewing with this button.
R. Large Mug Button

The large mug button can brew 9.25 oz / 274 ml of coffee; use a large mug if you want a hefty volume of coffee in the morning.
S. Power Button
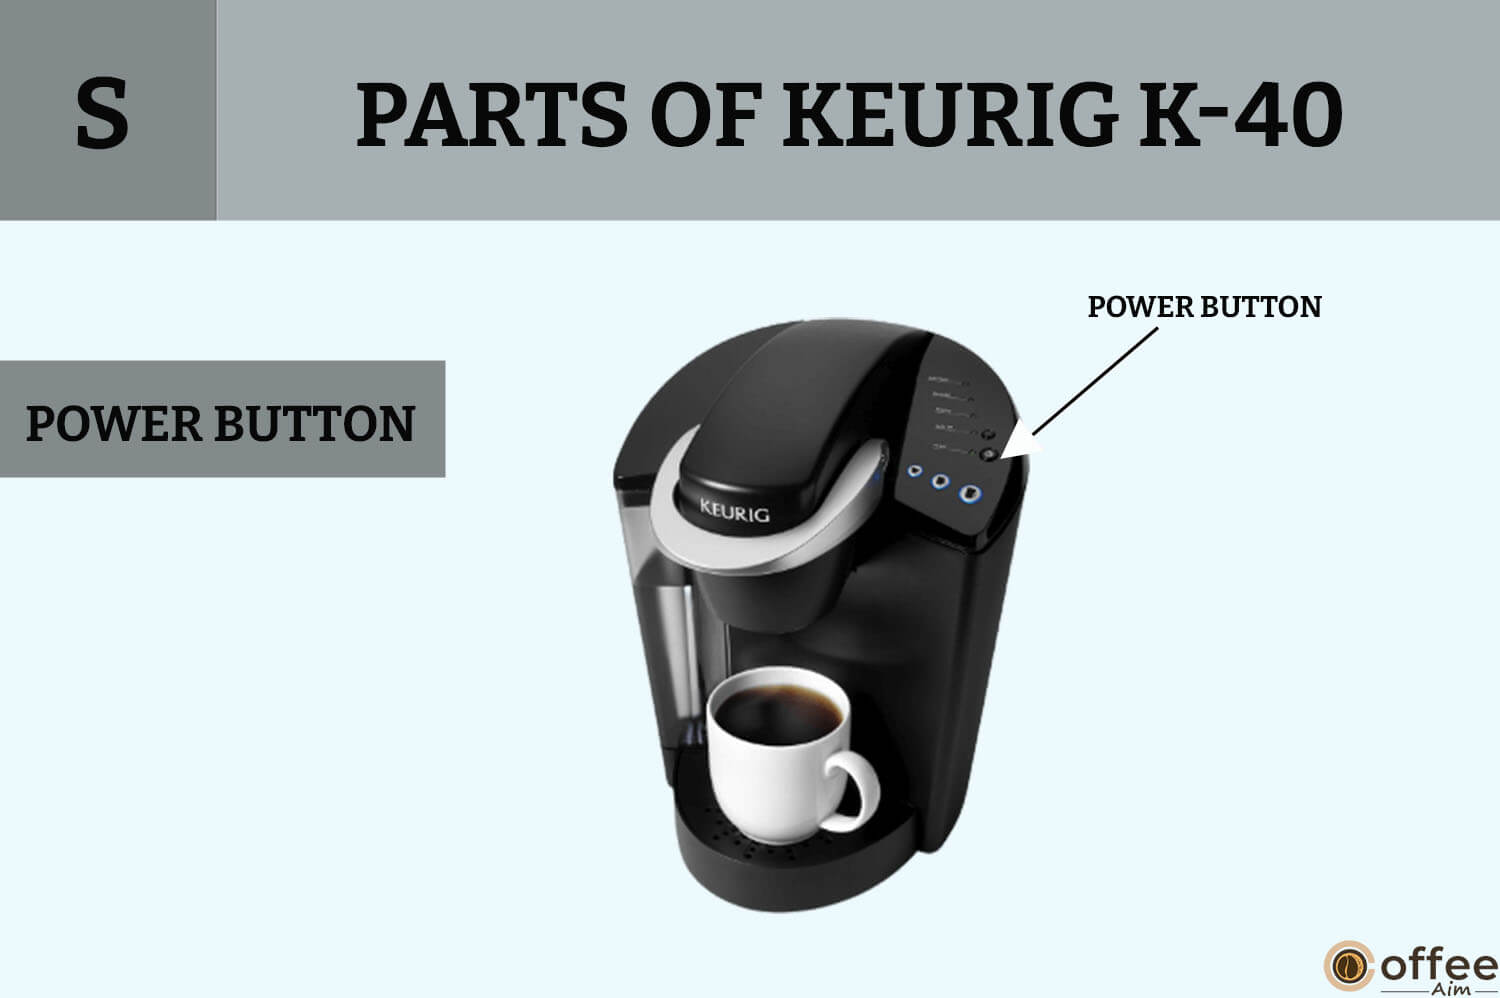
The power button is to turn ON /OFF your machine.
T. Power Light (Green)
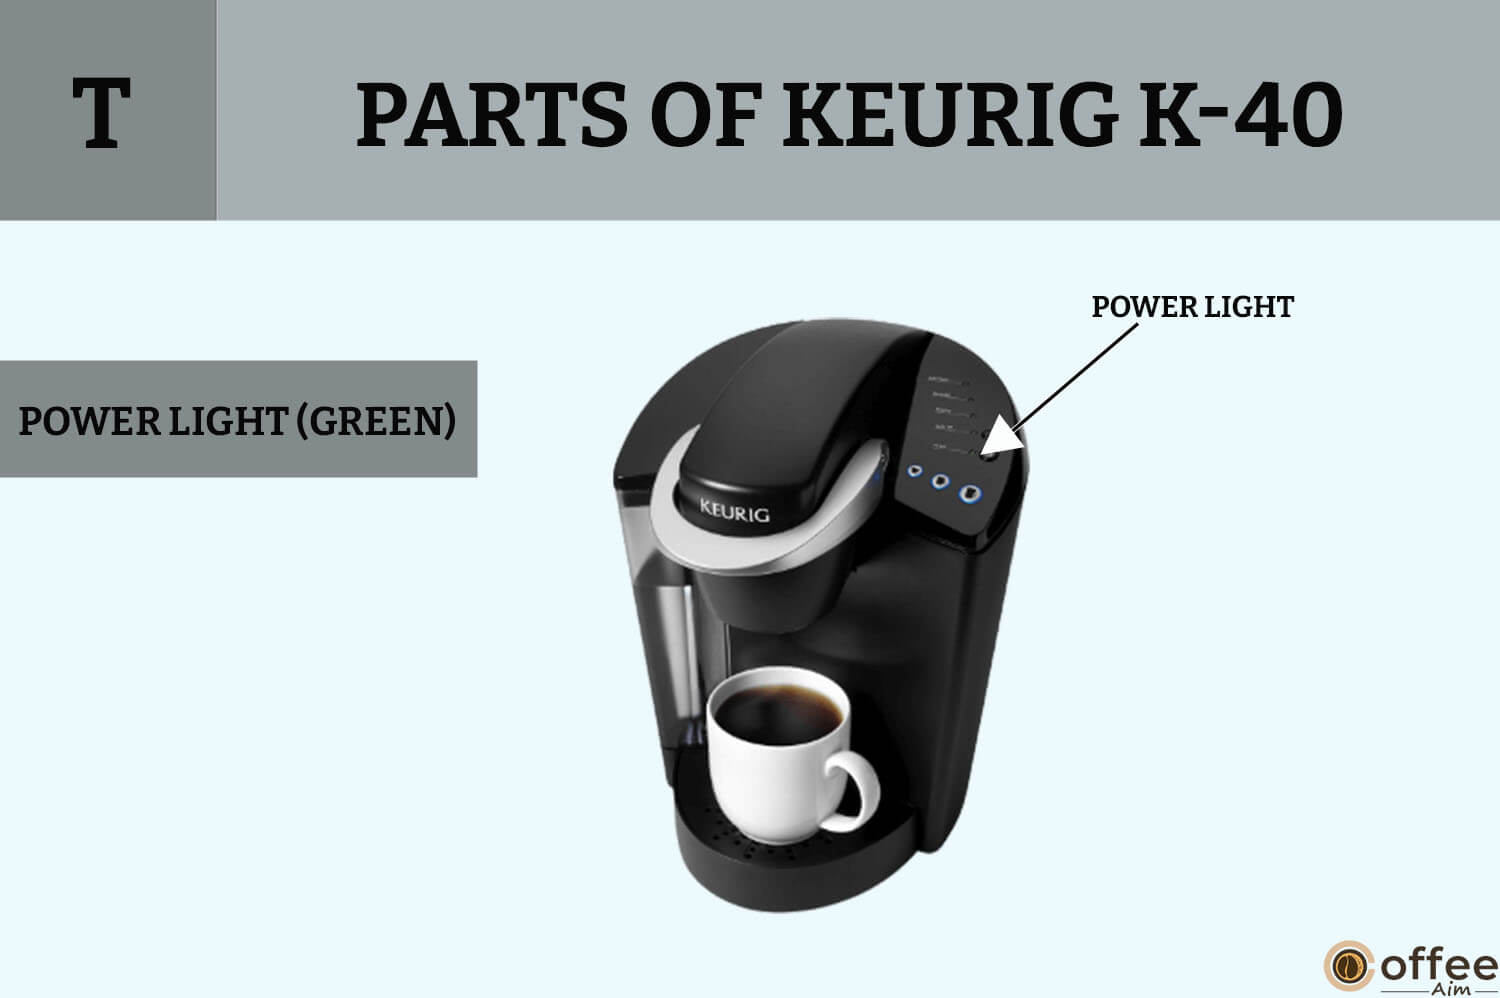
The green power light indicates your machine is powered ON.
U. Auto Off Button

The black Auto Off Button can set your machine to Auto Off mode.
V. Auto Off Light (Green)

The Green Auto Off light indicates your machine’s Auto Off timer is ON and will turn off automatically after two hours.
W. Heating Light (Red)

The red heating light indicates the water is in the heating process.
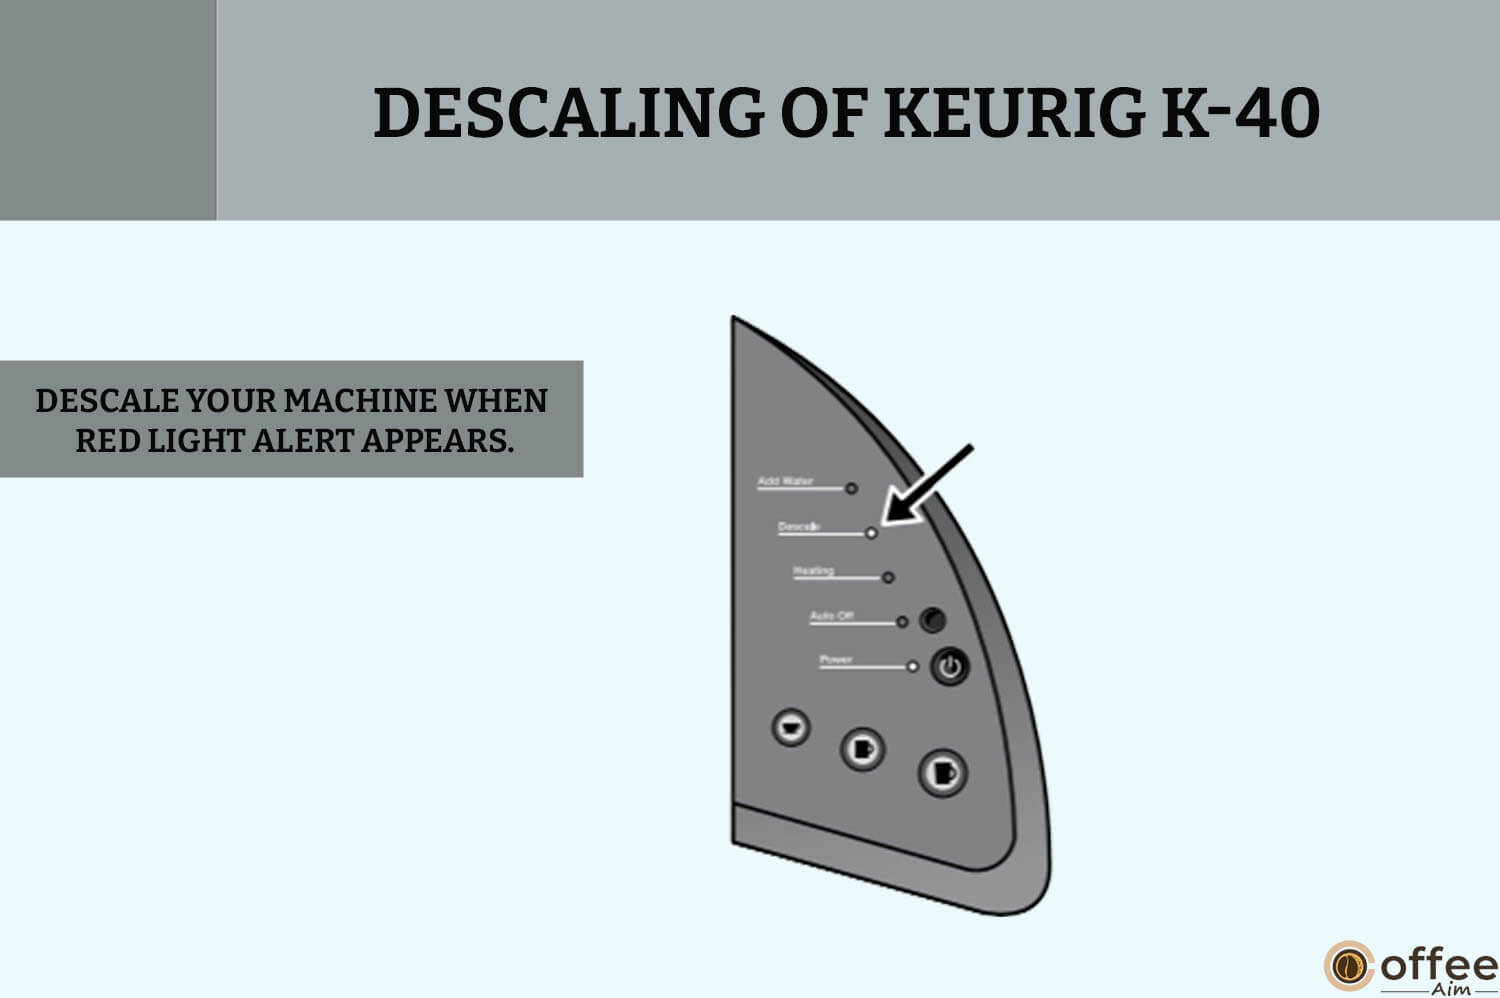
X. Descaling Light (Red)

The red descaling light indicates your machine needs descaling. Stop making coffee when you notice this red descaling light and immediately descale your machine.
Y. Add Water Light (Blue)

Blue add water light indicating you are running out of water, add water into the reservoir to keep making your coffee.
Helpful Suggestions
When you confront Keurig K-40 for the first time, it can be overwhelming, although, with the proper guidance or tips, it will become incredibly easy. That’s why before you start using your Keurig K-40, you must know what things should be taken care of while operating your Keurig K-40.
But wait! How do you know what to do and what not to do? Don’t worry; I have covered the do’s and don’ts of Keurig K-40 for you, which you should follow and keep in mind while operating your machine every time.
1. Plug The Brewer Only In Its Own Grounded Outlet
The brewer should be placed and operated independently in its circuit, separated from other appliances. Your brewer might not work correctly if the electrical circuit is overcrowded with other electronic devices.
2. Keep Your Keurig K-40 On
If you want to keep your brewer ON all the time to make cup after cup of either coffee or hot cocoa, you can set your brewer to Auto OFF mode by programming it. So, it may automatically turn off after two hours of last use.
3. Keurig Suggests Filtered Or Bottled Water While Preparing Best-Tasting Coffee, Tea, Or Hot Cocoa
Every area has a different quality of water. Suppose you feel an unpleasant flavor in your cup of coffee, tea, or hot cocoa(such as the taste of chlorine or other minerals taste). In that case, consider using bottled water or water that has been through a filtration system. Always use the water filtration system according to the manufacturer’s directions for better results.
4. Choose The Perfect Size, Taste, And Brew For You
Keurig machine gives you endless options to customize the size, flavor, and brew ideal for you with over 200 flavors of K-cup packs and three brew sizes (Small Cup-5.25 oz., Small Mug-7.25 oz., and Large Mug-9.25 oz.). Choose an extra bold K cup pack (up to 30% more ground coffee than regular types) and an appropriate brew size for an intense cup.
The smaller the brew size, the stronger the flavor in your cup. The flavor intensity in your cup decreases as the brew size increases.
5. Remove The Used K-Cup After The Use
Always remove the used K-Cup from the machine after using it by lifting the handle.
CAUTION: Be careful. K-cup packs must be hot.
6. Brew Coffee In A Travel Mug
If you want to brew coffee in a travel mug, remove the drip tray from the machine and place your travel mug on the base of the drip tray.
7. Descale Regularly
If the descale light is red, you should descale your Keurig K-40 right away. To maintain the best performance, descale your brewer every three to six months. Descaling will keep your machine in good condition by removing the mineral deposits from the internal parts of your brewer.
Let’s Set Up Your Keurig K-40 For First Use Or After A Storage Period
I can imagine your enthusiasm while unpacking your Keurig K-40. You are desperate to use it immediately to make your first cup of coffee, but you must wait a while to set up your machine. The setup phase is crucial as every machine has a different setup procedure, so you must do it carefully. If you are not aware of the setup process of Keurig K-40 and set it up incorrectly, it will have some problems.
I have outlined the setup procedure to help you correctly set up your machine. Let’s start without making you wait any longer.
Important: Your Keurig K-40 must be set up properly for the first use, as instructed below.
NOTE: If the brewer has been exposed to a temperature lower than freezing, give it at least two hours to warm up before brewing because a frozen brewer won’t work.
- Carefully unwrap and unwind the cord of your Keurig K-40 and connect it to a grounded outlet. Then take off all the pieces of packing tape from the brewer.
- Put a large mug of at least 10 oz on the drip tray plate.
- To remove the water reservoir from the brewer, you have to remove the lid first, then pull it vertically upward and place it away from the brewer. Clean it by rinsing it with fresh water.

- Use filtered water or bottled water to fill your water reservoir. Fill it until the water reaches the MAX FILL line but does not exceed this line.
- Place the reservoir back on the left side of the brewer and ensure the lock tabs are in contact with the brewer. Cover the water reservoir by replacing the lid.

- Press the power button on the brewer’s upper right panel. The power light will become green.
NOTE: You will not use the K-cup pack for this procedure.
NOTE: If the add water light turns blue, it indicates your water reservoir is either empty or may not be positioned correctly on the brewer. The small mug button will turn on once you add water to the reservoir.
- As you press the power button, the brewer will start filling up with water and heating up automatically. It will take 4 minutes, and the red heating light will blink throughout the heating process. As the water heating process completes, the red heating light will turn off, and the Small Cup, Small Mug, and Large Mug buttons will light up.
NOTE: Don’t lift the handle while the brewer is heating up.
NOTE: As the machine heats up, you may notice a small amount of water coming out of the reservoir, don’t worry; it is normal.
- Lift and lower the handle. Push the Small Mug button to start a cleansing brew and drain the hot water into the sink.
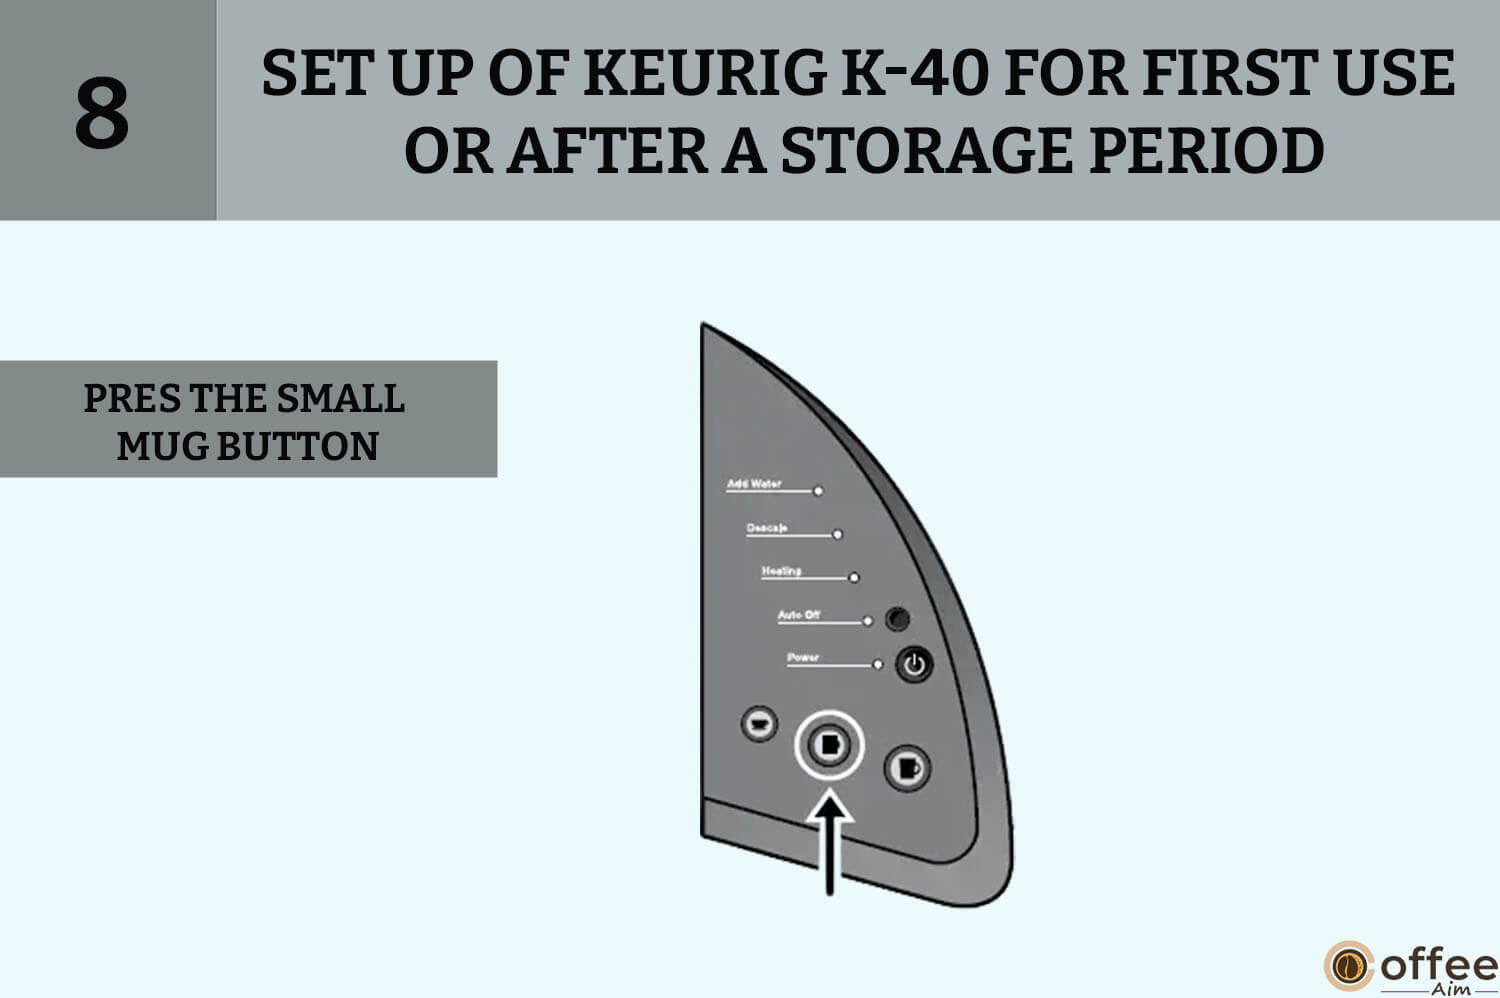
- Brewer reheats the water during brews, which will take 15 seconds; during the reheating time, the red heating light will illuminate and go off once the water has heated.
- The Keurig K-40 setup process finishes here, and you can start brewing now!
Ready To Brew
Finally, the wait is over now. Your Keurig K-40 is all set up and ready to brew coffee for you. You are excited to make your first coffee with Keurig K-40, but you are wondering how to make a perfect coffee with Keurig K-40. Well, You don’t have to worry about it. I’ll guide you exactly on how to prepare your first cup without making any blunders.
Ready? Let’s start!
- You are all set to brew your coffee, but how do you know your Keurig K-40 is powered on? Check the light on the power button; if green, it indicates your machine is ready to brew your first cup. If there is no green light, then press the power button to switch on your machine.
- Place a cup or mug on the drip tray plate.
- Lift the handle in the center of your machine; as you lift the handle, the K-Cup pack holder will open in your direction.

4. Choose a K-Cup pack you want to brew.
NOTE: Do not open the foil lid or damage the K-Cup pack.
5. Place the K-Cup pack you choose to brew in the K-Cup pack holder.
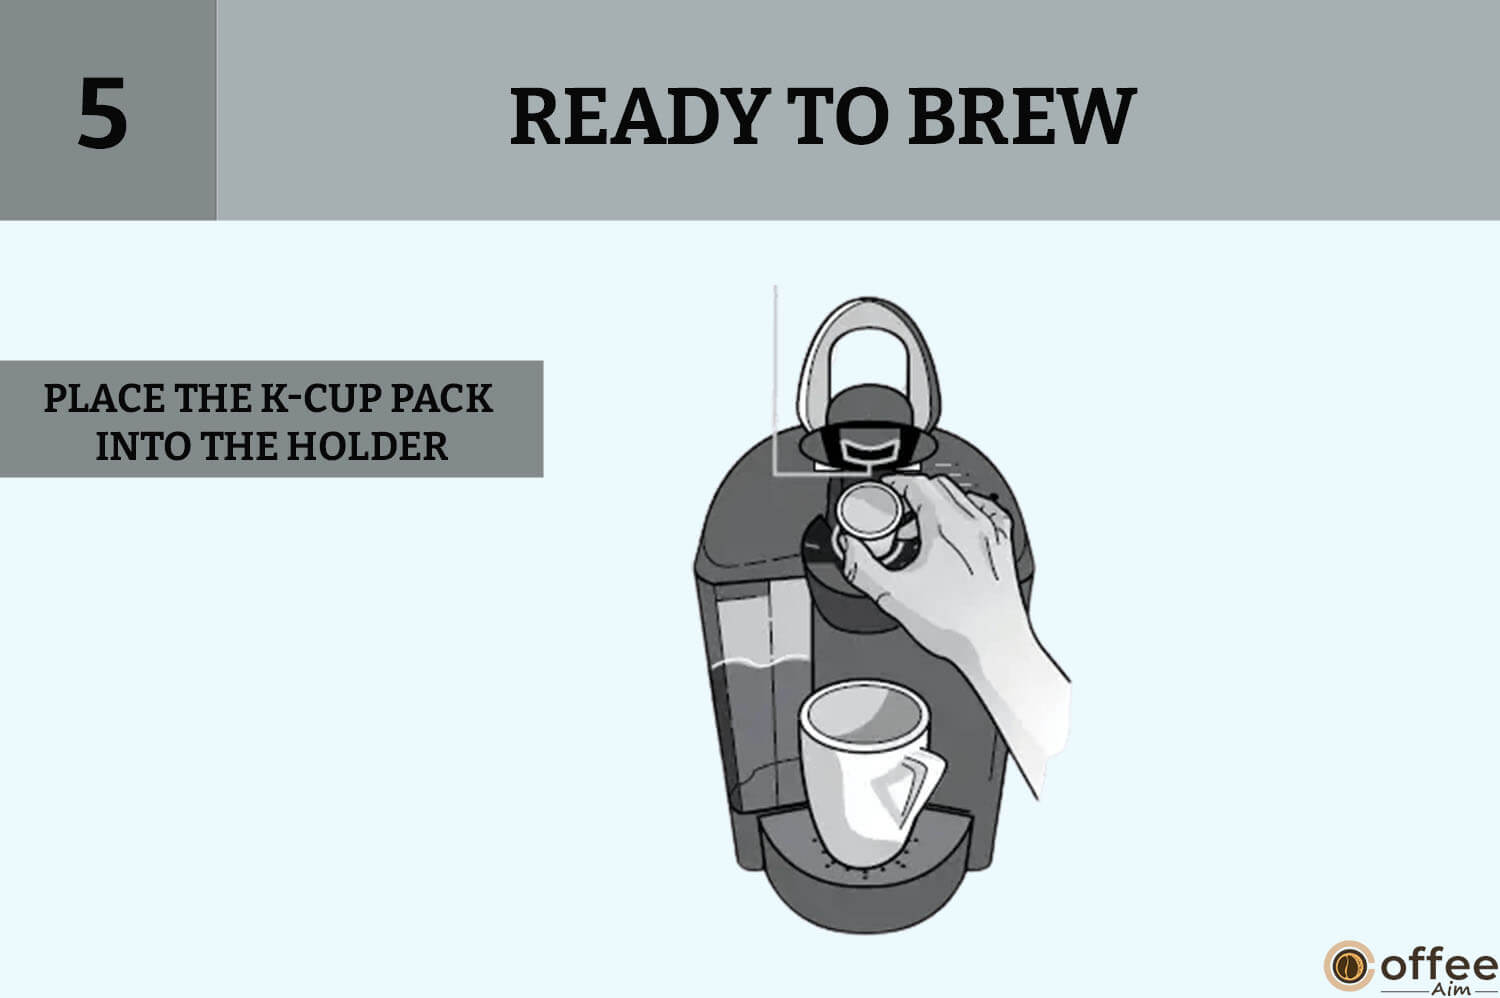
CAUTION: To reduce the risk of injury, do not insert your fingers inside the K-Cup holder assembly, as it contains two pointed needles to puncture the K-Cup pack. One is above the K-Cup pack holder, and the second is at the base of the K-Cup holder.
6. To close the lid, lower the handle of your machine.
7. Choose your brew size from the Small Cup, Small Mug, and Large Mug. What servings do these cup options provide you?
- Small Cup – 5.25 oz.
- Small Mug-7.25 oz.
- Large Mug- 9.25 oz.
NOTE: If you do not choose a brewing cup size within 60 seconds, the brew buttons will be disabled to avoid accidental operation. You must reset and reactivate the brew buttons by lifting and lowering the handle.
8. The brew button you have chosen to brew will remain lit during the brewing process.
NOTE: To avoid the risk of harm, do not lift the handle or K-Cup pack holder during the brewing process, as it contains boiling water.
9. There can be a little delay before the brewing process starts. The whole process of brewing will take a minute; as the brewing ends, the machine will release some air to remove the liquid from the K-Cup holder.
10. Remove the used K-Cup pack from the holder by lifting the handle.
CAUTION: Take care of your hand while removing the used K-Cup pack, as it will be scalding.
11. Yay! The brewing process completes here. Now, enjoy your freshly brewed Cup of coffee, tea, or hot cocoa made with your Keurig K-40.
12. After the first brewing cycle, your machine will automatically heat up for the next Cup to brew, it takes around 15 seconds, and during this period, the red heating light will blink until the heating completes.
NOTE: You may hear a vibrating sound when your machine is preparing for the next brew, don’t worry; it’s the normal sound of the pump.
How To Stop The Brewing Process?
You are in the middle of making coffee, but all of a sudden, your mood changes, and you feel like brewing hot chocolate. Now, what can you do? Do you want to stop the brewing process? It’s easy; press the power button of your Keurig K-40 and turn off the brewer; the flow of coffee will eventually stop, and the heating process and the green power light will be off. Now, you can start brewing hot chocolate.
NOTE: As you stop the brewing process and begin with your next brew, you might get less quantity of your coffee or hot cocoa. We suggest you prepare a cleansing brew after terminating your first brew. The second brew will then have the correct volume.
How To Add Water To The Reservoir?

When the water level in the reservoir is too low to brew a coffee or the reservoir is removed from the machine, the blue light will blink as a water alert. The machine will not let you brew until you add water to the reservoir.
There are two approaches to filling the water reservoir:
- You can add water directly into the reservoir by removing the lid of it, but the reservoir is still connected to the machine. Add water to the MAX FILL line of the reservoir but not above this line. Then place the lid to cover the reservoir.
- To remove the water reservoir from the brewer, you have to remove the lid first, then pull it vertically upward and place it away from the brewer. Add water to the MAX FILL line only. Then place the reservoir back into the machine and cover it with a lid.
IMPORTANT: Keep the water reservoir in place throughout the brewing process.
Brew Iced Coffee With Keurig K-40
Hey! Do you know that you can make iced beverages with your Keurig K-40? It’s surprisingly easy, and I will guide you on how to make iced coffee with your Keurig K-40 because the tastiest iced coffee is the one that is freshly prepared and poured over ice. Does it require any special thing to make iced coffee? No, you just need a pack of ice cubes. Choose your favorite K-Cup pack specially made to brew iced coffee, and press the desired brew size button.
NOTE: You can remove the drip tray plate to place a taller cup.
IMPORTANT: Do not use a cup made of glass; if you do this, your glass might break or suffer a crack.
Brew Hot Water In Your Keurig K-40 (brew hot water)
Your Keurig K-40 can produce hot water, which you can use for various purposes like making hot chocolate, cooking, or preparing soups. When you need hot water, lift the handle and then lower it without adding a K-Cup pack to the K-Cup pack holder. The blue light will blink. Before you push the brew button, place a cup on the drip tray plate.
NOTE: We recommend you run a cleaning cycle without a K-Cup pack after preparing hot chocolate with a K-Cup pack.
Clear Out Your Keurig K-40
Clear the water from the inner tank if you last used your Keurig K-40 over a week ago.
- When water is inside the reservoir, remove the lid by pulling it vertically upward, and placing it away from the brewer. Drain the remaining water, rinse the reservoir properly, and add water again. Put it back on the machine and cover the reservoir with its lid.
- Ensure the machine is ON. Lift the handle of your machine and lower it but do not insert the K-Cup pack in the holder and wait for the red heating light till it stops flashing.
- The blue brew button will light up as the heating cycle completes. Before you press the brew button, ensure you have placed the cup on the drip tray plate.
- To remove water from your machine’s inner tank, repeat steps 2 and 3 twice.
How To Program The Auto Off Mode On Keurig K-40?
If you are always in a hurry in the morning and forget to switch off your Keurig K-40 every time while going to your office, then this Auto Off feature of Keurig K-40 is a must. Once you activate this feature, your machine will automatically turn off after two hours. You can set your machine to Auto Off mode by following the steps below.
- Turn on your Keurig K-40 by pressing the power button.
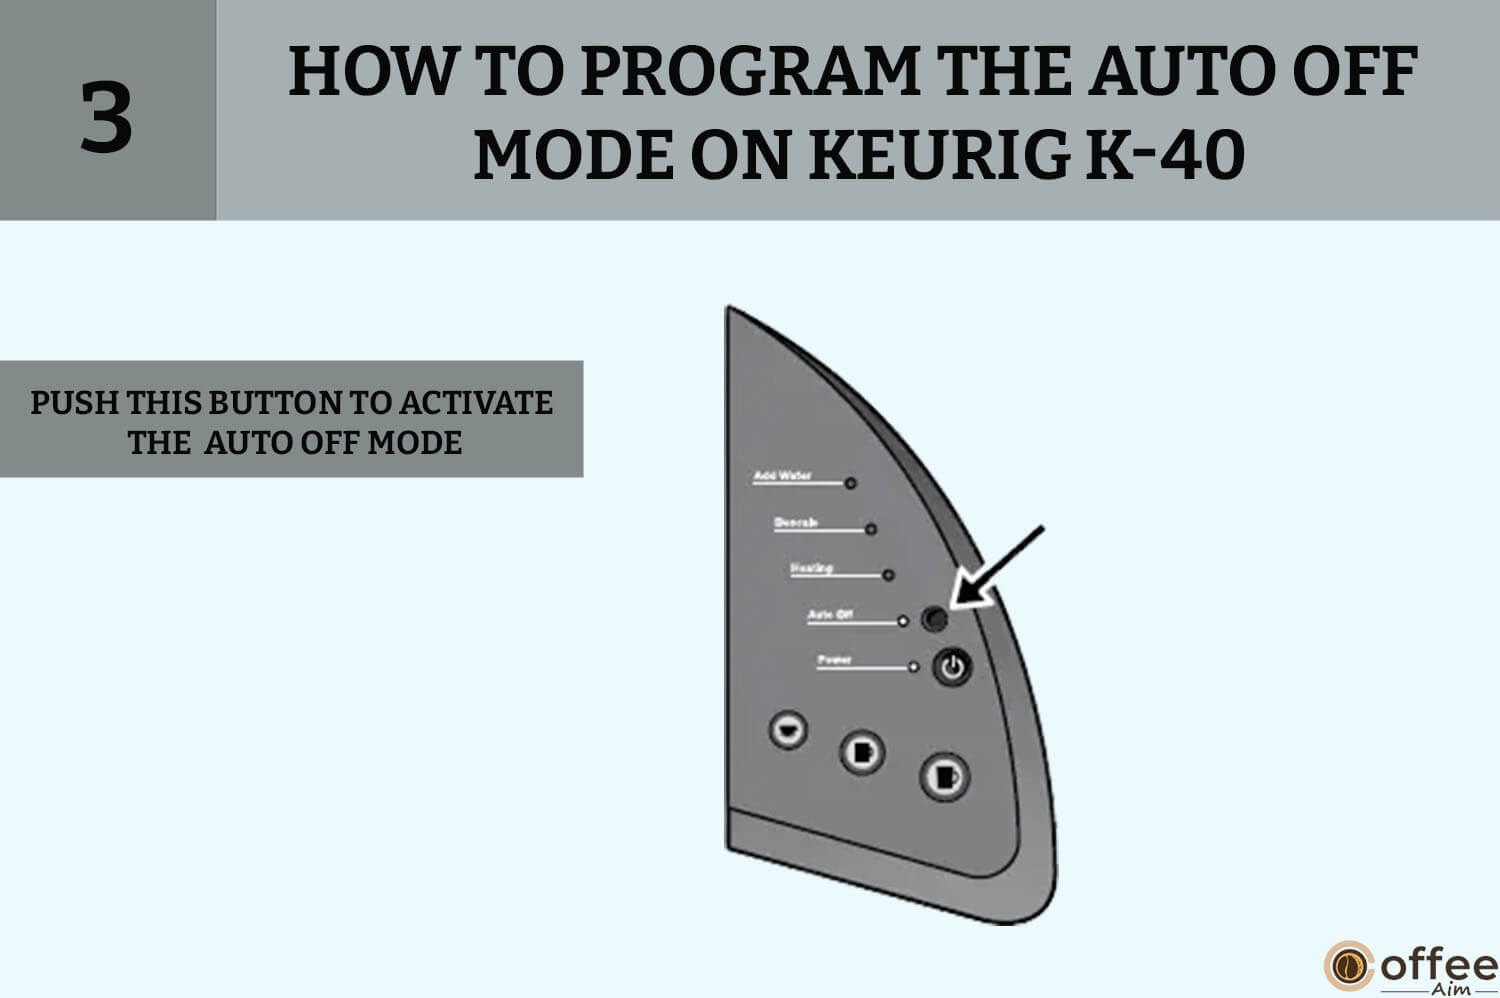
- To set your machine on Auto Off mode, you need to press the Auto Off button, but where is the Auto Off button? The machine’s right panel features a black button called Auto Off.
- Once you push this button, the Auto-off timer of your machine will be ON. You will see the green light appear on the Auto Off button, indicating the activation of Auto Off mode. As the Auto Off timer is activated, your machine will automatically switch off two hours following your last brew.
4. If you want to deactivate the Auto Off mode of your machine, push the Auto Off button, and the green Auto off light will disappear from the button.
Cleaning And Maintenance Of Keurig K-40
To keep your Keurig K-40 in tip-top condition, you must take good care of it by cleaning each part of your brewer. I will explain how you can clean each part of your brewer. Let’s get into the cleaning process.
Cleaning Of External Parts Of Keurig K-40
You should regularly clean the external parts of your Keurig K-40, especially if you are a daily user. Otherwise, your machine will start looking ugly from the outside, and you will surely not want it to happen. Right? So, do clean your Keurig K-40 by following the steps below.
- Do not soak your Keurig K-40 in water or any liquid. Only use a moist and smooth cloth to clean your machine’s housing and other external parts to remove dust.
- The drip tray can retain up to 8 oz of spillover. Check the drip tray and plate, clean them regularly, and keep them level to prevent spills.
- If you want to remove the drip tray, move it forward in your direction.
- You must never put the drip tray and the tray plate in the dishwasher; they must be cleaned gently with a moist, non-abrasive piece of cloth and rinsed thoroughly.
Cleaning Of K-Cup Pack Holder Assembly
It’s crucial to clean the removable parts of your machine. If you do not wash them properly, coffee grounds will get stuck inside, the machine will start having problems, and your machine will not survive more than a year just because of carelessness. To keep your machine working smoothly, clean the removable parts of it regularly by following the steps below.
1. Cleaning The Parts
You can place the K-Cup pack holder assembly on the dishwasher’s top shelf.
NOTE: In the dishwasher, use low-temperature settings.
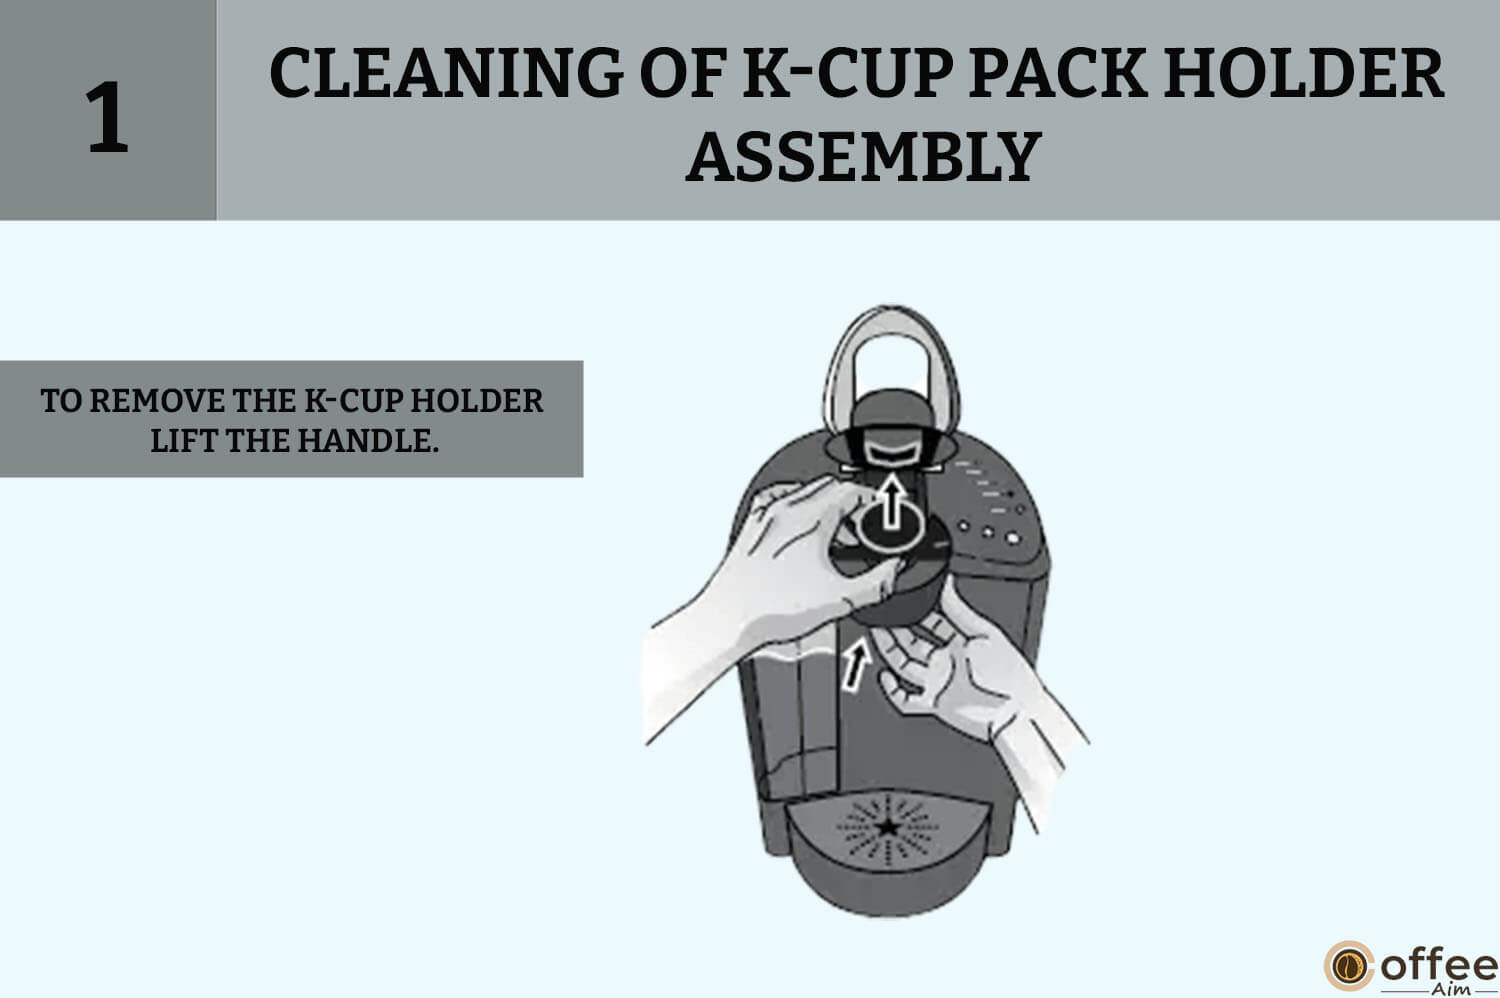
To remove the K-Cup holder from the machine, lift the handle. You are simply going to pull out the K-cup holder with one hand while pushing up with the other hand on the bottom of the K-Cup holder from underneath until it releases, and you have to do it gently because you don’t want to break your machine, Right? So, you put only a little bit of pressure from underneath the K-Cup holder.
After cleaning, you must align the K-cup holder by using the two front ribs as a guide and then fit it into place from the top.
2. Cleaning The Funnel
To clean the funnel, separate it from the K-Cup holder. Remove the funnel from the K-Cup holder by pulling on the sides until it detaches, and if you do this for the first time, it might take extra force.
The good thing is that the funnel is dishwasher friendly, and you can also thoroughly rinse it under running water. After cleaning the funnel, you must put it back into the K-Cup assembly; how can you do that? Use two hands to click the funnel back into the K-cup holder by aligning the sides.
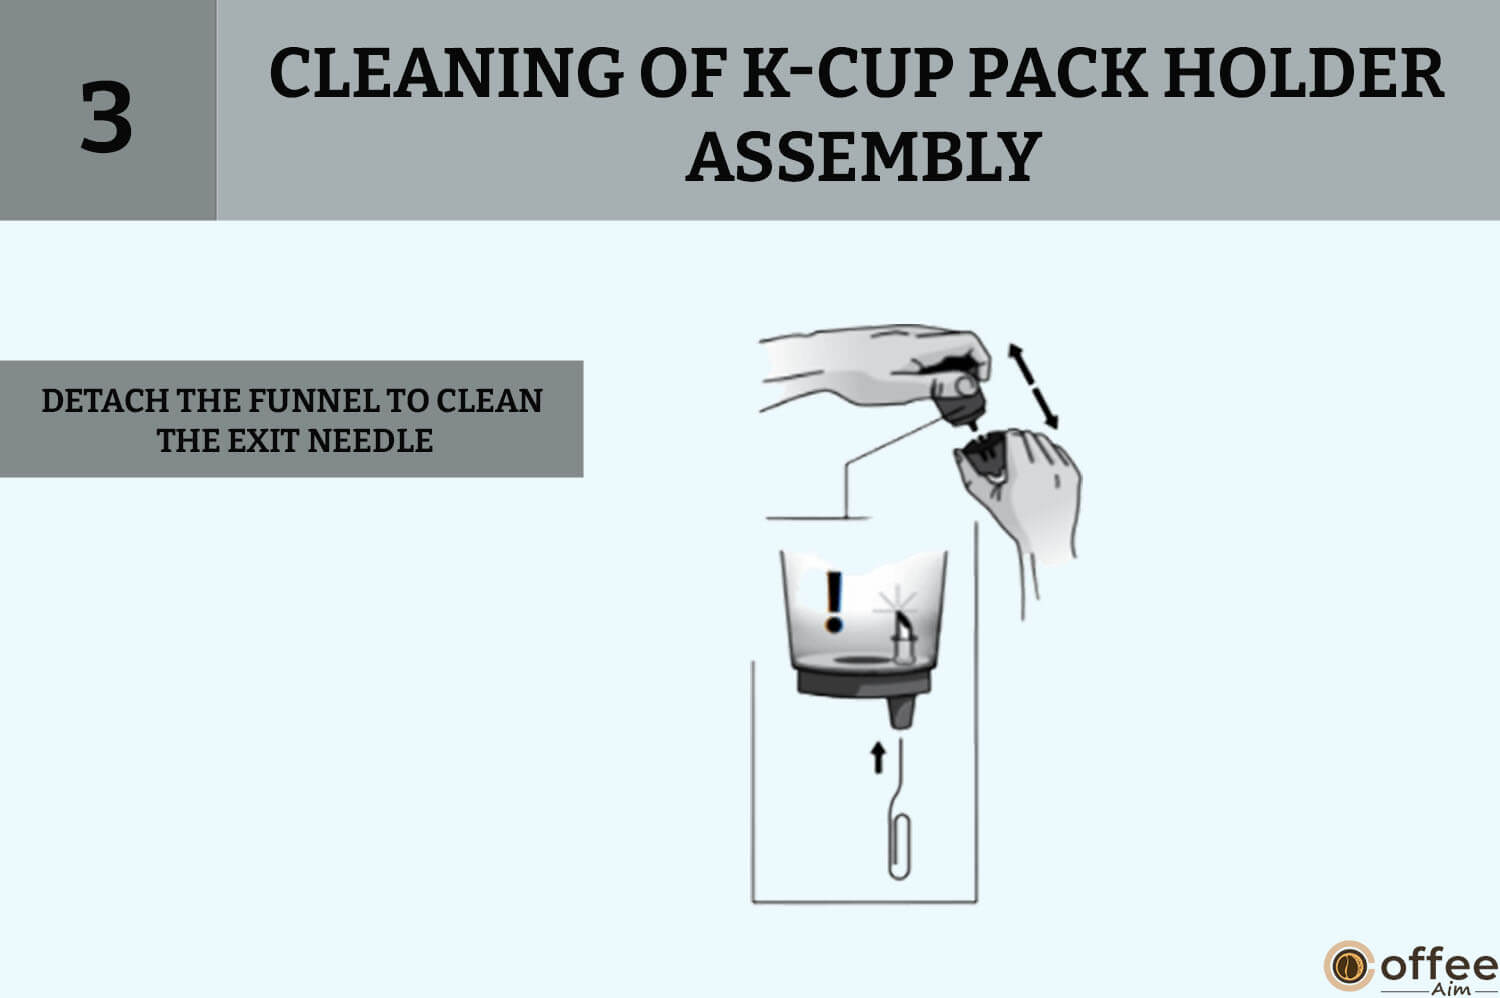
3. Cleaning The Exit Needle
Where can you find the exit needle? It is on the inner bottom of the K-cup assembly. Remove the K-Cup pack holder and detach the funnel to clean the exit needle. If coffee grounds cause a blockage or clog in the exit needle, you can clear it by inserting a paper clip through the exit needle hole and moving it around to loosen any clog and push it out.
The K-Cup holder is dishwasher safe, and you can rinse it under running water, washing thoroughly to loosen or remove any particles.
CAUTION:
You should be very careful while handling the K-Cup holder because there are sharp needles above and on the inside of this little K-Cup holder. So, just be mindful of the needles because I don’t want you to puncture your finger or harm yourself and avoid putting your fingers in the K-Cup holder.
Cleaning Of Water Reservoir And Water Reservoir Lid
If you are a true coffee lover, you surely don’t want to make this mistake of missing the step of cleaning the water reservoir and taking the chance of getting impurities in your coffee. I know you don’t want impurities to swim in your coffee, and for that, you must regularly monitor and clean the water reservoir of your Keurig K-40.
But do you know how to clean the water reservoir of your machine? No! Don’t worry! It’s an easy and quick process, and I will guide you on how you can clean the water reservoir of your Keurig K-40.
You must remember that you are not allowed to put the water reservoir in the dishwasher as it is not safe for dishwasher. You can use a moist, non-abrasive piece of cloth only to clean the reservoir from the outside, and you can rinse the reservoir with running water thoroughly. Let the reservoir dry itself, and avoid using a cloth to dry from the inside, as the fiber of the cloth may remain inside.
First, you drain the water from the reservoir to clean the filter screen, which is at the bottom of the reservoir. And then, you can follow any or all of the following methods.
NOTE: If you use a water filter in the reservoir, remove it before cleaning it.
- Wash the filter screen with a heavy stream of water from the faucet.
- Sprinkle the water on the filter screen with the help of a sprayer.
- Add clean water in the reservoir up to two inches and shake the reservoir.
After shaking the reservoir, drain the water, fill it with clean water, and put it back in the machine. You can repeat the procedure if necessary.
CAUTION: After cleaning the reservoir, wash it thoroughly to ensure no cleaning solution is left behind, as it may pollute the water supply in the brewer.
Descaling Of Keurig K-40
The amount of minerals in water varies from region to region. Your Keurig K-40 may develop calcium deposits if the water in your area is hard; what does it mean? It means the water has high mineral content in it. The build-up of Calcium deposits is one of the common issues with your Keurig K-40, which can affect the taste of your coffee. However, the scale is not toxic to humans. However, if it is not removed, it can impair the function of your machine.
You can protect and maintain the heating element or other parts of your machine that come in contact with water by descaling it. If calcium deposits develop quickly, more frequent descaling will be required. When does your Keurig K-40 need descaling? Your machine will give you a descaling alert by the red descaling light; when you notice this alert, immediately descale your machine.
Besides this, you should descale your machine every three to six months to maintain excellent performance.
How can you descale your Keurig K-40? You must know the right descaling procedure, and I am here to guide you step by step about it.
Descaling Instructions
Let’s start descaling your Keurig K-40 by following the steps below.
Let’s Prepare For Descaling
You have to prepare for descaling and require a few things for it. But what are the things you need? Check them out below.
- Undiluted white vinegar 48oz at least, access to an empty sink and a large ceramic mug, not a paper mug, please.
- Drain out the water from the reservoir.
NOTE: If you use a water filter in your reservoir, remove it before you proceed to the next step of descaling.
3. Deactivate the Auto Off mode of your machine.
Fill The Reservoir And Start Cleaning
Now, you will start a cleansing brew, and for cleaning, you have to perform the following steps.
1. Add 48 oz white vinegar into the reservoir and fill it to the MAX FILL line.
2. Put the large ceramic mug on the drip tray, press the brew button to start a cleansing brew, and then discard the content of the mug into the sink.
NOTE: There is no need to add a K-Cup pack while running a cleansing brew.
3. Perform the cleansing brew one more time without inserting the K-Cup pack till the blue “add water” light starts blinking, which indicates the water reservoir is empty now, and you have to stop the cleansing brew.
4. Leave the machine to rest for at least 4 hours with power ON.
5. Discard the remaining vinegar from the reservoir and thoroughly rinse it with running water.
Rinse Without Vinegar
After the cleaning step with vinegar, you need to perform a rinsing step without vinegar. Follow the steps below to start the rinsing cycle.
- Pour fresh water into the reservoir to the MAX FILL line; you must not add water above the MAX FILL line. There is no need to add vinegar in this step.
- Put a large mug on the drip tray, press the brew button, start the cleaning cycle, and empty the content of the mug into the sink.
- Repeat the cleaning process until the blue add water light blinks to indicate no water inside the reservoir.
- You may perform more cleansing brews if you detect any residual in your coffee.
NOTE: If the red descaling light does not stop illuminating after completing the descaling, repeat the descaling procedure.
Empty The Keurig K-40 Before Storage
If you are traveling out of town for some time and planning to store your Keurig K-40, you must empty your machine’s reservoir and choose a secure place to store it. Place your machine vertically to avoid water leakage from the inner tank. Ensure you do not keep your machine in a place where the environment is cold. Otherwise, the water inside your machine may freeze and cause damage to your brewer. When you start using your machine after a long time of storage, it is recommended to wash the reservoir with fresh water and perform three cleansing brews without using a K-Cup pack.
If you are moving your Keurig K-40 to a new place, switch off the machine, disconnect it from the outlet, and clear the water reservoir. If you have stored your machine below freezing, give it at least two hours to return to room temperature before using it.
Keurig K-40 Troubleshooting And Fixes
Are you experiencing issues with your Keurig K-40 and want to fix the issues? Don’t worry! We have outlined all the common problems and their solutions, so you can quickly solve all the issues of your Keurig K-40. Let’s improve the function of your brewer by reading the instructions below.
| PROBLEM | SOLUTION | |
| 1. | The machine does not have power. | Connect your machine to an independent outlet.Ensure that the cord is connected securely.Connect the machine to a different outlet.Reset the circuit breaker of your home, if necessary.Check the power button is On and the Green power light is flashing. |
| 2. | The machine fails to brew. | After placing the K-Cup pack in the holder, ensure the handle is completely lowered, and the brew buttons blink blue.If the blue “add water” light is blinking, fill the water in the reservoir to the MAX FILL line and make sure the reservoir is correctly positioned at the base of the machine.If the blue “adds water” light blinks even after filling the reservoir, contact customer service at 1.866.901.BREW (2739). |
| 3. | The Small mug button, red heating light, and blue “add water” light all flash simultaneously. | Remove the reservoir, wash it properly, and fill the water to the MAX FILL line but not above this line. Place it back in the machine, position it correctly, and press the small blinking mug brew button.Repeat the above step twice; if the problem persists, call customer service at 1.866.901.BREW (2739). |
| 4. | The machine is brewing half a cup. | The exit needle is blocked with coffee grounds. Rinse the K-Cup holder under the faucet, if necessary.The water reservoir has been removed from the machine; place it back and run a cleansing brew without adding a K-Cup pack.If you notice a red “descale light” blinking, descale your machine.If the machine is still brewing half cup even after repeating the descaling process two times, contact customer service at 1.866.901.BREW (2739). |
| 5. | Machine switches off automatically. | Check the “Auto Off Button” of your machine; if the green “Auto Off light” is illuminated, press the black “Auto Off button” to deactivate the Auto Off timer of your machine. |
| 6. | Water can be observed in the brewer base when the reservoir is removed. | It is normal for a small amount of water to accumulate in the base when the reservoir is not in its position for a while, and it will not affect the function of your machine.Use a clean piece of cloth to absorb the water.Place the reservoir back into the machine. |
One Year – Warranty
Keurig includes a warranty for one year. This warranty starts from the date of purchase, and your Keurig K-40 will be free of manufacturing faults under regular household use.
- Please fill out the warranty card that came with your machines and return it so Keurig will register your purchase in the Keurig system.
- When Keurig receives the documentation of the purchase date, it will exchange or repair a faulty machine without charging you anything.
- If a replacement brewer is required to fulfill the terms of this warranty, the brewer may be brand-new or remanufactured. If a replacement brewer is delivered, Keurig will issue a new limited one-year warranty with the replacement brewer.
- This warranty covers only brewers operated in the United States and Canada.
- This warranty offers particular legal rights. The rights may vary depending on the state you are in, and, in the case of Canada, it depends on the province.
- Your Keurig’s optimum performance and lifespan are only guaranteed when you use Keurig K-Cup packs for brewing and other Keurig accessories.
- Using a non-Keurig K-Cup pack may void this warranty if it causes damage to your brewer. In such cases, Keurig may charge a service fee.
What Is Not Covered By The Limited One-Year Warranty?
This warranty will not cover incidental losses such as property loss and will not include additional costs and expenses resulting from the violation of this warranty. Some states or provinces do not exclude the restriction of incidental damages mentioned above; it depends on the state or province where you made the purchase.
This warranty does not cover any loss incurred due to using non-Keurig K-Cup brand packs, unauthorized service providers, non-Keurig parts, inappropriate use, or improper power supply.
Other limitations
This warranty is the only exclusive and replaces any other, either oral or written. Keurig also declines all the other warranties regarding Keurig K-40/ K-45 Elite Brewer. Apart from the implied merchantability warranty and fitness for a particular purpose, the goods bought fit their ordinary and intended purpose.
Some states and provinces do not permit the decline of such implied warranties about how long such implied warranties last, so depending upon the state or province; the limitation mentioned earlier may not apply to you.
How Can You Obtain Warranty Services?
Keurig machines are high-end machines with proper care and should serve you for many years with satisfactory performance. However, if warranty services are required, you can contact Keurig customer service at their toll-free phone number, 1.866.901.BREW (2739). After speaking to Keurig customer service and receiving an Authorization to Return Number ( ATR ), please only send your machine for service. Keurig will not service the machine without an ATR number and will return it to the sender.
Conclusion
After fairly detailed guidance on how to use Keurig K-40, you have comprehended the ins and outs of your Keurig K-40. All done! You can now satisfy your coffee cravings and savor a delicious cup of your favorite drink made in your Keurig K-40 anytime.
I have covered everything in this guide about Keurig K-40, but if you face any issues while using your machine, come back and reread this guide. If you want to read more about coffee and coffee makers, visit CoffeeAim.
Thanks for reading!
FAQs
How Do You Get All The Water Out Of Keurig K40?
You can clear the water out of Keurig K40 in two different ways.
1. Remove the water reservoir from the machine by pulling it vertically upward, drain the water into the sink, rinse it thoroughly with fresh water, put it back in the machine, and place the lid.
2. Lift the handle to open the K-Cup compartment, then close it by lowering the handle without inserting the K-Cup pack. The red heating light will light up; wait for it to disappear, then place a mug on the drip tray plate and press the brew button.
To clear out the water completely, repeat steps 1 and 2.
Why Is My Keurig Only Giving Me Half A Cup?
It’s time to descale your machine. Your machine must be descaled every three to six months with white vinegar. To prevent the accumulation of scale in your machine, use filtered water.
How Do You Unclog A Keurig Needle?
The exit Needle is on the inner bottom of the K-cup assembly. Remove the K-Cup pack holder and detach the funnel to clean the exit needle. If coffee grounds have clogged the exit needle, you can clear the blockage by inserting a paper clip through the hole and moving it around to loosen any clog and push it out.
Why Won’t My Keurig K40 Brew When I Press The Button?
Suppose the buttons are not responding; press the power button. Try disconnecting the power cord and connecting it again after a short period. Then try again by pressing the power button. If it doesn’t work, please call Keurig customer service at 1-866-901-BREW (2739).
How Do I Reset My Keurig K40?
Switch off your machine by pressing the power button, and disconnect the cable from the socket for a few minutes. Remove the reservoir from the machine, reconnect the cable to the socket, and power on the machine. Place the reservoir back into the machine, then open and close the K-Cup holder. After trying these steps, if still, your machine is not resetting, contact the customer Keurig service at 1-866-901-BREW (2739).