Quick Navigation
Have you brought your Nespresso Creatista? First of all, good wishes on this purchase. Now, you must be curious about how to use Nespresso Creatista. Even if you are a regular user and having some difficulty, have lost your manual, or came to have more guidelines about your appliance, you will return satisfied. I am here to guide you through everything you need to know about this appliance from scratch to the advanced level.
Safety Precautions to Use Nespresso Creatista
You make blunders while using an advanced or an unfamiliar appliance due to unawareness. Now, you are searching for a useful guide to prevent incorrect use of the appliance. Do not worry anymore, as I am here to support and direct you to let you succeed without any hurdles. I have developed a proper safety precaution guideline to save you. Know the do’s and don’ts about the machine to thrive while using Nespresso Creatista. Read these safety precautions to avoid all possible harm and mishap.
What are the Specifications for Nespresso Creatista Machine?
You need to know if the Nespresso Creatista Machine suits your daily use routine, if its size fits rightly in the space you have, or if it has strength and endurance for your use. Before starting the proper use, you should see if the specifications of the Nespresso Creatista meet your living style. For example, see if your power outlet provides enough power and voltage required to operate the Nespresso Creatista machine. Look out for all the specifications one by one. You can return it if its specifications clash with your available sources.
| Specifications | Details |
| Voltage | 220-240V |
| Frequency | 50-60Hz |
| Power | 1300-1600W |
| Maximum Pressure(Pmax) in bar | 19bar |
| Maximum Pressure in MPa | 1.9MPa |
| Mass is kg | ~5.2kg |
| Mass in lbs | 11.4lbs |
| Length | 40.9cm/16.1 inches |
| Width | 17 cm/6.7 inches |
| Height | 30.9 cm/12.2 inches |
Related: Nespresso Descaling Solution Review →
What Is Included In The Packaging Content?
Before you start using Nespresso Creatista, you need to know what your package is supposed to comprise and that your one hasn’t missed anything. There is a list of the necessary items for your Nespresso Creatista package. If you find anything missing, you possess all rights to return or report it to Nespresso Club or the online stores(e.g., Amazon, Daraz) from wherever you buy it.
- Creatista Coffee Machine, the main body of the machine.

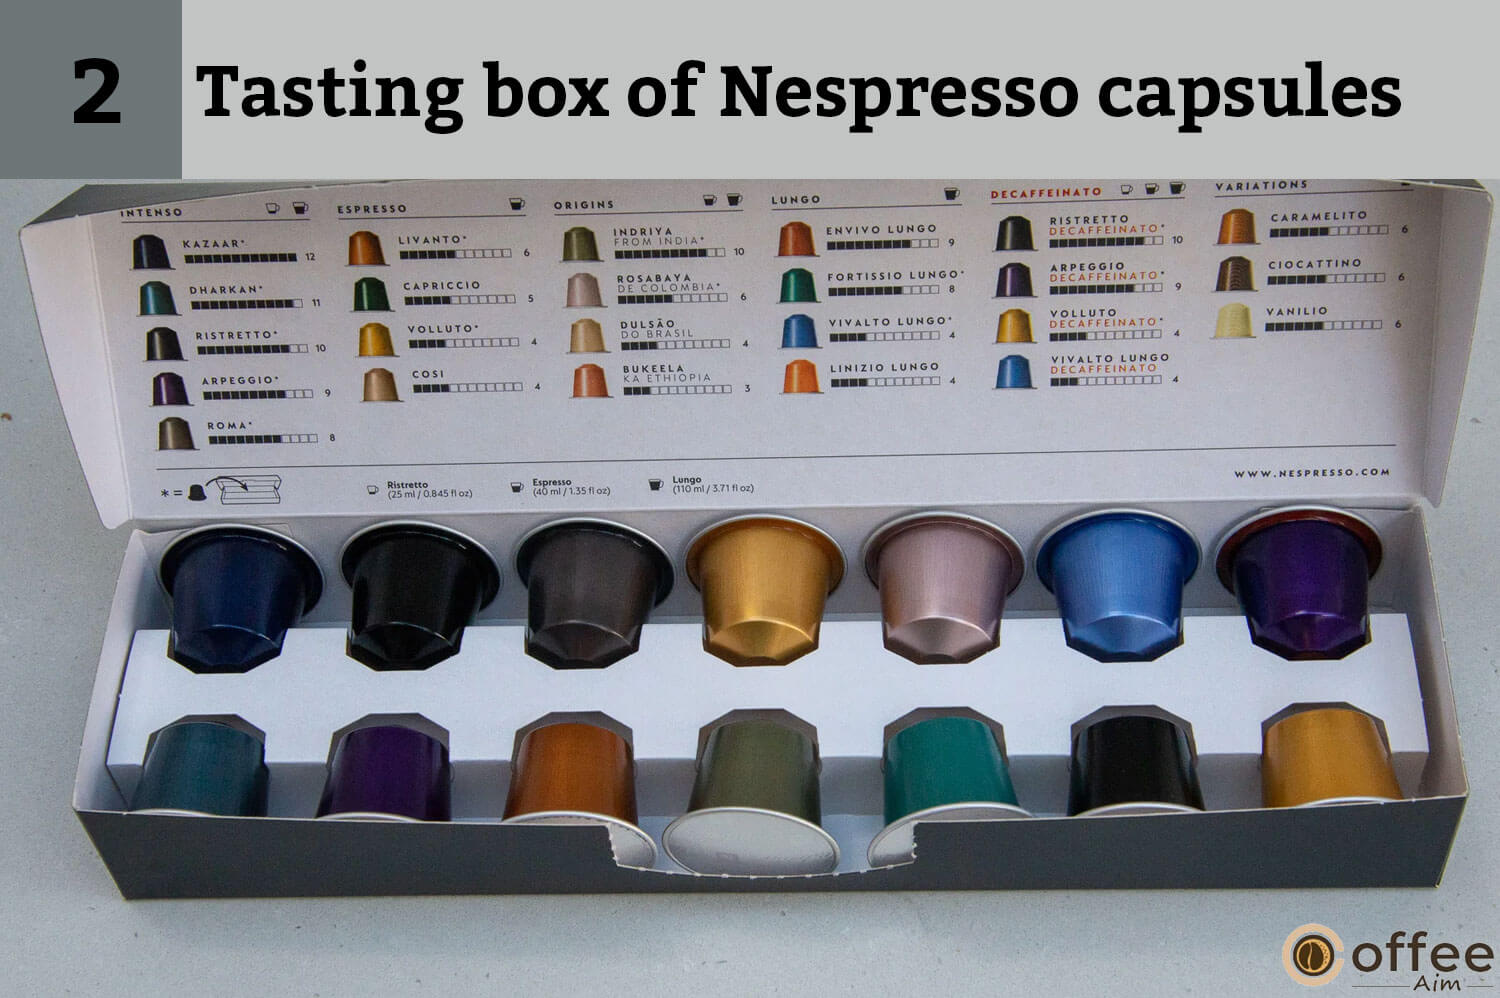
- Tasting box of Nespresso capsules
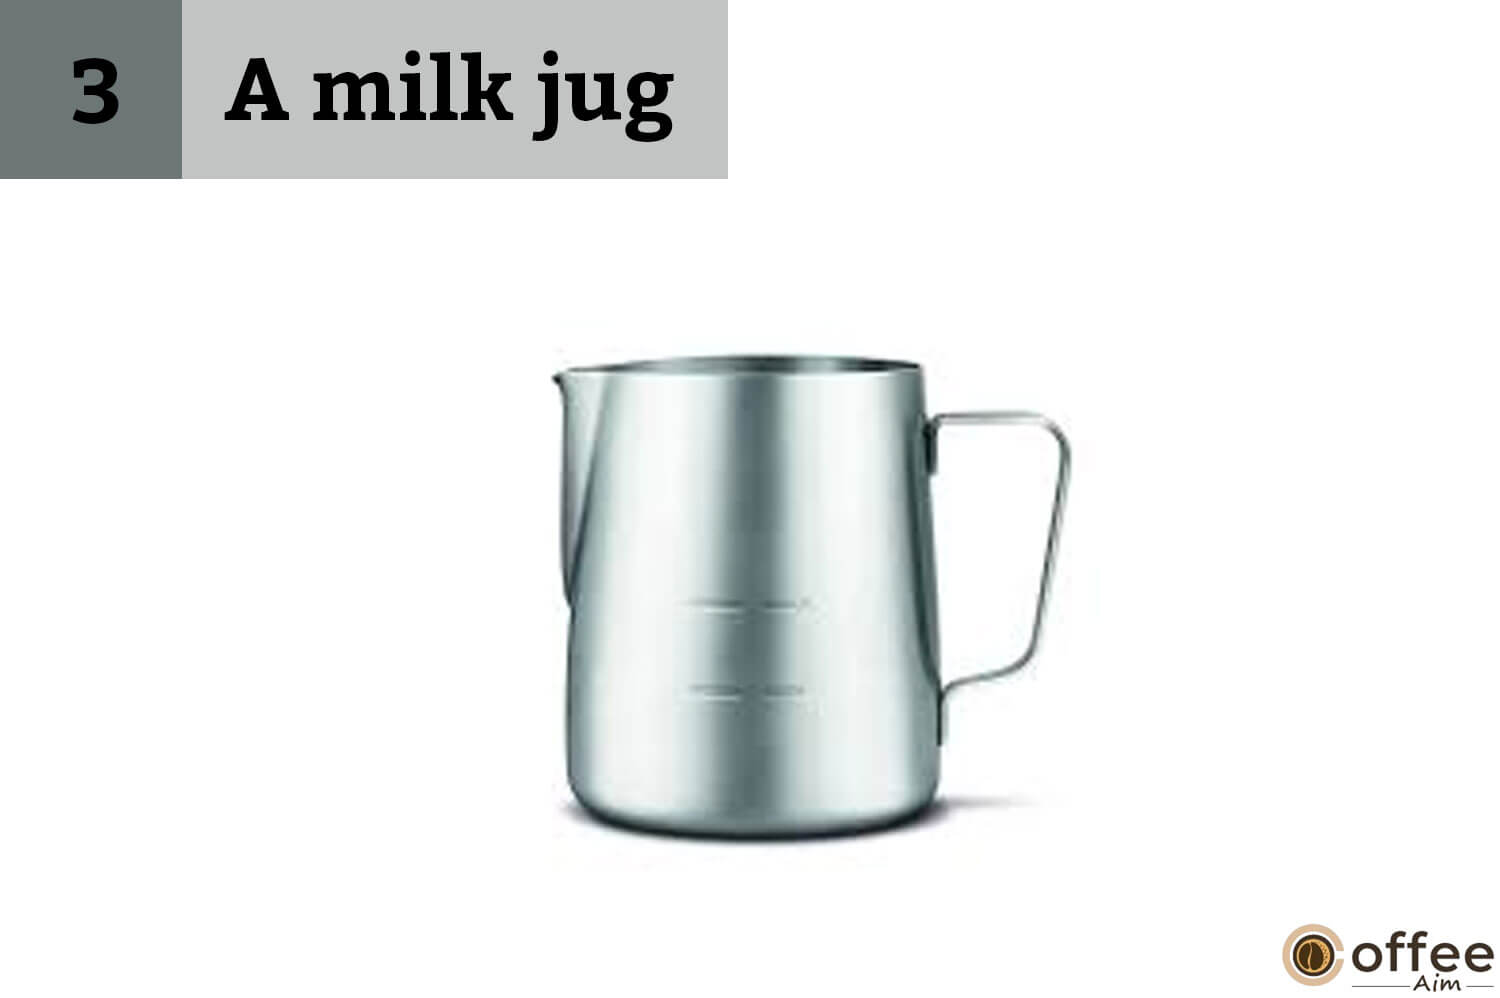
- A milk jug is provided with the machine for optimum results.
- Nespresso welcome brochure

- You have a user manual to get guidance. If you are unaware of the machine’s use or need some clarification, consult it.

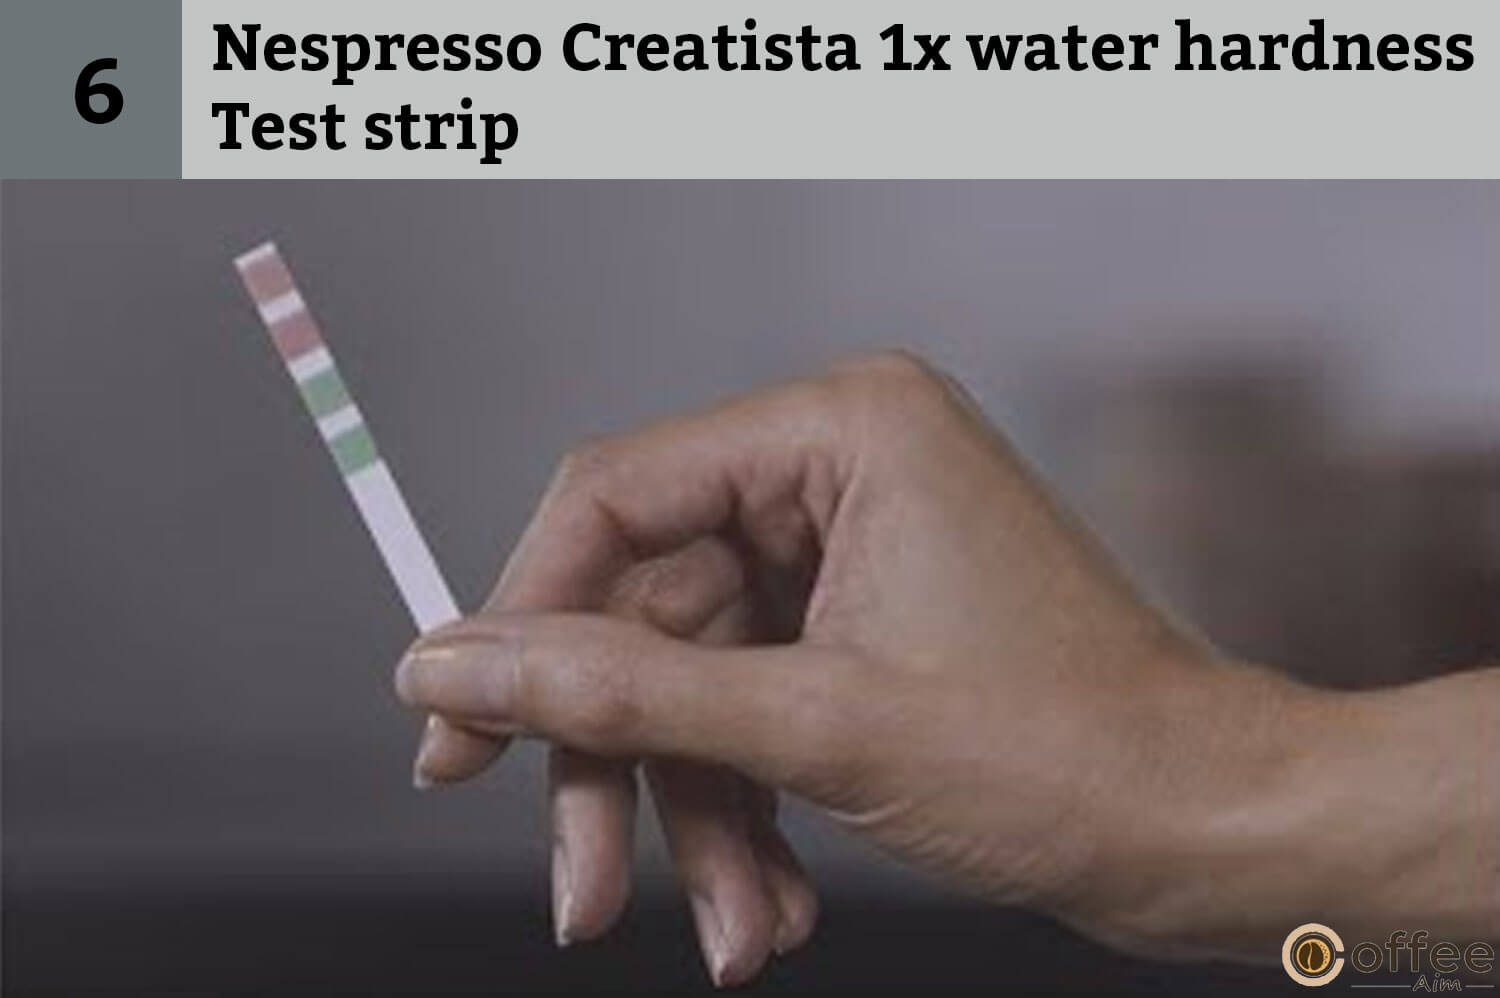
- You will find a 1x water hardness Test strip in the user manual.
What Are The Different Parts Of Nespresso Creatista?
Are you now curious about how to use each part of the machine? Before using the appliance, you need to identify each part and its purpose. Here you are given a comprehensive note of each part to make you aware of it.
- Color Display
The color display helps guide and alert you about the machine’s condition and its mode.
- SELECT Dial
At the right of the START|CANCEL button, a popped-out select dial is present. Rotate it left or right to select your drinks.
You adjust Espresso volume, milk froth, and milk temperature by pressing this select dial.
- START|CANCEL Button
This button is located above the machine on the left of the SELECT dial. You press it to go back, start or cancel an operation.
- Lever For Capsule Insertion
You can see a rectangular shape lever at the upper left corner of the machine. You lift it and insert a capsule in space.
- Used Capsule Container
The box-like container where used capsules are ejected.
- Pop-Out Cup Support
Small cups are unstable. Cup support is helping to keep them in the right position. You can pop this out by pushing it.
- Removable Drip Grid
The drip grid also ensures the safe usage of Nespresso Creatista.
- Removable Drip Tray With Full Indicator
It lets you make safe use of the appliance. Use your appliance with your drip tray rightly positioned.
- Milk Jug
You are provided with a milk jug with marked minimum and maximum levels on it. Fill it with cold milk within the marked level on the jug.
- Milk Jug Temperature Sensor
This sensor helps you with precise milk frothing. You place the milk jug and ensure its contact with the milk temperature sensor.
- Steam Wand
You put the steam wand in the center of the milk jug for the milk frothing.
- Water Tank & Lid
You fill fresh drinking water in the water tank and position it at the backside of the machine and cover it with the lid properly.
- Removable Pin-Cleaning Tool
You have a small pin attached under the water tank; you can disengage it to clean the holes of the steam wand.

Related Content: How to Use A Nespresso Machine →
How To Use Nespresso Creatista For The First Time?
Making the first use of any appliance is tricky and different from afterwards experiences. It can bother you if you do not have a proper guide. Here are the steps you need to perform before the appropriate use of this machine:
1. Rinse The Water Tank
First of all, rinse the water tank to ensure healthy use. Fill with fresh (preferred) or any potable water.

Note: The primary purpose for the first use is to rinse and start the heating system.
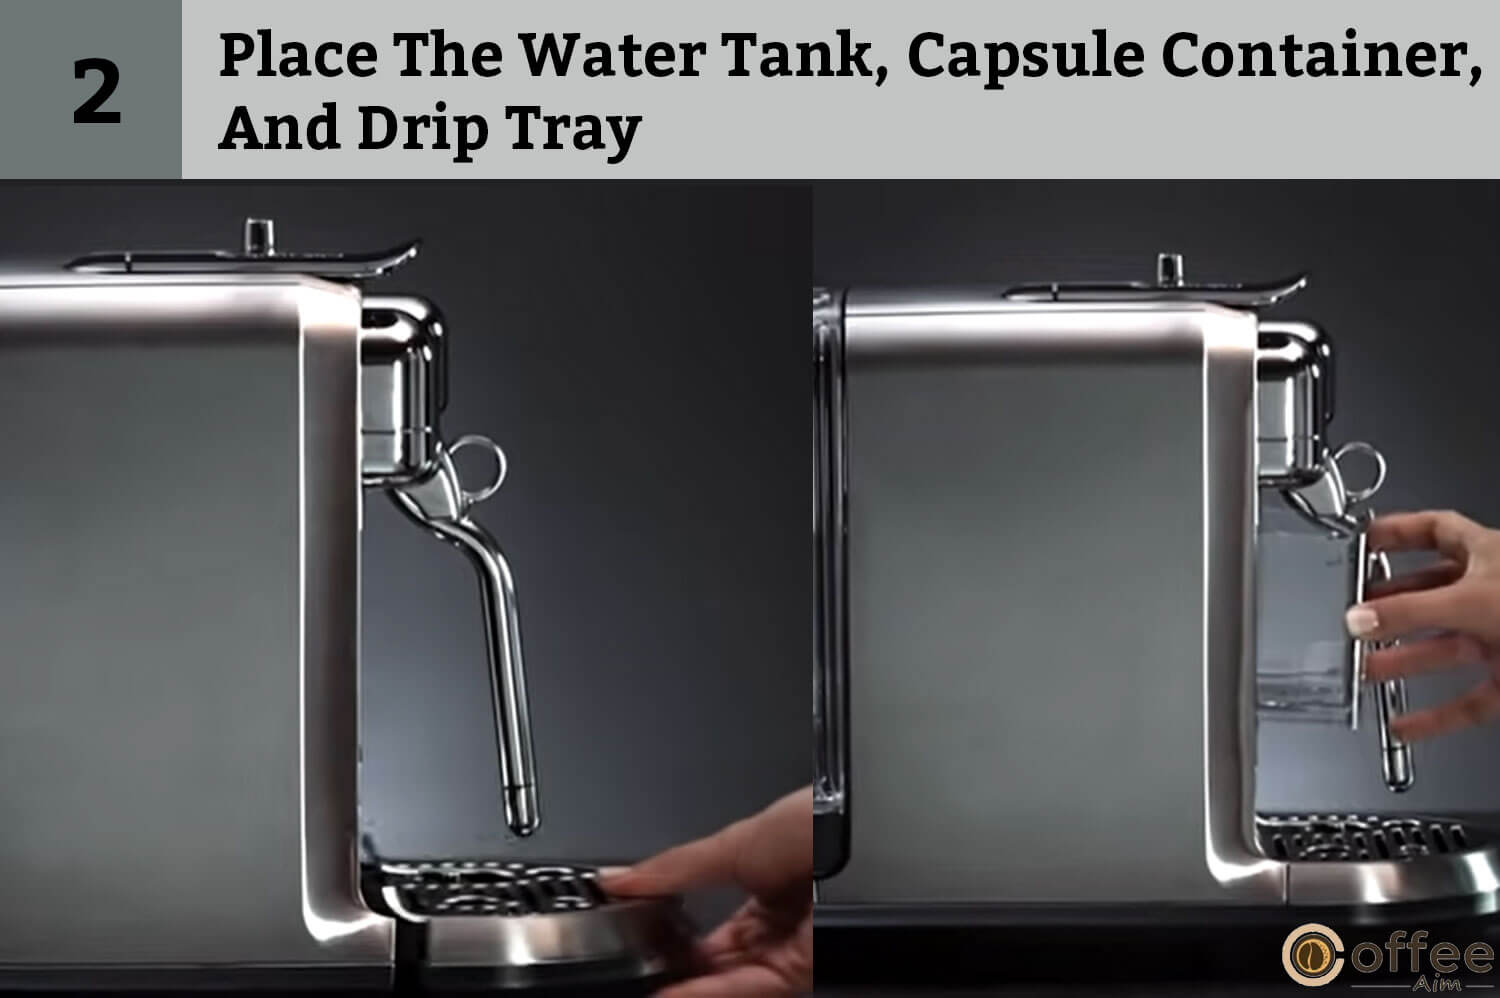
2. Place The Water Tank, Capsule Container, And Drip Tray
Now fit in the water tank, capsule container, and drip tray. Both of the latter are necessary to position properly for the safe operation of the appliance.
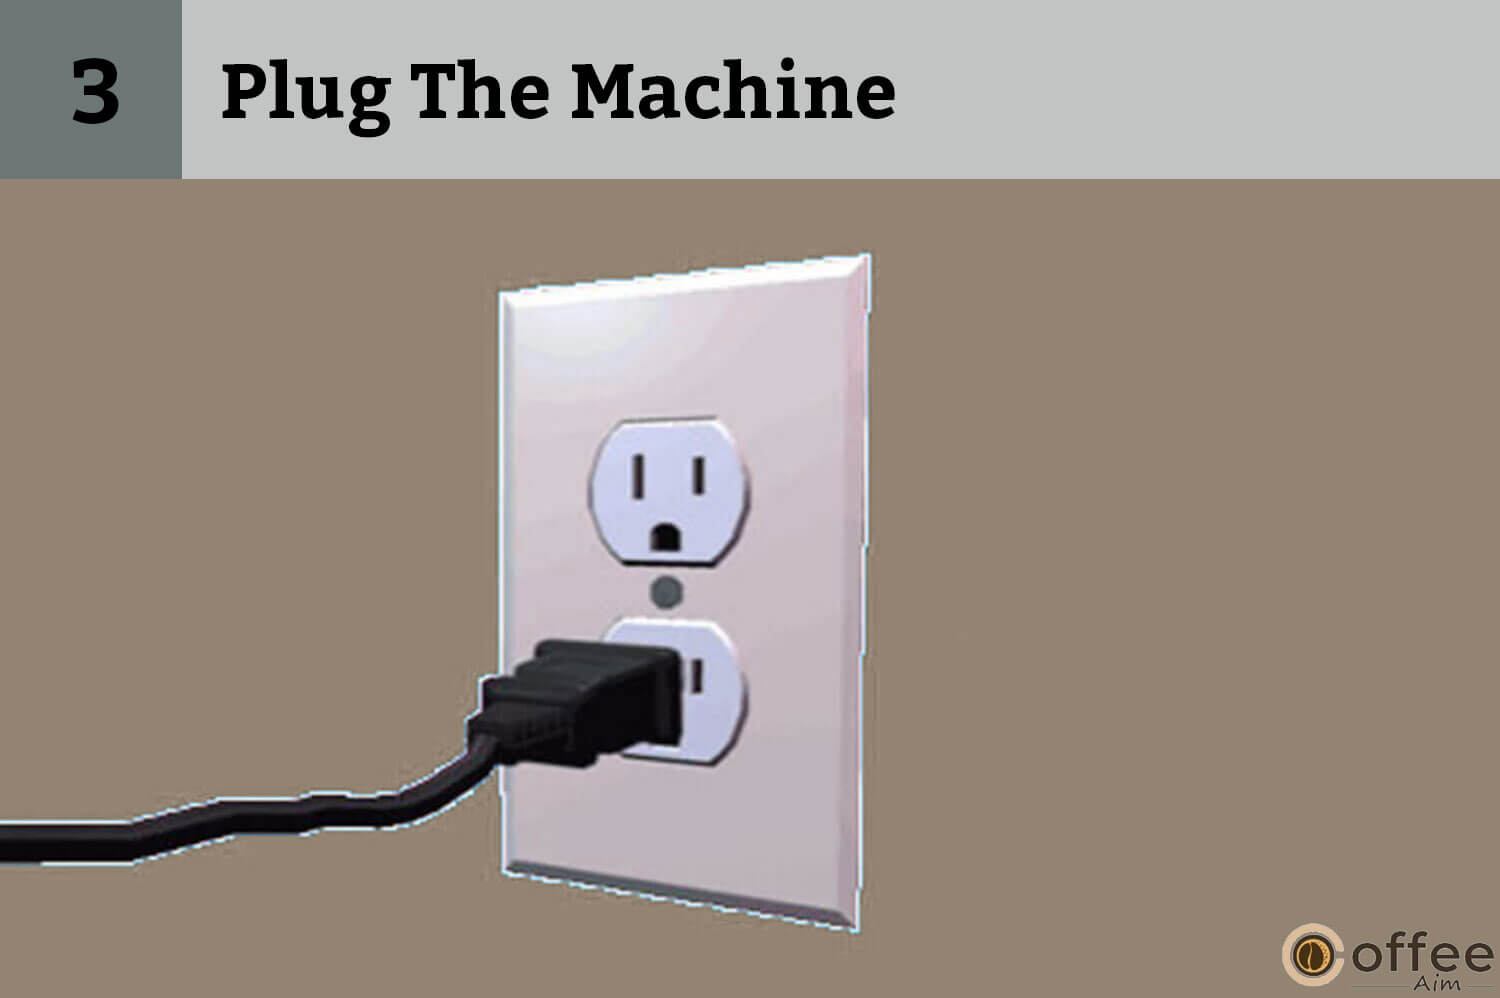
3. Plug The Machine
The machine is all set. The next step is to plug the appliance into the power socket.
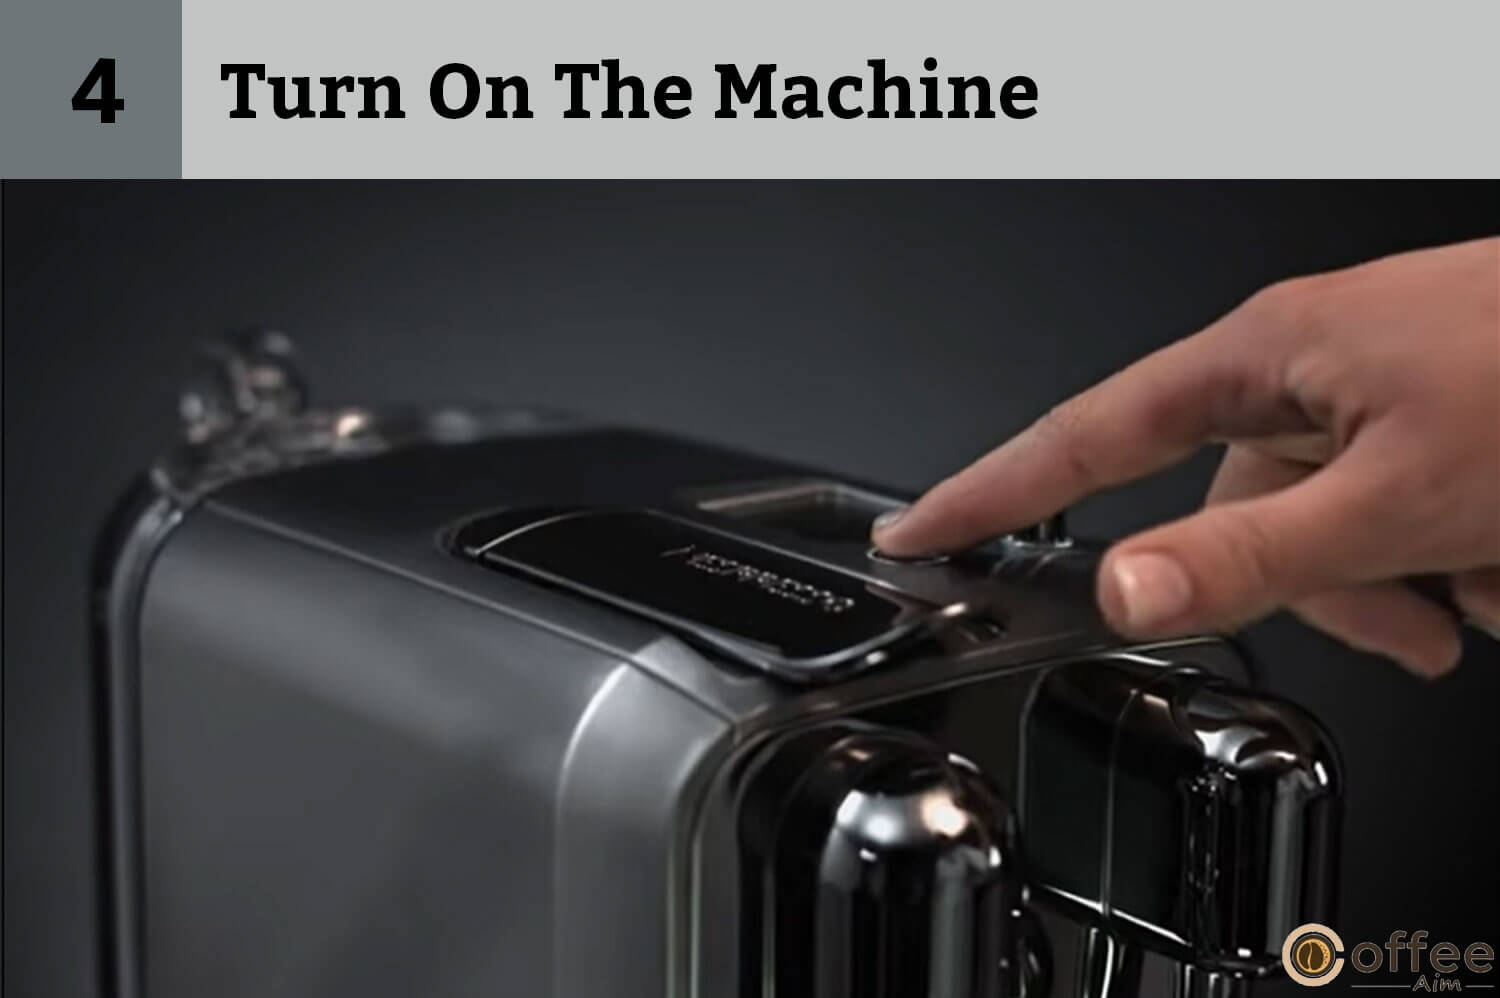
4. Turn On The Machine
The machine will not turn on after the power supply is. You have to turn the machine to on-mode by pressing the start|cancel button. Wait around ten seconds until it heats up.
5. Set Your Language
Your appliance has another remarkable feature for your convenience. Rotate the START button to select your language. Verify by pressing SELECT.

6. Set The Water Hardness
Dip the Water Hardness Test Strip in the water tank and take it out. Pause for a minute. Rotate the select button to set water hardness according to the test strip results. Press the START button to confirm.

7. Follow On-Screen Prompts
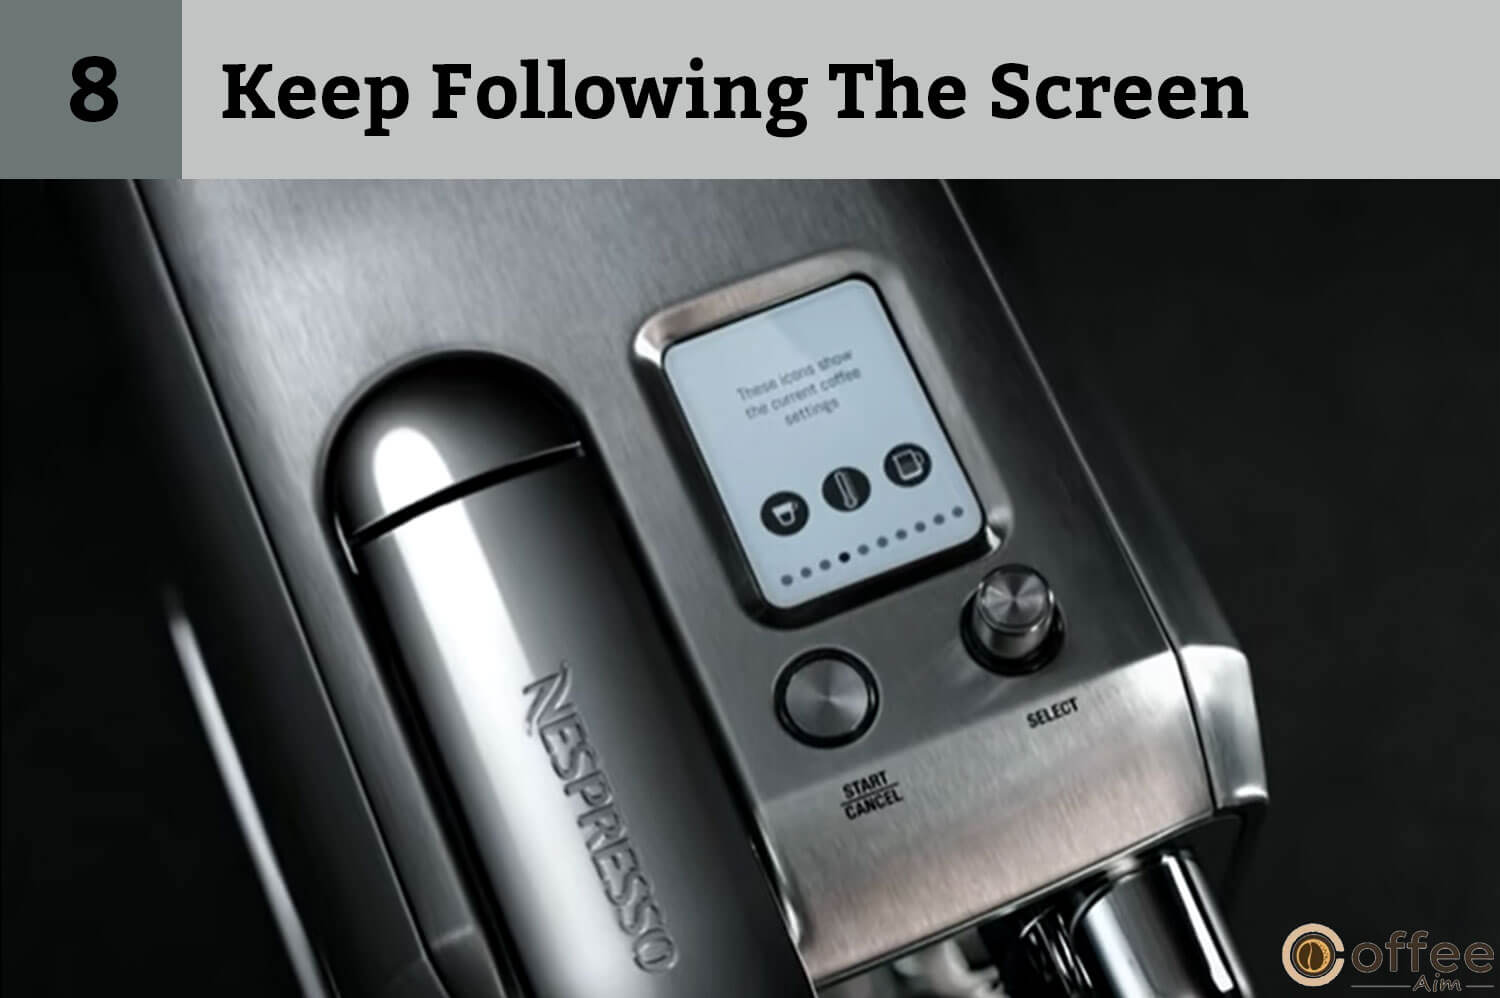
Note: The machine contains a screen with buttons for showing guides, settings, and options.
You must follow the screen instructions to rinse and prepare the appliance.

8. Keep Following The Screen
Lucky you are to have the screen prompts to understand and follow the next steps. It will make it convenient for you to learn coffee making. Now, follow the quick start tutorial on the screen.
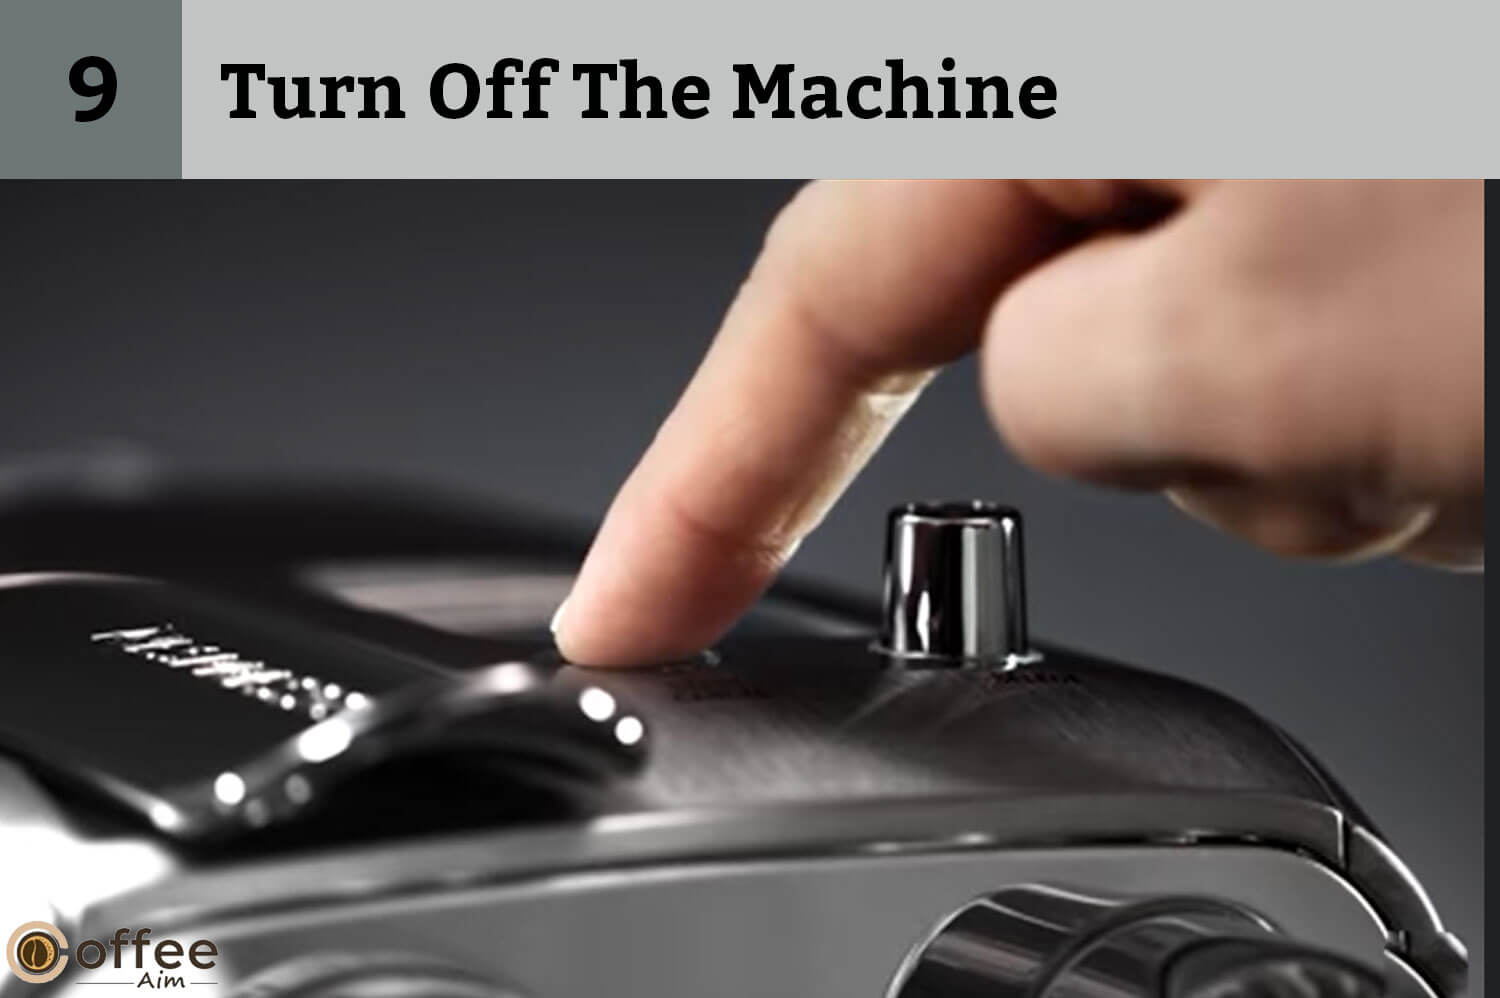
9. Turn Off The Machine
Turn your machine off after you are done with the first use of the machine. For this, press the START|CANCEL button, and hold for two seconds until the machine is off.
How to Prepare Regular Coffee Using Nespresso Creatista Machine?
Are you tired of going out for just a mug of coffee, or do you have to ask others to make it for you? Well, you need to adapt yourself to fulfill your own needs. Here is the step-by-step directory of how you can make regular coffee by yourself using Nespresso Creatista:
- Fill The Water Tank
The first step involves filling the water tank.

- Turn The Machine On
Press the START|CANCEL button to turn on the machine. Wait ten seconds for the system to heat up.

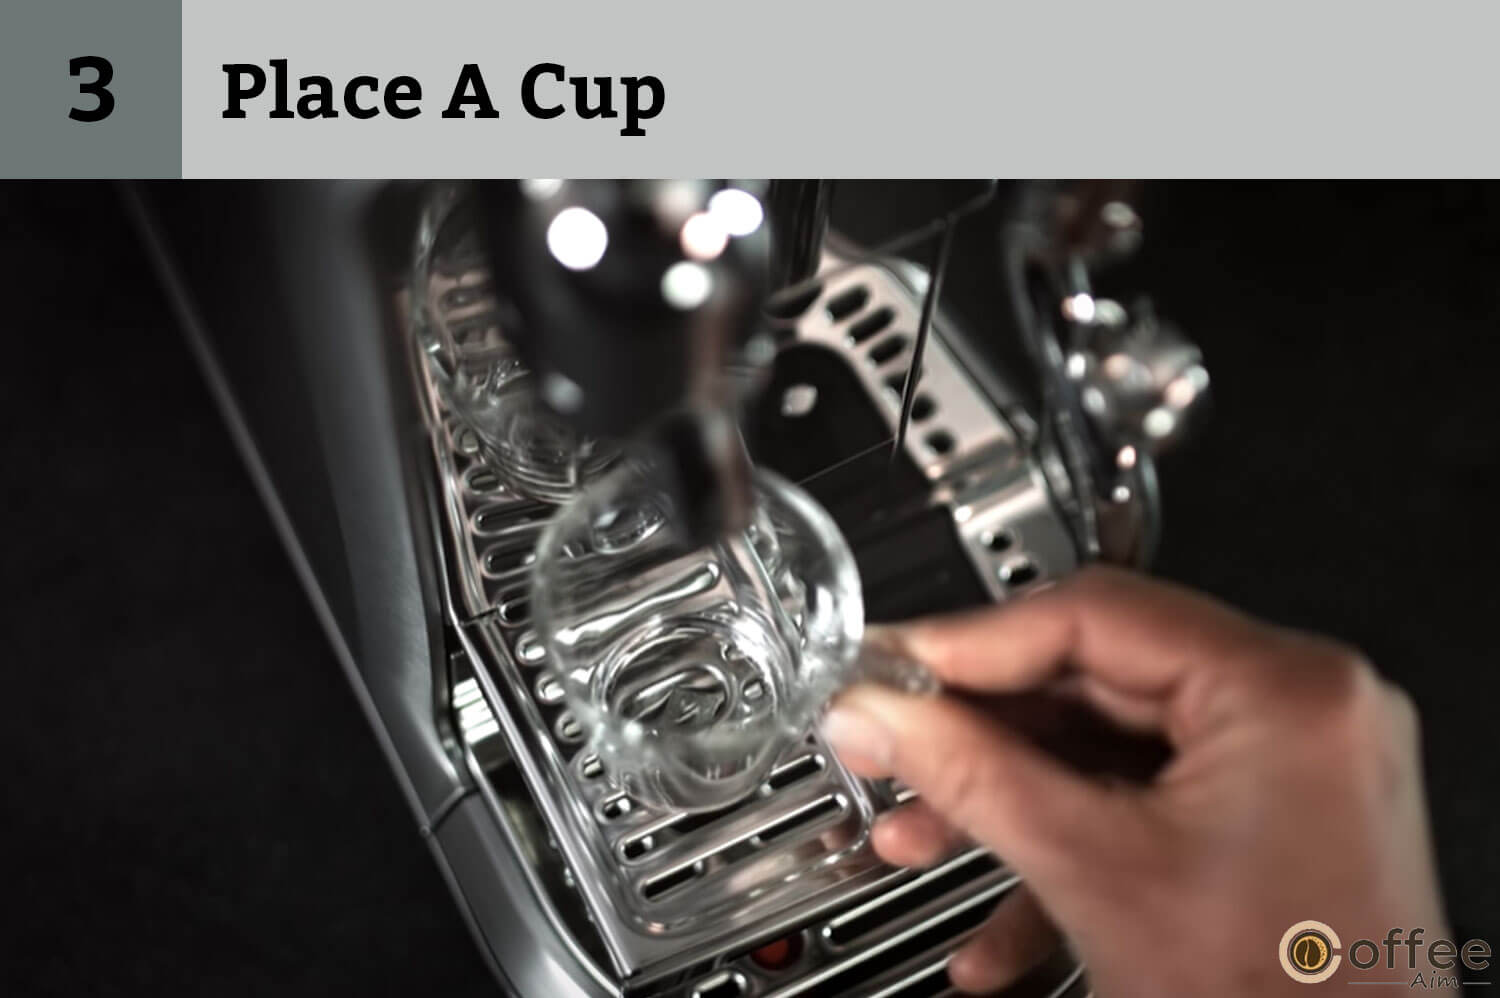
- Place A Cup
Put the cup under the coffee outlet, and use cup support if needed. Cup support opens up on PUSHING.
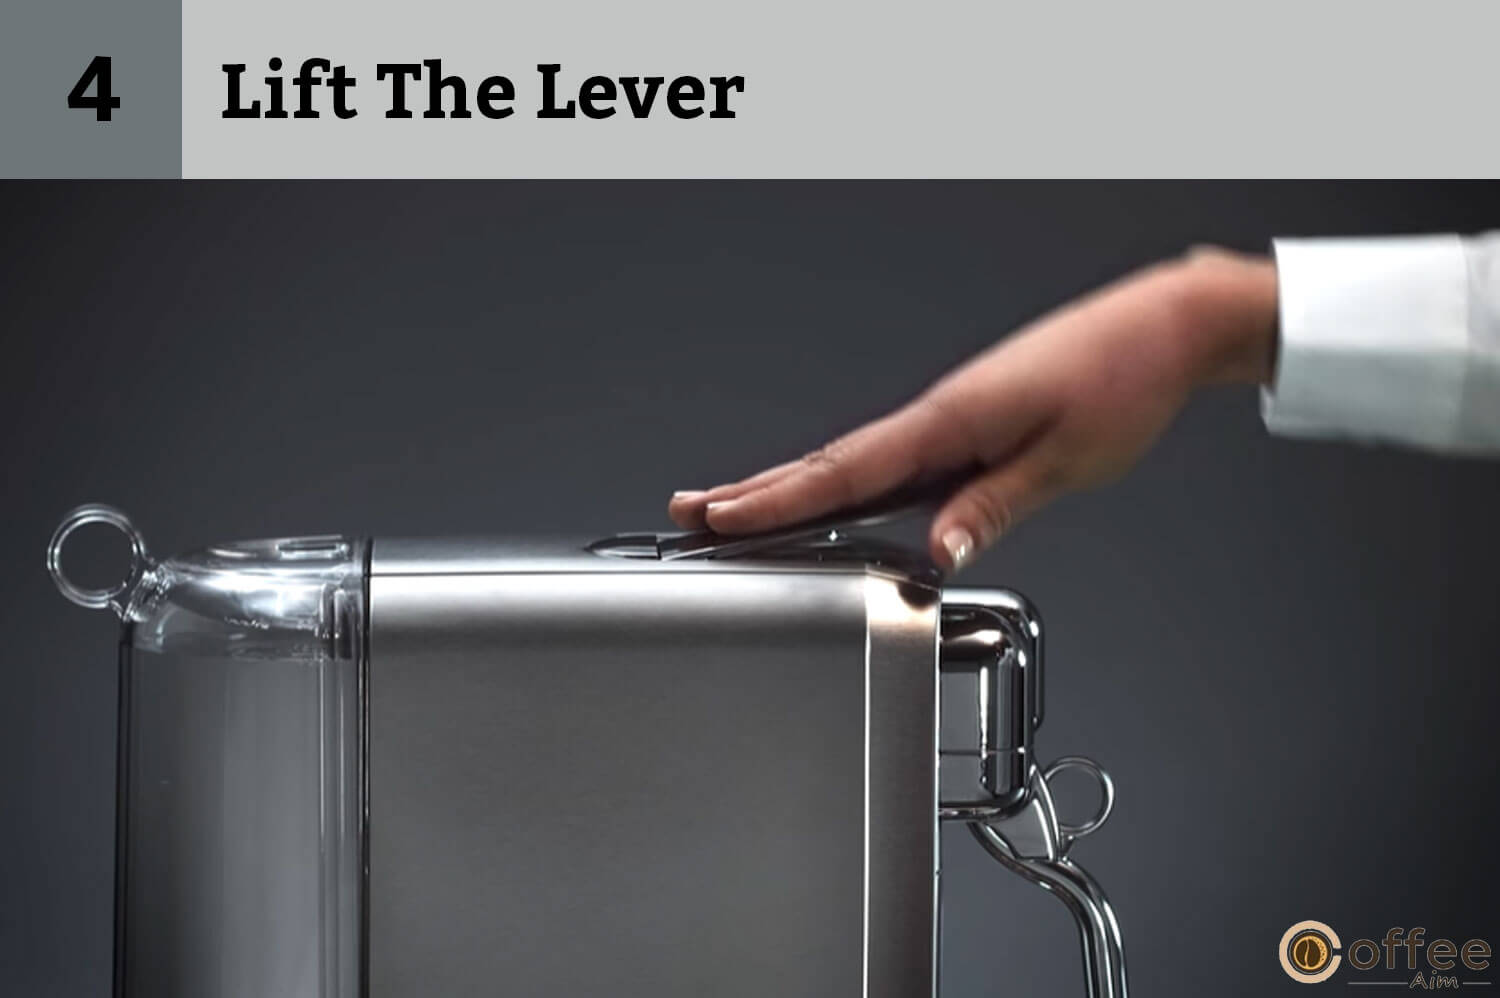
- Lift The Lever
Put a capsule, lift the lever and close it afterwards. Select your coffee by rotating the SELECT dial.
| Coffee | Volume in millilitres | Volume ounces |
| Ristretto | 25 ml | 0.85oz |
| Espresso | 40ml | 1.35 oz |
| Lungo | 110ml | 3.7oz |
Now, extract your coffee by pressing the START|CANCEL button.
Information: Do not reuse capsules to sustain hygienic benefits.
- Complete The Preparation
After this, your regular coffee preparation is completed and stops automatically. You have to eject the capsule in the used capsule container now by lifting and then positioning down the lever.

- Stop The Coffee Flow
Press the START|CANCEL button to stop the coffee flow.

How Do I Prepare Single-Cup Milk Coffee?
Milk coffee is the solution if you have an acidic stomach and are unable to stand black coffee alone. Milk will maintain the coffee’s pH level. Milk coffee is a good choice to make if you want your coffee full of nutrients and taste. Make a cup for yourself using Nespresso Creatista by following the steps given:
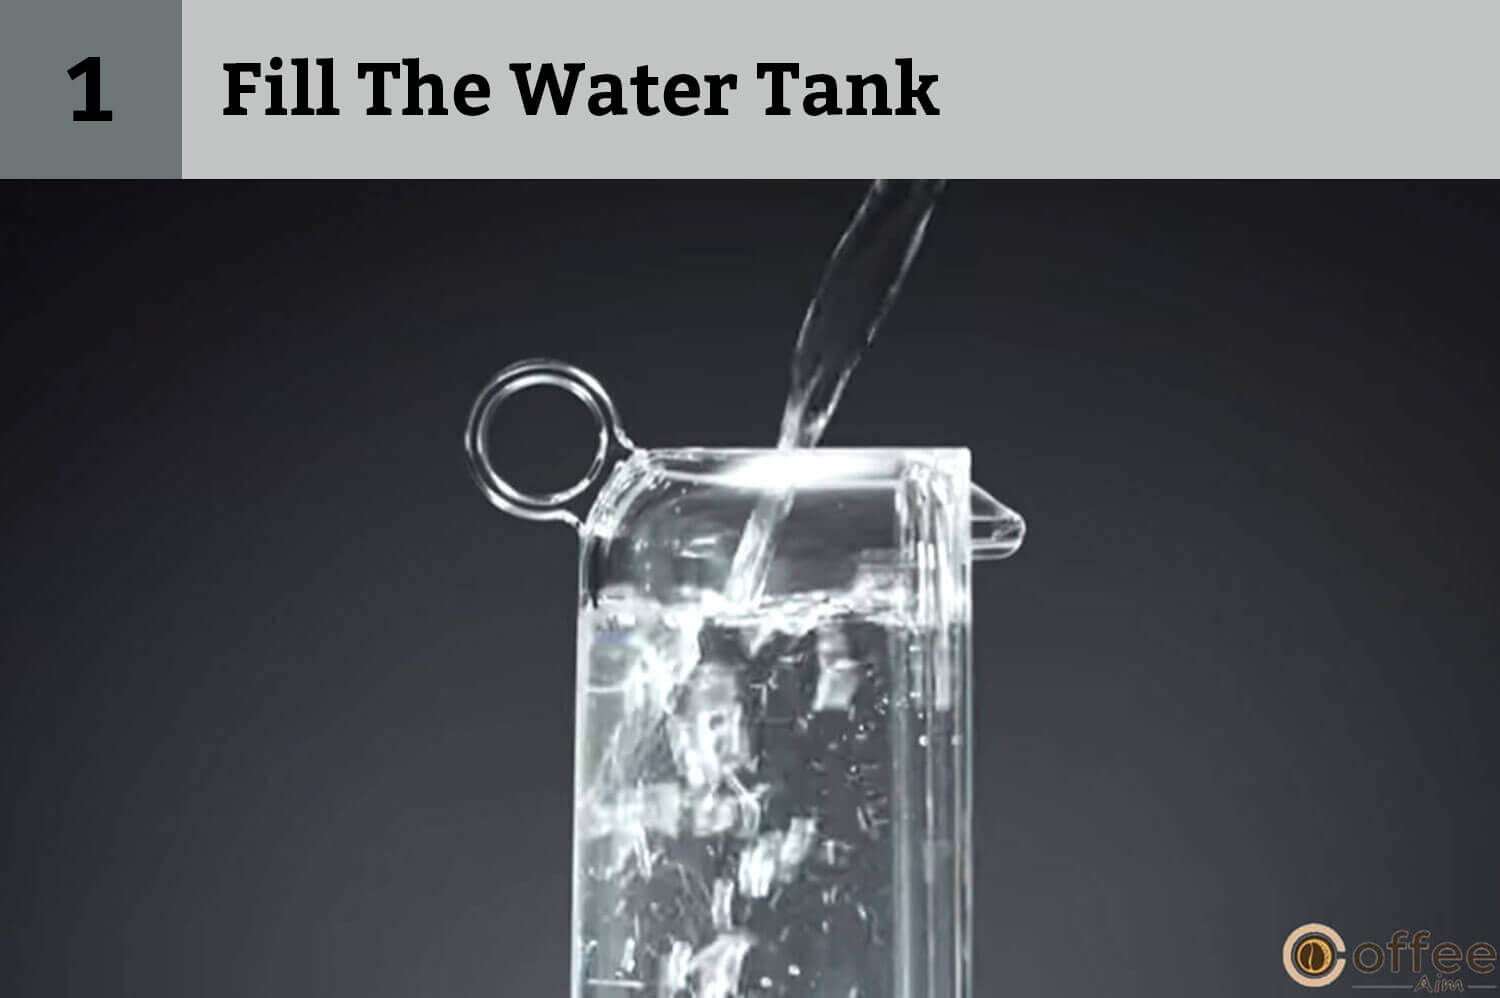
- Fill The Water Tank
Pour drinkable water into the water tank. Better to use fresh water.

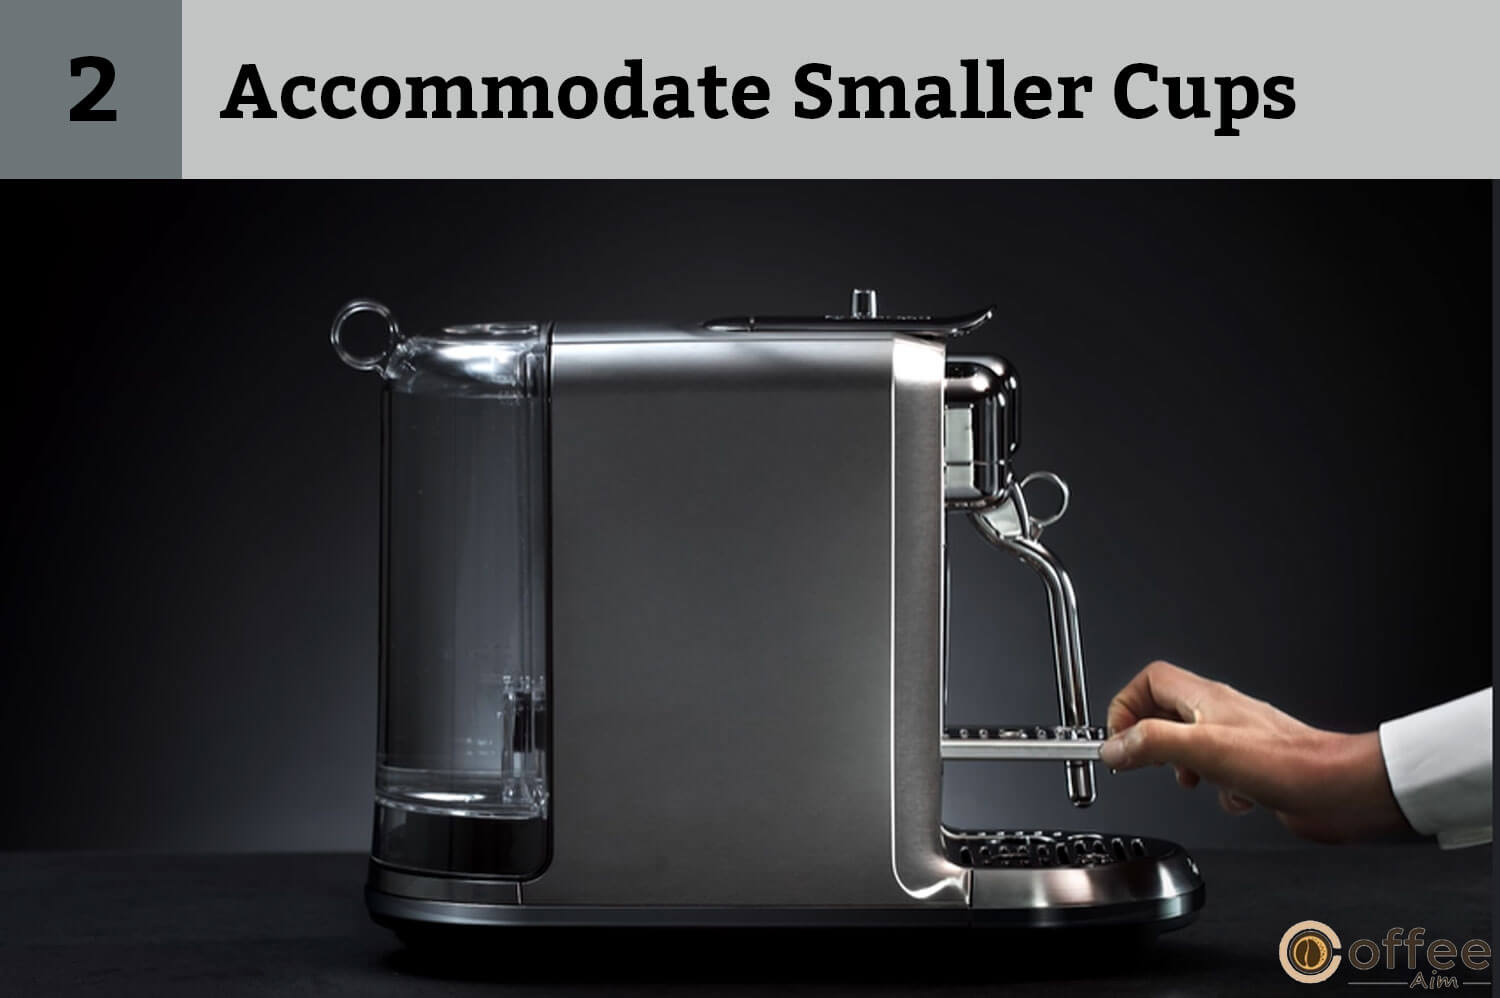
- Accommodate Smaller Cups
PUSH the cup support to unlock. Use it to accommodate the smaller cups.
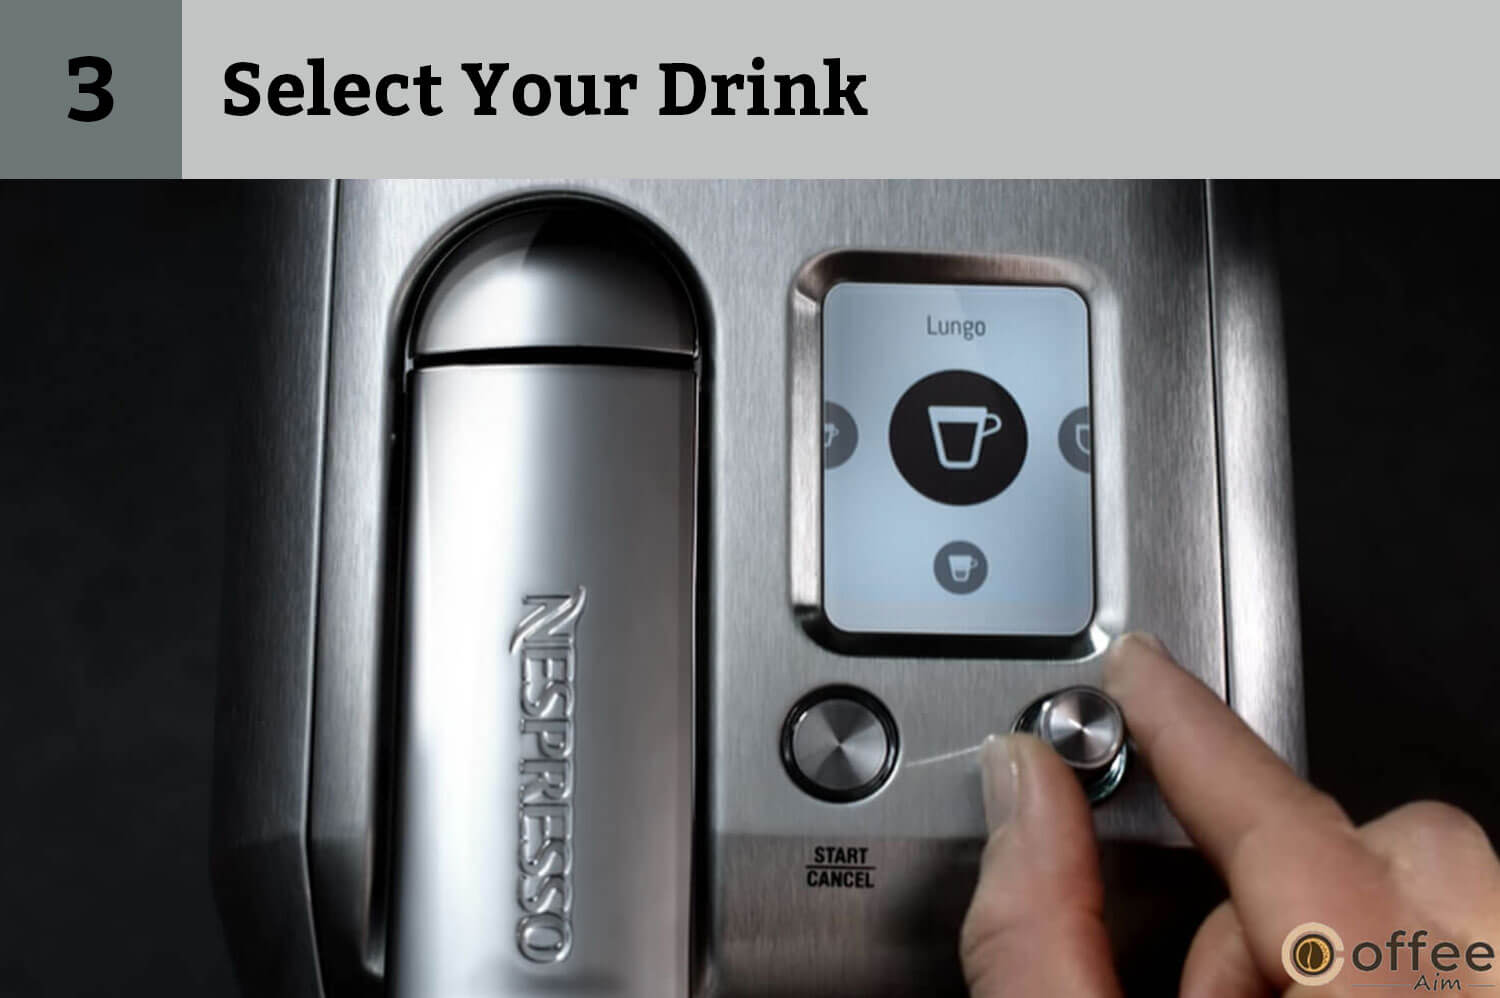
- Select Your Drink
Choose the drink rotating the SELECT dial.

- Fill The Milk Jug
Pour the fresh and cold milk into the jug within the minimum and maximum marks on the jug.

Caution: Do not fill the milk jug above the maximum marked limit on the inside and outside the jug.
Information: Make use of the provided milk jug only.
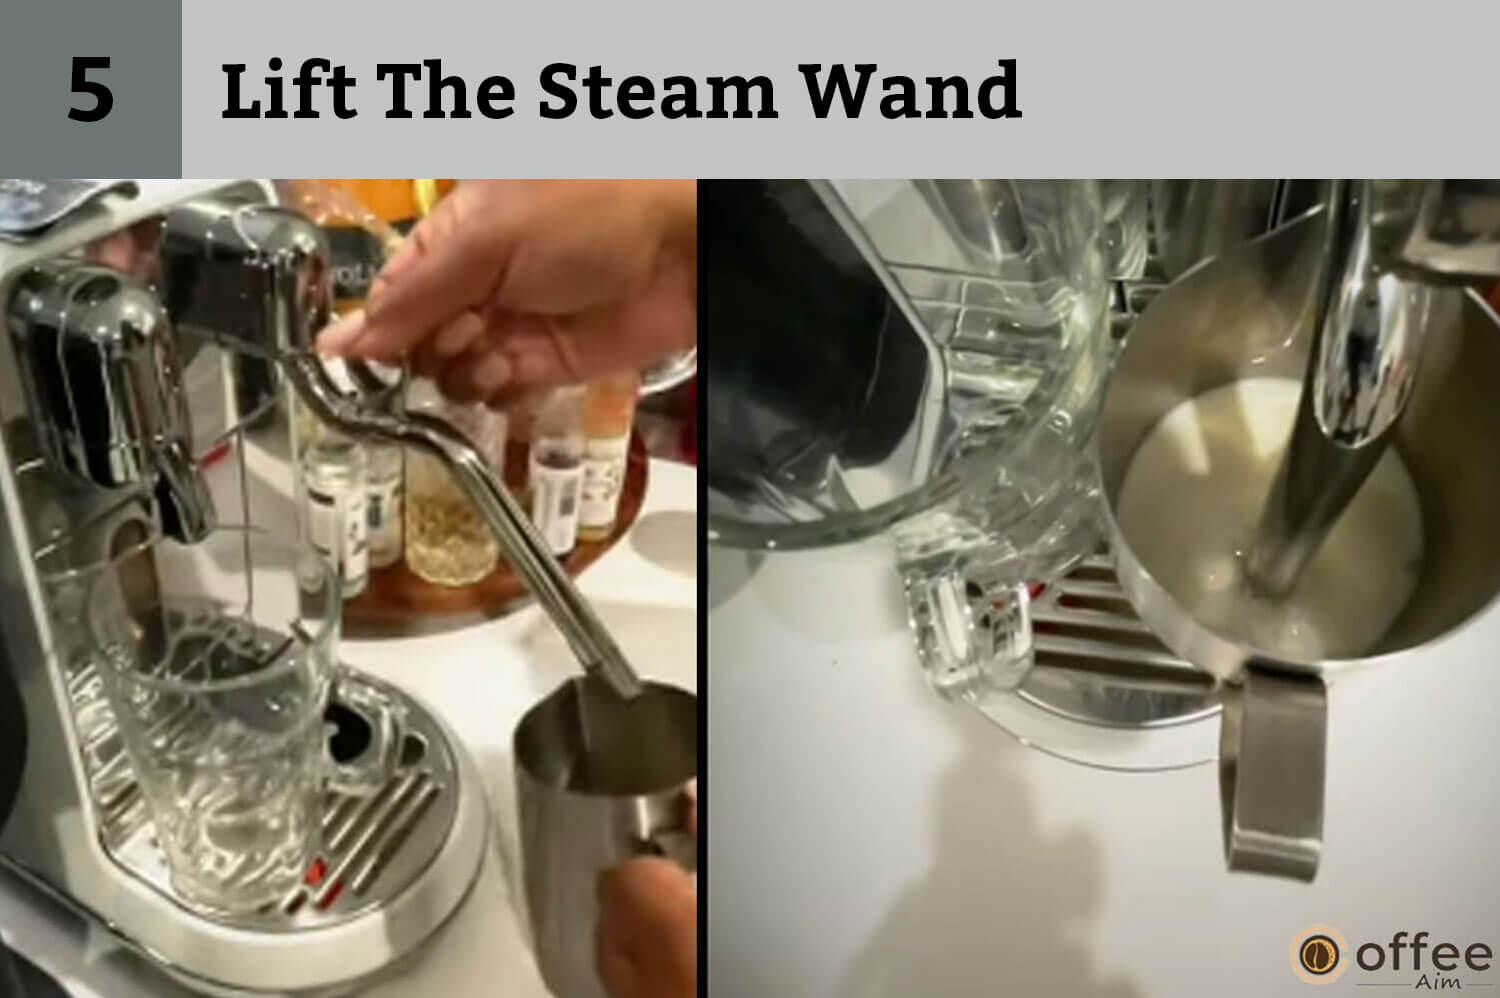
- Lift The Steam Wand
Lift and position the steam wand in the middle of the milk jug.
- Ensure Milk Jug Contact With The Temperature Sensor
Make sure the contact of the milk jug is with the temperature sensor in the drip tray.

- Insert Capsule
Put in the capsule of your taste lifting the lever.

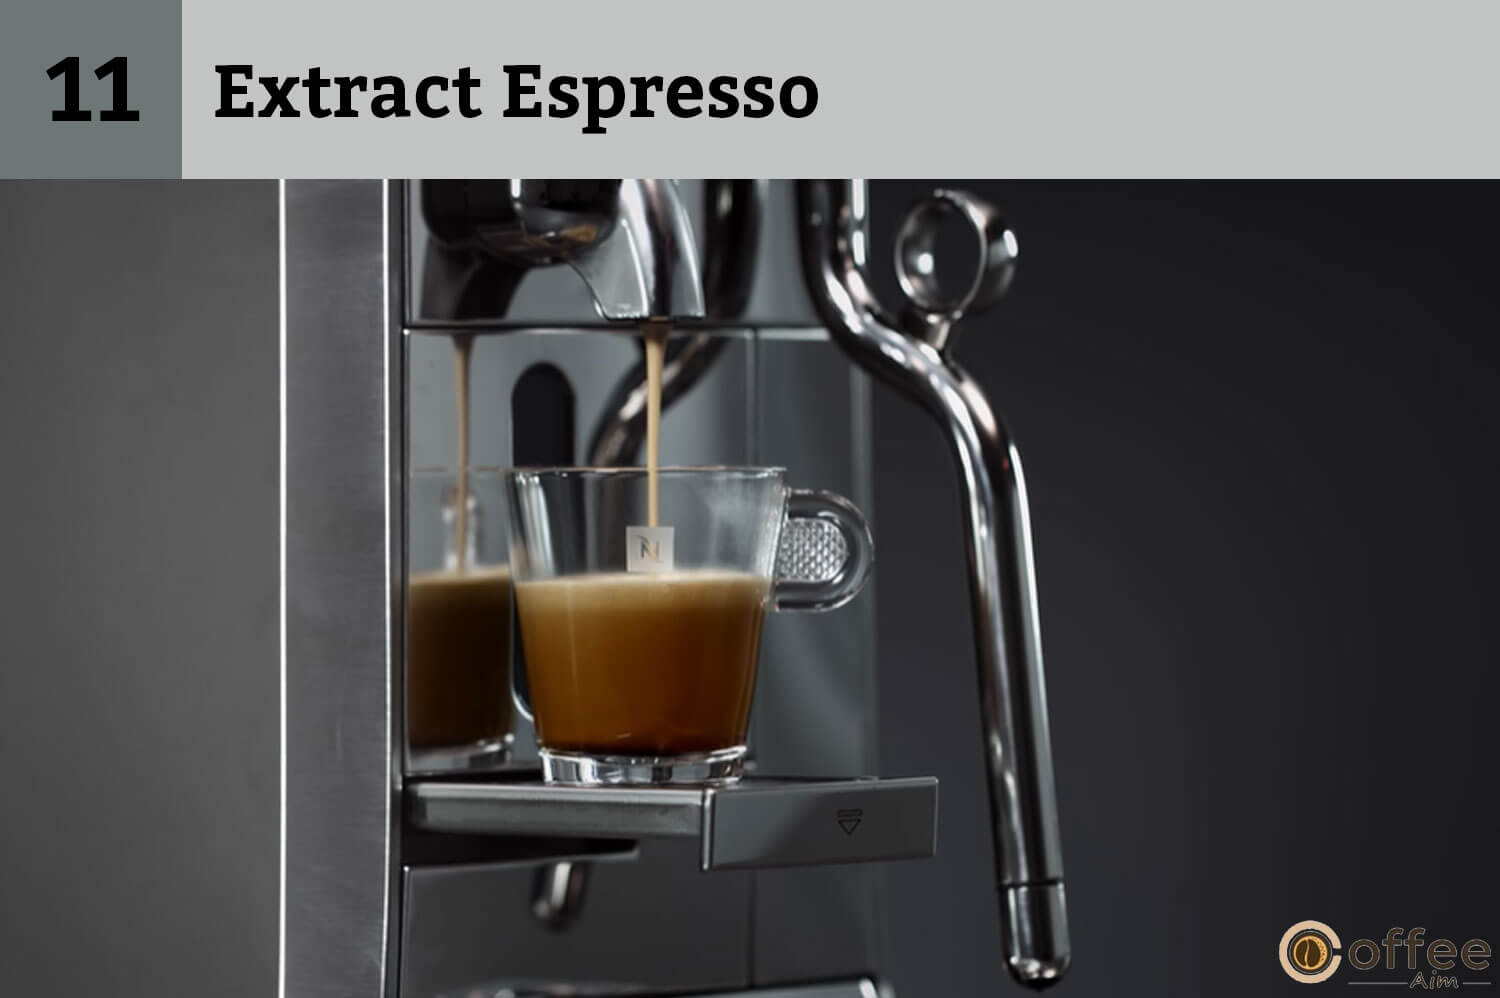
- Extract Espresso
Extract espresso by pressing the START|CANCEL button.

- Start Milk Frothing
After completing the espresso extraction, press the START|CANCEL button to start milk frothing.

Milk froth tip: Use semi-skimmed or pasteurized whole at the refrigerated temperature of around 4-6°C or 39-43°F for the best milk froth.
- Wipe Steam Wand
Lift and clean the steam wand using a clean damp cloth as the milk frothing completes.

- Adjust The Steam Wand
You do not have to clean the steam wand separately. Allow it to go to its down position. It will auto-purge and rinse itself.

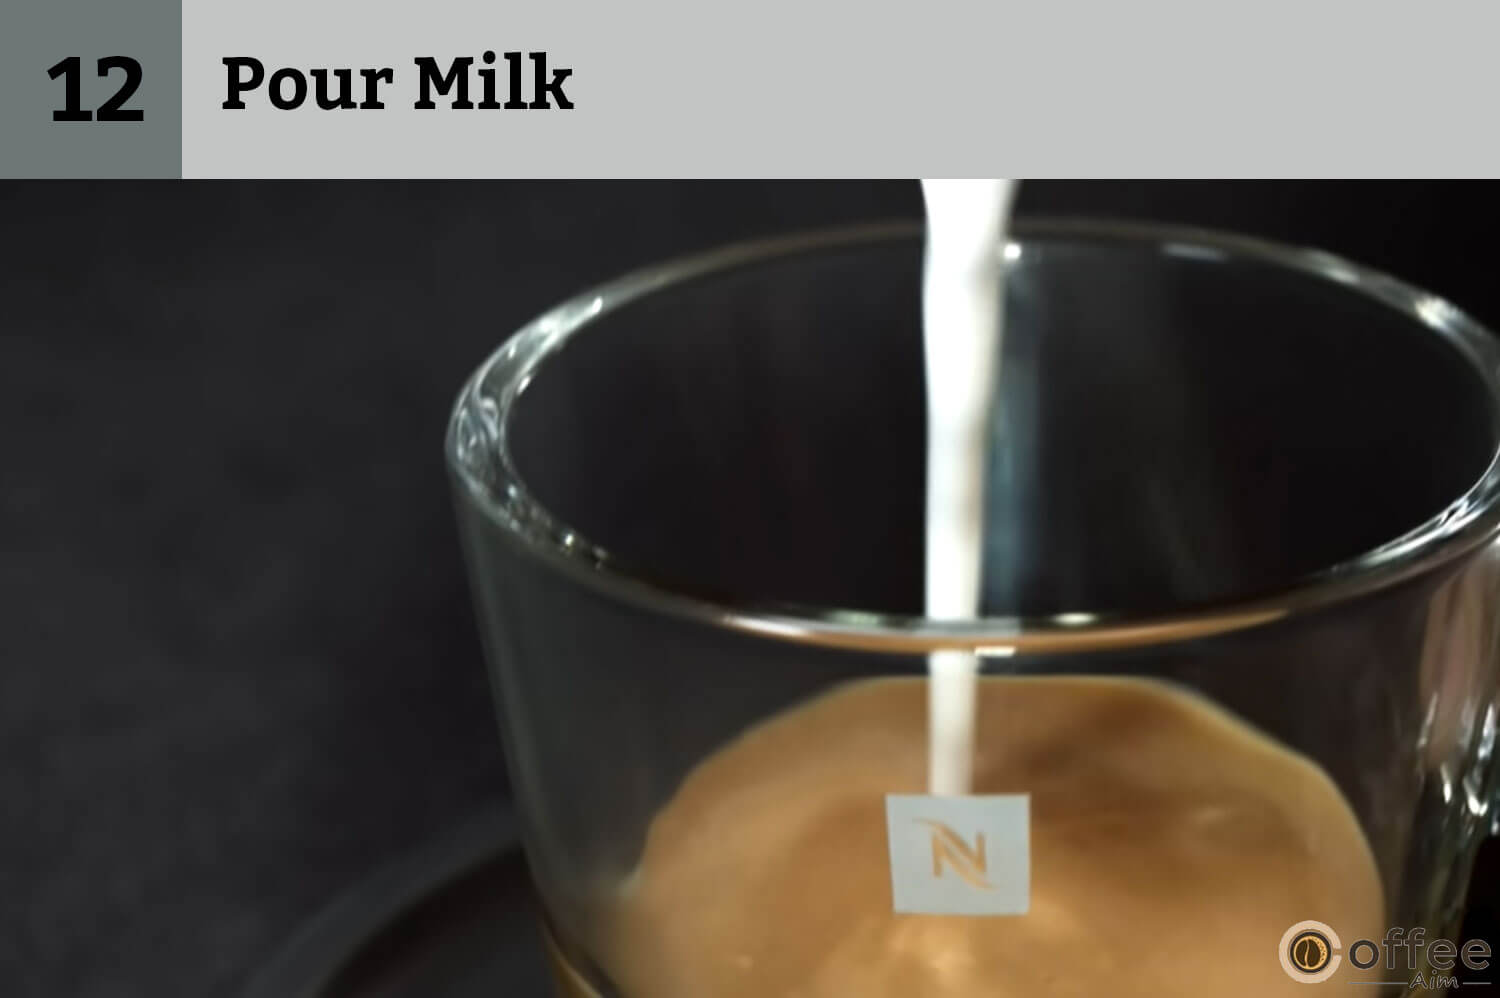
- Pour Milk
Complete your coffee-making by pouring milk into espresso.
Preparation Of Latte Macchiato Using Nespresso Creatista
If you like foam milk in your coffee, you certainly are finding a way to make a latte macchiato. Here is the complete guide for preparing Latte macchiato in Nespresso Creatista:
- Fill The Water Tank
Pour drinkable water into the water tank. Better to use fresh water.
- Accommodate Smaller Cups
PUSH in the cup support to unlock and accommodate the Latte Macchiato glass.

- Select Your Drink
Choose the drink by rotating the SELECT dial.
- Fill The Milk Jug
Pour the fresh and cold milk into the jug to the maximum marked level of the jug.

Caution: Do not fill the milk jug above the maximum marked limit on the inside and outside the jug.
Information: Make use of the provided milk jug only.
- Lift The Steam Wand
Lift and position the steam wand in the middle of the milk jug. Press the START|CANCEL button to start milk frothing.

- Ensure Milk Jug Contact With The Temperature Sensor
Make sure the contact of the milk jug is with the temperature sensor in the drip tray.

- Wipe Steam Wand
Lift and clean the steam wand using a clean damp cloth as the milk frothing completes.

- Adjust Steam Wand
Let the steam wand go down to auto-purge and rinse itself.

- Pour Milk
Place the latte macchiato glass under the coffee outlet after pouring milk into it.

- Insert Capsule
Put in a capsule lifting the lever in the space.

- Extract Espresso
Now, take out your espresso by pressing the START|CANCEL button and cherish it.
How To Adjust Regular Coffee Drinks In Nespresso Creatista?
You have got your appliance at home. Now, you don’t have to bother anymore to adjust your Nespresso Creatista every time for making your coffee. It is up to you how you program it for making the drinks of your choice. You can save these settings for the next use as well. I am here to guide you properly on how you can do this:
- Rotate The Select Dial
Rotate the select dial towards the drinks.

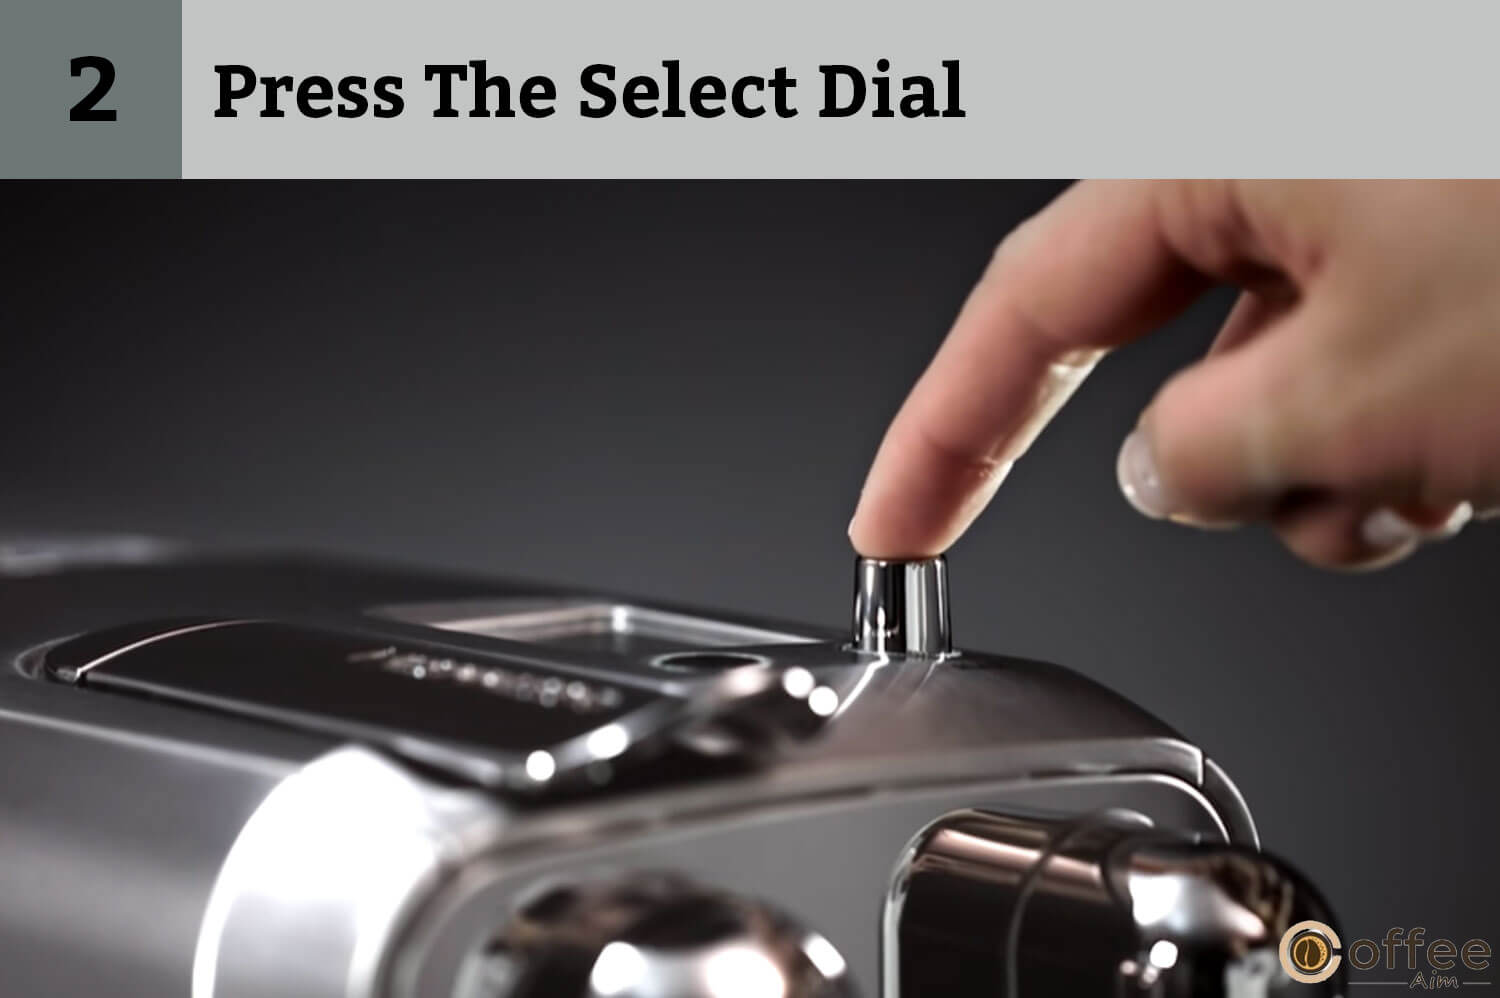
- Press The Select Dial
To Adjust the coffee volume Press the SELECT dial.
- Rotate he Select Dial Again
You can go for the suggested volume marked with the dotted line. However, it is not compulsory to follow. Rotate the SELECT dial to adjust the coffee volume.

- Press Select Dial/ START|CANCEL
Press the SELECT dial to save and exit. Press the START|CANCEL button if you want to exit and not save.

Milk coffee can be programmed as follows:
You can easily program your milk coffee with the help of different coffee type options present on the coffee maker.
| Coffee Type | Volume in millilitres | Volume in ounce |
| Ristretto | 25-60 ml | 0.85-2 oz |
| Espresso | 25-60 ml | 0.85-2 oz |
| Lungo | 70-150ml | 2.37 to 5 oz |
How To Adjust Milk Coffee Drinks In Nespresso Creatista?
Information: The appliance works best for pasteurized whole or semi-skimmed milk. You can adjust milk volume and milk froth to suit the milk type available to you.
There is a certain adjustment setting to follow for making milk coffee drinks using Nespresso Creatista.
- Adjust Drink
Rotate the SELECT dial to the drink and press the SELECT dial to choose the drink.
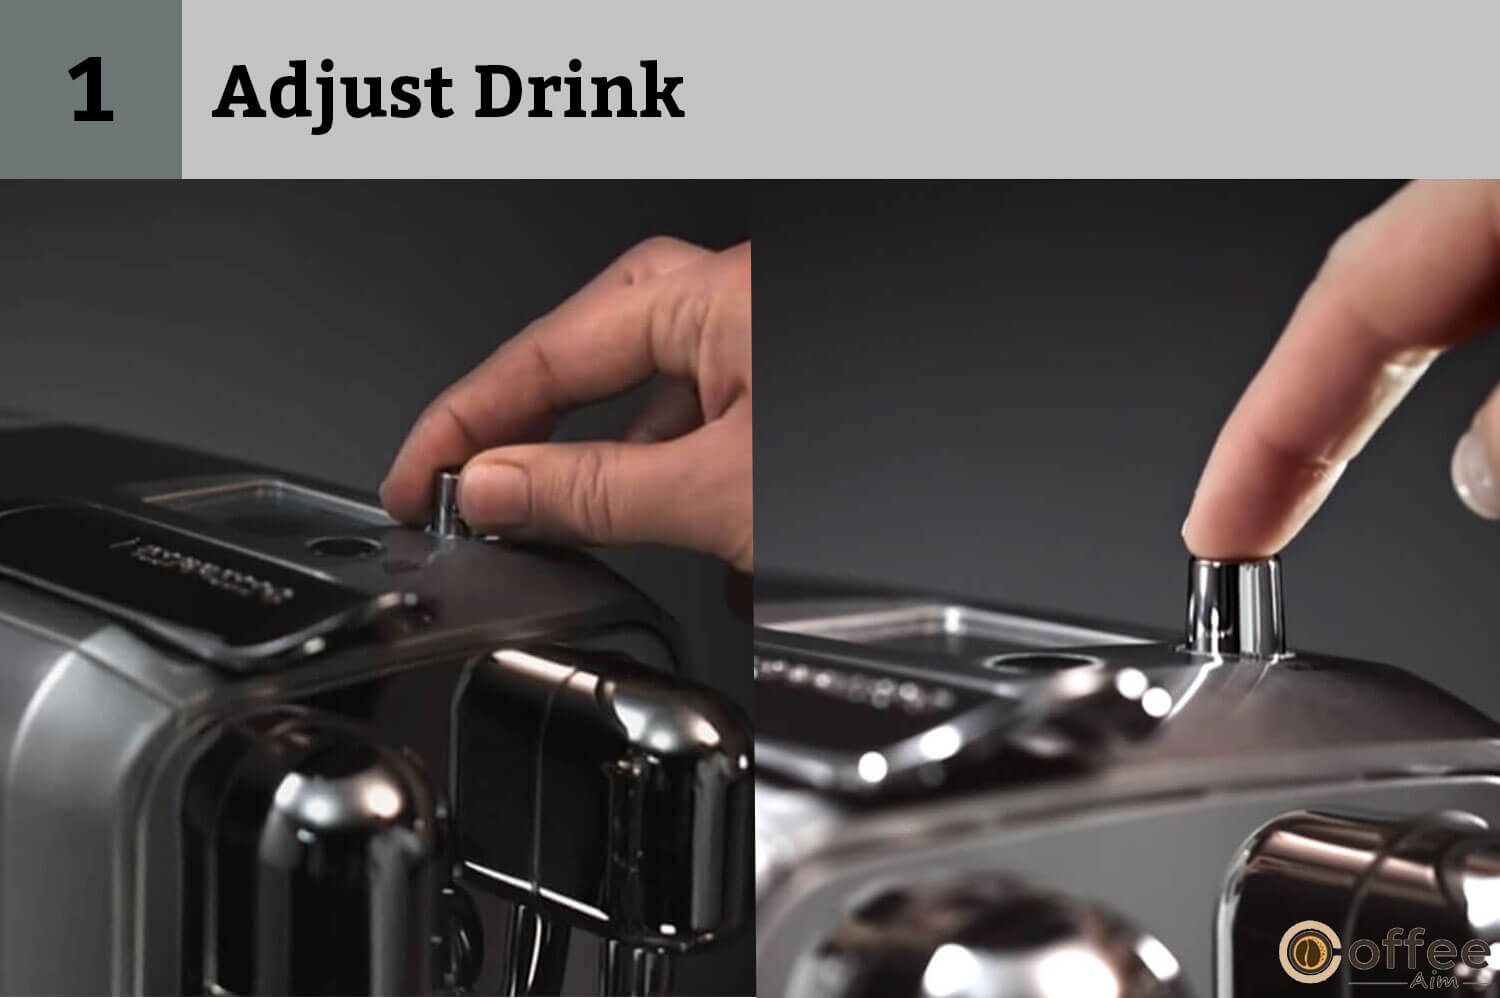
- Adjust Espresso Volume And Milk Temperature/ Milk Froth Level
Rotate the SELECT dial to adjust Espresso Volume, Milk Temperature
or Milk Froth level.

- Adjust The Settings
Press the SELECT dial to enter and then rotate to adjust the settings.
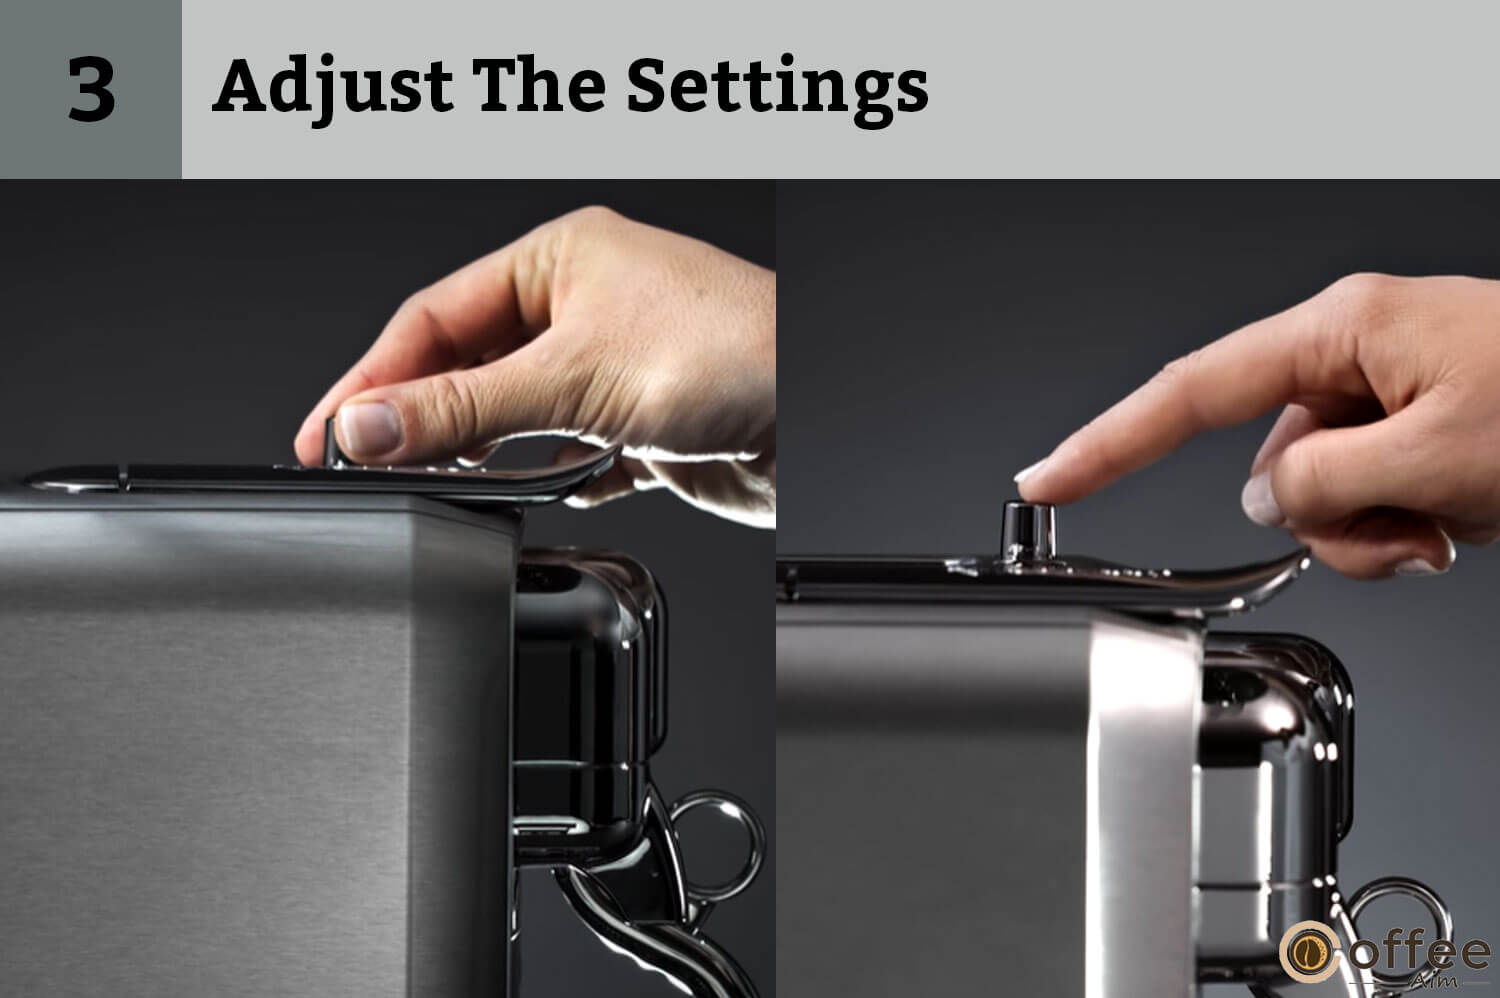
- Save & Exit/Exit
To save and exit, press the SELECT dial. Press the START|CANCEL button to exit without saving.

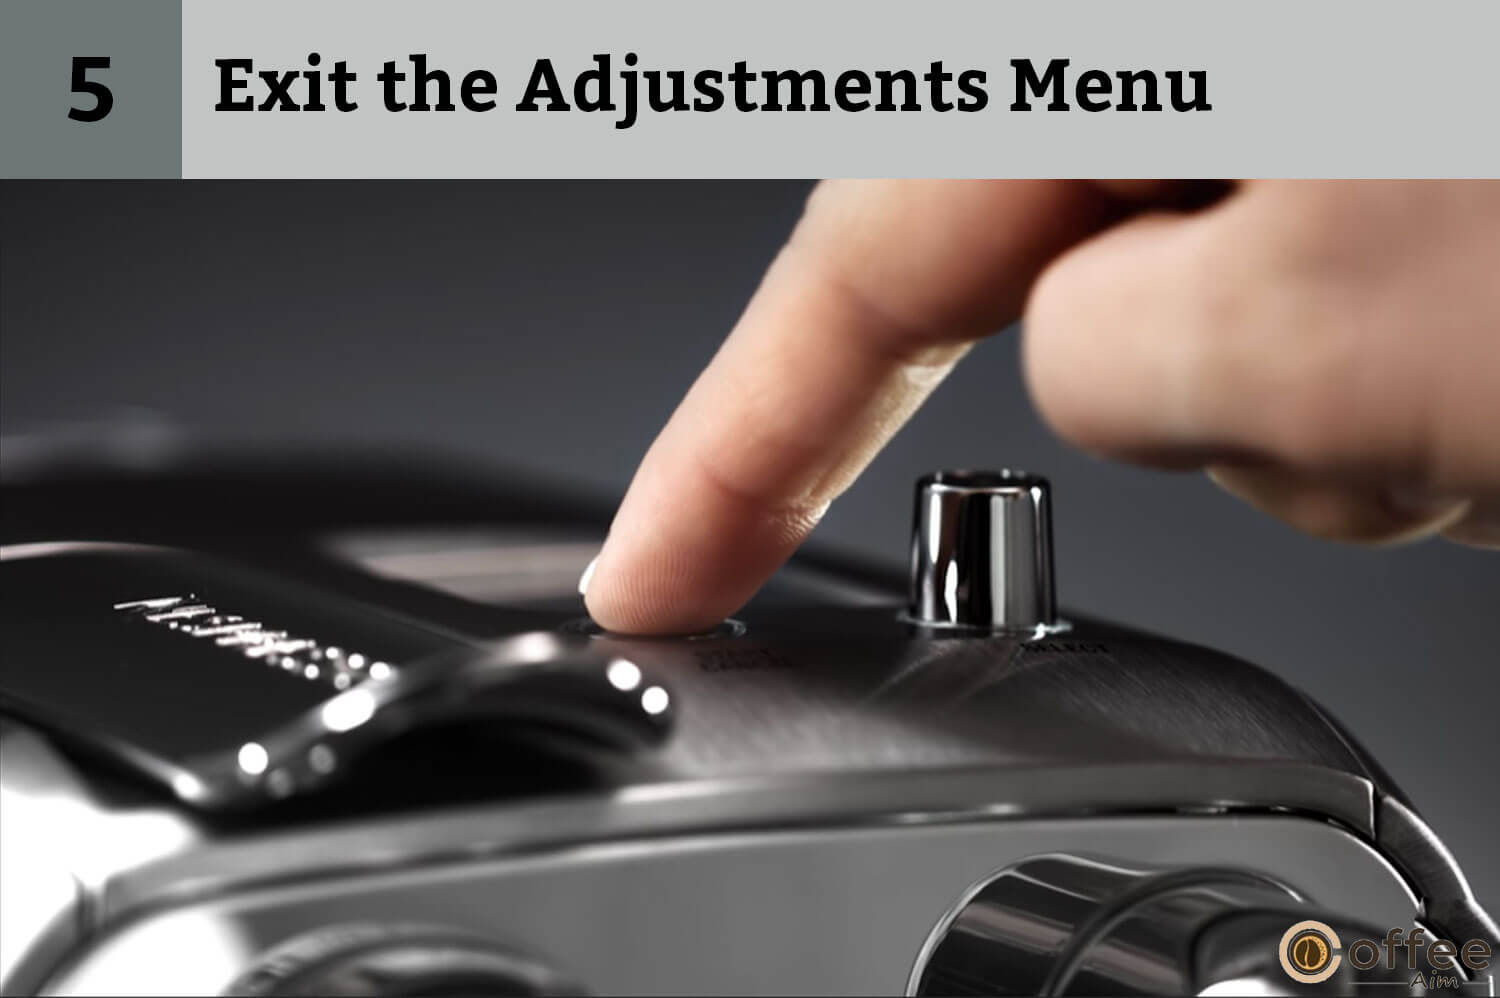
- Exit the Adjustments Menu
Exit the adjustments menu by pressing START/CANCEL.
You can program any milk coffee following this table:
| Settings | Optimum programming suggestions |
| Coffee volume in milliliters | 25-60 ml |
| Coffee volume in oz. | 0.85 – 2 oz |
| Milk temperature in celsius | 55-75 °C |
| Milk temperature in Fahrenheit | 131 – 167 °F |
| Milk Froth in millimeters | 2-30 mm |
| Milk Froth in inches | 0.08-1.2in |
How To Reset To Factory Settings?
Factory reset settings boost the performance of your Nespresso Creatista. Here is how to:
1. Choose SETTINGS
2. Select RESET
3. Select FACTORY RESET
4. Select to verify
5. Select to cancel
6. The machine will turn off
7. You need to follow the first use instructions for using the machine after this.

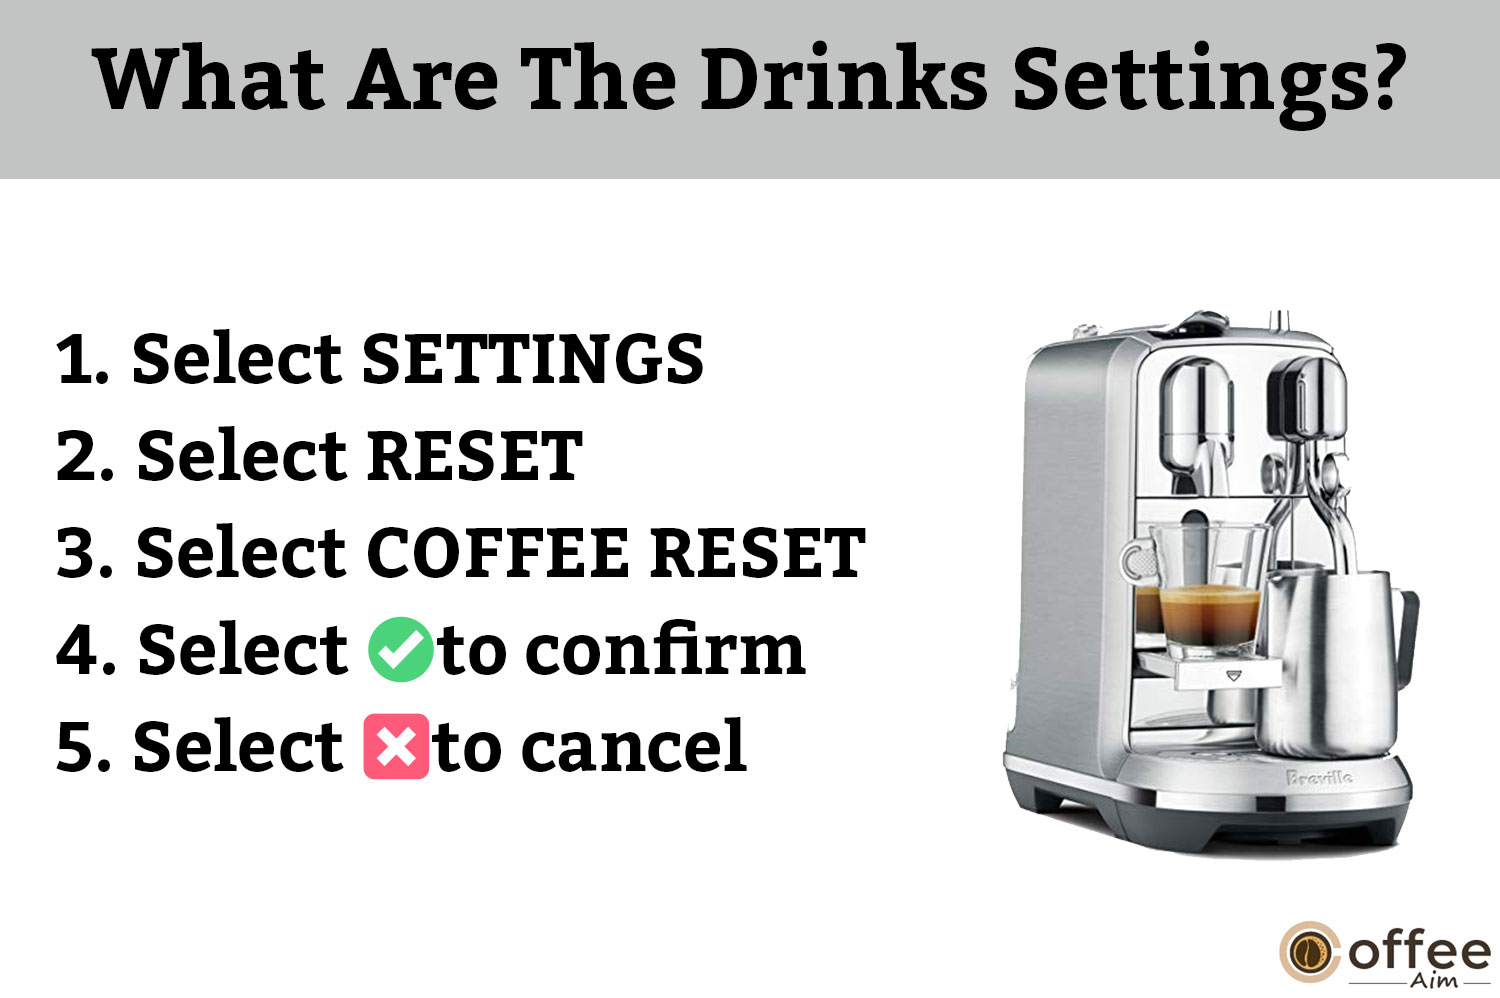
What Are The Drinks Settings?
Milk temperature, milk froth, and coffee volume are included in drink settings.
To reset your drink settings:
1. Select SETTINGS
2. Select RESET
3. Select COFFEE RESET
4. Select ✅to confirm
5. Select ❎to cancel
How To Empty The System For A Long Period Of Non-Use?
You are suggested to empty the system before a time duration of non-used. It can be emptied to avoid frost as well. Here’s how to do it:
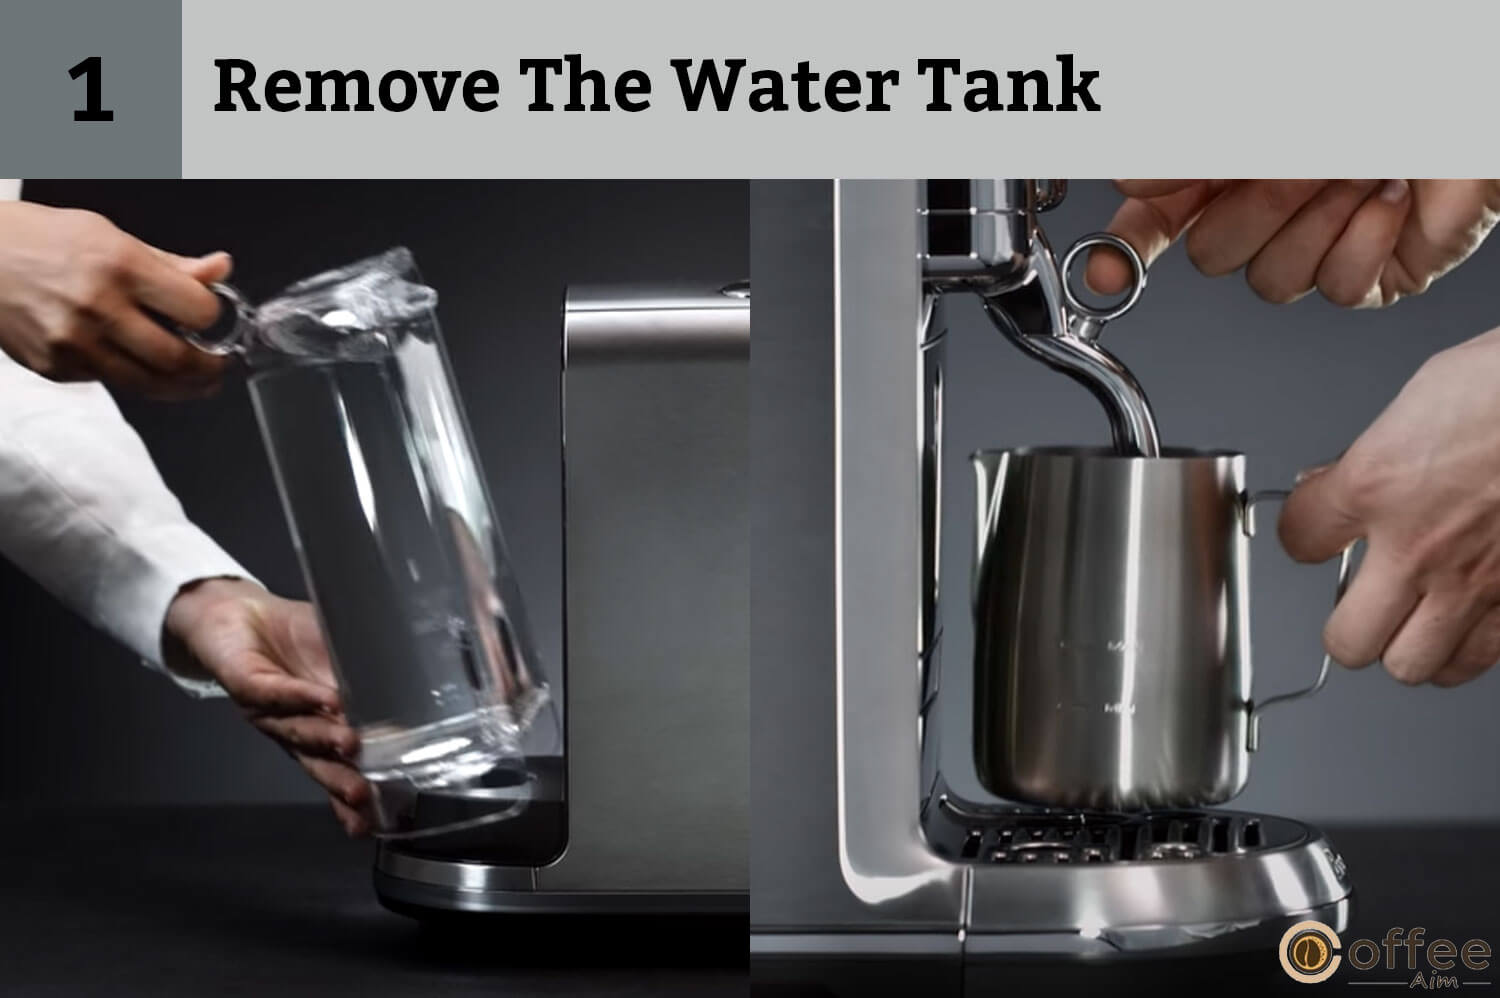
- Remove The Water Tank
Separate the water tank and put the milk jug under the coffee outlet.
- Maintenance
Rotate the SELECT dial towards MAINTENANCE and press the SELECT dial. Choose “Empty Cycle” and press SELECT to start. Evacuate and wipe out the drip tray and capsule bucket dry once the pump stops.

How The Energy-Saving Feature Of Nespresso Creatista Works?
The machine is energy efficient. It reduces power use when not in use. The display turns off after ten minutes of no use and dims after two minutes of no use. Restart with the START|CANCEL button.

What Is The Nespresso Creatista Daily Cleaning Procedure?
Daily cleaning is necessary to maintain the performance of the appliance. Here are the compulsory steps to follow:
- Empty The Drip Tray
Clean out your used capsule container and drip tray regularly. Remove the cup support. For it, you have to disengage the capsule bucket. Now unlock the cup support, and disengage it from the machine by pulling forward and then lifting upwards. Wipe the machine from the inside. Clean and reassemble the cup support using a clean damp cloth. Now remove the water tank and lid. Clean them using odorless detergent. Rinse with warm water afterwards. Here is the time to fill the water tank with drinkable water.

- Rinse The Milk Jug
Rinse and dry the milk jug after each use. A mild detergent can be used if necessary.

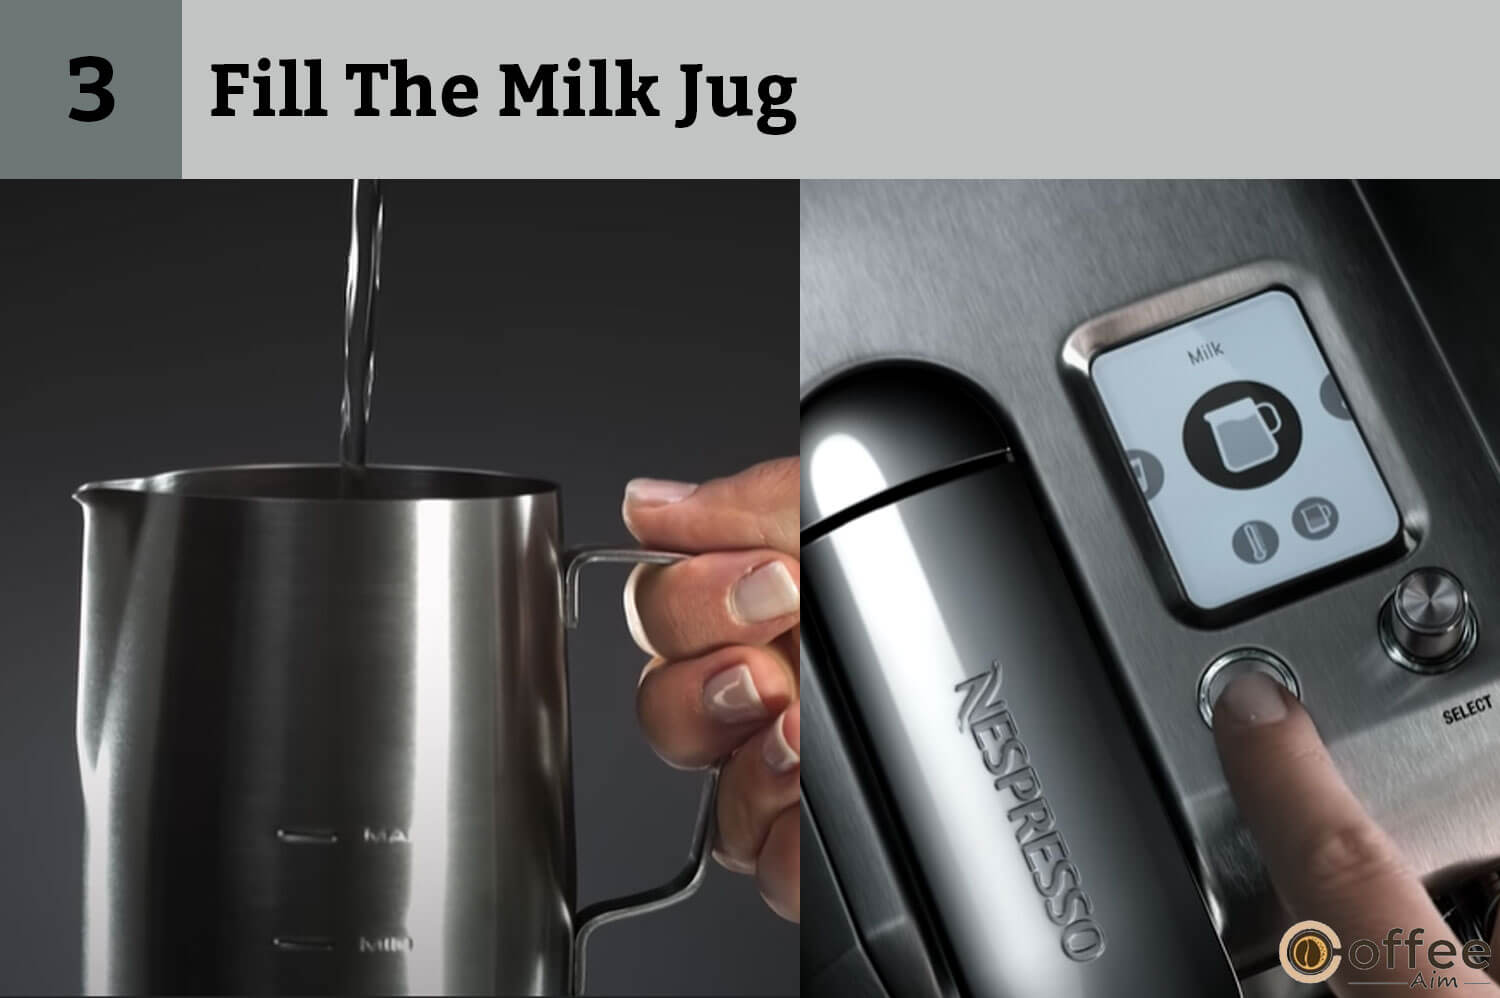
- Fill The Milk Jug
Pour drinkable water into the milk jug within the minimum and maximum marked levels on the jug. Choose the milk function and press start. Discard the hot water as the process completes. Clean the steam wand with a clean and damp cloth afterwards.
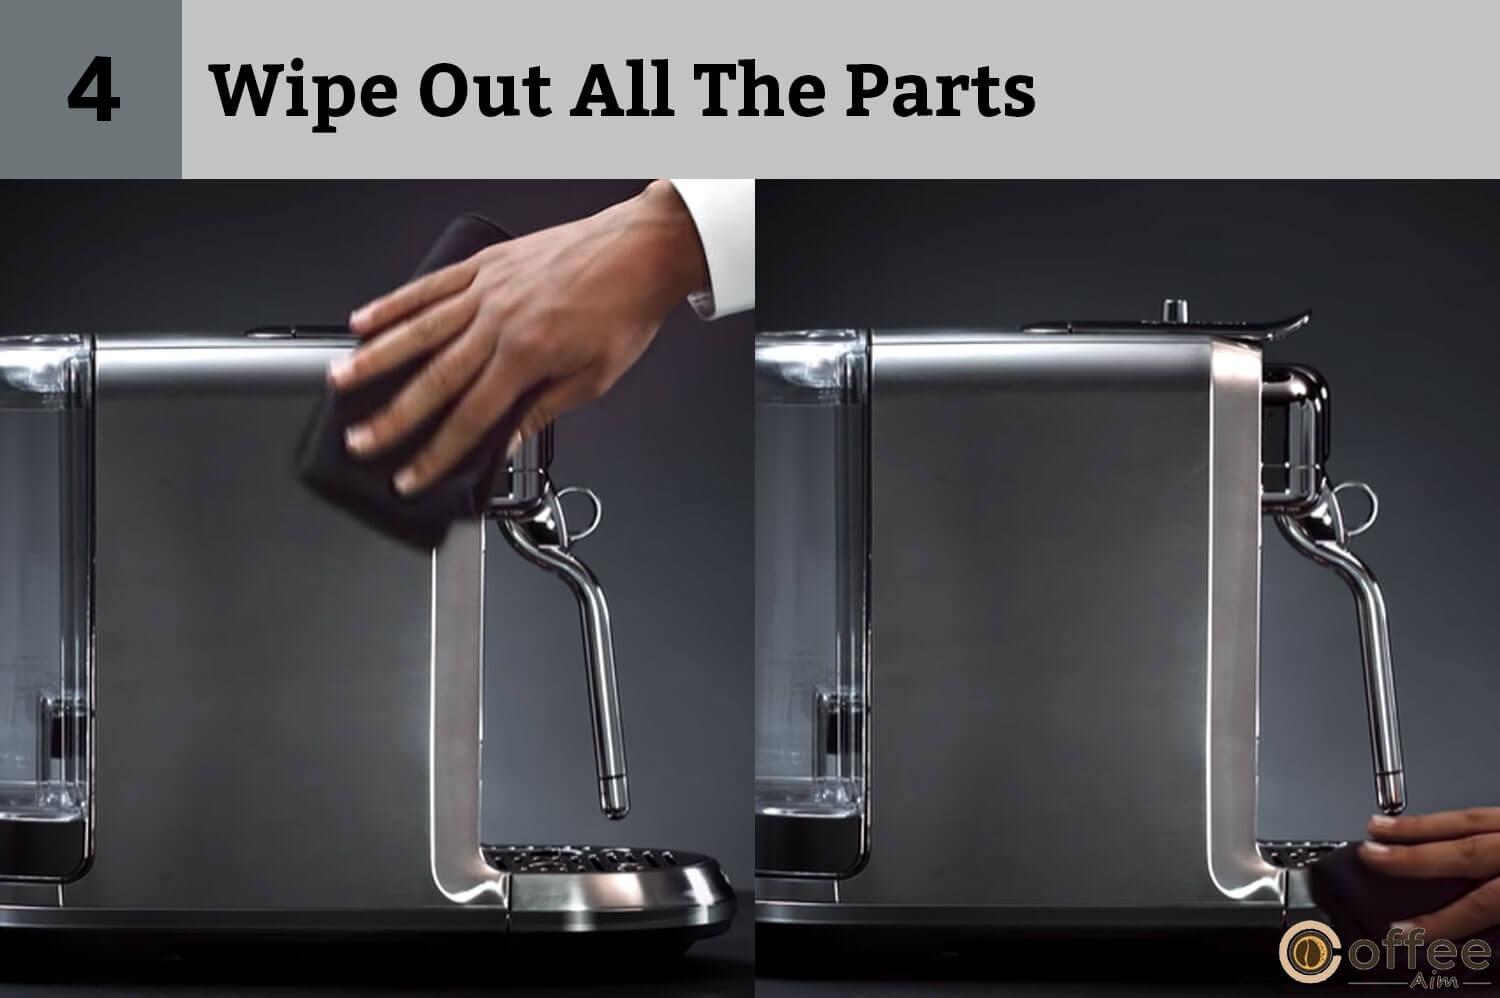
- Wipe Out All The Parts
Dry all the parts with a soft cloth and rejoin them. Daily clean the coffee outlet and inside of the machine using a clean damp cloth.
- Do Not Immerse It In Any Liquid Including Water
Do not immerse any part of the appliance in any liquid including water.

Note: Do not use any strong solvent for cleaning or put it in the dishwasher.
Information: Empty and clean the capsule container daily to maintain hygienic use of the machine.
How To Perform The Steam Wand Cleaning Procedure?
Steam wand cleaning is necessary to prevent blockage in the steam tip.
Milk System Cleaning Procedure
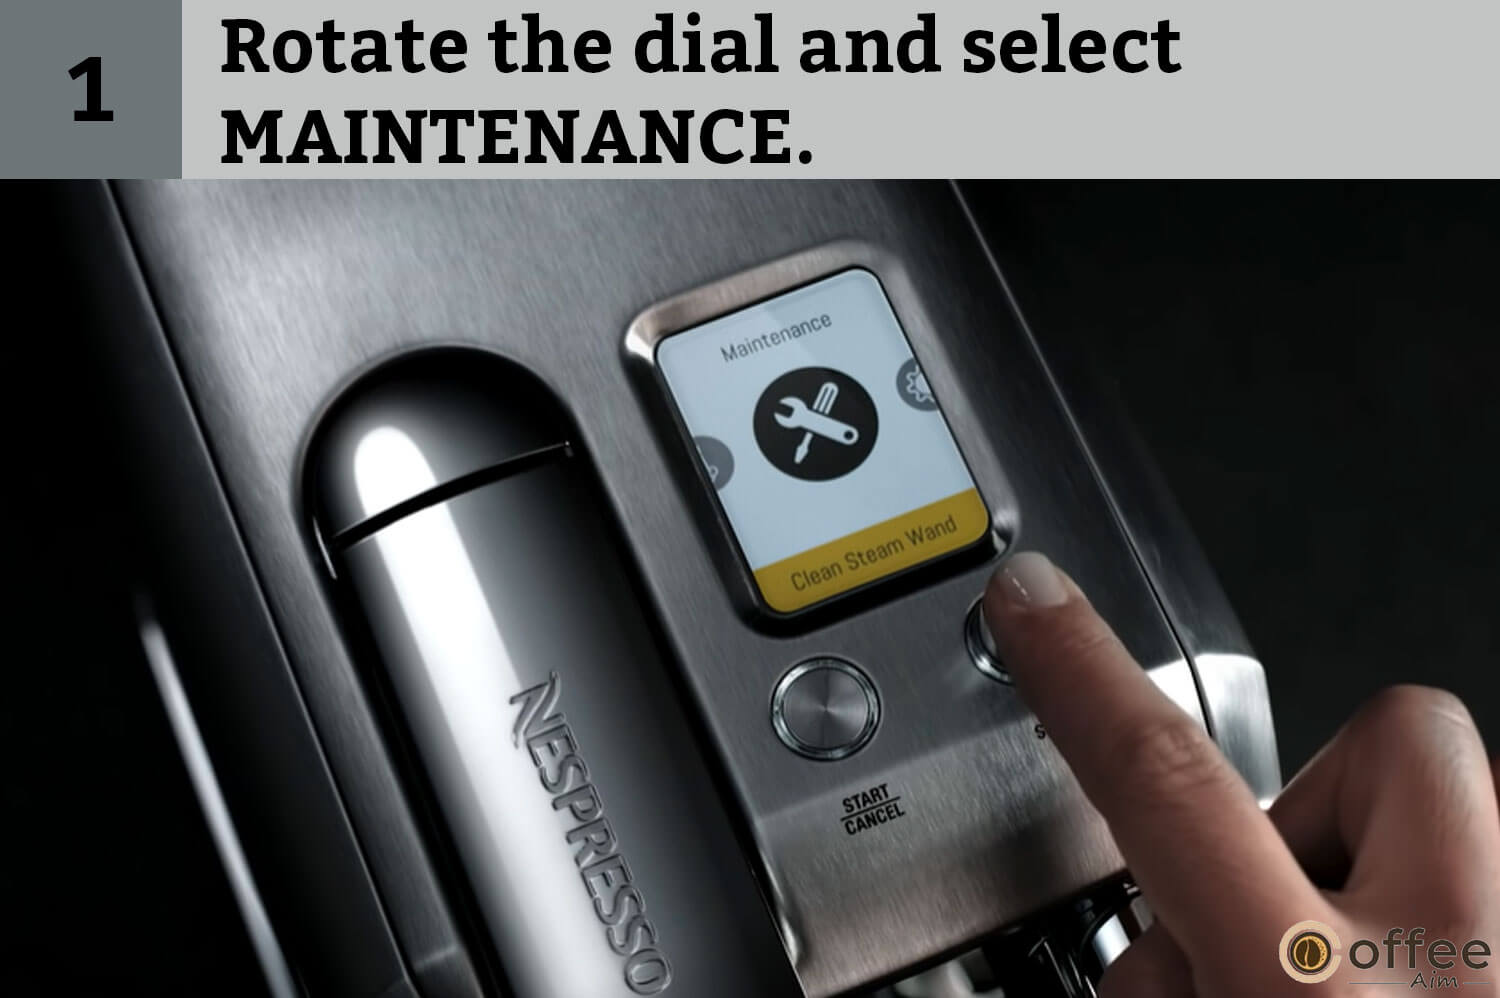
Perform the procedure each month or when the display reveals “Clean Steam Wand.” Here is the procedure:
- Choose MAINTENANCE

- Choose a Clean Steam Wand
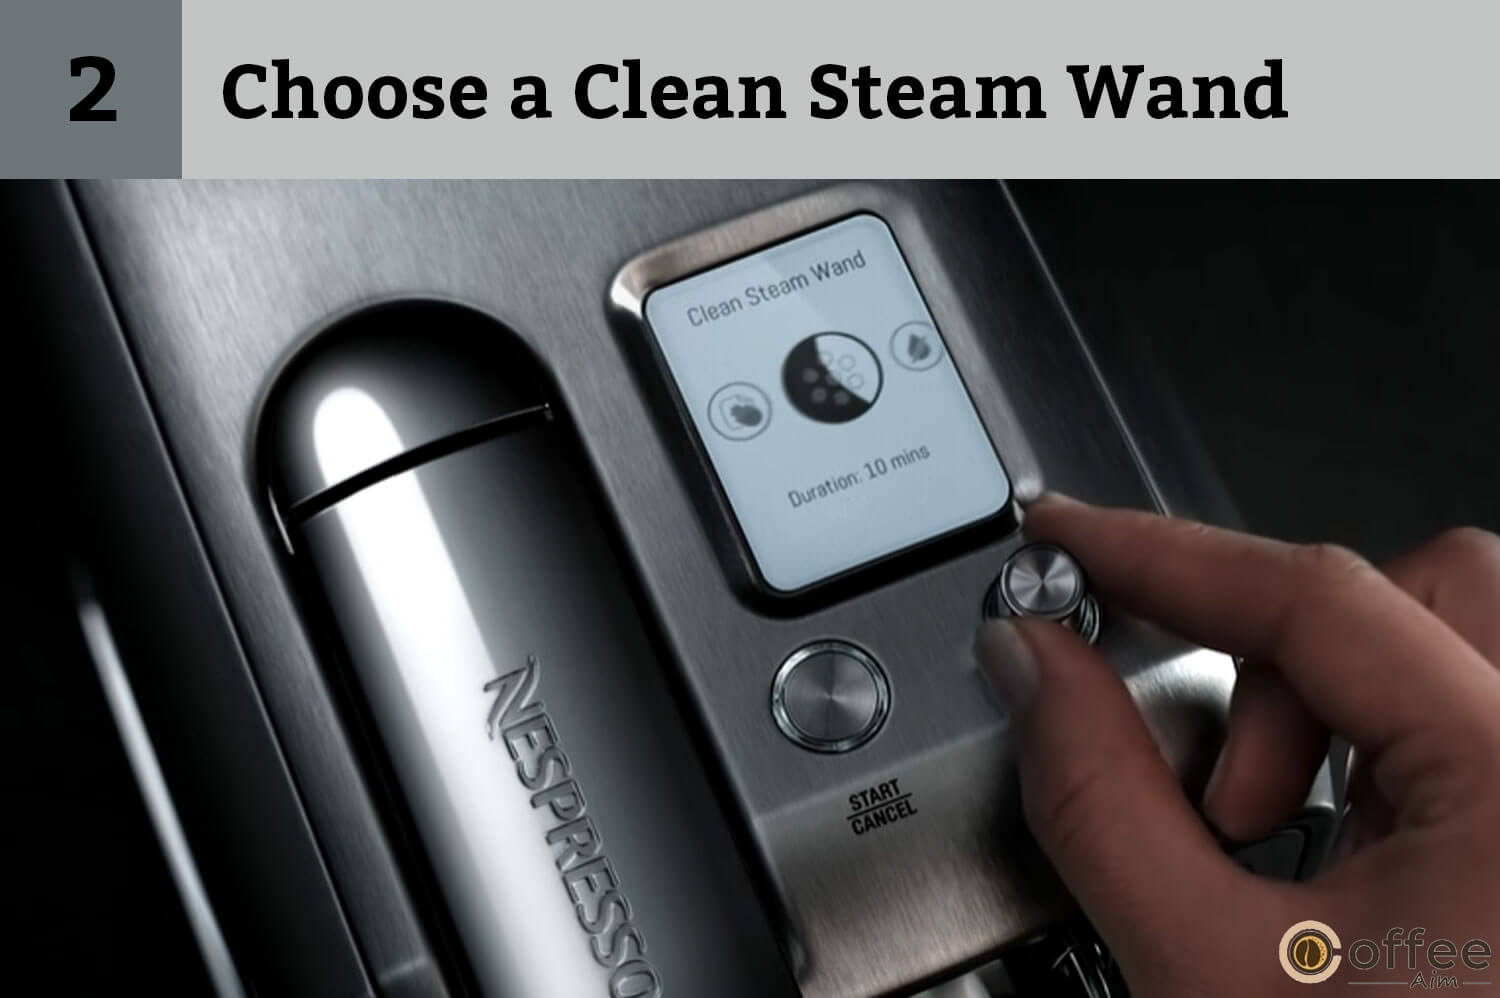
- Follow the on-screen prompts to complete the cleaning

What Is The Need For Descaling The Nespresso Creatista Regularly?
Descaling is like providing service to your appliance for better and long-term performance. It removes the scales on the appliance, prevents the machine from damage, and maintains the quality of the coffee. Descale when it is suggested on-screen. The usage will stop if the machine is not descaled after ten uses. A “lockout” will remind you of the uses left for descaling it again.
How To Perform Descaling?
Considering the descaling a tough procedure? Take a chill pill! I am here to make it super easy for you. Let’s start it.
- Rotate the dial and select MAINTENANCE.
- Choose DESCALE.
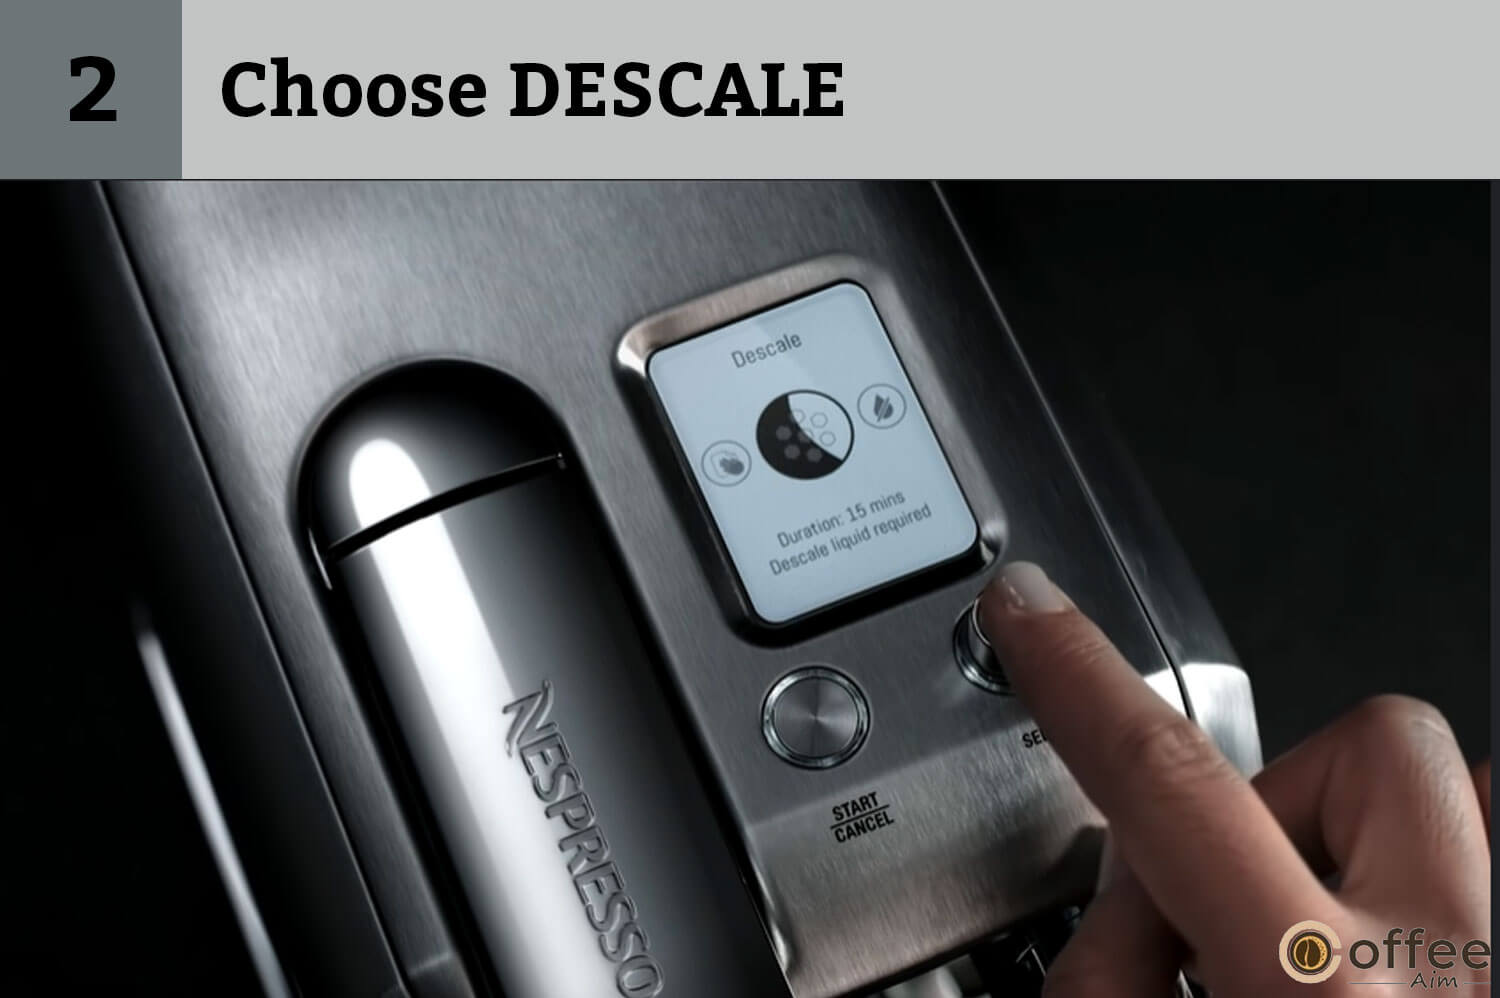
- Keep following the on-screen prompts to complete the descaling

Information: Descaling takes around 15 minutes.
Caution: Read the safety precautions on the descaling package and consult the table to know how much to use. Prevent the contact of the descaling solution with the eyes, skin, or surfaces. Use only the Nespresso descaling kit from Nespresso Club for appliance safety. The water hardness level determines the descaling frequency for the optimum performance of the appliance. Contact Nespresso Club for any query about the descaling.
What Is The Case With Water Hardness In Nespresso Creatista?
Now, you are wondering about the relation of water hardness with your Nespresso Creatista! Wonder to know that different water hardness levels affect your machine, coffee-making settings, and the frequency of the descaling differently. You use a test strip provided to determine the level of water hardness. Here’s how you can change the water hardness settings:
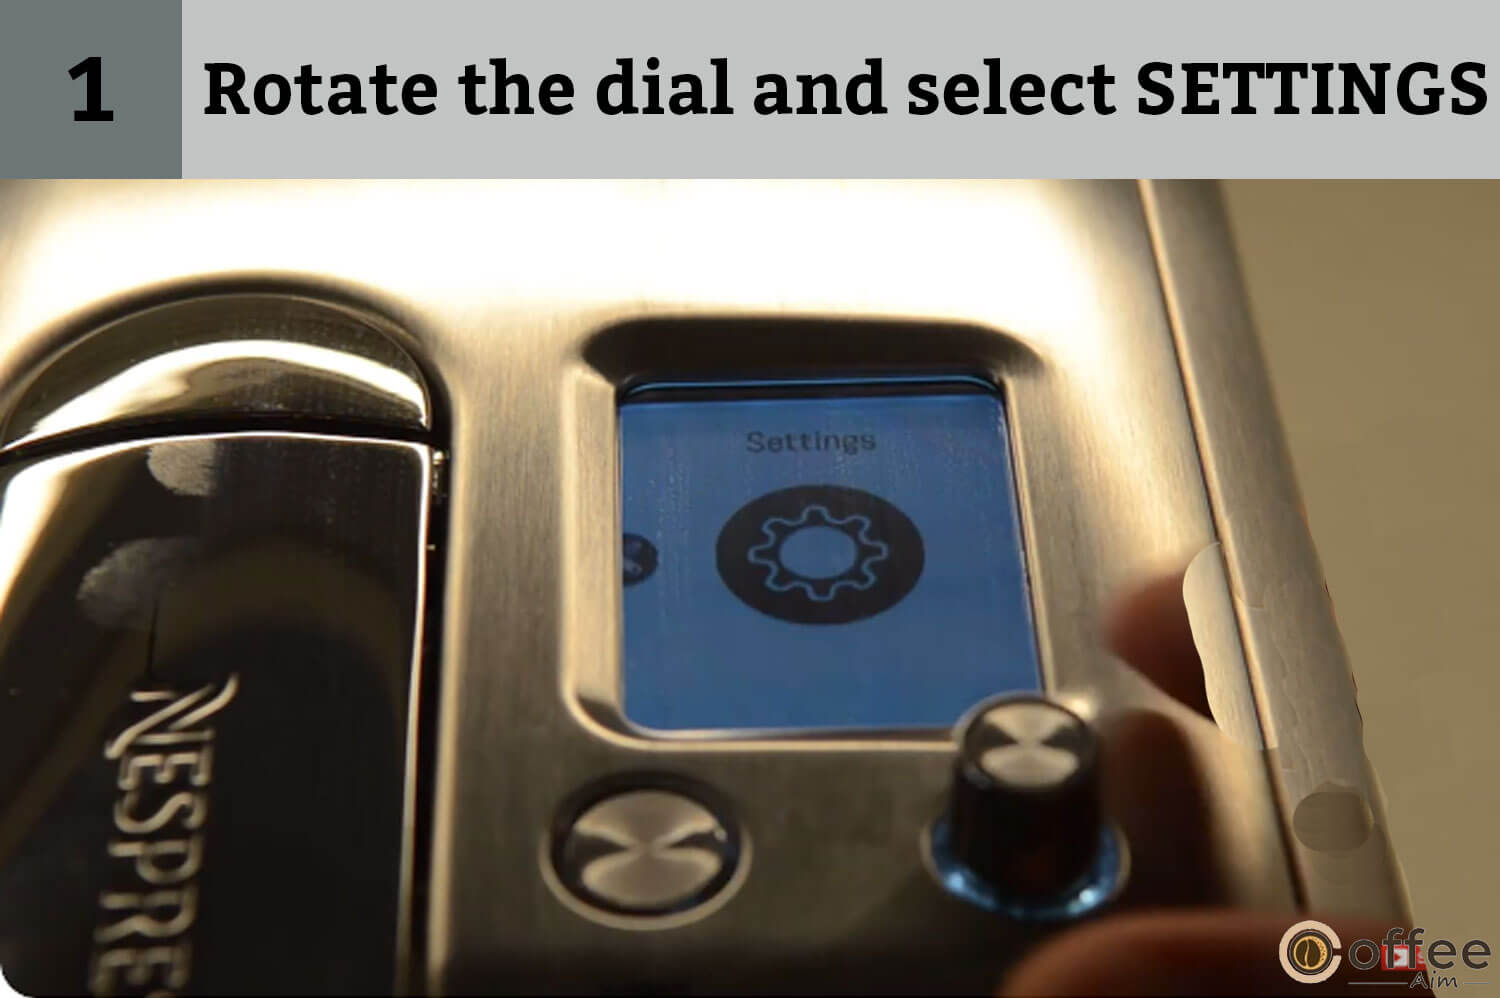
- Rotate the dial and select SETTINGS
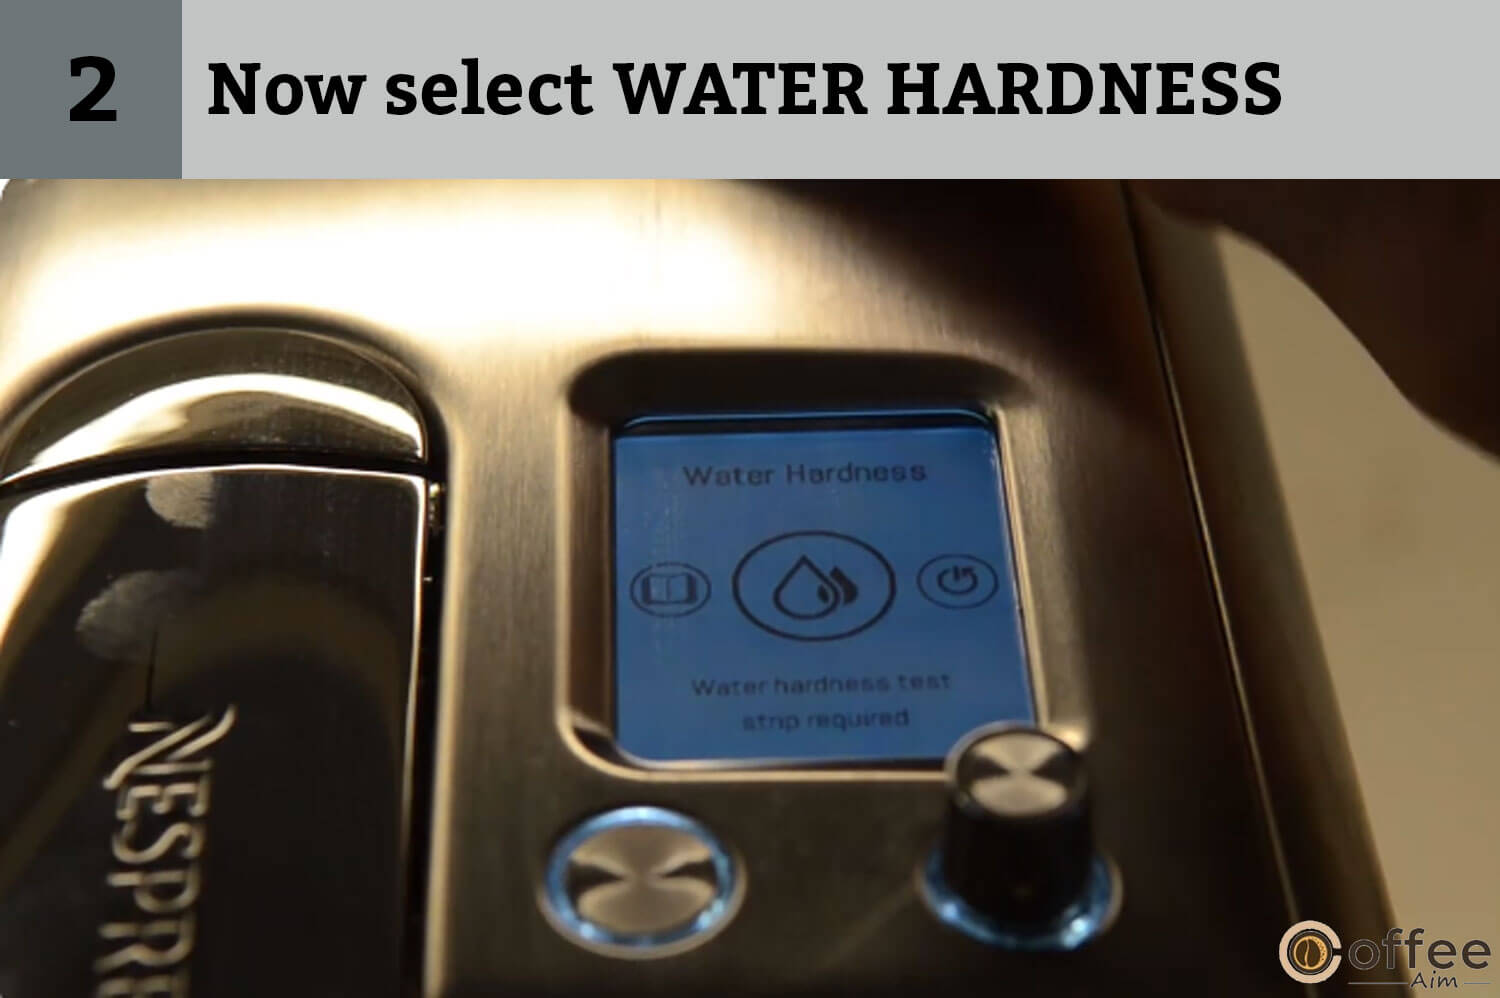
- Now select WATER HARDNESS
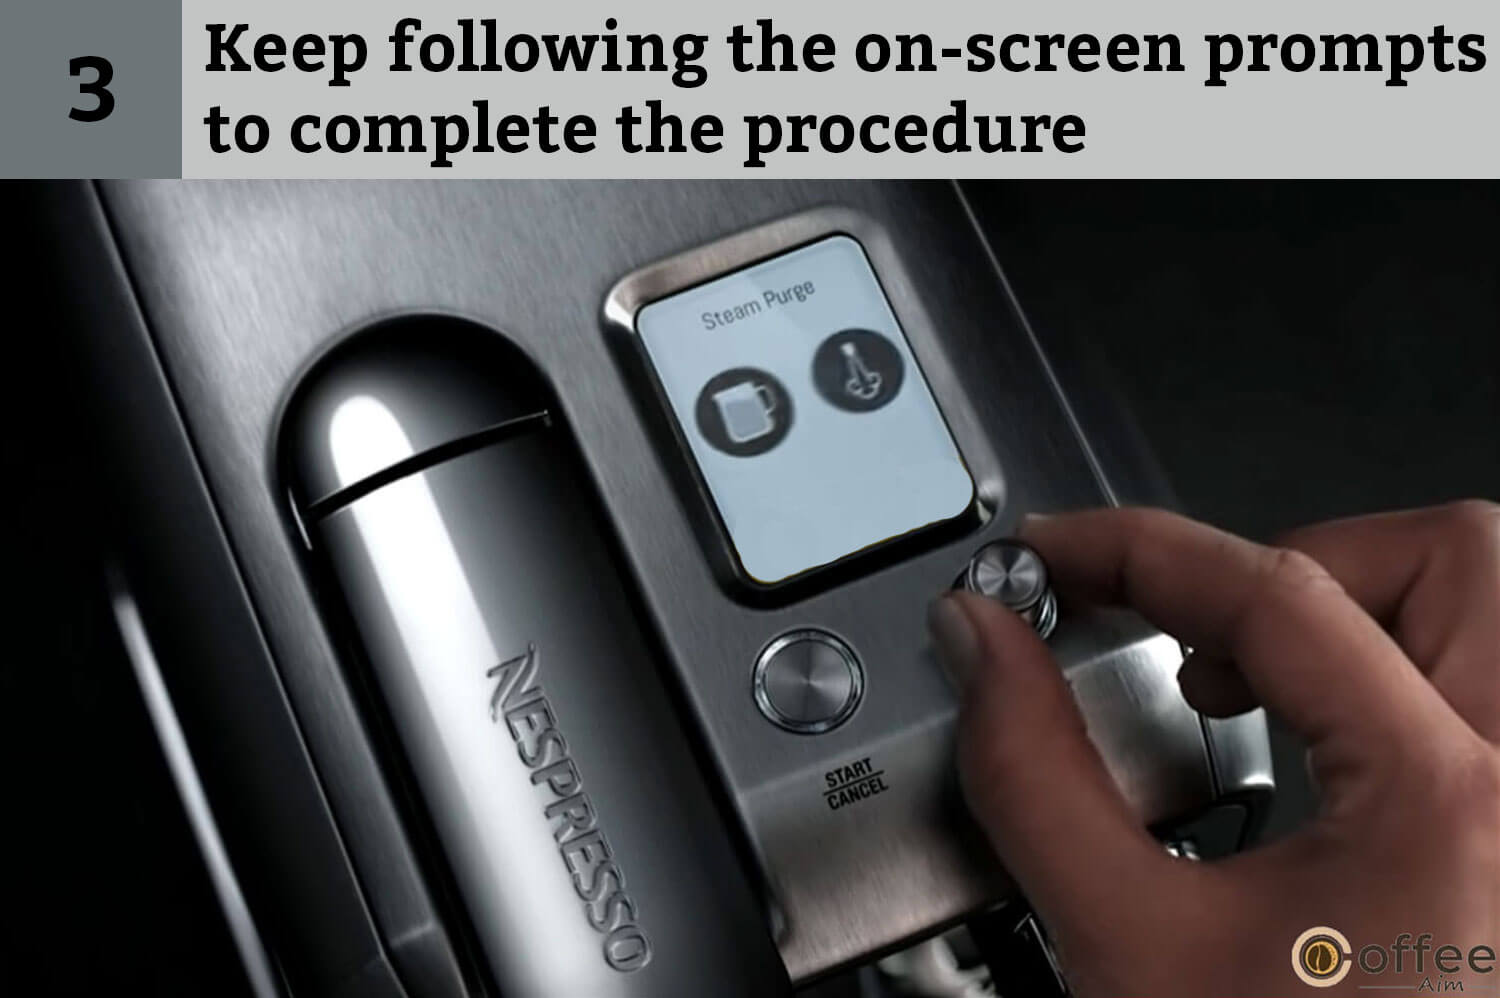
- Keep folowing the on-screen prompts to complete the procedure
Water Hardness:
Through this table, you can find out the water hardness level of your potable water and can descale your coffee maker accordingly. Let’s do it.
| Water hardness | Descaling After:* | |||
| App. | French degree (fH) | German grade(dH) | Calcium Carbonate(CaCO3) | |
| Level 0 | <5 | <3 | < 50 mg/l | |
| Level 1 | >7 | >4 | > 70 mg/l | |
| Level 2 | >13 | >7 | > 130 mg/l | |
| Level 3 | >25 | >14 | > 250 mg/l | |
| Level 4 | >38 | >21 | >380mg/l |
How Do I Troubleshoot The Machine?
The machine may end up having some technical irregularities due to incorrect and long use for some unknown causes. You can troubleshoot it to boost and restore its working.
| Trouble | Possible Solutions | Final Solutions |
| Button not lightened | The machine turned off automatically due to energy saving modePress the START|CANCEL or SELECT button to enable the ON-MODE of the machine | -Check out the power outlet: voltage, fuse, and plug. |
| No steam/ hot water | Press the START|CANCEL or SELECT button to enable the ON-MODE of the machine. | -Check out the power outlet: voltage, fuse, and plug. |
| No water/coffee, Unusual coffee flow | Make sure the water tank is rightly positioned and filled. | Descaling can be the solution. |
| Coffee is not hot enough | Preheat the cup to ensure hot coffee. | Dealing can solve the issue. |
| The capsule lever does not close properly | Empty the container. | Make sure no capsule is blocked in the machine. (Note: Do not out-finger inside the machine.) |
| Machine Leaking | Make sure the drip tray is empty and rightly inserted. | Call the Nespresso Club if the trouble remains. |
| Water goes to the capsule bucket directly(though the capsule is inserted); no coffee flow | Ensure the proper closure of the capsule lever. | Ensure the empty capsule bucket and no capsule is blocked in the machine. (Note: Do not put your finger in the machine.)Call the Nespresso Club if the trouble is still there. |
| The color display is too dim to read | The machine turns off after two minutes of no use due to energy saving mode on automatically.Press the START|CANCEL or SELECT button to enable the ON-MODE of the machine. | Adjust the screen brightness. Go to settings. Select brightness. Choose a high brightness level by turning the dial. |
| Buttons are flashing | Follow the on-screen prompts.Fill the water tank and brew a coffee.Unblock the holes in the steam tip Pin-cleaning tool-using the under the water tank. | Dealing can solve the issue.Performing the complete steam wand cleaning cycle can be the right solution. |
| The display keeps on alerting to fill the water tank though it’s full | Make sure the water tank is rightly positioned. | Call Nespresso Club if the problem still exists. |
| DESCALE NOW showed up on the display | Go to the MAINTENANCE menu. Select descale and follow the on-screen prompts to complete descaling. | |
| Machine ERROR message showed up on display | There are some major issues. | Visit Nespresso.com or call the Nespresso Club to contact your local service center. |
| The machine does not operate though it’s on | Hold the START/CANCEL button to turn the machine off.After 60 minutes, switch to ON MODE by pressing the START/CANCEL button or SELECT. | Call Nespresso Club if the problem remains. |
| The machine turns to OFF mode | If the machine is not in use for 10 minutes, it will turn off automatically due to energy-saving mode. | Turn the machine on by pressing the START/CANCEL or SELECT button. |
What Is Troubleshooting Milk Froth Preparation?
Do you want to enjoy your milk coffee, but your Nespresso Creatista is making problems? You can face the Issues like a problematic steam cycle, unsuitable milk temperature, and bad milk froth quality but here is why you face them and the solutions to these troubles:
| Issue | Possible Solutions | Final Solutions |
| The milk Steam cycle does not start | Ensure the rightly positioned water tank is filled with fresh and drinkable water. | |
| Low-quality froth | Ensure the milk is newly opened and pasteurized whole or semi-skimmed at refrigerated temperature (about 4-6 °C / 39-43 F). Check out the milk froth settings. | Clean the Milk jug and steam the wand after using it each time.A Breville milk jug is provided. Use it.Clean the steam wand. Go to the MAINTENANCE menu. Choose Clean Steam Wand and follow the on-screen prompts to complete the procedure. |
| Steam is wet | It can be resulted from using demineralized, distilled, or filtered water.Using Potable and cold water is preferable. | |
| Milk flow is too high | Pour the suitable milk volume into the jug.It should be within the maximum and minimum marked levels inside and outside the jug. | Reduce the initial milk volume and the froth level or one of them to stop the overflow. It differs from the milk type used. |
| The milk Temperature is too high | Use the Breville milk jug provided.Position the milk jug rightly on the milk jug temperature sensor.Make sure the the the temperature sensor is clean. | Lower the milk temperature settings. |
| Milk temperature is low | Preheat the cup.Make sure the milk jug is positioned rightly on the temperature sensor.Make use of the Breville milk jug provided. | Increase the milk temperature through the settings.Make sure that the steam tip has not had blockages in it. |
| Lower Wand alert is displayed | Lower the steam wand. | |
| CLEAN STEAM WAND is displayed | Clean Steam Wand. | Go to the MAINTENANCE menu. Select a clean steam wand. Now follow the on-screen prompts to complete the procedure. |
How To Contact The Nespresso Club?
If you find some information missing, do not feel helpless. Despite all the instructions, Nespresso Club or your Nespresso authorized representative are always open for your inquiries or in case of any problem, to advise and solve your issue.
The “Welcome to Nespresso” box in your machine box has the contact details. You can get them at Nespresso.com as well.
Disposal And Environmental Protection
The machine is made up of valuable materials and components that can be restored or recycled for significant use. The leftover materials can be separated into different categories to ensure the suitable recycling of each part of the scrap.
A collection point is a good option. You can contact local authorities for the disposal information about the appliance.
What Is The Limited Guarantee For The Nespresso Creatista?
Breville provides a two-year guarantee for household use and three months for commercial use. Breville takes full responsibility for the improper functioning or defective parts within this period. Breville will either restore or replace it by the requirement of the machine. The customer will not be charged for this at all. At the time of the product being repaired or replaced, the guarantee will expire after two years of the purchase of the original item. It has no concern with the date of repair or replacement. Liability This guarantee excludes the compensation for the loss and harm to the person and machine for reckless machine treatment or for ignoring the instructions.
How to claim Breville’s warranty?
Nespresso takes accountability for product servicing and conducting inquiries.
Make direct contact with the Nespresso customer service team for the overall direction for where and how to send it for repair with the help of a Breville authorized service agent. Nespresso services are available at 0800 234 579 auclub@nespresso.com (New Zealand) or 1800 623 033 (Australia).
Except for the guarantee, Nespresso has no liability for the product as per law.
Conclusion
You have just gone through each trace in detail about the Nespresso Creatista from how to position its parts properly to the usage and maintenance. Hope your experience with the machine is worth your investment in its purchase. It is a great achievement and satisfaction to me if you get guided thoroughly. You are ever welcome to approach our website to know more! I wish you a very great error-free coffee-making experience with your Nespresso Creatista.
FAQS
How Do You Use a Nespresso Creatista Plus Machine?
Using Nespresso Creatista Plus is sophisticated and smooth. First, you must fill your water tank with fresh drinking water and position it correctly. Press the START|CANCEL button to turn the machine on and place the cup under the coffee sprout. Insert the capsule lifting lever and close properly afterwards. Rotate the SELECT dial to choose the coffee type. Press the START|CANCEL button for the extraction or to stop the flow. Eject the capsule lifting the lever.
How Do You Use a Nespresso Machine for Beginners?
If you are new to using the Nespresso machine or the machine is new to being used, there are certain settings and adjustments to make for making coffee of your taste. The rest of the use is the same for all; beginners and daily users.
How Do You Use a Breville Creatista Machine?
Follow on-screen prompts. Regularly clean and descale the machine. Complete Clean Steam Wand Cycle when necessary. Position all the machine parts properly.
How Do You Froth Milk in Nespresso Creatista?
Set the coffee volume, milk froth & temperature. Put cold semi-skimmed milk or pasteurized whole in the milk jug within the marked minimum and maximum levels of a milk jug. Position the steam wand in the center of the milk jug and ensure temperature sensor contact with the milk jug. Press the START|CANCEL button to start milk frothing.