Quick Navigation
Are you tired of encountering frustrating issues with your beloved Keurig K-Elite coffee maker? Nothing can be more disappointing than a coffee maker that fails to dispense hot water or delivers a less-than-perfect cup of joe. But worry not, because in this article, we’ve got you covered with the ultimate guide to troubleshooting and solving common Keurig K-Elite problems. Whether you’re facing brewing issues, maintenance concerns, or other perplexing dilemmas, we’ll equip you with the knowledge and solutions to get your coffee maker back in top shape. So, let’s dive in and reclaim the flawless brewing experience you deserve.
Getting Started
Getting started with troubleshooting your Keurig K-Elite coffee maker is the first step towards enjoying a seamless brewing experience once again. To effectively address the common problems that may arise, it’s essential to have the right tools at your disposal. Here are the essential tools you’ll need and why they are beneficial for troubleshooting your coffee maker:
- Keurig Cleaning Solution:
A Keurig cleaning solution specifically designed for Keurig coffee makers helps remove mineral deposits and buildup inside the machine, ensuring optimal performance and taste.
- Keurig Descaling Solution:
The Keurig Descaling solution is crucial for eliminating mineral scales that can accumulate over time, clogging the internal components and affecting the efficiency of your coffee maker.
- Paperclip:
A simple paper clip or a Keurig Needle Cleaning Tool can be used to clear any clogs or blockages in the needle that punctures the coffee pods, ensuring a smooth flow of water and preventing brewing issues.
- Soft Cloth:
A soft, lint-free cloth is handy for wiping down the external surfaces of your coffee maker, keeping it clean and free from dust or debris.
- Water Filter:
A water filter, either built-in or external, helps improve the quality of the water used in brewing, removing impurities that can affect the taste and performance of your coffee maker.
Having these essential tools ready will enable you to tackle the common problems with your Keurig K-Elite coffee maker efficiently and effectively, ensuring a flawless brewing experience every time.
Problem 1: Why Keurig K-Elite Won’t Turn On?
Encountering difficulties when attempting to power on your Keurig K-Elite coffee maker can certainly put a damper on your morning routine. The expected response upon plugging in the machine and pressing the power button is for the touchscreen display to illuminate with the power icon. However, if this fails to occur, it indicates an issue with the Keurig K-Elite coffee maker. In this section, we will explore the typical reasons behind this problem and provide solutions to resolve it promptly.
Cause 1: Forget To Press The Power Button
On occasion, we may unintentionally overlook pressing the power button to activate the coffee machine. However, there is a simple solution to rectify this oversight and get the coffee maker up and running. Let’s address this situation promptly.
Solution: Press The Power Button
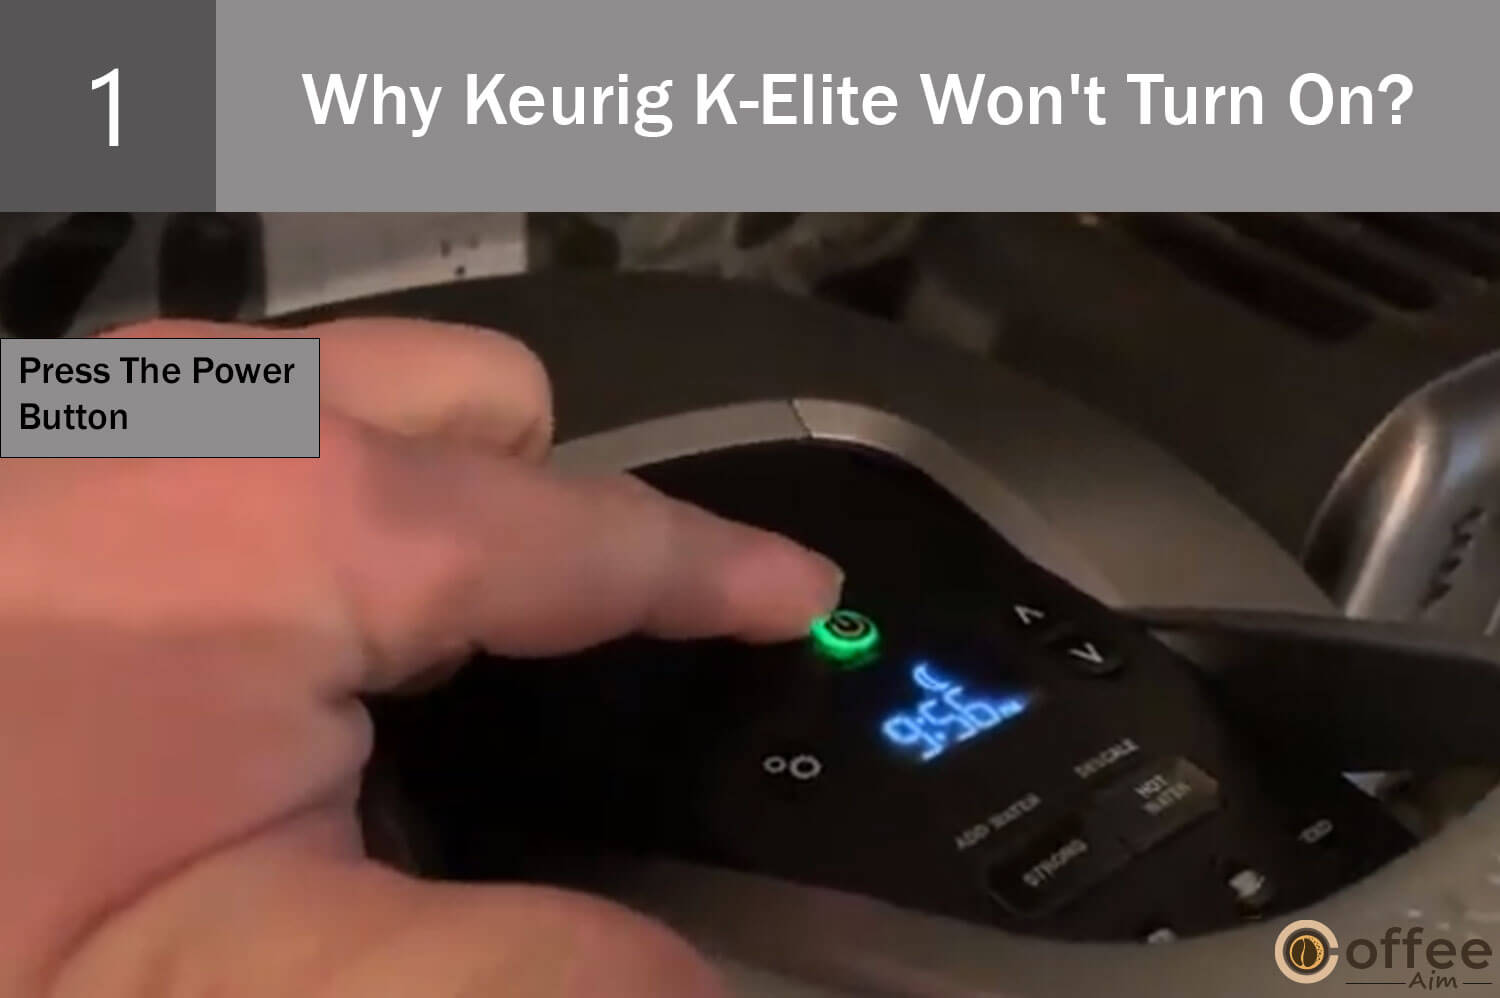
To activate your Keurig K-Elite, simply press the power button once, located on the front upper part of the machine. Another method you can try is to press and hold the power button for 10 seconds until the green power light illuminates. If you have already pressed the power button but the machine still isn’t functioning, let’s explore other potential causes.
Extra Tip: Try unplugging your Keurig K-Elite and removing the water reservoir. Leave it aside for a duration of two hours without being connected to power. Occasionally, unplugging the machine and detaching the water reservoir can be effective in resolving the problem.
Cause 2: Problem With Power Outlet
If your Keurig K-Elite isn’t functioning, it could be due to a problem with the power outlet. To check if this is the case, unplug the coffee maker and plug it back in. If it still doesn’t work, it indicates a potential issue with the power outlet itself. This problem can occur due to various reasons, such as a faulty outlet, loose connection, or power surge.
Solution: Plug Into Another Outlet

To resolve the power outlet issue with your Keurig K-Elite, simply connect the coffee maker to a different power outlet. Choose an outlet that is dedicated solely to the Keurig machine, without any other appliances connected to it. Once plugged in, turn on the coffee maker and relish the brewing experience. If the machine remains unresponsive, let’s explore other potential causes and their solutions.
Cause 3: Insufficient Voltage
Every appliance requires a specific voltage to work. So, if your Keurig K-Elite is not turning on, then the issue may be with the voltage difference.
Solution: Check The Voltage
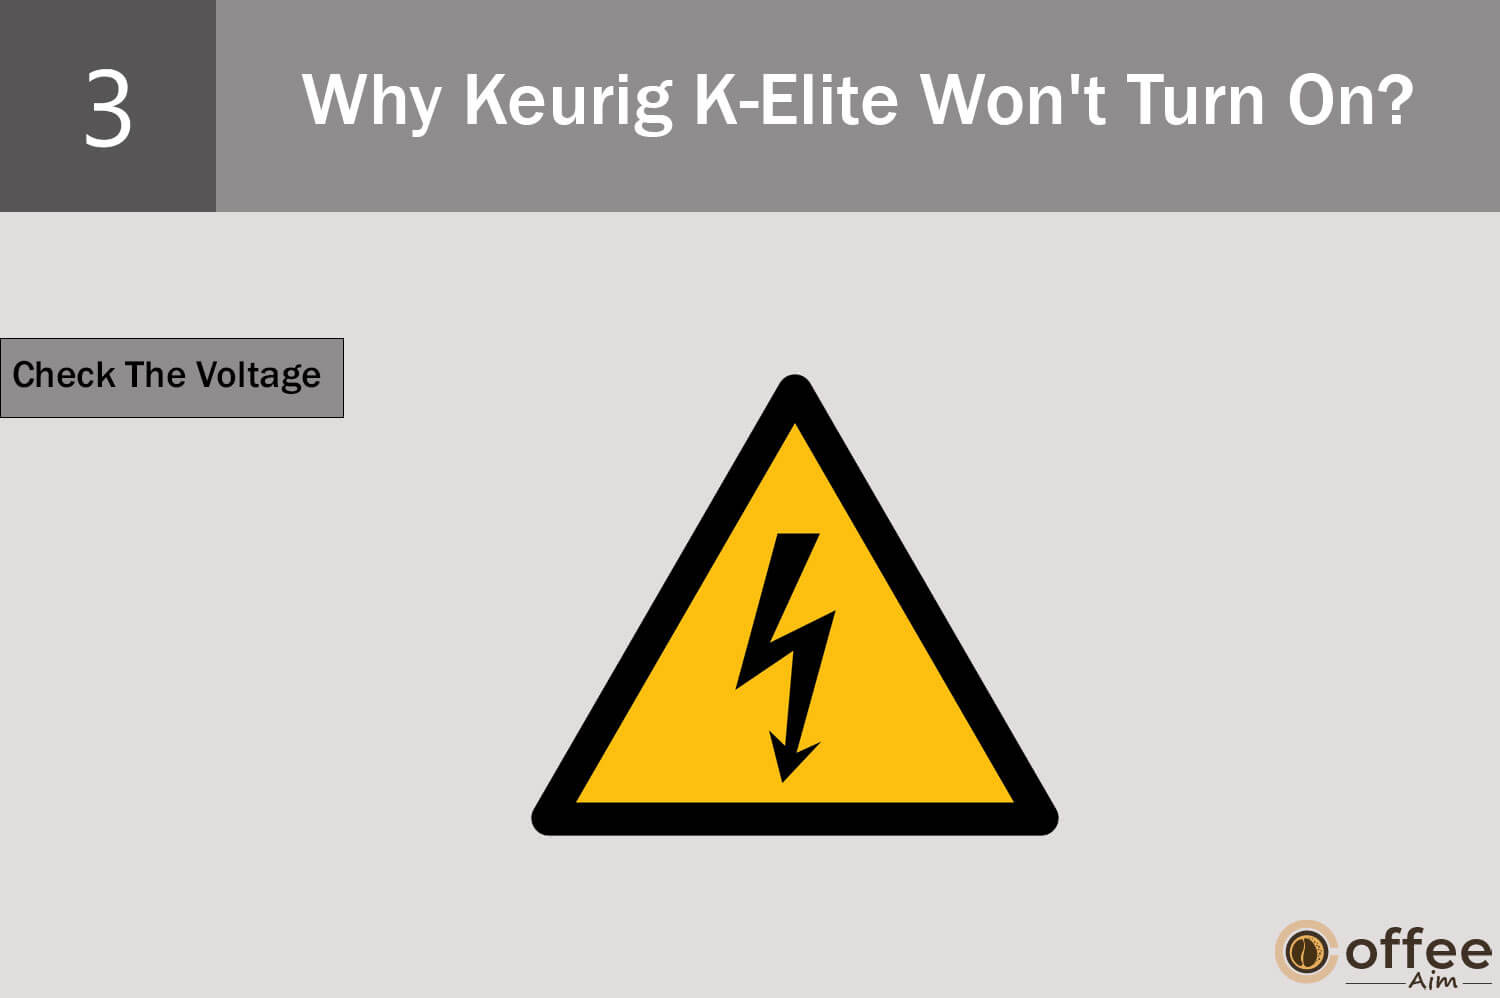
Ensure your home voltage is sufficient to operate the Keurig coffee machine on it. If not, then contact a professional or Keurig Customer Service for better solutions.
Cause 4: Loose Connection
If there is no issue with the power outlet and voltage, then check for a firm connection between the power outlet and plug. If the switch is not properly plugged into the power outlet, then your coffee machine will not turn on.
Solution: Plug The Switch Securely

Detach the switch from the power outlet and replug it firmly and securely. Now, try to turn on your Keurig coffee maker.
Cause 5: Problem With The Heating Element
Your Keurig K-Elite contains a heating element that heats water for brewing, and if the heating element gets faulty, it fails the machine to turn on. You can check the heating element by disassembling and testing the machine using a multimeter. Let’s check its solution!
Solution: Repair / Replace Heating Element
The heating element is a technical part that will be difficult to replace. Therefore, you must contact a professional technician or Keurig Customer Care Service. For contact details, see the section “When to seek professional help”.
Cause 6: Faulty Control Panel
If your Keurig K-Elite is not turning on, then possibly the control panel is malfunctioning. The control panel controls all the functions of your coffee machine; thus, if it becomes faulty, the machine will not turn on. You can verify malfunctioning using a multimeter. Let’s find a solution!
Solution: Contact Customer Care Service
A faulty control panel can lead to a more severe problem if it remains unattended, and it is better to contact Keurig or any professional. For contact details, see the section “When to seek professional help”.
Cause 7: Clogging In Water Line
If you have checked all possible causes of “Keurig won’t turn on,” the problem is still here. Don’t worry! There could be another reason for this. Let’s check it out and resolve it. With time, water minerals and coffee residues accumulate inside water lines leading to blockage. This blockage can lead to the machine not turning on. To verify this cause, remove the water reservoir and check for clogs in the water line. If you find any obstructions, follow the solution below to resolve the issue.
Solution: Unclog Using A Paperclip
So, you find obstructions inside the water line, and now it’s time to remove them. Let’s resolve it! Grab a paper clip or a similar tool and put it inside the connection (water line port from where water enters into the brewer from the reservoir) and move around to loosen clogs.
After this, reattach the water reservoir and run a water rinsing brew (no coffee pod should be added) by following the steps mentioned in the article “How To Perform Cleansing Brew” below.
If you are still facing problems, then contacting Customer Care Service will be worth it! See the section “When to seek professional help”. Now let’s move to the next problem that Keurig users often face!
Problem 2: Why Keurig K-Elite Won’t Brew?
A hot cup of coffee is always a must to kickstart our day. What if our Keurig refuses to brew one morning? Ugh! Nothing can be more frustrating than this. It will ruin your whole day. However, calm down! Every problem has a solution. Let’s check them out and resolve the issue!
Cause 1: Keurig Is Not Set Up Properly
One major reason for your Keurig not brewing is the improper setup of the coffee machine. What do you see while setting up? Which thing will consider a wrong/incomplete setup? Let me tell you!
- The power outlet is not active.
- Keurig is not properly plugged into the Power outlet.
- The power outlet is burdened with other appliances.
- The power cord is damaged.
- You do not have to press the power button.
If you find any of these criteria unfulfilled, then resolve them immediately by reading the solutions below!
Solution 1: Plug Into Another Power Outlet

You plugged another appliance into the current power outlet, and it also doesn’t start. So, the power outlet is faulty. Shift your coffee machine to another active power outlet.
Solution 2: Properly Plug In Your Keurig
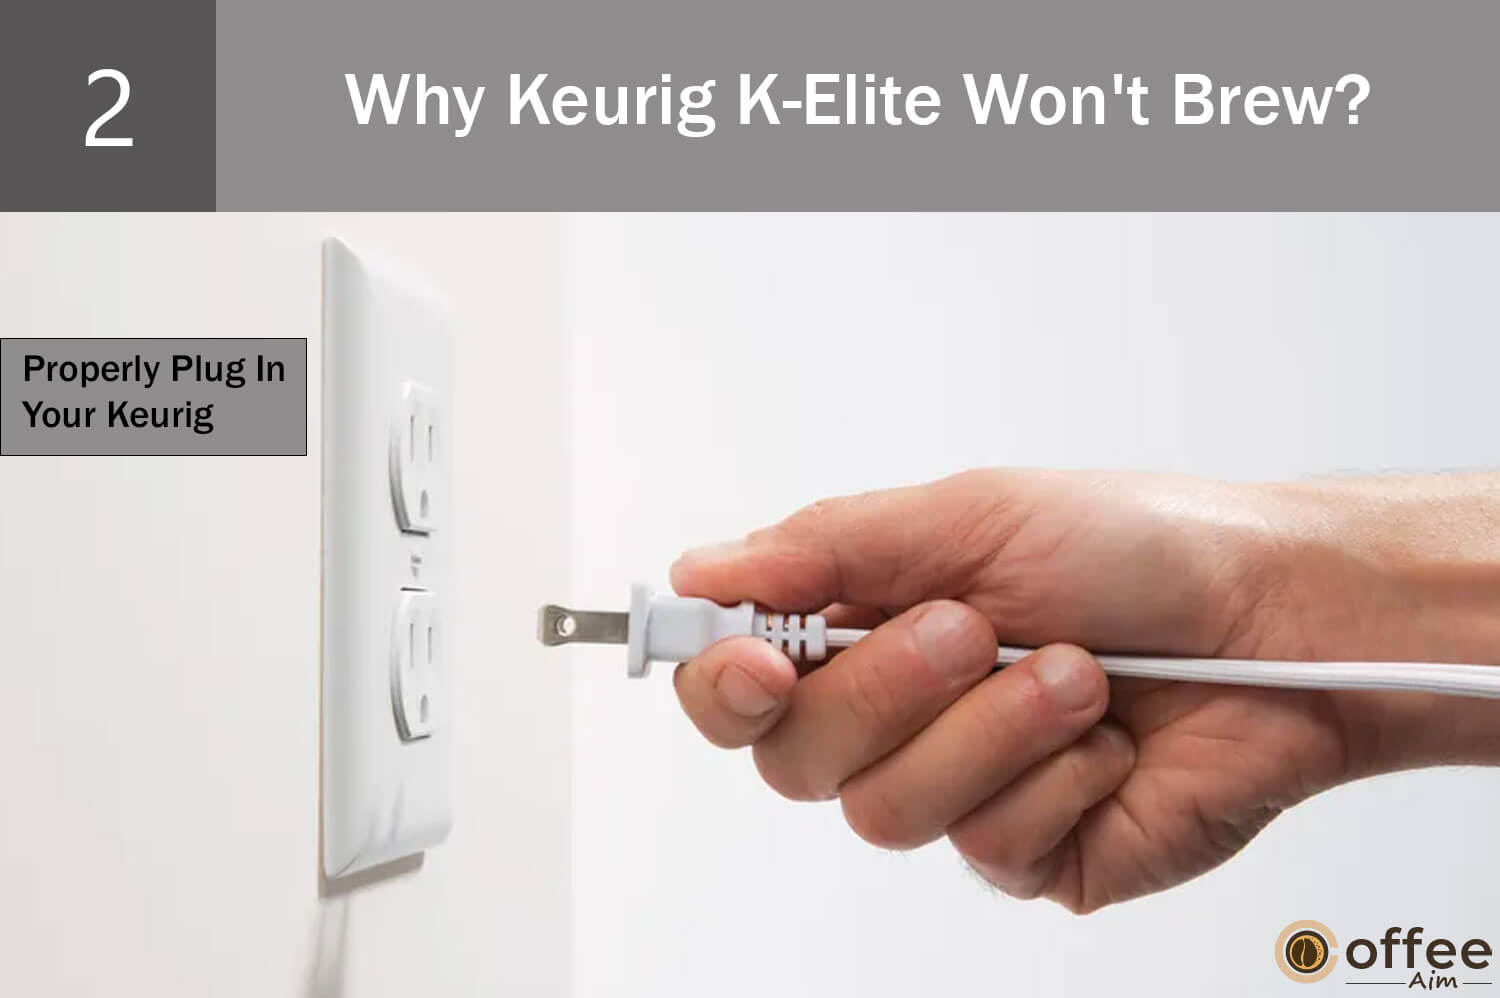
Unplug the switch, then replug it firmly to develop a secure connection between the power outlet and Keurig.
Solution 3: Plug Keurig In An Independent Outlet
Detach all other appliances from the power outlet. There should only be Keurig plugged into this power outlet for proper voltage distribution. Otherwise, your brewer will not brew.
Solution 4: Repair The Power Cord
If the power cord is damaged, try to repair it using tape. Or if the damage is not recoverable, then it is better to replace it with a new one with the help of a professional or seek help from Keurig customer care service. For contact details, see the section “When to seek professional help”.
Solution 5: Press The Power Button

After plugging your Keurig into a grounded outlet, press the power button to turn it on.
Cause 2: Handle Is Not Properly Down
If your Keurig is not brewing, you may haven’t lowered the handle properly after inserting the coffee pod. It may happen mistakenly, don’t worry! It’s not a big issue. Let’s settle it!
Solution: Lower The Handle

You can resolve the issue by just lowering the handle properly and securely closing the lid after inserting the pod. You will hear a clicking sound when the lid gets closed properly, and the brew buttons will start flashing.
Cause 3: Empty Water Reservoir
Another major reason why your Keurig is not brewing is an empty or underfilled water reservoir. So, check before brewing whether the water reservoir is filled to the suggested “MAX FILL line. Interestingly, Keurig has resolved this issue; once the water reservoir gets empty, a “Blue add water light” indicates that it’s time to refill it. So, if your coffee machine shows this light, follow the solution below!
Solution: Fill The Water Reservoir
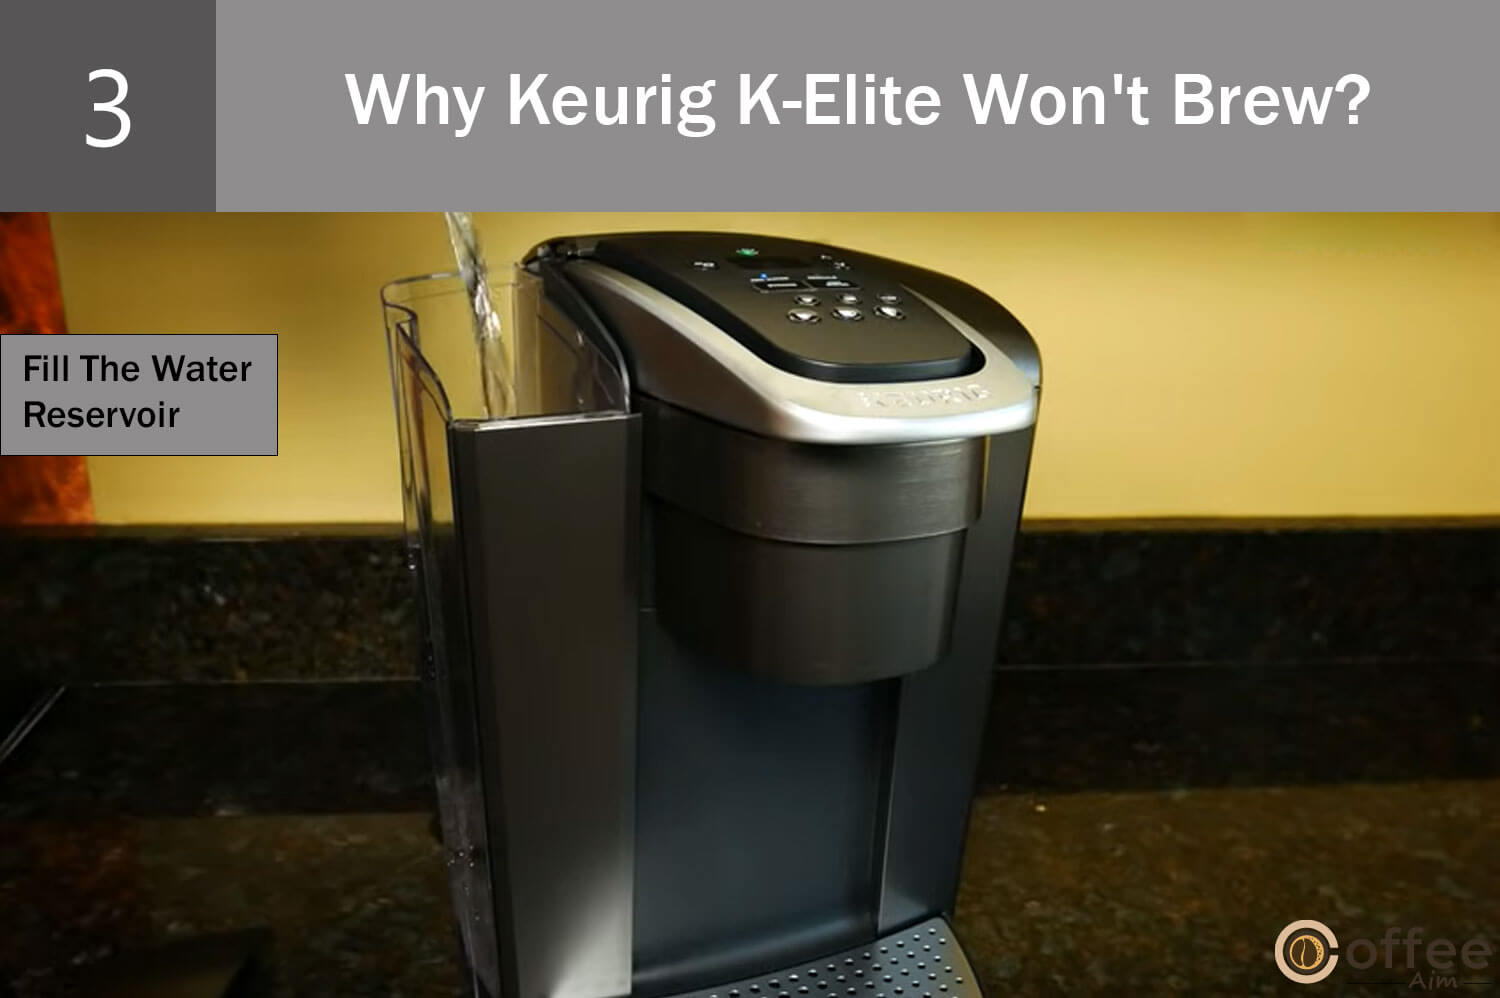
It is recommended to check the water reservoir first before starting brewing. So, here we also do the same. Check the water level in the water reservoir, and if it is below the Max Fill line or totally empty, then immediately fill it with fresh water up to the Max Fill line (not beyond it).
Cause 4: Water Reservoir Is Not Seated Properly
If the water reservoir has adequate water, your Keurig is still not brewing and the “Add water light” is also illuminating, check for its position. Whether the water reservoir is placed correctly on the base. There is a detection magnet in the base that detects the water reservoir and gives the coffee maker a green signal to start brewing. So, let’s resolve the issue!
Solution: Place It Securely

Let’s reposition the water reservoir properly! First, detach the reservoir and then replace it on its base firmly until you hear a clicking sound (it appears when lock tab slots get engaged firmly with the water reservoir).
Cause 5: Keurig Is Clogged
As your Keurig has close contact with the water; thus, water minerals and coffee residues can accumulate inside with time. This can lead to scale development and, ultimately, blockage. This blockage can hinder the brewing process, and you will get nothing out of your Keurig. Let’s resolve the issue!
Solution: Descale Your Keurig

It is recommended to descale your coffee machine every 3-6 months or after 300 coffee cups. Regular descaling ensures the proper working of your coffee machine. Thus, to properly turn on your Keurig, descale it following the method mentioned in the section “How to descale Keurig K-Elite” a little bit below in this article.
Cause 6: Air Bubbles
If you have run your machine with an empty/unfilled and mispositioned water reservoir, there have developed air bubbles inside. These air bubbles can hinder the brewing process. Let’s resolve this issue!
Solution: Remove Air Bubbles
The effective way to bring your Keurig back to working condition is the removal of air bubbles. You can do this by following the steps mentioned in the section “How to remove Air bubbles from Keurig K-Elite” written below in this article.
Cause 7: K-Cup Pod Holder Is Dirty
With the accumulation of coffee residues and oils, the K-cup holder can get dirty, and the dirty holder can impede brewing.
Solution: Clean K-Cup Holder
Cleaning the pod holder is a must to ensure the proper working of your Keurig. To clean the pod holder, follow the steps mentioned in the section “How to clean K-Cup pod holder” below in this article.
Cause 8: Clogged Needle
The puncturing needles are designed to poke a hole in the foil lid so water can enter the pod and extract coffee. But these puncturing needles often get clogged by coffee grounds. Due to clogging, needles can’t puncture the pod properly, thus impeding Keurig from brewing.
Solution: Unclog Needles
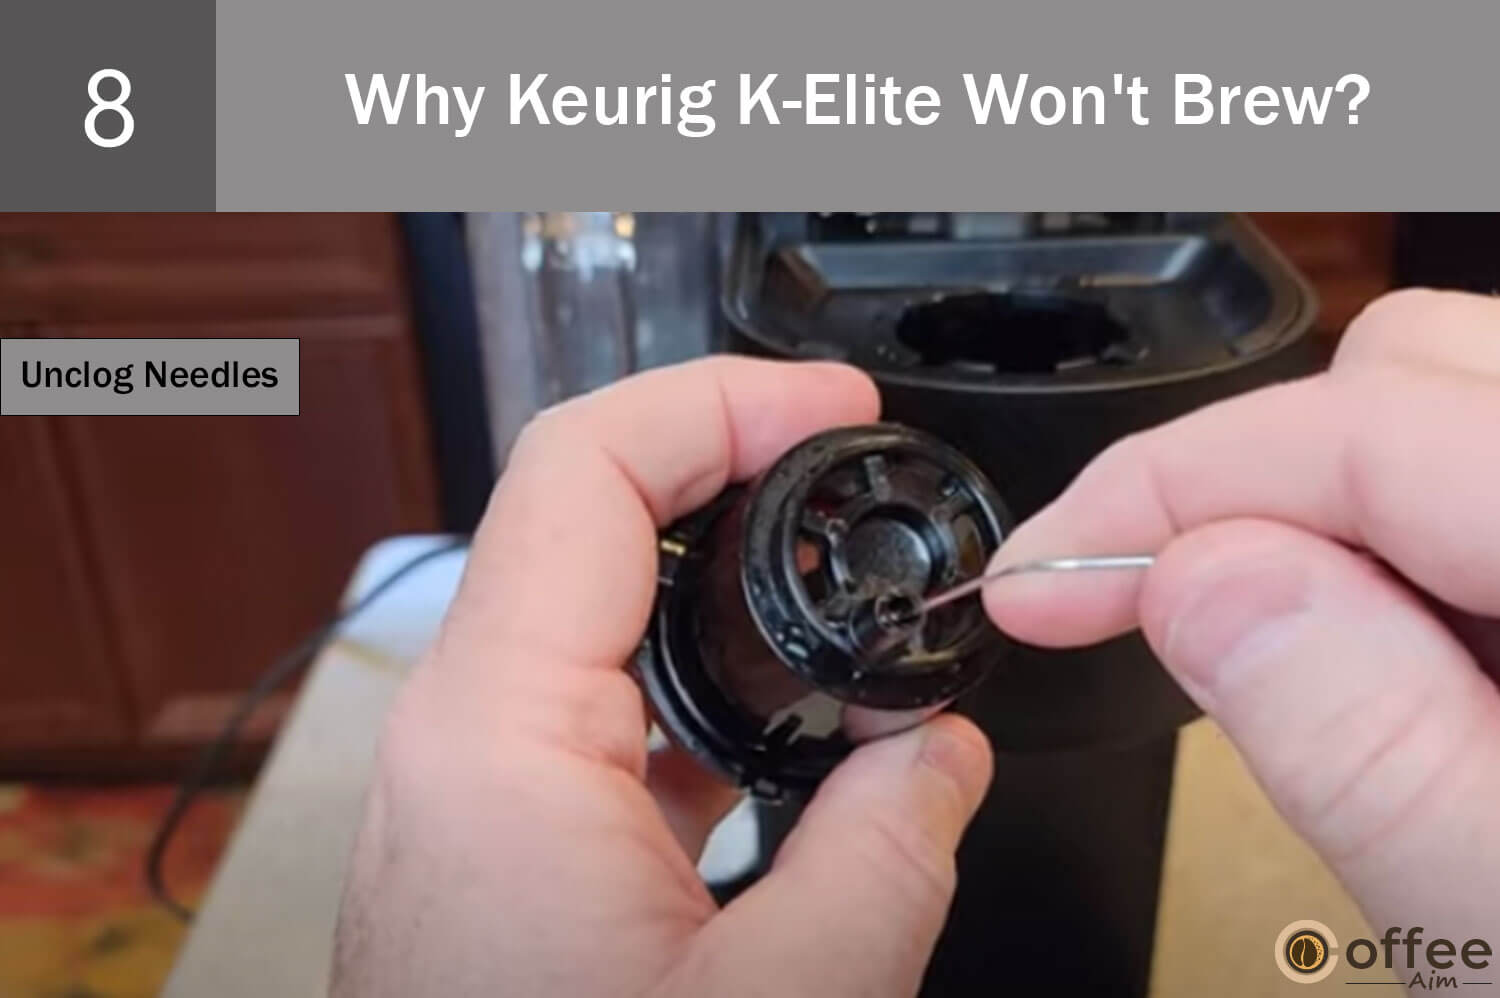
To unclog the needles, follow the instructions given in the sections “How to clean Exit needle” and “How to clean Entrance needle” given below in this article.
Problem 3: Why Keurig K-Elite Won’t Dispensing Water?
You want your Keurig to dispense hot water so you can prepare soup for yourself, but what is happening? Keurig is not dispensing water at all! Ugh! A non-working machine can ruin your whole routine. However, don’t worry! I have enlisted several possible causes of this problem and their solutions for your ease. Let’s explore and bring your coffee machine back to working condition!
Cause 1: Empty Water Reservoir
One of the possible reasons for Keurig not dispensing water is an empty/inadequately filled water reservoir. When there is no water in the water reservoir, how can the pump extract water? Your Keurig has an in-built system that alerts you when the water tank gets empty by illuminating the blue “Add water light”. Let’s settle the issue!
Solution: Fill The Water Reservoir

Fill the water reservoir up to the MAX FILL line with fresh drinking water. However, you should not fill it beyond or below the MAX Fill line.
Cause 2: Misaligned Water Magnet
There is a water magnet located inside the water reservoir that is used to detect the water level. After detection, it gives a green signal to the brewer to start brewing. However, if it is misaligned, the machine will not get a signal, ultimately refuse to brew, and will not pump water. With time, this magnet gets misaligned or stuck due to brewing vibrations, and the brewer is now unable to detect water and stop pumping.
Solution: Fix The Water Magnet
Gently touch the tank near the magnet housing to correct this. If nothing happens, jiggle it a little to see if it will move. After doing this, if it is still stuck, drain any remaining water from the tank, give it a cleaning with gentle soap, and then refill it with water. If cleaning doesn’t help and you still can’t get the tank to move, you’ll probably need to buy a new one.
Cause 3: Water Reservoir Exit Is Blocked
Water from the reservoir must be allowed to flow freely into the brewing unit. Make sure the tank is firmly connected. If so, there can be mineral accumulation at the exit nozzle producing a blockage and stopping your Keurig from pumping water. Let’s resolve the issue!
Solution: Clear Water Reservoir Exit
Here is how you can unclog the water reservoir exit;
- First, drain all water from the water reservoir into the sink.
- Now, a water filter holder.
- Overturn the reservoir. Use the spring to find the nozzle. Try pressing the spring down many times with anything dull, such as the rubber end of a pencil. You can rule out any problems with that item if it travels smoothly.
- Reinstall the tank on the device. Add two to three inches of water to it.
- Bring out the turkey baster. Take a small amount of water from the tank with you.
- Put the baster right where the water should come out of the tank—the top side of the black nozzle. Work your way around the nozzle two or three times by doing this repeatedly.
- After this, particles start appearing in the particles coming from the nozzle (clogged particles).
- Now, time to run a water-cleansing brew to clear all the blockage.
Cause 4: Keurig Is Air Lock
It’s conceivable that air got into the water tubes if you’ve ever unintentionally started a brew cycle when there wasn’t enough water in the tank. The Keurig may be unable to pump water as a result of this clogging. Let’s see how you can resolve the issue!
Solution: Remove Air Bubbles
When you remove air bubbles, water will start flowing freely inside your coffee machine. To clear the air bubbles, see the section “How to remove Air bubbles from Keurig K-Elite” written below in this article.
Cause 5: Blockage In Internal System
Dispensing issues mainly occur due to potential clogs. If you discovered calcium accumulation in your water tank, your machine probably has it as well. The water that is used to brew your K-cups leaves behind minerals that cause limescale to build up within your brewer. Eventually, this accumulation could become significant enough to jam your Keurig. Your Keurig won’t dispense any or enough water when this occurs. You can fix this by cleaning your Keurig K-cup needle at least once a month and descaling every 3-4 months. Let’s see how you can fix this issue for now!
Solution: Descale Your Keurig

Descaling will remove all the blockages present inside your Keurig K-Elite. Let’s descale your coffee machine by following the steps mentioned in the section “How to Descale Keurig K-Elite” written below in this article.
Cause 6: Puncturing Needles Are Blocked
There are needles inside the coffee maker that create two holes in the K-cup when you brew it. As a result, hot water can finally make its way through the capsule and into your cup. Coffee grinds that become trapped around the needle may ultimately dry up and turn hard.
This is more likely to occur if you don’t get rid of your brewing pods right away. Due to the accumulation of ground coffee, your Keurig’s water flow ultimately becomes obstructed, resulting in a clogged needle and a non-functioning machine. Let’s resolve the issue!
Solution: Unclog The Needles

Grab a straightened paper clip or similar tool and clear the clogs by following the instructions in the sections “How to clean Exit needle” and “How to clean Entrance needle” below in this article.
Final Solution: Contact Customer Care Service
If you have tried all mentioned above, still your Keurig K-Elite does not start dispensing water, then contacting the Keuring customer care service will be worth it. To know the contact details, see the section “When to seek Professional Help”.
Problem 4: Why Does Keurig K-Elite Turn Off Automatically & Won’t Brew?
For a coffee lover, a hot cup of coffee is everything in the morning. But what if your Keurig turns on automatically instead of brewing coffee for you? Ugh! It will be disastrous. If you can’t get your morning caffeine, the whole day will be dull and tiresome. Don’t worry! Scroll down to find its possible causes and solutions too!
Cause 1: Power Outlet Is Overburdened
If your Keurig is shutting off and won’t brew, then check for the power outlet. If the power outlet is overburdened with other appliances, your coffee machine can’t get enough voltage to stay on and brew. Read the solution below!
Solution: Plug Keurig Into Grounded Outlet

Detach all other appliances from the power outlet, or if you can’t, then shift your Keurig to another grounded outlet which is independent of all other appliances.
Cause 2: Insufficient Voltage
Keurig K-Elite demands a specific range of voltage to turn on and work. Thus, if you are not providing your brewer with its demanded voltage, it will disappoint you. So, using a multimeter, check the voltage supply range of your home. If it is not aligned with your brewer, then you must find a solution, so scroll down!
Solution: Contact A Professional
Its best solution is to contact a professional technician or Keurig customer care service. To know contact details, see the section “When to seek professional help”.
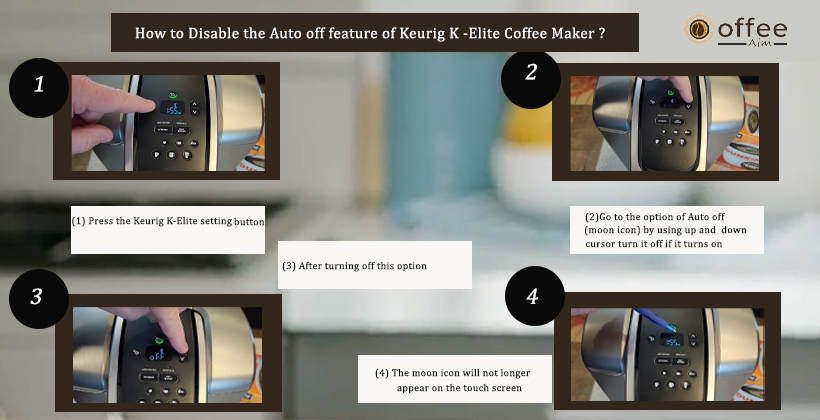
Cause 3: Auto-Off Mode Is Activated
If your Keurig K-Elite coffee maker turns off automatically, then the “Auto-off mode” is on in your Keurig. Due to energy savings, Keurig K-Elite turns off 2 hours after the last brew. However, if you are not happy with this default setting, you can change it. Let’s see how!
Solution: Disable/Change Auto-Off Mode
You can change the Auto-off time from 15 minutes to 2 hours or disable the mode entirely.
To change the duration;
To choose your desired off time, press the settings button and utilize the up and down arrows. The off time may be adjusted in 15-minute increments from 15 to 2 hours. A moon icon will appear on the screen to indicate your machine is in AUTO-OFF mode.
To disable the Auto-off timer on Keurig K-Elite, by following these steps;
- Press the settings button, go to auto off (the moon icon)
- Use the up and down cursor to turn off the option.
- When you turn off this option, the moon icon will no longer appear on the screen.
Cause 4: Clogged Exit Needle
A hole must exist at the top and bottom of the capsule for a K-cup for water to pass through. Because of this, your machine has two needles: one under the pod holder and one beneath the opening in the brew head. Regular cleaning of your Keurig will help keep these needles free of dirt.
The K-cup may not be pierced if old coffee grinds accumulate around any of these needles. The next time your Keurig keeps turning off when you try to brew, a quick test for this is to remove a K-cup. The bottom needle of your brewer is the problem if the bottom of the pod has not been completely pierced and vice versa. Let’s resolve the issue!
Solution: Unclog The Needles

If you want perfect brewing again, clear all the clogs inside the needles by following the instructions in the sections “How to clean Exit needle” and “How to clean Entrance needle” below in this article.
Cause 5: Broken / Bent Needle
One other reason for Keurig shutting off is a damaged (bent) or broken needle. If the needle is damaged, then the coffee pod can’t get pocked. Read the solution below!
Solution: Replace The Needle
You should swap out the needle gasket with one that works with your machine if the needle is cracked or deformed.
Cause 6: Misaligned Water Magnet
You may notice a magnet there if you peek inside your water tank. This is how your Keurig gauges the reservoir’s water level. The vibrations caused by the coffee maker when it is brewing might cause this magnet to become misaligned and trapped over time. Your Keurig won’t brew in this situation because it is unable to identify the water level. It will instead turn off.
Solution: Adjust The Water Magnet
Gently touch the tank near the magnet housing to correct this. If nothing happens, jiggle it a little to see if it will move. After doing this, if it is still stuck, drain any remaining water from the tank, give it a little cleaning with soap, and then refill the water supply.
Cause 7: Keurig’s Internal System Is Clogged
Over time, limescale will accumulate in your machine because of the minerals in the water you use to brew. This might result in water obstructions inside your brewer if not addressed. The appliance would turn off if water couldn’t get through completely.
Solution: Descale Your Keurig
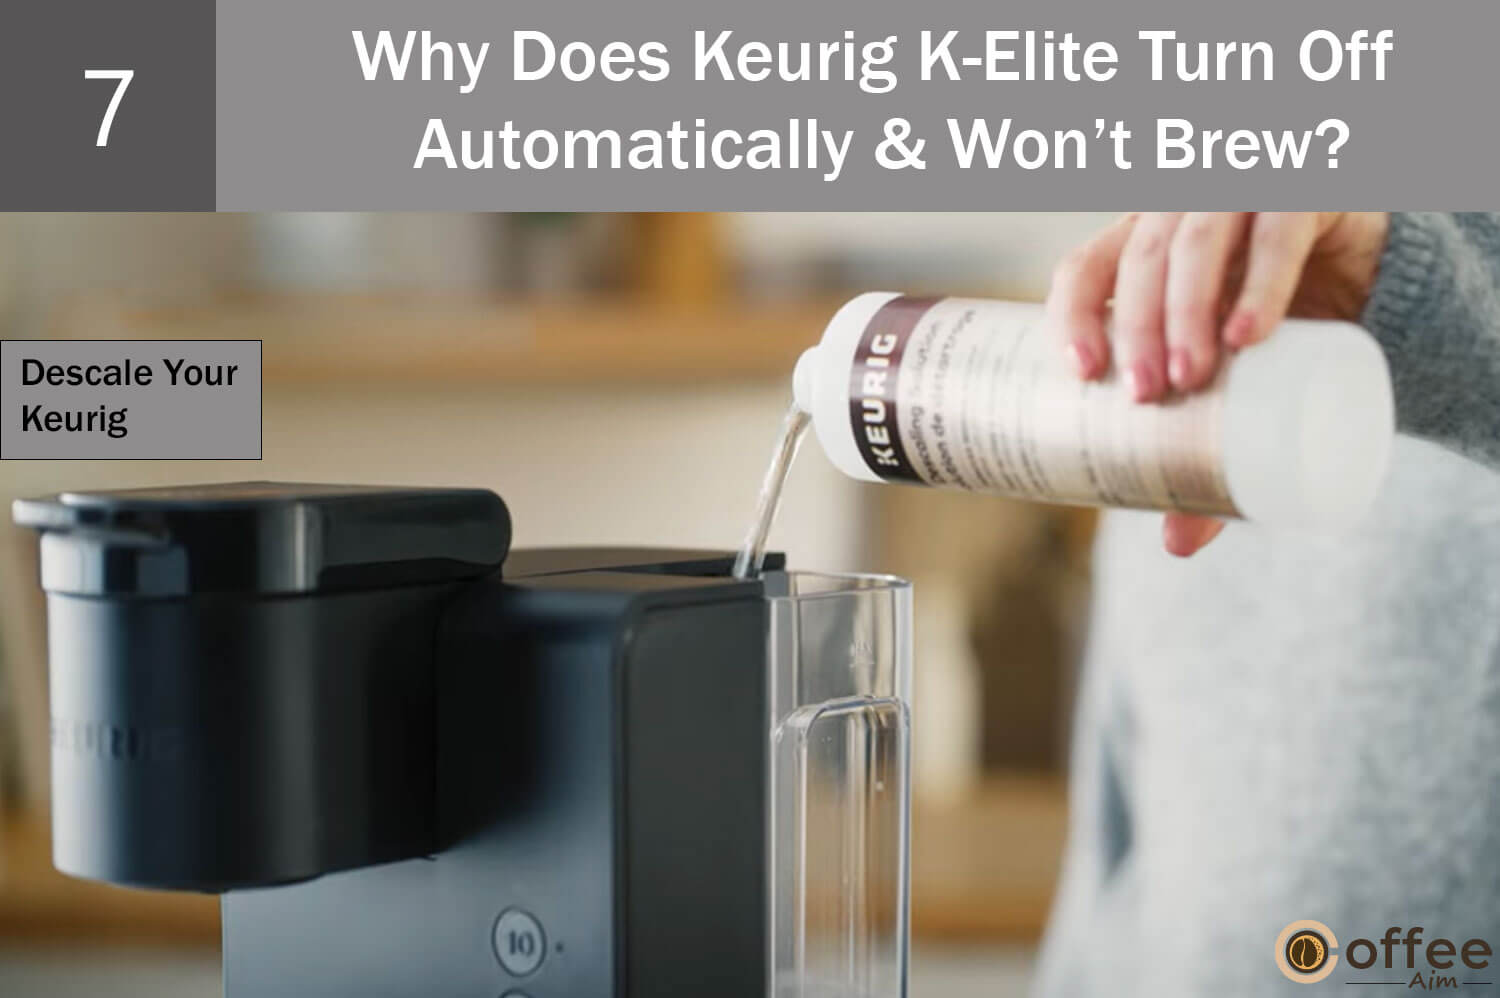
In order to keep your Keurig in good working condition, descaling is a must every 3-6 months. To know the descaling process in detail, see the section “How to Descale Keurig K-Elite,” written a little below in this article.
Problem 5: Why Is Keurig K-Elite Not Heating Up Properly?
It’s morning, and you want a hot cup of coffee that infuses energy into you. But what you find is a malfunctioned coffee machine that is not heating up properly. Ugh! You will be deprived of the soothing smell of coffee that helps to open up your eyes. It can be unmanageable. But wait! Why not resolve the issue on your own? Let’s troubleshoot and find the solution!
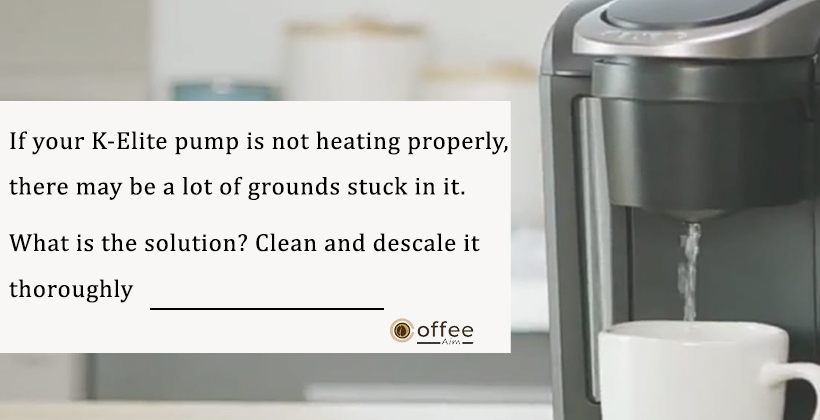
Cause 1: Water Pump Is Faulty
Keurig’s water pump isn’t operating properly. To save the machine from overheating, the heating element automatically turns off when the pump isn’t functioning properly.
Solution: Repair / Replace The Water Pump
If the water pump is faulty, then it’s time to repair or replace it. For this purpose, hire a professional or contact Keurig Customer Service. For contact details, see the section “When to seek professional help”.
Cause 2: The Heating Element is Not Working
It is used to heat the water, and if you are facing an improper heating problem, the reason can be the heating element.
Solution: Replace The Heating Element
If the heating element is not working, replacement is the best option. However, it is technical work; therefore, hiring a technician or contacting Keurig customer care service will be a good option. For contact details, see the “When to seek professional help” section.
Cause 3: Keurig Is Clogged
Continuous contact with water can cause water mineral build-ups in the machine, especially if clogs have developed on the water pump or heating element. These clogs can impair the working of the water pump and heating element. Let’s resolve the issue!
Solution: Descale The Machine

Descaling can bring your Keurig back to proper working condition, and it will start heating up again. To know the descaling process, see the section “How to descale Keurig K-Elite” written below in this section.
Problem 6: Why Does Keurig K-Elite Show “Add Water Light” Even If Adequate Water In The Reservoir?
You want to brew a hot cup of coffee, but your Keurig K-Elite says to add water (Add water light is illuminated), but the water tank is full. It will be quite perplexing. If this issue doesn’t get resolved, you can’t get your caffeine fix. Don’t worry! I have found out some possible causes and their solutions too for your ease. So, let’s get started!
Cause 1: Water Reservoir Is Not Seated Properly
Keurig has a function that if the water reservoir is not seated properly, it will inform you by showing “Add water light” So, check whether the water reservoir is seated properly or not. If not, then follow the below-mentioned instructions.
Solution: Re-Adjust The Water Reservoir
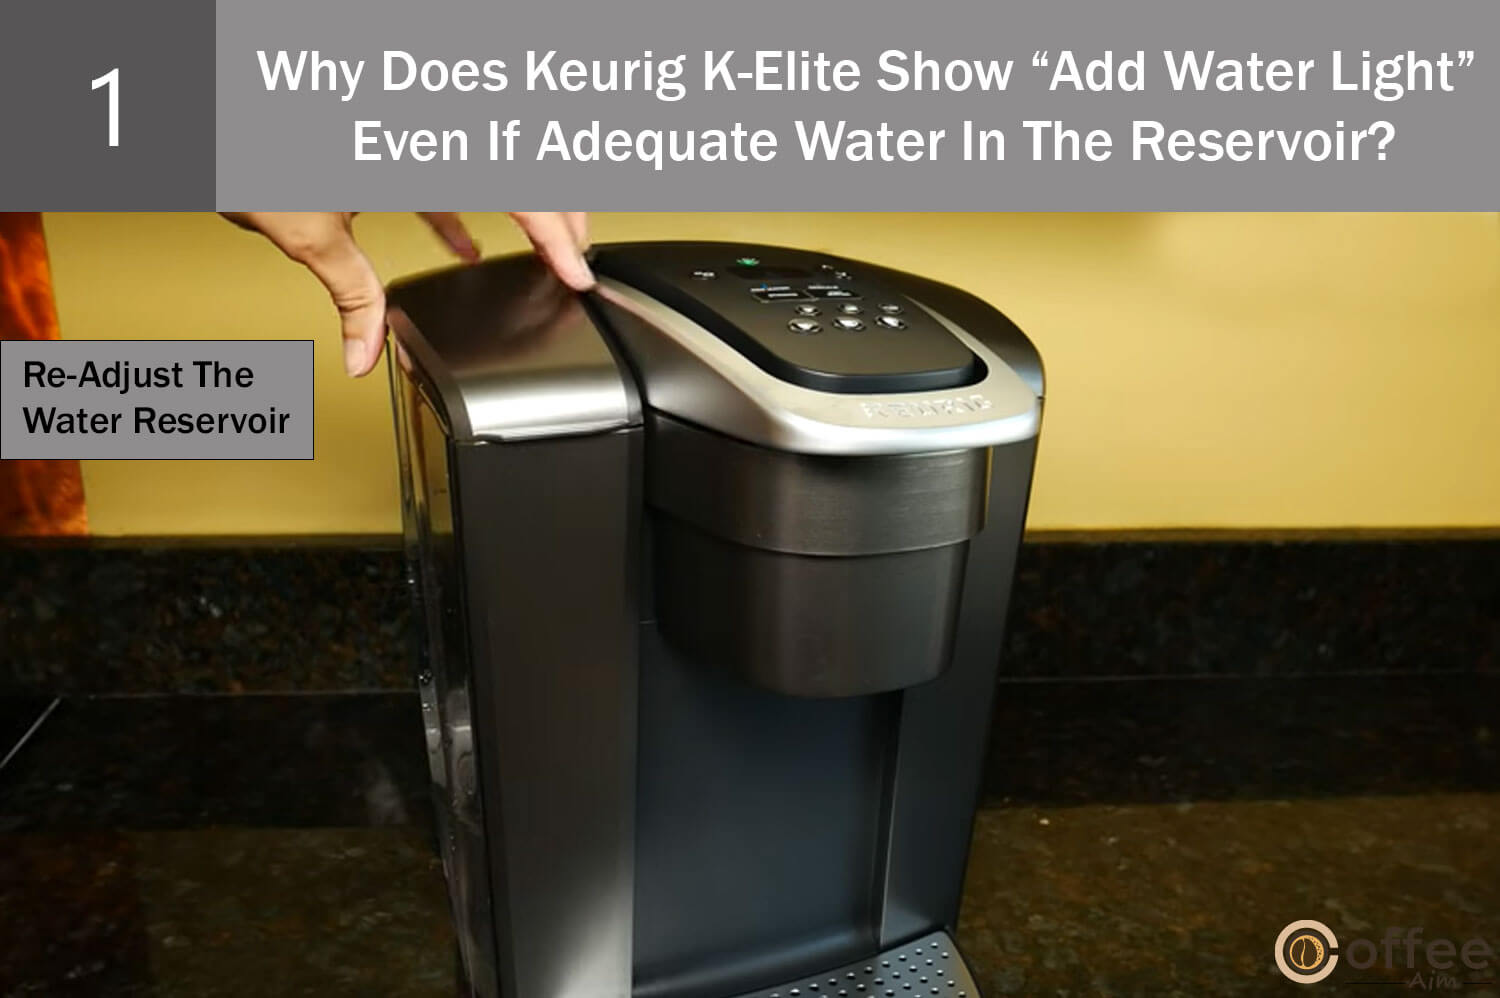
First, remove the water reservoir from the base and place it again. Empty the water, clean the reservoir, and refill it. Then place the unit back on base and press a little bit until you hear a clicking sound (it appears when the lock tab slots engage with the reservoir). Turn off and on again.
Cause 2: Water Magnet Is Misaligned
The most evident reason why the “add water” indicator continues to illuminate even after the reservoir has been full. Is it the water magnet that shows the coffee maker’s water level is stuck in the tank? This could occur if you haven’t used your Keurig coffee machine or the scale has built up in a while. Furthermore, it can also be misplaced due to vibrations produced while brewing.
Solution: Adjust The Water Magnet
Remove the water tank and shake it vigorously until the floater releases. The “add water” light ought to have vanished by the time you’ve filled the reservoir once more.
Cause 3: Water Reservoir Valve Is Dirty
Particularly if you don’t use filtered water for your Keurig coffee maker, the opening in the water tank where the water travels to the coffee maker might become quite dirty from limescale and other things.
Solution: Clean The Valve
You must remove the water reservoir and drain the water in order to clean this. The water dispense hole may be seen if you peek inside the reservoir.
If you can’t reach it with your hand, try reaching it from the inside with a brush or put it in the dishwasher. Don’t forget to use a brush to clean the opposite side as well.
Cause 4: Overflow Tube Is Blocked
There may be air or water clogged in the coffee maker’s overflow tube, which is another reason why the “Add water” light may continue to illuminate.
Solution: Remove The Trapped Air / Water
If you look at the coffee maker from the side after removing the water tank cover, you will notice a silicon tube protruding from the top left corner. The overflow tube comes to a close here.
To blow on this tube, you must remove the water tank and use either your mouth or an apparatus like a balloon inflator. This ought to have resolved the issue if you hear air or water flowing.
Cause 5: Air / Dirt In Water Tubes
Sometimes, the air gets trapped in the water tubes when you accidentally run your Keurig with an empty water reservoir. Furthermore, with the passage of time, dirt can also get accumulated in the water lines and cause blockage. The accumulation of dirt/air inside tubes can also trigger the “Add water light” alert.
Solution: Clear The Tubes
You’ll need to take off your Keurig coffee maker’s front top cover in order to fix this. Either two bottom screws need to be removed, or two clips holding the cap in place need to be pushed out to do this. One tube that is attached to a white component that delivers water to the K-cup is visible once the cap has been removed. This tube may be removed from the white portion.
You should wipe out this tube first since it can become blocked with coffee and limescale deposits. After cleaning the tube, you should firmly blow into it while bending the tube a little. As an alternative, you might use a device like a balloon inflator to inflate it up. You’ll probably hear some gurgling of air bubbles going out the other side when you blow into it.
Cause 6: Descale Is Required
If you still see the message after trying both of the above steps, it may be time to descale your unit. Water minerals and coffee oils can start accumulating with time and lead to clogs build up. Let’s resolve the issue!
Solution: Descale immediately

It is a good idea to clean/descale your Keurig K-Elite brewer regularly, and it solves many common issues. To know the descaling process, see the section “How to descale Keurig K-Elite” written below in this article.
Final Solution: Contact Keurig

If you have tried all the tricks mentioned above, still your coffee maker is showing the “Add water” light, then it’s time to contact Keurig Customer Care Service. For contact details, see the section “When to seek professional help”.
Problem 7: Why Does Keurig K-Elite Keep Pumping Water Continuously?
You have made your hot cup of coffee and now want your brewer to stop dispensing, but instead, it is continuously pumping water now. It can be messy and also problematic if it remains unattended. But how can you resolve this? Let me tell you. Scroll down to know how you can troubleshoot and stop your Keurig from dispensing water continuously.
Cause 1: Your Machine Is Clogged
Only when there is scale building inside or when there is debris obstructing the tubes and valves inside the machine does the Keurig tend to pump water constantly. As a consequence, the valves remain open and do not cause the water pump to stop.
Solution: Clean & Descale Your Keurig
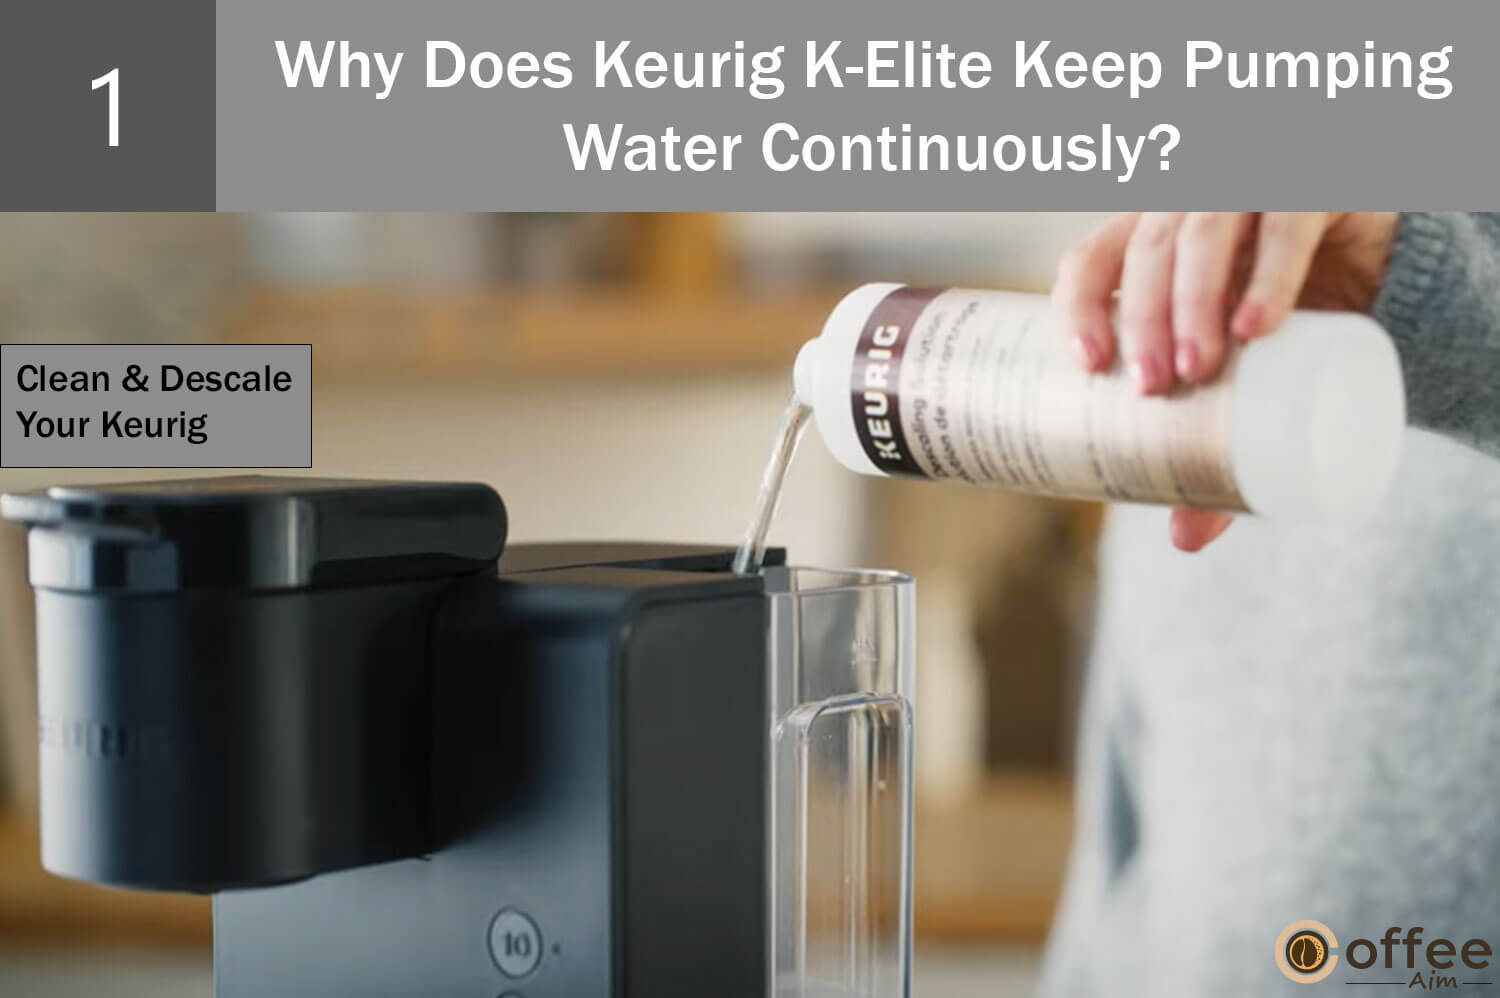
Cleaning and descaling are the only methods that ensure the proper working of your Keurig. That’s why cleaning and descaling your machine each day and every 3-6 months is recommended, respectively.
Want to know how to clean and descale your Keurig? Check the sections “How to descale Keurig K-Elite” and “How to clean Keurig K-Elite” written below in this article.
Additional Fixes:
If Keurig K-Elite doesn’t solve the water pumping problem, it’s time to clean the water reservoir and ensure that the water pump is clean and free of all clogs or debris. You can flip the machine gently upside down to clear out any clogs.
I know that this solution here sounds a bit silly. But, trust me, it works.
Avoiding distilled water when using a Keurig K-Elite coffee maker is highly recommended.
Hopefully, this will solve your problem, but it might be an internal issue with the Keurig K-Elite coffee machine’s pump if it doesn’t. For additional help, reach out to Keurig customer service. To know the details, see the section “When to seek professional help”.
Problem 8: Why Does Keurig K-Elite Descale Light Remain On Even After Descaling?
When the descale light turns on, it’s time to descale your Keurig K-Elite, a coffee maker. Descale light stays On even after descaling, possibly due to clogging in any part. Let’s troubleshoot the problem and resolve it!
Cause 1: Needs Descaling
If the descaling light is still on after you have performed it once, possibly the calcium buildups inside your machine have not washed off completely. Let’s make all the water paths clear inside your coffee machine.
Solution: Descale Keurig With Vinegar
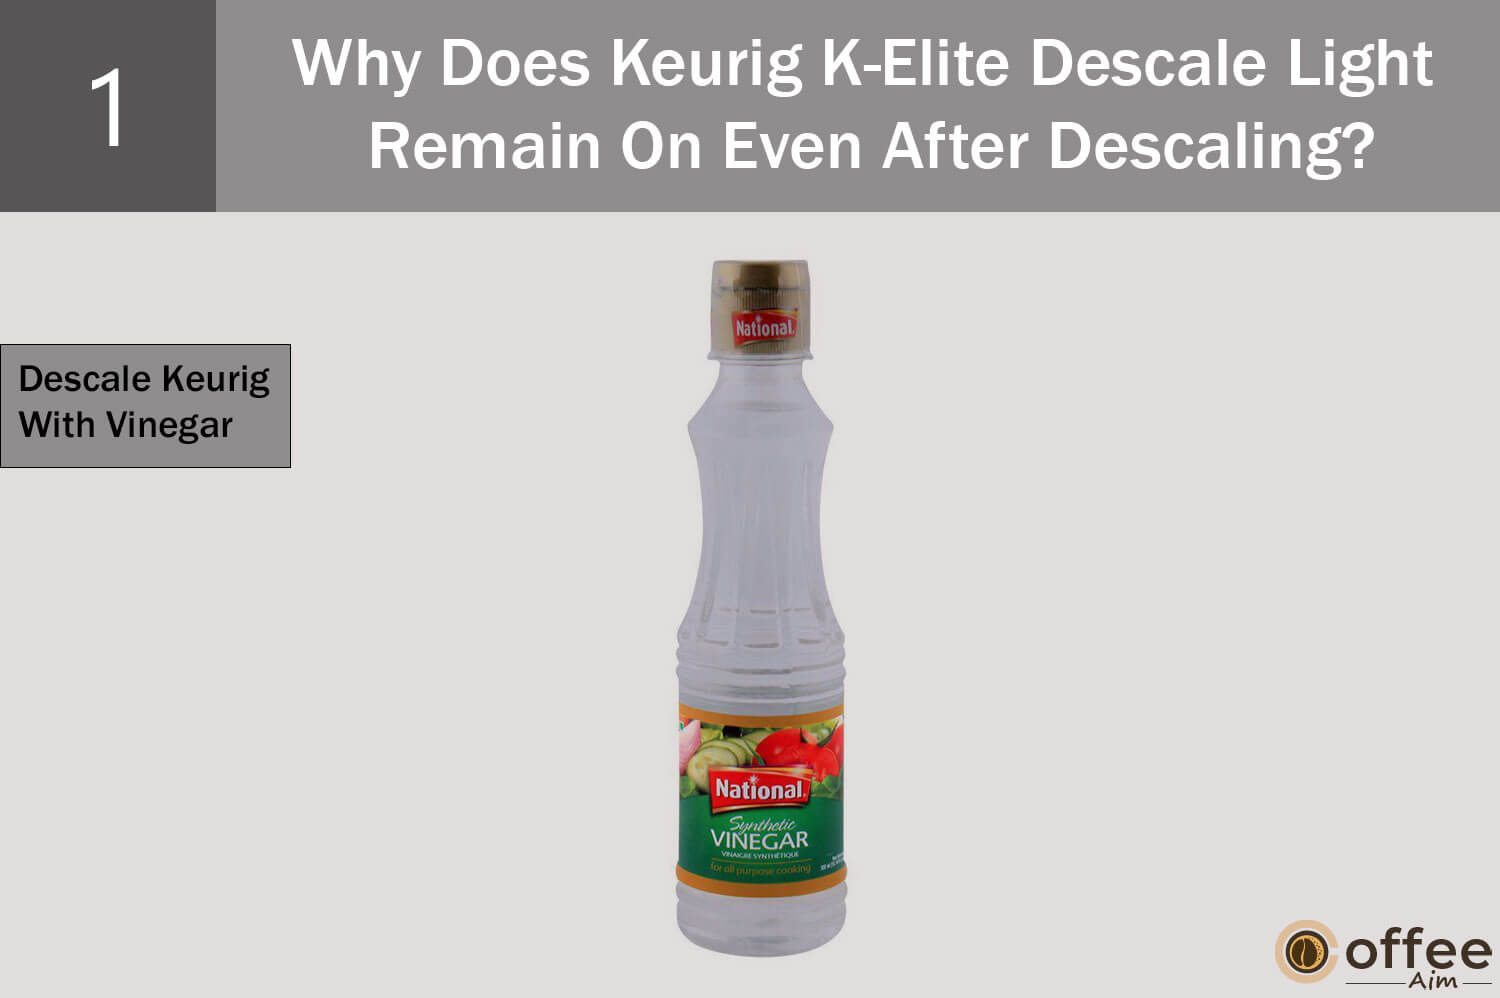
If your Keurig has a heavy buildup, then using vinegar/citric acid instead of a descaling solution can be worth it. To know the descaling details, see the section ”How to descale Keurig K-Elite” below in this article.
Solution 2: Rinse Your Keurig

These are simply a build-up of calcium and other minerals inside your Keurig K-Elite coffee maker. I recommend that you flush the machine with fresh water. Remove the water tank from the machine, fill it to the ‘max’ mark with tap water, and rinse your Keurig K -Elite machine with water only.
Cause 2: Blocked Needles
If the descaling light is illuminating even if you have descaled your coffee machine, possibly the needles are blocked. The descaling light illuminates when there is any kind of blockage in the coffee machine.
Solution: Clean The Needles

Clear all the blockages inside your coffee machine to shut off the descaling light. Therefore, clean the puncturing needles by following the instructions in the section “How to clean exit needle” & “How to clean entrance needle” below in this article.
Cause 3: Inserting Overflowing Reusable K-Cup
An overpacked reusable K-Cup can be the reason for the descaling light being on. If the coffee is overpacked in the K-Cup, the water can’t easily pass through the cup. This hindrance is considered blockage by your machine and turns the descaling light on.
Solution: Lessen The Coffee Quantity
It is recommended to add only 2 tablespoons to your reusable K-Cup. Therefore, remove all the extra coffee and insert it into your coffee machine to start brewing again. The descaling light will also turn off after that.
Final Solution: Contact Keurig

If you have tried all, and the descaling light is still on; then you better contact Keurig Customer Service. To know contact details, see the section “When to seek professional help”.
Problem 9: Why Did The Keurig K-Elite Leak During Pre-heating?
Keurig K-Elite coffee maker leaking during preheating can be a great mess. It can ruin the whole coffee experience. Don’t worry! It is a prevalent issue among Keurig coffee makers. However, it can be resolved. So, scroll down to know the possible reasons and their solutions!
Cause 1: Clogged Keurig
The long contact of your Keurig with water and coffee beans or oils leads to scales build-up inside it. These build-ups cause blockage and can’t pass through the water while brewing. Therefore, the water starts leaking out. Let’s discuss its solution!
Solution: Descale Your Keurig

So, if your coffee machine is clogged with water minerals and coffee oils, it’s time to descale it. To know the descaling process, see “How to descale Keurig K-Elite” below in this article.
Cause 2: Exit & Entrance Needles Are Blocked
These puncturing needles are responsible for poking a hole in the coffee capsule. And if these needles are blocked, they can’t poke a sound hole, and water can’t pass through the capsule resulting in leakage.
Solution: Clean The Needles

Clear all the clogs from both the needles (Exit & Entrance) by following the instructions in “How to clean Exit needle” & “How to clean Entrance needle” below in this article. By doing this, leakage while heating will disappear. Let’s move to the next possible cause!
Cause 3: Water Tank Valve Is Blocked
Remove the water tank, and there you will see a hole (passing) through which water enters the brewer from the water tank. Check for any clogs or blockage inside this, as it may hinder the water flow, which will cause leakage. If it is blocked, then follow the steps mentioned in the solution below.
Solution: Remove Blockage Inside The Valve
Drain the water inside the valve to clean this. The water dispense hole may be seen if you peek inside the reservoir. If you can’t reach it with your hand, try reaching it from the inside with a brush or put it in the dishwasher. Remember to use a brush to clean the opposite side as well.
Cause 4: Overfilled Water Tank
We often fill the water tank above the MAX Fill line, which leads to leakage while heating. While heating, the water expands and overflows the water tank. Let’s resolve the issue!
Solution: Fill Water Up To MAX Fill Line
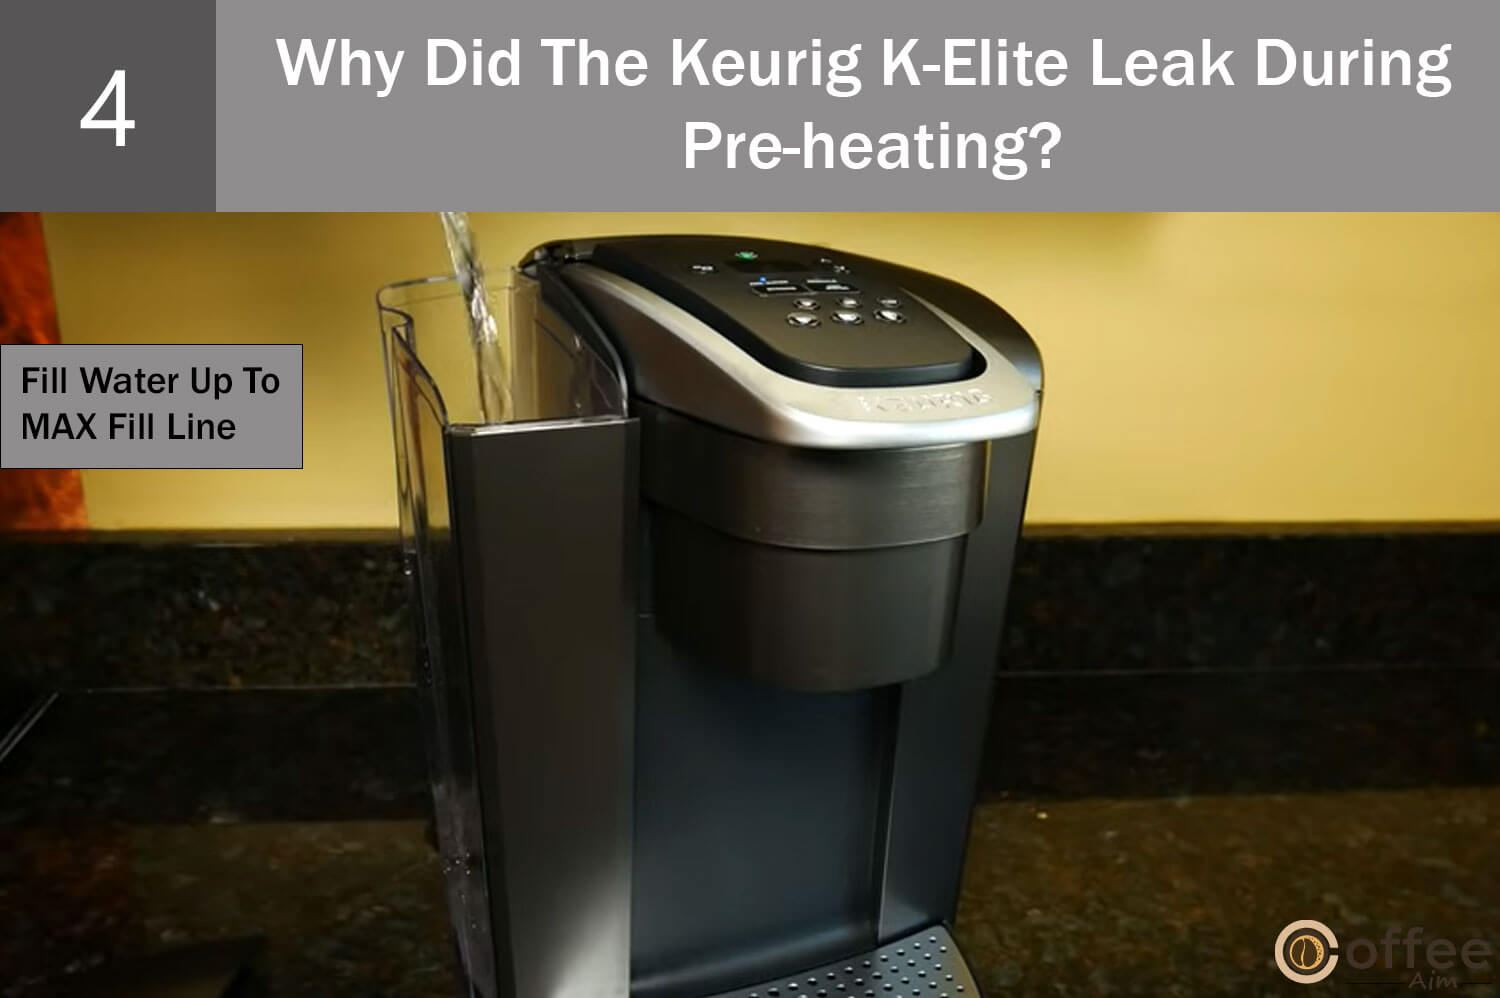
As the overfilling is causing the leakage, remove the excess water from the water tank. It is recommended to fill the Water tank up to the MAX Fill line (not below or beyond this line). It will definitely resolve the leaking problem. Time to discuss another cause!
Cause 5: Incompatible Coffee Capsule
Instead of authentic Keurig K-Cup pods, you may be utilizing refillable capsules or third-party pods, which might be the reason for the machine’s leak at the top water. The leak can be brought on by the refilling capsule being too big and not fitting properly within the pod holder. The film caps of third-party coffee pods can be too thick to be pierced by the puncture needle, which would cause water leakage.
Solution: Use Original K-Cup Capsules

You better use original Keurig K-Cups in your Keurig K-Elite to prevent leakage. Keurig manufactures the coffee pods considering the space inside the pod holder and the position of the needles. Therefore, for better results, always use Keurig K-Cups.
Cause 6: Damaged Pipework
Water may escape the top of the Keurig brewer due to leakage in the internal pipes. The Keurig’s water circuit’s piping may be loosely linked, which might possibly be the cause of the problem. Let’s find the solution!
Solution 1: Repair The Pipework
- By disassembling your coffee machine, you may investigate if the internal pipes inside the water circuit are faulty or leaking and are the source of the leak. Let’s see how you can do this!
- Unplug your coffee machine.
- Unscrew and open the back panels.
- Next, look for the leaky component visually.
- Once you find the leak’s source, apply a strong adhesive to seal it.
Note: Don’t disassemble your Keurig K-Elite, if the warranty period has not ended, as this act will void the warranty.
If there are any loose pipes, manually reposition them until they are securely fastened and are not dripping any water.
Solution 2: Replace The Damaged Parts
It is preferable to go with fresh substitute parts rather than patching up already-faulty ones. If you’re not a DIY enthusiast, consider hiring a qualified service expert to complete the repair or replacement. To know the contact details, see this article’s “When to seek professional help” section below.
Cause 7: Malfunctioning Upper Gasket
On your Keurig brewer, the top gasket is a silicone part that creates a tight seal between the K-Cup and the water pipe. Water leaks at the top of your brewer are likely to occur if this portion of the machine breaks or gets loose.
Solution: Repair The Gasket
Start by removing the water reservoir and its lid/cap to stop water from seeping out of the Keurig brewer due to a loose or damaged upper gasket. Then, using a plastic opening tool, remove the circular screen at the reservoir’s base and pull the O-ring off.
The rubber seal that encircles the circular screen is called an O-ring. Finally, swap out the worn O-ring for a fresh one. Replacement O-ring parts are often available from Keurig under their warranty policy. Let’s discuss another cause!
Cause 8: Malfunctioning K-Cup Lid
Water may leak out of the machine’s top if the brewer isn’t holding the K-Cup lid firmly. The lid’s inability to tightly seal the coffee maker prevents the water pressure inside from building up.
Solution: Replace The K-Cup Lid
Contact Keurig for a replacement K-Cup lid if your Keurig is leaking water because the brewer is holding the lid too loosely. For a tight grip, wrap something around the K-Cup. For contact details, see the section “When to seek professional help”.
Problem 10: Why Does the Keurig K-Elite Leak From The Bottom?
You get up in the morning to make a hot cup of coffee, but what you see is the rack is wet due to leakage from your Keurig K-Elie. Ugh! It is creating a mess in your kitchen. Furthermore, leakage can also cause electrocution. Therefore, it is necessary to stop the leakage. Don’t worry if you don’t know how to do it as I have enlisted all the possible reasons for this problem and their solutions too. So, scroll down and get your Keurig K-Elite back in good condition!
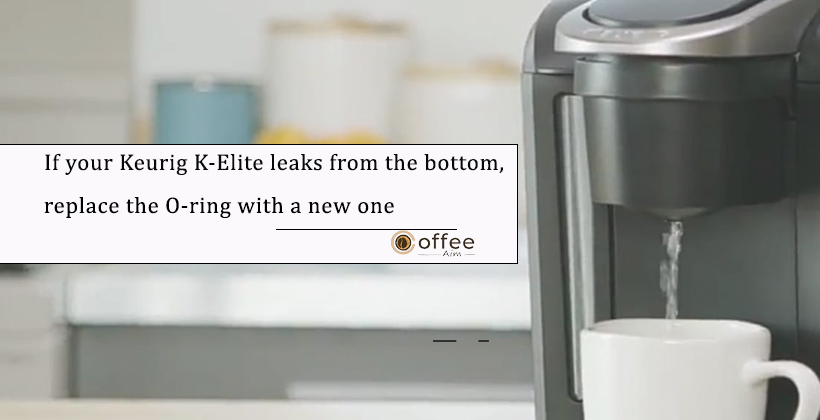
Cause 1: O-Ring Is Malfunctioning
A component called an O-ring seals low-pressure hydraulics within a coffee machine to stop fluid leaks. The O-Ring necessary for creating a reliable connection between the valves and the pump might perhaps become worn out or disappear.
Solution: Adjust / Replace The O-Ring
First, make sure the O-ring is still in its original location because the machine’s vibration during brewing might cause it to be misplaced. Try moving the O-ring in different directions to fix its position.
If moving the O-ring about doesn’t fix the problem, a new one should be installed.
Simply place an order for a replacement O-Ring on Amazon or the official Keurig website.
Related: Easy installation of O-Ring.
However, if you don’t want to do this task yourself, I recommend calling Keurig customer service for further assistance. For contact details, see the section “When to seek professional help”.
Cause 2: Water Reservoir Is Cracked
If you wash the water reservoir carelessly, it may develop some cracks, which eventually cause water to seep from the bottom of the Keurig machine.
If you can’t see any cracks in the water reservoir, try filling it with water and setting it down on a piece of cloth. After 15 to 20 minutes, take note of the fabric. If the cloth is dry, your water reservoir is working properly; nevertheless, if the cloth is moist, there must be some tiny, invisible holes inside the water tank.
Solution: Repair Or Replace The Water Reservoir
Depending on the damage, you can repair or replace the water reservoir. However, if the crack is minor, apply hot glue to it, or you can also solder it. If the crack is non-repairable, you must order a new water reservoir from Amazon. It will be better to replace the older water reservoir with a new one because repairing the older one may only last for a while.
Cause 3: Exit Seal Is Malfunctioning
At the place where the water reservoir and the brewer are connected, there is a little valve. This silicone seal on your Keurig K-Elite might be worn out because the water tank’s bottom pushes against the base whenever the water reservoir is full. It may also get clogged with mineral scales. When this occurs, the damaged seal lets water through.
Solution: Repair The Exit Seal
First, thoroughly clean the base connection and valve with white vinegar. Wipe it, then replace the water reservoir to check for any leaks.
Silicon Grease should be used if cleaning is ineffective. The connection between the water reservoir and the brewer is strengthened, and the seal will be repaired.
Problem 11: Why Are There Coffee Grounds In My Coffee?
You want a perfect cup of coffee, but your Keurig is dispensing coffee grounds, also. These coffee grounds destroy the whole coffee-drinking experience. Let’s get rid of this problem with easy troubleshooting tips.
Cause 1: The Exit Needle Is Clogged
If grounds appear in your cup after brewing, coffee grounds may have accumulated in the Keurig brewer’s exit needle.
Solution: Unclog The Exit Needle
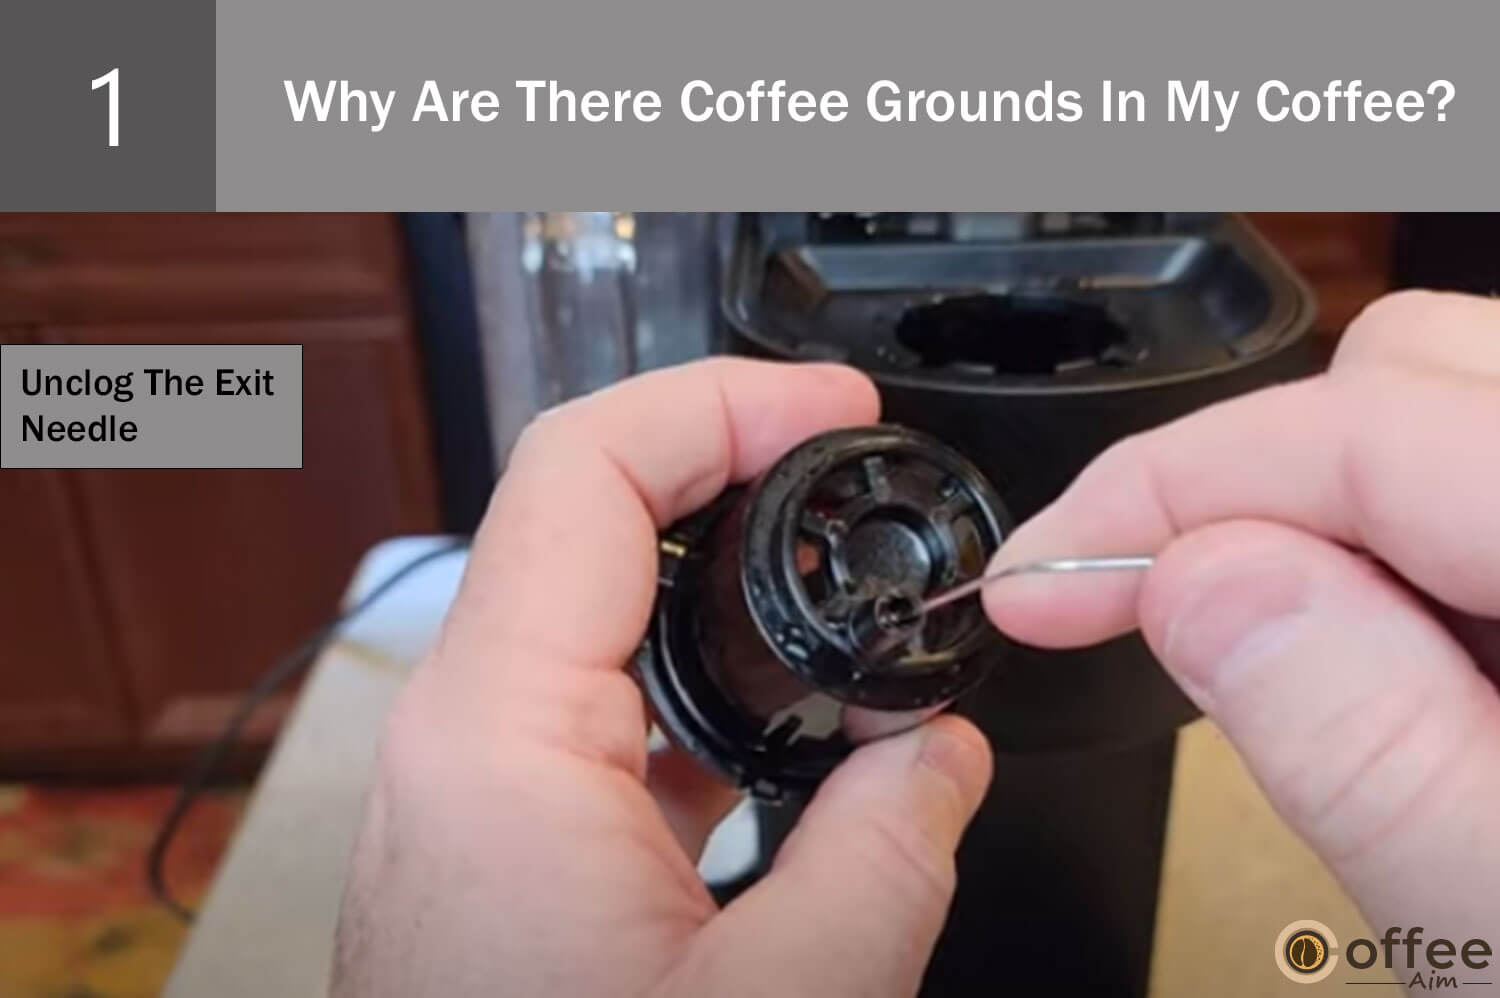
To unclog the exit needle, follow the instructions in the section “How to clean exit needle” below.
Note: Regular cleaning is also essential. Clean the brewer quickly and keep your coffee maker in good working condition.
Cause 2: Overfilled Reusable My K-Cup
If you are using reusable K-Cup and getting coffee grounds in your coffee, then overfilling K-cup has been done.
Solution: Avoid Overfilling
Please be sure to use a coarse drip if you are using the My K-Cup® Reusable Coffee Filter. The mesh basket should only be filled up to the level of the brown band, or around 2.5 Tbsp.
Final Solution: Contact Keurig
If the issue can’t be resolved, contact Keurig customer care service. For contact details, see the section “When to seek professional help”.
.
Problem 12: Why Keurig K-Elite Coffee Often Tastes Bitter?
Coffee is bitter up to some extent, but extreme bitterness can ruin the coffee-drinking experience. Do you wonder why it is so bitter that you can’t even take a sip? Let me tell you the possible causes and their solutions. So, scroll down!
Cause 1: Dirty K-Cup Holder / Exit Needle
If your coffee suddenly tastes bitter or burnt, possibly the K-Cup Holder, Exit Needle, or area around the Pod holder is dirty.
Solution: Clean The Dirty Parts
Cleaning can improve your coffee taste, so clean all the dirty parts of your Keurig K-Elite by following the instructions in the section “How to clean Keurig K-Elite” given below.
Cause 2: Coffee Oils / Residues Build-Ups
Another possible reason for a bitter-tasting coffee is your Keurig is clogged with coffee oils and residues and needs descaling. These clogged coffee oils are the reason for butter and burnt-tasting coffee.
Solution: Descale Your Keurig
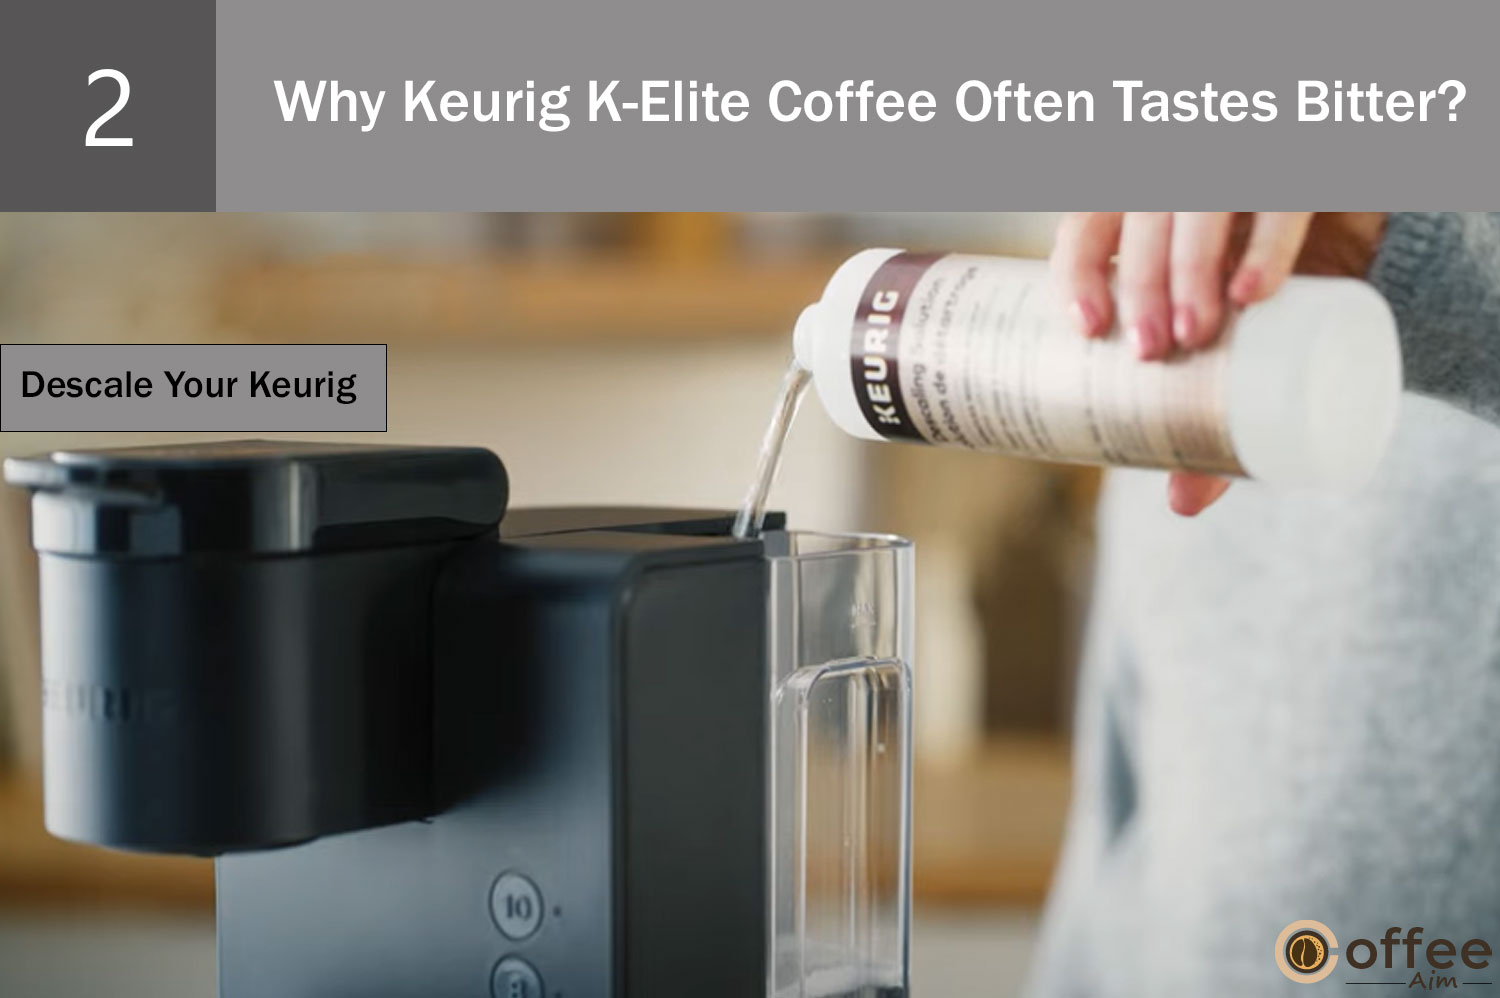
It’s time to descale your machine to get better coffee again. To know the descaling process, see the section “How to descale Keurig K-Elite” below in this article.
Problem 13: Why Is Keurig K-Elite Stuck On The “Add Water” Error Message?
If your Keurig K-Elite is Stuck on the “add water” error message, even if you have filled the water tank to the brim. There can be several reasons for this error message. Scroll down to know!
Cause 1: Water Reservoir Is Not Seated Properly
If you have added water to the water reservoir and the “add water” light is still appearing, then possibly a problem with the position of the water reservoir. Check if the water reservoir is seated correctly on the base or not. If not, then follow the instructions given in the solution below.
Solution: Replace The Water Reservoir On The Base
First, detach the water reservoir from the brewer, then place it again on it correctly. Now, start the brewing. Hopefully, the “add water” light will disappear. However, if not, check the other causes!
Cause 2: Broken Water Pump
There is a possibility that the water pump is broken, that’s why the “add water” light is appearing. How is the water pump broken? You might have damaged the water pump while carrying your brewer from one place to another. Let’s see its solution!
Solution: Replace The Water Pump
The broken water pump needs to be replaced. This is a technical task; therefore, you should hire a professional or contact Keurig customer care service. To know the contact details, see the section “When to seek professional help” below.
Cause 3: Dirty Water Filter
Keurig comes with a water filter in the water reservoir to purify the water. However, it gets dirty with time. Maybe that’s why your Keurig continuously displays the “add water” light. Let’s resolve the issue!
Solution: Replace The Water Filter
So, it’s time to purchase a new water filter and replace the old one with the new one. You can easily buy a water filter from Amazon.
So, the point is how you can change the water filter. It’s pretty easy. Follow the below-mentioned steps.
- Put the new filter in a cup of water and let it soak. Give it five minutes or so to sit.
- You should remove the old water filter in the meanwhile. Pull up the filter holder very carefully to do this.
- There are three pieces to the filter holder. The filter that you wish to discard is within the holder, which is simple to disassemble.
- Take out the new water filter and thoroughly wash it in the washbasin after soaking it for five minutes. Do the same with each component of the filter holder.
- Then, clip the pieces together after inserting the fresh water filter into the holder. To specify a date for the subsequent change, the filter holder has a dial that displays all twelve months of the year.
- Insert the water holder into the water filter’s proper location, then lock it in place.
Cause 4: Cracked Water Reservoir
A crack (minor or major) can lead to the illumination of the “Add water” light on your Keurig. Thus, if you are getting a continuous alert of “Add water” from your Keurig, check for any cracks in the water reservoir. If there are cracks, see the solution section to resolve the issue.
Solution: Repair / Replace The Water Reservoir
Depending on the damage, you can repair or replace the water reservoir. However, if the crack is minor apply a hot glue on it, or you can also solder it. If the crack is non-repairable, you must order a new water reservoir from Amazon. It will be better to replace the older water reservoir with a new one because repairing the older one may only last for a while.
Cause 5: Water Magnet Is Misplaced
Keurig has an inbuilt system to detect the water level in the water reservoir. At the base of the water tank is a little floating gadget with a sensor. This little object may occasionally become stuck at the bottom. In such a situation, even though the water level isn’t low, it will indicate that it is.
Solution: Fix The Water Magnet
Reactivate the sensor by just pressing the area where it is stuck.
Cause 6: Dirty Water Reservoir
If the water tank is dirty, it can’t detect the water level properly; thus, the “add water” light gets illuminated. Let’s resolve the issue!
Solution: Clean The Water Reservoir
First, empty the water reservoir and clean it using mild soap and non-abrasive, lint-free cloth. Then, wash it thoroughly with fresh water. Now, fill it up to the MAX Fill line.
How To Descale Keurig K-Elite
To unclog your coffee machine, you must use a Keurig descaling solution. Let’s get started!
- Turn your Keurig off.
- Pour the entire bottle of Keurig descaling solution into the empty water reservoir.
- Now, fill the empty bottle with water and pour it into the water reservoir.
- Turn the brewer on.
- Put a large container on the drip tray.
- Run rinsing brew (without inserting the coffee pod) by pushing the “Hot water button” and “Largest brew size”.
- Repeat the process until the blue “Add water light” turns on.
- Dump liquid contents from the container into the sink after each cycle.
- Now, let the brewer stand for 30 minutes (the brewer should be on).
- After 30 minutes, dump all the solution from the reservoir into the sink and wash it with water.
- Now, fill the water reservoir with fresh water up to the Max Fill line (not beyond this limit).
- Put a container on the drip tray.
- Run water rinsing (with a coffee pod and descaling solution inside) by selecting the largest brew size.
- Pour contents from the container into the sink.
- Repeat this process at least 12 times (you may refill the water reservoir).
How To Perform Cleansing Brew
Let’s resolve several Keurig problems just by running a single cleansing brew.
- Plug your Keurig K-Elite into a grounded outlet.
- Put a large mud of at least 12 oz capacity on the drip tray.
- Fill the water reservoir with fresh water up to the MAX FILL line.
- Now, turn on your brewer; the green power light will illuminate.
- Your brewer will automatically start heating the water (approximately 3 minutes).
- Don’t add coffee/beverage pods.
- Once the brewer is ready, push the “Hot water button,” and the five brew buttons will start blinking.
- Now, press the 8oz button to start a cleansing brew.
- Discard the content from the mug into the sink.
How To Clean Keurig K-Elite
- Firstly, you’ll need to unplug your Keurig K-Elite.
- Secondly, remove the K-cup holder from the Keurig K-Elite coffee maker. To access the holder, open up the handle, hold it from the top of the pod holder, and by using your other hand to push the holder from the bottom.
- Once you’ve got the pod holder, you will need to remove the funnel from its part. And the funnel sits on the bottom of the holder, and if you hold both ends, you should be able to free the funnel. You can pour the holder under hot water if the connection is too tight.
- Next, get your paper clip or toothpick. Please insert it into the small tube on the bottom of the pod holder. You’ll need to flip the holder.
- Also, you want to move the paper clip or toothpick around to free any clogged coffee grounds or debris. Be careful not to poke the paper clip or toothpick through the entire tube.
- After removing the clogs, rinse the pod holder and funnel under normal water.
- After rinsing these pieces, wipe them gently with a cloth.
- Avoid contact with your bare skin during this process.
- After the pod holder and funnel are dry, snap them together.
- Place it by pushing down on the top rim while holding your brewer handle.
- Lower the handle
- Place a brewer mug on the drip tray.
- Rinse the holder and funnel with water by selecting the largest cup size without a K-Cup pod.
- After the rinse, you can start using your Keurig K-Elite to make your morning cup of coffee again!
Here I define the whole procedure of cleaning the Keurig K-Elite coffee maker K-Cup needle due to dispensing issues, but if there any confusion occurs, watch this link below.
Related: How to clean Keurig K-Elite.
How To Remove Air Bubbles In Keurig K-Elite
To remove the air bubbles, there are two different methods;
First Method:
- Unplug your Keurig and remove any coffee/beverage pods from it.
- Now, detach the water reservoir and drip tray also.
- Grab your Keurig and give it jerks. Rattle it until you see water coming out of the bottom.
- Now, place your Keurig back and try brewing.
Second Method:
1. Add water to the tank until it is roughly a fourth full.
2. Quickly raise and lower the tank. At the reservoir’s base, near the water intake valve, you should notice little air bubbles rising.
3. Continue until no more bubbles appear.
4. Add water to the top of the water tank. Activate the hot water brew cycle. If water begins to flow through the machine, the problem has been resolved.
How To Clean K-Cup Pod Holder
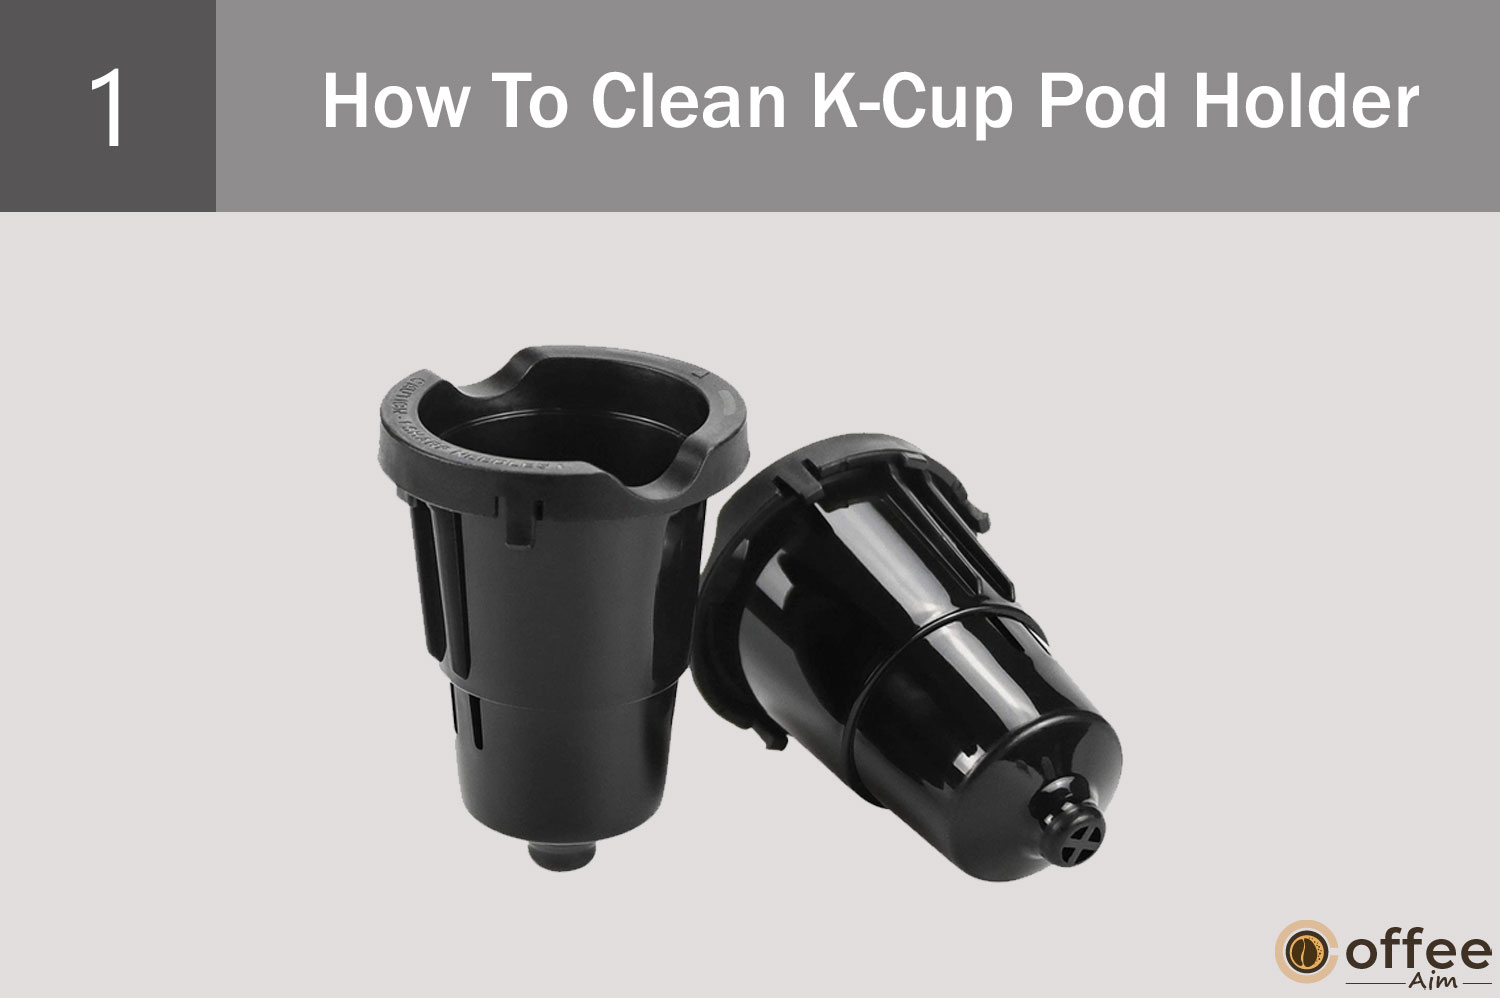
- Lift the pack holder’s handle.
- Push the holder assembly up by grabbing its sides. The holder assembly should be removed from the machine.
- By doing this, you may get rid of the base and the K-cup holder from the brew head.
- When you want to detach the pack holder from its housing, use the side release buttons.
- Wipe out the interior of the holder, base, and complete housing with a fresh, moist, soapy cloth.
- Give everything a good rinse.
How To Clean Exit Needle Of Keurig K-Elite
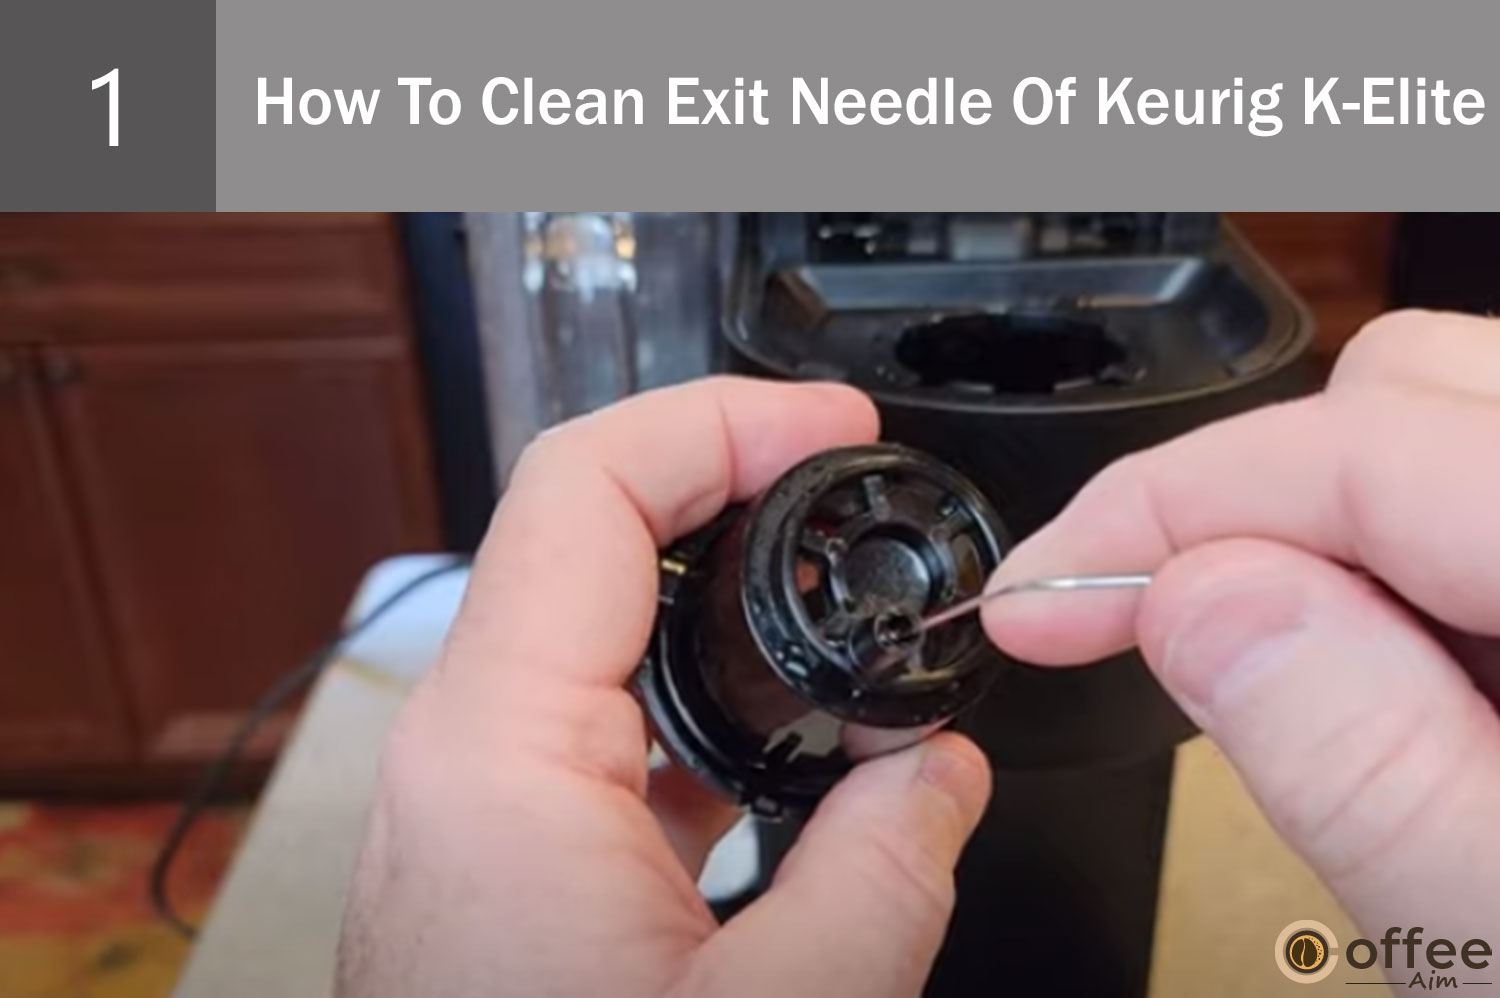
- First, remove the pod holder assembly and detach the funnel.
- You will see the exit needle on the inside bottom of the pod holder.
- Now, insert a paper clip or similar tool inside the needle.
- Move around the paper clip to lose the clogged ground.
- Now, pour hot water and vinegar through a straw into the needle.
- This will remove all the blockages.
- Reassemble all the parts.
- Now, run multiple water cleansing brews (without the K-Cup pod).
How To Clean Entrance Needle Of Keurig K-Elite
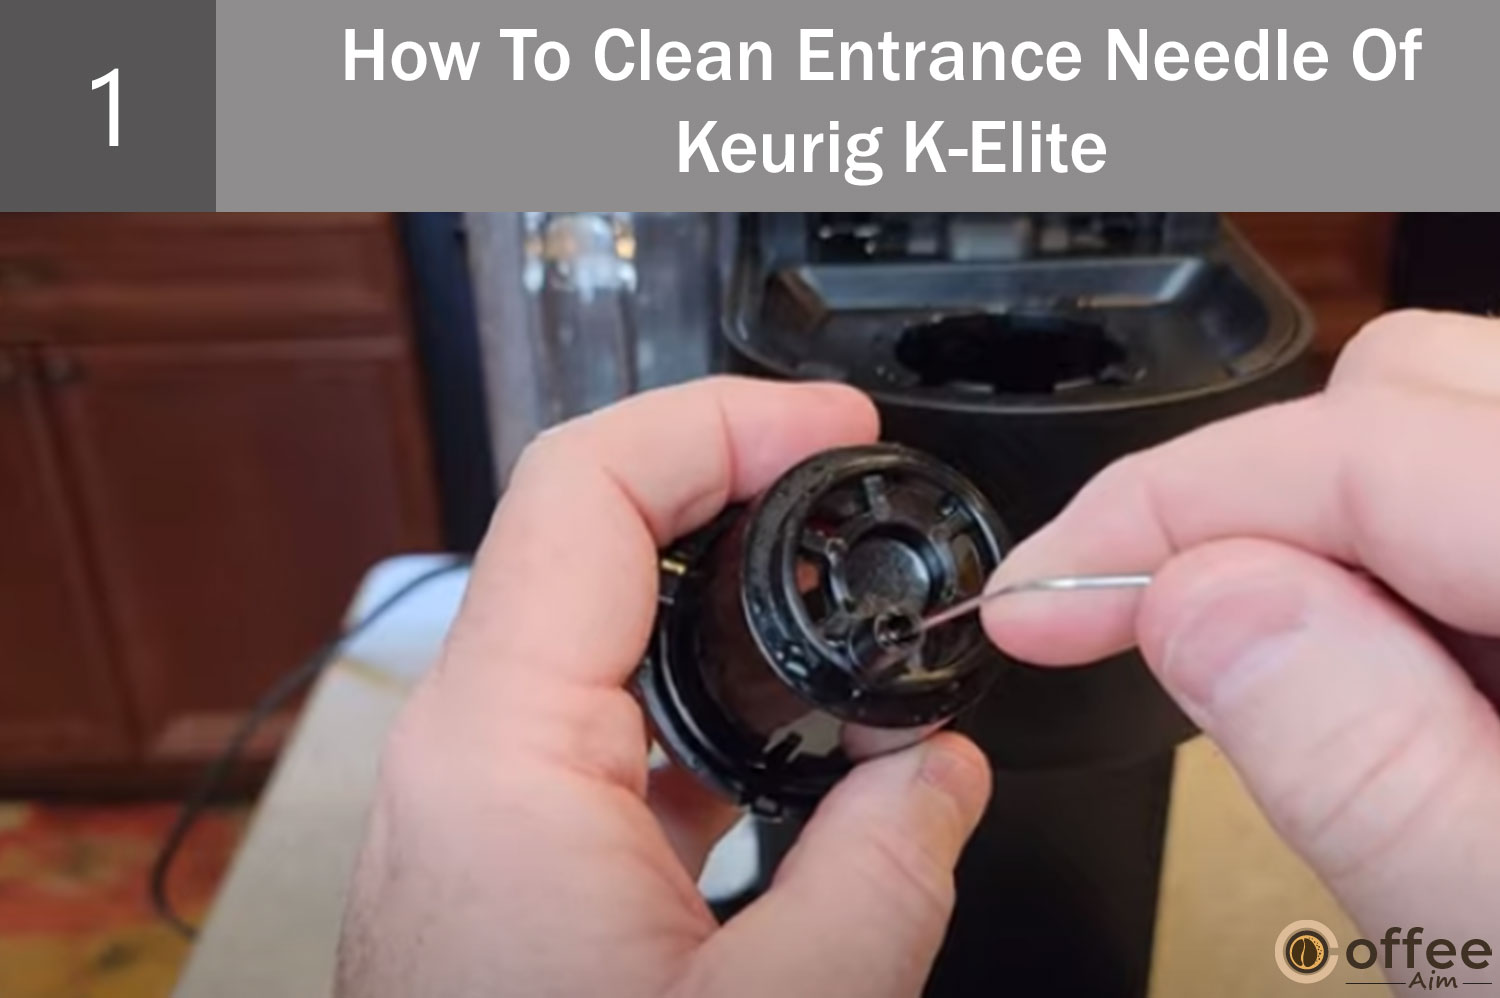
First of all, let’s locate the entrance needle in your Keurig;
- Lift the handle, and you will find it on the underside of the lid.
- Grasp the handle with one hand, while with the other hand, insert a paper clip or similar tool inside all the holes of the entrance needle one by one.
- After insertion, move the clip around to loosen any clogged ground.
- Once you have done this, lower the handle and run two water-cleansing brews (without K-Cup).
Keurig K-Elite Support
If none of these solutions work, please contact the Keurig K-Elite coffee maker.
Keurig Customer Service help is available seven days a week at 866-901-2739.
Contact Keurig Customer Service at 866-901-2739 if your K-Elit has a swear issue
Maintenance Tips:
To ensure your Keurig K-Elite coffee maker stays in top-notch condition and continues to deliver that perfect cup of joe, regular maintenance is key. By incorporating a few simple cleaning and maintenance practices into your routine, you can prevent potential problems and prolong the life of your machine. Here are some essential tips to keep your Keurig K-Elite running smoothly:
- Regular Cleaning: It’s important to clean your Keurig K-Elite regularly to remove any coffee residue, mineral deposits, and other buildup. Follow the manufacturer’s instructions for cleaning, which typically involve descaling the machine and wiping down the external surfaces.
- Descaling: Over time, mineral deposits can accumulate inside your coffee maker, affecting its performance and the taste of your brew. Descaling is the process of removing these deposits. You can use a descaling solution or a mixture of water and vinegar to descale the machine. Remember to rinse it thoroughly afterward.
- Cleaning the Reservoir: The water reservoir should also be cleaned regularly to prevent any buildup of impurities. Empty and wash the reservoir with mild soap and water. Ensure it is completely dry before refilling.
- Removing Clogs: If you notice any clogs in the needles or the water lines, you can use a paperclip or a needle cleaning tool (as mentioned earlier) to clear them. This helps maintain consistent water flow and prevents blockages.
- Proper Storage: If you’re not using your Keurig K-Elite for an extended period, it’s important to store it correctly. Ensure the machine is clean and dry, and store it in a cool and dry place away from direct sunlight.
By incorporating these simple maintenance practices into your routine, you can keep your Keurig K-Elite coffee maker in excellent working condition. Remember, a well-maintained machine not only ensures a delightful brewing experience but also helps extend its lifespan.
When to Seek Professional Help:
While troubleshooting and fixing common problems with your Keurig K-Elite coffee machine can often be done by following the solutions provided, there are certain situations where seeking professional help is recommended. If you encounter any of the following scenarios, it’s time to reach out to experts who specialize in Keurig K-Elite repairs:
- Persistent Malfunctions: If you have tried all the suggested solutions and your machine continues to experience the same issues, it’s best to seek professional assistance. They have the expertise to diagnose complex problems and provide effective solutions.
- Technical Faults: If you suspect that the problem lies within the internal components or electrical system of your Keurig K-Elite, it is advisable to leave the repairs to trained technicians. They have the necessary tools and knowledge to handle intricate technical faults.
- Warranty Coverage: If your Keurig K-Elite is still under warranty, it’s recommended to contact the authorized service center mentioned in your warranty documentation. They can provide reliable repairs and ensure that your warranty remains valid.
For reputable repair services that specialize in Keurig K-Elite coffee machines in the USA, here are a few trusted options:
- Keurig Customer Service: You can contact Keurig’s customer service directly for assistance with repairs and service inquiries. Visit their official website or call their customer support hotline at 1-866-901-2739.
- Local Appliance Repair Shops: In your local area, there may be appliance repair shops that offer services specifically for Keurig coffee machines. Do some research, read reviews, and choose a reputable shop with experience in repairing Keurig K-Elite models.
Remember, seeking professional help ensures that your Keurig K-Elite is handled by experts who have the knowledge and resources to resolve complex issues. It’s always better to rely on their expertise to get your beloved coffee machine back up and running smoothly.
Final Thoughts
Congratulations, coffee aficionado! You are now equipped with the knowledge and solutions to tackle common problems that may arise with your beloved Keurig K-Elite coffee machine. Throughout this article, we’ve explored various issues and provided step-by-step solutions to get your brewing experience back on track.
Remember, the key takeaway here is empowerment. You have the ability to troubleshoot and fix many of these issues on your own, saving time and money. By following the troubleshooting tips and utilizing the maintenance suggestions, you can keep your Keurig K-Elite in tip-top shape for years to come.

However, it’s important to know when it’s time to seek professional help. If you’ve exhausted all the solutions provided and the problems persist, or if you suspect technical faults beyond your expertise, don’t hesitate to reach out to trusted repair services or Keurig’s customer support. They have the know-how to handle more complex issues and ensure your coffee machine gets the attention it deserves.
So, before picking up the phone, put on your troubleshooting hat and give it a go! You may find that you can easily resolve the issues yourself and be back to enjoying your favorite cup of coffee in no time. Remember to refer back to this article as your go-to guide whenever a hiccup arises.
Keep brewing, keep sipping, and keep enjoying that perfect cup of joe from your Keurig K-Elite. Cheers to hassle-free coffee mornings!
Important FAQs
Why is my Keurig K- Elite not working?
It is a prevalent complaint about most Keurig K-Elite coffee makers.
Keurig K-Elite is not working suddenly, or Keurig K-Elite stops working after a short period. These are issues that may be common, do not be worried. Around 10 percent of Keurig K-Elite buyers face the same problem.
.
- The reason behind this is which type of water you’re probably using. You should know that normal water contains all kinds of minerals, this includes calcium. Then there’s also debris that tends to build up within the water lines of the machine, thus making it almost impossible to work.
- But you can sigh relief knowing that the problem is not technical. You can quickly fix it. And here’s how.
- If the malfunction is because of calcium scaling, then descale your Keurig K-Elite coffee maker using vinegar and water solution. Let the coffee maker soak in this solution for at least 30 minutes.
- Remember that the Keurig K-Elite manual does not recommend the treatment method here. But if you still go ahead, the warranty might become void.
- Then, flush the machine with just clean water a few times. And now try to start it.
- Try troubleshooting when you’ve learned that your Keurig coffee maker isn’t working. Run the machine several times using only water without the K-cup.
- Another effective remedy is clearing the coffee maker’s dispensing line with a paperclip. But only after you have turned off the Keurig K-Elite and even unplugged it. What this does is help in getting rid of all the leftover coffee grounds stuck in the dispensing line.
- You can also blow some air into it with the help of a straw for a quick clean.
Why does my Keurig K- Elite keep Shutting Off?
A Keurig K-Elite often shuts off during brewing because the K-Cup hasn’t been punctured on the bottom by the needle in the K-Cup. It can also shut off due to a clogged brew needle, faulty outlet, or misaligned water reservoir magnet.
Which Keurig is on Recall?
K10 MINI Plus Brewer Recall
Details. In cooperation with the U.S. Consumer Product Safety Commission (“CPSC”) and Health Canada, Keurig Green Mountain, Inc. voluntarily recalled in December 2014 MINI Plus Brewing System units with model number K10 (formerly identified as B31) manufactured between December 2009 and July 2014.
In assistance with the U. S Consumer Product Safety Commission (CPSC) and Health Canada, Keurig Green Mountain, Inc. voluntarily recalled Keurig MINI Plus Brewing System units in December 2014 with model number K10 (formerly identified as B31). Keurig has received 200 reports of hot liquid escaping from the brewer, including 90% reports of burn-related, but this model doesn’t affect any other Keurig models. Recalled units were produced between December 2009 and July 2014 and they can be identified by the serial number printed on a white sticker on the bottom of the brewer.
With assistance from the U. S Consumer Product Safety Commission (CPSC) and Health Canada, Keurig Green Mountain, Inc. deliberately called back Keurig MINI Plus Brewing System units in December 2014 with model number K10 (formerly identified as B31). 200 reports of hot liquid escaping from the brewer of the Keurig were received, including 90% of reports of burn-related, but this model didn’t affect any other Keurig models. Recalled units were introduced between December 2009 and July 2014 and they can be identified by the serial number printed on a white sticker on the bottom of the brewer.

How do I Force my Keurig to Reboot?
The word Reset and Reboot the Keurig K-Elite is the same, we can reset the Keurig K-Elite by following the steps below.
- Please turn off your brewer by pressing the power button
- Then unplug it for a few minutes.
- Remove the water reservoir before you plug the Keurig K-Elite back. Wait for a few minutes.
- Reconnect your machine by powering On.
- Attach the water reservoir back to your Keurig K-Elite coffee maker.
- Try to brew a delicious cup of coffee again.
Does my Keurig have a Reset Button?
Unfortunately, the Keurig K-Elite doesn’t have a reset button, but these brewers are easy to use. Luckily, the simplest method for resetting Keurig k-Elite is by unplugging it for two hours. If you’re still having an issue, it may be easily removed by descaling your Keurig K-Elite.
Why is my Keurig Elite not Brewing?
If your Keurig K-Elite isn’t brewing a coffee, it may need to be reset by plugging and unplugging.
But why does this happen? Chances are that your Keurig K-Elite coffee maker contains a build-up of debris deposits. Due to this, the coffee maker can not brew your delicious cup of morning coffee. That is one of the reasons for bad-tasting coffee. You can remove it by descaling and cleaning the process
.