Quick Navigation
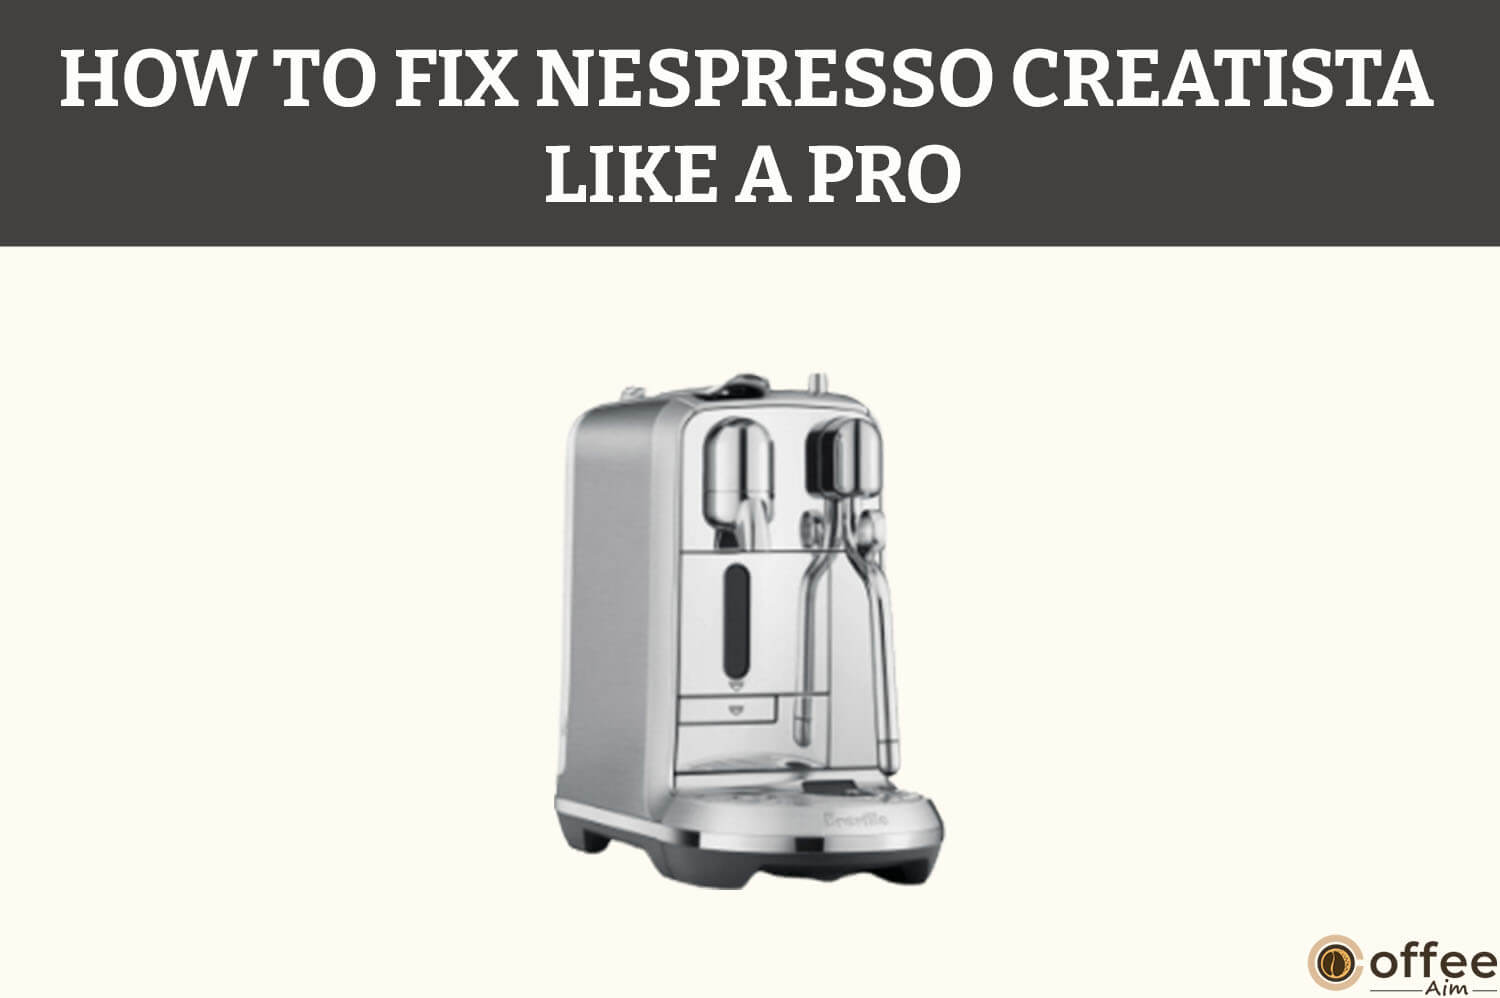
You get out of bed excited to enjoy a delicious coffee from your Nespresso Creatista to start your day. But wait – something’s wrong. Your machine won’t turn on, or the milk frother isn’t working properly. You don’t have to panic or run to your nearest coffee shop. In this article, I’ll guide you through the steps to fix your Nespresso Creatista like a pro. With our expert tips, you can quickly diagnose and resolve issues with your beloved coffee maker. Therefore, take a seat back, unwind, and prepare to relish your wonderfully brewed cup of coffee once more.
Related: How To Use A Nespresso Creatista Machine
Overview
As a Nespresso Creatista owner, you’re probably used to the convenience of having barista-quality coffee at your fingertips. However, your machine can sometimes experience technical difficulties that damage your daily caffeine fix. Some of the most common issues that Creatista owners face include the machine not turning on, the coffee not getting hot enough, or the milk frother not working as it should. I’ll provide step-by-step instructions to diagnose and fix these common problems in this article. So, let’s get started and get your Nespresso Creatista back in working order!
Related: Review Of Nespresso Creatista Machine
Getting Started
Before we dive into troubleshooting your Nespresso Creatista, having the right tools is important. As it will help you diagnose and fix any problems with your machine quickly and efficiently. Here are the essential tools you’ll need:
Descaling Solution
The descaling solution is crucial for removing any mineral buildup in your machine that may cause it to malfunction. It helps to keep your machine clean and working at its best.
Cleaning Tool
The cleaning tool that comes with your Nespresso Creatista is to help you thoroughly clean the milk frothing wand and coffee pod holder. It’s essential to use this tool regularly to prevent clogs and other issues.
Soft Cloth
A soft cloth is beneficial for wiping down the machine’s exterior and cleaning any spills or splatters.
Water
It sounds obvious, but it’s essential to have clean water on hand to fill the water tank and for descaling.
Having these tools available at your place will make fixing your Nespresso Creatista much smoother and less stressful. So, let’s dive into the troubleshooting guide and get started!
Problem#1: Nespresso Creatista Buttons Not Illuminating
There’s nothing more frustrating than waking up to discover that your Nespresso Creatista buttons aren’t working. It can be aggravating and perplexing to wonder why your beloved machine has suddenly stopped working. There could be several reasons why your Nespresso Creatista isn’t lighting up. This guide will explain how you can quickly and efficiently troubleshoot your Nespresso Creatista buttons not lighting up.
Cause 1: Energy-Saving Mode
The Nespresso Creatista buttons may not illuminate due to the machine’s energy-saving feature, which helps your machine save electricity by turning it off after ten minutes of non-use.
Solution: Press The START/CANCEL Button

If energy-saving mode is the case, wake up your machine by pressing the START/CANCEL or SELECT button.
Cause 2: Faulty Power Socket
If the buttons of your Nespresso Creatista are not illuminating, it could be the faulty power socket, which is not supplying the right power supply required to turn on your machine.
Solution: Examine The Power Supply

Examine that the power socket you plugged into your machine is operational. Unplug the power cable and connect your machine to some other socket at your place to check if the issue is actually with the socket or if there is some other problem with your machine. If your machine turns on, then, indeed, the previous socket is faulty.
Cause3: Loose Connection
One of the causes is that you have not correctly plugged your machine into the power socket. It causes a loose connection, leading to an inappropriate power supply to your machine.
Solution: Connect The Cable Firmly

Your machine must receive sufficient electricity; therefore, connect the power cable securely to the power socket.
Cause4: Voltage Incompatibility
The buttons of your Nespresso Creatista are not illuminating because the power socket’s voltage supply differs from what the machine needs and the machine’s internal voltage may become unstable. This instability can prevent the machine from turning on.
Solution: Check The Voltage

The voltage required by your Nespresso Creatista is 220-240V. So, you must inspect the voltage of the power socket to which you connect your machine. Ensure the socket’s voltage is appropriate for your coffee machine. Otherwise, your Creatista machine will face a voltage fluctuation, and severe electrical damage can occur.
Cause 5: Blown Fuse
Your Nespresso Creatista buttons might not illuminate because the machine’s fuse has burnt. The fuse is for protecting your machine from any electrical short circuit. In that case, the power supply will be disrupted, and your machine cannot receive the power to switch on.
Solution: Replace The Fuse

You need to replace your machine’s fuse. Please ask a professional to replace the fuse rather than attempting it alone.
Final Solution: Contact Nespresso Customer Service:

If none of the above solutions helps, contact Nespresso customer service. They will provide additional troubleshooting tips or assist you with a warranty claim if necessary. For contact details, see the section “When To Seek Professional Help..”
Now, let’s move on to the other problems that Creatista users are facing and check out the potential causes and fixes for them.
Problem#2: Why Isn’t My Nespresso Creatista Making Steam?
Have you ever experienced the disappointment of craving a perfectly frothed cappuccino but discovered that your Nespresso Creatista isn’t making steam? It’s a situation that can leave you frustrated and unsure of what to do next. But here I have some good news; you can perform simple steps to resolve this issue and get your machine back up and running. Let’s dig into the causes of this problem and check out the possible solution listed below.
Cause 1: Dysfunctional Power Socket
Your Nespresso Creatista is not making steam because it is not switched on yet. But why is it not switched on? Because the power Socket is dysfunctional. It indicates that the outlet is not functioning properly and cannot supply electricity to the plugged-in device.
Solution: Inspect The Power Socket

Examine the power socket to which you have connected your machine to determine whether it is functional. If it’s not functional, connect your machine to some other socket. Then press the START/CANCEL or SELECT button to turn on your machine.
Cause2: Improper Connection
There might be a connectivity problem that is not letting your Nespresso Creatista turn on and start making steam. It will have a loose connection if you have not firmly inserted the power cable into the socket. It cannot receive the appropriate power supply, preventing your machine from turning on.
Solution: Plugin The Cable Firmly

Simply remove the cable from the socket and connect it again securely to attach it to the socket and receive the correct power supply.
Cause3: Voltage Issue
Your Nespresso Creatista is not producing steam because the voltage supply in the power socket is different from the voltage required for your machine.
Solution: Check The Voltage Compatibility

If this is the cause, then check your Nespresso Creatista’s user manual to determine the required voltage, which is 220-240V. Also, check the voltage of the socket in which you are plugging the power cable and ensure your machine receives the correct voltage supply.
Cause4: Blown Fuse
There can be an issue with the fuse of your machine. If the fuse has blown, your machine cannot start working as the fuse is the safety device that helps protect the machine from any electrical damage.
Solution: Inspect The Fuse

Examine the fuse in your machine. If the fuse blows, you need to change it, but it’s better to consult a professional rather than do it alone. For contact details, see the section “When To Seek Professional Help”.
After discussing the Nespresso Creatista’s issue regarding producing no steam, Let’s move towards another issue, “machine’s inability to dispense hot water”. I will discuss the potential causes of this issue and offer suggestions for how to fix it.
Problem#3: Why Is My Nespresso Creatista Not Dispensing Hot Water?
A delicious coffee from a Nespresso Creatista to start your day is a lovely experience, but what if one day you turn on your machine and try to run the cleaning cycle, but unexpectedly, nothing comes out? Frustrating, isn’t it? If you are wondering why my Nespresso Creatista is not dispensing hot water and how you can troubleshoot it, then your half problem is solved here as you have found the perfect guide. I will explain each cause of this problem in depth and how you can effectively fix this problem. So, let’s get started!
Cause 1: Non-Functional Power Socket
Your Nespresso Creatista is not dispensing hot water because it has no power. But why is that so? Because the power Socket is non-functional. It indicates that the outlet is not working properly and cannot supply electricity to the plugged-in device.
Solution: Examine The Power Socket

Inspect the power socket into which you have plugged your machine to determine whether it is functional. But if the socket is non-functional, connect your machine to a different socket. Then press the START/CANCEL or SELECT button to turn on your machine.
Cause 2: Loose Connection
A loose connection might be a problem which is not allowing your Nespresso Creatista to turn on and to start dispensing hot water. If you have not inserted the power cable securely into the socket, it will have a loose connection and cannot receive the correct power supply, preventing your machine from turning on.
Solution: Plugin The Cable Firmly

To fix this issue, reconnect the cable securely so that it gets attached to the socket and receives the correct power supply to switch on the machine.
Cause 3: Voltage Difference
Your Nespresso Creatista is not dispensing hot water because there is a difference in the voltage supply in the power socket and the voltage required for your machine. Thus, due to this voltage difference, your machine will not work properly.
Solution: Check The Voltage Difference

Check the voltage compatibility; the voltage required by your Nespresso Creatista is 220-240V. Also, check the voltage of the socket to which you connect the power cable. If there is a voltage difference, you have to fix this voltage difference. Ask the help of an electrician. So you can ensure your machine gets a consistent voltage supply.
Cause4: Blown Fuse
There is an issue with the fuse of your Nespresso Creatista. If the fuse is not working, it may have blown, and your machine cannot start working, as the fuse is the safety device that protects your machine from any electrical damage.
Solution: Inspect The Fuse

Inspect the fuse in your machine. If the fuse blows out, you need to replace it, but rather than doing it yourself, you must contact a professional.
We have just covered the issue “Nespresso Creatista not dispensing hot water”. Let’s move on to learn about another problem that users face: no coffee and no water coming out of Nespresso Creatista. Let’s get into the details of this problem; for the details, see the next section.
Problem#4: Why Is No Coffee And No Water Coming Out Of My Nespresso Creatista?
Have you ever tried to make coffee with your Nespresso Creatista only to discover that it isn’t dispensing any coffee or water? It can be a perplexing and disheartening experience, especially if you’re looking forward to your morning coffee fix. Don’t give up just yet, because here I will discuss the most common causes of this problem and provide solutions to them. So, let’s uncover the causes below so you can fix your Nespresso Creatista and enjoy your delicious coffee drinks again.
Cause1: Issue With The Water Tank
A common cause of why your Nespresso Creatista is not dispensing coffee or water is an empty water tank. Without water in the tank, your machine cannot start brewing and dispensing coffee. And cannot dispense water if you want to run a cleaning cycle.
Solution: Add Water Into the Tank

Have you checked the water level before you start brewing coffee? Do check the water tank and fill it with potable water if it is empty. And remember to check the water level every time you decide to brew a coffee to fulfill your cravings so you don’t have to encounter such a situation.
Cause2: Incorrect Position Of Water Tank
It could be the incorrectly positioned water tank which is not letting your Nespresso Creatista detect the presence of water and start brewing coffee.
Solution: Place The Water Tank Correctly

Remove the water tank from the back side of your machine and place it again while positioning it correctly on the base.
Cause3: Mineral Accumulation Inside The Machine
The buildup of mineral scale, formed by the dissolved minerals in the water, may hinder the flow of coffee and water. When water is heated, minerals precipitate and build up as a thick layer of mineral scale, which is hard and crusty and can restrict flow. Minerals from water can accumulate inside your Nespresso Creatista over time, reducing its performance.
Solution: Descale Your Machine

Descaling the machine removes mineral buildup from the inside of your machine and helps restore optimal performance. Descaling is typically accomplished by adding the descaling solution to the water tank and cycling the machine. For descaling instructions for your Nespresso Creatista, see ” How To Descale Your Nespresso Creatista” at the end of the problem section.
Problem#5: What Could Be The Cause Of Experiencing An Unusual Coffee Flow From Your Nespresso Creatista?
Are you facing an annoying issue in your Nespresso Creatista that the coffee flow isn’t as it should be? It’s either too slow or too fast, or inconsistent, ruining the formation of the perfect crema of your Espresso. If yes, don’t feel alone, as it is a common problem, and you can easily fix it with a few troubleshooting tips, which I will discuss in this guide. So, let’s dive in and figure out why the coffee flow is unusual in your Nespresso Creatista.
Cause 1: Empty Water Tank
The cause of the unusual coffee flow in your Nespresso Creatista Plus could be the empty water tank. If this is the case, your Nespresso Creatista cannot pull water to brew coffee which causes a slow and weak coffee flow.
Solution: Fill The Water Tank

If the water tank is empty, add potable water into the water tank. Remember to fill the water tank before using the coffee machine to brew your favorite drink.
Cause 2: Incorrect Position Of Water Tank
You are experiencing an unusual coffee flow because you have incorrectly positioned the water tank. It could affect the water supply to the machine, resulting in an irregular flow of coffee.
Solution: Position The Water Tank
Take a look at the water tank on the back of your machine. Remove it by pulling it upward and putting it back but ensure you position it correctly.
Cause 3: Mineral Scale
An unusual coffee flow in your Nespresso Creatista Plus may indicate mineral scale buildup inside the machine. It can cause blockages in the tubes and affect the flow of coffee if left unchecked and untreated.
Solution: Descale Your Machine

Descaling is the only procedure that may help remove mineral scales from your machine. For descaling instructions for your Nespresso Creatista, see ” How To Descale Your Nespresso Creatista” at the end of the problem section.
Although the unusual coffee flow of the Nespresso Creatista is a typical issue, it’s not the only one that might come up. In the next section, I’ll go into detail about the problem of your machine not brewing hot enough coffee and provide instructions on how to troubleshoot and fix the problem.
Problem#6: Why Is My Nespresso Creatista Not Brewing Hot Enough Coffee?
As you leave bed in the morning, a steaming coffee is the first thing you want. But when your Nespresso Creatista cannot deliver you a hot coffee, this must disappoint you. But don’t worry; I will help you escape this situation. There could be several reasons why your Nespresso Creatista isn’t brewing hot enough coffee. Let’s jump into the reasons below and troubleshoot this less-warm coffee problem.
Cause 1: Temperature Of Cup
Your cup temperature might be responsible for the problem that you are not getting hot Coffee. A vital aspect of the coffee brewing process is the cup’s temperature. When you use a cold cup, pouring hot coffee into it warms the cup up and lowers the temperature of the coffee because the heat from the coffee is transferred to the cup. As a result, your coffee might not be as hot as you prefer.
Solution: Preheat Your Cup

Considering heating your cup before brewing coffee helps you to keep it warm. There are a few approaches you may be able to apply.
- One method is to add hot water to the cup and let it remain for some minutes before adding coffee.
- Another option is rinsing the cup with boiling water.
Both methods will help keep your coffee at the ideal temperature.
Cause 2: Mineral Buildup On Heating Element
One probable cause of the problem of less hot coffee in your Nespresso Creatista is the mineral buildup on the heating element, compromising the machine’s ability to brew hot coffee. This problem results from the hard water you use in your machine to brew coffee, as it contains high concentrations of dissolved minerals which are not good for your machine. Because water heats, the minerals precipitate, form scale layers, and deposit in your machine’s internal tubes and heating element. Thereby affecting the heating element by preventing it from reaching the ideal temperature for your coffee.
Solution: Descale Your Machine

Descaling is an effective solution to remove the mineral deposits from the heating element of your machine. When the descaling solution runs through the machine, it dissolves the layers of mineral deposits and ensures it operates well and makes coffee with the right amount of warmth. For descaling instructions for your Nespresso Creatista, see the section at the end of the problem part called “How To Descale Your Nespresso Creatista” Also, it’s best to avoid using hard water in your machine.
By addressing these causes and implementing the appropriate solutions, you can ensure that your Nespresso Creatista brews the coffee at the optimal temperature every time, producing a rich and flavorful cup. Now, move on to the problem of the Nespresso Creatista capsule lever not closing and figure out its solution.
Problem#7: Why Does My Nespresso Creatista’s Capsule Lever Not Completely Close?
Is your Nespresso Creatista’s capsule lever not closing as you want to brew coffee? Something is obstructing the lever from closing, and I will explain the reason behind this half-opened lever and provide you with a possible fix to this problem. Below are the causes and some possible solutions to this problem.
Cause1: Capsule Stuck In Compartment
A capsule caught inside the capsule compartment is most likely the cause of the Nespresso Creatista’s lever issue. The capsule may be stuck, preventing the lever from fully closing it. It can happen for several reasons, including when a capsule is misaligned or damaged or when coffee grounds accumulate inside the compartment.
Solution: Check The Capsule Compartment

Open the lever and look inside the capsule compartment for a capsule that might be stuck inside.
NOTE: You must not insert your finger into the capsule compartment as it can result in burns.
Cause2: Used Capsule Container Is Full
If the used capsule container is full, it might be the root cause of the problem with the Nespresso Creatista’s lever not closing. The full container blocks the entry of a new capsule into the compartment and prevents the lever from closing fully.
Solution: Empty The Capsule Container

It is important to clear the capsule container of your machine to solve this issue. You can do this by removing the capsule container and disposing of any used capsules.
In addition to the lever not closing completely, I will explain another issue: the leakage issue in your Nespresso Creatista. Let’s jump to the next section!
Problem#8: Why Is My Nespresso Creatista Leaking?
You just finished brewing your favorite coffee and noticed water on your countertop from your Nespresso Creatista. It feels like your coffee machine is leaking from somewhere. Don’t let the leaky machine ruin your coffee experience, as I have the solutions for you so you no longer have to face leakage issues. Read on to discover why your Nespresso Creatista leaks and how to fix it.
Cause1: Overfilled Drip Tray
The leakage problem is caused by an overfilled drip tray, which is to catch spilled liquid throughout the brewing process. It can happen when the cup is not properly positioned, causing the coffee to spill. The drip tray has a specific capacity to store spilled liquid, and if it has filled beyond its capacity, it causes leakage. As a result, the extra liquid leaks out of your machine.
Solution: Empty The Drip Tray

Check the drip tray, and if the drip tray is full, remove it by pulling it outward to drain the excess liquid. To avoid any potential overflow and consequent leakage, check the drip tray occasionally so it does not fill beyond capacity.
Cause2: Incorrect Insertion Of Drip Tray
An incorrectly placed drip tray is another common source of water leaks in your Nespresso Creatista. Water can leak from the machine if the drip tray is not inserted firmly.
Solution: Place The Drip Tray Securely

To solve this leakage issue, insert the drip tray correctly and lock it into place before you start brewing coffee. By securely placing the drip tray, you can avoid the risk of leaks caused by an incorrectly positioned drip tray.
By reading the above-mentioned solutions, you have gained knowledge about the leakage issue. Let’s head on to the next section, so you must know how to tackle the issue ’’No coffee flows out, and water goes directly into the capsule bucket’’ in your Nespresso Creatista machine, in case you encounter this problem in the future.
Problem#9: Why Is No Coffee Flows Out Of My Nespresso Creatista, And Water Goes Directly Into The Capsule Bucket?
Are you eagerly staring at your Nespresso Creatista so you can observe the first glimpse of your favorite drink flowing out? But all you see is water going directly into the capsule bucket rather than into the capsule to brew your coffee. Frustrating, right? But you have to relax first, as this issue is fixable, and I will get you out of this problem with a few tips and tricks. But first, you check on the causes below.
Cause1: Capsule Blocked In The Capsule Compartment
No coffee flows out of your Nespresso Creatista, and water goes directly into the capsule bucket because a capsule is blocking the passageway (inside the capsule compartment ), preventing water from entering the cup. What happens is that the water skips the capsule and instead collects in the capsule bucket.
Solution: Remove The Blocked Capsule

Clearing the blockage is the solution to this problem. Open the lever of your Nespresso Creatista to look for a blockage. If a capsule is stuck inside the compartment, remove it from there.
NOTE: To avoid burning yourself, please avoid inserting your finger into the capsule compartment.
Cause2: Lever Is Not Closed
Another reason why your Nespresso Creatista is not dispensing coffee and the water goes directly into the capsule bucket is a partially closed lever. The lever closure is the mechanism that allows the piercing of the capsule and water flow to pass through the capsule. And If the lever is not closed, water will not pass through the capsule; instead, it is redirected into the bucket beneath the capsule, and the machine will not brew and dispense coffee.
Solution: Close The Lever

To properly close it, pull the lever downward. It will enable the water to pass through the coffee capsule and into the cup; that’s how you can resolve this issue.
Please contact the Nespresso Club for more help if the problem with no coffee flow doesn’t go away after attempting the previously advised fixes. For contact details, see the section ‘’When To Seek Professional Help.’’
As you move forward, you will find out the causes and solutions of the dim hard-to-read display issue of your Nespresso Creatista machine, which is a common issue. So, let’s delve into this!
Problem#10: Why Is The Color Display Dim And Hard To Read On My Nespresso Creatista?
Having difficulty reading your Nespresso Creatista screen because the display color is dim? It’s annoying when you cannot read the important information. Your machine display must be clear and readable so you can operate it efficiently. Let’s explore the reason for a dim hard-to-read display and what you can do to make it bright and readable.
Cause: Energy-Saving Mode
The color display of your Nespresso Creatista is dim because it is in energy-saving mode. When you don’t use your Creatista machine for more than two minutes, it automatically enters energy-saving mode to switch to save energy. As a result, the display may appear lighter than usual and become harder to read.
Solution#1: Press The START/CANCEL Button

To get your machine in operating mode, push the START/CANCEL button, and the display will turn on. Doing so will switch your machine from energy-saving mode to active mode, and the display’s brightness will return to normal.
Solution#2: Increase The Brightness Level

If your machine isn’t in energy-saving mode, but you feel the display light is still too dim, you can increase the brightness level on your Nespresso Creatista.
- First, reach the “Settings” by turning the dial, then enter the settings by pressing the SELECT button.
- Choose the screen brightness option from the menu. The display will show three brightness levels: low, mid, and high.
- Rotate the dial to the high brightness setting to make the display more readable and clear.
The dim, hard-to-read display is a common problem of Nespresso Creatista, but just like this: ”Buttons flashing” is the most common problem users often encounter in their brewing journey. And in the next part, I will provide you with troubleshooting instructions to address and fix this problem.
Problem#11: Why Are The Buttons On My Nespresso Creatista Flashing?
If the buttons on your Nespresso Creatista are flashing, you might be curious why they are flashing. Each flashing light on your coffee maker’s buttons wants to deliver a specific message, so you must pay attention to each flashing light. And with this guide, I have made it easy for you to understand the message behind blinking buttons. Keep reading to discover the cause of your Nespresso Creatista Plus’s flashing and how to solve it.
Cause1: Empty Water Tank
Your Nespresso Creatista’s flashing buttons often mean that the water reservoir is either empty or low on water. This safety measure keeps the machine from operating without water, which could harm or present a risk.
Solution: Fill The Water Tank

Check the water tank of your Nespresso Creatista; if the water level is low or the tank is empty, fill it immediately. And to prevent any issues or damage to your Creatista machine, it is crucial to ensure the water reservoir is always filled with enough water before usage.
Cause2: Mineral Scale Accumulation
Another cause behind the flashing buttons of your Nespresso Creatista is the accumulation of mineral scale inside. Mineral scales that develop over time might clog the machine’s interior components and restrict proper operation.
Solution: Descale Your Machine

Descaling is the easiest way to remove the mineral scale from your machine. The descaling solution dissolves the layers of mineral scale and helps enhance the efficiency of your machine. For descaling instructions for your Nespresso Creatista, see the topic at the end of the problem section, “How To Descale Your Nespresso Creatista”.
Cause 3: Blockage In The Steam Tip
The buttons of your Nespresso Creatista are flashing due to the blockage in the tip of the steam wand. It usually happens because you have not cleaned the steam wand after making a milk-based drink, and excess milk dries up and clogs the tip of the steam wand. Hence the blockage develops in the steam wand tip.
Solution: Clean The Steam Wand Tip

To fix this problem, examine the steam wand tip for any blockage. If there is a blockage, utilize the cleaning tool’s pin to clean it. It is better to perform your machine’s clean steam wand cycle.
For cleaning steps of the steam wand tip, see the topic named, “How To Clean The Steam Wand Tip Of Your Nespresso Creatista” at the end of the problem section. You can avoid the blockage issue by cleaning the steam wand every month.
As you have finished reading the above solutions to fix the button flashing issue? Then you must check out the next section, where you may learn about the reasons and solutions for another most typical issue ‘’Nespresso Creatista displaying a Descale now alert.’’
Problem#12: Why Is My Nespresso Creatista Displaying A Descale Now Alert?
If you love brewing coffee with your Nespresso Creatista every day, you must be aware of how important it is to maintain it so you can savor a delicious cup all the time. Thankfully, your Nespresso Creatista has this feature to communicate with the user by displaying an alert. So, if you see a descaling alert on display, scroll down to determine what causes it to appear on your machine and what necessary measures are required to eliminate it.
Cause: Mineral Scale Accumulation
Your Nespresso Creatista is displaying a ‘’Descale Now’’ alert because the mineral scale has accumulated on the internal parts of your machine. This mineral scale develops when you use hard water in your machine to brew coffee with high mineral content; as the water gets heated, the mineral starts to precipitate and form scale layers. As time passes, these scales turn into hard layers and start affecting the internal parts of your machine. Once the mineral scale obstructs the machine, your Nespresso Creatista will detect the mineral scale and display the descale now alert on the screen.
Solution: Descale Your Nespresso Creatista

It’s time to pause your coffee brewing routine and descale your Nespresso Creatista to fix this ‘’Descale Now’’ alert. For descaling instructions for your Nespresso Creatista, see the section “How To Descale Your Nespresso Creatista’’ at the end of the problem section.
After discussing the “Descale Now Alert” issue of your Nespresso Creatista Now, I want you to look into the next section to get information on the “Fill water tank” alert, another frequent problem the Nespresso Creatista users may experience. Let’s check it out!
Problem#13: Why Does The “Fill Water Tank” Alert Persist On The Display Of My Nespresso Creatista Even The Water Tank Is Full?
Are you trying to brew a coffee in your Nespresso Creatista machine, but the “Fill Water Tank” keeps showing on the display even though the water tank is full? Dealing with such problems might be frustrating, especially when you require your caffeine fix. I will tell you what is causing this problem and how you can eliminate this alert. Read it out below.
Cause: Incorrect Position Of Water Tank
The cause behind the “fill water tank” alert is the position of the water tank, which is incorrect; the machine may not be able to detect the water tank even though it is full. If your Nespresso Creatista cannot detect the water tank, it will display the “fill water tank” alert.
Solution: Position The Water Tank Correctly

You need to correct the water tank position. Simply take the water tank out of the machine and reposition it correctly. Make sure the water tank is positioned correctly in the machine so that it can be recognized. Once you reposition the tank, the “fill water tank” signal will go away.
I hope repositioning the water tank helps you resolve the ‘’Fill Water Tank’’ alert. In the subsequent section, I will tell you how to tackle an ‘’Error Message’’ of your Nespresso Creatista. So, Let’s delve into the causes below.
Problem#14: Why Is My Nespresso Creatista Showing An Error Message On The Display?
Is your Nespresso Creatista machine showing an error message on the display? And you desperately need help because you have different scenarios about this error message? Keep calm; I will tell you the reason behind this error alert. Scroll down to read out the cause and the practical solution to this problem.
Cause: Major Fault In Your Nespresso Creatista
Your Nespresso Creatista’s display showing an error message means a major issue has occurred in the machine. A number of mechanical difficulties, including pump system failure, a damaged heating element, or electrical issues like a broken power cable or blown fuse, could be the reasons for this.
Solution: Contact Nespresso Club

If you are worried about your machine, think about what you need to do next. Don’t worry; Nespresso is always available to rescue you. You just have to Call the Nespresso Club to find the nearby service center or go to Nespresso.com to resolve any technical problems with your Nespresso Creatista. For contact details, see the section “When To Seek Professional Help.”
Get ready, my dear reader. In the upcoming section, I will uncover the causes of another prevalent issue of your Nespresso Creatista not operating even though it is powered on. Let’s move forward and learn the causes of this problem and how to handle it expertly.
Problem#15: Why Is My Nespresso Creatista Refuses To Operate But Powered On?
When you have a Nespresso Creatista at home, you live your life to the fullest by brewing delicious drinks. But when it starts malfunctioning, just like this annoying issue when it is powered on but refuses to operate, all your happiness turns into sadness. But I am here to lift your mood as I will tell you what is causing your Creatista to behave this way and how to get your machine running again. So, let’s get started!
Cause: Your Nespresso Creatista Is Overheating
Your Nespresso Creatista machine is not running even though it is turned on, which means it is not functioning as it should. The possibility is that the machine might get overheated as a result of extensive use. When a machine undergoes extensive use, it may overheat and trigger a safety function that causes it to cease function. This feature protects against overheating and damaging the machine’s internal parts.
Solution: Switch Off The Machine

Hold the START/CANCEL button for two seconds to turn the machine off. After that, wait an hour and let the machine rest so it cools down. Then, press the START or SELECT button to switch on the machine.
Giving some rest to your Nespresso Creatista by switching it off may help you fix the non-functional machine issue. And I want you to be aware of all the problems with your Nespresso Creatista, so you must check the upcoming section, where I will discuss the issue of the machine turning off automatically and how you can resolve this issue.
Problem#16: Why Is My Nespresso Creatista Turns To Off Mode Automatically?
Are you having trouble using your Nespresso Creatista machine because it often turns off automatically, and you can’t identify why it’s happening? If you have false thoughts in your mind, give a break to your thoughts and keep reading this guide to figure out the cause behind this auto-turn-off of your machine.
Cause: Energy-Saving Mode
If your Nespresso Creatista Plus turns off automatically, it could be because it has been inactive for more than 10 minutes and entered the energy-saving mode. Your Nespresso Creatista features an energy-saving option that assists with energy conservation by preventing the machine from staying ON unnecessarily. If you leave it on, your machine could sustain significant harm because it could overheat and experience an electrical short circuit.
Solution: Press The START/CANCEL Button

To reactivate the machine and start brewing your coffee, press the START/CANCEL or SELECT button.
Besides the Auto-turn-off issue, you may encounter many other problems in your Nespresso Creatista, including the machine failing to initiate the milk steam cycle. Scroll down to learn the cause of this problem and to get expert guidance on how to fix it.
Problem#17: Why Doesn’t My Nespresso Creatista Start The Milk Steam Cycle?
Are you trying to start the milk steam cycle in your Nespresso Creatista so you can savor a creamy Cappuccino? But you are confusingly staring at your Creatista machine because you are unaware of why your Creatista machine is not starting the steam cycle. There must be a genuine cause behind this issue, and I am here to assist you in troubleshooting this problem, but first, you must know the cause of it. Let’s take a look at the causes below.
Cause1: Water Tank Issue
One potential reason is that the water tank might not be in the right place or empty. If the water tank is not in the right spot, your machine may be unable to detect the water tank to produce steam to heat and froth the milk. And if the water tank is empty, there won’t be enough water to produce steam.
Solution: Check The Water Tank

- If the water tank is not in the right place, reposition it and make sure it is sitting firmly.
- Fill the water tank with potable water if it is empty.
Once you fill and reposition the water tank, try starting the milk steam cycle.
Cause2: Steam Wand Blockage
Your Nespresso Creatista is not starting the milk steam cycle because there is a blockage in the steam wand holes. Tiny holes in the steam wand’s tip release steam to froth milk. The steam may not be able to travel through these openings if dried milk residues accumulate there, which would prevent the milk from foaming.
Solution: Unblock The Steam Wand Tip
If the cause is steam wand tip blockage stopping the milk steam cycle from starting, then you must check on it; if it has blockage with milk residues, unblock it using a pin-cleaning tool. You must follow the correct protocol for cleaning the steam wand tip. For cleaning steps of the steam wand tip, see the section at the end of the problem section, “How To Clean The Steam Wand Of Your Nespresso Creatista?”
Next, I will discuss the most important issue of your Nespresso Creatista machine, ‘’Froth Quality Not Upto Standard. So, let’s dive into the causes and fixes to get the ideal froth.
Problem#18: Why Is The Froth Quality In My Nespresso Creatista Not Up To Standard?
If you love milk-based beverages, you must know a wonderful cappuccino or latte macchiato requires the ideal froth. However, if your Nespresso Creatista isn’t providing the desired creamy texture, it can be frustrating. But there are several reasons why this issue might occur in your machine and what steps you can take to enhance the froth quality. Let’s check out the reasons below!
Cause 1: Inappropriate Milk Quality
If you notice that your Nespresso Creatista isn’t creating the right kind of froth for your milk drink, it may be because the quality of the milk you’re using is not fresh. The quality of your milk has a big impact on how frothy it is, and using milk that isn’t fresh might lead to less-than-ideal outcomes. How does the milk quality affect the milk frothiness? If you use a pack of milk lying in your fridge for several days, its protein content decreases over time when it is not in use, which is necessary for creating and maintaining a perfect creamy milk froth.
Solution#1: Use Skimmed Milk

If you want your Cappuccino or Latte Macchiato to have the ideal froth, work on the milk quality you use in your Nespresso Creatista. Skimmed and semi-skimmed milk are the most suitable options, which have a high concentration of protein and no fat and are great for milk foaming. The milk’s proteins form a network that aids in stabilizing the froth, giving the froth a desired creamy and smooth texture.
Solution#2: Use A Newly Opened Pack Of Milk
When frothing milk for your drinks, use only freshly opened milk for the best results. The milk pack that has just opened has a larger protein level, essential for producing a stable and gratifying foam texture.
Cause2: Inappropriate Milk Temperature
You are not getting the perfect creamy froth from your Nespresso Creatista because your milk isn’t at the right temperature. Such as, if milk is at room temperature or warm, it cannot provide you with the desired creamy texture.
Solution: Use Cold Milk
It is better to use cold milk because it is quicker to froth and will produce the nicest froth for your coffee. Air bubbles are more effectively absorbed into cold milk during frothing, giving the beverage a creamy, velvety texture. For milk frothing, the ideal temperature range is between 4-6°C (39-43°F). Warm milk is not recommended for frothing because the texture of your froth will become less stable and less attractive.
Cause3: Your Creatista Is Set For Less Froth
The froth settings on your Nespresso Creatista could cause the less creamy froth quality you’re experiencing. You might have programmed your Creatista to a less froth level, giving your Cappuccino or Latte Macchiato undesirable froth.
Solution: Change The Froth Level

Check the milk froth settings of your Nespresso Creatista. Choose any milk-based recipe; your Nespresso Creatista will present three options. One is milk froth; rotate the dial to change the froth level according to your preference.
Cause4: Different Milk Jug
If your Nespresso Creatista isn’t producing an ideal froth, the milk jug you are using may be responsible. You are not using the jug provided with your machine, and due to variations in the milk jug size, shape, and material, your machine may lead to varied frothing results.
Solution: Use the Breville milk jug

Use the Breville milk jug that came with your Nespresso Creatista machine; it will enhance the froth quality of your milk drink. This jug aims to create a creamy texture and perfect quality of the froth in a way that other milk jugs might not be able to achieve.
Cause 5: Dirty Steam Wand Tip
A dirty Steam Wand tip can cause poor froth quality in the Nespresso Creatista machine. The tiny holes at the steam wand’s tip that release steam during milk frothing can get clogged with dried milk residues, which makes it difficult to create a perfect froth, and that’s why you are not getting a perfect creamy froth on your milk drink.
Solution: Clean The Steam Wand After Each Use

You need to clean the steam wand of your Nespresso Creatista to get rid of the poor textured froth issue. For cleaning steps of the steam wand, see the section “How To Clean The Steam Wand Tip Of Your Nespresso Creatista” at the end of the problem section.
Following the solutions mentioned earlier can fix the poor froth quality issue in your Nespresso Creatista. Next, I am going to uncover the causes and solutions of the too-wet steam issue of your Creatista machine. Let’s move forward to learn the potential fixes.
Problem#19: What Is Causing My Nespresso Creatista’s Steam To Be Too Wet?
If you notice that for a few days, your Nespresso Creatista creates a froth that is watery and thin rather than rich and creamy, it may indicate the steam is extremely wet. But what is causing the steam to be too wet, and how can you resolve this problem? Well, there are various reasons for it, and to resolve this issue, you should be aware of them. Let’s dive into the details below to troubleshoot the problem.
Cause1: Using Warm Water
The steam in your Nespresso Creatista is too wet because you are using warm water in your machine. The steam produced by warm water results in a watery and less stable froth because water is a component of steam, and when you heat milk with warm water, it means you are adding too much water. Thus too much of it will make milk froth less creamy. Also, milk proteins get denatured while heating and cannot form a network to stabilize the froth.
Solution: Use Cold Water For Frothing

To solve the problem of too much steam in your Nespresso Creatista, use cold water instead of warm water. Cold water takes time to produce steam allowing the milk to froth perfectly, resulting in an ideal creamy textured froth. So, always use fresh, chilled milk for frothing.
Link
Cause 2: Use Of Highly Filtered, Demineralised, Or Distilled Water
The cause of extremely wet steam in your Nespresso Creatista is the water you use for steaming the milk for frothing. Highly filtered, demineralized, or distilled water is not good for frothing as they do not contain minerals necessary for creating stable froth.
Solution: Use Fresh, Potable Water

To fix the steam issue, using potable water instead of distilled water balances the mineral concentration and can help produce a more smooth and more stable foam. For the milk to maintain its shape and texture during steaming, the minerals in the water help to support the protein structure of the milk.
Link
We have just covered the too-wet steam issue of your Nespresso Creatista. Let me grab your attention to another common problem, which is the milk-overflowing problem you will surely encounter in your brewing journey. Let’s check out the cause and solution below.
Problem#20: Why Is The Milk Overflowing While Frothing In My Nespresso Creatista?
Are you tired of cleaning the mess caused by the milk overflowing issue in your Nespresso Creatista? It could be happening because, for some reason, you might be doing something wrong that you might be unaware of. But don’t worry; I will assist you in determining the cause of the milk overflowing while frothing in your Nespresso Creatista and what you can do to fix it. Let’s check out some of the causes below and some practical advice for avoiding this milk spillage.
Cause1: Too Much Milk In The Jug
The cause behind overflowing milk in your Nespresso Creatista is the inappropriate milk volume in the milk jug while frothing. Adding too much milk in the jug, which is above the recommended level, causes it to overflow from the jug while frothing and make a mess at your place.
Solution: Add Appropriate Milk Volume

To stop overflowing:
- Decrease the milk volume from the jug.
- Remember that the quantity of milk and froth required can change based on the kind of milk you use.
- Always fill up the Breville jug with the appropriate volume of milk.
The maximum and minimum fill levels are marked on both the inside and outside of the Breville jug. And the next time you froth milk for your Cappuccino or Latte Macchiato, ensure you have not overfilled the milk jug.
We have just covered the overflowing problem of your Nespresso Creatista; let’s walk over to the following problem: Milk temperature is too hot. In the upcoming paragraph, I will explain how to keep your machine at the right milk temperature.
Problem#21: Why Is The Milk Temperature Too Hot In My Nespresso Creatista?
Nothing can match the joy of a creamy froth topping on your favorite milk drink, but it can burn your tongue if the milk temperature is too high. Experiencing this cannot be very pleasant. But don’t panic; I’ll explain to you what is causing the milk temperature in your Nespresso Creatista to be too hot and provide you with solutions to troubleshoot this issue. Here are some potential reasons and the recommended solutions to them.
Cause1: Different Milk Jug
The milk temperature in your Nespresso Creatista is too hot because you are using a milk jug other than the one that came with your Nespresso Creatista machine.
Solution: Use The Breville Jug

To fix the milk temperature issue, use the Breville milk jug manufactured especially for Nespresso Creatista. It features a special function that interacts with the machine’s temperature sensor to ensure you heat the milk to the right temperature.
Cause2: Incorrect Position Of Milk Jug
A possible reason behind too hot milk in your Nespresso Creatista is the incorrect position of the milk jug on the temperature sensor. If the milk jug is placed incorrectly on the sensor, which could result in an incorrect temperature reading, and the milk may get too hot.
Solution: Position The Milk Jug Correctly

You have to correct the position of the milk jug so that the temperature sensor can keep track of the milk’s temperature during frothing. It guarantees that the milk reaches an appropriate temperature without overheating or burning.
Cause 3: Temperature Sensor Is Dirty
Another possible cause of too hot milk temperature in your Nespresso Creatista is the dirty temperature sensor on the drip tray. Sometimes milk overflows from the jug. If you don’t clean it, the milk residues accumulate on the sensor and interfere with its ability to detect the milk temperature in the jug accurately.
Solution: Clean The Temperature Sensor
You need to look at the temperature sensor on the drip tray and ensure it is clear of any buildup. If the sensor has milk residues, use a damp cloth to clean it.
Cause 4: High-Temperature Settings
If the milk temperature is too hot in your Nespresso Creatista, a potential explanation could be that your machine’s temperature settings are too high. That’s why the milk heats up excessively during the frothing process.
Solution: Decrease The Milk Temperature

To fix the problem, check your machine’s temperature settings to ensure they are at the right temperature for the milk you want to froth for your milk recipe. To adjust the milk temperature, follow the steps below.
- Choose any milk-based drink on your Nespresso Creatista. Current drink parameters, including coffee volume, milk temperature, and milk texture, will be shown on the display.
- Rotate the SELECT dial to the Milk Temperature option to change the milk temperature.
- When you reach the temperature option, rotate the dial to decrease (or increase) the temperature of your drink.
- Press the SELECT dial to save and exit the setting OR push the START/CANCEL button to exit without saving the newly changed setting.
NOTE: You can program the milk temperature from 55 to 75 °C / 131 to 167 °F.
Related: How to change the temperature.
Like this issue of milk temperature being too hot, your Nespresso Creatista also experiences a not hot enough milk temperature. And In the next paragraph, I will discuss why it usually happens and how to get the right temperature. Let’s dig into the details below!
Problem#22: Why Is The Milk Temperature Not Hot Enough In My Nespresso Creatista?
Are you disappointed with the milk temperature not being hot enough in your Nespresso Creatista? You must be wondering why it keeps happening to you. Well, It’s a common problem you can fix, so don’t worry. I will discuss the causes of low milk temperature in this guide and offer ways to troubleshoot this issue. So let’s get into this and create your favorite Latte Macchiato at the right temperature.
Cause1: Wrong Milk Temperature Settings
The milk in your Nespresso Creatista is not hot enough; it could be because your machine’s temperature settings are too low. If the temperature settings are too low, the milk will be heated at a low temperature, resulting in less warm milk and an unpleasant cup of coffee.
Solution: Change The Milk Temperature Settings

You can fix this issue by raising the milk’s temperature during frothing by changing the Nespresso Creatista milk temperature settings. Changing the temperature settings to the appropriate level guarantees that the milk temperature is correct during frothing. To change the milk temperature settings, see the section, “Decrease the Milk Temperature” under “Problem 21 (Cause 4)”.
Link
Cause2: Incompatible Milk Jug
If you are getting your milk drink that is not hot enough, It may be because you are using a milk jug for frothing incompatible with your Nespresso Creatista and cannot communicate with the temperature sensor. That’s why you are unable to reach the desired milk temperature.
Solution: Use The Breville Jug
To fix this problem, Use the Breville milk jug that came with your Nespresso Creatista to froth milk. It ensures that the jug and the machine’s temperature sensor communicate effectively, giving you the ideal milk temperature for your coffee.
Cause 3: Incorrect Placement Of Milk Jug
The cause of your Nespresso Creatista’s milk not being hot enough is the incorrect placement of the milk jug on the temperature sensor.
Solution: Place The Milk Jug Correctly

The milk jug must be placed correctly on the temperature sensor during frothing, which enables the sensor to measure its temperature accurately. So the milk will be warm enough for your coffee.
Cause 4: Steam Wand’s Tip Blockage
One potential reason why the milk in your Nespresso Creatista isn’t hot enough is because of a blockage at the steam wand’s tip. To froth milk, steam is released from the steam wand’s tip. The path of steam may be obstructed at the tip if there is a blockage, resulting in less warm milk.
Solution: Clear The Steam Wand Tip Blockage
Examine the steam wand for any obstructions. If you notice milk residues blocking the steam wand, you must clean the steam wand’s tip. After cleaning the tip, the steam flow will increase, giving you the ideal milk temperature and froth for your coffee. For cleaning steps of the steam wand tip, see the section named “How To Clean The Steam Wand Tip Of Your Nespresso Creatista” at the end of the problem section.
Cause 5: Cold Cup
The temperature of the cup you use to brew your coffee may be to blame if you notice that your Nespresso Creatista isn’t producing hot milk. When you pour hot milk into a cold one, the heat from the milk will pass to the cup, causing the milk to cool down more quickly than it would in a warm cup.
Solution: Preheat Your Cup

Preheating your cup will help the milk stay hotter for longer, improving the taste of your milk drink. You can preheat your cup by pouring hot water for a few minutes, drain it, pour your freshly brewed cup, and top it up with frothed milk.
Following the above-mentioned solutions will help you troubleshoot the not hot enough milk temperature issue of Nespresso Creatista. Next, I will discuss the cause and solution of Nespresso Creatista displaying the lower wand alert issue.
Problem#23: Why Is My Nespresso Creatista Displaying The Lower Wand Alert?
With your Nespresso Creatista, you can enjoy a café-like experience in the comfort of your own home. However, if a lower wand notice appears on your machine and you’re not sure what it means, then don’t worry. I will explain the reason behind this alert and how to handle this situation. There is a specific reason why the lower wand alert is displayed; let’s check it out below.
Cause: Steam Wand Not Lowered
This alert relates to your Nespresso Creatista’s frothing mechanism. The steam wand in your machine is primarily in charge of frothing the milk and creating a creamy texture for any milk-based recipe. And you are seeing this alert because the steam wand is not in a lower position.
Solution: Lower The Steam Wand
Lower the steam wand to its correct position to get rid of this alert. For the machine to operate correctly and to stop receiving any more notifications, make sure you lower the steam wand completely.
Lowering the steam wand will fix the steam wand alert issue, and now I will take you into detail about another problem with Nespresso Creatista displaying the clean steam wand alert. Let’s get started!
Problem#24: Why Is My Nespresso Creatista Displaying The Clean Steam Wand Alert?
Does your Nespresso Creatista display the clean steam wand alert? You might be wondering what this alert implies and how to get rid of it. I’ll explain what this alert implies and how to resolve it. But If you are a frequent coffee drinker, you must understand the need to keep your coffee maker in good working order to have a flawless cup consistently. Let’s not wait any longer; check out the cause and find its solution below.
Cause: Steam Wand Tip Blockage
There is a blockage of milk residues in the steam wand tip of your Nespresso Creatista machine, which is why you are receiving the clean steam wand alert on display. If you don’t clean the steam wand after making each milk recipe, milk residues may build up inside the wand, blocking it and lowering the milk froth quality.
Solution: Clean The Steam Wand Tip
To fix the clean steam wand alert, you don’t have to go into the technicalities of your machine. You have to clear the blockage of the steam wand tip. Cleaning the steam wand tip of your Nespresso Creatista can restore the magic to your milk froth, and the alert will disappear from the display. For cleaning steps of the steam wand tip, see the section at the end of the problem section, “How To Clean The Steam Wand Tip Of Your Nespresso Creatista?”
How To Descale Your Nespresso Creatista?
To keep your Nespresso Creatista free from mineral scale, follow the below descaling steps.
- First, Rotate the dial to select maintenance on display, then choose DESCALE and follow the on-screen prompts. Descaling takes approximately fifteen minutes.
- Open the lever to remove any used capsule, then close it.
- Turn the SELECT dial to the next step.
- Remove and empty the capsule bucket, water tank, and drip tray.
- Fill the water tank to the descaling mark and add 100 ml of the descaling solution.
- Place the water tank back in position, and ensure you insert the drip tray and capsule bucket correctly.
- Put a one-liter container beneath the steam wand and coffee outlet.
- Press the START/CANCEL button to activate the descaling process. Once the descaling cycle ends, drain the descaling water from the container.
- Empty and rinse the water tank thoroughly, then fill it with potable water.
- Place a one-liter container under the coffee outlet and steam wand.
- Push the START/CANCEL button to begin the rinsing cycle. ‘’Rinsing is in progress’’ will be displayed on the screen.
- Once the cycle finishes, drain the liquid from the container. Also, empty the drip tray and capsule bucket container.
- Place the container back in its position beneath the coffee outlet and steam wand. And repeat the rinsing process by pushing the START/CANCEL button.
- Fill the water tank with potable water. The descaling process finishes here.
Link
How To Clean The Steam Wand Tip Of Your Nespresso Creatista?
Here is an in-depth guide for cleaning the steam wand tip of your Nespresso Creatista so it can continue to produce perfect froth.
- First, you have to select the maintenance setting of your machine. Turn the dial to choose maintenance on display.
- Then turn the dial to Clean Steam Wand and press the SELECT dial to confirm and follow the steps on the screen, which I have mentioned below. The entire cleaning process takes ten minutes.
- Remove the water tank to take the cleaning tool out.
- Turn the SELECT dial to the next step. Unscrew the steam wand tip, and move the tip counterclockwise to detach it.
- Use the cleaning tool’s pin to unclog each steam wand tip hole.
- Remove the O-ring of the tip and put it aside.
- Now, use the hole of the cleaning tool to remove the cap of the steam tip. Examine the seal for any damage.
- Remove the milk residues by rinsing the cap and tip of the steam wand, then wipe it with a clean, dry cloth.
- Reassemble the steam wand tip and tighten it firmly with the hole of the cleaning tool.
- Put the O-ring back on the tip of the steam wand.
- Attach the steam tip to the steam wand. Place the cleaning tool back.
Link
Maintenance Tips
Regular maintenance is essential to keep your Nespresso Creatista in good working condition. Neglecting to clean and maintain your machine can cause problems and decrease lifespan. Here are the simple tips which will help you keep your machine clean and functioning optimally:
- Clean your milk frother after every use: Wipe the frothing wand with a damp cloth to remove any milk residue. If there is significant buildup, soak the wand in warm soapy water for a few minutes before wiping it down.
- Clean the coffee pod holder: Remove the pod holder and rinse it with warm water after every use. Use the cleaning tool to remove any buildup around the edges.
- Descale your machine: It is essential to keep it free of mineral buildup every three months. Follow the manufacturer’s instructions for descaling using the descaling solution.
- Replace your water filter: If your Nespresso Creatista has a filter, replace it regularly as the user manual directs.
Through these simple maintenance tips, you may prevent future problems from arising and keep your Nespresso Creatista in excellent working condition. If you regularly maintain your coffee machine, you enjoy delicious, barista-quality coffee daily.
When to Seek Professional Help
In some cases, fixing your Nespresso Creatista may require the help of a professional. Here are some situations where you must consider seeking professional help:
- The machine is still not working after attempting the troubleshooting steps provided.
- You are not comfortable or feel confident in your ability to fix the problem.
- The machine is still under warranty, and attempting to fix it yourself could void the warranty.
To Contact Nespresso Customer Service for assistance, Call Nespresso Australia: 1800 623 033 or New Zealand: 0800 234 579.
Also, there are many reputable repair services in the USA that specialize in Nespresso Creatista espresso machines. Here are a few to consider:
- Nespresso USA: You can contact Nespresso USA’s customer service team at 1-800-562-1465 or visit their website at www.nespresso.com to find a repair service near you.
- Breville USA: Breville USA offers repair services for Nespresso Creatista machines. You can contact their customer support team at 1-866-273-8455 or visit their website at www.breville.com/us/en/support to schedule a repair.
- Authorized Service Center: You can also find a Nespresso authorized service center near you by visiting the Nespresso website and searching for service centers in your area.
By seeking professional help when necessary, you can ensure that your Nespresso Creatista is fixed correctly and continues to provide you with delicious coffee for years to come.
Conclusion
By following the troubleshooting steps and maintenance tips outlined in this article, you should know how to fix common issues with your Nespresso Creatista espresso machine. Always unplug the machine and take necessary precautions before attempting any repairs.
Even though getting professional assistance is always an option, we encourage you to troubleshoot the issues first. With extra effort and the right instruments, you can fix the problem and save money.
Maintaining your Nespresso Creatista is also necessary to keep it in good functioning order. Through the simple tips we provided, you can prevent future problems and prolong the life of your machine.
I hope this guide will help you address any issues you may have had with your Nespresso Creatista. Remember, with patience and some basic know-how, you can enjoy delicious coffee from your machine for years.
FAQs
Why Has My Nespresso Coffee Machine Stopped Working?
There could be several reasons why your Nespresso coffee machine has stopped working. Some common reasons include a clogged or dirty nozzle, a faulty water pump, a malfunctioning heating element, or limescale build-up. These issues result in a lack of water or pressure, preventing the machine from brewing coffee properly.
Another possible reason for your Nespresso machine not working is an electrical issue or a faulty power cord. Sometimes, the machine may have simply overheated or become damaged due to wear and tear.
To determine the cause, check the machine’s power supply, water tank, and other components for any visible signs of damage or blockages. If you are doubtful about what you can do next, check your machine’s user manual or contact the Nespresso customer service team for assistance.
Fixing the issue may require basic troubleshooting and maintenance, such as descaling the machine or cleaning the nozzle. However, if the problem is more concerning, you may need to seek the help of a professional repair service or consider replacing the machine altogether.
How Do I Reset My Nespresso Creatista Machine?
To reset the factory settings of your Nespresso Creatista machine, follow the steps below:
- Open the settings menu and rotate the SELECT dial to the RESET option. Press the SELECT dial to choose the reset option, then choose the FACTORY RESET option from the menu.
- Choose the Right Tick to confirm OR choose the Cross Tick to cancel.
- Your machine will switch off, which indicates the factory reset is complete.
- Now, for the next use, you need to follow the first-use instructions.
Resetting your Nespresso Creatista will erase any customized settings or personal preferences you may have previously programmed into the machine. If you want to preserve your settings, write them down or photograph them before resetting the machine.
Resetting your Nespresso Creatista can help fix certain issues or error messages you may encounter while using the machine. However, if the issue persists even after resetting the machine, you may need to contact Nespresso customer service or consider seeking professional repair assistance.
How Do You Fix A Blocked Nespresso Machine?
If your Nespresso machine is blocked, there are several steps you can take to try and fix the issue:
- First, turn off and unplug the machine to prevent any accidents.
- Remove and empty the water tank.
- Remove the coffee capsule and check if it is pierced. If it’s not, it may be the reason for the blockage.
- Check the nozzle and ensure it is clean and free of coffee grounds or debris.
- If the nozzle is clogged, use a toothpick or a small brush to remove debris or buildup.
- If the machine still doesn’t work, try using a Nespresso descaling kit, as limescale buildup can cause blockages.
- After descaling, run several water cycles through the machine to flush out any remaining descaling solution.
If these steps don’t help you resolve the issue, you may need to contact Nespresso customer service or seek professional repair assistance. Regular maintenance and cleaning can prevent blockages and help ensure your Nespresso machine works properly.
Can My Nespresso Machine Be Repaired?
Yes, you can repair your Nespresso machine in most cases. Nespresso offers a repair service for their machines, and they can also direct you to authorized repair centers in your area. If your Creatista machine is still under warranty, the repair may be covered, but if it is not, there may be a cost associated with the repair.
Common issues you can repair easily include leakages, blockages, broken parts, or malfunctioning electronic components. However, if the machine is severely damaged or the repair costs are too high, it may be more cost-effective to replace the machine instead.
To prevent the need for repairs, you must perform regular maintenance and cleaning, use high-quality coffee capsules, and follow the manufacturer’s instructions. If your Nespresso machine encounters an issue, contacting Nespresso customer service for assistance before attempting any repairs on your own is always best.