Quick Navigation
Have you recently bought your Nespresso Creatista Pro machine and found it difficult to brew a cup of coffee? Have you been using this coffee maker for a long time but now facing a problem? Or have you lost the user manual? If the answer to any of these questions is yes, then Let’s come with us and understand the mechanism of making excellent coffee using your Nespresso Creatista Pro.
This guide manual includes details on the secure setup, use, and maintenance of your Nespresso Creatista Pro machine. Before using the Nespresso Creatista Pro machine, please carefully read this complete user manual, and save a copy for future use.
Safety Precautions:
What is better than taking safety precautions first or facing a severe injury later? Don’t forget! Your coffee maker is an electrical device, and each electrical device needs to be handled properly. Not operating the Nespresso Creatista Pro with precautions may cause serious problems, such as fire eruptions or other mishaps. Therefore, it is better to go through all the safety precautions first.
What Will You Find Inside The Box?
Your Nespresso Creatista Pro comes with mandatory parts; if these parts are not in the parcel, you must go for a replacement. The rules and procedure of replacement are briefly explained in Limited Guarantee heading. Let’s unbox your Nespresso Creatista Pro machine and find out what parts are inside the package.
1. Creatista Coffee Machine
Congratulations! You have got your Nespresso Creatista Pro Coffee machine. It is the central part of the package and is used to brew coffee. You should use the Nespresso Creatista Pro according to this manual to avoid any damage.

2. Tasting Box Of Nespresso Capsules
Good News! With your Nespresso Creatista Pro machine, you will get a complimentary tasting box of Nespresso capsules. Brew your coffee with the divine Nespresso capsules.

3. Milk Jug
You will get a Milk Jug with your Nespresso Creatista Pro machine. You can froth milk in the Milk jug and should only use the Milk Jug provided by Nespresso.

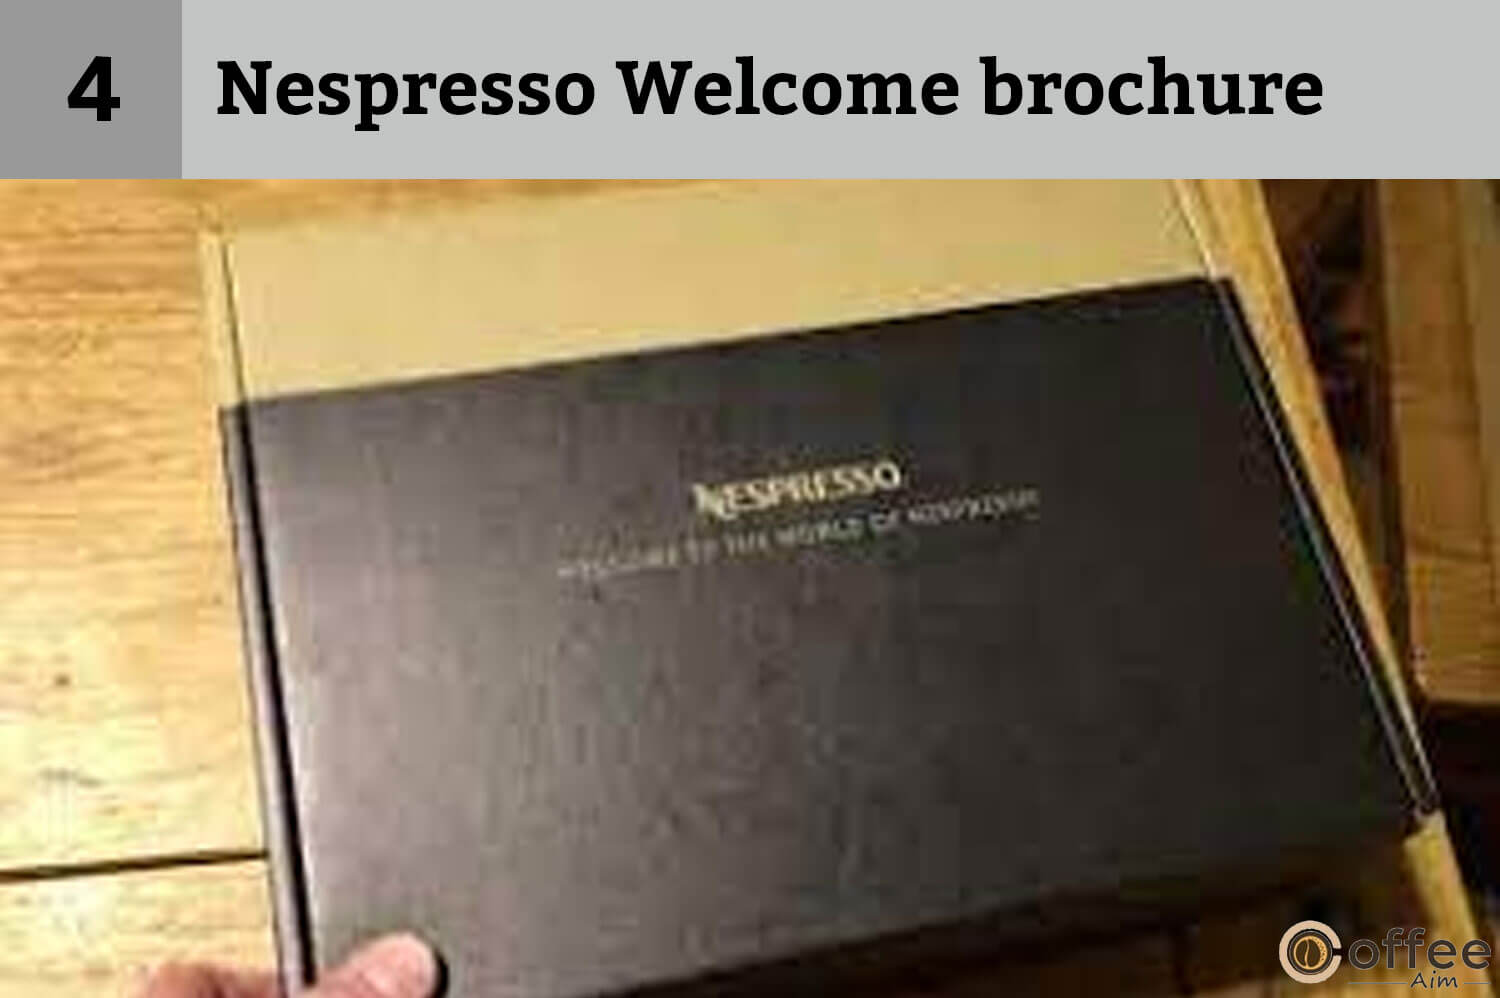
4. Nespresso Welcome Brochure
Nespresso welcomes you to use the Nespresso Creatista Pro machine through this brochure. Read this literature and embrace yourself.
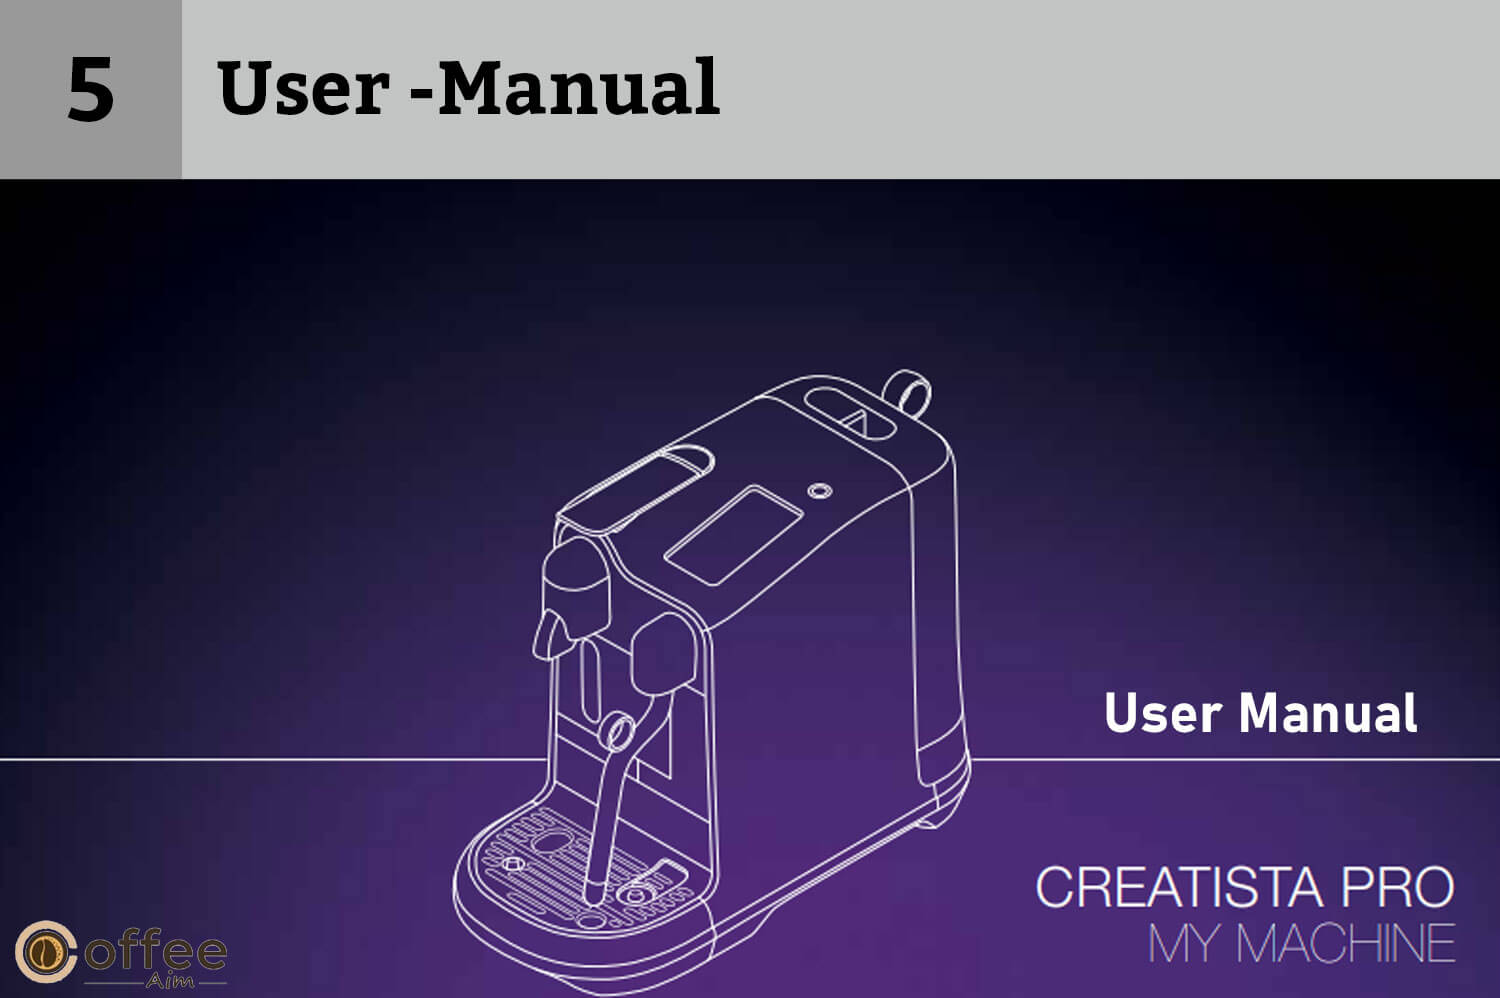
5. User Manual
To operate any machine, you must understand the procedure before usage. Thus, Nespresso provides you with the User Manual of the Nespresso Creatista Pro machine. Read this manual carefully and repeatedly.
6. 1 X Water Hardness Test Strip
Nespresso also provides the Water Hardness Strip, which checks water’s mineral content. I will discuss the purpose and use of the Water Hardness Strip in this manual.

Specifications Of Nespresso Creatista Pro.
The Nespresso Creatista Pro runs under specific power outlet conditions. If your home power conditions do not satisfy the machine’s requirements, please contact your Nespresso agent urgently and replace your Nespresso machine. Weight, water tank volume, and Nespresso Creatista Pro dimensions are also mentioned in the table below. Let’s check out the specifications of Nespresso Creatista Pro. intention
| Specifications | Values | |
| ∿ | Voltage(V) | 220-240 |
| Frequency(Hz) | 50-60 | |
| Power(W) | 2300 | |
| Pressure | bar | 19 |
| MPa | 1.9 | |
| Weight | Kgs | 6.65 |
| lbs | 14.7 | |
| Volume | L | 2 |
| fl. oz | 68 | |
| Dimensions | Length(cm) | 25.1 |
| Length(in) | 9.8 | |
| Height(cm) | 41.8 | |
| Height(in) | 16.5 | |
| Width(cm) | 49.9 | |
| Width(in) | 19.6 | |
Nespresso Creatista Pro Parts
You must be eager to brew a cup of coffee! Let’s first understand the parts of the Nespresso Creatista Pro and get familiar with them. After overviewing the parts, it will be easy for you to understand their functions, which are mentioned later in this article.
1. Power Button
The Nespresso Creatista Pro machine’s power button is on top. You can turn the machine on/off by pressing the power button.
2. LCD Touch Screen
It is also on top of the Nespresso Creatista Pro machine. You can swipe to navigate and tap to select any option on the LCD touchscreen.
3. Lever For Capsule Insertion
Lever is on top of the Nespresso Creatista Pro machine. You have to lift the lever for Nespresso capsule insertion. After insertion, close the lever.
4. Capsule Container
The Nespresso Creatista Pro machine has a capsule container internally. Insert the Nespresso capsule into the capsule container.
5. Pop-Out Cup Support
It is located on the top left of the front side of the Nespresso Creatista Pro machine. Push the pop-out cup support to unlock. The support will pop out, and you can also accommodate a small cup on it.
6. Removable Drip Grid.
Drip Grid is present on the bottom left of the Nespresso Creatista Pro’s front side. Accommodate the large cup on it.
7. Drip Tray Baffle
It is on the bottom left of the Nespresso Creatista Pro’s front side.
8. Removable Drip Tray With Full Indicator
It is located on the bottom left of the Nespresso Creatista Pro’s front side. It collects all the drips/spills from a coffee cup.
9. Steam Wand
It is located on the right of the Nespresso Creatista Pro’s front side. Use a steam wand to froth the milk.
10. Milk Jug Temperature Sensor
It is positioned on the bottom right of the Nespresso Creatista Pro’s front side. Always put the milk jug on the temperature sensor.
11. Milk Jug
You will get the Milk Jug with the Nespresso Creatista Pro machine. Use only provided Milk Jug for frothing of milk.
12. Water Tank And Lid
The Nespresso Creatista Pro’s water tank and lid are on the machine’s backside. Fill the water tank with fresh water and get a cup of coffee with this water.
13. Removable Pin Cleaning Tool
It is located beneath the water tank of the Nespresso Creatista Pro machine. After frothing the milk, the formation will build up in the steam wand. Use the pin-cleaning tool to clean out each hole in the steam wand.

First Use of Nespresso Creatista Pro
Have you unboxed your Nespresso Creatista Pro machine? If yes. Let’s make your Creatista Pro ready for its first use. You must be very excited to brew your first cup, but priming your brewer is necessary.
Read carefully all literature included in the Nespresso Creatista Pro package or promotional labels attached to your machine before use. Refrain from discarding any material before understanding them entirely.
Read all safety precautions first to avoid an accident, fatal electrical shock, or fire.
1. Plug The Machine
First, Plug the Nespresso Creatista Pro into the outlet. Only use suitable, accessible, earthed mains to plug in the equipment. Verify that the power source’s voltage matches the values listed in the Nespresso Creatista Pro specs.

2. Turn On The Machine
Turn ON the machine by pressing the Power button. In case of any emergency, immediately remove the plug from the power socket.

3. Language Selection
You will get multiple language options on your LCD Screen. Tap to select any language in which you are comfortable.

4. Follow On-Screen Instructions For Machine Setup
Add. You should rinse the Nespresso Creatista Pro machine and prime the heating system because you are using it for the first time. Follow all the instructions for machine setup, which have been mentioned on the LCD screen of your Nespresso Creatista Pro.

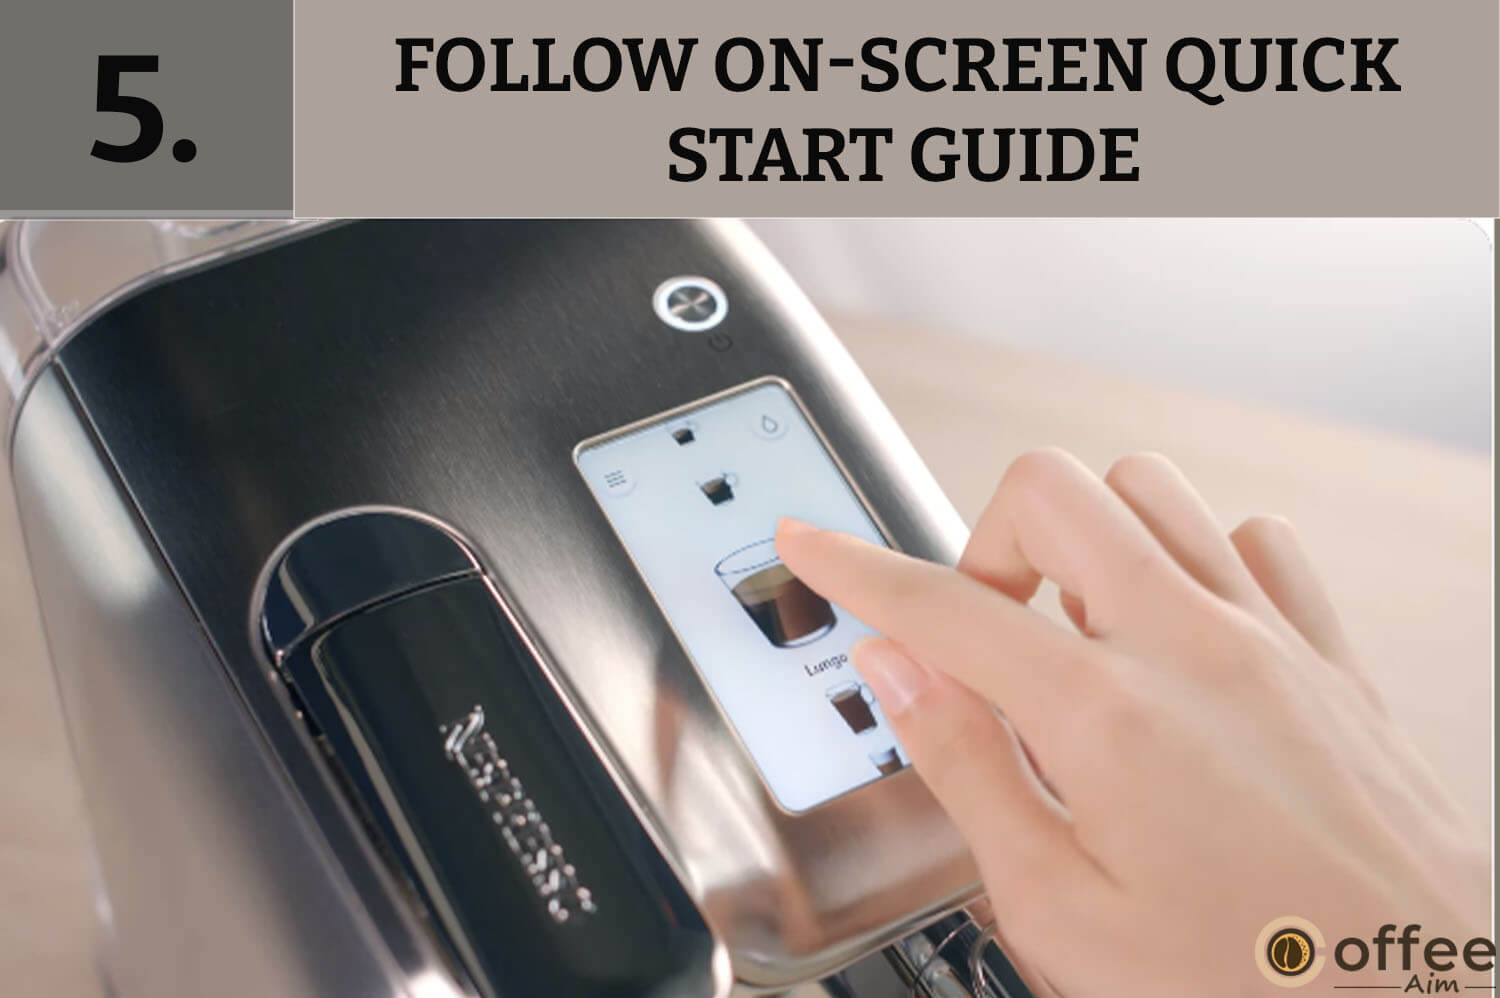
5. Follow On-Screen Quick Start Guide
The LCD Screen will show you Quick Start Guide, follow all the instructions mentioned in the guide. Following the Quick Start Guide, you can manually set the Water Hardness level. You can also use default settings and adjust other settings in the menu.
6. Turn Off The Machine
Turn the machine OFF after the completion of the drink. You should carefully remove the plug from the power socket. Turning the machine off will halt any drink recipe.

How To Make Coffee In The Nespresso Creatista Pro
Now, the wait is over, and the time has come when you will make your first coffee in the Nespresso Creatista Pro. To avoid confusion, follow all the steps mentioned below;
1. Drink Menu

By following the steps mentioned below; you can select the type of coffee you want to brew.
- Tap the Menu button and swipe up and down on the touch screen to navigate the menu. Select the type of coffee you want to make.
- Tap the Hot Water button and manually start and stop the water flow. The maximum amount of water you can take is 200 mls (6.5 fl. oz).
- Tap the screen to select.
2. Drink Confirmation
Nespresso Creatista Pro provides impressive features such as drink confirmation. You can easily select your drink type and program the volume of coffee and water also. Let’s dig deep into it.
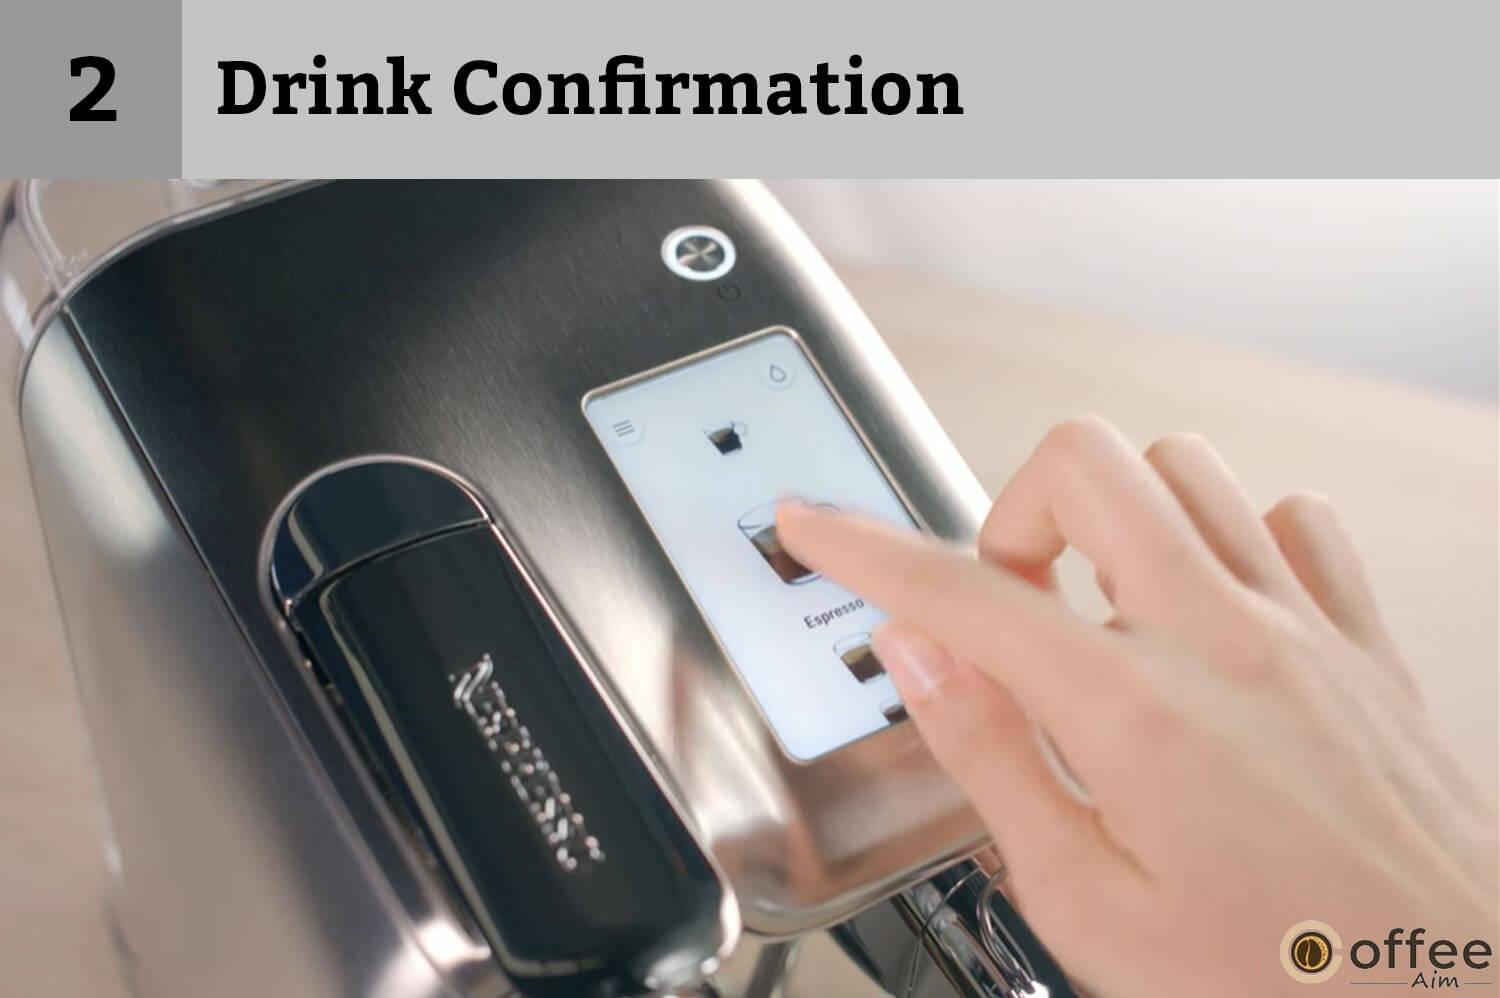
- After selecting the type of coffee you want, select Tap to Start.
- After tapping, you will get a drink adjustment option. We will discuss it in the next heading.
Drink Adjustment of The Nespresso Creatista Pro
After selecting the type of coffee, adjust desired coffee volume, milk froth level, and milk temperature by following these steps;
Adjust Coffee Volume
Add: The first step to making the desired cup of coffee is to adjust the coffee volume. You can make different volumes of coffee, not only default settings in Nespresso Creatista Pro. Let’s adjust the desired coffee volume!
- Adjust your coffee volume by sliding the Adjustment Slider on the vertical bar.
- The small circle on the vertical bar is called Notch. It represents the default setting.
- If you slide the adjustment slider on the notch, you select the default setting.
- Tap the Save button to save your custom drink settings. The custom drink will appear on the Drinks Menu.
Adjust Milk Froth Level
Add After Adjusting the coffee volume; you should now adjust the milk froth level as you make a milk coffee. You can adjust the milk froth level according to your taste, not only the default setting. Let’s adjust the milk froth level!

- Adjust your milk froth volume by sliding the Adjustment Slider on the vertical bar.
- The small circle on the vertical bar is called Notch. It represents the default setting.
- If you slide the adjustment slider on the notch, you select the default setting.
- Tap the Save button to save your custom drink settings. A custom drink will appear on the Drinks Menu.
Adjust Milk Temperature
You can also adjust the temperature of the milk by following the easy and straightforward steps. Let’s learn it.

- Adjust your milk temperature by sliding the Adjustment Slider on the vertical bar.
- The small circle on the vertical bar is called Notch. It represents the default setting.
- If you slide the adjustment slider on the notch, you select the default setting.
- Tap the Save button to save your custom drink settings. A custom drink will appear on the Drinks Menu.
Making Milk Coffee From Nespresso Capsules
After adjusting your milk and coffee settings, Let’s enjoy your customized milk coffee.
Drink Running
Add You have successfully set the milk and coffee settings. The coffee running process will start, and you will get coffee in your cup and frothed milk in the milk jug. Let’s enjoy!
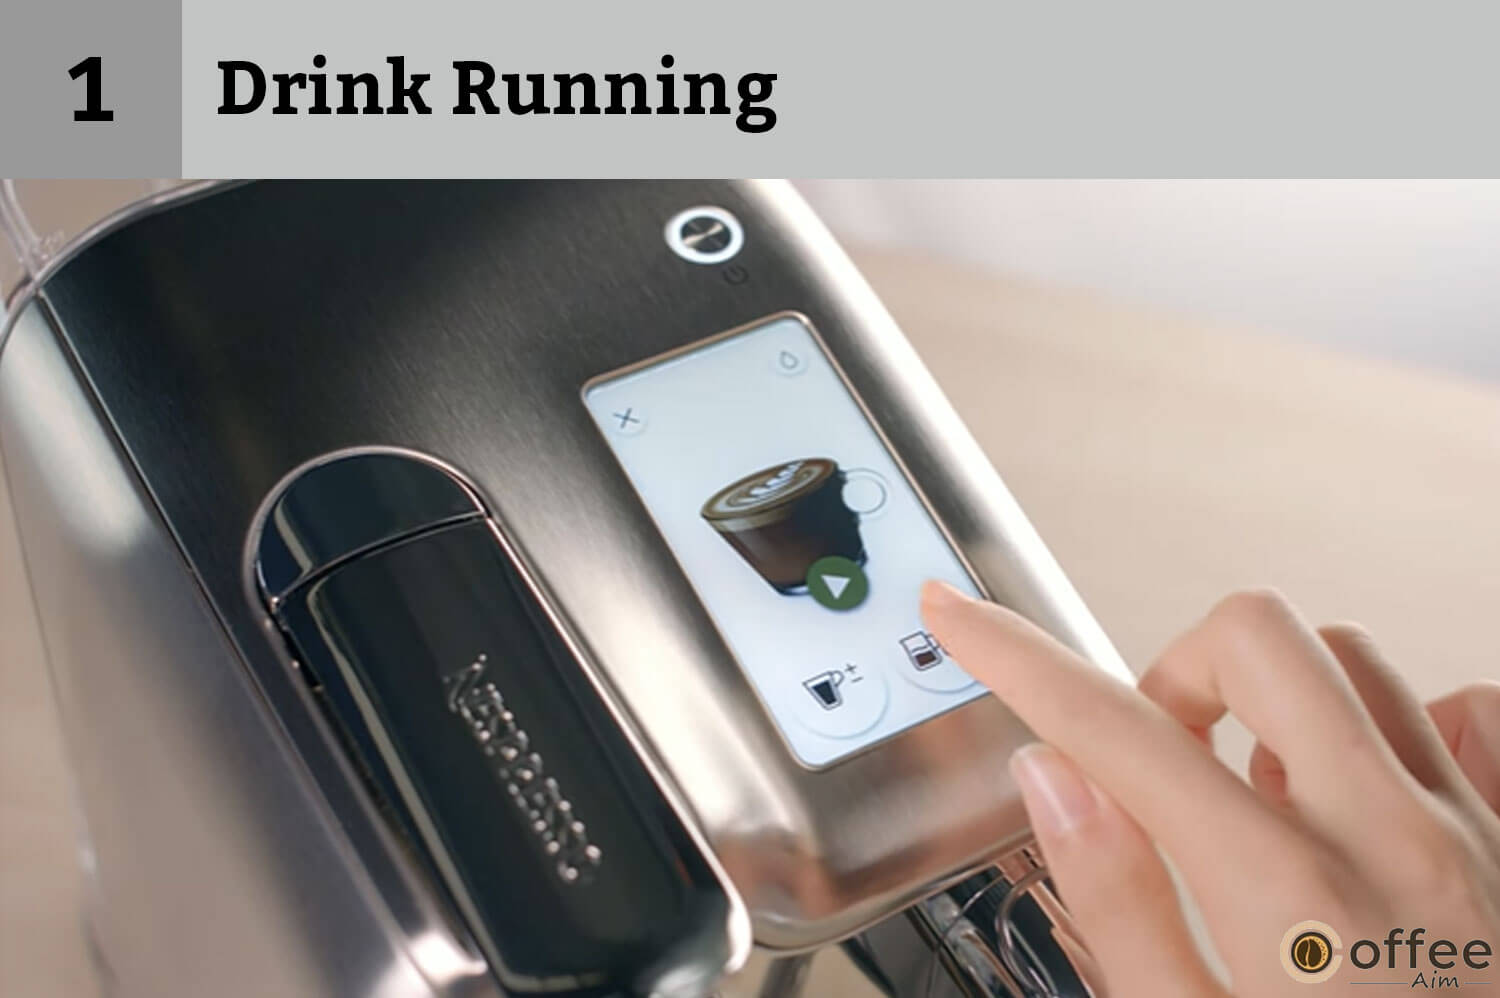
- Coffee extraction from Nespresso capsules and milk texturing will start simultaneously.
- You will get coffee extraction in your cup and milk in Nespresso Creatista Pro provided milk jug simultaneously.
- Coffee and milk will stop running automatically after the completion of the drink. Alternatively, tap the icon to stop.
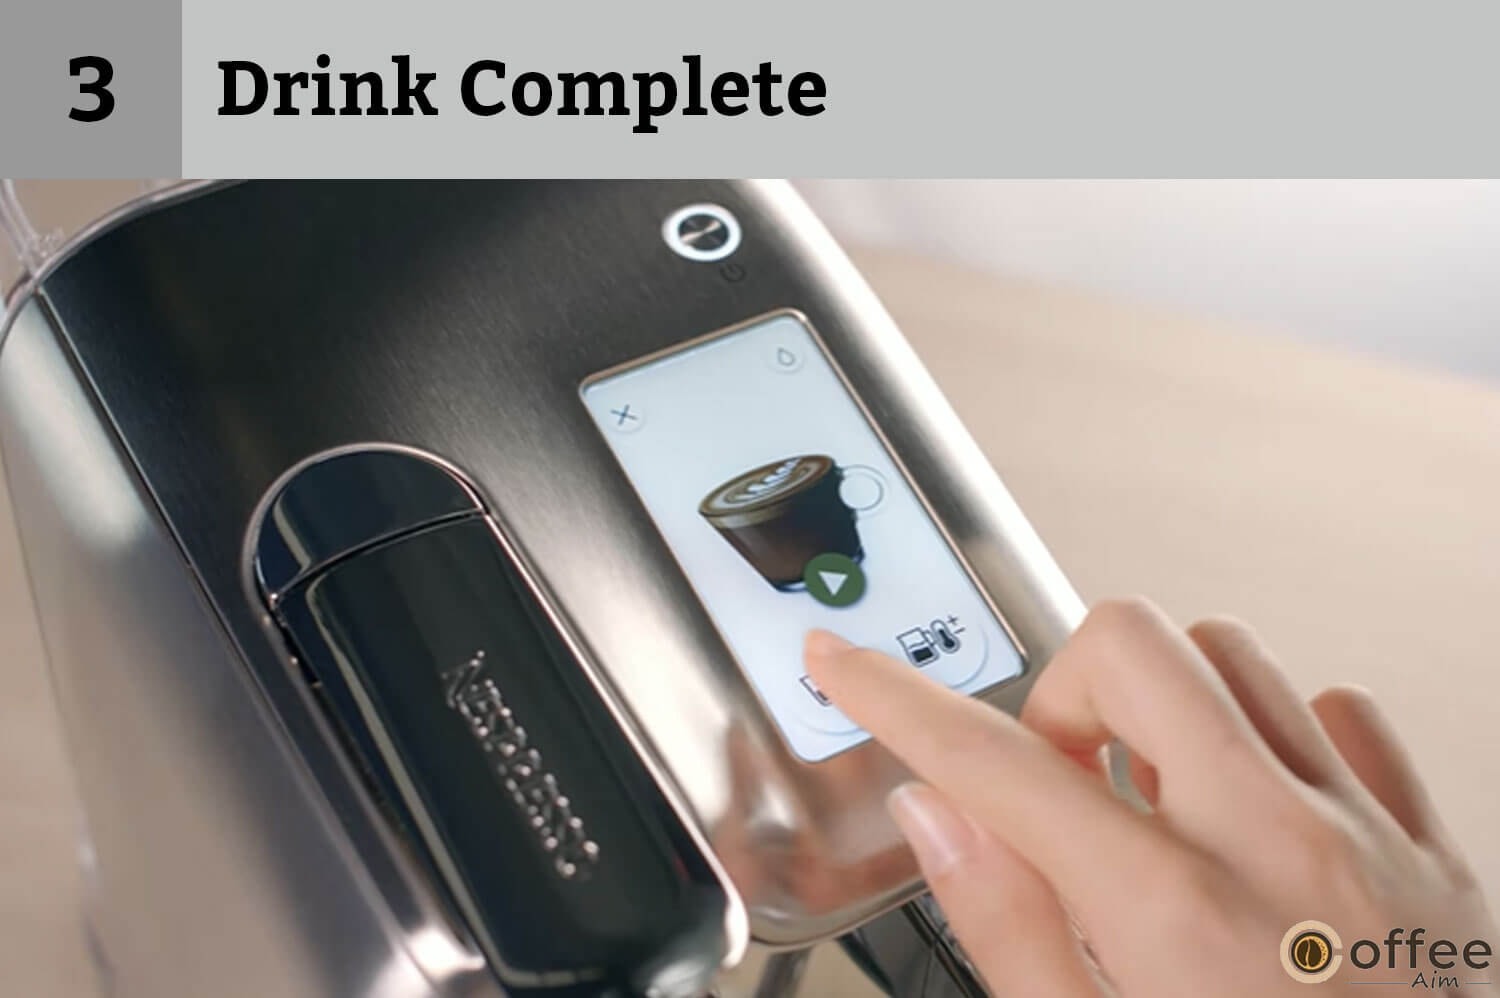
Drink Complete
Your Nespresso Creatista Pro has speedy processing as you can prepare several cups of coffee consecutively, one after another, in no time. Let’s do it.

- If you want to make another cup of coffee, Insert new capsules and tap the Add Coffee button for extracting again.
- Tap the Delete button, If you want to delete your customized settings
Icons

On the LCD touchscreen of your Nespresso Creatista Pro, you will get different icons. You must be familiar with them because you can also use them on your smartphones. For example, you save the settings by tapping the Save button and skip a step you don’t want to perform by tapping the skip button, etc.
Likewise, these icons indicate the same meaning in Nespresso Creatista Pro.
Making Regular Coffee From Nespresso Capsules
Add. You can also make regular coffee in Nespresso Creatista Pro. Insert the Nespresso capsule into the capsule container and follow all the instructions below. When making regular coffee, you will not get any milk options.
Let’s brew hot and divine regular coffee!
1. Drink Confirmation
Following the instructions on the screen display, choose your favorite coffee and start the process. Let’s see how it works!

- First, tap to select the coffee type you want to brew.
- Tap the Coffee Settings button and adjust the coffee volume.
2. Drink Running
After selecting your favorite coffee type, tap the Start icon to initiate your coffee-making process. Let’s brew it perfectly!

- The extraction from Nespresso capsules will start in the drink running process.
- You will get coffee extraction in your cup within a few minutes.
3. Drink Complete
Your Nespresso Creatista Pro has now completed the coffee-making process. Let’s enjoy your first cup of coffee!
- Coffee will stop running automatically after the completion of the drink.
- If you want to make another cup of coffee. Insert new capsules and tap the Add Coffee button and extract again.
Coffee Preparation Tips
We understand that you learned the mechanism of coffee making in the Nespresso Creatista Pro. But, to use those steps, there are some tips that you need to follow. Also, understand the information provided below.
It is strongly advised against using a previously used capsule for hygiene reasons.
For optimal and best milk froth, use pasteurized whole or semi-skimmed milk at refrigerated temperature (about 4-6 °C / 39-43 °F ).
1. Small Cups

Always use the cup support for smaller cups. Otherwise, it will fall.
2. Use Provided Milk Jug

For texturing milk, you can only use the milk jug provided in your Nespresso Creatista Pro machine.
CAUTION: The maximum level is marked on the inside and outside of the milk jug, Do not fill the milk jug above the maximum marked level.
3. Milk Jug On Drip Tray

When texturing milk, always make sure the milk jug is positioned on the drip tray temperature sensor. Do not hold it or place it anywhere else.
Adjust Regular / Milk Coffee Drinks
Regular Coffee Drinks
Following are the coffee volumes according to the coffee types.
| Regular Coffee. | Coffee Volume. |
|---|---|
| Ristretto | From 10 to 30 ml / 0.35 – 1 fl. oz |
| Espresso | From 30 to 70 ml / 1 – 2.3 fl. oz |
| Lungo | From 70 to 130 ml / 2.3 – 4.4 fl. oz |
Milk Coffee Drinks
Following are the settings required to make perfect creamy milk coffee.
| Milk Coffee. | Settings. |
| Coffee Volume | 7 levels from 15 to 130 ml / 0.5 – 4.4 fl. oz |
| Hot Water Volume | 7 levels from 50 to 200 ml / 1.7 – 6.8 fl. oz |
| Milk Temperature | 11 levels from 50° to 76°C / 122° to 169°F |
| Milk Froth | 8 levels from 2 to 30mm |
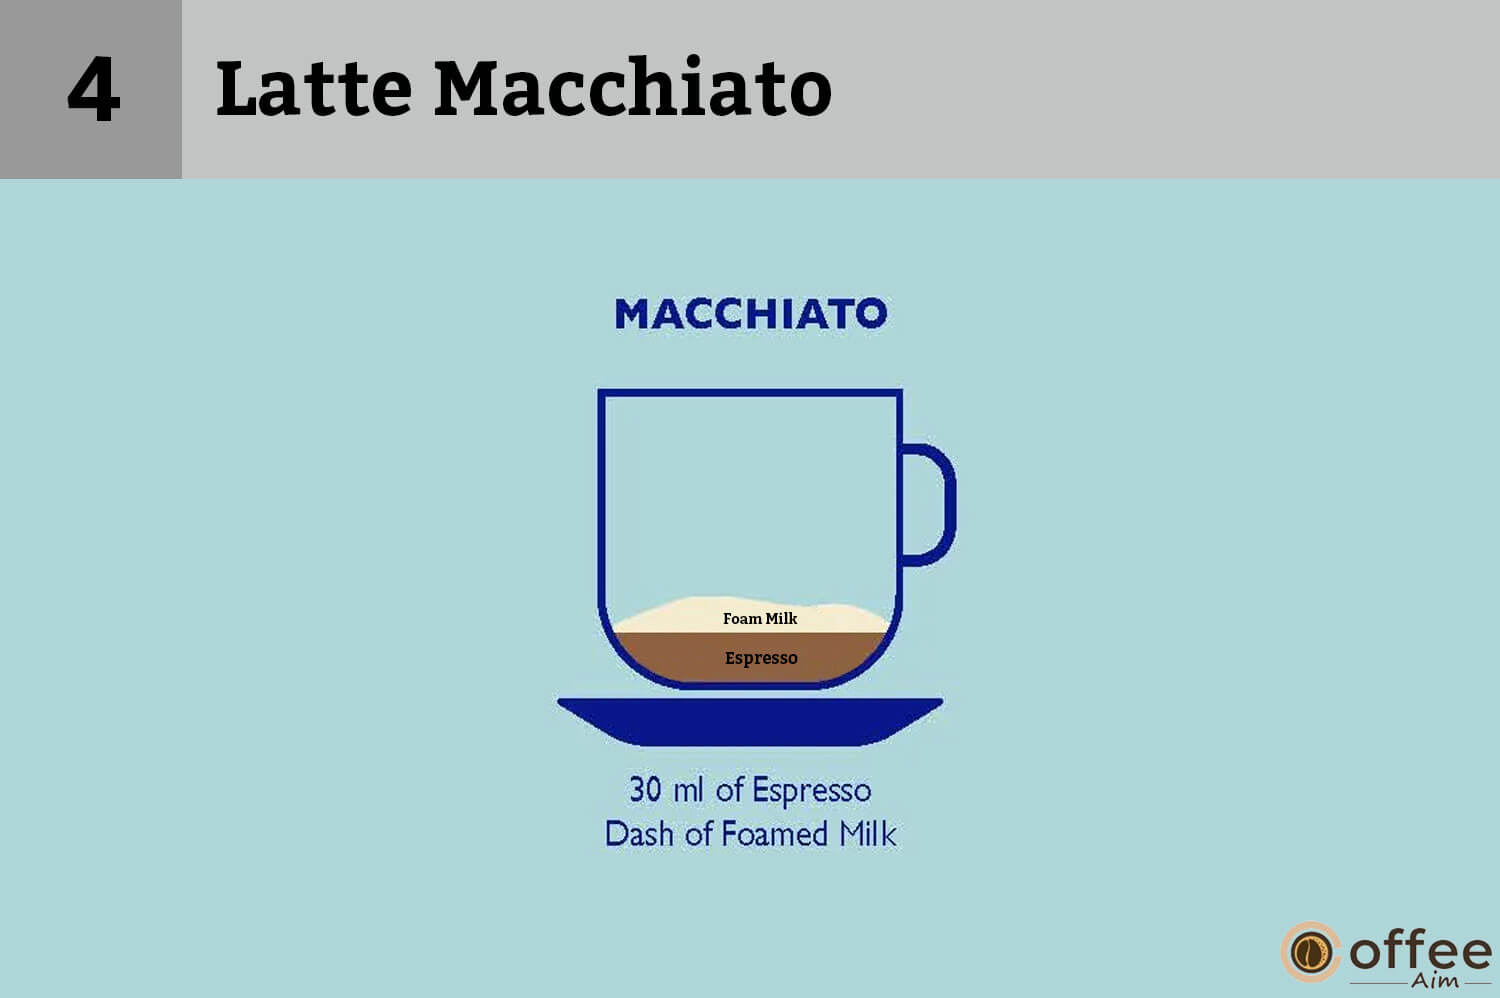
Milk Level
Following images represent the level of milk required to make your desired coffee:
1. Flat White

2. Cafe Latte

2. Cappuccino

4. Latte Macchiato
Daily Cleaning
Cleaning of your brewer is a must to avoid build-up residue caused by coffee grinds and beans. To ensure the long life of your Nespresso Creatista Pro machine, you should clean it daily. Also, understand the informative points for better usage mentioned below;
Do not use strong or abrasive cleaning creams, sponges, or solvents when cleaning.
Do not put any part of your coffee maker in the dishwasher.
Never dip the machine or part in water or other liquid.
1. Clean The Steam Wand

Go to the MENU and Select the Clean Steam Wand option, then follow all the steps shown on-screen. You should clean the steam wand daily because the milk residual will build up in the steam wand, affecting the taste of your milk coffee.
2. Empty The Drip Tray, And Capsule Container
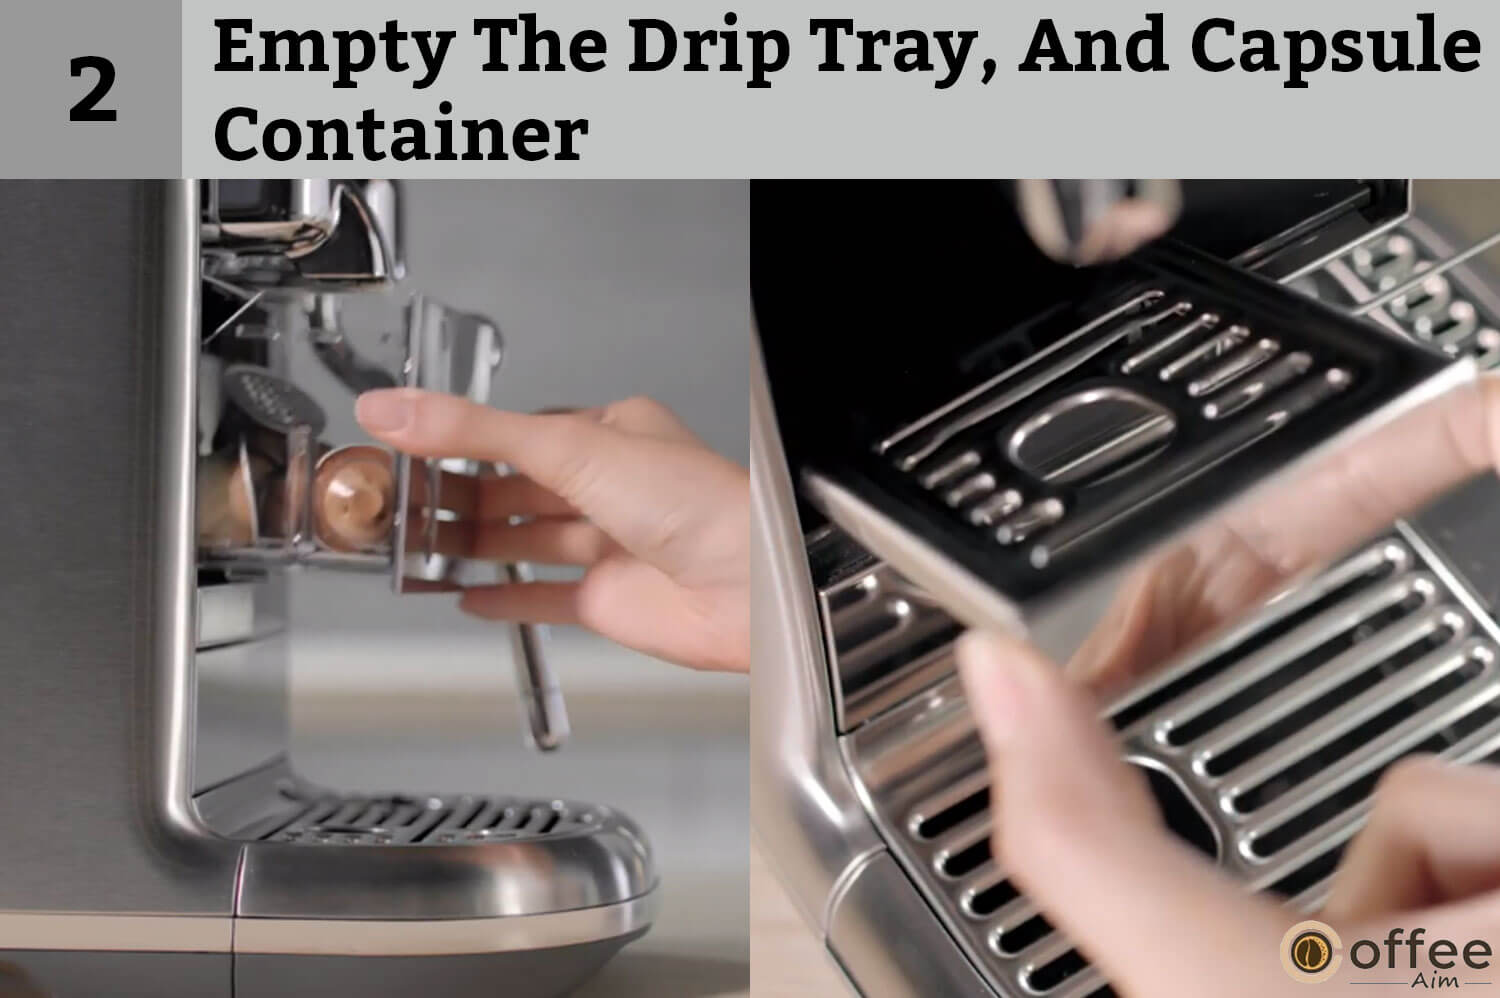
Cleaning of the Drip tray and Capsule container is a must. If you clean it daily, your machine’s life will be protected.
- Separate the capsule container from the machine, discard all the used Nespresso capsules, and clean it.
- Remove the drip tray and clean it with warm water.
- Unlock the cup support and clean it. You should also wipe inside the machine where your cup support inserts.
- Detach the Water Tank and clean it with odorless detergent. After cleaning, rinse it with warm water.
3. Clean The Milk Jug
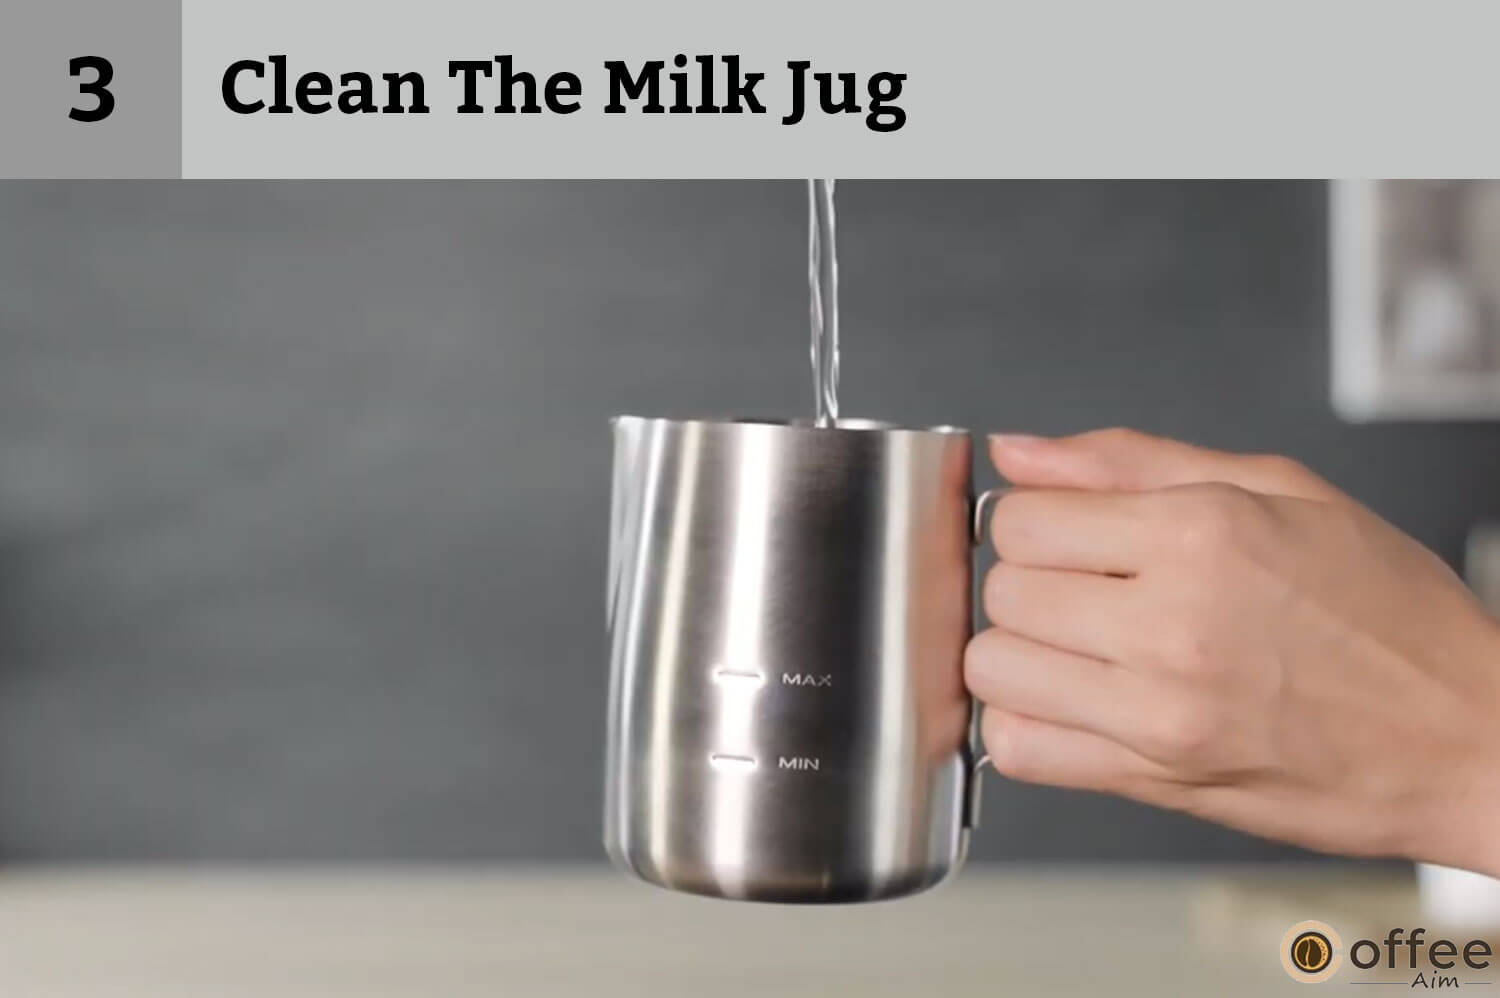
After each use, rinse and dry the milk jug. Furthermore, use a mild detergent If it is required.
4. Dry All Parts

Use a gentle and clean cloth to dry each component before reassembling the device. Wipe the coffee outlet and machine regularly with a clean damp cloth.
Menu
Do any task in your Nespresso Creatista Pro, like cleaning, descaling, or setting language, by tapping the Menu button. Don’t you think it is incredible! Yes, it will make your life easy. You will get different options on the screen; you just have to touch a choice according to your situation and follow the on-screen instructions.
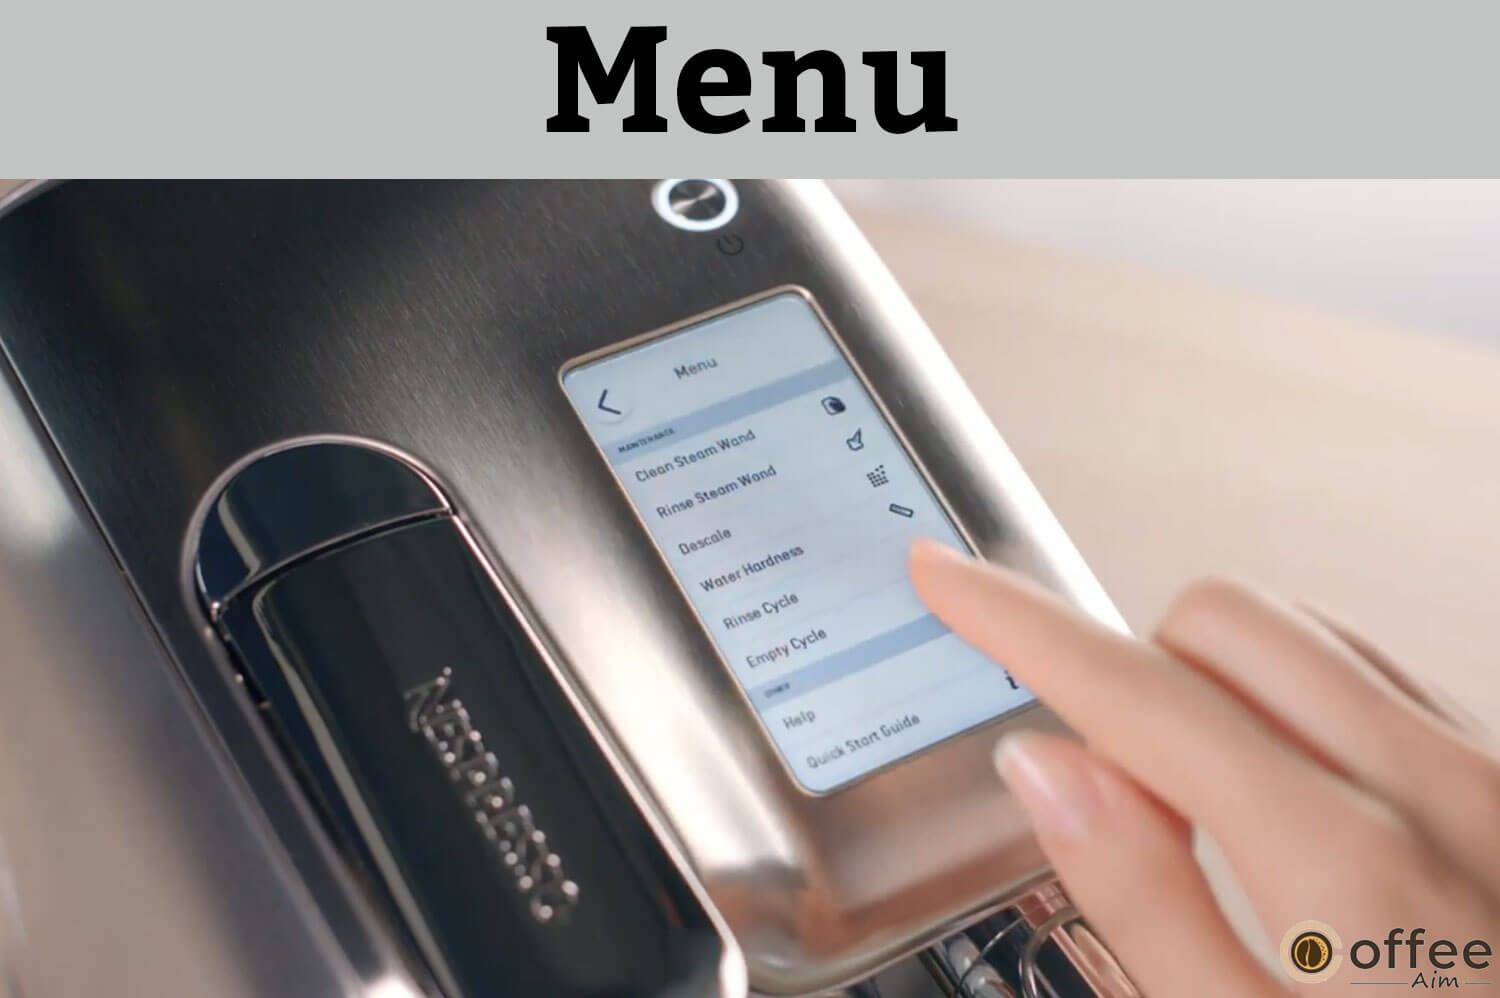
 Clean Steam Wand.
Use this option daily to clear the steam wand routes and blockages.
 Rinse the Steam Wand.
Use as needed to unclog any obstructions that may develop in the steam wand.
 Descale.
Remove any accumulated scale. See the directions for descale on the following page.
 Water Hardness.
Reset the water hardness level.
 Rinse Cycle.
When a machine is inactive over a prolonged amount of time.
 Empty Cycle.
When protecting against or storing a machine for a period of inactivity.
Quick Start Guide.
Reread the Quick Start manual.
 Language.
To change the machine’s language.
Factory Reset.
Erases all settings and resets the device to its default configuration.
Descaling
Different regions have different water types, which vary in calcium and mineral contents. Due to this, the buildup can occur in your coffee machine from calcium, magnesium, and other minerals. Descaling is a process that removes this buildup, preserves the coffee flavor, and avoids appliance breakdown.
- The amount of use and water hardness will determine how frequently you should descale.
- When instructed on-screen, descale.
- If the descaling cycle will not run after 30 uses, the machine will stop allowing you to use it. You’ll see a “lockout” count-down to determine how many more uses there are before usage stops.
- To increase the life of your Nespresso Creatista Pro machine, descale your machine regularly.
Descaling Process
Let’s understand how you can descale your Nespresso Creatista Pro.
Select Descale from the Menu by navigating there. Obey the directions displayed on the screen.
Duration
Around 15 minutes long.
Note:
- Read the necessary safety precautions on the descaling packet, then use the table to determine the frequency of use.
- The descaling agent might be dangerous. Avoid making contact with surfaces, eyes, and skin.
- To prevent harm to your machine, always use the Nespresso descaling kit available from Nespresso.
- Please contact Nespresso if you have any further queries about descaling.
Water Hardness Levels
Based on the water hardness, the following table will show the descaling frequency necessary for your machine to operate at its best.
| Water Hardness Test Strip | App. | fH | dH | Descaling afterCaCO3 | (40ml) |
| Level 0 | < 5 | < 3 | < 50 mg/l | 2200 | |
| Level 1 | > 7 | > 4 | > 70 mg/l | 1800 | |
| Level 2 | > 13 | > 7 | > 130 mg/l | 1400 | |
| Level 3 | > 25 | > 14 | > 250 mg/l | 1000 | |
| Level 4 | > 38 | > 21 | > 380 mg/l | 600 |
| Symbols | Abbreviations |
| fH | French Degree |
| dH | German Grade |
| CaCO3 | Calcium Carbonate |
Troubleshooting.
Until now, we understand the process of making coffee in the Nespresso Creatista Pro. Please go through the solutions below if you still have problems and need help making your desired coffee. If the answer to your problem is not here, please contact Nespresso.
| Issues | Solutions |
| Screen/buttons not illuminated. | The device immediately shuts off.To turn the machine ON, press the POWER button.Check the outlet: plug, voltage, fuse. |
| No steam or hot water. | The machine is not in use. To turn the machine ON, press the POWER button.Check the outlet: plug, voltage, fuse. |
| No coffee, no water, unusual coffee flow. | Check the water tank; if it is empty, fill it with fresh, usable water. The water tank should be adequately positioned If necessary, Descale the machine. |
| Coffee is not hot enough. | Use the hot water button to warm the cup.Descale the machine, if necessary. |
| The capsule lever does not close completely. | Take the capsule out and empty it.Verify that there are no capsules blocking the machine. (Note: Avoid sticking your fingers inside the device.) |
| Leakage (water under the machine). | If the drip tray is full, empty it.Securely install the drip tray.If the issue continues, contact Nespresso. |
| Water flows directly into the capsule bucket; no coffee flows (regardless of added capsule). | Shut the capsule lever.Check that no capsules have been blocked inside the machine after emptying the capsule bucket.(CAUTION: Avoid sticking your fingers into the device.)If the issue continues, contact Nespresso. |
| The display is dim and hard to see/read. | The brightness of the screen is set to a low level.To turn it ON, press the POWER button.Adjust the screen’s brightness. Select Screen Brightness under Menu. |
| The message “Fill Water Tank” is still shown (water tank is complete). | Verify that the water tank is appropriately situated.If the issue continues, contact Nespresso. |
| Descale alert is displayed. | Descale the apparatus.Select Descale from the Menu by navigating there. Observe the instructions on the screen. |
| The device is turned on, but it stops working.. | Press the POWER button to turn it OFF.Turn the device ON by pressing the POWER button after waiting 60 minutes.If the issue continues, contact Nespresso. |
| The touchscreen is not working. | Press the POWER button to turn it OFF.To turn the machine ON, press the POWER button one more.If the issue continues, contact Nespresso. |
| The touchscreen is in in-store mode | Turn the device off by pressing the POWER button to get out of in-store mode. To turn the machine ON, press the POWER button one more. |
Troubleshooting Milk Froth Preparation
Please go through the solutions below if you still need help making your desired milk froth. If the answer to your problem is not here, please contact Nespresso.
| Problems | Solutions |
| Milk steam cycle does not start. | Check the water tank. If it is empty, fill it with fresh, usable water. The water tank should be adequately positioned. Make sure the wand is lowered, and check the steam tip for any obstructions. |
| The quality of the froth is not up to standard. | Use pasteurized whole or semi-skimmed milk at a refrigerator temperature of between 4-6 °C (39-43 °F). The milk ought to be freshly opened for the best results.Verify the setting for milk froth.Use the milk jug that is provided.After each usage, wash the steam wand and milk container.Finish the cleaning cycle for the steam wand. Follow the on-screen instructions after selecting Clean Steam Wand from the Menu. |
| The steam is very wet. | Use fresh, potable water.Never use distilled, demineralized, or highly filtered water. |
| Milk overflows. | Add the right amount of milk to the jug. NEVER fill more than the MAX level.The inside and outside of the jug are marked with minimum and maximum levels.Reduce the milk’s original volume or the froth level to prevent overflow. Depending on the type of milk, this varies. |
| The milk temperature is too hot. | Utilize the provided milk jug.Verify that the milk jug is correctly positioned on the drip tray’s milk jug temperature sensor.Verify that the drip tray’s temperature sensor is dry and clean.Reduce the milk’s temperature. |
| The milk temperature is not hot enough. | Warm the cup.Use the milk jug that is provided.Verify that the milk jug is placed on the drip tray’s temperature sensor.Increase the milk temperature.Examine the steam tip for obstructions. |
| A clean Steam Wand alert is displayed. | Make the steam wand clean.Select Clean Steam Wand from the menu by going to the menu. Observe the instructions provided on the screen. |
Contact Nespresso.
Call Nespresso or your authorized agent if you require any additional information, have any questions, need assistance, or simply want to seek advice because we may not have anticipated all uses for your device.
You can find Contact information for Nespresso in the “Welcome to Nespresso” folder in your machine box or online at nespresso.com.
Disposal and Environmental Protection.
All of us must participate in environmental protection; thus, we must follow the instructions to protect our environment.
- Your appliance has valuable components that can be recycled or recovered.
- Recycling valuable raw materials are made easy by classifying the leftover waste into several categories.
- Appliances should be left at a collection location.
- The local authorities can provide you with information on disposal.
Limited Guarantee
The Nespresso Creatista Pro guarantee card includes the following,
- For two years of residential usage (or three months of commercial use) following the date of purchase.
- Breville guarantees this product against manufacturing and material flaws.
- Any damaged goods within this period will be fixed or replaced at Breville’s discretion without cost to the customer.
- The warranty on the repaired item will expire two years from the original product’s purchase date, not two years from the repair date if a product or accessory is repaired or replaced during the guarantee period.
- This assurance disclaims responsibility for indirect losses and any other losses or damages to people or property resulting from any cause.
- It also doesn’t cover issues brought on by improper usage, misuse, tampering by unauthorized individuals, inadequate maintenance, consumable parts, or typical wear and tear. Additionally, it does not cover the cost of making a warranty claim.
Australian Consumer Law
- Under the Australian Consumer Law, our products are covered by assurances that cannot be revoked in Australia.
- For a significant failure, you are entitled to a replacement or refund, as well as payment for any further loss or damage that was reasonably foreseeable.
- If the products are not of acceptable quality and the failure does not constitute a major failure, you may also be entitled to having the products repaired or replaced.
The Breville Warranty Claiming Process
On behalf of Breville, Nespresso handles product inquiries and servicing. If you think your product is faulty, get in touch with Nespresso Customer Service immediately to find out where to send or bring it so that a Breville-authorized service specialist can fix it.
Contact Nespresso Australia: 1800 623 033 or
New Zealand: 0800 234 579 nespresso.com.
Breville is the importer, distributor, and provider of this warranty for this product. To the fullest extent allowed by law, Nespresso disclaims any guarantees, warranties, and conditions concerning the product.
Conclusion
I hope this user guide has answered all your questions concerning the Nespresso Creatista Pro. In detail, I have explained all the instructions, trips and tricks, and procedures of brewing coffee in Nespresso Creatista Pro. Now you can make a divine cup of coffee like a pro. Always follow the directions provided by your product to extend its life. Please reread this manual if you still need answers to your question. After reading the manual thoroughly, please contact Nespresso or our authorized agent if you still need help making desired coffee. Furthermore, if you want to know more about coffee beans or coffee machines, just scroll the pages of CoffeeAim.
Have fun by taking little sips of your favorite cup of coffee!
FAQs
How do you froth milk with the Nespresso Creatista Pro?
To choose the FLAT WHITE preparation, use the SELECT dial. Use the milk jug that the machine provides for the best results. Add enough fresh, cold milk to the stainless steel milk jug. Use pasteurized whole or semi-skimmed milk at a chilled temperature for the best milk froth. The inside and outside of the milk jug are marked with minimum and maximum levels. Place the steam wand in the middle of the milk jug after raising it. Ensure the drip tray temperature sensor is in contact with the milk jug. To start foaming milk, press START. Lift the steam wand after the milk has finished frothing, then wipe the surface with a fresh, moist cloth.
How to make a latte with Nespresso Creatista Pro?
Pour the frothed milk close to the top edge of the cup. Begin reversing the jug while making brief, swift movements to the left and right. To finish, raise the jar and draw a line across the rosetta.
Can you make regular coffee with the Nespresso Creatista Pro?
Although Nespresso Creatista coffee makers generally create espresso-based beverages, you can also make regular coffee. Simply press the machine’s coffee button to brew a cup of ordinary coffee with the specified amount of water.
What distinguishes Nespresso Creatista Pro from Nespresso Creatista Plus?
The interface is the only thing that differs. While the Nespresso Creatis Pro is entirely digital with its touchscreen, Creatista Plus uses an LCD screen and dial buttons.