Quick Navigation
Welcome to the world of Keurig K-Express. I’m guessing you might have some questions or confusion about using the Keurig K-Express. Perhaps you’re a new buyer and finding it challenging to understand the manual’s usage instructions, or you’re a long-time user who has lost the manual and seeking solutions to your problems.
The good news is that you’ve come to the right place! In this article, I’ll guide you through the unique technology of your Keurig K-Express and explain how you can use it to brew the perfect cup of coffee. So, let’s dive into the instructions on how to use your Keurig K-Express.
Safety Precautionary
Before starting, let me tell you some essential measures to keep yourself safe. For this, you need to read out preventive measures to eliminate the whiplash from the hot beverage. Then as it’s an electric appliance, electrocution can damage your Keurig coffee maker. Lastly, it can cause burnout, so read the details below to remain safer. Click on the link and learn all precautionary measures before using your Keruig K-Express.
Specifications Of Keurig K-Express
Let us look into the specifications of your Keurig K-Express. In case the specifications are not compatible with your needs, I recommend you contact your retailer or seller and replace it with the one catering to your needs.
| Specifications | Detail |
| Product Line/System | K-Express |
| Brew Sizes | 8 oz/ 236.6 ml, 10 oz/ 295.7, 12 oz/ 354.882 |
| Water Reservoir | 42 oz/ 1242.09 ml removable |
| Display | Button control panel with buttons for each brew size, Strong, and Over Ice LCD indicator lights for Add Water and Descale |
| Temp Control | No |
| Strength Control | Yes |
| Other Features | Auto-OffHigh Altitude setting |
| Iced Setting | No |
| Weight | 4.1 lbs |
| Dimensions | Width 4.6″W Depth 12.6″D Length 12.9″H |
| Power | 1475W |
Keurig Coffee Maker Features
The Keurig company delivers on its promise of efficiency and convenience with various features. Some of them are listed below.
Quick & Fresh Brewed
In your Keurig K-Express, you can brew a swift and efficient coffee in just a few minutes.
Cup Size Friendly
It can accommodate up to 17.8cm (7 inches) tall mugs.
Press To Control
Your Delicious Coffee is only a button away from you. So what are you waiting for? Let’s get it done. Insert your favorite K-cup pod, select desired brew size, and hit the brew button to get a delicious cup of coffee.
Maintenance Alert
You no longer have to remember when you last cleaned your machine, as your Keurig K-Express will remind you when it needs to be serviced.
Compatibility
With Keurig K-Express, you can bring your favorite coffee beans to life using your own K-Cup® reusable coffee pods. Enjoy a personal touch in every cup.
Auto Off
This feature automatically shuts down the coffee maker 5 minutes after the last brewing cycle, ensuring no unnecessary energy is consumed. It saves energy and provides you peace of mind knowing that the appliance is not consuming power when not in use.
Fly Up In The Sky (High Altitude)
The feature of high altitude is a unique one that ensures that wherever you are, it makes its way through even at (1,500 meters /5,000 feet); you just need to press it up.
1. Begin by plugging into the socket.
2. Turn the POWER and hold the 80z button for 3 seconds. The 10 oz button will light up to make sure that the High Altitude Brewing Mode is enabled.
3. To disable the High Altitude Brewing mode, you must repeat steps 1-2. The mode will remain enabled until these steps are repeated successfully. Once you have completed these steps, the 10 oz light will turn off, and the 6 oz light will turn on, indicating that the High Altitude Brewing mode has been successfully disabled.
High Altitude Brewing
While holding the handle of the Keurig coffee maker upwards, slowly push down the K-cup pod in the pod holder until the exit needle punctures it.
What Is Inside The Box?
I understand your excitement about finally being able to unpack your new brewer and try out different coffee blends and strengths. Without any delay, let’s explore what you will find when you unbox your Keurig K- Express brewer.
Note: The items mentioned below are mandatory. Thus, if anything is missing inside the box, go for the order replacement.
Coffee Machine

The most critical thing in the package is the coffee machine, so it’s essential to ensure that it’s included in the box and that you have received the exact model you purchased.
User Manual

The user manual contains important information about the machine’s features, operating instructions, safety guidelines, and maintenance tips. By reading the manual carefully, you’ll be able to understand how to use your Keurig K-Express efficiently and get the most out of its unique brewing technology.
Parts Of Keurig K-Express
To carry on with your Keurig K express, you first need to know its parts to handle it properly briefly. It will help you to brew your favorite flavor easily without interruption. So let’s get to know about different aspects of your Keurig K-Express.
1. Handle
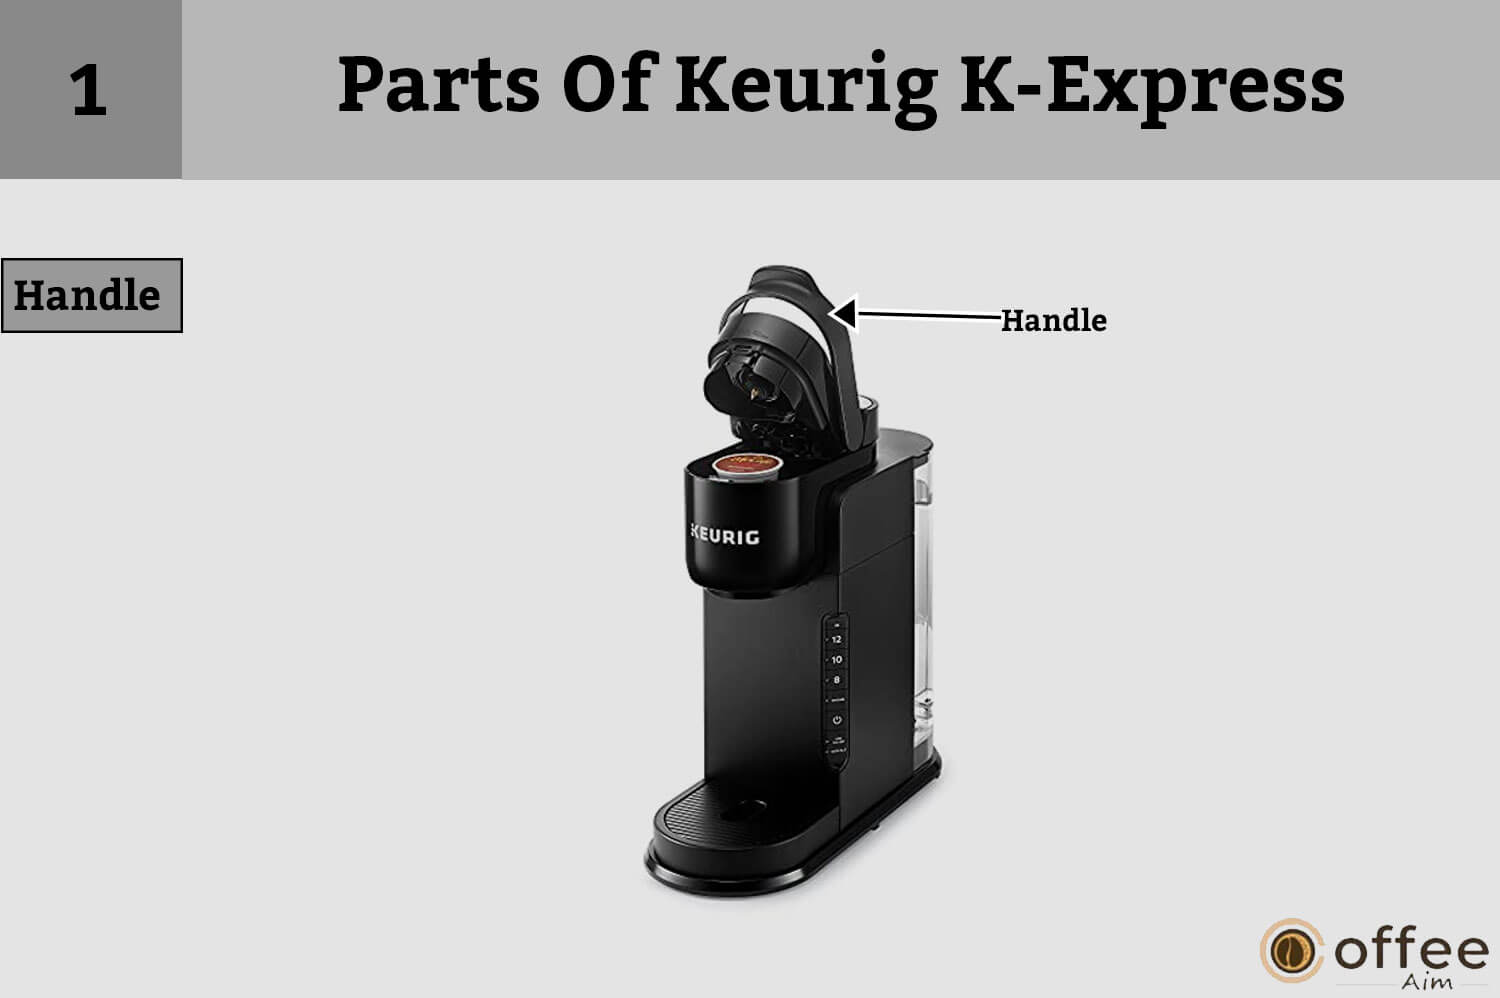
The handle of the Keurig K-Express is used to lift and close the brewer K-Cup lid. It is designed to lift the K- Cup holder smoothly.
2. K-Cup Pod Holder

The K-Cup pod holder is part of your Keurig K-Express that holds the K-Cup pod you want to brew. It is easy to load and unload and can have a variety of K-Cup pod sizes and flavors.
3. Funnel

The Keurig K-Express uses a funnel designed to attach directly underneath the pod holder,where the coffee pods are inserted. During brew, the hot water is forced through the pod and into the funnel. The funnel then channels the hot water directly into your cup.
4. K-Cup Pod Holding Assembly Housing

The funnel and the K-cup pod holder are collectively called the K-cup pod holder assembly. The K-Cup pod holding assembly is part of your Keurig K-Express, where the pod holder assembly is adjusted.
5. Drip Tray Plate

The drip tray plate is the surface where your cup or mug sits while brewing. It is designed to catch any excess drips or spills, preventing them from reaching your countertop or table.
6. Drip Tray
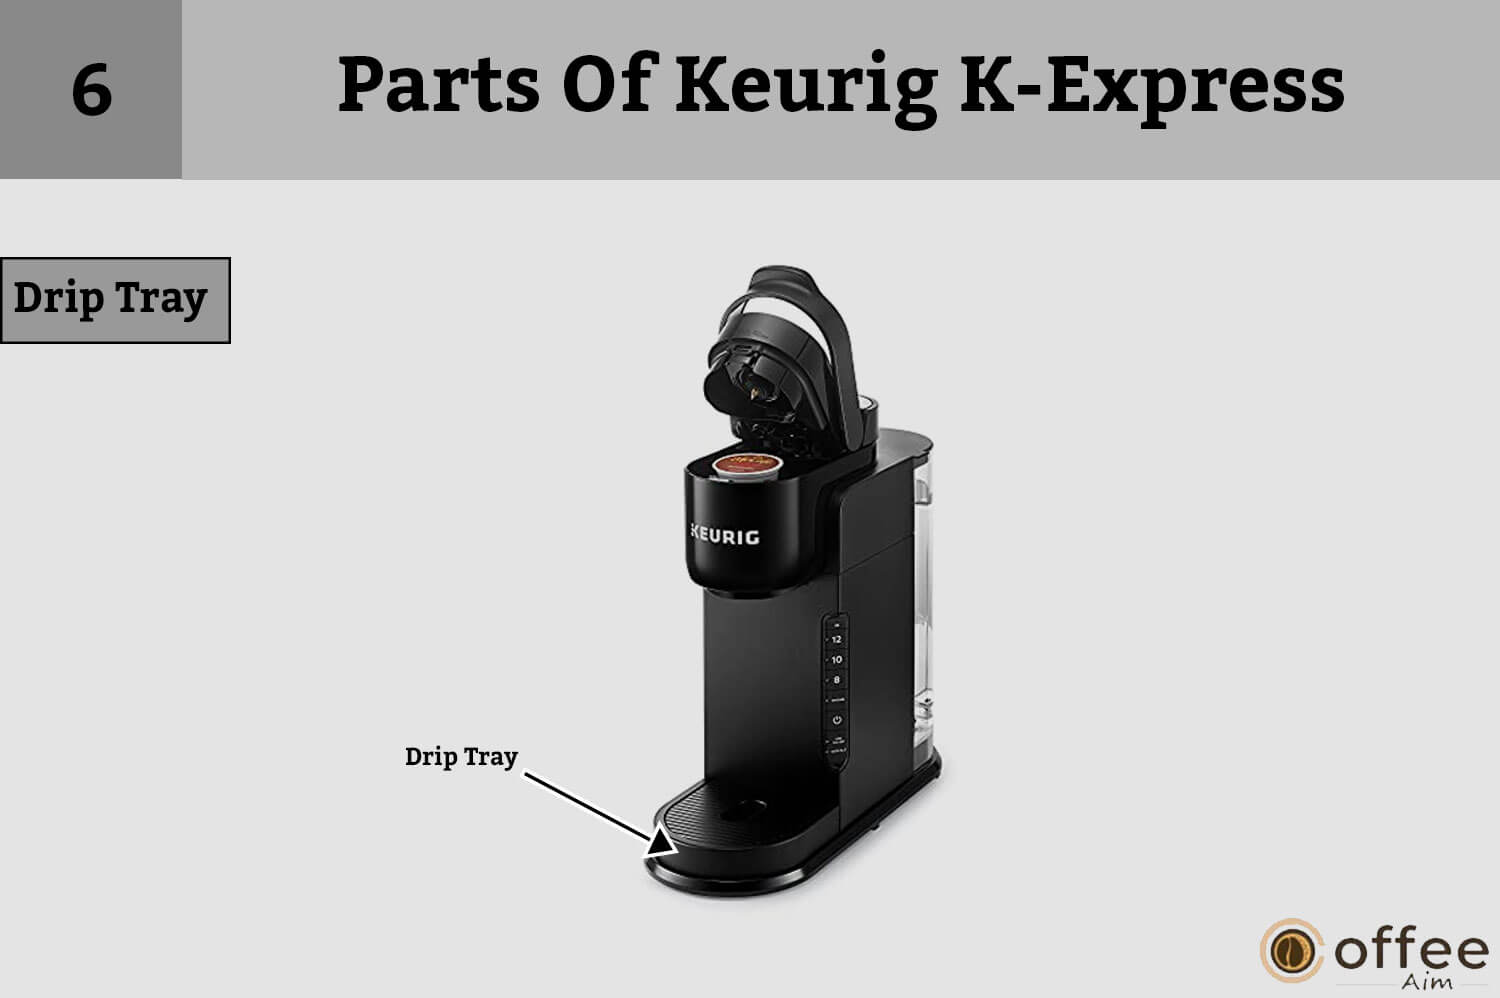
The drip tray is the component of the Keurig K-Express that catches any excess liquid that may drip from the pod holder during brewing. It is removable and easy to clean.
7. Drip Tray Base

The drip tray base is part of your Keurig K-Express that holds the drip tray. It is designed to be stable and sturdy to keep the drip tray plate in place. Furthermore, remove the drip tray plate and place it on the tray base if you use a travel mug.
8. Water Reservoir Lid

The water reservoir lid is part of your Keurig K-Express covering the reservoir. It is easy to remove and is designed to prevent spills or leaks.
9. Water Reservoir
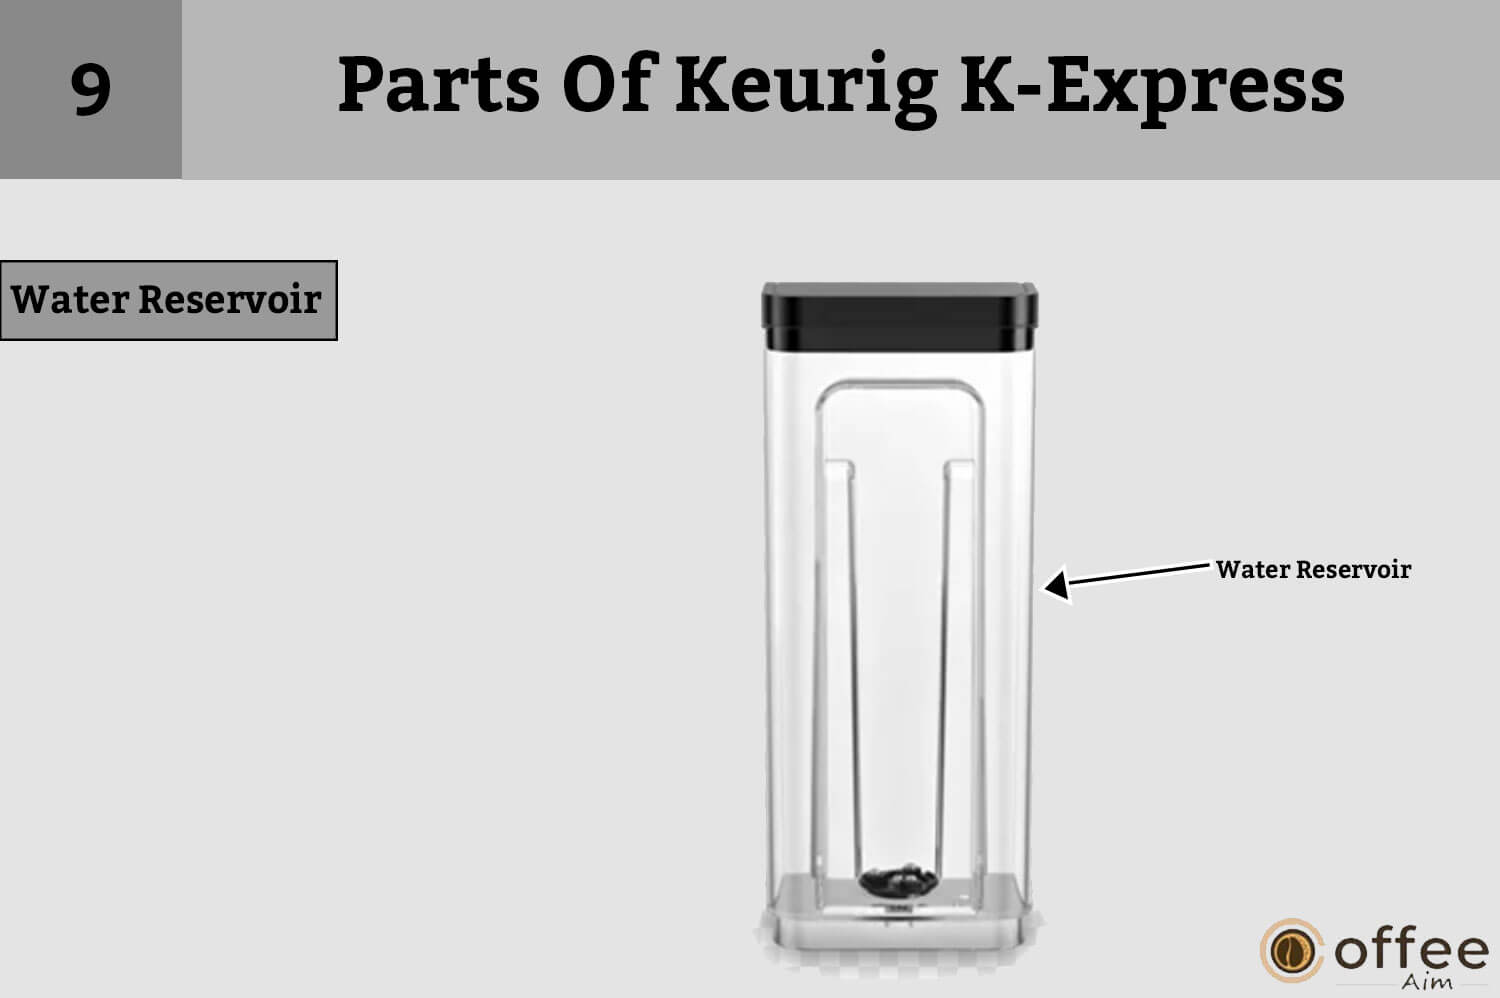
The water reservoir is part of your Keurig K-Express that holds the water for brewing. The refilling method is easy and has a large capacity, so you can brew multiple cups of coffee without needing to refill it frequently.
Before You Brew For First Or After A Long Period Of Inactivity
To start, cheer yourself up for the fun you will witness by making your favorite beverage. Why wait? Let me tell you how to arrange it for the mouth-watering coffee.
Plug and Place

To Plug and place your appliance, follow these steps.
- Carefully put the box on a table and tear out the wrapping paper sheet from the appliance.
- Plug into the socket.
- Place a minimum cup of 296 ml/10oz with a max of 12 oz on the drip tray. Make sure the cup can withhold the temperature of the hot beverage.
Rinse & Fill
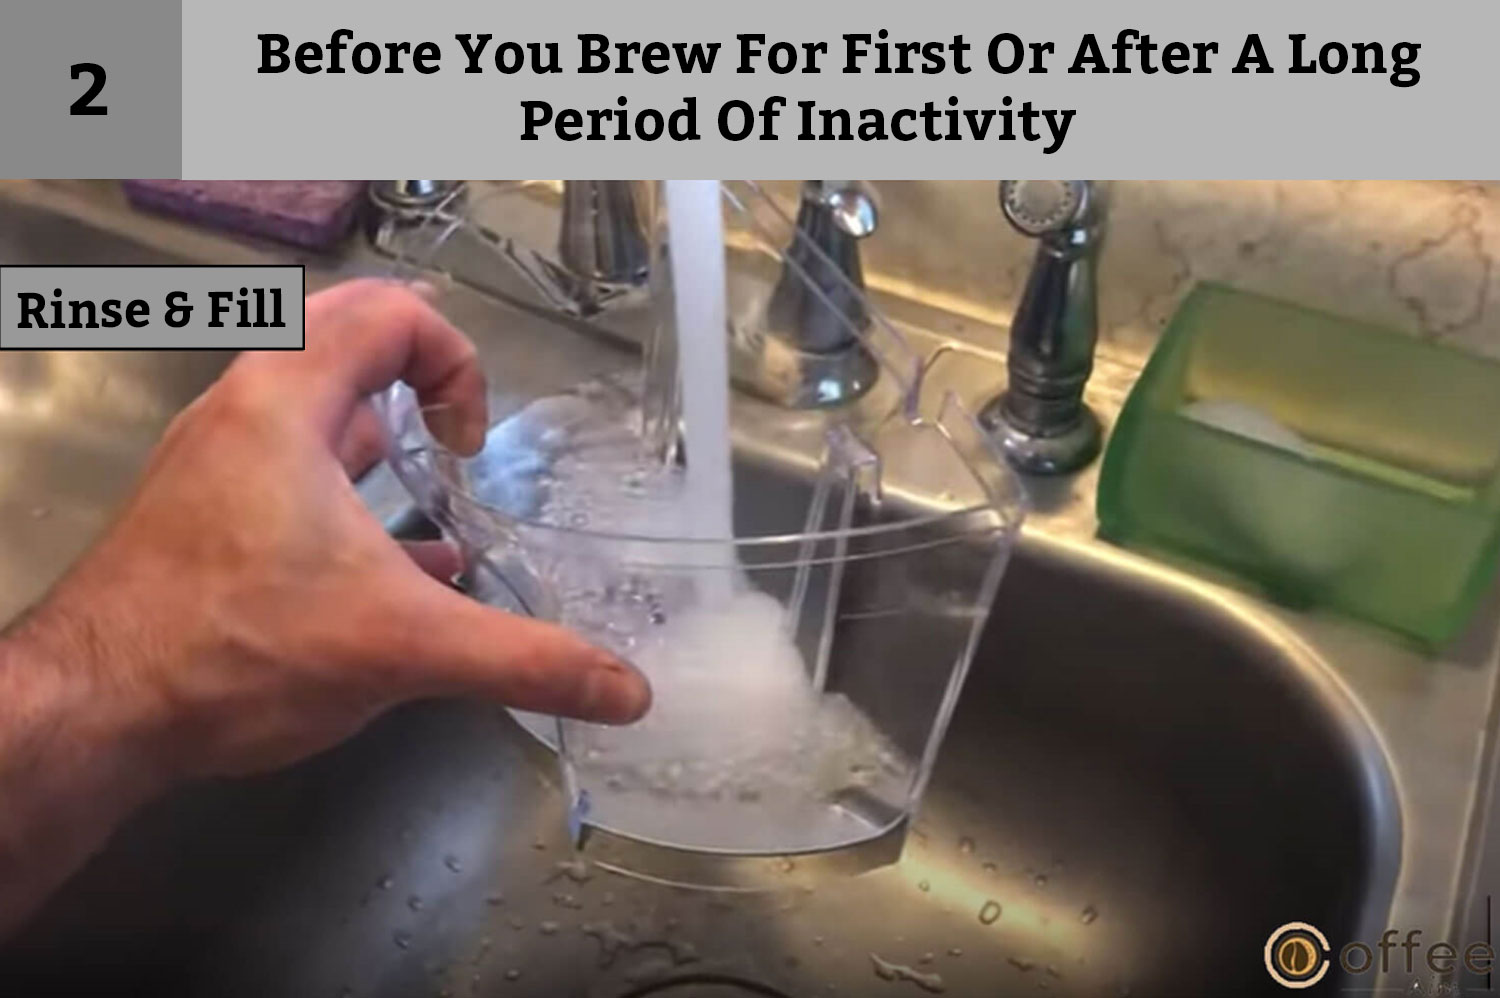
- Now lift the water reservoir lid straight up and remove it.
- Rinse it with fresh water and fill to the max fill line.
- Now replace the reservoir, ensure the water reservoir is correctly fixed with the base, and replace the lid.
- For fresh and pure water, install a Keurig water filter.
NOTE: Avoid using distilled water in this process.
Raise & Lower The Lever
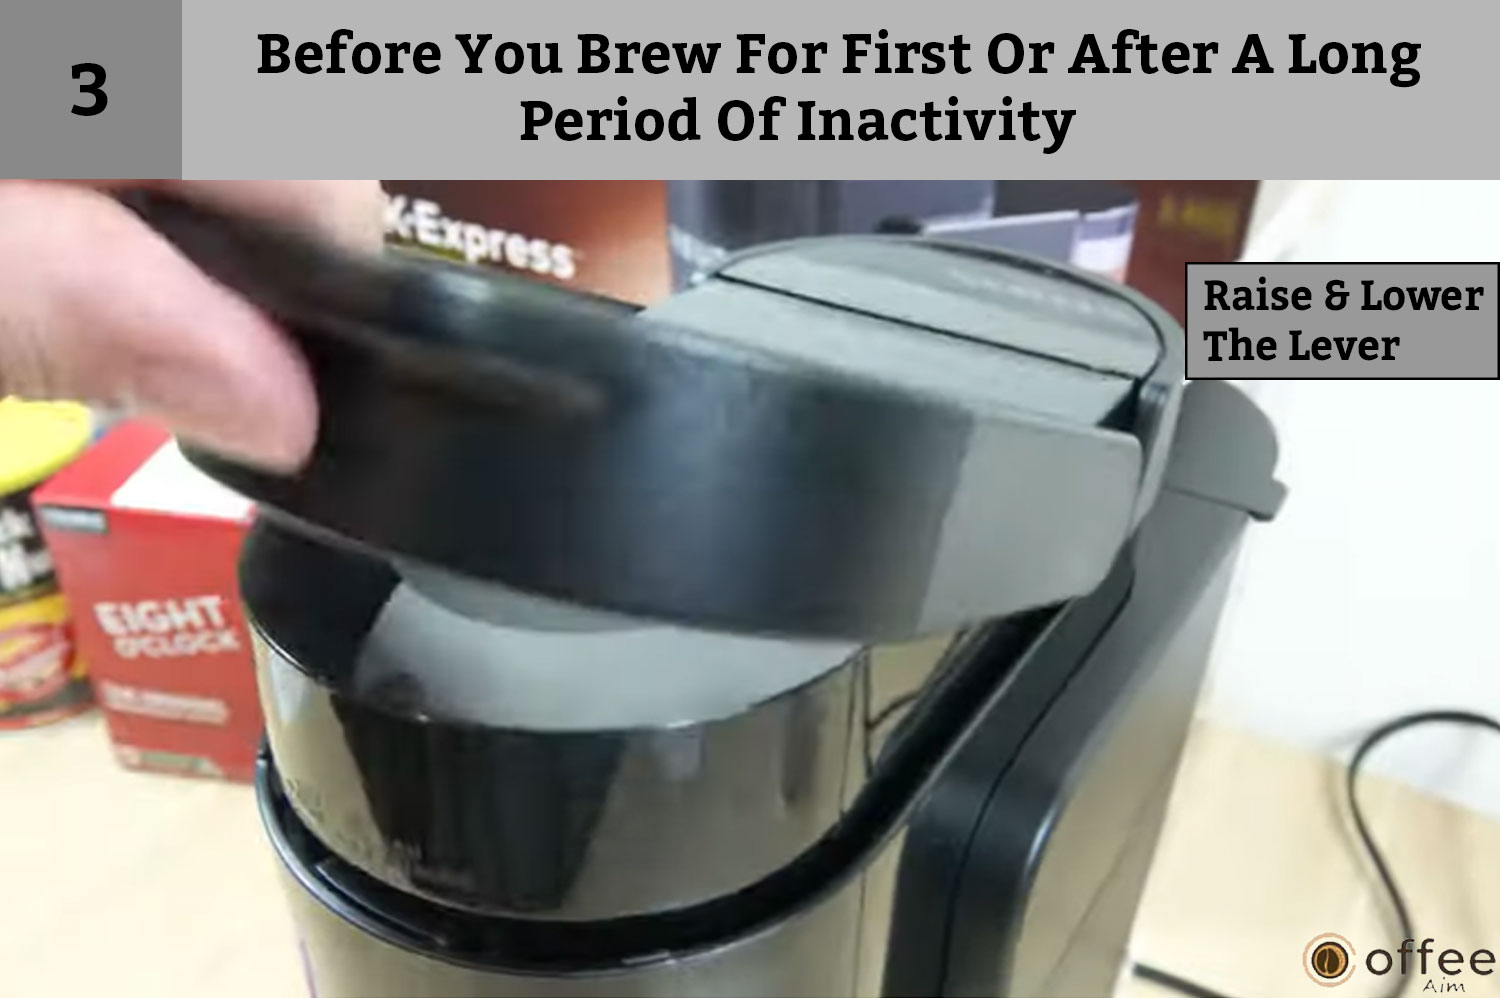
Lift the handle and lower it down. It will turn on your Keurig coffee maker automatically.
Make sure not to insert a K-cup pod.
Cleansing Brew
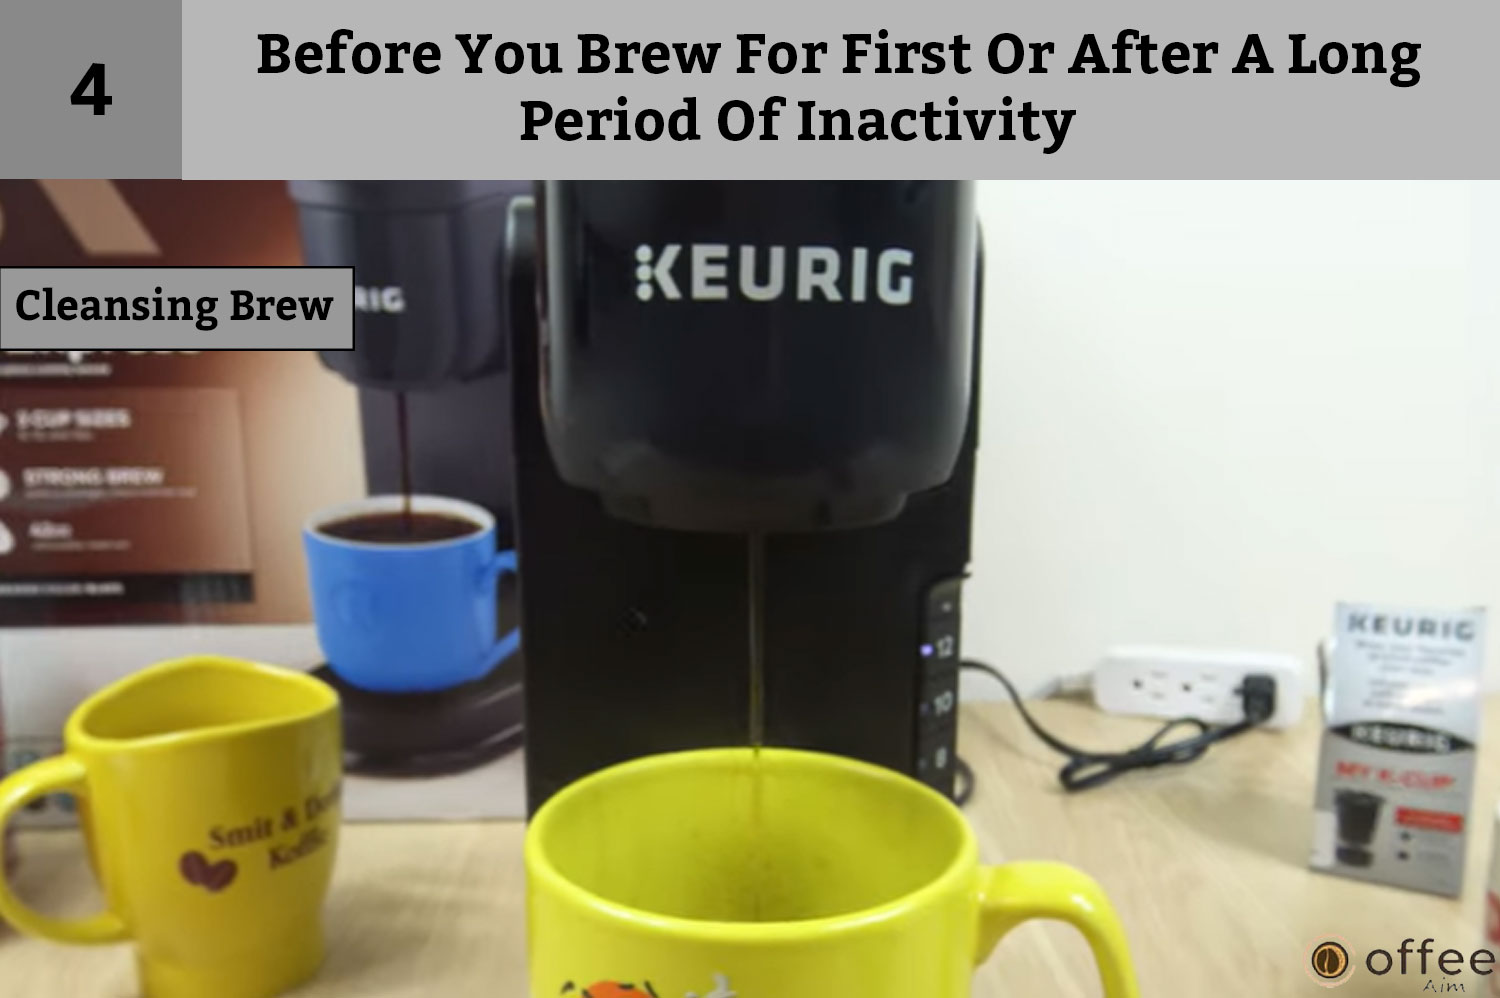
As soon as your Keurig K- express starts, three-cup sizes lighten up. Now, press the 8 oz button. Pour the dirty hot water from the cup into the sink.
Be careful not to lift the reservoir or the handle when you press the power button until the brew completes. As the time set-up process is done, K-Express is ready to brew.
Why wait now? Let’s make your first cup of coffee to enlighten your mind with its aroma. Get ready to brew up.
Brew Your First Cup
Brewing a perfect cup of coffee is a delightful experience for every coffee enthusiast. I am feeling your excitement as you perform your most awaited task. Stay calm, If you need more confidence in your coffee-making skill, as I will guide you through every process step by step. So, let us begin!
The Arrangement

Before proceeding, you must arrange the essential items needed to brew. Follow the steps mentioned below
- Check your cup size and place it on the drip tray.
- If using a travel mug, remove the drip tray and place the mug at the bottom of the drip tray.
- Lift the handle, place a recyclable K-cup pod in the holder, and lower the handle to close the lid.
Note: Do not remove the foil lid on the recyclable K-cup pod.
Brew & Enjoy!

To have a smooth brewing experience, follow the mentioned steps.
- Three brew sizes will flash.
- Now select and press your desired brew size. Light will remain blinking until the process completes.
- When all the sizes start flashing, it indicates the brewing process is completed.
- Lift the handle to recycle the recyclable K-cup pod.
Note: The water in the K-Cup pod holder is boiling during brewing. Avoid lifting the handle throughout the brewing process to avoid harm.
How To Recycle The Pod?
Follow the instructions to learn the K-Cup Pod’s recycling method.
- Peel the lid from the cup and dispose of it.
- Empty the cup’s contents into a compost bin if compostable. Don’t remove the filter from the cup.
- Place the empty and cleaned K-Cup® pod into a recycling bin or container.
Caution: The Pod is hot, so allow it to cool after use.
Care For Your Coffee Maker
When brewing coffee, cleanliness should always be your top priority. It is especially true for Keurig K-Express machines, which rely on various internal components to deliver high-quality coffee. To ensure that the coffee is clean and hygienic, it’s essential to clean and maintain your Keurig regularly. Let’s learn how to clean different parts of your Keurig K-Express!
Coffee Maker Exterior

Keep your Keurig K-Exoress in top condition by cleaning the exterior periodically. Wipe with a lint-free, non-abrasive cloth dampened in soapy water. Never immerse your Keurig coffee maker in water or other liquids.
Drip Tray

The drip tray should be emptied and cleaned occasionally. To remove, lift the base of your Keurig K-Express and level it to avoid spillage. Rinse and wipe with a lint-free,non-abrasive cloth dampened in soapy water. Do not place the drip plate in a dishwasher.
Water Reservoir

The water reservoir should be cleaned regularly. Wipe the reservoir’s inside and the lid’s underside with a damp, soapy, non-abrasive, lint-free cloth. Do not dry the inside of the water reservoir with a cloth, as it may leave lint behind. Allow the reservoir to dry completely, as the water reservoir is not dishwasher safe.
Regular Maintenance
Regular maintenance of your coffee brewer is essential to ensure that it continues delivering high-quality and flavorful coffee cups. Over time, coffee machines can develop mineral buildup, bacteria, and other contaminants that can impact the taste and quality of your coffee. By performing regular maintenance, such as cleaning the machine and descaling the internal components, you can remove these contaminants and extend the life of your machine. Let’s see how often you should service your Keurig K-Express.
| Frequency | Product | Benefit |
| Every two months | Keurig water filters | Keep your water fresh and help remove impurities |
| Every three months or when the descale notification turns on | Keurig descaling solution | Eliminates mineral buildup to preserve the long-term health of your Keurig K- EXpress |
If the coffee maker has been in storage or hasn’t been used in days, perform a cleaning brew before preparing your coffee.
Hand-wash the water reservoir, lid, and drip tray with warm soapy water and rinse clean regularly.
Caution: Do not wash parts in a dishwasher.
Note: Do not use a cloth to dry the interior of the water reservoir, as lint may remain.
K-Cup Pod Holder Assembly
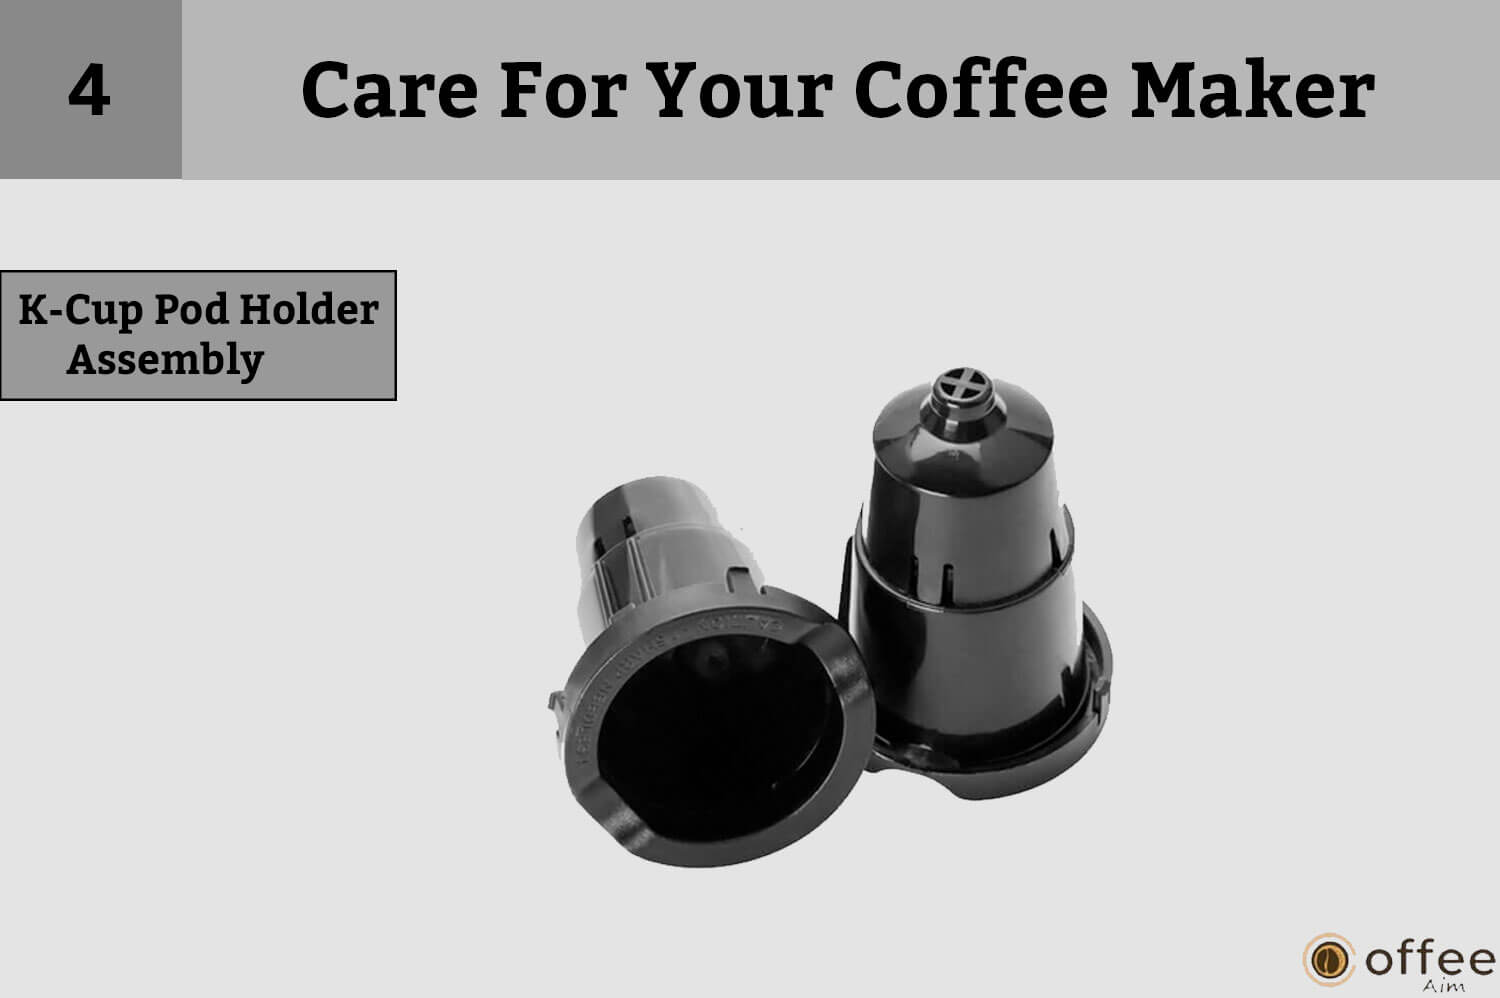
Lift the handle and hold the top of the K-Cup pod holder with one hand while with the other hand pushing up the bottom of the K-cup pod holder from underneath to remove the holder from the Keurig coffee maker. Clean and arrange the K-cup pod holder with the opening using the two front ribs and check if it is appropriately aligned.
Funnel

Cleaning the funnel guarantees that you get a fresh beverage experience. The funnel should be cleansed regularly and can be removed from the K-Cup® pod holder by pulling until it pops out.
Replace it by orienting the snaps to the indent and simply snapping it back onto the K-Cup® pod hold.
Exit Needle

Remove the pod holder assembly and detach the funnel. Now, locate an exit needle on the inside bottom of the K-cup holder. Insert a straightened paper clip into the needle to loosen any coffee grounds.
Entrance Needle
There is an entrance needle on the underside of the lid as you lift the Keurig coffee maker handle. To clean the holes in the needle:
- Use one hand to lift the handle while, with the other hand, insert a straightened paper clip in all the holes.
- Slowly and gently move it around to loosen any coffee grounds.
- Lift down the handle and run through the cleansing brew twice.
- Do not insert a recyclable K-cup pod.
Descale Your Keurig K-Express
By taking the time to descale your machine regularly, you can ensure that it continues to function well and provide you with the delicious coffee you love. If you want your coffee machine to last and keep brewing great coffee, I recommend that you descale your Keurig K- Express after 3-6 months or immediately when it shows the descaling alert. Your taste buds and your wallet will thank you!
If you need help with how to descale your machine, I have mentioned all the steps below that can walk you through the process step by step.
Note: To turn off the descaling light, you need to perform the descaling procedure completely.
Pre-Requisites
A large ceramic mug (296 ml/10 oz minimum), fresh water, Keurig Descaling Solution, and access to the sink. Ensure that there is no beverage pod in the K-Cup pod holder. This procedure takes approximately 20 minutes. Do Not use paper cups.
Step 1: Preparation

Pour the entire bottle of Descaling Solution into an empty water reservoir. Then, fill the empty bottle with water and pour it into the water reservoir. Now place a large mug on the drip tray.
Note: Do not insert a recyclable K-cup pod.
Step 2: Descaling
Plug in the socket, ensuring that it is powered off, and press and hold the 6 oz and 10 oz buttons together for 3 seconds, and as the light flashes, press the 8 oz button to start descaling. When the process is completed, pour the hot liquid into the sink and continue to brew 8 oz until the added water light illuminates.
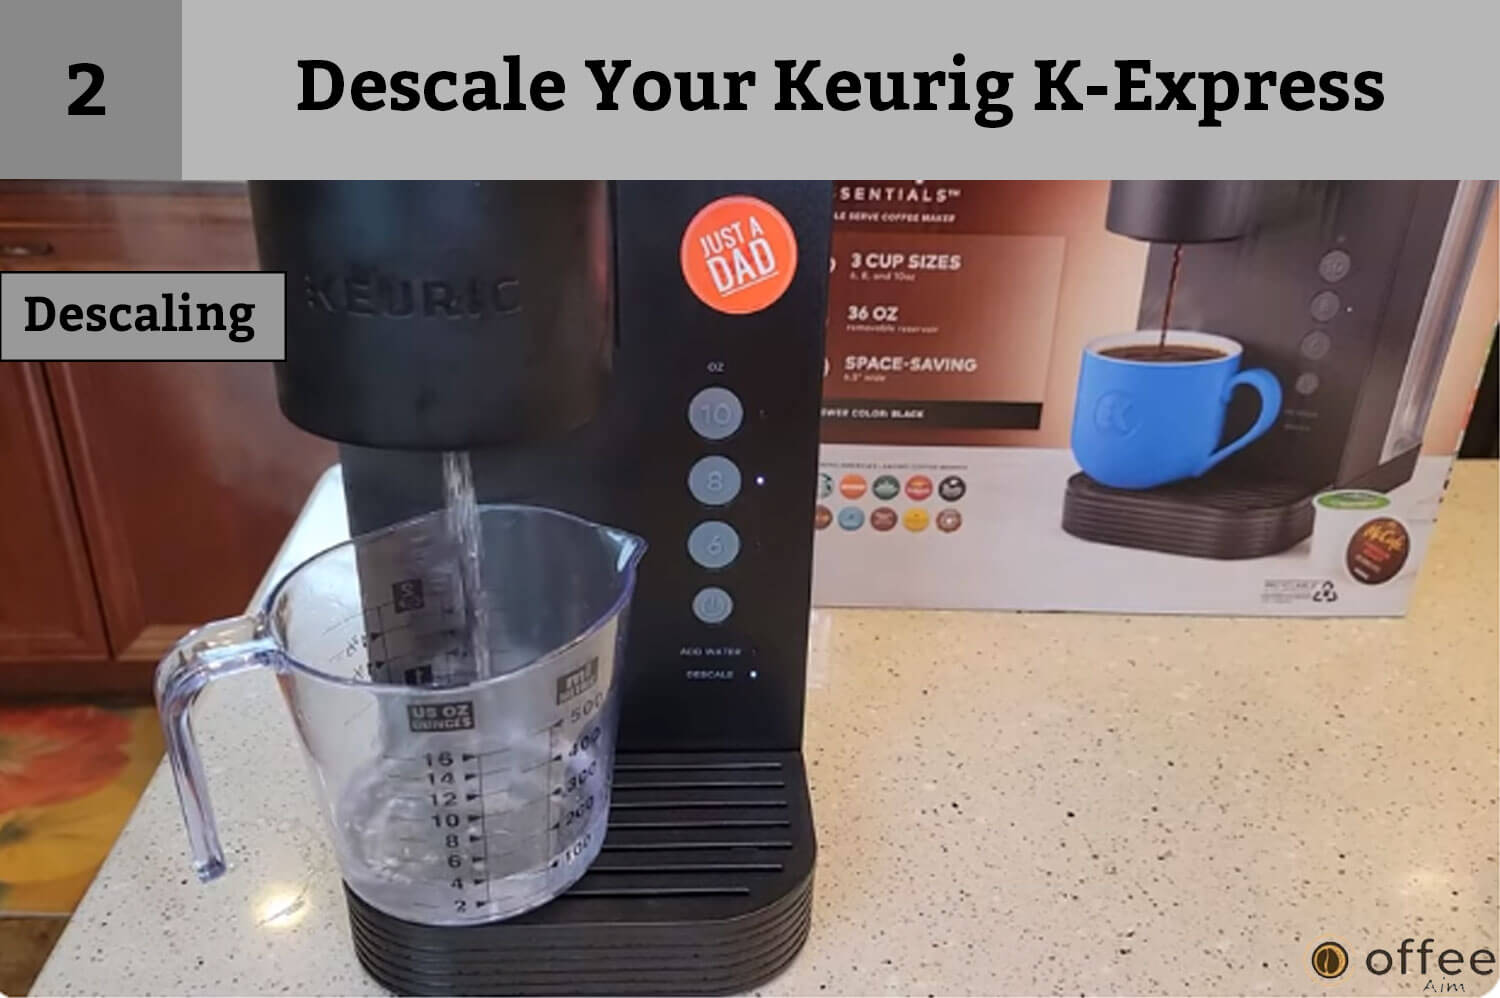
Step 3: Rinse It Off

Empty the water reservoir and pour fresh water till the max fill line. When the light flashes, press the 8 oz button when the light flashes to start the rinse. Once the brew is complete, pour the hot liquid into the sink. Continue to brew 8 oz until the descaling light turns off. Your Keurig K- Express has now exited Descale Mode and will be ready for use!
NOTE: Keurig Descaling Solution‘s cleaning action might cause the coffee machine to discharge “foam.” This is expected since the scale inside the solution is responding. After adding the descaler, a coffee machine that has been highly scaled might not fill correctly. If this happens, you could observe little to no output discharged and hear air blowing out afterward. If this happens:
- Unplug and turn off the coffee machine.
- If there is Keurig® Descaling Solution is in the water reservoir, remove it, thoroughly clean it, and replace it with water.
- Plug the coffee machine, turn it on, and repeat the Step 3 Fresh Water Rinse procedure.
- After the solution is washed out and the scale is gone, the coffee maker should resume regular operation. If the problem persists, disconnect the coffee maker for at least 30 minutes before the rinse.
Troubleshooting
Don’t let a malfunctioning brewer ruin your day. You can fix common problems yourself, saving time and money. Troubleshooting and repairing your brewer can be done quickly and easily without the help of a professional.
| Problems | Solutions |
| Coffee ground in your coffee | Some grounds might have remained in the needles and can be cleaned using a straightened paper clip.Clean up the exit and entrance needles with the help of the instructions in the exit needle care section.When brewing hot water or brewing something else (such as tea or chocolate), clean the exit and entry needles as directed and do two cleaning brews to ensure that you get the most out of your coffee and don’t have too many grounds in your cup. |
| The coffee maker will not brew | During brew, the water level must be at or below the minimum line. Pour an extra 2 oz of water into the reservoir to ensure the minimum fill level is met, then press the size button. Repeat until the coffee maker starts brewing..Check that the reservoir is fitted on the base properly. |
| Brewing a Partial Cup | Power off your Keurig K- Express. Press and hold the 10 oz button for 5 seconds until the water dispenses. Release and discard the leftovers into the sink.Perhaps the exit needle is blocked. See the care section for the exit needle.Clean the needles and K-cup pod holder according to the instructions provided in the care section of the K-cup holder.If you have repeated the descaling procedure on your Keurig coffee maker twice and it is still brewing a partial cup, contact Keurig Customer Care. |
| The coffee Maker Does Not Have Power or Shuts Off | First, switch on the power button.Ensure the coffee maker is plugged into its outlet, as it won’t function properly if the circuit is overloaded.After 5 minutes, the coffee maker will turn off automatically after the last brew.Press the power button to restart; contact customer service if it doesn’t work. |
Helpful Hints
Use filtered or bottled water to have the best quality beverage. (Do not use distilled water). Distilled water is not recommended as it lacks the minerals that are present in filtered and bottled water. These minerals can enhance the taste and aroma of the beverage. Additionally, using distilled water can also lead to the over-extraction of coffee, resulting in a flat and unbalanced taste.
Service
Beyond these suggested cleaning and upkeep methods; this coffee machine cannot be serviced by the user. Please refer to this guide’s Warranty section for information on service.
If you are unable to manage the upkeep of any services, please consult the warranty section of this article.
Safe Storage
When you’re storing or transporting your Keurig® coffee maker, it’s important to empty the water reservoir and store it safely and frost-free. Before using the coffee maker again after storage, it’s recommended to rinse the water reservoir with fresh water and descale the machine using the instructions in the “Descaling your Coffee Maker” section. If you’re planning to move the coffee maker to a new location, turn it off, unplug it, and empty the water reservoir. If the coffee maker has been in a freezing environment, it’s essential to let it warm to room temperature for at least two hours before using it again.
Call For Queries
We’re here; one call away to help. Visit keurig.ca/support_1 for step-by-step videos on cleaning, descaling, and more.
Still, Need Help? Contact us at 1-800-361-5628
Limited One-Year Warranty
Keurig Green Mountain, Inc. (Keurig) warrants that your Keurig coffee maker will be free of defects in materials or workmanship under all circumstances for one year from the date of purchase. It is recommended to register your Keurig K-Express on keurig.ca/welcome so that your purchase information will be stored in our system. After confirming the date of purchase, Keurig repairs or replaces any defective coffee maker free of charge. If a replacement Keurig coffee maker is required to be serviced under this warranty, the replacement brewer may be new or refurbished. A replacement coffee maker may be new or reconditioned and come with a new limited one-year warranty.
This warranty applies only to coffee makers in the United States and Canada. This warranty gives you specific statutory and other rights that vary from state to state and, in Canada, from province to province.
Keurig K-cup brand pods and accessories only guarantee the correct functioning and service life of your Keurig coffee maker. Any damage or malfunction caused by the use of non-Keurig® pods and accessories may not be covered by the warranty or may result in a service fee.
What Is Not Covered By The Limited Warranty?
This warranty does not cover consequential or incidental damages, such as property damage, or incidental costs or expenses resulting from a breach of this warranty, even foreseeable. Some states or provinces do not allow the exclusion or limitation of incidental or consequential damages, so the above limitation or exclusion may not apply to you depending on the state or province of purchase.
This warranty also does not cover damage caused by using accessories other than Keurig brand, service performed by anyone other than Keurig or its authorized service provider, using non-parts of Keurig from origin or external causes such as abuse, misuse, improper feeding, or acts of God.
Other limitations
This exclusive warranty supersedes any other express warranty, whether written or oral. Further, Keurig express disclaims all other warranties for the Keurig K-Express, including any implied warranty of merchantability or fitness for a particular purpose. Some states or provinces do not allow the exclusion of such implied warranties or limitations on how long an implied warranty lasts, so the above limitation may not apply to you, depending on the state or province of purchase.
Obtaining Warranty Services
Keurig coffee makers are high-quality appliances that, with proper care, are designed to provide years of satisfactory performance. However, if you require warranty service, please call Keurig Customer service at 1-800-361-5628. Do not send your coffee maker for service without contacting Keurig customer service to obtain a return authorization number(RMA). Keurig coffee makers without an RMA number will be returned to the sender without assistance.
A Goodbye Note!
I have provided you with everything regarding your Keurig K- Express. After reading this article, I hope you can use your Keurig K- Express like a pro and that now you will not face any difficulties regarding its usage or maintenance. In case of any problem, feel free to scroll around the information provided in the guide or contact Keurig customer service. You are always welcome from our team. Have a caffeine rush with Keurig!
Visit https://coffeeaim.com/ for abundant information about coffee, including informative and engaging articles. Immerse yourself in the world of coffee with our website and discover this beloved beverage’s different aspects.
I wish you a happy sip!
FAQs
How Many Watts Is Keurig K-Express?
You can find the current UL rating of 1,520 watts for the coffee maker on its base. However, be careful when tipping the coffee maker over to check the base.
How Do I Turn On My Keurig K-Express?
Turn the coffee maker on by pressing the POWER button or lifting the handle. If the power does not turn on, unplug the power cord, plug it back in, and press the POWER button. If that doesn’t work, please call Keurig® Customer Service at 1-800-361-5628.
Why Is My Keurig K-Express Not Working?
1. Some grounds might have remained in the needles and can be cleaned using a straightened paper clip.
2. Check that the reservoir fits the base completely.3. Ensure the coffee maker is plugged into its outlet, as it won’t function properly if the circuit is overloaded.