Quick Navigation
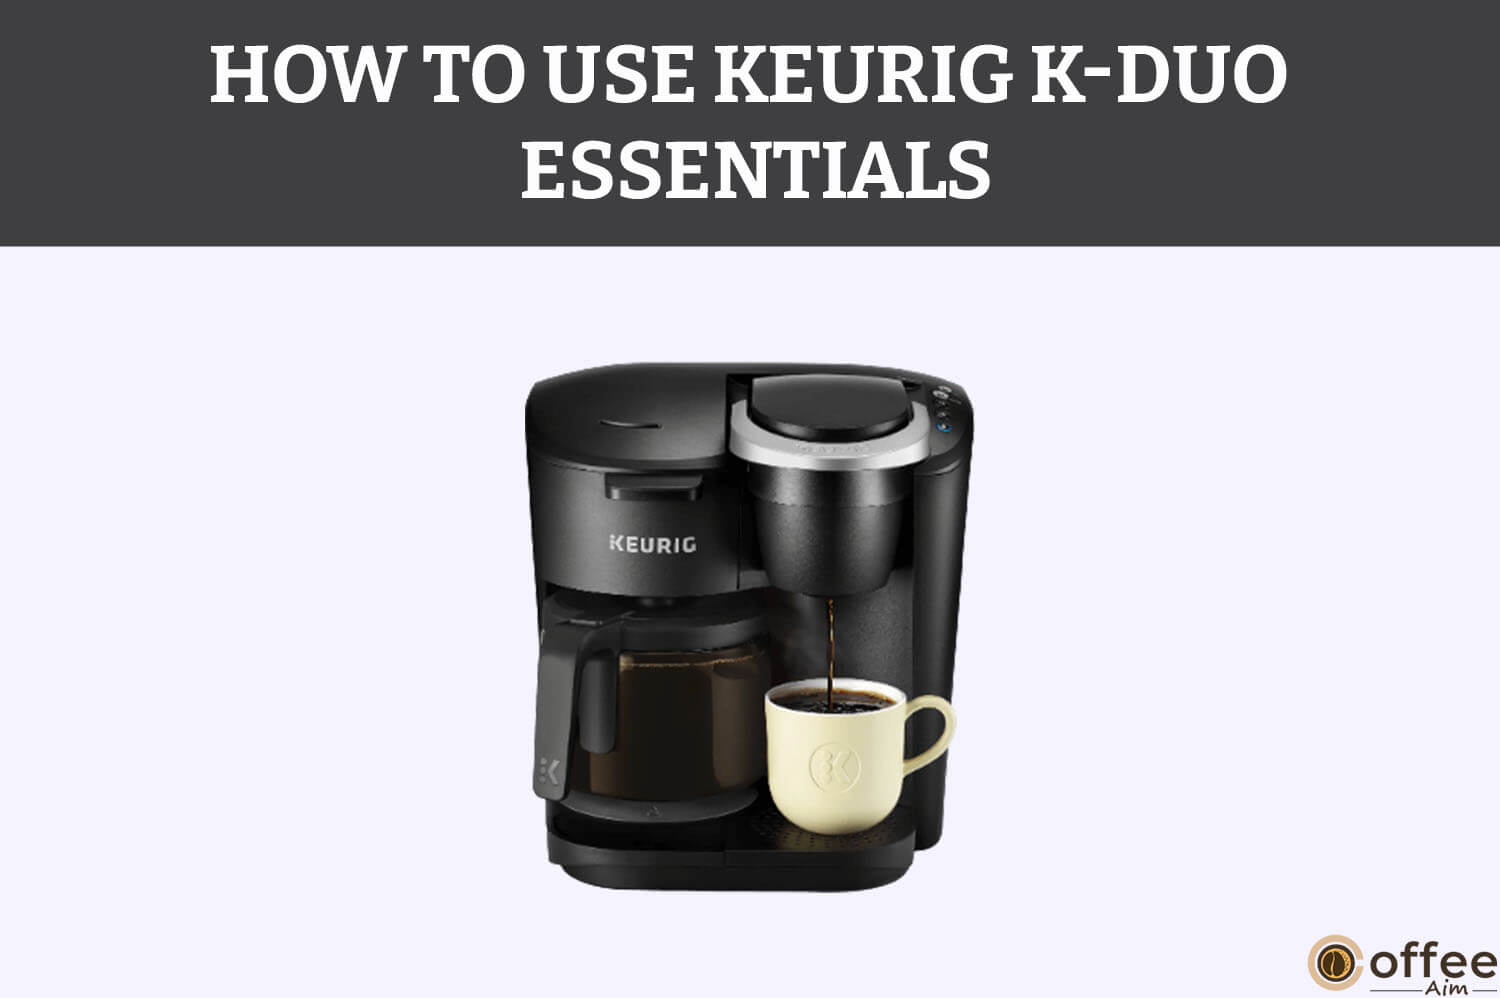
Whether you’re an old user or just starting your journey with Keurig K-Duo Essential to enjoying your life with coffee, at some point, you need to learn how to use Keurig K-Duo Essential or may have trouble with any process. So, if you are also struggling with such issues, then you have landed on the right article. This guide will provide tips on using Keurig K-Duo Essential to get the best cup of Joe every time. Are you ready to make the perfect cup of coffee? Let’s jump in and explore your coffee machine’s fantastic features!
Precautions Keurig K-Duo Essentials
If you don’t know about precautions before using your Keurig K-Duo Essential or misuse it, it could harm you or your loved ones. So, before filling your life with a delightful cup of coffee, always consider the precautions below.
- Always read and follow the instruction manual provided with your coffee machine.
- Ensure that the power cord is not damaged or frayed
- If the power plug is loose, do not use the device.
- Make sure you always use fresh and clean water.
- Over 20 seconds without the carafe could overflow the filter basket.
It is just a summary. For more details, click the link below.
Related: Keurig K-Duo Essentials Safeguards
Specifications Of Keurig K-Duo Essentials
Before getting into the features of Keurig K-Duo Essential, know that every coffee machine has its specifications. Keurig K-Duo Essential is unique in its way! If you know the specifications of Keurig K-Duo Essential, it will be easy for you to use. Before using it for the first time, ensure it meets your needs. It is necessary to ensure it is suitable for you before using it because you can only return it if not used once.
| Features | Details |
| Name | K-Duo |
| Weight | 8.5 lbs |
| Water Storage Tank | 60 oz |
| Display | Buttons for Brew Strength, Brew Size, Auto-On, and a digital clock display, the K-Duo Display Button control panel is given the name. |
| Temp Control | Absent |
| Strength Control | No |
| Dimensions | Width 12.3″Depth 13.4” Height 12.7″ |
| Auto on/off(single cup + Carafe) | Yes |
| Warming Plate | Yes |
| Brew size | Single-serve8 oz 10 oz12 oz CarafeUp to 60 oz |
| Pause before pouring the carafe | Yes |
| Smart Start | Yes |
What Will You Find Inside The Box?
Before unboxing your Keurig K-Duo Essentials, you must know what you will find inside it. If anything is missing, replace your coffee machine without using it. You will find four items inside the box.
1. User Manual
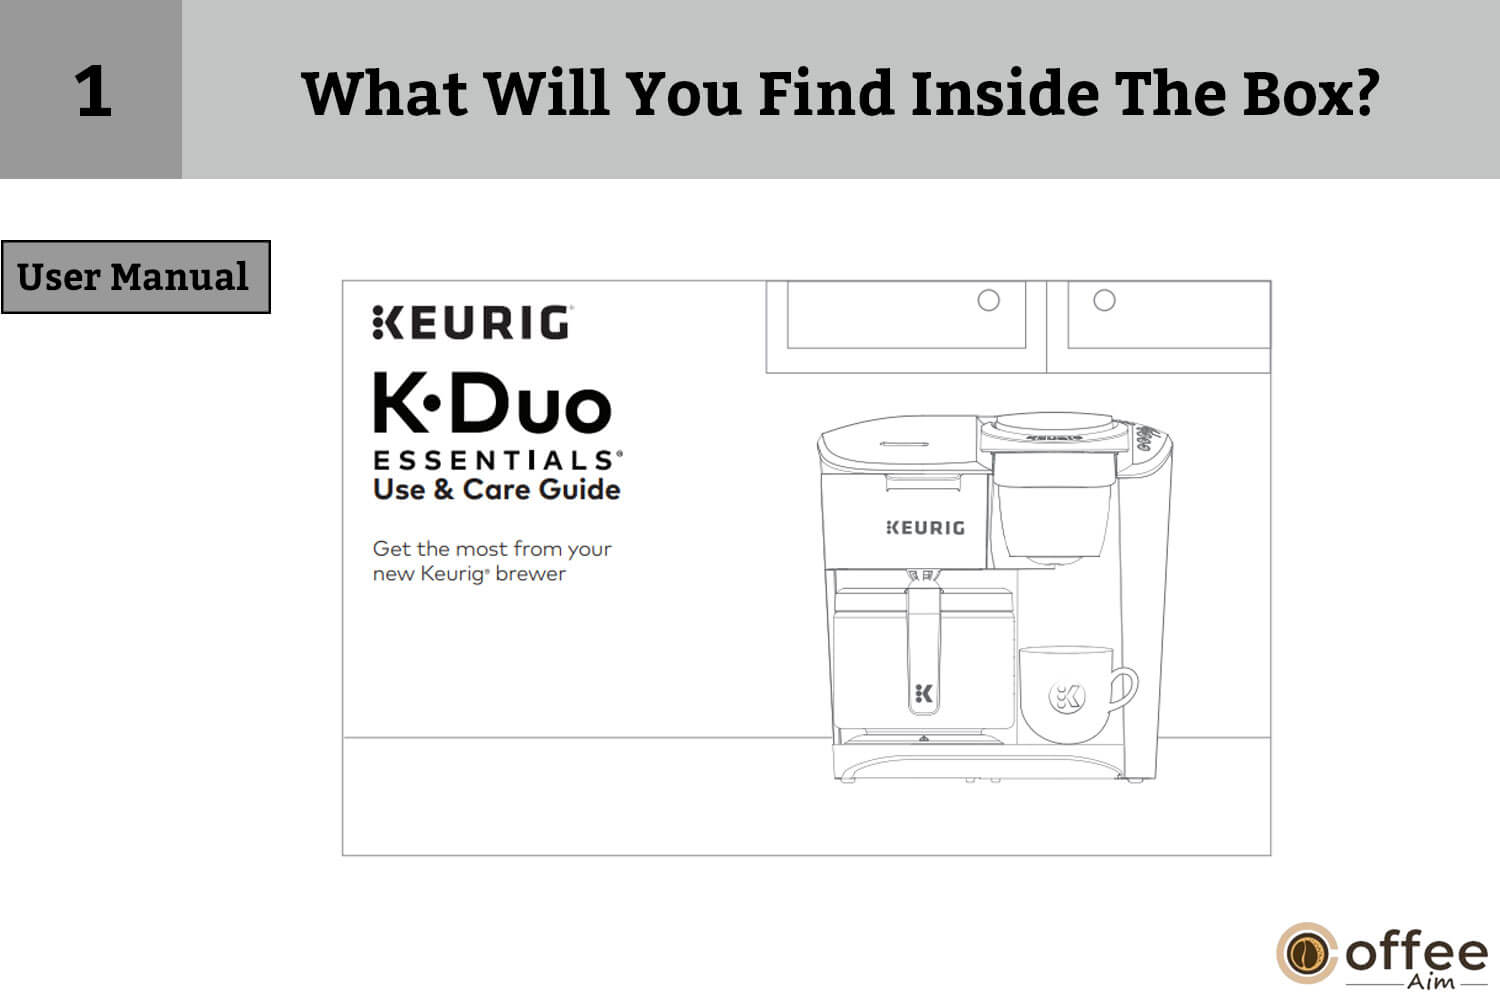
You will find two user manuals. One is written in English, and the other is written in French.
2. Keurig K-Duo Essentials Machine
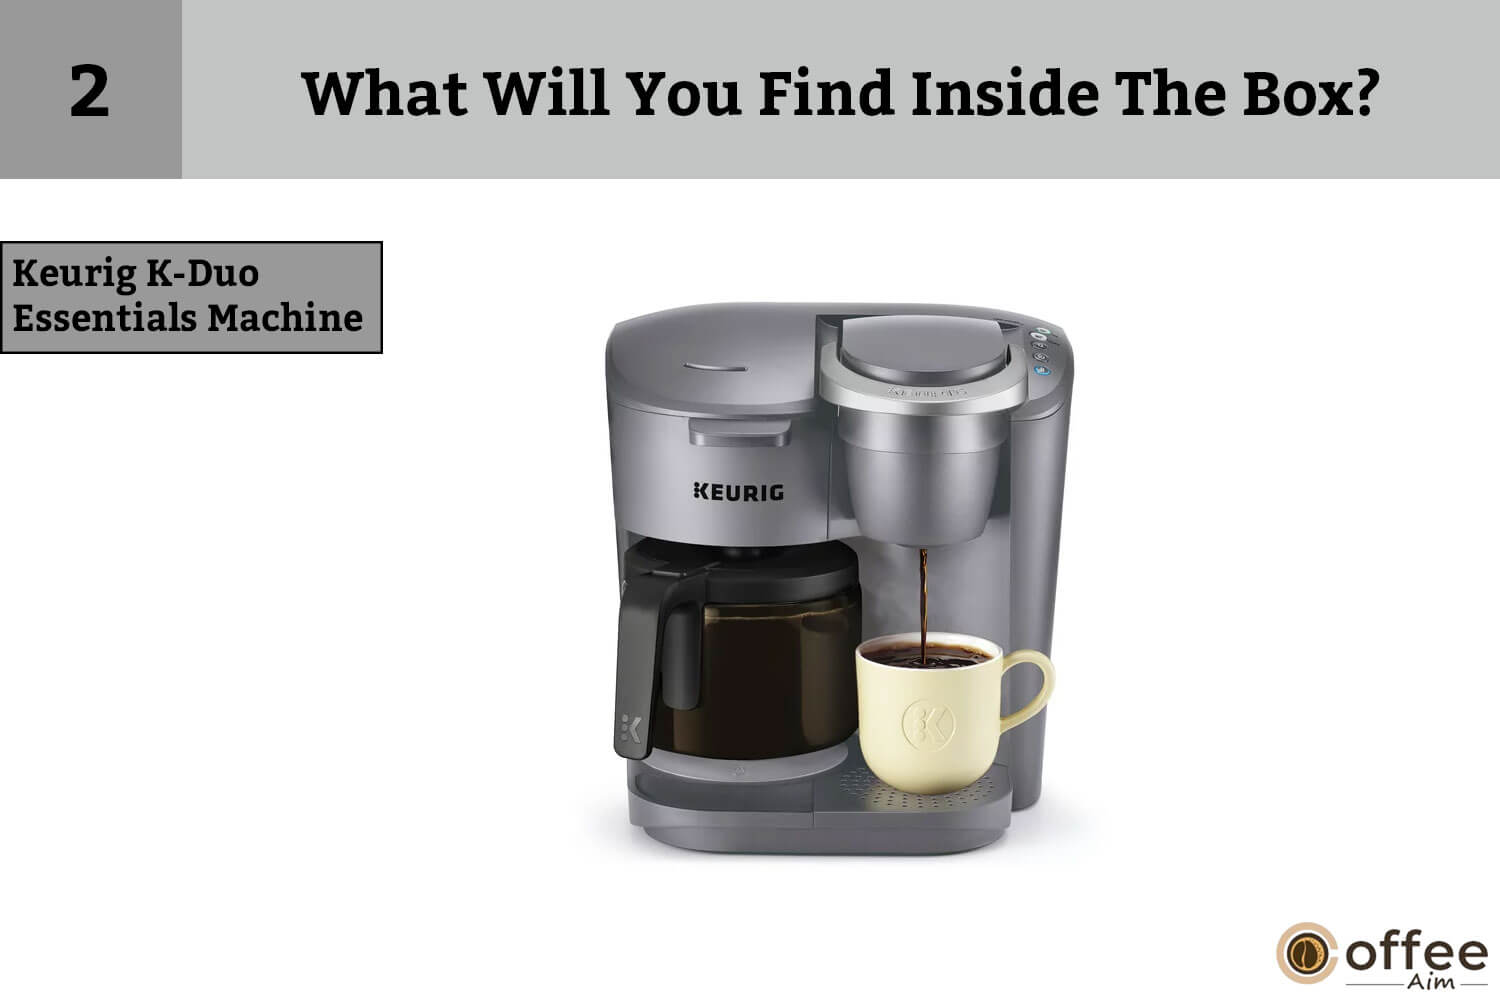
It is a main part of your Keurig K-Duo Essentials. It has a water reservoir and all the features.
3. Carafe

You can put 12 cups of coffee in your carafe maximum. But you have options of 8, 10, and 12 cups of coffee.
Keurig K-Duo Essential Parts
Before learning more about your Keurig K-Duo essential, it is important to know about K-Duo Essential’s parts. Knowing about all of K-Duo essential’s parts will make it easy for you to use it.
A. Water Reservoir Lid
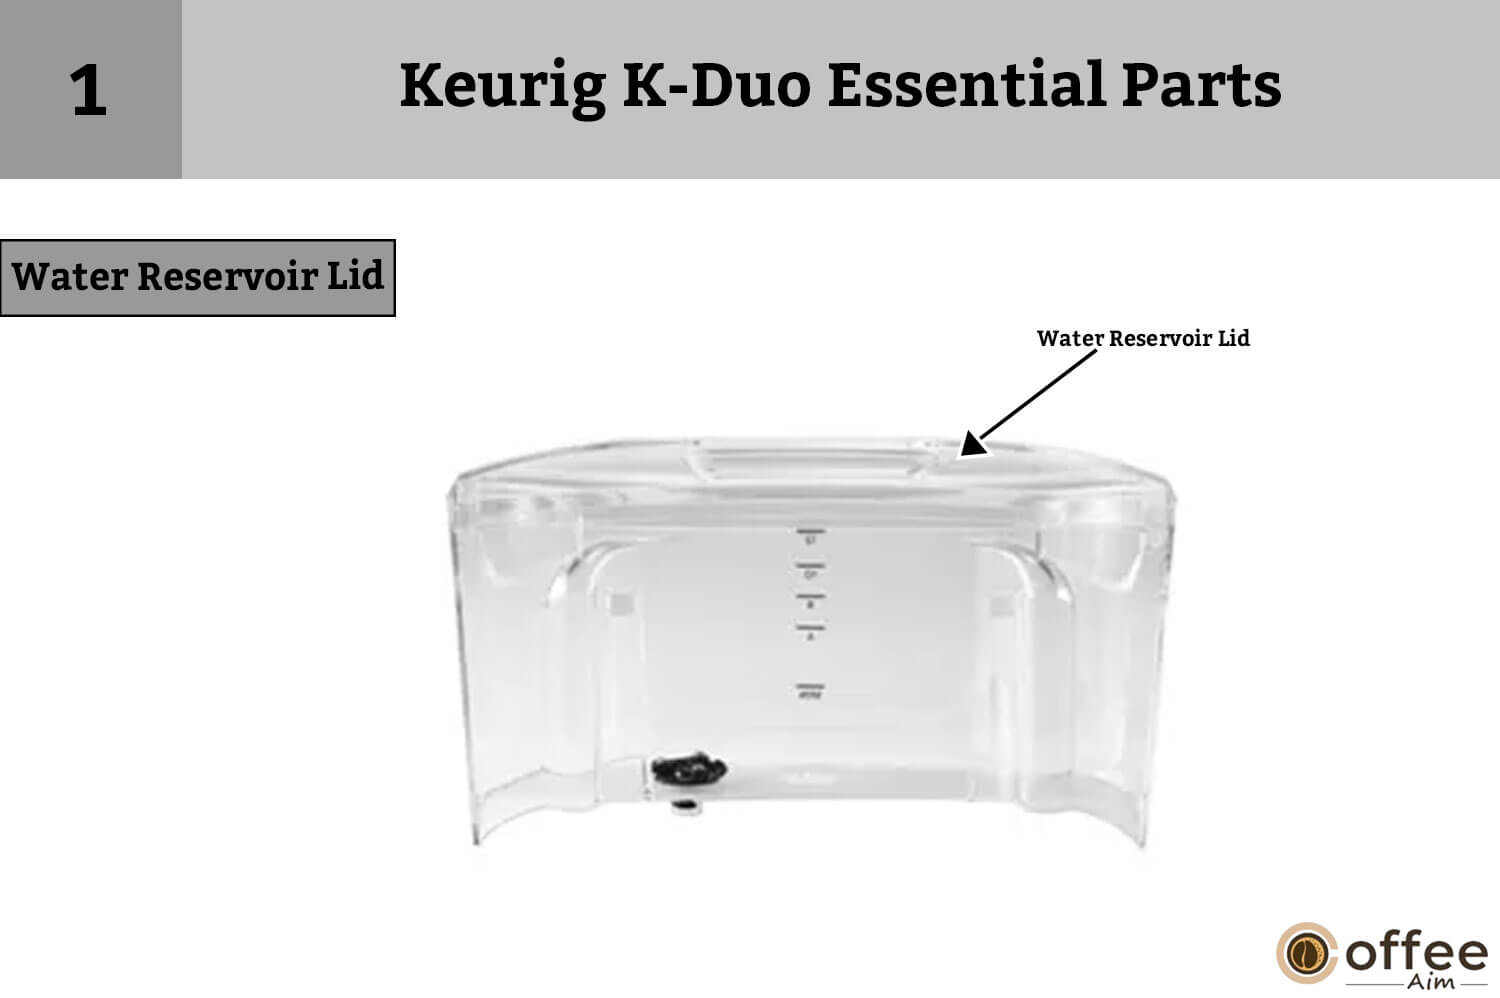
The water reservoir’s lid covers the Keurig K-Duo Essentials water reservoir. The water reservoir lid should be firmly fitted to protect water from dirt. So, you always get a healthy cup of coffee.
B. Water Reservoir

One of the essential parts of your Keurig K-Duo Essentials is the water reservoir. It is located at the back of your Keurig K-Duo Essentials. Before making a cup of coffee, ensure the water reservoir is filled. If you power on your machine without filling water into the water tank, then the chances of the machine burning are there.
C. Max Fill Line

It is marked on the water reservoir. Try not to fill your water tank above this line.
D. Water Reservoir Lock Tab Slots

Water Reservoir Lock Tab Slots are present on the water reservoir. They keep the water reservoir in place.
E. Power Cord

The power cord is attached to your Keurig K-Duo Essentials. It is designed to transfer electricity from the main electricity supply to your coffee maker.
F. Handle

It is attached to the water reservoir. Place a K-Cup® pod in the K-Cup® pod holder by lifting the handle. To close the lid, fully lower the handle. Moreover, a handle is useful while preparing coffee at a high altitude.
G. Lid
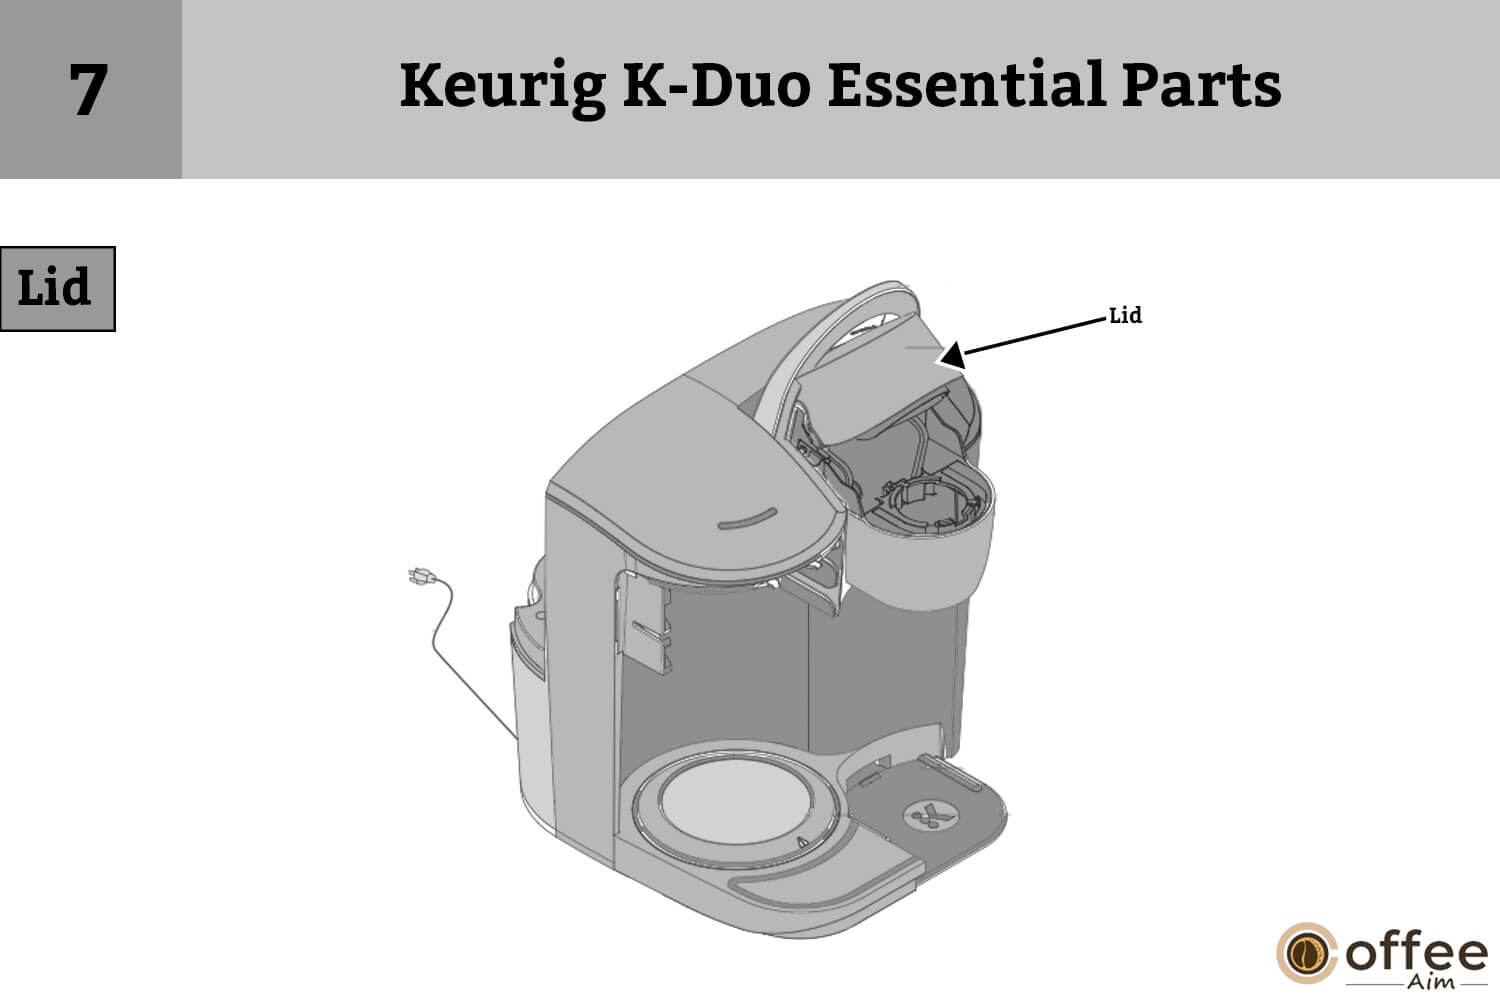
Lower the handle to close the lid. Always clean the lid after each brew.
H. K-Cup Pod Holder

In the K-Cup Pod Holder, insert your favorite K-cup pod to brew a delicious cup of coffee.
I. Funnel

It is a small nozzle-type part through which the brewed coffee passes through and reaches the coffee outlet, and finally dispenses in your cup. It also acts as a sieve and filters any coffee grounds from brewed coffee.
J. K-Cup Pod Assembly Housing
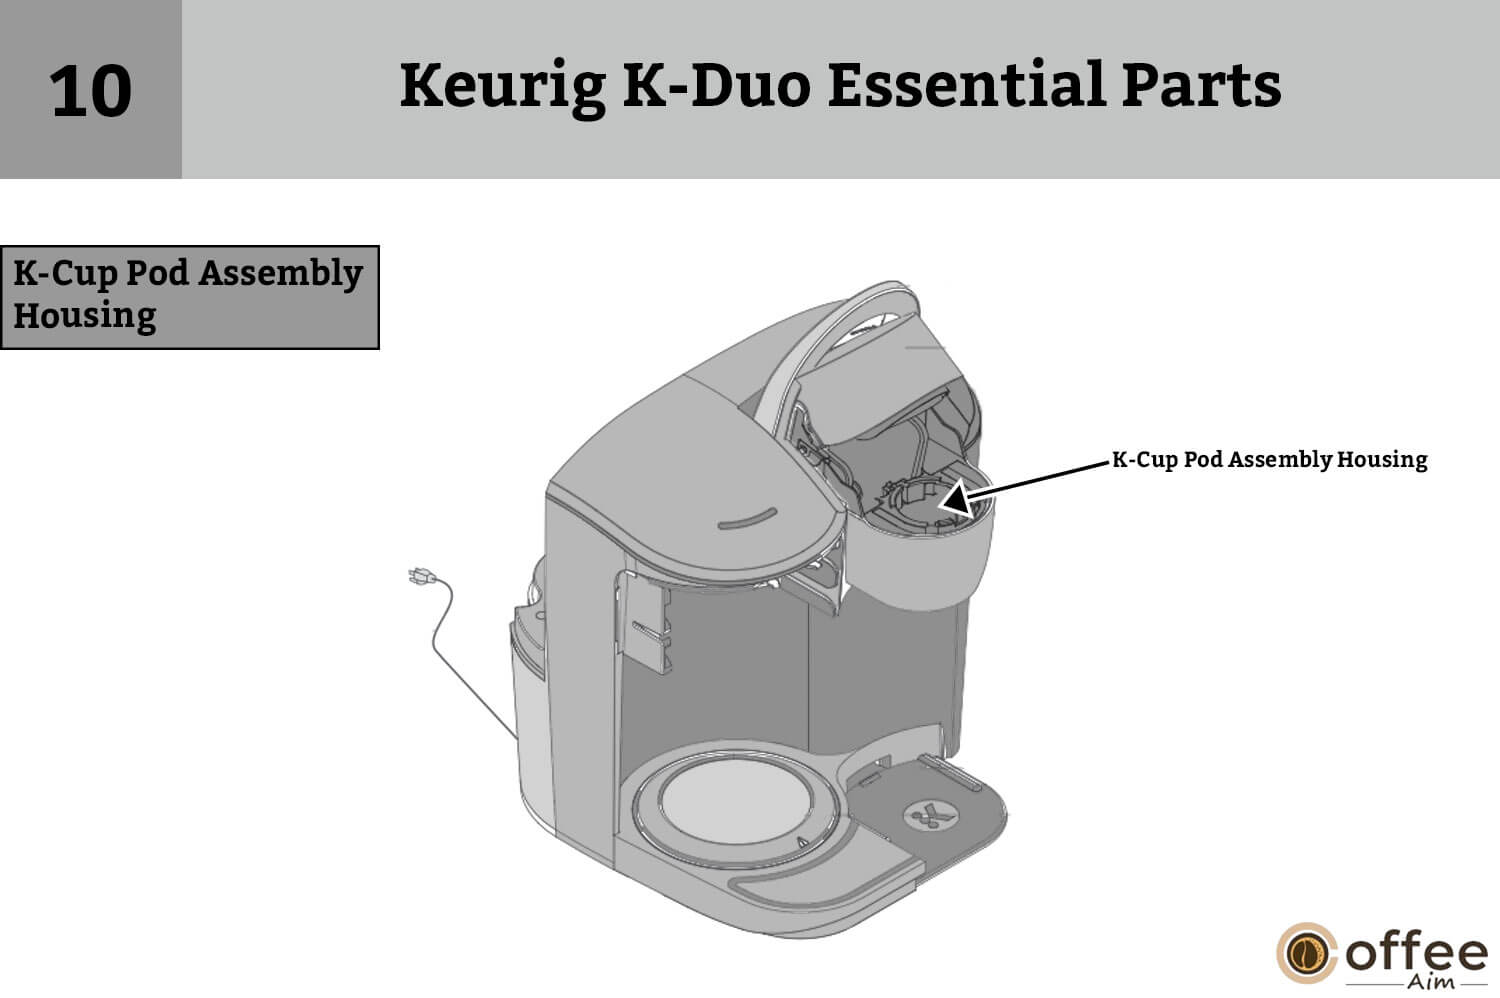
K-cup pod holder and funnel are collectively called K-cup pod holder assembly, and the place where it is inserted is referred to as K-cup pod assembly housing. It is quite a complex part of the brewing unit.
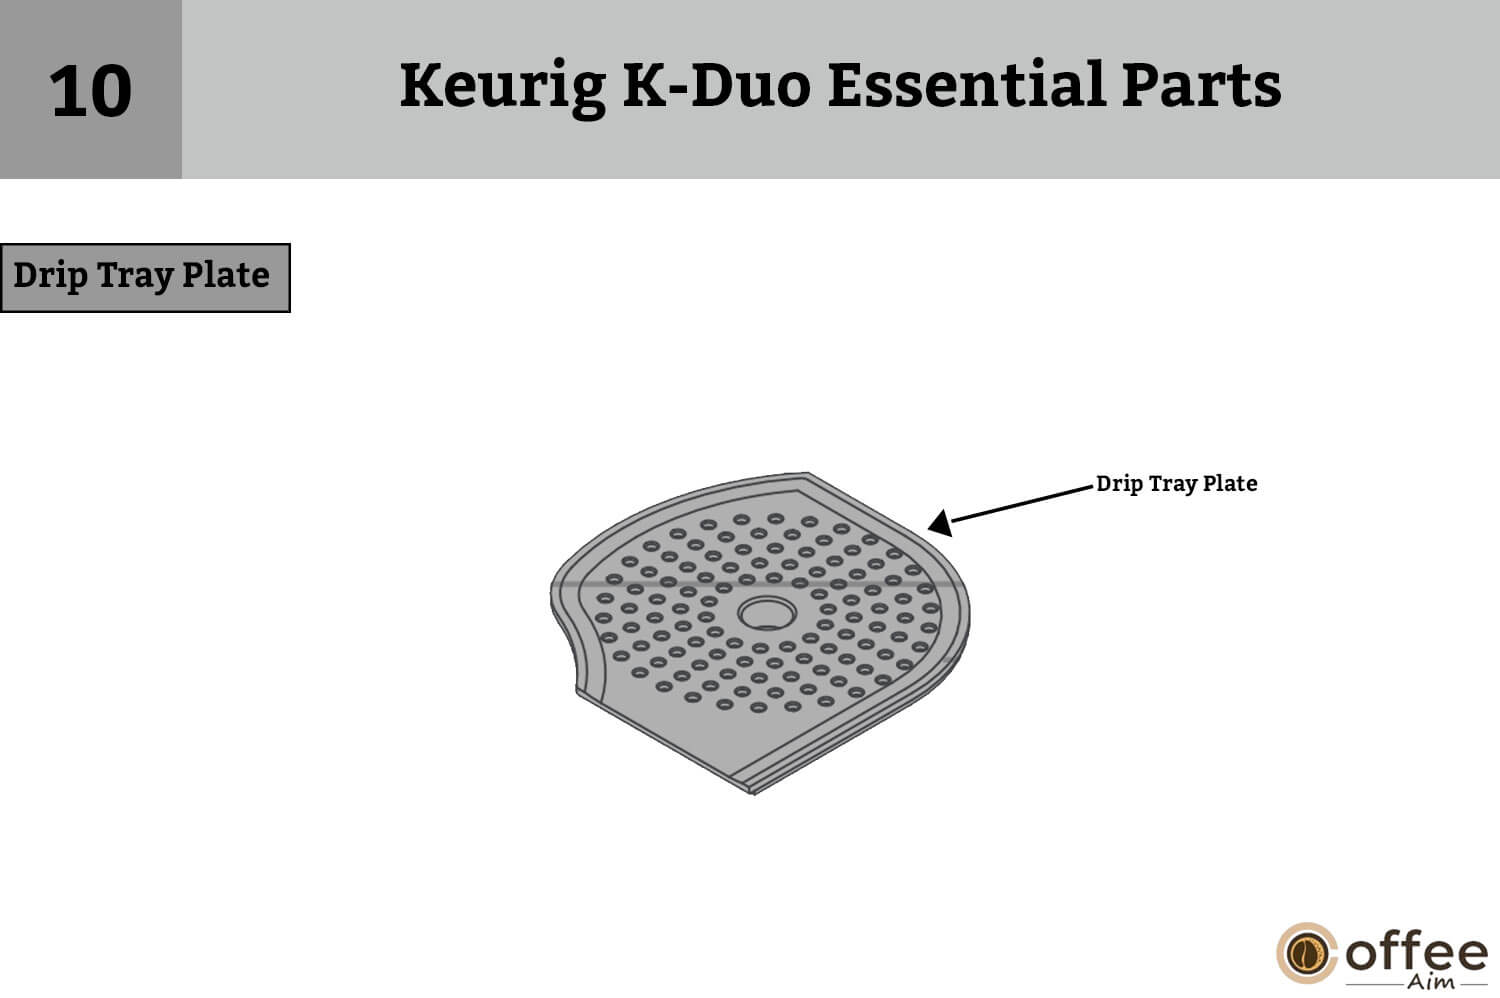
K. Drip Tray Plate
The drip tray plate is present under the drip tray. It holds your cup in place.
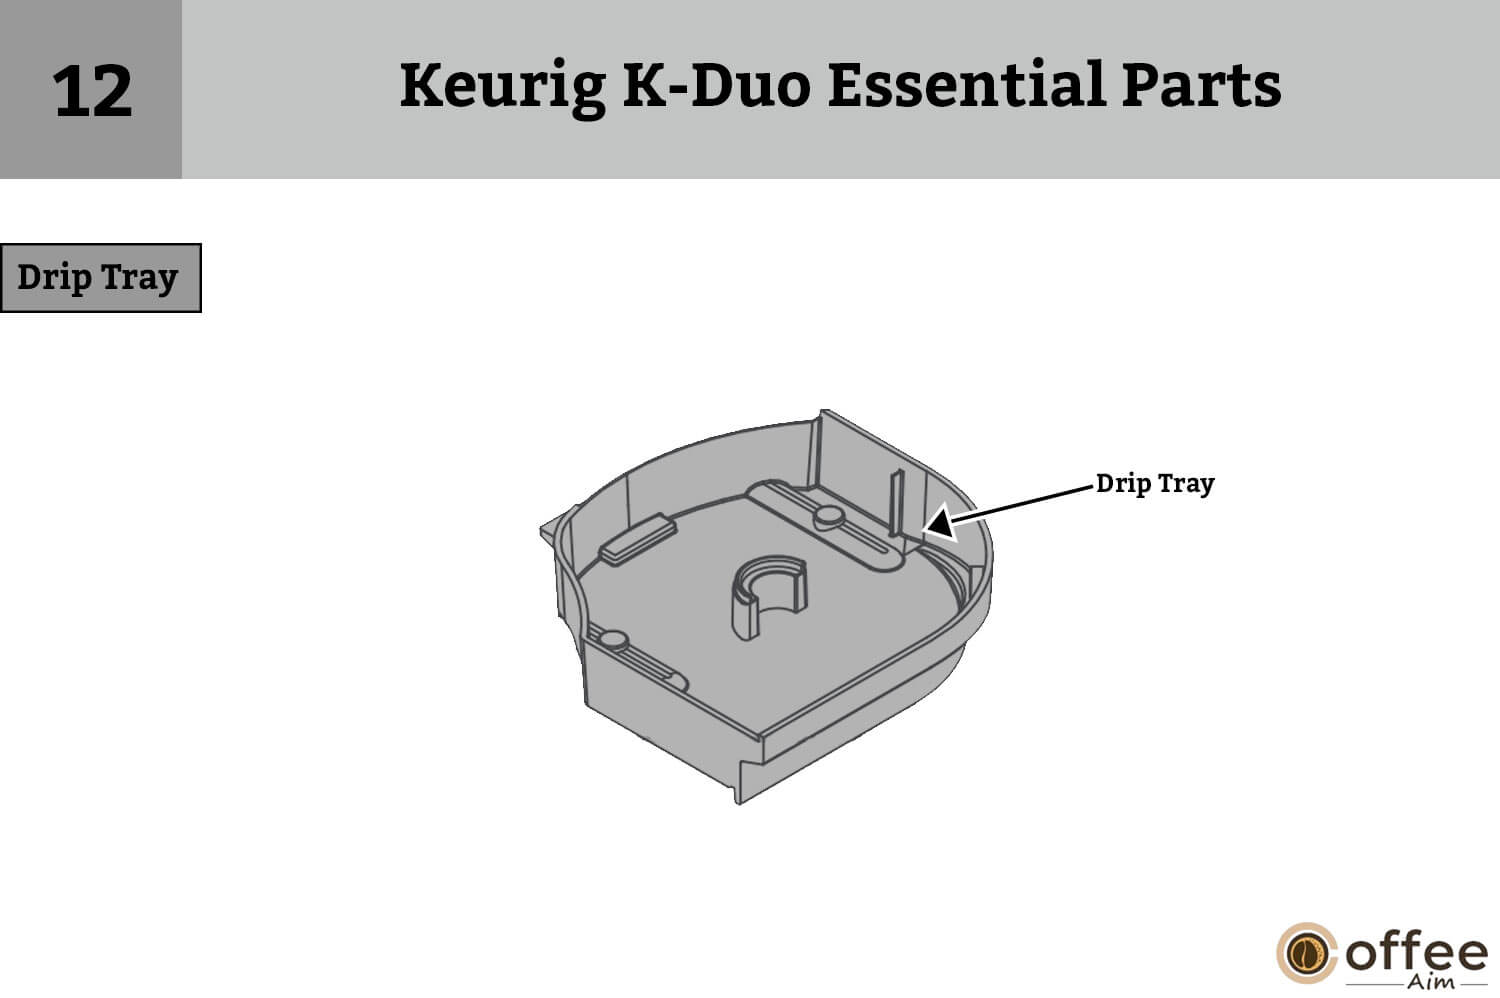
L. Drip Tray
It is present on a drip tray plate. The drip tray is necessary for catching spills.
M. Drip Tray Base

The drip tray base is used to place your coffee mug on it. When you are using a travel mug, remove the Drip tray and place it directly on the drip tray base.
N. Carafe And Lid
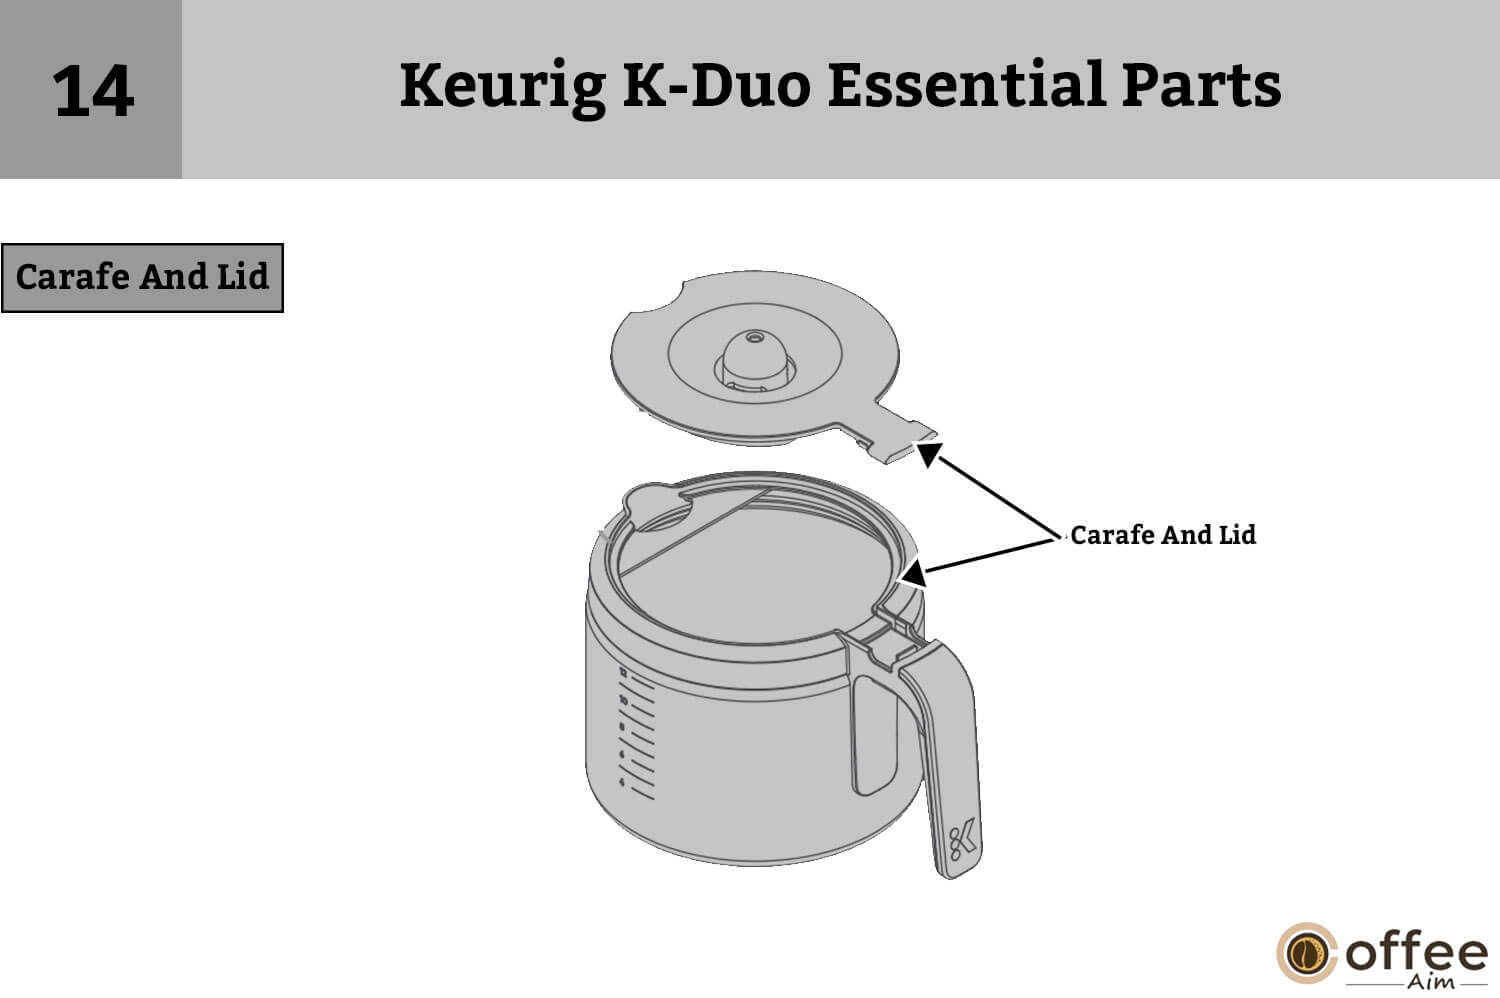
To make 1-12 cups of coffee, use a carafe. It can’t hold more than 12 cups. Run the water through the carafe before using it for your coffee. Place the carafe back after pouring coffee within 20 seconds.
O. Heating Plate

The heating plate will automatically turn on after the brew is complete. It stays warm for 2 hours after brewing, and then your Keurig K-Duo Essentials automatically shuts off. To turn it off, press and hold the carafe button. Put your carafe back on the heating plate after 20 seconds.
P. Filter Basket

Place filter paper in the filter basket. Do not fill the filter basket with coffee grounds. Add 1 tablespoon of coffee grounds per cup.
Q. Filter Basket Drawer

Coffee grounds and water are passed through the filter basket and then into your coffee cup. Filter Basket Drawer holds filter basket.
What Should You Do Before Your First Brew Or After A Long Period Of No-Use?
Your first brew can be challenging for you if you are unaware of the use of your Keurig K-Duo Essential. In these instructions, you will learn everything you need for your first brew. Let’s get started!
1. Plug And Place

As you have unpacked your brewer safely now, plug it into an outlet.
Single Cup: Set a sizable mug (at least 12 ounces) on the drip tray.
Carafe: After thoroughly cleaning it, set it on the heating plate.
2. Clean And Fill

You must clean your brewer before first use to make sure there are no dust or unwanted particles on your brewer, and then fill it with water. Doing this will make your coffee healthy for you!
- Lift the water reservoir straight up to remove it after removing the lid.
- Install your Keurig® water filter right away if you have one.
For instructions, consult your Water Filter Starter Kit. - Add fresh water into the water reservoir up to the MAX Fill line.
- Replace the water reservoir and make sure lock tabs are engaged with the brewer.
3. Single Cup Cleansing Brew

A freshly made pot of coffee can help you refresh even if you’re planning your day or taking a respite from your day. To ensure that you get the greatest cup of coffee, carefully follow the manufacturer’s directions as you are ready for your cup of coffee.
- To activate the single cup side, press the “OZ” button.
- Never insert a K-Cup® pod.
- To begin the purifying Brew, press button 8; when the brewer heats up, the OZ button will start to pulse green.
- When heated, the OZ button will become entirely green, signaling the start of the cleansing Brew.
- Pour hot water into the sink.
NOTE: The brewer may need a minute to reheat between brew cycles.
4. Turn On – Carafe
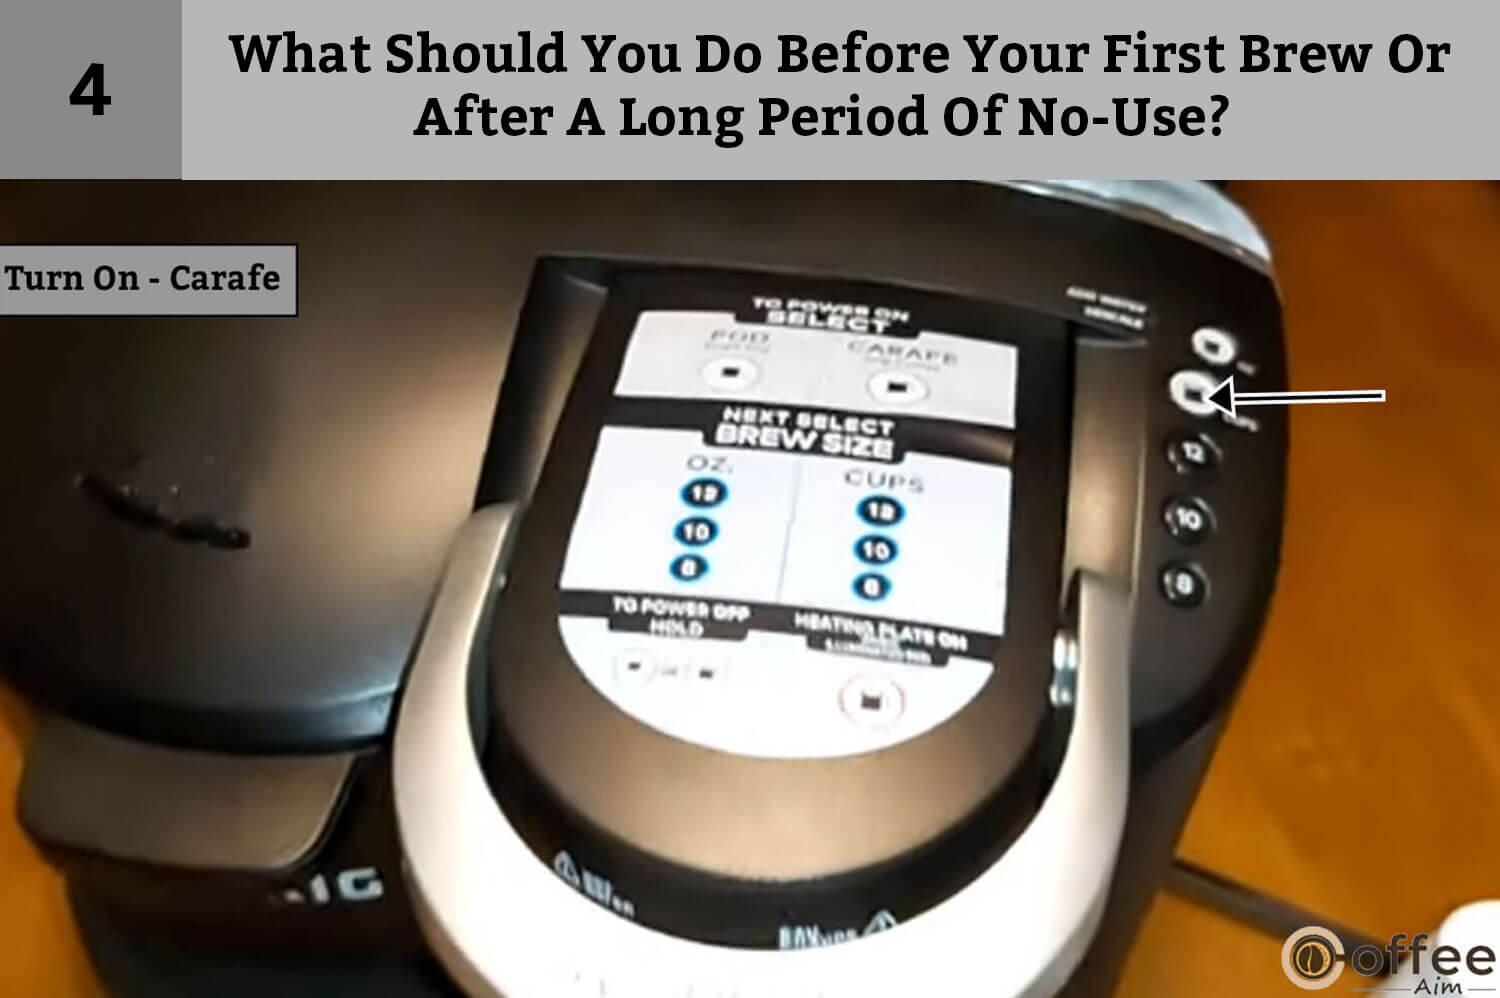
Take a second to savor the simple joy of a well-prepared cup of coffee before turning on your carafe. The pleasure that awaits you includes the aroma, the comfort, and the delicious flavor, and then turn on the carafe.
- When the reservoir is packed to the MAX Fill line, turn on the carafe side by pressing the CUPS button.
- Don’t put coffee grinds in the filter basket. The three brew-size buttons will blink blue, while the CUPS button will glow green.
Cleansing Brew-Carafe
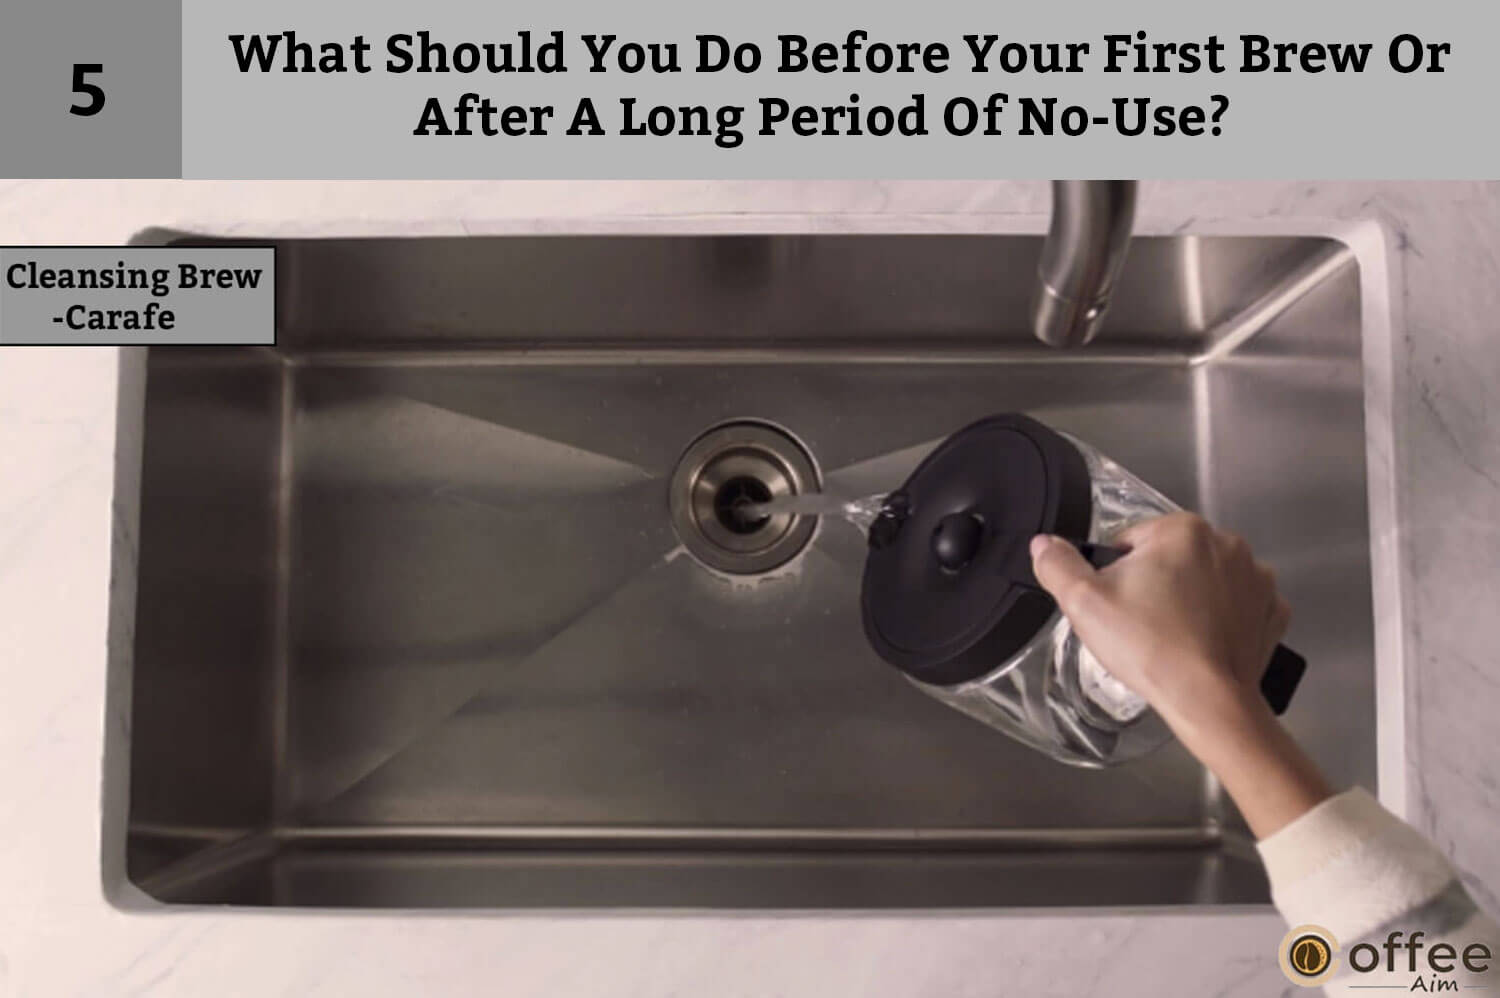
If you don’t know how to clean your Keurig K-Duo Essential, it could be difficult for you. You will find all the information you need in these instructions. Let’s start now.
- The button which has mentioned no. 8 on it will become blue when you press it to begin a cleansing brew.
- When the cleansing brew is finished, the CUPS button will turn red to show that the heating plate is on.
- After turning off the heating plate with the CUPS button held down, pour the hot water into the sink.
You’re all set to brew now that the one-time single-cup setup procedure is over!
Make Your First Single Cup Of Coffee
If you want to make your first cup of coffee but don’t know how to make it so, don’t worry! I got you. Read and follow the instructions below to make and enjoy your first cup of coffee.
1. Assemble Your Mug And Pod

Before making a delicious cup of coffee, you must know the details of every step, and each and everything is shared below. So Jump ahead!
- On the drip tray, set a cup.
- Remove the drip tray if you are using a travel mug, and place the travel mug on the drip tray base. Place a K-Cup® pod in the K-Cup® pod holder by lifting the handle. To close the lid, fully lower the handle.
High Altitude Brewing
When brewing at a high altitude, while holding the brewer handle, steadily press down on the K-Cup® pod on the pod holder until the exit needle punctures the bottom of the K-Cup pod.
2. Brew And Adore

Congratulations! You are all done making your first cup of coffee. Follow the instructions below for further process so you can enjoy your first single cup of coffee.
- Select your brew size after pressing the OZ button. The button “OZ” and the brew size button will be lit for roughly a minute while the coffee is brewing.
- When the brew size button stops illuminating, the brewing process is over.
- Remove the handle, then throw away the used K-Cup® pod. The brewer will be prepared to produce another cup in approximately a minute.
- To keep the needles clean, I advise using a Keurig® Rinse Pod or brewing a cleansing brew right away after brewing hot chocolate or other sweetened pods.
- The brew button will be disabled after 60 seconds. Press the “OZ or CUPS to restart.
Brew Your First Carafe Coffee
You can’t wait to make your first carafe coffee, and that’s why you are here. Here you will get to know each and everything you need to brew your first carafe. Let’s dive straight into the instructions without wasting time.
- Assemble Carafe And Basket

Nothing gets the day going quite like a hot cup of coffee in the morning. To guarantee that your coffee is brewed flawlessly every time, it’s crucial to take the time to carefully assemble your coffee maker. We’ll walk you through the process of putting your mug and pod together in this user manual so you can create a wonderful cup of coffee each time you use your Keurig K-Duo Essential.
- Fill the water reservoir to the MAX line.
- Insert a 12-cup paper filter into the filter basket after drawing the filter basket drawer outward.
- Add the necessary quantity of ground coffee (it’s recommended to use one tablespoon for each cup).
- Place the carafe on the heating plate and completely reinstall the filter basket drawer.
NOTE: The maximum amount of regular ground coffee is 15 tablespoons, and the total amount of decaf is 12 tablespoons. Overflow could result if this amount is exceeded.
- Brew And Relish!

You may enjoy a tasty cup of coffee that is customized in just a few minutes, thanks to the ease of single-serve coffee makers. Now just sit back and enjoy your perfect cup of coffee.
- Press the CUPS button and choose the brew size.
- The heating plate will automatically switch on after the Brew is finished and stay on for two hours; the CUPS button will turn red.
- Hold down the CUPS button until the light stops illuminating to switch off the heating plate.
- Press and hold the CUPS button until the red light turns on to turn the heating plate back on if you accidentally turn it off.
Caring For Your Brew
Start every day with a delicious coffee and an energizing boost whenever you need it. Keurig K-Duo Essentials should be regularly maintained and cared for to keep it working optimally! With this guide, learn how to take care of your Keurig K-Duo Essentials for years of delicious coffee.
Caution: Brewer parts are not dishwasher friendly.
Exterior Of Brewer
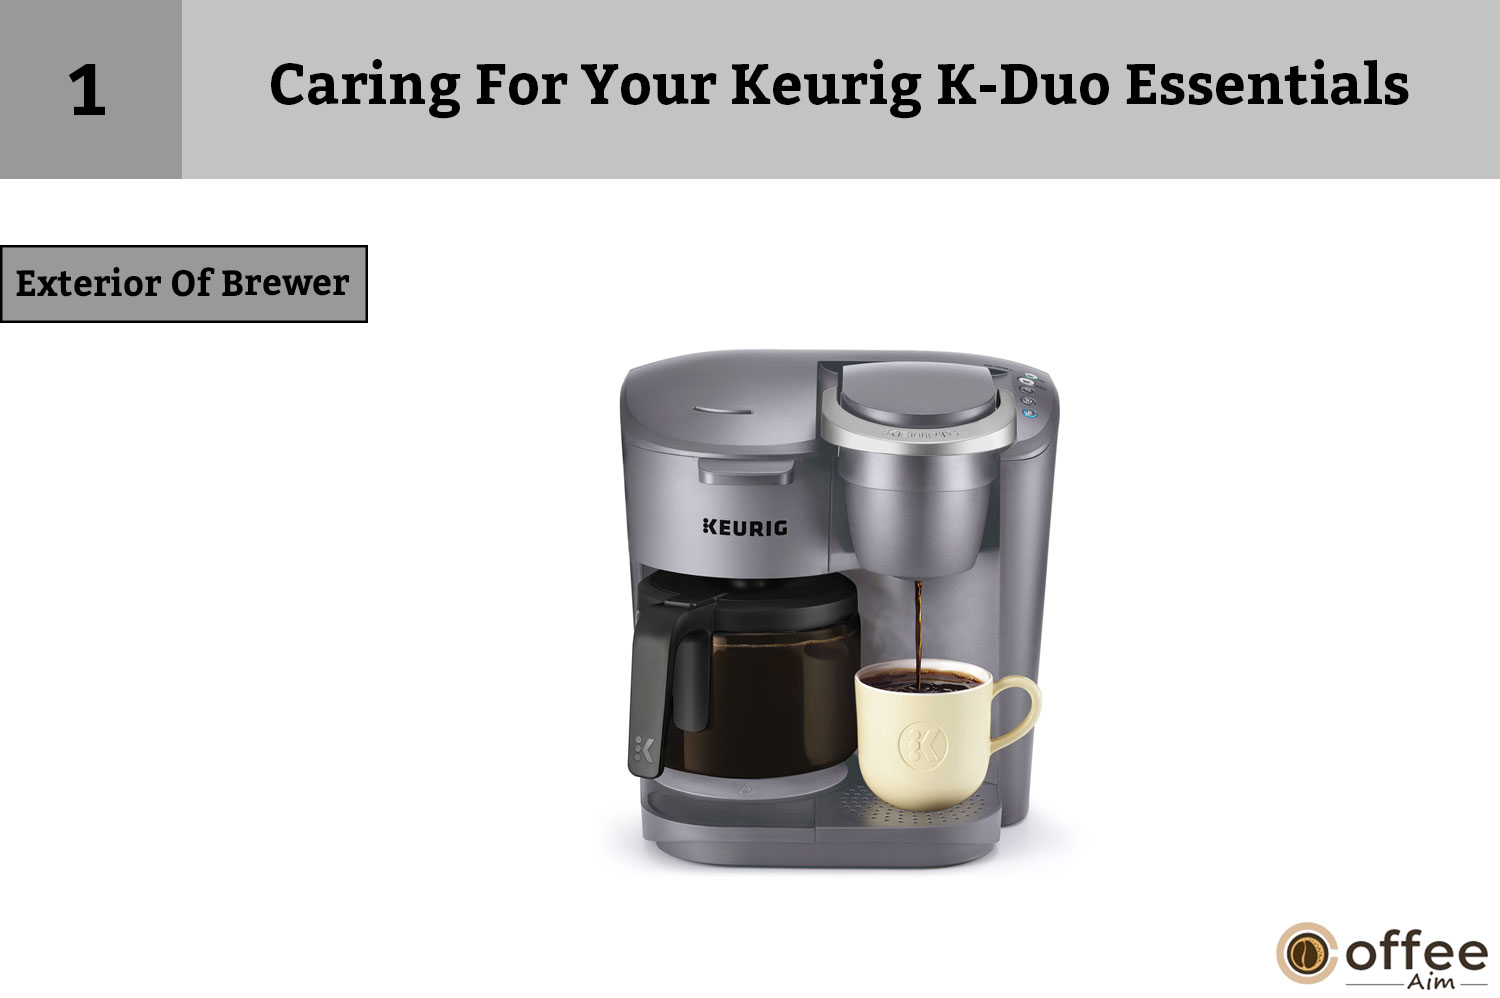
Caring for the exterior of the brewer is necessary as it is the body of Keurig K-Duo Essential. If it is damaged, then your brewer will lose its beauty. Don’t let that happen.
- Clean the exterior of your Keurig® brewer for its best looking.
- Once in a while, use a non-abrasive, lint-free, moist, soapy cloth to clean.
- Never submerge the brewer in liquids, including water.
Drip Tray

Cleaning your drip tray will always give you a creamy and nice cup of coffee without any excess beans. Never miss it while cleaning!
- The drip tray can contain up to 8 oz. liquid and needs to be periodically cleaned and emptied.
- Slide it away from you while keeping it level to prevent spills. Use a non-abrasive, lint-free, moist, soapy cloth to clean.
Carafe And Its Lid
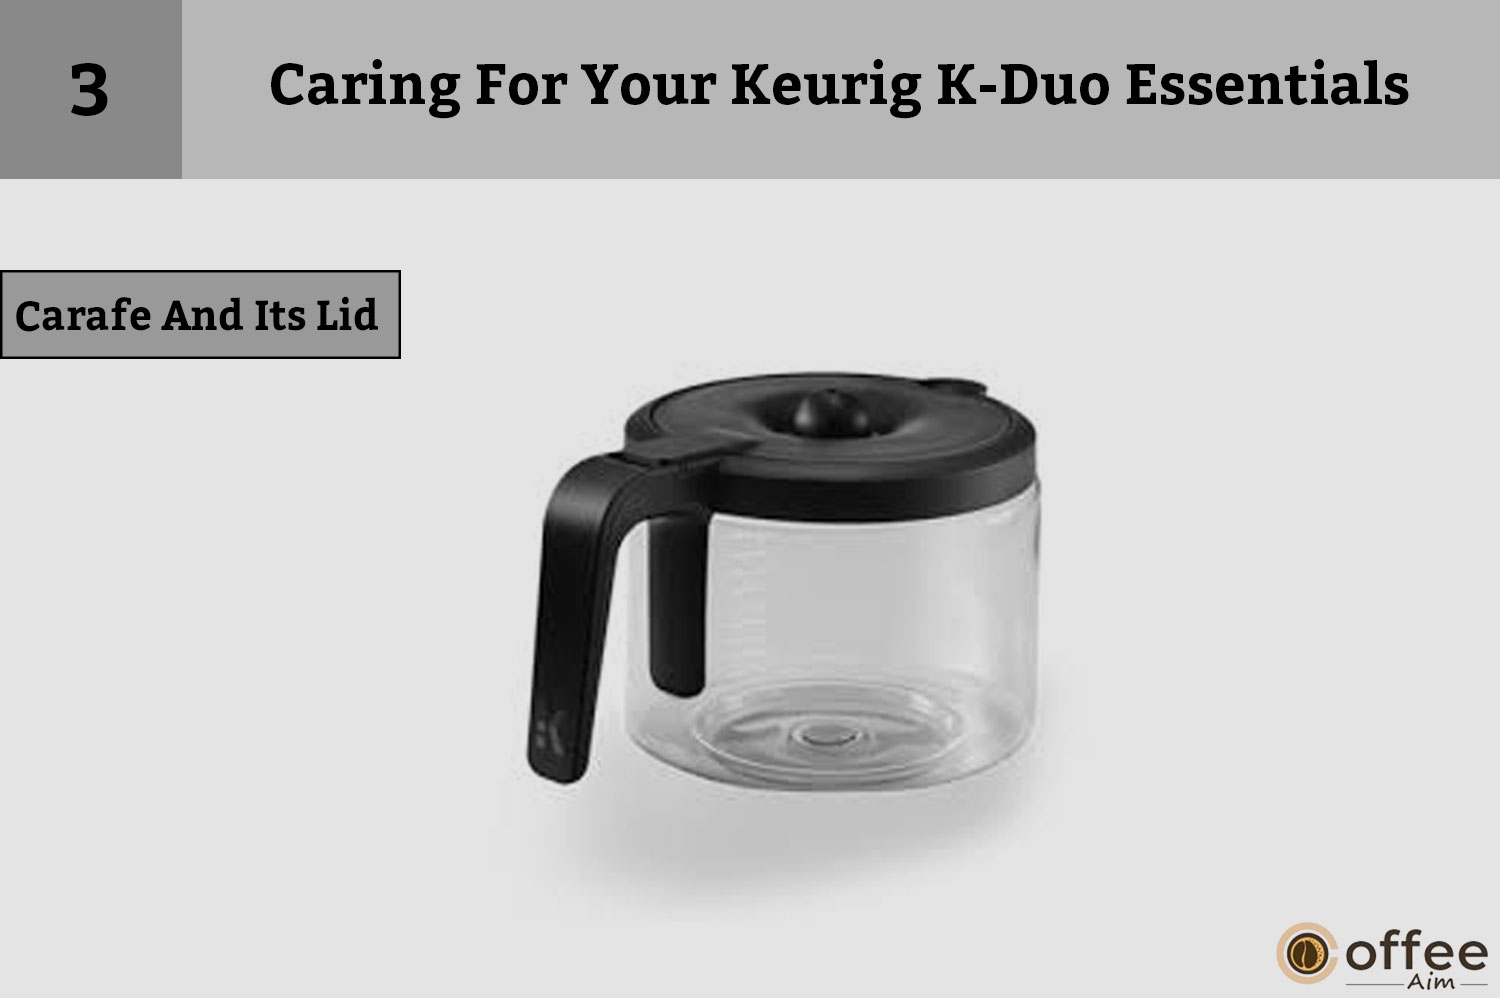
After each Brew, You should clean the carafe and its cover. Use a moist, soapy, lint-free, non-abrasive cloth to rinse and clean.
Heating Plate

Gently wipes the heating plate with a clean, moist cloth after it has cooled. You must never clean the heating plate with abrasive, rough materials.
Water Reservoir And Reservoir Lid

Cleaning a water reservoir is very important as it stores water. This water is used in your coffee. So, don’t ever forget to clean your brewer water storage tank and reservoir lid.
- You must use a wet, soapy, and non-abrasive cloth to clean the water reservoir lid and the reservoir itself.
- After cleaning, carefully rinse the reservoir. By doing this, it will be made sure that no cleaning agents are left behind, which could contaminate the water supply.
- Fill the reservoir with fresh water after rinsing, then place it back in the brewer. Avoid using a cloth to dry the interior of the water reservoir since lint may be left behind.
- It would help if you didn’t put the water reservoir lid or the water reservoir in the dishwasher.
Note: Remove the water filter from the reservoir if you use one before cleaning. As directed by the filter, the filter cartridge needs to be changed.
Filter Basket And Basket Drawer
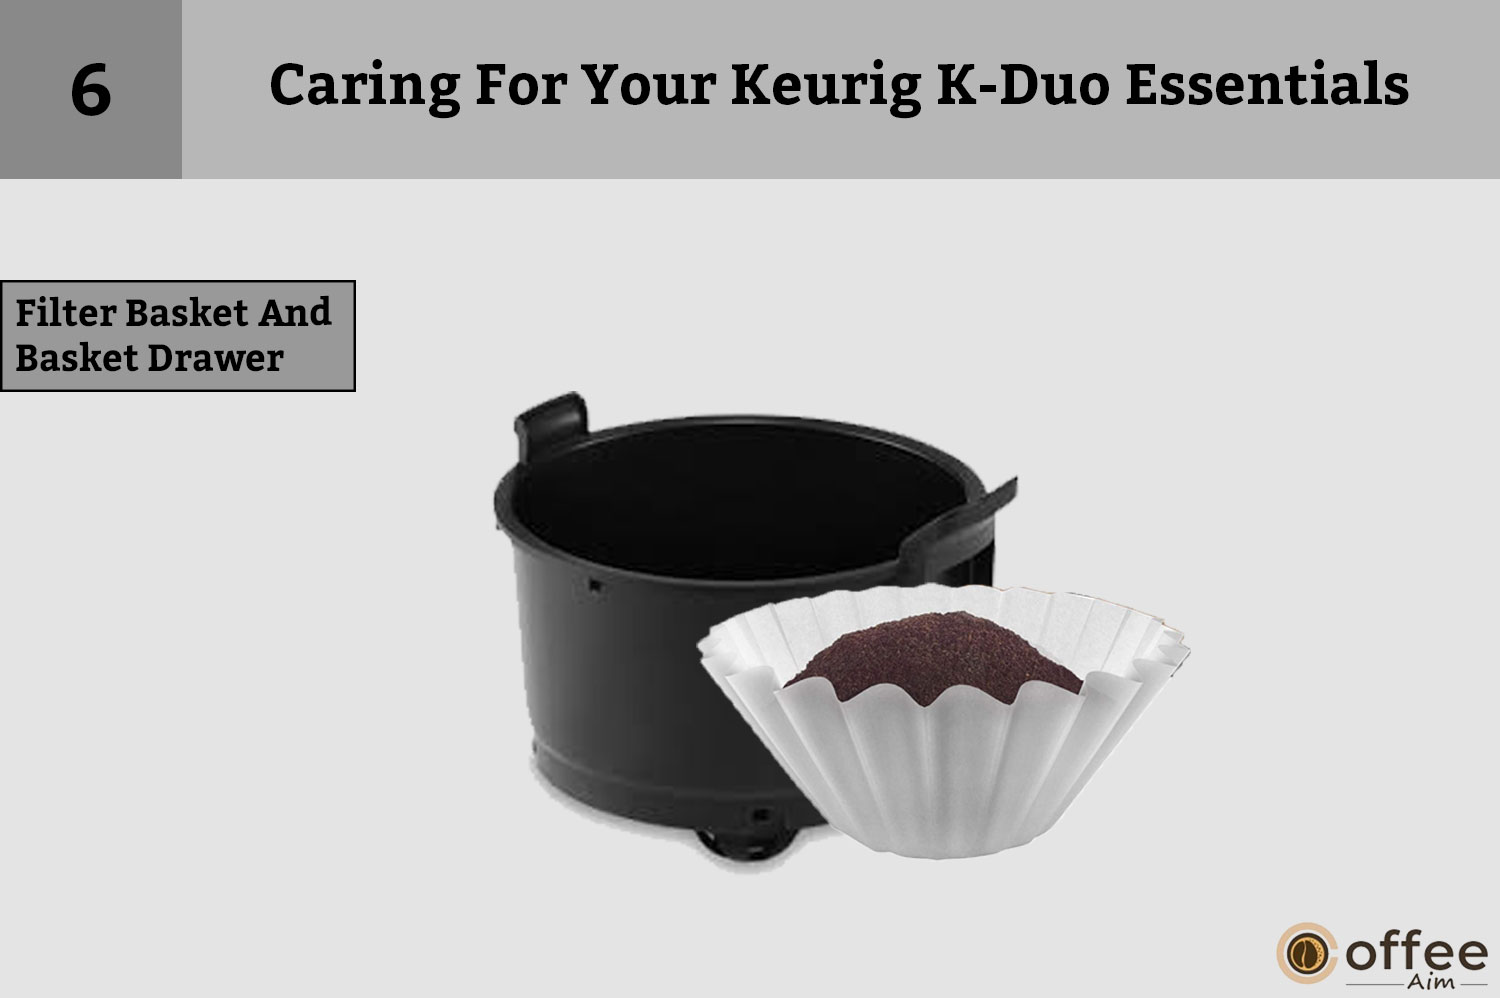
Cleaning the filter basket and basket drawer is crucial to remove all coffee grounds from previous use.
- Remove the brewer’s filter basket drawer.
- Remove and throw away the coffee grounds and paper filter.
- After washing them in warm, soapy water, you should thoroughly rinse the filter basket and drawer.
- After cleaning, dry every component.
Note: After brewing, throw away the coffee grounds and rinse the filter basket thoroughly, or do it as part of your daily cleaning regimen.
Holder For K-Cup Pods
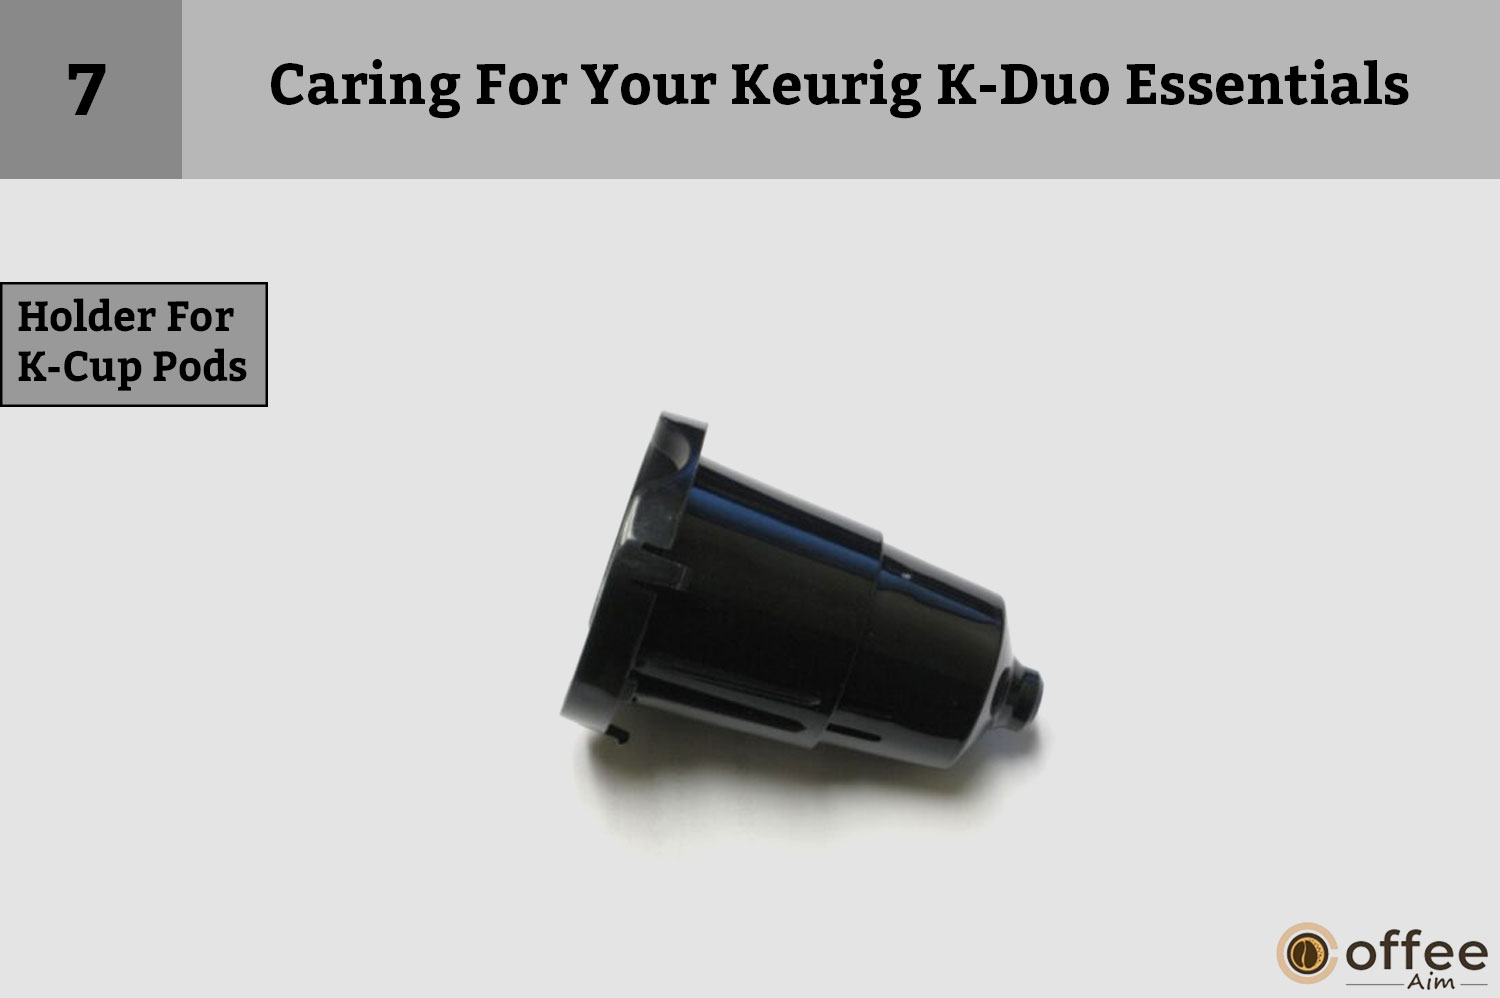
Always clean the holder, so you don’t get any leftovers from your previous brew.
- Lift the handle, grasp the top of the K-Cup® pod holder with one hand, and press up on the bottom of the K-Cup® pod holder from underneath with the other hand until it releases from the brewer.
- After cleaning, use the two front ribs as a guide to line up the K-Cup® pod holder with the opening, and then snap it into place from the top.
CAUTION: The K-Cup® pod holder bottom and the area above the K-Cup® pod holder both include sharp needles that can puncture the pod. Do not insert your fingers into the K-Cup® pod holder to reduce the risk of harm.
Exit Needle

The needle creates a hole at the base of the K-Cup, through which the water flows into the coffee powder. Must clean it, so you always get a perfect cup of coffee.
- Detach the funnel and take out the pod holder assembly.
- Find the exit needle within the K-Cup® pod holder’s bottom.
- To remove coffee grounds, insert a paper clip straightened into the exit needle.
Funnel

You can remove the funnel from the K-Cup® pod holder by pulling on it until it pops off. To replace it, orient the snaps to the indent and snap it back onto the K-Cup® pod holder.
Entrance Needle
You can find the entrance needle on the bottom of the lid if you lift the brewer handle. Holding the brewer handle upright, carefully slide a straightened paper clip into each of the needle’s three holes with your other hand.
It will clean all holes present in the needle. To remove any coffee grounds, gently move them around. Ultimately lower the handle and do two water-only brew cycles. Never put it in a K-Cup® pod.
Pro Tip: For better understanding through video, visit support. Keurig.com
Descaling Of Your Brewer
Coffee machine is a great way to get a quick and delicious cup of coffee. But, for them to work perfectly and make the perfect cup of coffee, they must be descaled regularly, at least every three months or according to need. This guide will discuss why descaling is necessary and how you can do it yourself with ease. So let’s get started!
Descaling Method
Descaling is essential to keeping your coffee machine in good condition and ensuring it produces the best quality coffee. This guide will give you details about the descaling method.
- A sizable ceramic mug, fresh water, Keurig® Descaling Remedy, and access to a sink are all necessary before you start.
- Use a cup other than paper. Verify that the K-Cup® pod container is empty of any beverage pods. This process will take approx. 75 minutes.
- Remove all of the water from the reservoir. Remove and set away the Keurig® Water Filter if you are using one.
First Step: Descaling Solution Rinse
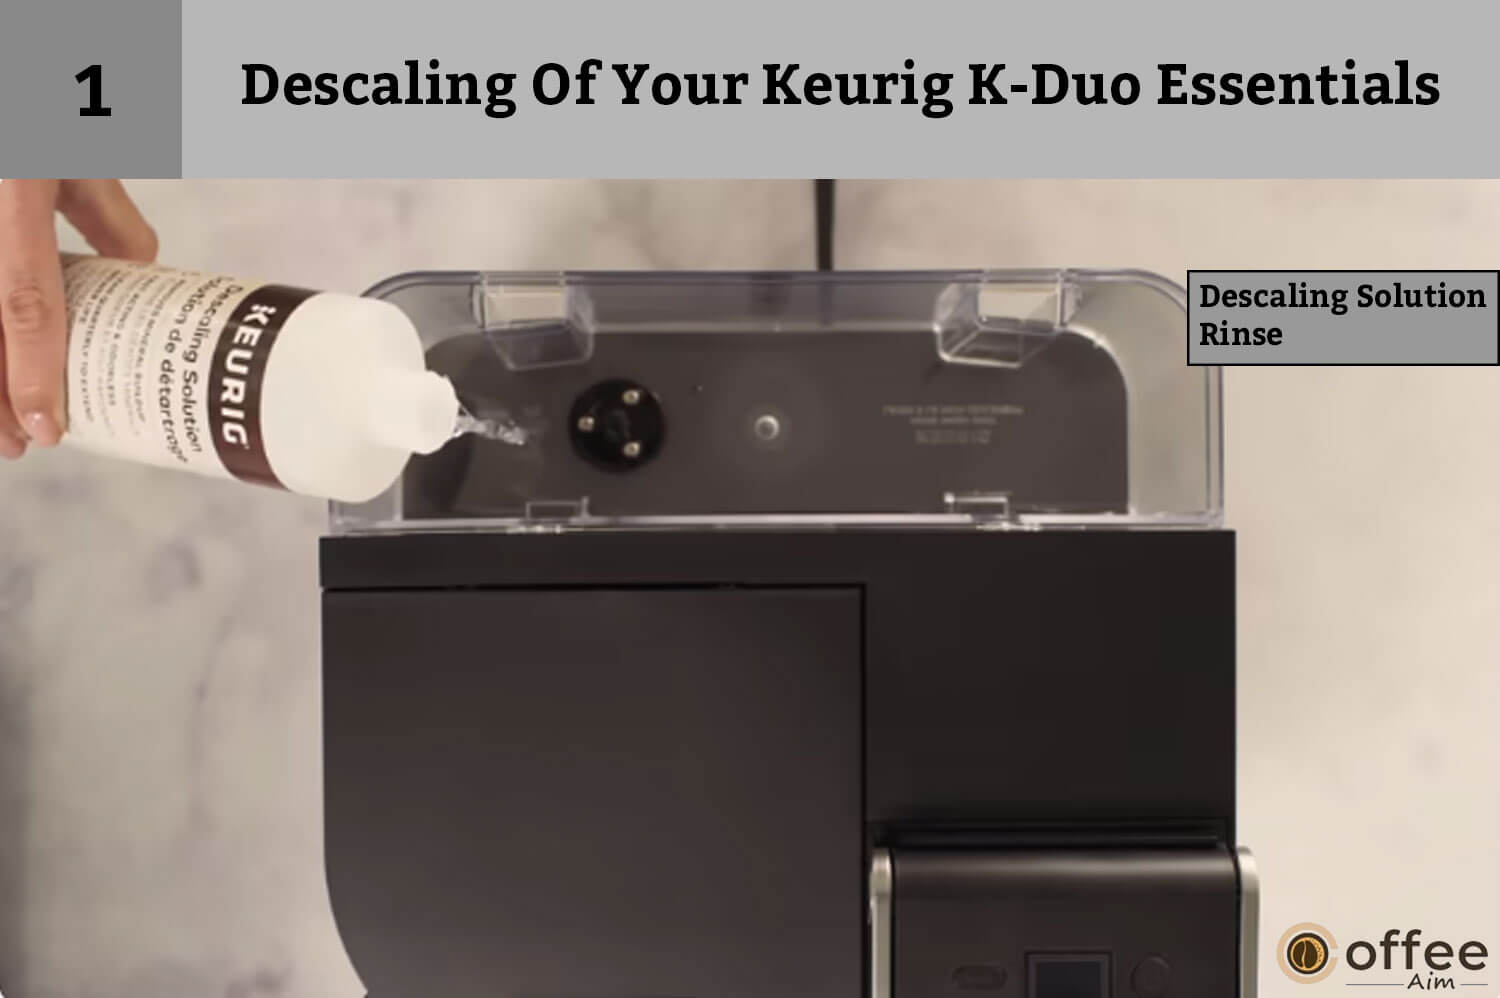
- Switch off the brewer.
Add a full bottle of the Keurig Descaling Solution into the empty water reservoir. Then, pour the water into the bottle and then empty the bottle into the water reservoir. Do not insert ground coffee or K-Cup® pods during the descaling process. - Put a sizable mug on the drip tray and activate the single cup side by pressing the OZ button. You can start a single-cup rinse brew by pressing the button mentioned as 12. Pour the heated liquid into the sink.
- Ensure that the carafe is placed on the heating plate. Press the CUPS button to turn on the carafe side. Then press the button mentioned as 12 to begin a carafe rinse brew. Pour the warm water into the sink after the brewing process has finished. Firmly press and hold the CUPS button to switch off the heating plate.
Step Two: Rinse And Relax

- Give the brewer 30 minutes (minimum) to stand.
- After 30 minutes, empty the water reservoir of any remaining solution and give it a good rinsing.
Step 3: Rinse With Fresh Water

- Pour fresh water into the water reservoir up to the MAX fill line. Ensure that the carafe is placed on the heating plate.
- To turn on the carafe side, push the CUPS button.
- Then, press the button mentioned as 12. to begin brewing water in a carafe. Press and hold the button labeled as CUPS to switch off the heating plate after the Brew is finished. Pour the content from the cup into the sink.
- Fill the water reservoir to the MAX fill line.
- For a total of 4 brews, repeat the 12-cup carafe rinse three more times.
- Fill the water tank again, then set a big mug on the drip tray.
- Turn on the single cup side by pressing the OZ button, then pressing the button mentioned as 12 to begin brewing single water brew. Follow the 12-ounce brew procedure three more times for a total of four brews.
NOTE: The Keurig® Descaling Solution’s cleaning action could cause a “foam” to be dispensed from the brewer. It is expected because the scale inside the solution is reacting. In the case of a heavily scaled brewer, this may cause the brewer to not fill correctly after you add the descaler. If this happens, you might observe little to no output discharged and hear air blowing out afterwards. If this occurs, you can:
- Shut off and disconnect the brewer if this happens.
- If the water reservoir contains Keurig® Descaling Solution, remove it, give it a good rinse, and then replenish it with water.
- Re-plug your brewer, turn it on and go through the Step 3 Fresh Water Wash cycle. As the solution is rinsing out and the scale is being eliminated, the brewer should start to operate normally. If the issue still exists, let the brewer sit without power for 30 minutes (minimum) before beginning the rinse.
Troubleshooting
Coffee is a morning need! You must be able to overcome problems with your coffee maker. So, without wasting time, let’s discuss the problem and its solution.
Grounds In Your Coffee
You can remove grounds that have accumulated in the needles at the entrance or exit using a paper clip that is straightened or something similar to this. Follow the method below;
- Clean the K-Cup® pod holder’s exit needle. Consult the care instructions for the exit needle.
- Clean the brewer entrance needle. See the instructions for caring for the entrance needle.
- Brewing a carafe: The maximum amount of regular ground coffee is 15 tablespoons, and the total decaf is 12 teaspoons.
NOTE: Overflow could result from going beyond this limit.
Putting The Filter Basket Drawer Back In
Line up the tabs on the filter basket drawer with the rods on the front of the brewer to reinstall it. Push the bill firmly into the rails until it snaps into place.
Brewer Refuses To Brew
If your brewer refuses to brew, don’t panic, I am here to your help. After reading the instructions below, you can make your brewer brew without any difficulty.
- Ensure that the handle is firmly pushed down after putting the K-Cup® pod in the holder.
- Add water to the reservoir if the “add water” light is on.
- Fill up to the fill line marked MAX but no farther.
- Please verify that the water reservoir is securely fastened to its base. If, despite being refilled, the add water light remains on, contact customer service.
- Contact customer service if each of the buttons begins to blink at the same time.
Brewing A Partial Cup Or Carafe
If your brewer is not providing you with a full cup of coffee or a carafe, then don’t worry. Here are the tips through which you can repair your brewer by yourself.
- Check that the reservoir has enough water to make the desired amount of beverage.
- The exit needle can be clogged. Refer to the care instructions for the exit needle.
- During brewing, you might have taken out the water reservoir. Rinse the Keurig K-Duo Essentials without a K-Cup® pod. It might be necessary to descale your brewer.
- Contact customer service if your brewer is only producing a 1⁄2 cup of coffee after you have performed the descaling process twice.
- A clog in the drip stop could exist. Pull the filter basket drawer and basket and give them a thorough rinse to get rid of the grounds that remained in the plunger.
- Contact customer service if you reside at a high elevation and see brief carafe brews.
Brewer Loses Power Or Shuts OFF
Every machine can get into trouble due to many reasons, including not getting used properly. Keurig K-Duo Essentials can also get any if not used properly. Don’t worry! Here are things you can do to make your brewer work again normally.
- Verify that you turned on the brewer by pressing either the OZ or the CUPS button.
- Connect the brewer to its own grounded outlet. Your brewer might not work correctly if the electrical circuit is overburdened with other appliances.
- The brewer needs to be run on its own circuit, separate from other machines.
- Your brewer is programmed to shut off 60 seconds automatically after your previous Brew to save electricity.
- Contact customer service if the brewer is still without electricity.
Helpful Hints
If you’re a coffee lover, you must have a coffee machine at your home, which is an excellent way to relish. However, to get the most out of your device and you want to ensure a perfect coffee cup every time, here are some helpful hints for you to keep in mind every time:
- There is a vast range of water quality. We advise using purified or filtered water if you detect an unfavorable flavor in your drink (such as chlorinated or mineral tastes).
- Use non-distilled (pure) water instead.
- To assist in eliminating pollutants from water and enhance beverage flavor, you can insert a Keurig® Water Filter.
Brewing A Carafe:
- The maximum amount of ground coffee you can use in a carafe is 15 tablespoons for regular coffee and 12 teaspoons for decaf. More remarkable than this amount could result in an overflow.
- If the brewer isn’t used in a few days, ensure the paper filter is correctly seated flat in the filter basket and perform a full carafe rinse brew to clear up the internal water.
Service
Beyond these suggested cleaning and upkeep methods, this brewer cannot be serviced by the user. Please see this guide’s Warranty section for information on service.
Storage:
- When storing or moving, empty the water reservoir, and make sure your brewer is in a secure place and free from frost.
- Please store your brewer in an upright position to prevent water leaks from the inner tank.
- If the brewer is stored in a cold climate, you may face the danger of freezing water within the brewer, which could lead to damage.
- Before using Your Keurig K-Duo Essentials after storage, we advise using freshwater for rinsing the reservoir, repeating the cleaning process three times, and brewing a 12-cup carafe without any ground coffee.
- Before moving it to a new place, please turn off your brewer, unhook it from the wall, and remove water from the reservoir.
- If your brewer has been exposed to temperature below zero please make sure to let your brewer warm up to room temperature for two hours.
Attention: Before storing, make sure the brewer is turned off and the heating plate is at room temperature.
NOTE: A full descaling can be done before and after storage if the brewer needs to be kept for a long time (a few months or more) in order to keep it in fantastic condition.
Get In Touch!
Need help? Visit support.keurig.com for detailed videos on any queries.
If you want to make a call,
here’s the number:
1-866-901-BREW (2739)
One-Year Warranty
For a year from the date of purchase, Keurig Green Mountain, Inc. (Keurig) assures you will not get manufacturing flaws under regular household use. It is advised to register your brewer at keurig.com/new for your purchase data to be saved in our database.
Upon receiving documentation of the purchase date, Keurig will fix or substitute a damaged maker without charging you anything. If a substitute brewer is required to fulfill the terms of this warranty, it may be brand-new or refurbished. A new limited one-year warranty will be given to the substitute brewer if one is delivered.
Note: This warranty covers only breweries located in the USA and Canada
You may also have legal and other legal rights that differ from state to state, and in the case of Canada, from province to province.
Your Keurig® brewer’s correct operation and durability are only guaranteed when you use K-Cup® brand pods and accessories. The use of non-Keurig® pods and accessories may cause your brewer to malfunction or sustain damage that is not covered by this warranty. If the malfunction or damage is found to have been caused by such usage, you may also be charged a service fee.
What Does The Limited Warranty Not Cover?
THIS WARRANTY EXCLUDES CONSEQUENTIAL AND INCIDENTAL DAMAGES, INCLUDING PROPERTY DAMAGE, AS WELL AS INCIDENTAL COSTS AND EXPENSES RESULTING FROM ANY BREACH OF THIS WARRANTY, EVEN IF FORESEEABLE.
The restriction mentioned above or limitation may not apply to you based on the state or province where the user made the transaction because certain nations or regions do not permit the exclusion or limitations of accidental or indirect damages.
The use of non-Keurig® pods or equipment, services rendered by parties other than Keurig or its authorized service providers, the use of non-Keurig® parts, or outside factors, including abuse, misuse, improper power cable, or acts of God are also not covered by this guarantee.
Other Restrictions
THIS WARRANTY IS EXCLUSIVE AND IT REPLACES ANY OTHER EXPRESS WARRANTY, WRITTEN OR ORAL.
MOREOVER, KEURIG, AT THIS MOMENT, EXPRESSLY DISCLAIMS ALL OTHER WARRANTIES WITH RESPECT TO YOUR K-ELITE BREWER, AS WELL AS ANY IMPLIED WARRANTY OF RELIABILITY OR SUITABILITY FOR ANY SPECIFIC PURPOSE.
According to the state or province where you made the purchase, some nations or regions may not permit the exclusion of such implied guarantees or restrictions on how long an implied warranty lasts. As a result, the regulation mentioned above might not apply to you.
How To Obtain Warranty Services?
Keurig® brewers are high-end devices that, with careful maintenance, should last for many years with adequate performance. To contact Keurig Customer Service, please dial our toll-free number,1.866.901.BREW(2739). Please call Keurig Customer Service to get a Return Materials Authorization (RMA) number before returning your brewer for service. Brewers from Keurig® will be returned to the owner unserved if returned without an RMA number.
Conclusion
In conclusion, This guide provides you with each and every detail about Keurig K-Duo Essentials. The realm of coffee is now open to you if you’ve read this guide and discovered the Keurig K-Duo Essential Brewer’s secrets.
The days of uncertainty and irritation are over, and their place is now filled with a fresh sense of ease and confidence when preparing the ideal cup. Should I share with you the coffee realm, which a coffee enthusiast like you would like to visit before I end? Visit www.coffeeaim.com to learn more about coffee and enter the fantastical realm of your dreams.
FAQs
What Are Keurig-K Duo Essentials?
Keurig-K Duo Essentials is a coffee maker that allows you to make both single-serve and full-pot coffee using K-Cups or ground coffee.
What Are The Dimensions Of Keurig K Duo Essentials?
The dimensions of Keurig K Duo Essentials are approximately 12.74 inches in height, 12.27 inches in width, and 13.44 inches in depth.
How Many Cups Of Coffee Can Keurig K Duo Essentials Make?
Keurig-K Duo Essentials can make 8,10, and 12-cup sizes of coffee using the full-pot brew setting.
What Type Of Coffee Can Keurig K Duo Essentials Use?
Keurig-K Duo Essentials can use both K-Cups and ground coffee.
Does Keurig K Duo Essentials Have A Programmable Timer?
No, Keurig K Duo Essentials does not have a programmable timer.
What Is The Water Reservoir Capacity Of Keurig K Duo Essentials?
The water reservoir capacity of Keurig K Duo Essentials is 60 ounces(removable).
Does Keurig-K Duo Essentials Have An Automatic Shut-Off Feature?
Yes, Keurig K Duo Essentials has an automatic shut-off feature that turns off the coffee maker after 2 hours of inactivity.
Is Keurig K Duo Essentials Easy To Clean?
Yes, Keurig K Duo Essentials is easy to clean. The removable drip tray and brew basket can be washed in the dishwasher, and the exterior can be wiped clean with a damp cloth.
Does Keurig-K Duo Essentials Come With A Warranty?
Yes, Keurig K Duo Essentials comes with a 1-year limited warranty which varies from region to region.