Quick Navigation
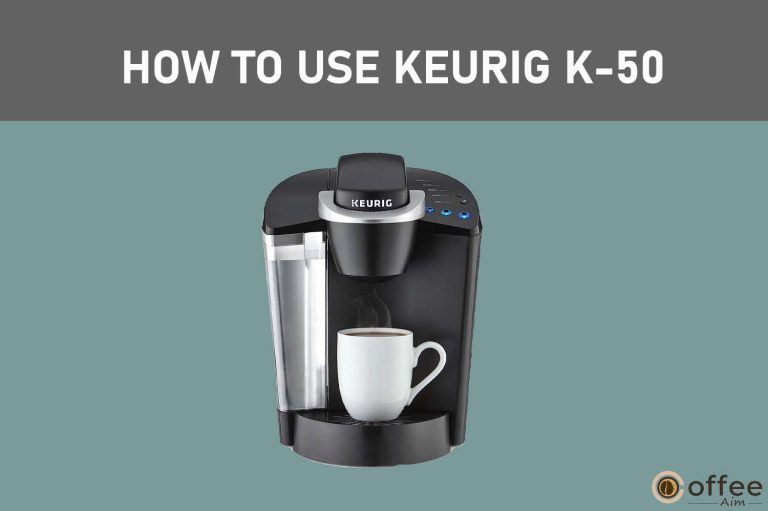
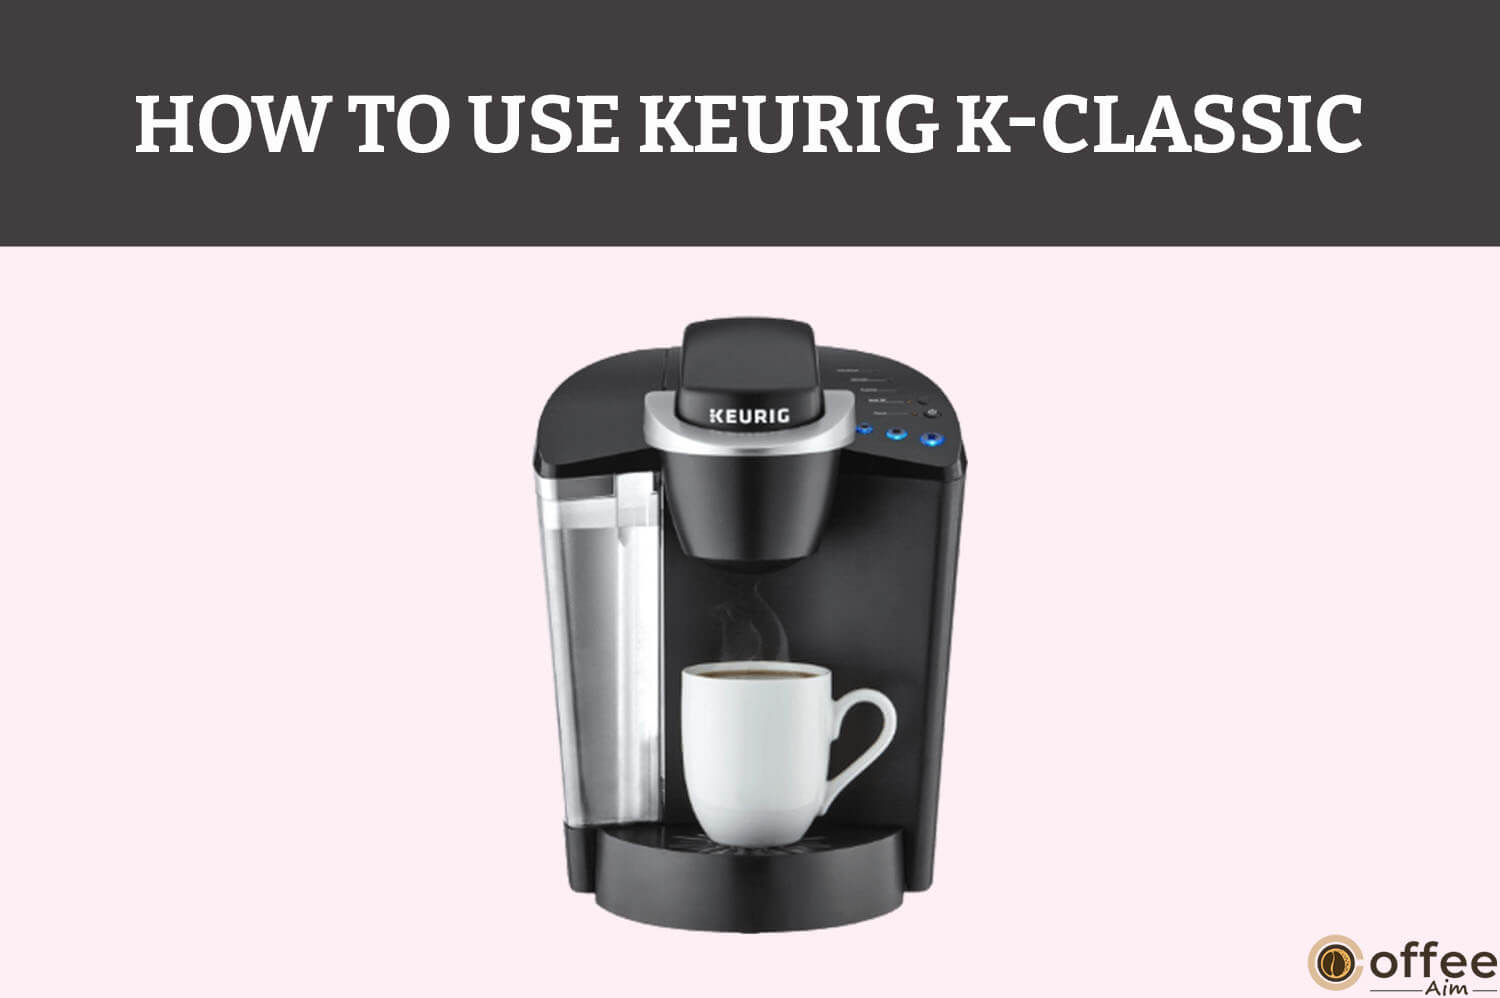
You are all set to use your new Keurig K-Classic and ready to brew your cup of delicious coffee. But Wait!, Have you lost the manual and are not able to comprehend the usage and care techniques? Or you are a first-time user of Keurig K-Classic. And for that reason, you are rummaging through the internet sites to find the best solution to all your problems. Well! Allow me to help you in this matter and provide you with the necessary guidelines for using and maintaining your Keurig K-Classic. I will be with you in this journey of brewing and make sure that you will have the most delicious experience.
So Get ready to enjoy the ultimate coffee experience with your Keurig K-Classic.
Safety Precautions
Do you know that this life-savior brewer could become a nightmare for you, if not properly handled? According to the U.S. Consumer Product Safety Commission (CPSC), hot appliances such as brewers are the leading cause of burn injuries. Moreover, they can also result in electrocution.
To steer clear of any misfortune, it is important to take all necessary precautions when you use your Keurig K-Classic. Do not let any of your missteps make your beautiful morning into a disaster. Click the link and arm yourself with all the information you may need for your protection.
Related: Saftey Precautions of Keurig K-Classic.
Specifications Of Keurig K-Classic
For your ease, I have created a comprehensive table outlining the key features of the Keurig K-Classic. Thus, overview them properly to consider whether this coffee maker is suitable for your home or not. If you find it non-suitable then return it before using it.
| Features | Details |
| Product Line/System | Keurig 1.0 Elite |
| K-Cup Compatibility | Unlicensed K-Cups, Keurig 2.0 licensed K-Cups, and ground coffee with the My K-Cup |
| Brew Sizes | 6 oz, 8 oz |
| Water Reservoir | 48 oz/ 1.41 L |
| Water Filter | Compatible but not included |
| Dimensions | Width 9.8″W Depth 13.0″D Height 13.3″H |
| Display | Button controls for Brew Size and Power; LED indicators for Add Water, Descale, Heating, Auto-Off and Power |
| Temp Control | No |
| Strength Control | No |
| Weight | 12.0 lbs |
| Other Features | Auto-On/Off, removable drip tray, comes with K-Cup variety pack |
Brewer Features
Want to know more about your beloved coffee maker? Let’s discuss the features your Keurig K-Classic comes with!
Auto Off Feature
Keurig K- Classic offers many unique features; one is Auto Off Feature. To enable the Auto Off feature and save energy, press the black Auto Off button. The green light will turn on, indicating that the feature is now active.
- The Auto Off feature automatically turns off the coffee brewer 2 hours after the last brew, so you don’t have to worry about leaving it on and wasting energy.
- If you want to disable the Auto Off feature, press the button again. It will turn off the green light and deactivate the feature, allowing you to keep the brewer on for as long as you’d like.
Unboxing Of Your Keurig K-Classic
It is natural If you are eager to unwrap your new Keurig K-Classic and start discovering the wonderful world of coffee. However, before we get started, you must ensure that all machine parts are in the box. If you find any part missing during unboxing, please contact your retailer or seller for assistance. Let’s now begin our exploration of this exciting new brewer!
Keurig K-Classic Machine

Upon unboxing, you’ll discover your much-awaited Keurig K-Classic machine right in the box, with its water reservoir attached to it. Make sure that you have got the same model in the box.
User Manual

Along with your Keurig K-Classic machine, you’ll receive a user manual as part of the packaging. This manual contains essential information about how to operate your machine, its features, maintenance tips, and troubleshooting instructions in case of any issues
Keurig K-Classic Parts
Now that you have your Keurig K-Classic with you, it is time to master its usage, but before that, you must familiarize with all its components if you want to utilize its full potential. To make it easy for you, I have compiled a list of all the parts you will welcome when you unbox your brewer. Following is the complete list of machine parts you should be familiar with.
1. Water Reservoir Lid

It seals/covers the water reservoir to prevent water from leaking and ensures the water reservoir is properly closed.
2. MAX FILL Line

It is the standard mark that indicates the maximum water filling level for the water reservoir to prevent overfilling and potential water spills. You should not fill your water reservoir beyond the Max fill line.
3. Water Reservoir

It stores the water for brewing coffee and can be easily removed and refilled.
4. Vent

Vent prevents pressure buildup during brewing and helps release hot air to maintain the temperature
5. Water Reservoir Lock Tab Slots

Water reservoir lock tab slots securely lock the water reservoir in place and ensure proper alignment with the Keurig machine.
6. Power Cord

Power cord supplies power to the Keurig machine and is detachable for easy storage and transportation.
7. Handle

Handle enables you to open the K- Cup Holder.
8. Lid

Lid covers the K-Cup pod holder and prevents dust or debris from entering.
9. K-Cup Pod Holder ( I and J are the K-Cup Pod Holder Assembly)

K-Cup pod holder accommodates the K-Cup pods and punctures the pod to allow hot water to run the coffee.
10. Funnel

Funnel is inserted into the K-Cup Pod Assembly housing. It guides the K-Cup pod to the K-Cup pod holder and helps prevent coffee grounds from spilling.
11. K-Cup Pod Assembly Housing

K-Cup pod assembly housing holds the K-Cup pod assembly in place and ensures proper alignment with the K-Cup pod holder.
12. Drip Tray Plate

Drip tray plate collects excess liquid from brewing and is removable for easy cleaning.
13. Drip Tray
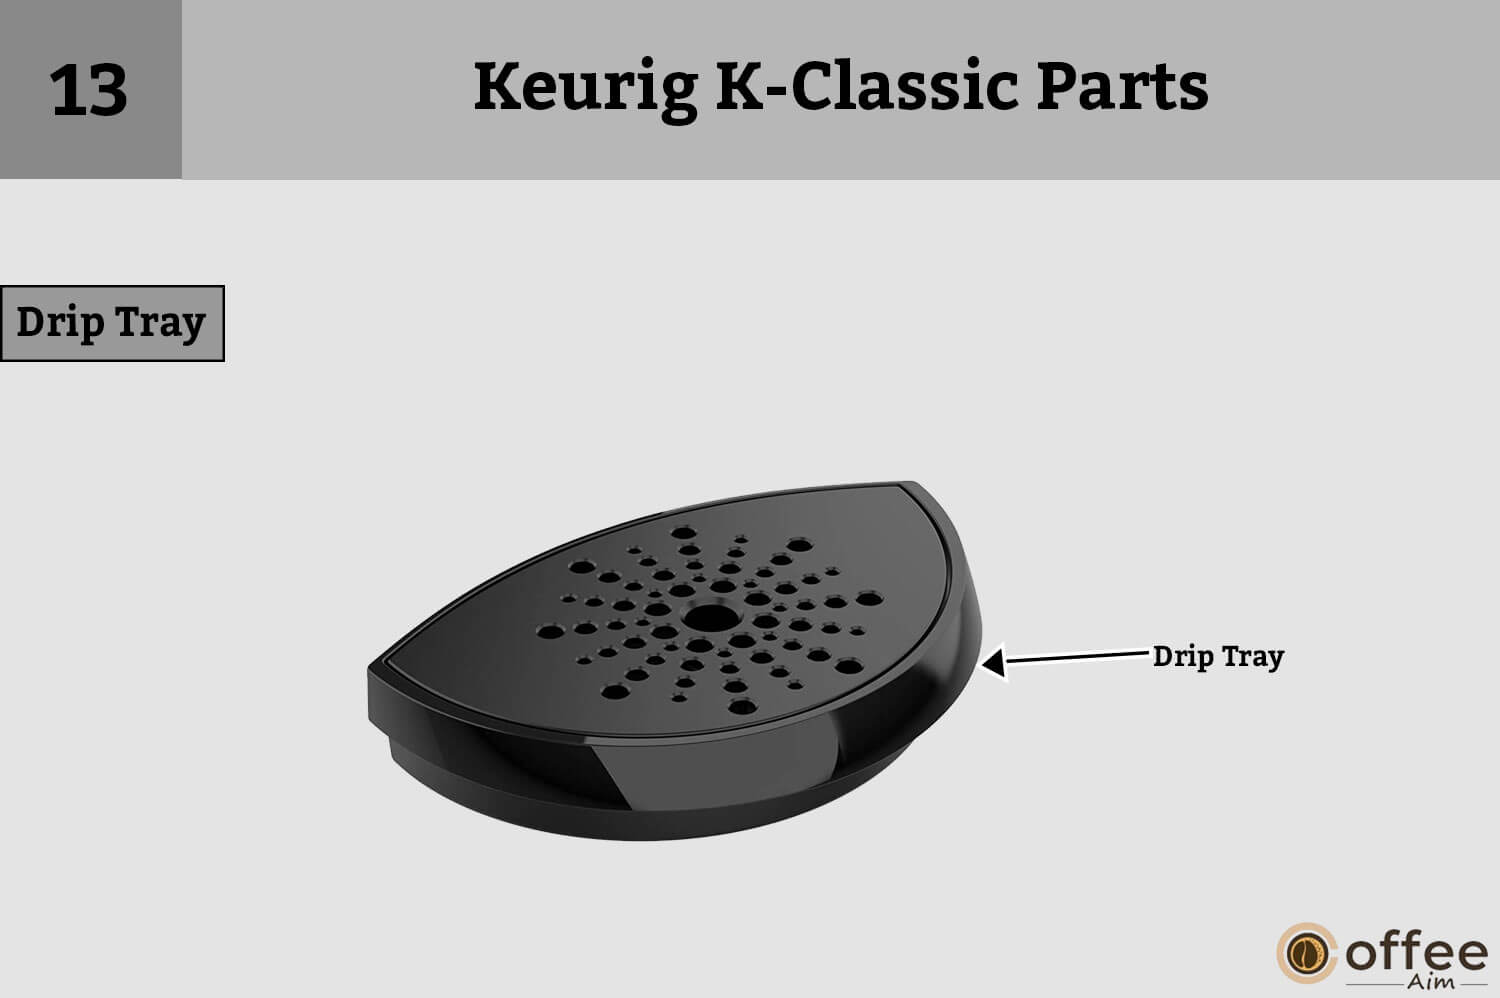
Drip tray holds the drip tray plate and prevents coffee spills on your countertop.
14. Drip Tray Base

Drip tray base houses the drip tray and provides stability to the Keurig machine.
Initial Steps Before You Brew Your Coffee
To fully enjoy the magical experience of brewing coffee with your Keurig K-Classic, you should take a few essential steps before diving in. By taking these steps, you’ll ensure that your device sets up correctly and that you can use it efficiently and safely. Let’s begin!
1. Unbox And Plug Your Keurig K-Classic

You are taking the first steps in your brewing journey with your Keurig K- Classic by finally unboxing and plugging it. Now, it’s time to take another step towards setting your brewer. Follow the steps below to avoid any inconvenience.
- Firstly, unwrap the packing tape from the brewer and plug the system into a grounded outlet.
- Place an appropriate-sized mug on the machine’s drip tray plate. The size of the mug can be a minimum of 10 oz.
2. Rinse & Fill It With Fresh Water.

If you are still determining whether the brand-new brewer is clean, do not worry; you can assure yourself by following the steps below.
- Remove the water reservoir lid and lift the reservoir straight up to remove it.
- Install the Keurig Water Filter in the filter holder using the instructions mentioned on Filter Starter Kit.
- Use fresh water to rinse the water reservoir and fill it with water to the MAX FILL line.
- Now replace the water reservoir and ensure that lock tabs are connected to the brewer
- Replace the lid at the end.
NOTE: Do not use distilled water.
3. Power On

The next and more straightforward step is switching on the brewer through the power button. If you still need clarification, follow the steps below.
- Press the machine’s power button with which the green power light will flash.
- The Brewer would automatically start heating the water, for which the machine’s red heating light will light up for 4 minutes.
- When the heating light gets off, and the brew button brightens, the brewer is ready.
4. Lift And Lower The Handle Of Keurig K- Classic

Lift the machine’s handle and lower it further. At this step, the three buttons of the Brew will blink, but do not insert a K-cup Pod here.
Now start the cleansing brew by pressing the small button. You are now prepared to brew after completing the one-time setup procedure.
Brew Your First Cup Of Coffee
The moment you’ve been eagerly anticipating has arrived – it’s time to start brewing with your Keurig K-Classic! With all your efforts, you’ve completed all the necessary steps, and now the exciting part is here. There’s no time to waste, so let’s dive in and start immediately!
Place Mug
To make your first cup of coffee, you need specific guidelines to perform this procedure.
- First, place a mug on the drip tray plate of the brewer. However, if you use a travel mug, remove the drip tray and then place the mug on the drip tray base.
Note: The Brewing process takes up to 15 seconds; meanwhile, the machine’s light will remain on.
1. Lift And Insert

- Lift the machine’s handle and insert the K- Cup pod in the K-Cup Pod holder.
- Then, lower the handle to close it properly.
Note: Don’t remove the foil present on the K-Cup pod.
High Altitude Brewing
At high altitude, hold the brewer handle towards the upper side and slowly out the K-Cup downwards. Keep pushing it down until the bottom part of the K-Cup is punctured by the machine’s exit needle
2. Brew Coffee And Savor

To brew the coffee, select the preferred size, such as a small cup of 6 oz, a small mug of 8 oz, or a large mug of 10 oz. The button will remain illuminated during brewing, which usually takes about one minute, and brewing will end with a burst of air, indicating that your coffee is ready to be enjoyed.
Note: The brew buttons deactivate after 60 seconds. Lift and fully lower the lever to reactivate.
WARNING: The water in the K-Cup pod holder is very hot when the coffee is brewing. Do not raise the handle while the brewing occurs to prevent harm.
Caring For Your Brewer
If you’ve invested your hard-earned money in a Keurig K-Classic, you’ll naturally want to ensure that it lasts for a long time and functions optimally. For your Brewer’s longevity, it’s important to prioritize its care and maintenance. Let us look at how to clean various parts of your Keurig K-Classic.
Start by turning your coffee maker off and then unplugging it from the power outlet to clean it.
- Brewer Exterior

The exterior of the brewer needs as much cleaning as the interior structure. Use a damp, non-abrasive, lint-free piece of a soft cloth and wipe over the external surface of the machine. Never immerse your coffee maker in water or other liquid.
- Drip Tray

The drip tray holds 8 ounces of direct overflow and should occasionally be empty. To clean it, slide the tray in your direction while avoiding spilling the liquid. Clean in the dishwasher (top rack only) or with a moist, soapy, lint-free, non-abrasive cloth.
- K-Cup Pod Holder

To remove the K-Cup pod holder from the machine, raise the handle and grasp the brewer
the K-Cup® pod holder’s lid while pressing up the K-Cup pod holder’s bottom with one hand from below with the other hand till It releases. After cleaning, use the two front ribs as a guide to line the K-Cup® pod holder with the opening and snap it into place from the top.
NOTE: The K-Cup pod holder has sharp needles present both above and below. These needles puncture the pod. Avoid putting your fingers inside the K-Cup® pod holder to prevent injuries.
- Funnel

The funnel of the Brewer is easy to remove. Pull it until the funnel pops off easily from the K-Cup pod holder. Snap it back to the holder to replace it on position.
- Water Reservoir & Reservoir Lid

Regular cleaning with a wet, soapy, non-abrasive cloth and thorough rinsing are recommended for the water reservoir lid and the reservoir itself.
The dishwasher should not be used to wash the lid or reservoir. Avoid using a cloth to dry the interior of the water reservoir since lint may be left behind.
Empty the water reservoir first, then do any or all of the following steps to clean the filter screen at the reservoir’s base:
• Rinse the filter screen with a continuous stream of water from your faucet; if you have a sprayer, aim the water spray towards the filter screen.
• Fill the water reservoir with about two inches of clean water and agitate (shake) it. Fill the water reservoir with clean water and return it to the brewer. If necessary, repeat the preceding steps.
NOTE: Take off the water filter from the reservoir if you use one before cleaning.
- Exit Needle

Detach the funnel and remove the pod holder assembly. Find the exit needle within the K-Cup pod holder’s bottom. To unclog and remove the obstruction, insert a paper clip straightened into the exit needle.
- Entrance Needle
Lift the handle of the brewer to access the underside of the lid and locate the entrance needle. Hold the brewer handle upward and, with your other hand, insert a straightened paper clip into both holes on the needle. Move the paper clip around to loosen any coffee grounds stuck in the needle.
Once you’ve cleaned both holes, lower the handle of the brewer and run two water-only brew cycles to flush out any remaining debris. It’s important to note that you should not insert a K-Cup pod during this cleaning process.
Note: Do not attach the K-Cup pod to the machine at this stage.
Descaling Of Keurig K-Classic
You should regularly descale your coffee brewer every 3-6 months because mineral buildup from water can cause calcium deposits or scale to form inside the machine, reducing its function. Following the descaling technique correctly helps preserve the heating element and other internal elements that come into touch with water, ensuring your machine has a longer lifespan. If you have hard water, descale more frequently.
Descaling Procedures
Before starting the descaling process, provide the following things.
1. Ceramic mug (large-sized)
2. Water
3. Keurig Descaling Solution
4. Access to sink.
Disable the “Auto off” feature, and ensure no beverage pod is in the pod holder. Start the procedure from the first step by emptying the water reservoir. Remove the Keurig Water Filter and set it on the side. The descaling method should take about 45 minutes. Remove the water from the reservoir. Remove and lay away the Keurig Water Filter.
Step 1: Descaling Solution Cleanse

Press the brewer’s power button to turn it off and pour the Keurig Descaling Solution’s liquid into an empty water reservoir. Now fill the bottle with water and pour it into the water reservoir. Now turn on the brewer by pressing the power button. Next, place a large-sized mug on the brewer drip tray. Then run a rinsing brew by lifting the handle and lowering the handle, and selecting the largest size brew.
Step 2: Descale Rinse & Repeat

Now, Rinse the brew again till the add water indicator illuminates. Use a K-Cup pod instead. Let the brewer stand for at least 30 minutes while still turned on.
After 30 minutes, remove any remaining solution from the water reservoir and carefully rinse.
Step 3: Fresh Water Rinse
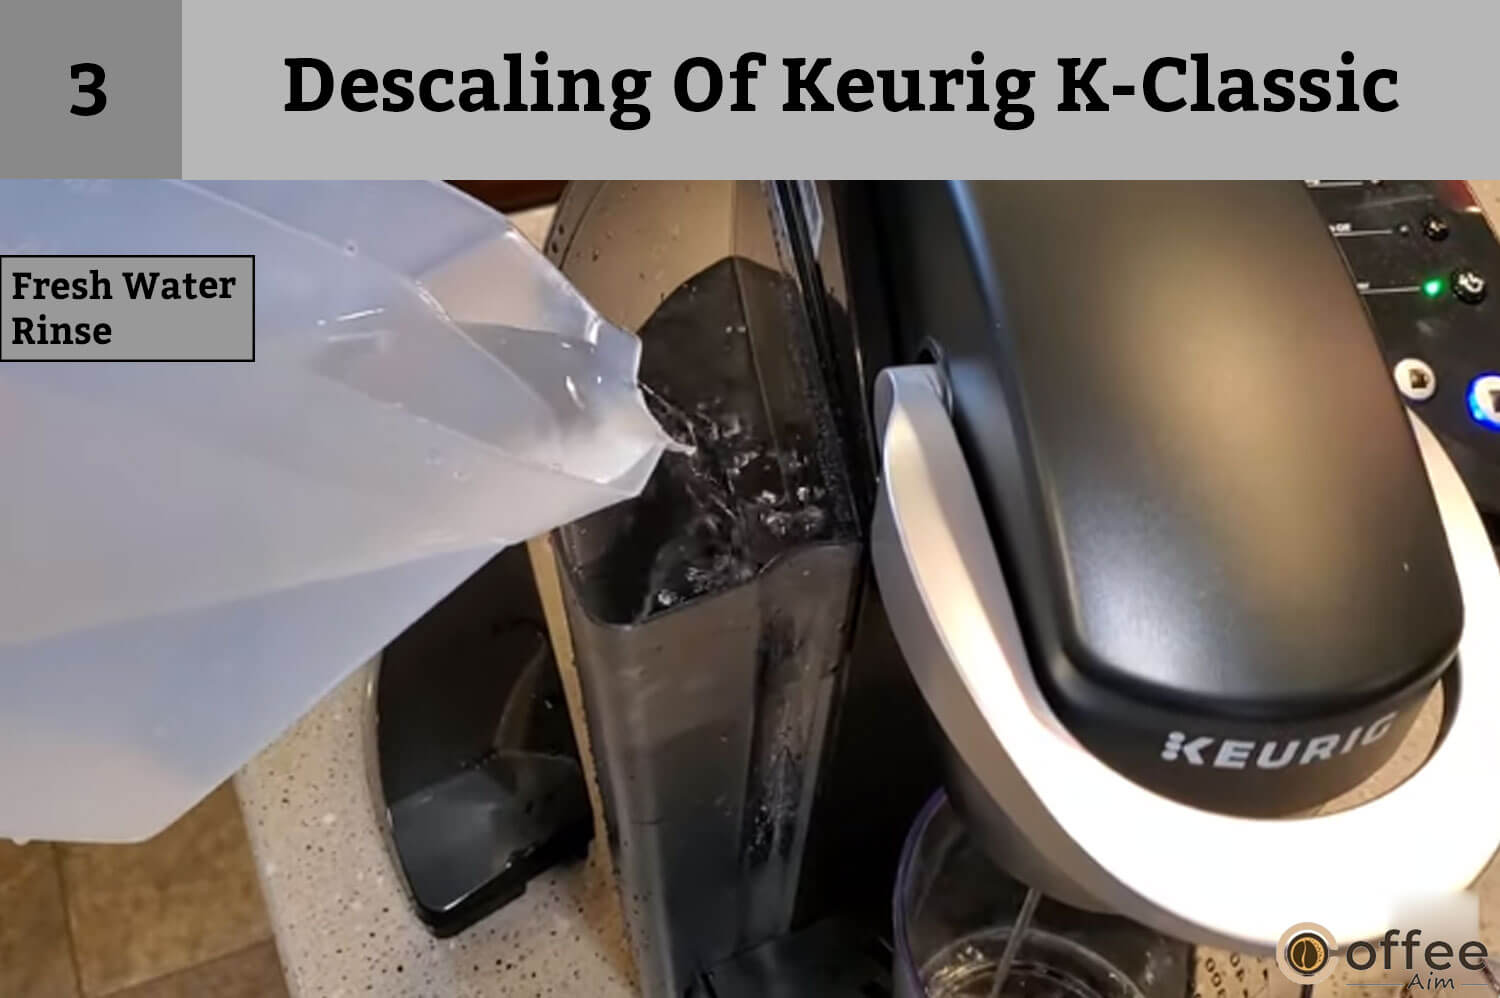
Fill the water reservoir to the MAX FILL line with fresh water. Put a large mug on the drip tray plate and use the largest brew size to run a rinse brew. Use a K-Cup pod instead. Fill the sink with the liquid from the cup. Continue the brewing method until you’ve finished at least 12 rinse brews using the biggest brew size. You may need to replace the water reservoir at least once throughout this procedure.
Troubleshooting
You happily go to brew a hot cup of coffee for yourself and your friend and find out that your Keurig K-Classis has a glitch. There is no need to panic or to get frustrated. Fortunately, you can solve many problems by yourself if you can correctly identify the issue. I am here to help you with this troubleshooting process and provide some tips on how to fix the problems at home without needing professional assistance.
Grounds In Your Coffee
You can easily clean the grounds accumulated in the exit or entrance needles using a straightened paper clip or other similar instruments. Follow the steps below for a smooth process.
- Remove the K-Cup pod holder’s exit needle. Please follow the Exit Needle care section in this article.
- Remove the brewer’s entry needle. Go to this article’s “Entrance Needle care section” for further information.
Brewer Will Not Brew
- Make sure you firmly pull down the handle and the brew buttons are blinking after inserting the K-Cup® pod into the K-Cup® pod holder.
- If you see the “add water” light turn on, it implies you need to fill the water reservoir. Fill it to the MAX FILL line, but not beyond. Ensure that the water reservoir is correctly positioned on its base. If the “add water” light remains on after you refill it, contact Customer Support.
Brewing A Partial Cup
Here are a few possible causes for your brewer brewing a partial cup:
- The exit needle may be blocked. To resolve this issue, refer to the Exit Needle care section.
- If you removed the water reservoir while brewing, refill it and perform a rinse brew without a K-Cup® pod.
- It’s possible that it’s time to descale your brewer. If you’ve already descaled it twice and it’s still not brewing a full cup, please contact Customer Support.
Brewer Does Not Have Power Or Shuts Off
If your brewer isn’t turning on, here are a few things you may try:
- Make sure the power button is turned on.
- Check that the brewer is plugged into a grounded outlet. The brewer may not perform properly if the outlet is overloaded with other appliances. It’s recommended to utilize a separate, dedicated outlet only for your brewer.
- The Auto Off option, which switches off the brewer after 2 hours of inactivity, is activated. For information on how to turn this feature on or off, see Brewer Features.
- If the brewer still does not turn on, contact Customer Service.
Helpful Hints
The taste of your beverage can be greatly influenced by the quality of the water. I recommend switching to bottled or filtered water if you detect any unpleasant tastes, such as chlorine or mineral flavors. Nonetheless, distilled water should be avoided. Adding a Keurig Water Filter can also help remove pollutants from the water and improve the taste of your beverage. This filter is an excellent choice for ensuring that the quality of your water is suitable for your brewer.
Service
This brewer is not user serviceable beyond the specified cleaning and maintenance procedures. Please see the Warranty section of this book for servicing information.
Storage
There are a few precautions to take when storing your brewer:
- When storing or transporting your brewer, empty the water reservoir.
- To minimize water leaks from the inner tank, store your brewer in a secure, frost-free location and an upright posture. If you keep your brewer in a chilly place, the water inside may freeze and harm the equipment.
- I recommend washing the water reservoir with new water and performing three rinse brews without a K-Cup® pod before using the brewer after storage.
- If you want to relocate your brewer, switch it off, disconnect it, and empty the water reservoir.
- Allow your brewer to reheat to room temperature for at least 2 hours if it exposes to temperatures below freezing.
Click Or Call
You can see the step-by-step videos on cleaning, descaling, and other topics at www.Keurig.com/support.
To contact, you can call 1-866-901-BREW (2739)
Limited One-Year Warranty
All Keurig Green Mountain, Inc. brewers with a one-year guarantee starting from the date of purchase. This guarantee covers any flaws in materials or workmanship. For normal home usage, It is advised to register your brewer at Keurig.com/new in order for your purchase information to be saved in their system.
If your brewer develops a flaw within the warranty term, Keurig will repair or replace it free of charge. If the company decides to replace the brewer, it may be new or reconditioned, and the new product will come with a one-year guarantee. This warranty applies exclusively to brewers sold in the United States and Canada.
It is suggested that you only use Keurig K-Cup brand pods and accessories to ensure your Keurig brewer’s-correct operation and longevity. If you use non-Keurig pods and accessories and the brewer is damaged or malfunctions as a consequence, the warranty may not cover the damage or malfunction, or there may be a service cost if the damage is judged to be caused by the use of non-Keurig pods and accessories.
What Is Not Included In The Limited Warranty?
This guarantee does not cover any indirect, consequential, or incidental damages, including property damage, or any fees or expenditures incurred due to a violation of this warranty, even if the breach was foreseen. Certain jurisdictions or provinces do not allow the exclusion or limitation of incidental or consequential damages; therefore, depending on the state or province of purchase, this exclusion or limitation may not apply to you.
Furthermore, this warranty does not cover damages caused by the use of non-Keurig® pods or accessories, services performed by anyone other than Keurig or its authorized service providers, the use of non-Keurig® parts, or external causes such as abuse, misuse, insufficient power supply, or acts of God.
Other Limitations
This is the only warranty and excludes all other guarantees, written or oral. Moreover, Keurig explicitly disclaims any and all additional warranties related to your K-Classic brewer, including any implied guarantee of merchantability or suitability for a particular purpose.
Because certain states or provinces do not allow implied warranty disclaimers or limitations on how long an implied warranty lasts, the disclaimer above may not apply to you, depending on the state or province of purchase.
How Can You Obtain This Warranty?
Before returning your brewer for warranty service, you must first get a Return Materials Authorization (RMA) number from Keurig Customer Service. You may get an RMA number by calling Keurig Customer Service at 1.866.901.BREW (2739), which is a toll-free number. Returns of Keurig® brewers without an RMA number will not be serviced and will be returned to the sender.
Conclusion
With the information obtained from this article, you can now confidently use your Keurig K-Classic brewer. Say goodbye to confusion and frustration while brewing your favorite coffee, tea, or hot cocoa. I hope that the brewing process becomes as simple and satisfying as the taste of a freshly brewed cup of coffee. If you are still confused, I would recommend you revisit this article and resolve your confusion.
As a coffee lover, I encourage you to explore the world of coffee even further by visiting www.coffeeaim.com for more exciting content on your favorite beverage.
Have a nice day!
FAQs
How Do You Start A Cup Of Coffee With A Keurig?
Want to make a delicious cup of coffee with your Keurig K-Classic? First, fill fresh potable water in the reservoir to the MAX FILL line. Then, open the pod holder by lifting it up, insert your favorite pod, and close the lid. Place a cup under the coffee spout. Now, press the brew button to start the brewing process. After brewing, remove the K-cup pod and enjoy your coffee.
Why Is My Keurig Not Brewing?
If your Keurig K-Classic is not working, then the possible reason is it needs descaling. Keurig stops pumping water because the accumulation of water minerals and debris interferes with the activity of the water pump. Therefore, immediately descale your brewer using the descaling solution.
How Many Scoops Of Coffee Do I Put In A Keurig?
I recommend you use one tablespoon of ground coffee per cup. The maximum capacity for regular ground coffee is 15 tablespoons, and 12 tablespoons for decaf. Exceeding this amount may cause overflow.